HOLIDAY DONATION DRIVE - SUPPORT MSW - DO YOUR PART TO KEEP THIS GREAT FORUM GOING! (Only 13 donations so far - C'mon guys!)
×


wyz
-
Posts
411 -
Joined
-
Last visited
Content Type
Profiles
Forums
Gallery
Events
Everything posted by wyz
-
 Every once in a while you get a none-too-subtle reminder you are human, and a fragile one at that. Last night, while taking two trash can full of poplar scrap from the basement out to the garage, I did something to my lower back. Instantly I knew I really hurt myself as the pain was intense and that I had difficulty walking, let alone walking erect. Four ibuprofen barely cut the pain. I went to bed in the fetal position. When I woke this morning the pain was less, but not by much. It was perfectly clear to me that I had really hurt myself and that this wasn't going away in a day or two. What I also realized was that the solid hull Winchelsea I had started, which weighs a ton, was not a project I was ever going to be able to bring to fruition easily, if at all. Maybe in my youth a project of that size and weight would have been doable, but not as a 70-year-old with a weak back. It's asking too much. That leaves me to make some choices. Do I walk away from ship model building for good (it's NOT going to happen), choose a much smaller vessel to build with a solid hull (it's unlikely to happen), or build a POB Winchelsea? While POB is not my favorite build method I'm not totally averse to it. Lord knows I've built enough POB models in my life. Truth be said, Chuck has put together a wonderful POB project of a beautiful ship, certainly better than any POB kit I've ever built. Who knows, maybe I'll like it. One other thing has been made clear to me is that, no matter what I try, I can't keep the fine wood dust from going all over the house. Yes, the filter helps, but it's not a solution. I was still seeing a serious saw dust problem when I was just starting to form the hull with heavy sanding. You don't have to be a rocket scientist to see where this is going.... dust in every nook and cranny in my condo. Before I can do anything I need to get my back right.
 -
Christian, is that Baltic birch plywood between the bulkheads?
-
Thank you for your kind words Frank. I don't look at myself as being an artisan as much as being an innovative eccentric. For some time now I've wanted to share my method for building a solid hull model with others, and this group project has presented me with that opportunity. The problem is that my method takes an inordinately long time to complete. That would turn most people off from trying it. Those building a POB model will be done with Winchelsea and into the next model on their list while I'm still forming the hull. Fortunate for me, I don't see modeling as a race or a competition. I think I enjoy the process as much as completing a model. It makes me feel good there are model builders like yourself who are enjoying my build log. Thanks. Tom
-
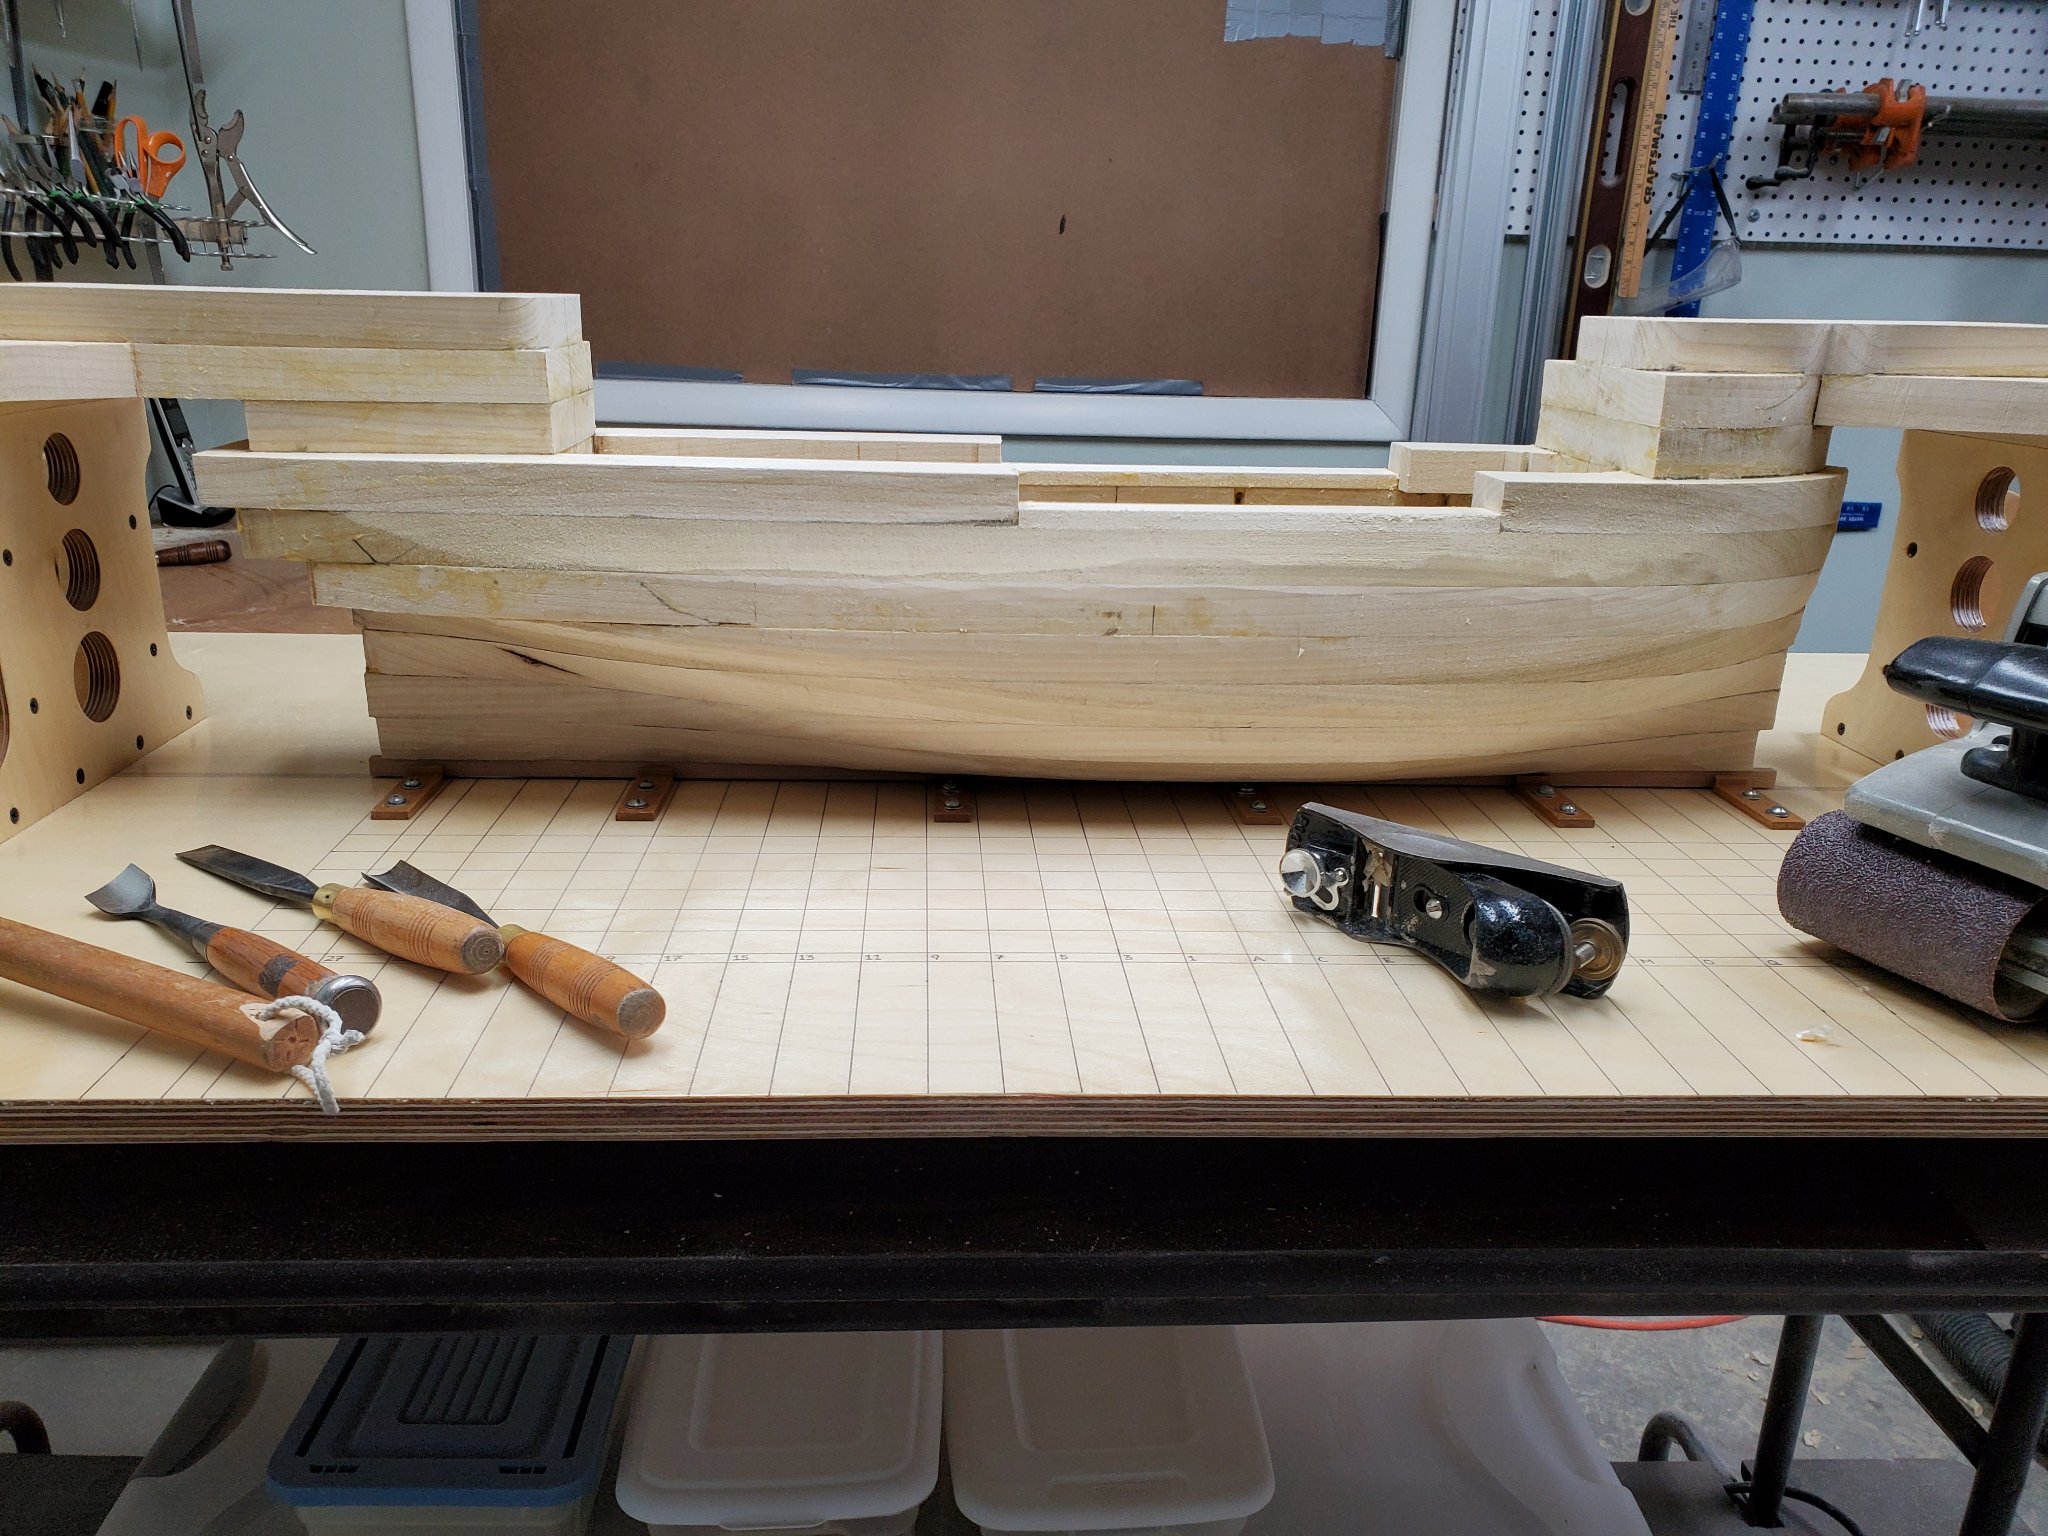
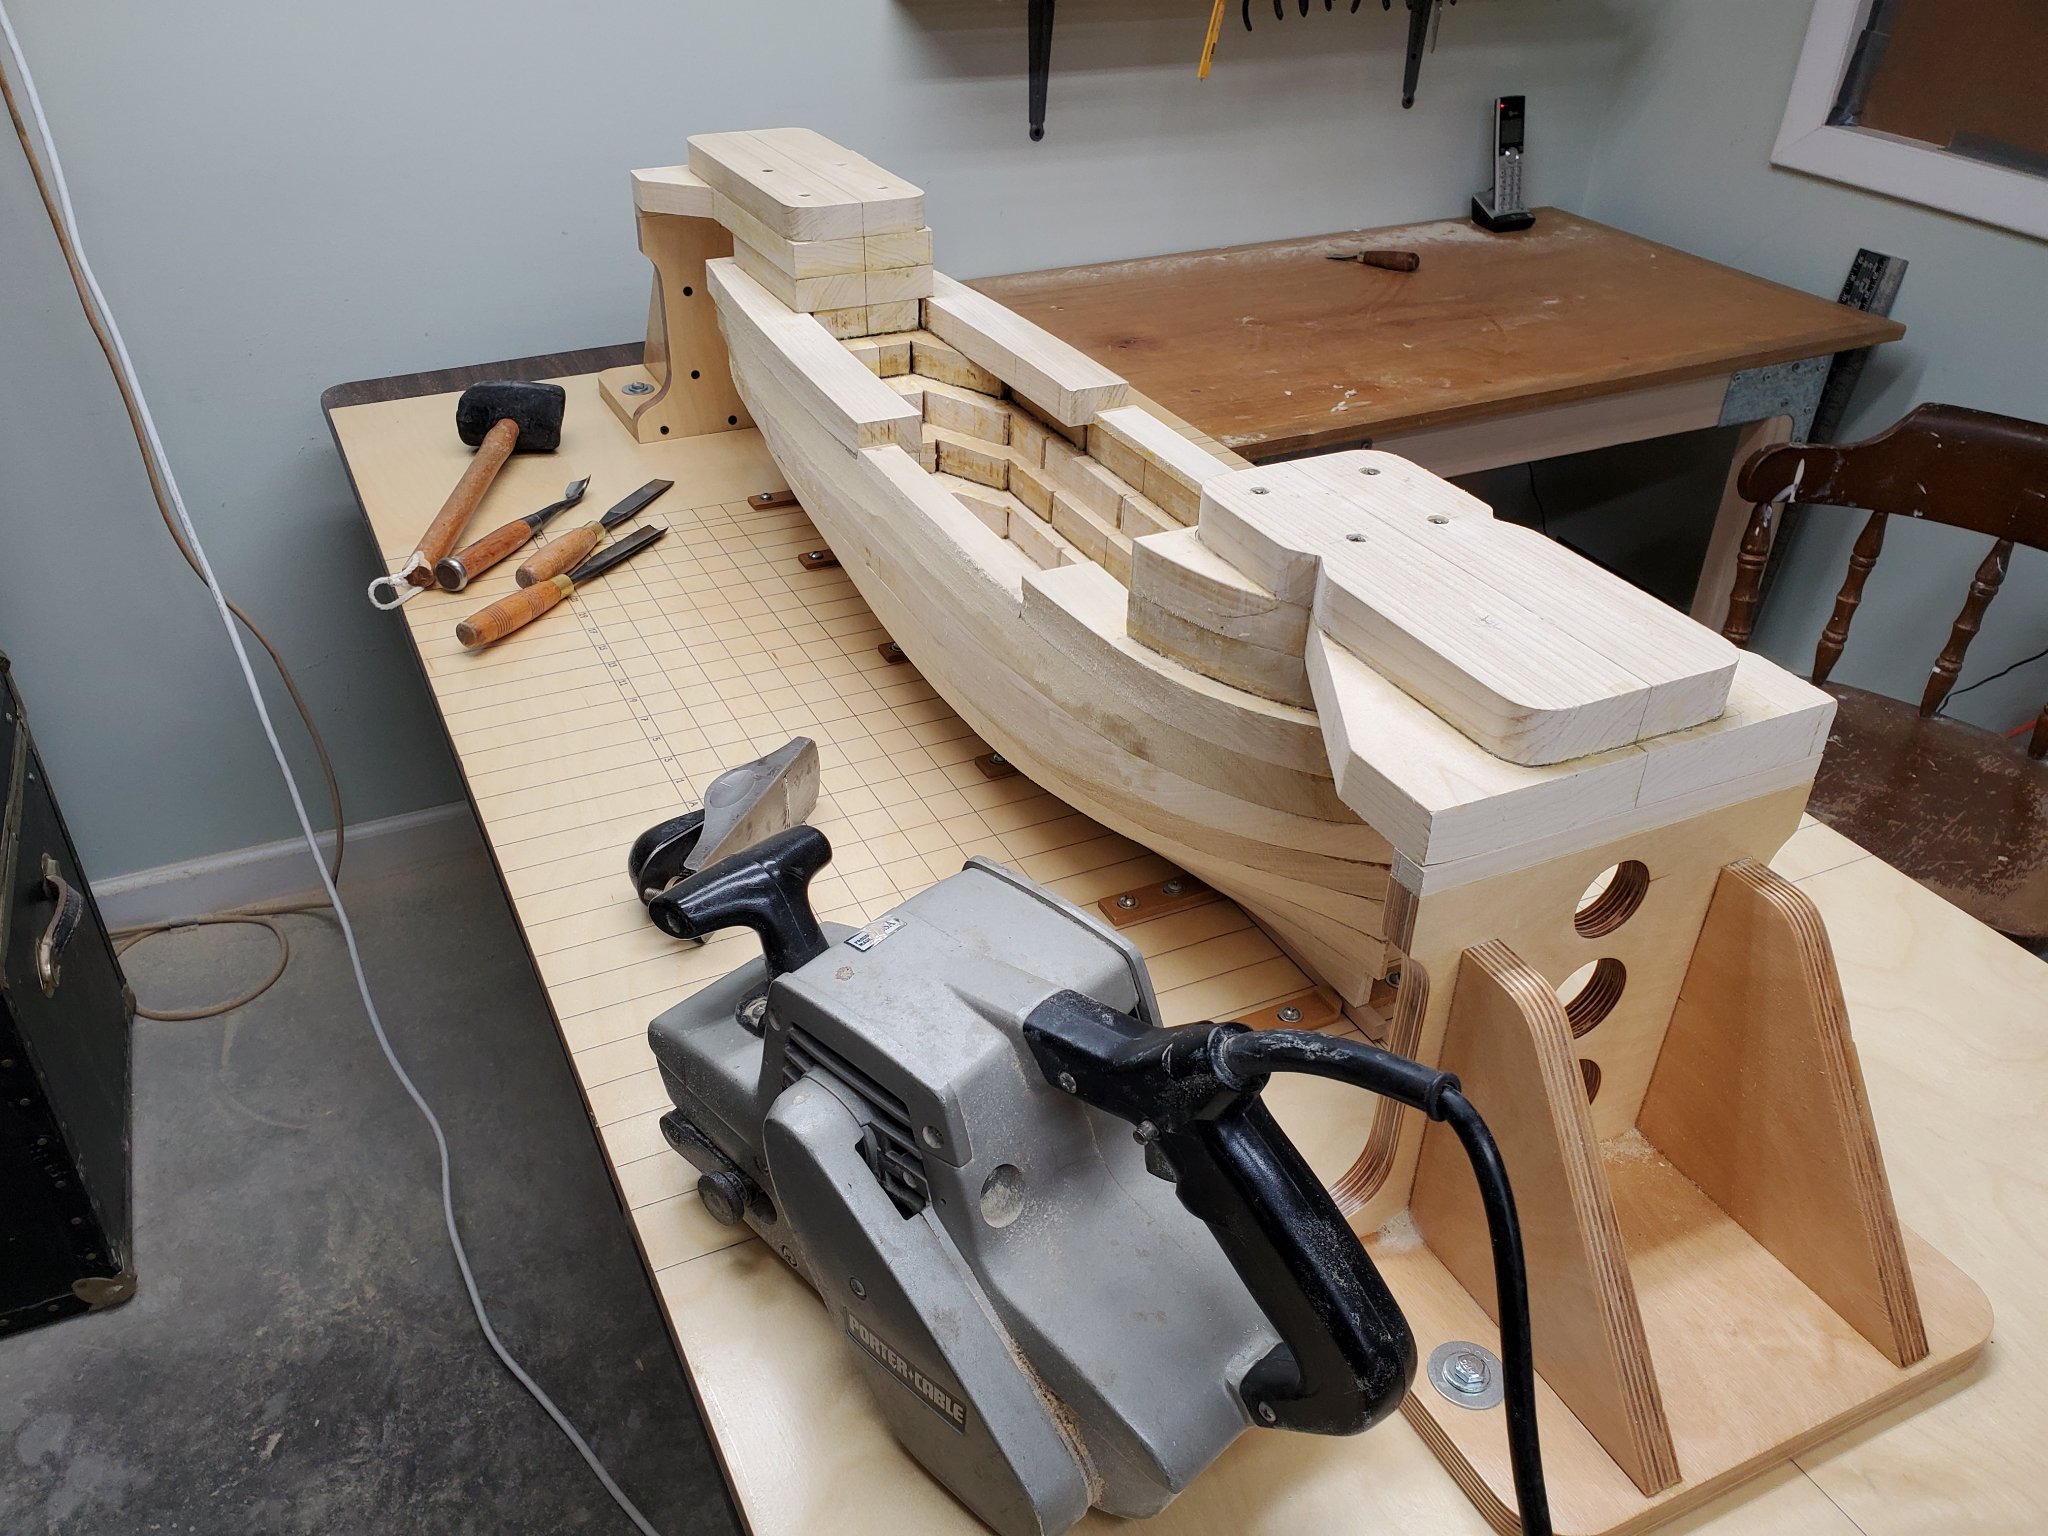
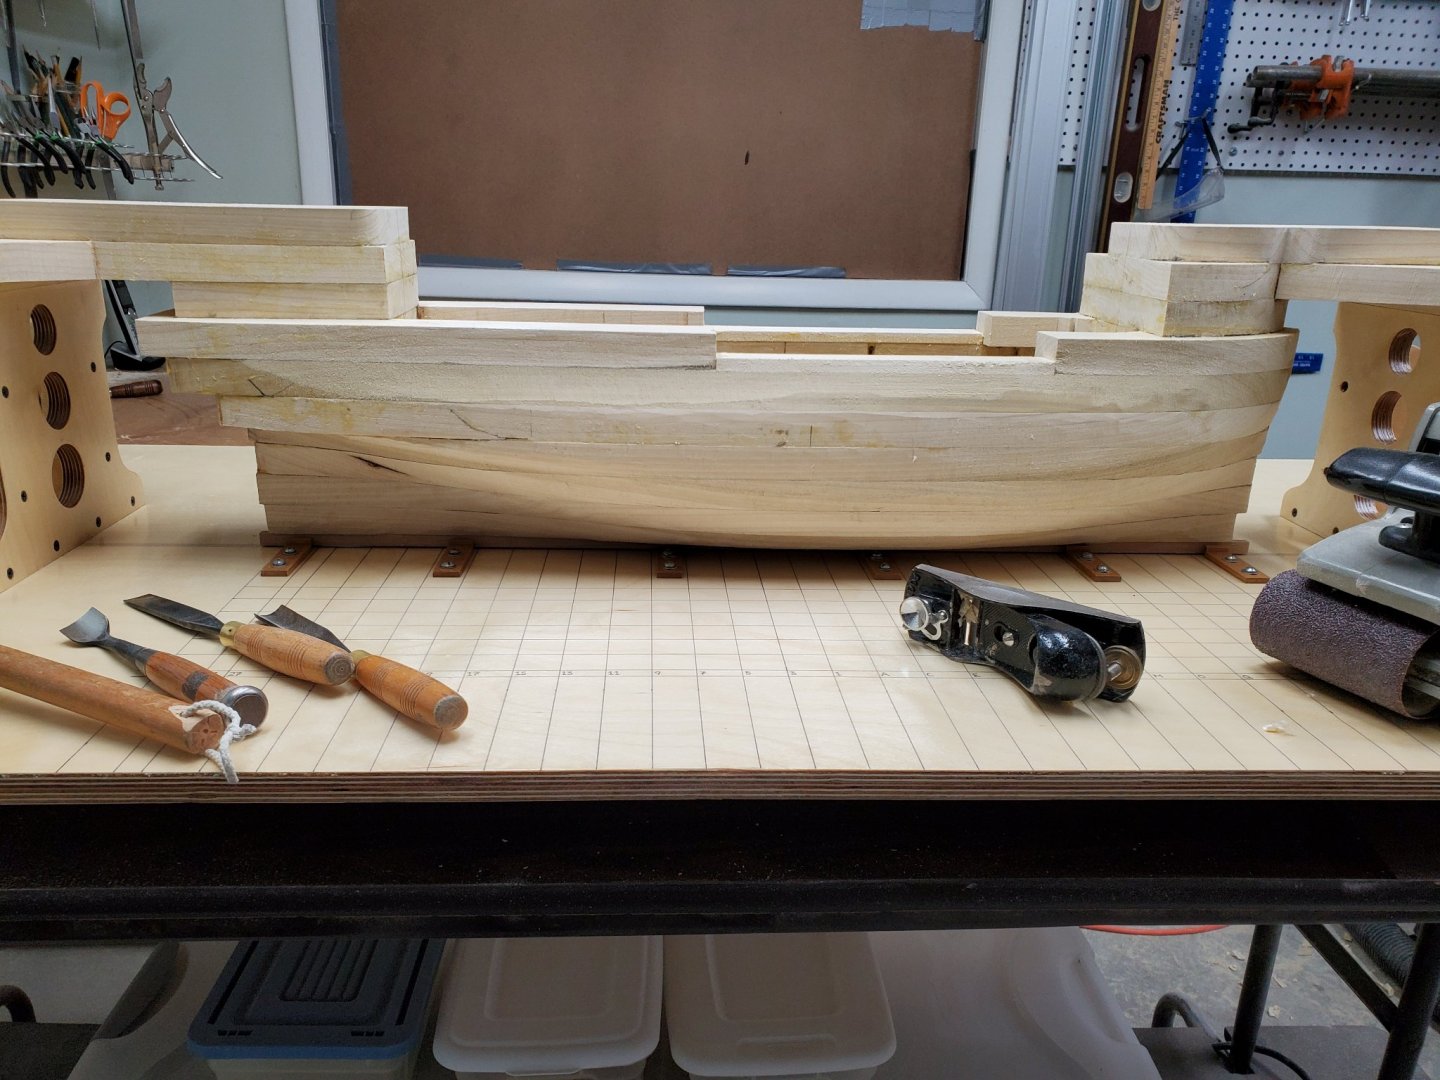
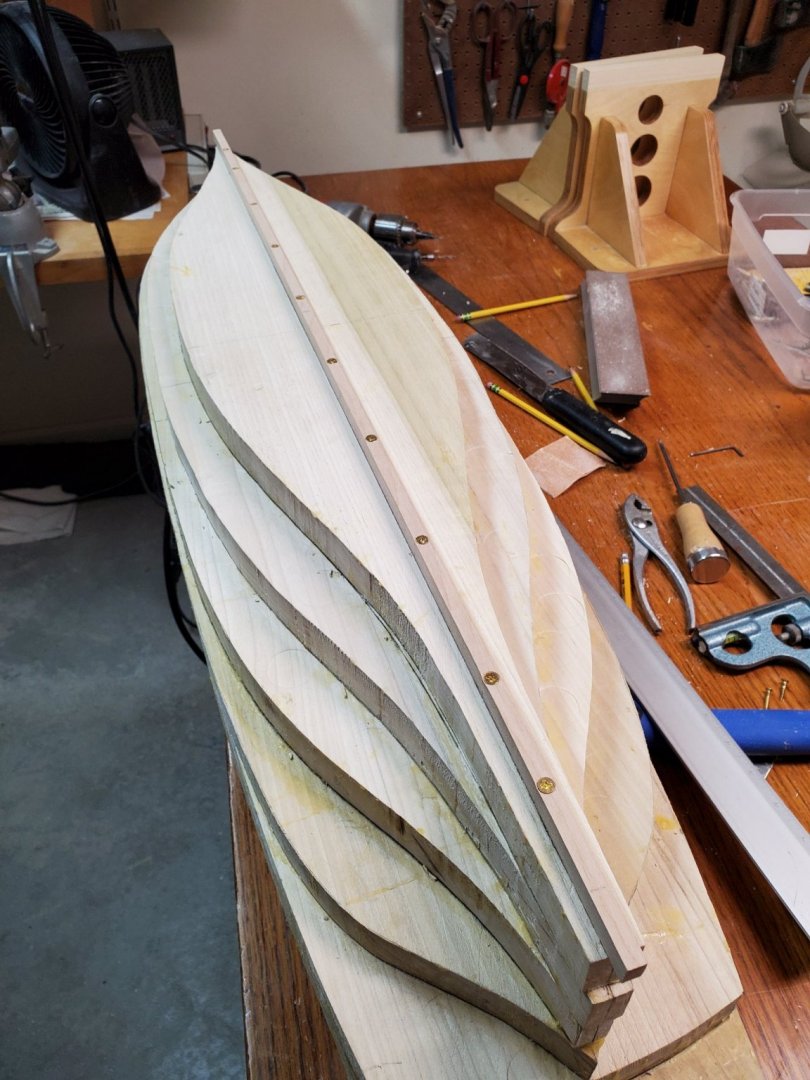
These two photos show an hour's work with hand and power tools on the starboard side. I started with mallet and gouges, then I went to the Porter Cable belt sander with 36 grit, and ended with several passes with the block plane.

-
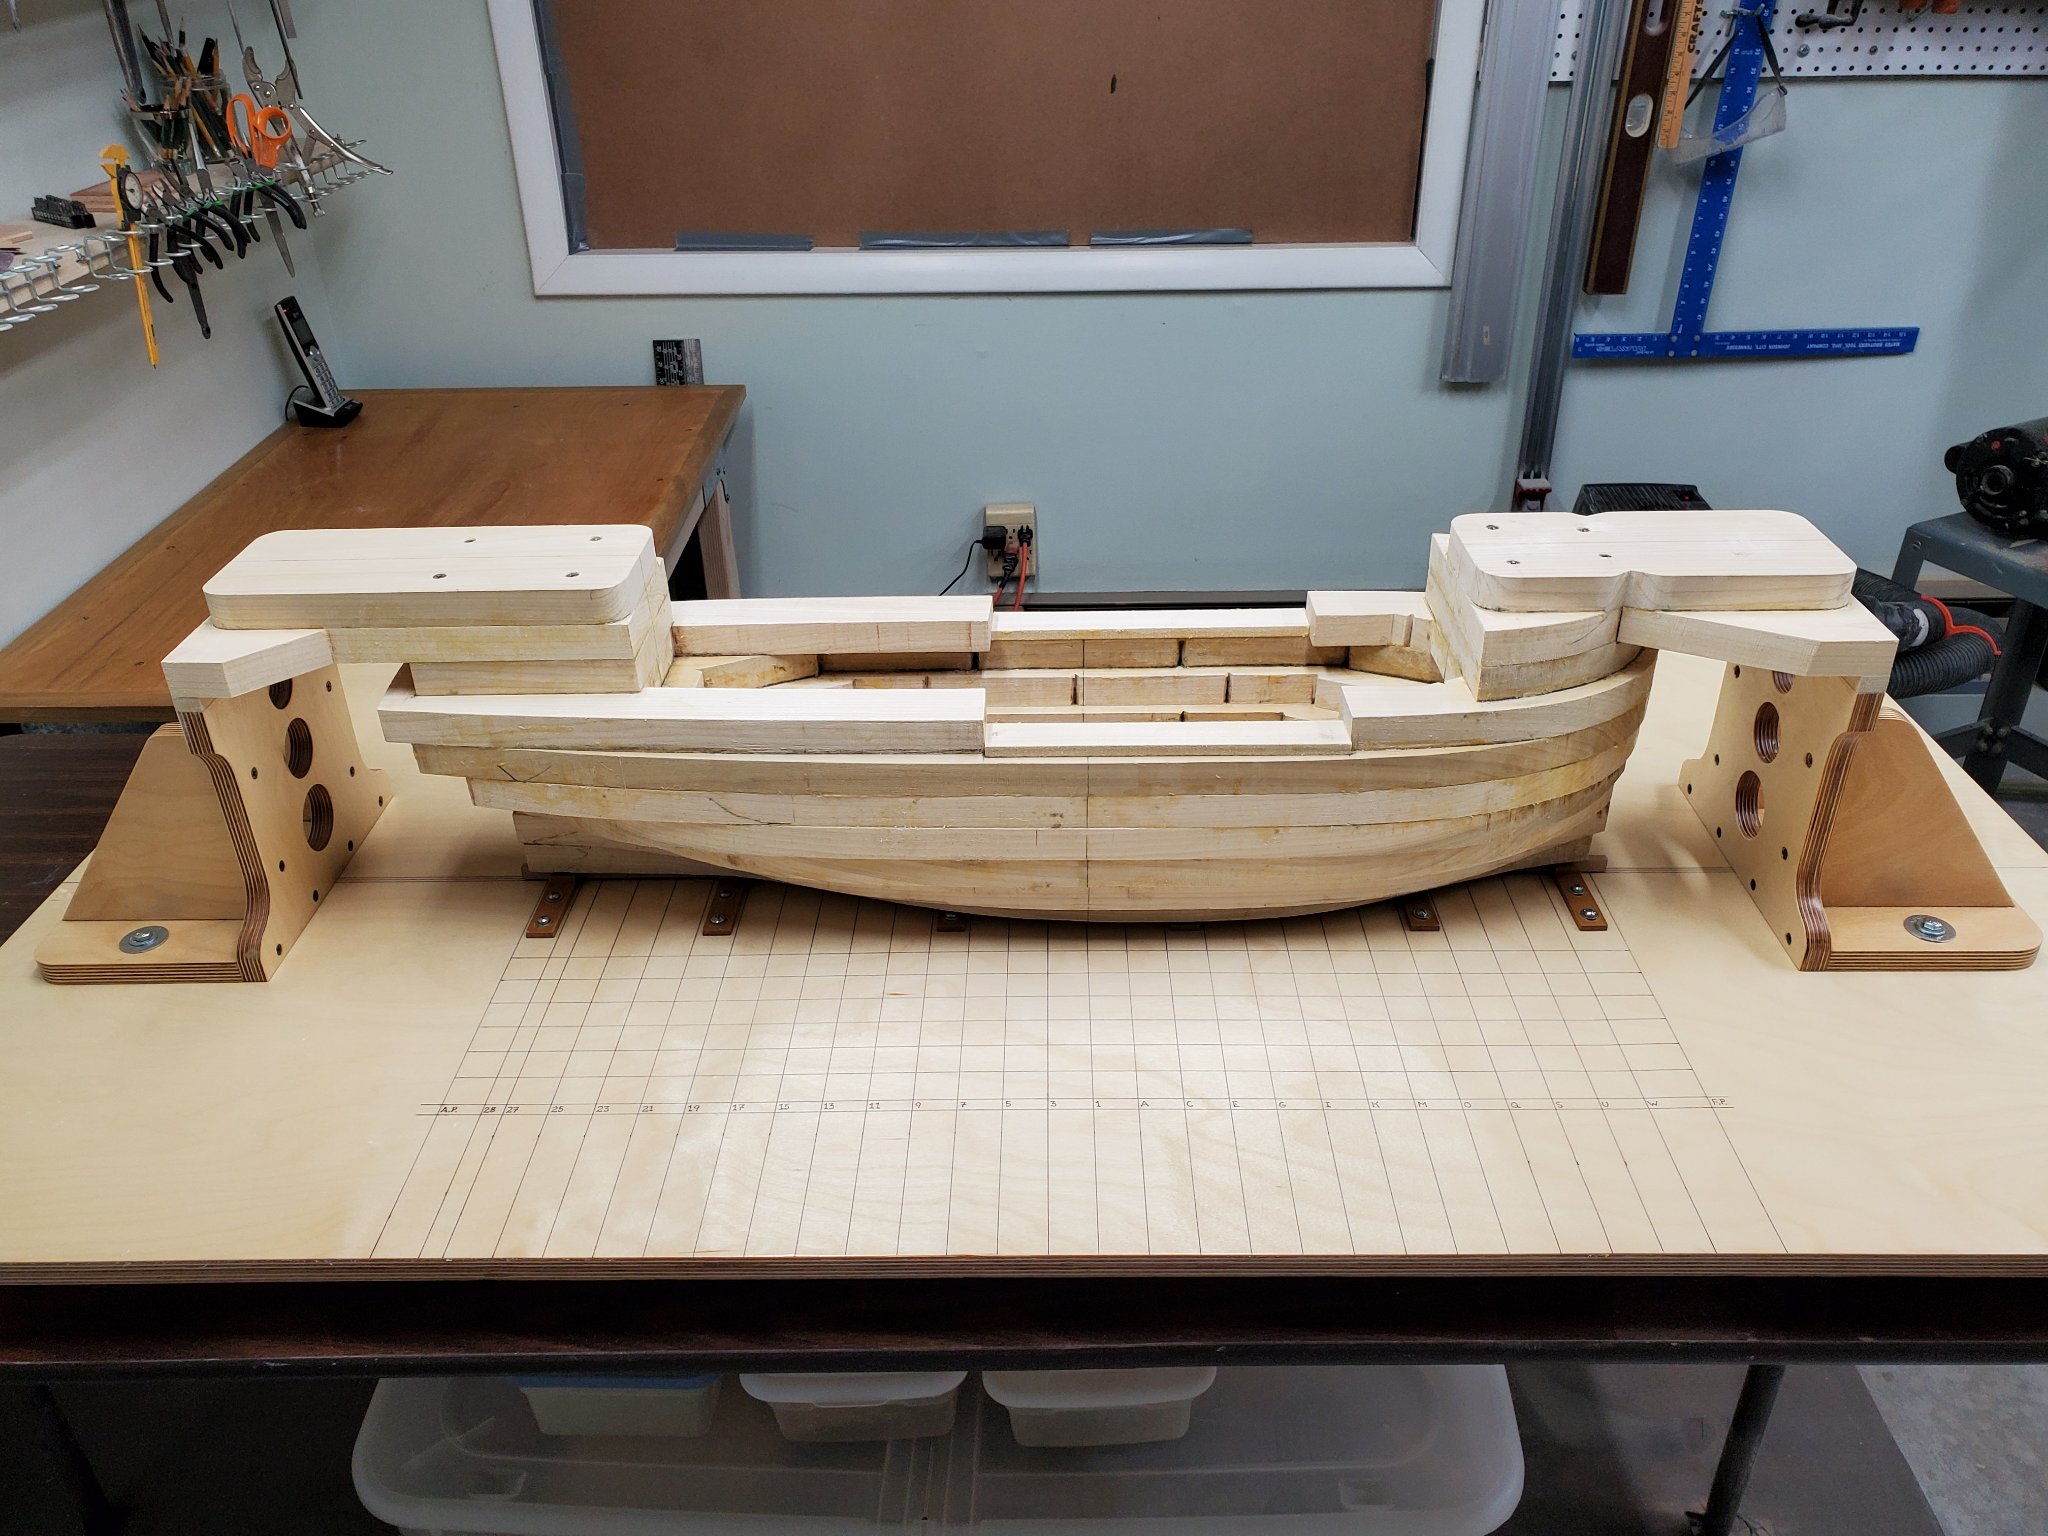
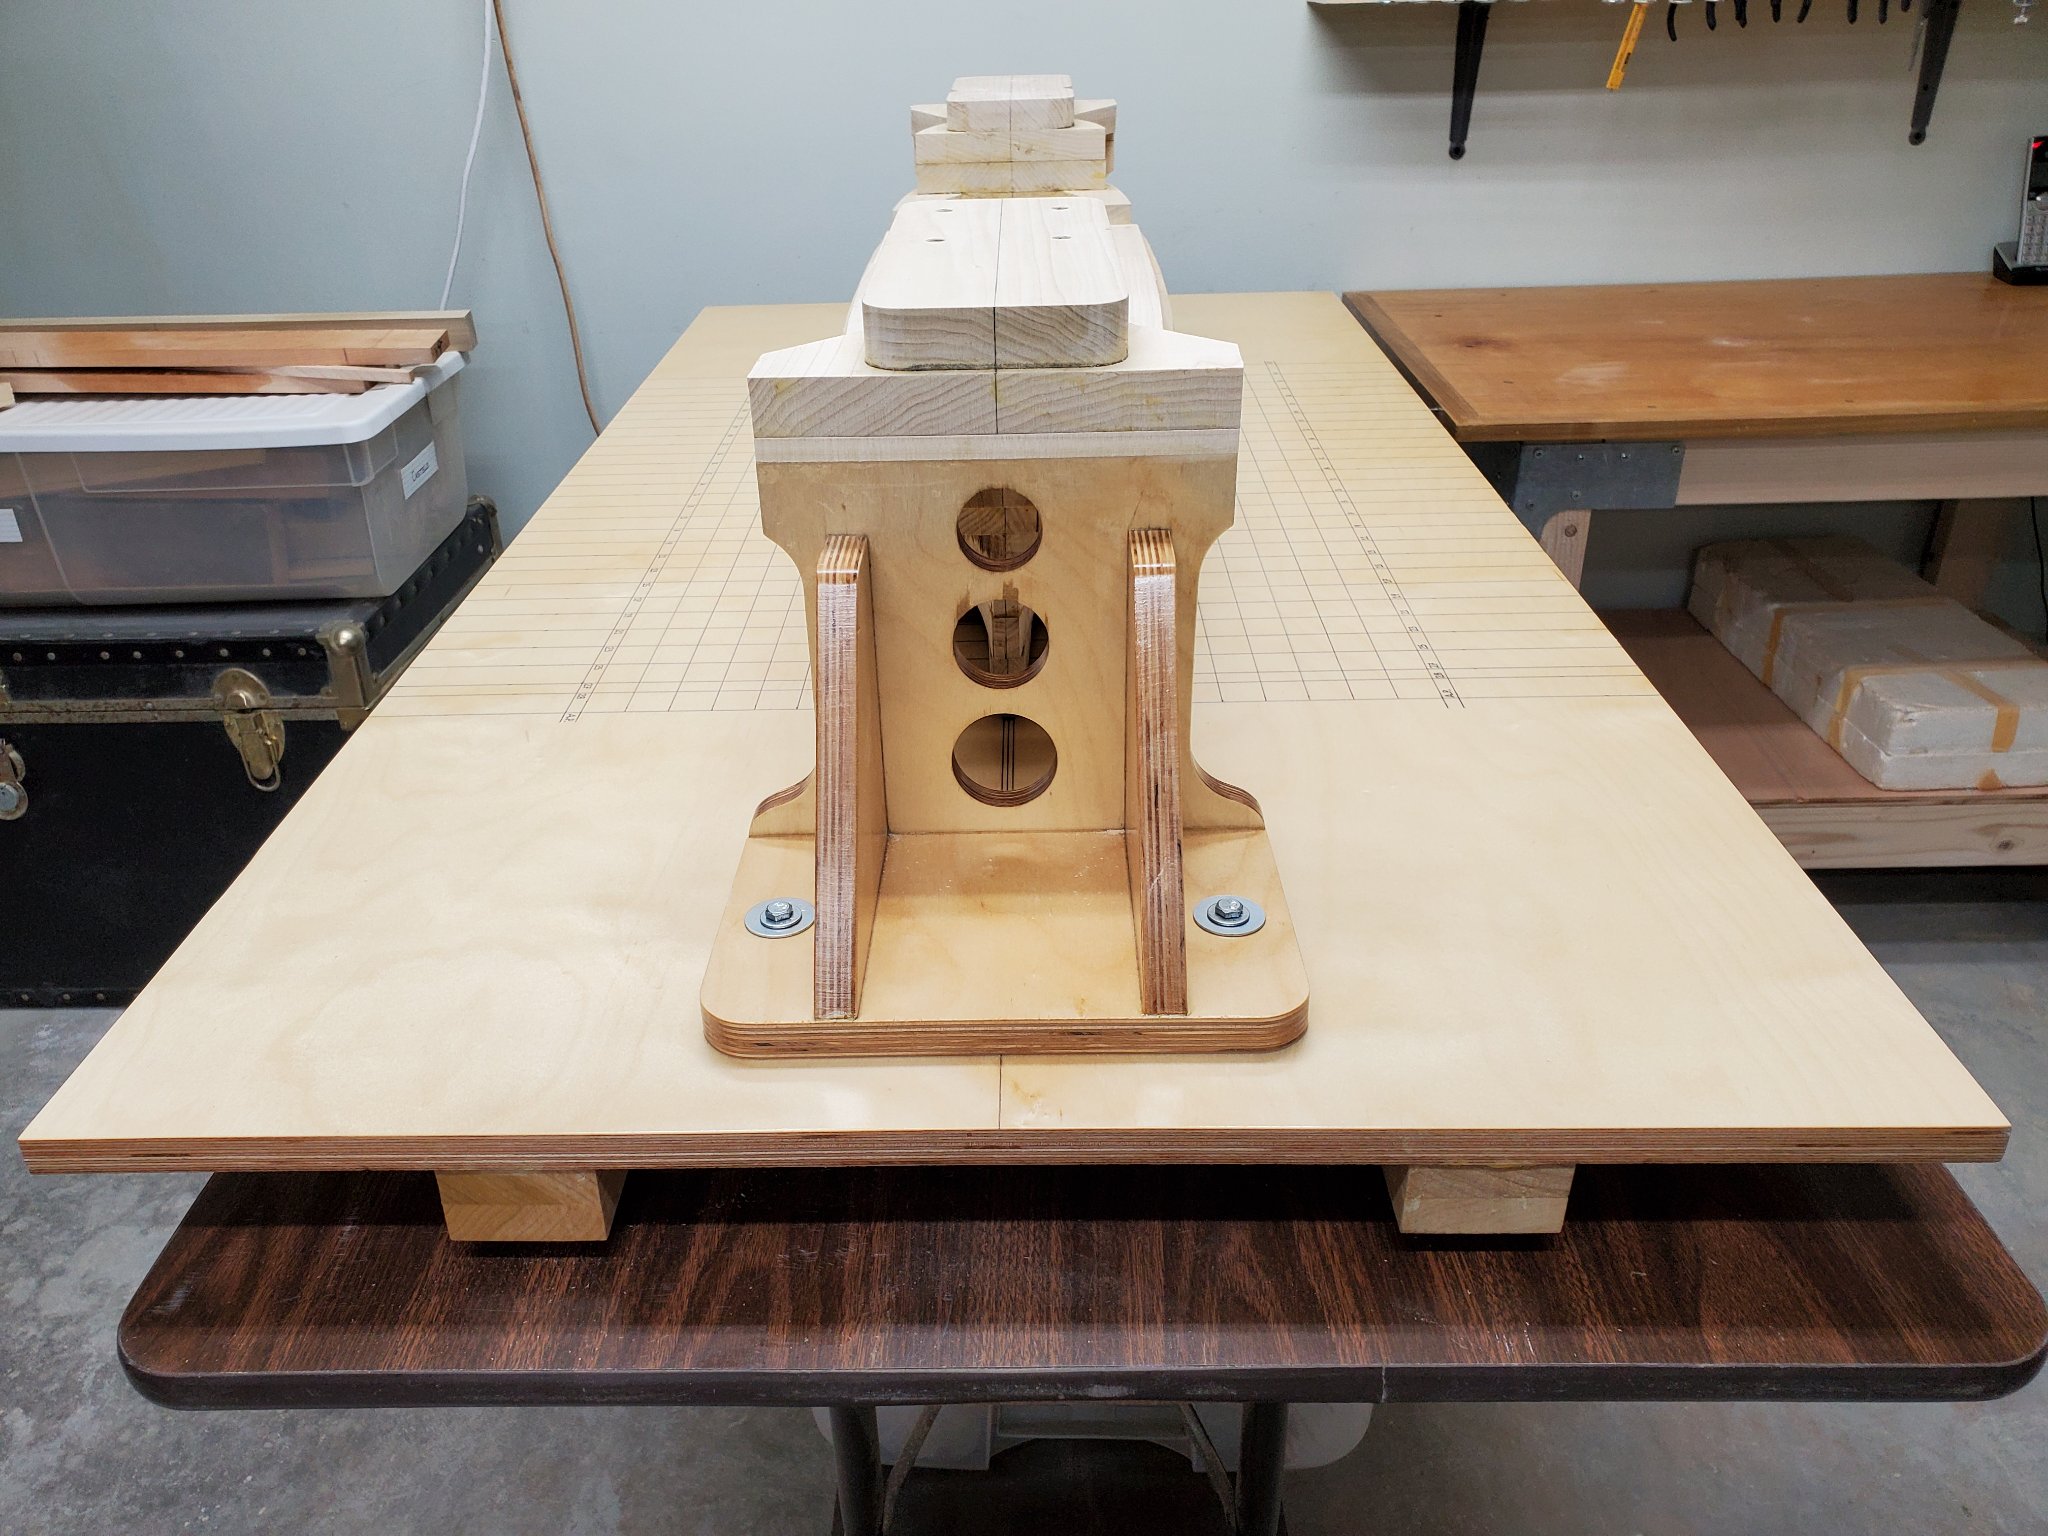
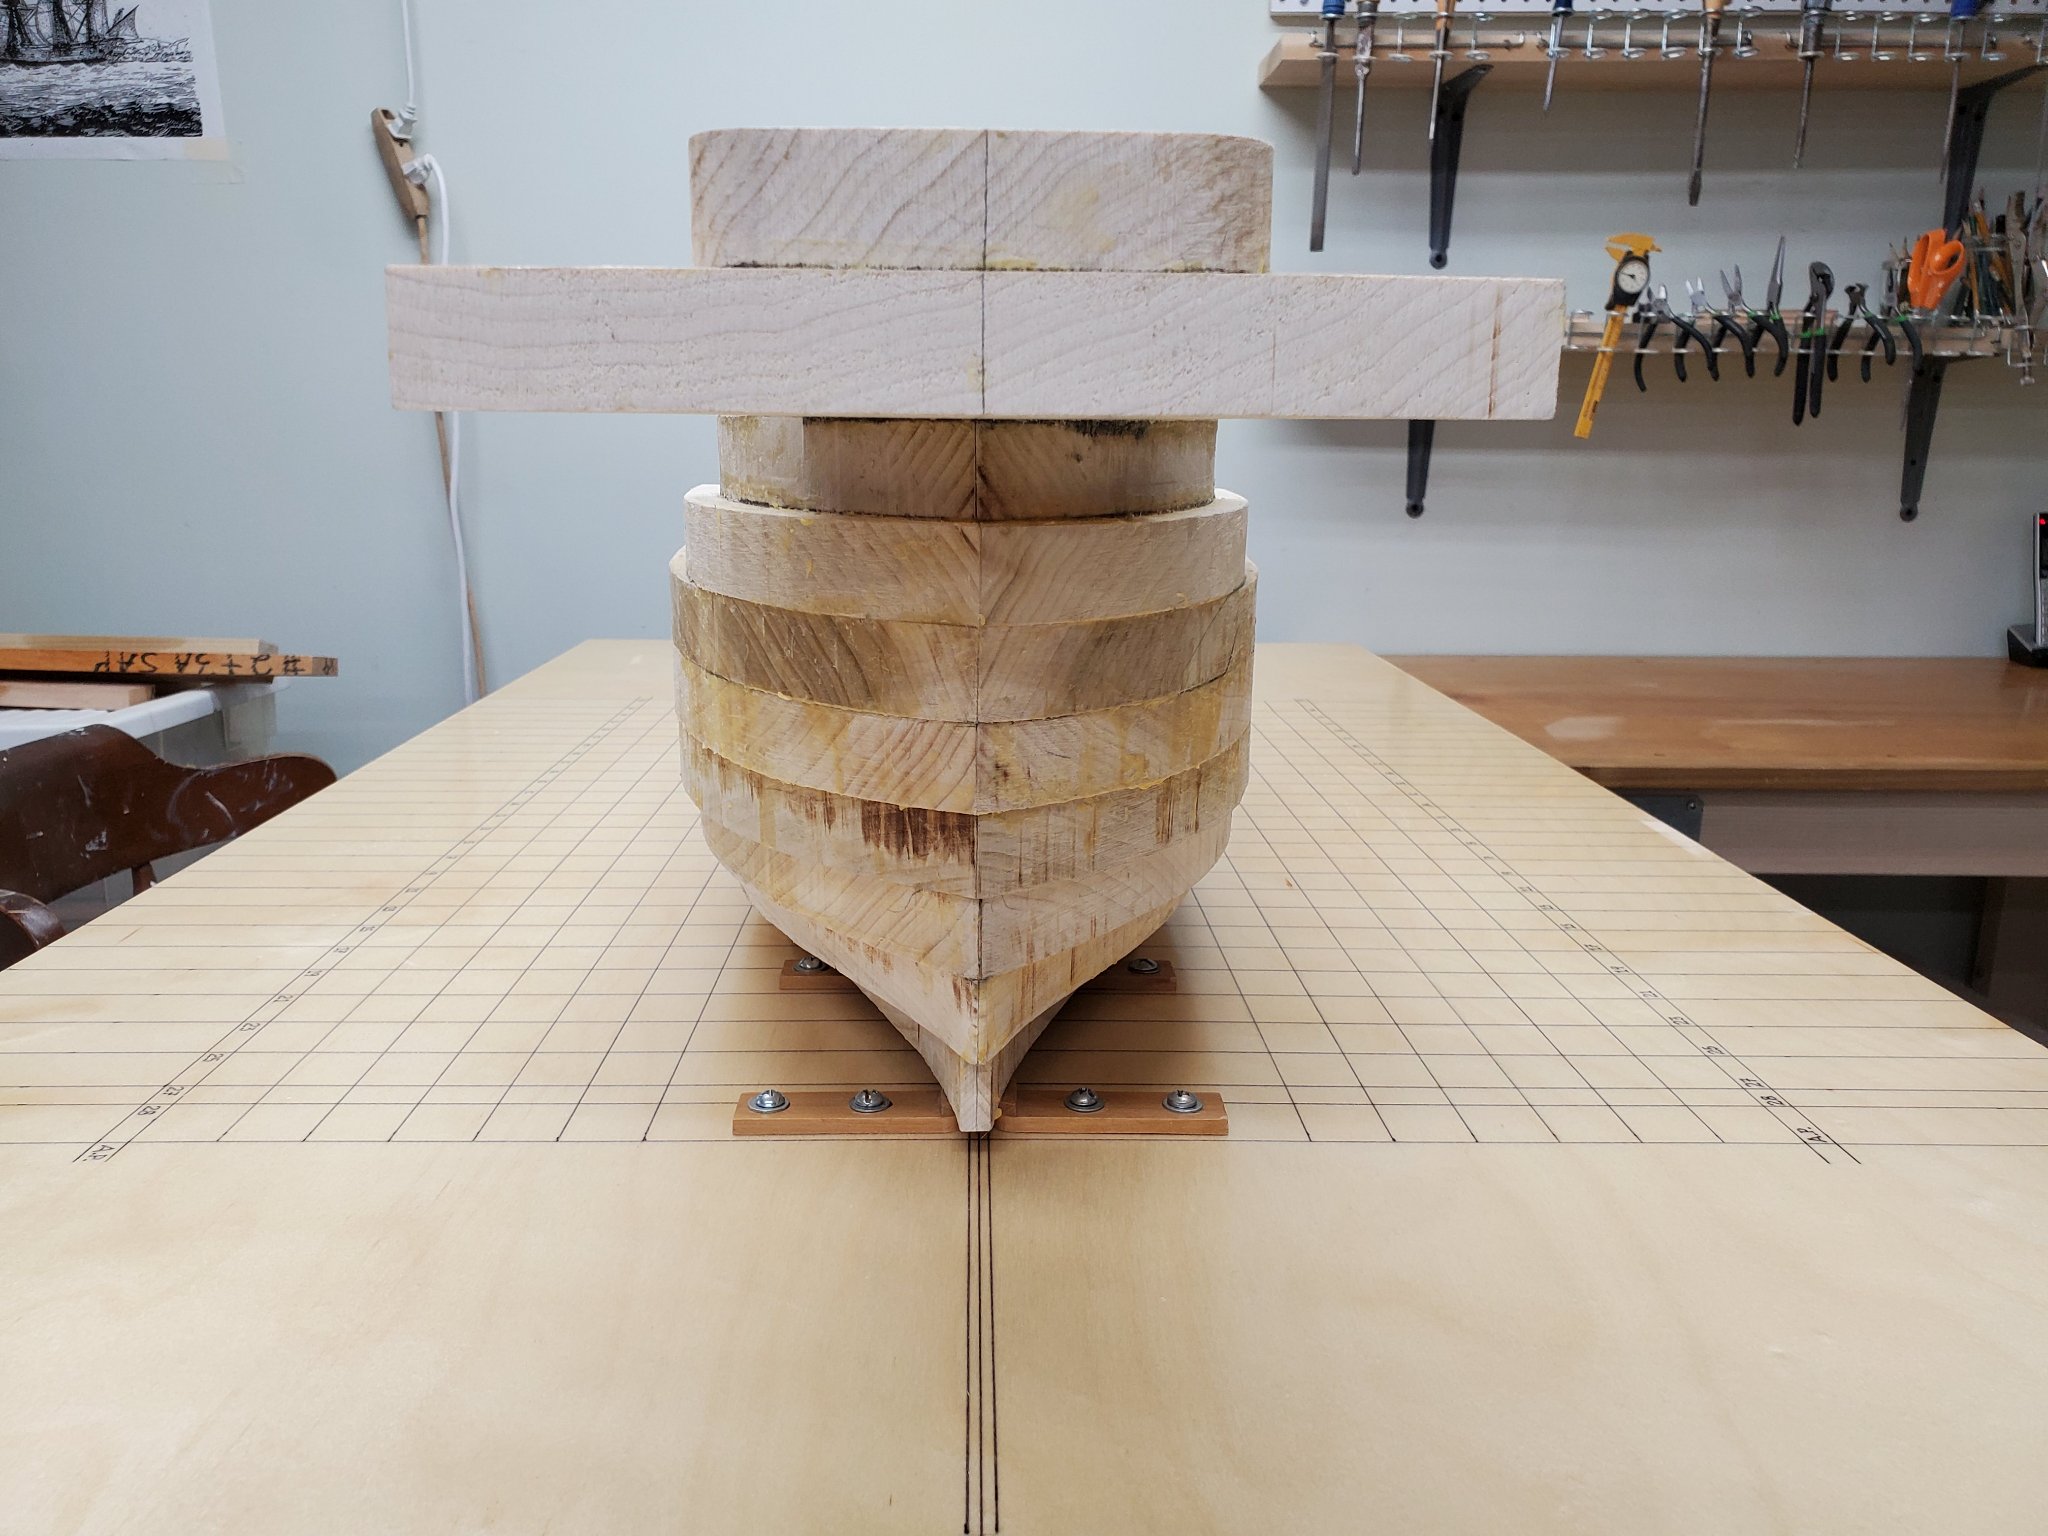
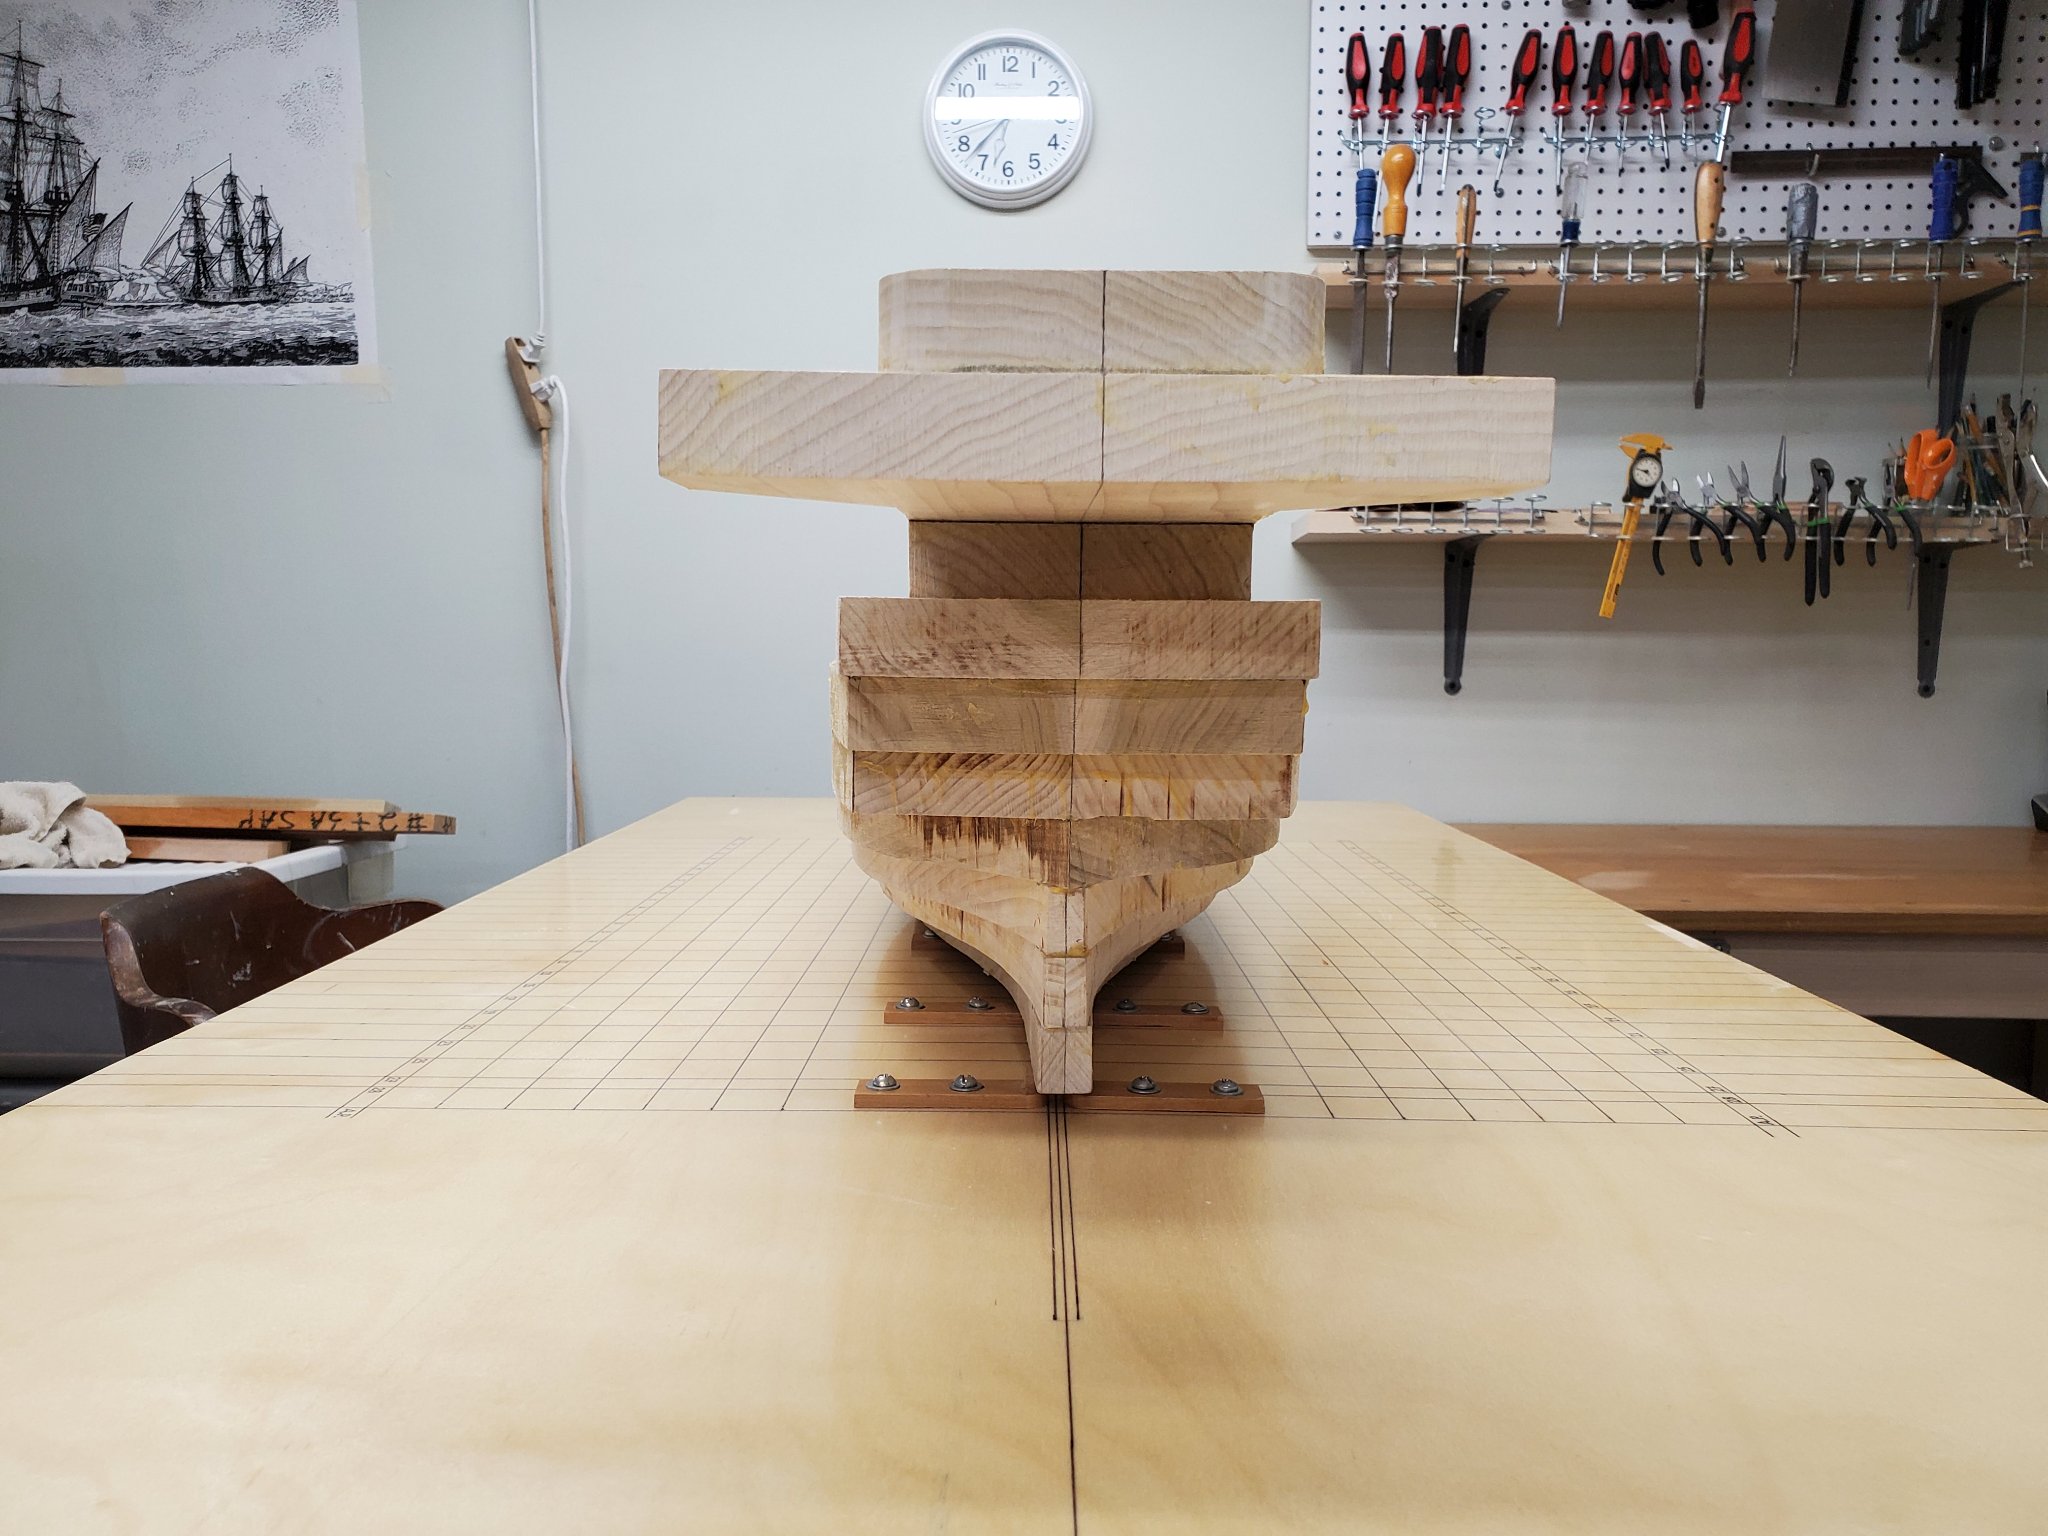
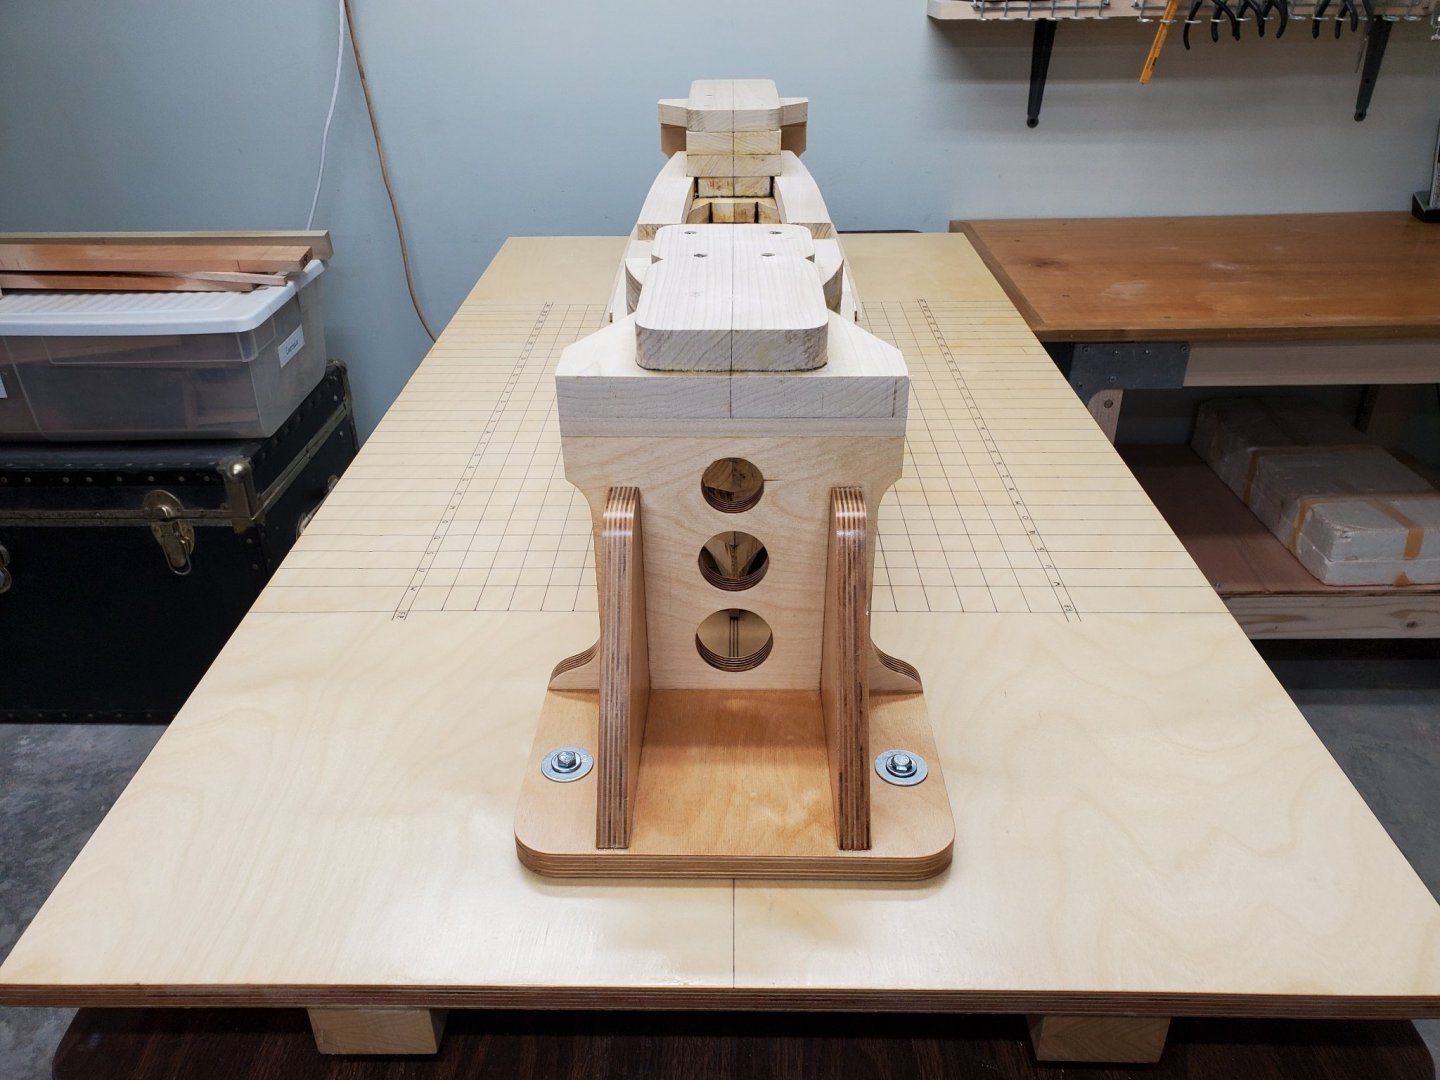
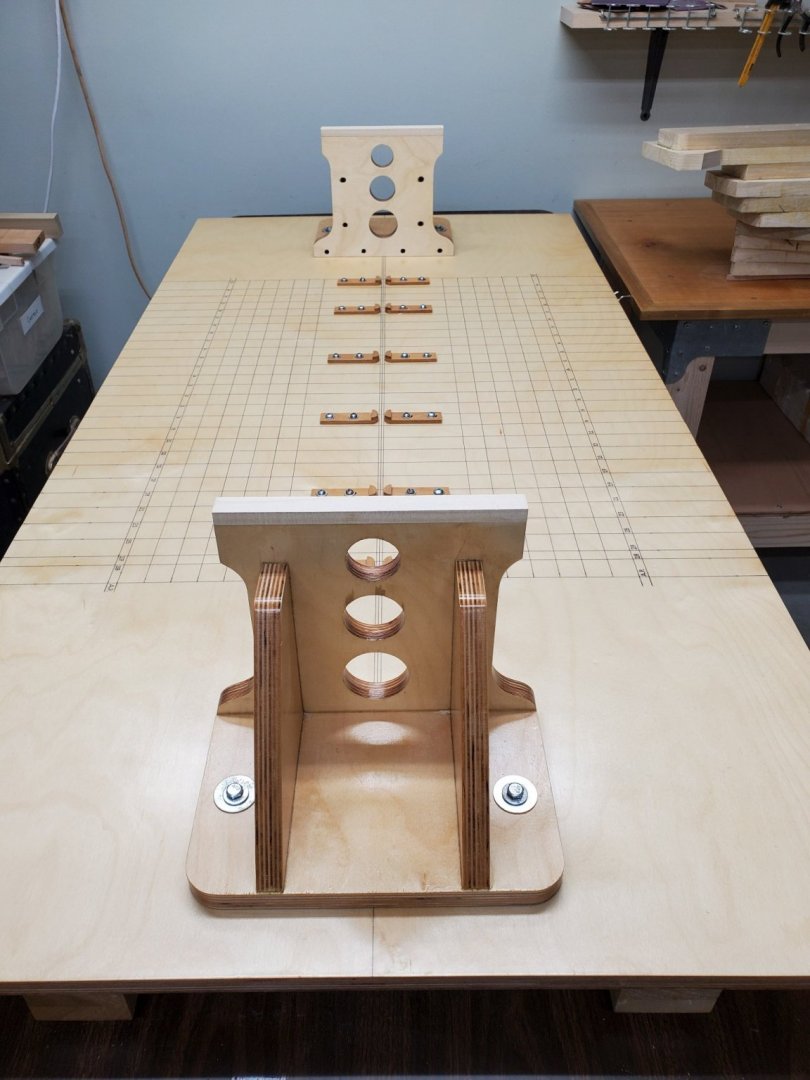
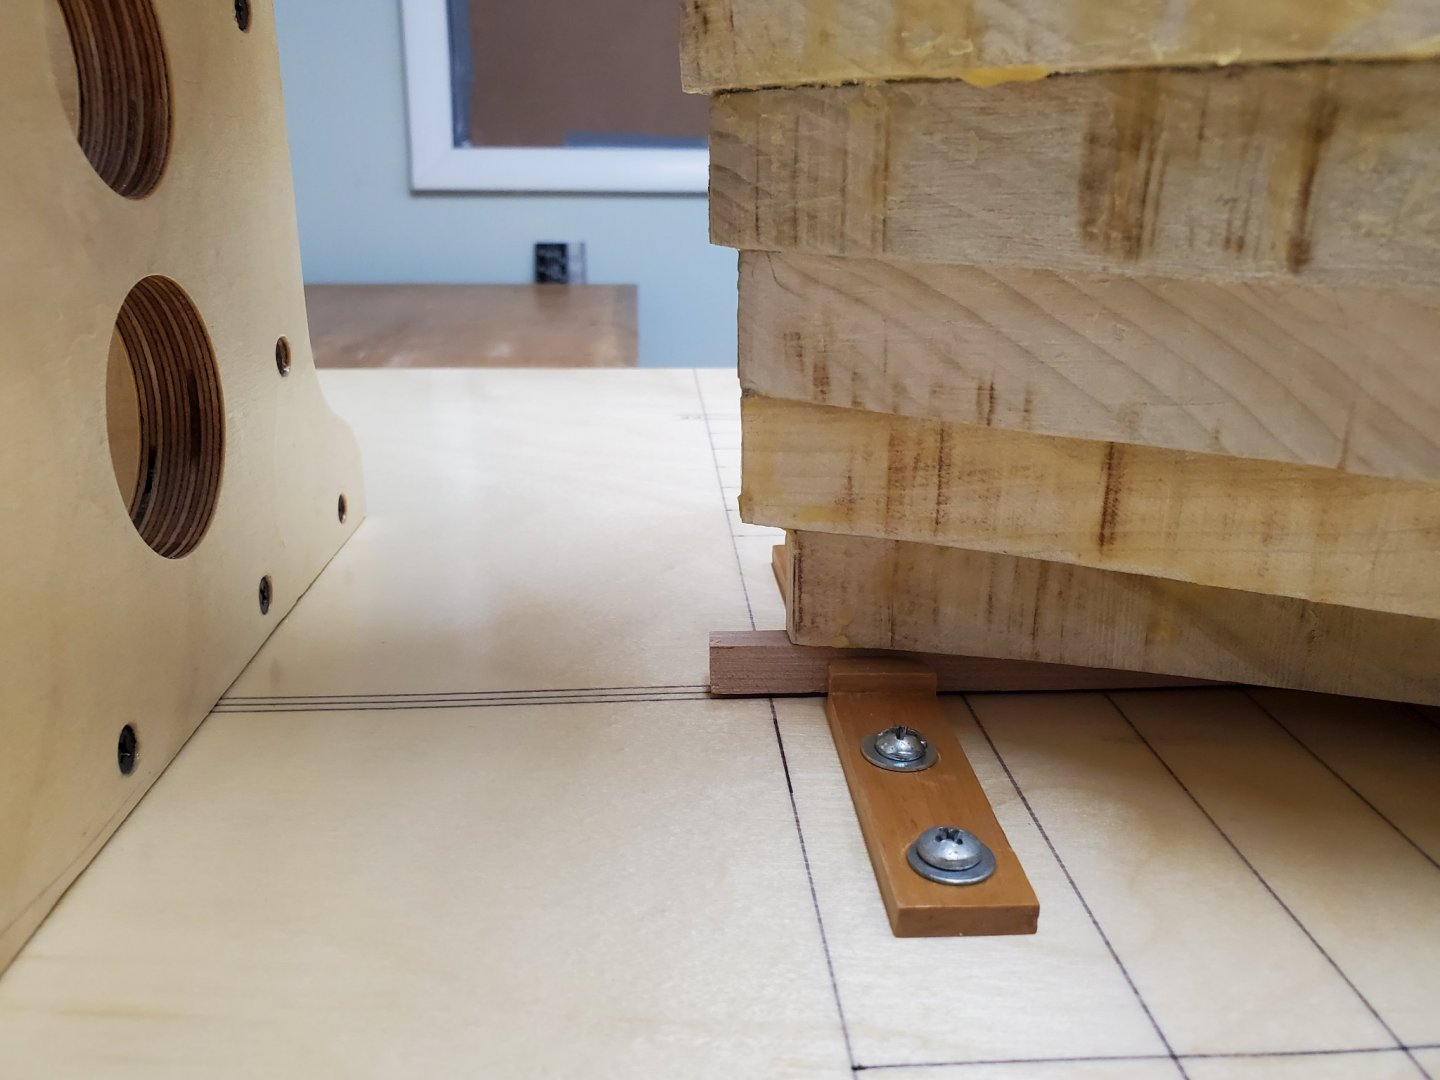
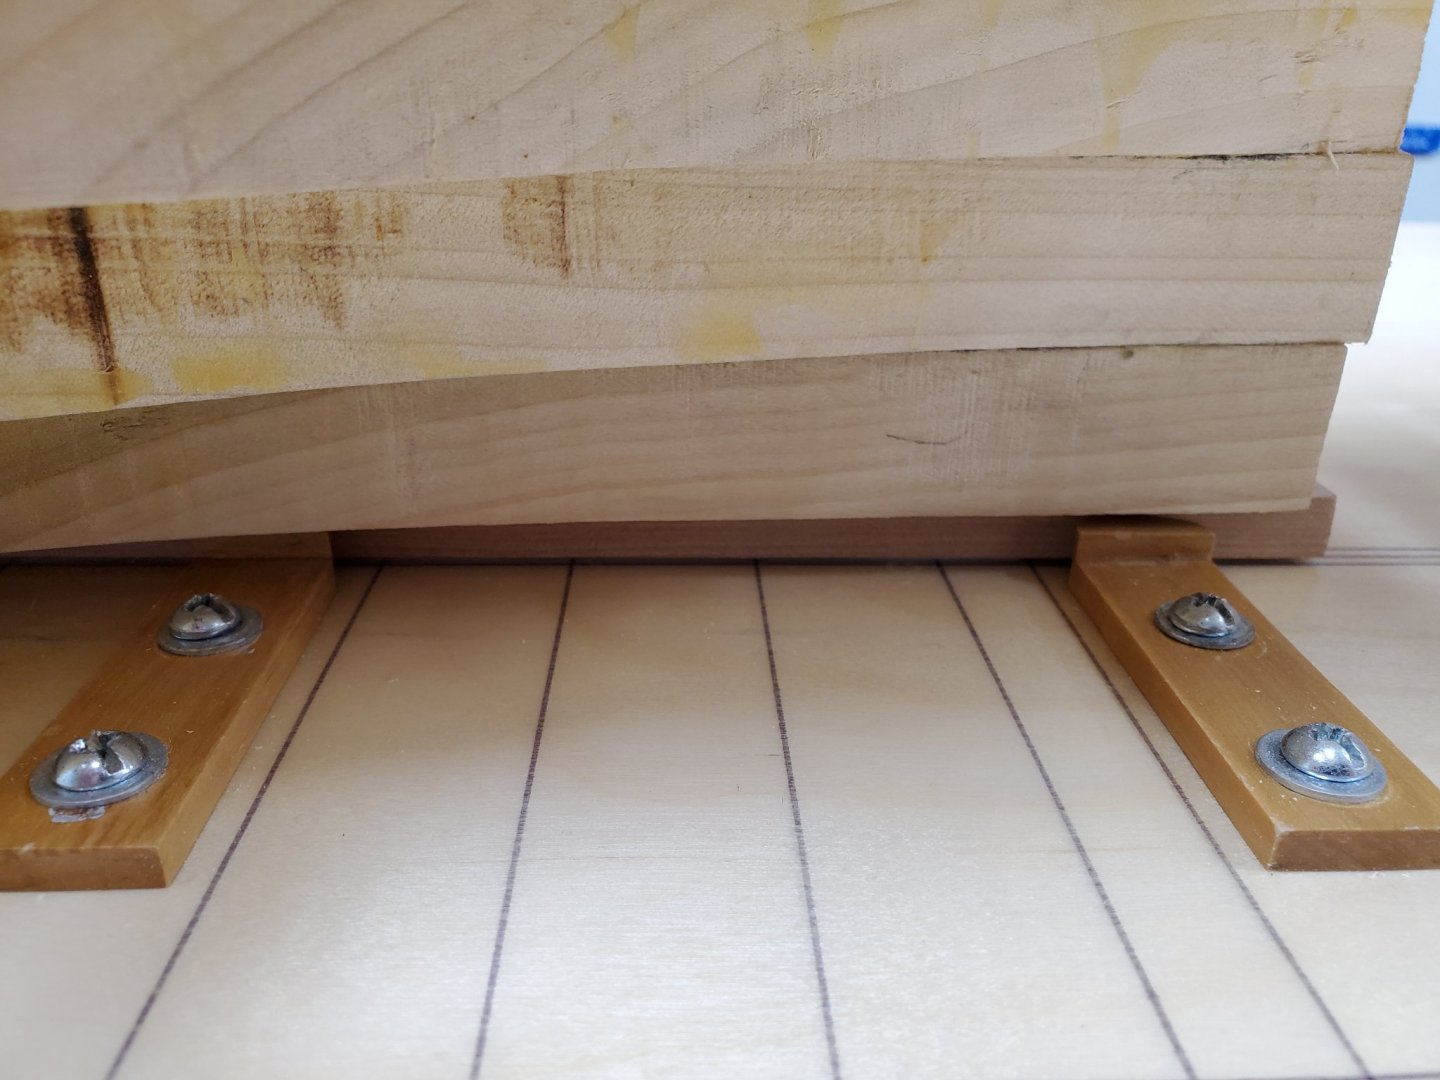
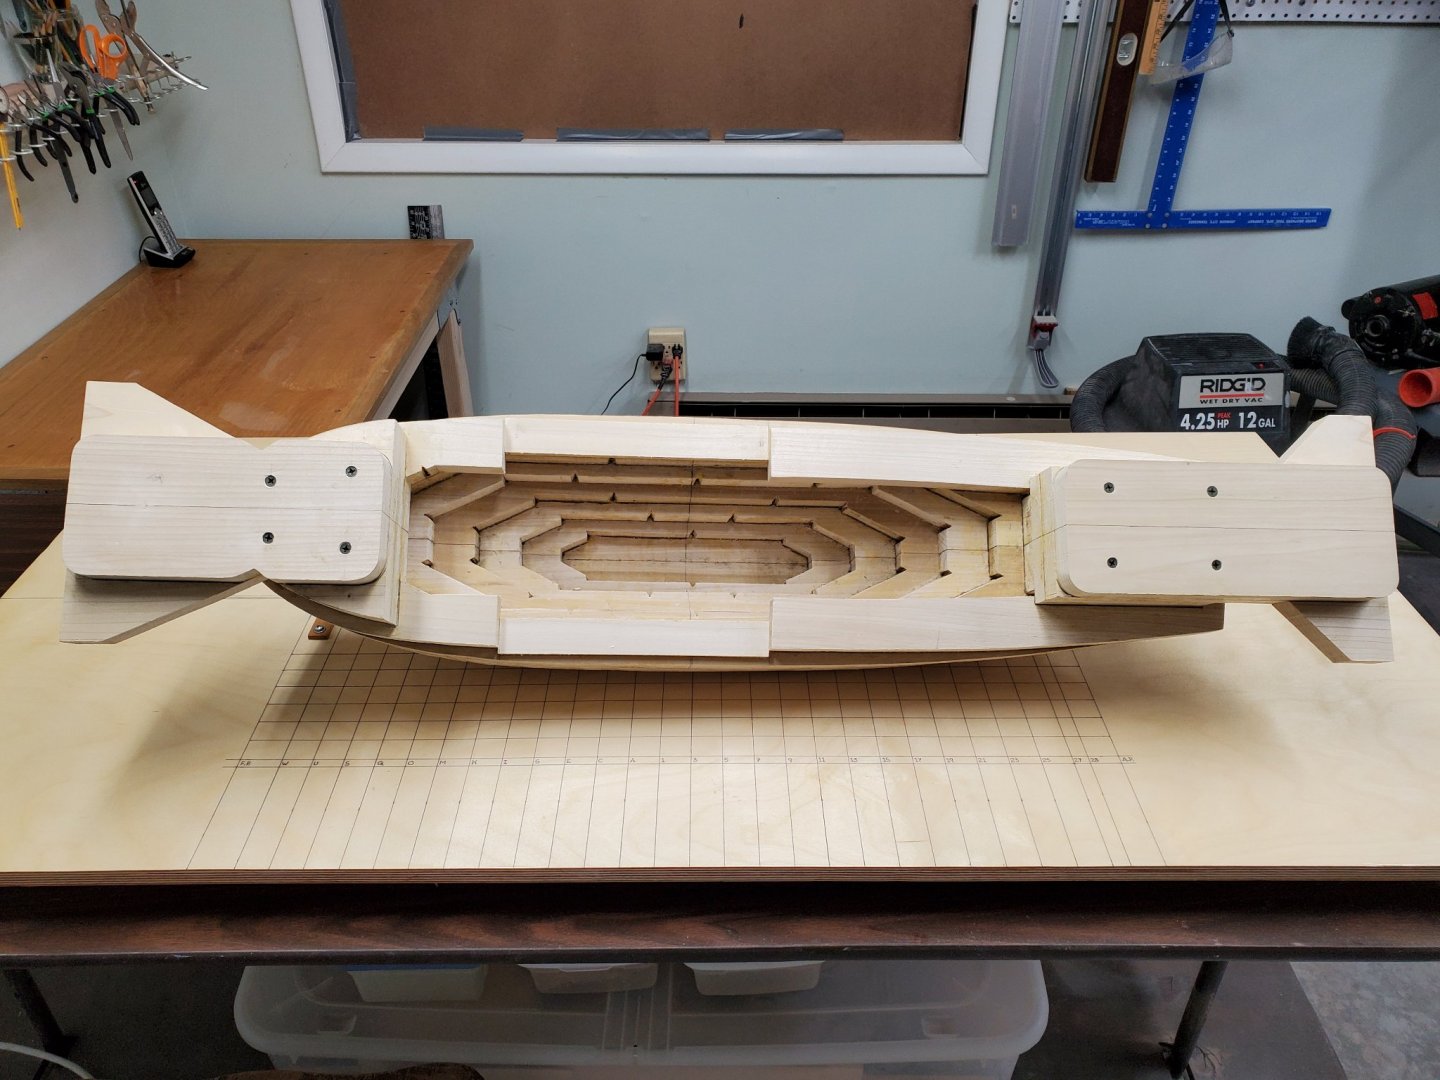
Well Ron, you didn't have to wait very long. I start in with mallet and gouge tonight! Yes, I have my Winnie finally mounted on the fully completed building board, and I'm ready to start forming the hull. It was a lot of work just to get to the starting line. LOL Where I'm at would be the equivalent of my fellow builders just receiving their Winchelsea kit from Chuck. Now the real work starts. Shaping the hull is a very long and arduous task, and very messy too. You can see on photo 4 that I did some work on the vertical building board supports. I removed some of its Baltic birch and added a strip of yellow poplar. The reason for doing so is that it was much easier to make the final height adjustments on the softer wood. While Baltic birch is a beautiful furniture grade plywood it's not so easy to sand or plane. I spent much of the afternoon making the final adjustments to the building board and was quite meticulous in getting it to support the hull exactly as designed, 1/16" off the building board's surface. Photos 5 and 6 show this forward and aft. The hull, resting on the supports is ROCK SOLID STABLE with zero movement. I couldn't be happier with the results.


-
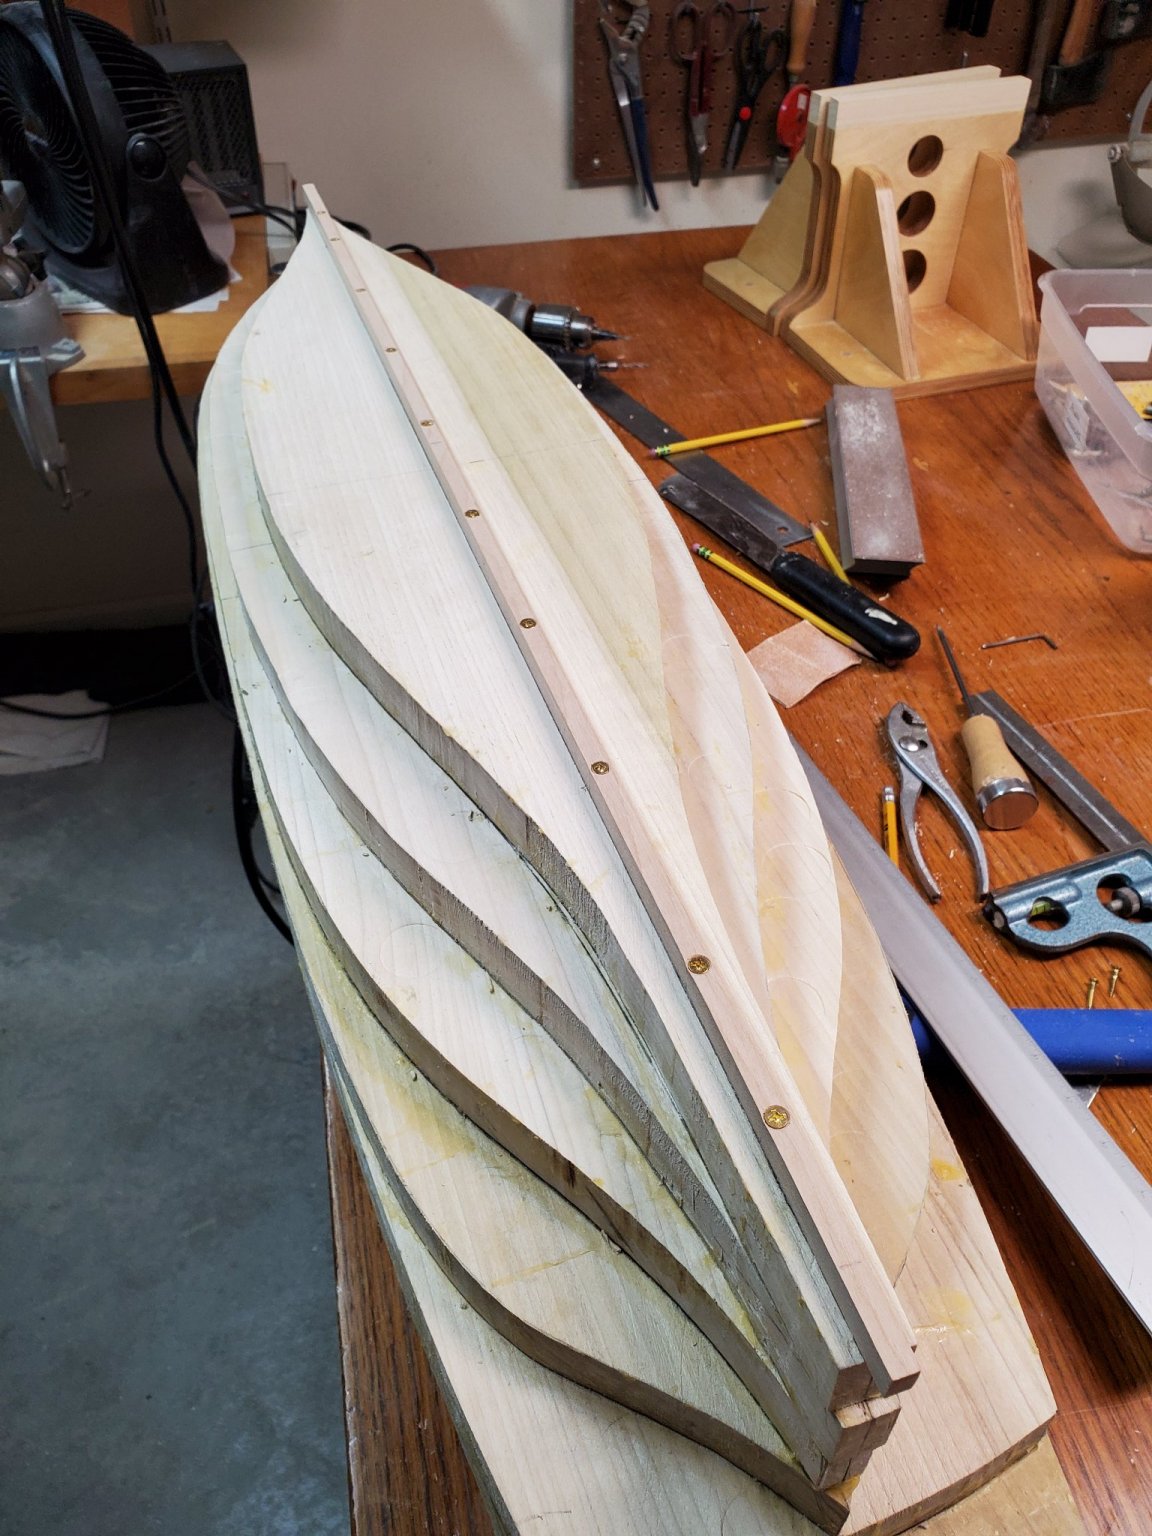
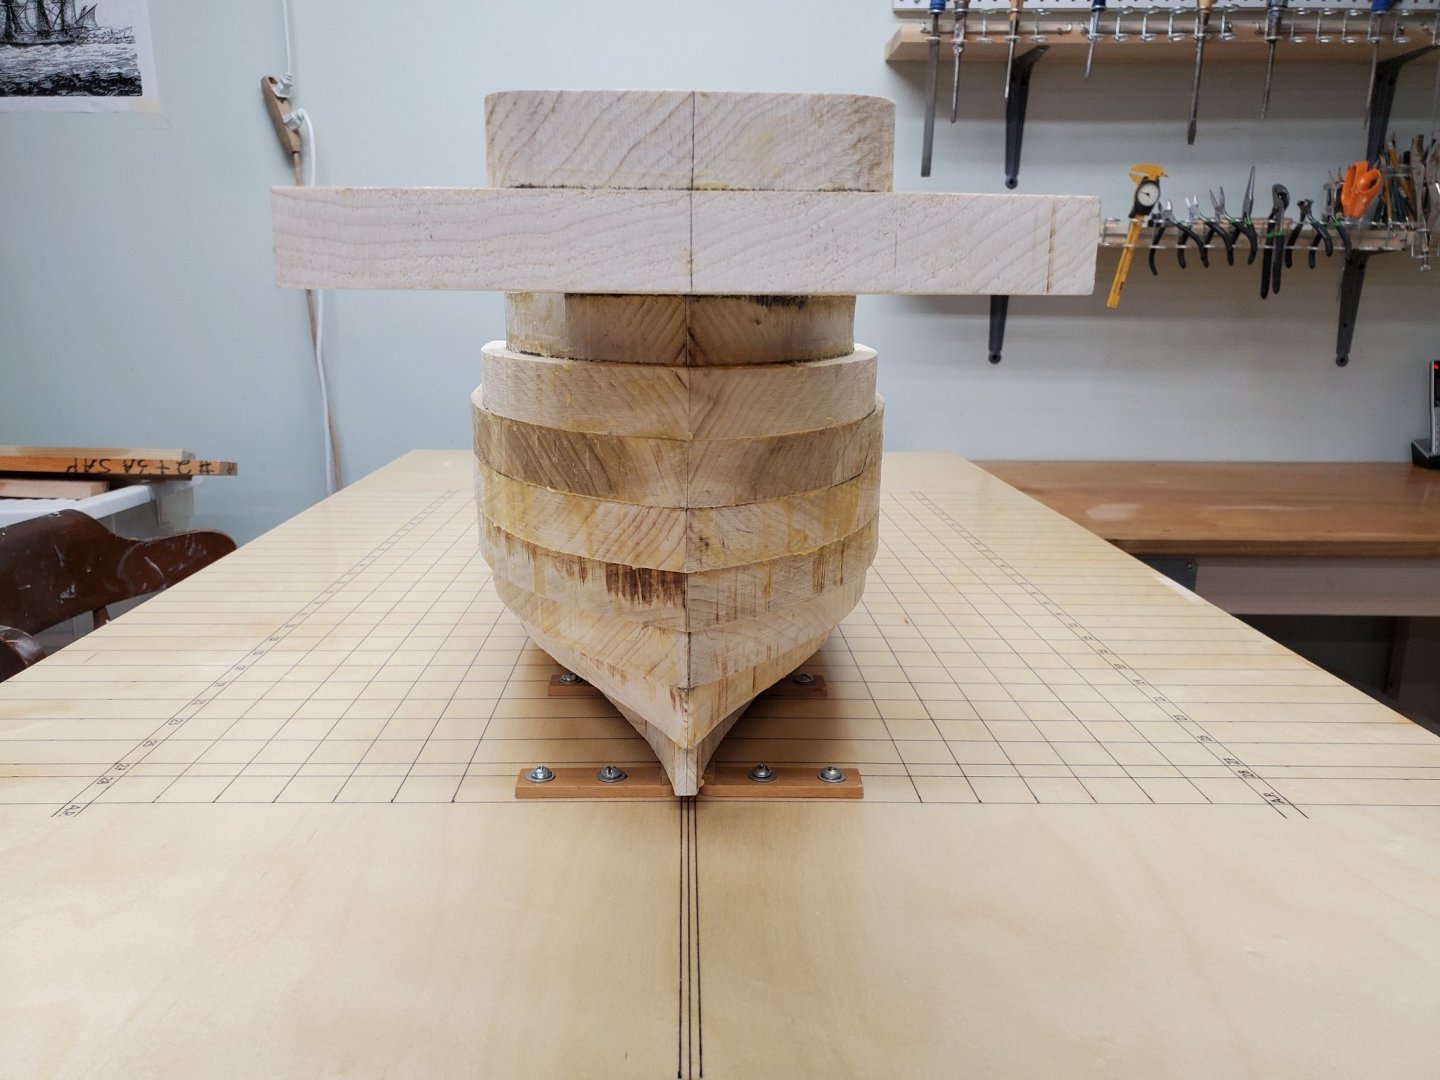
This morning I attached the temporary keel. I first drew lines on the hull slightly wider than the keel. This was just so I could center the keel easier when screwing it down. Next I predrilled the holes in the keel and then countersunk them. I also predrilled holes in the hull right before attaching the keel with 10 - 3/4" small brass Phillips head screws.

-
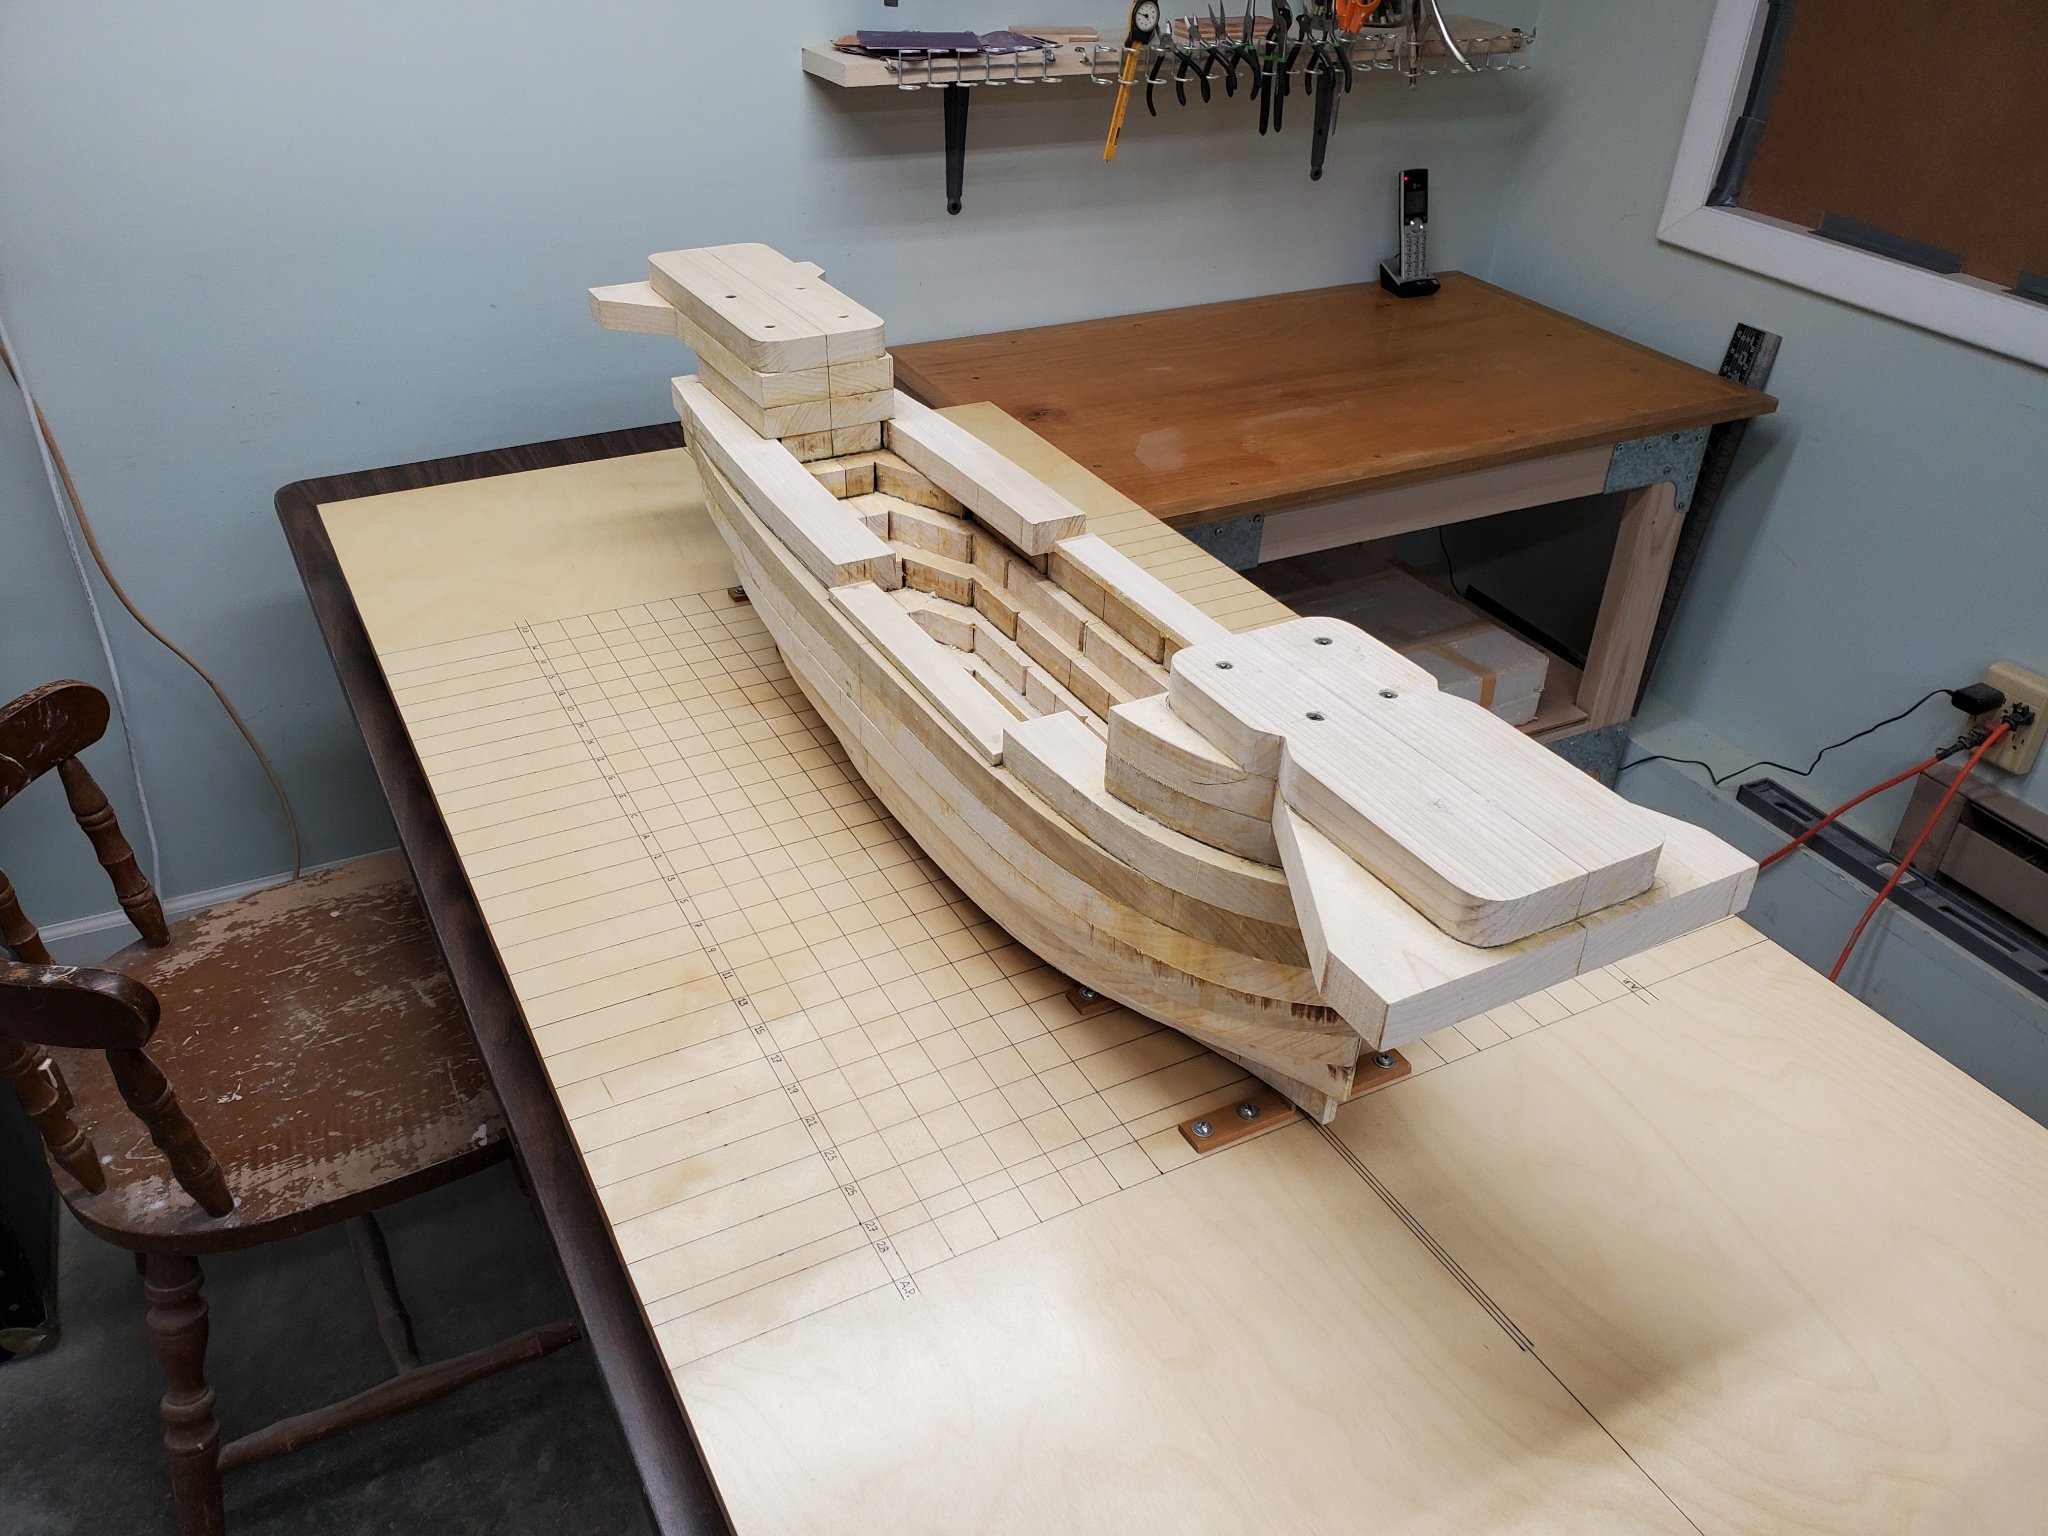
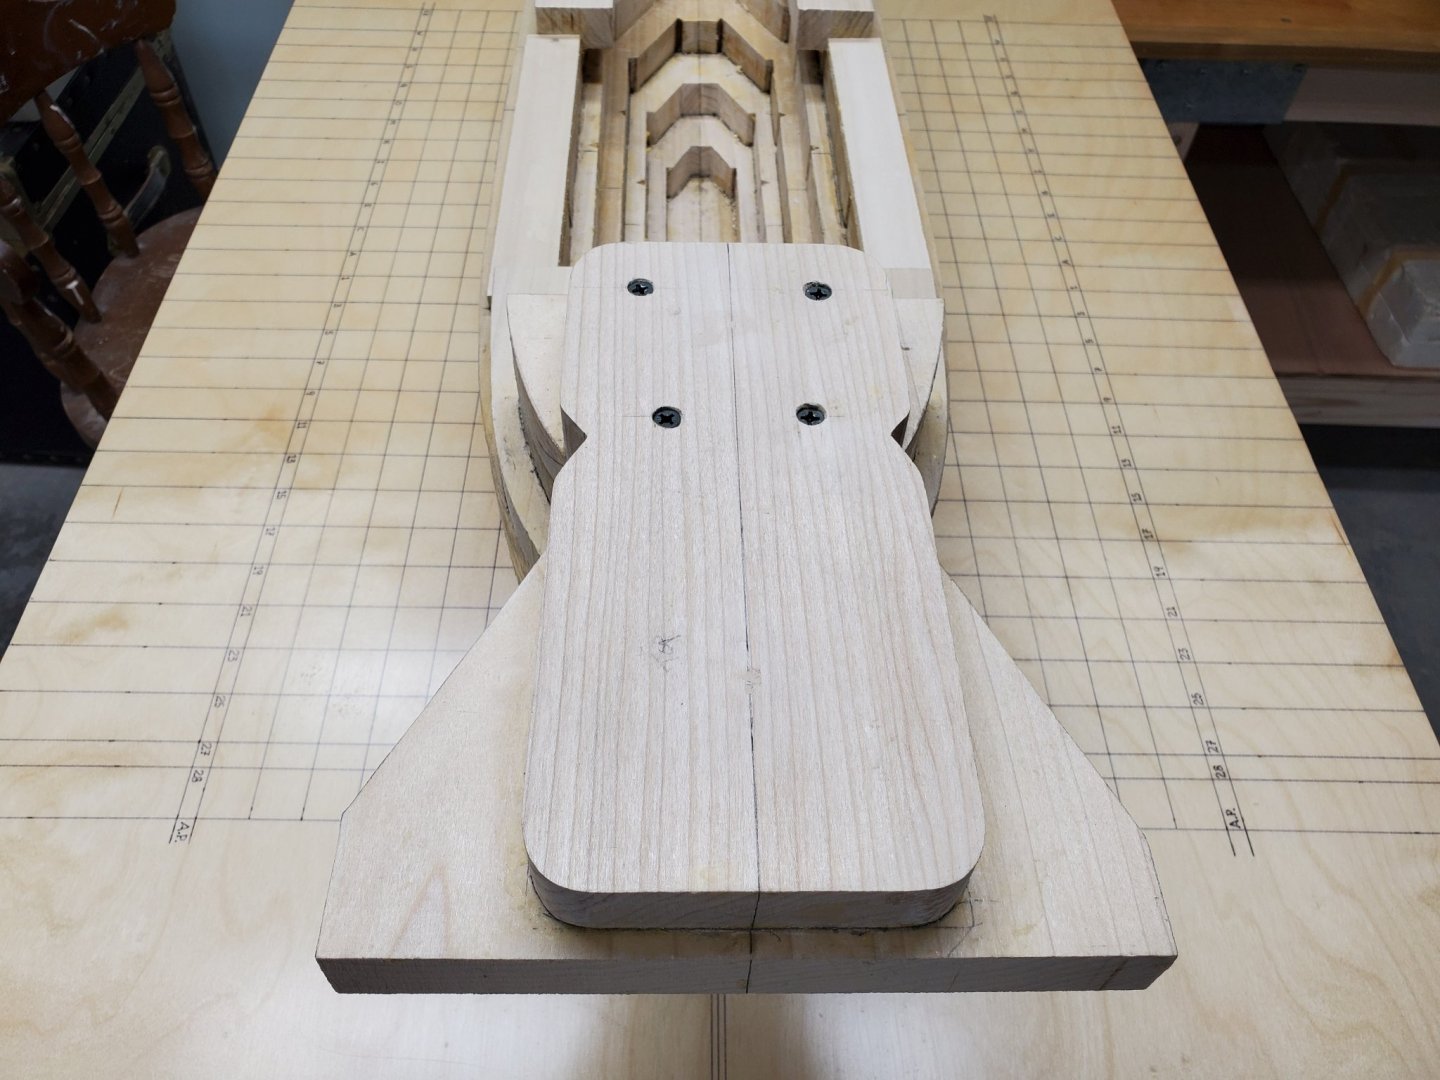
For the past several days I've been working steadily on gluing up the lifts and the other pieces that help support the model when it's on the building board. All seven lifts are glued together, as are the bases that the horizontal arms rest upon and the reinforce pieces that are glued on them. Because the weight is off the scale heavy I felt it necessary to strengthen the glue joint for each arm with 4 - 3 1/2" Phillips bugle head screws. They go through the reinforce pieces, the horizontal arms, the arm bases, and 2/3 the way through lift 7. As previously mentioned, number seven lift was done in three pieces. That lift amidships is not very thick, less than 1/4". I just felt it was easier to do it this way.


-
Hey Ron, what ship model builder who really cares about doing things correctly doesn't have do-overs? I checked my birth certificate to make sure that wasn't my middle name. Tom
-
Mike, I have a question for you. Where did you get the external profile and body plan I saw on page 1 of your log? Is it an enlarged copy of a plan in a book/manuscript or is it a plan you sent away for. If you did send away for it, where is it from, and how much did you pay for it? It doesn't look like it's from the NMM. I would really like to get a copy myself. Thank you. Tom
- 607 replies
-
- 1
-

-
- winchelsea
- Syren Ship Model Company
- (and 1 more)
-
When I have a gap between pieces of wood, similar to what you are experiencing, I mix glue with some fine sawdust into a very sticky paste. I then push it into the gap and smooth it out with an old chisel. Tom
-
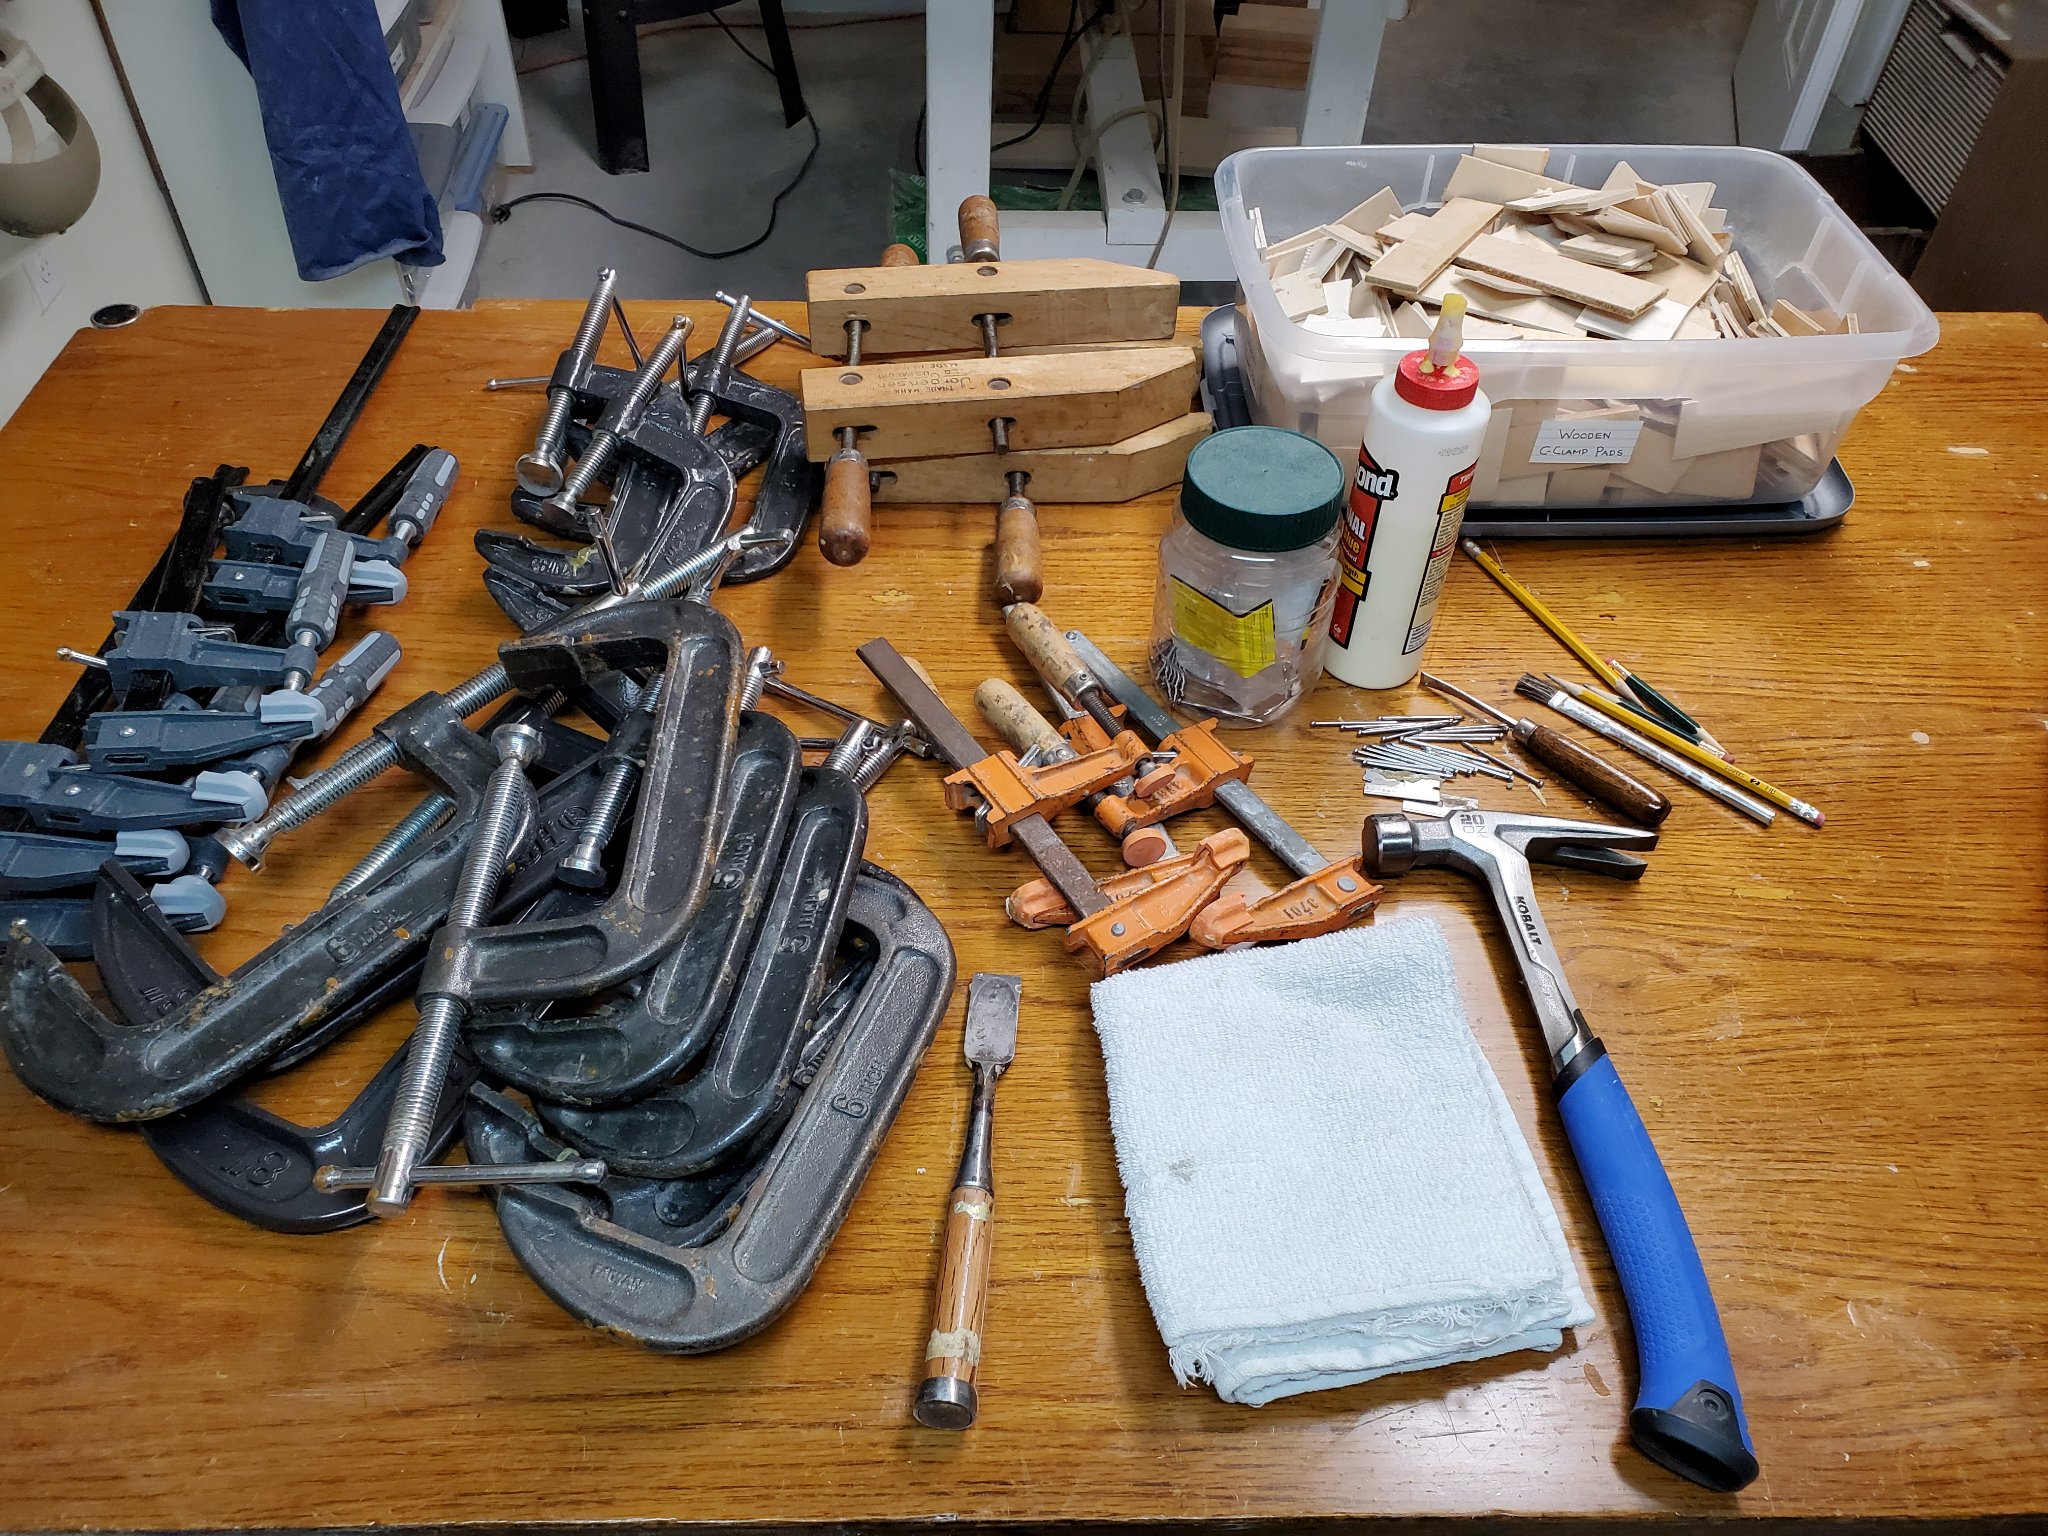
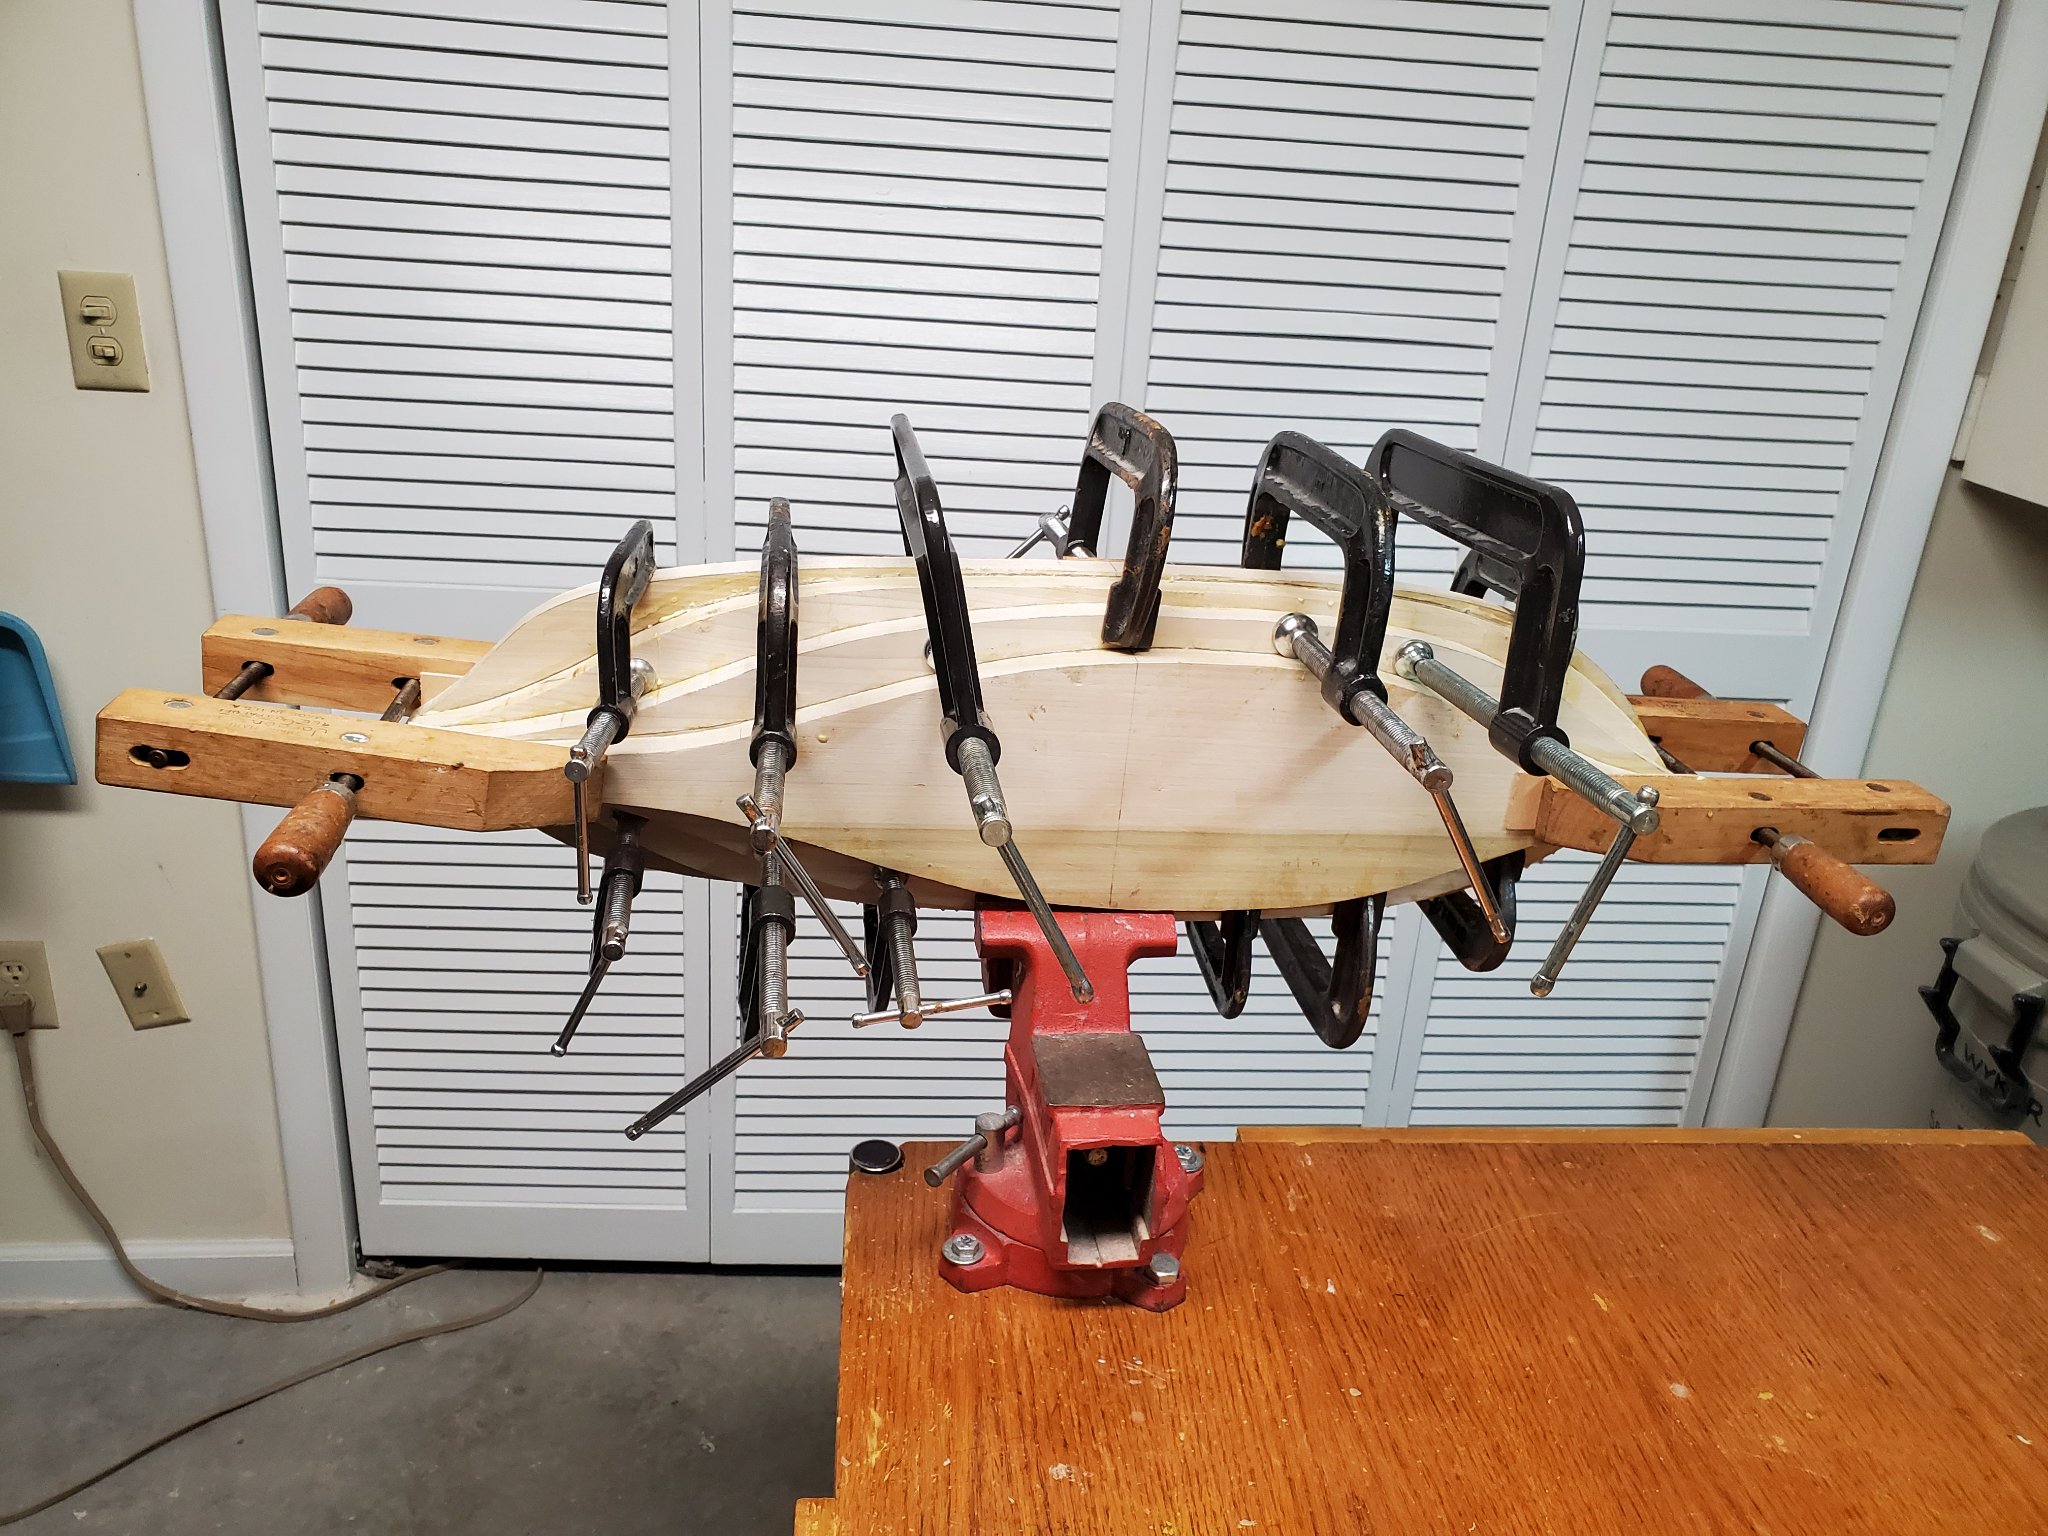
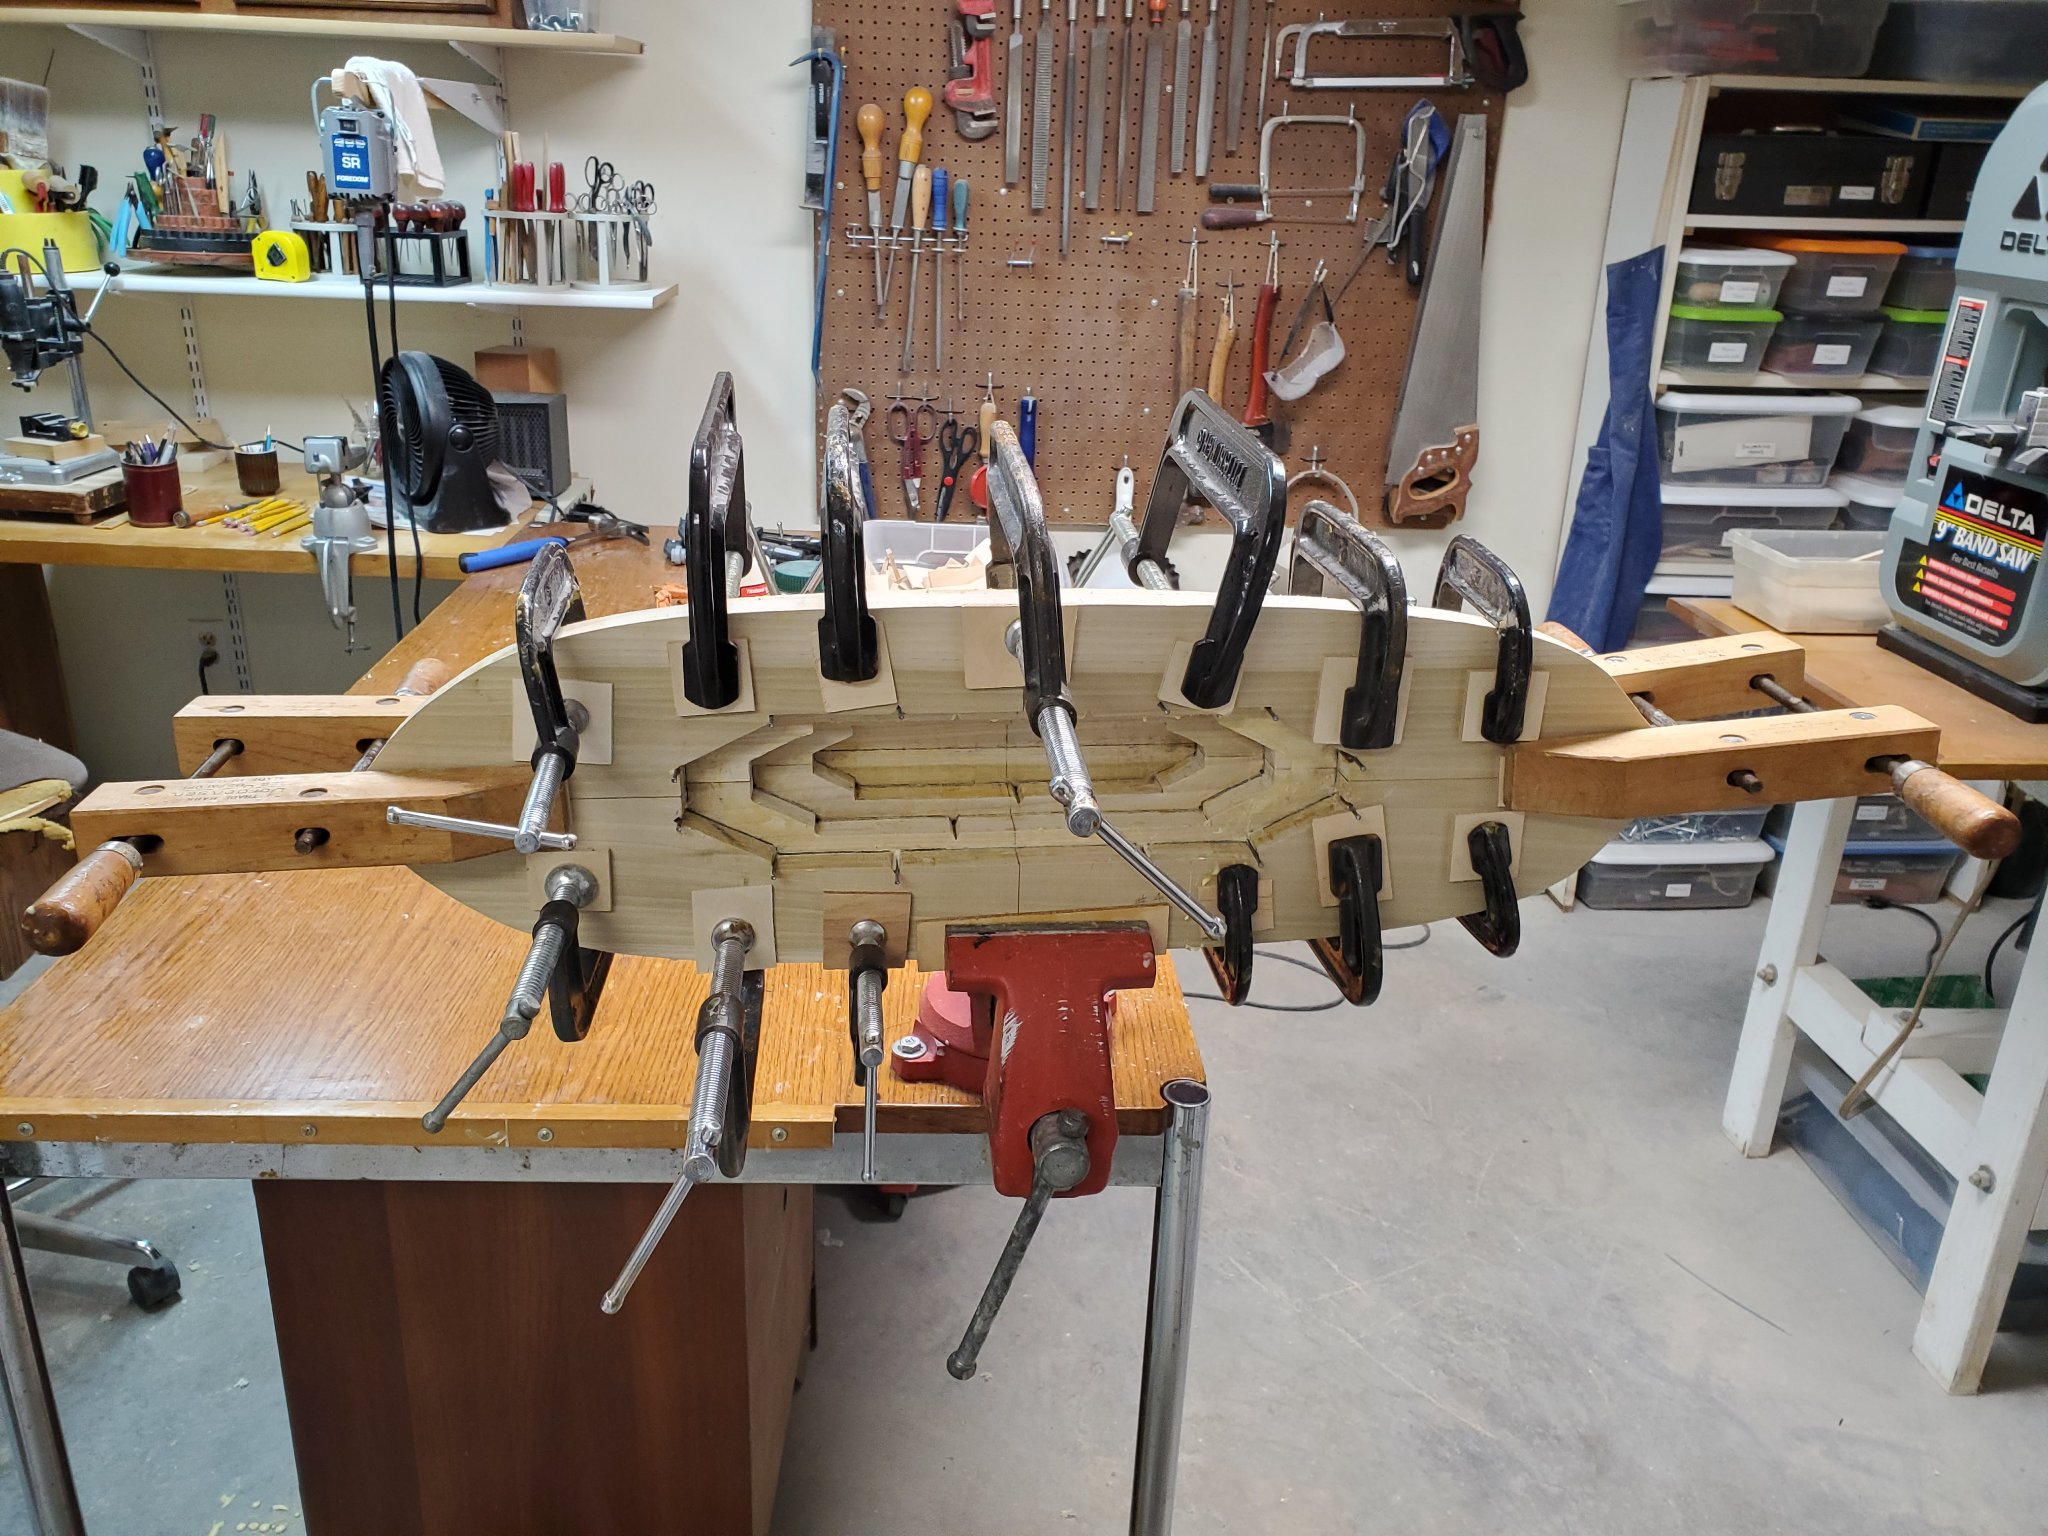
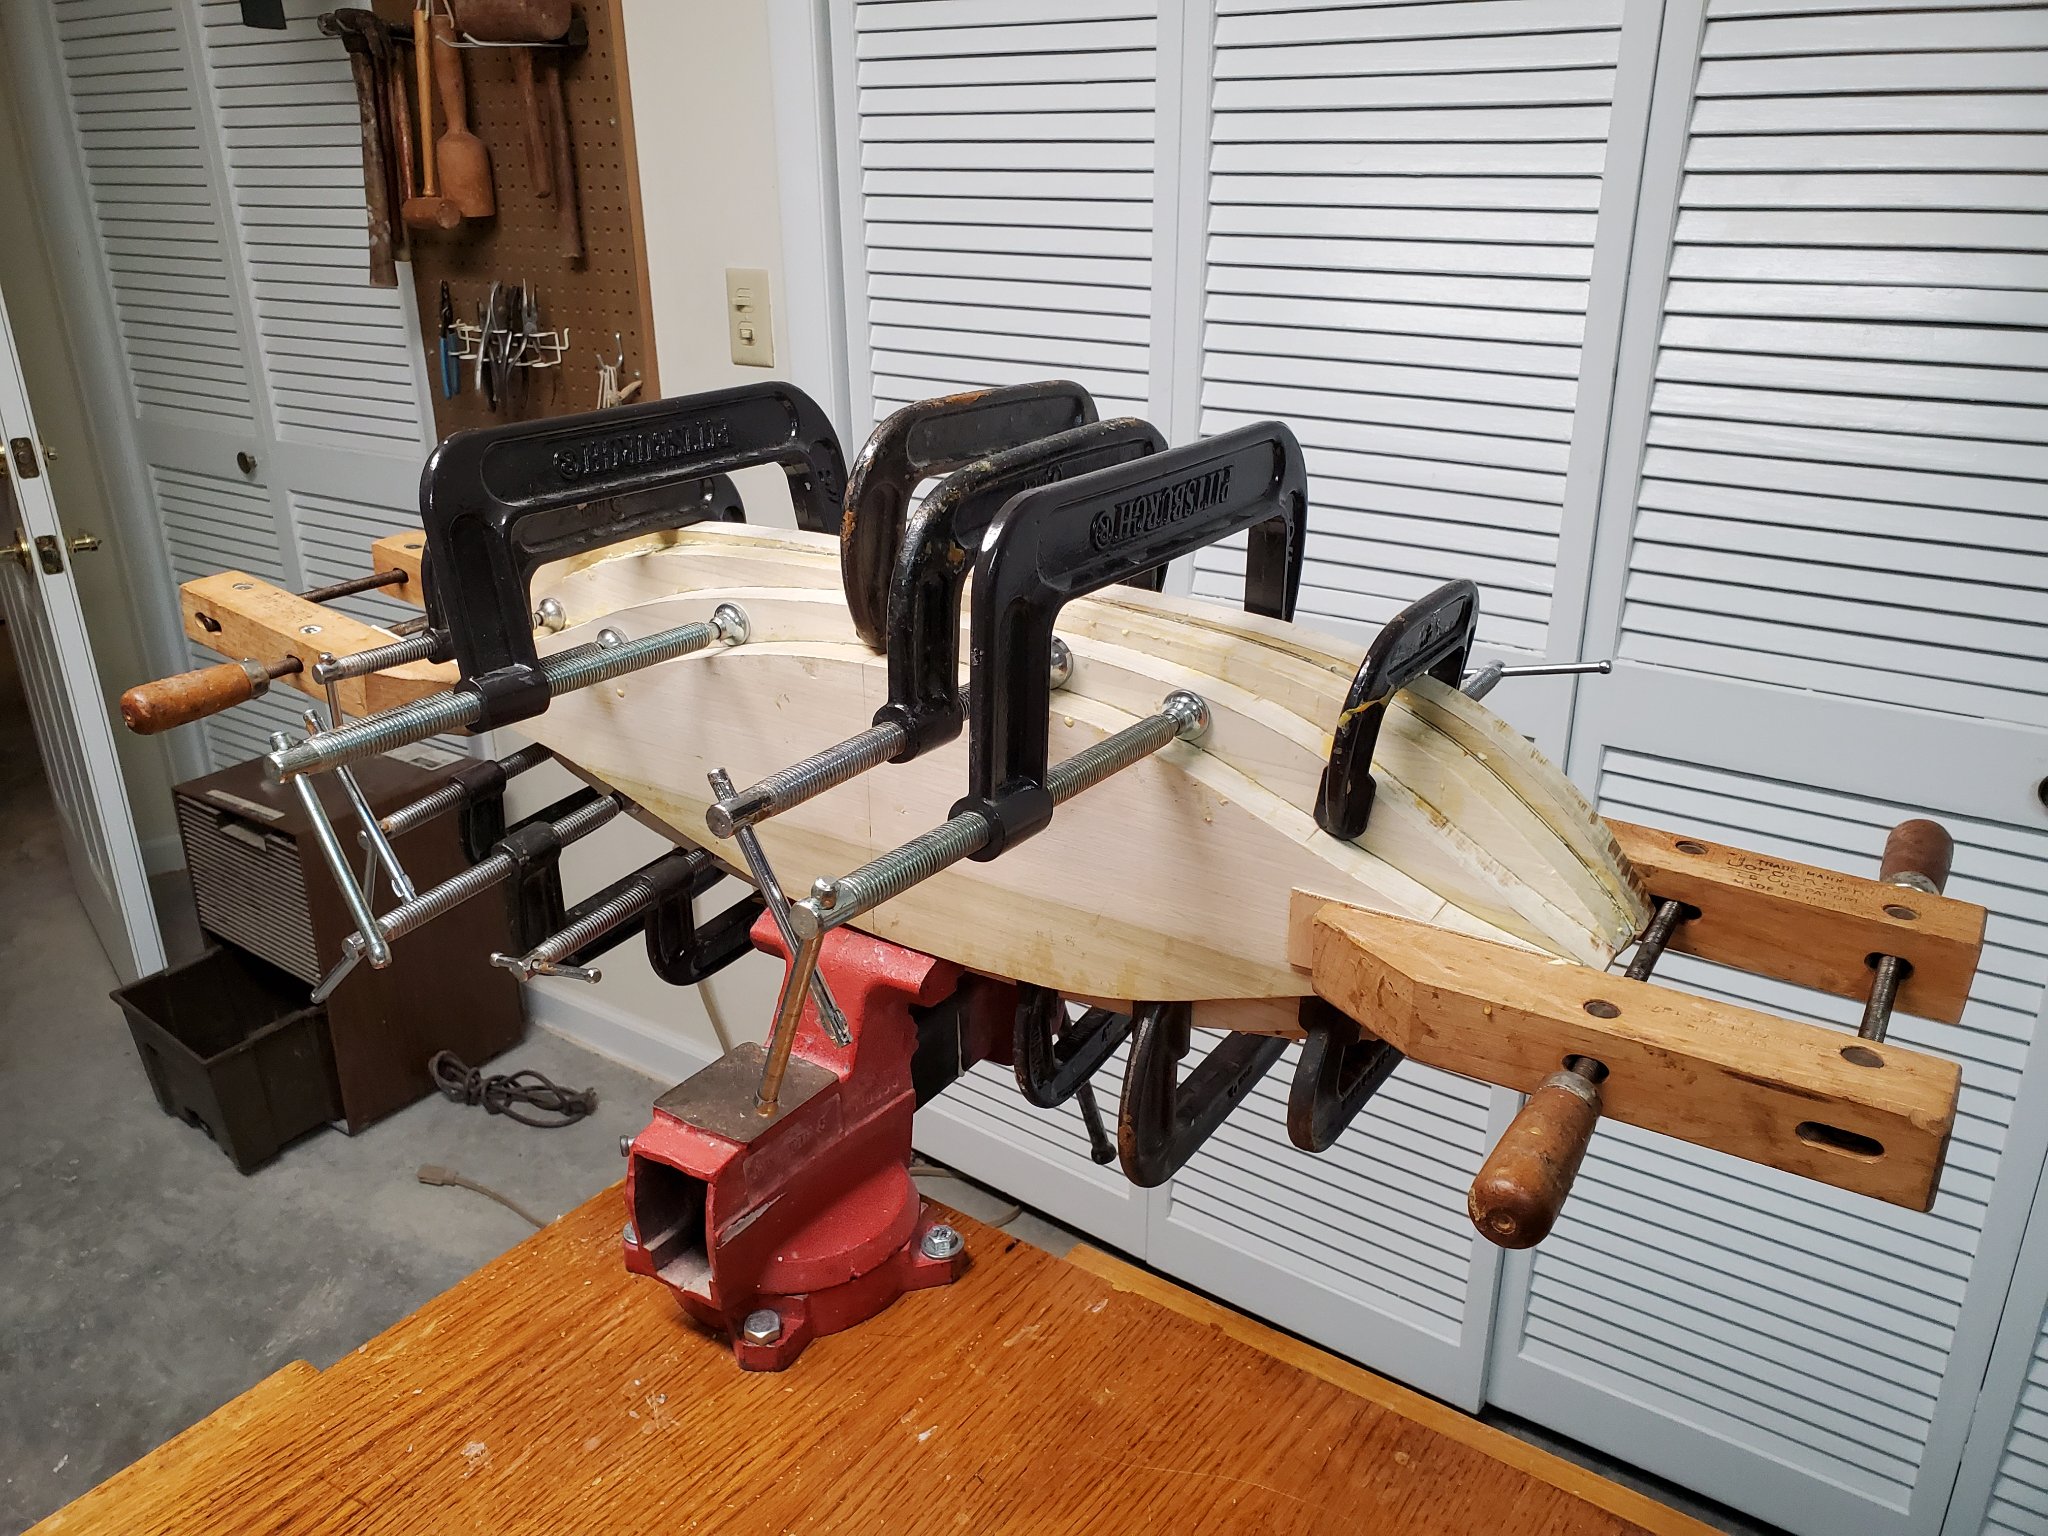
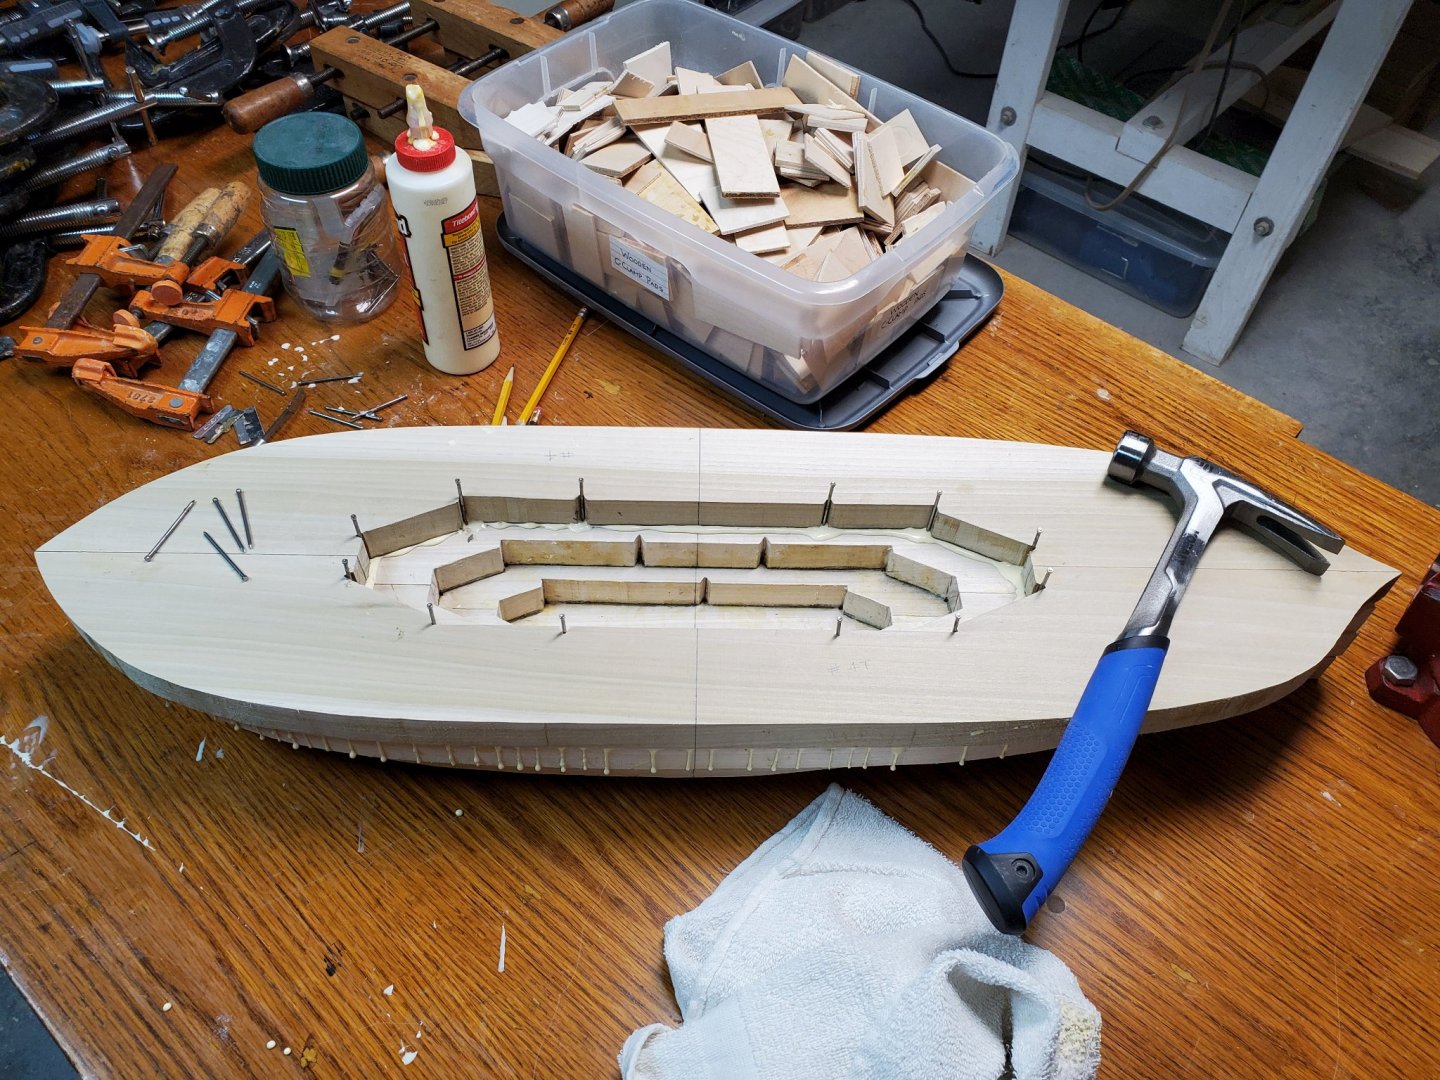
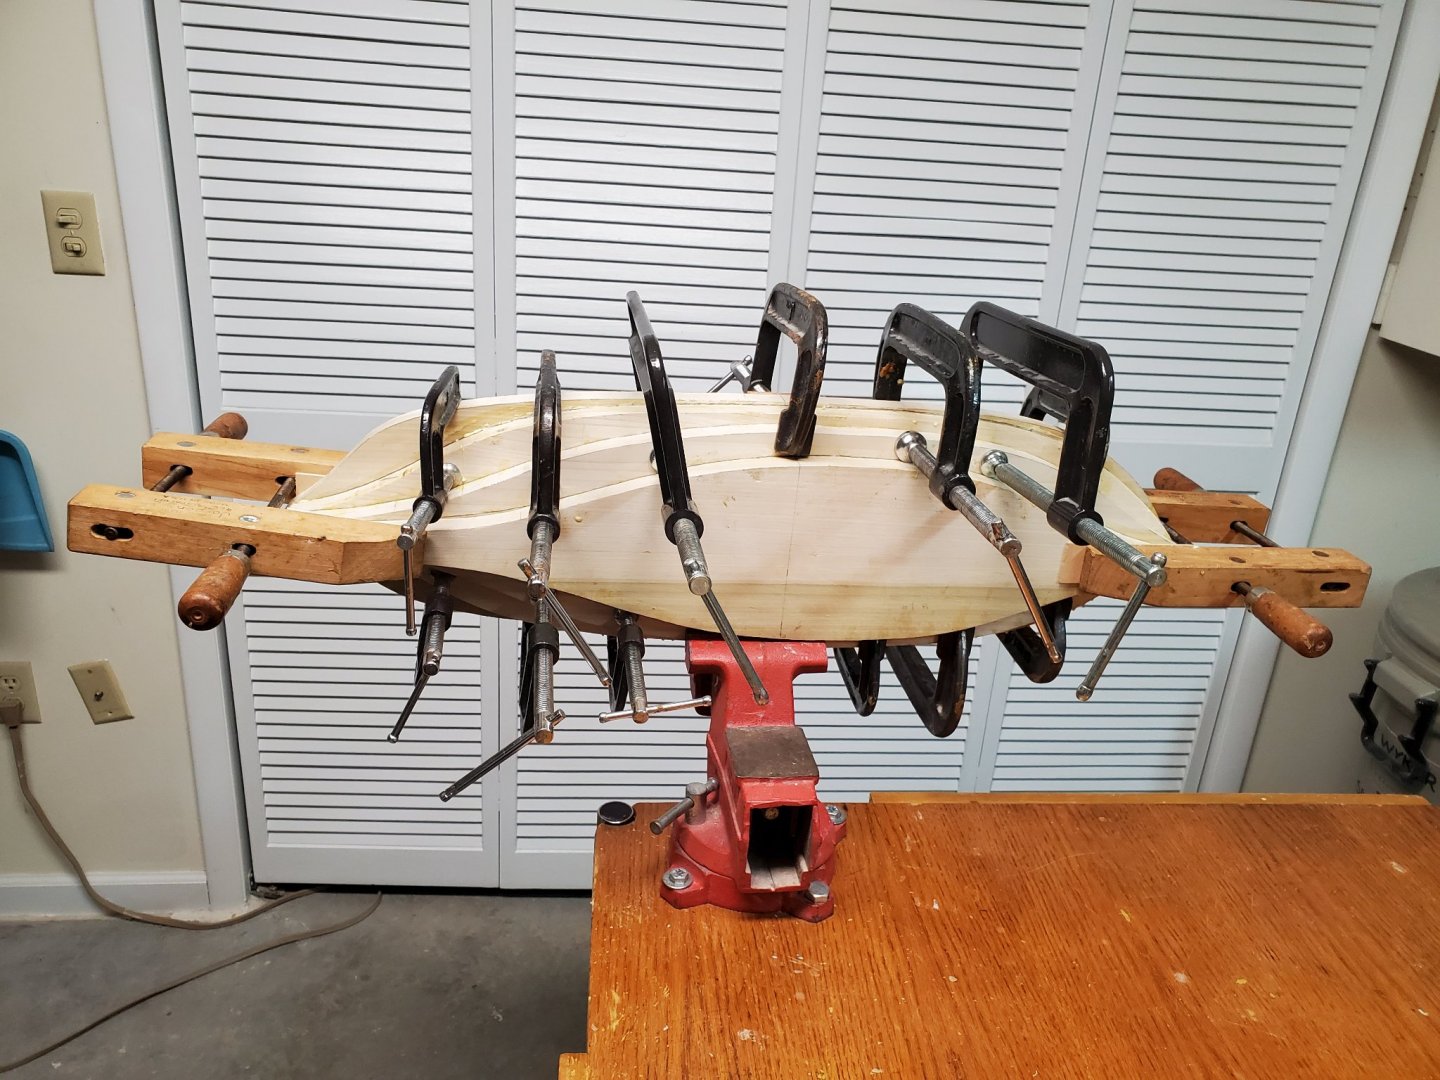
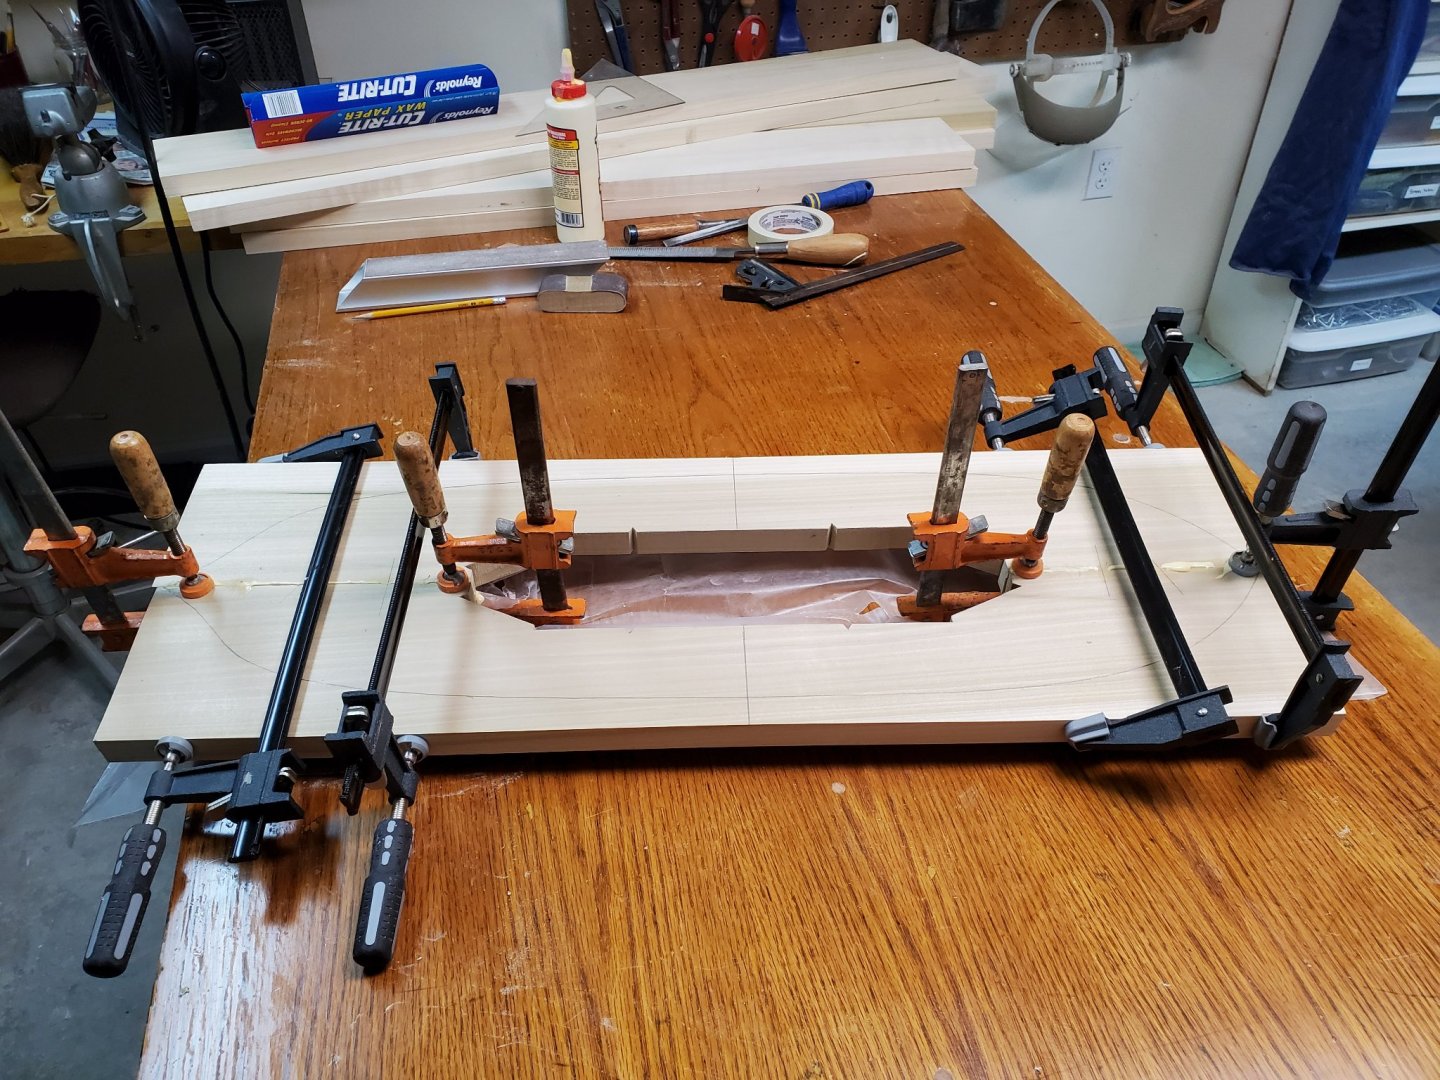
Gluing the Lifts Together For the Winchelsea model there are seven lifts. Number 7 is in three parts. Now that they are assembled it's time to glue them up. The first thing I do is to gather all the tools used in the process. (photo 1) Next I carefully check the lifts to be glued together. I make sure the surfaces are perfectly level and that they don't have any dried glue on them from an earlier lift glue-up. When that's done I make sure the center line, number 1 station line and any lines on the ends of the lifts (inside and out) are accurate and darkened for easy visibility. This is important because there is often so much glue that squeezes out that line visibility can be obscured. After this is done I place the two lifts to be glued together, carefully align them and then run a #2 pencil around where the lifts meet, inside and out. (photo 2) Glue is then applied to each lift. I am very liberal with the glue, so I have to wait a little longer for it to get tacky. Be careful doing this. You don't want to wait too long because you want all the excess glue to easily squeeze out. (photo 3) My next step, and a very important one, is to put nails into the lifts to keep them from moving when clamping. Without them there is no way I can keep the lifts from sliding out of place. I use 2" finishing nails for the job. As you can see in the above photo I don't actually drive the nail through one lift into the other. What I do is to place the nails into certain V grooves or in the corner of L shapes in the top lift and then drive the nail approximately 5/8" to 3/4" into the lower lift. I use anywhere from 8 or 14 nails to immobilize a lift. This step is made possible because yellow poplar takes nails so well. The nails are easy to put in, the wood doesn't split, and when the clamping is done the nails are easily removed. Be very careful the lifts don't slide out of place when nailing. In this photo I completed the nailing and am about to clamp lift #4 to lifts #1, 2 and 3 that are already glued together. (photo 4) When the nailing is complete I'm ready for clamping. (Photos 5, 6 and 7) In those places that I don't want marred from clamp pressure I use a small piece of plywood to protect the lift's surface. After all the clamps are in place I remove the excess glue that squeezes out. There is usually a considerable amount that needs to be cleaned from the lifts. The excess glue is scraped off with a few different chisels. I give the clamped-up lifts at least six hours to dry before gluing the next lift.


-
Thanks for sharing, JJ. Those warm colored LEDs you've found have just the right look. I'm sure a number of other modelers will look into using them. Tom
-
Hello Ben, This evening I sat down with a cup of coffee and finally read your build log. I'm sorry it took so long to get around to it because you have a beautiful build going with all sorts of interesting additions. I liked your idea of putting wheels on the Harbor Freight work table. Your pear wood frame reveal with the shadow box is really eye catching. I like your use of hardwoods throughout, especially the Gabon ebony wales. You don't see the wood used as much for the wales anymore, but when it is used it really stands out. Very nice, and classy looking. That jet black ebony must have cost you a pretty penny. I took notice of your plank bending station too. Where did you get those two hold-downs? Last but not least is your use of black string to insure good planking runs. That's something I'll have to try. Thank you, Ben. It was a pleasure reading and seeing what you're doing. I will, for sure, follow your build more closely. Tom
- 399 replies
-
- 6
-
-
- winchelsea
- Syren Ship Model Company
- (and 1 more)
-
Total lockdown? No stores open? What a bummer! I'd go crazy if I didn't have access to my local hardware/lumber stores. Hopefully the world can start vaccinating people en masse soon, so we can get back to living a normal life again. I hate this jail at home. Tom
-
Yes Ron, it has WEIGHT, and it will get even heavier still with the horizontal arms to be added. This thing is a beast! It's always fun to break out the mallet, chisels, and gouges and go at it. I even use my Porter Cable belt sander with the 40 grit belts at times. You have to be VERY CAREFUL with it because it has real teeth. My next door neighbor just loves the bags of wood plane shavings and gouge chips I give her for her fireplace. Tom
-
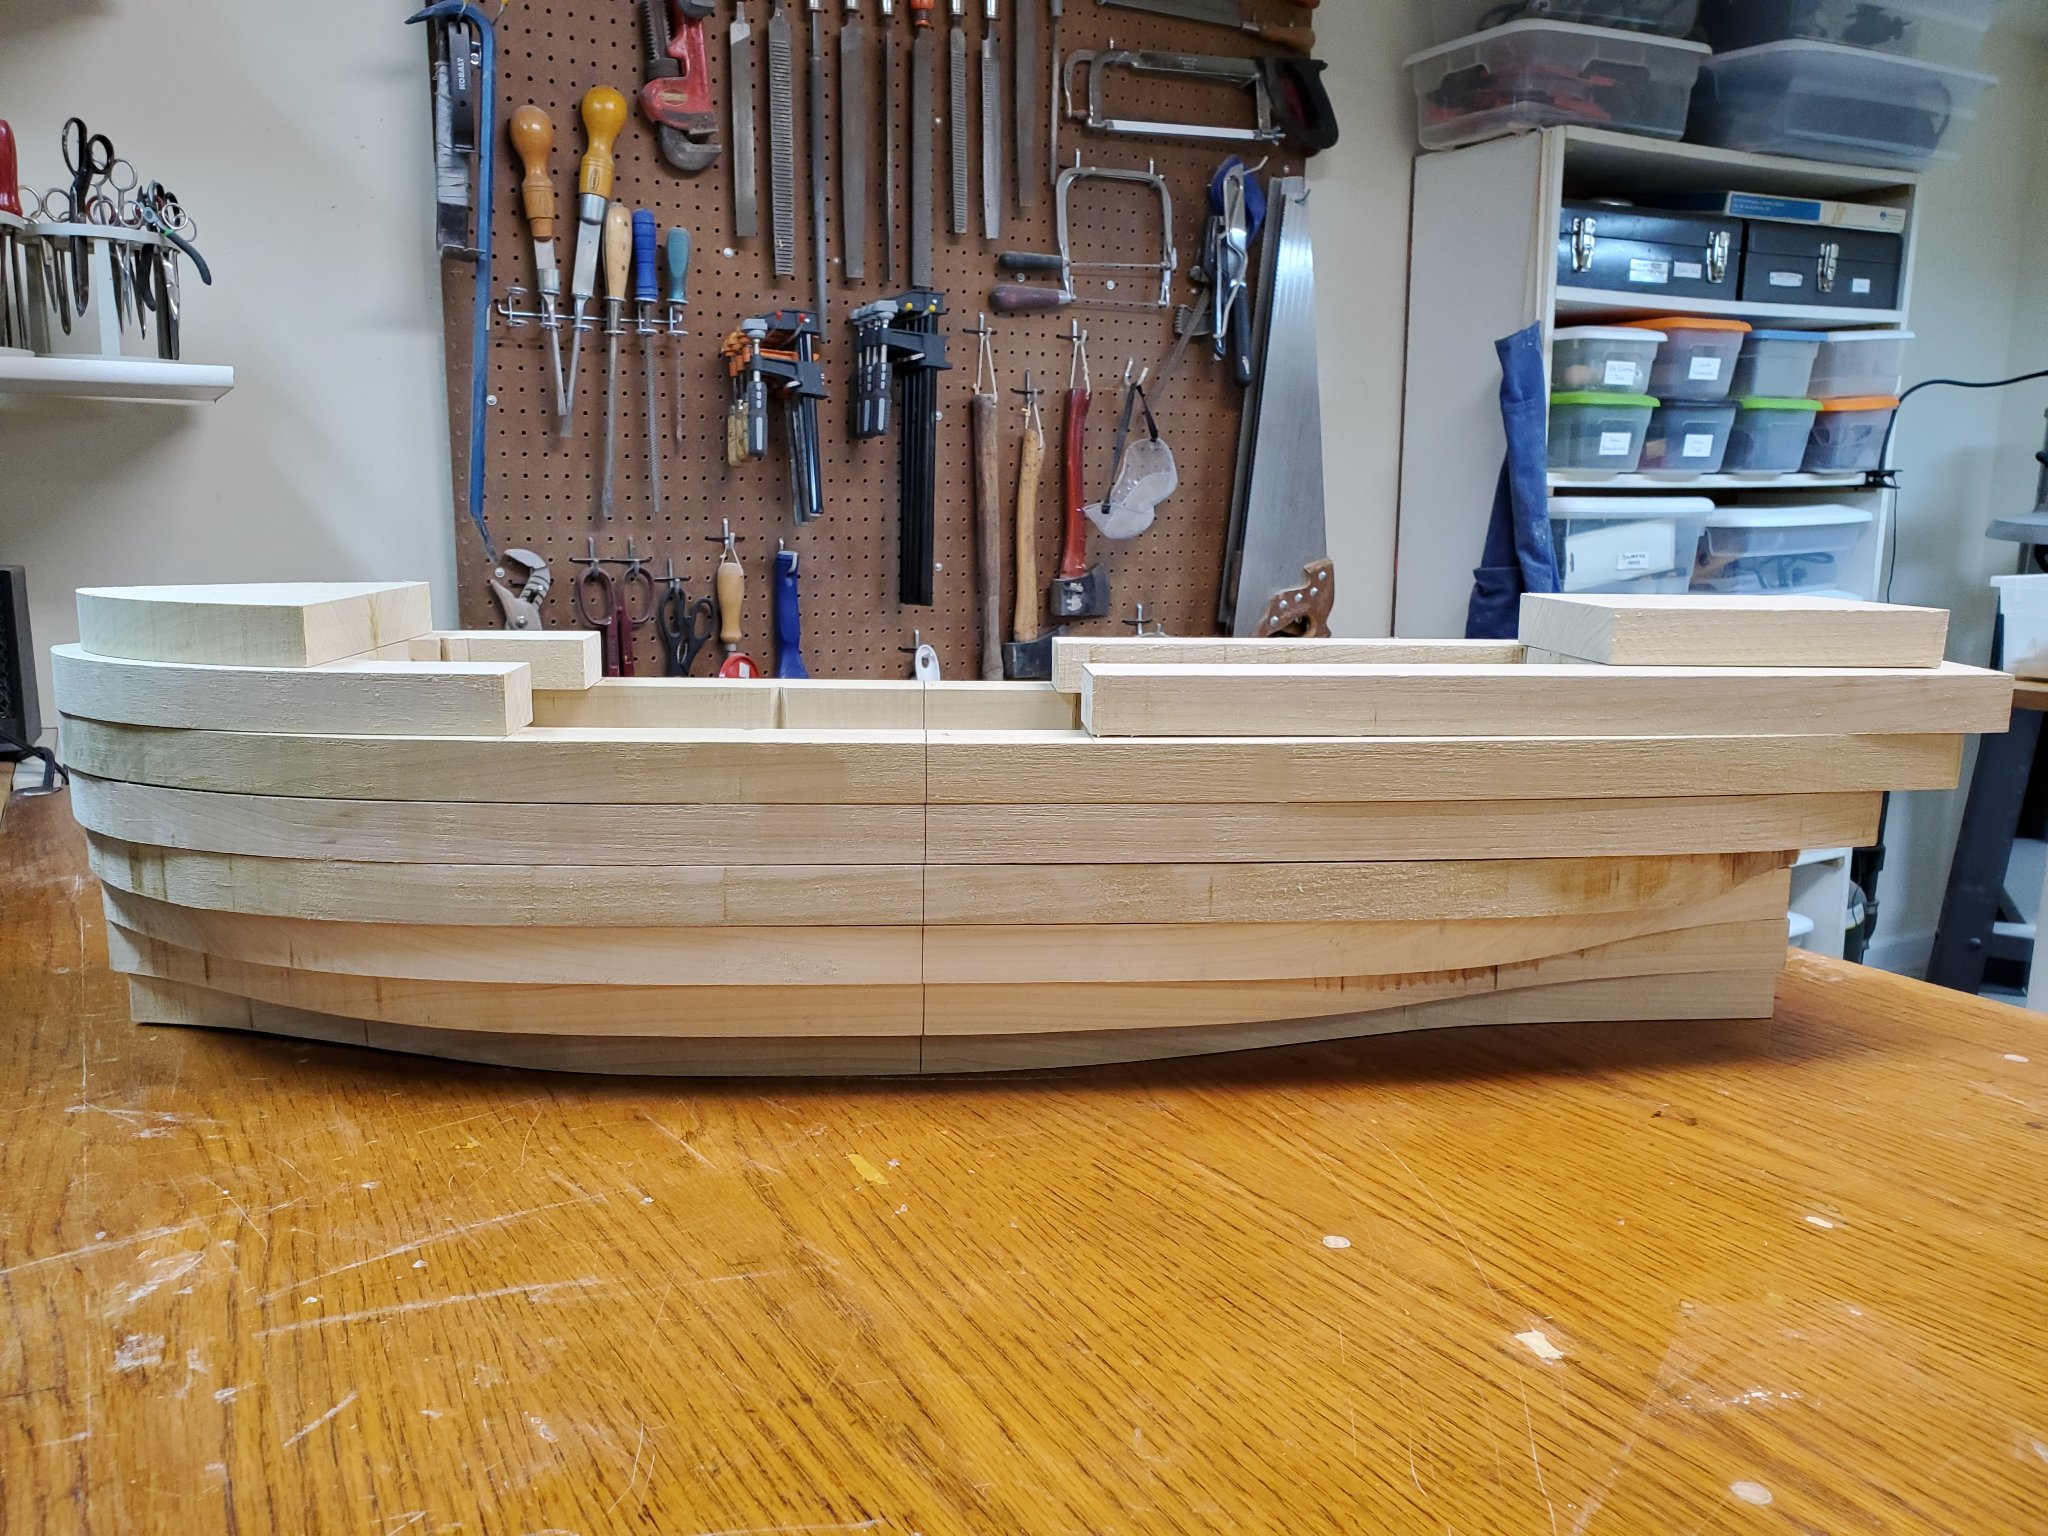
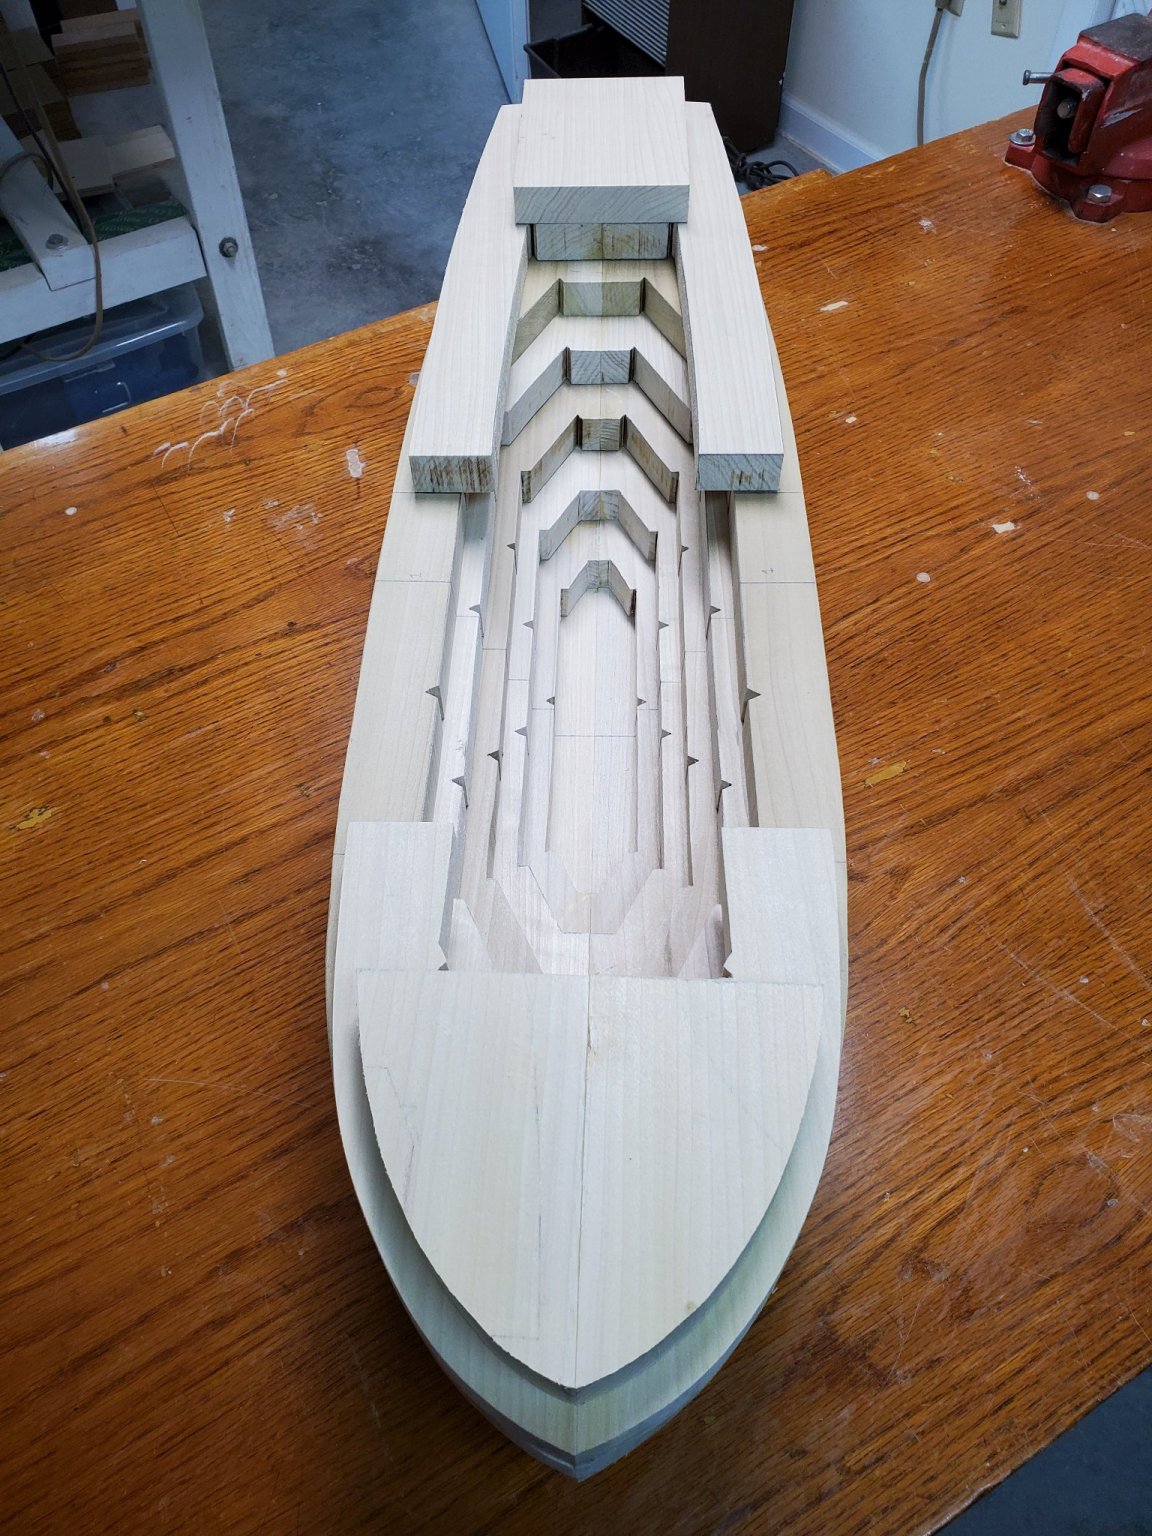
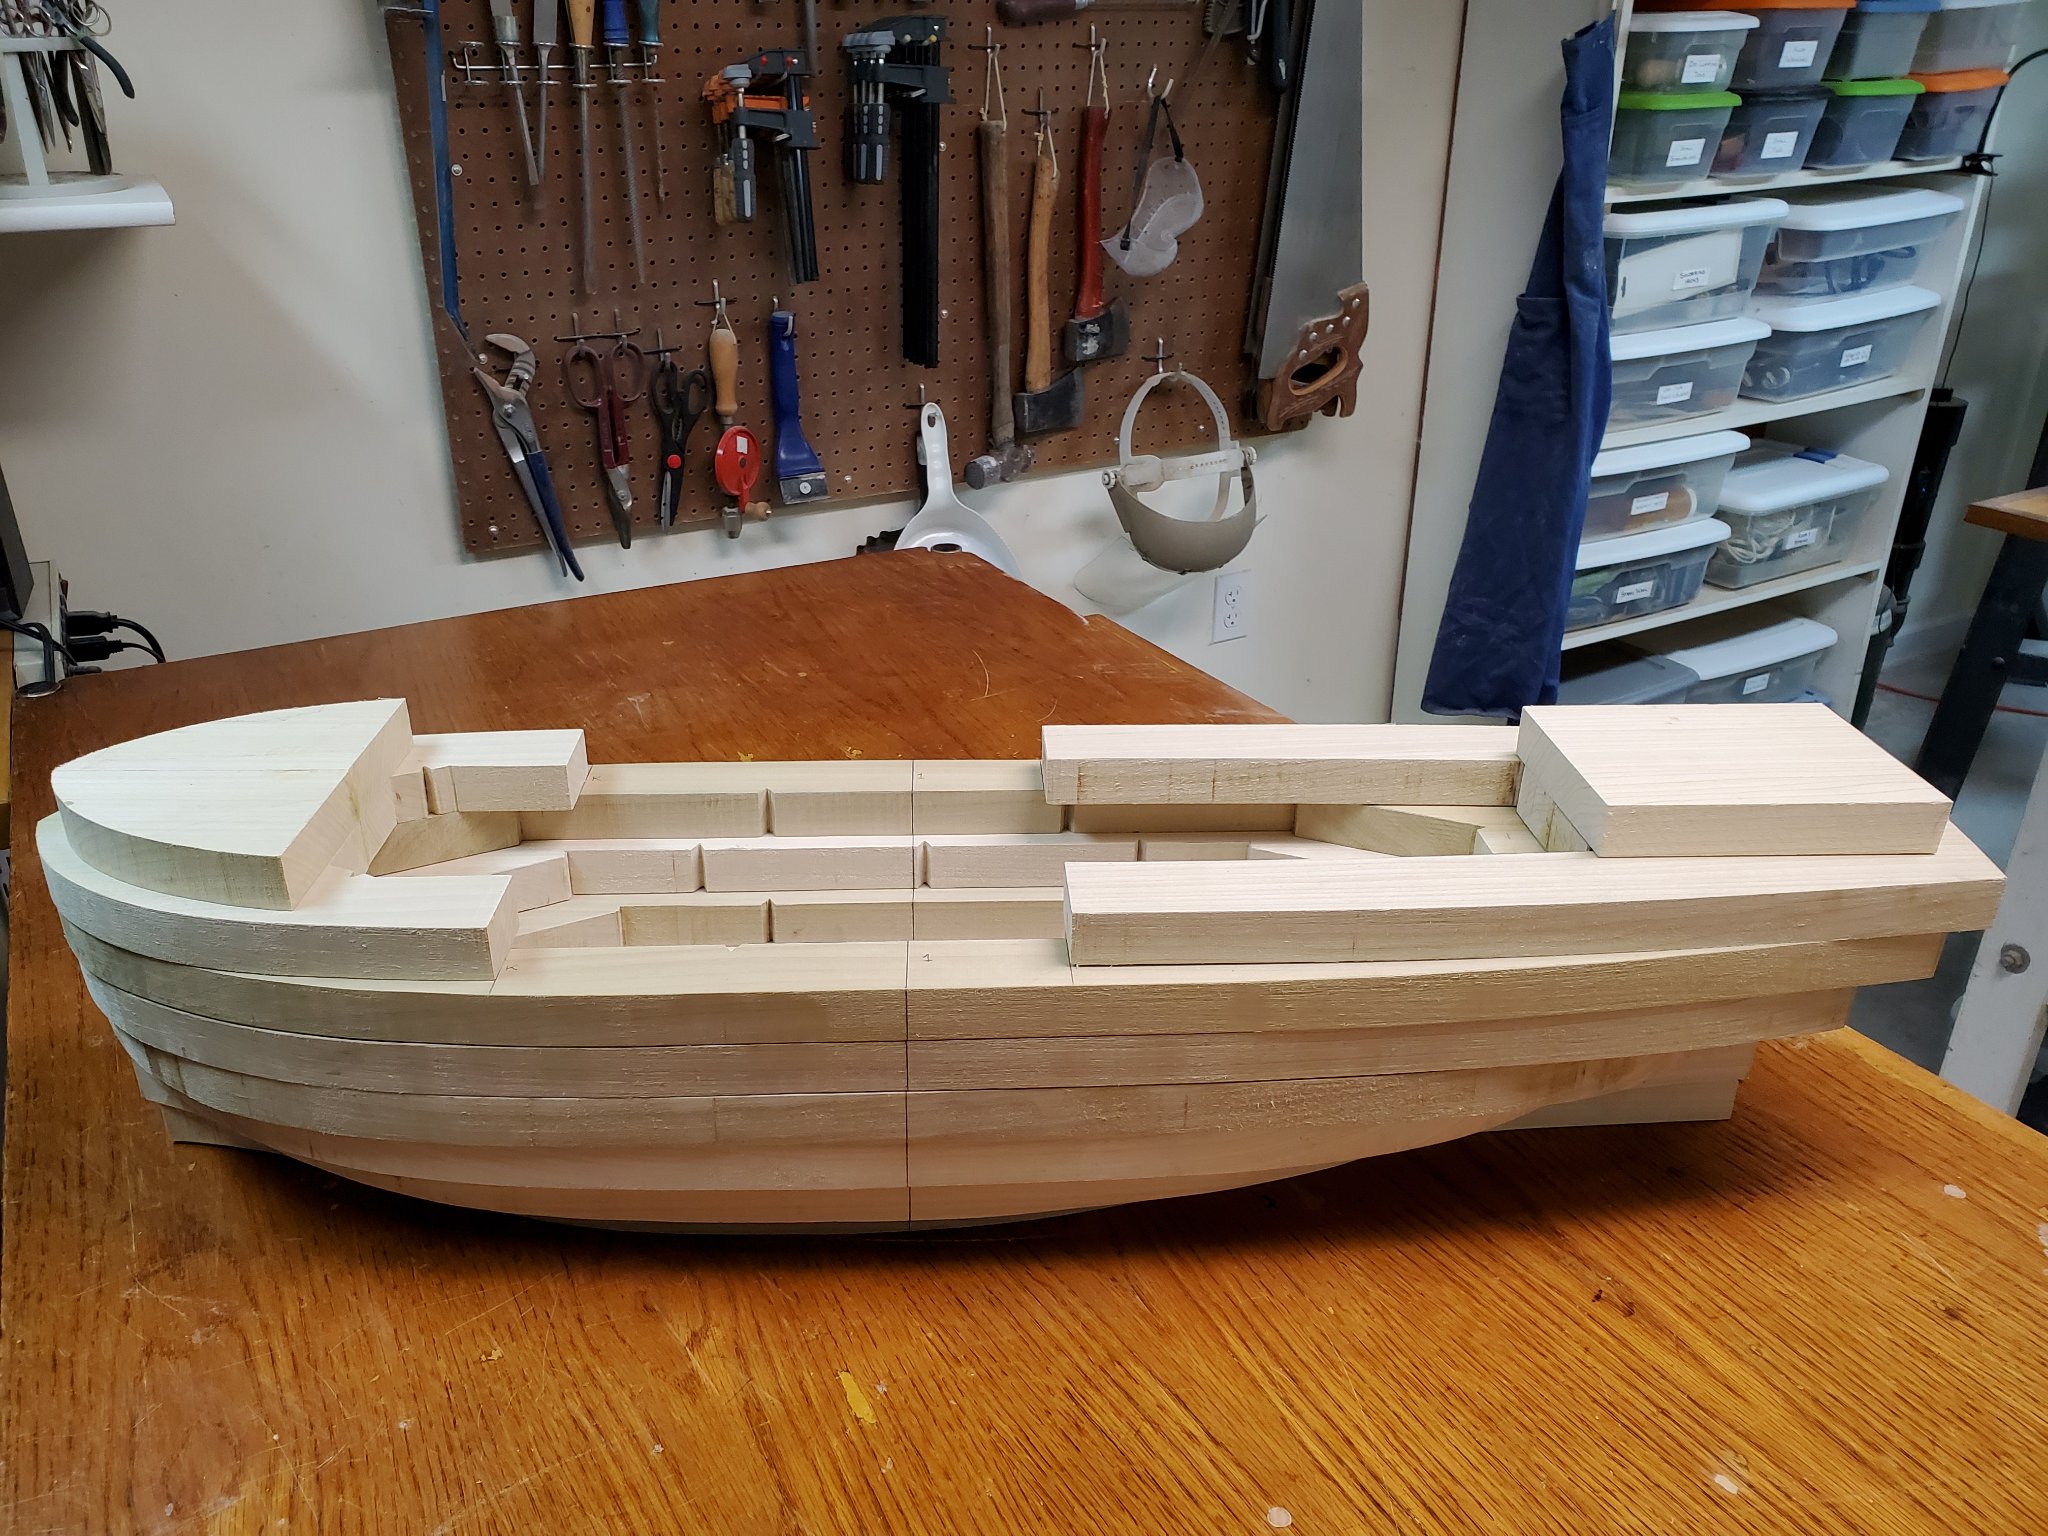
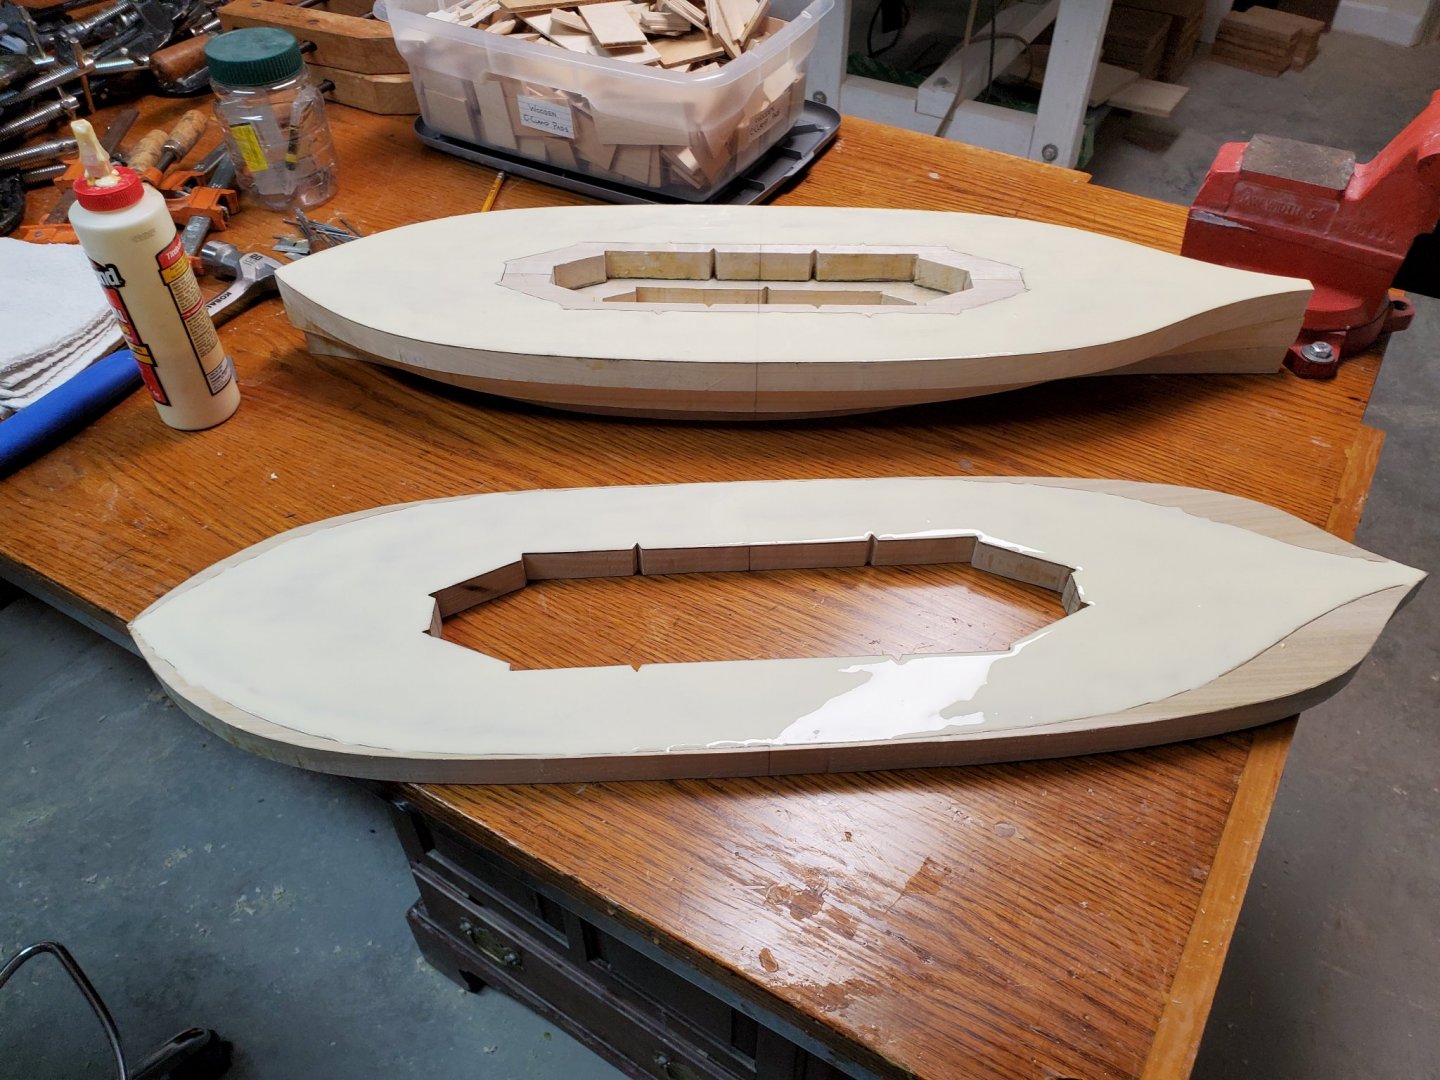
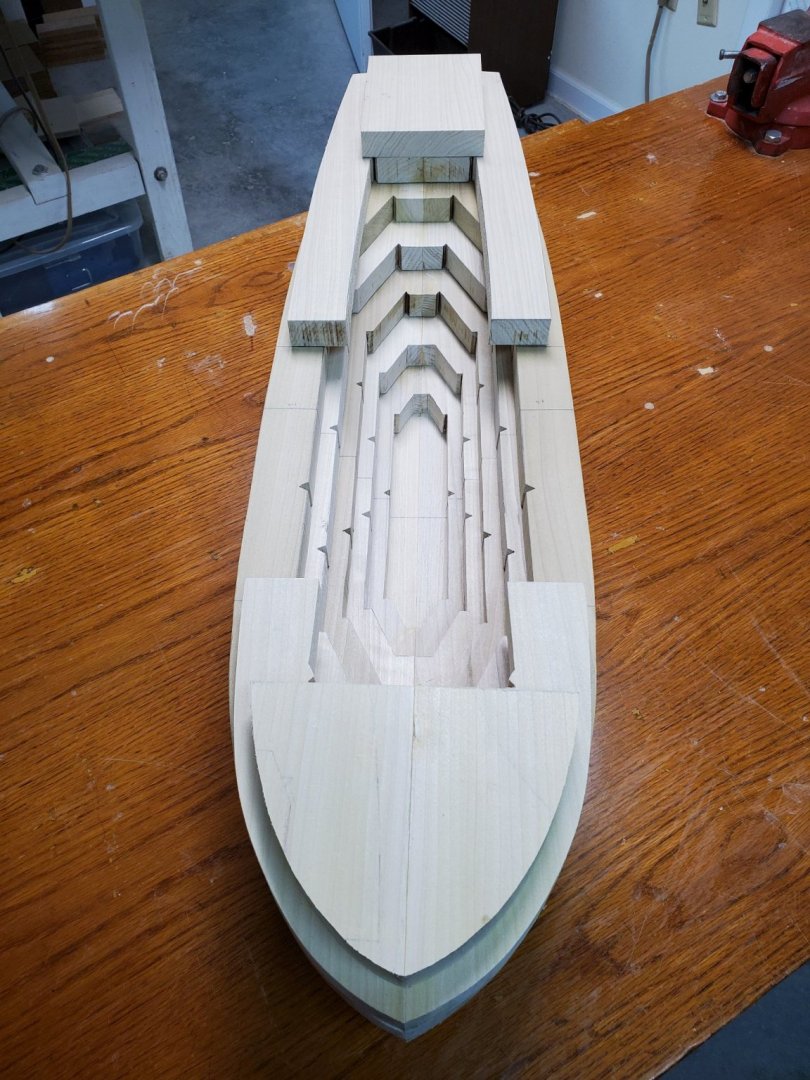
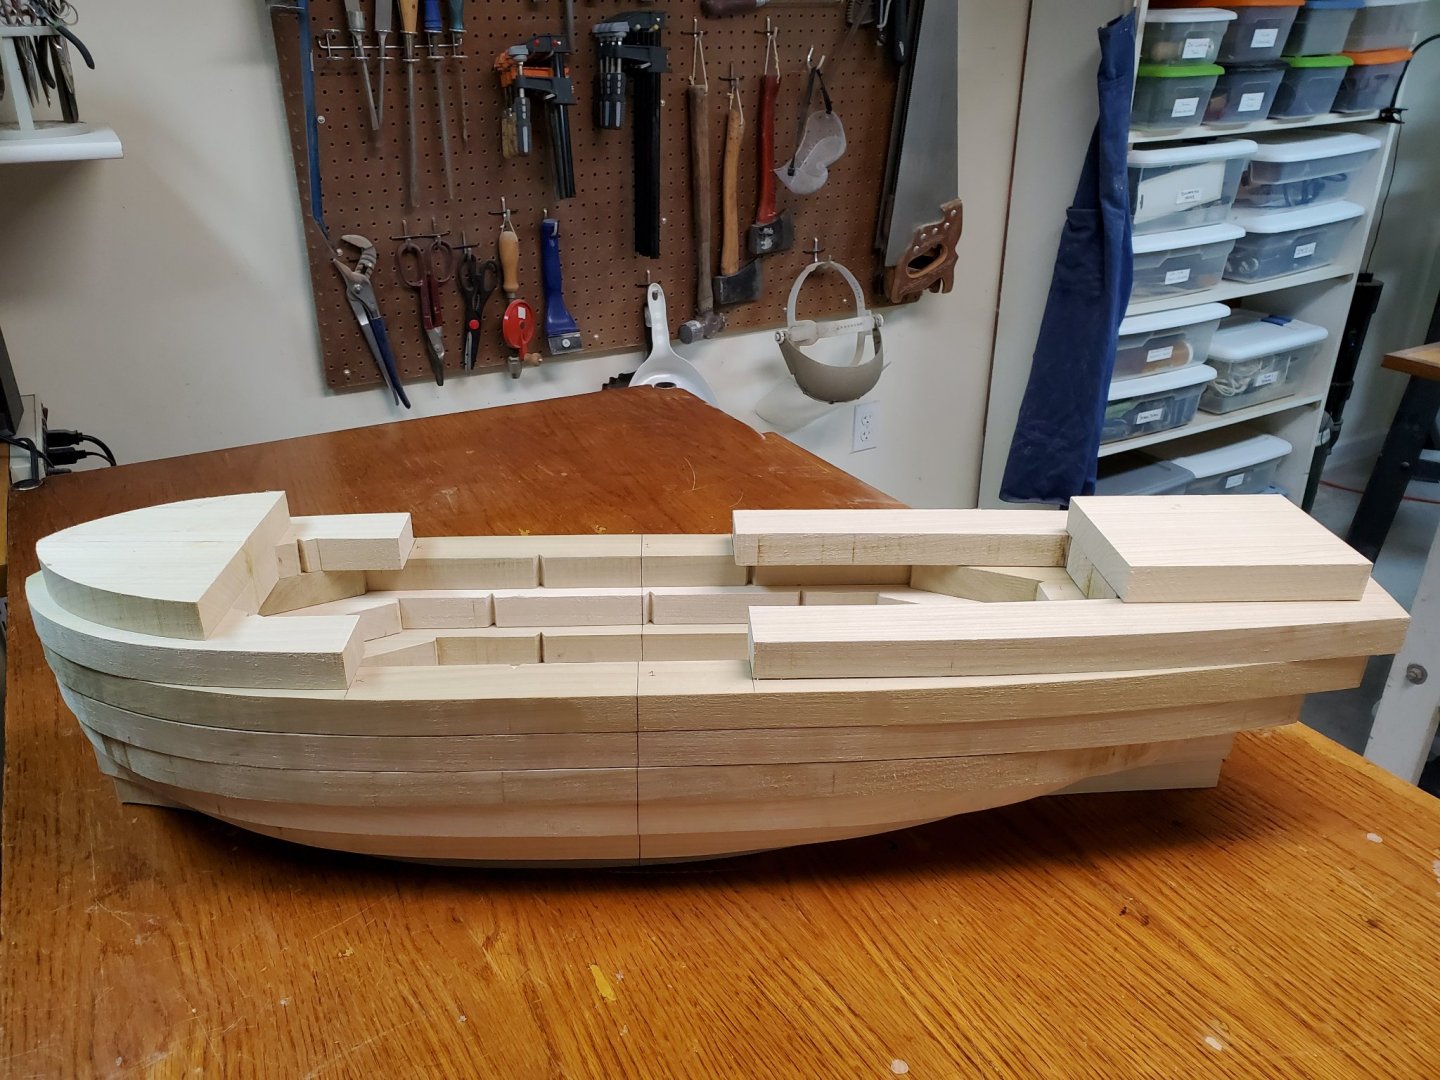
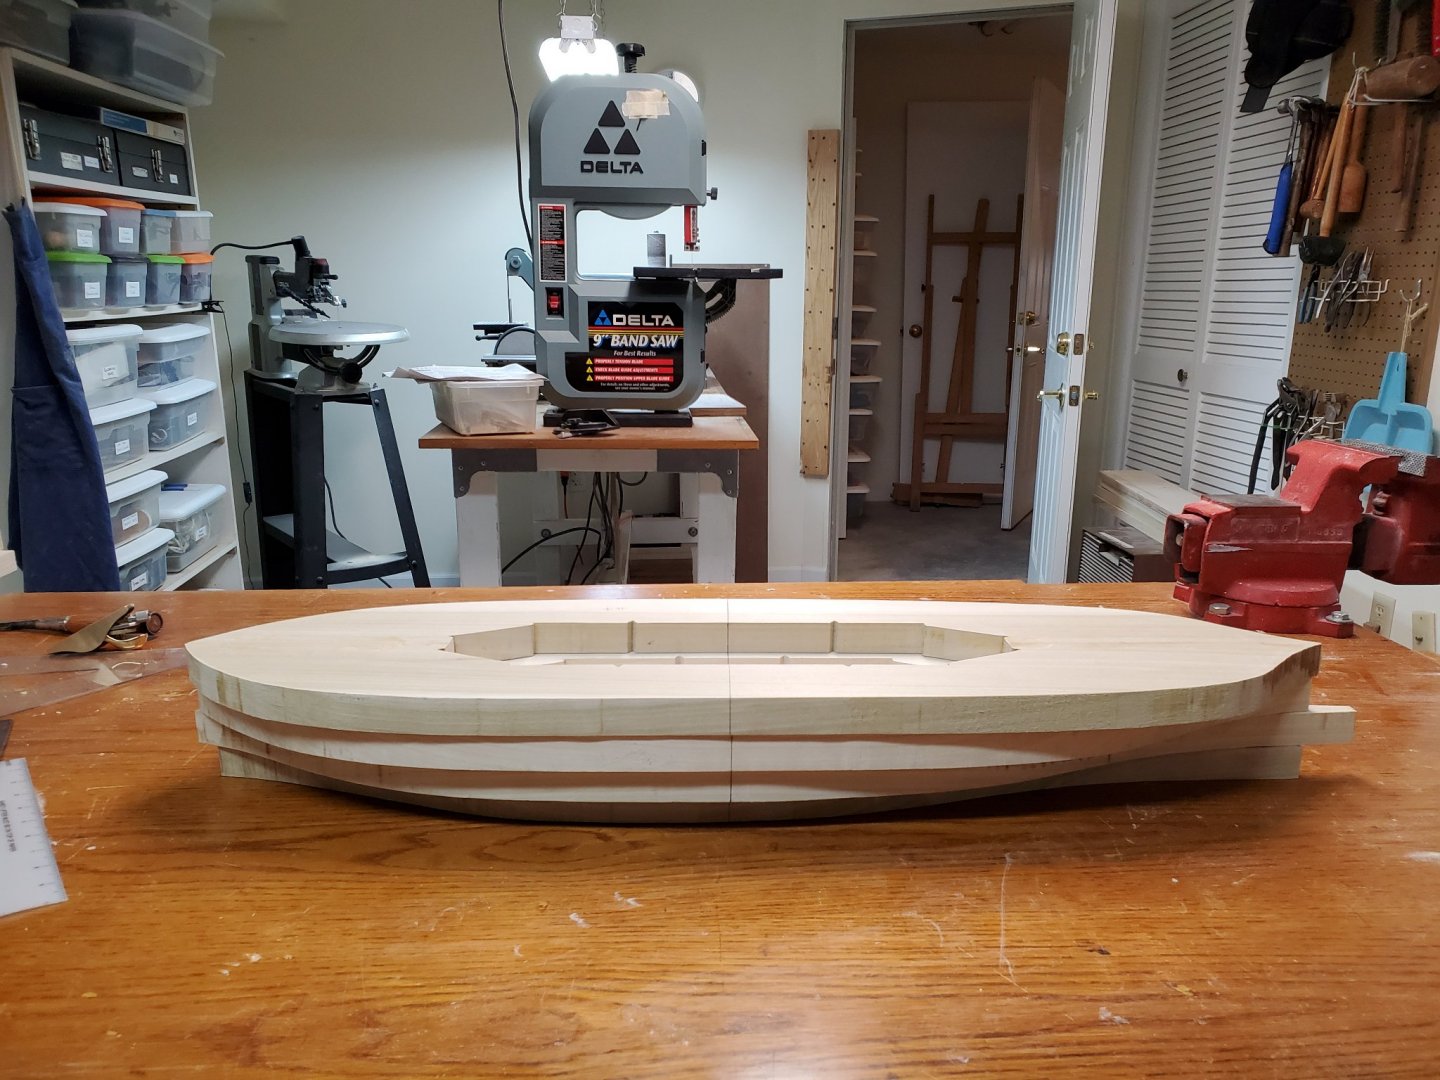
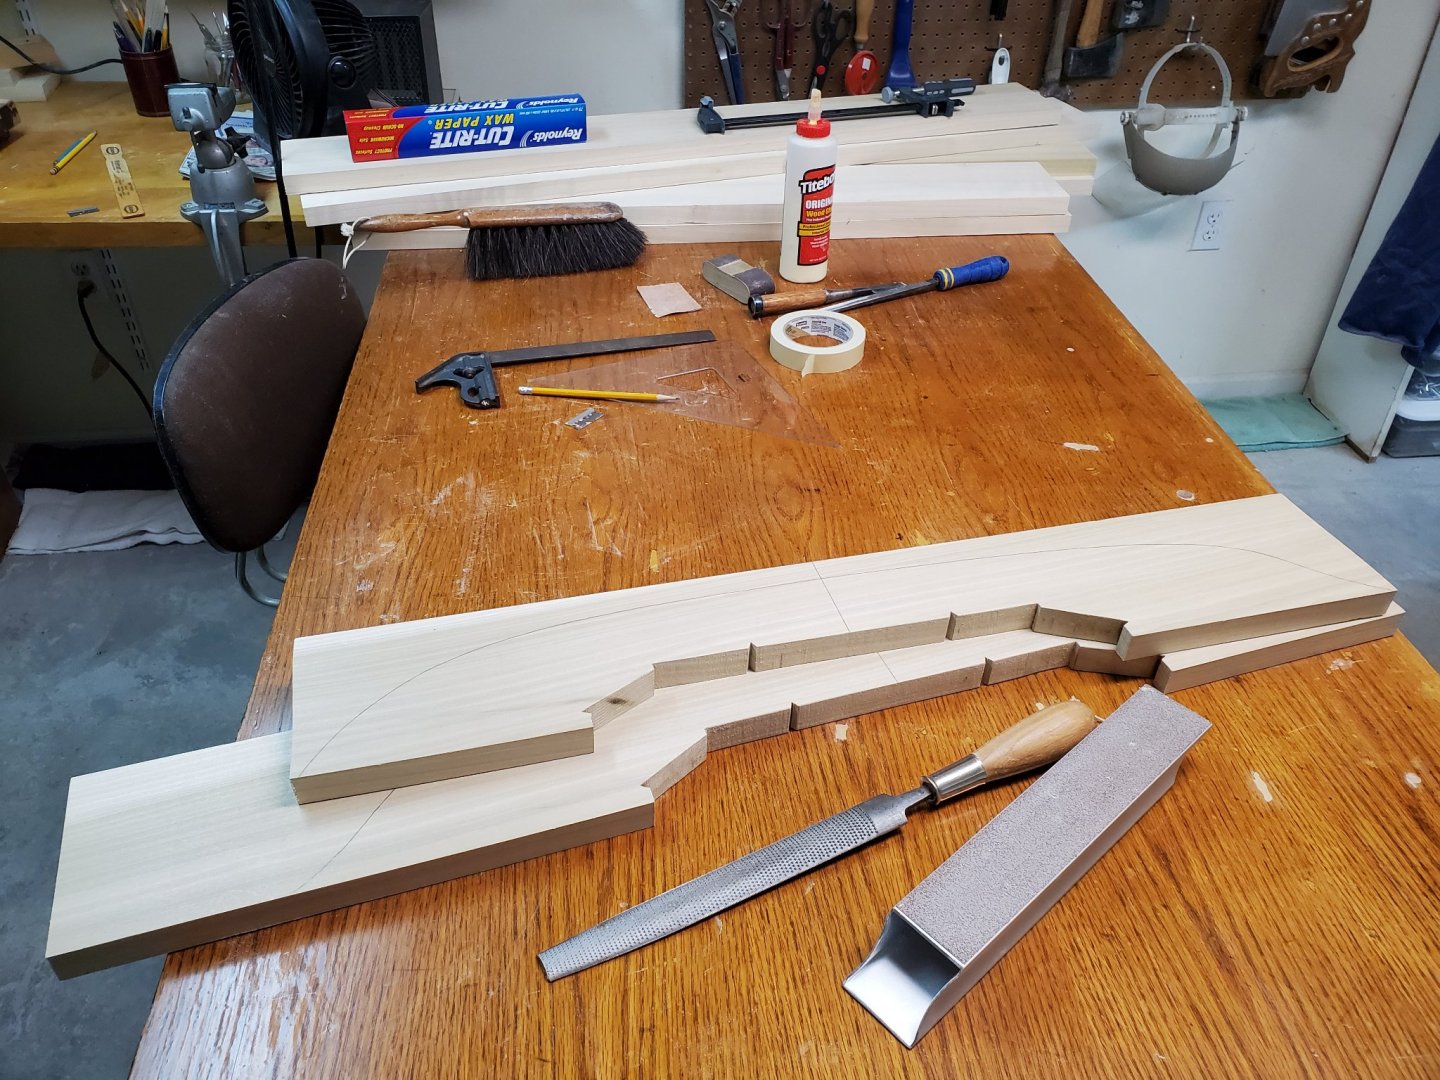
This afternoon I finished making the lifts, and have a few more photos of my progress. The smaller pieces you see on top in the bow and stern are the bases for the horizontal pieces that extend outward from the hull and rest upon the vertical supports I made earlier. These are not made yet and will need to be custom fitted at a later date. My next step will be to start gluing the lifts together. It's fun, but the glue gets all over the place.

-
Good questions H's H. In an ideal world I think quarter-sawn stock would be the best choice for lift #1, but there are some limitations for me as to what is available. In searching for lumber for a project I primarily look for length and width, and any distortion (i.e.: cupping). I also search through what I have in seasoned wood. When shopping for wood ideal grain orientation is a gift, something I occasionally stumble upon. When I pair half-lifts usually the best I can ask for is for the grain to run in similar directions outward from the centerline. Yellow poplar, when seasoned and grain orientation is taken into account, is pretty stable. I found that grain direction is more critical when I'm sanding to small thickness on certain areas of the hull. I once ran into considerable distortion on some quarterdeck bulwarks because some wood was old and some new, that no care was taken for grain orientation and that the hull curved in two directions. LOL I was asking for trouble. The first lift is obviously not hollowed out and the second one has only a little removed from the interior so there is generally good surface area for gluing. I'm also liberal with the glue and use quite a number of clamps to insure good lift to lift contact. Over the years I've found, with some care taken, that I've had only a few problems with yellow poplar's stability. In the first lift I watch for any slight movement of the keel relative to the build building board. I assume you know I suspend the hull 1/16 " during the template shaping process. Solid hull construction can, on occasion, be problematic, but for the most part yields good results. I cross my fingers. Tom
-
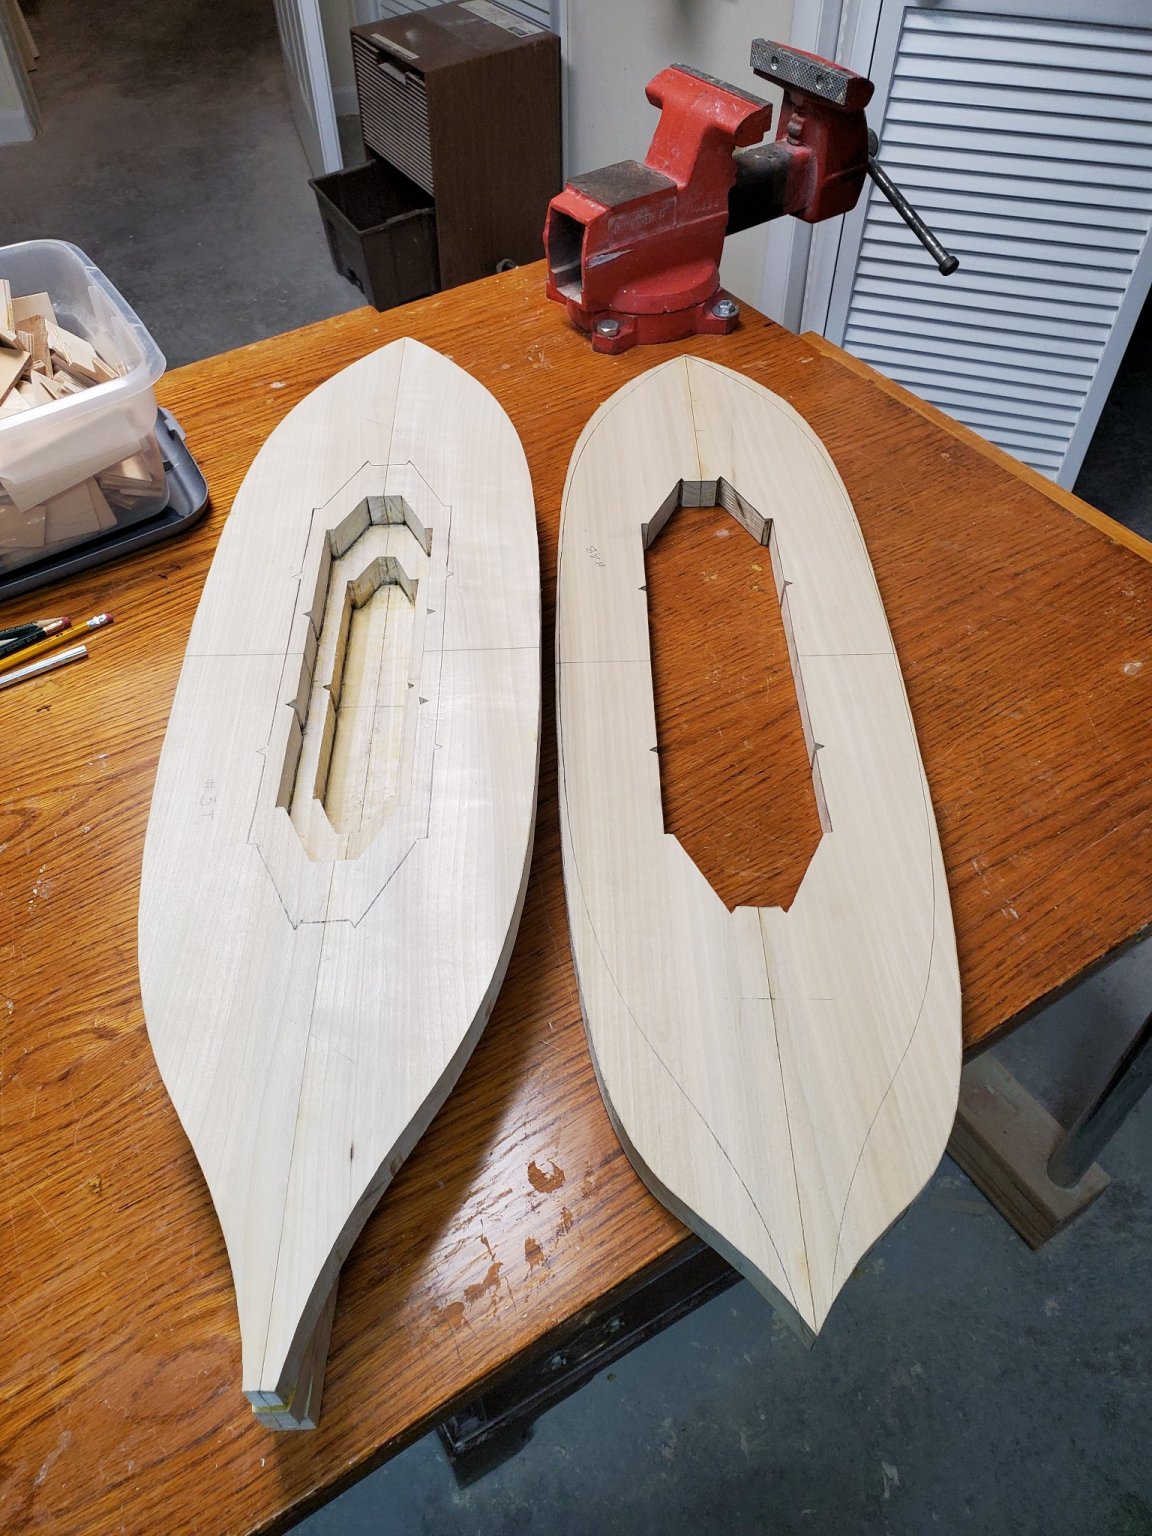
Here is a photo of the first four completed lifts. They are not glued together yet Tom
-
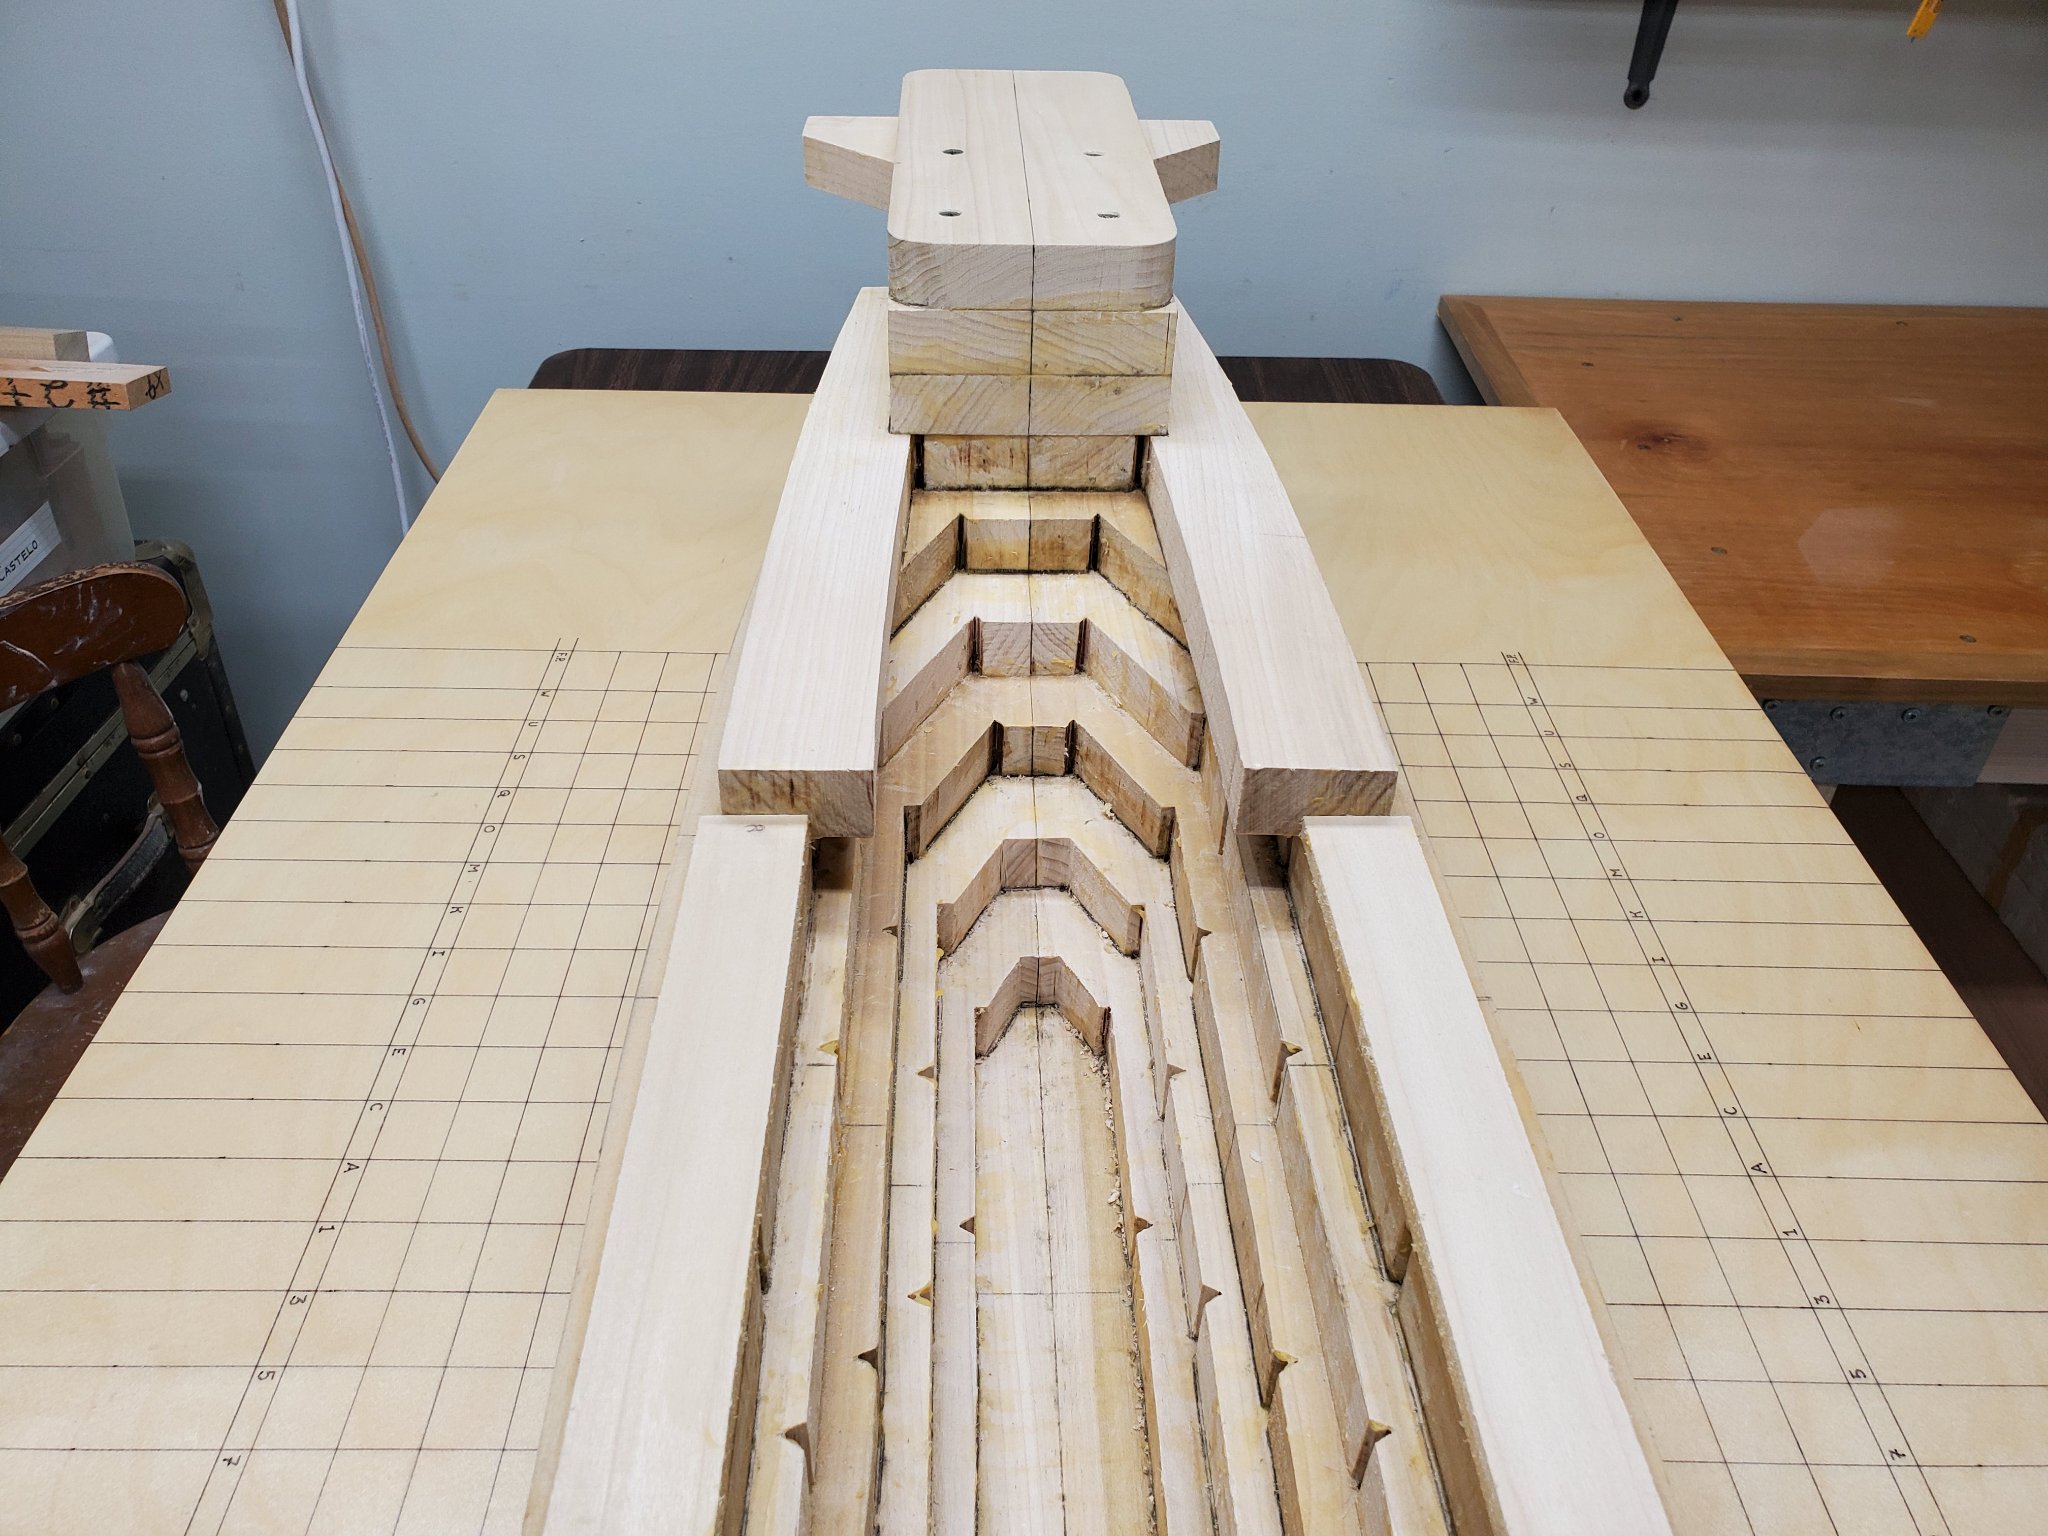
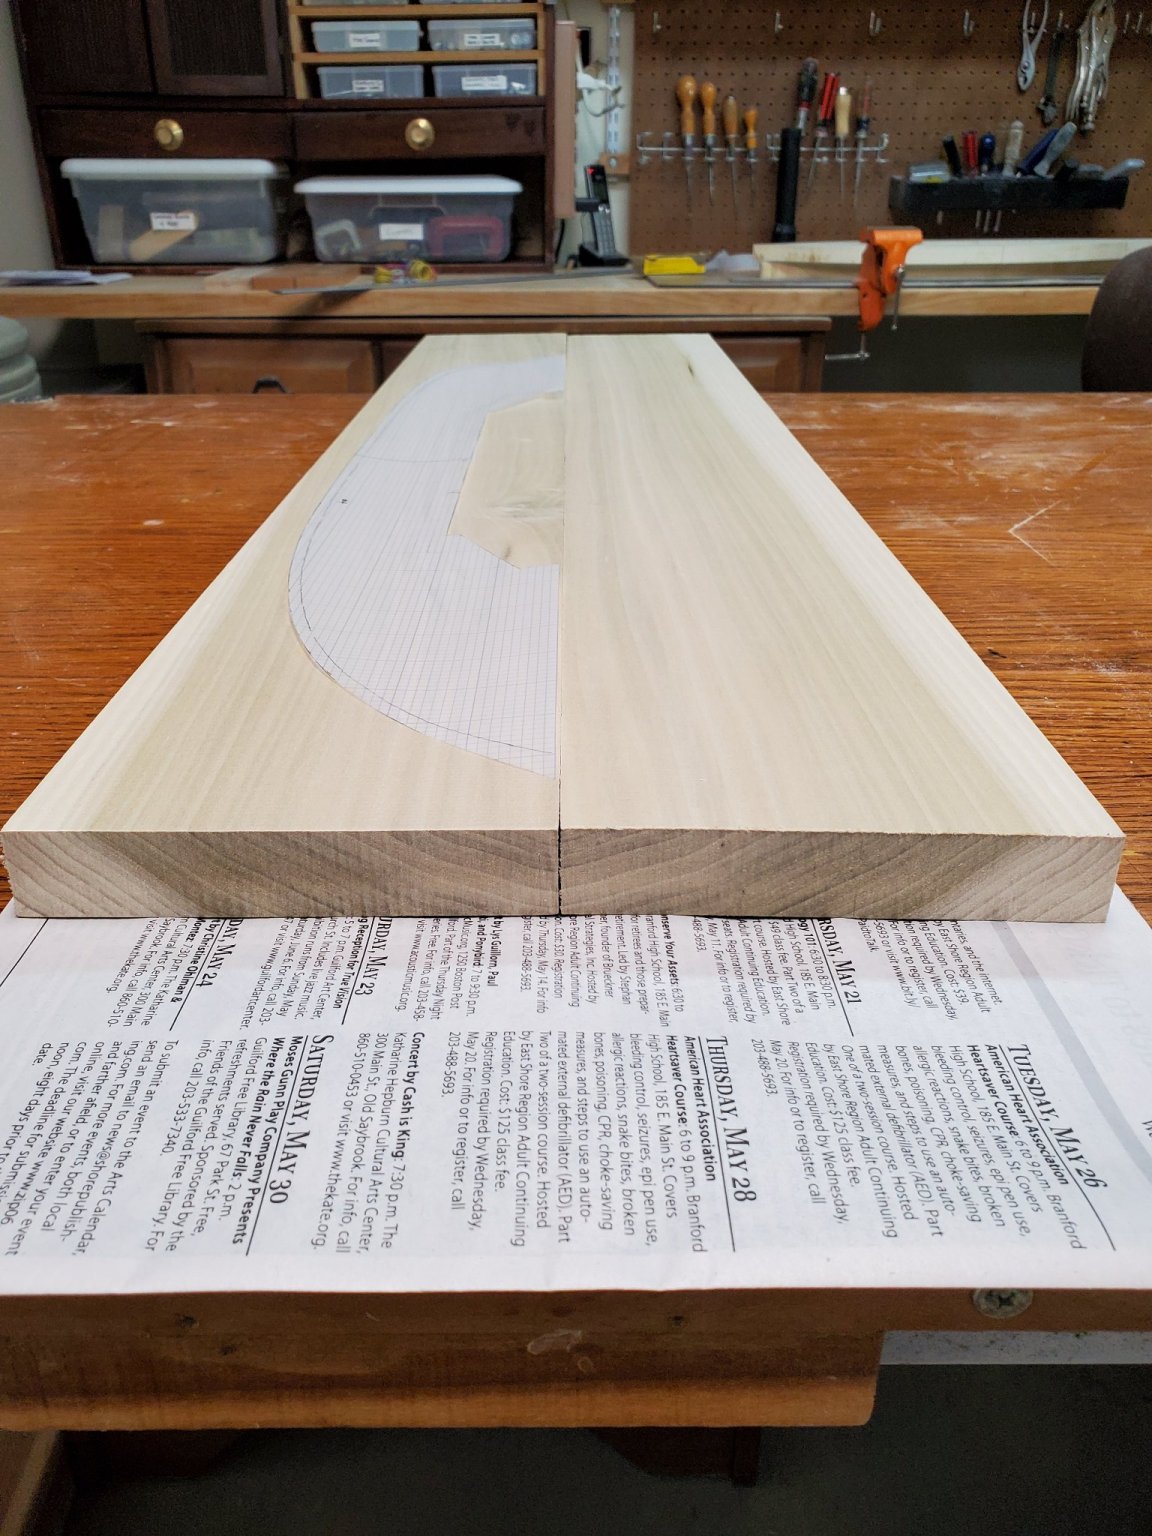
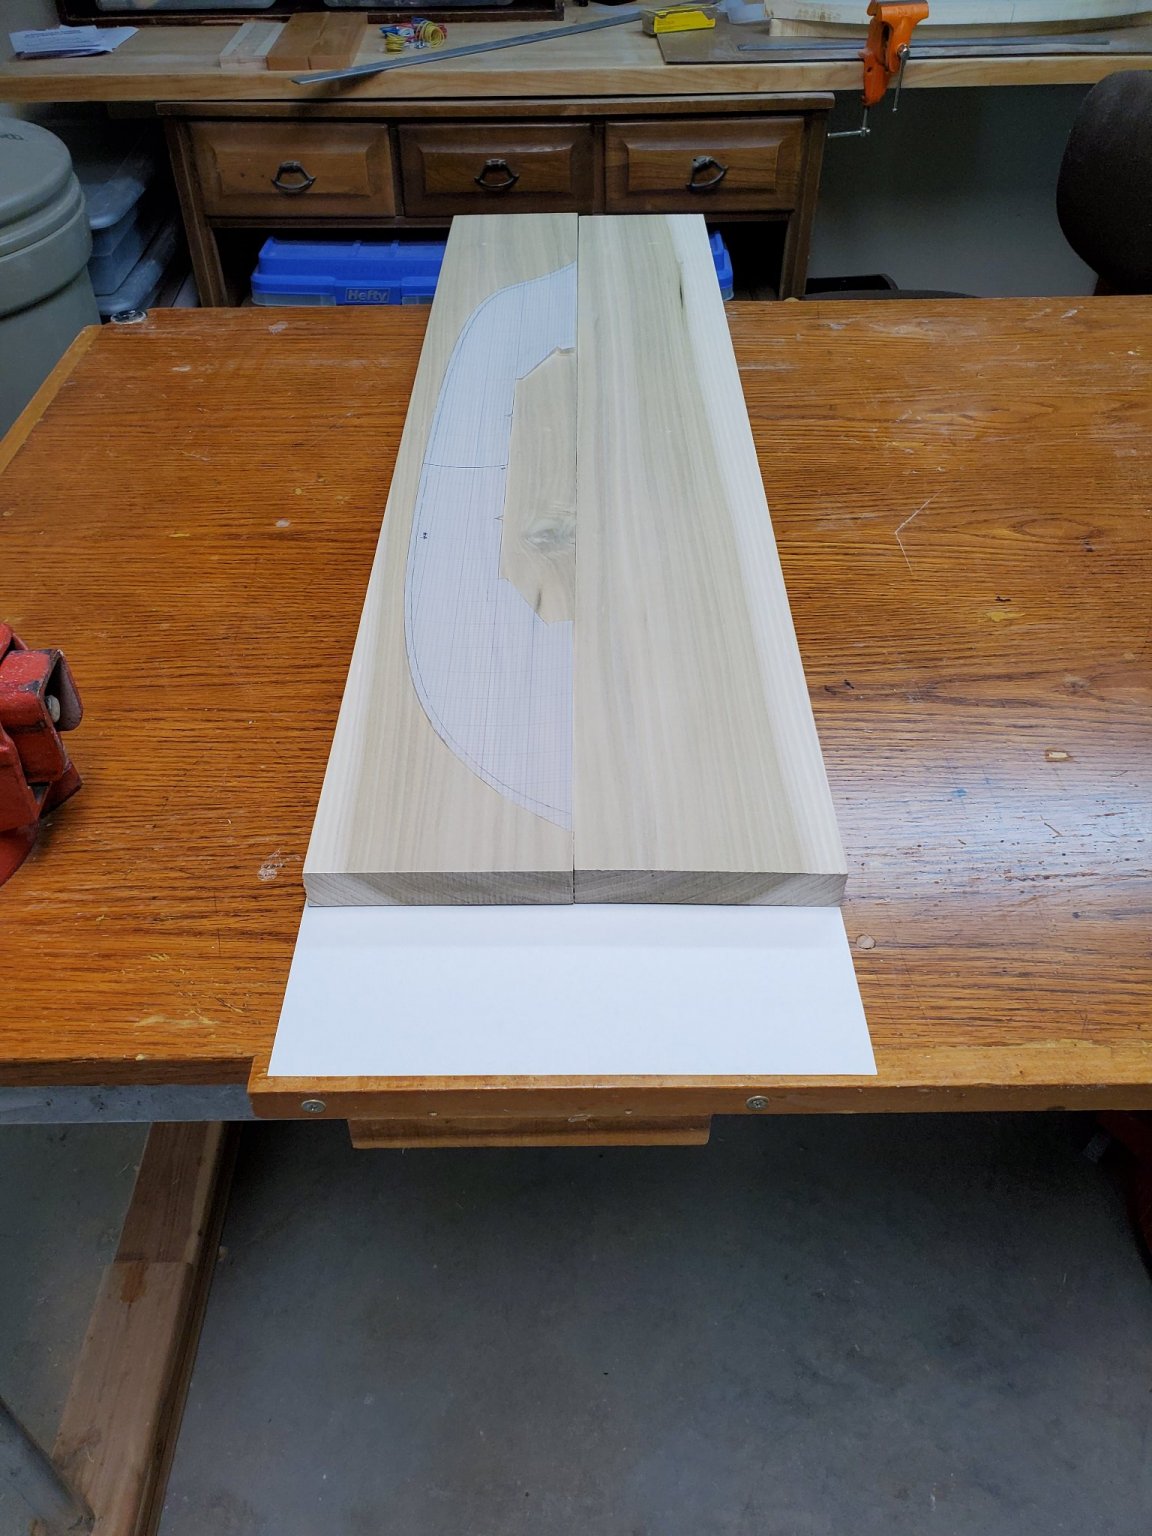
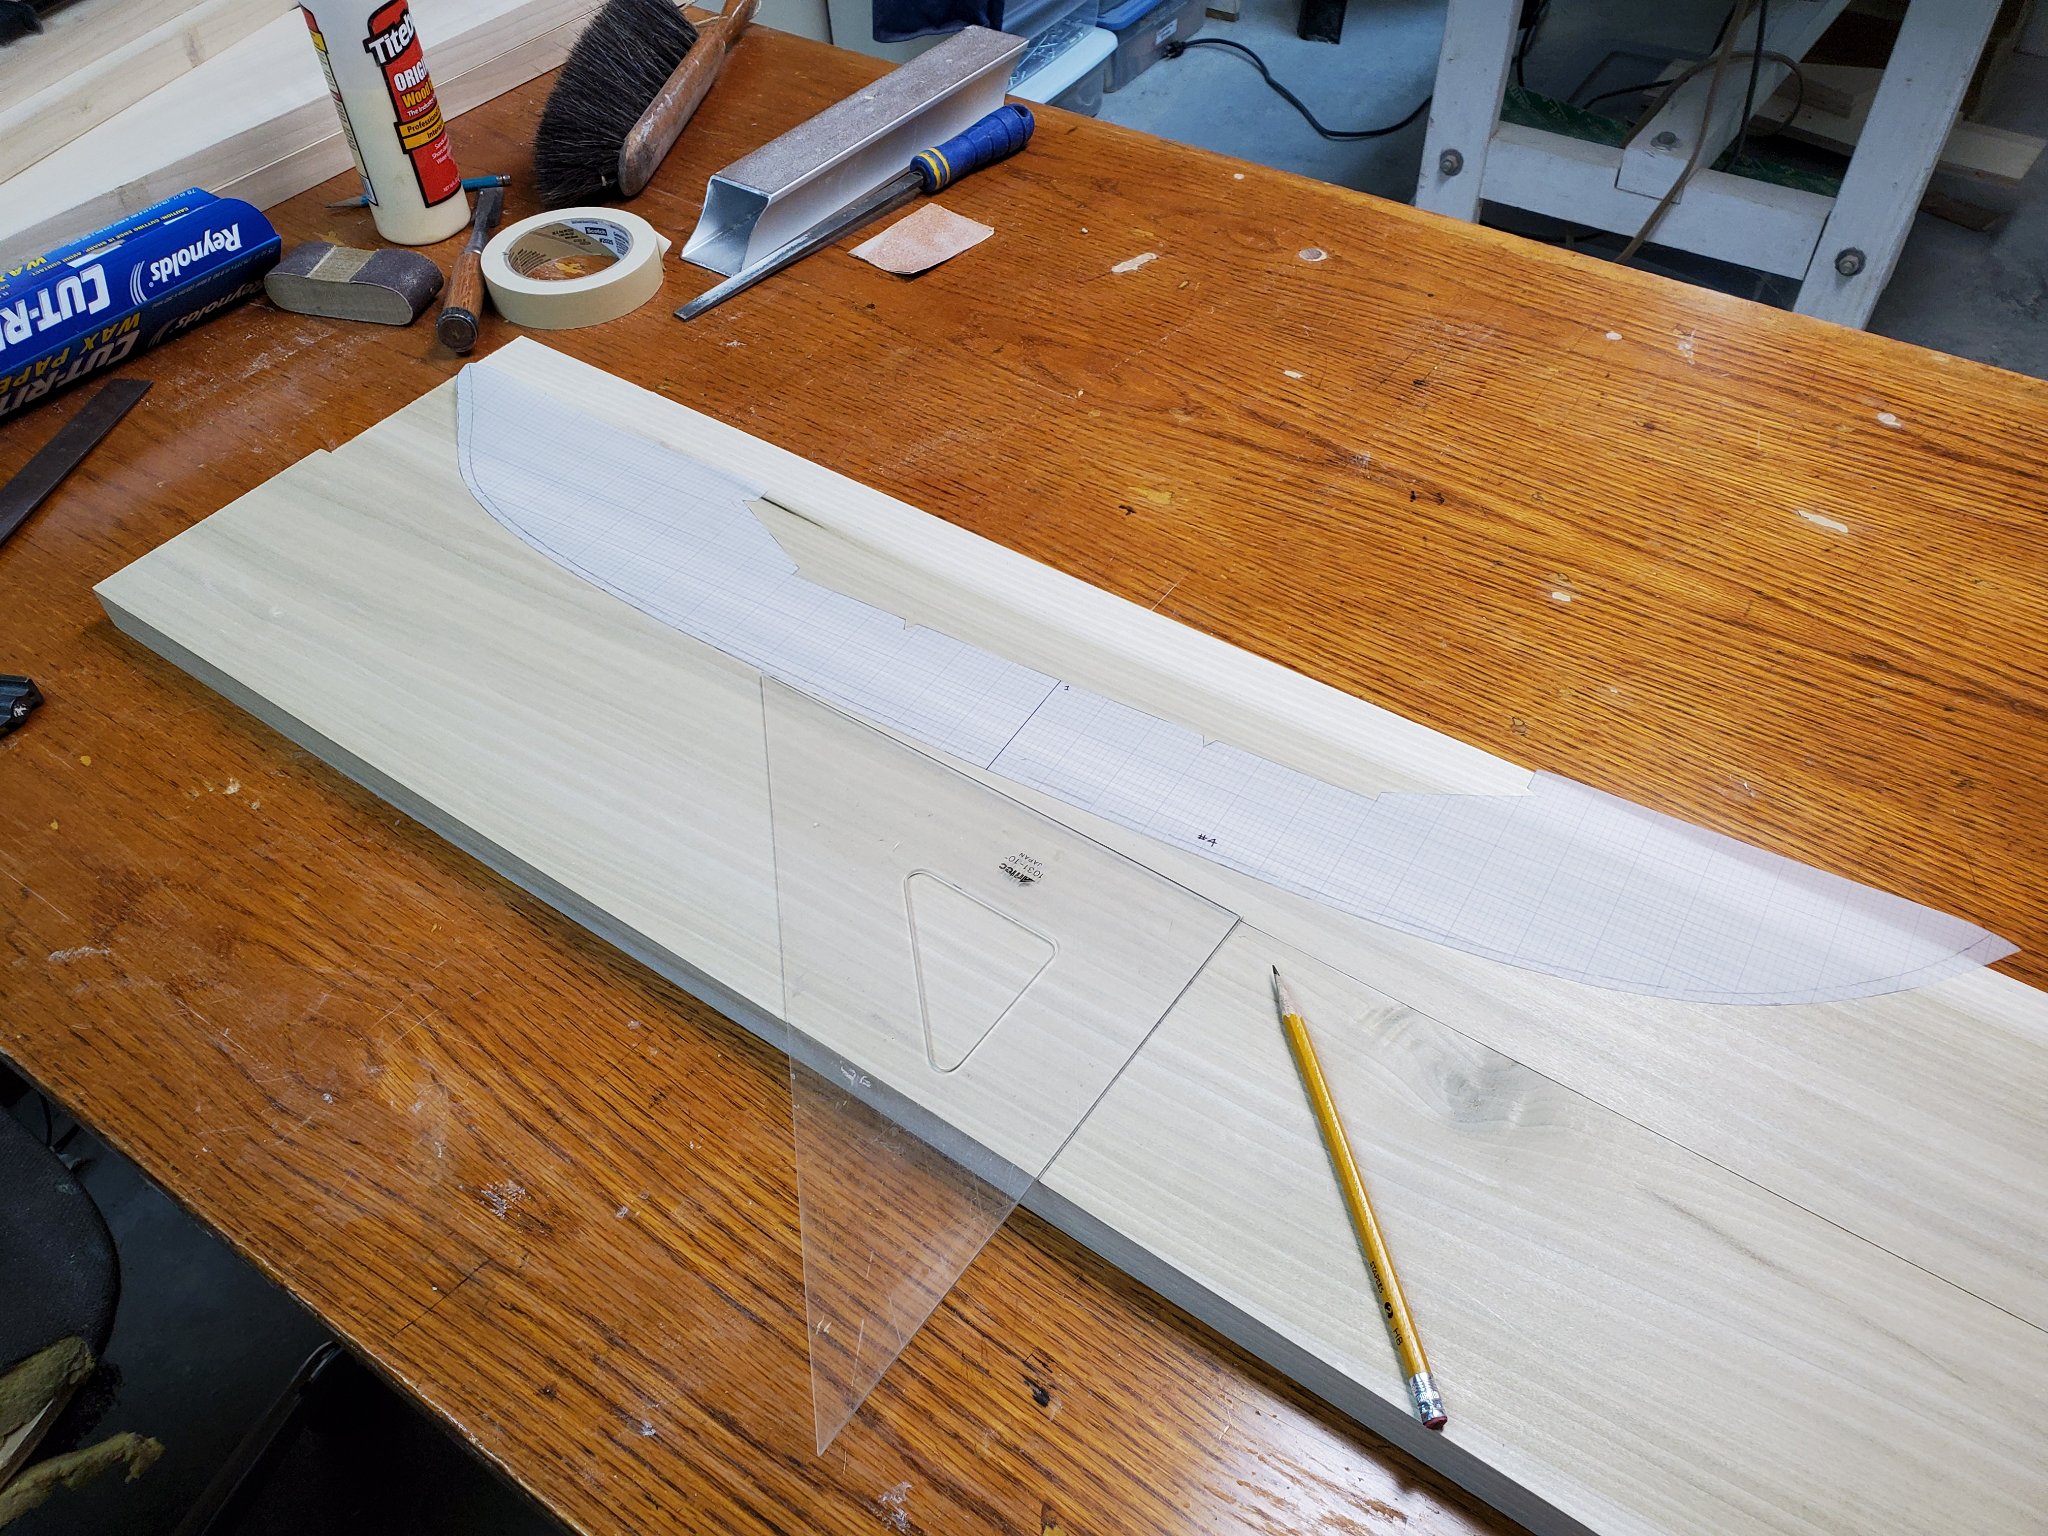
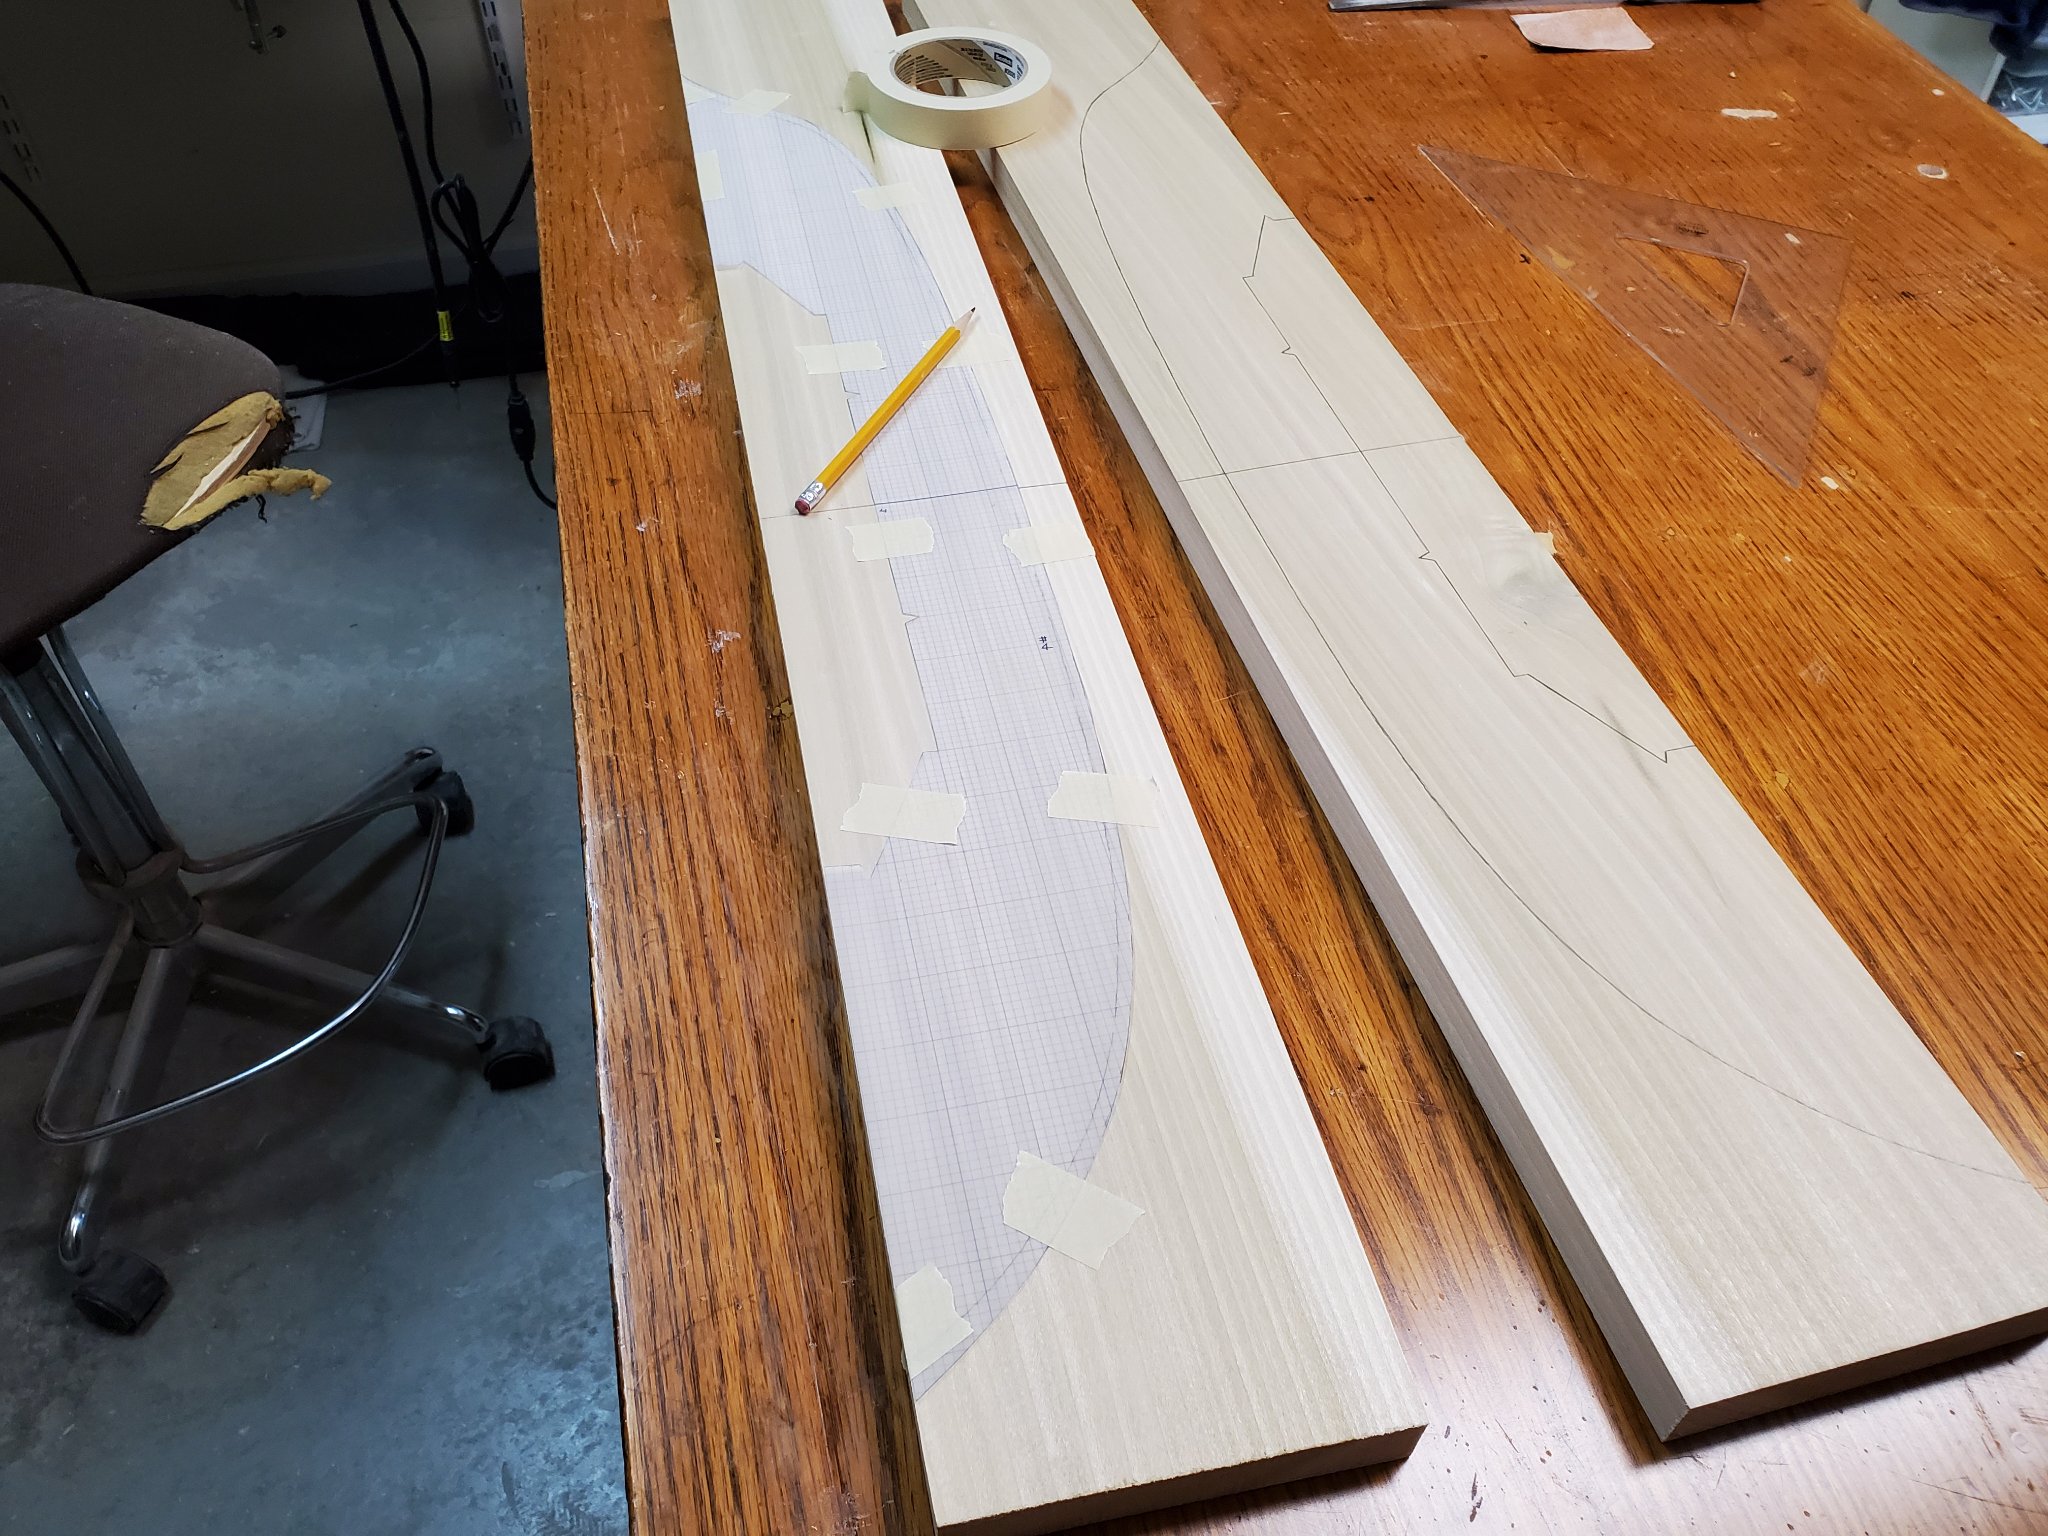
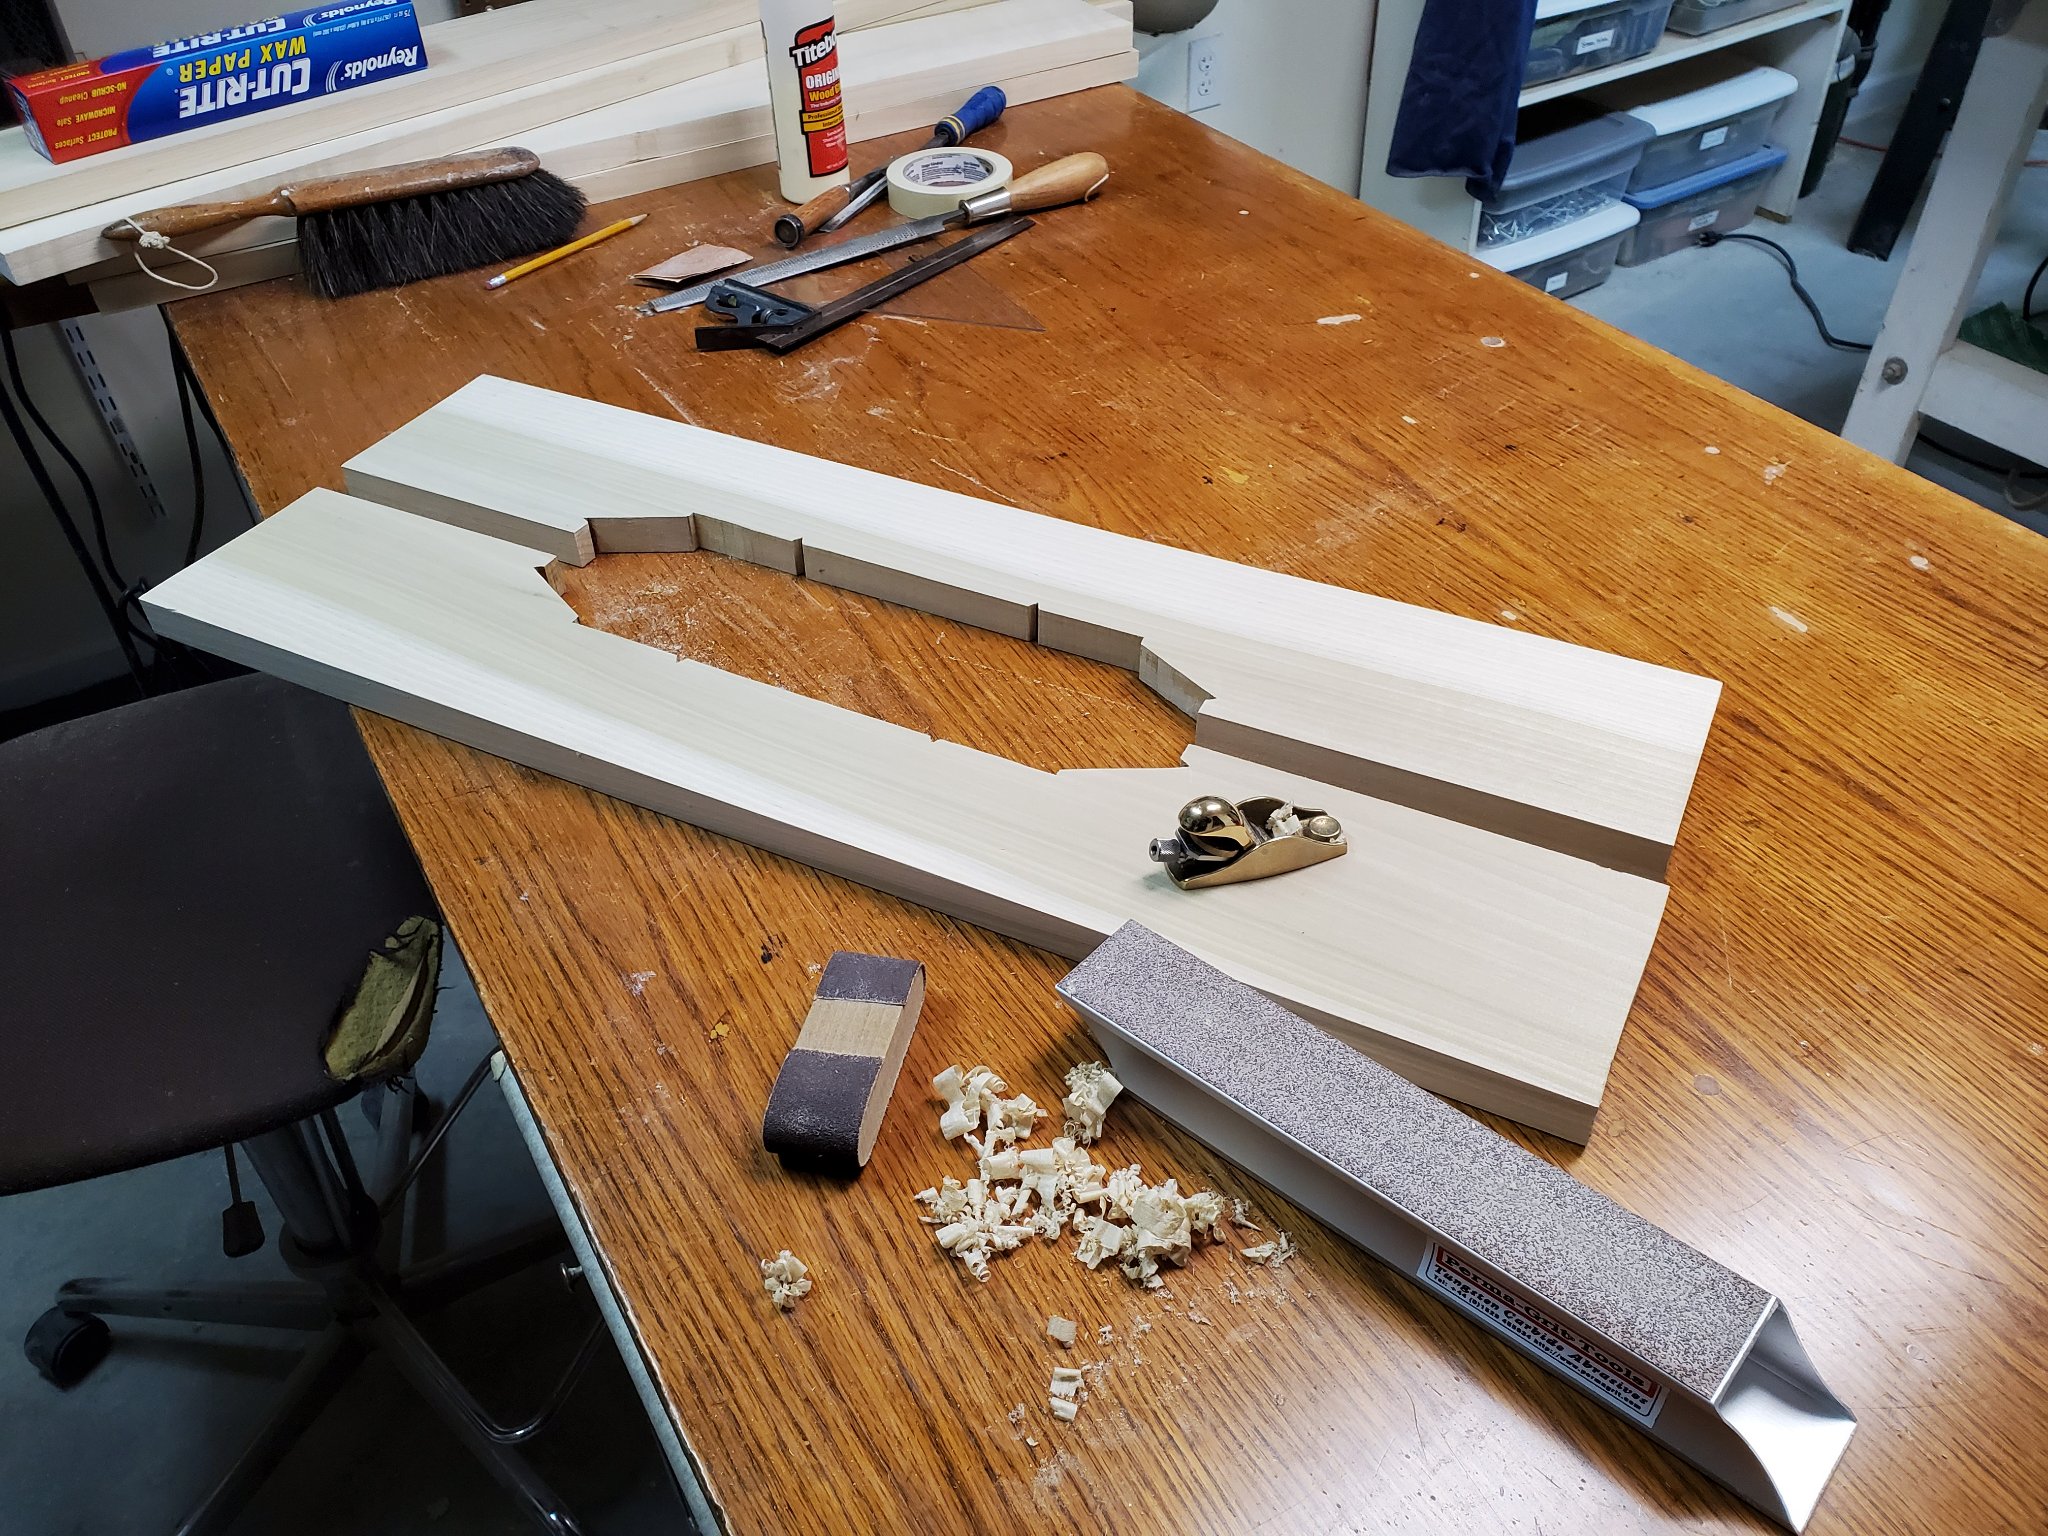
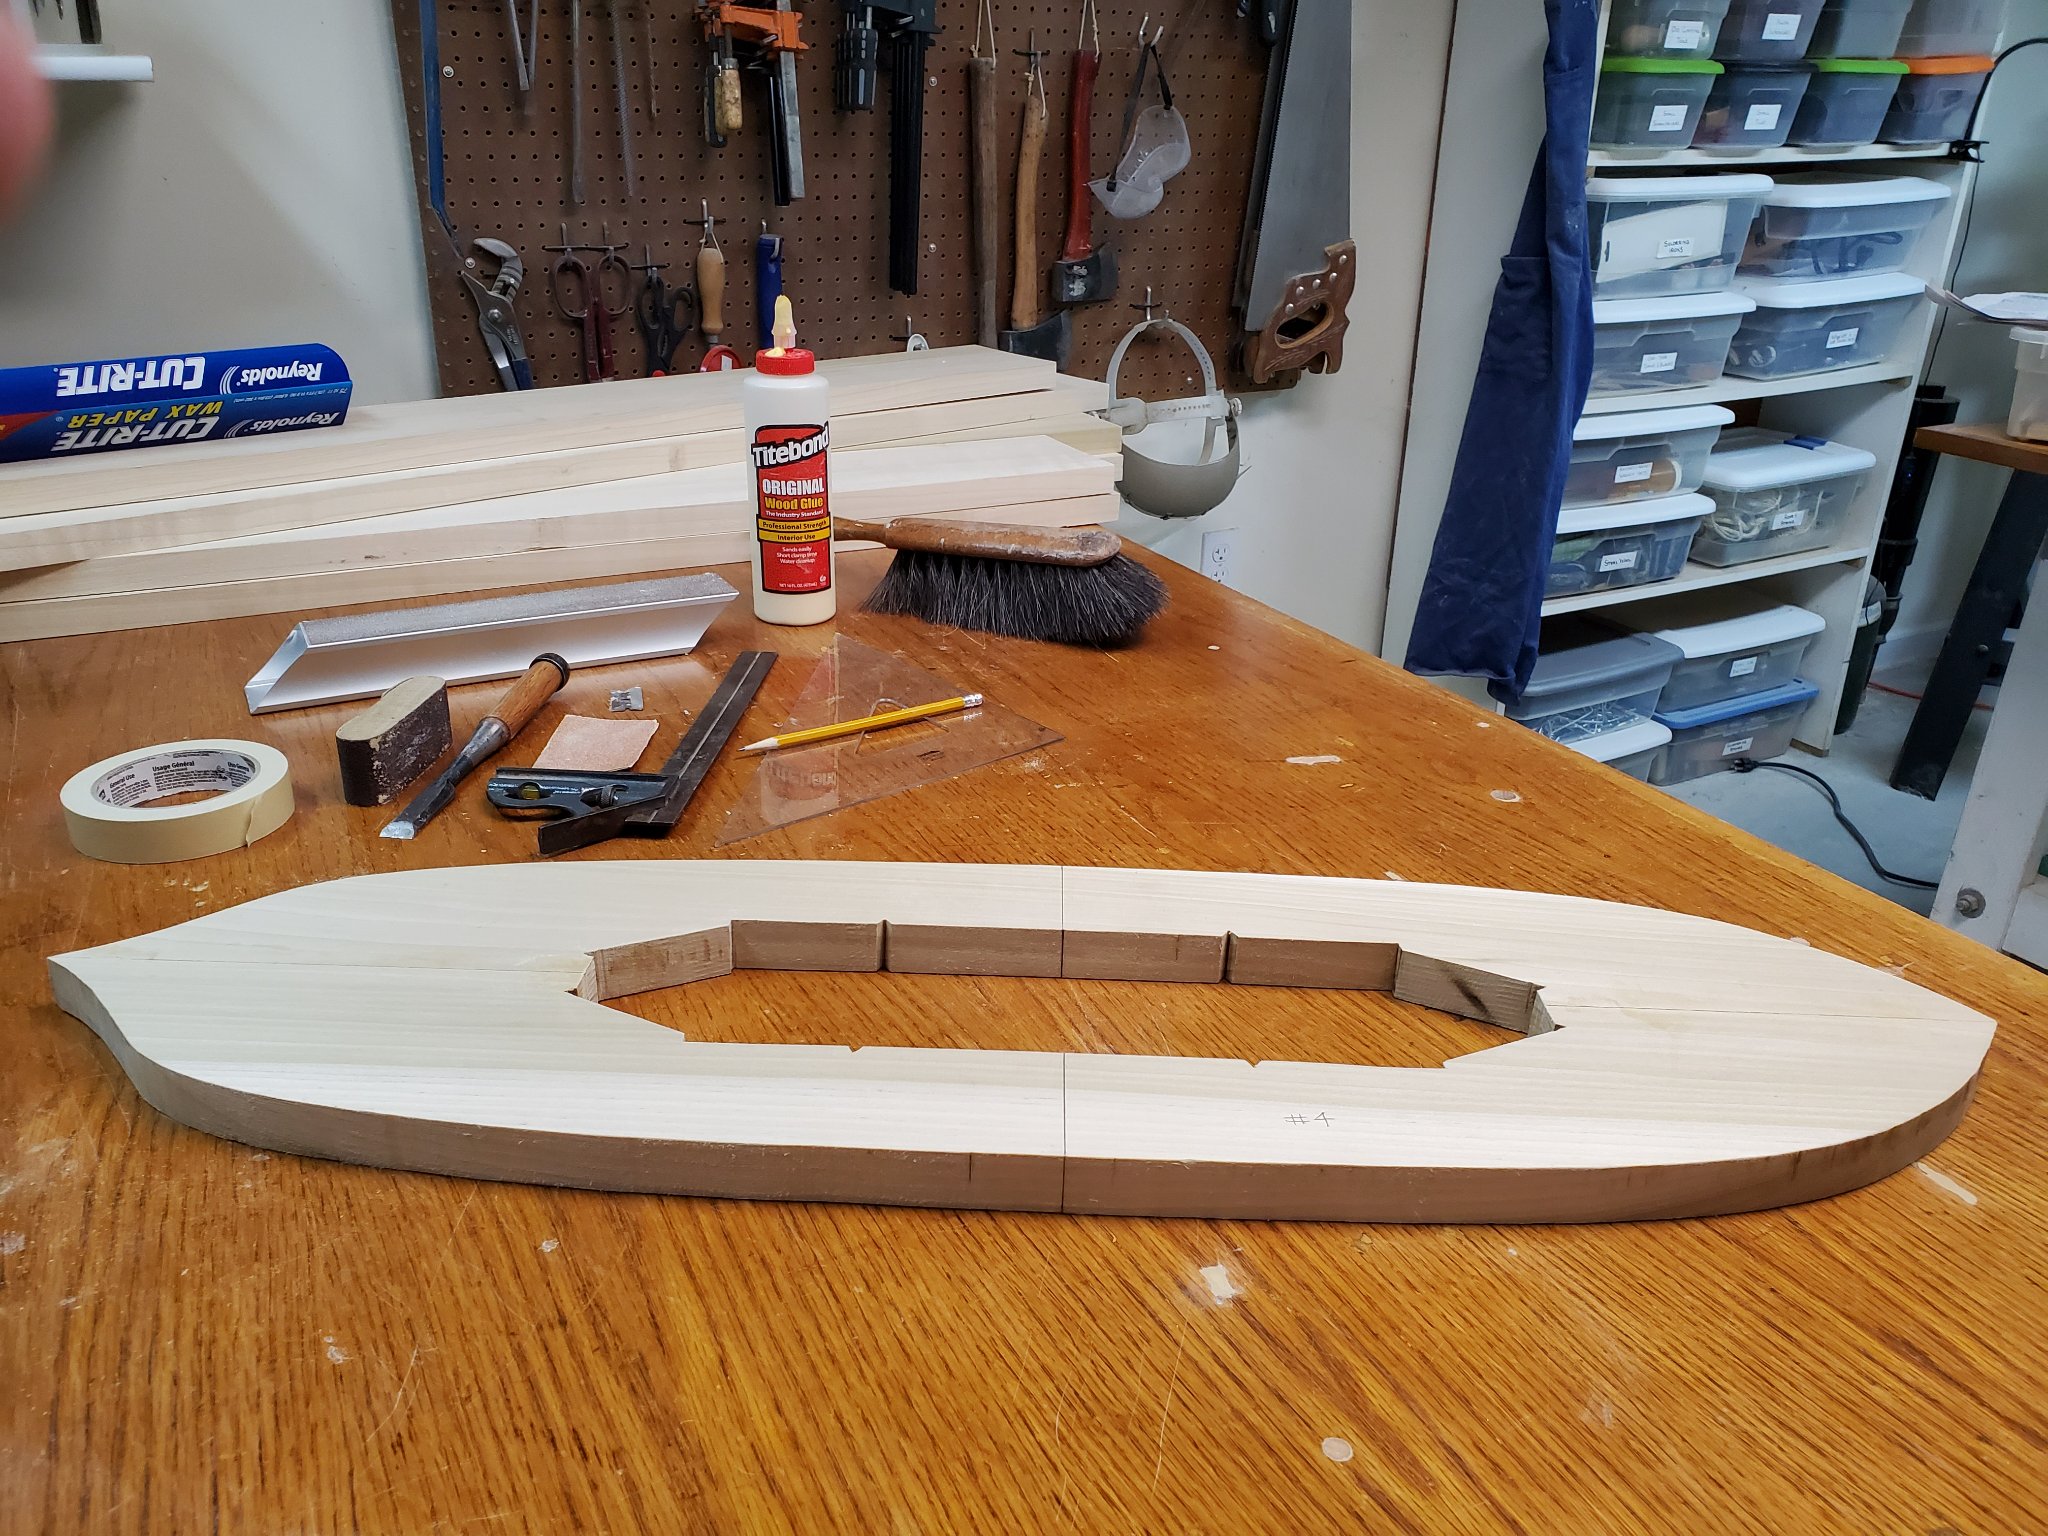
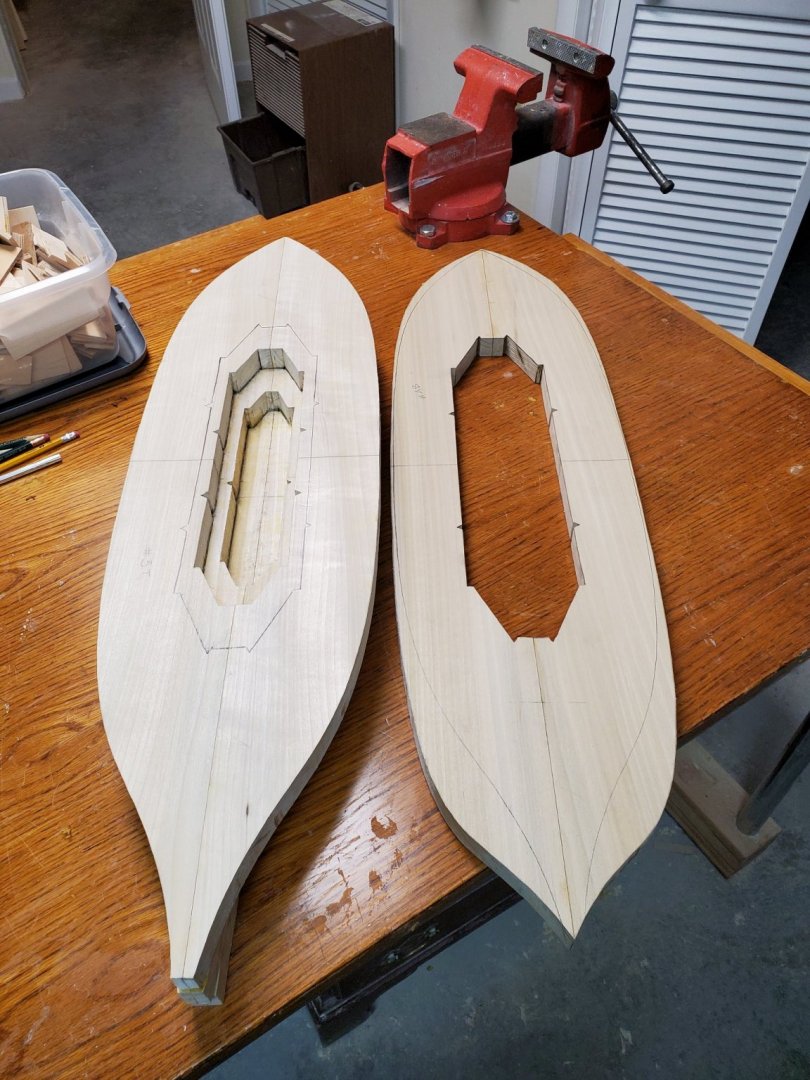
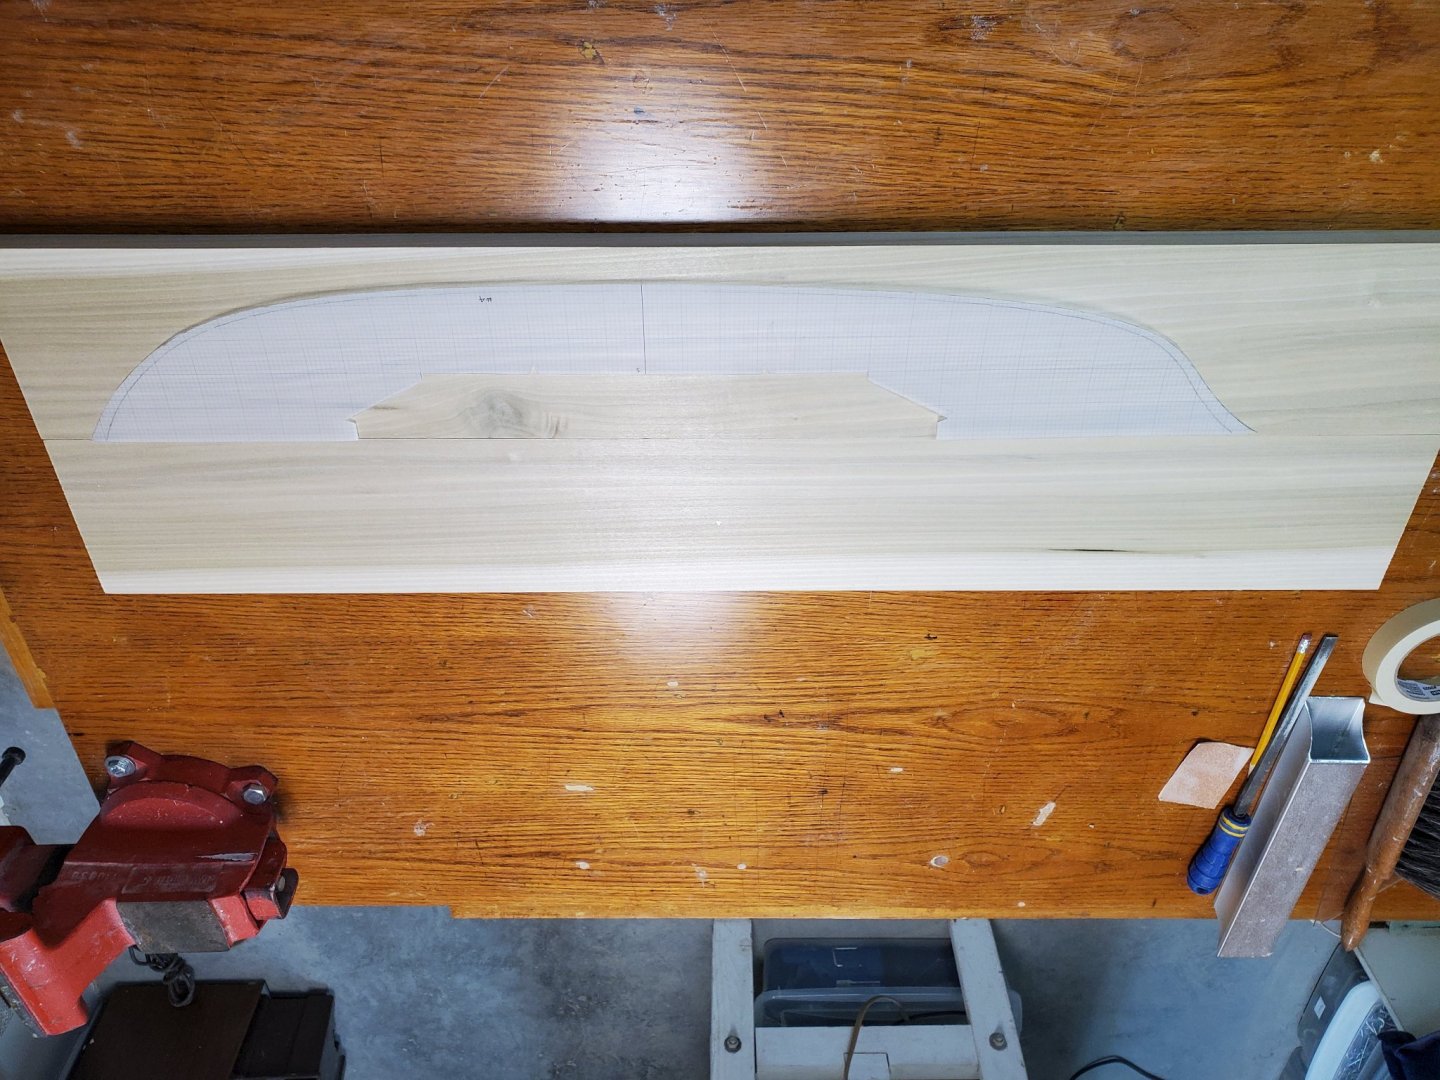
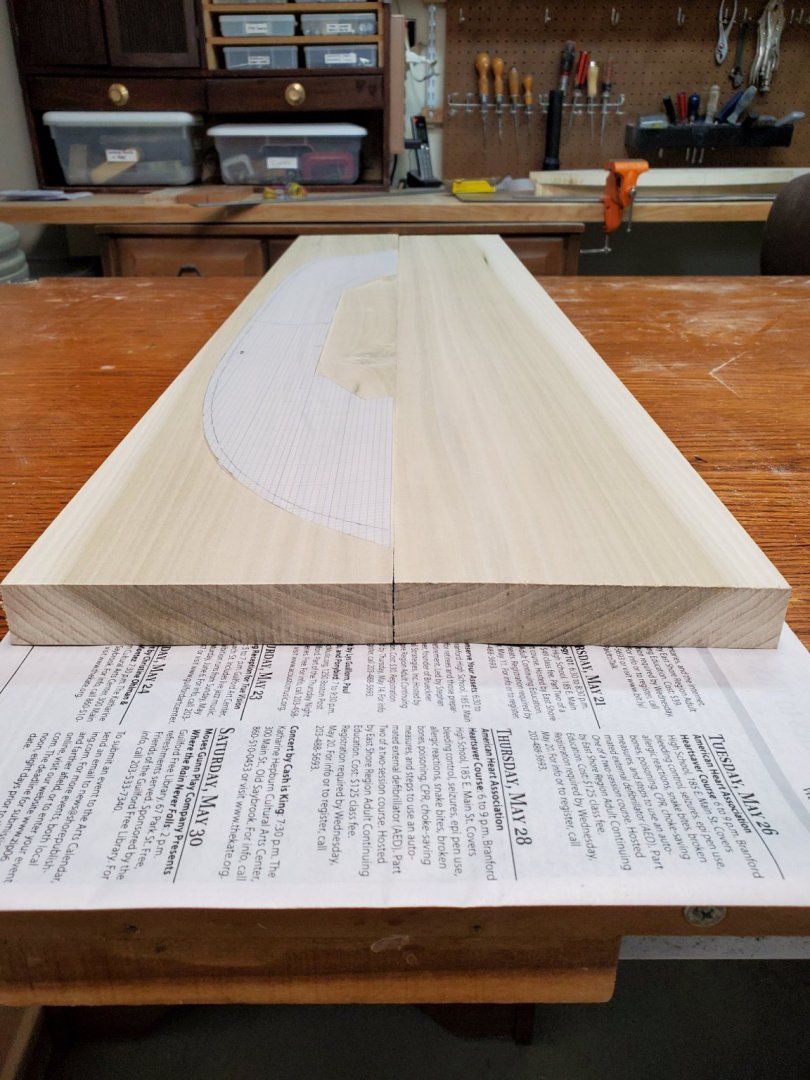
Author #39 Posted 20 hours ago (edited) Lift Construction Model construction begins with making the lifts that the hull will be formed from. I make each one using two planks of 1" thick yellow poplar (Liriodendron tulipifera), shaped inside and out and glued together. I use yellow poplar because it's very stable when dry and well seasoned; is soft enough that it cuts, carves, chisels and planes easily, and it glues well. Another great quality of this wood is that you can nail into it without fear of the wood splitting. I use 2" finishing nails to keep lifts from sliding around when I go to glue them together. (more on this later) The wood can be sanded to a very smooth finish, but it's not all that attractive. This "negative" is not an issue for me as the wood will be planked over with Castello boxwood and Swiss pear wood. While yellow poplar is a hardwood (from a deciduous tree), it's actually one of the softer ones on the Janka hardness scale. Note that when I cut the shape of the templates from the mylar I also cut some out from the middle. Why? Several reasons. Most importantly, when the two half lifts are glued together to form a whole one and it is about to be glued to other lifts you have a place to put nails into to keep the glued lifts from slipping out of place. Secondly, it reduces weight. Thirdly, when the time comes it makes it easier to shape the interior. Lastly, it affects wood movement. In an ideal world you want your wood to dry out, or at least to be hydroscopically stable in your workshop environment. Sadly, not all model builders wait long enough before using the wood. When that happens the wood will lose a greater amount of water over time and you will get more shrinkage. If the wood is going to shrink you want that to happen before you start building, not after. The general rule is that the wider the board used to make a lift the more shrinkage you will see. Cutting wood out of a lift adds to its stability. Also, bear in mind that the sapwood of a species absorbs a greater amount of water than the heartwood. As you would think this too affects the drying process and shrinkage. There is an excellent book written by R. Bruce Hoadley on wood properties and characteristics entitled Understanding Wood, a craftsman's guide to wood technology. It's a very informative book, albeit somewhat technical. The first lift is different from all other ones. Why? Well, it has to be perfectly flat as it sets the stage for all lifts that follow on top of it. In earlier models I chose a single piece of wood for this lift, but for Winchelsea all my wide pieces of wood had slight cupping, thus making them no good for this use. I had to make lift 1 just as I will have to make lifts 2 through 7. Number 1 lift also needs to be flat because the keel gets attached to it. In this case a temporary keel. When I first started building solid hull models I attached what I always hoped would be a permanent keel, but two times in the hull shaping process I damaged it. Damage so bad it had to be replaced. What a pain in the *** that proved to be. After that I learned my lesson and started using a temporary keel until the hull shaping was finished. Only then would I attach a permanent keel, stem, stern post and knee of the head. I usually make the temporary keel out of a piece of straight well seasoned hardwood. For Winchelsea I found a beautiful piece of yellow birch (Betula alleghaniensis) that I brought to finish dimensions on my new Jim Byrnes thickness sander. The keel does not get attached until all lifts have been glued together. To illustrate lift construction I decided I would show how I built one from start to finish. For this example it's lift #4. The very first thing I do is look over all the lumber and make note of where any defects and knots are. Only after assigning lift templates to all six pairs of half-lifts did I start work. As you can see in photo 1 there is a big knot in one of the half lifts. By choosing a lift template with a sizable interior cut out I can easily take that knot out of play. Another consideration when pairing pieces of wood is grain orientation. Photos 2 and 3 show this. Photo 4 shows me drawing station line 1 at 90 degrees to the centerline when I've determined the exact placement of the lift template on the wood. After this is done I tape the lift template down with the station line of the lift template over the station line drawn on the wood. (photo 5) I then draw around the edges of the lift template. When this is done I go to the large bandsaw and saw out the interior of the half-lifts. I DO NOT saw out the half-lift outline at this time. If I did it would have made it damn near impossible to clamp the two half-lifts together for gluing. Photo 6 shows the lift interiors after they were cleaned up with various files and sanding tools. Next I checked how well the two half-lifts fit together under pressure. Not shown are the 12" adjustable clamps used for this. I was quite surprised at the size of the "man made" cup it produced. To solve the problem I took off some wood on 1/2 of the bottom edges of both half lifts with my violin maker's plane and the tungsten carbide sanding tool. After ten minutes of very careful planing and sanding I was able to get the half-lifts ready to be glued up. (photo 7) When gluing the half lifts together I used 8 clamps for the job, four short clamps to keep the half lifts level with one another, and four more long clamps to squeeze them together. You can see the clamp-up in photo 8. I let it dry overnight to get maximum strength for the two "questionably strong" glue joints. NOTE: I find that glue joints between half-lifts are not as critical nor as strong as glue joints between lifts. In all the years I've been making solid hulls this way I only had one half-lift joint fail, and that was because I got sloppy/careless. The next morning I sawed the outline of the lift on the bandsaw and then cleaned it up some on the oscillating spindle sander. I finished the lift by drawing the station line completely around both halves of the lift. These extended station lines really help in lift alignment when gluing lifts together. Photo 9 shows lift #4 completed.


-
Ron, that's a good observation you made. Yes, the interior will be far more hollowed out in the future. A lot more! I only start doing that when the hull is completely shaped. You will see why the size of the interiors spaces are what they are now when you see how I go about gluing the lifts together. The completed lift you are looking at (lift #4) is the approximate shape of the hull at the waterline. I believe it will make more sense to you when the hull starts coming together. It's like trying to guess what a jig saw puzzle looks like from only a handful of pieces connected. Tom
-
Tic Tic Tic Tic .... Time, no doubt, can't go fast enough for you to get the extra timber. While the wait can be taxing it gives you time to get your shop set up and for you to read through the build logs of your fellow model builders again. Tom
-
Oh wow! What a fantastic build you have going Guillermo. It's absolutely gorgeous! The great number of photos in this build log along with the explanations make it really enjoyable for your fellow model builders to follow along. I especially liked how you did the planking tabs. You were quite meticulous in your work on them, and they came out perfect. Well done! Tom
-
Ron, after I saw how you did out of the gate (chapter 1) there is no reason you should be scared of planking. Something tells me it will come out great. You have a really nice build going. Keep it up. Tom
-
Don't rush the planking Edward. Slow and steady is the way to go. Take note of Chuck's planking tips as they are mega-helpful. I found his travel iron tool works real well. Tom
-
Frank, I can tell you're champing at the bit to get started with this project. When the package arrives you will feel like a little kid at Christmas. You should take to heart what Chuck tells so many other neophytes, to take your time and don't rush. Read through the other build logs too, and make mental notes of where your fellow model builders have stumbled. Fortunately, we have a number of guys in the group with keen eyes who can spot mistakes beginners often miss. I hope you enjoy the build and the friends you will make along the way. Happy modeling!