


toms10
-
Posts
897 -
Joined
-
Last visited
Content Type
Profiles
Forums
Gallery
Events
Posts posted by toms10
-
-
Tom, thanks for the kind comment.
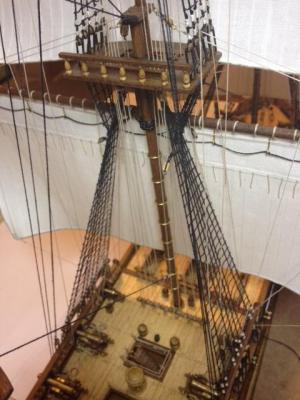
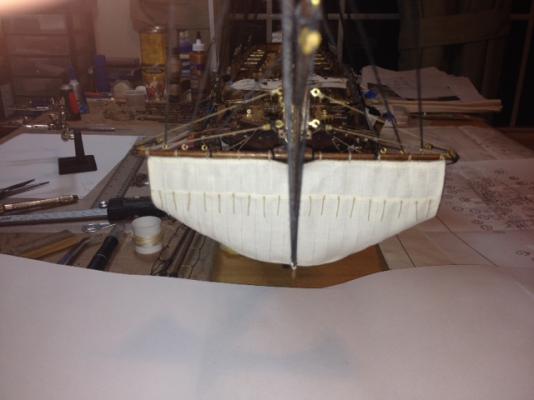
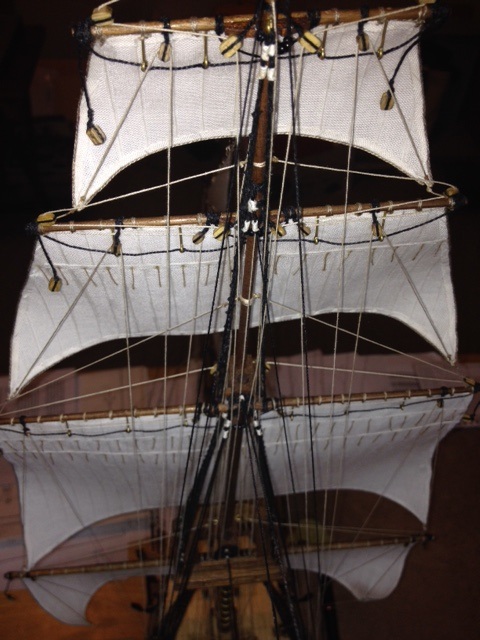
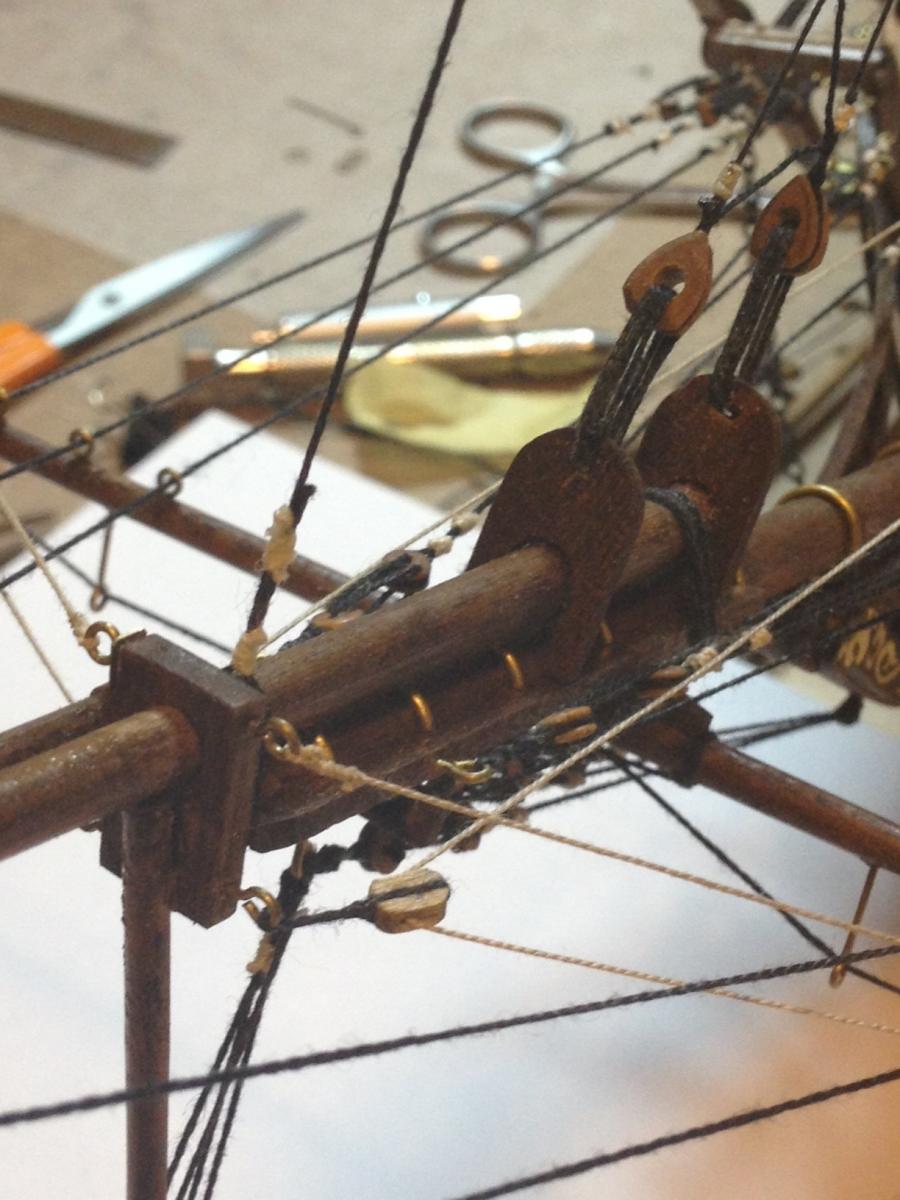
Jeff, the clew lines pull up on the bottom corners of the sails and give them a somewhat billowed effect. The instructions do not include them but with a little help from my MSW friends and some period rigging ship books they added a nice look. The down side is you have to add 2 belaying pins per sail and that totally changes the belaying pin layout. I guess that is where the "kit bashing" part comes in!

Tom
- mtaylor, thomaslambo and Bobstrake
-
 3
3
-
Thanks to all for the likes/comments.
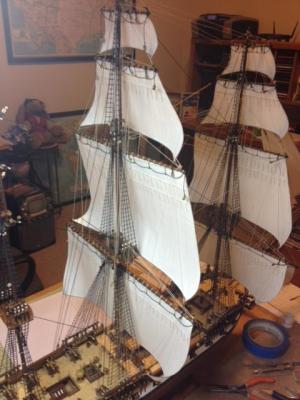
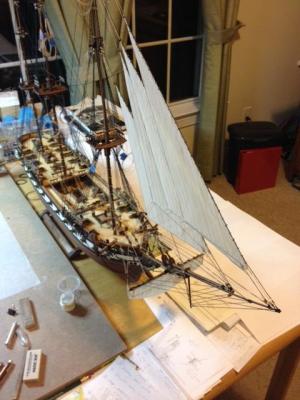
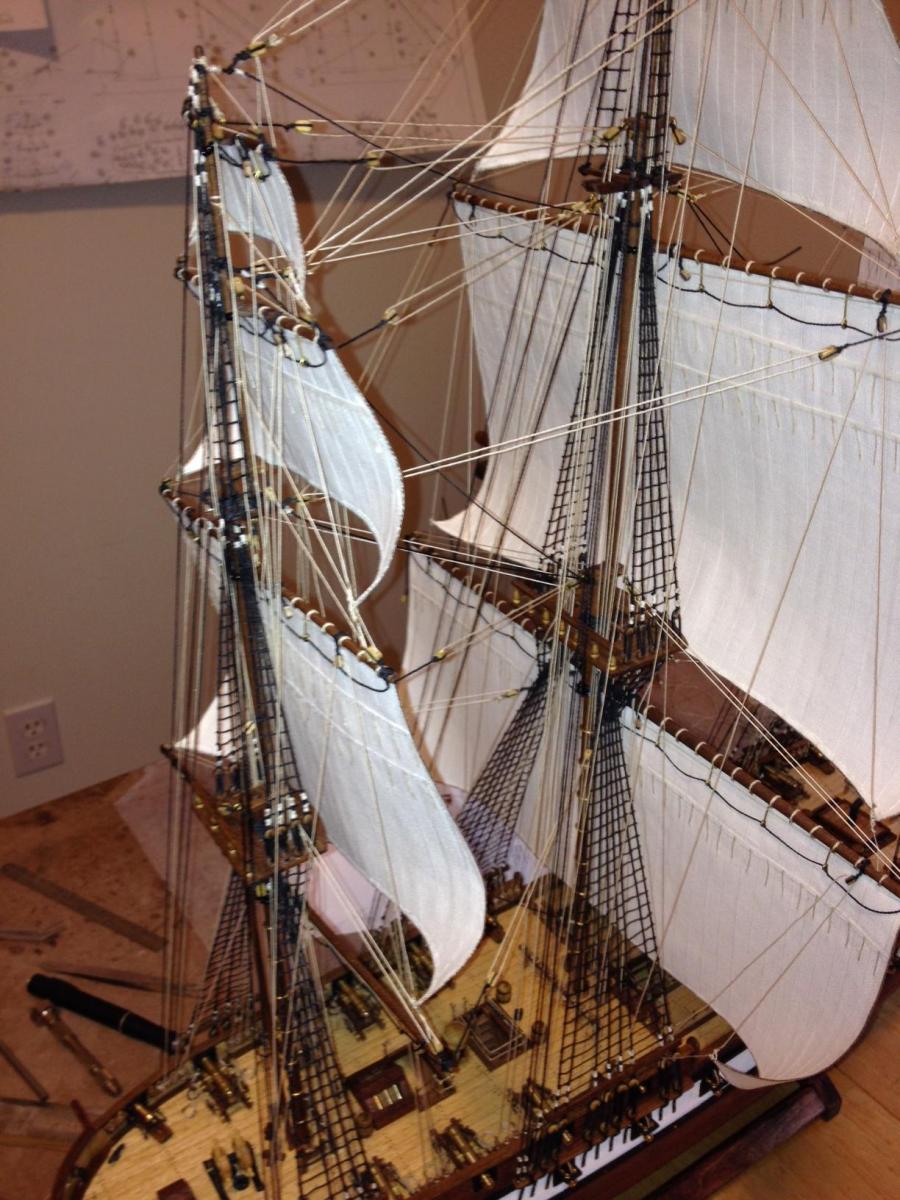
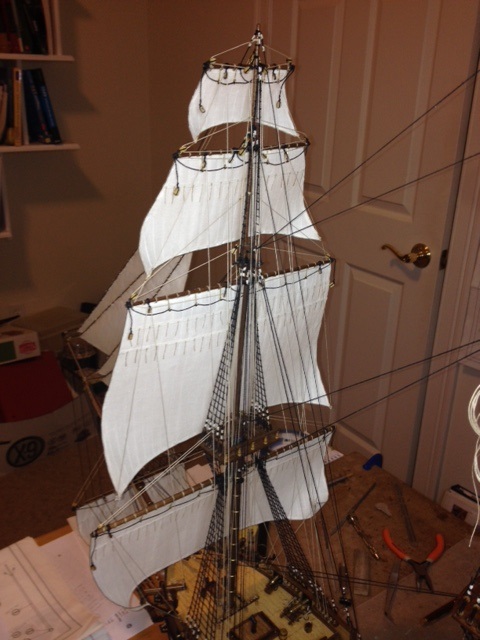
I got a little closer to the finish line this weekend but it still at least couple of weeks away. The mizzen sails and almost all the yard braces are in place.

Still need to:
1) Attach the spanker sail to the gaff and boom and then run the rigging.
2) Coil up 127 loops of rope for the belaying pins
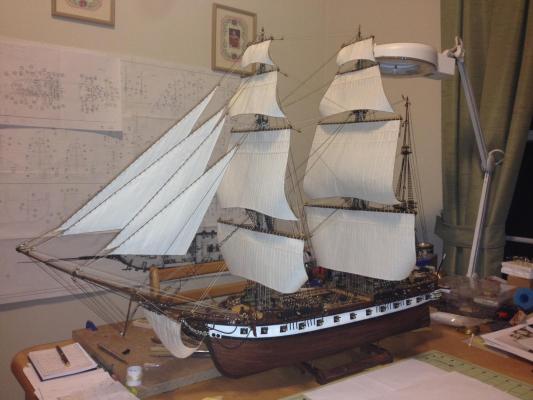
3) Run the colors! I didn't care too much for the supplied flag so I printed some jpeg images on a piece of cloth with an inkjet plotter and they came out pretty nice. Working in an engineering office with nice printers has its advantages. I also found out the the supplied flag is technically wrong. It should have 15 stars and 15 strips (not 13) according to the Flag Act of 1794. They went back to the 13 stripes pretty quickly however when more states joined the union and they could not add a stripe as well as a star for each state. Since I am constructing "my" 1797 version I am going with 15/15.
Tom
- thomaslambo, mtaylor and Bobstrake
-
3
-
Thanks all for the likes and comments.
Jparsley, I am starting to look at different builds. I like the San Juan Nepomucemo but I am far from deciding. I was also looking at a scratch build Pandora or maybe the Triton on MSW but I don't think I am quite ready. I don't have all the mini saws and tools yet and not sure if I want to invest in tools or model kits. The money tree is not producing much fruit!
 I am going to build a case for the Constellation. I drew up some plans to build a narrow table with some drawers underneath and then a lit glass enclosure with wood trimmed corners. I have an "office" in my house which may need to be redecorated with a nautical theme. It's a pretty big model so finding a space where it gets a lot of views is a challenge.
I have several other furniture projects that have been on the burner for a while so I will do those before I start another model. Otherwise they will be on the burner forever.
Tom
-
-
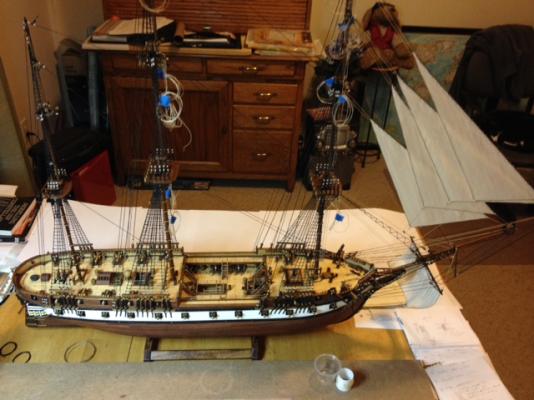
The light at the end of the tunnel is getting brighter!
Finished the main mast sails and rigging along with the braces for the fore mast yards. Mizzen is next in line. Then have to make 127 rope loops for the belaying pins.
- thomaslambo, Gahm, Bobstrake and 4 others
-
7
-
Marsalv,
I just found this build log. I am not sure how to say it but, WOW. Absolutely incredible. I am definitely going to tag along and learn. Thanks for all your efforts in showing us "lesser experienced"
how it is really done.Tom
- Dimitris71, mtaylor and wyz
-
3
-
-
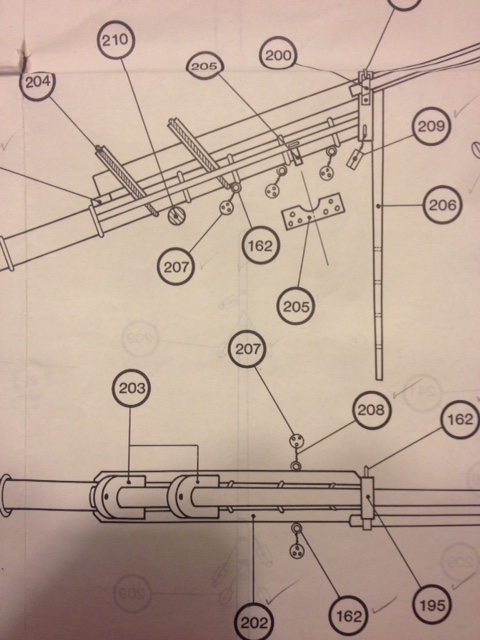
I am working on putting the sails on my first build, the AL kit Constellation. Can someone tell me why the lowest yard on the mizzen mast does not have a sail? There is a royal, gallant and top sail but no main (course) sail. The yard as per the instructions has foot ropes and blocks for rigging but no sail. I was just wondering as I am "less than an expert" at ship design. I can't seem to find any information and when somebody looks at my model and asks, I want to be able to give a reasonable answer.
Tom
-
Nice job on the woldings. You are moving right along.
Tom
- mtaylor, Canute and Dimitris71
-
3
-
Hello all,
Thanks for all the likes.
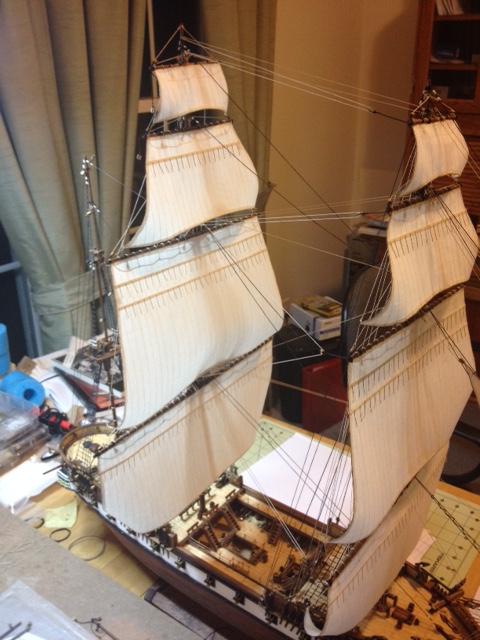
Got the fore mast sails up and all the running rigging is in place except the yard braces. I will put those on after the main mast sails are mounted. I think the fore mast yard brace lines will be in the way. Miles and miles of rope. I will play around with the sails after they are all mounted to see if I can "billow" them a bit more. The middle of the top and course sails a sagging a bit due to their size.


- thomaslambo, Jack12477, mtaylor and 3 others
-
6
-
-
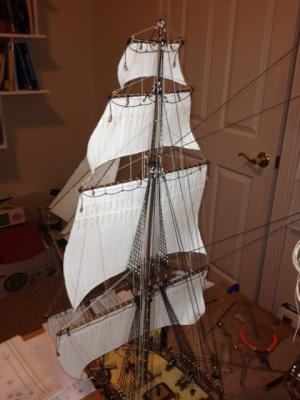
Holiday weekend gave me some extra time in the shipyard. Started attaching some sails starting at the bow. All the jib sails and sprit sail are done. Next I will work on the fore mast sails. Then I need to make a bunch of belaying pin rope loops to finish off the running rigging at the bow. The light at the end of the tunnel is very dim but I am definitely in the the tunnel.
-
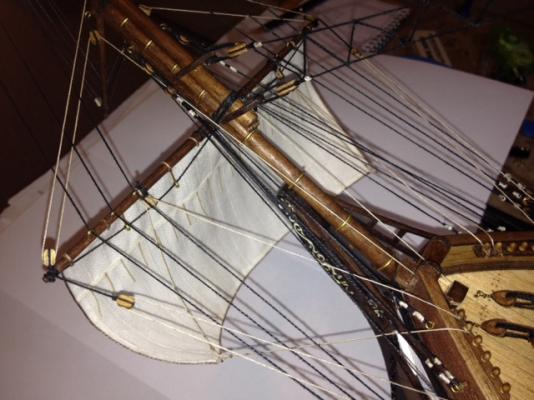
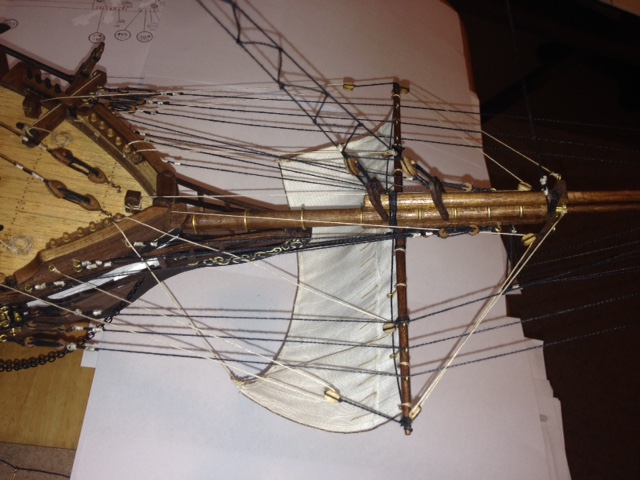
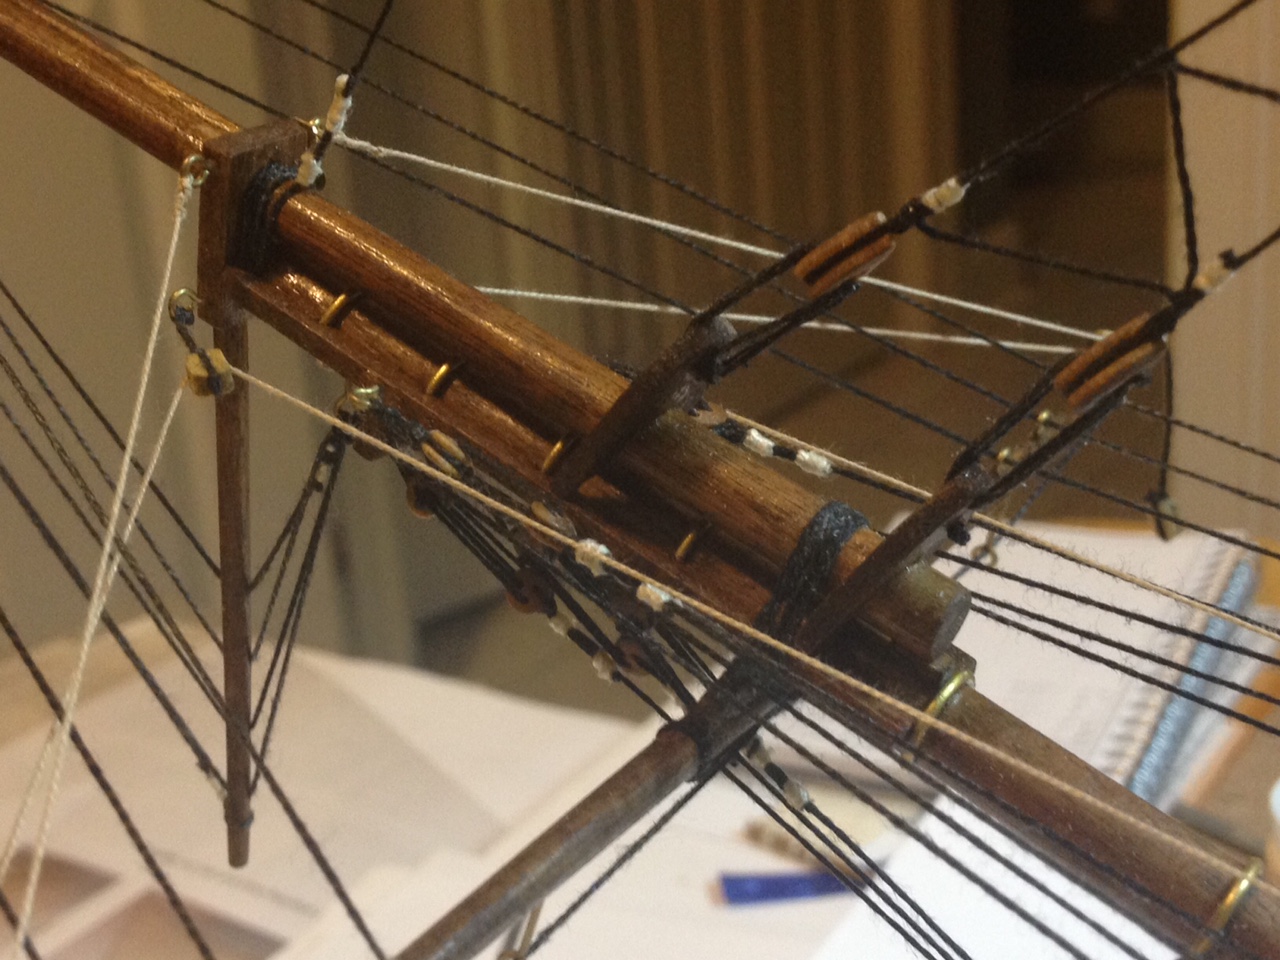
JeffHey tom I was looking at my plans and reviewing your build I noticed that your mizzenmast is not the same as my plans Did yours have this extra support
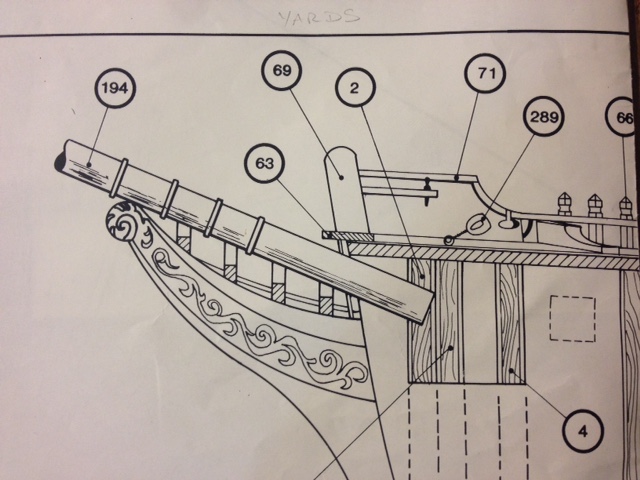
My mizzen also has the small support mast. I did not install it yet. Will do that when I install the boom. The bow sprit yard is not attached with the brass rings. It is just glued in place with the little triangular shaped piece which is glued to the yard per the instructions. The instructions also had me put the brass rings on the bow sprit mast. It didn't really make sense to me as the yard is supposed to be able to ride up and down this area by using the yard lifts. The rings would seem to get in the way as I see it. What do I know? It's my first boat and I know more now then when I put the sprit masts together. I guess the bottom line now is the rings look great and I am not changing it now!
Tom
-
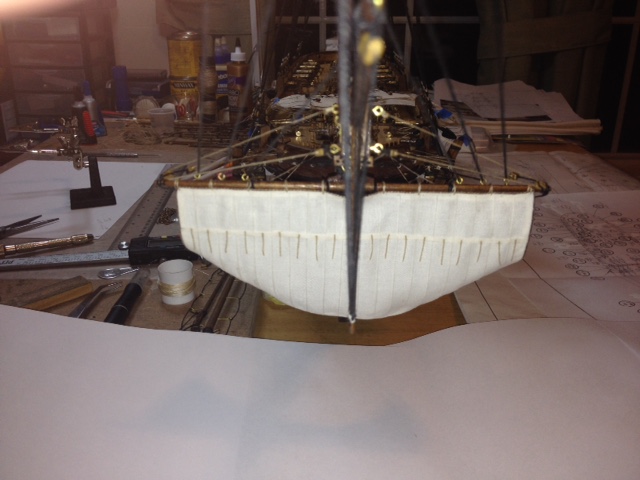
Reached a milestone this weekend! I am no longer just drifting in the currents. I have the beginnings of a propulsion system!!!


 Okay, I admit I am a little excited.
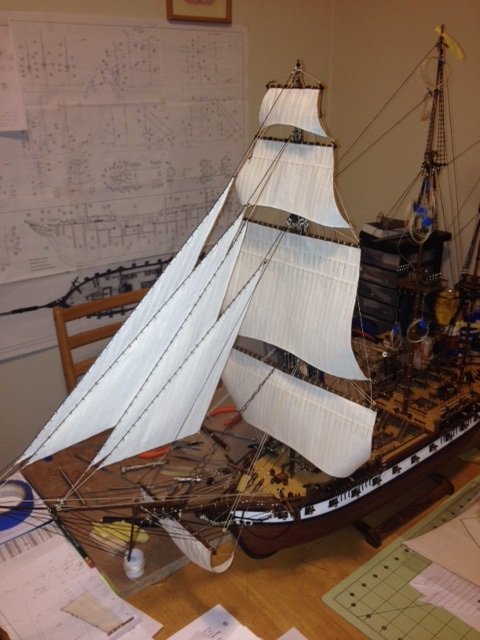
 I fit the sprit sail to the yard and rigged all the lines. Need to start working on the jib sails and work my way back to the mizzen sails. Spent quite a bit of time laying out a belaying pin pattern since I have added clew lines. My deck and pin racks are no longer of the "kit" design. The further I went with this kit and the more I learned (thanks MSW) the more I bashed. I learned one important thing during this project, I like bashing!
Maybe one more kit and then a scratch??? Ahh patience grasshopper, that is many years away.Here is are pics of my wind power so far. I still need to put loops of rope on the belaying pins but will probably wait and do them all at the end of each section of sails... kind of like a mass production assembly line.

-
Mike,
That is one lucky library. Congratulations on a completing a beautiful model.
Tom
- mtdoramike and GLakie
-
2
-
-
-
Jeff,
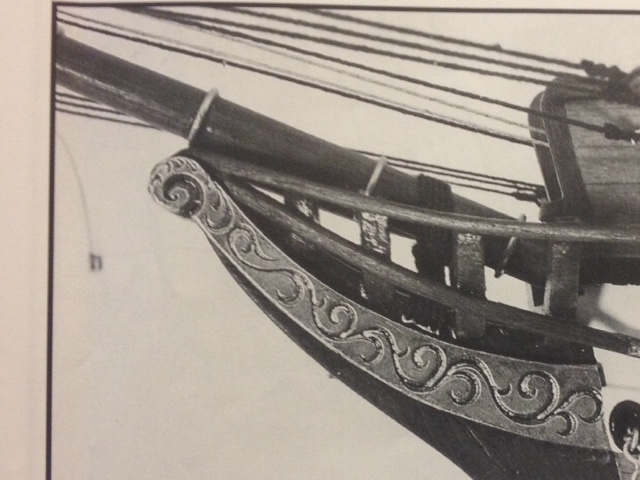
Those head timbers came out nice. I found that part a bit difficult, especially the curved pieces attached to the bow.
- Canute, Dimitris71, Bobstrake and 1 other
-
4
-
Jeff,
I think they look fine. And by the way, it only matters if they look good to you!
- Dimitris71, mtaylor, src and 2 others
-
5
-
Just a status update.
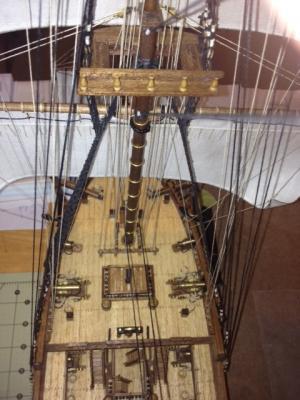
I just spent most of the afternoon layout out the belaying pin schematic. The supplied rigging plans don't have any clew lines. I added a couple of belaying pin racks because you can never have enough places to tie off rigging. I was going to put bunt lines on the main and fore main and top sails but I don't think the layout I have will work with regards to the belaying pins. The other main reason I will leave them out is I will be displaying all the sails fully sheeted. I was going to partially reef the main and fore main sails to see the deck better. The method I used (mentioned above) to make the sails caused the foot lines to be stiff because of the glue. Also the threads I glued to the faces of the sail made them stiff enough where they will not look like loosely hanging window drapes. The sails look great but they can't be reefed. Luckily, with the sails fully extended there is still plenty of room to see the deck details. I spent a lot of time on them and would have hated to make them over.
I will have to look into just sewing them without any glue on the sides or foot on the next build. Then they should hang loosely if needed. This must be one of those learning experiences that I keep hearing about.
My next step is to start attaching the sails to the yards and then pre-install as much rigging as I can before I mount them.
Tom
-
-
Jeff,
Sweeeeet. Nice job. Keep it up.
Tom
- mtaylor, Dimitris71 and Canute
-
3
-
John,
It is great to see you are back. Sails are a whole lot more complicated and time consuming than I originally thought! It is a toss up between sails and ratlines. I am making my last of 17 sails now but I still have to put on the head, foot and leech lines on all of them. That seems like it will take a very long time also. I am getting antsy now... I want to attach a sail to a yard and put it up on a mast! Okay, now that I vented that out... paaaatience.
Tom
-
Thanks for the vote of confidence Jeff but this is my first build so I don't know how much guidance I can give. I think I am still in the "winging it" stage. It has been fun!
I am about half way through making the 18 sails. Then I need to decide about what the best way to do the head, foot and leech ropes will be. LIke you and Mark mentioned earlier, I don't want to ask myself why I didn't bother with them so I decided to put them on. I will probably make a spare sail and practice on that one. This sail making from scratch is a lot more involved than I thought it would be. It is probably going to take the same amount of time as planking.


USF CONSTELLATION by toms10 - FINISHED - Artesania Latina - scale 1:85 - first wooden build
in - Kit build logs for subjects built from 1751 - 1800
Posted
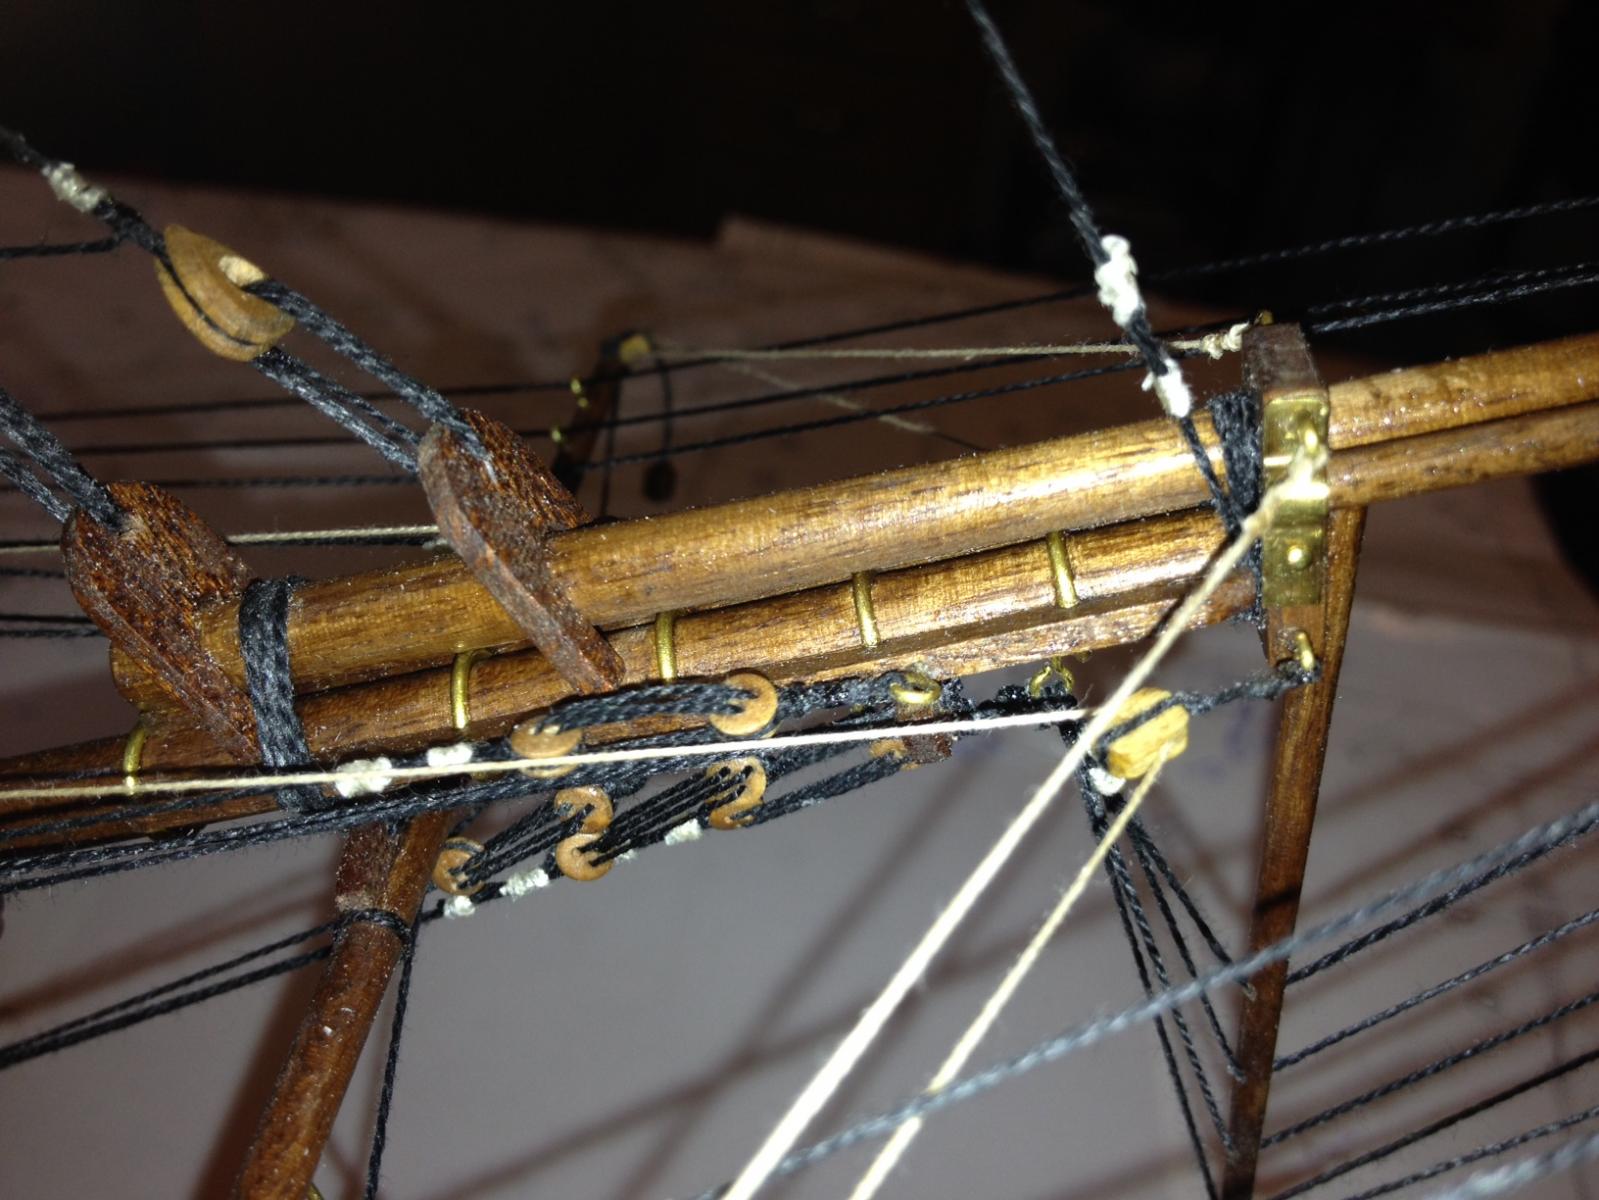
No, I needed to buy pins. I also needed to reconfigure the belaying pin racks (added a few). It pretty much meant tossing out the pin layout in the instructions and going through several of my own until I got all the lines to keep from crossing themselves when bringing them down to the pins. The inventory of the kit was a bit disappointing. It was short blocks, pins, parrel beads and many other small components. The kit requires some "enhancements" but gave a small hint about scratch building which definitely looks interesting... once you invest in all the tools.
Tom