


mattsayers148
-
Posts
685 -
Joined
-
Last visited
Content Type
Profiles
Forums
Gallery
Events
Posts posted by mattsayers148
-
-
-
Dang it! Now I look at your beautiful work of art and realize I forgot about the knees! cant wait to see what you do with the oars, then I'll copy it
- CaptainSteve and GLakie
-
 2
2
-
Thank you George, Buck, CaptainSteve, Ken and everyone for the likes and words of encouragement.
Any time I work on tiny little pieces, my admiration goes out to all of the other builders and their many talents.
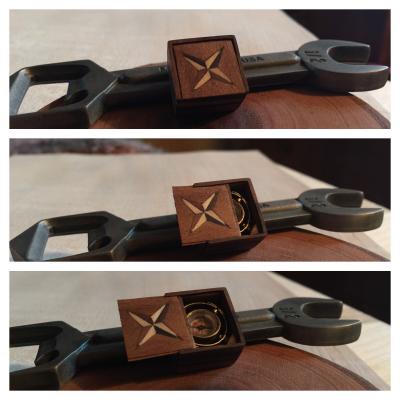
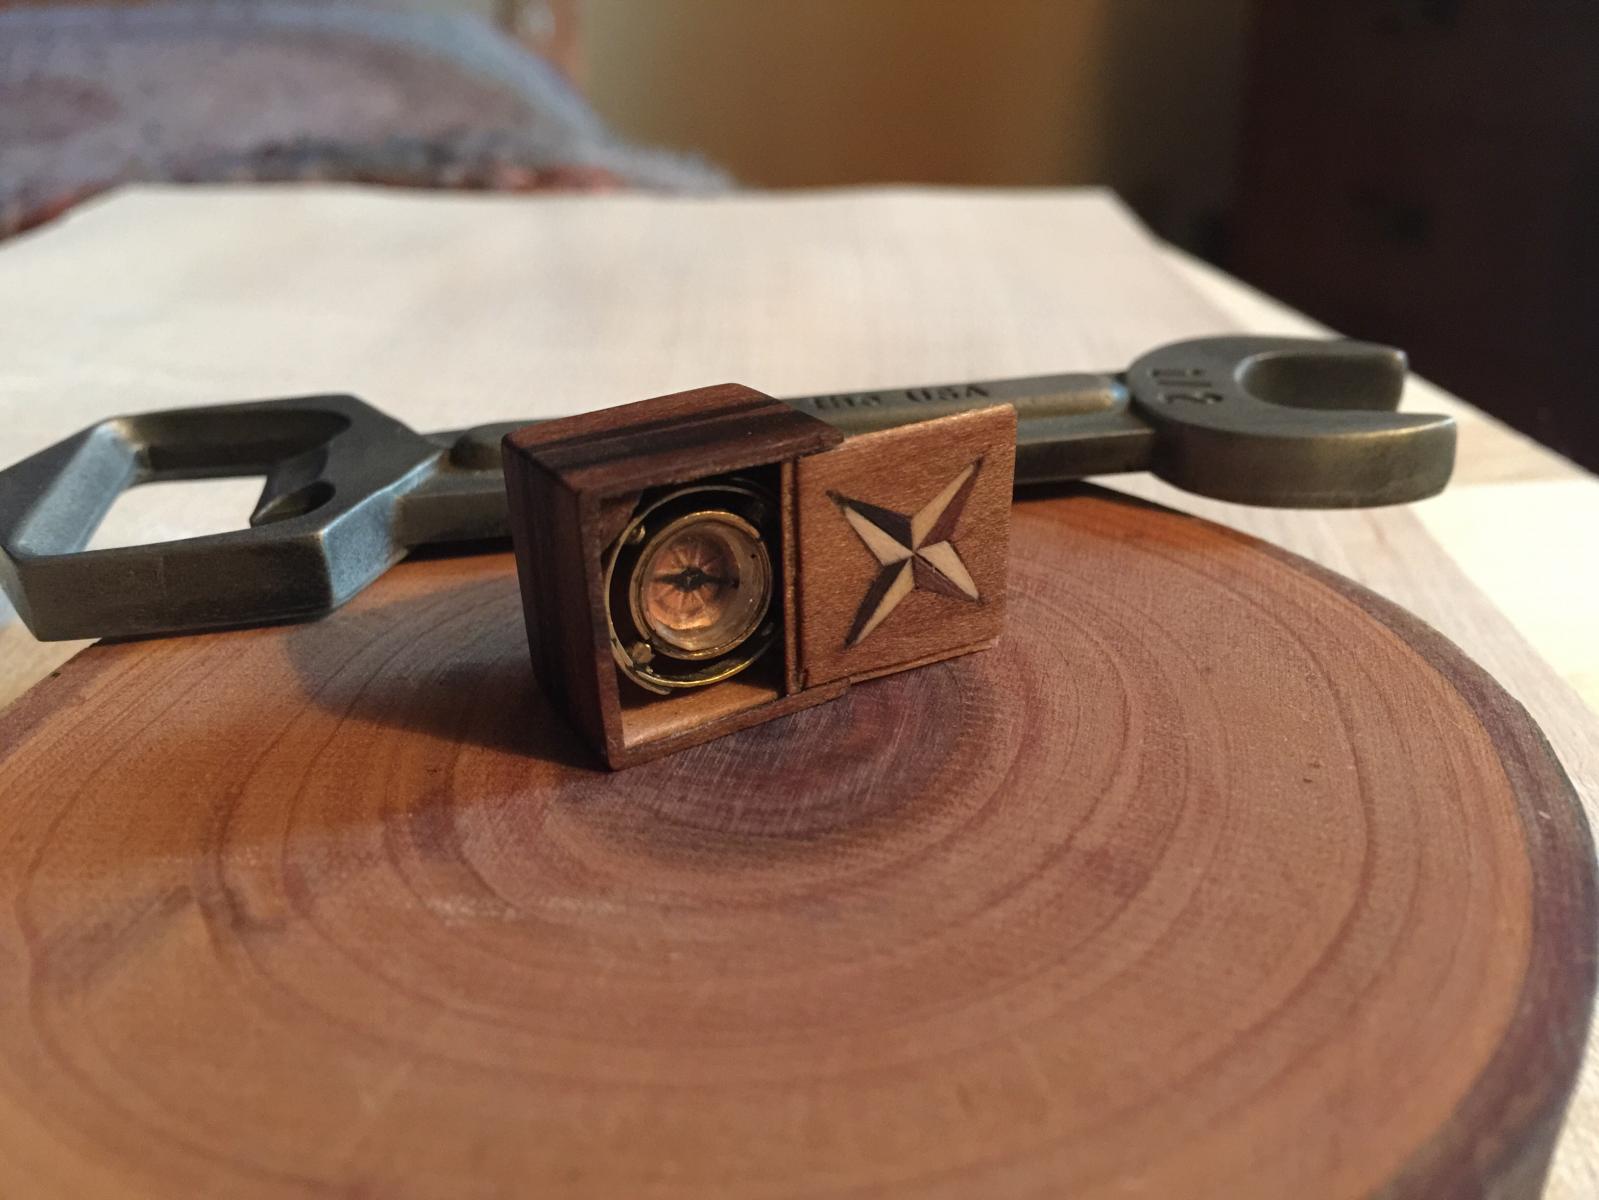
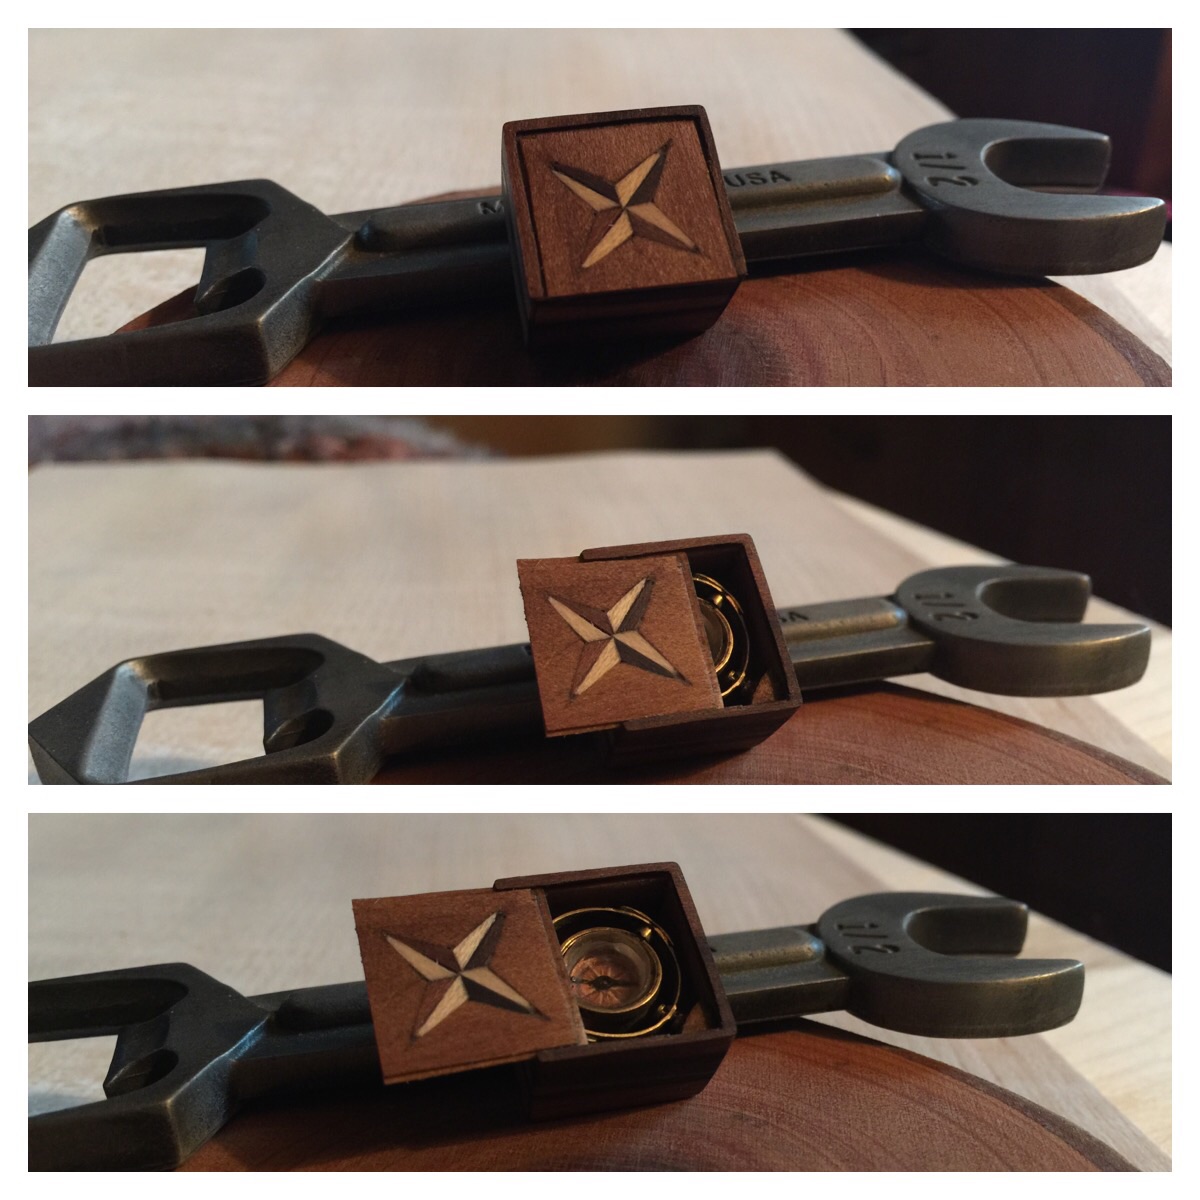
It took me two different boxes and six lids to get one that was acceptable. I've done many inlays on larger scales, but this small one has proved to be, by far, the most difficult that I've attempted. One time I coughed and blew the little pieces to kingdom come. After that I went with a different method. I taped down a piece of blue tape, sticky side up. It holds really well and doesn't destroy them in the process.
- CaptainSteve, GLakie, Salty Sea Dog and 1 other
-
4
-
So, every since I made my compass, I wasn't a fan of the box it was in.
I came across a few good deals on eBay for hardwood veneers and acquired a large assortment of different woods to play around with. This is what a came up with.

-
Most excellent Boyd. So if the vote is on, I say head and foot of chock #1 and the belly of chock #2. Also, I've learned in time that being called "anal" is actually a term of endearment.
-
Hey CaptainSteve, here's another idea. You could store you edibles like campers do in bear country. Bundle everything in a cargo net, draw up the four corners, join them to a rope and hoist them up the mast. This most certainly would detour the starving crew from pilfering the food supplies.
- avsjerome2003 and GLakie
-
2
-
Most excellent barrels CaptainSteve! I have a feeling it won't be too long before your lathe becomes one with you.
- CaptainSteve, Canute and GLakie
-
3
-
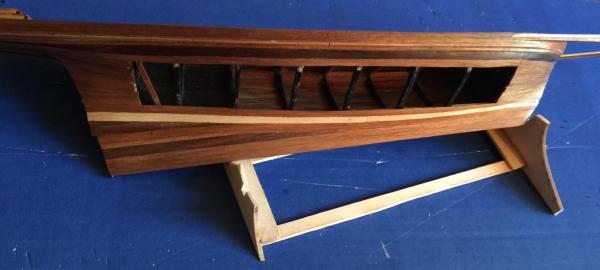
Hey George, the windlass takes up very little space. The stern(anchor) crane and stabilizer arms could be unshipped and displayed on the stand. All the extra barrels are already taken care of. Even with the know items on board, for the life of me, I can't imagine what a miserable mess it was on board! It's surprising they didn't kill half the crew just for some leg room!
Hey Mark, thank you for the info for the folks here in Portland. One of my Grandmas favorite things to do was to go on day trips on a sternwheeler. I must have gone with her at least a half a dozen times with her on the Willamette R, Columbia R, and Yaquina Bay. Fun times. I'll have to get in touch with these locals and see what they're up to.
Hey CaptainSteve, I'm considering lashing all of the oars together to make a raft-in-tow. The squirrels got a good one to figure out now.
- mtaylor, CaptainSteve, GLakie and 1 other
-
4
-
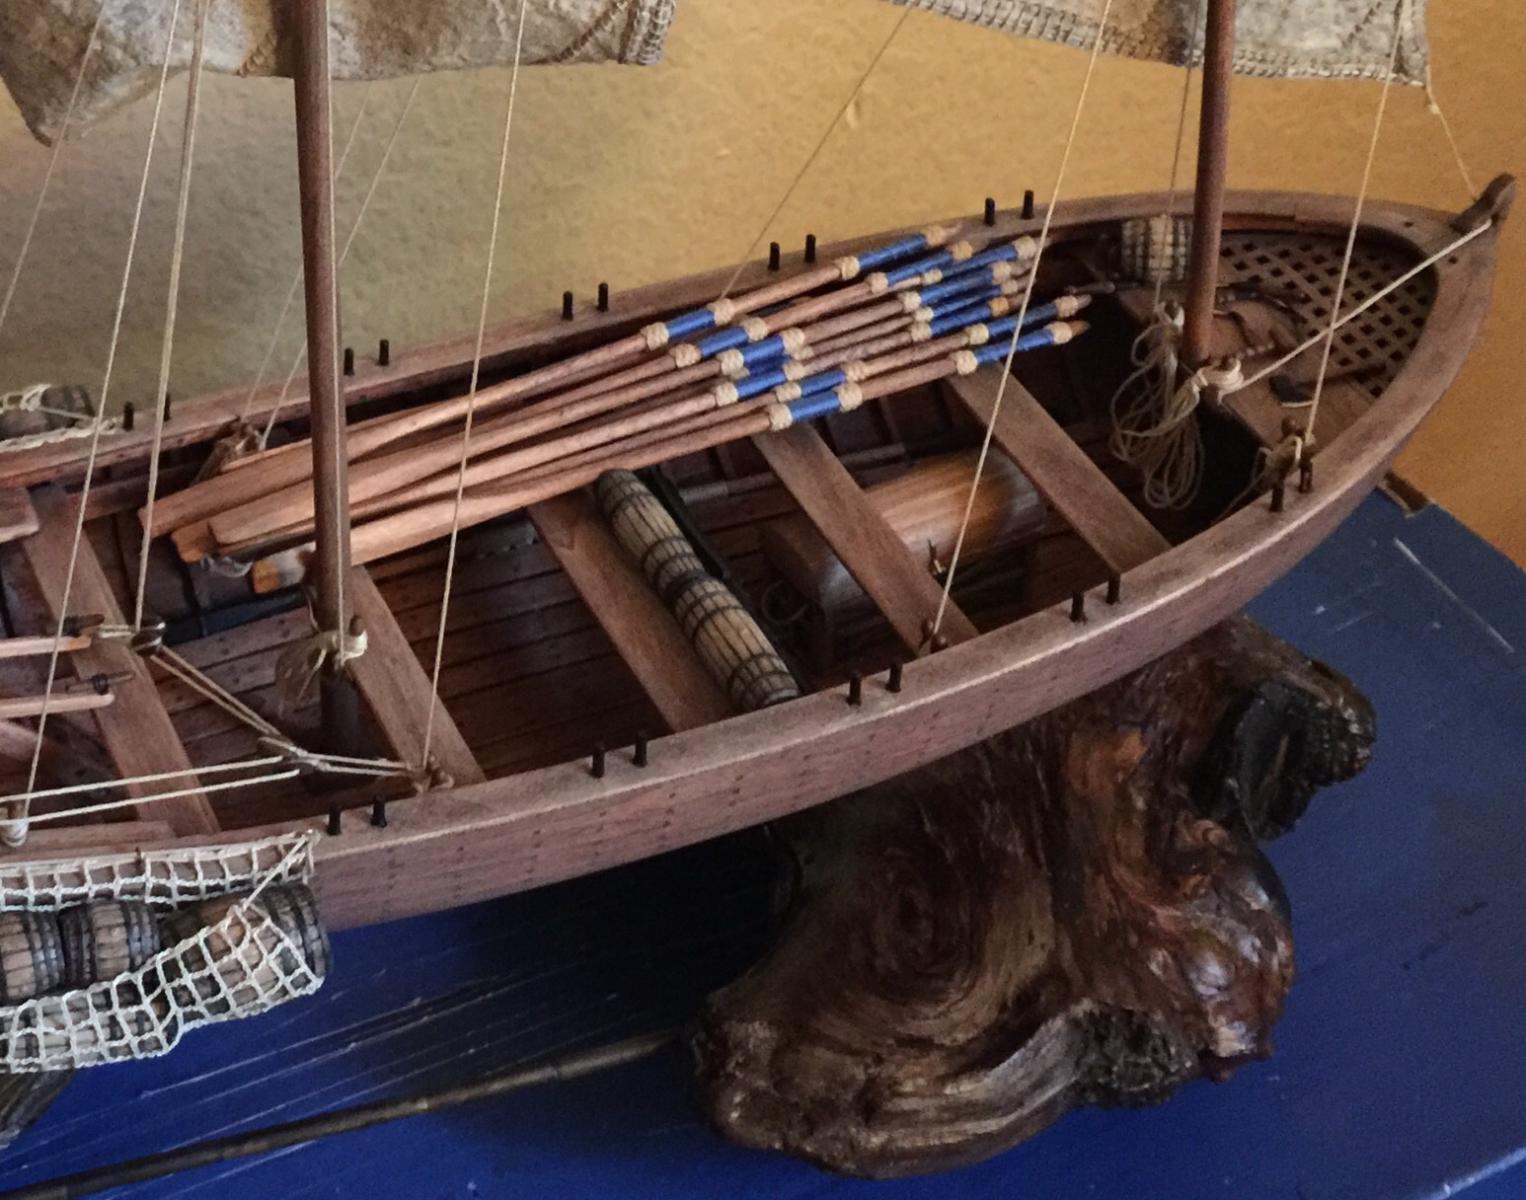
Given the incentive of a long overdue day off, the squirrels busted out the rigging in record time! "Double rations of rum my brethren, for two days," Harry shouted, "Oorah!" Although they completely rebuilt the Launch and placed some items aboard, I've been assured that it's still not complete.

The cargo netting seemed to be a solution to overcrowding. However, once all items were put on board, there still is a significant lack of space.

So I began making mental notes to give to the squirrels. Hopefully after a day or two, they'll get some idea for a solution.
- IgorSky, CaptainSteve, mtaylor and 5 others
-
8
-
Ken!!!
You're alive, I mean, you're Launch is alive!
- Canute, CaptainSteve and GLakie
-
3
-
Thank you George, CaptainSteve, Tom and everyone for the likes. Wow guys you're makin me top heavy with this bulbous head that's growing!
I think I've figured out where all my extra squirrels are coming from. All of our clans must be goin out on the town when we're all asleep and breeding! Not just the average squirrel, but some sort of mutant ninja squirrels!
-
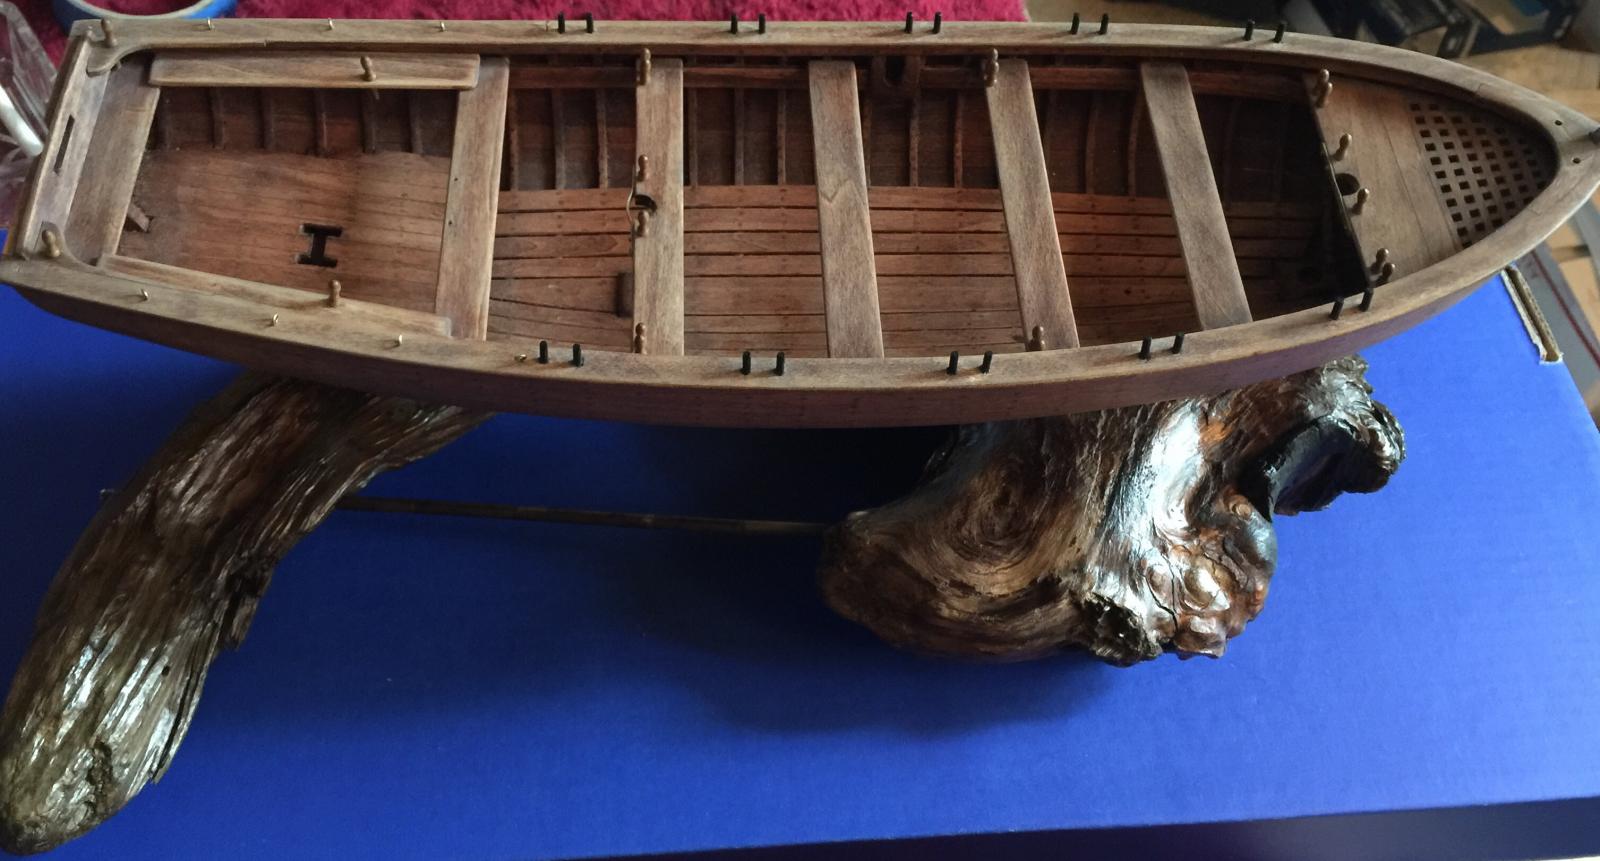
Here is the Launch on the pad, now I have to put it back together.
- mtaylor, dgbot, Salty Sea Dog and 7 others
-
10
-
Thanks Boyd, George an everyone for the likes.
The squirrels are giving me very little heads-up on what's happening. I too am looking forward to seeing what's gonna happen next!
- GLakie, Canute and CaptainSteve
-
3
-
Hey Boyd,
Oh the dust issue! I've used a can of CleanDr multipurpose duster(used to clear sensitive electronics) As long as you don't get to close and blow your house down
-
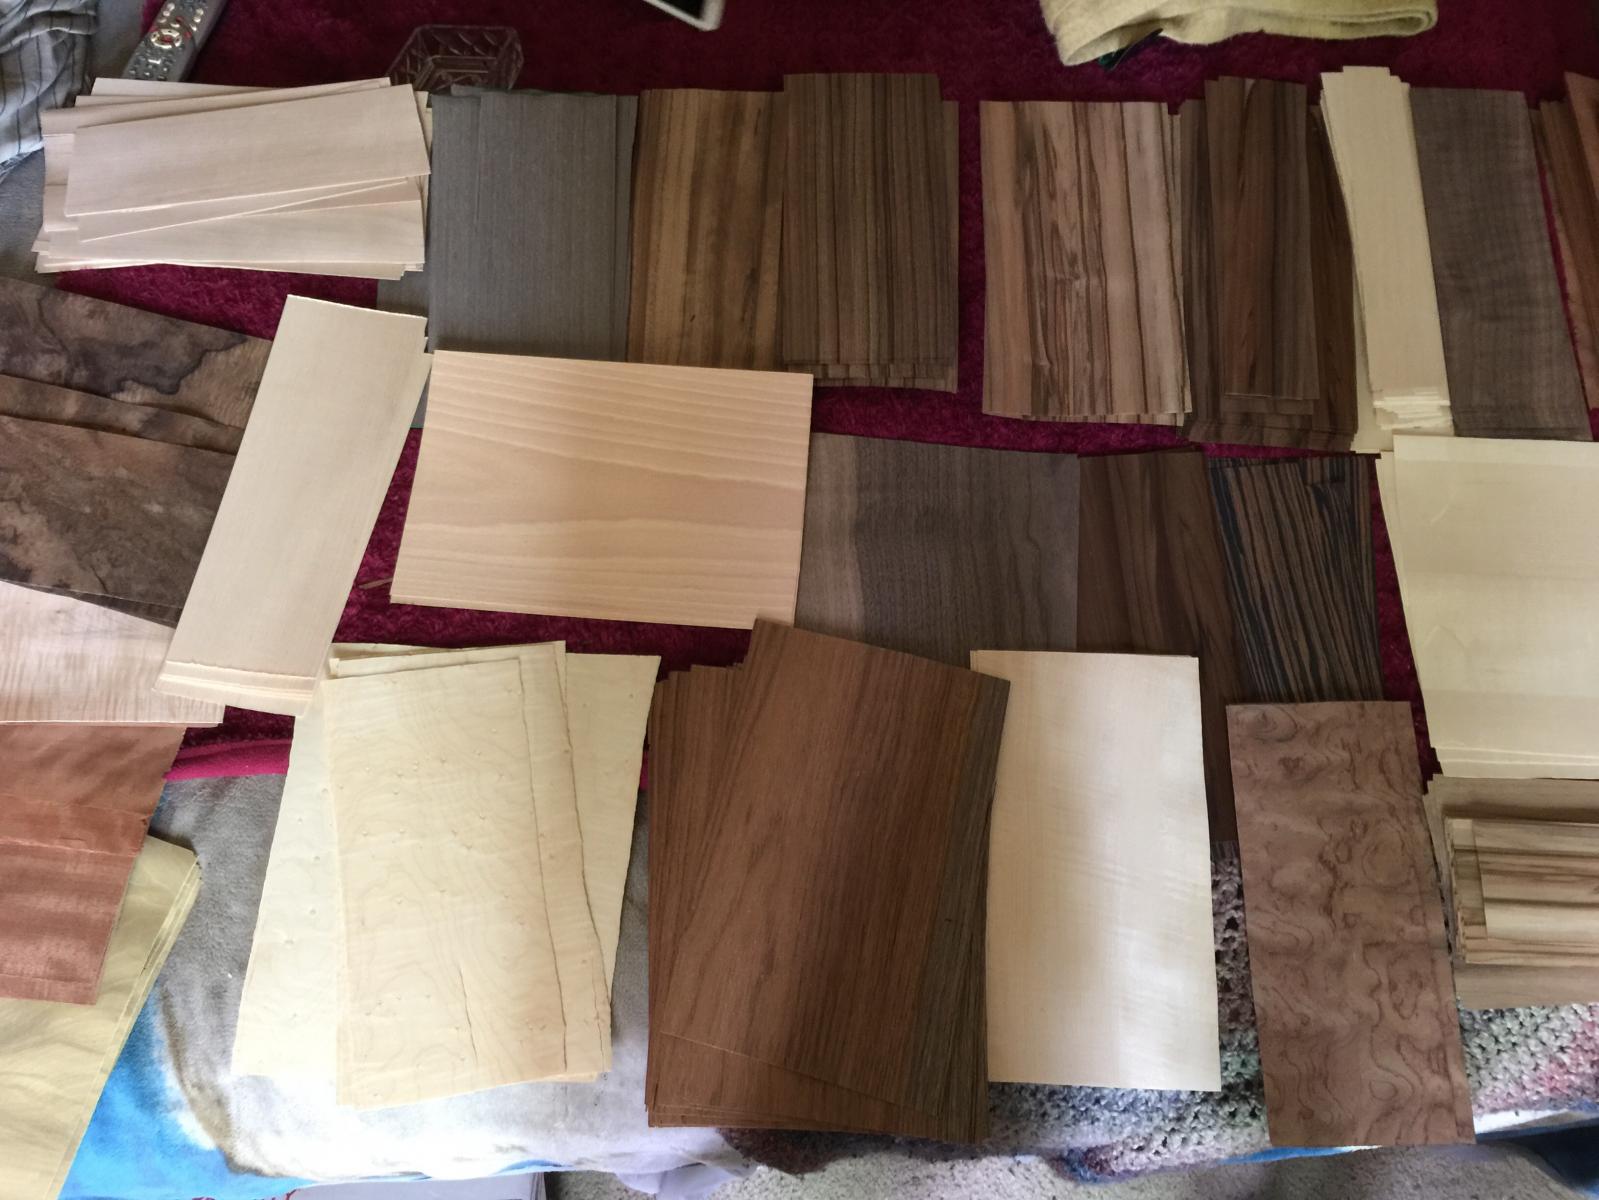
I found when scratch building, purchasing extra wood can get spendy. On eBay there are many types, qualities and quantities of veneer that can be purchased for a very reasonable price. I bought around 200 sq ft of veneer in this photo for only $20.

-
Your bulging sacks are to be envied! As my build only contains non-perishable items, I may steal your empty sacks and fashion them into pillows, for the head or the bum. Very nice, very nice indeed!
- GLakie, Canute and CaptainSteve
-
3
-
-
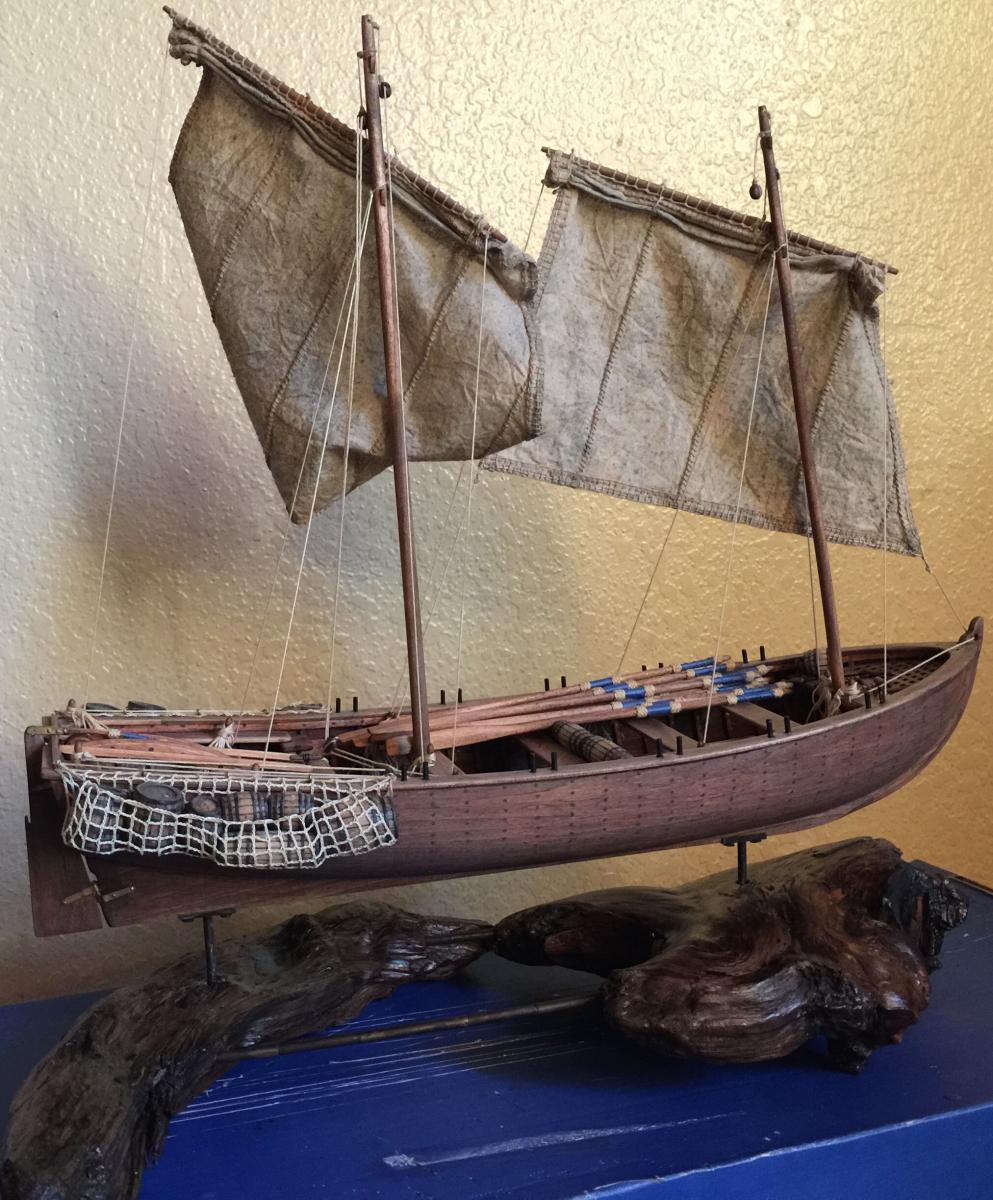
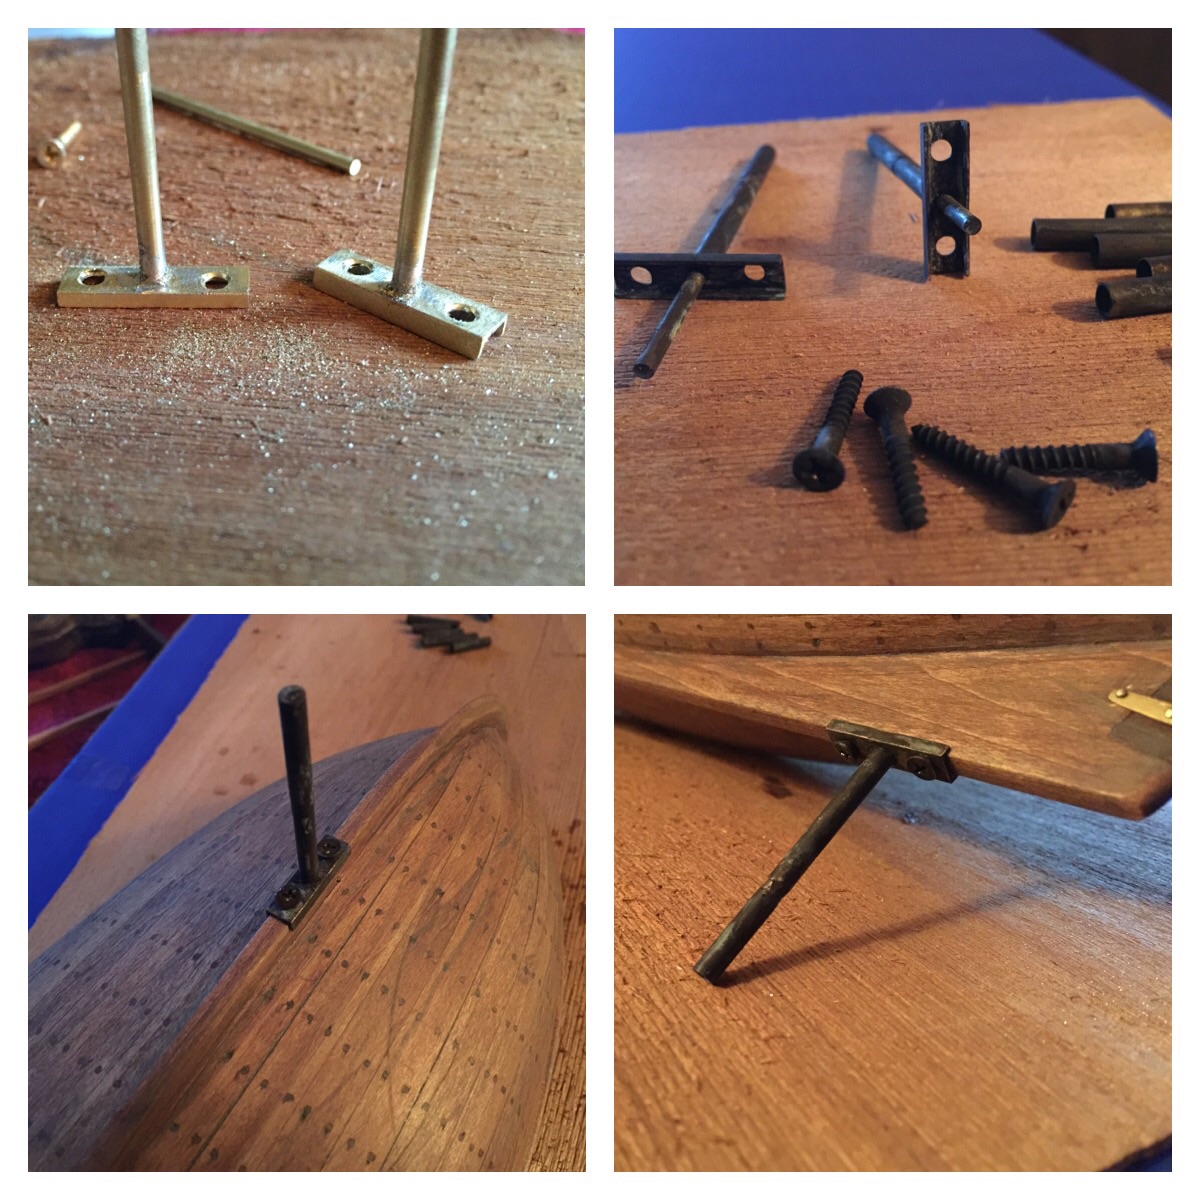
The final finish has been applied to the Launch pad. I used small sections of brass tubing to cover the threaded rod and treated them with Casey's brass black.
While the Launch pad was drying, various pieces of brass pieces were chosen for the mounting brackets. Holes were drilled through the keel to accept brass rod and mounting screws. Then mounting brackets were removed and treated with Casey's brass black as well.
Today's list of to-dos is to bore out holes in launch pad for brackets to go into and mount the Launch.
I decided to remove all the rigging so that thorough scrubbing could be done. Once the launch is mounted, the mast, sails and rigging will be done. Stay tuned...

- IgorSky, usedtosail, GLakie and 3 others
-
6
-
It's crazy! I checked on them squirrels today and there's more of them than yesterday! I'm pretty sure they're forming a colony, strength in numbers against them filth rotten Beavers!
- CaptainSteve, IgorSky, GLakie and 1 other
-
4
-
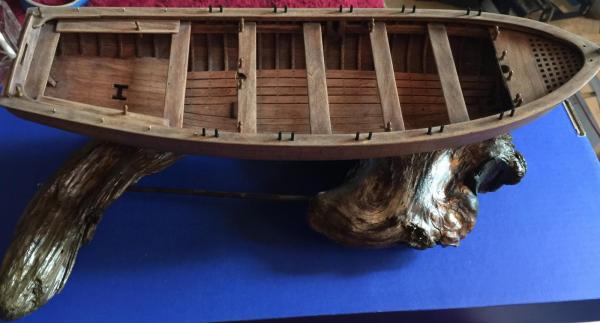
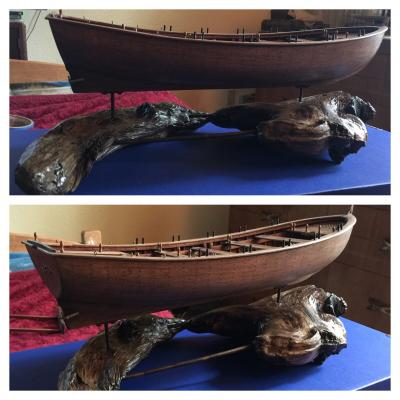
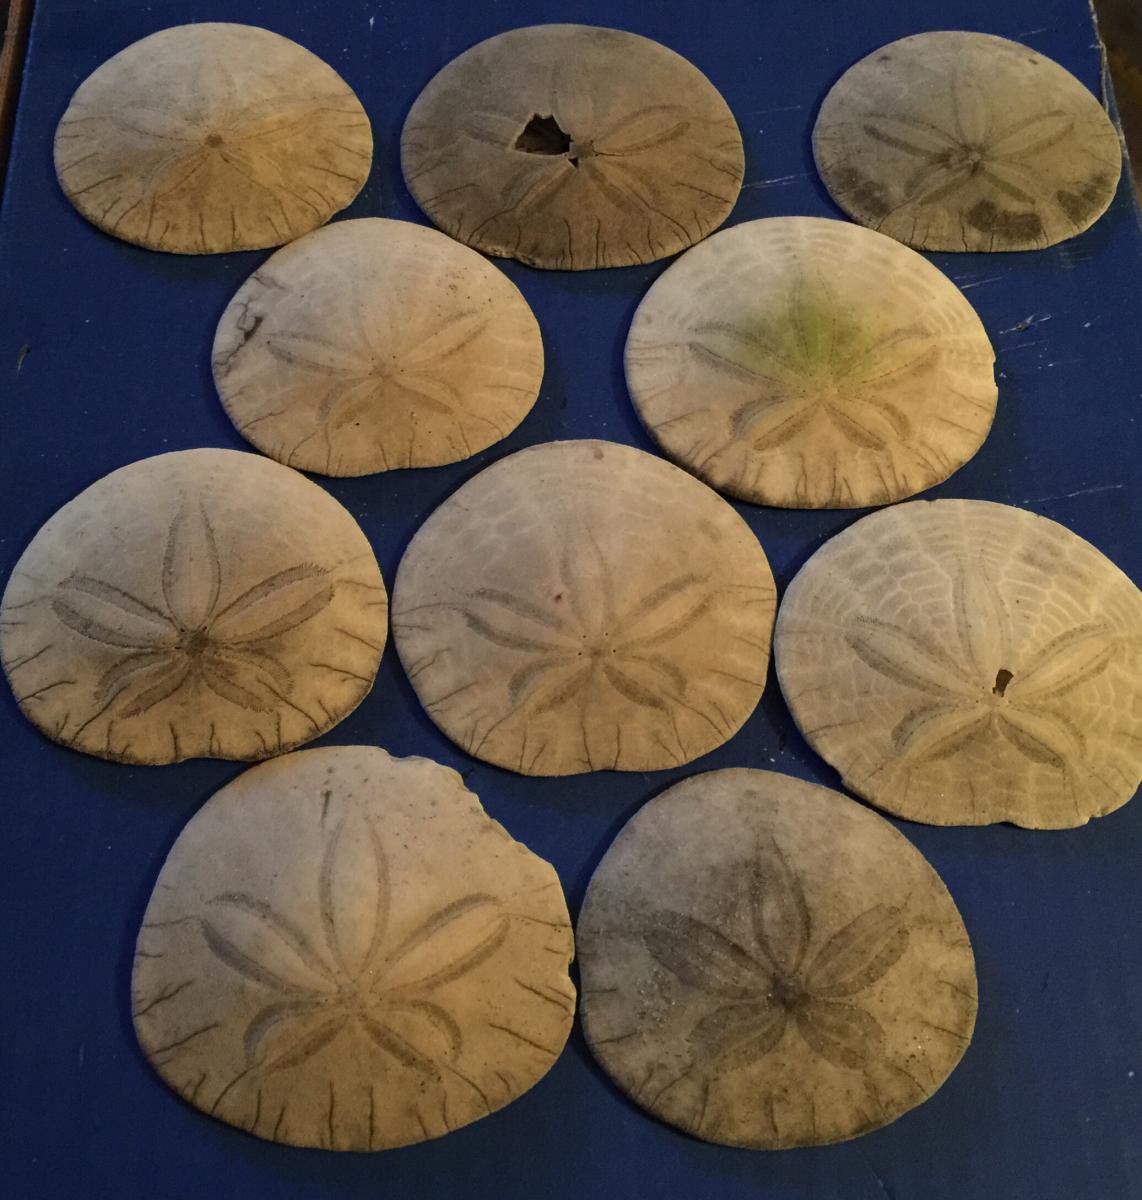
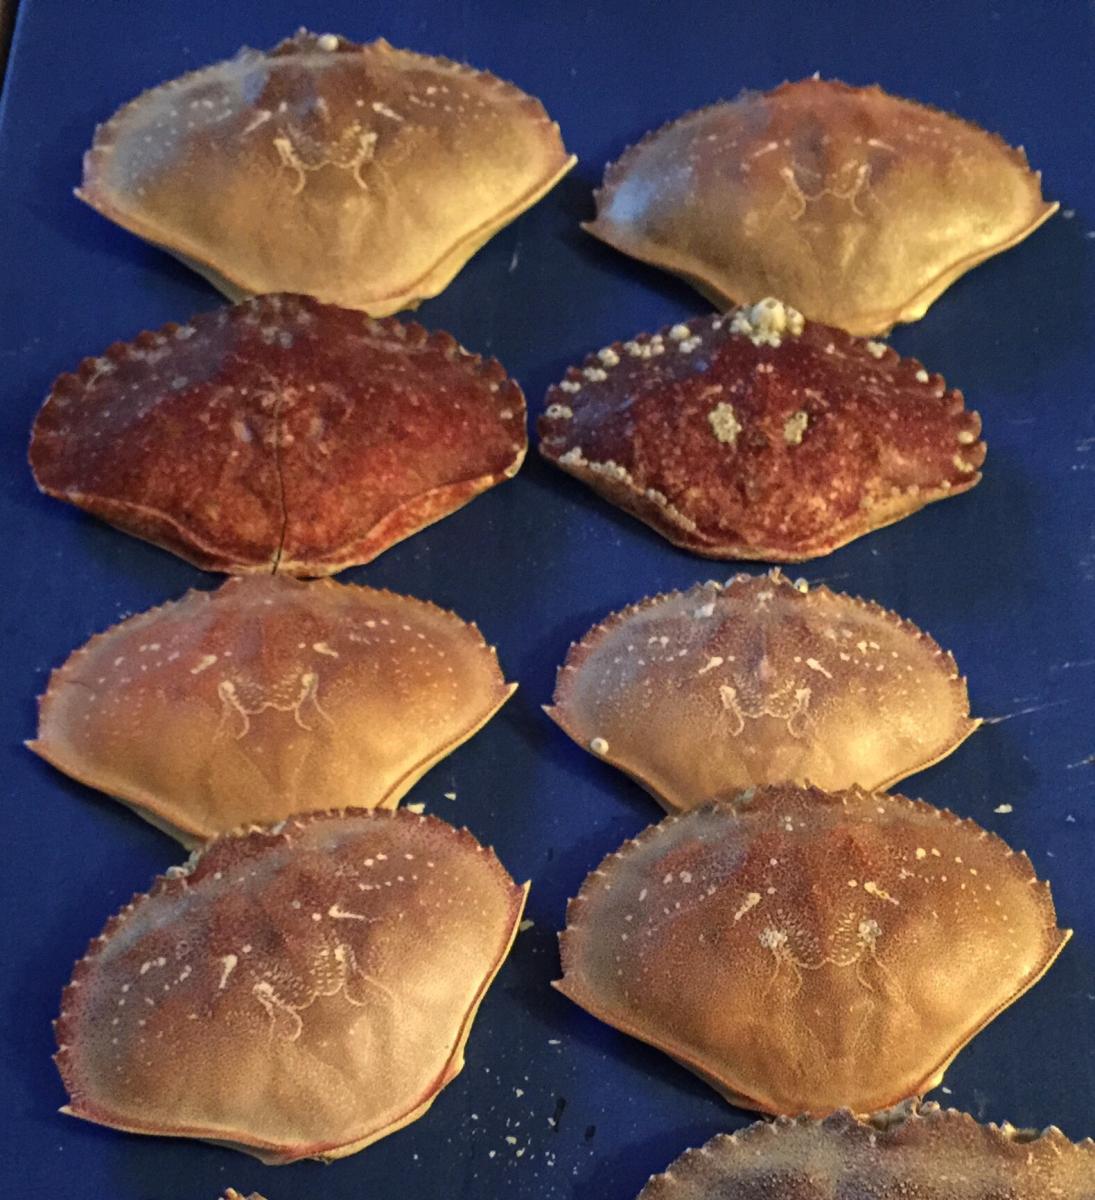
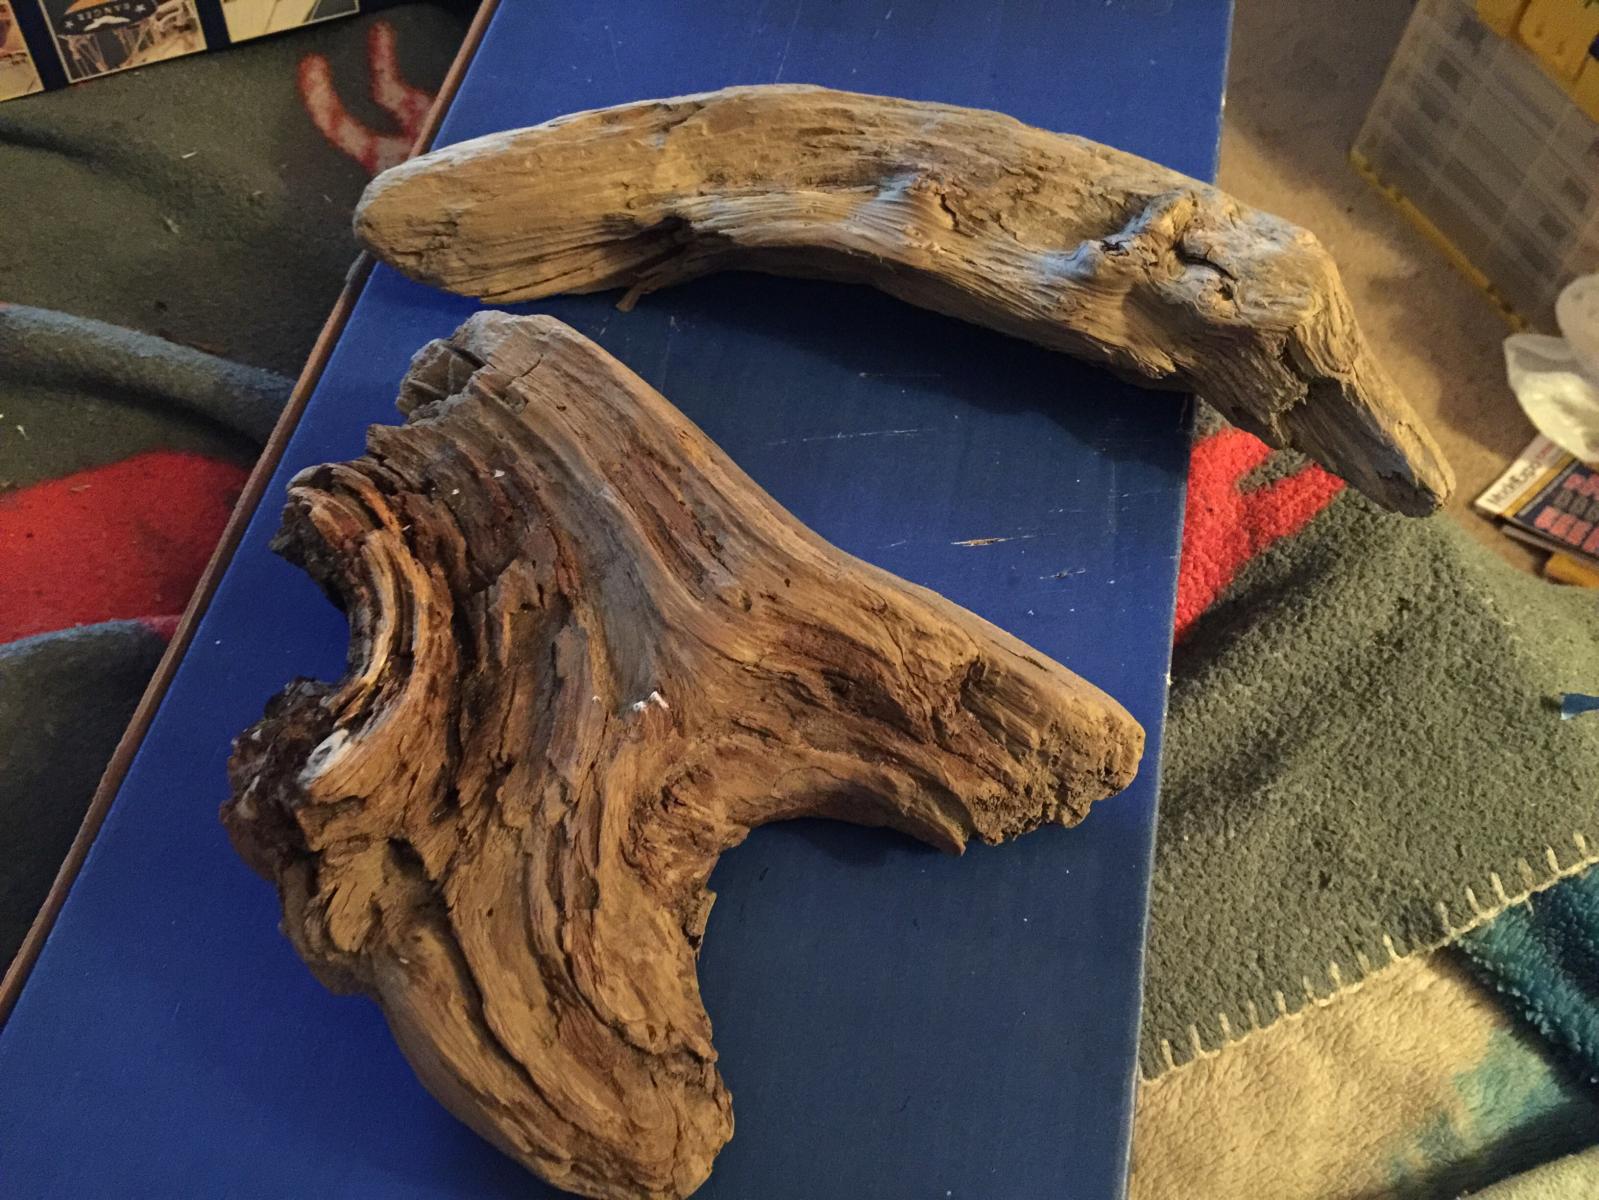
For all who thought my squirrels and I had left our Launch behind, we're still here. My last trip to the Coast was for work, but I was still able to steal a few hrs away to go to the beach.

I found several sand dollars....

Several crab backs...
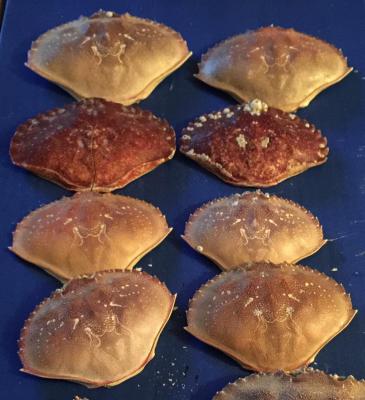
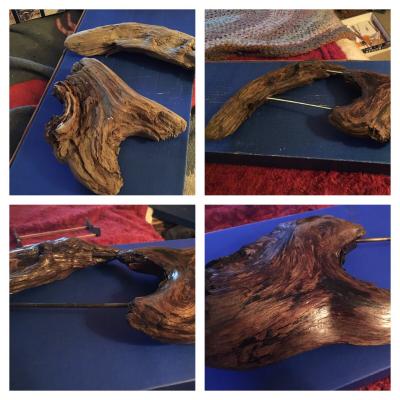
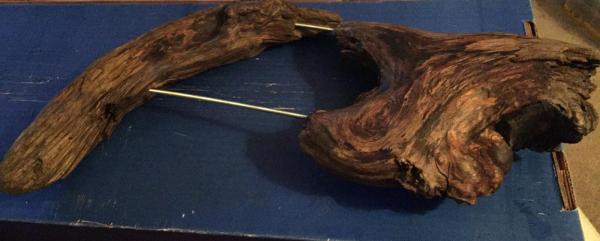
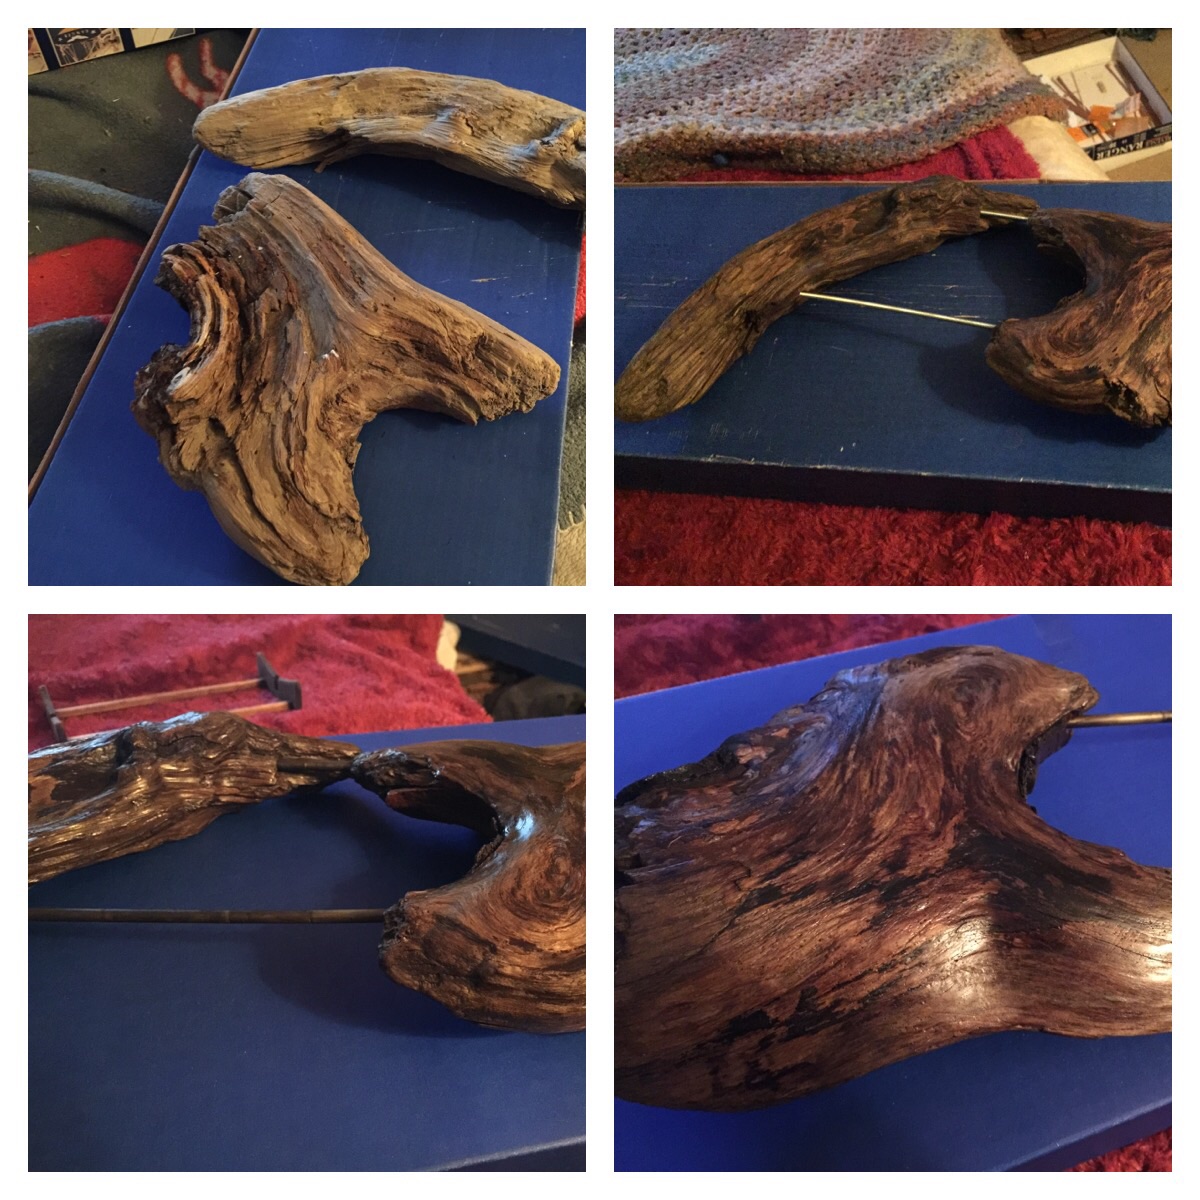
And some driftwood. I figured I could use these some how for the base of my launch.

So this is the configuration that I came up with. The metal fasteners need to be covered, and a finish needs to be applied, but these will be done after I decide placement and attachment of said Launch.
Stay tuned through the weekend as I hope to have this done by weekends end.
- GLakie, Salty Sea Dog, dgbot and 4 others
-
7
-
Thank you for the info Ken and George. I guess my thoughts went more to a gamer, in which what you can do is only based on reality but takes the liberty of including fiction. Remember, I can only follow the mighty Harrison Nutz.
- CaptainSteve, GLakie, trippwj and 2 others
-
5
-
-
-
Now that Harry has proven that he is the toughest Nutz on land and sea, the squirrels cried out a loud "Oorah!"
He let the squirrels know, "The harder you work, the higher you'll rank!" Being smart as they are, they instantly knew the higher the rank the higher the pay...more rum!

So they joined together as one and worked their little fingers to the bone. They proudly sat back and admired their accomplishment. The planking and the primary sanding done, they decided to put on the first of many coats of natural stain.
Harry was quite pleased. So he tapped a fresh keg and smiled as the squirrels sang "Yo-ho-ho and a bottle of rum.."

- CaptainSteve, aaronc, Canute and 3 others
-
6


HMS Bounty by thomaslambo - Artesania Latina – Scale 1:48
in - Kit build logs for subjects built from 1751 - 1800
Posted
Hey Boyd, when I looked at your last chock in your line up my brain goes to home and building details. There is a large amount of columns that retain the square shape at the top and bottom, and the decorative aspects in the middle. Have you tried that? I like your last picture because, as you said, it looks more rustic with smooth, yet subtle shaping without hard lines.
One thing that may help the appearance of strength is iron bands, possibly at top and bottom. Just throwing you a brain teaser.
You are really doing an excellent job. I like how you throw out a bunch of options that you're working on, makes my brains see things that I might not have otherwise.