


mattsayers148
-
Posts
685 -
Joined
-
Last visited
Content Type
Profiles
Forums
Gallery
Events
Posts posted by mattsayers148
-
-
The boys thank you George and to everyone for the likes.
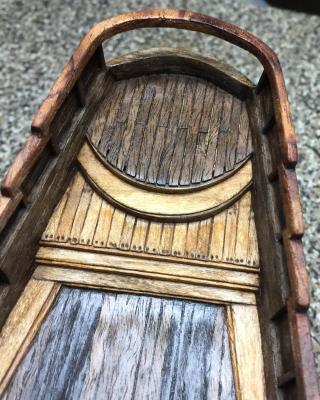
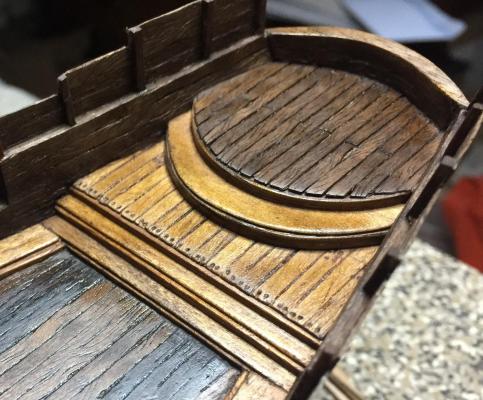
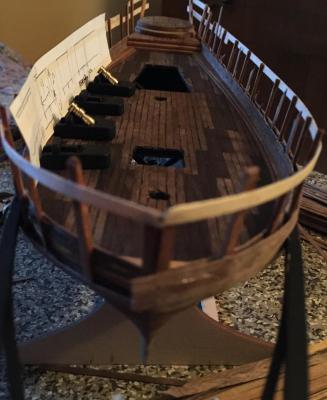
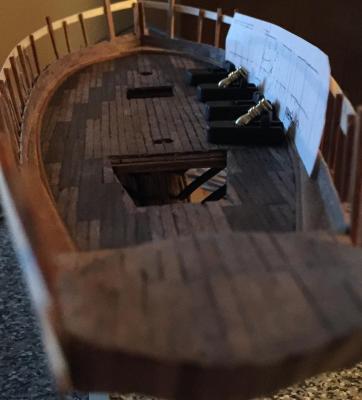
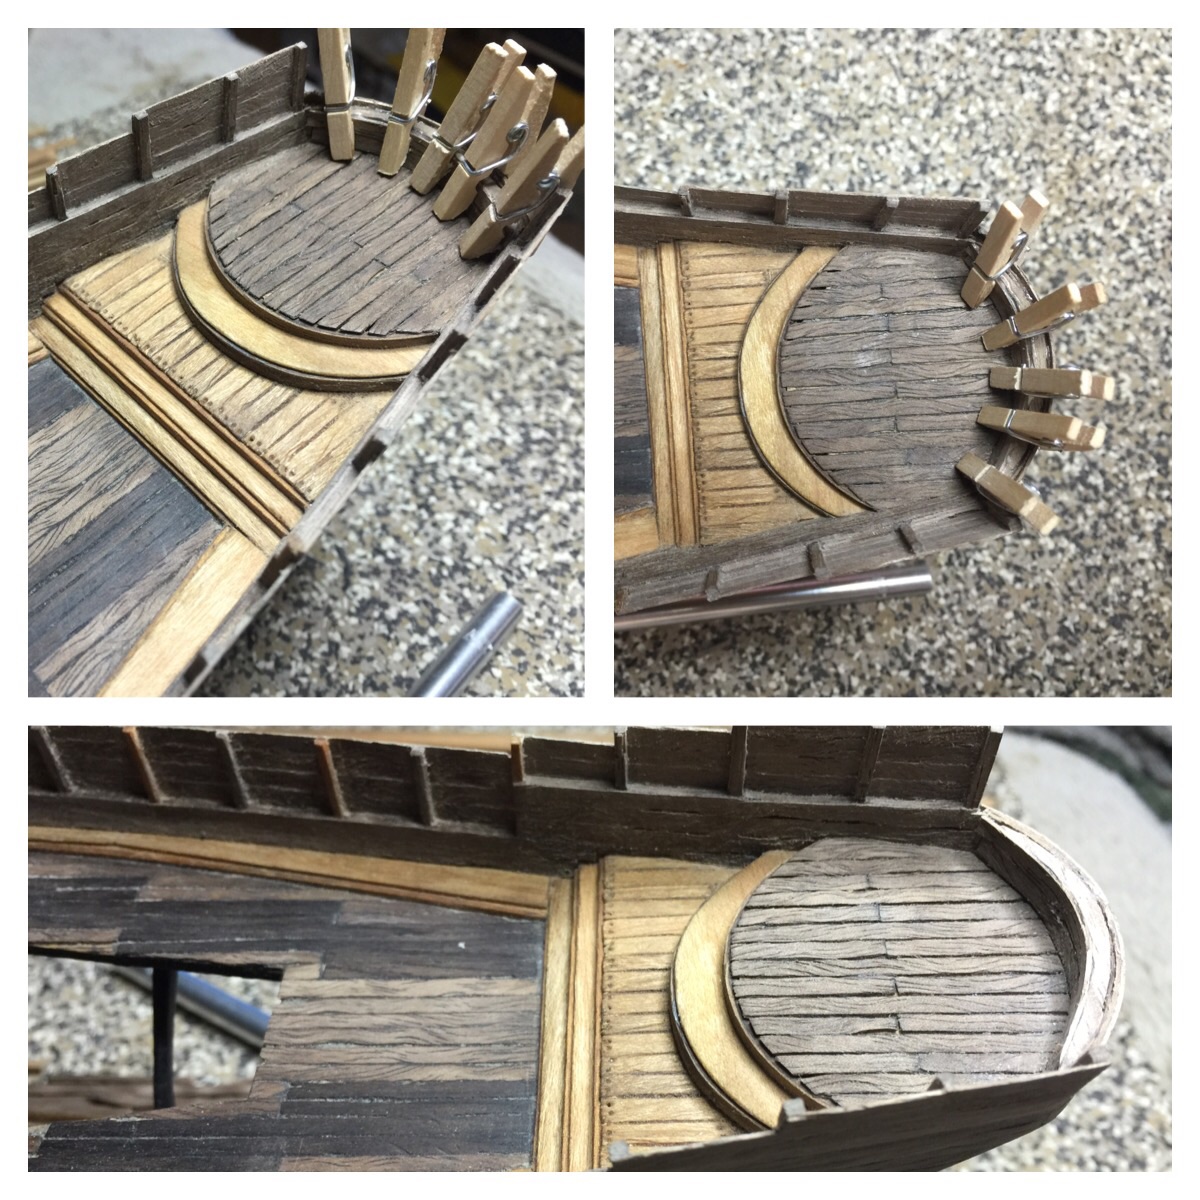
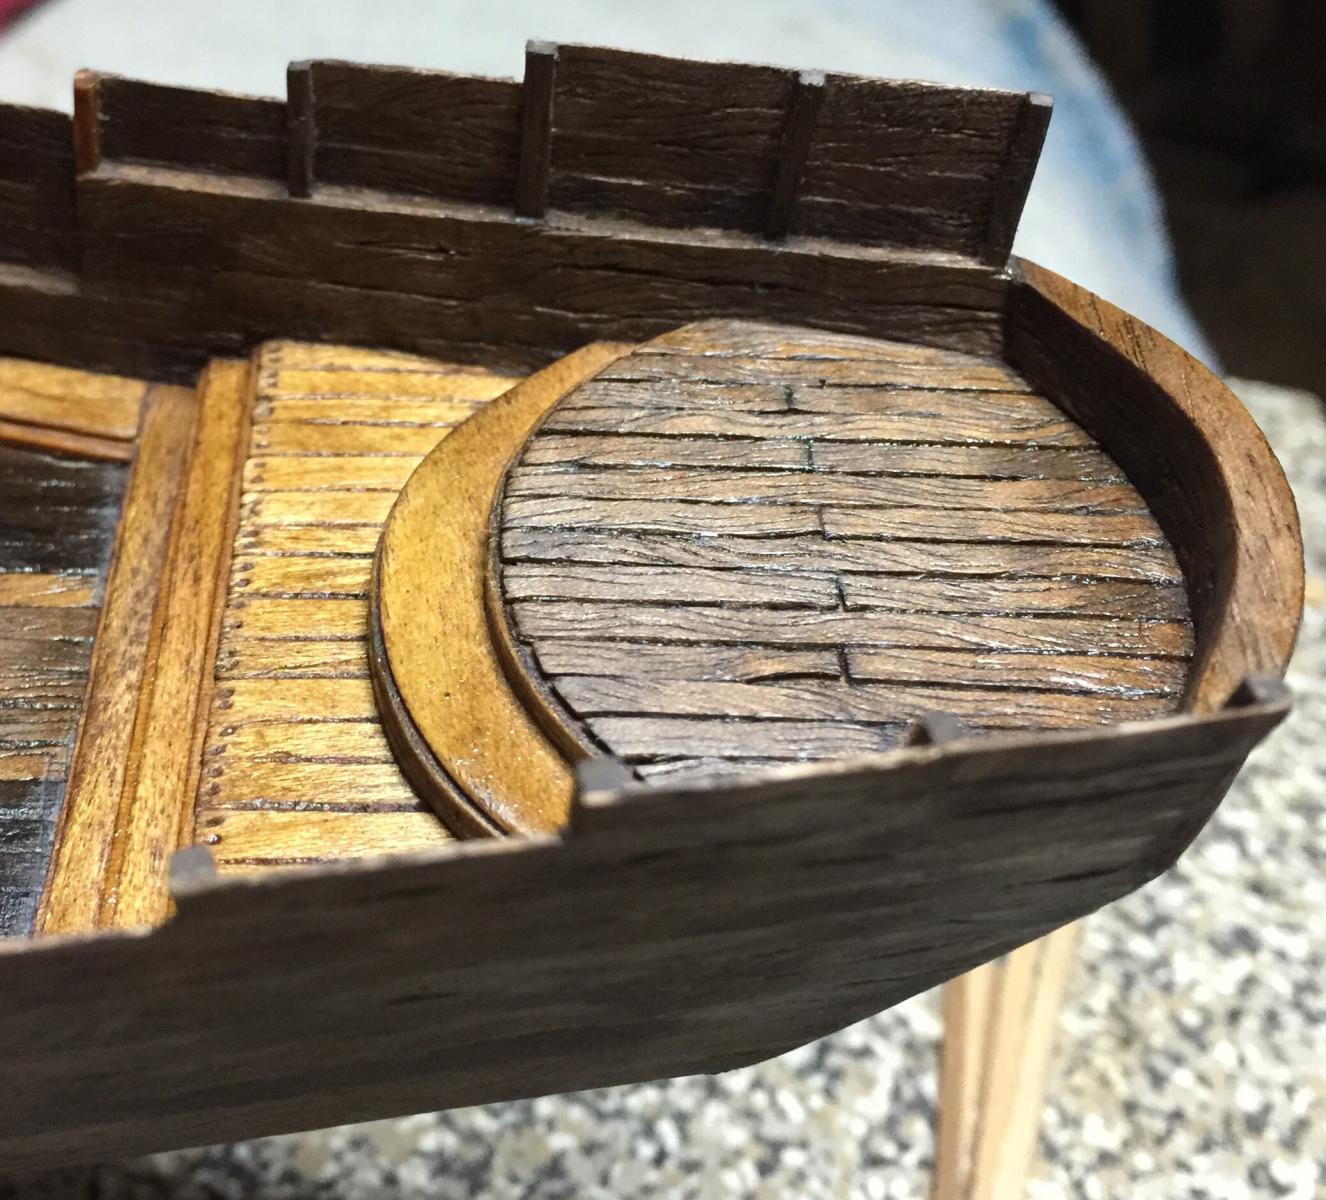
Many a day has Harry pounded his head against a tree trying to design a pleasing raised stern deck. Round and around Harry, Woodie and Red tossed ideas, and nuts, at each other. Finally after a warm glass of rum, Harry said its time, and sent Red and Woodie to deliver the finished plans to the minions.
They cut lumber, steamed strips to be bent and sharpens their chisels for the task at hand. Once the rough pieces were laminated, they fastened them in place and started whittling away and a form started to shape.
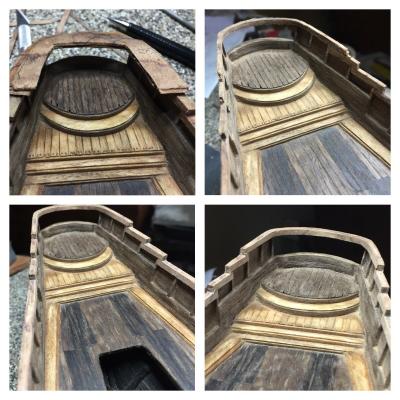
After shaping, filing and sanding the boys gave the deck and bulwarks a good cleaning before applying a nice coat of Minwax natural stain.
Red's youngest son Tiny had earlier been sent to fetch the newly trained parrot for the final call of the day. Upon his return, Red shouted at Tiny, "That ain't no parrot! What the heck kinda bird is that?" Fortunately Uncle Salty was there and he'd seen everything. "Son, that's a cockatoo! They can talk like a parrot but just with a little mans attitude!" "Aawk...splice the mainbrace...Aawk!" And we'll, there it is.
-
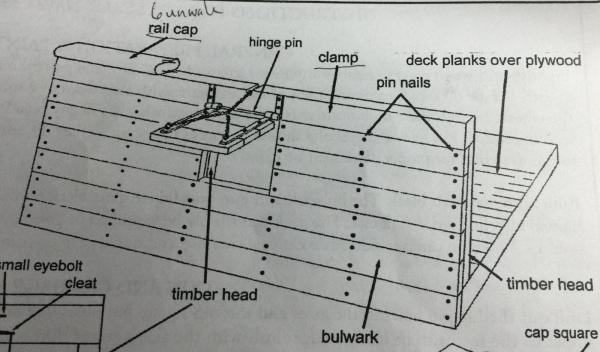
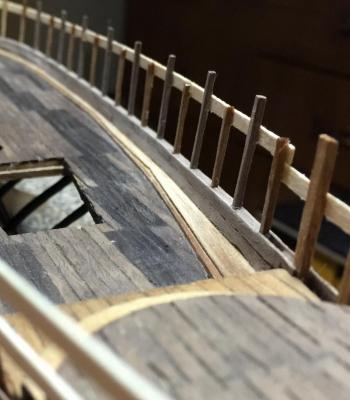
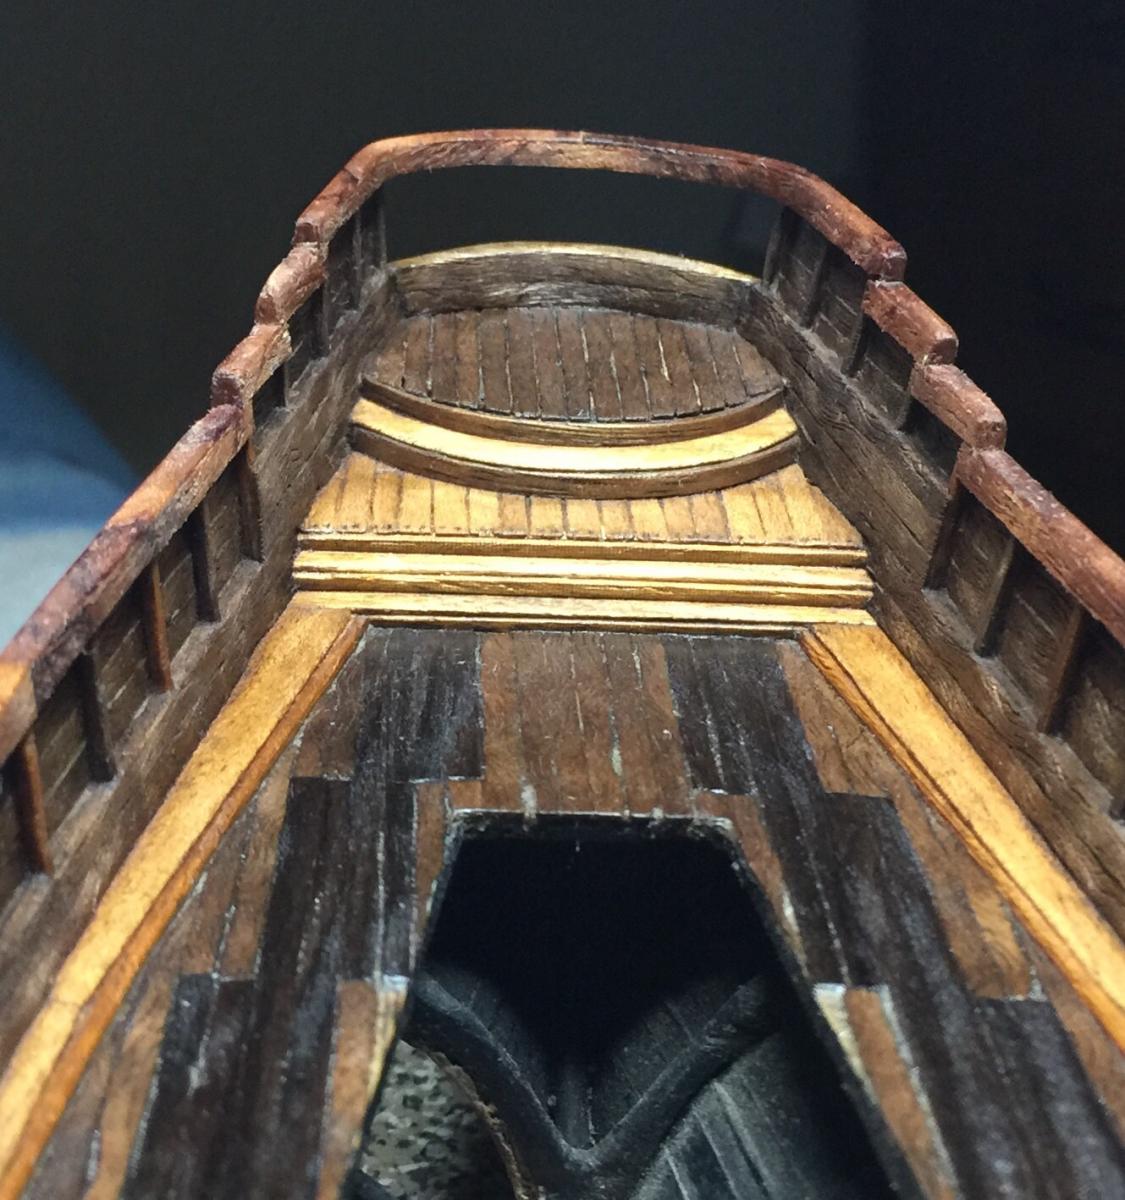
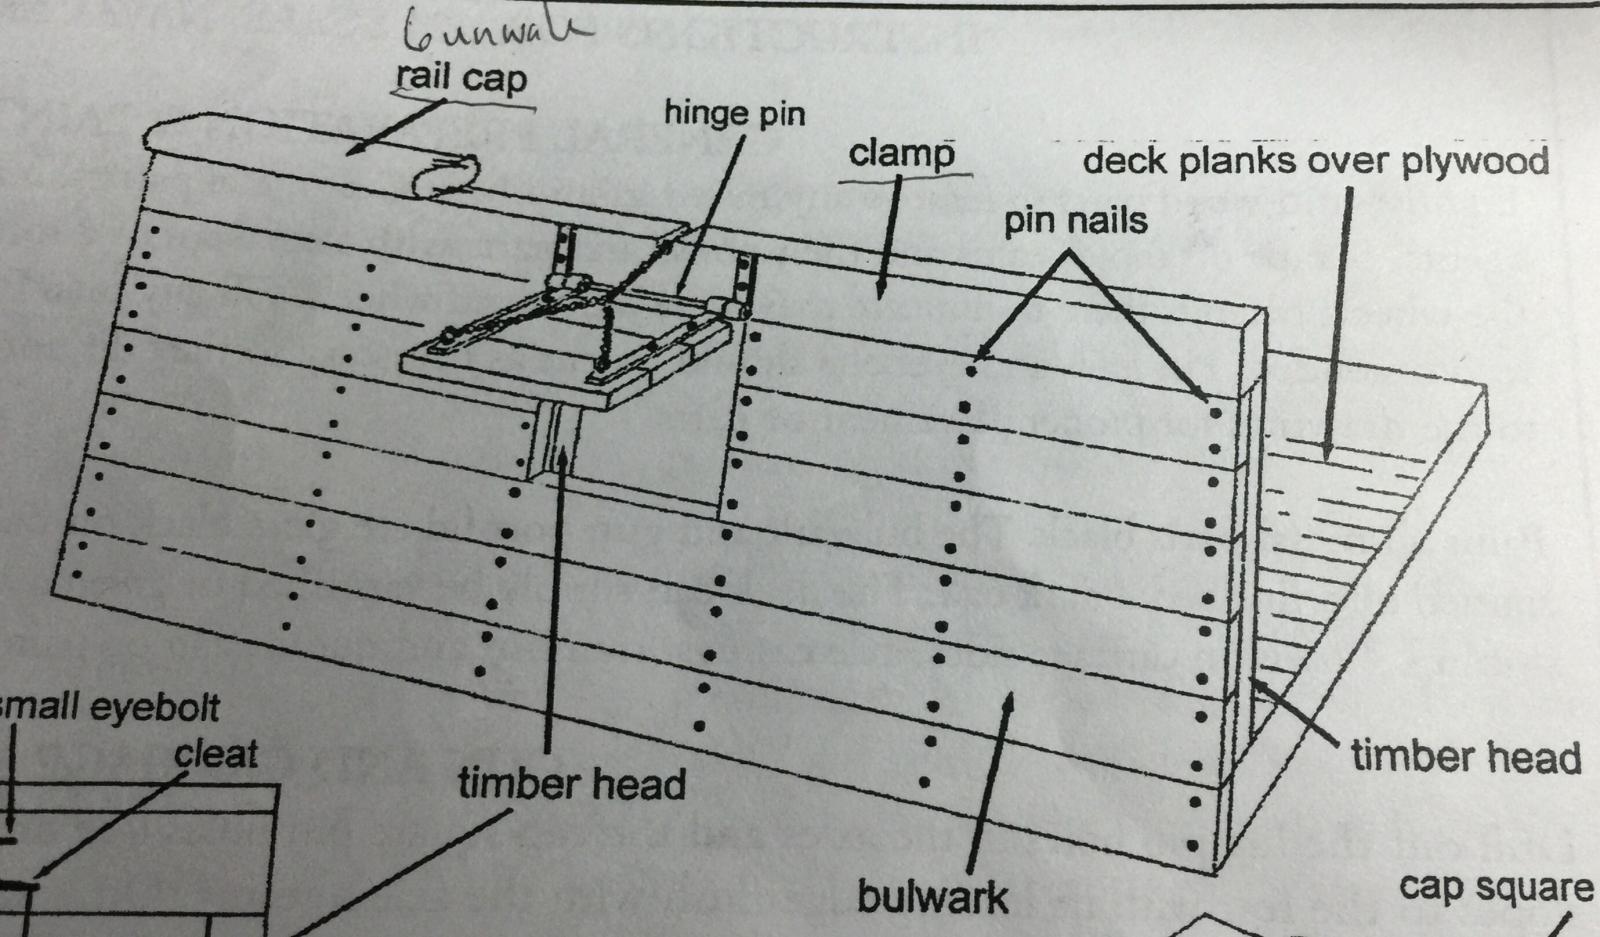
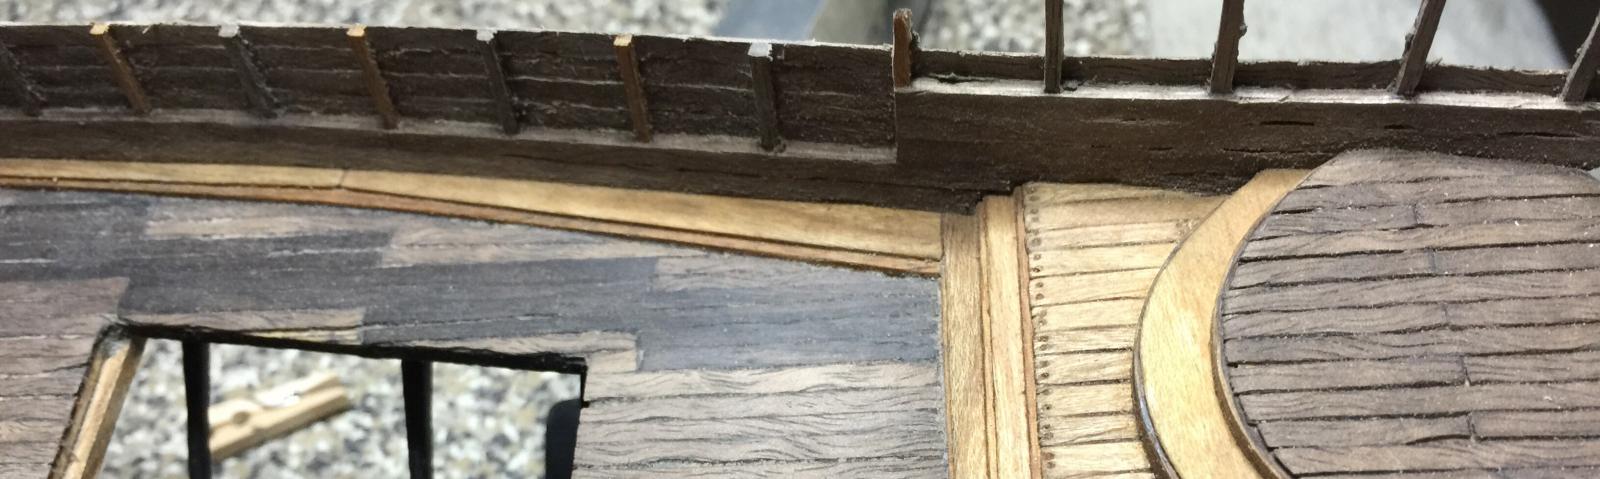
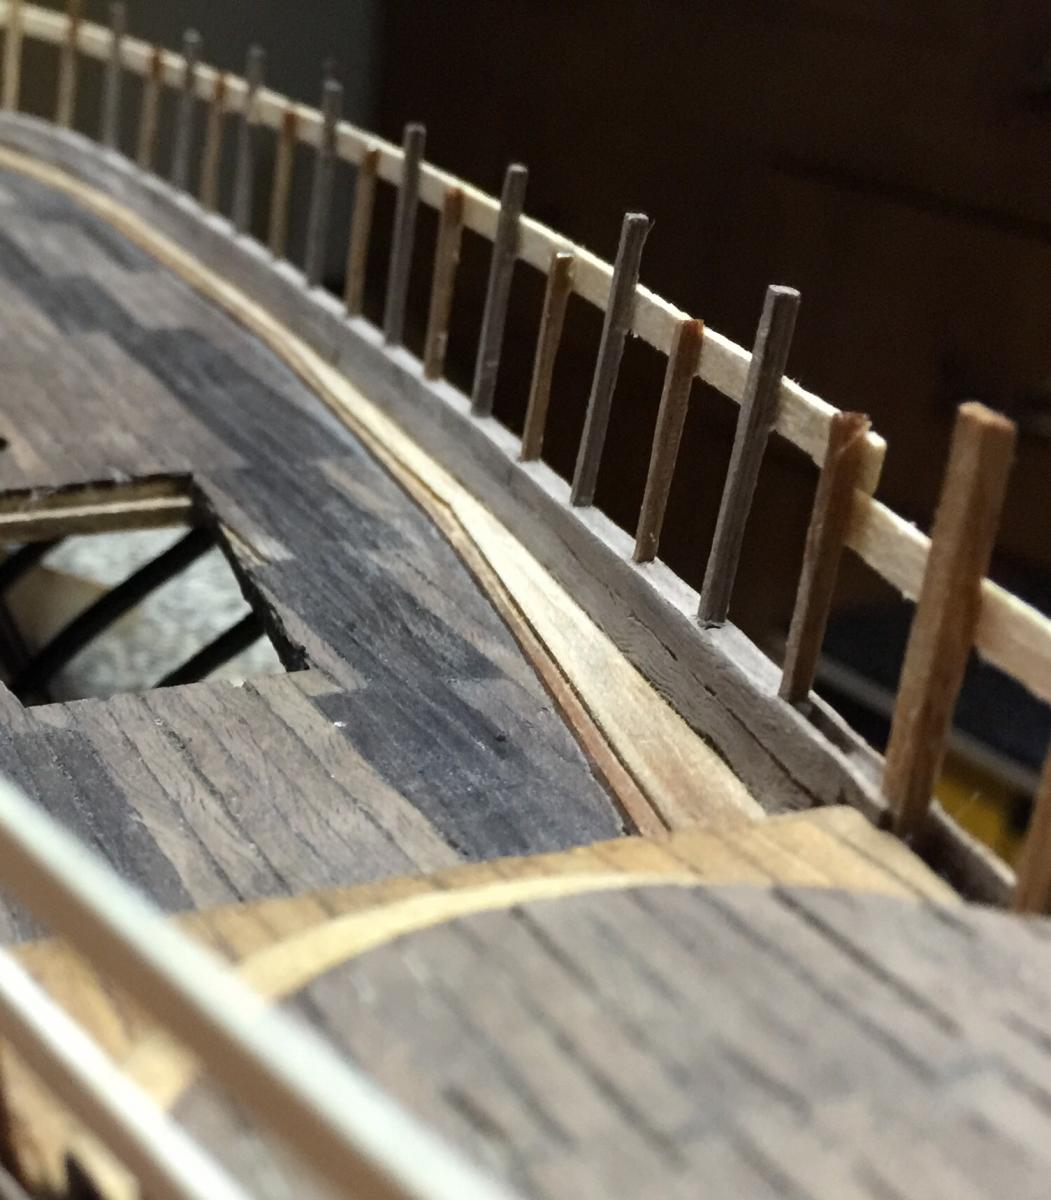
So first question of the day: Is it a gunwale or a rail cap? Thanks to everyone for the likes.
So the crew took a bite at the clamp (Q2: Is this also the correct term?) and decided to make it one big piece. So Woodie and Red made a template of the bulwark and used that to make the clamp(5 pieces laminated).

Once they were dry, the crew trimmed most of the bulk off before glueing to the top of the frames. Now don't be haters, Harry decided to return to the CA for this part. The reason for this was because he needed the clamp to give strength to the entire bulwark.
Finally, Woodie and Red directed the sanding: flush to the planking on one side, and flush to the framing on the inside. Now that everything is boxed in, it is really sturdy.
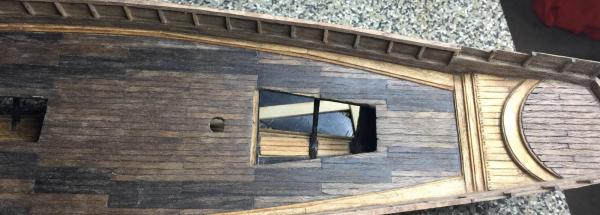
The work continues today with the crafting of the clamp on the raised stern deck.
This is the image that raises my questions.
- Salty Sea Dog, mtaylor, trippwj and 3 others
-
 6
6
-
Thanks CaptainSteve, Crackers, Ken and Boyd for your words of favor.
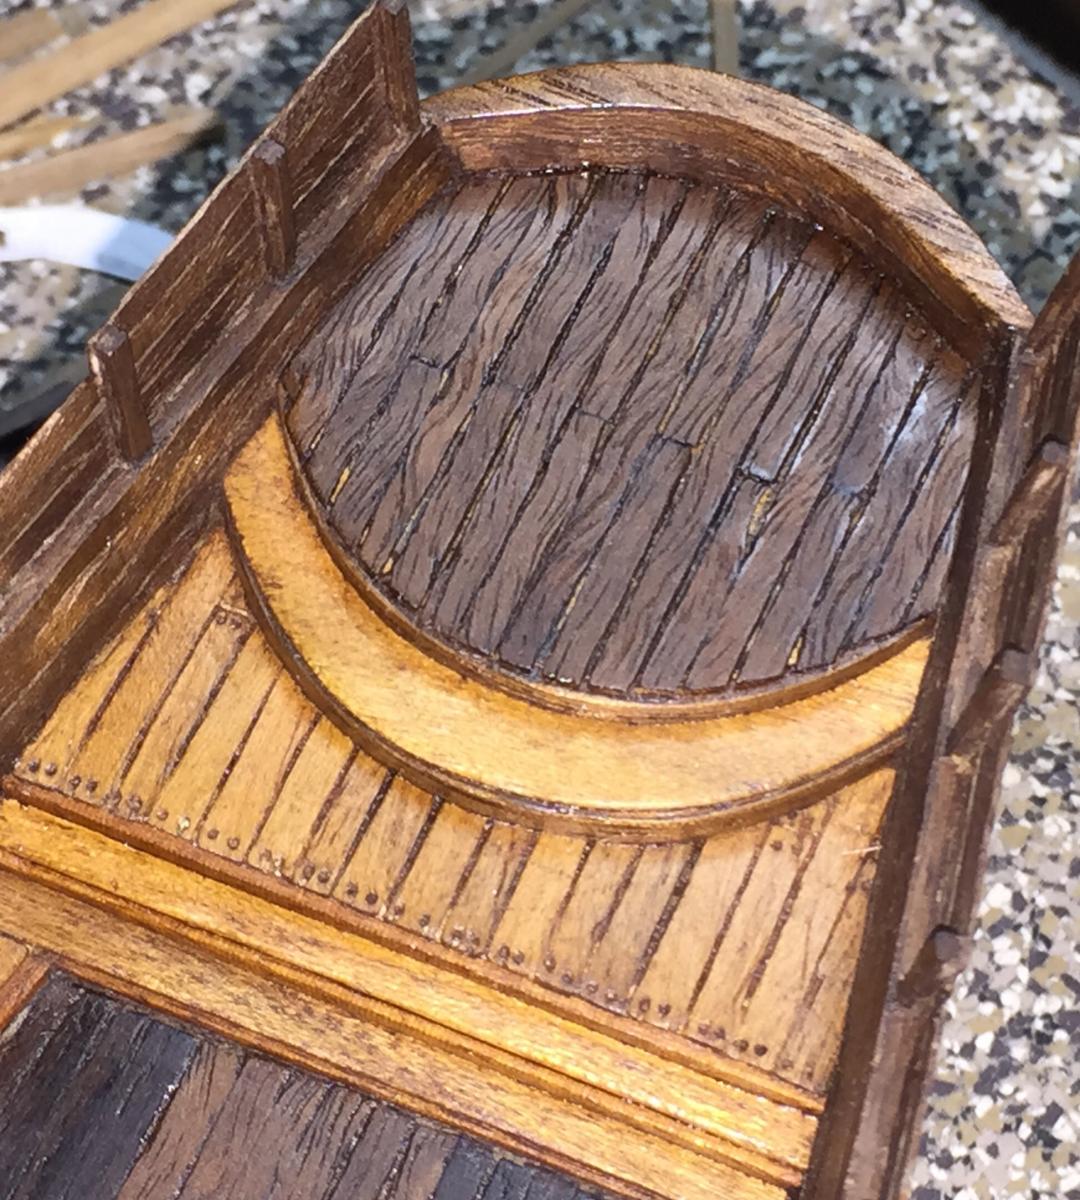
As for the finishes Boyd, I'm a big fan of Minwax and Murray's pure Australian beeswax. There are, in my belief, pros and cons for any finishes. What I like best with Minwax is you can use multiple colors of stain to gives nice depth to the wood. It ends up with a matte finish but you can put the beeswax on at the end and buff it to a desired shine.
On this build, up til now, I've been using a natural stain. This coat I used Early American which is not too dark. Because of the previous natural staining, colors don't soak in as much, this I like. It's easier to darken wood than to lighten it. I will most likely scrape off a good amount, leaving the cracks and crevices alone. This give it an aged look, which again, is personal preference.
I've used the straight beeswax on a lot of previous projects that weren't as delicate as these ships. It takes a bit of rubbing to get it deeper into the wood, so I only use it in places that are strong enough to work like the decking and planking.
I would suggest getting several pieces of scrap wood and experiment away. Varying the amount of sanding and length of time when applying can give you a nice variety with the same color. Check out how Buck finished his whaleboat for a different approach. Also a hard finish is easily dusted off, where a soft wax finish seems to attract dust.
With experimenting you'll be able to find a process that works for you. As many people are in this forum, there are as many ways to finish. Happy experimenting! Hope this is of any help and feel free to ask for any refinements that I may have skipped over.
-
Thank you George, Boyd, CaptainSteve, Buck, Ken and to everyone for the KOs on the like button. (Ken, I have a feeling that these squirrels may have captured a parrot and only taught it, "Aawk, splice the mainbrace, Aawk!")
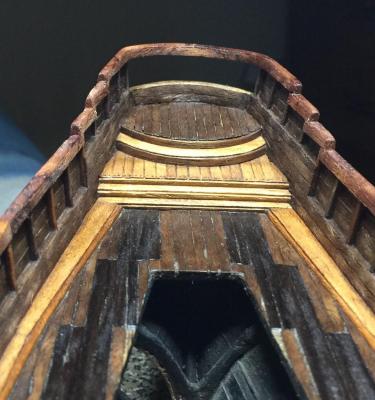
After checking in on Harry, I headed over to see how Woodie and Red were working out. At first, they thought there may be trouble, but to their shagreen, the men were getting along famously. Turns out, the Bawlz Clan were excellent singers of the Blues. This helped raise the morale since the Nutz Clan had been sanding and waxing wood for weeks.
Harry drew up more plans of raised stern deck, and working together, the clans joined forces to finish the work...

...and to all follow up with waxing of all the wood on the deck level.


-
Although Woodie and his rabble have been hard at work, a large number from boot camp have been dismissed due to lack of respect and nefarious activities. This has resulted in the Nuts Bros to seek out new, skilled labor and they've found a clan from Northern Ireland that are of the sort that the Nutz Bros have been searching for.

The Bawlz Clan are a rough group and hard to understand, but their work ethics are great. Woodie has teamed up with the leader of the Bawlz Clan, who simply goes be the name Red, to ensure that all the men get along.
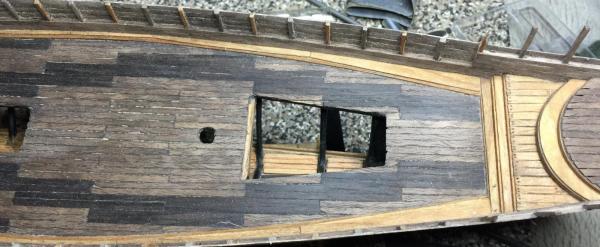
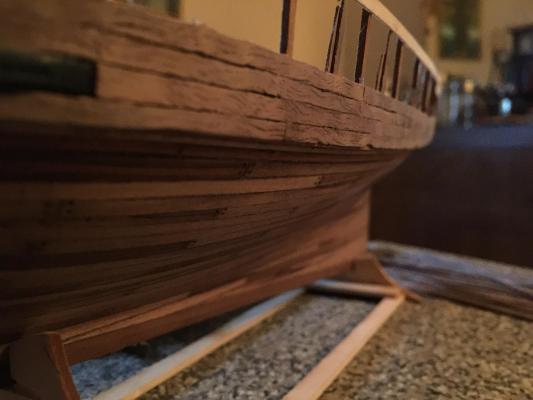
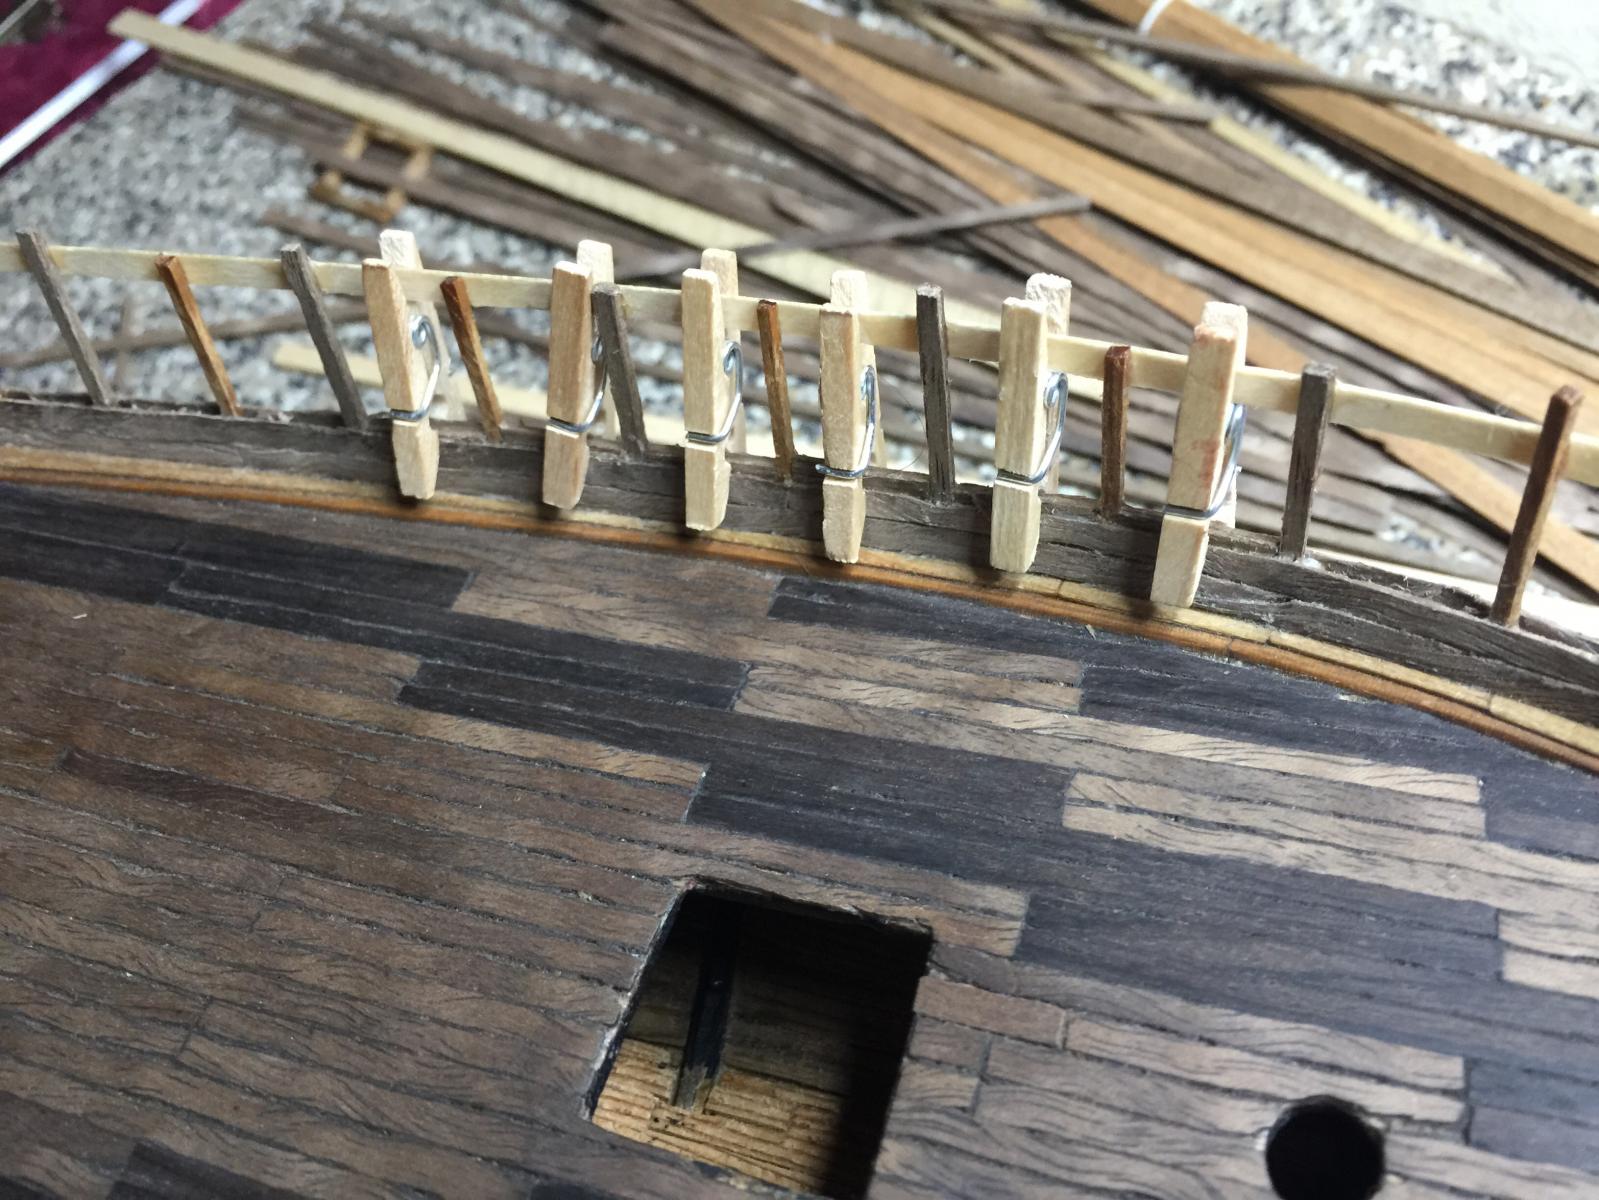
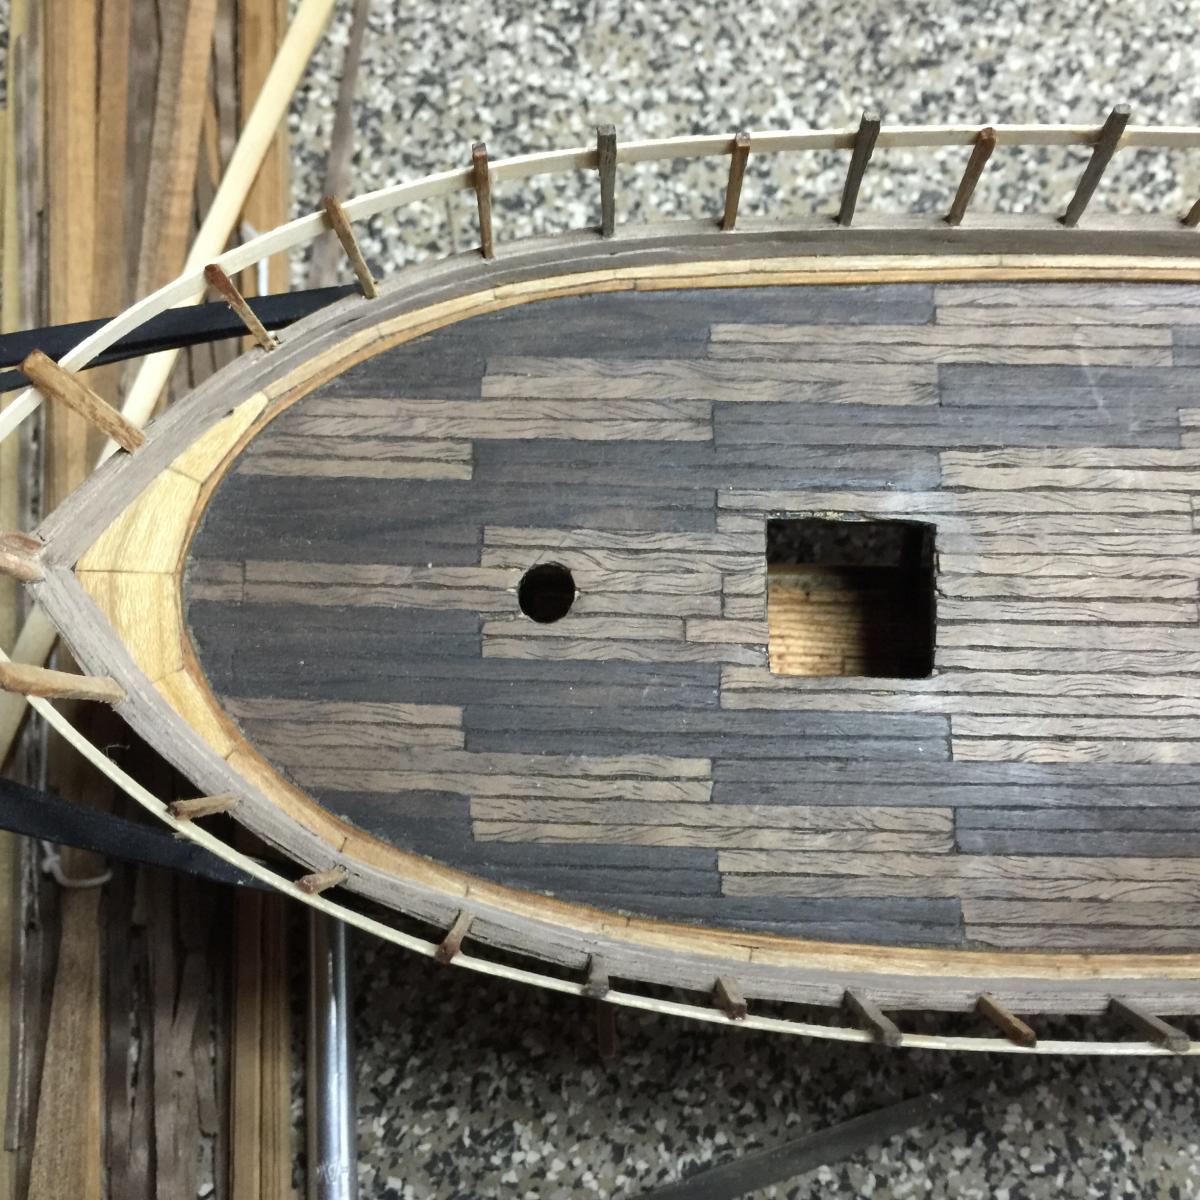
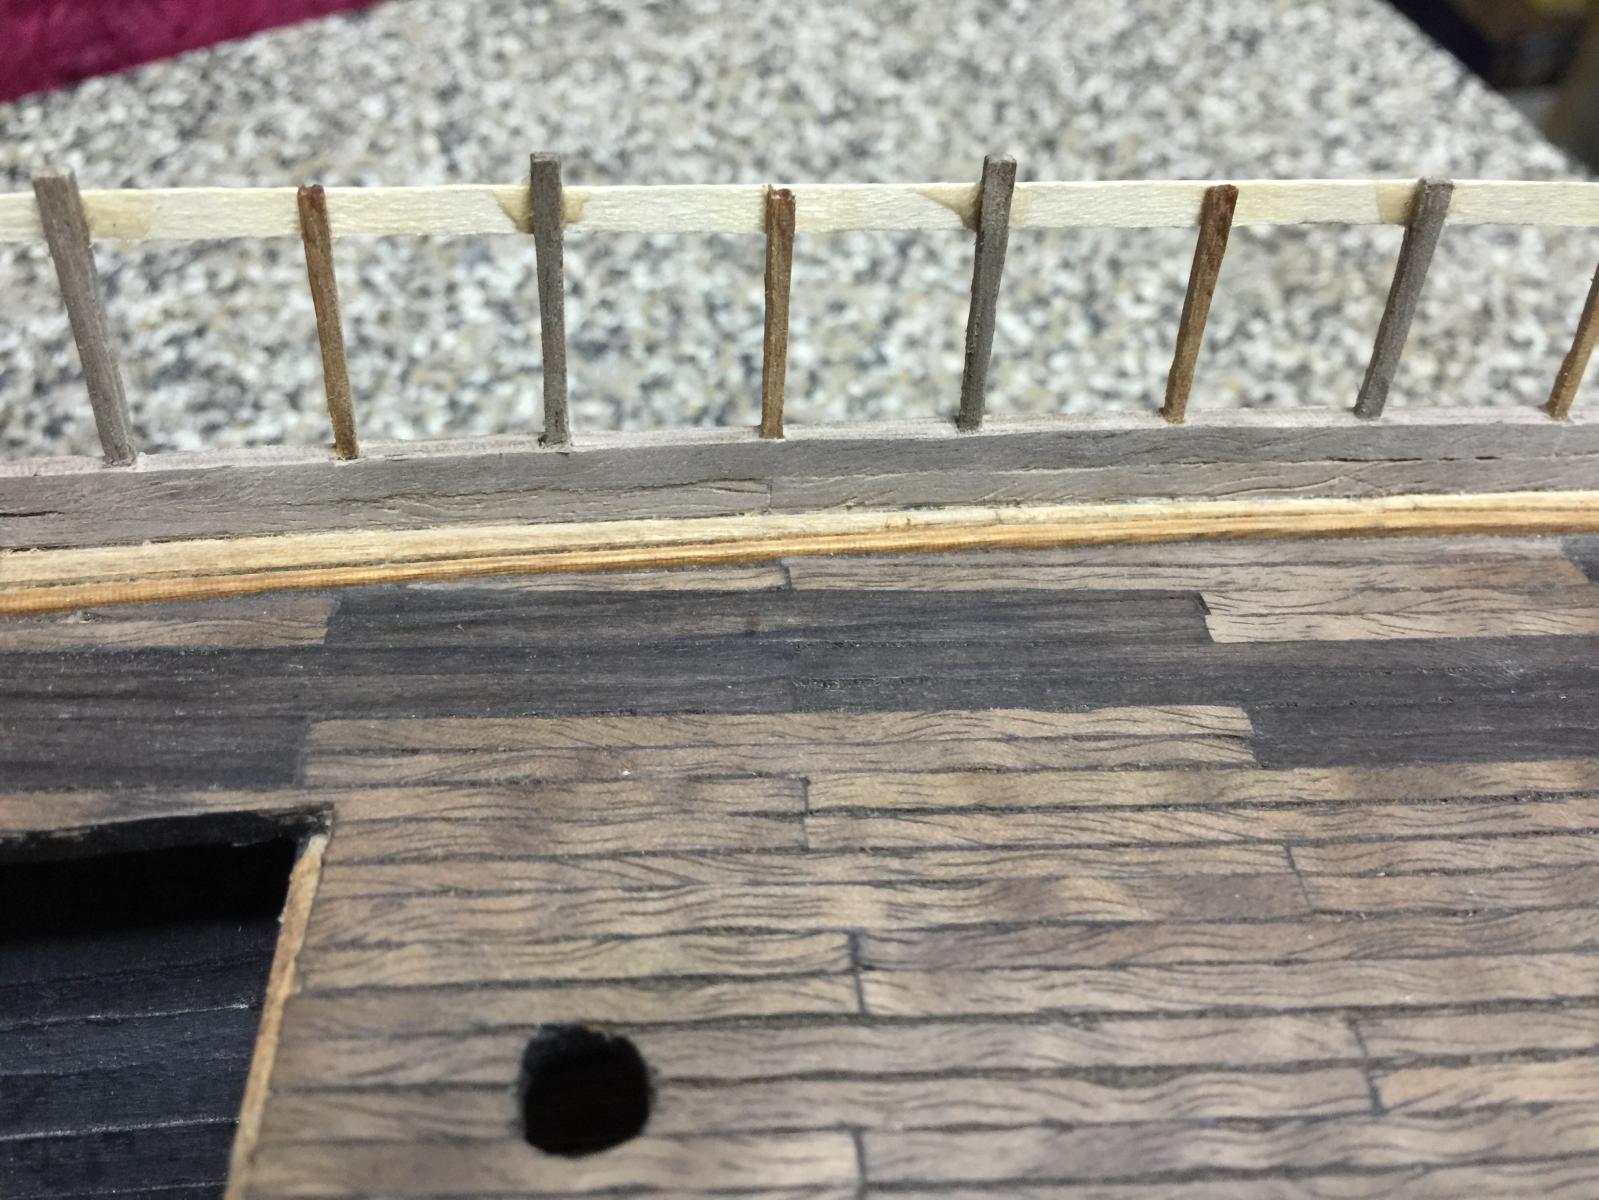
They have made progress on the exterior planking of the bulwarks. They are now at the proper height so the frames have been trimmed down, next to be fitted with clamp and rail cap. A smaller group headed to the stern deck to begin building as was done on the main deck.


I'm hoping to be back home by the end of the week as I've been working out of town the last two weeks. Then I'll be able to meet with the Bawlz and see how they're working out.
-
Awesome lantern and keg Buck! Now for the candles, matches, tobacco and a supply of hard bread...
- CaptainSteve, GLakie, JesseLee and 1 other
-
4
-
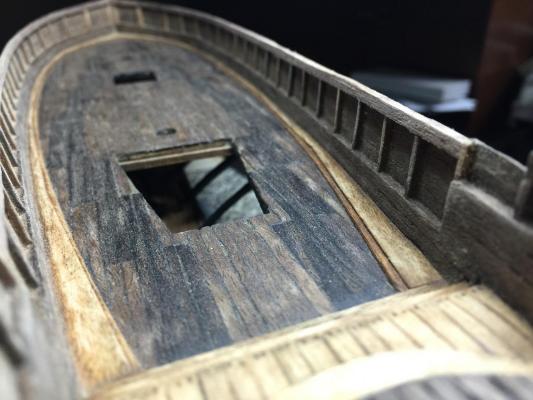
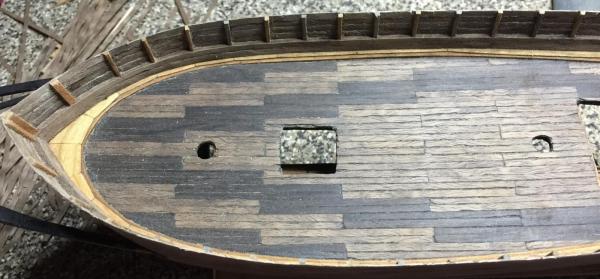
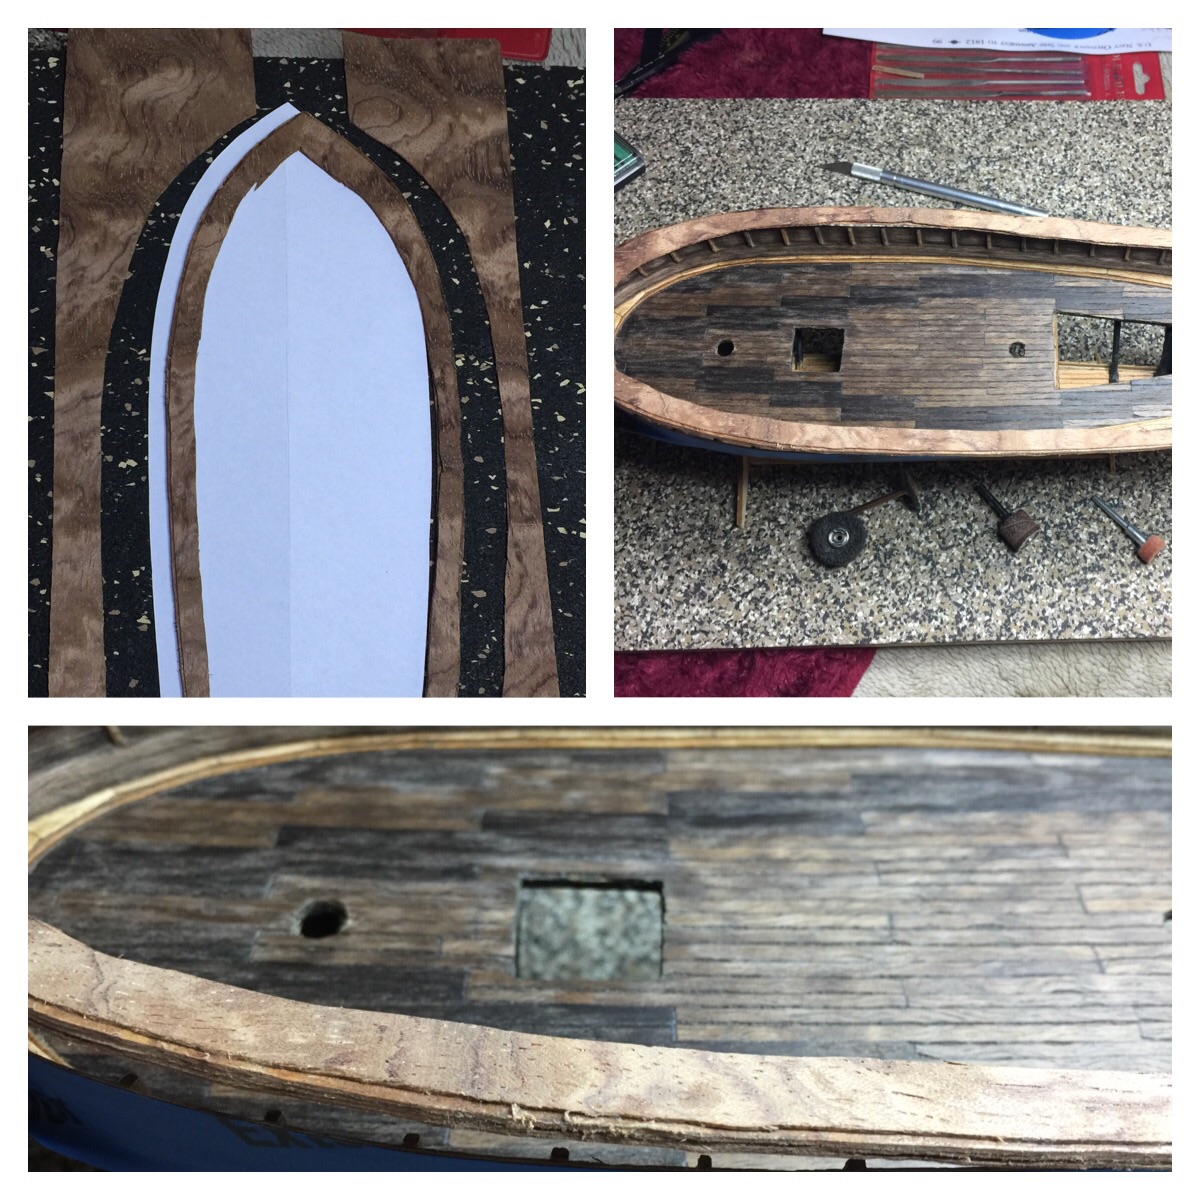
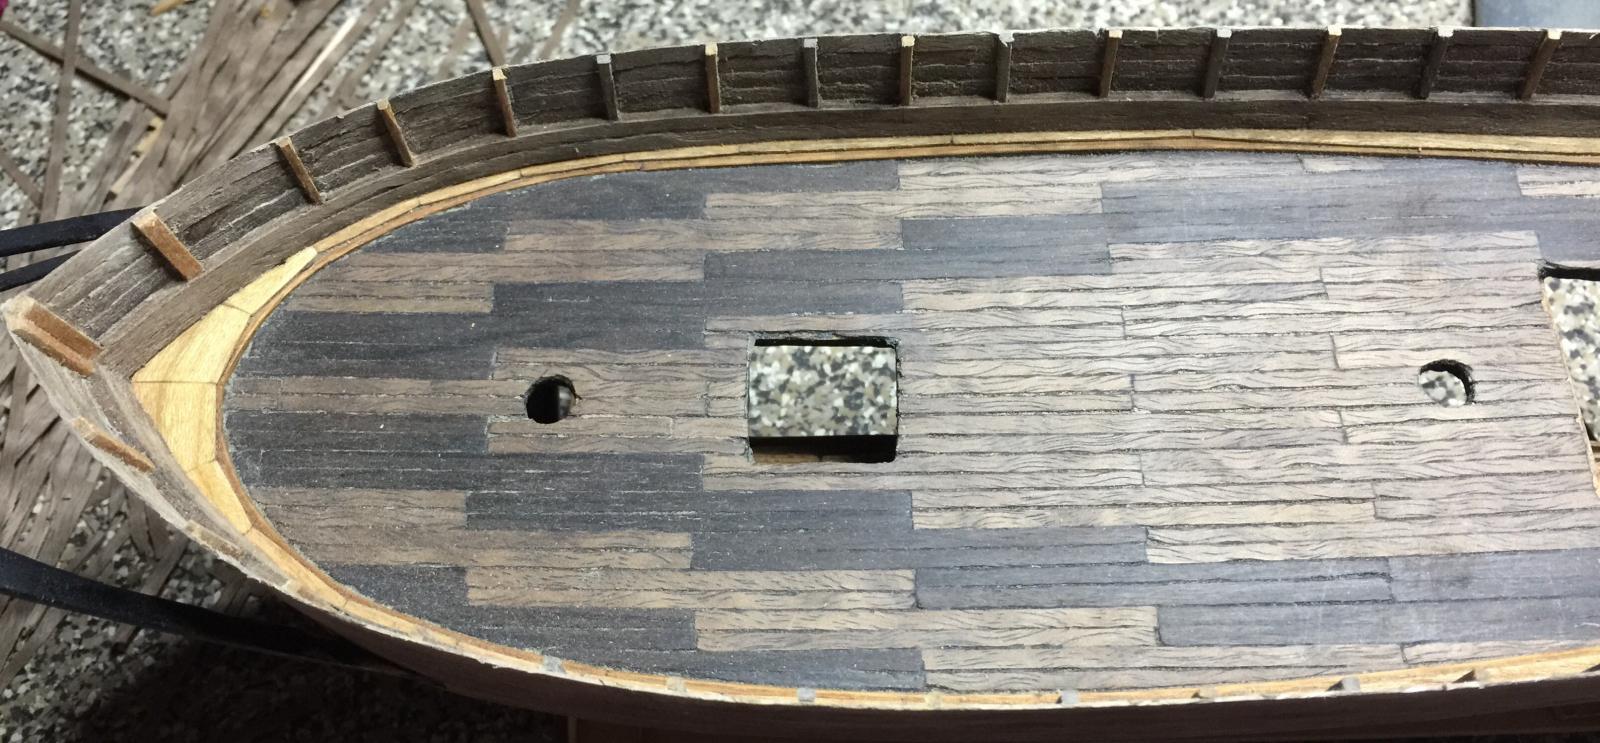
Come to find out the Nutz Bros have been keeping busy. Harry and Woodie had taken detailed measurements of the bulwark from my smoothbore kit and modified them to fit their ship
First on their list, add additional frames made of dark walnut...

...after which filler block were inserted between the frames.

All hands were on deck to assist in the tedious part of trimming down the filler blocks...
...and rough sanding of the internal planks of the bulwark.

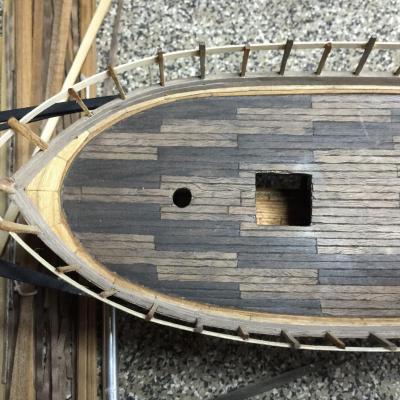
This process was done from bow, back to the raised stern deck.
The details are still being made as to how to finish off on the stern bulwark. But for now, Woodie and his minions will continue planking upward to the clamp and rail cap on the outside only.
- UpstateNY, mtaylor, Salty Sea Dog and 3 others
-
6
-
George hit the nail on the head CaptainSteve. The candle is stationary so you move the piece to be soldered over the flame. Same concept as the torch and hands free plus greater control of the heat. This would only work on a smaller object that can be easily maneuvered. In my case with the tubes, it critical to hold them perfectly level, or all the individual ones will fall out.
Another way, I've used a zippo lighter. Burns a bit hotter, but you have to be careful not to pick it up to extinguish it, blow it out like a candle.
- Salty Sea Dog, GLakie and CaptainSteve
-
3
-
Thanks Boyd for the kind pep talk.
Cannon 1.0 failed the balance test...didn't feel like taking a brass bullet to the chest! Cannon 2.0 had a solder failure and blew off the base ring near completion...3 evenings and 8+ hrs gone in a blink of an eye! I probably could have saved it and made a repair, but the OCD has a tight grip over me. I would end up starring at it in disgust til I made a better one.
So by cannon 3.0, determination kicked OCD to the side. 6hrs straight with gentile shaping, and Now I can live with it. I had arrogantly thought I was pretty good at soldering, having joined many a copper pipes together. I have thrown that notion into the trash bin.
One way that I found helpful was to solder with a candle. It freed up a hand and allowed for much greater control of temperature, but I still have much to learn.
- GLakie, Canute, Salty Sea Dog and 1 other
-
4
-
Very nice, very nice indeed CaptainSteve! I cannot even imagine partaking in such a grand build as yours at my stage in the game! And just remember, a sharp blade hurts less than a dull one when cutting across ones finger.
- CaptainSteve, src and GLakie
-
3
-
Thanks George, Ken, Buck and to everyone for the likes.
You guys are having more faith in me than I am about now! I might have to build a burial plot to hold all the twisted and jacked up parts that don't make it into a picture. You may be right Buck, I may be avoiding the inevitable Optivisor.
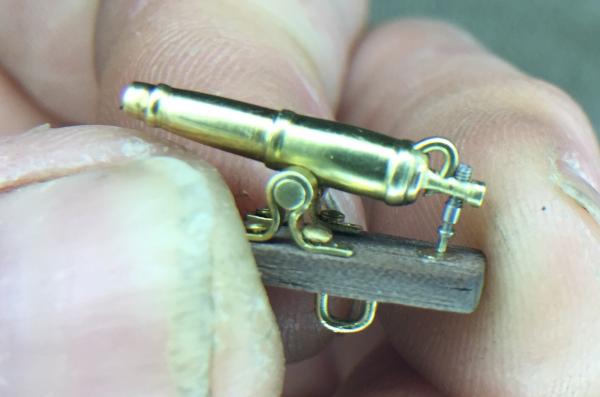
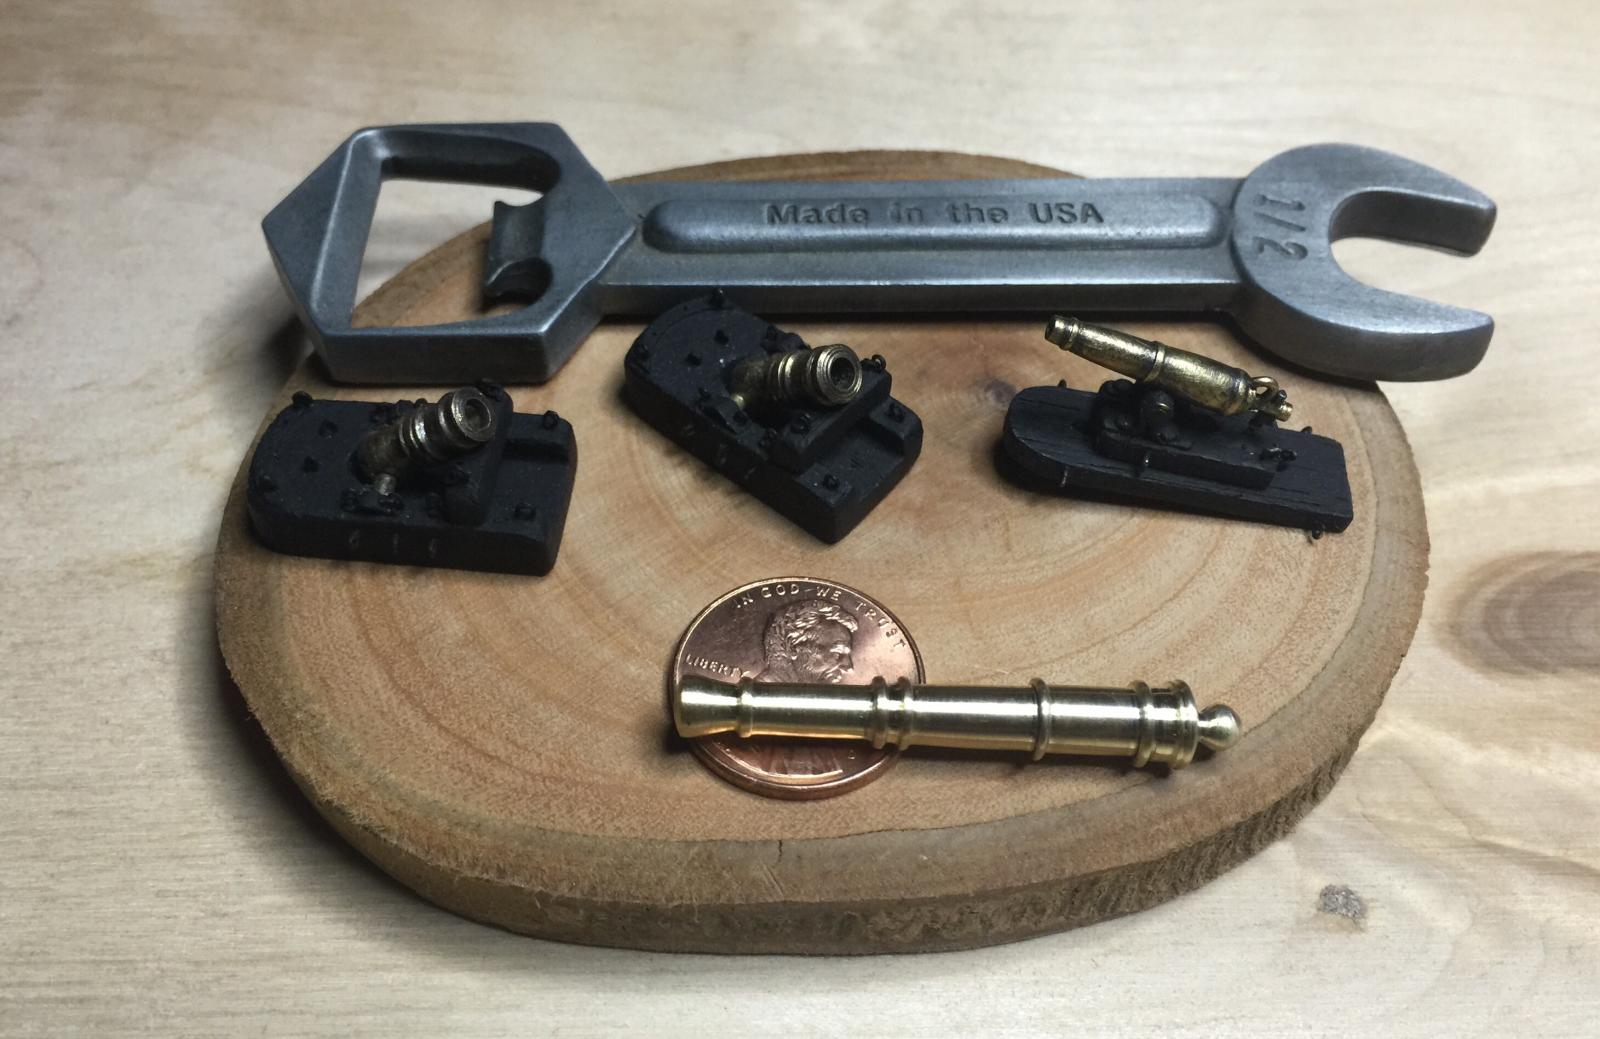
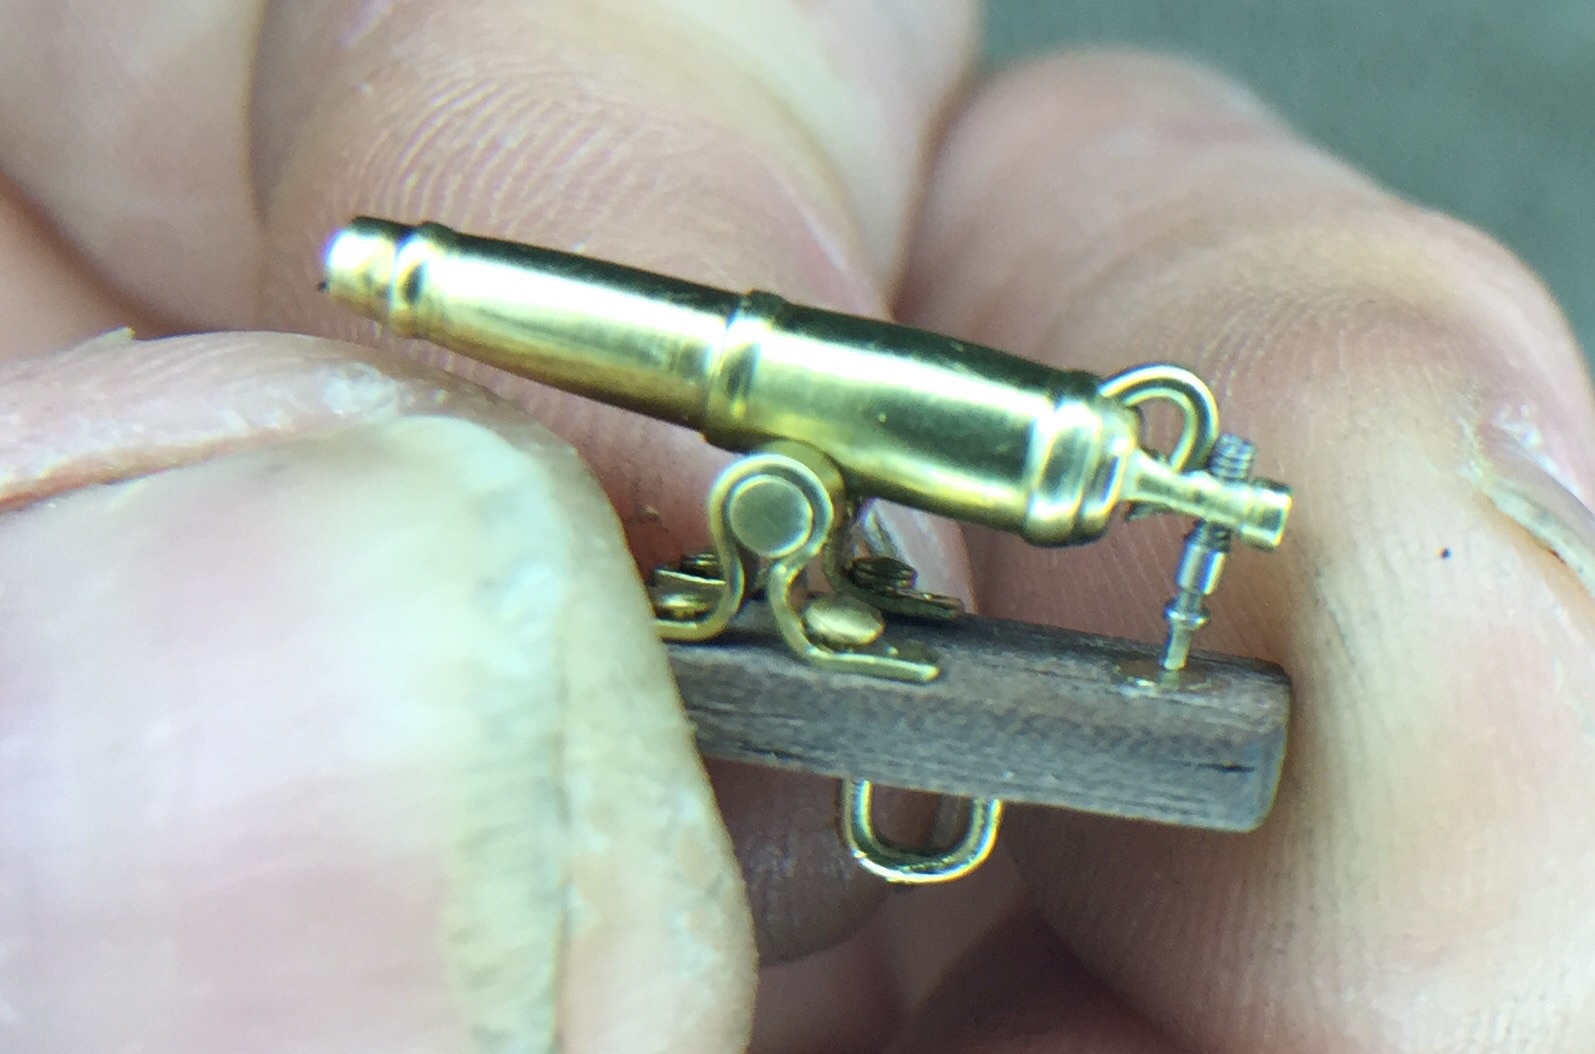
I've been busy with work but was finally able to finish cannon 3.0 today. I now have a nice supply of scraps to turn into culverins later on.


-
Here's the end product. Thanks Ken, I'll have to keep those boys trudging ahead.
Now that I have some good dimensions, it's back to the pirate cutter. Many a modification will be in store to keep me and the Nutz family busy for awhile.


- mtaylor, Salty Sea Dog, GLakie and 4 others
-
7
-
Thank you George, CaptainSteve, Buck, Mark and Boyd for the likes, assistance and encouragement.
Hey George, you are correct, I just added a whole lot of work for myself with the gun ports and sweep ports.
Hey Mark, thanks for the links. I had seen those plans somewhere and had to do some digging through piles of rubble to find them. The dimensions for the 12pdr matches up with this kit. Also, I think it was near the first link, there's a really cool plan for a stern lantern.
Hey Boyd, I'm definitely loving the magnifying lamp. It doesn't give me the crazy eyes like the reading glasses do.
- CaptainSteve and GLakie
-
2
-
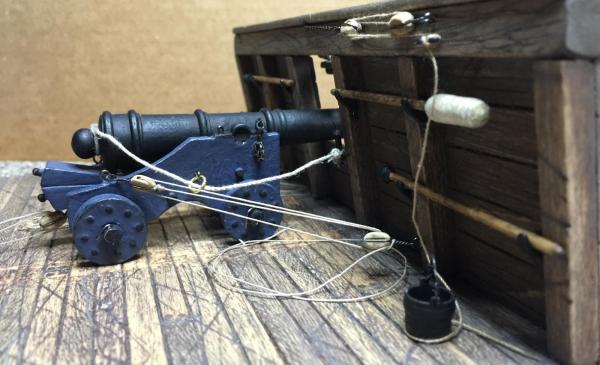
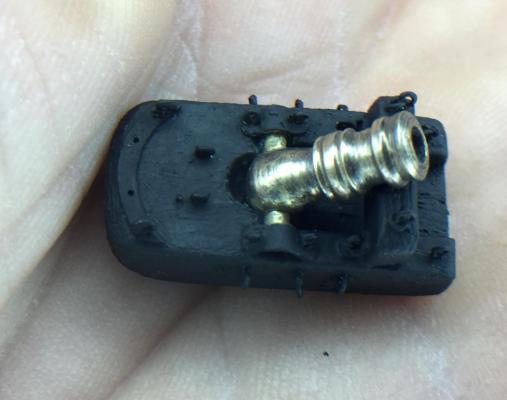
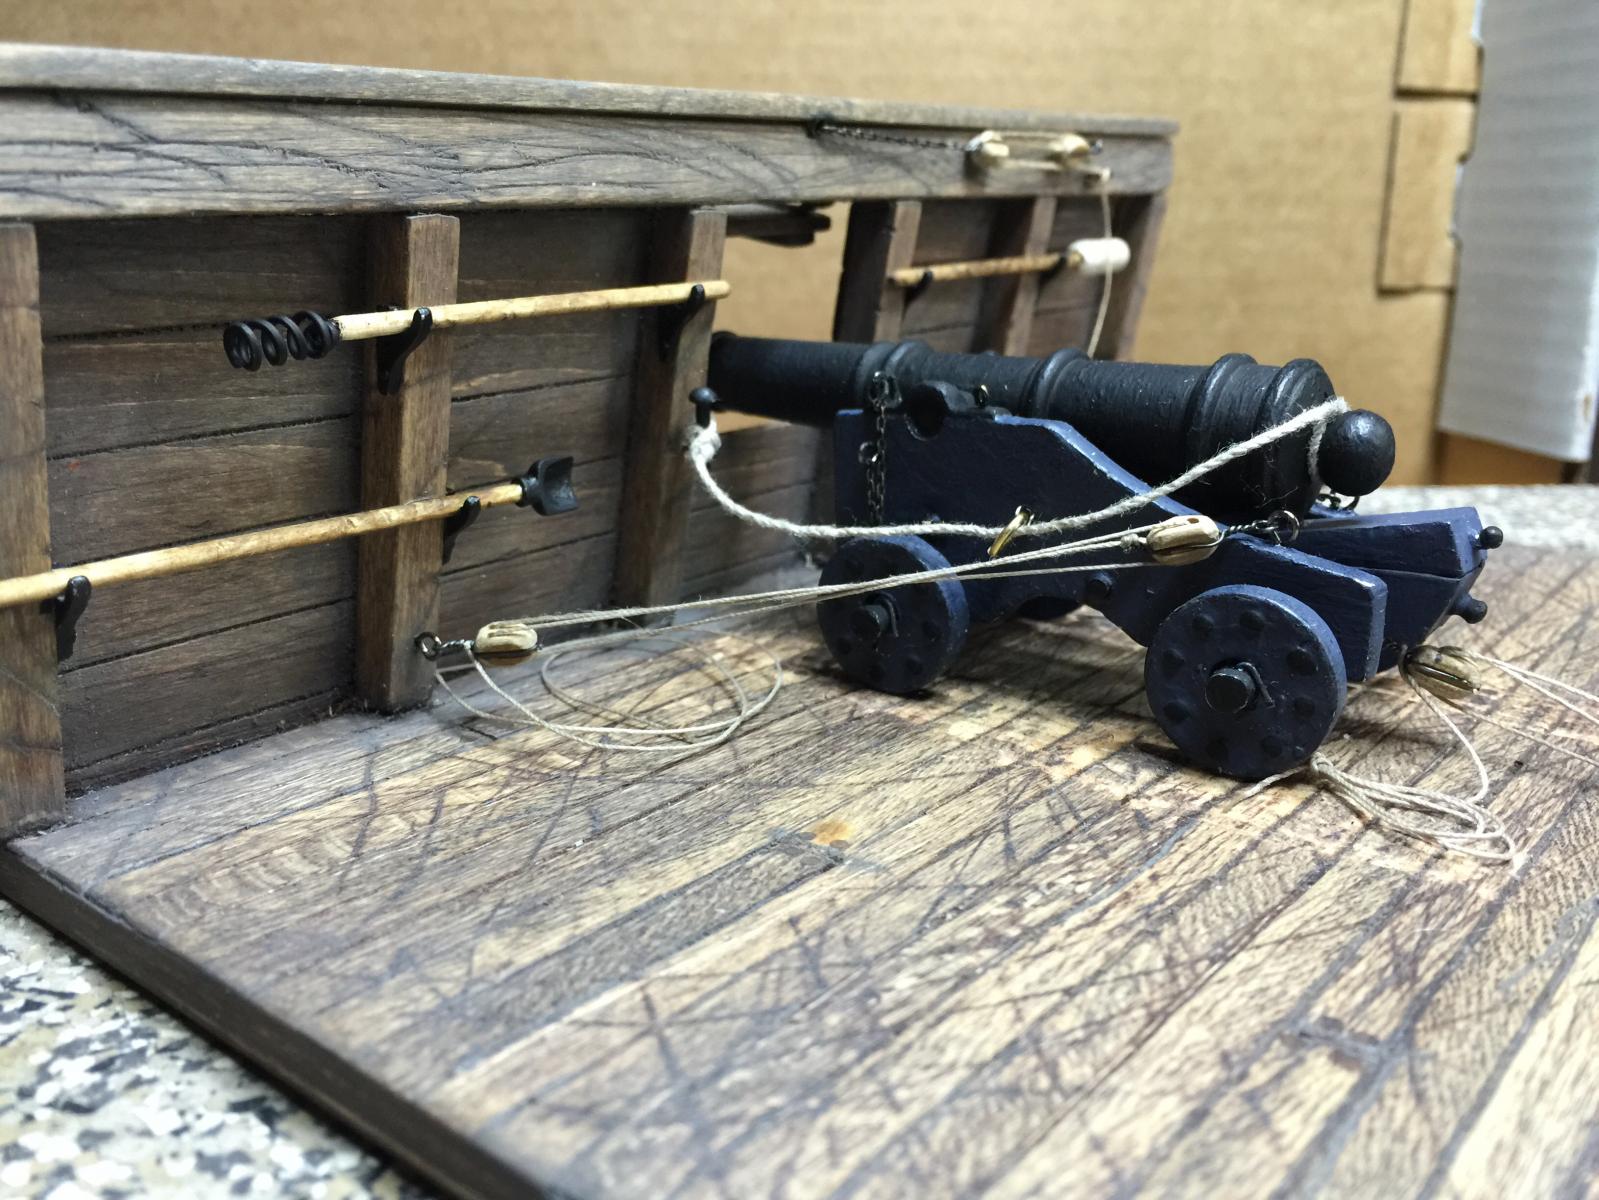
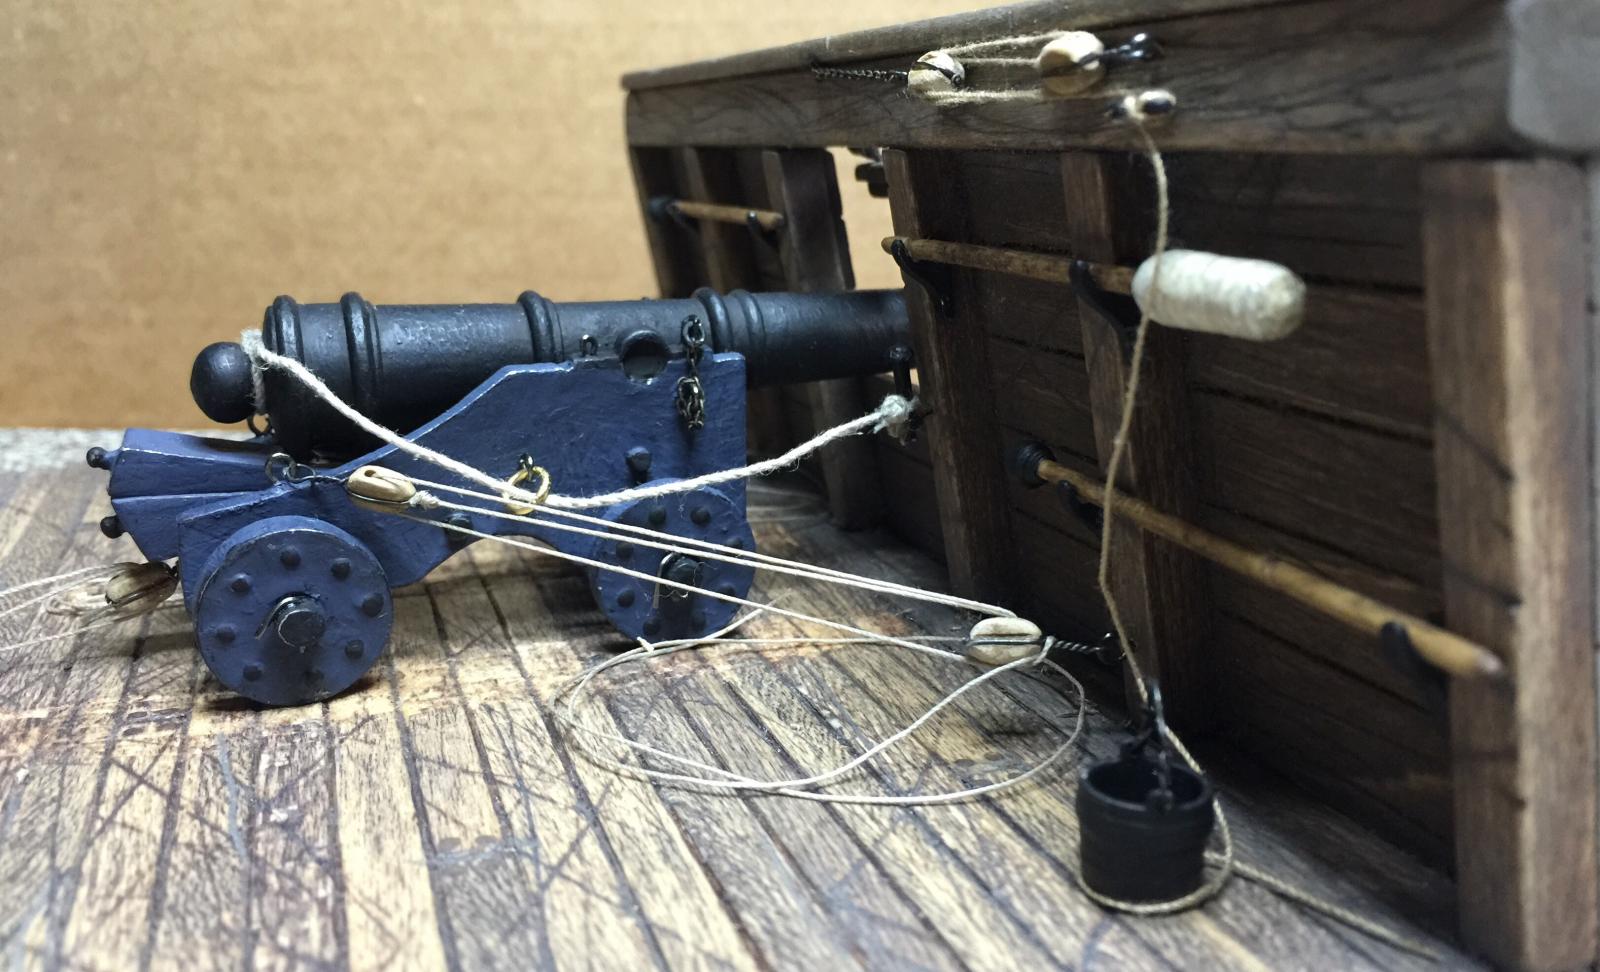
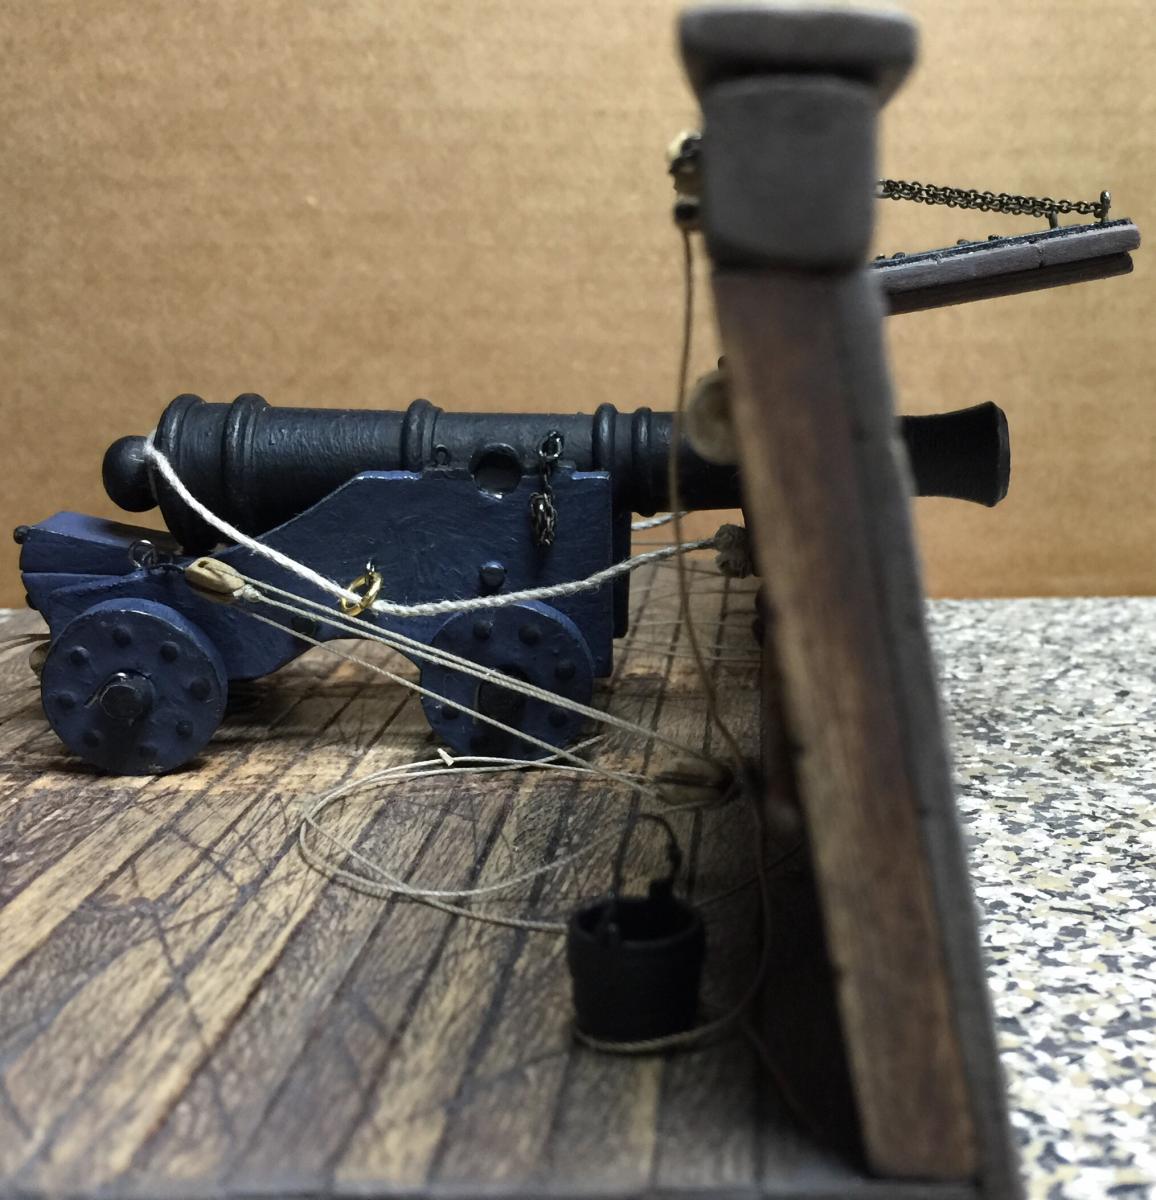
So I went off kilter a little bit again. I picked up a 2008 version of an 18th century naval smoothbore by MS. I wanted to get more accurate dimentions for the cannons and gun ports.
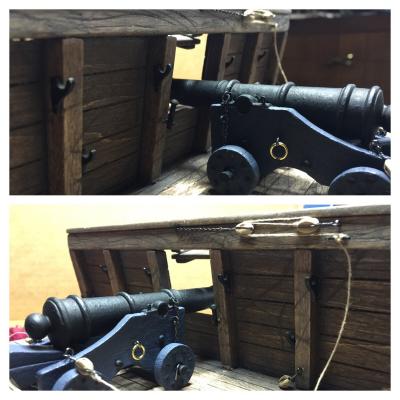
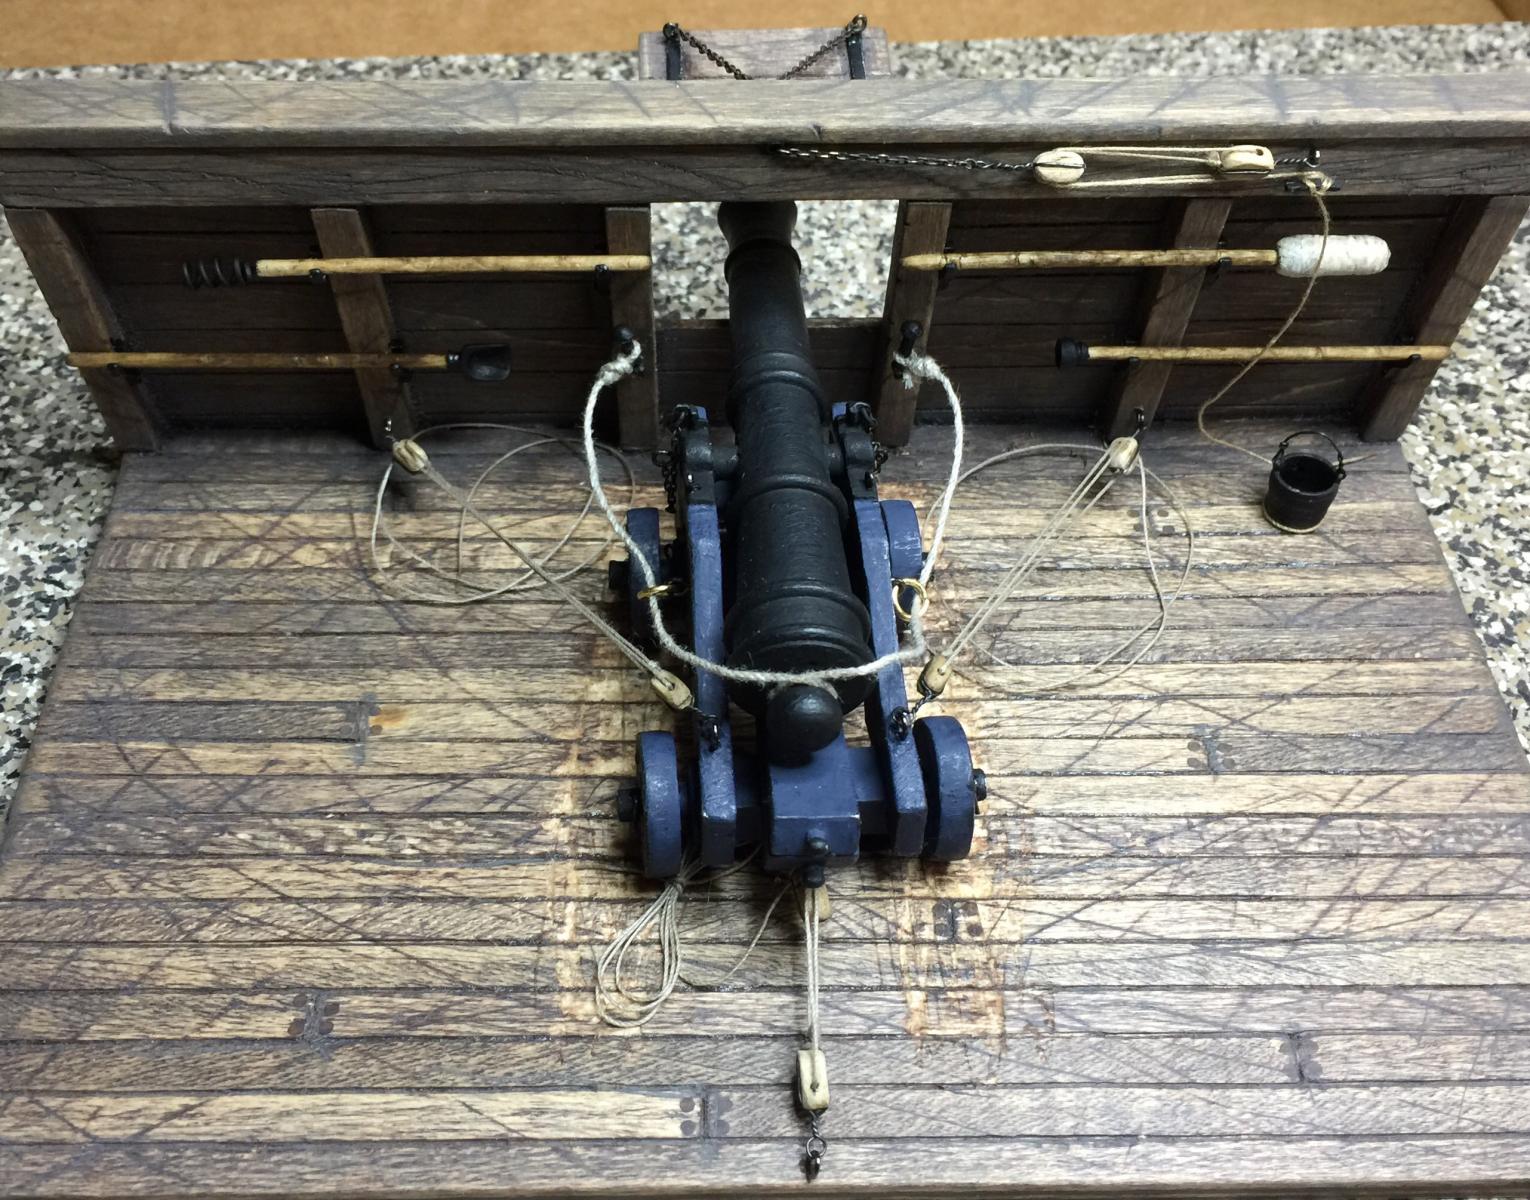
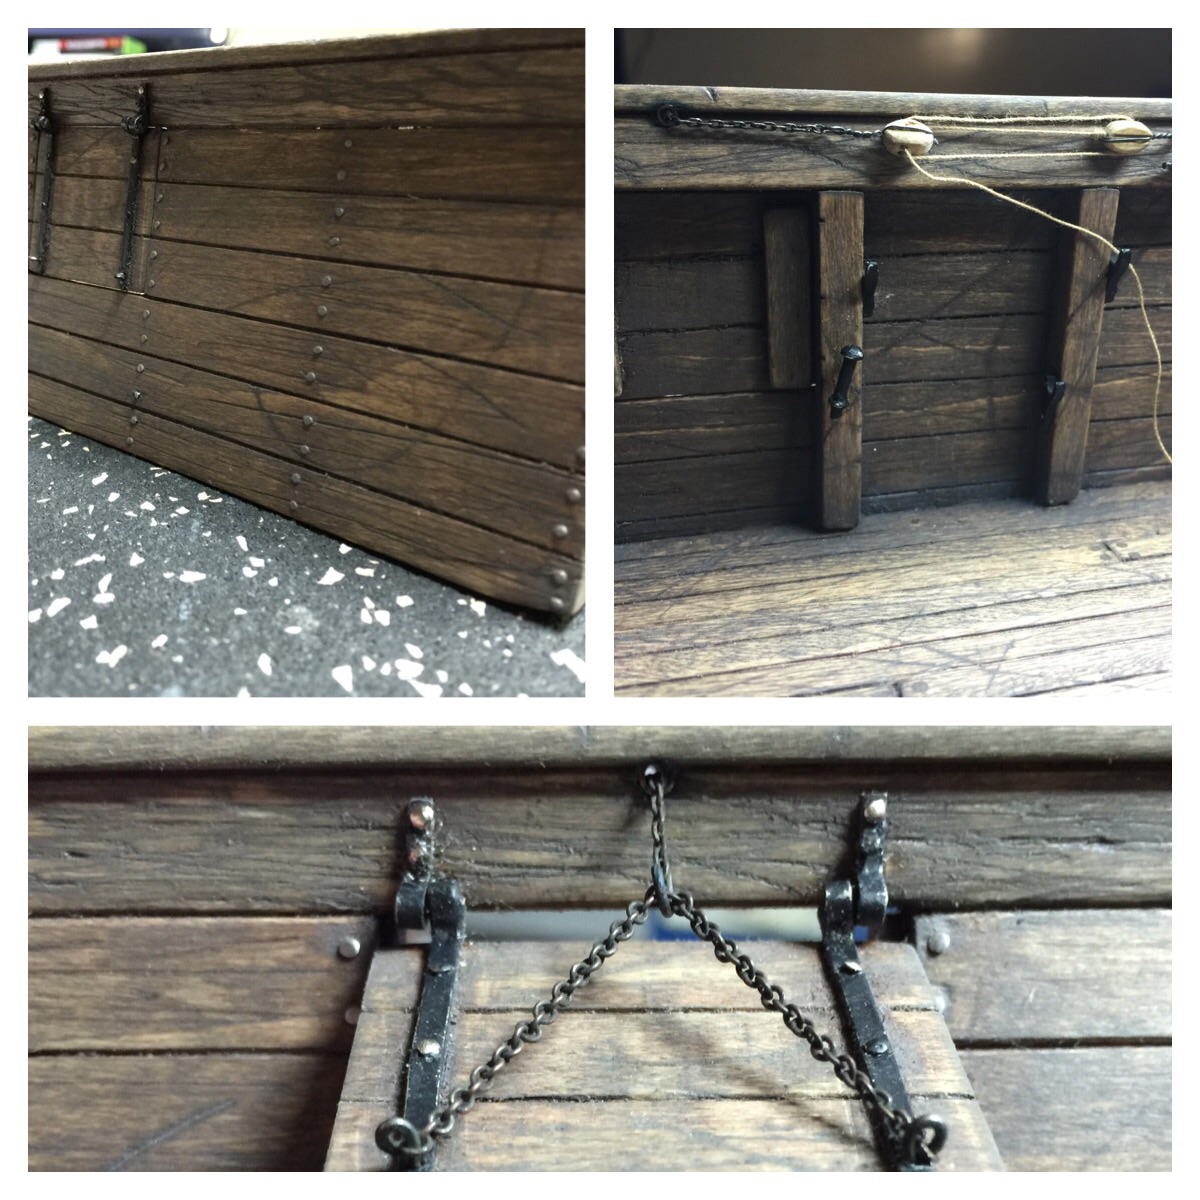
Just like my version of the 18th century mortar, this was a simple, straightforward kit that I would definitely recommend. Everything for the cannon is cast Britannia and the rest is basswood. I switched out all the brass eyelets with gunmetal and added a brass tube above the port lid for the chain to pass through. For all the wood I finished similar to my Launch kit.
It was beaten up with a hook blade and then aged oak gel stain was applied, sanded then early American applied then final sand with a light coat of grey minwax. The Britannia was ground down, removing all the cast eyelets to be replaced with gunmetal. Then all parts CA'd and painted matt black and dark blue(I like it better than the recommended red).

What I have left is the tackle with single and double blocks and make a sponge, rammer, scoop and worm.
All parts were measured off and then converted from 1:24(cannon kit) to 1:64 for my pirate ship. This is where I'm at odds. A guy did a new version of this kit on YouTube an said it should be 1:16 instead of 1:24.
{At 1:24 entire length of real life cannon would be 100 inches with bore of 4.56, this woul be a 12pdr}
{At 1:16 entire length or real life cannon would be 66.72 inches with a bore of 3.02, this would be a 4pdr}
For height at top of top rail - 1:24 is 64.8 inch and 1:16 is 43.2 inches in real life. These are drastically different and leaves me unsure what's correct. From where I sit, 1:24 seems to be what it is. Anyone have some guidance for me?
-
Wow Boyd, everything looks absolutely awesome! I see the force is strong with you! I really like that you're covering all the ply edges, it makes the structure appear very solid. I do like the idea of using netting and am looking forward to seeing your secret garden greenhouse.
-
Thanks Mark, Ken, George, Tom and everyone for the likes.
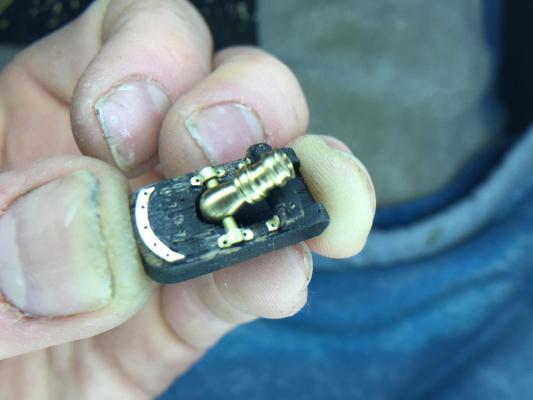
The new magnifying lamp works great. I was able to see small enough to get a screw out of my watch parts for the rear of my carronade.
- GLakie, CaptainSteve, Salty Sea Dog and 3 others
-
6
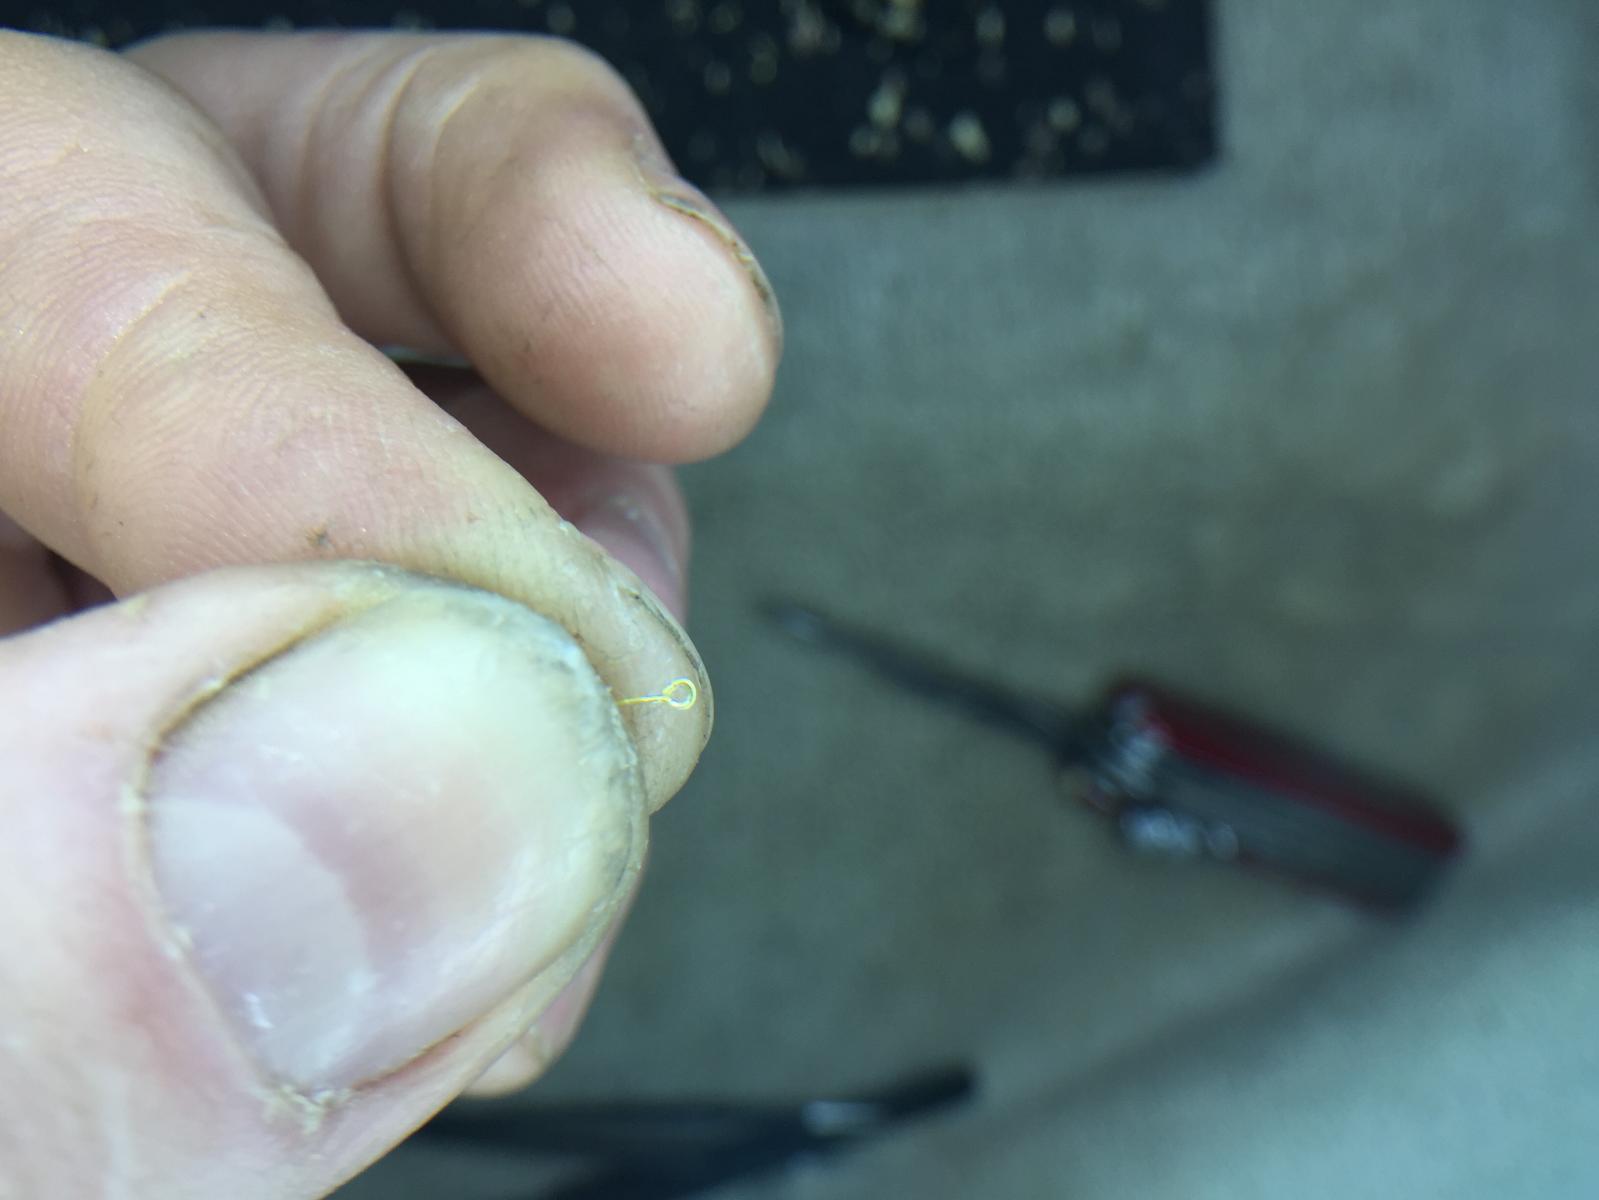
-
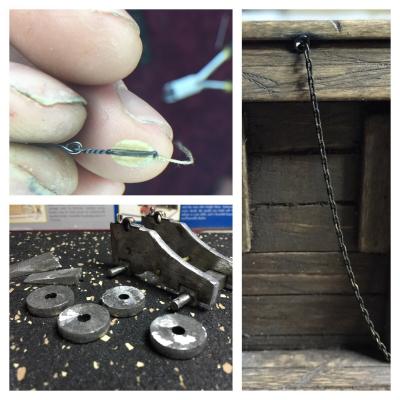
I ended up working with some of the tiny stuff today. I used 28ga wire to make all the eyelets.


Final look except I still need to do the chains.
- Canute, riverboat, Salty Sea Dog and 4 others
-
7
-
-
-
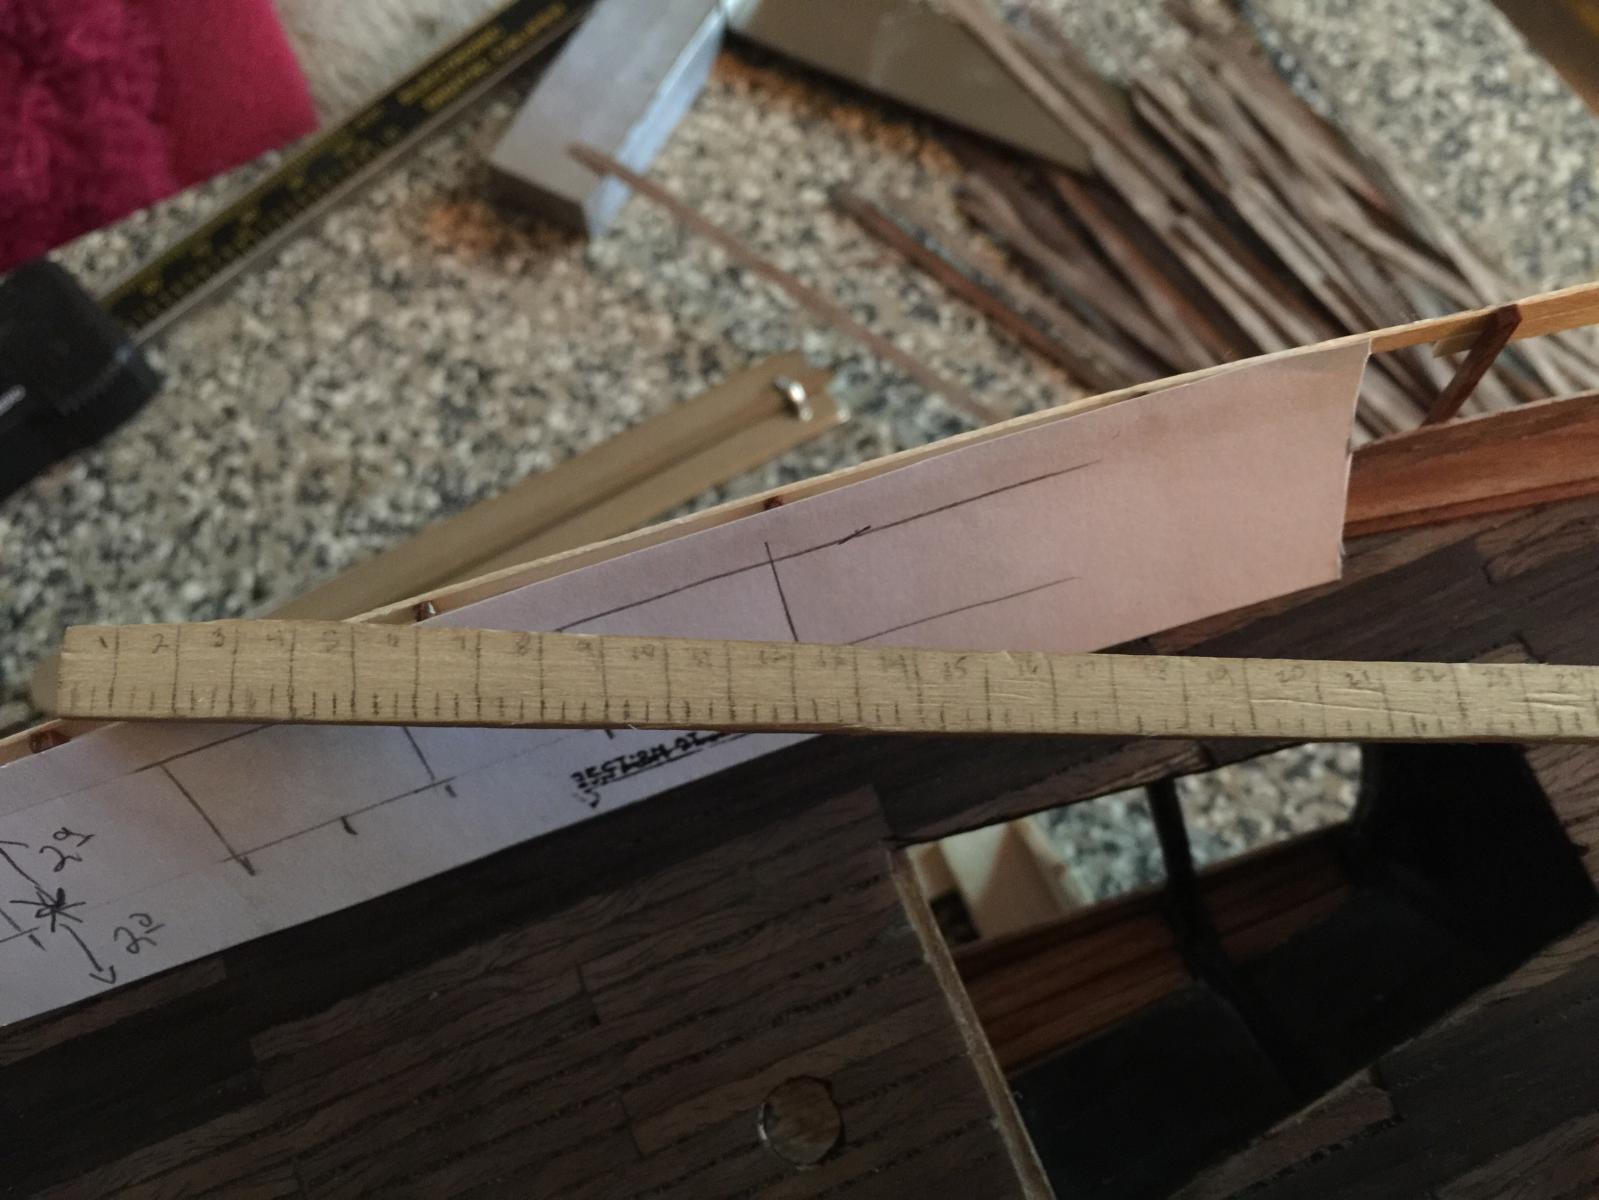
Thanks for the info Buck, and enjoy the absence of cellular and wifi connection.
This is my crude ruler that I've been using. A tick every 1/16(4inches) and the feet marks written in.

If you want to scale real life or from one scale to another go here...
http://webpages.charter.net/sinkwich/sdventure/html/sd_scalecalc2.htm
Transfer to your digital caliper...and there it is. There may be a faster way.
- UpstateNY, GLakie, CaptainSteve and 1 other
-
4
-
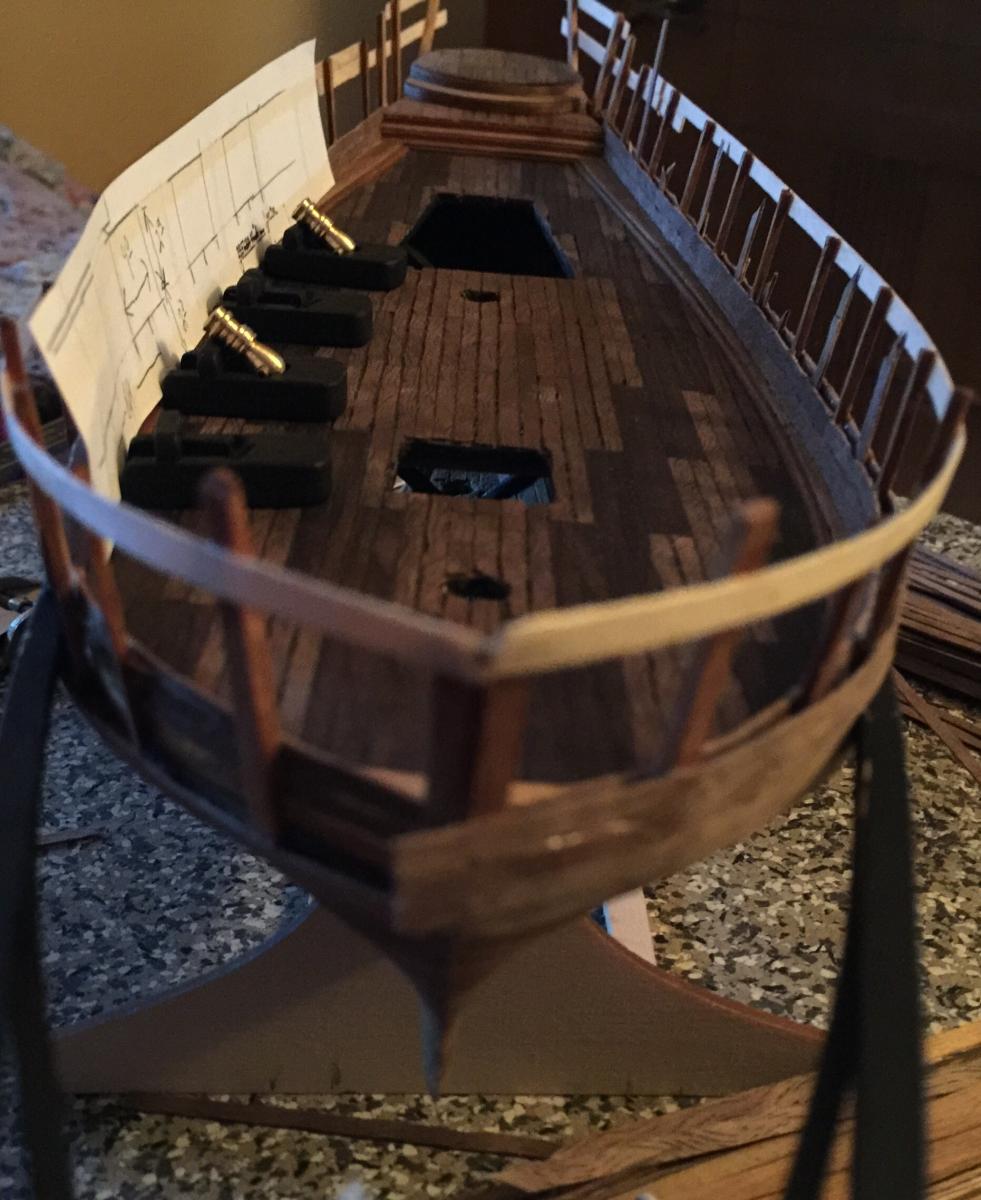
CaptainHarry has been hard at work designing gun port and sweep port locations. He's handed over these drawings to Woodie who is now in the process of figuring placement and construction of the ports.
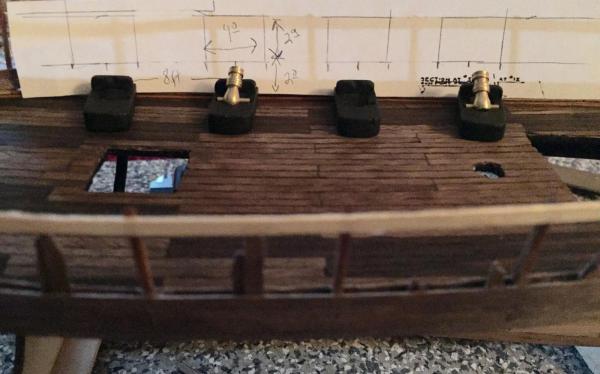
Multiple crews have been working on side planking, port framing and covers.
Salty, being adept at stone work, has been given the task of designing a galley fire hearth. As the men have slowly been completing their basic training, the Nutz Bros have been giving out their construction assignments.
I, for my part, am continuing the construction on the armaments while occasionally lending a hand to the Nutz until basic training is complete.
- CaptainSteve, Salty Sea Dog, Canute and 4 others
-
7
-
Hey I just thought of something Ken. It seemed like more than a few of us had our boats spread wider after planking and removal from the jig. So when you get to the point of popping it off, you might consider glueing in some stabilizers to prevent that from happening. And, I'm hanging by a thread here waiting for photos.
-
I feel ya Boyd, sometimes I get that headache that starts in your eyeball, wraps over your head and down your back.
I went to Office Depot and only found the standard blueprint items. I did leave there with a bag of rubber bands and a nice desk lamp with a pretty decent magnifying lens.(sorry Buck, I'm still fighting over the head gear) I printed out that conversion chart at full size but it's 1/16 per inch short. The idea of a printout ruler glued to a stick sounds like a good idea.
-


USS Constitution by CaptainSteve - Model Shipways - 1:76.8 scale
in - Kit build logs for subjects built from 1751 - 1800
Posted
It is so nice to see such excellent work from someone, who too, suffers from the debilitating disorder OCD! Very impressive sir, very impressive indeed!