


mattsayers148
-
Posts
685 -
Joined
-
Last visited
Content Type
Profiles
Forums
Gallery
Events
Posts posted by mattsayers148
-
-
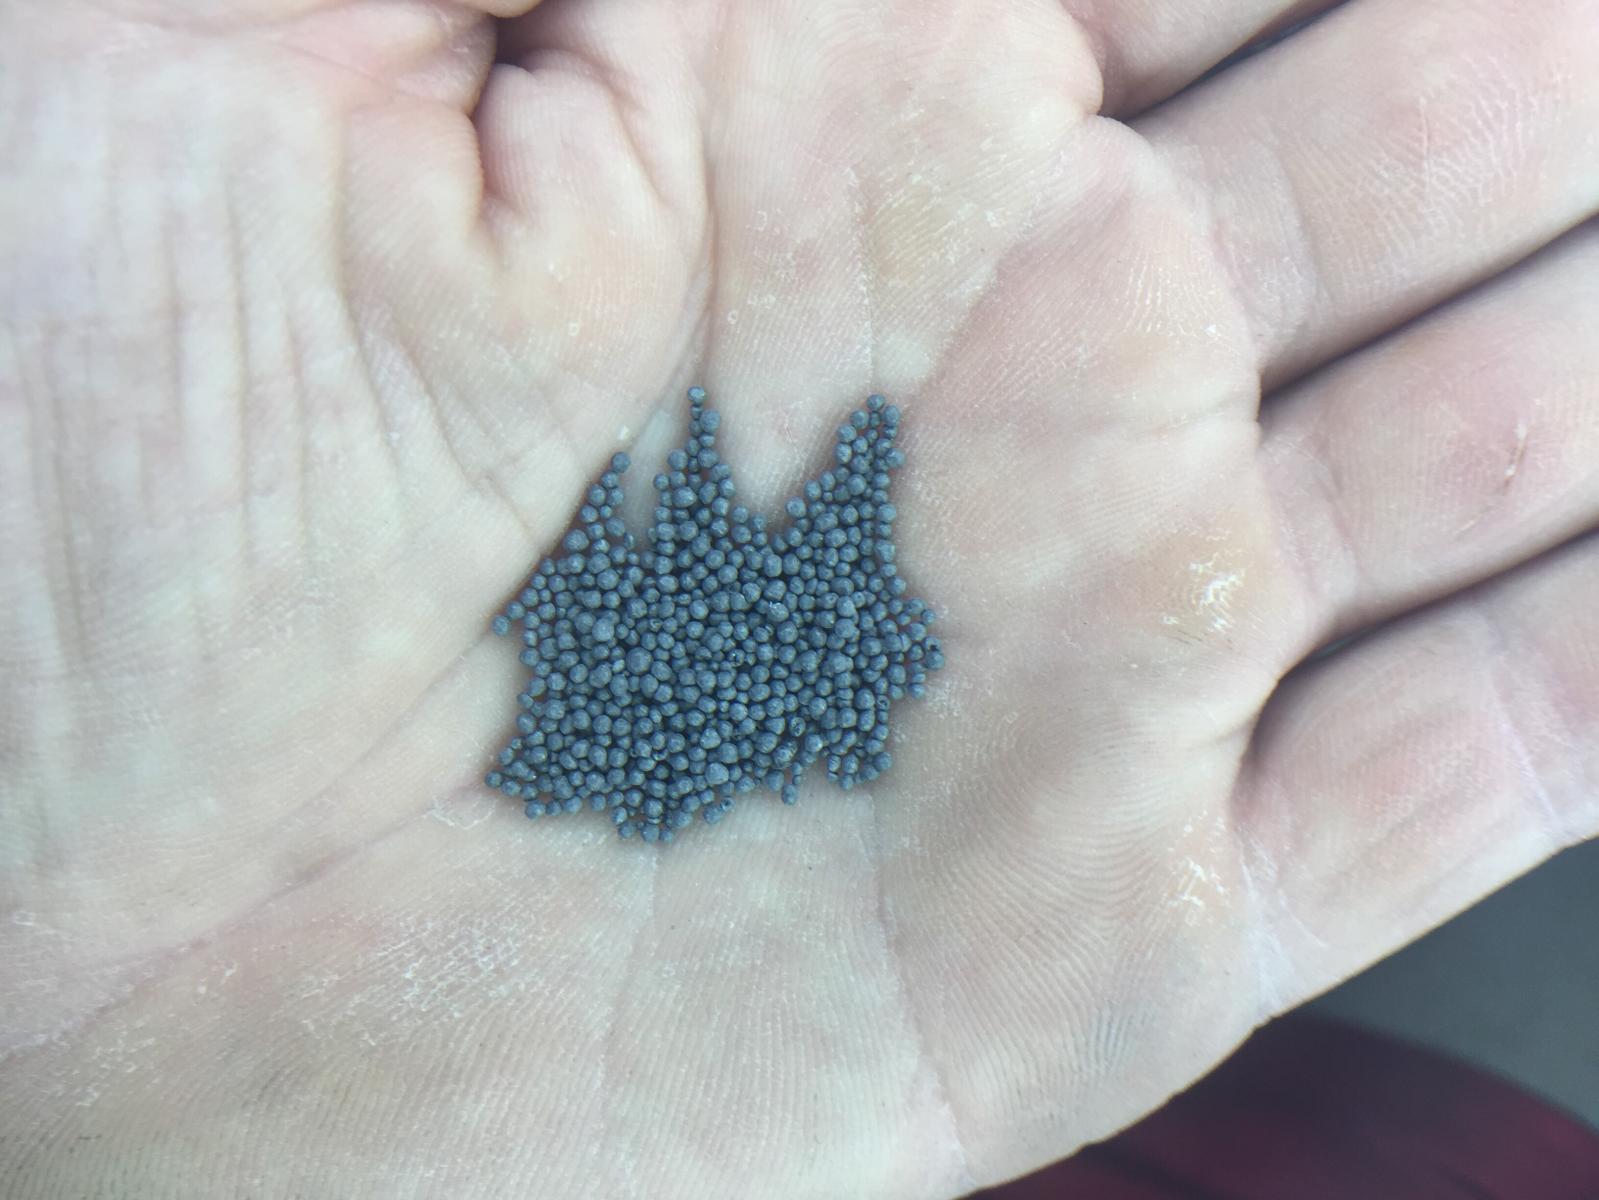
SPENT STEEL SHOT FROM SHOT-BLASTING
Endless uses.

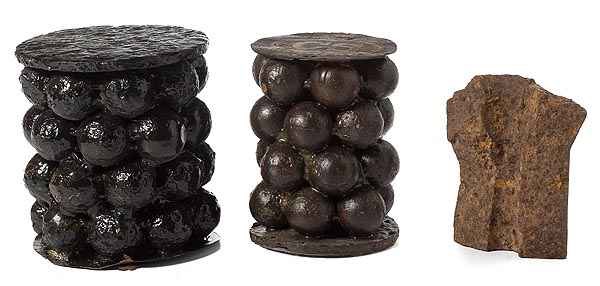
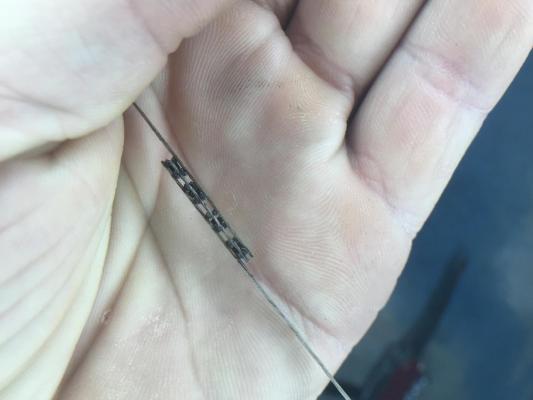
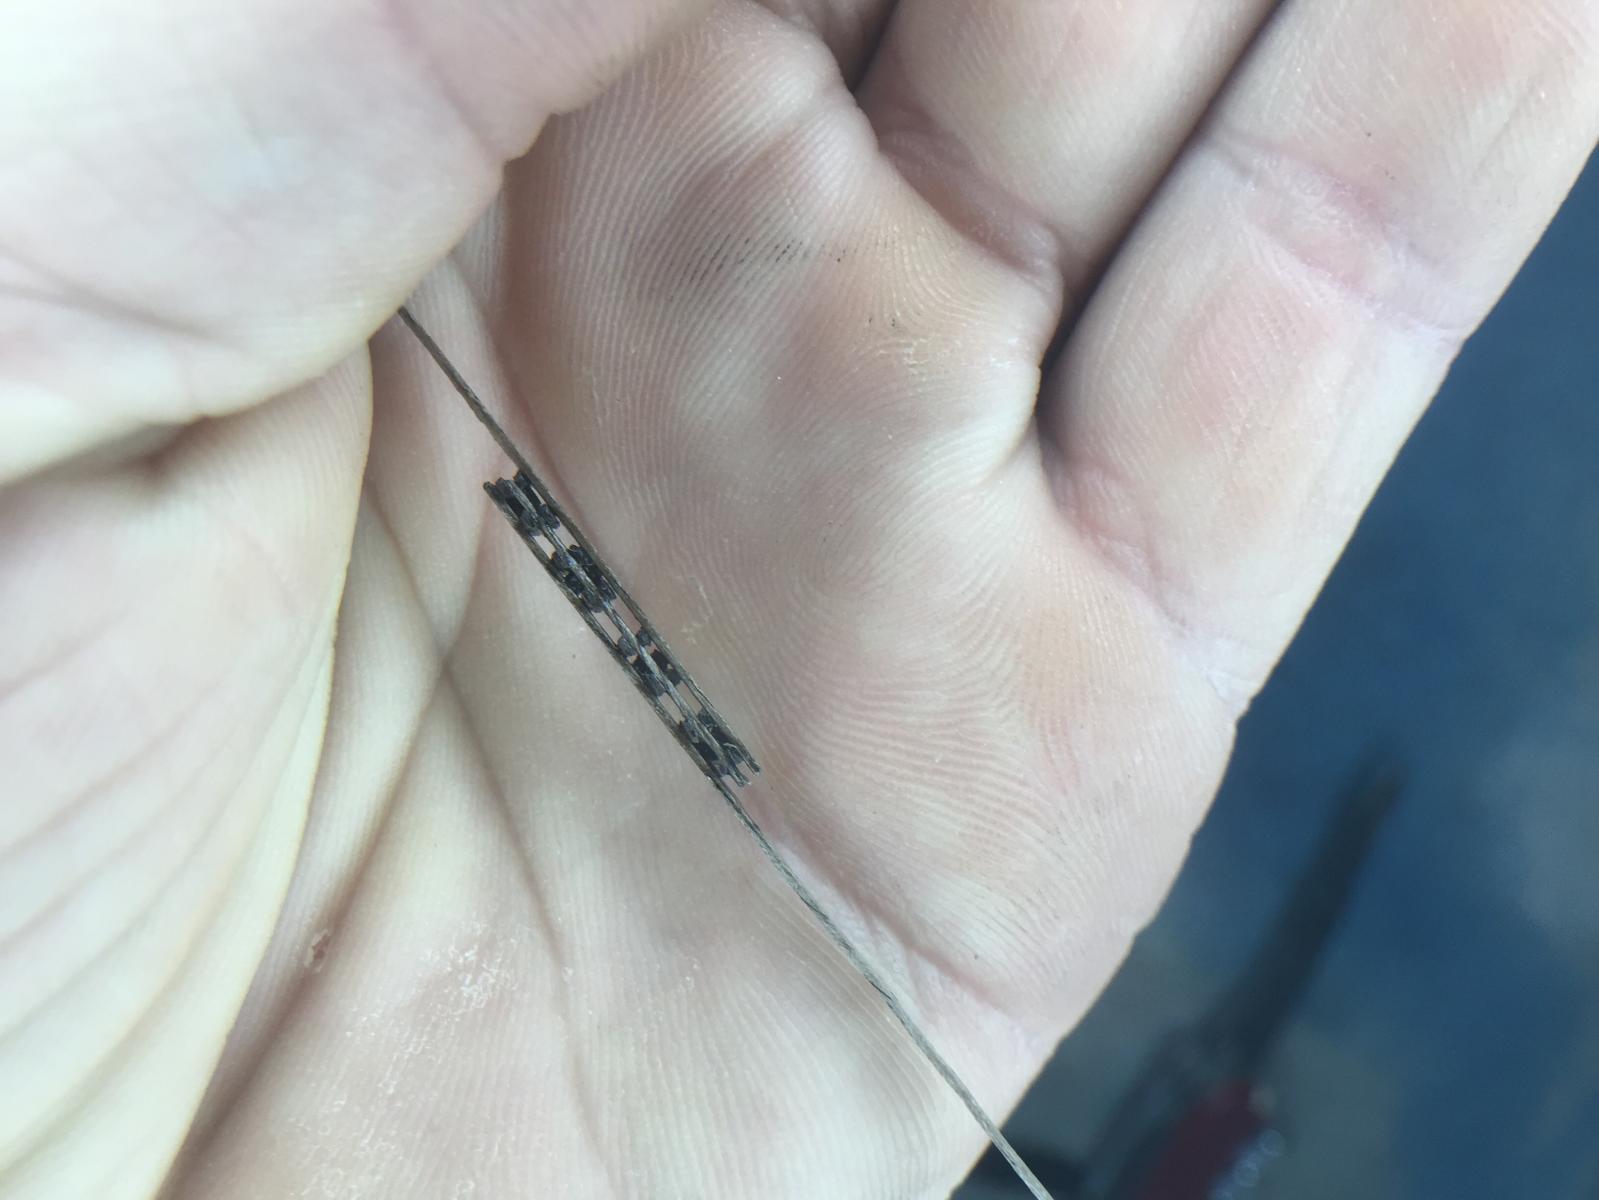
GRAPESHOT

First off is find a tube, I used brass, that matches the bore size of desired cannon and cut to length of shot. Apply wax to the inside of the tube with an object that slides snug inside the tube(I used brass again).
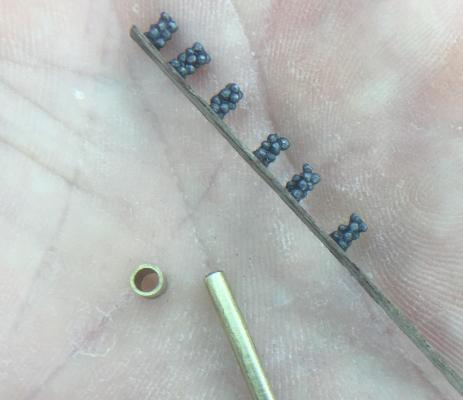
Carefully select desired size shot and drop them loosely into the tube. DO NOT pack, lightly drop. It works best if at least 3 or more pieces can lay flat, side by side inside the tube.
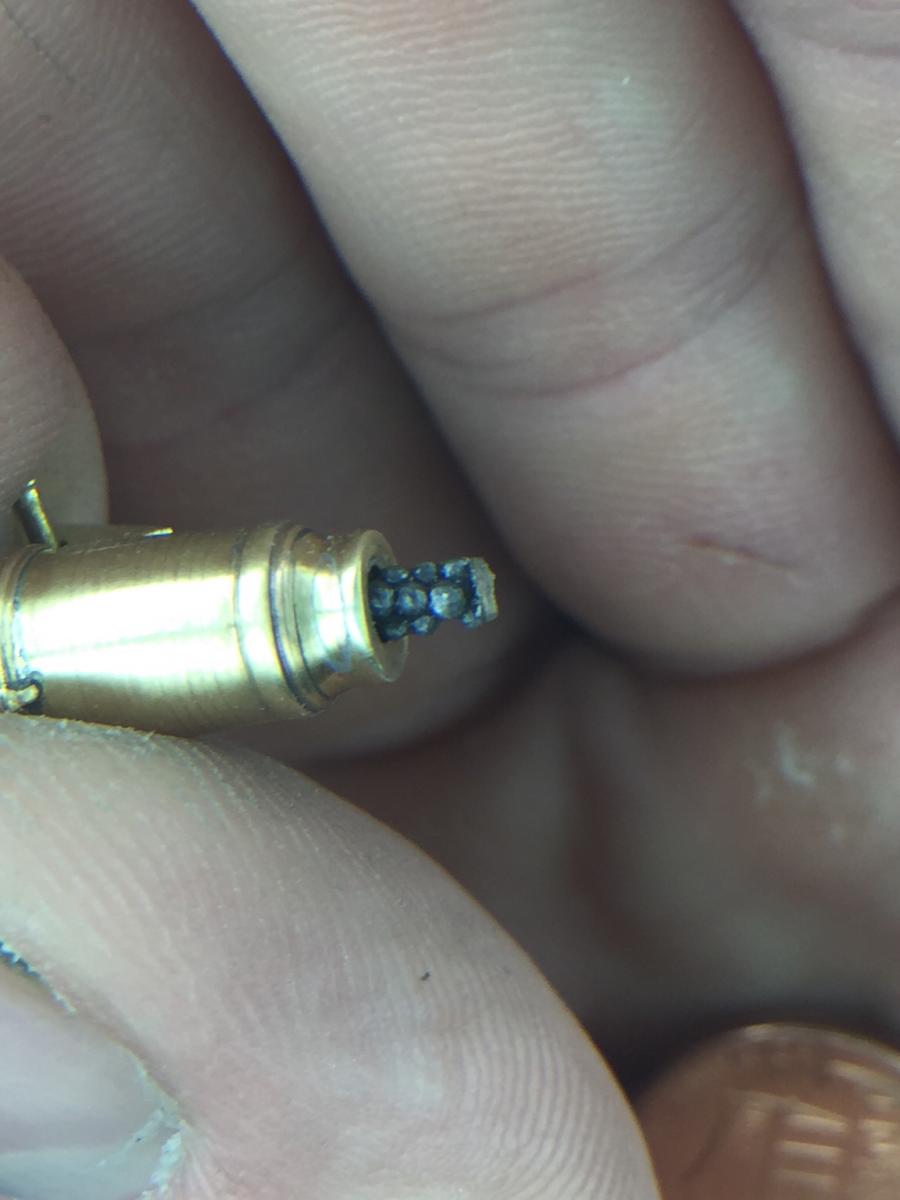
Once the tube is filled, carefully drop a tiny bit of thin CA on top of the shot, let it sit for a couple of seconds, and then use the smaller tube to push out the mold.
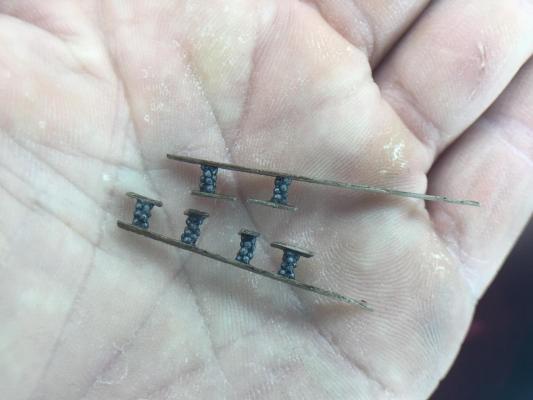
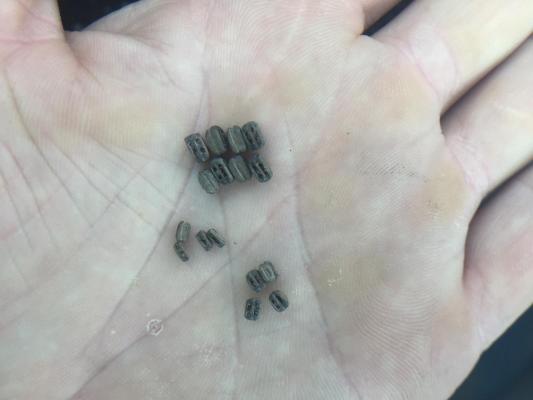
Let the pieces dry hard, lightly file both ends and glue to a thin piece of wood with CA. Once dry, glue another piece to the other end the same way. Apply CA to the backside of the wood pieces and let dry hard.

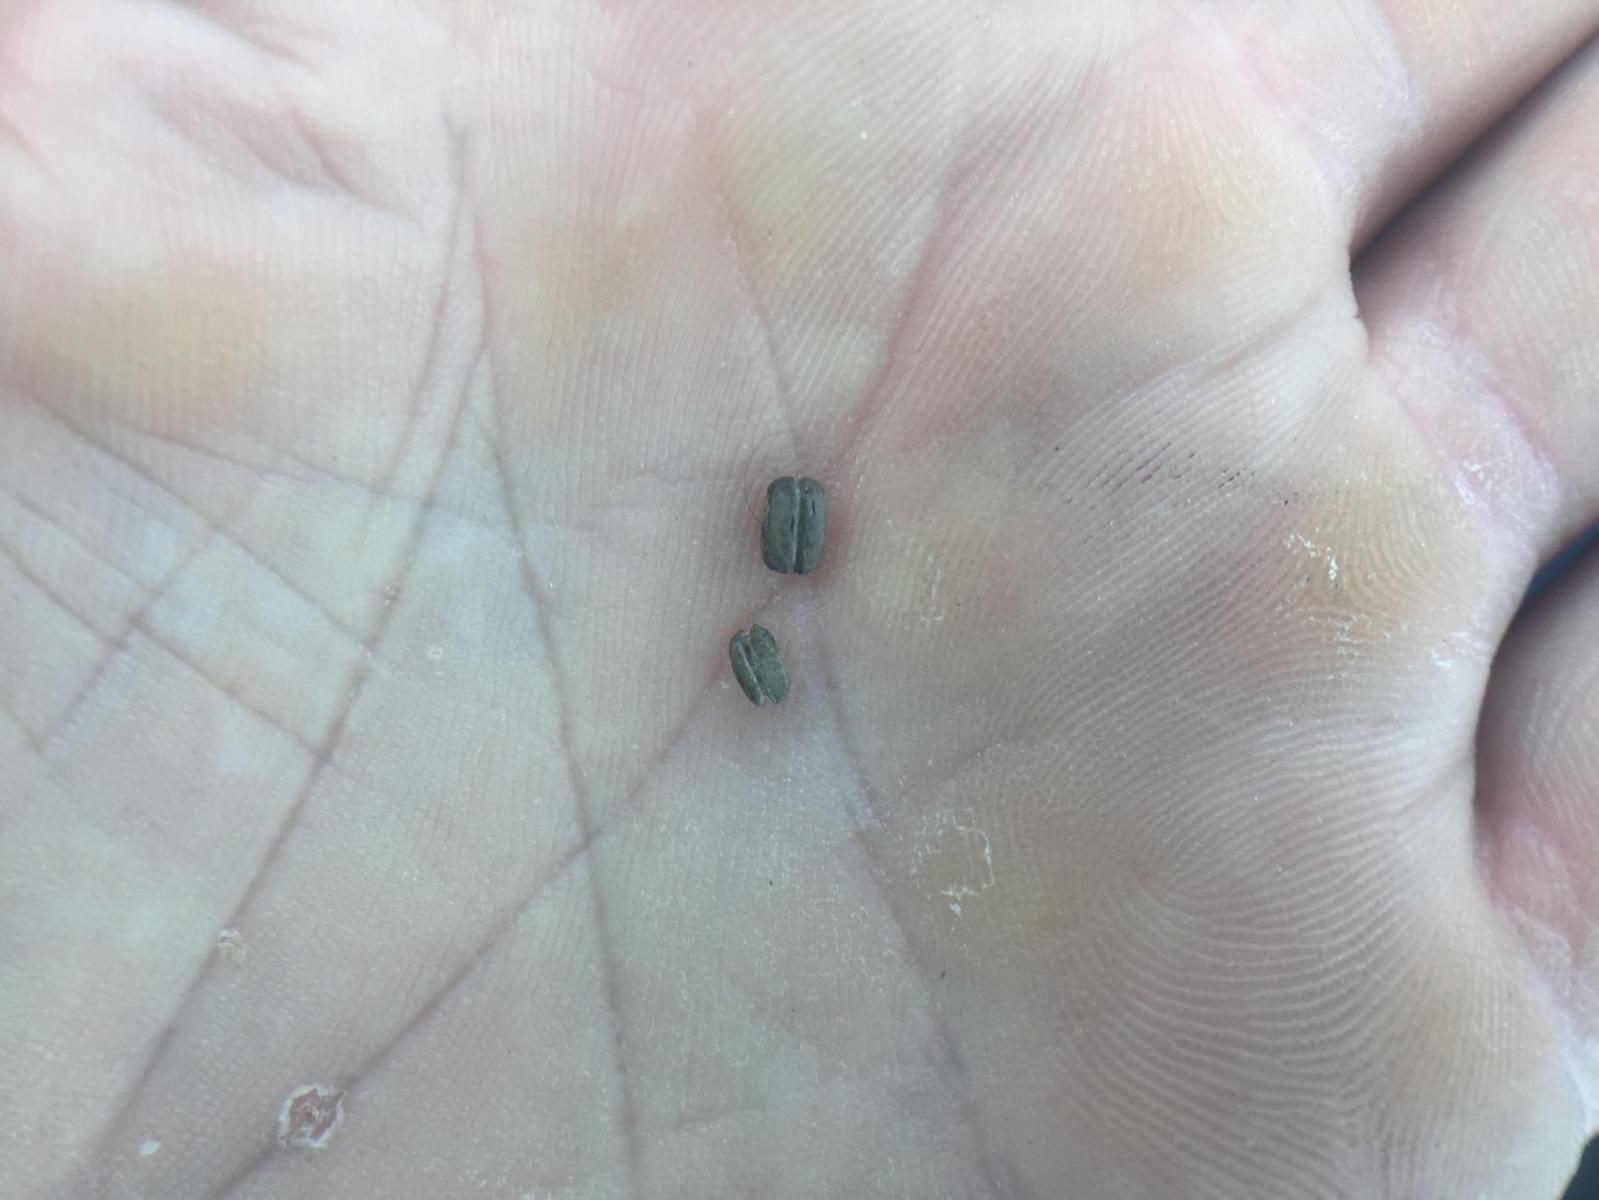
Now the fun part. Sand or file the wood to match the bore diameter and thin the wood at the ends. Avoid sanding or scraping the shots because the dried CA will go white and look bad.
Carefully pick off any dried, white bits of CA. Use a dab of wax, or the sweat off your forehead at this point, and softly roll on the palm of your hand to remove any left over white flakes of CA. Continuing doing this until you achieve the desired amount.
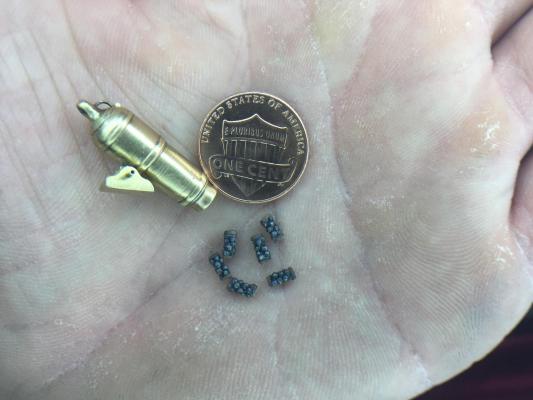
The most important part, wax inside the tube and the push rod! If you don't, it may be stuck there for good. Most likely a few get botched and it also creates build up inside the tube. So if you want 6, make 12. If you're lucky more than six will turn out well.
-
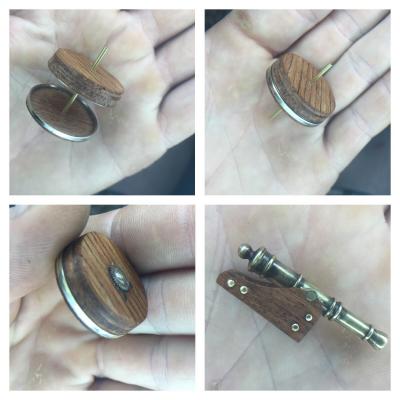
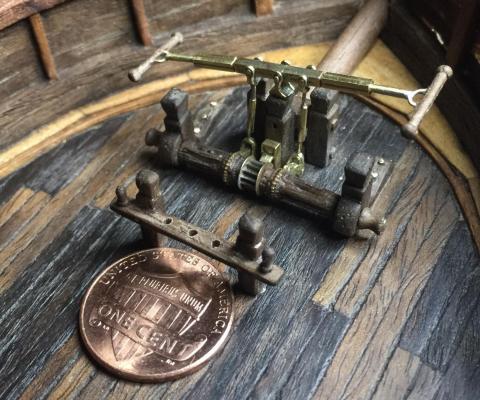
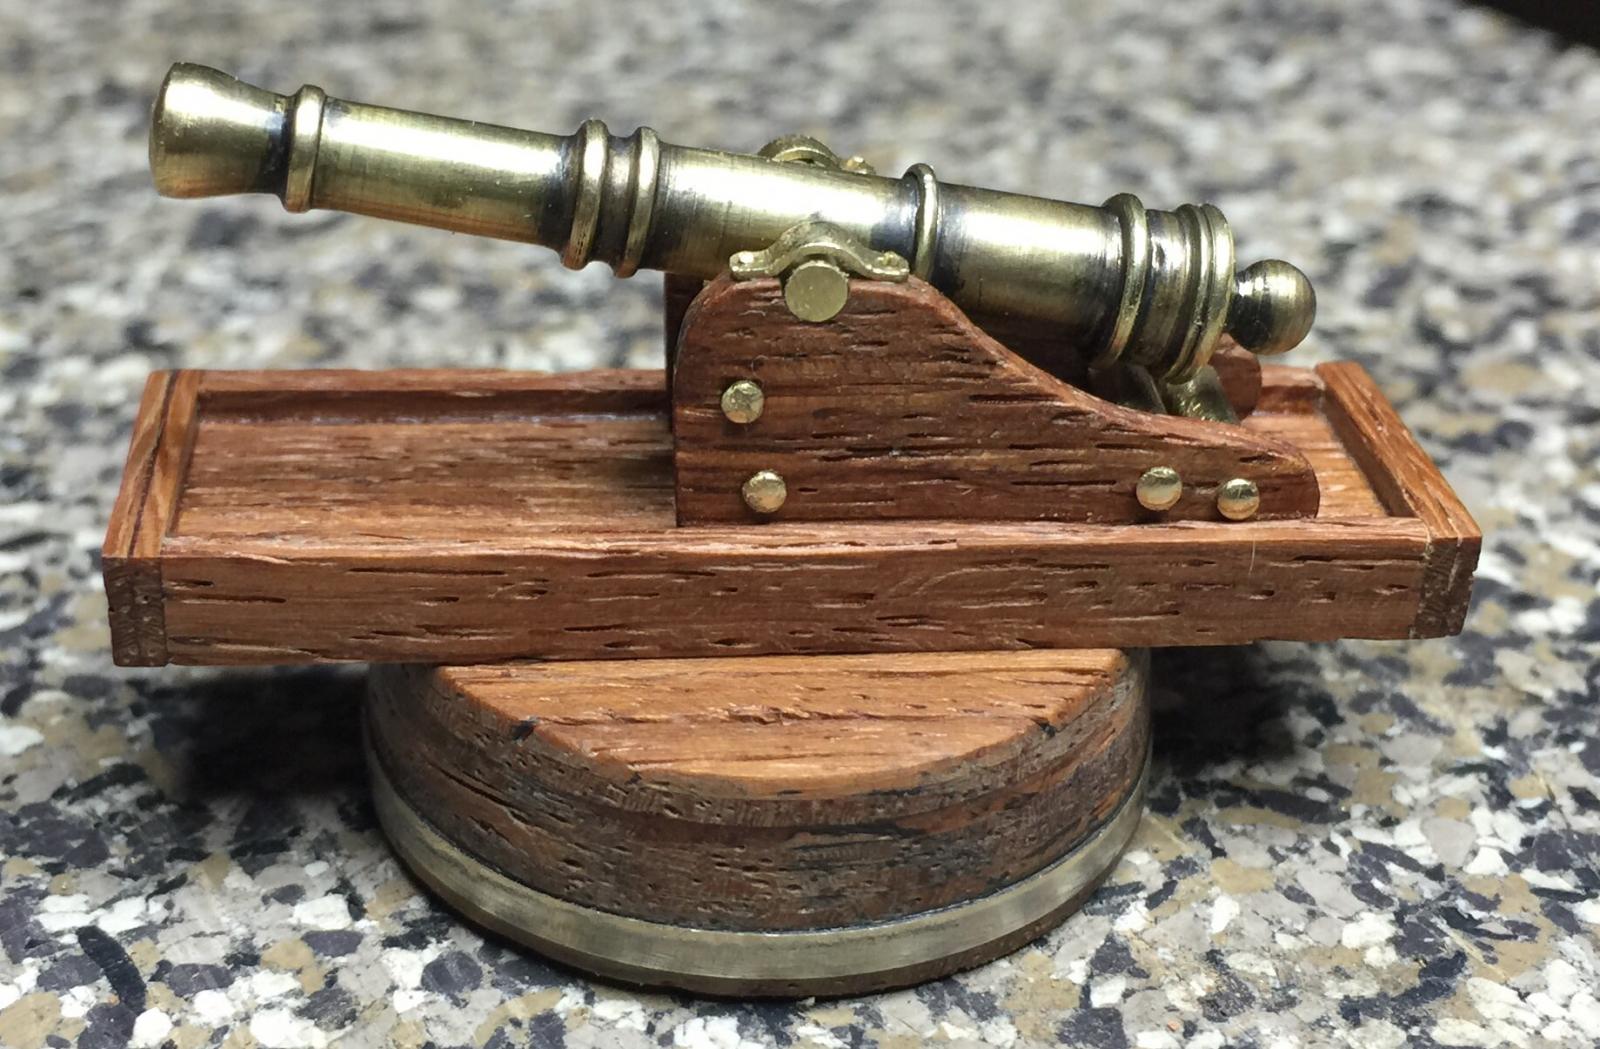
Ken, the new carronade length is 20.43mm @1:64 making it 51.12inches. To reach the 4'.5" I'd have to take off .05inches. The bore is .269inches making real life 6.46inches.
So the new carronade is just a hair too big(.05inchch too long). That being said, the new one is spot on. The old one scales out to about 30inches long, way off for a 32 pounder.
- GLakie, Bobstrake, thomaslambo and 3 others
-
 6
6
-
-
George, Mark, Ken, Boyd, Robb, CaptainSteve, Frank, thank you guys for the words of encouragement. Also, thank to everyone for pounding the like button.
So I'm a bit curious about what size the kit supplied carronade is supposed to be. I've read here and a few other places that this model, as well as some similar cutters(like the Alert) are designed to hold a 32 pounder. The first one I made was the same size as the kit supplied carronade. This new one is scaled to the dimensions of a 32 pdr.
So, what size carronade was used for these kits? I'm not sure if this is a result of the 1:64/1:50 debacle that's been so well addressed by others in this forum.
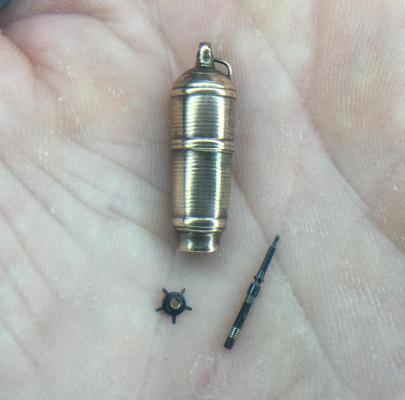
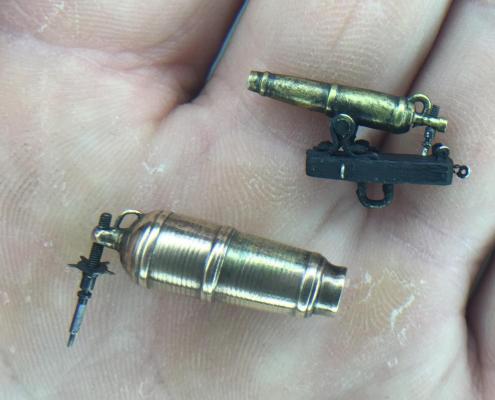
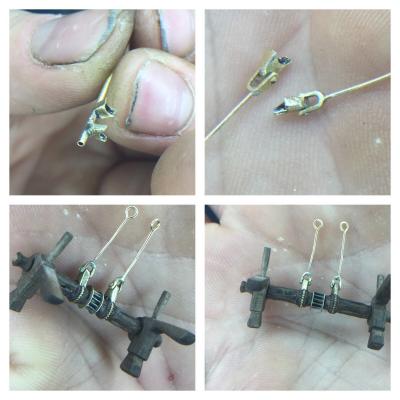
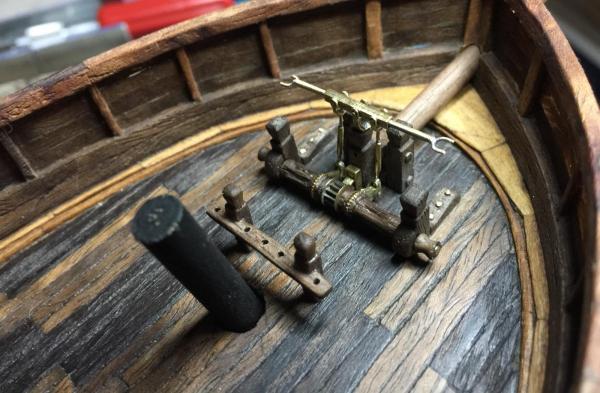
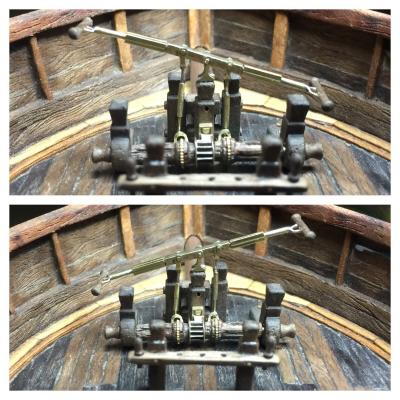
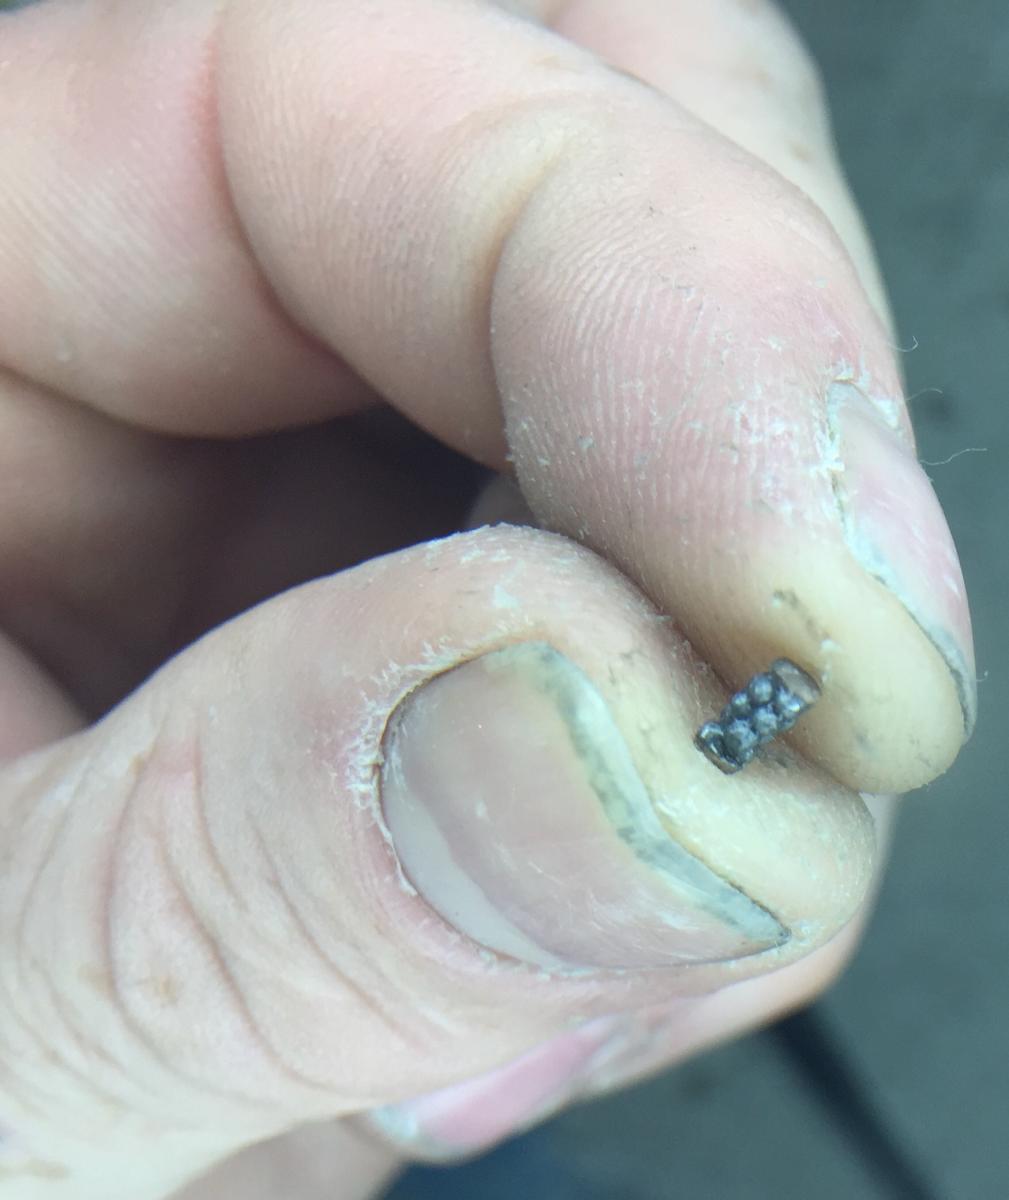
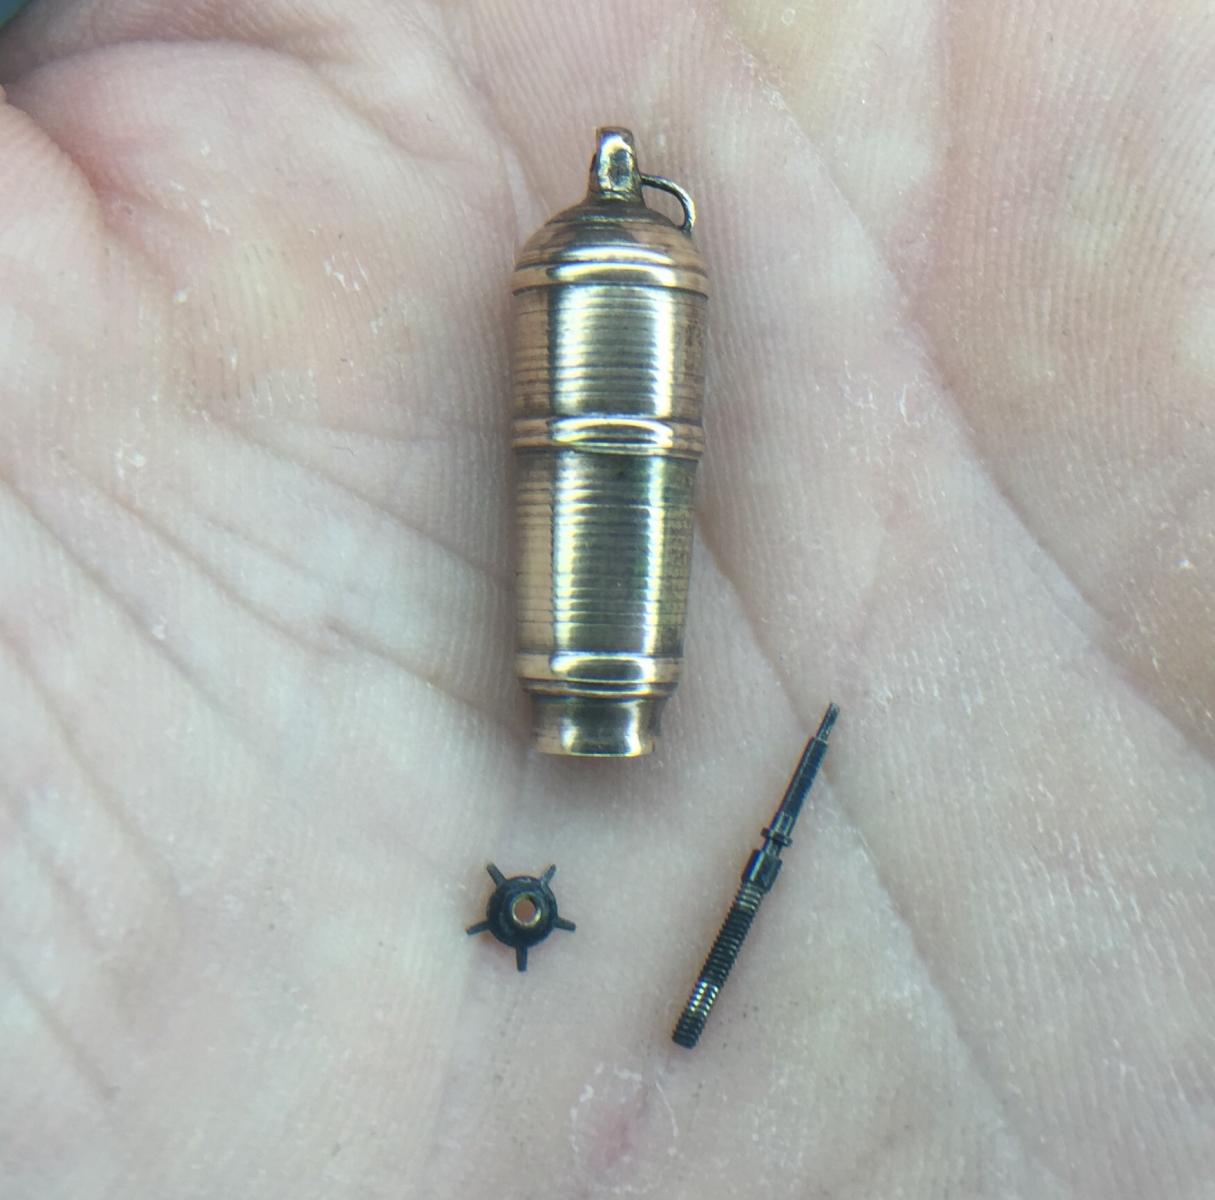
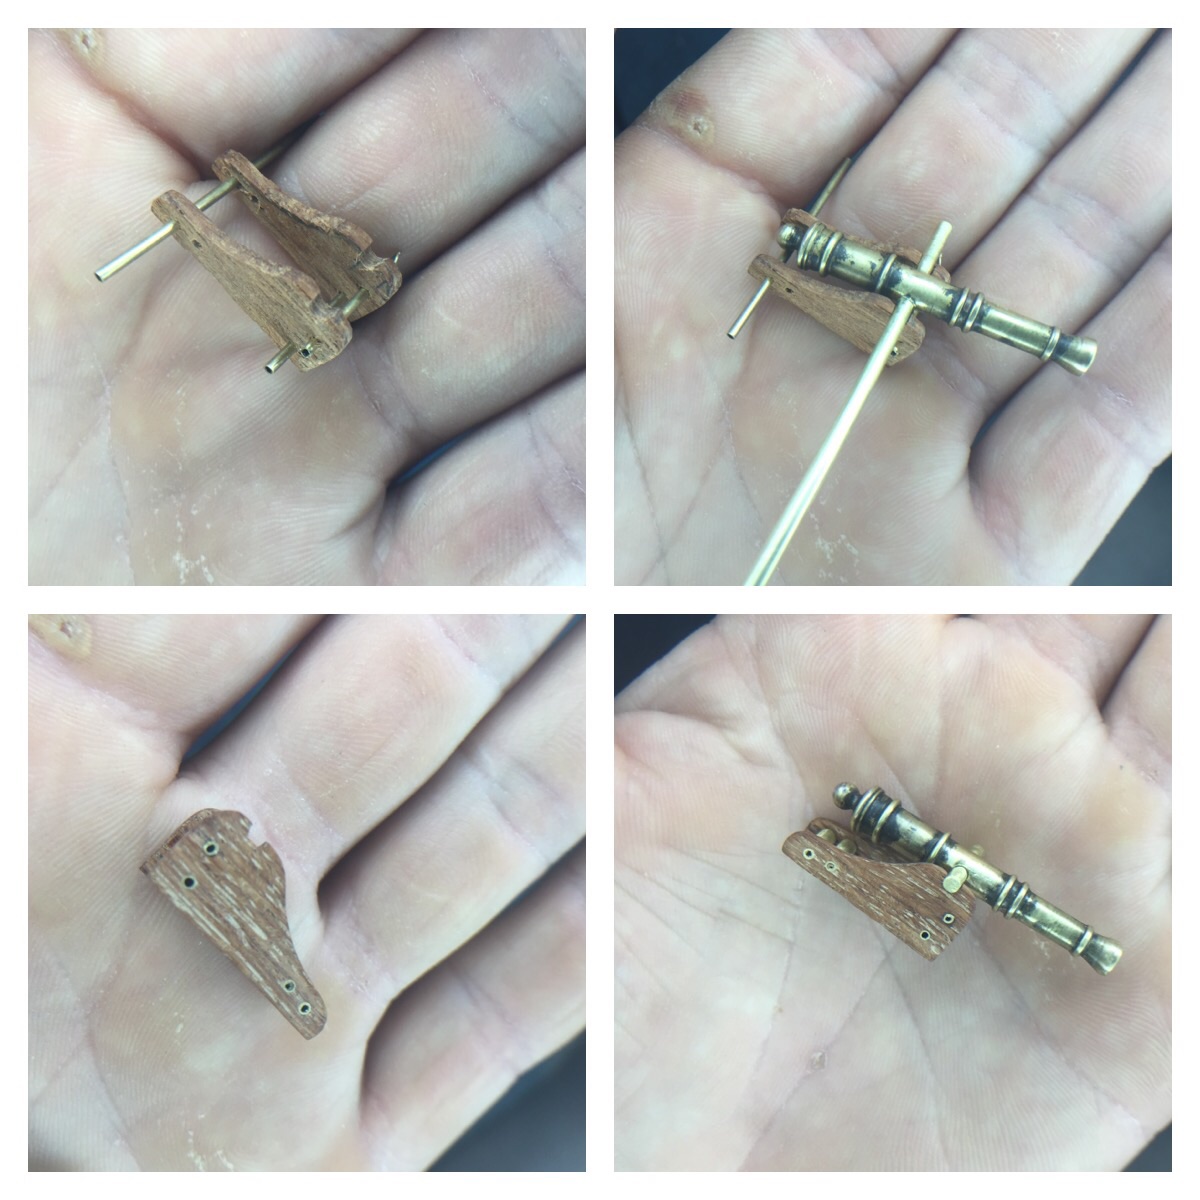
Either way, the new carronade will take its place on the raised stern deck. Tiny found some really nice watch scraps, so he was charged with making the elevation screw. The carronade was made in similar fashion to the other cannons. Small brass tubing soldered together, then turned with dremel flex shaft in one hand and a file in the other. Now it's off to build a new pivoting slide carriage.
-
-
Thanks George, Ken and everyone for the likes.
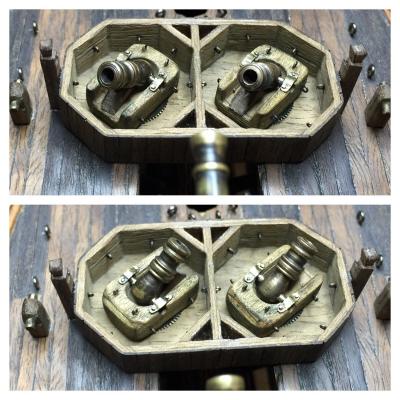
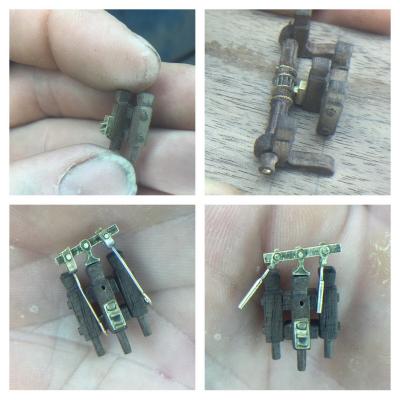
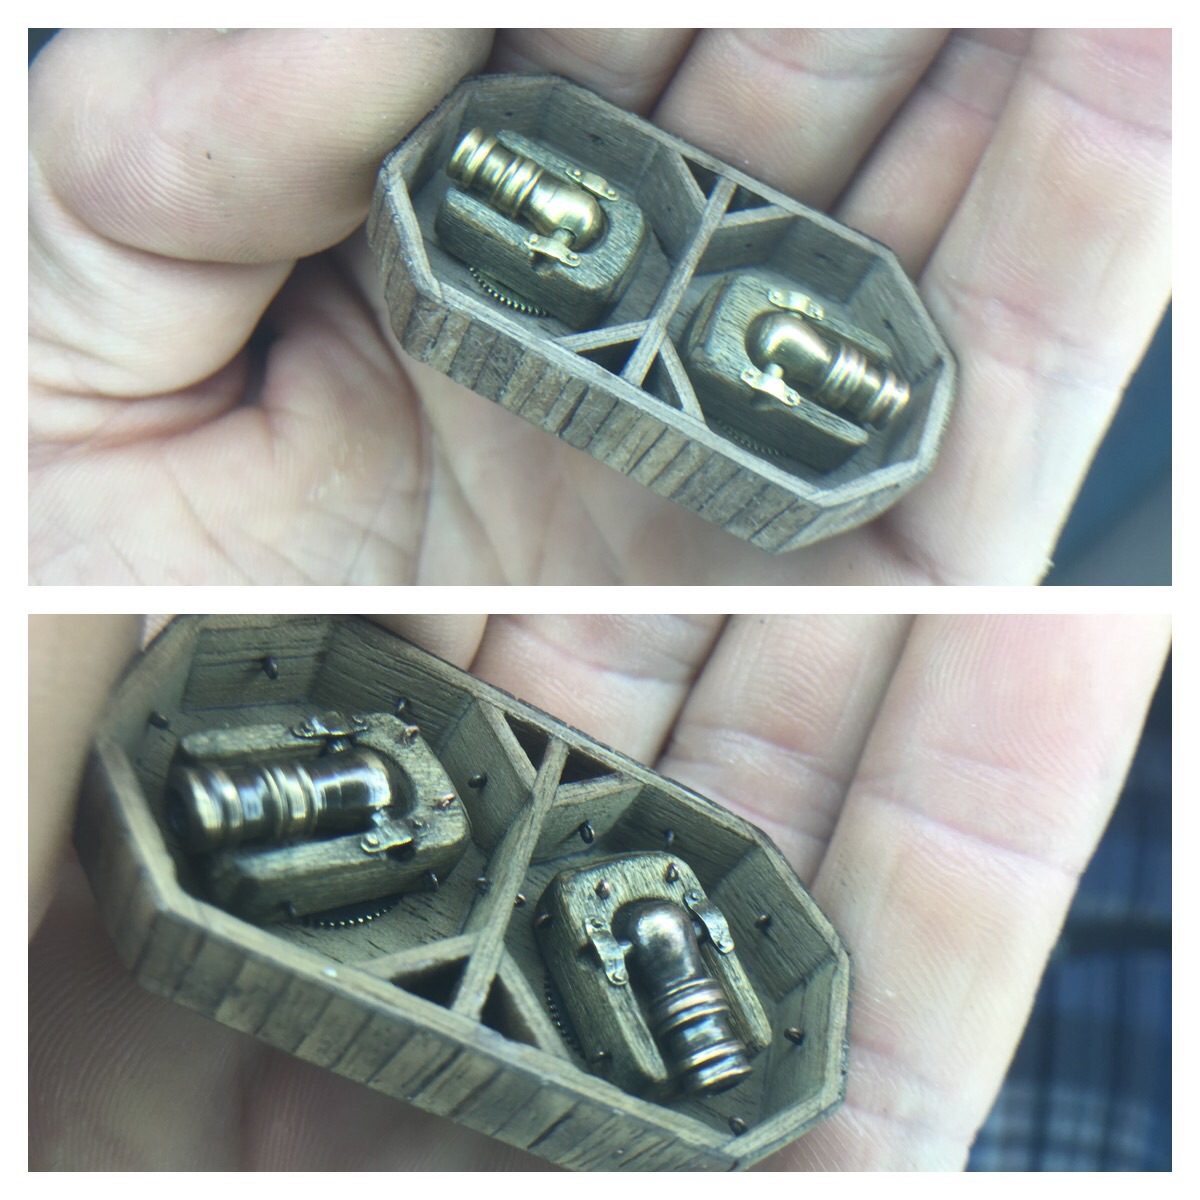
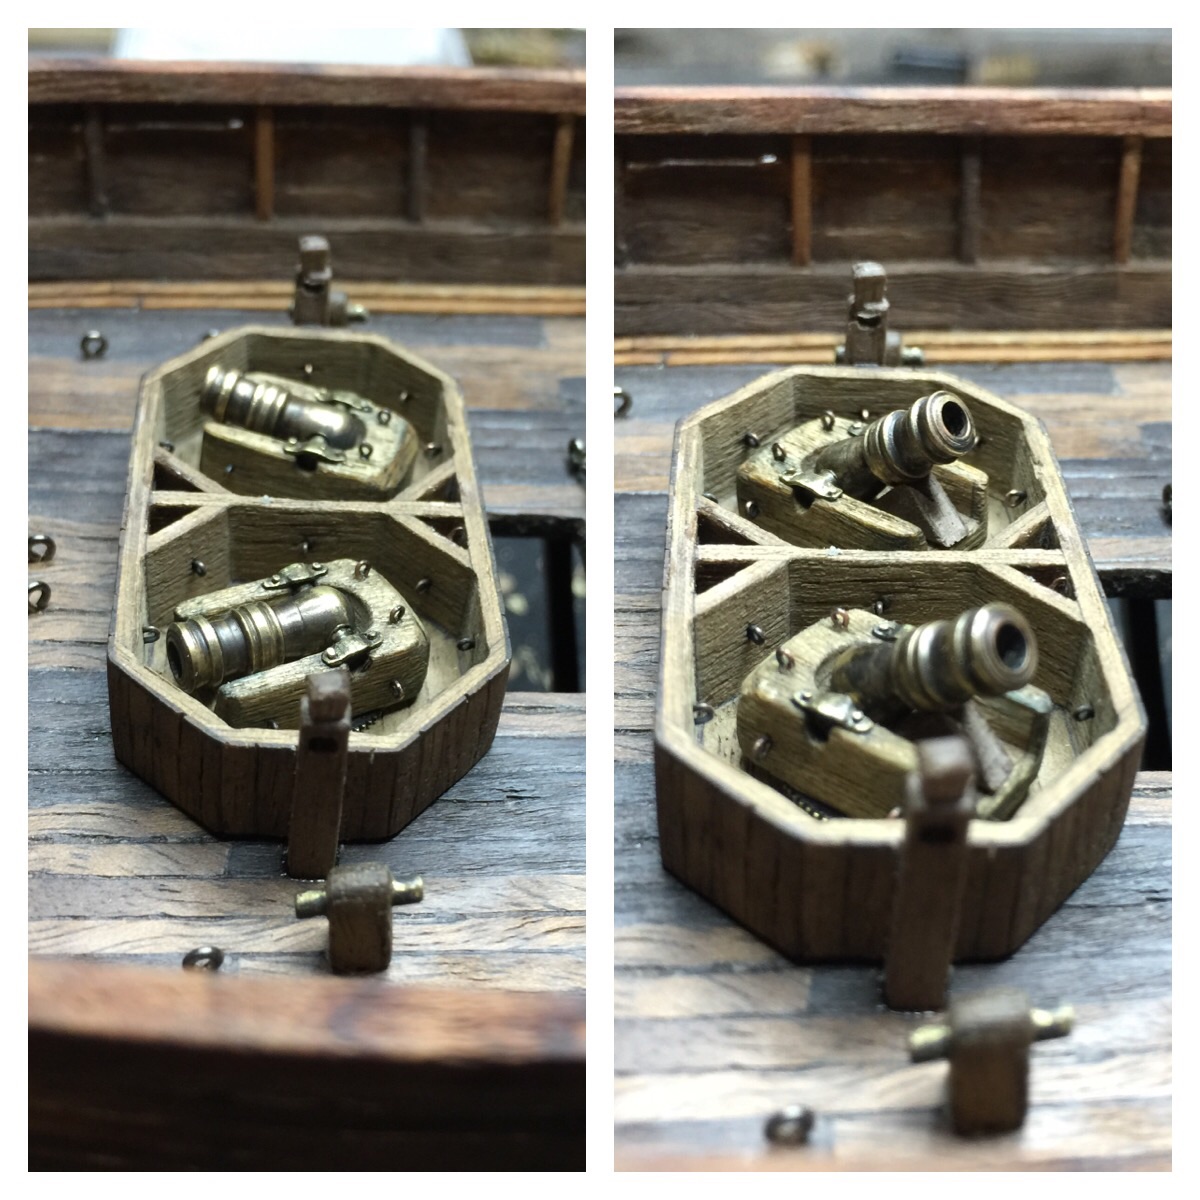
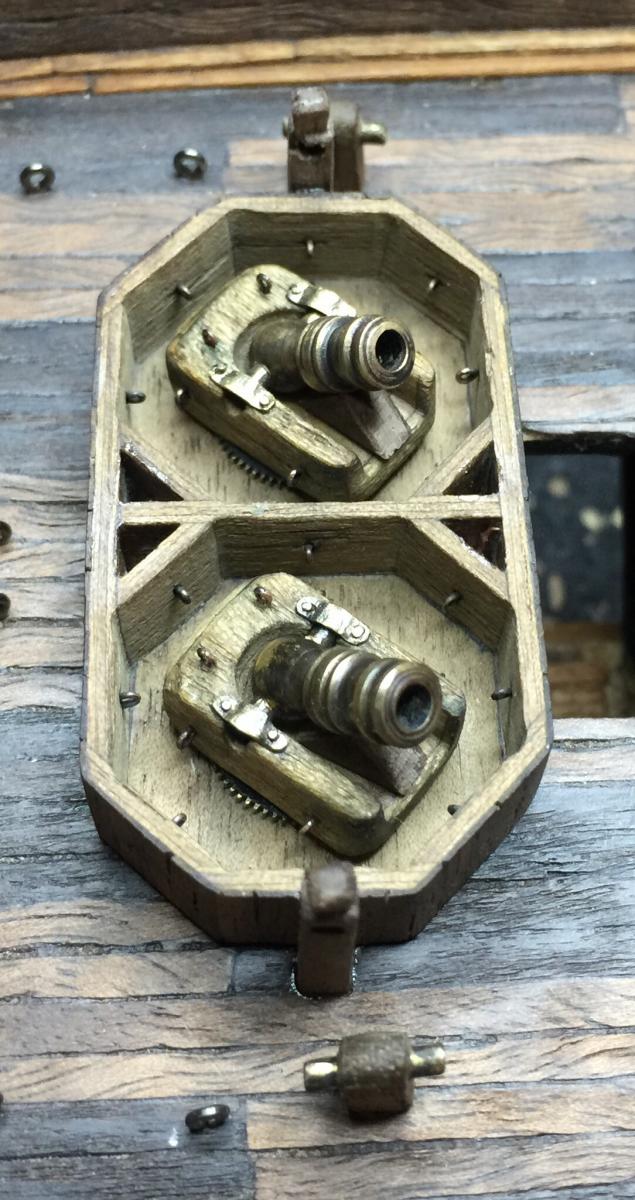
This week entailed mounting the two 10 inch mortars. I decided to scrap the previous mortar beds and start anew.
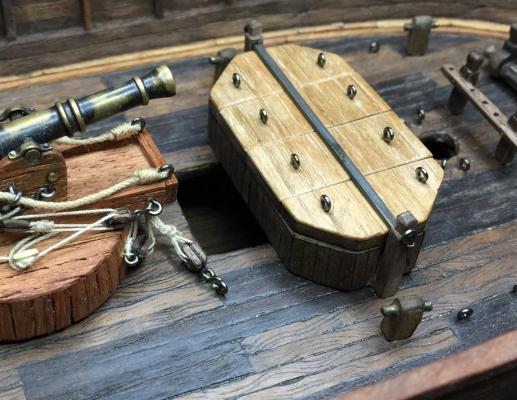
I happened along a pdf copy of the AOTS for the bomb vessel Granado 1742. Although a bit larger than the Nutz Pirate Ship, there was a lot of really good ideas that I pumped into the noggin for a retrofitting.
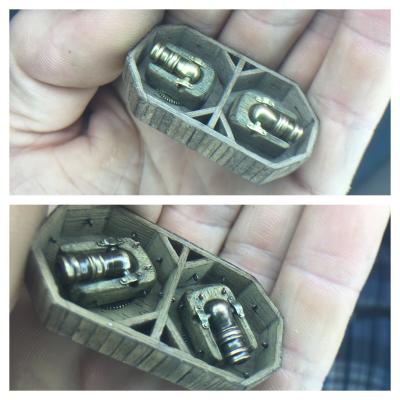
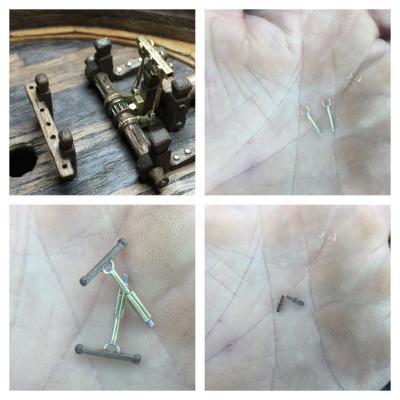
I started out by making a much smaller carriage that could fit into a covered bed. I took the idea from the singular mortar bed and doubled up. Tiny rounded up some more watch parts which we made into a turntable. The octagon was then made to hold the mortars.

We followed up by making removable covers for both sides. Posts were added to the sides where a piece of iron passes through to hold the lids on in turbulent weather.
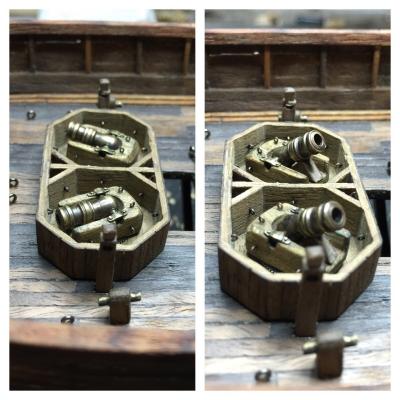
When the lids are removed, the mortars can then be elevated by portable wood supports.
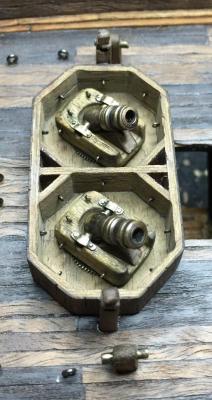
The turntables should come in very handy for the Nutz and Bawlz Clans. Multiple targets can be hit, or a volley on one. It was decided that the tackle be stored rather than affixed, giving the viewer a more uninterrupted picture of the mortars.
Tiny and I are off to make some more weapons...
- src, Salty Sea Dog, GLakie and 9 others
-
12
-
-
-
Thank you Bob, George and everyone for the likes.
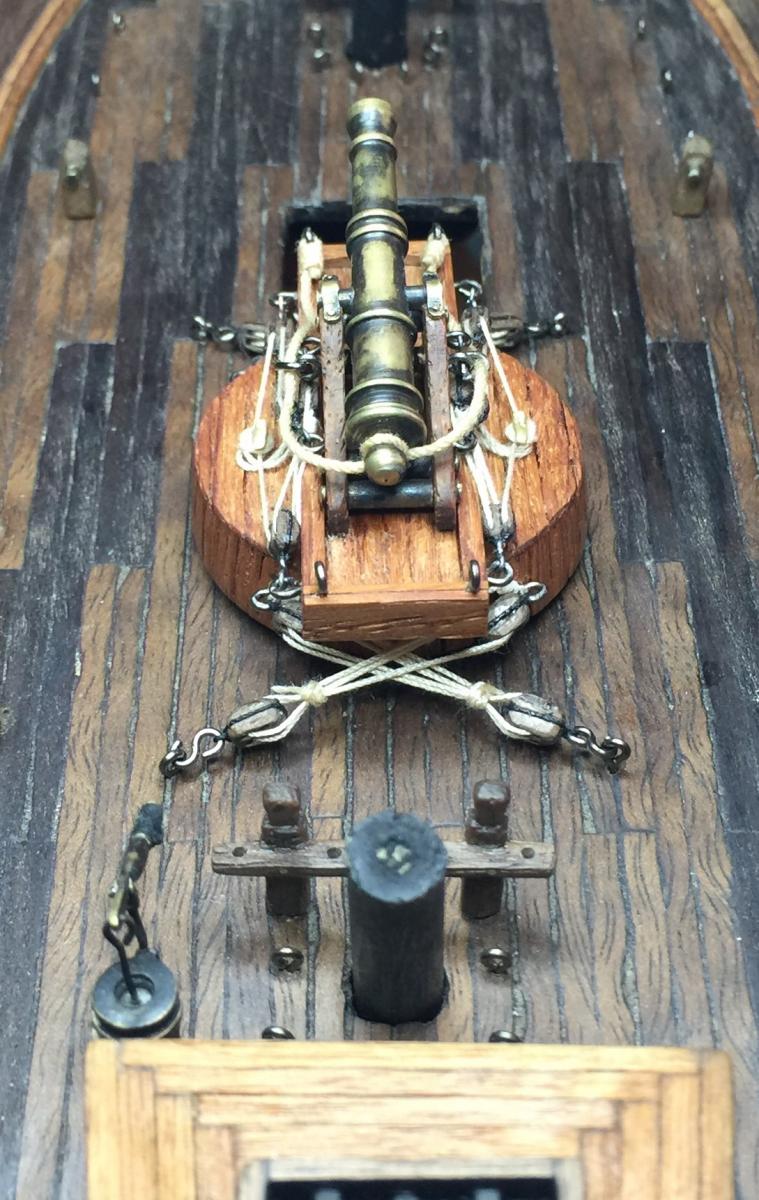
George, yeah I have four 4mm double blocks to secure to the deck. The four 4mm double blocks on the corners of the slide will attach to them. I used a T-shaped piece of brass to make cleats to secure the lines to. What I still haven't determined is how/where to put the tails of the cordage.
The other decision to be made is the placement of the blocks and which way to connect to the slide. The diagrams I have for the rigging show them crisscrossing each other. Is this the way it's done, or can the positions be changed?
- mtaylor, GLakie, thomaslambo and 1 other
-
4
-
Hey Ken, I think my light magnifier is like 6X or so. It's got the fully articulating arm so I can get right up on my work. I just don't think the Optivisor would allow me to keep an eye on the doors and windows while I work. I gotta watch out for anti-squirrel snipers!
- thomaslambo, GLakie, src and 11 others
-
14
-
I'll put my two cents in to add to George's comment. Now that you've cut the base at the angle, you can use it to make a template of its footprint. Then mark on the deck the oval, or just hold it in place and trace around it. This way you can cut to the inside of the line before any drilling. That way you can avoid splintering or oversizing the hole.
-
Love it Robb, the deck is filling up beautifully! I had a drawing of the bowsprit with the rope lashings but can't find it now. Anyway, I think it looks better with the space. When you add the rope bands are you going to crimp them with rope? If you do you might not need the wedge.
-
Wow Bob, that looks awesome! So this is where the AWOL squirrels are hanging out!
- Bobstrake, Canute and thomaslambo
-
3
-
-
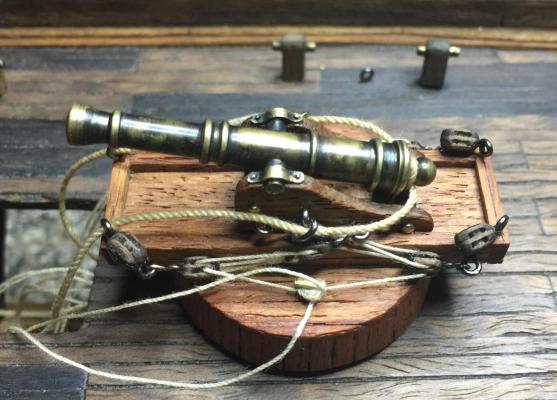
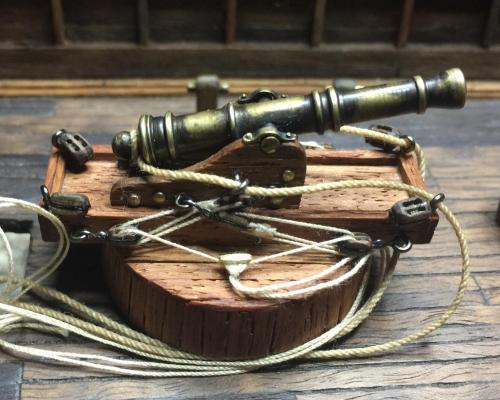
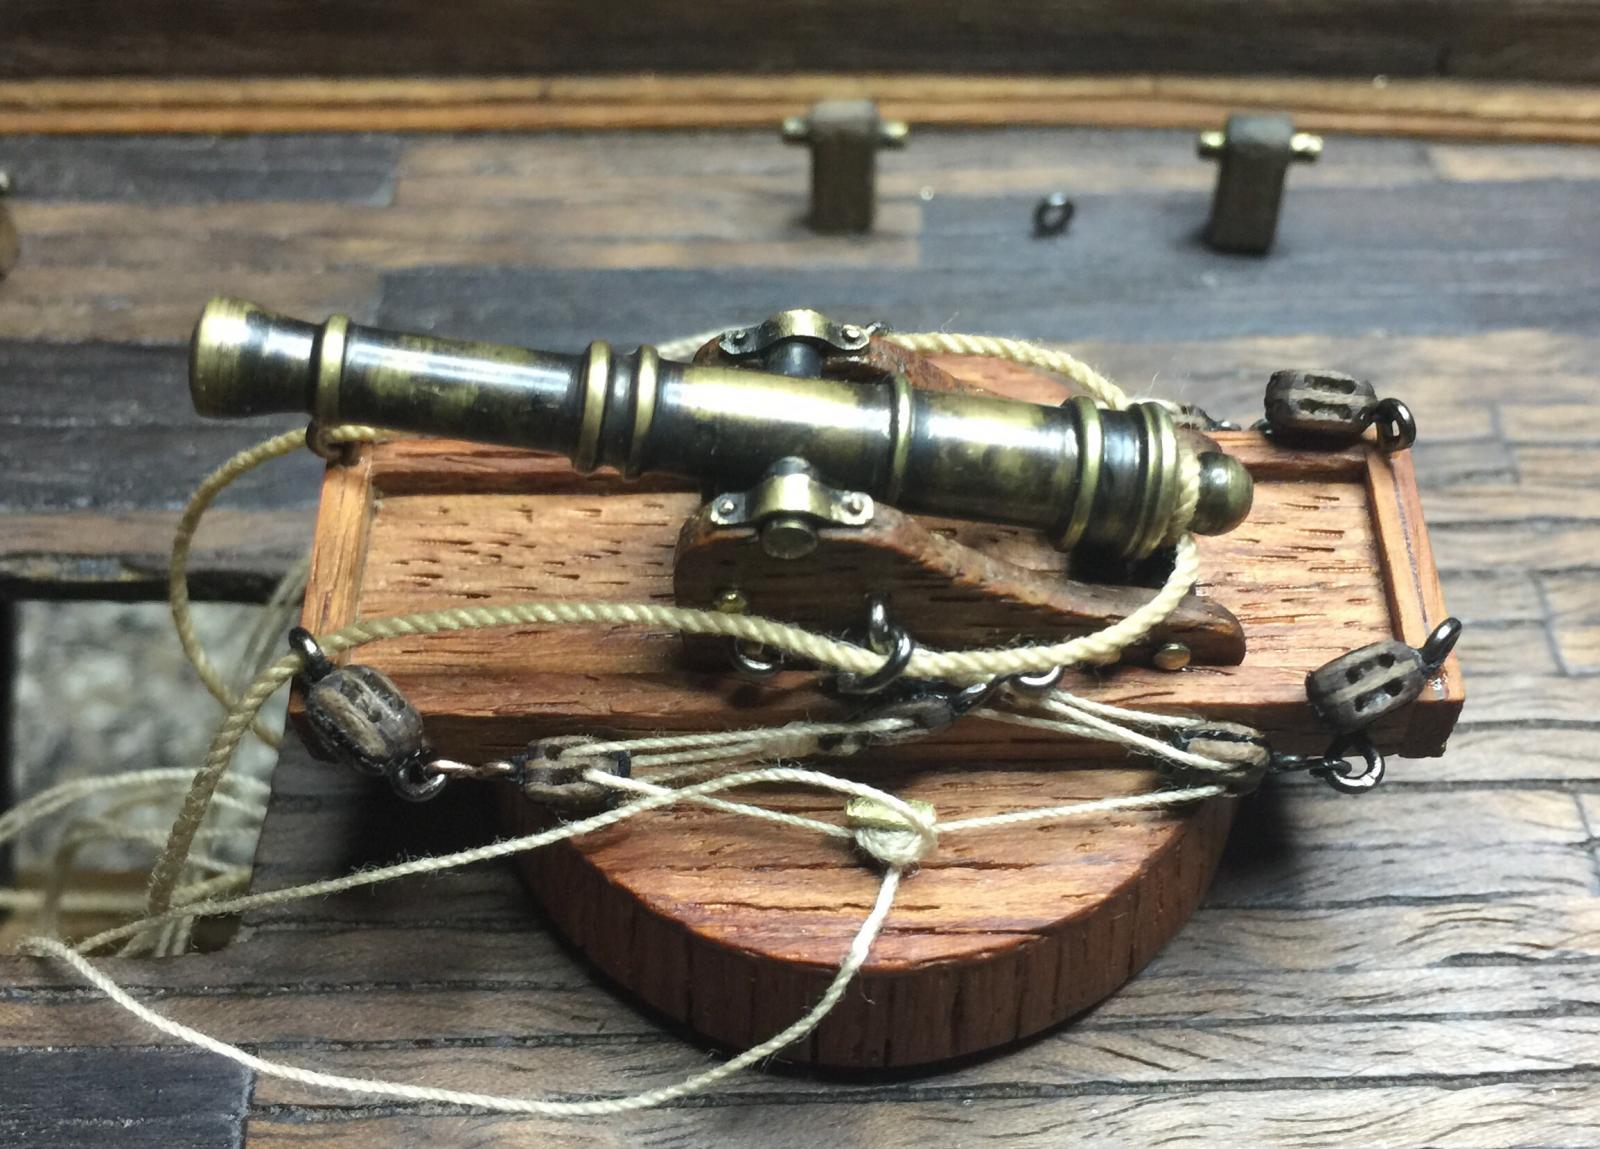
First on the agenda was to change the look of the circular platform. I considered painting the vertical section black or cover it with blackened brass. I settled with widening the sides by three layers and a final top layer. This helped with the final look being larger, helping balance the slide and base.
Next was the block debacle: use kit supplied blocks, or make my own. Physical measurements prove that all the kit blocks were up to 1mm too large. So Tiny and I took the leap and decided to make our own.
In CaptainSteve's Kit Bashers Guide, there were some examples of this process that I tweaked a little. The blocks are about 1mm less in width than in height.
This set was for making 4 single blocks and 4 double blocks, all being 3mm high and 2mm wide. Walnut strips were cut to the 2mm width and then marks were drawn 3mm apart. 1mm strips were CA'd in place and then the tiny little pieces in between were glued in as well(simulating a center wheel). A 2mn strip was then glued on top.

The first 4 were cut off since they are single blocks. The process was repeated again, making a kind of Big Mac look.
All blocks were then cut apart and the job of shapeing began. The space above and below the tiny center piece were carefully drilled out the the block was shaped to 3mmx2mm. The space between the two holes were then cleaned up, with the final step being to burnish the blocks.

In total for the 12 pounder were: 8 double blocks 4mmx3mm, 4 double blocks 3mmx2mm and 4 single blocks 3mmx2mm. Now is time to begin rigging up the 12pounder. We'll see how long this takes. Til next time...
-
Hey Robb, looking sharp! Check out this guy's bowsprit pics and process http://modelshipworld.com/index.php/topic/1673-byzantium-by-qwerty2008-radio-scale-1-20-custom-model-based-on-the-pride-of-baltimore/page-13?hl=%2Bmaking+%2Bthe+%2Bbowsprit#entry285950
I'm creeping closer to this step as well, so I'm gonna keep an eye on your progress.
-
Looking awesome Bob! I hear you with the sails. I've done exactly 4 sails to date and they are tedious and time consuming. There's a lady in here that has been working on a junk boat with three sails. She said it was third set of sail before she was happy with the results. There are some threads in here for making furled sails that are much easier than making the whole sail. Everything looks exceptional.
- Bobstrake, thomaslambo and Canute
-
3
-
Thanks George, Ken, Robb and everyone for the likes and kind words. Now that the majority of the deck fittings are in place, it's time to arm this bad boy!
- CaptainSteve, mtaylor, Salty Sea Dog and 1 other
-
4
-
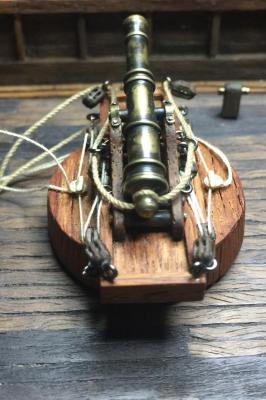
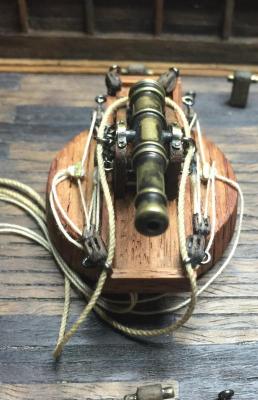
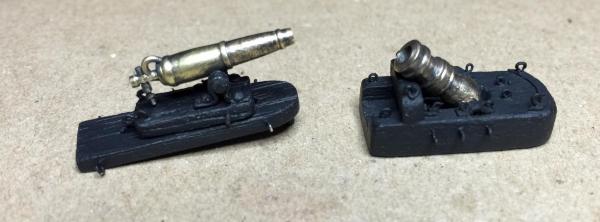
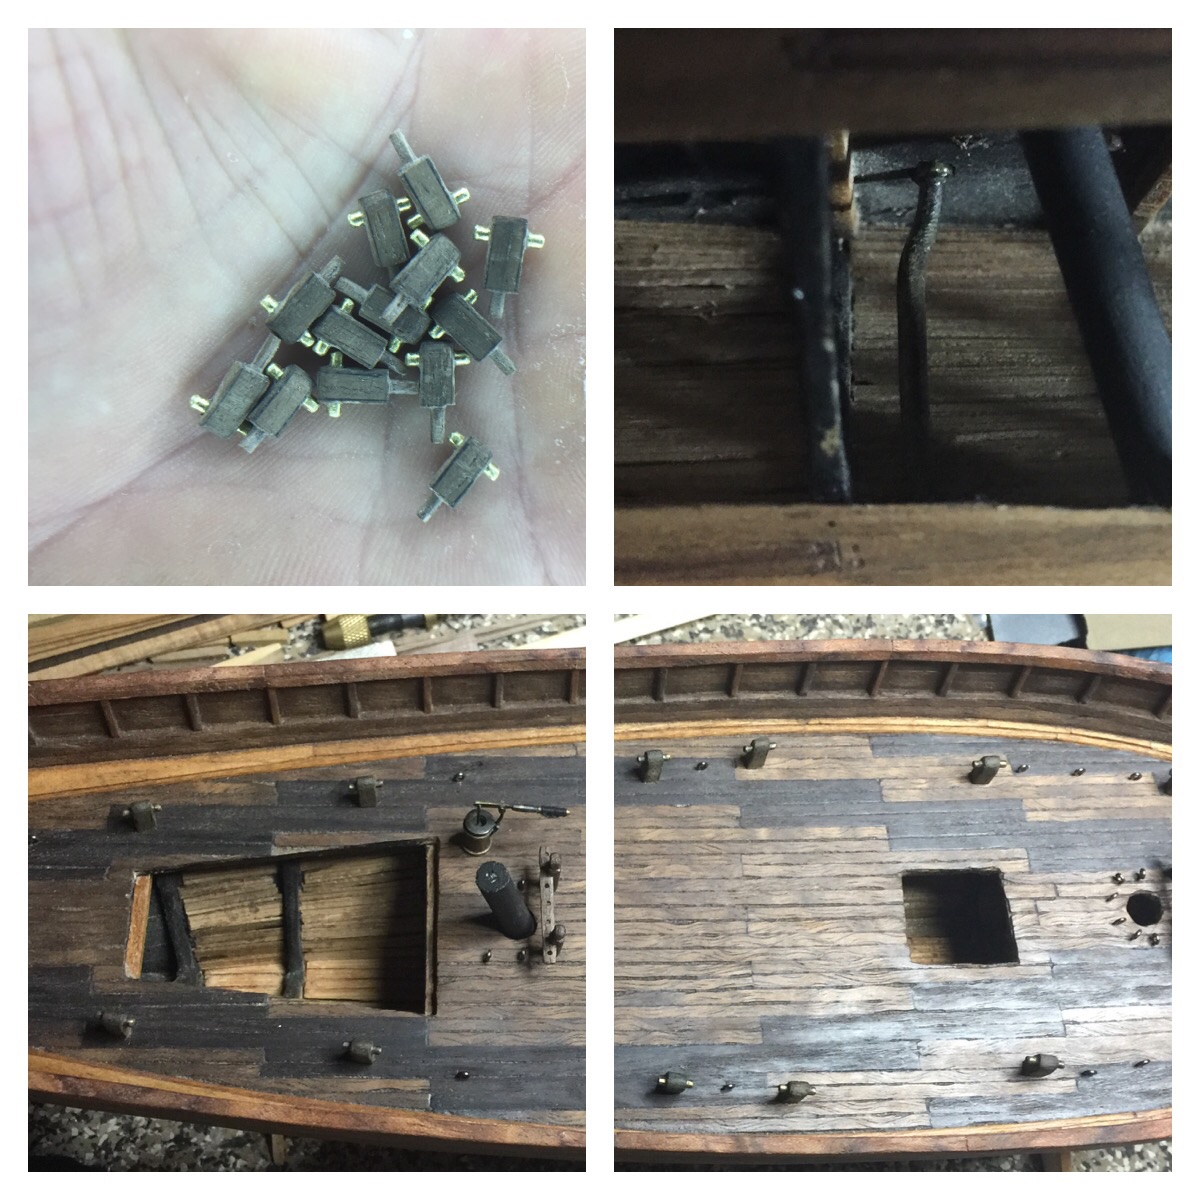
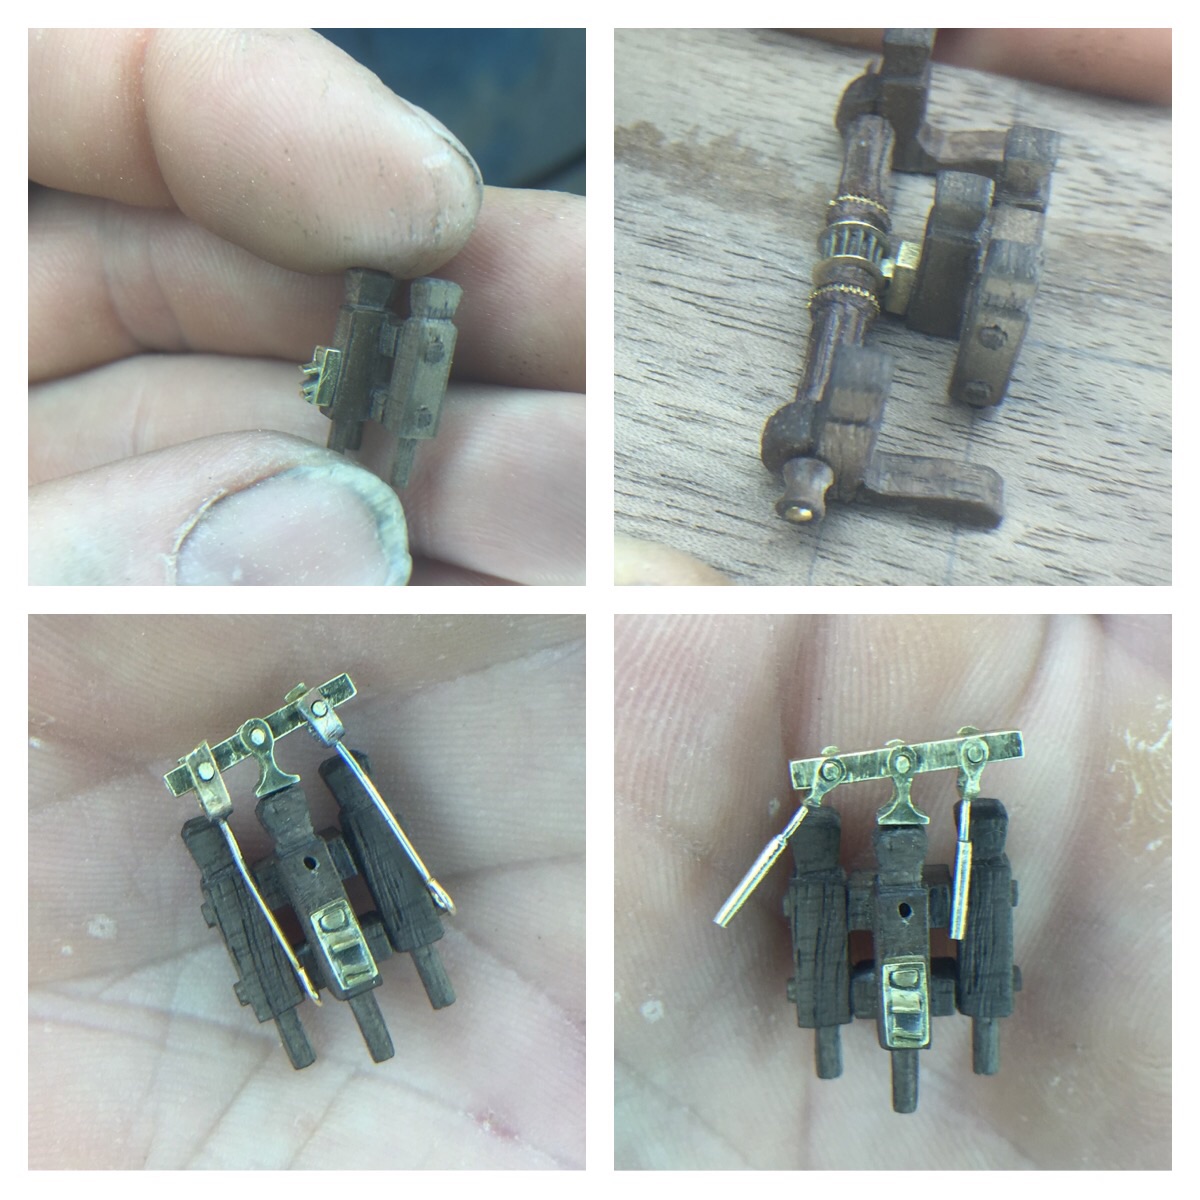
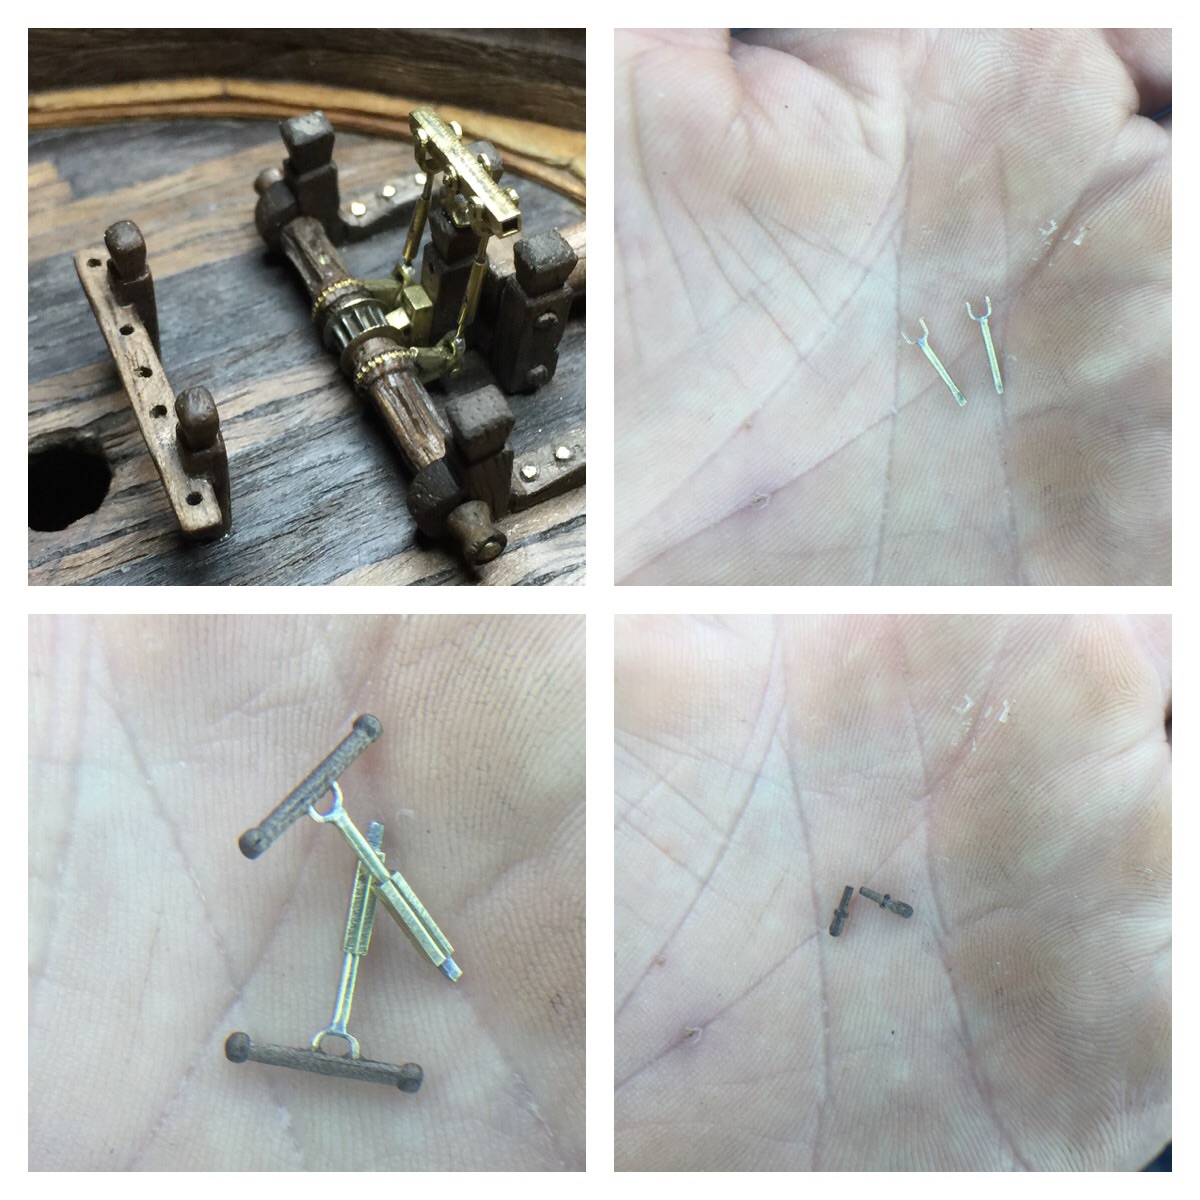
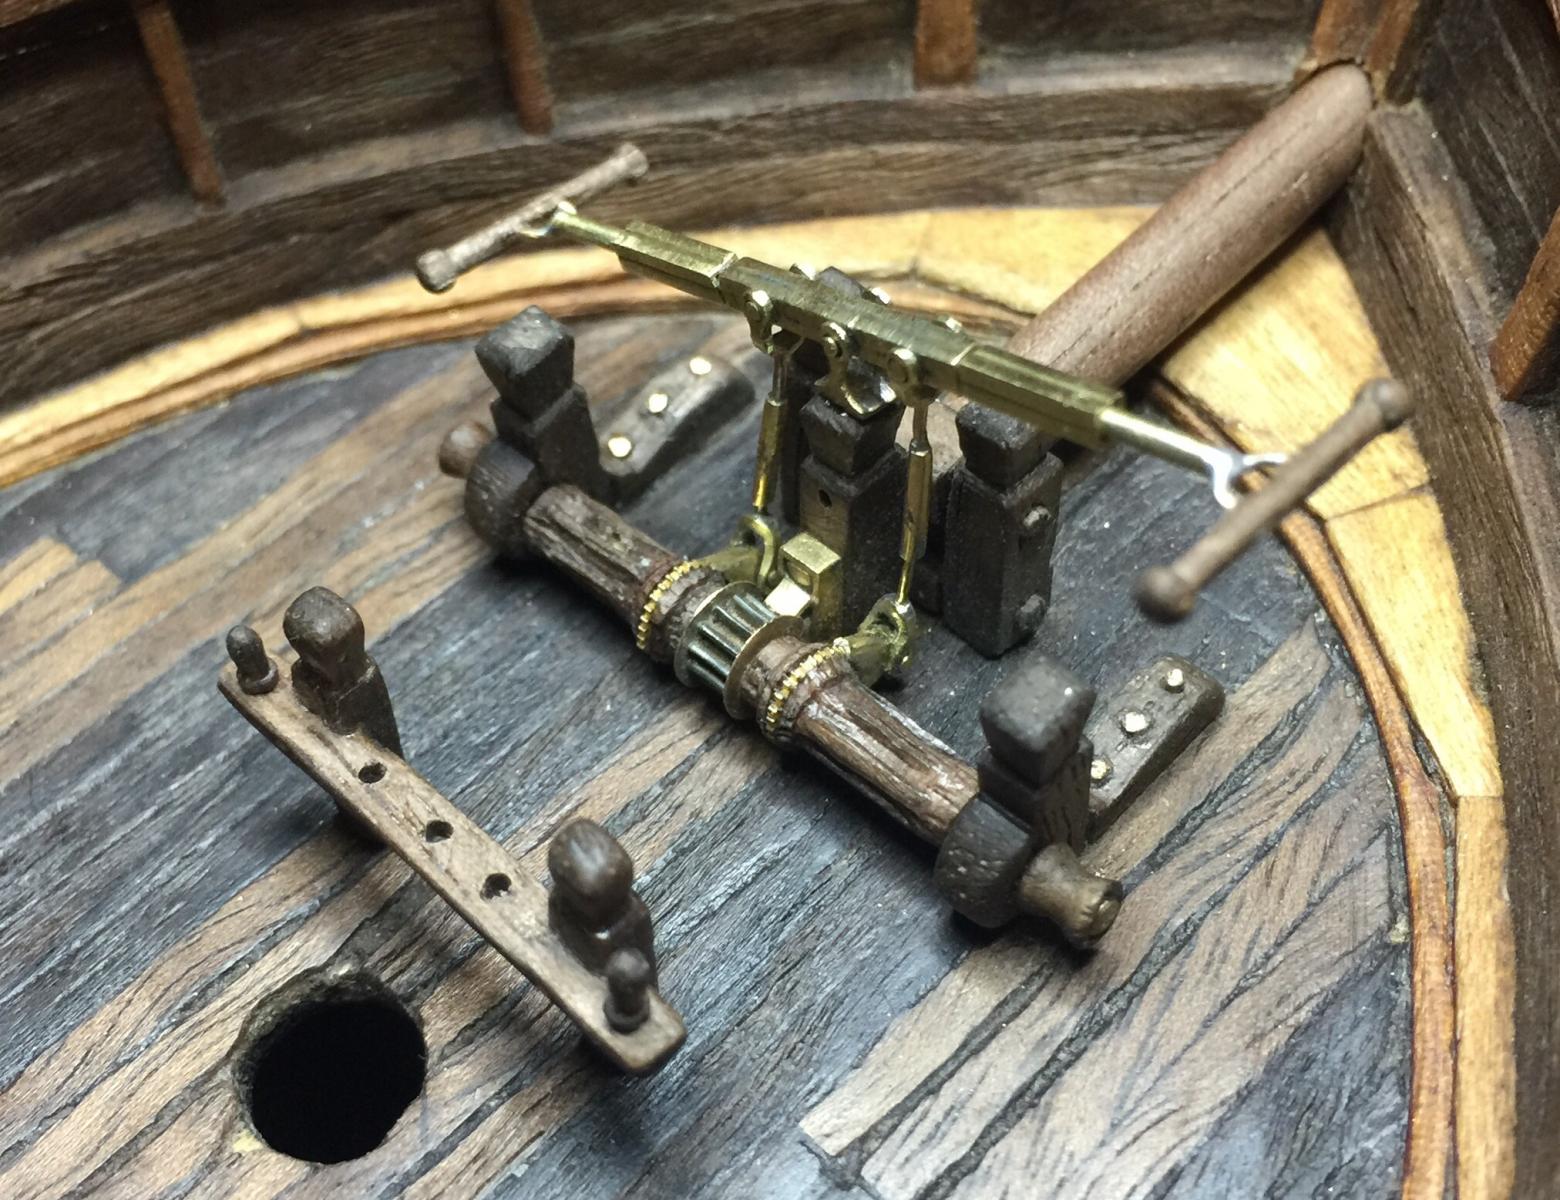
Well, the squirrels forge ahead, slowly filling the decks with the necessary fittings to set sail. All the while, Tiny and I have been working on the 12 pounder.
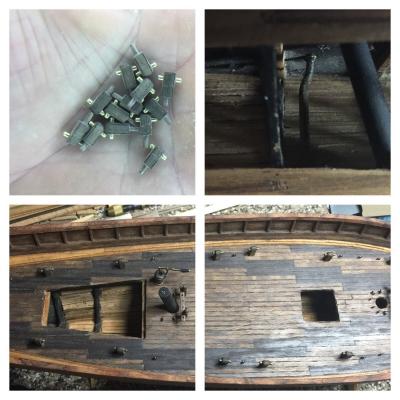
The Nutz and Bawls Clans seem to have put any differences aside since their 4th of July festivities. Red and Woodie set up a production line for making and installing the many bits and eye bolts. Harry took the job of securing the elm tree pump, putting a temporary pipe in place until the perfect elm is found.
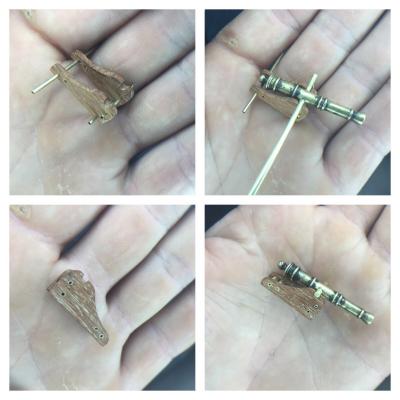
I sent Tiny off to the scrap heap for parts while I began work on the carriage. A hole was drilled for the trunion and a brass rod was soldered in. The sides were shaped and drilled while clamped together, and brass rods were inserted. After the cannon was fit, brass spacers were added to ensure that everything stays square.
Tiny returned with some watch parts that we decided to use to make the gun turret. Wood was built on both top and bottom of the parts to elevate the cannon. A brass rod was put through both pieces, and brass watch gears were soldered to its ends to secure everything together, and still be turnable. Trunion caps were made and installed to secure the cannon to the carriage.
Finally, we made the slide rail and placed everything together to see how she fits. The shiny brass is just for now, everything will be blackened and buffed out for the 'aged' look. There's still much work to be done. Until next time...
- mtaylor, UpstateNY, CaptainSteve and 7 others
-
10
-
Does this have anything to do with a certain rim in the sky? My navy buddy gave me a spoiler!
- thomaslambo, GLakie, mtaylor and 2 others
-
5
-
It reminds me of when the discussions went around about aging sails on the Launches. I was ready to tie one on my bumper!
Thanks Boyd, and borrow away!
- GLakie, CaptainSteve, thomaslambo and 4 others
-
7
-
I could always put it in a birdcage down by the beach for a couple of years!?
- Canute, mtaylor, Salty Sea Dog and 3 others
-
6
-
Nigel, CaptainSteve, George, Sam, Buck, Ken, Bob and Mark thank you guys for your kind and encouraging remarks. Thanks for the 'likes' as well.
I'm just a click away from the Optivisor. We're in the process of upsizing our living situation. I'm shooting for a room, shed corner of the garage, I want a space just for boat work. So when this happens I plan to do some upgrades to assist me before I break. Do you guys remember how I did the mortars? I blackened them and then ran a buffing wheel over them to blend off the darkness. This may be how I do it?

It kinda gave it an antique look. Also the shine seems to blur pics. Hey Cathead, thanks. Since my phone is my mobile computer that's always with me, I rarely get to see what a full screen looks like.
- Canute, CaptainSteve, thomaslambo and 7 others
-
10
-
Well this little windlass is taking awhile so I'm doing an update of the weeks adventures.
First on the agenda was to move the windlass back 12inches. I won't say who(Harry), but no room was left for the samson post which has the pawl and hand pump assembly.
The pawl was made by soldering three brass strips that extended through a small, rectangled brass stock. The pivot arm was attached atop the samson post and fitted with links to attach to the purchase arms.
Next, the purchase arms were made from thin brass tubing and were beaten into submission. Solid brass rods were inserted into the ends to accept more links. Finally, the purchase arm were attached to the rear of the windlass with a tiny pin nail and secured with a drop of CA.
After much painful eye straining, final adjustments were made and the links were joined together. Next was making the detachable pump handles. While there was wood being turned, I made a couple of belaying pins to check for fit and appearance.
In this trial fit of the handles, they proved to be too short. So extensions were added to the handles to achieve the desired length.
Everything fit well in the end, even the first of many belaying pins.
This picture shows the handles in the up and down position, which are the only moving parts to the windlass.
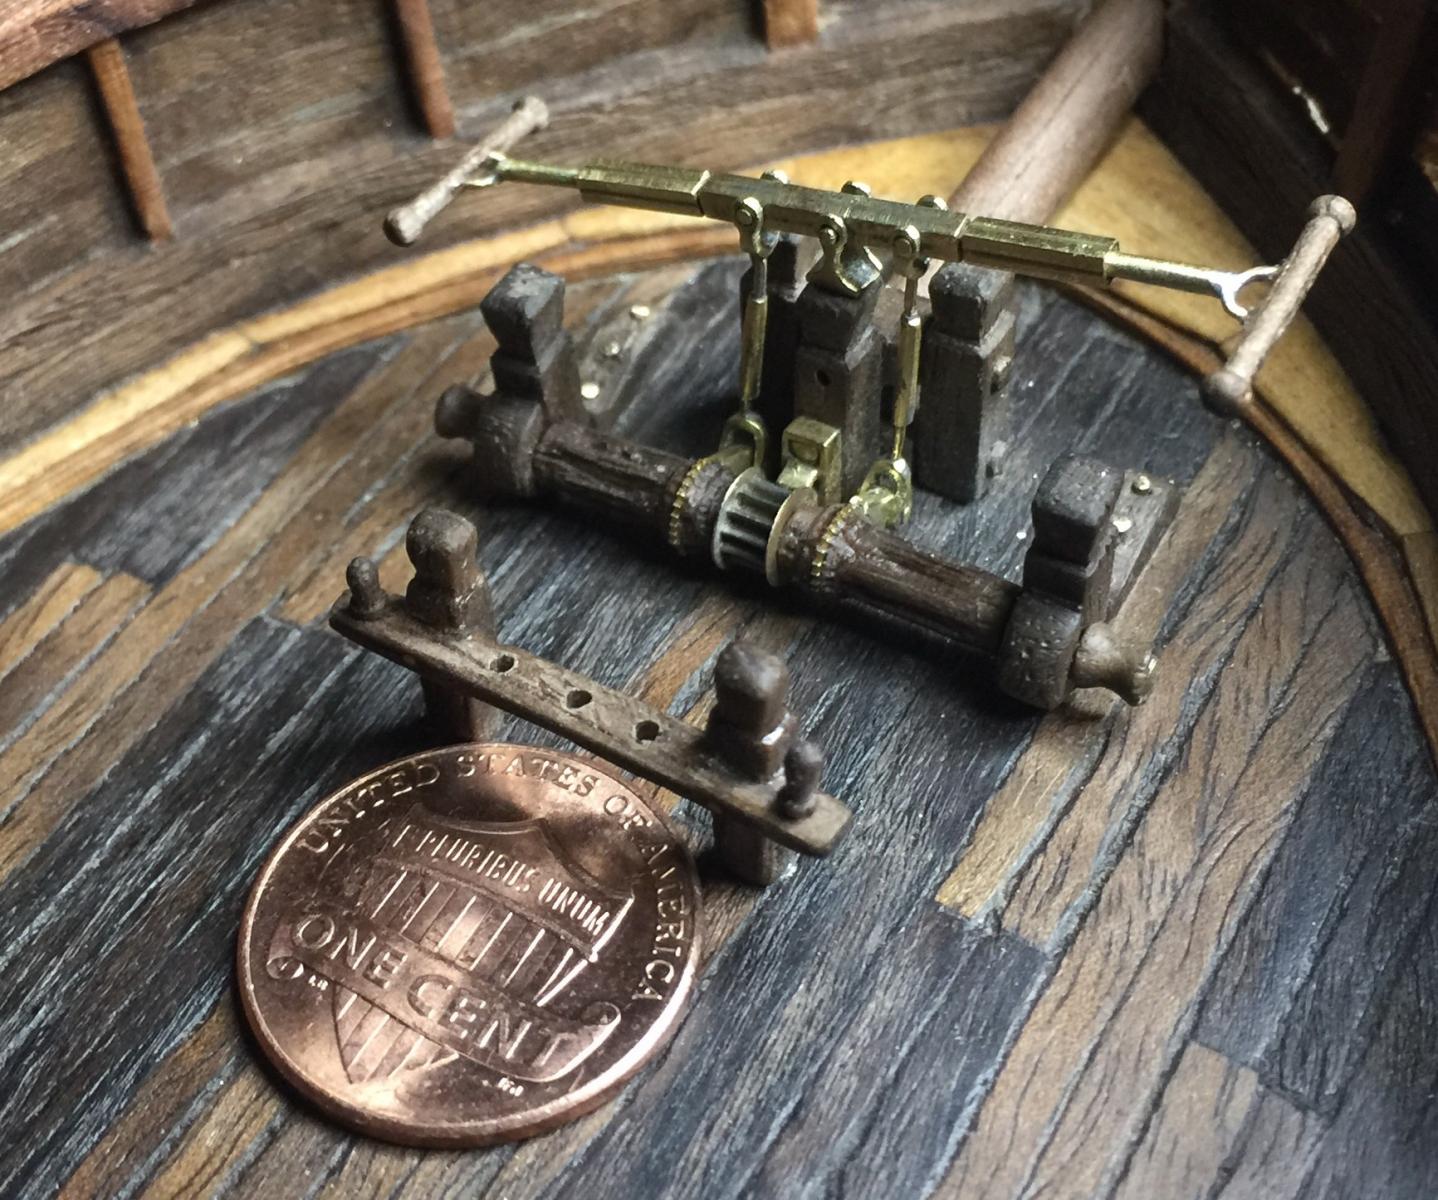
Here's a penny for reference. I still plan to add whipping to the handles and a bracket on the front of the samson post to hold the handles when not in use. Also in debate is blackening or not. Might be awhile before that's figured out.
- Canute, dgbot, usedtosail and 10 others
-
13


USS Ranger by mattsayers148 - FINISHED - Corel SM55 - 1:64 - 4th build, 2nd build log
in - Kit build logs for subjects built from 1801 - 1850
Posted
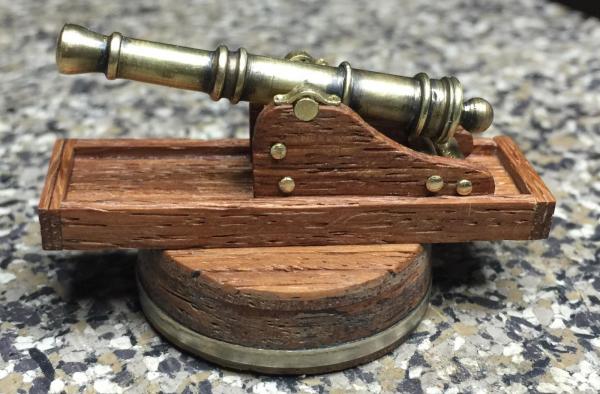
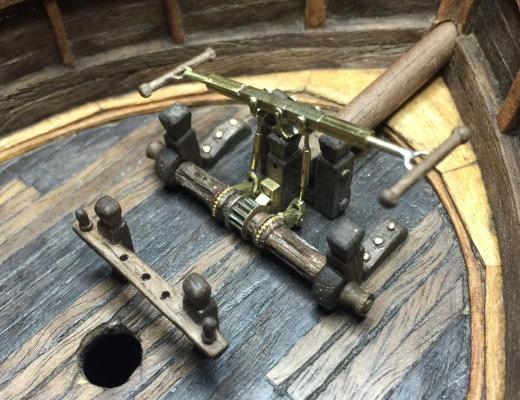
I was able to do a bit more this week on the carronade. Most of the pivoting slides that I've seen had individual sideways wheels attached to a wood crossmember. I decided to make these in one piece for easier handling.
It worked out well once the wheels were attached to the carriage.
After the wheels were attached, the slide and carriage were joined together. The leg on the slide was put through the slot in the carriage and cut flush to the underside. A hole was grilled through the leg and a pin with a thin brass washer affixed to keep the two together. After that all brass pieces were blackened and given the wire wheel aged treatment.
A small block was attached to the deck to receive the pivotal pin.
Next is making the blocks and tackle to attach the slide to the deck. Unfortunately the cap rail on the backside it slightly in the way if the carronade were fired at sea level. My guess is that most shots would be elevated for distance, so the cap rail may be ok where it is. If not, it'll need to be modified.