


Philg88
-
Posts
166 -
Joined
-
Last visited
Content Type
Profiles
Forums
Gallery
Events
Posts posted by Philg88
-
-
Looking very nice indeed! I see we have the same guillotine, which I would rate as a "must-have" tool for all model shipbuilders.
Cheers,
Philip
- robert22564 and maddog33
-
 2
2
-
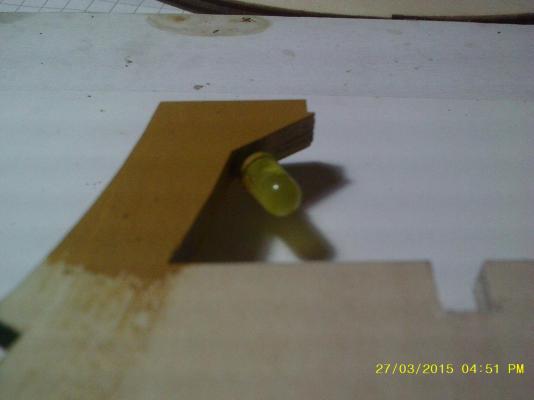
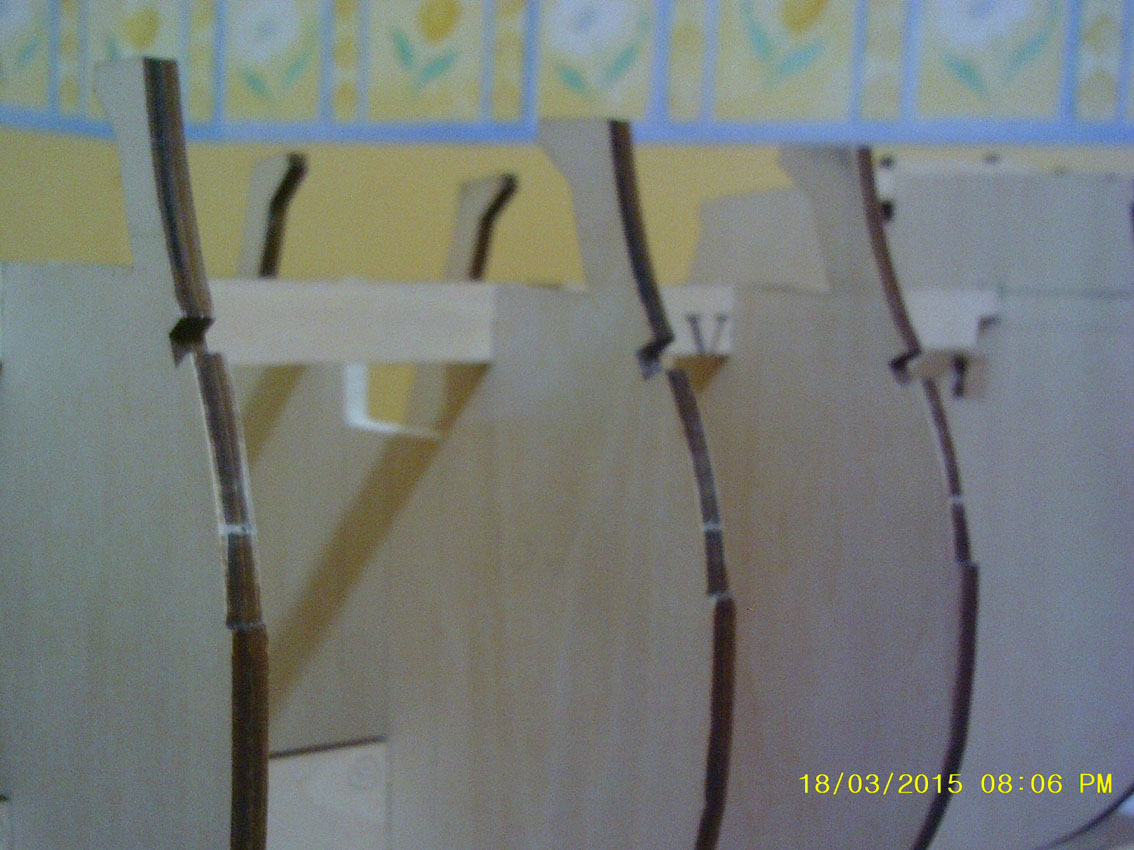
Another fiddly bit complete. The starboard navigation light is made from 3mm and 6mm brass tube, a washer and an LED.

-
According to the company's website, Vallejo's official UK distributor is here: http://www.creativemodels.co.uk/vallejo_model_color-c-5_11_227_81.html
-
You could try Admiralty paints from Cornwall Model Boats (http://www.cornwallmodelboats.co.uk/acatalog/admiralty_paints_water.html). I've had no problem with these on wood or plastic.
Cheers,
Philip
-
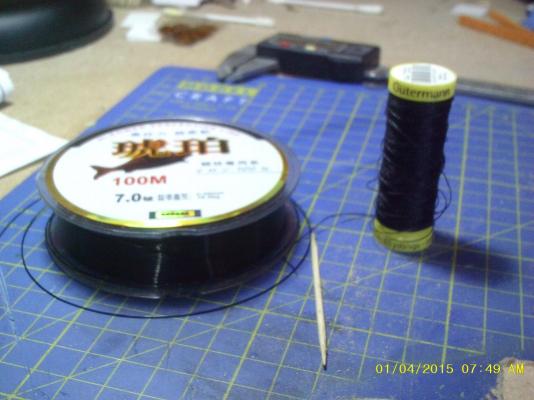
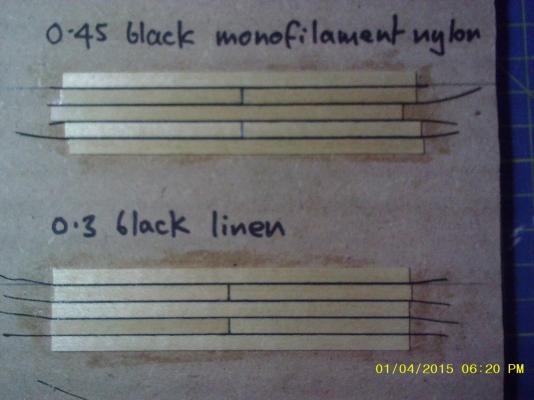
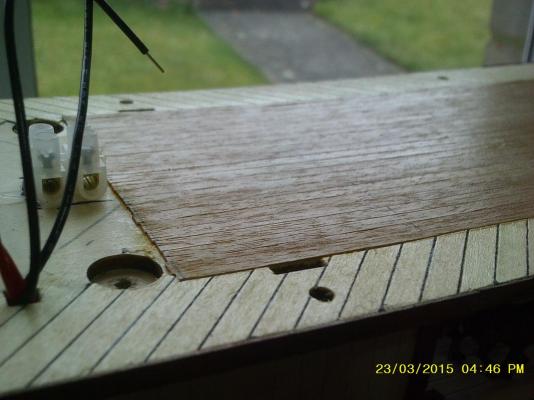
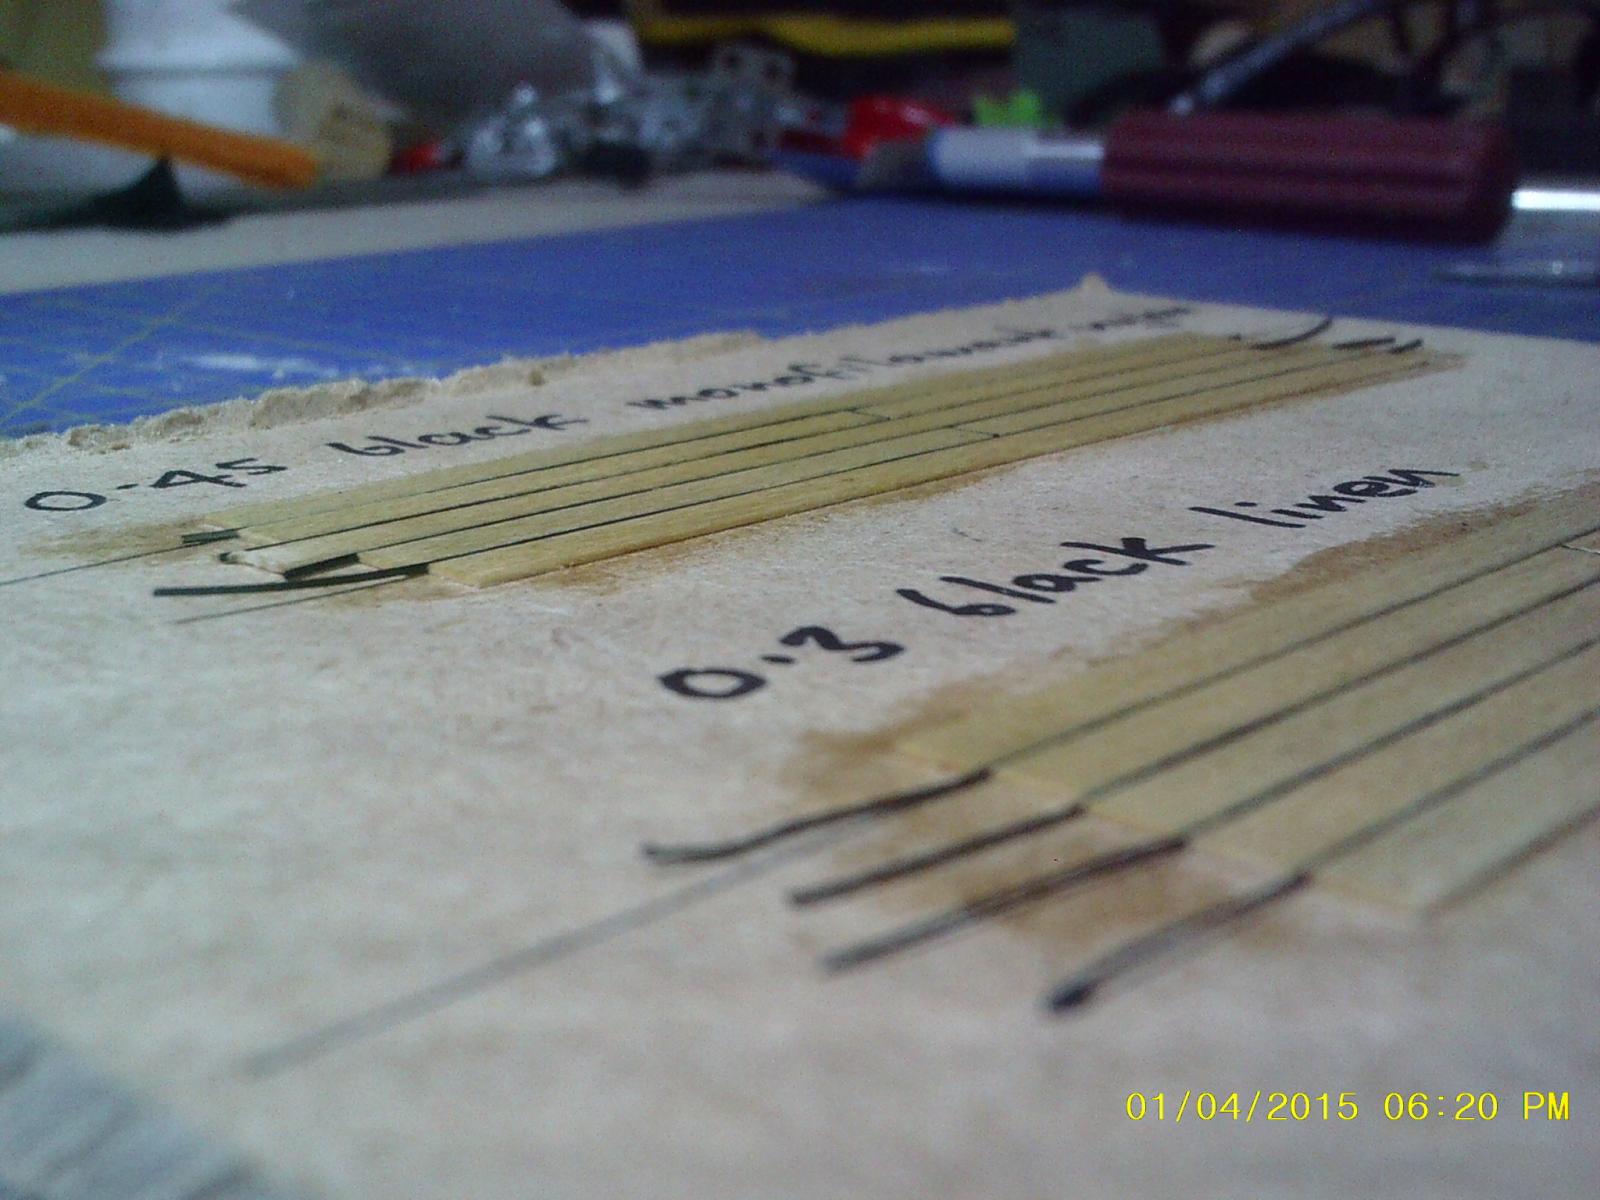
Time to plank the upper deck. I did a test as to which would be the best caulking method and decided to use the nylon. There's not a lot in it but t looks to me more "caulk like" and gives crisper lines. Scale wise it's also pretty close given that the original caulking on ships of this class was apparently 1 1⁄2in (38.1 mm), which at 1:75 gives 0.508 mm.

- CaptainSteve, AON, shihawk and 2 others
-
5
-
Thanks a lot for that. It has set my mind at rest somewhat because I honestly couldn't see how I had created a problem, Onwards and upwards ...
Cheers,
Philip
-
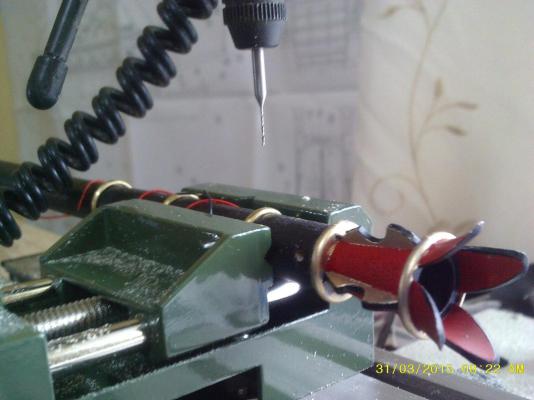
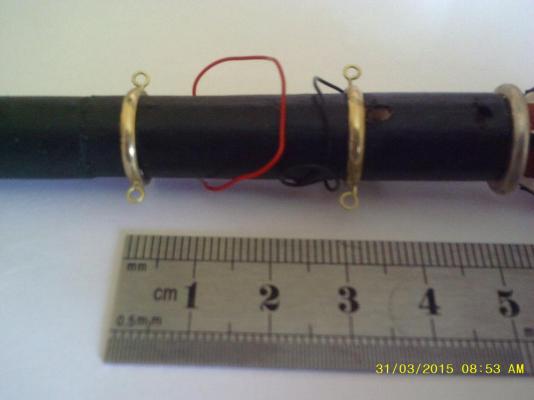
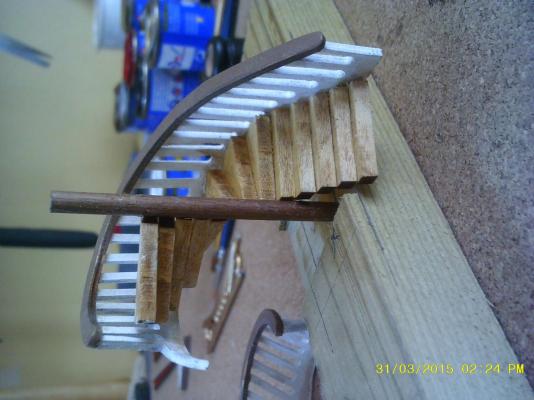
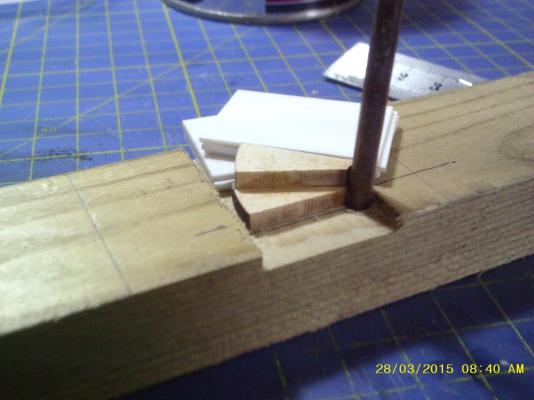
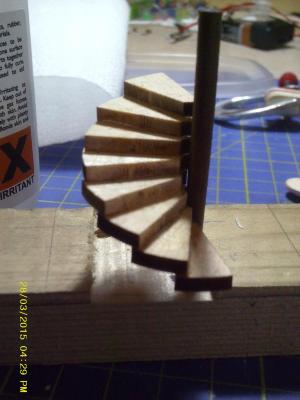
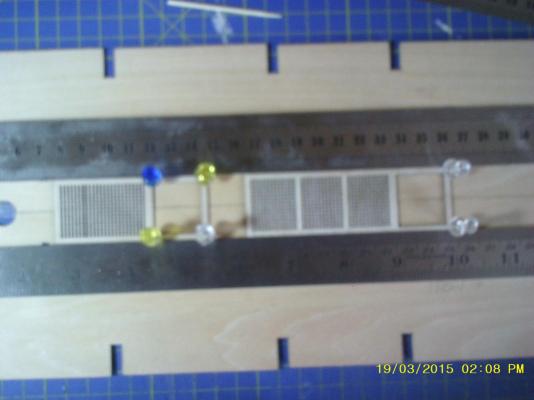
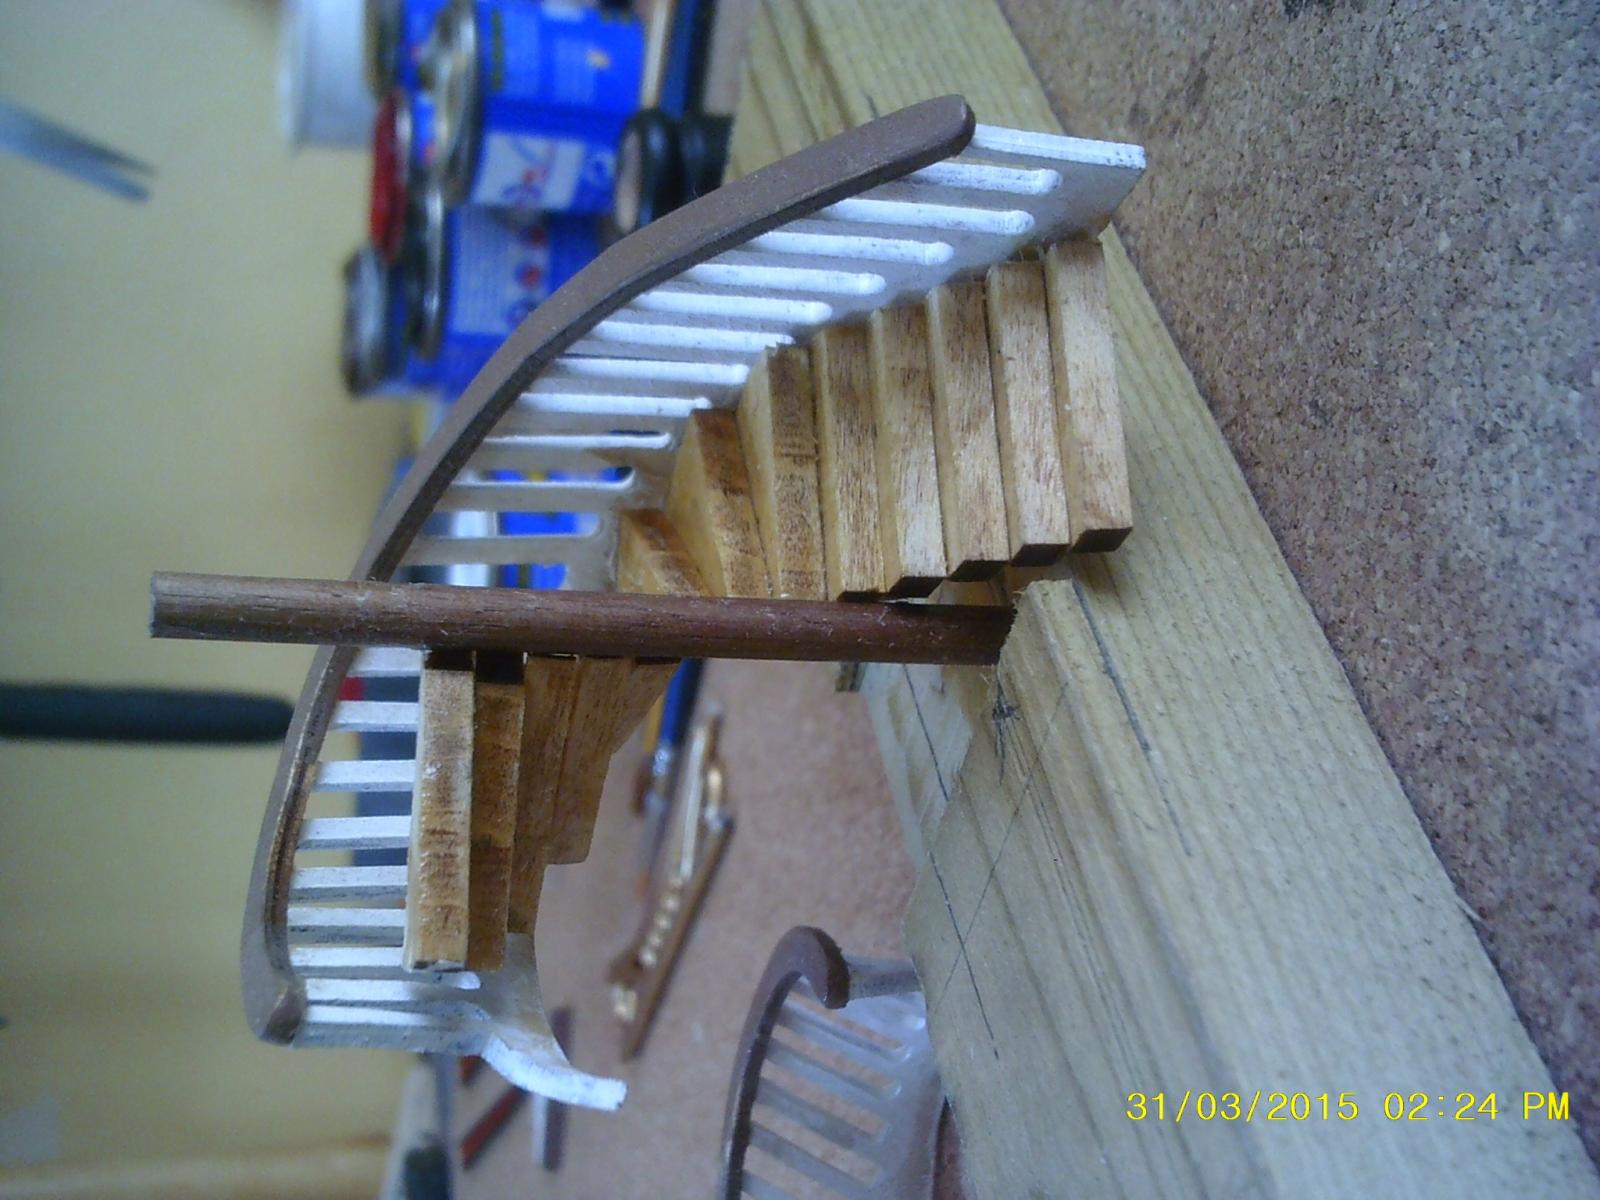
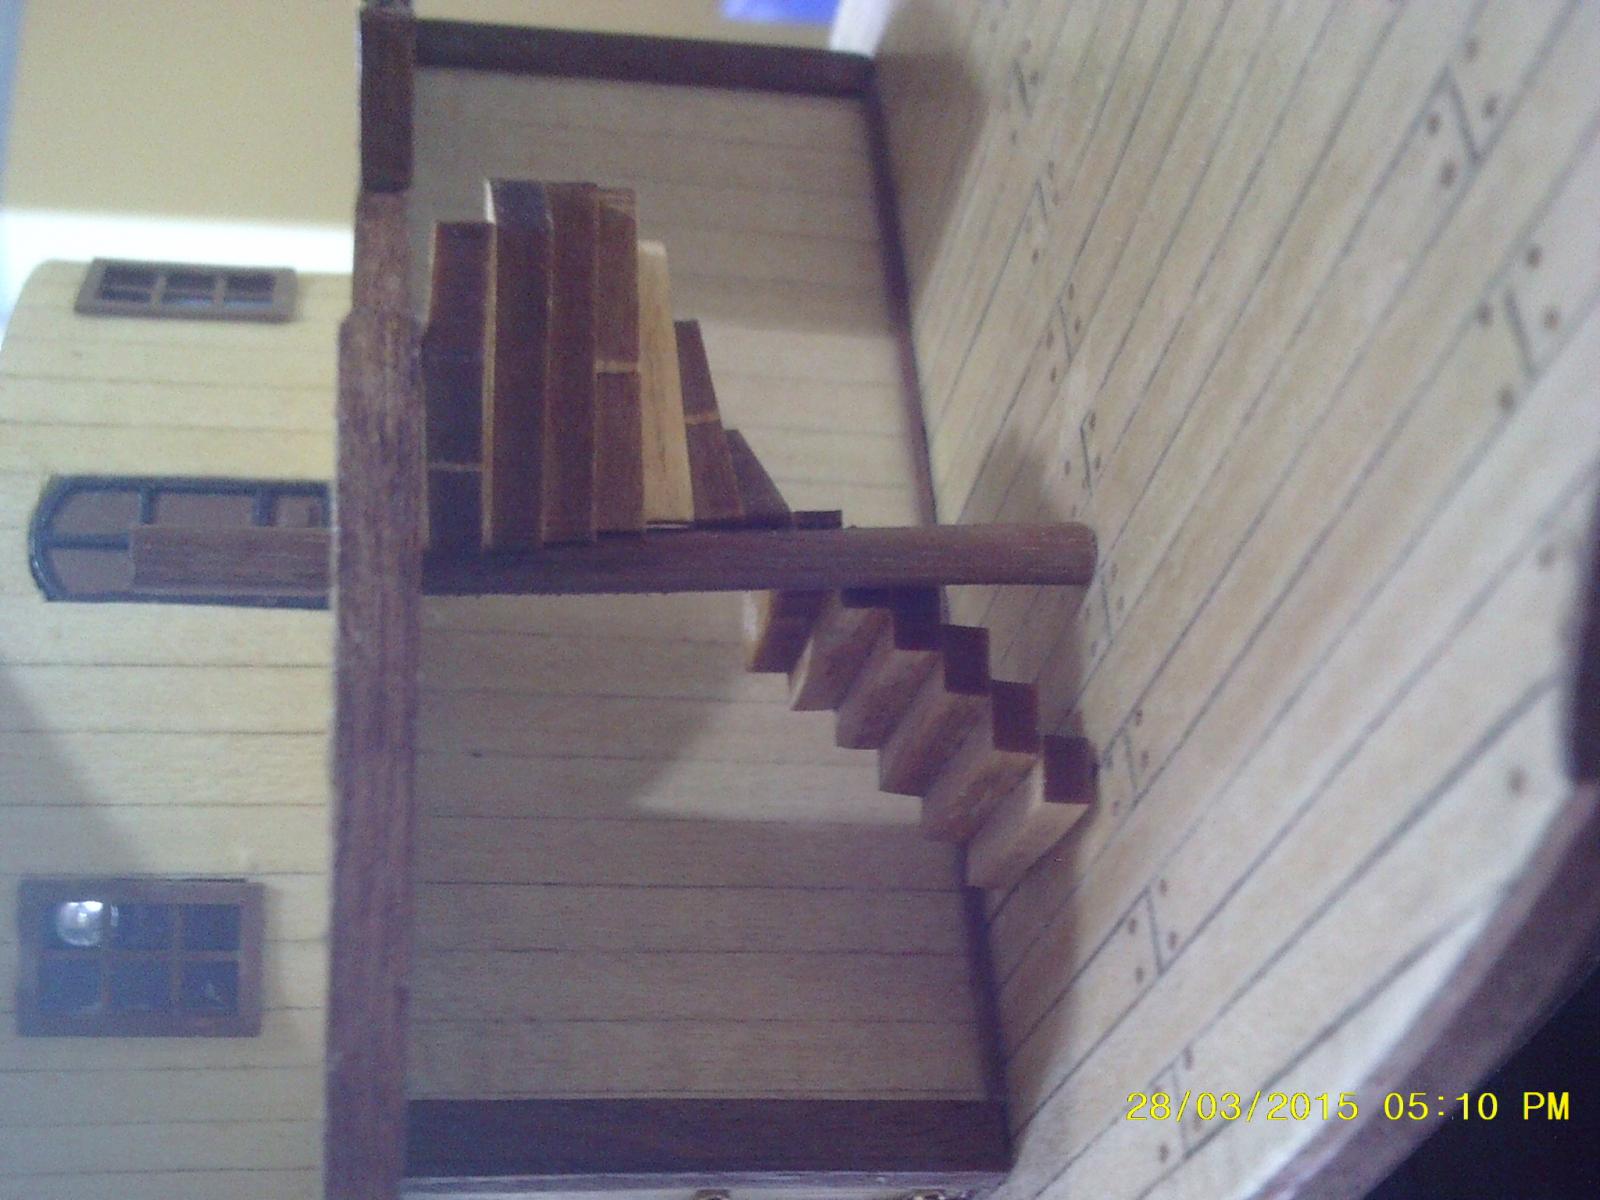
Fixing the eyepins to the brass rings on the smokestacks is another fiddly task, thank God for the XY table and drill press. Stairs are all but finished, final gluing can wait until they're in position to ensure the correct fit. I'm doing these adjunct tasks while I wait for the rest of the windows (i.e. 2) for the second deck staterooms, which STILL haven't arrived. I've ordered some more from a different supplier so that little bit of kit bashing has now cost me 25 quid with the extortionate handling and postage charges involved!
 .
.- msberkman, Grey seal, CaptainSteve and 1 other
-
4
-
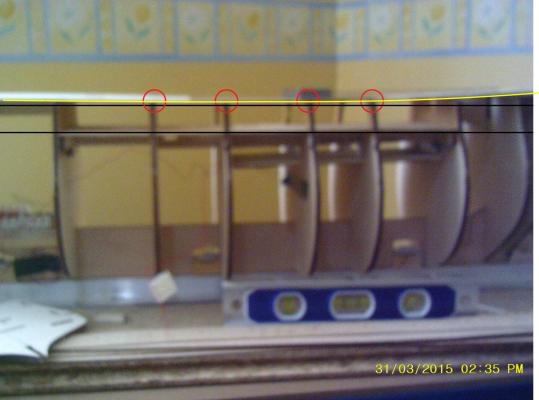
Thanks Keith. Let me try and explain what I mean in more detail ... The bulkhead tops that span the upper deck are equal in height (shown circled red) while those either side are slightly higher, hence the curve (yellow line). However, the upper deck is level (black lines) so I don't think there is a misalignment, just a curve built into the design. What do you think?
-
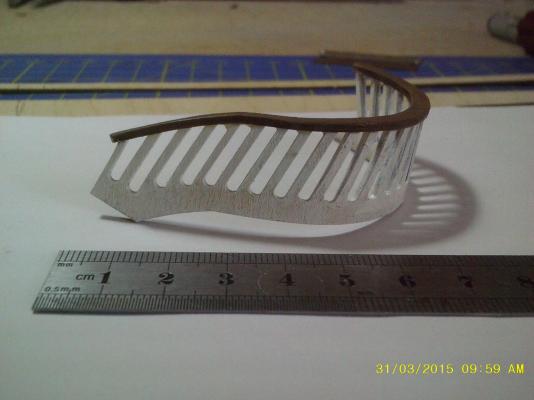
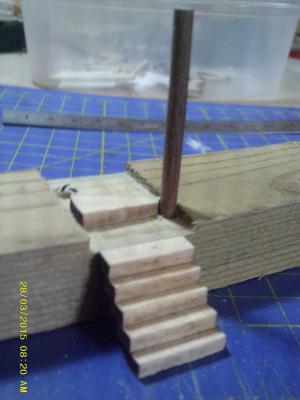
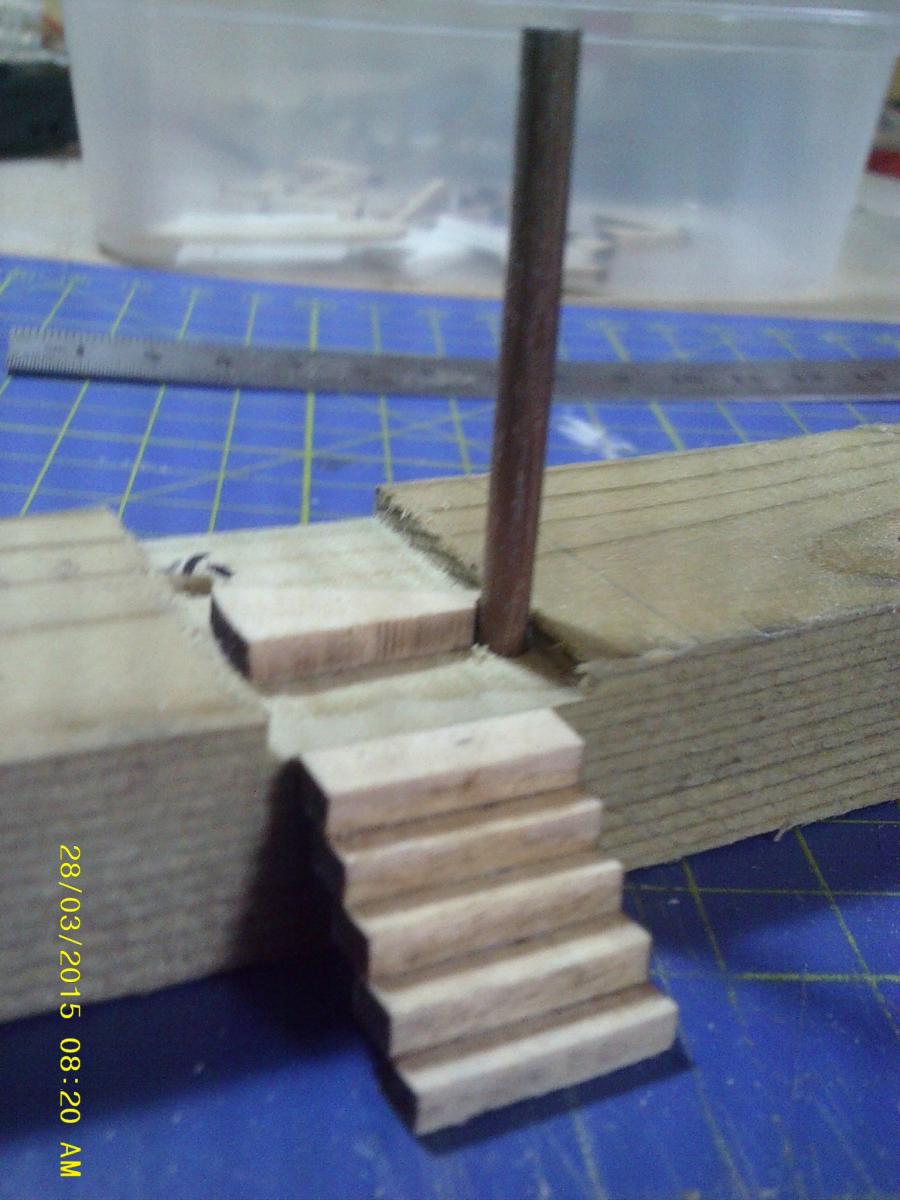
The stairs are so far proving the trickiest part of this build. I made a jig with a hole the same depth as the straight section of the stairs to make the spiral bit easier. Then I used 3 bits of 1mm thick plasticard glued together to bump up the height on each step, which was offset by 2mm against the top of the previous one
 .
.- CaptainSteve and clearway
-
2
-
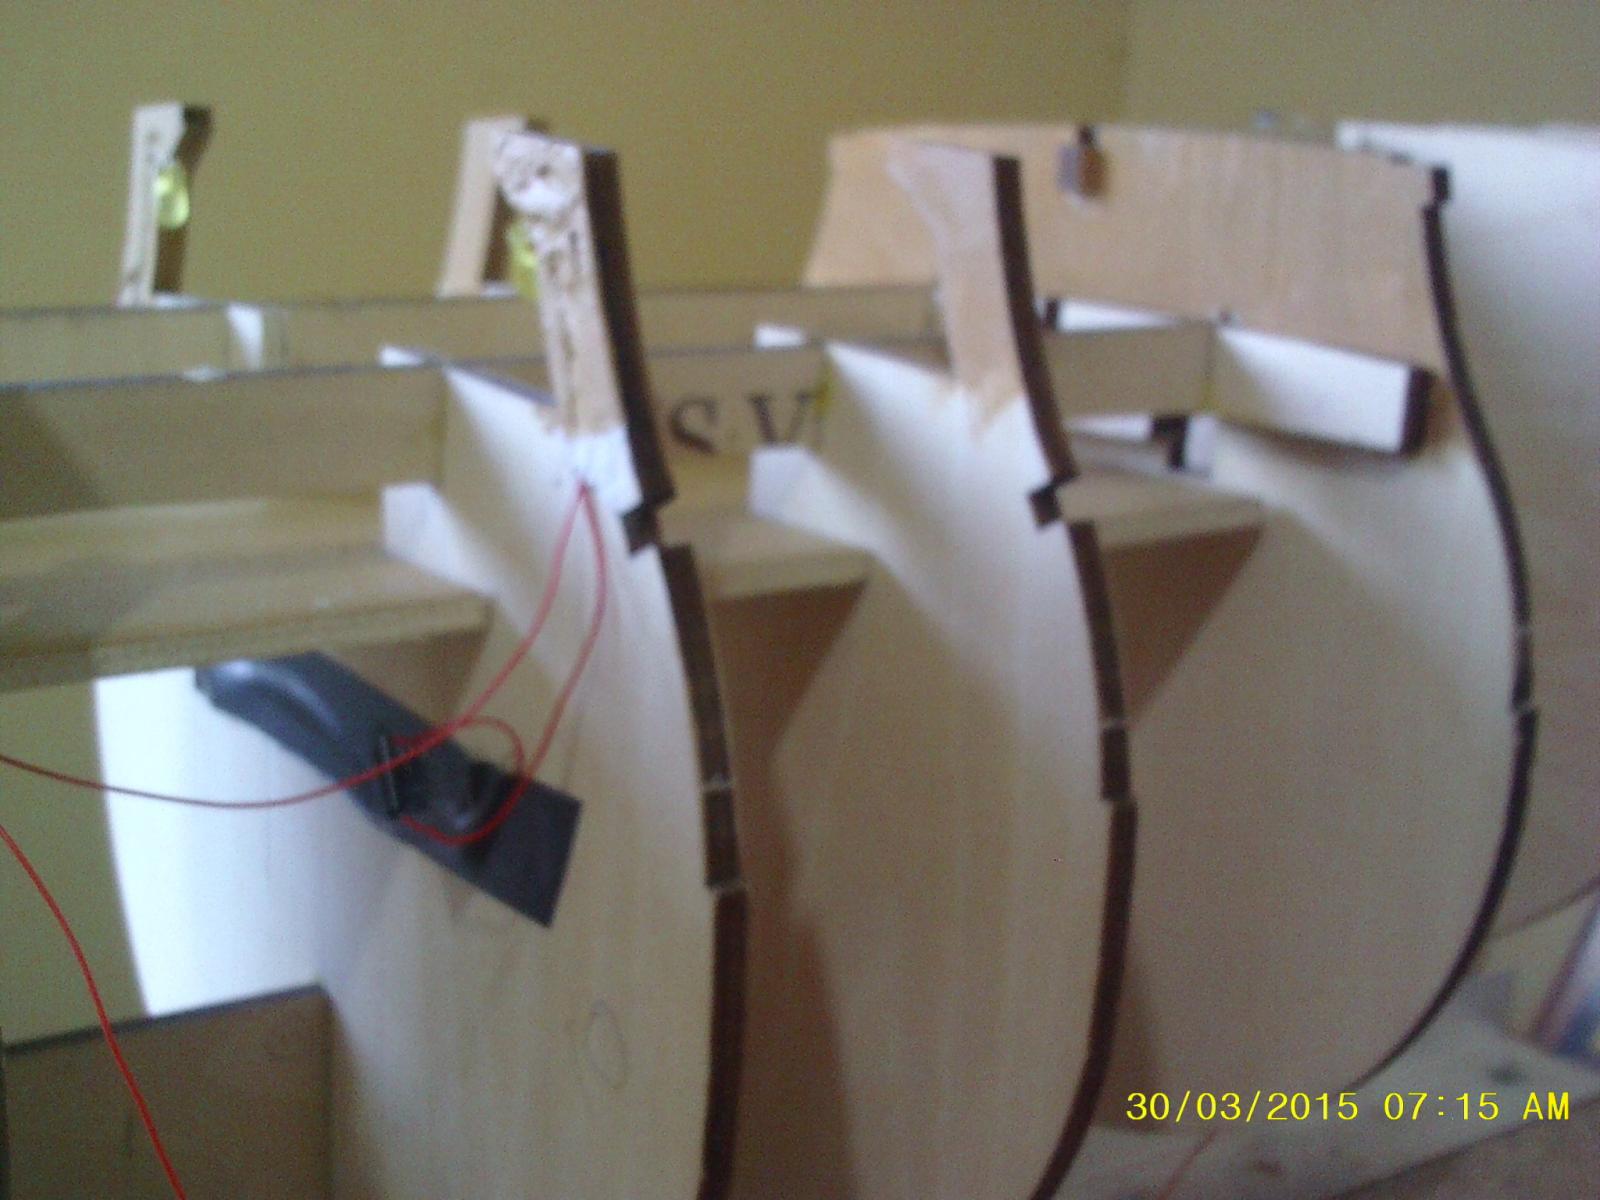
First of the bulkheads and the middle deck now glued in position. It looks like the quarterdeck will dip at the waist above the upper deck - is it supposed to be like that or is their a misalignment somewhere?

-
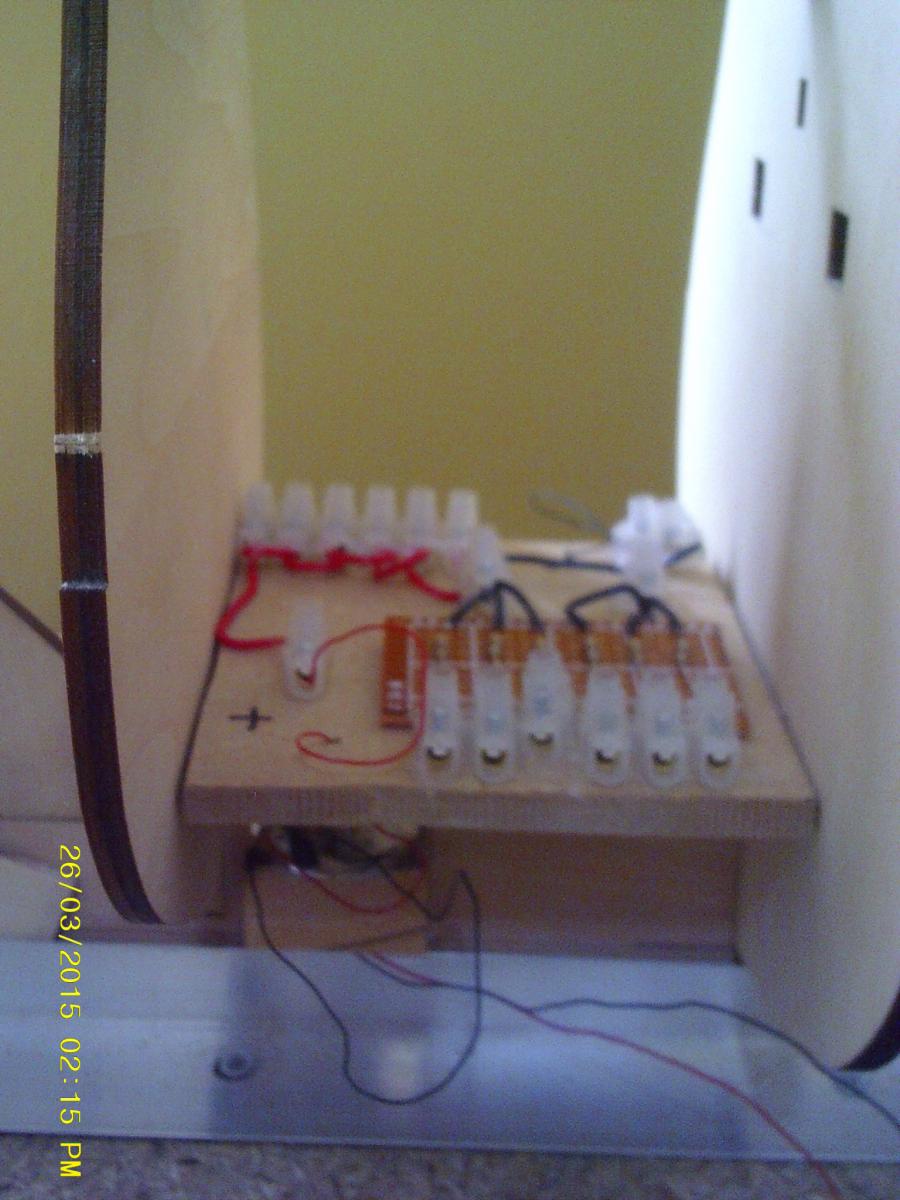
This is what I meant by integral bulkhead lighting. I chased out a channel with an end cutter attached to my Proxxon rotary tool, soldered the connections and filled it in with plasto - the power feed wires are on the other side. This LED and the one on the other side will reflect off the upper deck and out through the waist under the spars.
- clearway and CaptainSteve
-
2
-
I haven't tried lemons, although you are quite correct that they contain citric acid. I suspect that lemon juice might work, it would just take longer. Then again, the concentration may not be up to triggering the necessary chemical reaction.
Cheers,
Philip
- hornet, mattsayers148 and GLakie
-
3
-
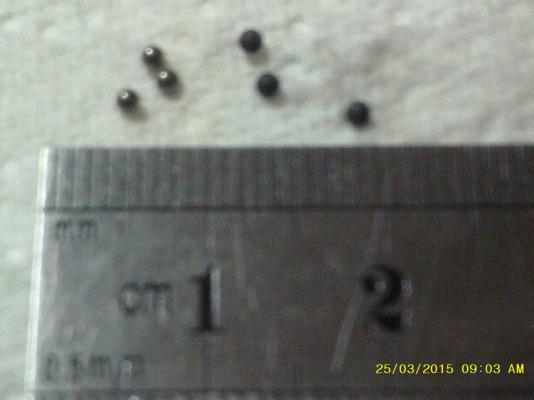
Ball bearings for cannon balls
I know this isn't a new idea so forgive me if you've seen it before. Steel (important!) ball bearings react with citric acid to produce a beautiful black matt finish. The beauty of this is that ball bearings are available in every size imaginable so scale wise there are no issues. 24 hour immersion in a concentrated solution of citric acid (available in powder form online for around £5 per kilo) produces the desired effect. So, for a tenner I got a thousand 1.5 mm cannon balls with enough citric acid left over to make lemonade until doomsday ...
(Untreated ball bearings on the left of the pic - sorry about the focus)
- GrandpaPhil, GLakie, Geoff Matson and 5 others
-
8
-
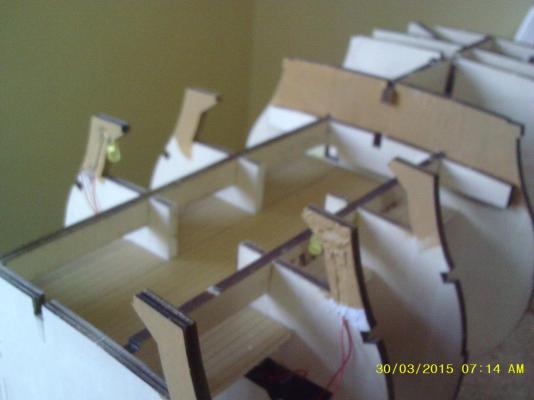
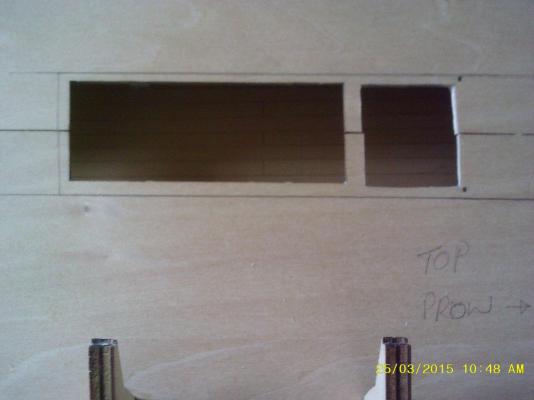
Finally cut the holes in the upper deck for the new ladders and installed the power distribution board between the rear bulkheads.
I'm finding that this build requires a lot more thought than previous ships I have built. It becomes a question of thinking right ahead almost to completion before taking the plunge and chopping things about. Next will be the the waist bulkheads, which will have integral LED lighting. To find out what that means, watch this space!


- CaptainSteve and clearway
-
2
-
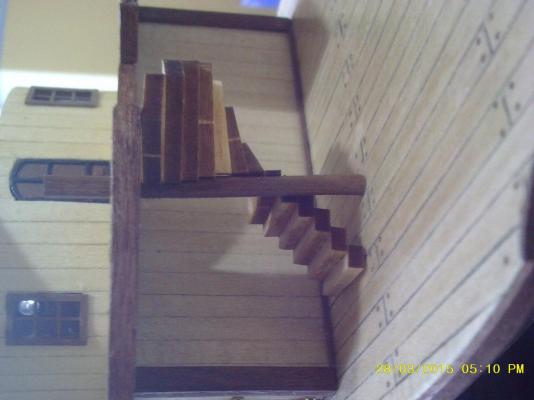
After all the work on the new stairs it would be a shame to cover them up. But then again ...

-
-
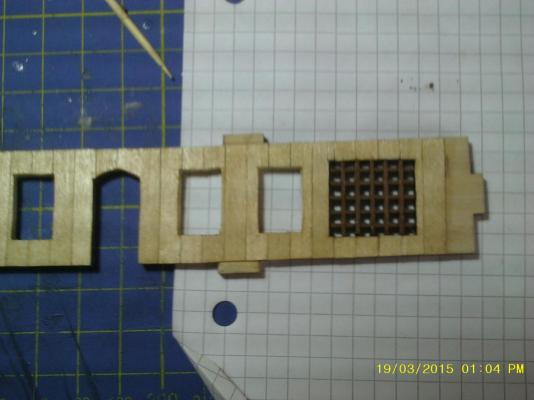
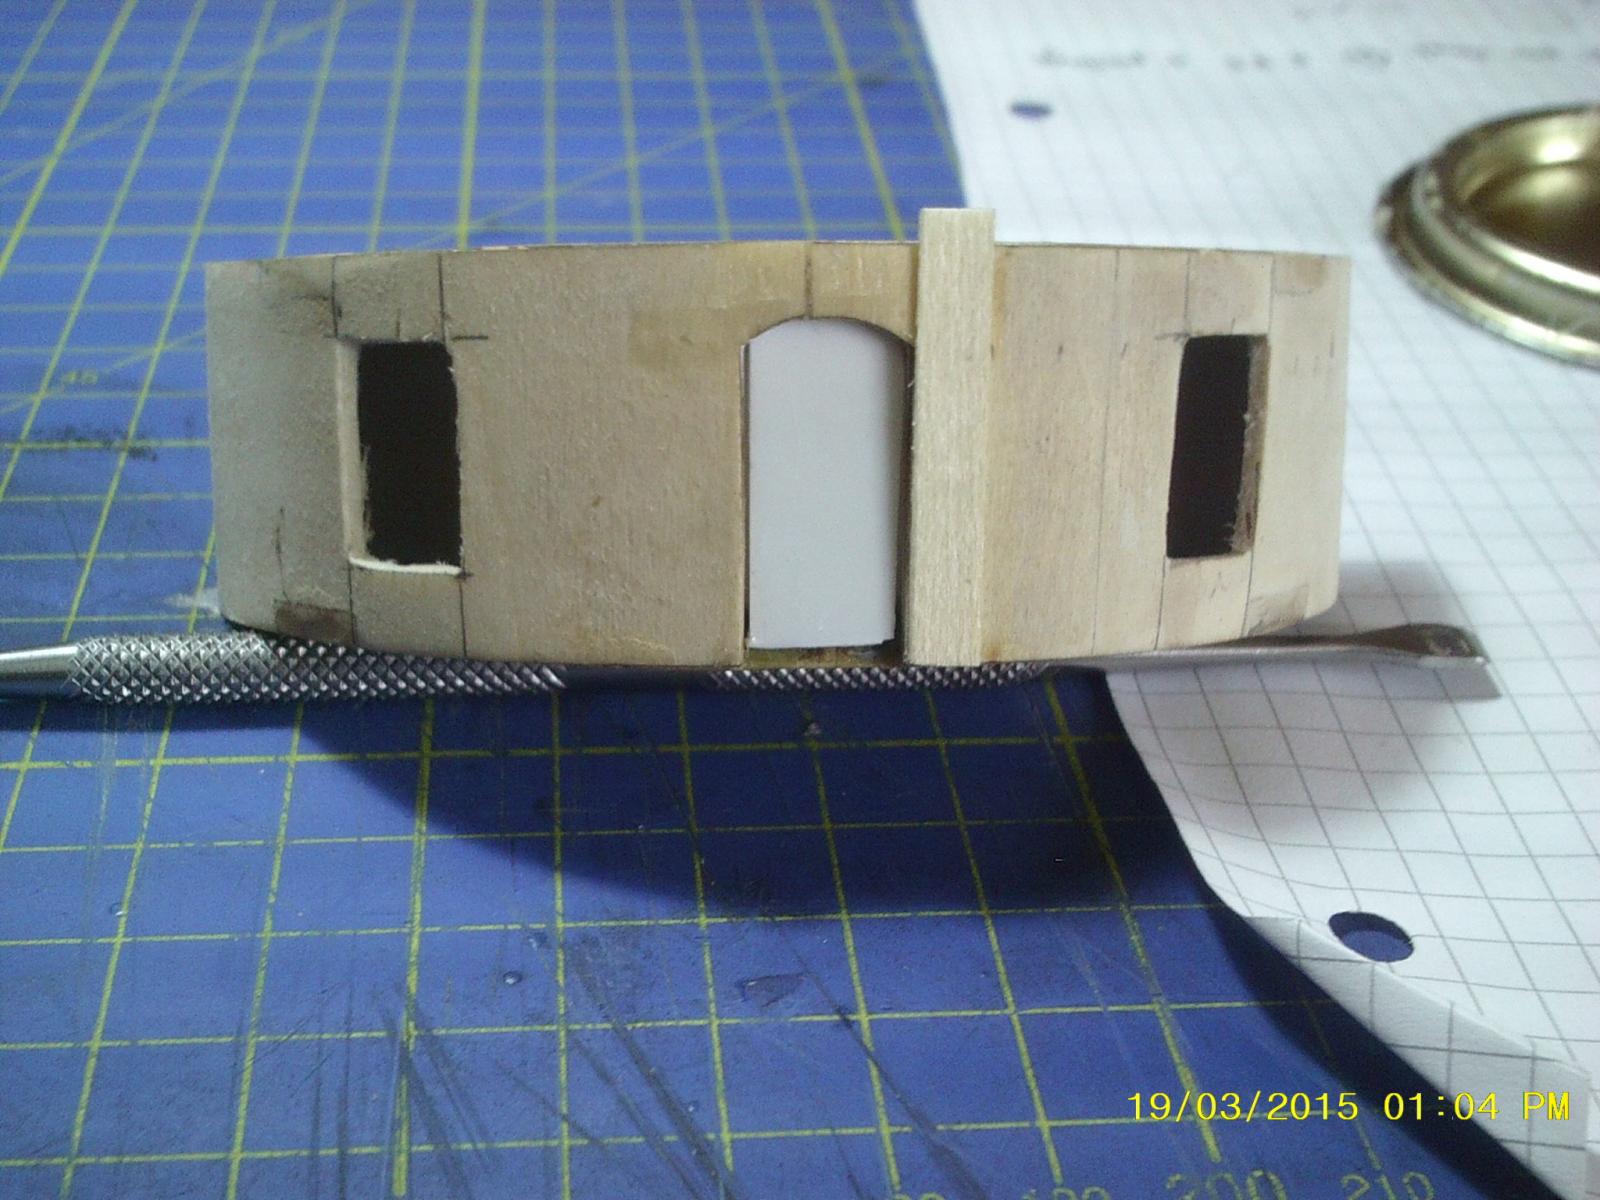
Some scattered progress while I wait for the rest of the replacement windows for the 2nd deck staterooms.
As the floor will now be visible through the glazed windows, I fitted a floor laid using wood shamelessly stolen from the HMS Victory (which will now be planked with lime)
Smokestack alignment problem fixed by moving the holes in the 3rd deck back by 3mm

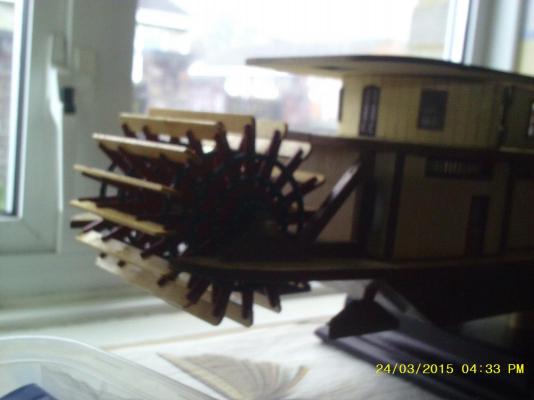
Paddlewheel assembled and fitted
- CaptainSteve and clearway
-
2
-
I don't know why Longridge's plans show it like that, but if you look at McKay's later work The 100 gun ship Victory, he doesn't show any treenails so maybe it's down to artistic licence. 19th century practice seems to have used four trenails (two per plank) at each butt joint plus a single run of treenails into each deck beam abaft. There are plenty of photos of Victory's deck knocking about that confirm use of that system but as Druxey says above, they wouldn't be visible at 1:100.
-
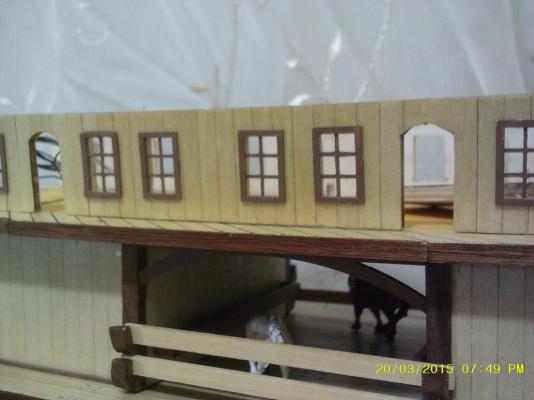
It was a lot of fiddly work to enlarge the holes for the windows then paint and glaze them but I think it was worth the effort. Now that the deck will be very noticeale through the windows I'm thinking of planking it - at the moment it's just ply painted yellow.

-
Thanks for that - I'll check it out.
Philip
-
Hmm ... I like the boat idea. I haven't seen these anywhere at 1:75, which is why I've avoided them up to now.
-
She is indeed a beast, which was my first thought when the box arrived. As for the hatches, I assume that you mean the ones on the next deck down (i.e. the lower (gun) deck). It's an admirable suggestion but I don't think they would be visible. Looking at the other build logs here that have added the stairs, only about half of them is visible from directly overhead without the spars in place. Once the masts and rigging are in place it's going to be pretty much impossible to peer down the hole so I'm going to give your idea a miss - there's plenty to do already!

-
The decks on the Victory used a system known as "four butt shift planking" so that no planks attached to the same beam within four planks widths of each other - plank joints aligned athwartships every fifth plank. A Google search for the term will give you a bunch of images, which should help.
Cheers,
Philip
-
Progress on the faux middle deck ...
Bulkheads 9 and 10 modified to carry the new deck and allow access from the upper deck via the scratch built staircases...

Central spar replaced with two, the new one made from the stand, which is now redundant owing to the built in brass supports (waste not want not
)Before ...
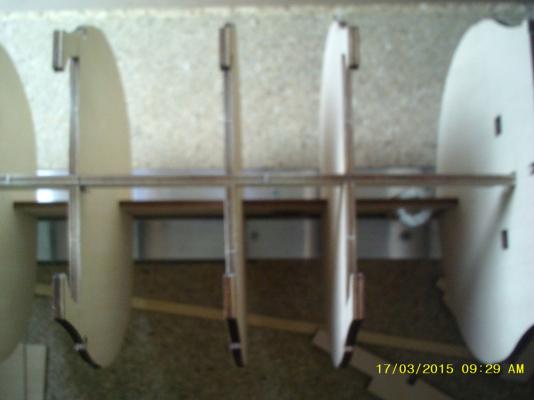
After ...

Et voila ...

I wonder if Billing will modify their kit to take this on board. Not much needed really, two extra bits of cheap plywood (extra spar and deck), a couple of staircases and some minor mods to the laser cutting program.
- clearway, knotty74 and CaptainSteve
-
3


Bounty Launch by CaptainSteve - FINISHED - Model Shipways - 1:16 Scale - SMALL
in - Kit build logs for subjects built from 1751 - 1800
Posted
That bread looks good enough to eat ...