


Angarfather
-
Posts
225 -
Joined
-
Last visited
Content Type
Profiles
Forums
Gallery
Events
Posts posted by Angarfather
-
-
Happy birthday, Dave
Cheers Angarfather
-
Hello Nils,
aboslut perfect craftmanship you show! Thanks for shareing.
Angarfather
-
What an elegant ship, and what a perfect work.
Angarvater
-
By the way my sister's name is Gianna...
Regards
Dimitris
Hello Dimitris ,
Gianna is in German Hanna. Well, and thats my wifes name.
Kindly Angarvater
-
-
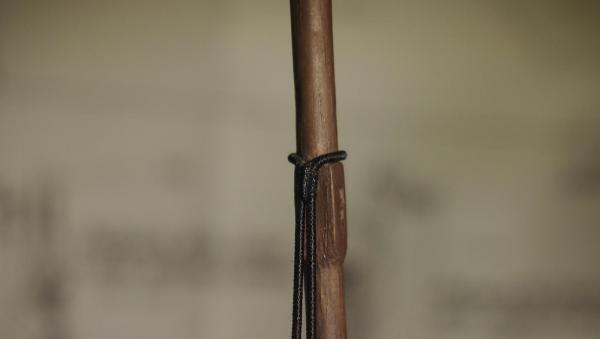
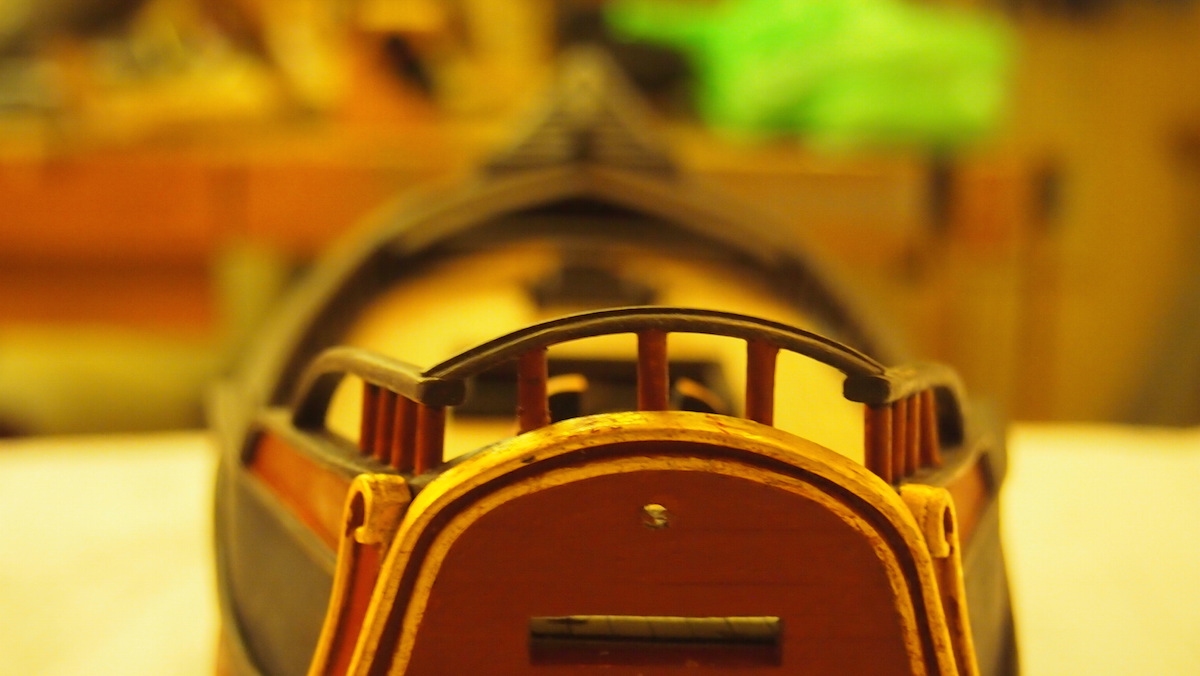
Only the shrouds of the mizzenmast are rigged with deadeyes.

The shrouds are served
Kindly Angarfather
- Dimitris71, mtaylor, tadheus and 3 others
-
 6
6
-
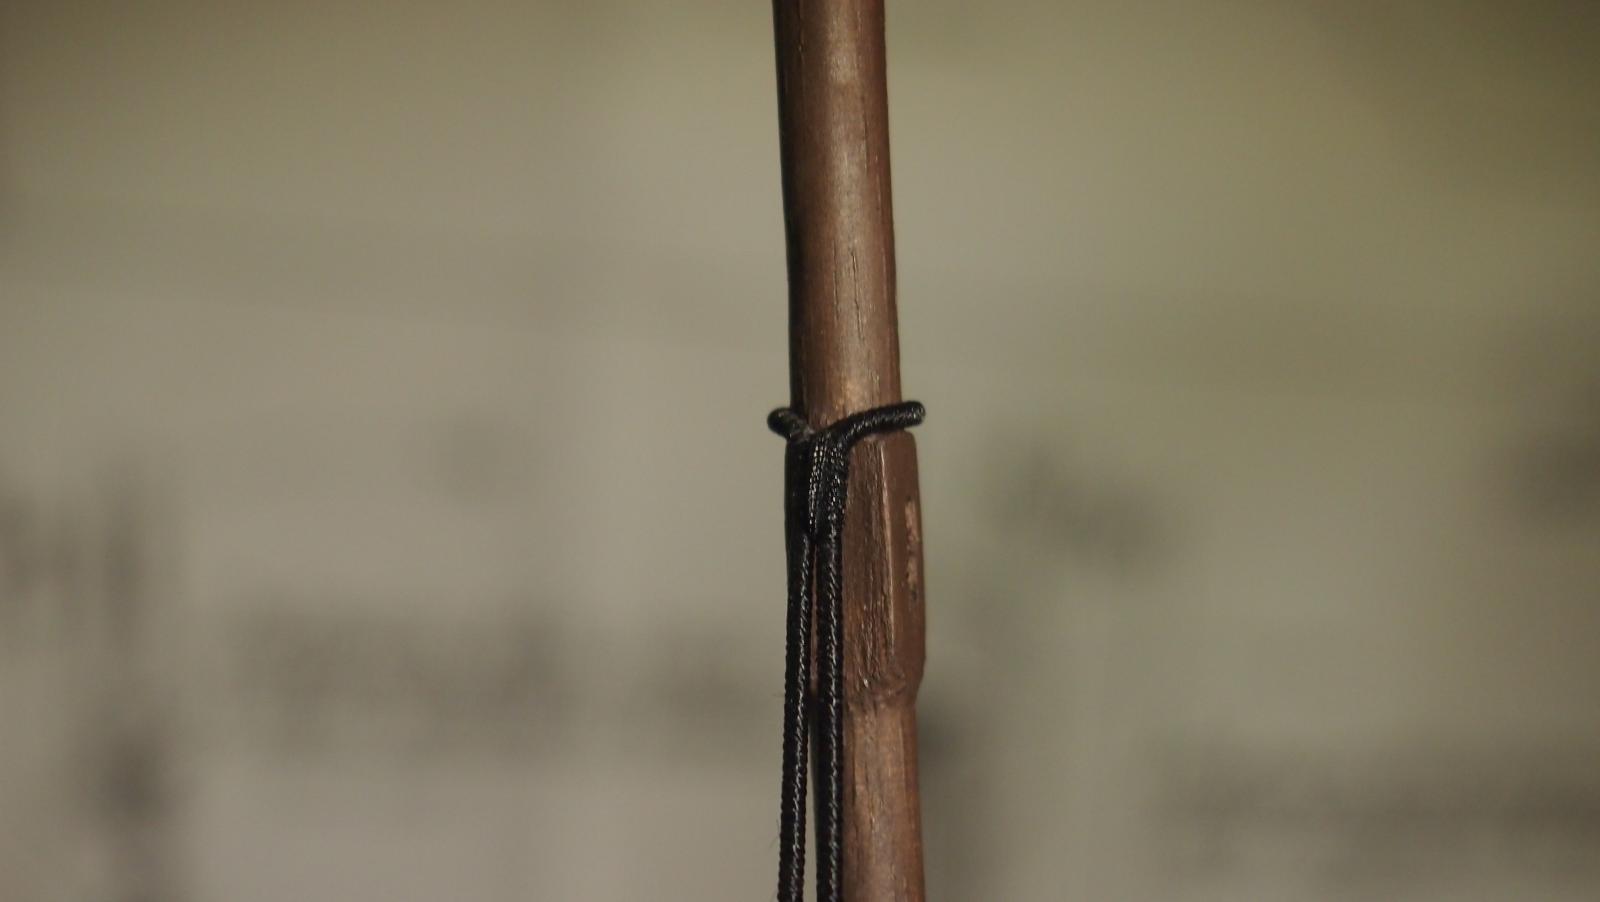
Masts
The masts of a pinco are made from one treestem. One peace. Non problem to make this on the turninglathe.
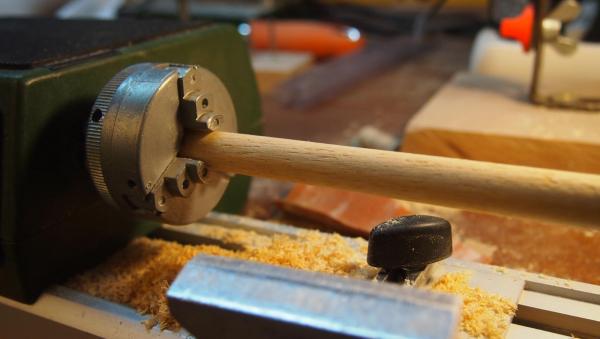
The mastheads with the sheaveholes are quadrangle. This form can be sanded well on the millingmachine
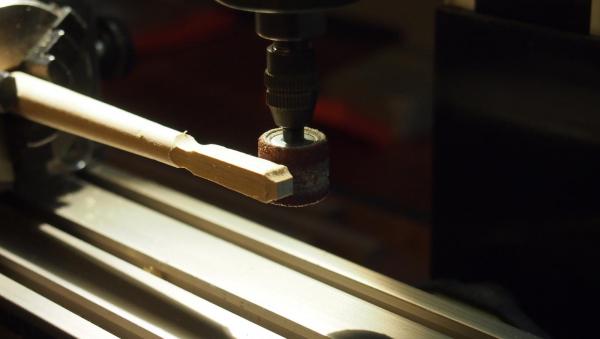
drilling and milling the sheaveholes.

drilling in the holes for the fixingpoints of the cleats
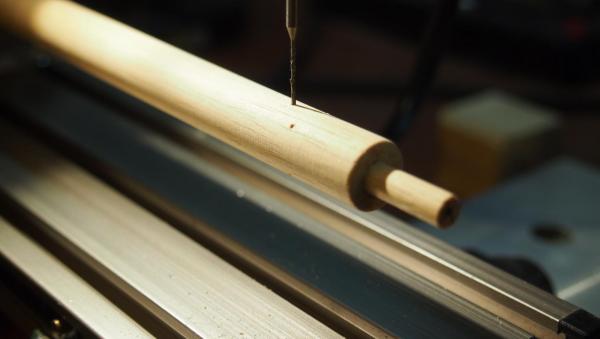
Foremast

Mainmast


Regards Hartmut
-
Congratulation!
What a nice idea, and what a perfect shop sign!
Cheers
Hartmut
-
Aye, Nils
a wonderfull job you are doing there.
Kindly Hartmut
-
Thanks, Nils,
Yes, gianna get's sails. Two sets. One latin, and one squaresails. Next week my wife will sew the sails. She is a perfect tailor herself, and I am very clumsy in needlework.
Hartmut
- Mirabell61 and Sjors
-
2
-
Thanks, John. I use distemper colours. These colors can be thined well. However, there are some small problems with the surface, as it is watercolor.
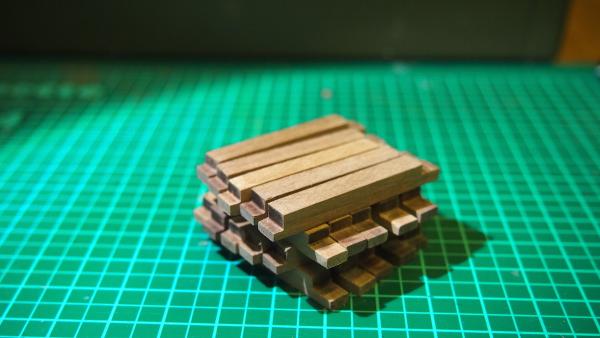
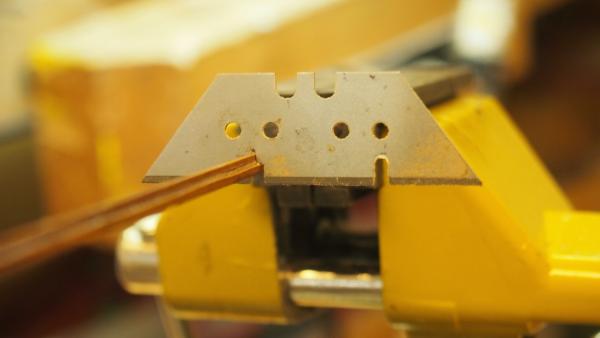
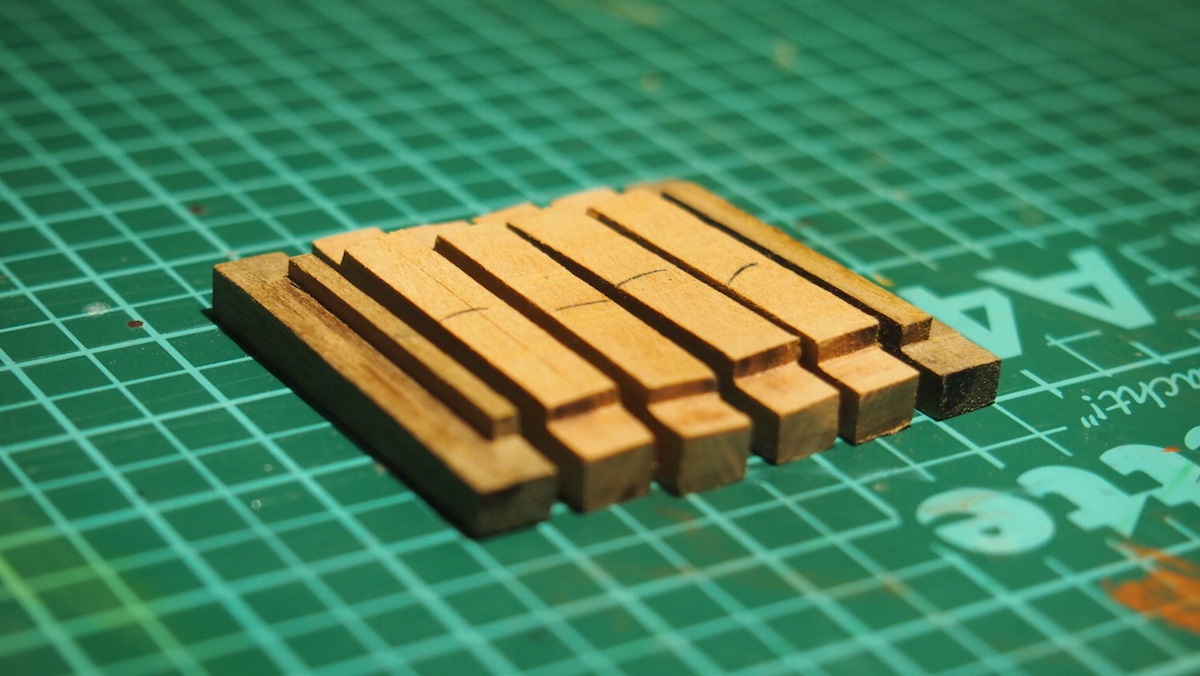
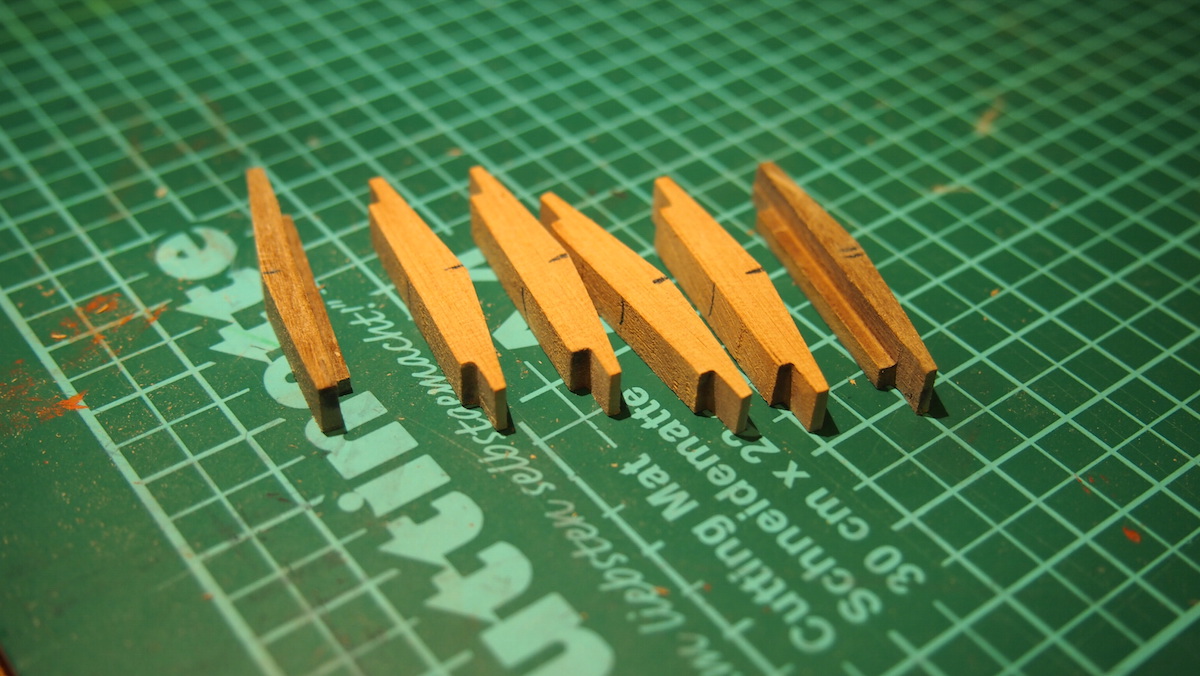
I had to make nearly 50 cleats for this little ship. And that's may way to do this.
First I have made a squarebar. Than milling the profile.
Thats the result, a profilbar.
Thereafter cutting with the circular saw

I attach the cleats with glue and a nail in a centerhole. Drilling in the centerhole

Now just grind a bit, and the first cleat is ready

Angarfather
- mtaylor, tarbrush, Dimitris71 and 2 others
-
5
-
-
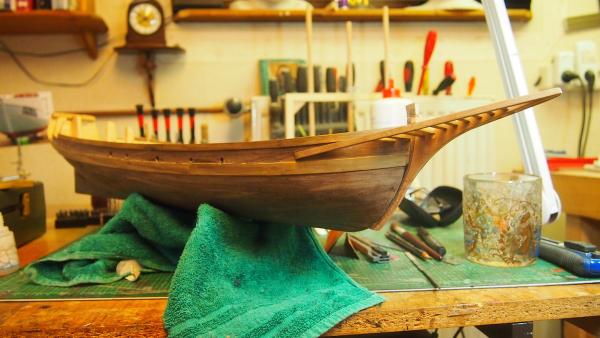
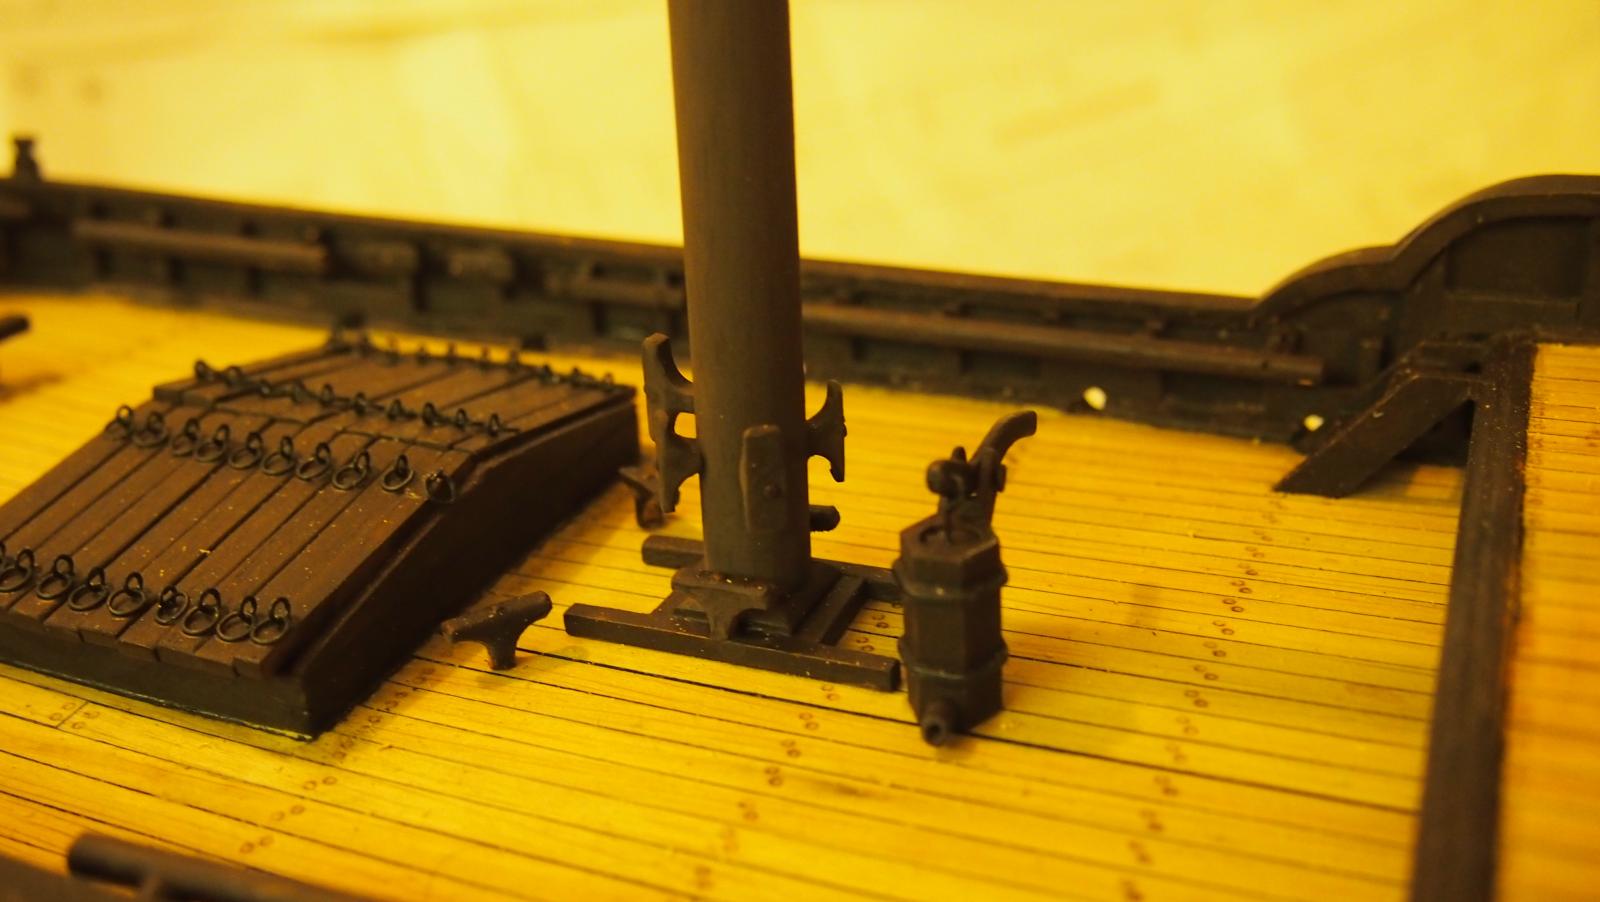
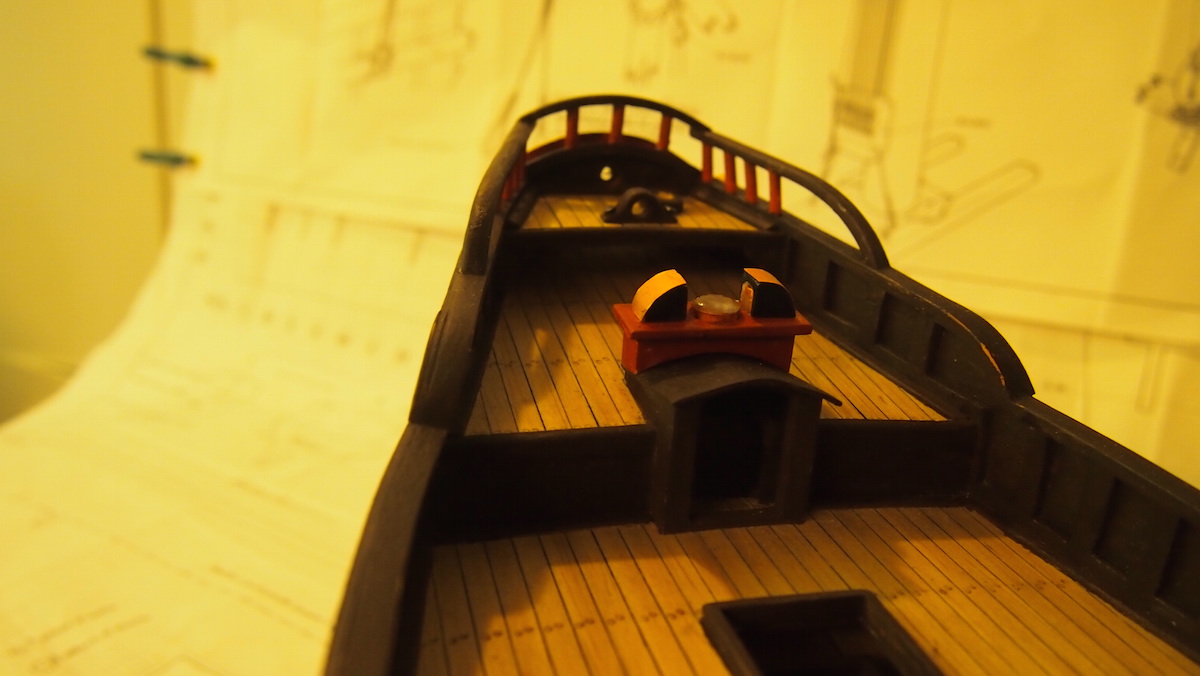
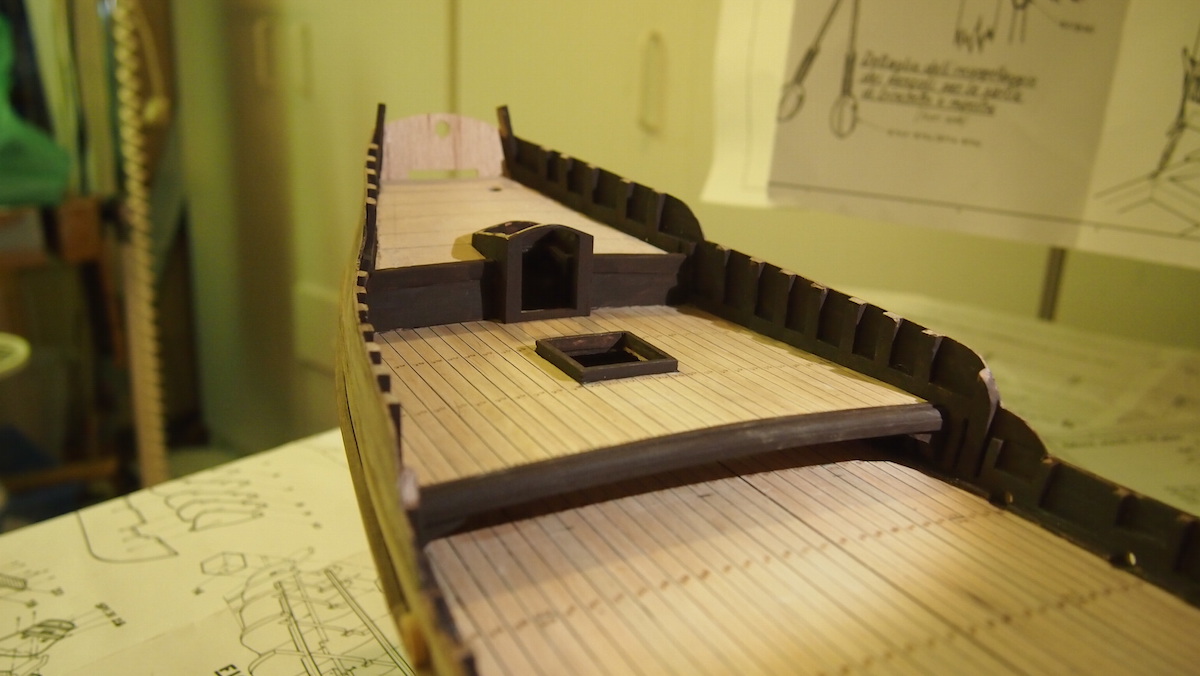
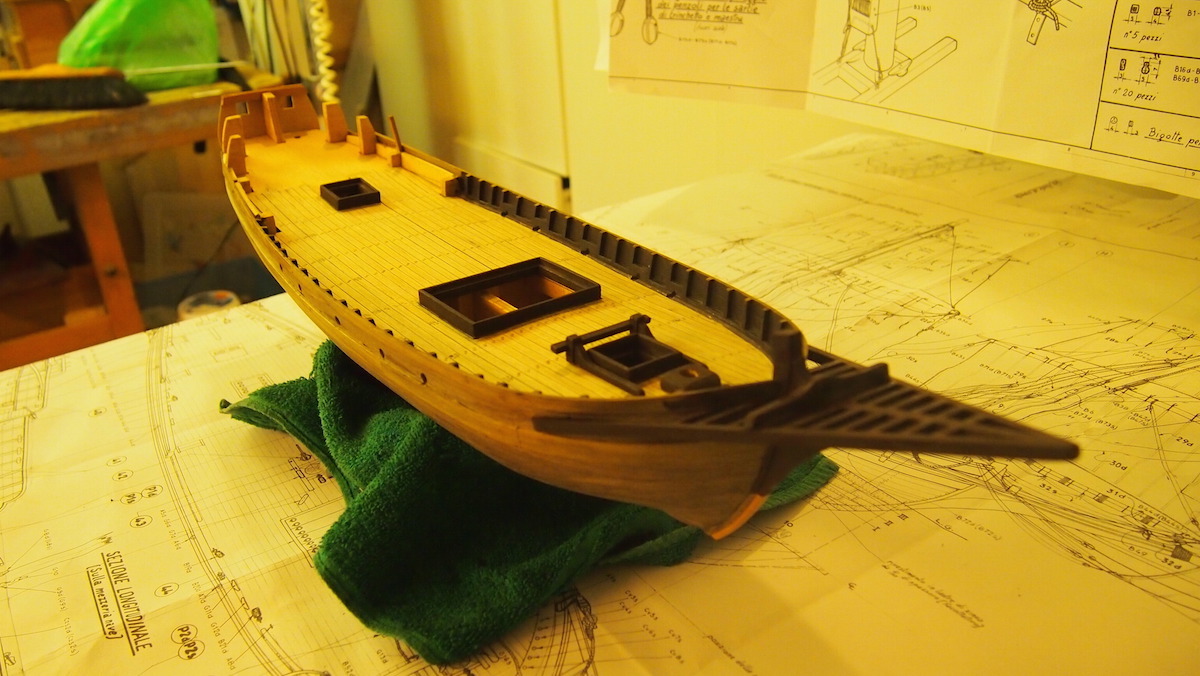
The bilge pump
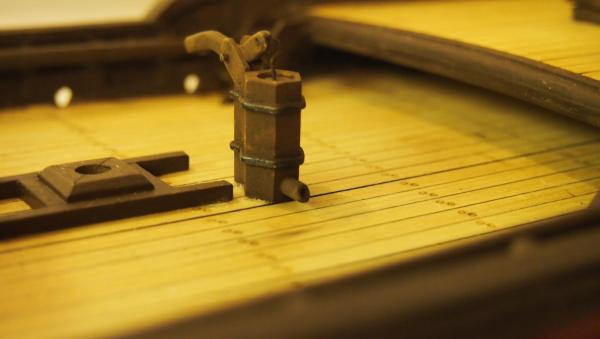
Next step was modelling and assembling the rudder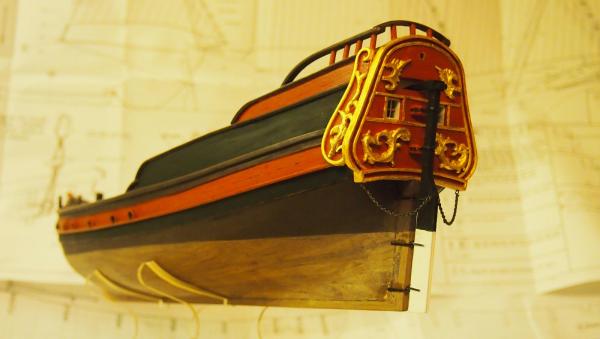
Regards Angarfather- Dimitris71, Mfelinger, mtaylor and 6 others
-
9
-
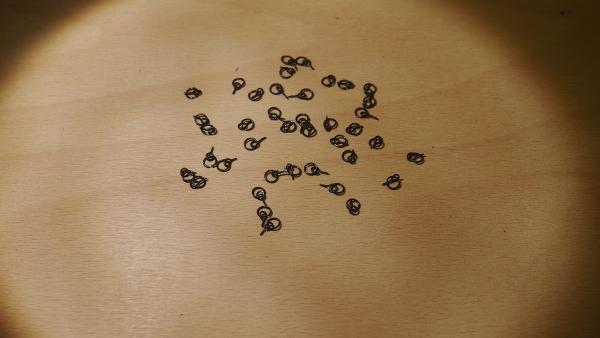
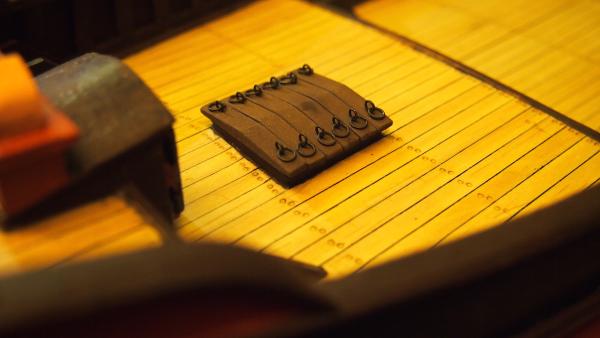
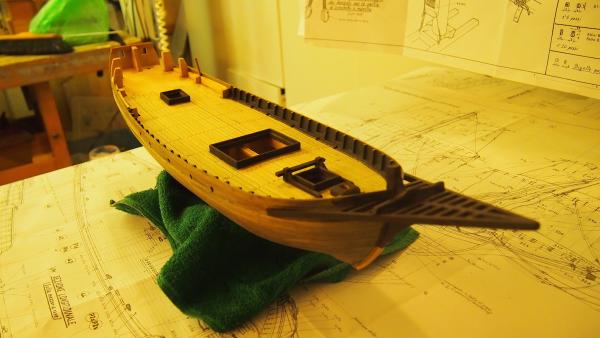
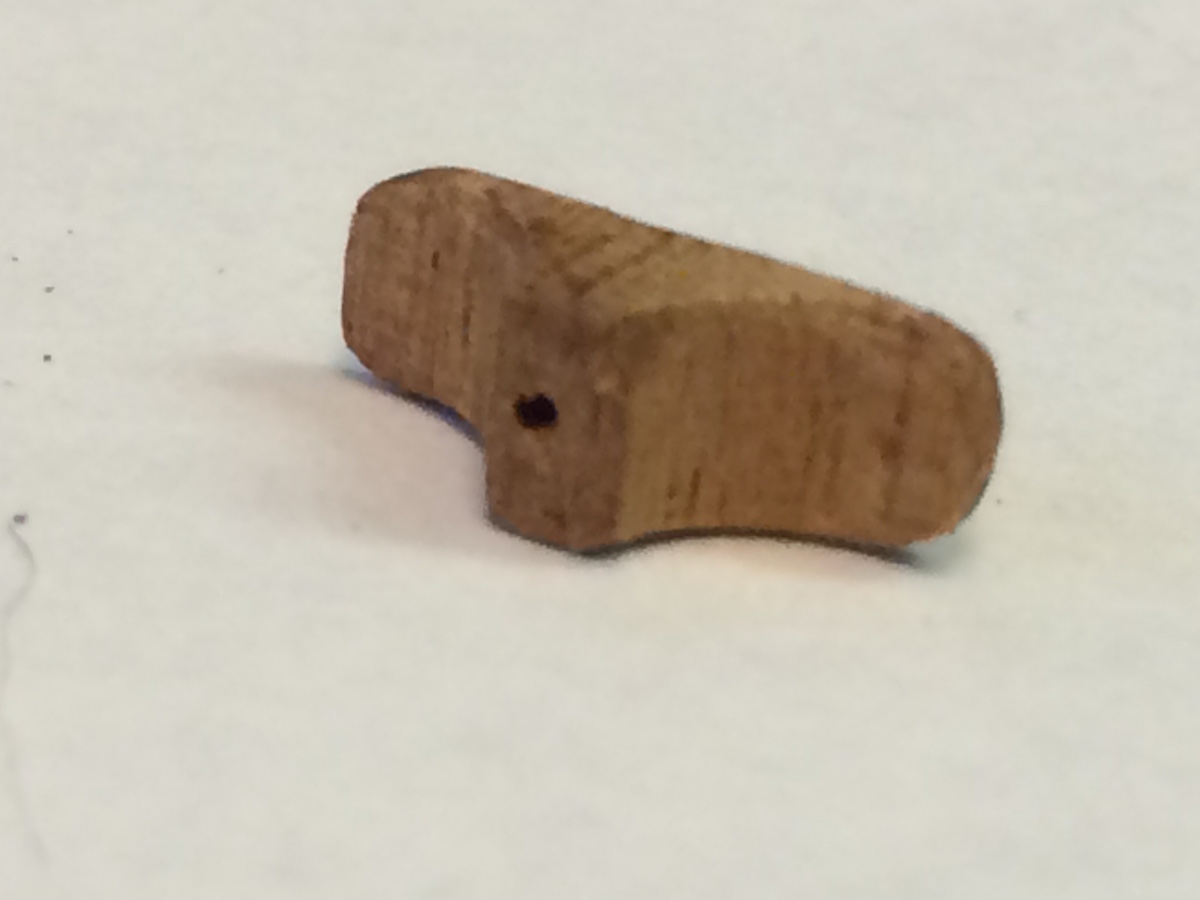
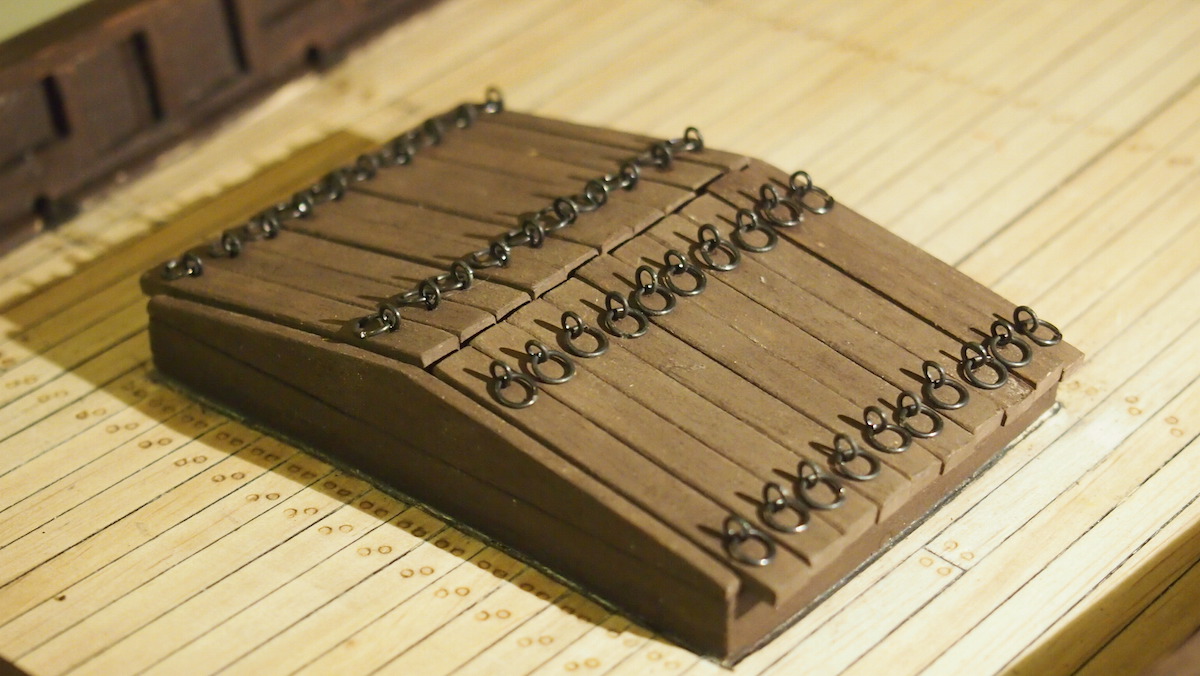
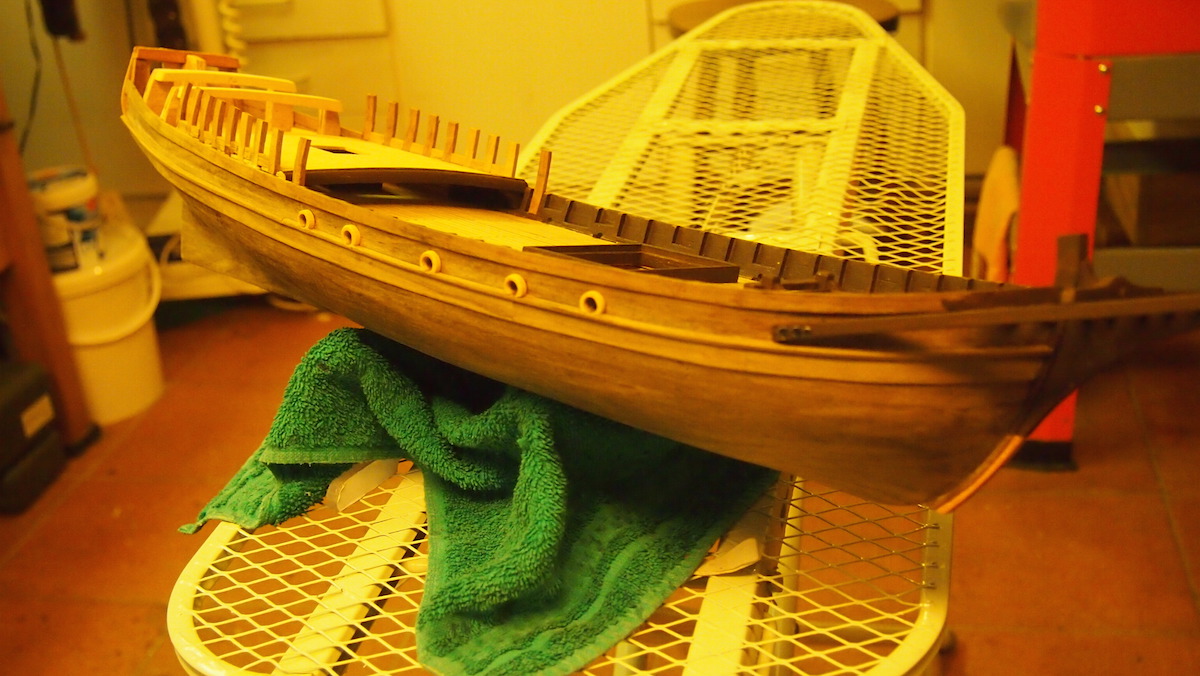
I have made the grips from 0,7mm black ironwire ( bindingwire from a floristshop).
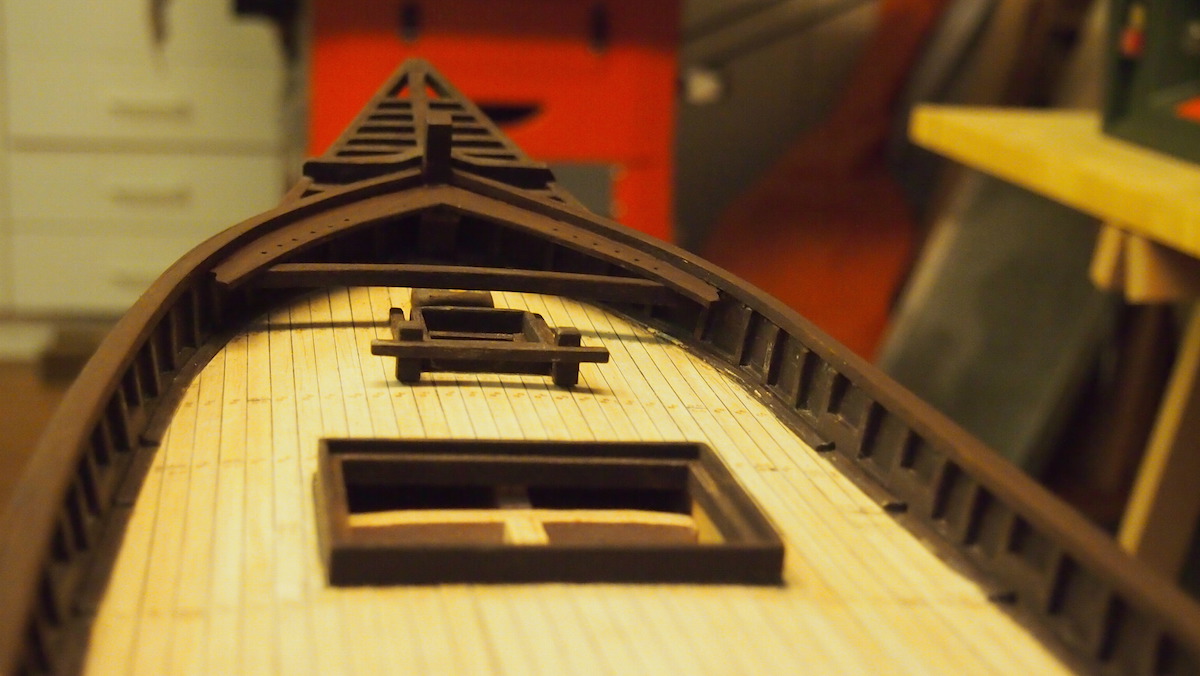
All together 12 pieces for the quaterdeckhatch and 40 for the cargohatch.
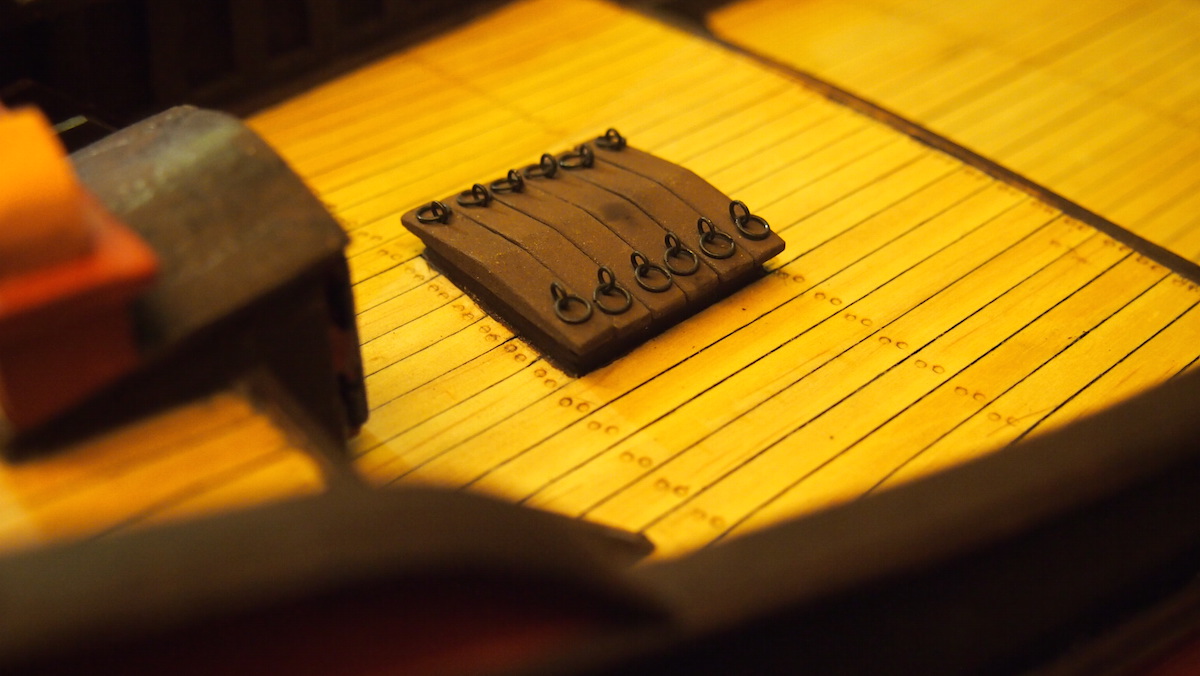
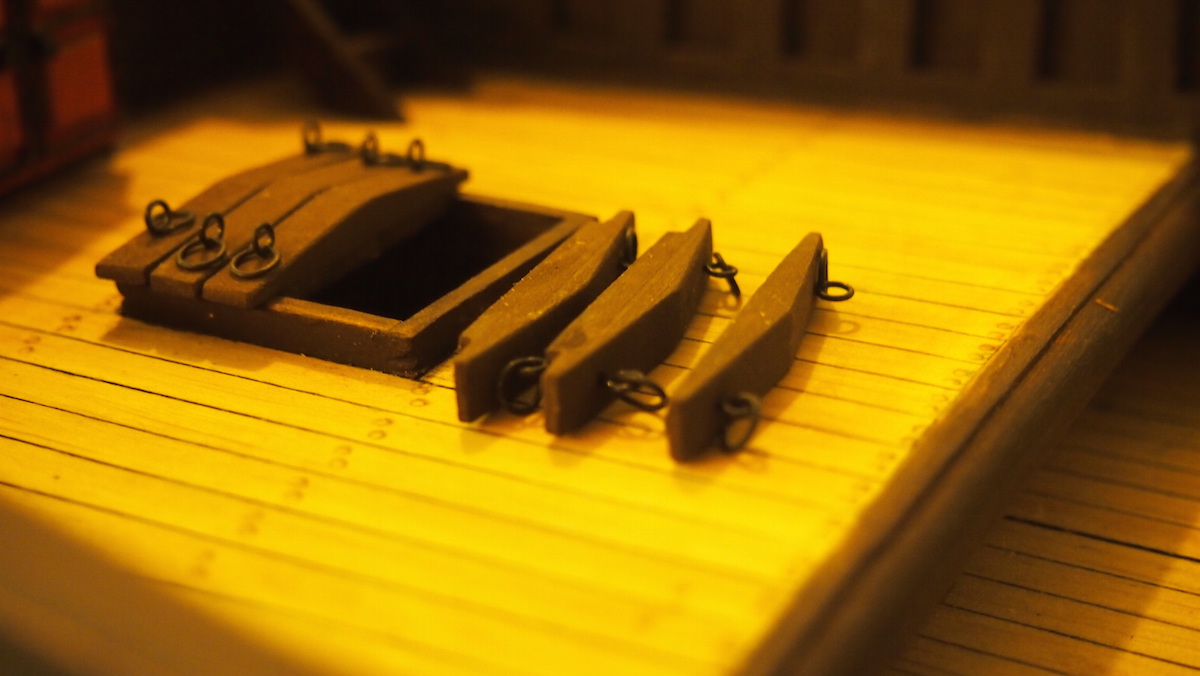
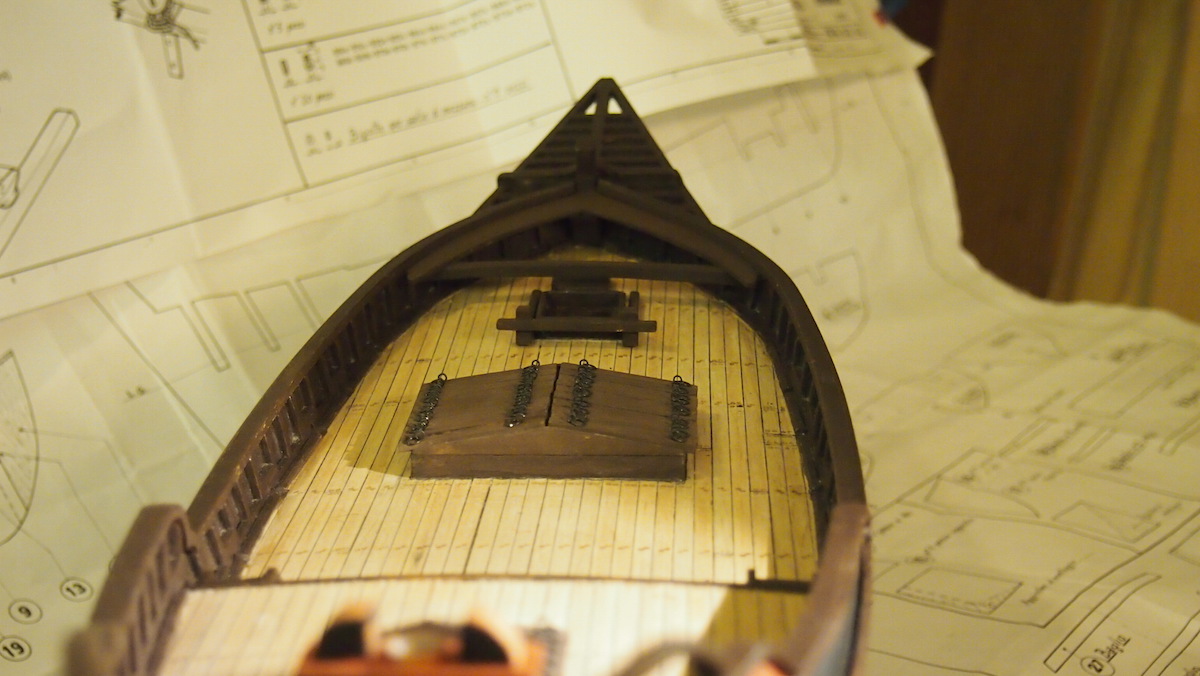
The ready quarterdeck hatch.

The cargo hatch on maindeck
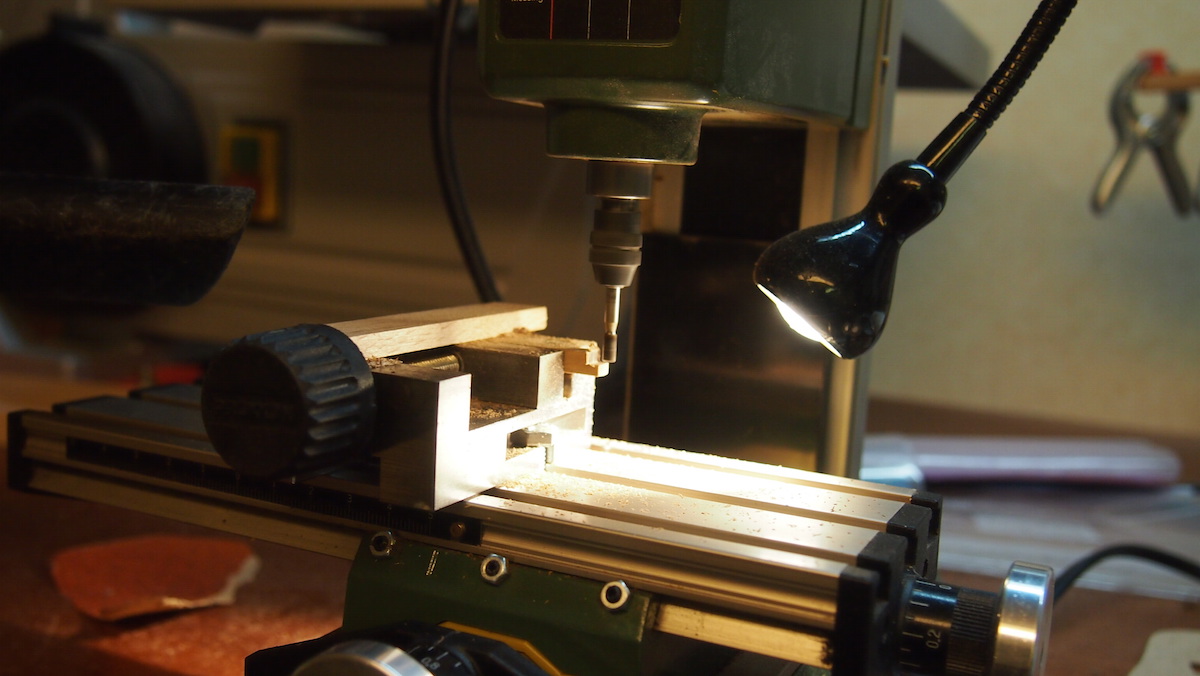
Milling the planks


Ready


A Happy New Year 2015 to all.
Cheers!

Hartmut
-
Hi mates!
thanks !
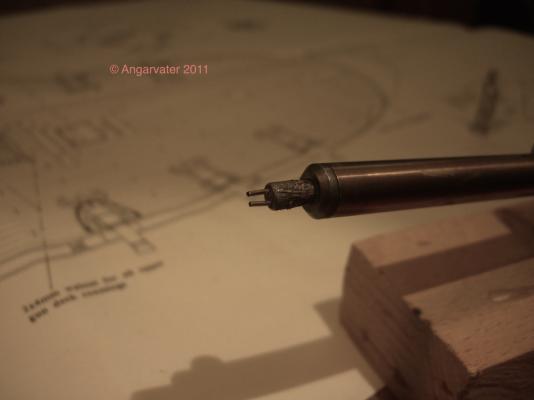
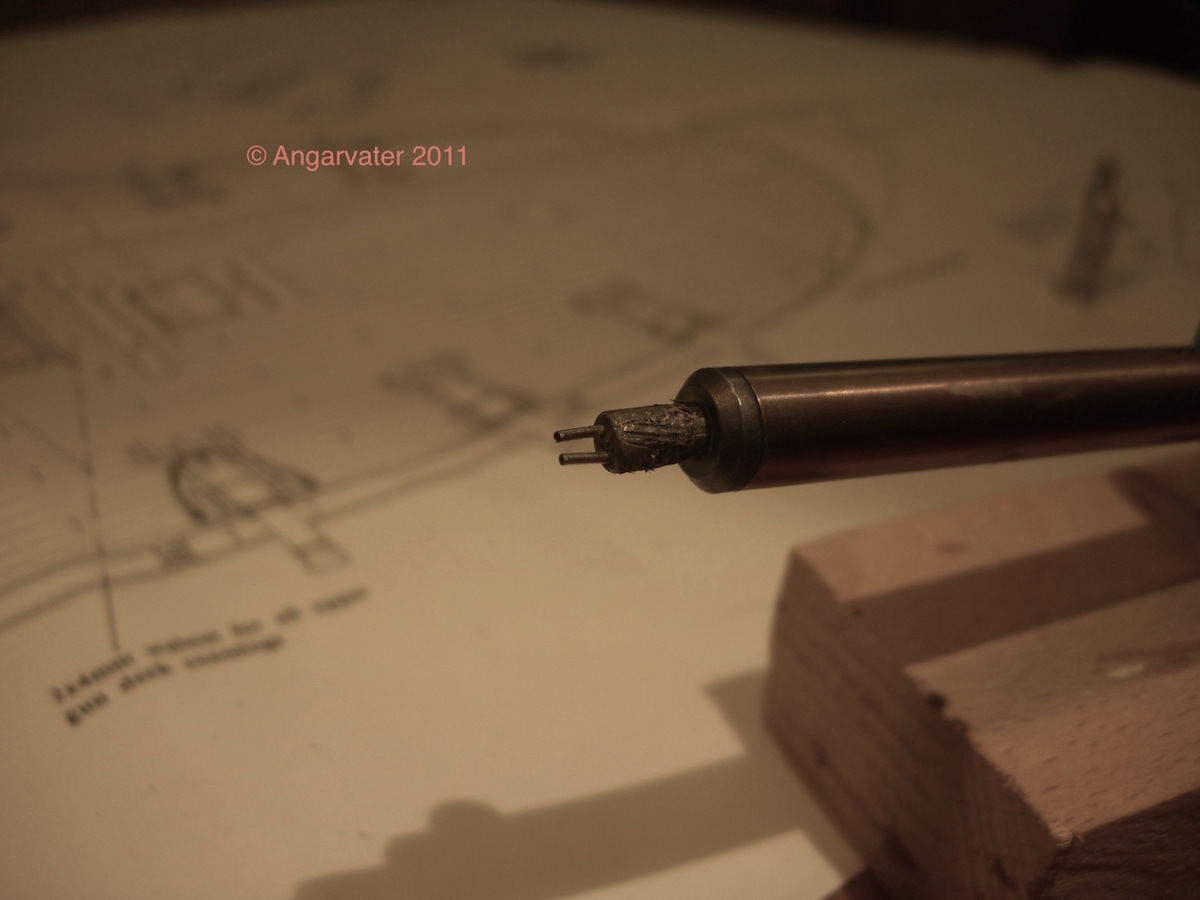
@: S.Coleman To show the nails I use this little device: two cutted hypodermic needles in the top of a soldering iron to burn in the covering of the nails.
Kindly Hartmut
- WBlakeny, Sjors, Farbror Fartyg and 4 others
-
7
-
Hi,
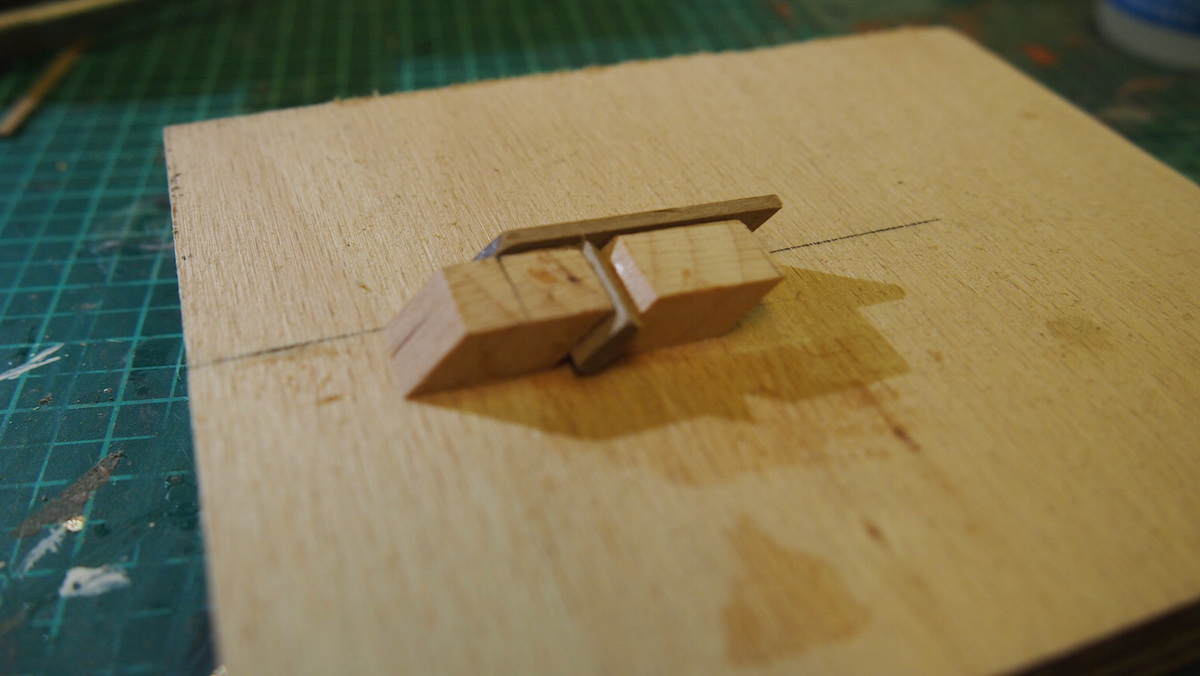
one question. Is it ok to show how I make such little things like a ladder, or isn't it interesting? Things like this:
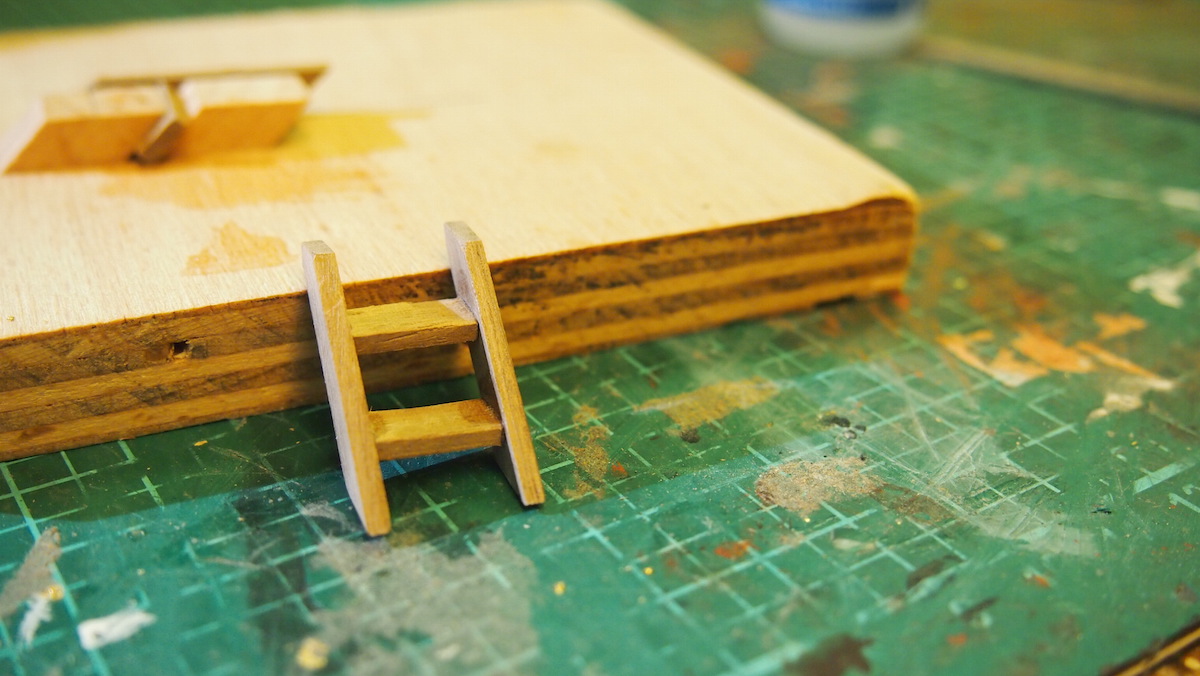
There are 6 little laders on pincos deck. Every with only to stairs. I think it's more easy to make this parts with a jig.


The laders in place
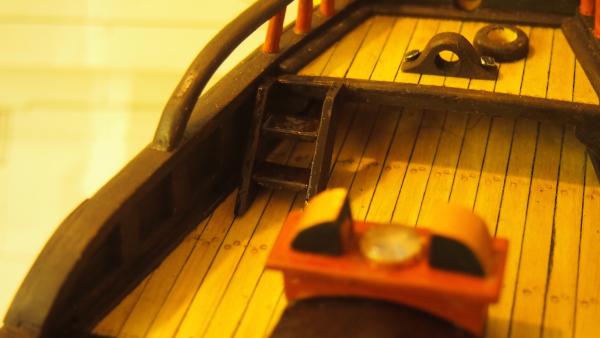
Another new little piece. The kabinedoor
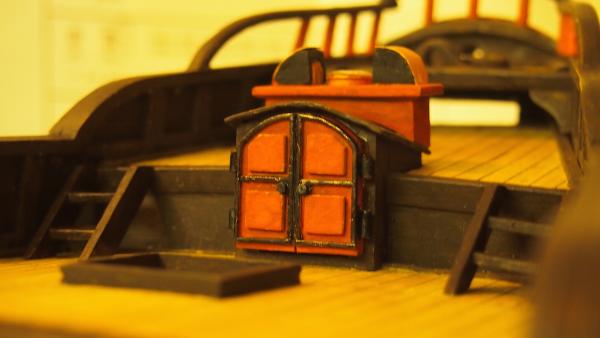
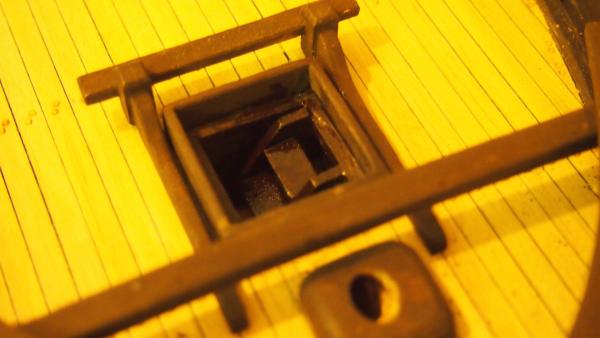
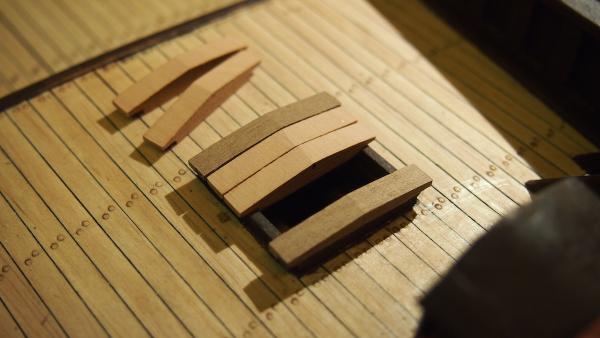
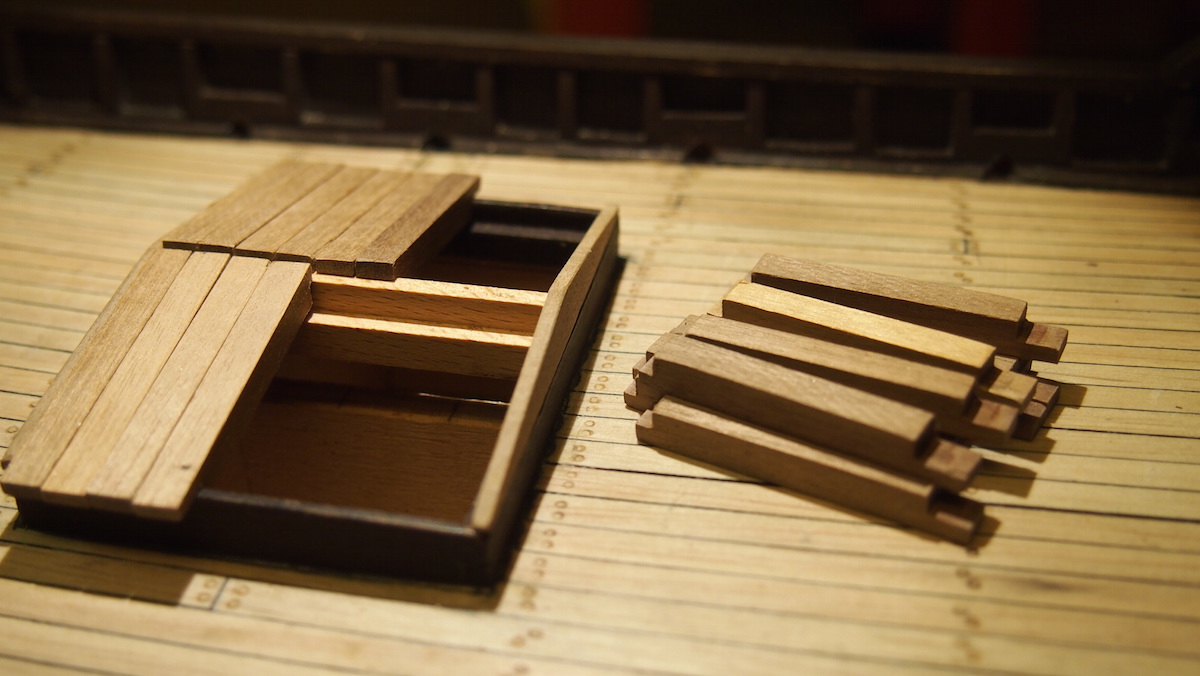
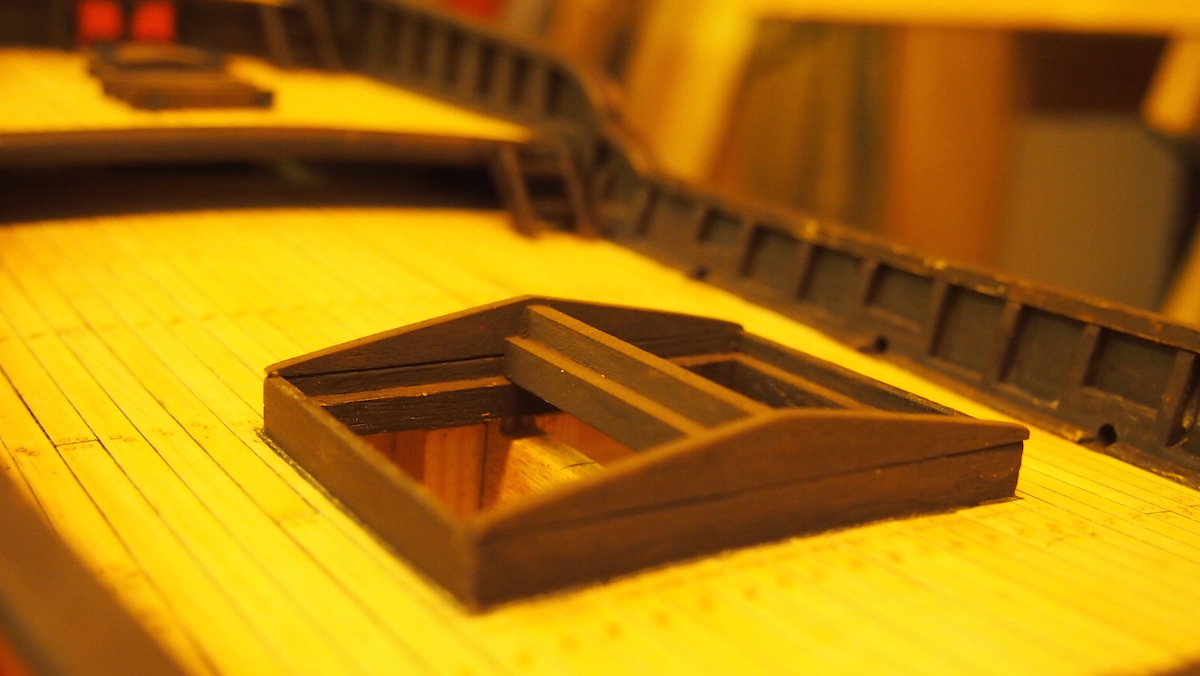
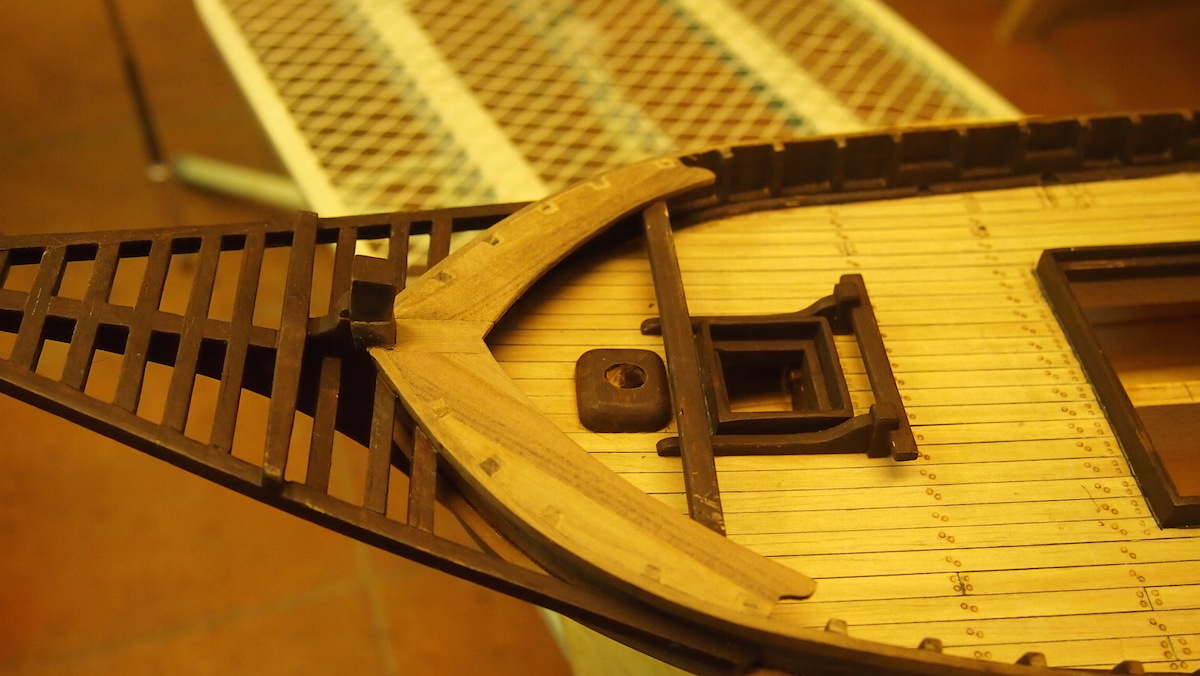
This evening I thought how to make the cover of the hatchway on quarterdeck. The span width is only 1m /3,3". So I made the coverbeams like a roof.
The way: the parts after milling the covering of the hatch.

than sanding the "roofs"

I think that will be ok
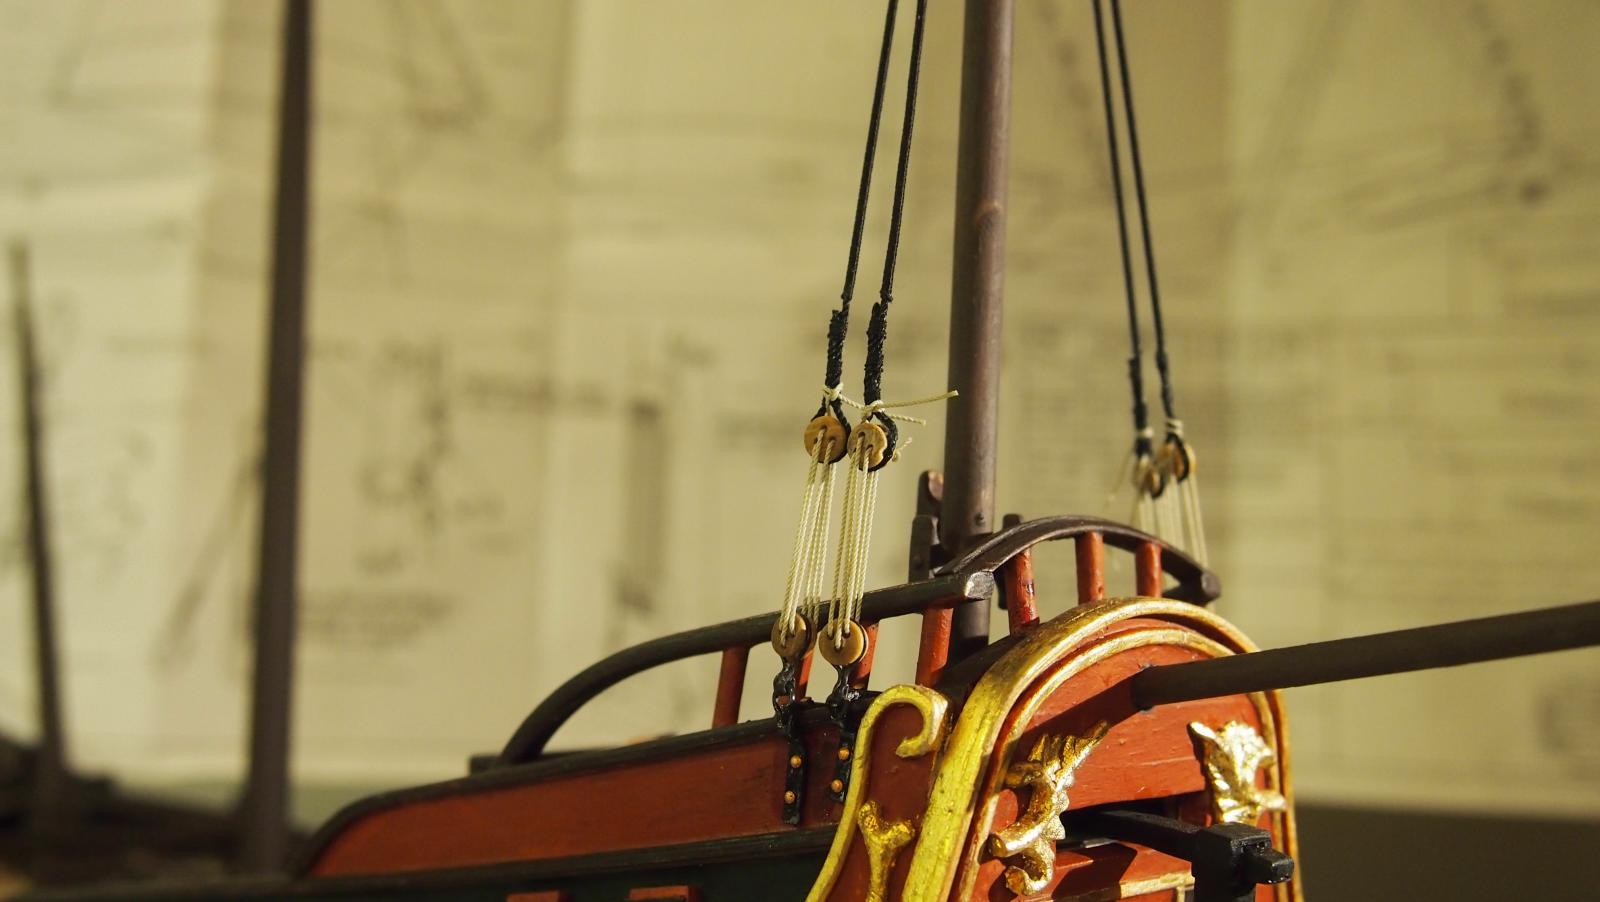
Next step will be modelling the grasps - eybolds with rings -
kindly Hartmut
-
Hello Kay;
an absolut marvelous piece of work!
kindly Hartmut
-
-
-
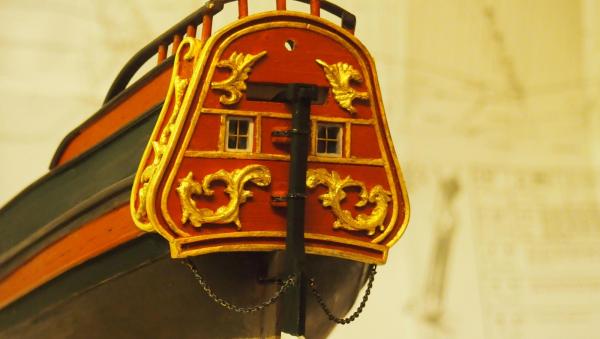
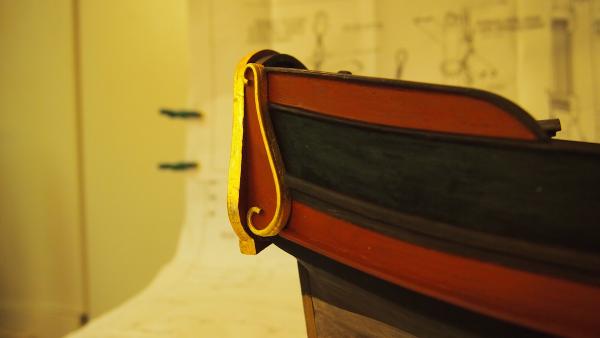
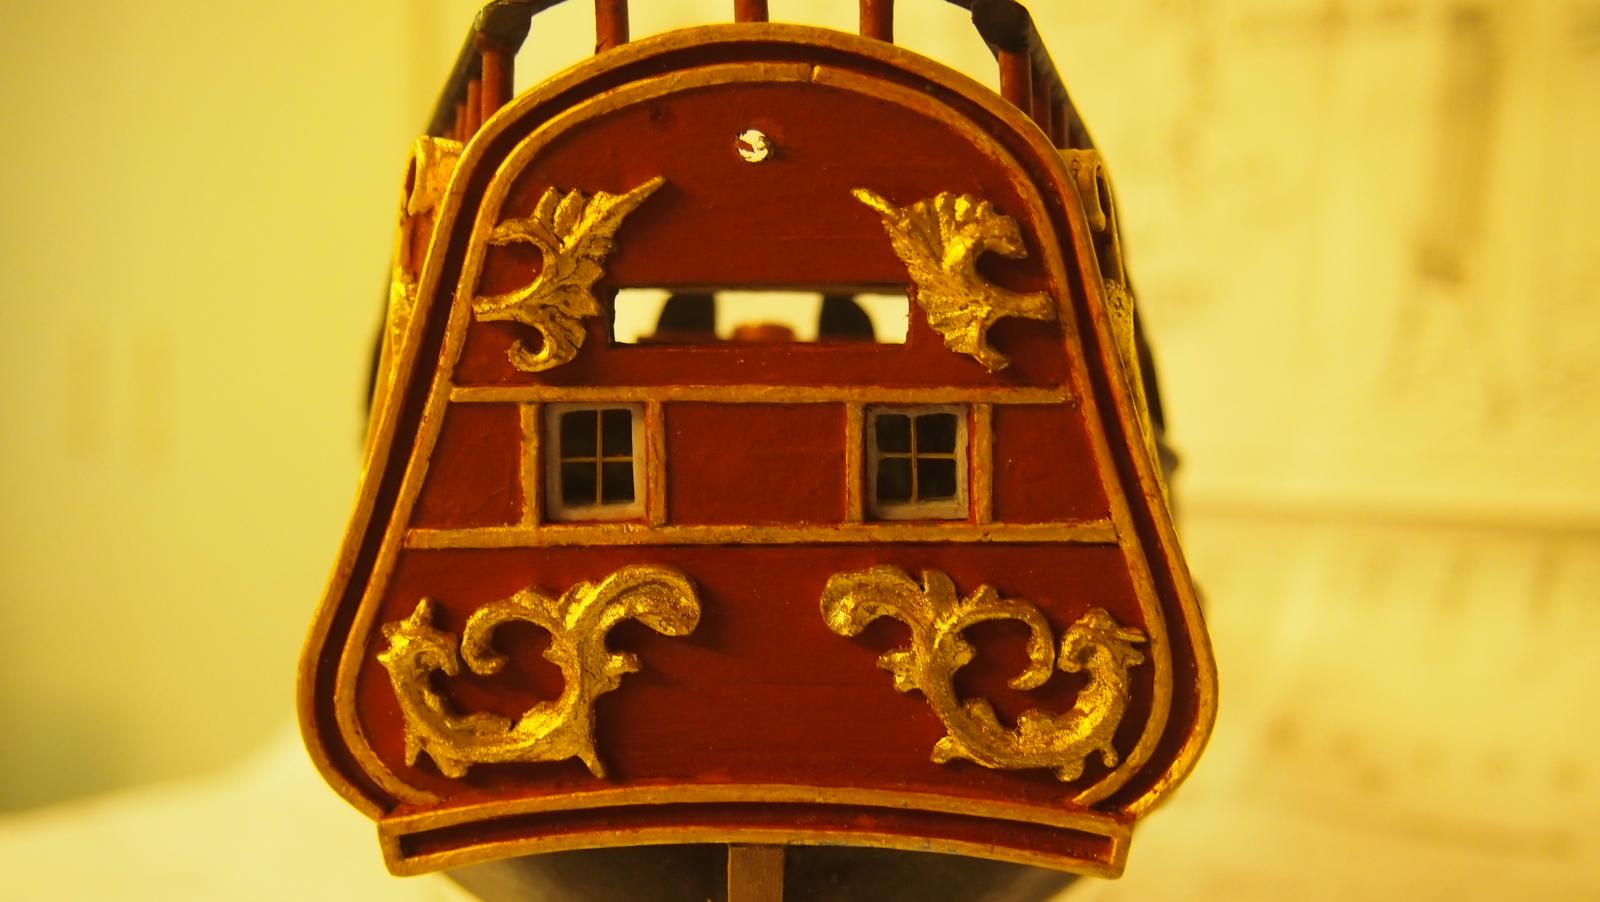
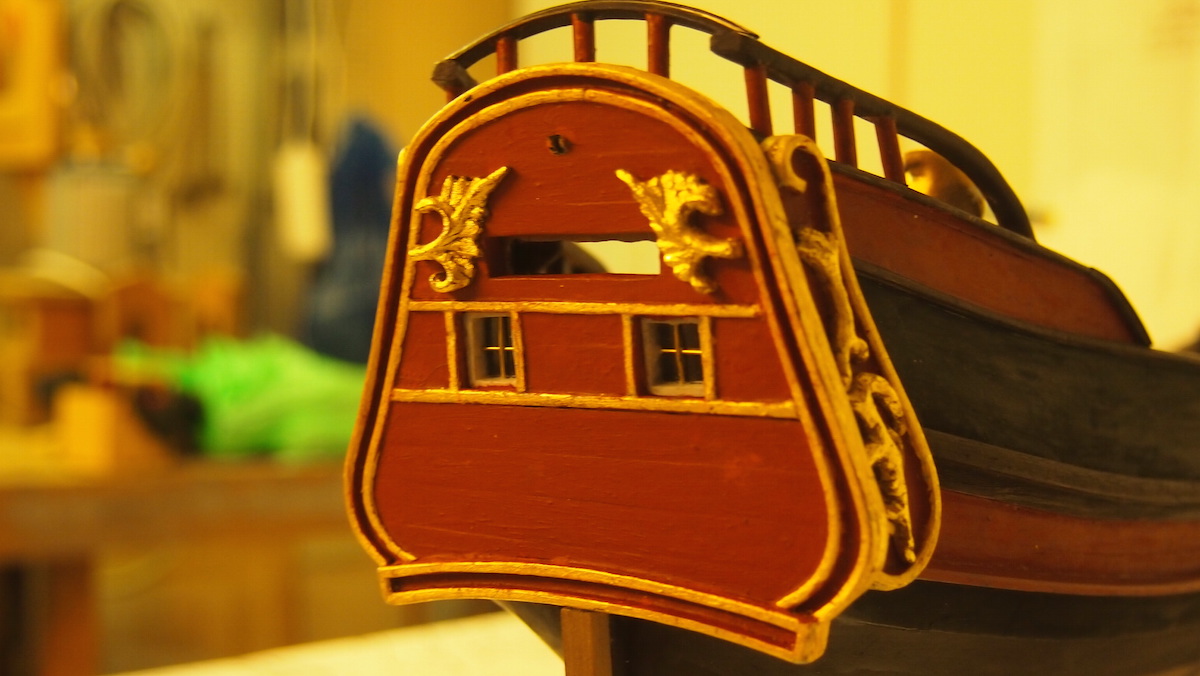
Part 5
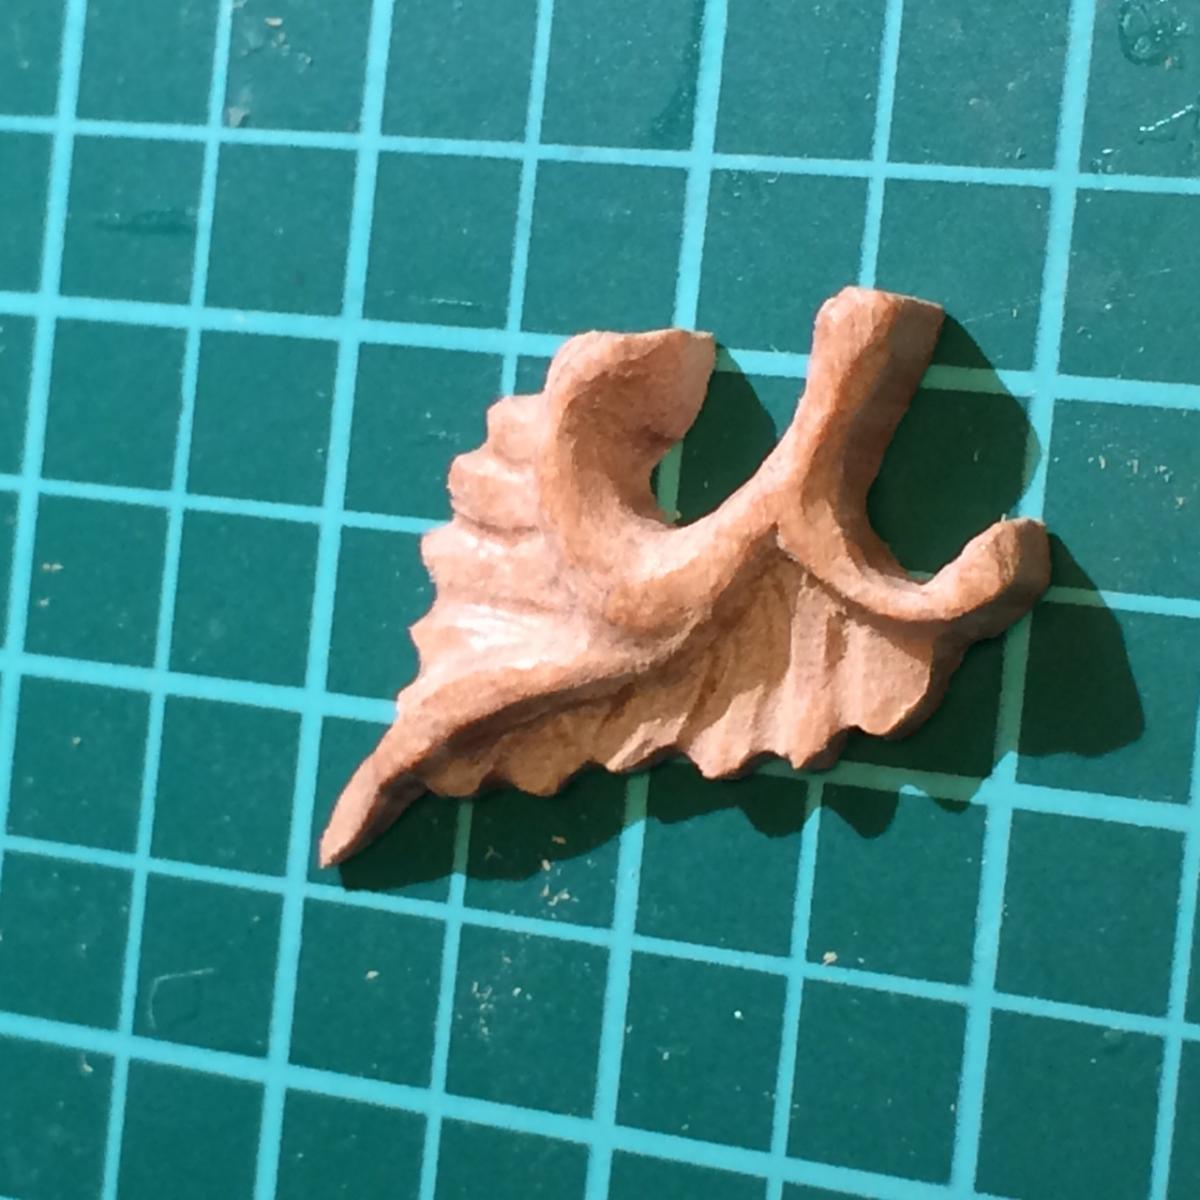
It's the first time that I have to carve decorations.
My first akantus pieces
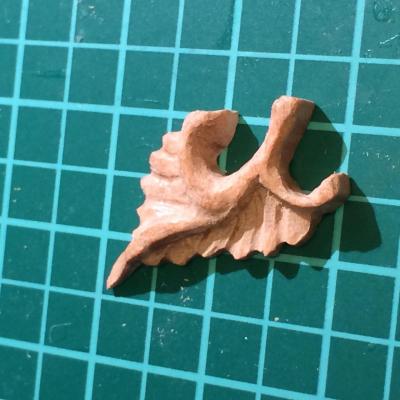
and than the next parts with leaf gold and in place.
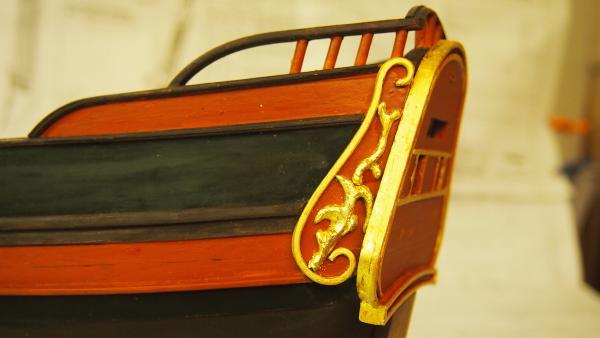

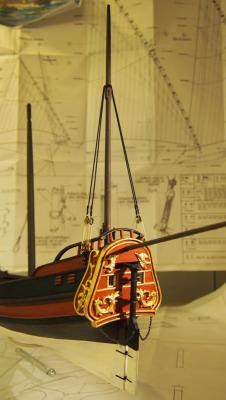
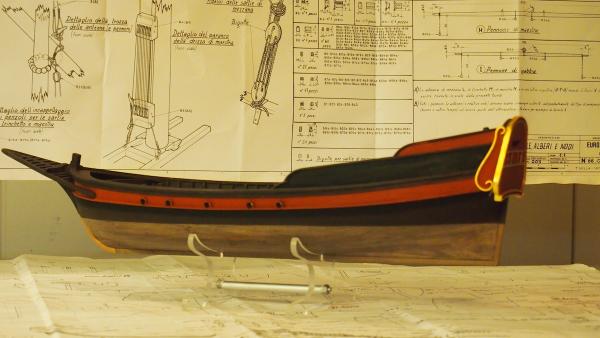
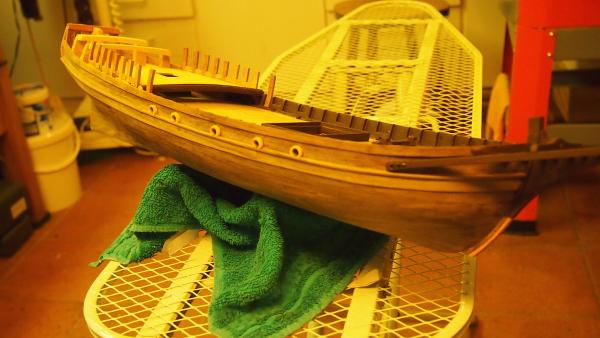
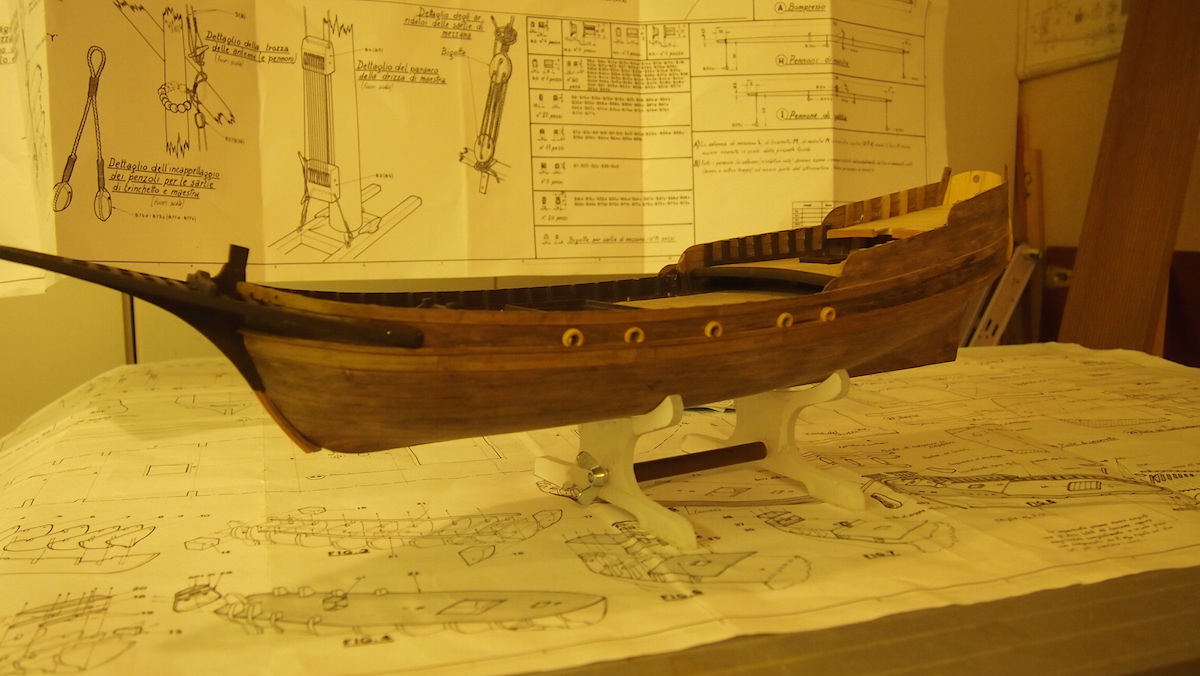
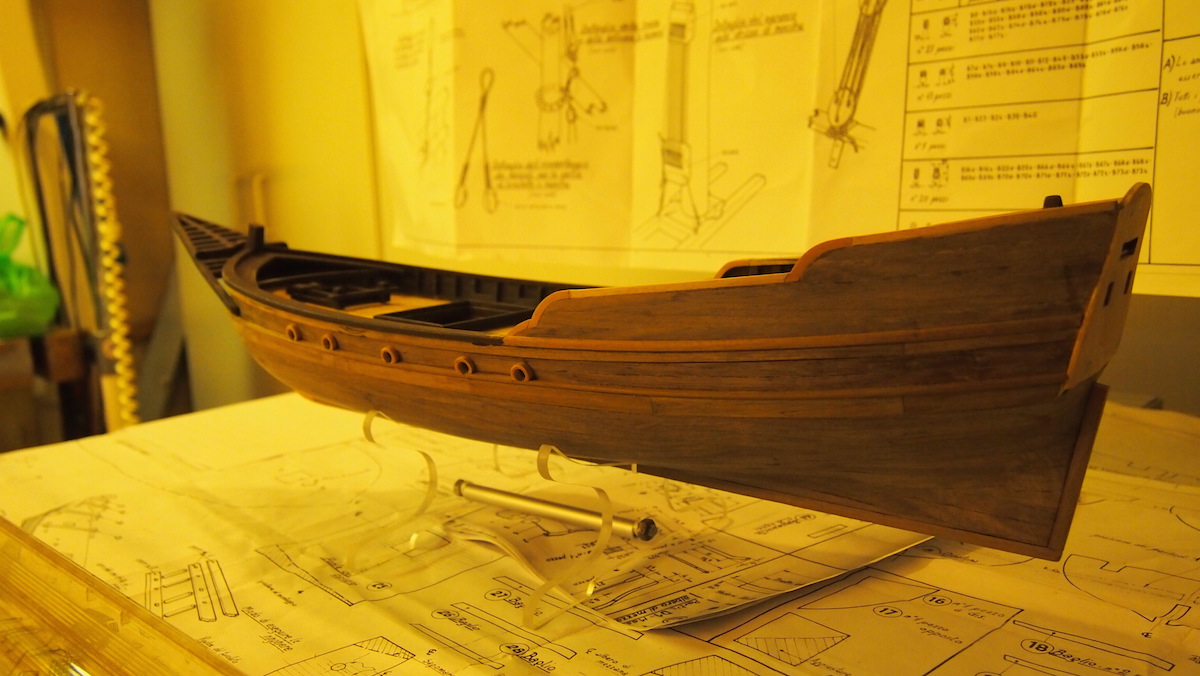
That's my pinco today.
Last but not least : I belive that a ship must have a name. Her name is Gianna - and that's in german Hanna.

Cheers Hartmut
-
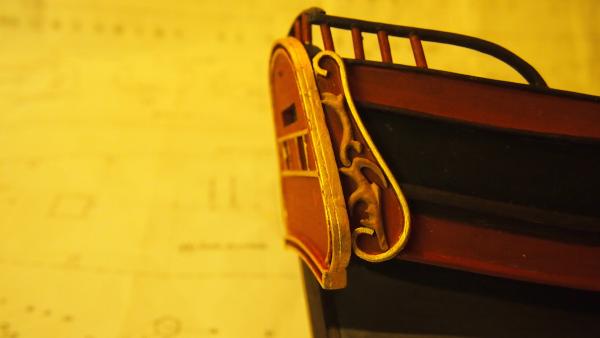
Part 4
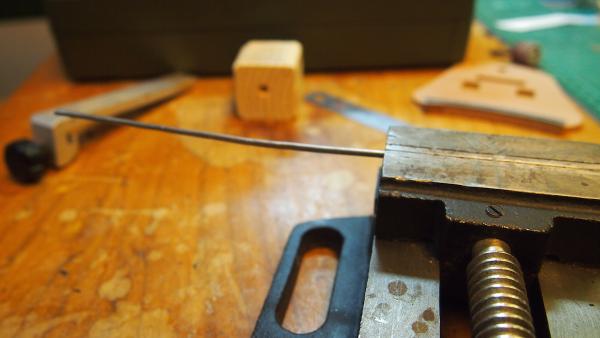
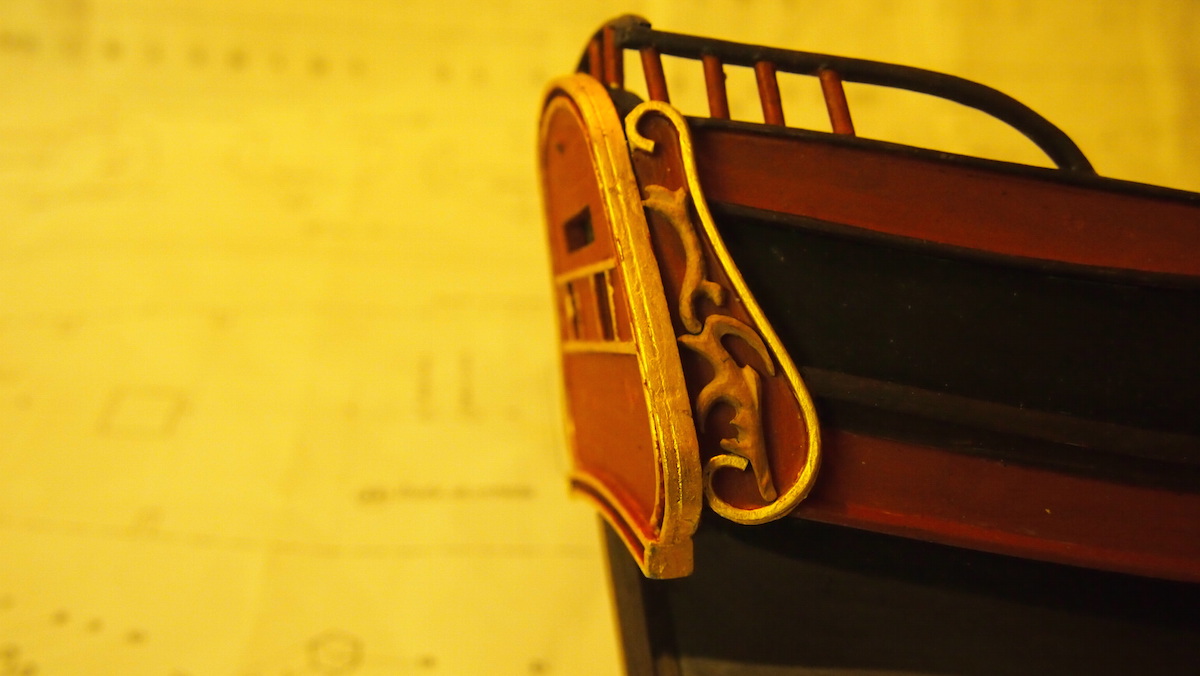
The decoration of the transom was a interesting area. First problem was the framing. I wasn't able to make it from wood.
But the solution was to make it from 2mm soldering wire. In a vice I formed it into a fourcorner.
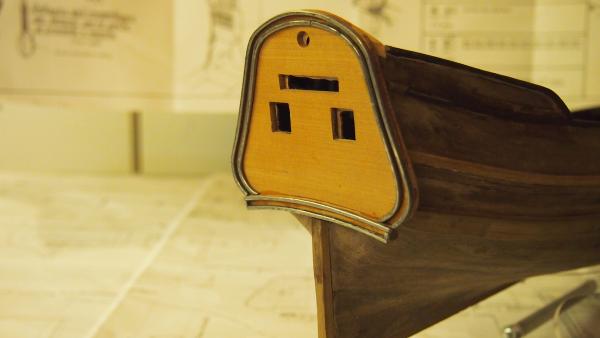
Some shots after painting the hull. I use distemper coulors. Tar = van Dyck brown decorationareas = english red
rails are black. The frames of the transion and the decoration = leaf gold


-
-
-
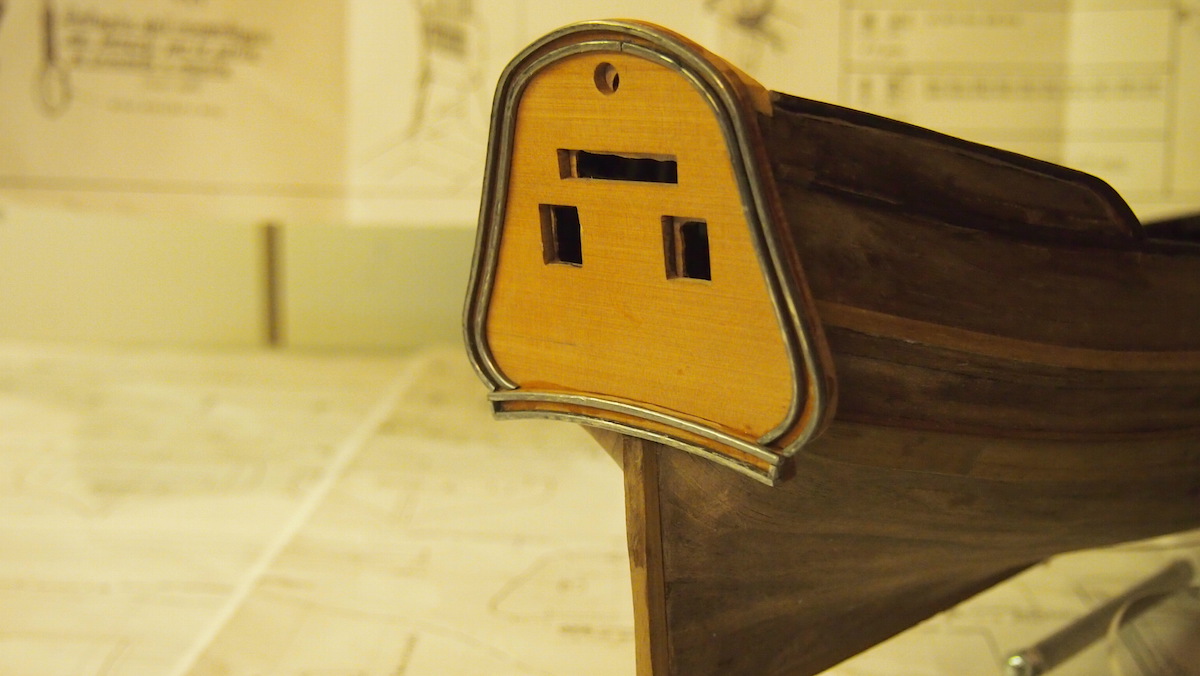
Part 2
The Gallion
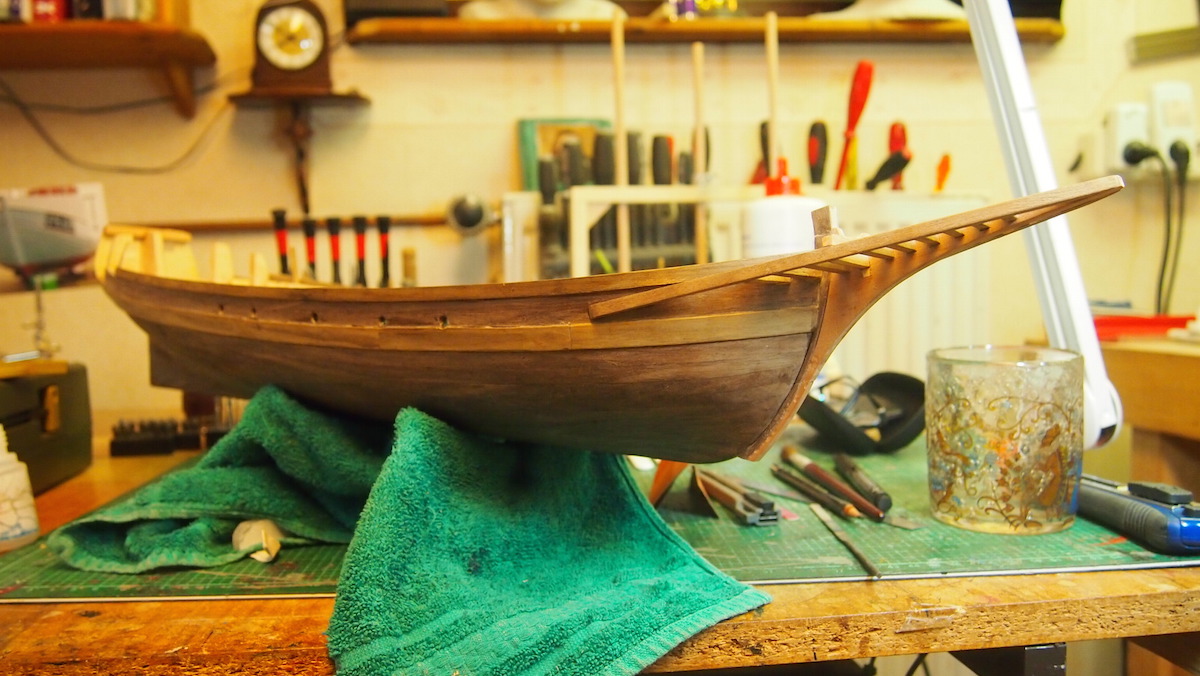
I think that the wood of a sail ship from the early 18.century was protected by tar. The guys in the International Maritime Museum, Hamburg told me, that this tar was not black but dark brown. And so I take "Van Dyck Brown" for this job, as I have seen the ships in the paintings of Rembrandt and van Dyck.
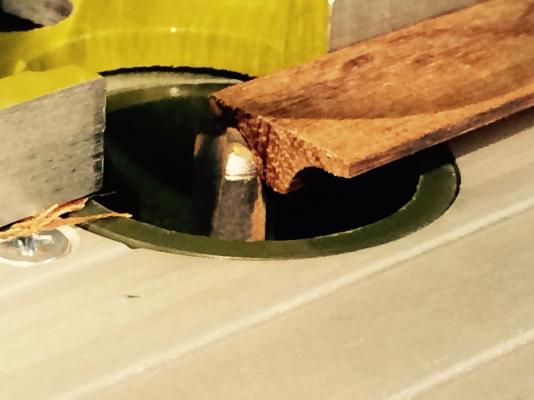
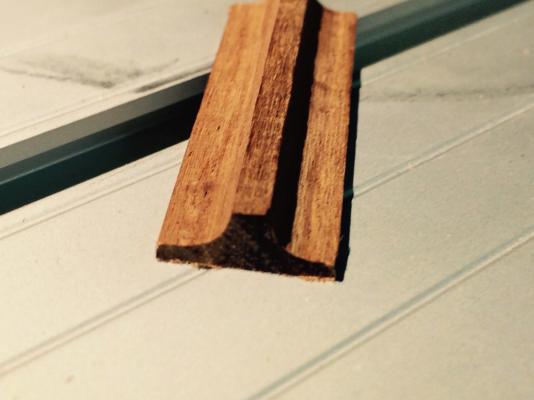
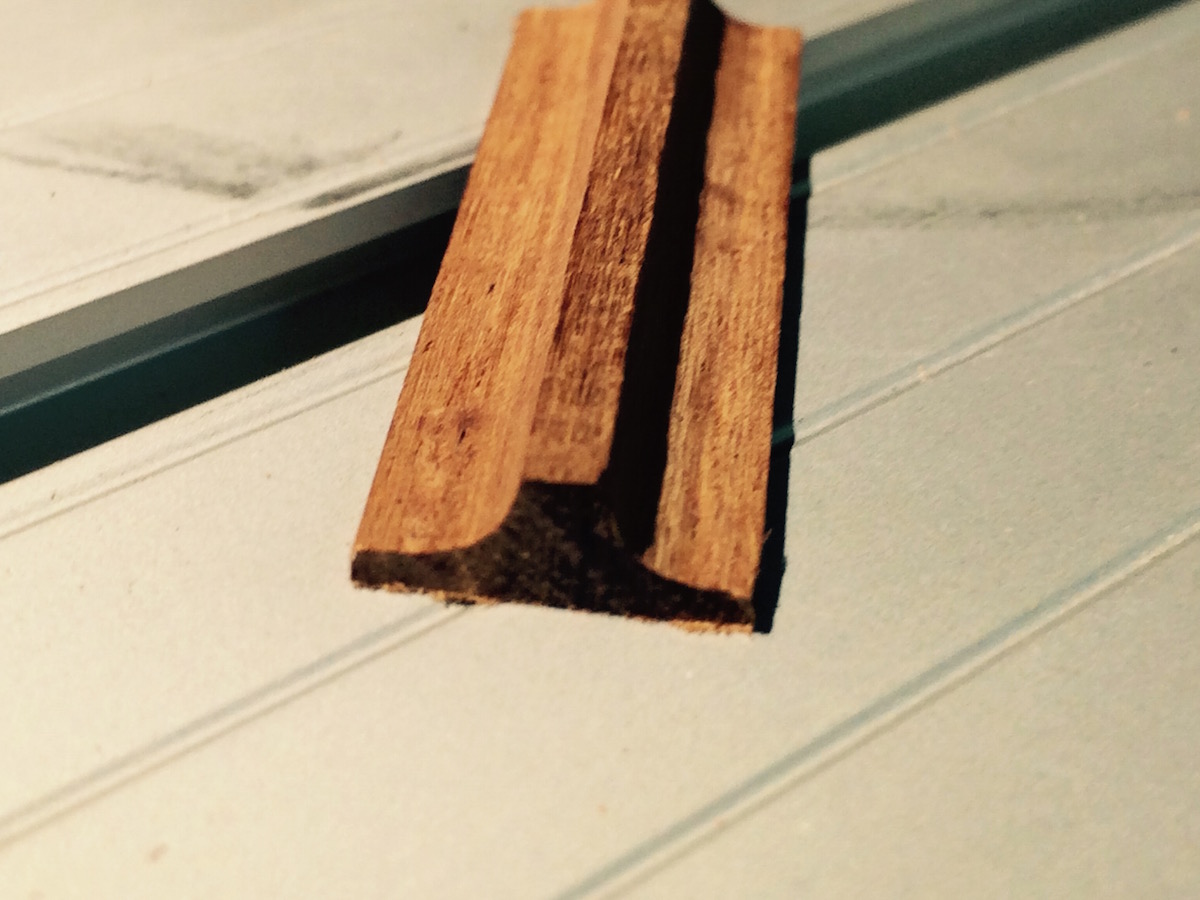
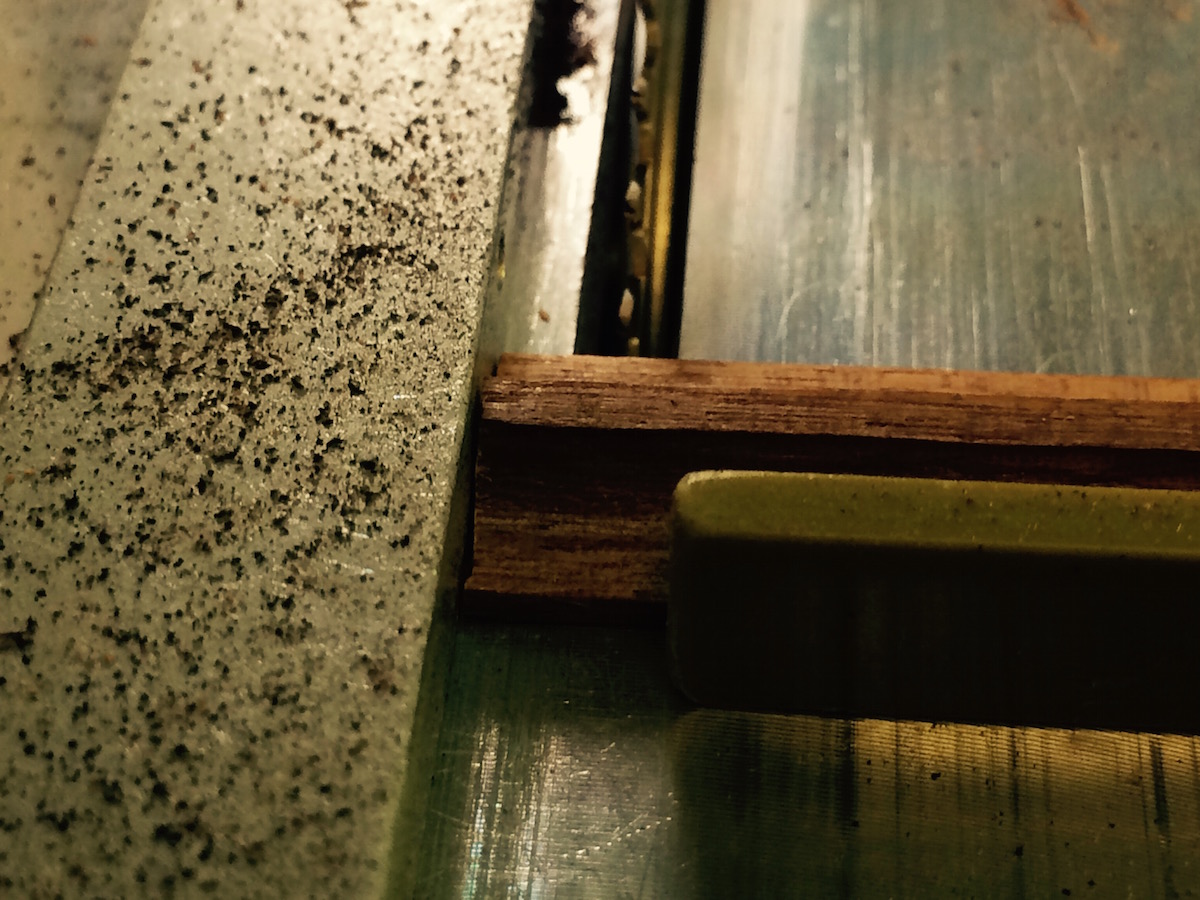
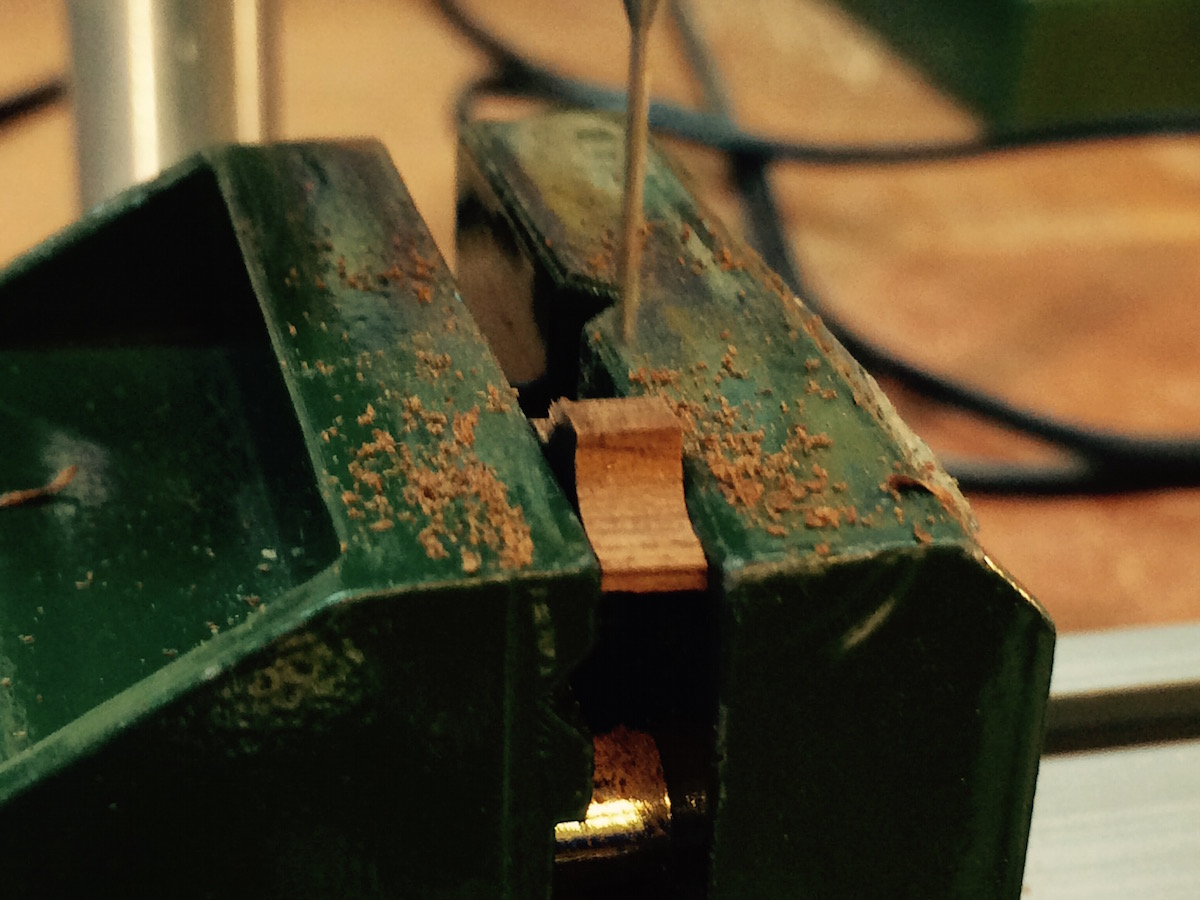
To cover the wales I scratched an angle trim. That had been a very fiddely job, for the 2*3mm wallnutbeams are very sensible under progress.
The skupperports are from 9mm Ramin. To make these parts was not a difficult job: first drilling the 5mm whole, than cutting into 2,5mm slides, some sanding - ready.


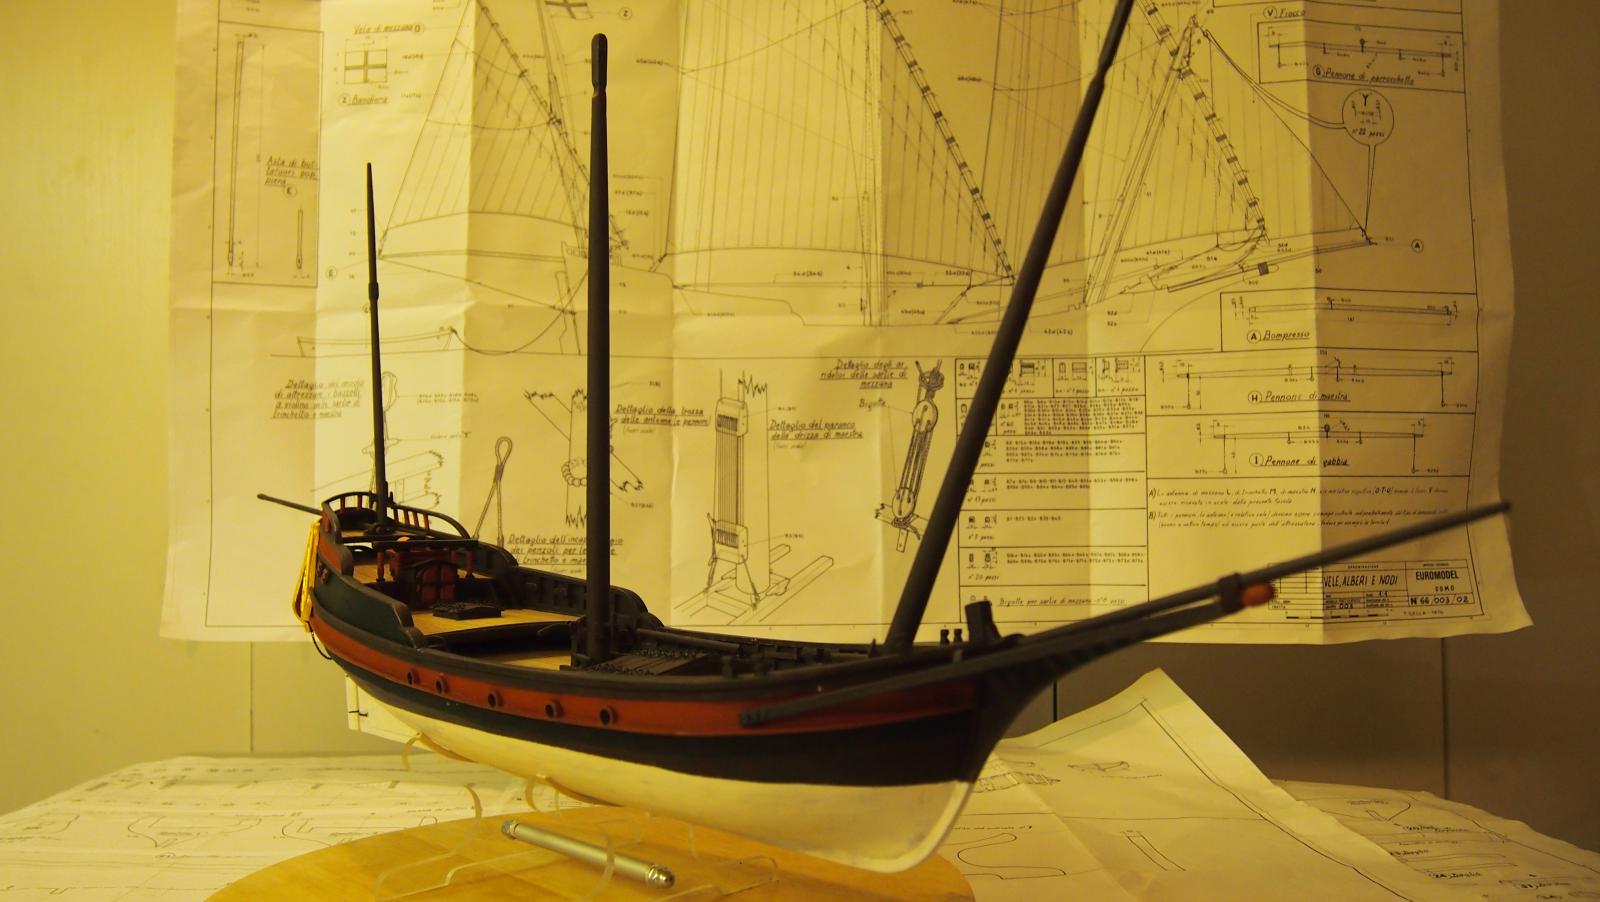


Pinco Genovese by Angarfather - FINISHED
in - Build logs for subjects built 1501 - 1750
Posted
Hello Mike,
Thanks!
The dark wood is painted with tempera - vanDyck brown (from Schmicke) und varnished with matvarnish (Marabu)
Best regards Hartmut