KeithAug
-
Posts
3,986 -
Joined
-
Last visited
Content Type
Profiles
Forums
Gallery
Events
Everything posted by KeithAug
-
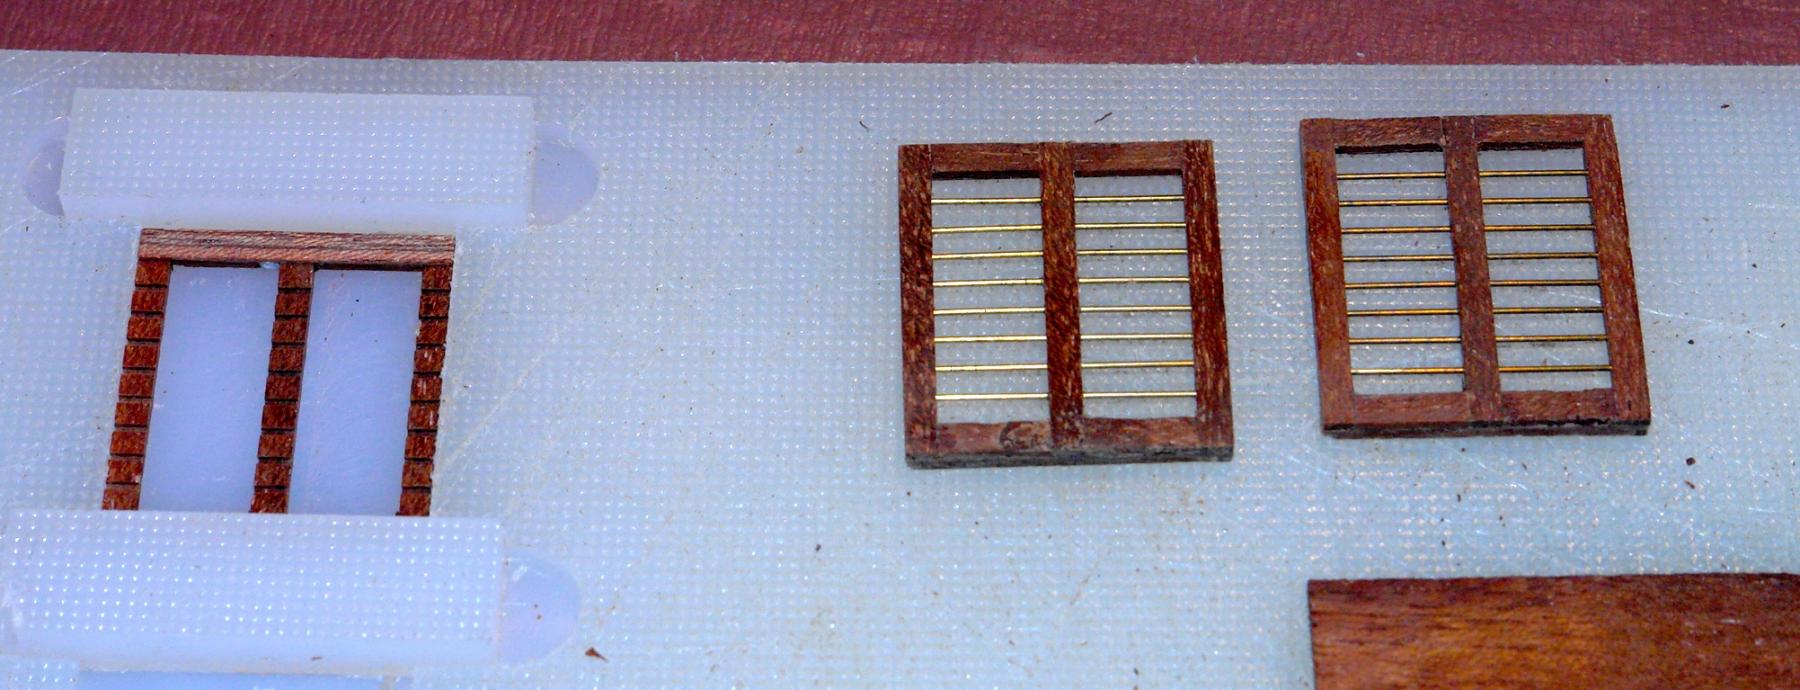
 A little more progress - now most of the windows ready to be mounted within the the outer part of the frames.. The profiling of the skylight frames is quite noticeable and I wanted to reproduce this. The sanding dust is making it look a bit messy. To get a clear view of the detail needs a bit of experimentation with the light.


-
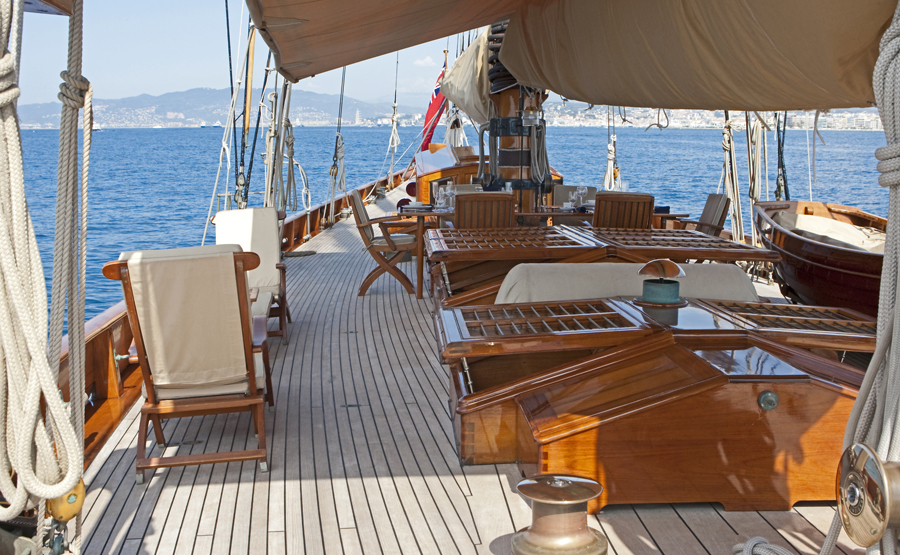
Nils, I'd be interested to know why the ship has a stern anchor. Have you any history on this? Love the aft deck detail.
- 2,625 replies
-
- 4
-

-
- kaiser wilhelm der grosse
- passenger steamer
- (and 1 more)
-
Thank you Julie. Being patient helps, but a good dose of obsessive compulsive disorder is also an advantage.
-
ancre La Salamandre by tadheus - 1:24
KeithAug replied to tadheus's topic in - Build logs for subjects built 1751 - 1800
Magic. -
Nils At what level of detail do you personally stop? I ask because I find it very difficult to decide and was wondering how others deal with the dilemma. Thanks for all the photos and keep them coming - much to admire and learn here.
- 2,625 replies
-
- 7
-
-
- kaiser wilhelm der grosse
- passenger steamer
- (and 1 more)
-
Julie Thats the trouble with rasps, they sometimes develop a mind of their own. You need to reprimand it. The trouble is its probably male and hence prone to flights of fancy. I think cutting back the offending area to get a surface for gluing and then adding a fillet is probably the way to go.
-
Looking good Julie. What is in your mind for the small section of hull at the top rear of the rudder?
-
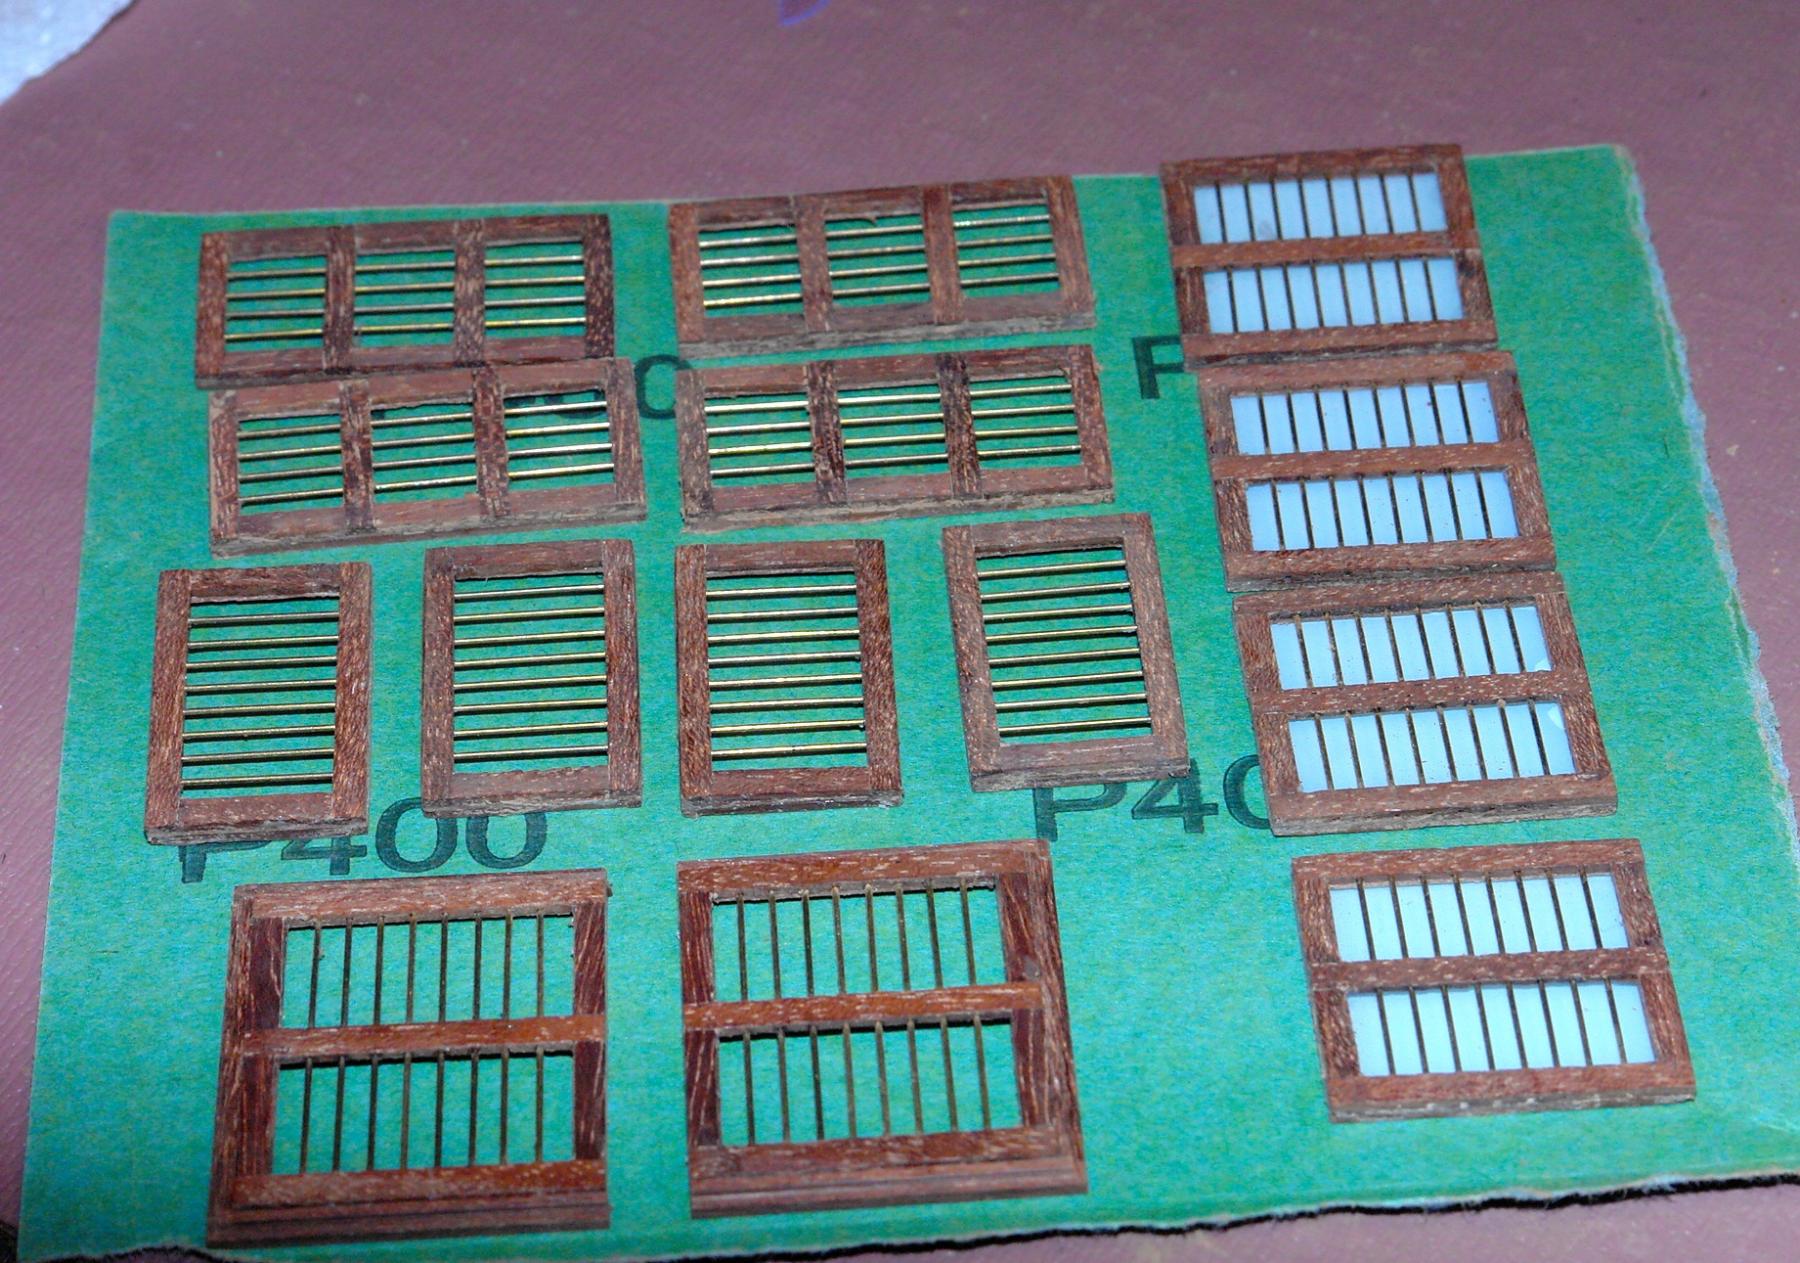
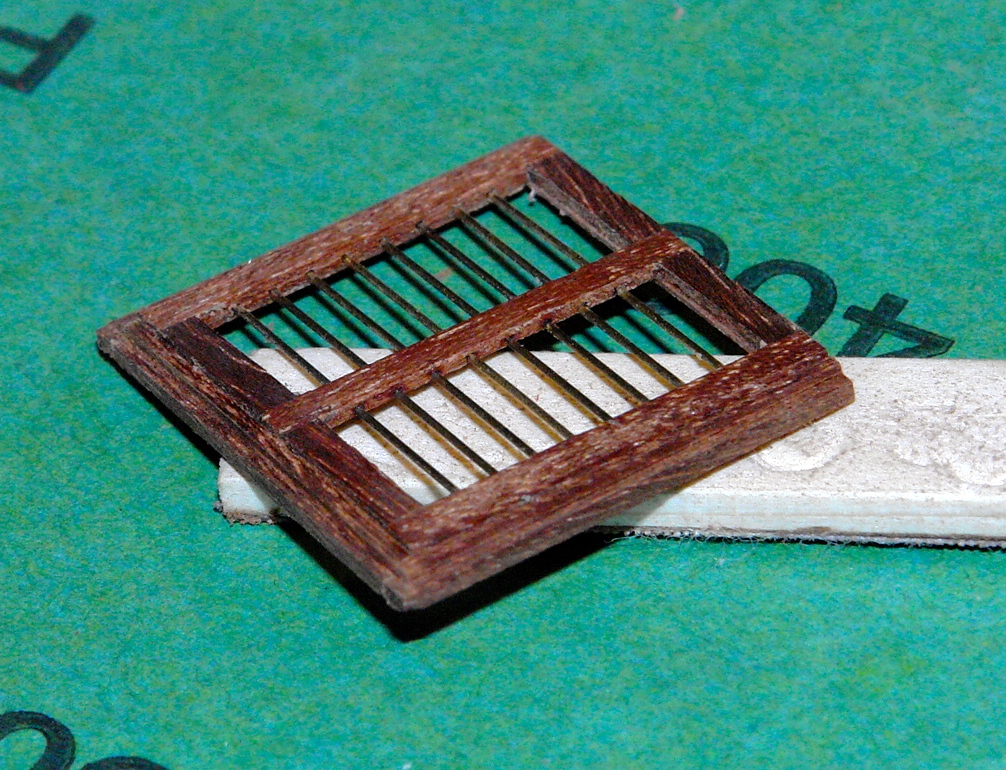
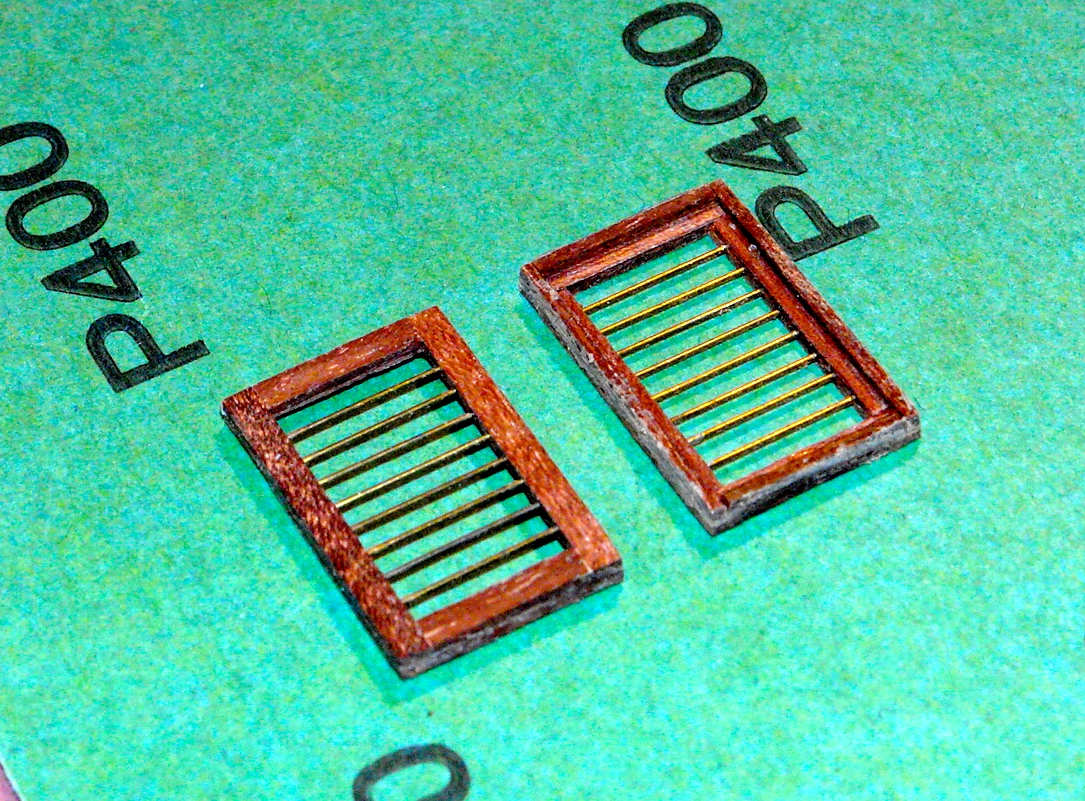
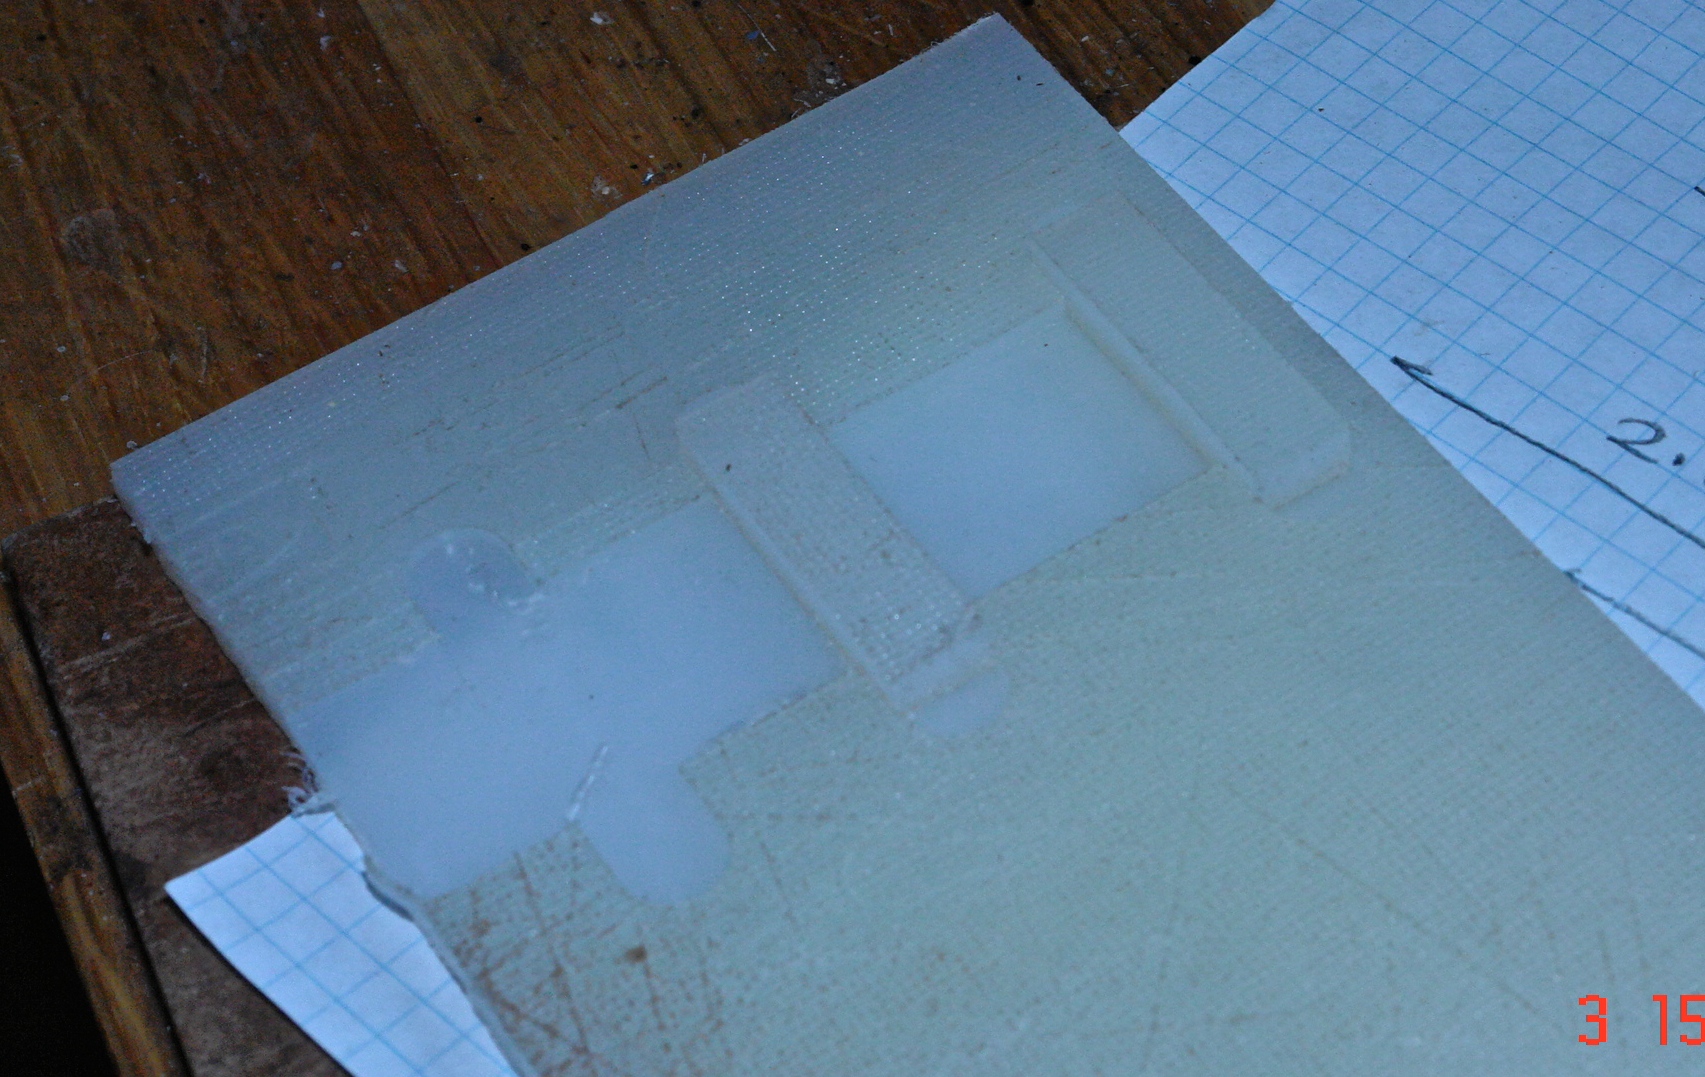
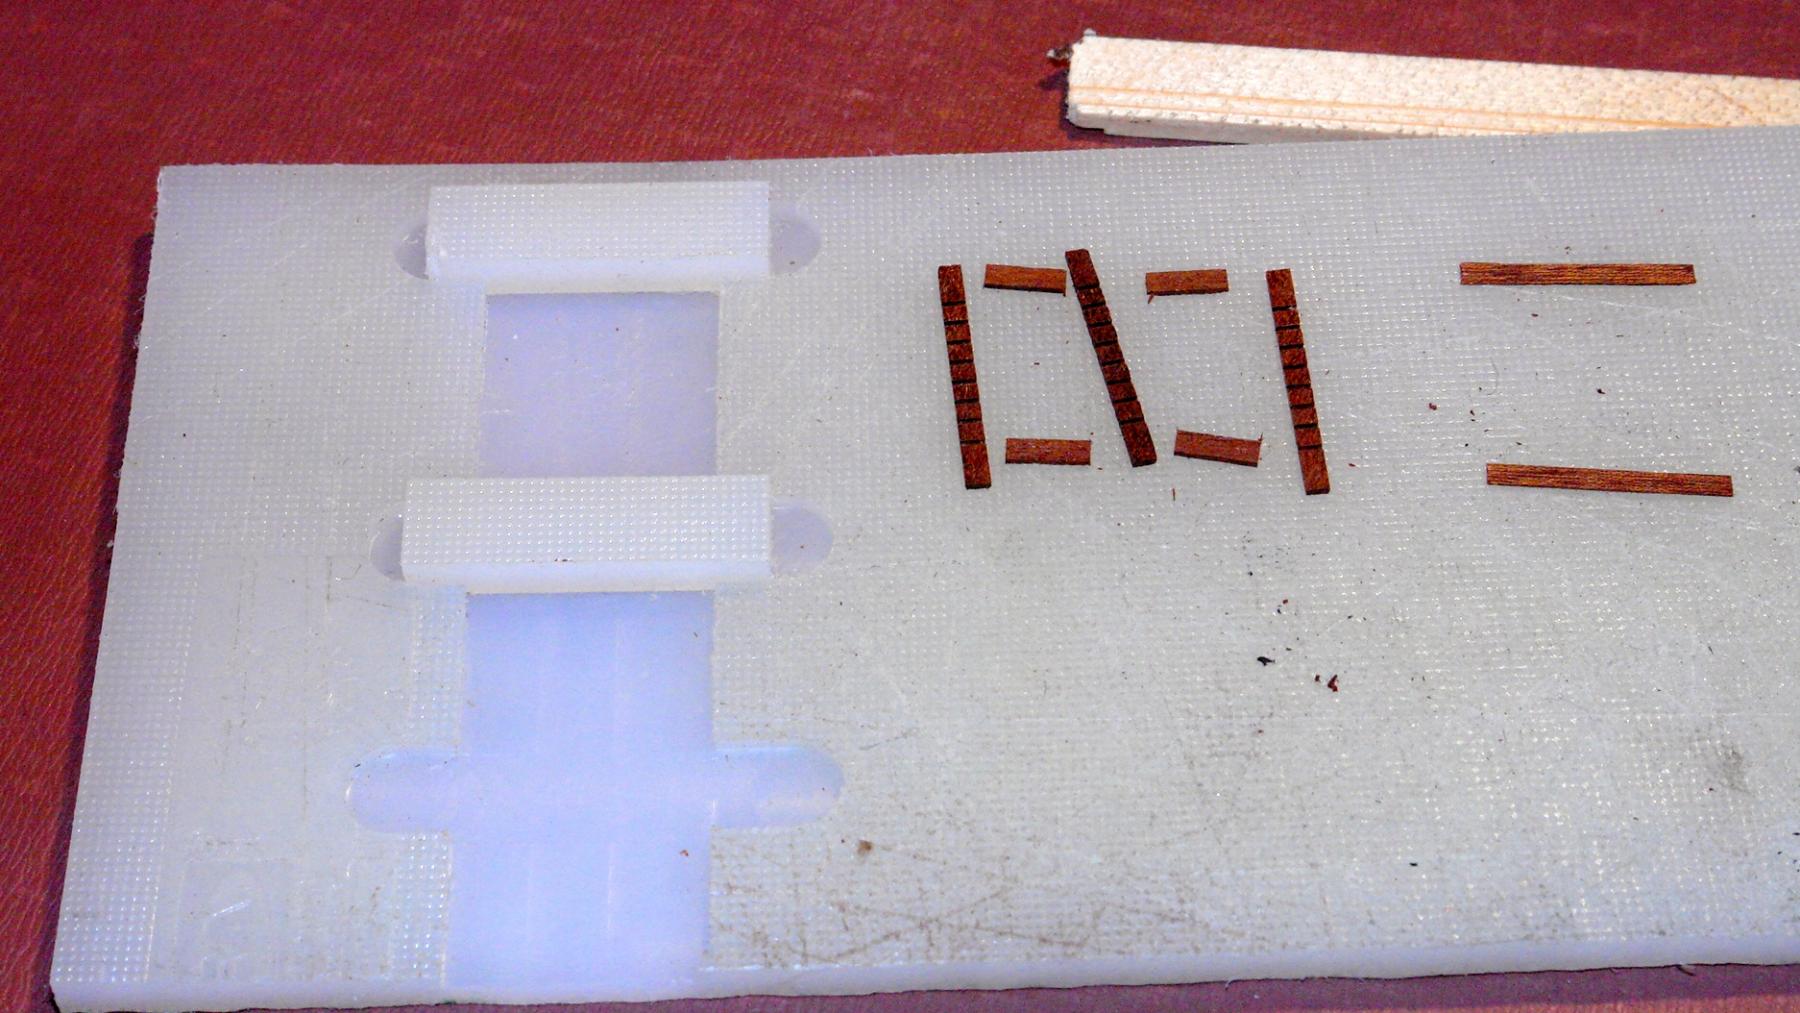
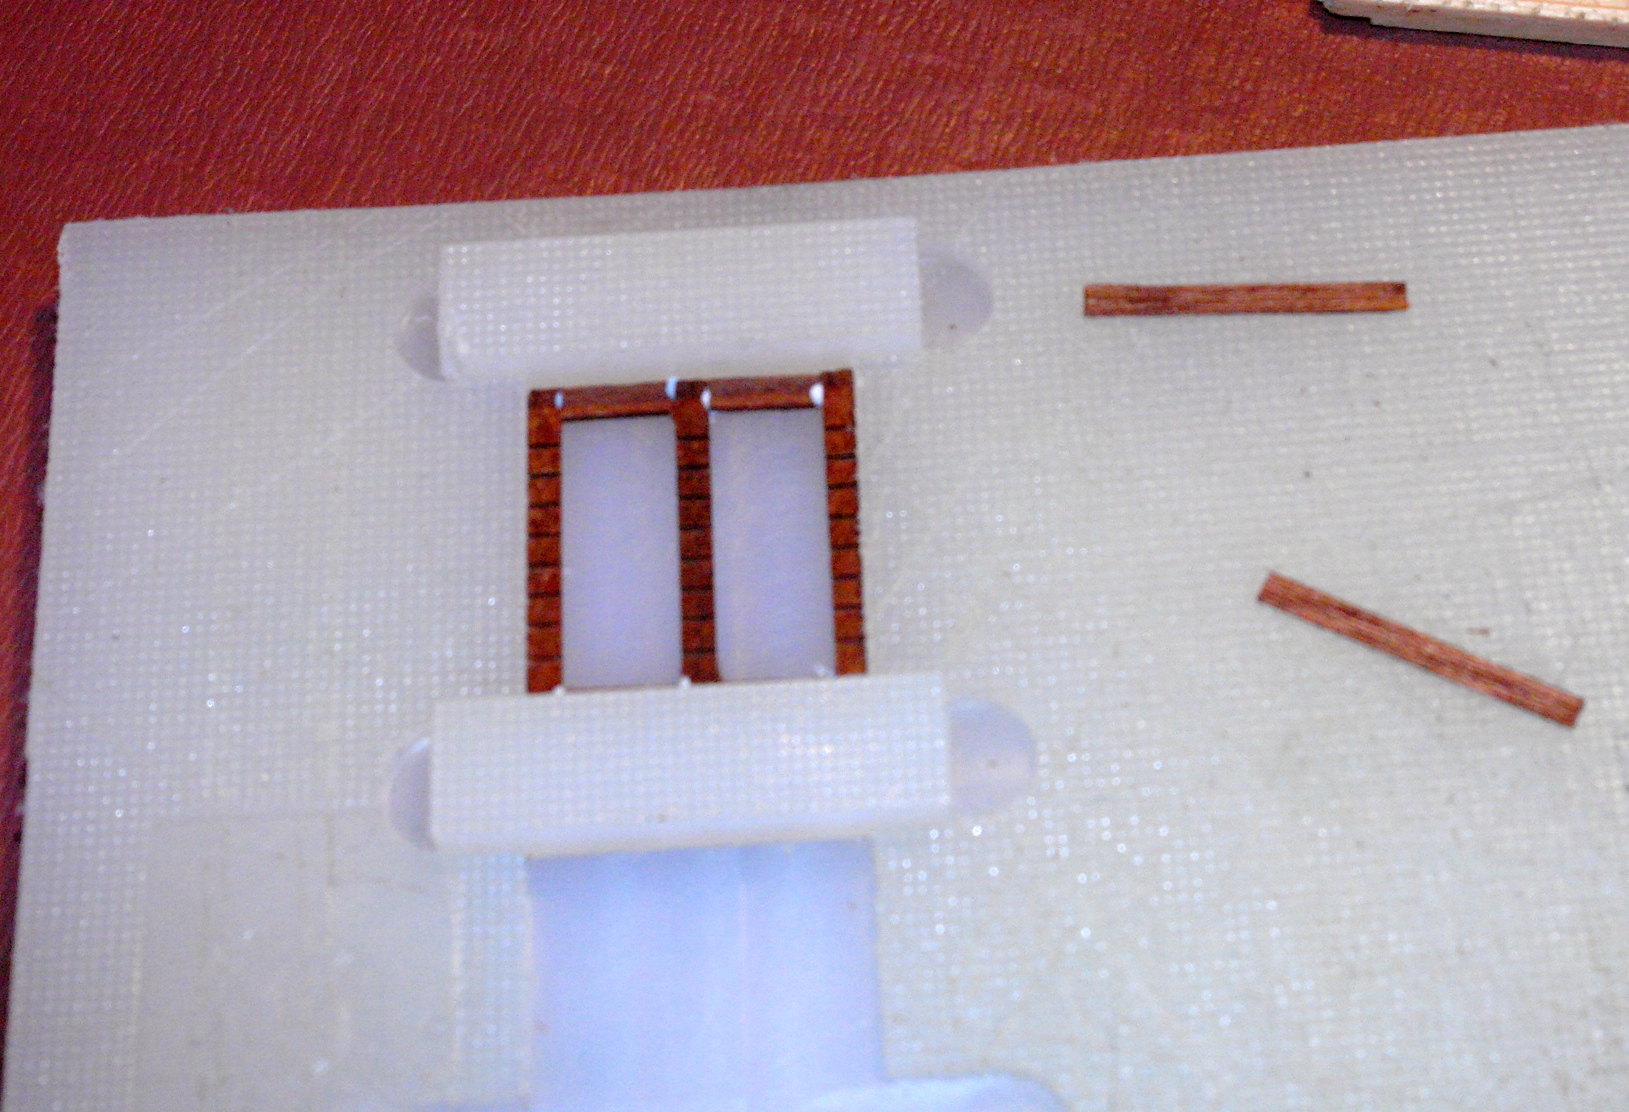
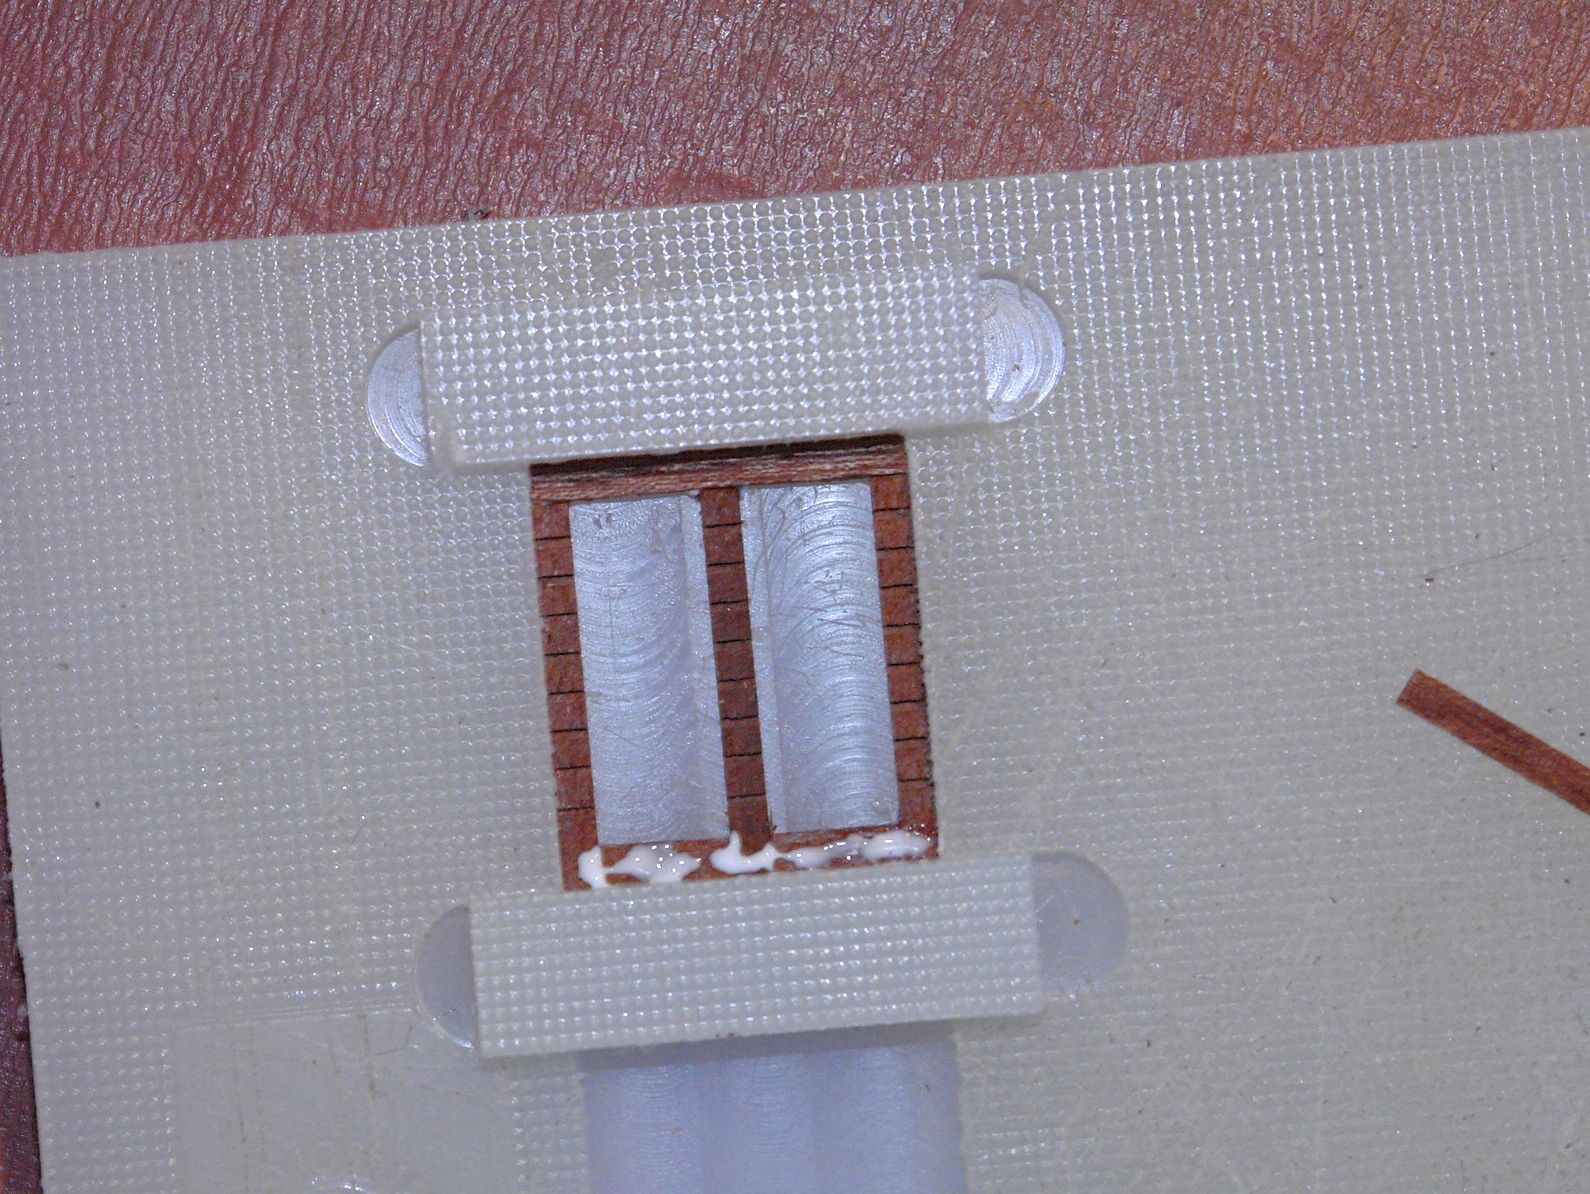
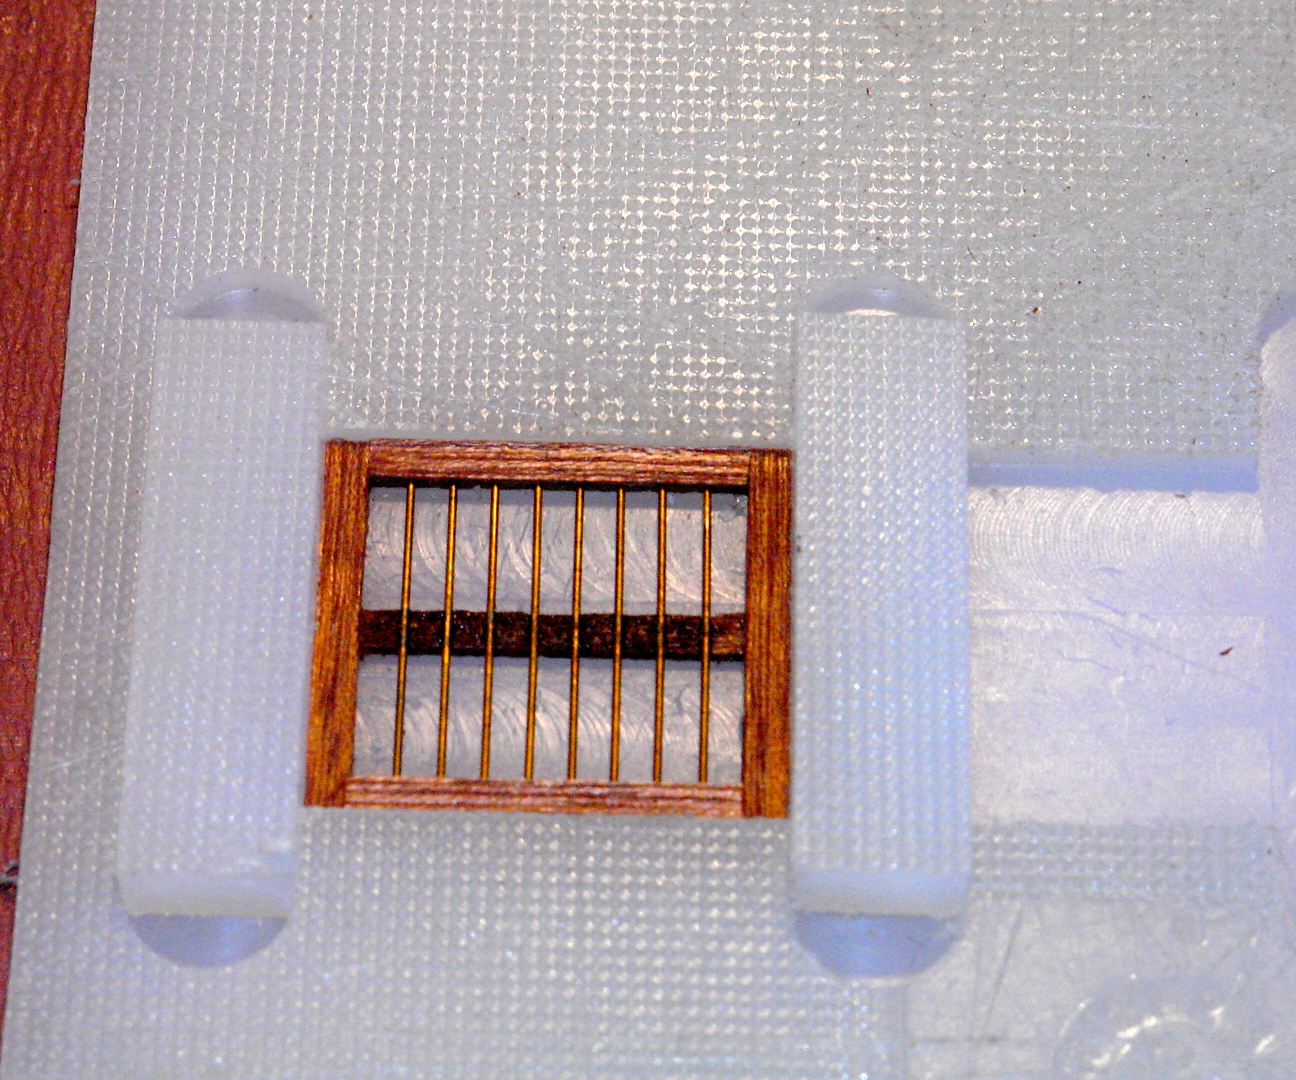
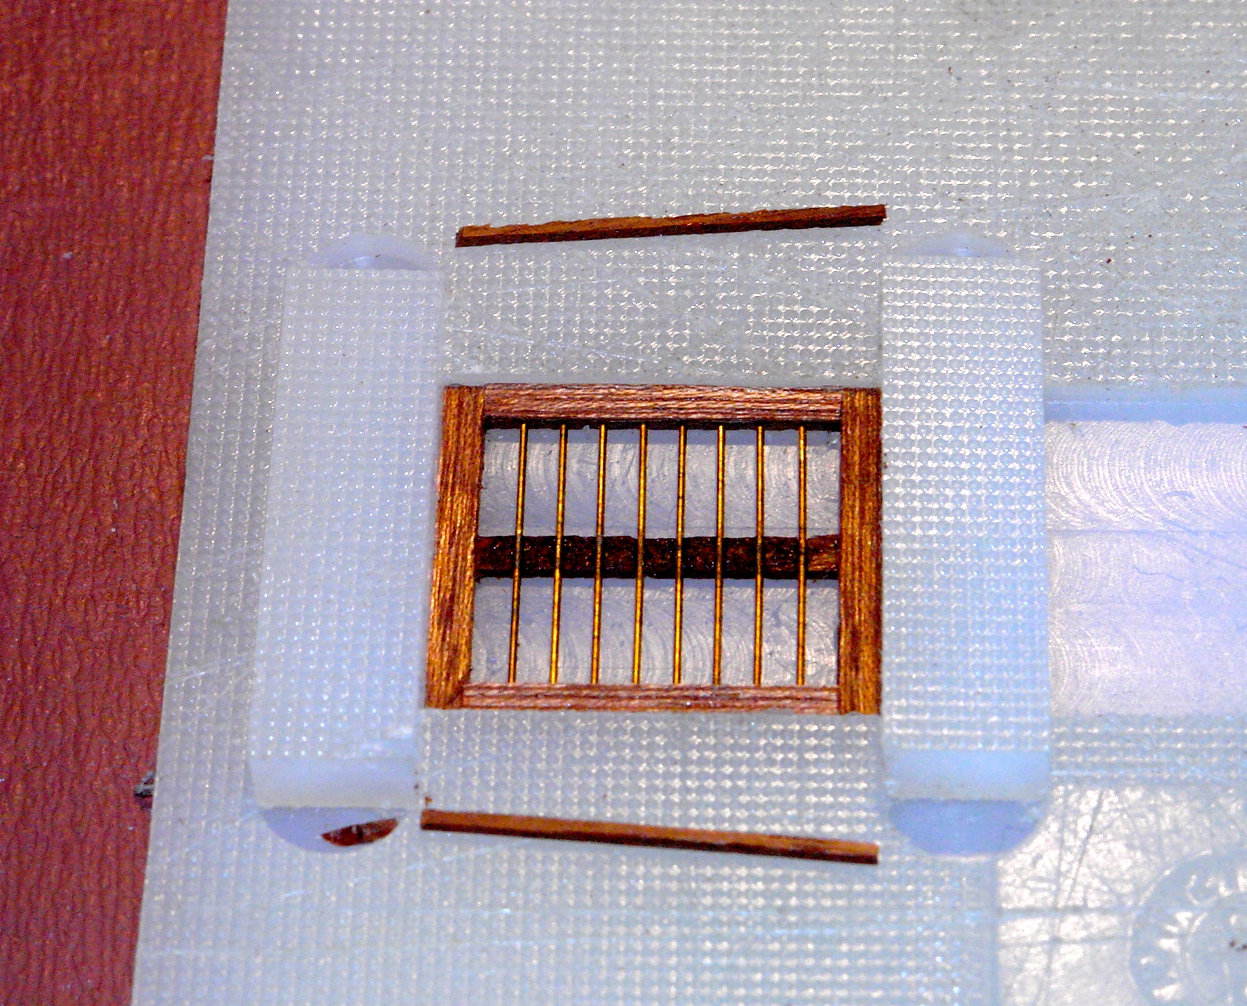
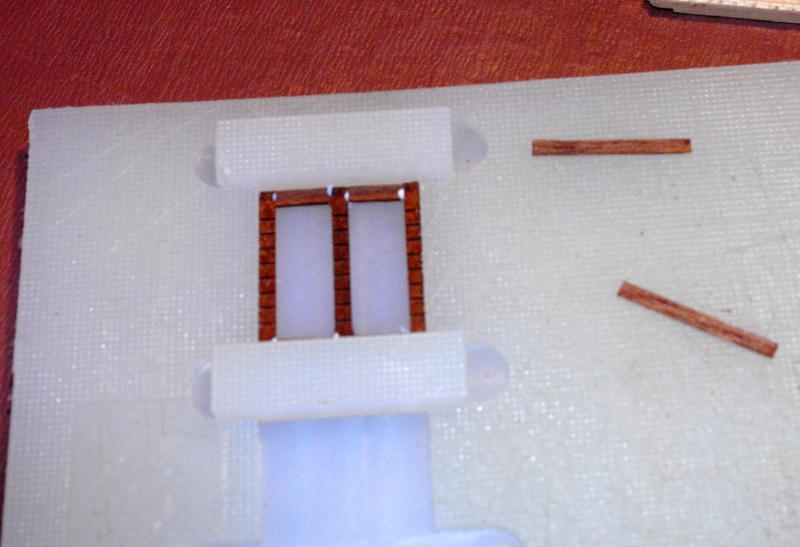
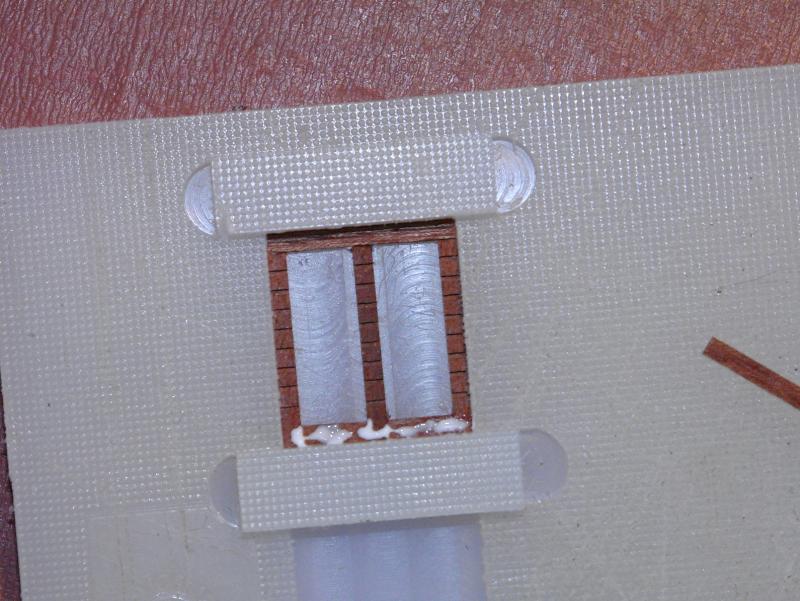
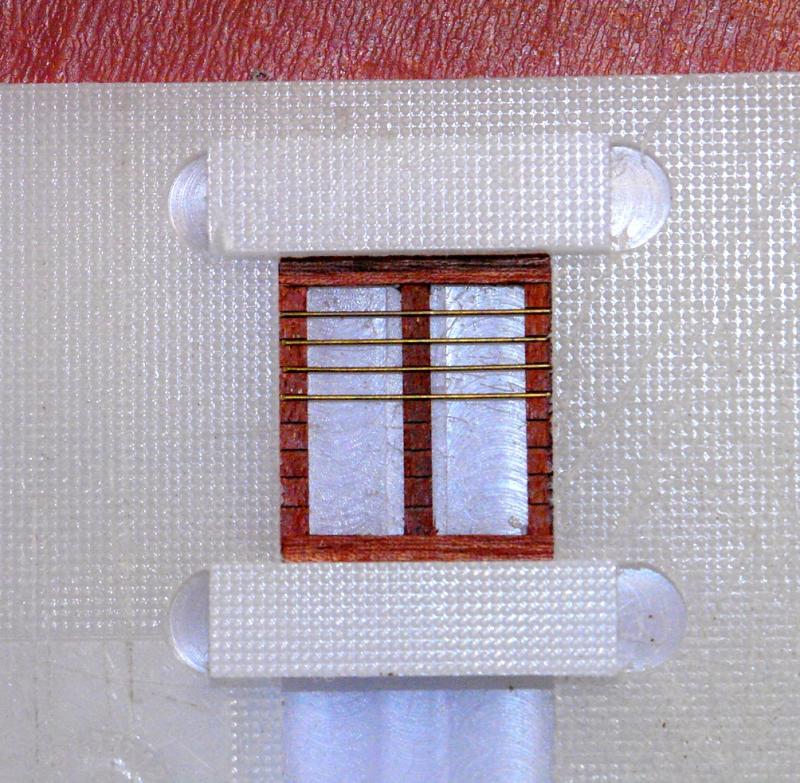
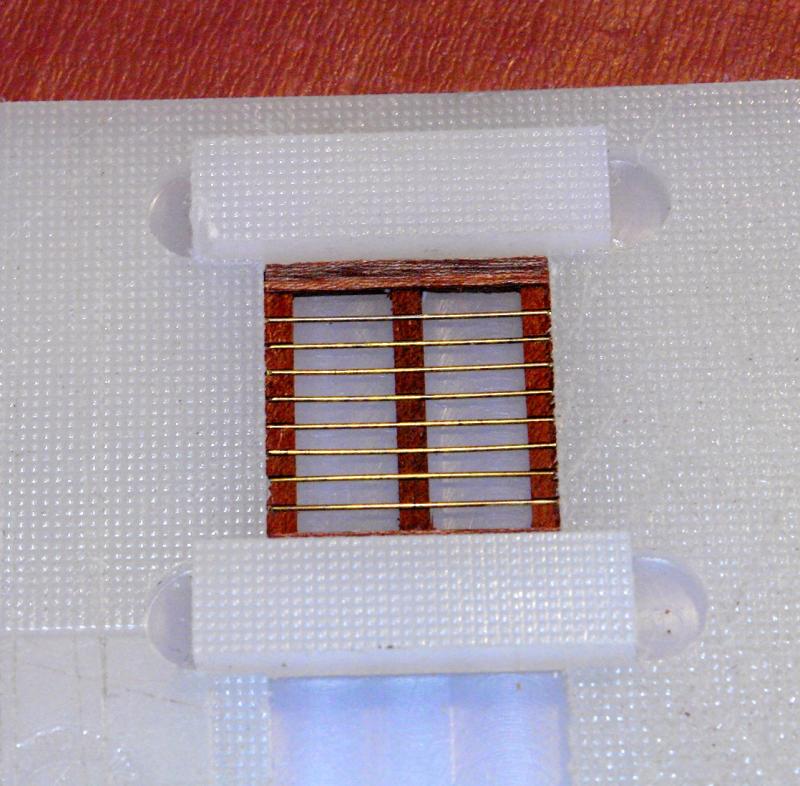
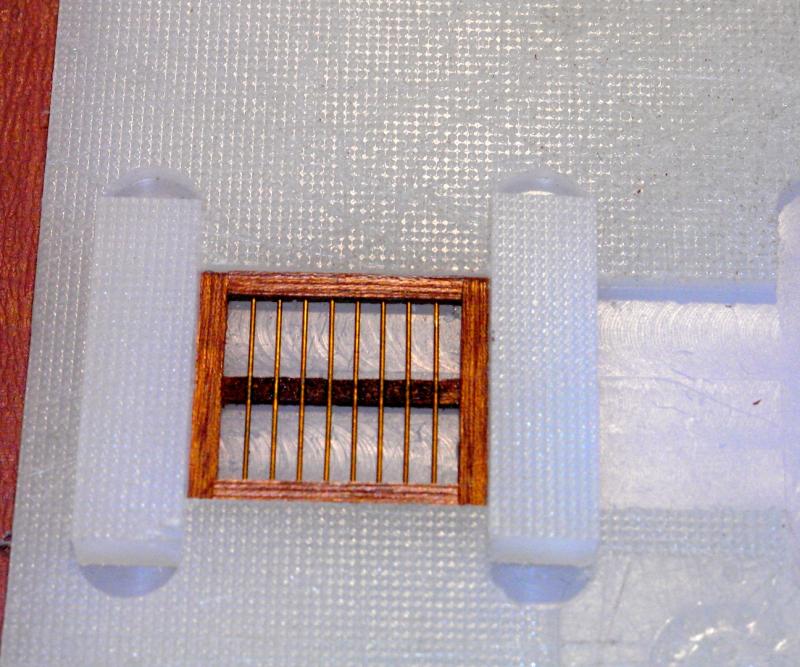
Skylight Windows. I think I have made hard work of making these and many of you will have improvements to suggest. If you do feel free to advise. One of the key elements I wanted to achieve was to set the protective brass bars within the frame and have them separated from (not sitting directly on) the window acetate. This reflects the design on the original. This had to be done while minimising the thickness of the window frames so that it looks to scale. The window are 1.1 x .980 inch and I wanted them less than .100 inch thick Because I needed to make a number of matching frames I made a simple jig. This was cut from one of my wife's chopping boards. (To clarify I have one wife and she has a number of boards I find one is more than ample)!!!! As yet she has not discovered the theft. I find nylon chopping boards make ideal jigs particularly if they are to be used while gluing components. The glue does not adhere to them and the glued and dried components are easily removed. The first layer of the frame is built from .040 inch thick mahogany. Slots of .025 inch wide and deep were accurately cut into the mahogany to take the brass bars which are cut from .024 inch wire. The side strips of the frame was then cut - .100 inch wide. The fist (top layer) of the window was then assembled in the jig from 7 separate pieces and glued with PVA. The second layer of the window is constructed from .018 inch thick by .100 inch wide mahogany. The strips for the top and bottom of the window were glued in place (PVA) to reinforce the 1st layer. The brass bars were positioned and fixed with CA glue. Then the bars were closed in place by edge strips in the .018 inch mahogany. The final layer forms the recess for the acetate and is .040 x .040 inch in section. Having cut all the components and with a bit of practice assembly time for each window is less than 30 minutes. The acetate was cut to fit - at this stage it still has its protective covering. Many more lights still to do!!!!!!!!!!!!!!!!!!!


-
Michael, John, Mark. Thank you for your continuing interest and kind remarks. One of the great things about MSW is the support everyone gets from fellow builders of exceptional skill.
-
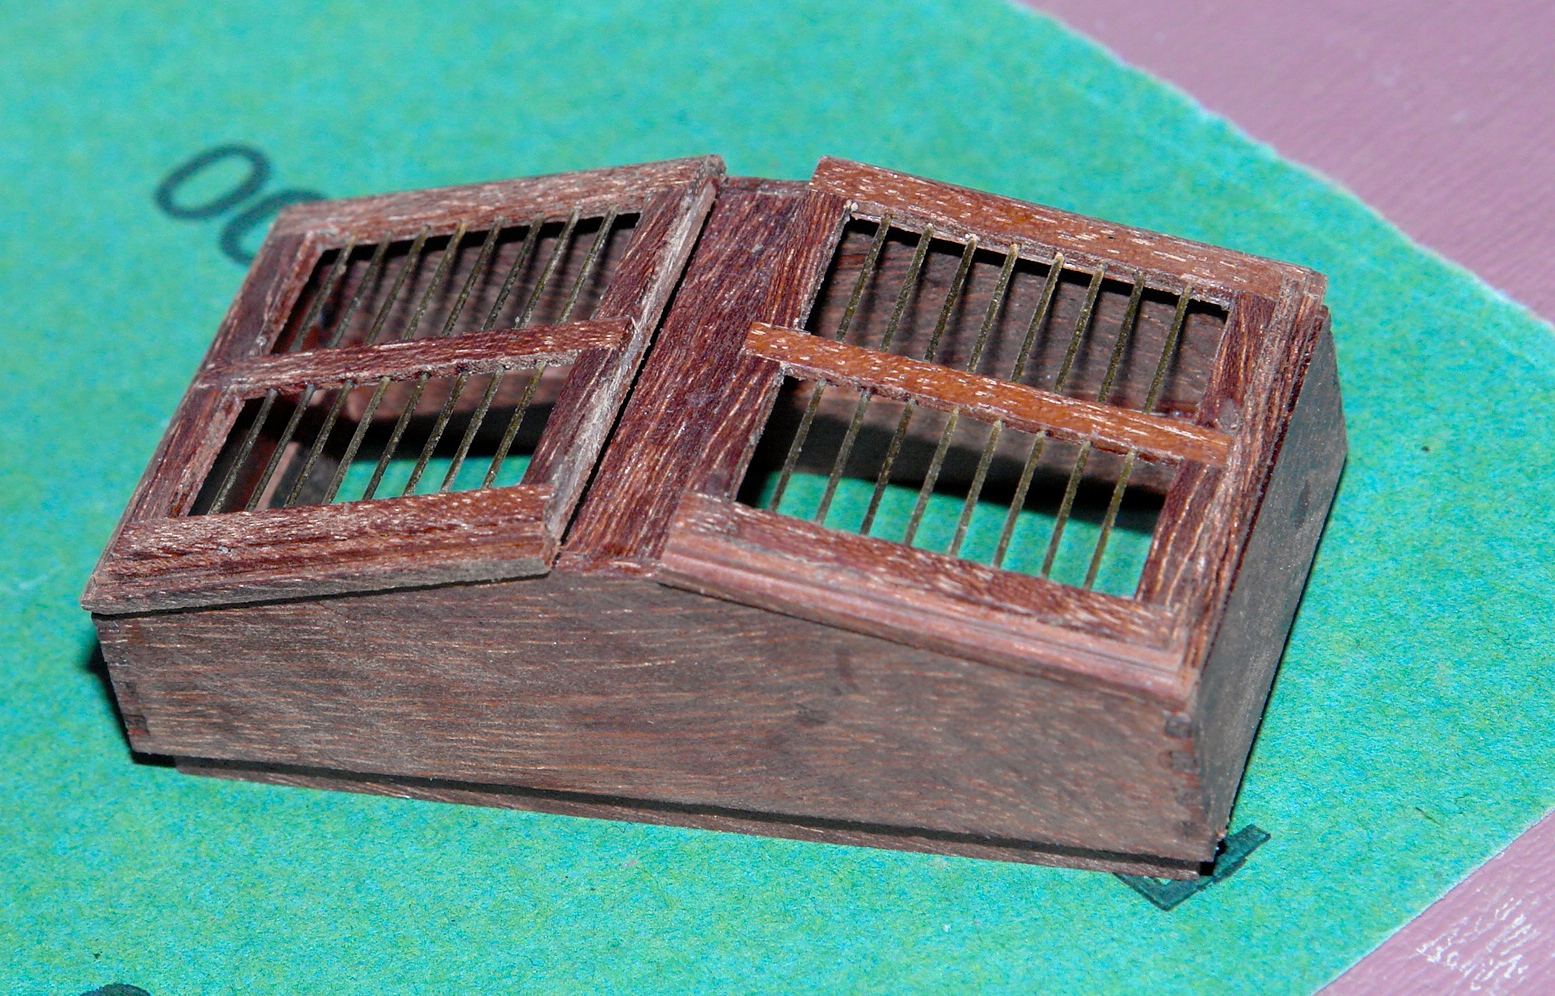
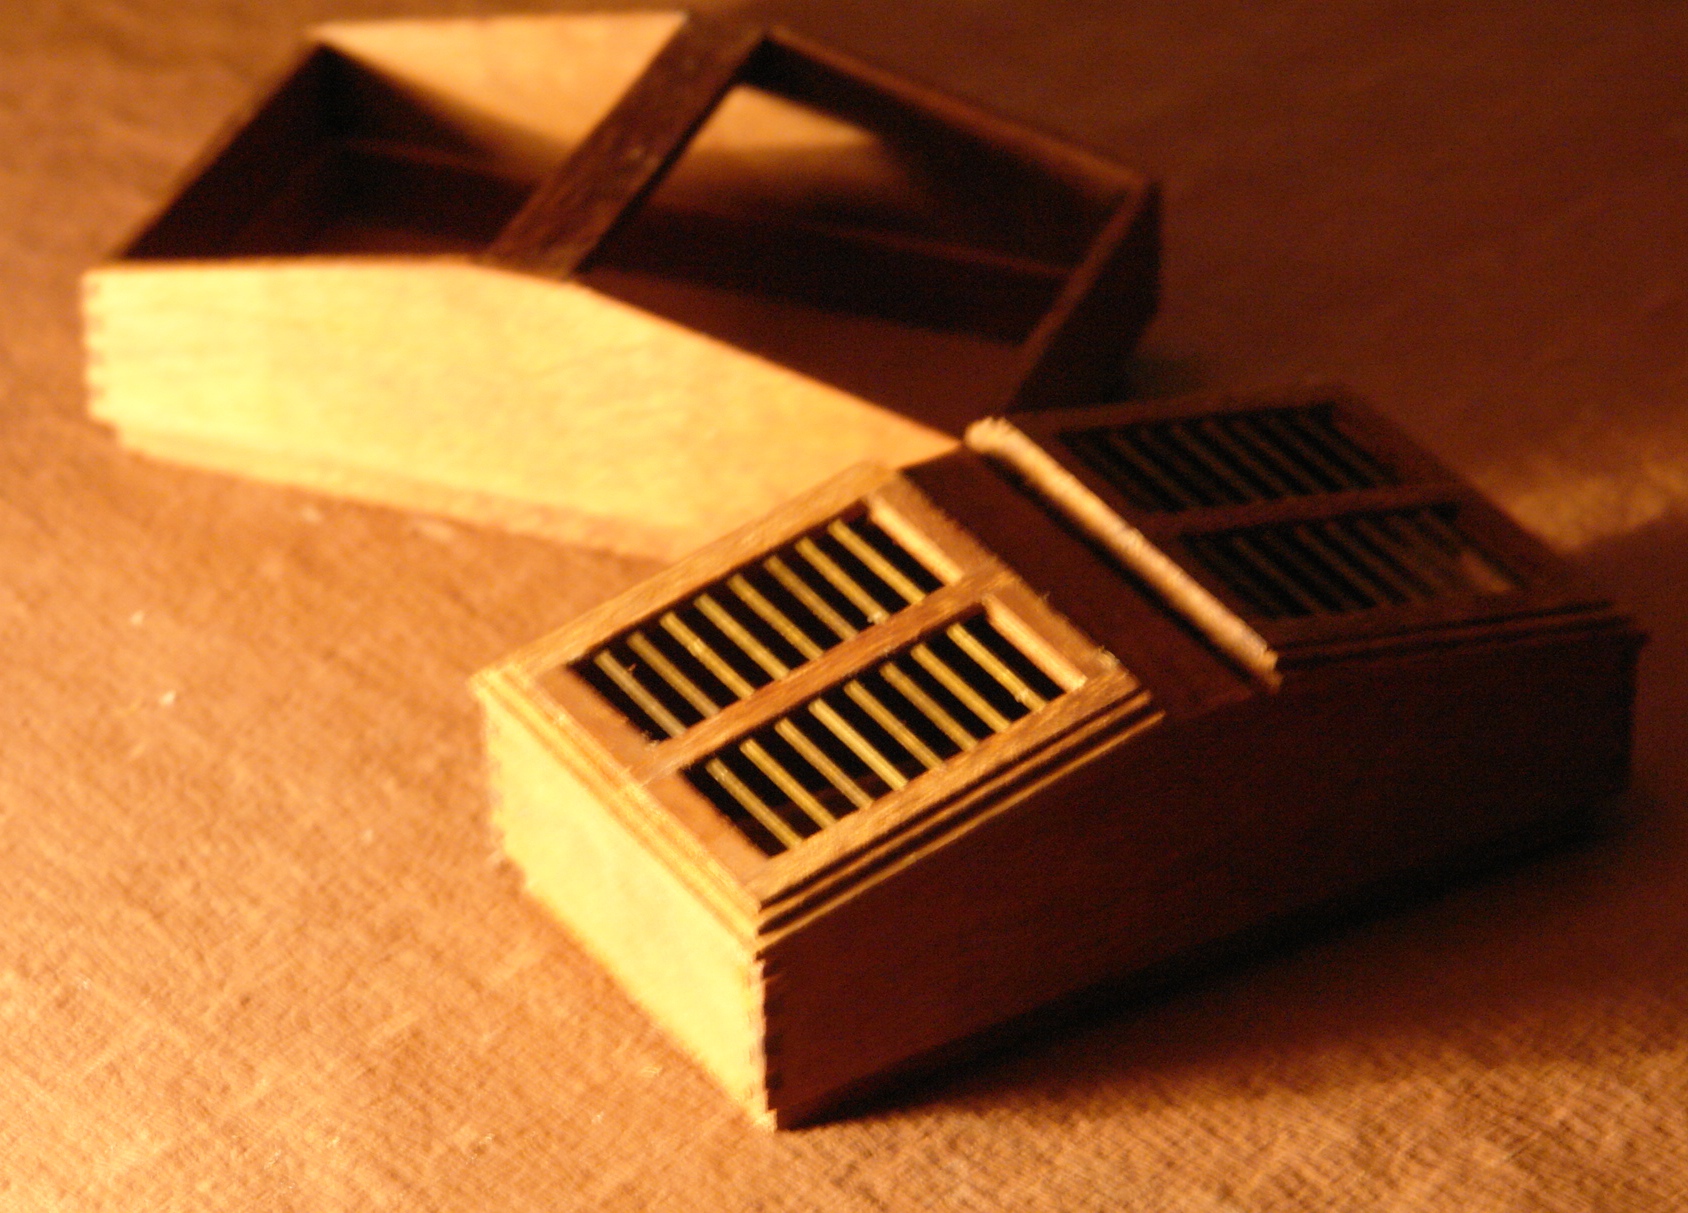
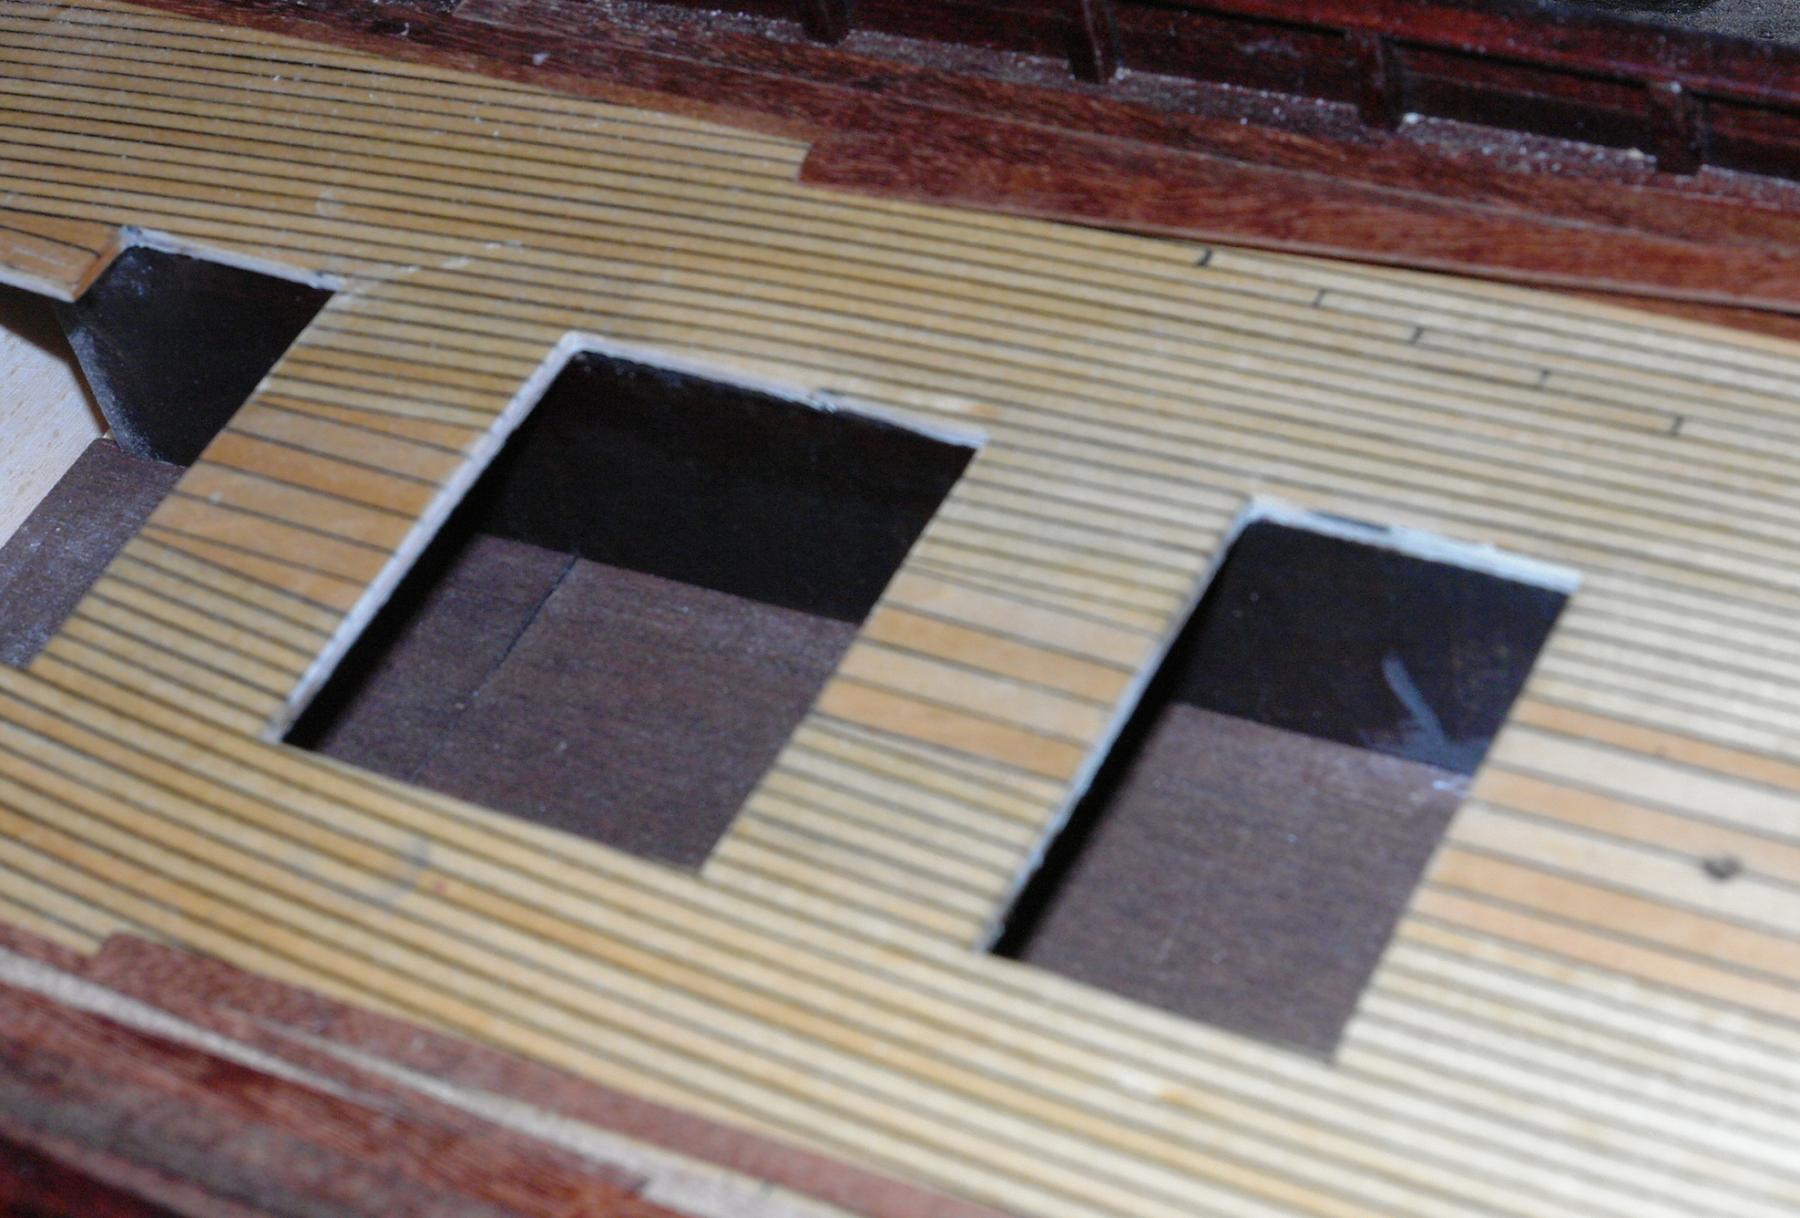
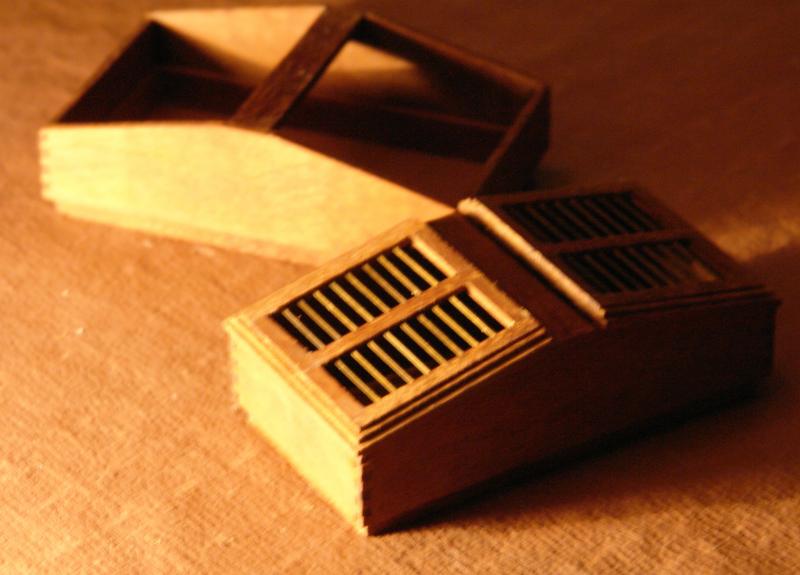
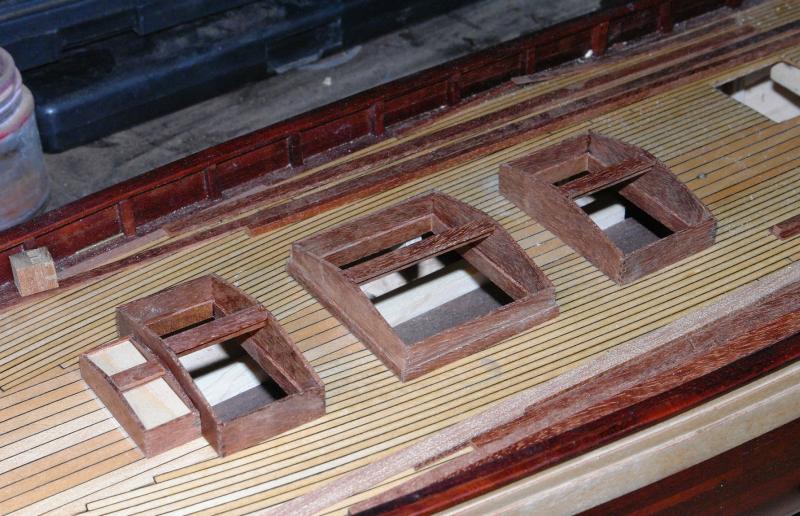
I continued with the skylights - taking care to get them square. Ribs and skirts were added. I didn't think that any below deck detail would be visible through the small skylight windows, so I didn't do any. I was a bit worried however that the lighter woods on the inside of the hull might look a bit odd so I decided to clad the inner spaces in darker wood. The 5 skylights are now in position but not painted or fixed. I'm hoping they will come up really well after a few coats of poly. Fingers crossed that the joints will show up well. I think I'll have a go at the windows next. I have a few ideas but it all seems a bit complicated and fiddley.


- 882 replies
-
- 10
-
-
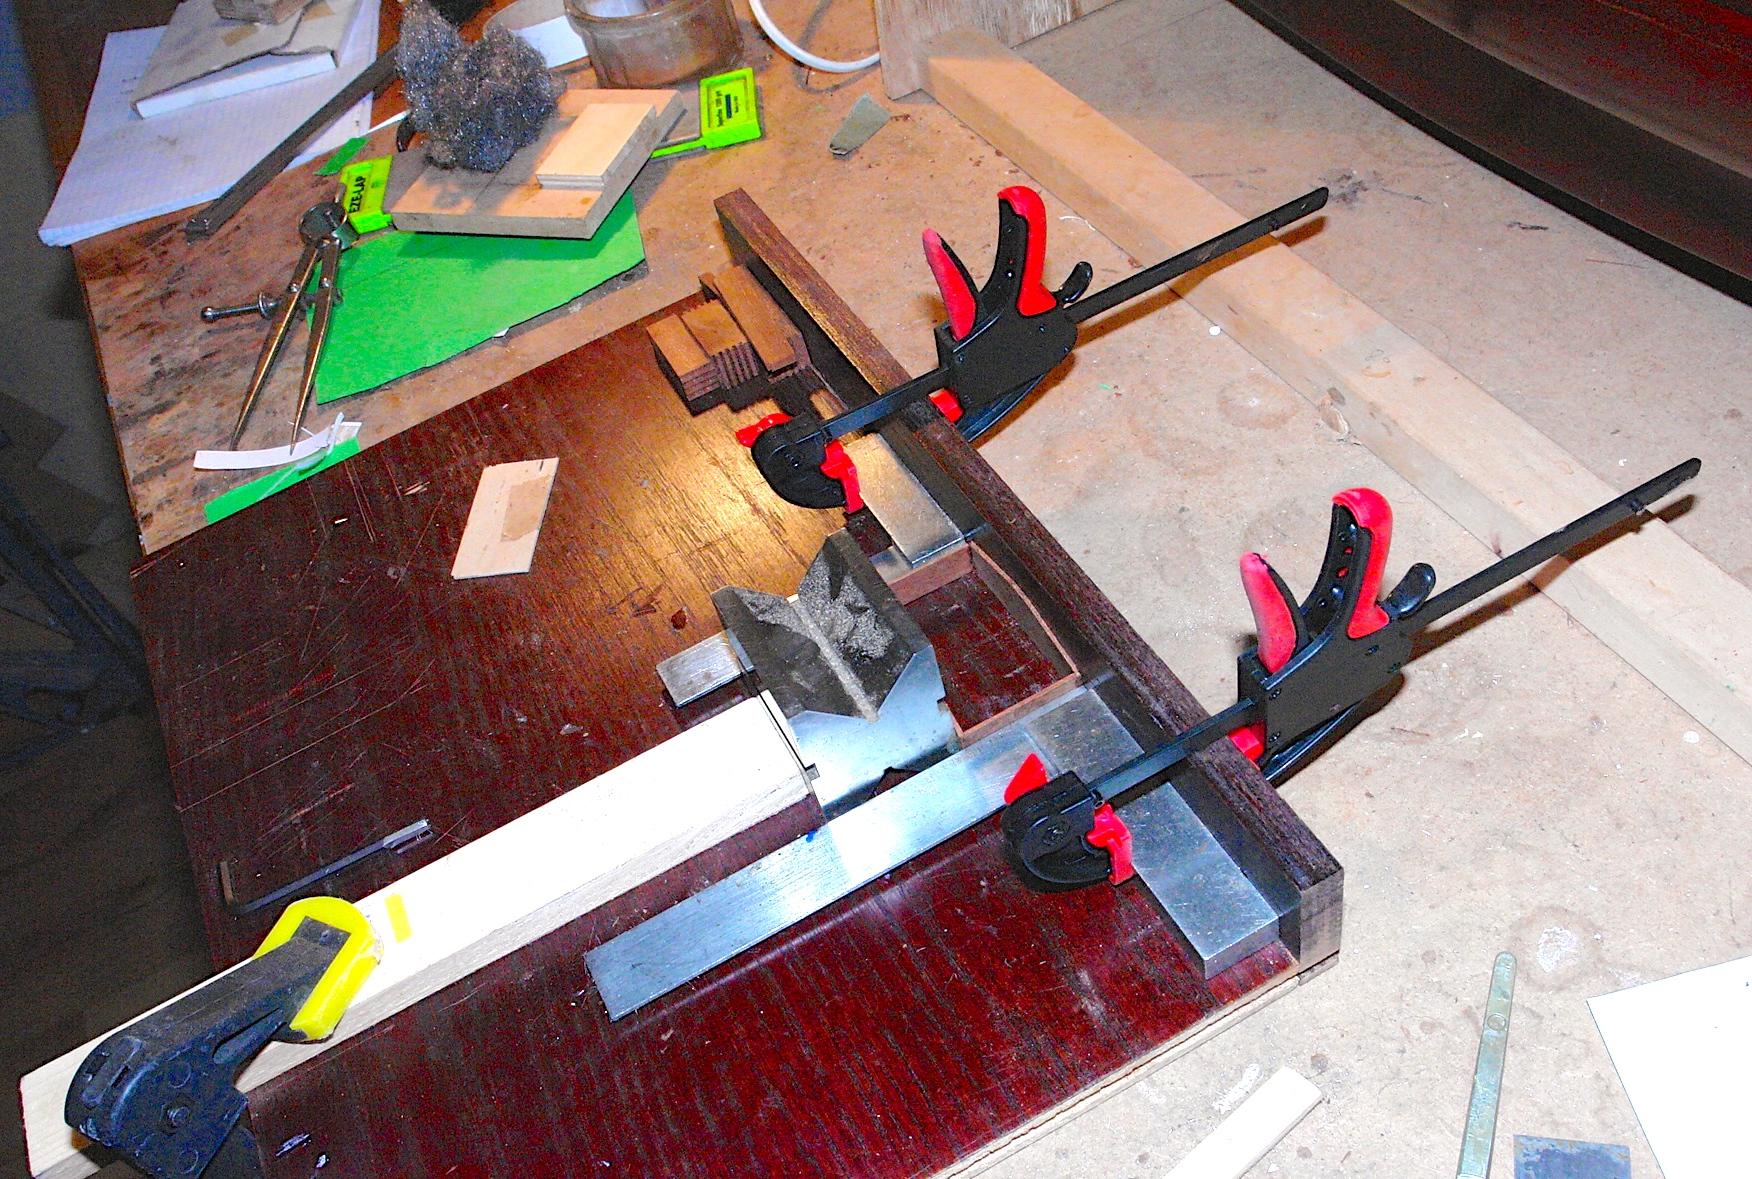
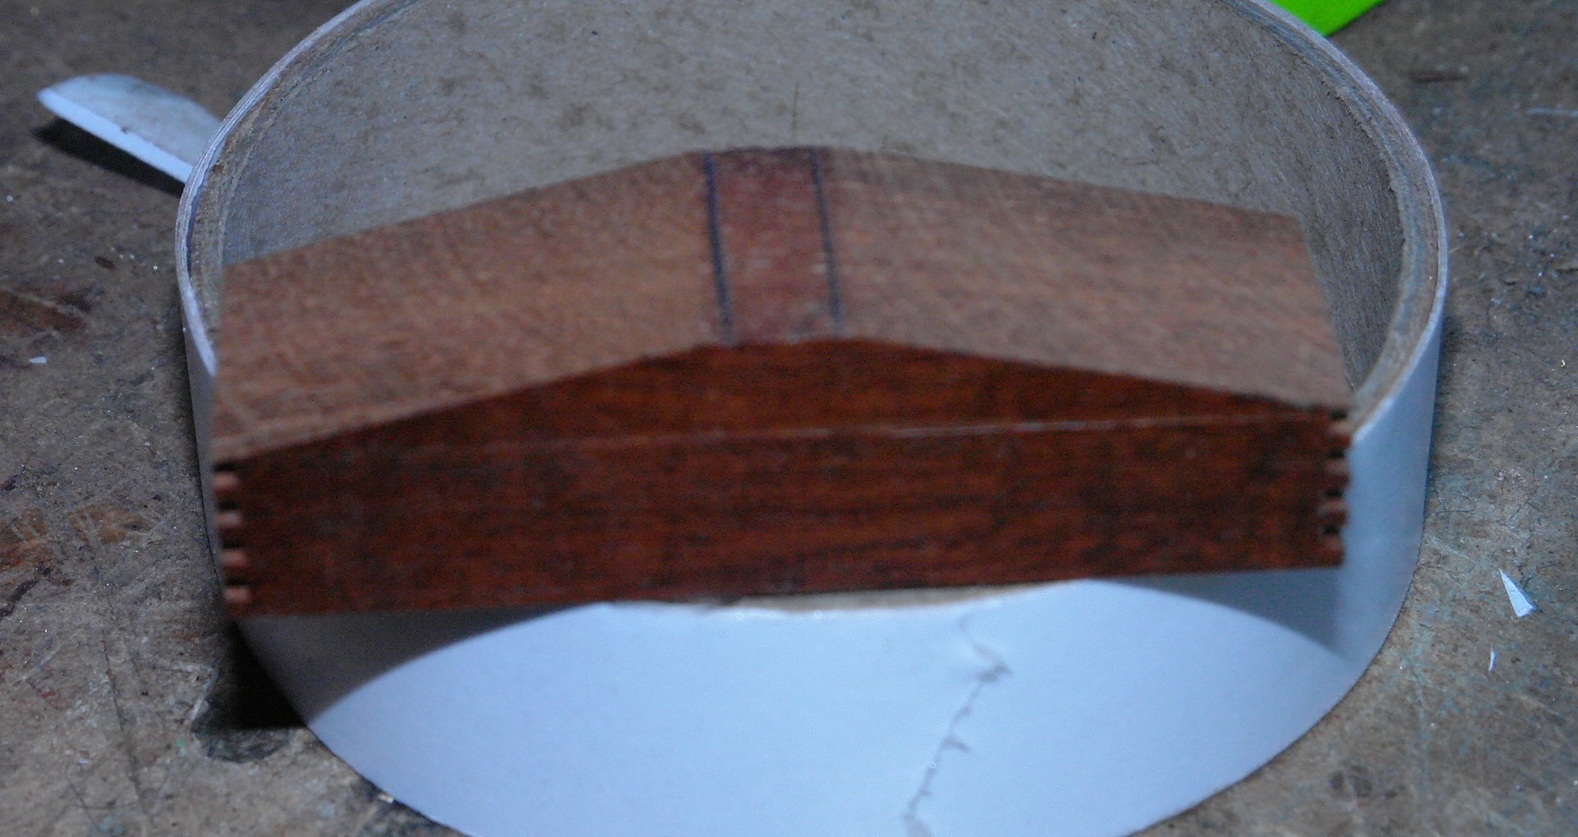
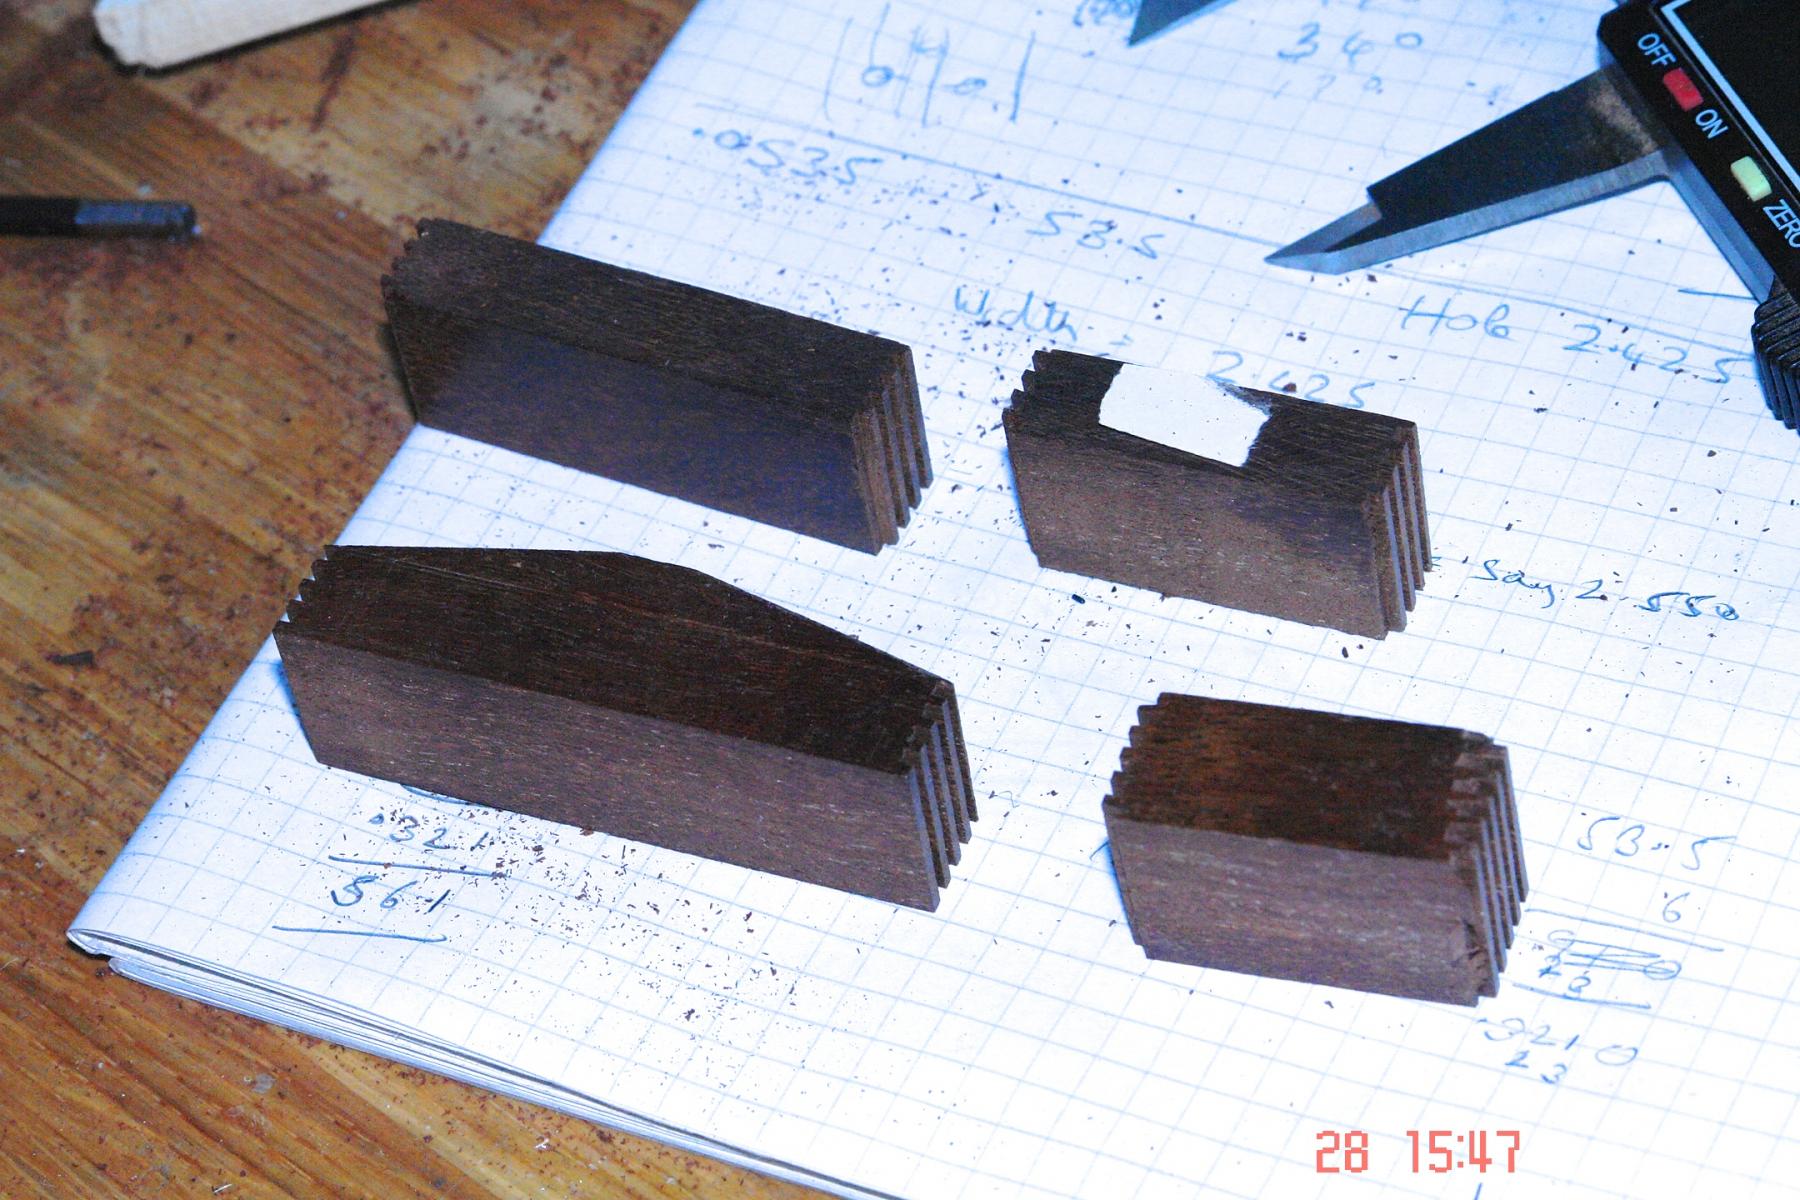
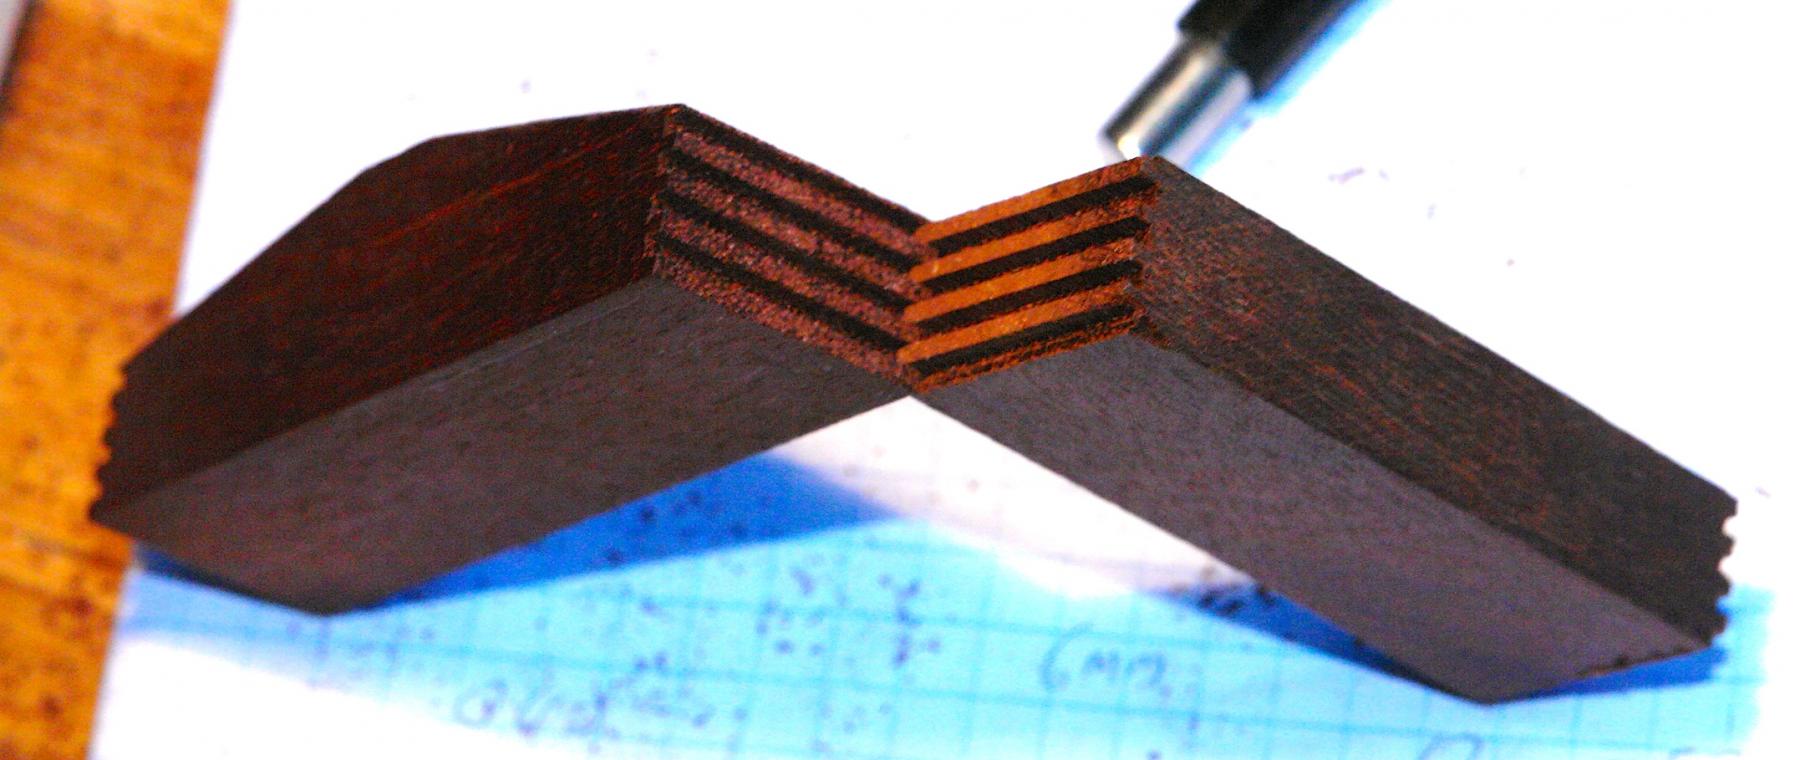
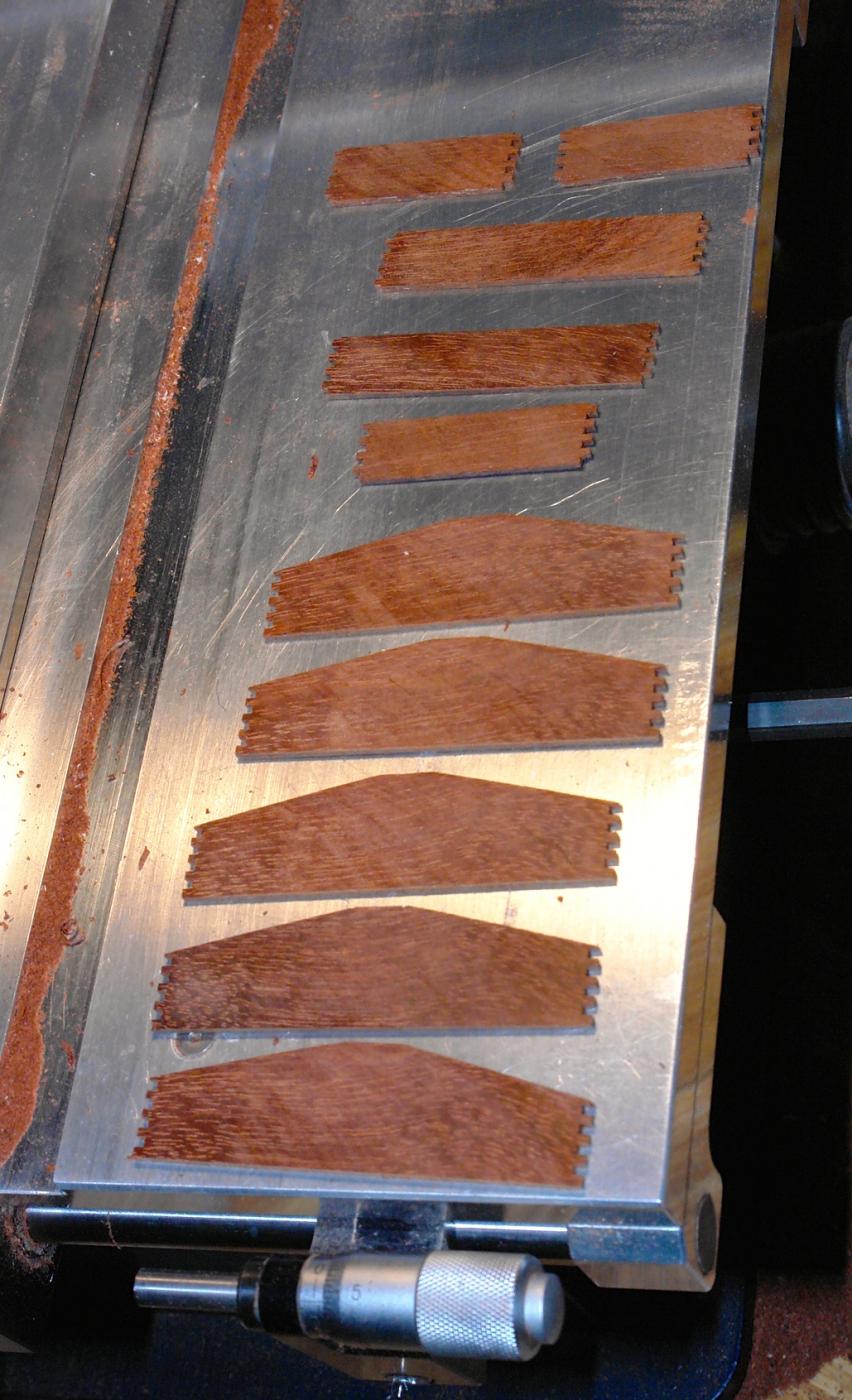
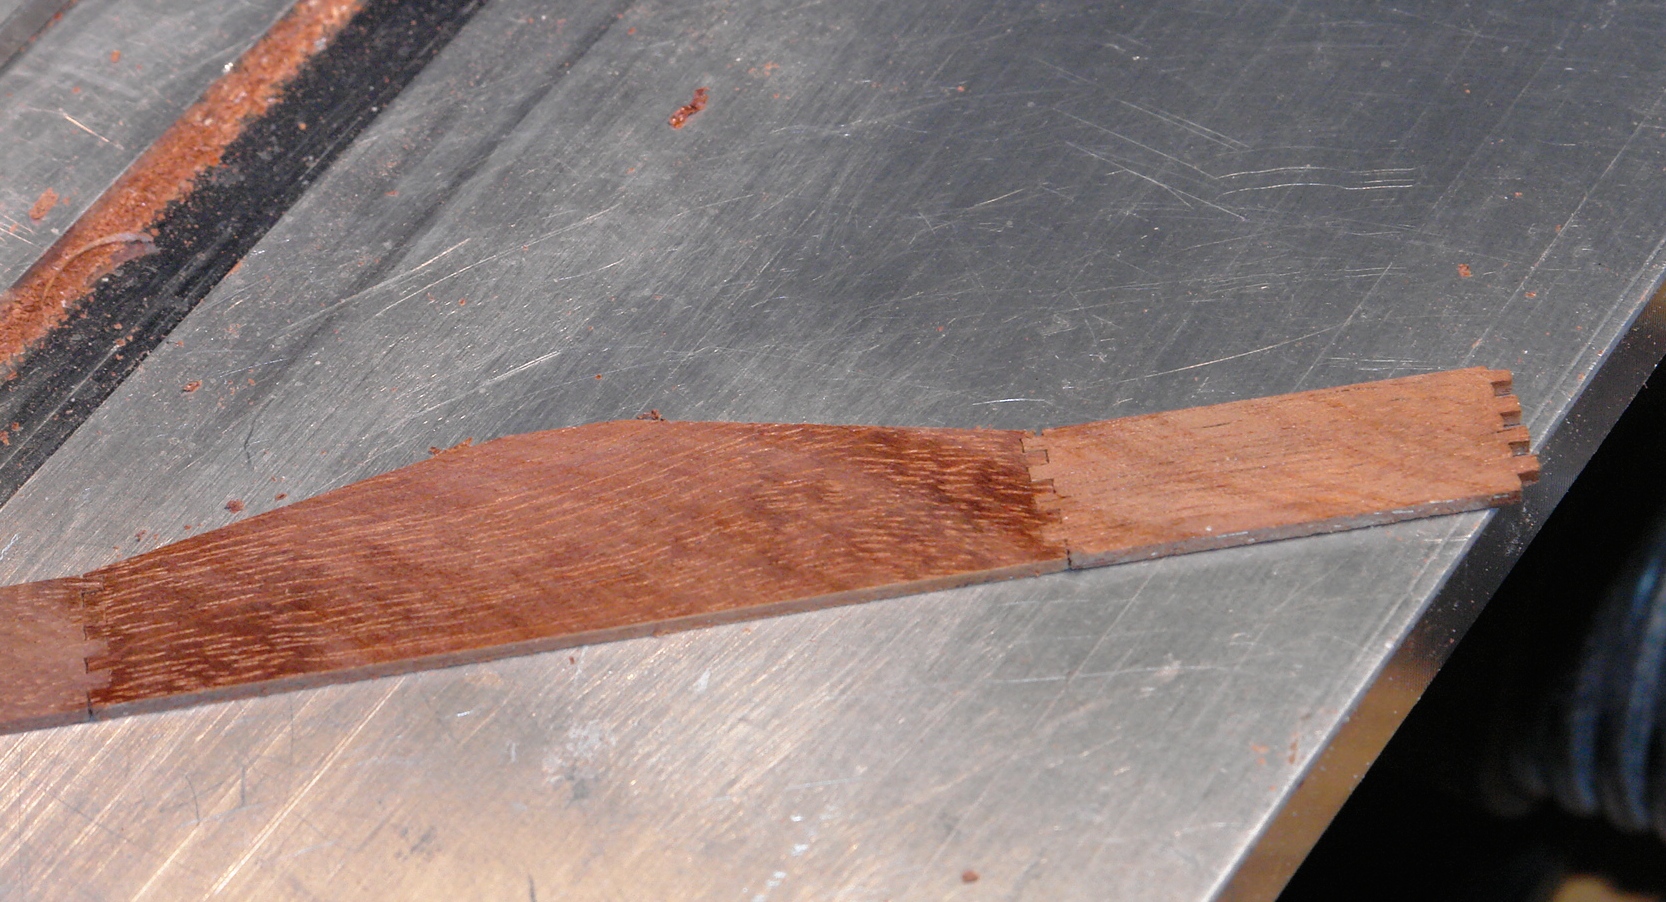
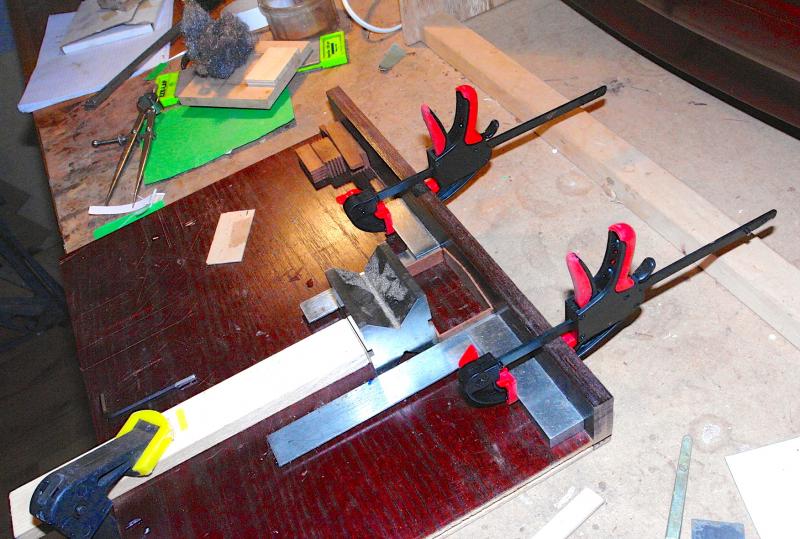
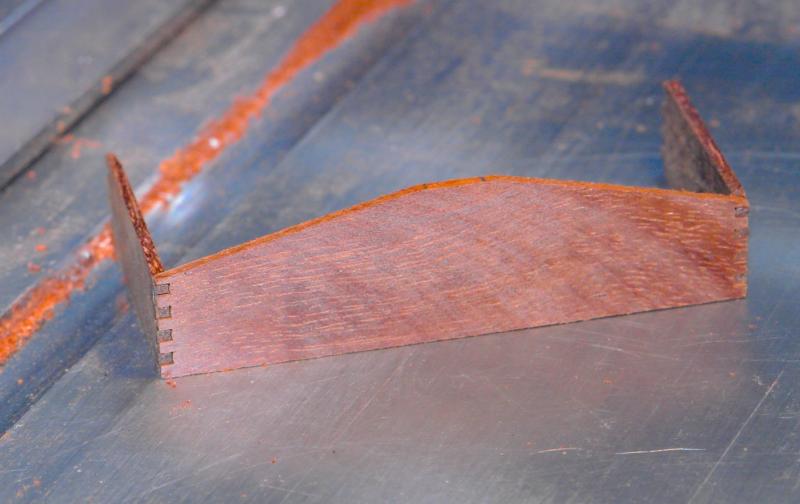
I'm back on line after a 4 day broadband failure. 20 years ago it would have been a non event but in the modern era it feels like the end of the world. Anyway I did a bit of work on the skylights - in particular the 5 forward of the deck house. I had a few good photographs of the skylights and one bit of detail that was catching my eye was the dovetail joints on the corners of the upstands. The plans for the hatches were reasonable and together with the photos they made interpretation relatively straightforward. One advantage of this part of the build was that the 3 centreline hatches are identical in cross section (but of varying length). I therefore cut a solid block of mahogany to the correct shape (together with joints) and then parted off the 6 ends .050 thick. I went for finger joints rather than dovetails. The fingers are only .050 inch wide and my skill isn't up to cutting dovetails at this size. The sidewalls were all of different lengths but I made them in a similar way to the ends to get matched pairs. The finger joints were checked for accuracy prior to cutting them to the required thickness. The slices were then cut. Before being checked again. To give an idea of scale the side walls are .4 inches high.


- 882 replies
-
- 15
-
-
ancre La Salamandre by tadheus - 1:24
KeithAug replied to tadheus's topic in - Build logs for subjects built 1751 - 1800
Pawel Being in the picture gives a good impression of size. I hadn't quite realised how big she is. Very impressive. -
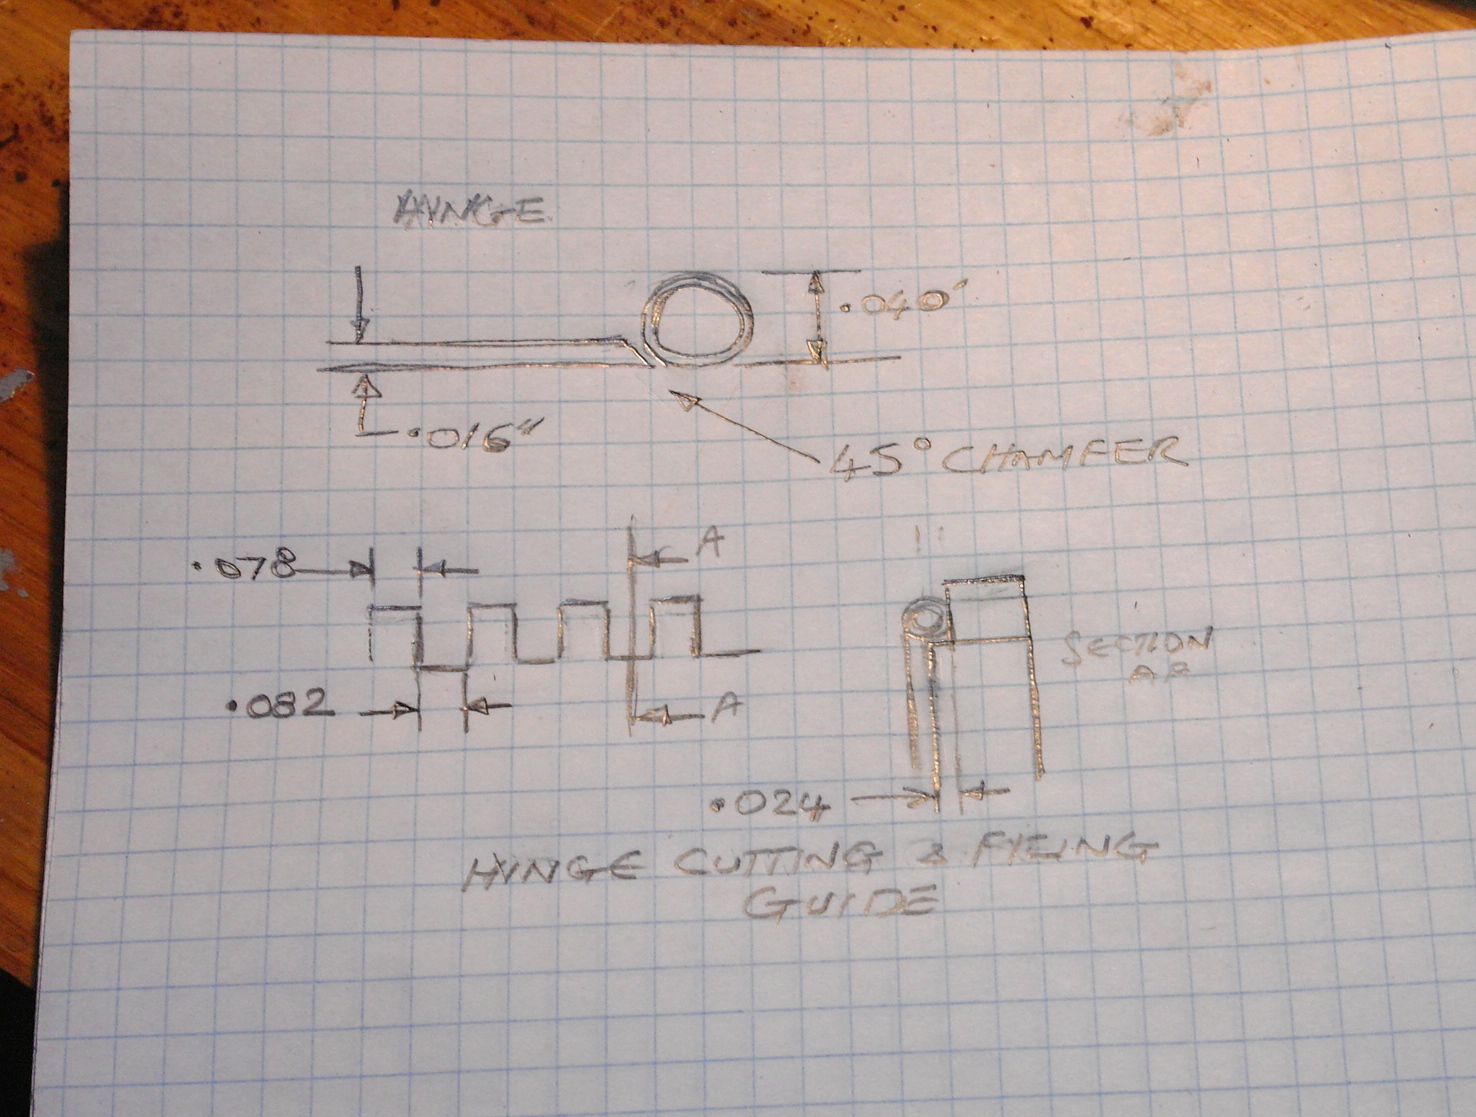
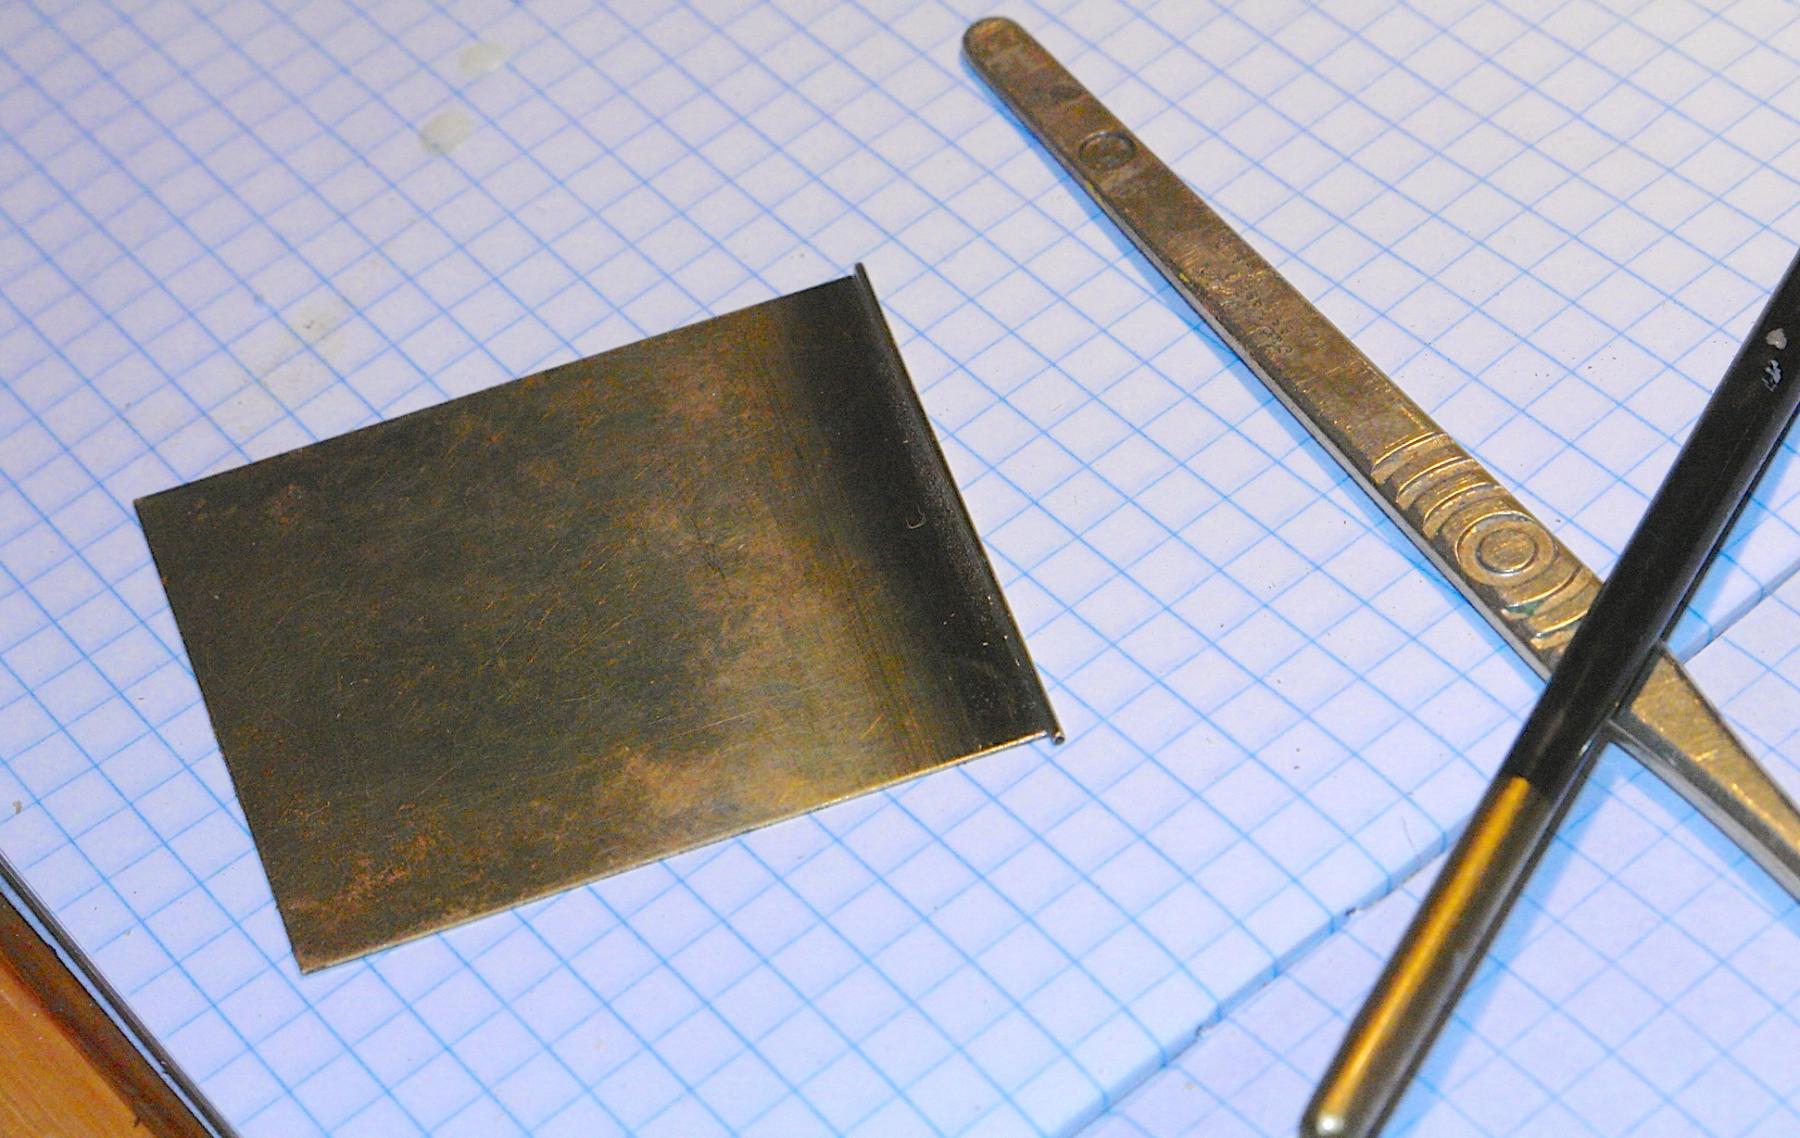
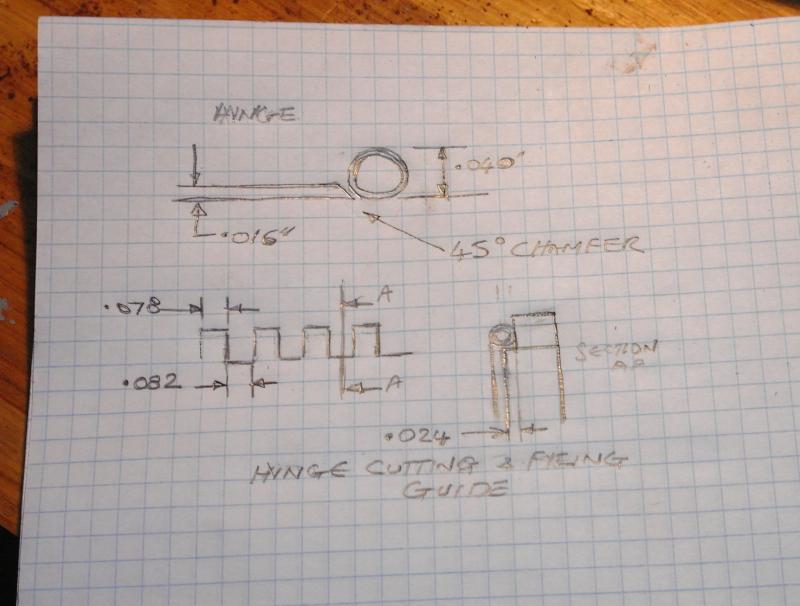
Michael If you have a go at the hinges here are a few pointers. I found it better to have the thickness of brass sheet a bit less half the OD of the tube. Any thicker and the hinges didn't fully close. The chamfer on the sheet gave a better joint - slightly more contact area. In the end I found tinning the sheet and tube to be counterproductive as it was harder to get the sheet and tube in good contact along their length. Once soldered I cut the tube on the jig with a fine razor saw (52 tpi) After soldering I parted of the sheet by hand with a razor saw. The mill slitting saw generated too much heat / vibration and tended to detach the tube. John - thank you for the comments which are much appreciated.
-
Hi Nils - either the pins are very big or the rail is very small. It looks great.
- 2,625 replies
-
- 6
-
-
- kaiser wilhelm der grosse
- passenger steamer
- (and 1 more)
-
Thank you Michael. And I just happen to have some tripod legs sitting in my scrap box. It must be destiny.
- 749 replies
-
- 6
-
-
- albertic
- ocean liner
- (and 2 more)
-
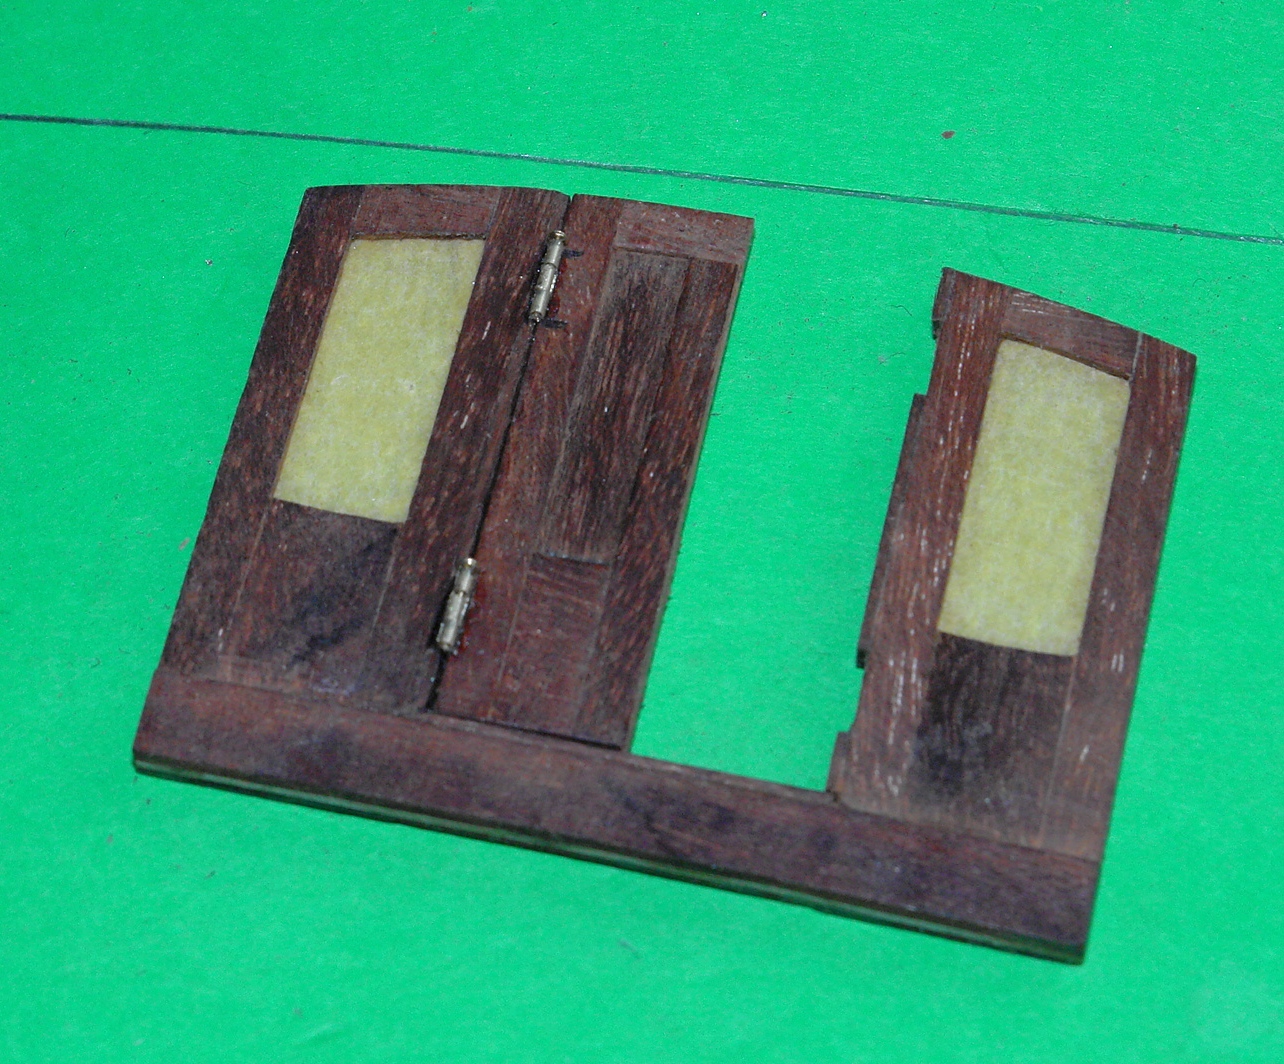
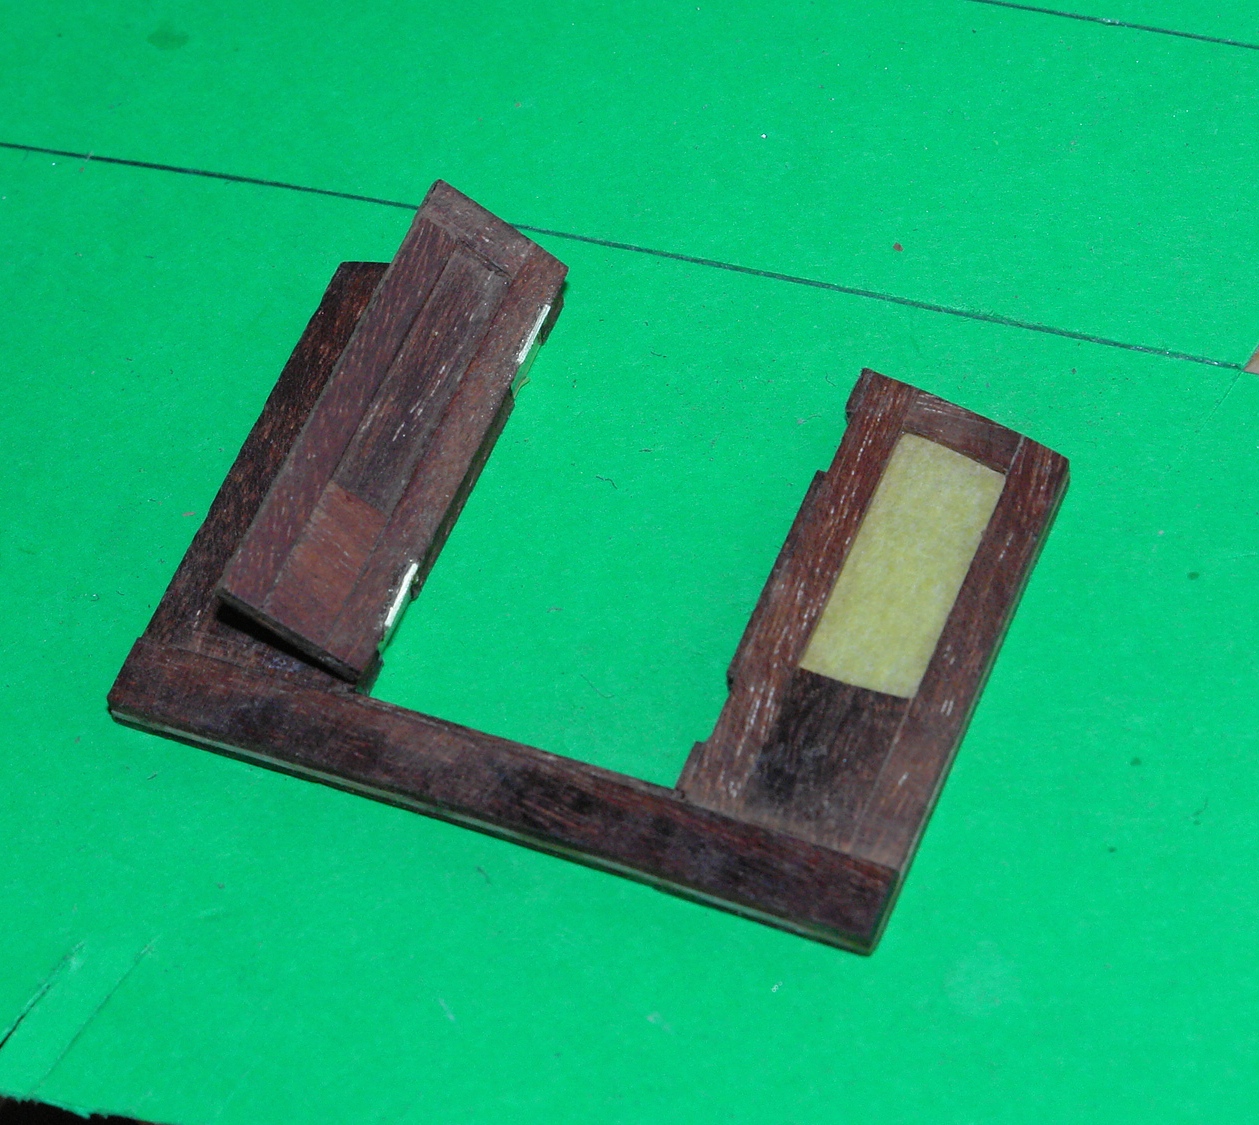
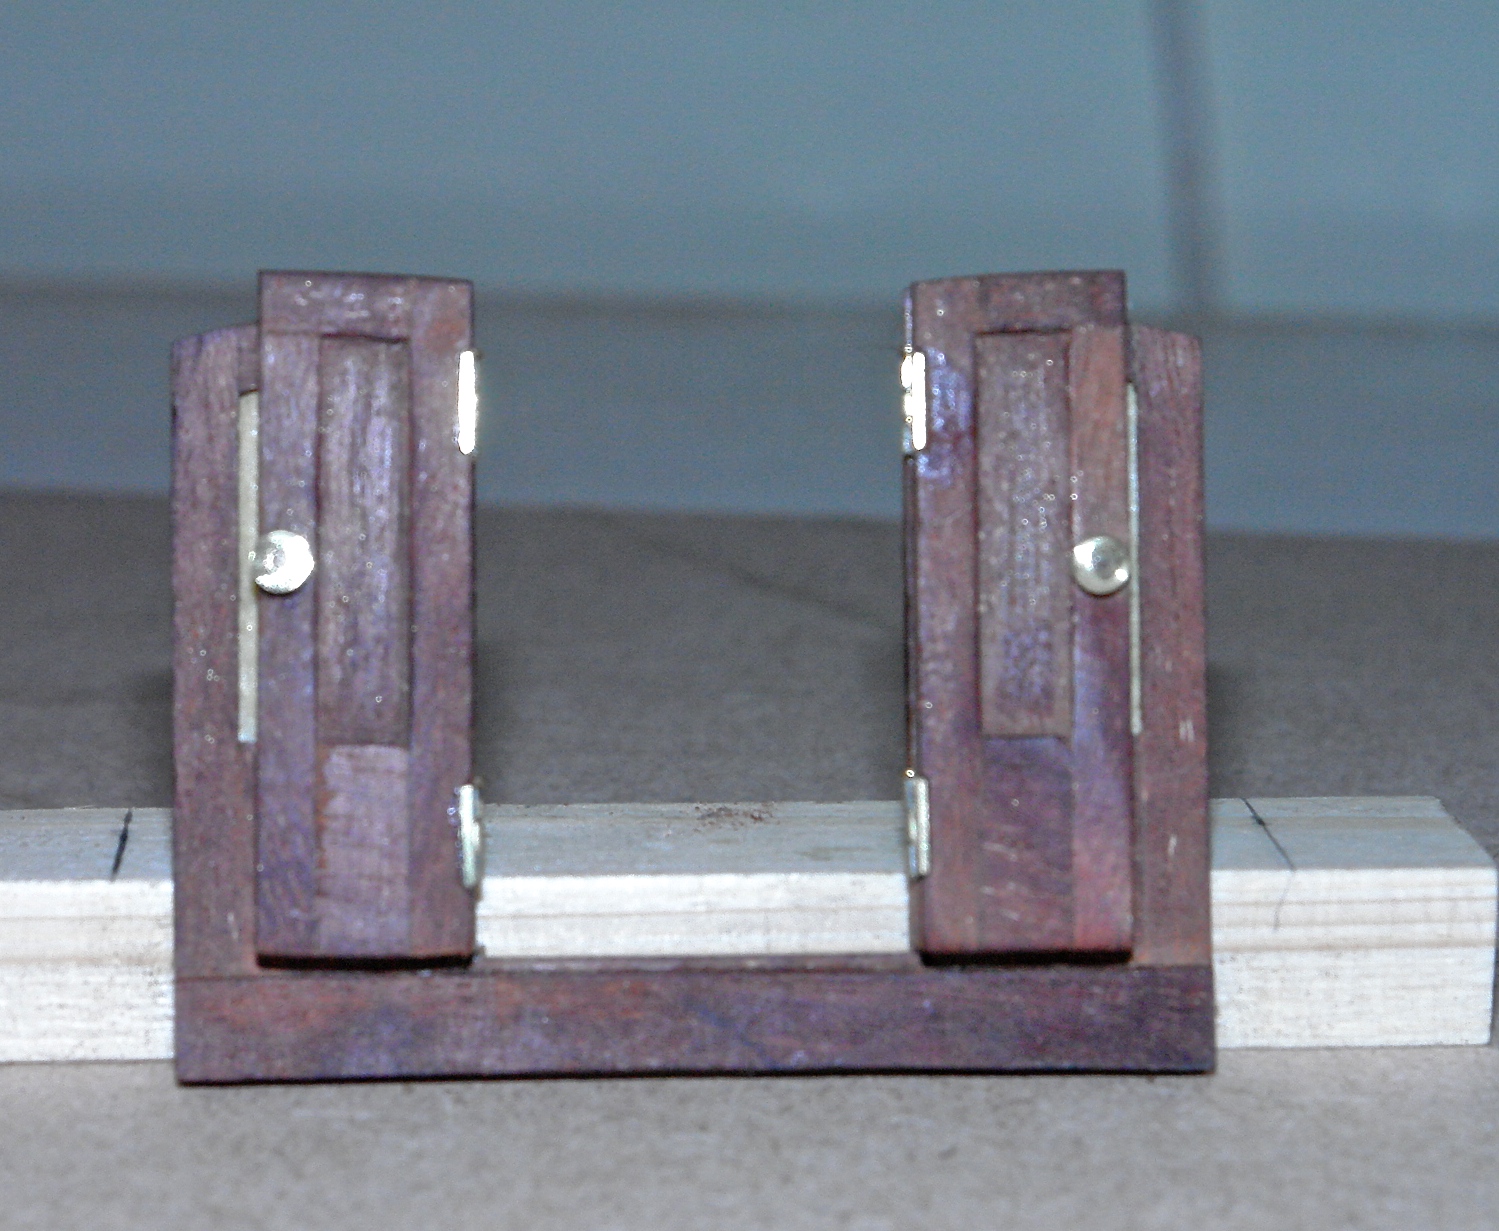
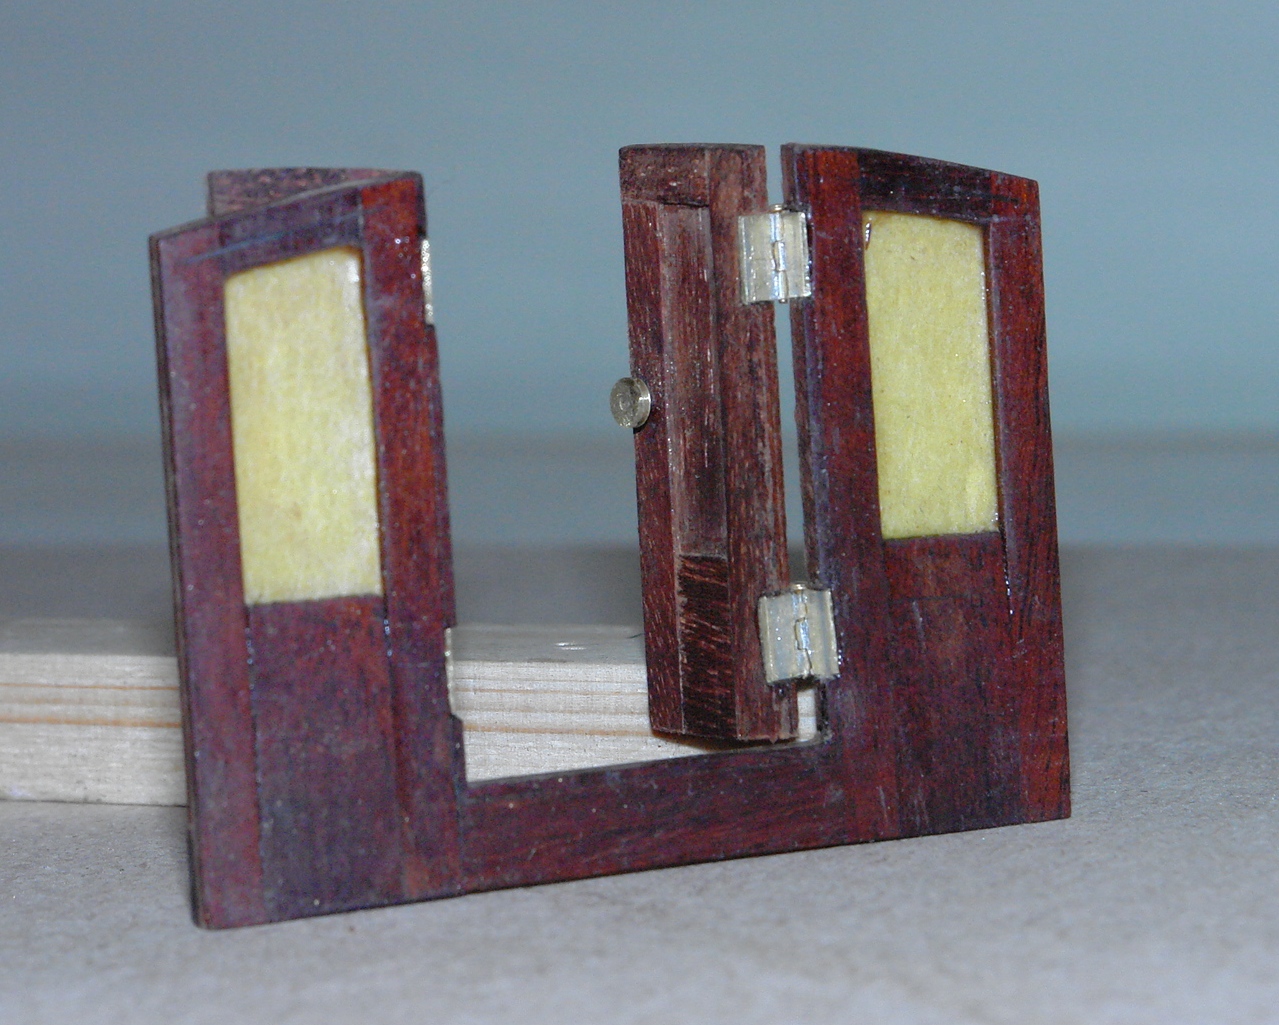
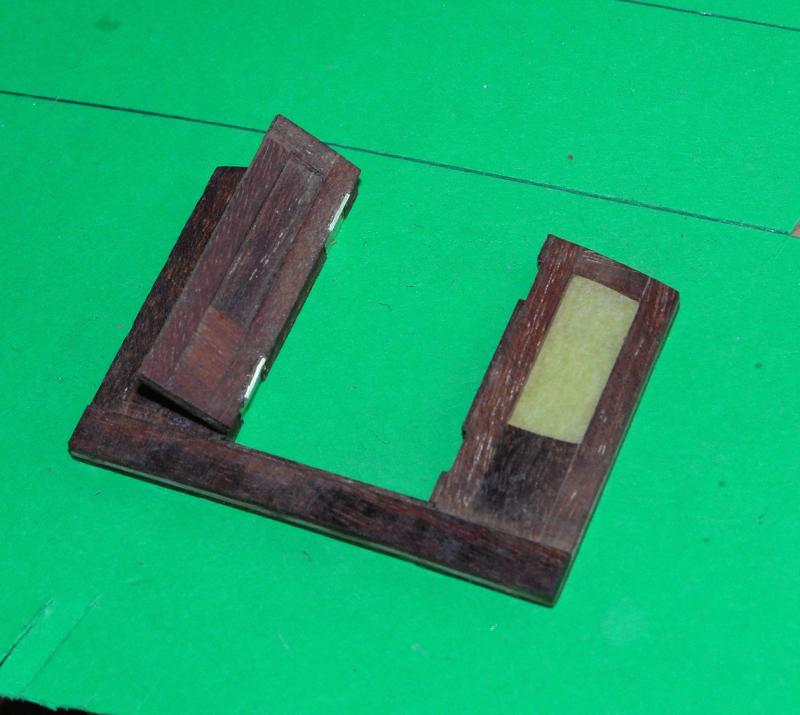
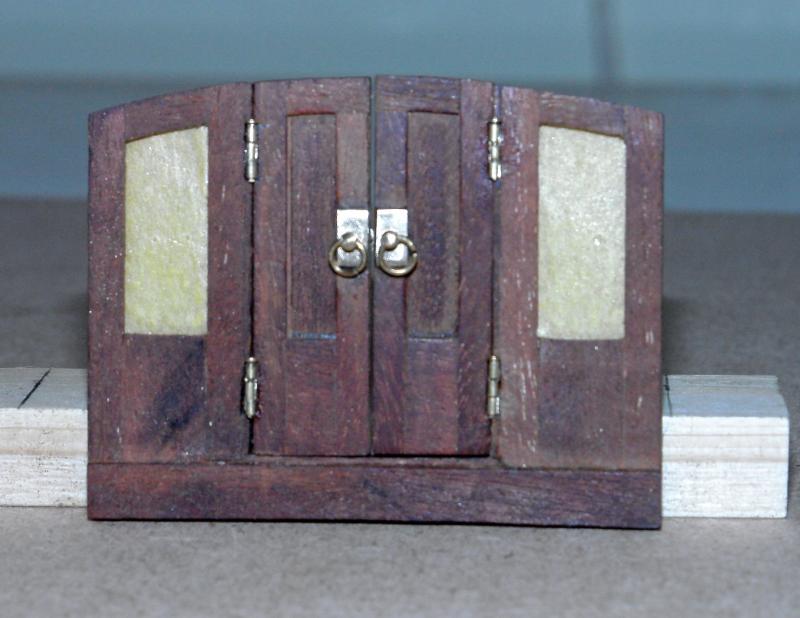
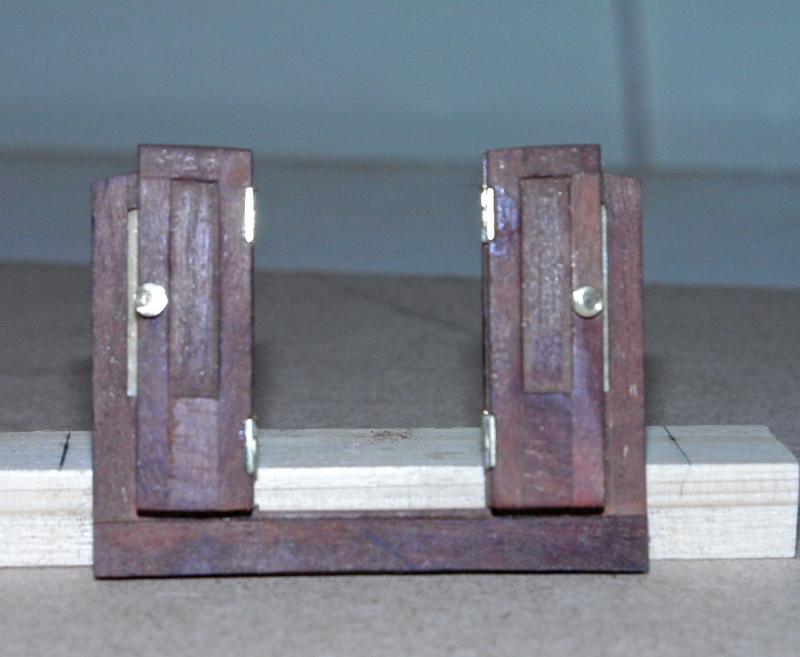
I spent much of my spare time this weekend finishing the deck house doors. I made the 3rd set of hinges and was finally happy with them. In particular my soldering was much improved. Getting the hinges in the right position proved vital for smooth operation. In the end I took the pins out and mounted the hinge halves separately. Accurate cutting out of the hinge recesses proved to be a key aid to correct positioning. Having mounted both doors I spent a few hours making the door handles (matching the originals in so far as scale and skill) would allow.


- 882 replies
-
- 14
-
-
Julie It looks pretty good to me. The grain in the natural wood finish is bound to distract the eye and mask the definition of the transom. Strangely it would probably have been more defined if it had been painted in a colour but that wasn't your choice which is fine. One option would be to put a further layer of planks over the transom in a toning but darker veneer. Alternatively rather than cutting in a darker plank overlay a darker edge plank to follow the contour and then fill in by overlaying the existing transom planks with another layer.
-
ancre La Salamandre by tadheus - 1:24
KeithAug replied to tadheus's topic in - Build logs for subjects built 1751 - 1800
Pawel, It is true craftsmanship to make the things you can't see as well as the things you can see. You show great dedication to your craft. -
Michael - you could just stop the restoration and go into 3rd hand production. I'm sure you would find many buyers.
- 749 replies
-
- 8
-
-
- albertic
- ocean liner
- (and 2 more)
-
John Thank you for your comments and thanks to the rest of you who have hit the like button.
-
ancre La Salamandre by tadheus - 1:24
KeithAug replied to tadheus's topic in - Build logs for subjects built 1751 - 1800
Pawel Will the below decks detail be visible once the deck is in place? It would be tragic to loose sight of all of your lovely work.