


UpstateNY
-
Posts
466 -
Joined
-
Last visited
Content Type
Profiles
Forums
Gallery
Events
Posts posted by UpstateNY
-
-
-
Hi All,
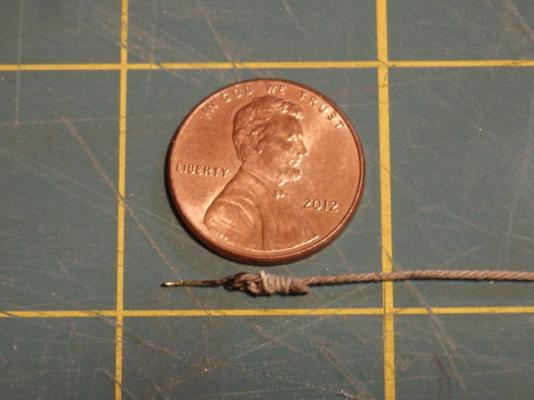
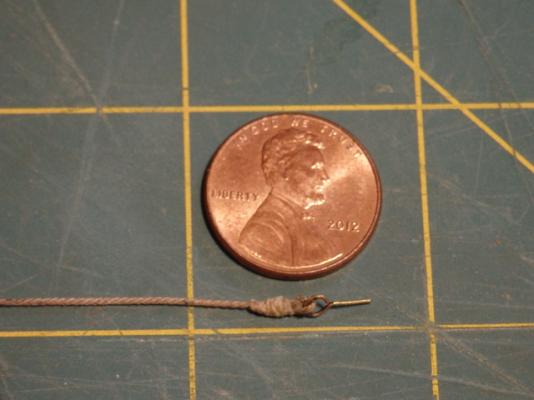
Only a small update as I’ve now completed assembly of the other three cannons. Also tried to improve the rather plain kit bitts by adding some 5mm cleats to provide some extra detail. The Images also show I now have some dust removal and other clean up work to do!I also made my first attempt at a breeching line which strained both my eyes and my patience as I tried to seize the line ends of the 0.025in rope neatly using some thin sewing thread. Found this much harder than the tiller rigging as there was no block to hold. I wilI have to make some jigs to hold the lines firmly as I seize them and also invest in a good magnifying light. I am probably going to finish the masts and the final decking items like the ships boat and railings while I practice rigging.Pictures below…thanks for reading.Cheers,Nigel.

-
Hi Patrick,
I like the canopy...could be these shots I suppose, but I think it is helping provide a nice contrast point and so makes the rest of your precise decking details show up more clearly.
Lovely work!
Cheers,
Nigel.
-
HI Brian,
Love those shots of the shrouds with the swivel gun, deadeyes and shroud cleats all completed! Looks great and your bowsprit straps are amazingly precise. Great work..really enjoying watching your AVS come together.
Cheers,
Nigel.
Edit. By the way, all your recent serving work adds so much to the realism in your build...looks like I'll also be ordering a Servomatic soon as well!
-
Hi Captain,
Just checking in to make sure all is still well as seems to have been a while since you posted.
Looking forward to whenever you decide to spill the beans on whatever it is you are up to!

Cheers,
Nigel.
- CaptainSteve, mattsayers148, GLakie and 1 other
-
 4
4
-
Hi Nigel,
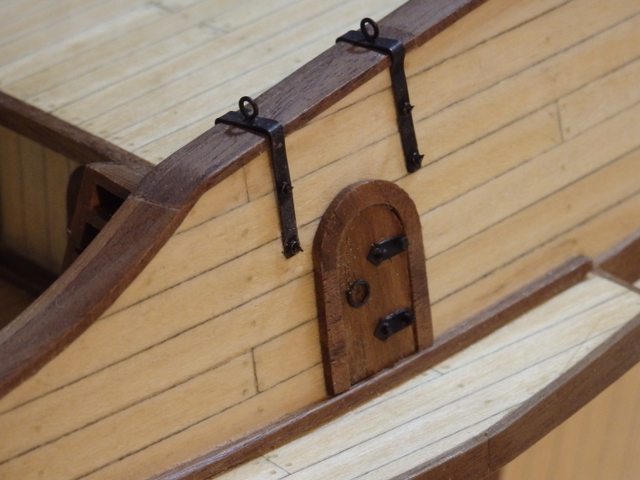
Lovely work as usual and I like the recessing on the liners of the chaser ports. The relief shows up nicely even allowing for the black colors. Will you leaving these ports open in the finished model so this nice detail is visible?
Also, what is the wood under the ebony...swiss pear? The light reddish color makes for a very nice contrast against the ebony. Sorry if I missed this info in an earlier post.
Cheers,
Nigel.
-
-
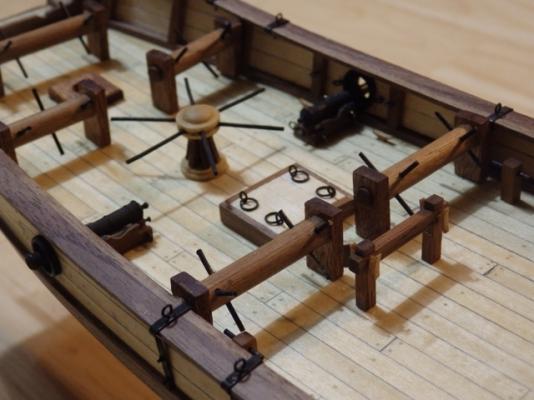
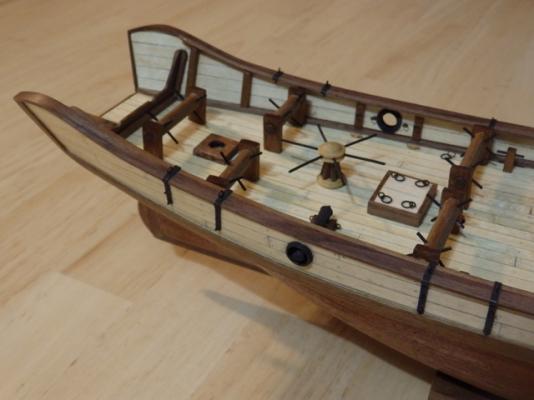
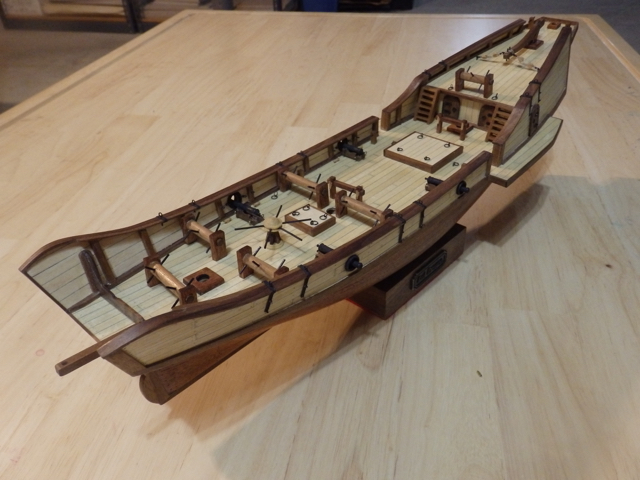
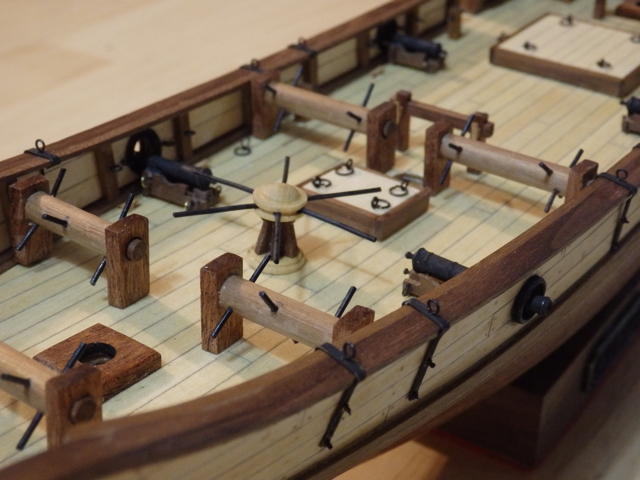
Hi All,
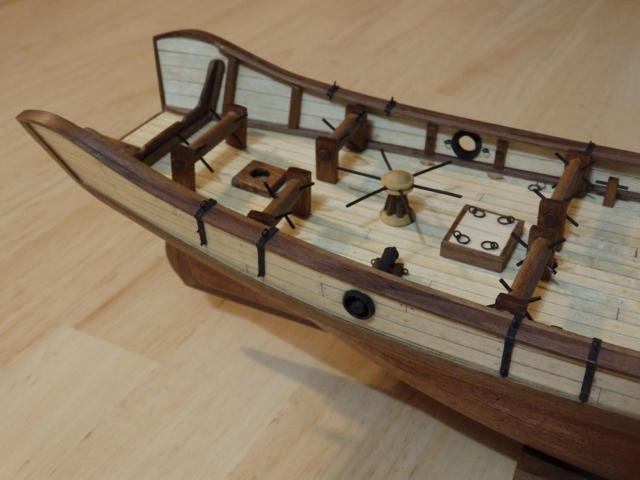
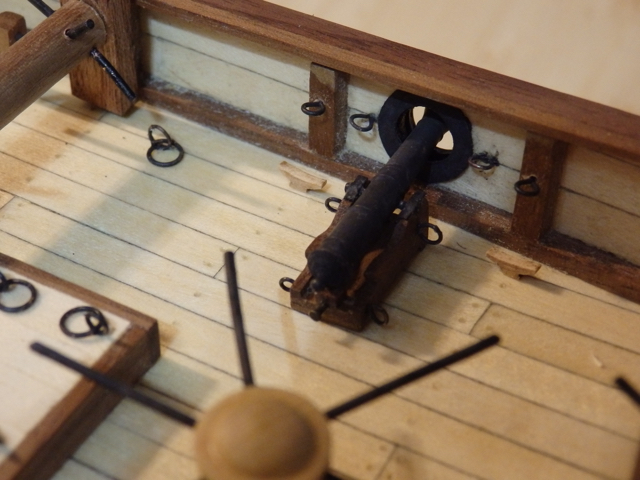
The past few days I’ve been working to complete all the deck furniture.All the windlasses have been completed and pinned to the deck as has the capstan. I spent a lot of time learning to make my own rings and eyebolts from 26 gauge brass wire as I ran out of the kit supplied items after I used some them on the cannon rigging points. Kit as it comes does not rig the cannons. As part of the cannon rigging setup, I've used Chucks 5mm boxwood cleats which I think look really good. The laser char was cleaned off using just light scrapping.Last but not least, I finally assembled a cannon to check how it would look. I had to make even smaller eyebolts given the small size of the carriages as the kit ones looked way out of scale. Quoin handle was made using a blackened brass planking nail and the cap squares from painted black card.Next up is to complete the rest of the cannons and fit the mizzen and main mast bitts. Then the cannons need to be rigged before I'll can glue down all the deck furniture.Thanks for reading and the images are below.Cheers,Nigel.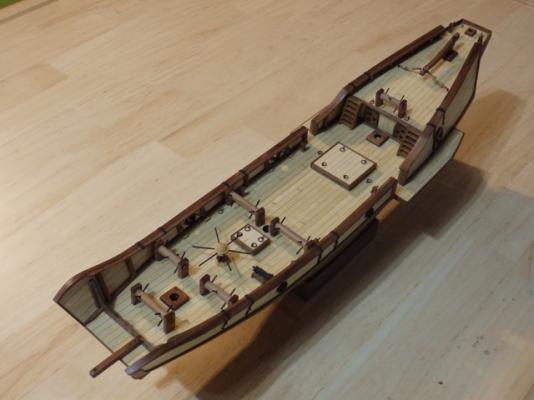


- CaptainSteve, kiwiron, GuntherMT and 3 others
-
6
-
-
Hi Vic,
Build looks awesome...love the wood contrast between the deck, hull and the black wales and rails.
On coiling the tackle lines, perhaps see the recent discussion in Ken's Niagara log on page 15. Seems several people find using a small turntable helps.
Cheers,
Nigel.
-
Hi Danny,
Congratulations on finishing your gorgeous build. Also my thanks as well for a beautifully detailed build log...while I started to follow along late, I know I will be using it as a wonderful reference log for years to come.
Finally, I think there should be at least another dram in that bottle for you...just one seems a bit light after so much work!
Cheers,
Nigel.
-
Hi Brian,
My 2c is no more supports...like Antanas, I like the clear view of your great planking including the butt pattern you so carefully laid out and the base for me already has enough added detail.
You're the captain so whatever you decide, I am sure it will look great.
Cheers,
Nigel.
-
HI Robb,
Thanks for the tip on using those small pegs. Will check them out...perhaps they will help me make some reusable rigging jigs. When I rigged my tiller, I spent more time dropping the blocks than rigging them, so definitely need some type of jig!
VT is great and plan to stop by the Lake Champlain Maritime Museum in Vergennes on the way home. Should be fun!
Cheers,
Nigel..
-
Hi Nigel,
Truly impressive work. The window components look completely vertical and horizontal across the curved transom.
Are you measuring this off, using a jig perhaps or working more by eye, especially when you glue in the horizontals?
Finally, the treenails look really great. I especially like the contrast against the ebony.
Cheers,
Nigel.
-
-
Hi All,
A little more progress to report before I take off to spend a few days in the Vermont mountains with the family.
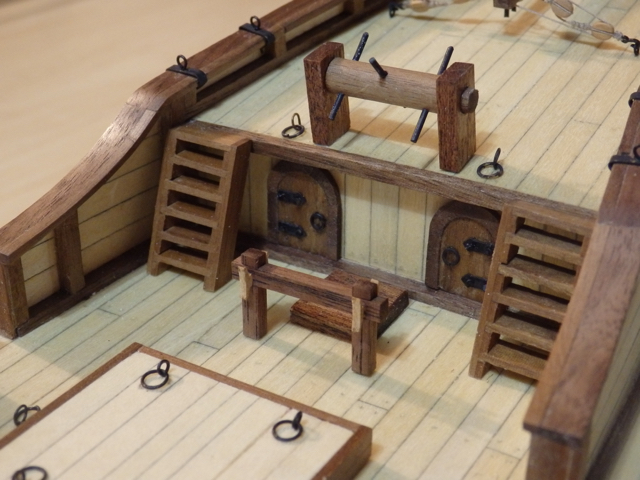
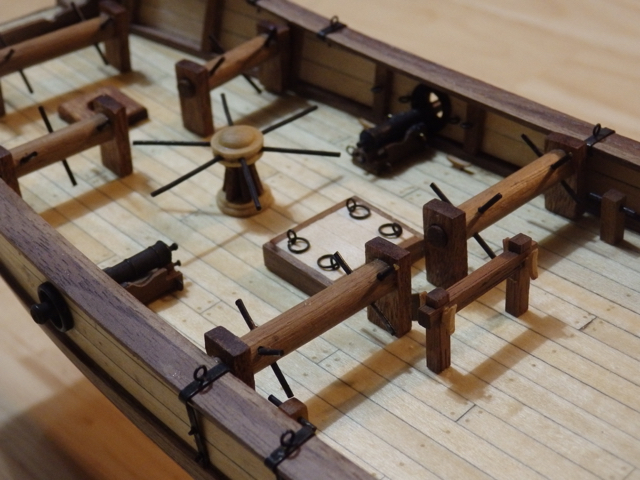
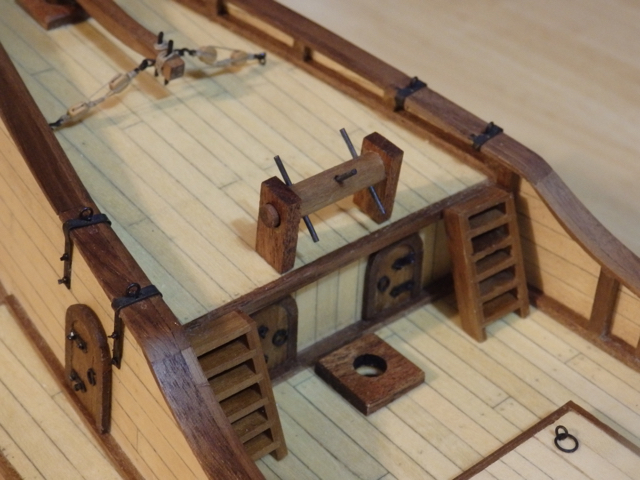
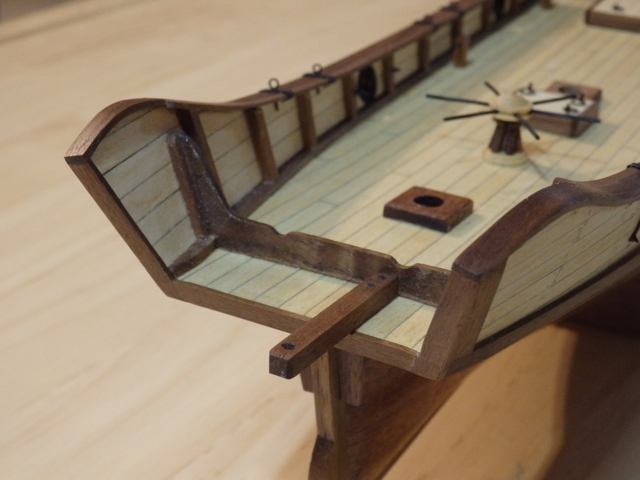
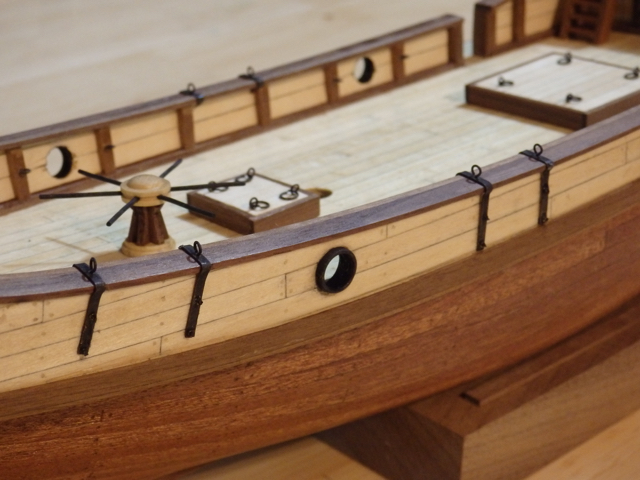
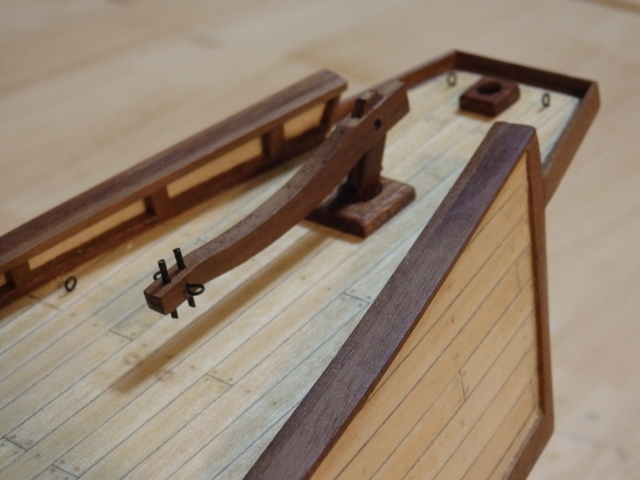
The six deck bitts have been made from 3x3mm walnut strip and some blackened brass rod before pinning and gluing to the deck. The poop deck windlass was remade as a test using thicker walnut dowel for the center bar with some thinner walnut only used to simulate the axles. Once more blackened brass is used for the bars. I preferred this over the earlier versions I built to the plans so it is now also pinned and glued to the deck. Now I need to remake the other 5!
The brass cannon port rings I made in the last post were also blackened and glued to the inside bulkwarks. I can now move ahead to rig the canons using either the 2 or 3mm single blocks that just arrived from Chuck. Carriages I made are very small so I expect the 2mm will look better, but I am wondering how I will hold onto them long enough to rig them!
The bowsprit was made per the plans from some 4x4mm walnut. I inlaid some thick blackened brass rods into the walnut to simulate some fastenings down to the deck. Again it is glued and pinned to the deck.
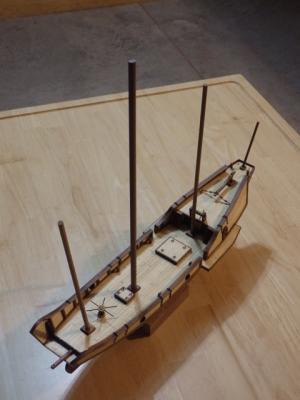
Finally, I went ahead and test fit the masts and flagstaff before I start to taper them....it was good to see the Dragon finally gain some height!
Thanks for reading and of course for the likes.
Cheers,
Nigel.


- CaptainSteve, NMBROOK, GuntherMT and 4 others
-
7
-
-
Hi Mark,
Been following along from afar and enjoying hitting the like button. Your Licorne is looking just wonderful...the patience and dedication that goes into these expert, fully framed scratch builds simply astonishes me.
Great news that you may not need any drops or stealers, though if they end up being required, I think they also make a nice detail.
One question, are you planning to fully plank the hull on both sides or leave some of your beautiful framing details visible? Just wondering as you mentioned you placed battens on both sides to check the runs.
Cheers,
Nigel.
- popeye the sailor, mtaylor, augie and 5 others
-
8
-
Hi Patrick,
Quick note to say, while I started late, I am really enjoying watching the interior of your ketch come to life. Lovely skills to build at such a small scale. On your model ships in your model ship, I tried to figure out their scale and come up with something like to 1/10,000!
One question with all the lovely detail work you are putting in, are you going to leave some of the decking off to allow top viewing as well as side?
Cheers,
Nigel.
-
-
Hi Popeye,
She continues to look better and better as each detail is added. You and Nils together are making me want to try building a liner one day!
You asked so my two cents is I like the the second arrangement better as well for some reason. Hard to pin down why, but there looks to be an even progression in the stack heights from bow to stern. How about doing a test mount of this deck on the hull to see if you still like that way the best?
Cheers,
Nigel.
-
HI Brian and Ken,
Thanks for the comments and yep...you are absolutely right on the block size. I ordered 4mm replacement blocks from Chuck as that matched the kit size. 4mm actually looks a bit big even for the heavy tiller assembly and will certainly be way too big for the cannons. I will order some smaller sizes down to 2mm and see how those look along with some of Chuck's smaller hooks so I scale those as well. Will also find some finer thread for seizing as well.
Thanks again for the comments!
Cheers,
Nigel.
-
Hi All,
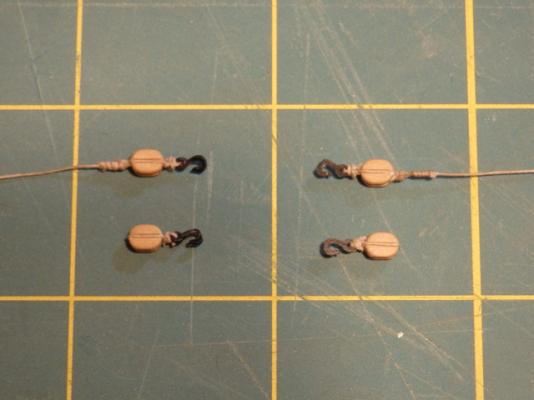
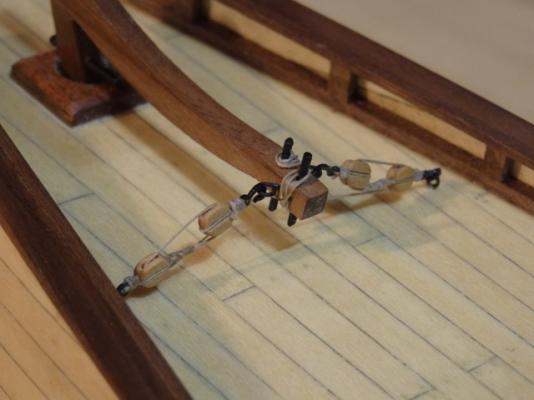
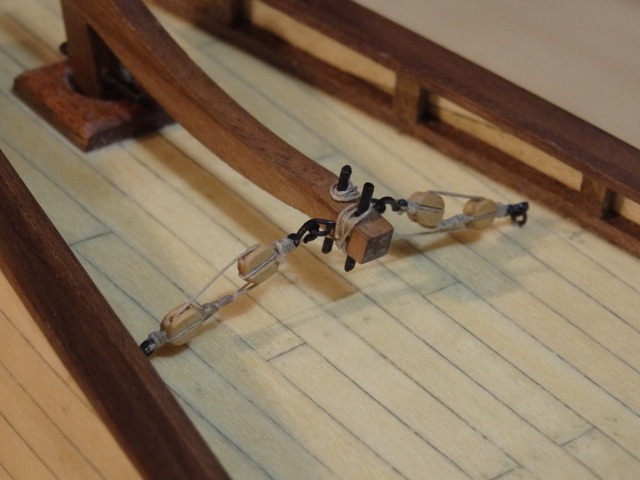
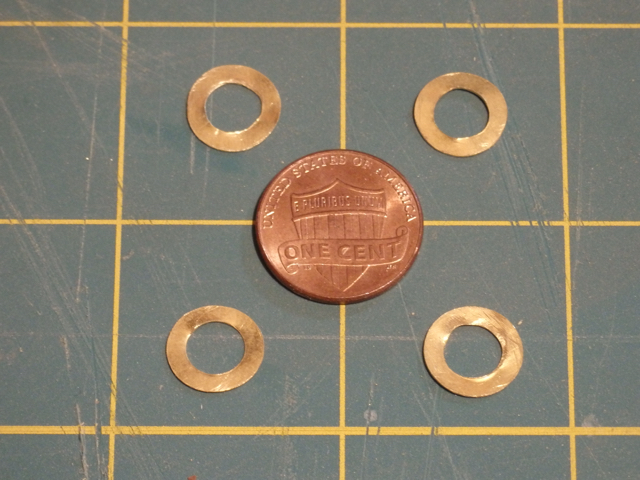
Another small milestone as I just completed my first ever rigging work by adding the tiller rigging.
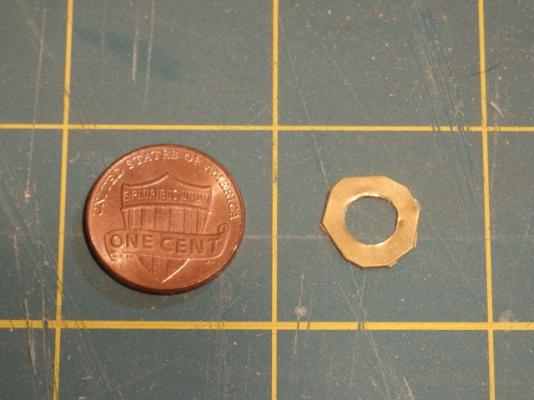
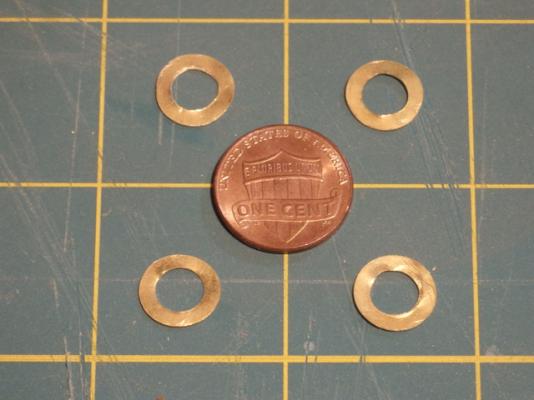
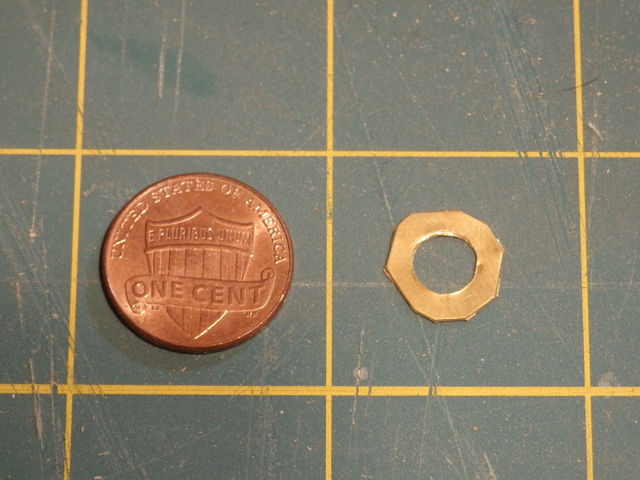
The rope ,blocks and hooks are all from Chuck and are a huge improvement on the kit supplied items. After attaching the hooks to the blocks, the ropes were secured using diluted wood glue. I found serving the ropes evenly to be the most difficult part...next time I may try using some thinner thread than the same 0.008in rope I used for the rest of this work. These simple pieces took me about 4 hours to do so I hope with practice I can speed up at least a little. Overall, I am pretty happy with my first rigging attempt and I think I can use the same basic rigging layout for the cannons.I also made a bit more progress on finishing off the cannon ports. The kit provided some brass finish rings for the outside of the ports, but no extras for the inside of the bulkwarks So, I made my own from thin brass sheet by initially drilling out the holes in several stages or I found the thin sheet would tear. The rings were then roughly cut from the sheet using my small tin snips, before being filed to shape using my needle files. I just have to blacken them and glue them into place and I can then start to rig the cannons.
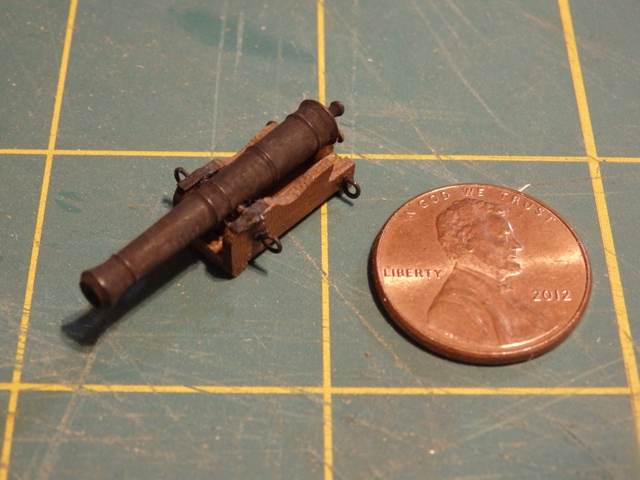
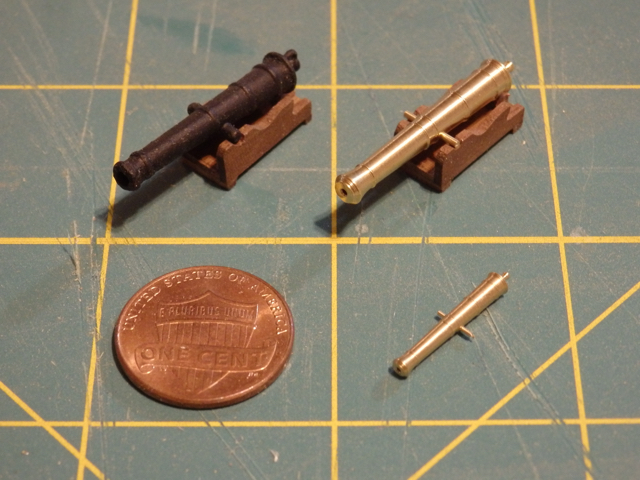
I also checked the fit of my replacement cannons. I caught a break as Chuck's cannons fitted nicely onto the carriages I had already made. His cannons are beautifully machined as are his small swivels. Image below shows the improvement over the kit cannons pretty clearly I think. I hope the swivels will be a nice detail once I've figured out how to make some interesting supports to perhaps compliment the carriages.
Thanks to those who hit the like button and of course everyone for following along.
Cheers,
Nigel.

- Dimitris71, NMBROOK, Bobstrake and 5 others
-
8
-
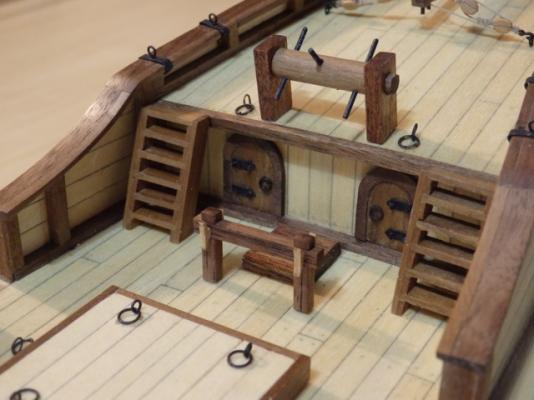
Hi All,
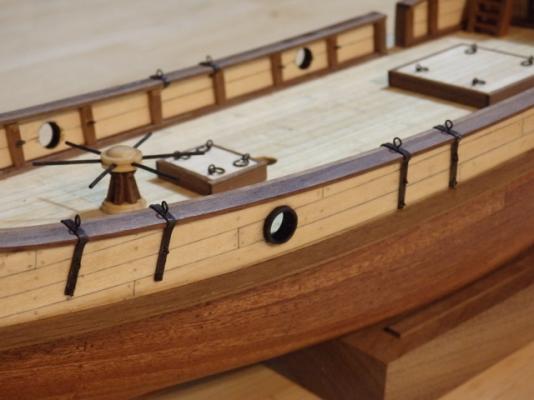
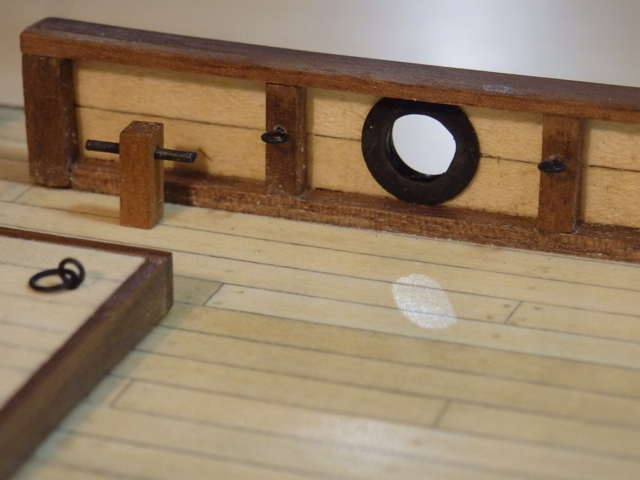
Been enjoying having the in-laws in town and so things have been a bit slow in the shipyard for the past couple of week. However a little progress has still been made here and there.Chainplates were fabricated out of 2mm brass strip and blackened before gluing to the bulwarks. Chainplate bolts were simulated using the heads from some blackened brass planking pins provided in the kit. Tiller brasswork was also blackened, the rigging eyebolts were added and the tiller was then fixed in place. I reduced the height of the tiller above the deck vs the plan height as it looked rather out of scale after I looked harder at the image my previous post. Finally blackened eyebolts were added to the deck, hatches and also to each side of the cannon ports for the breeching ropes.Thumbnails below and thanks for reading.Cheers,Nigel.


Cutty Sark by NenadM
in - Build logs for subjects built 1851 - 1900
Posted
Adding my thoughts and best wishes for a full recovery for your mother in law.
Your CS looks wonderful and will wait patiently.
Cheers,
Nigel.