kurtvd19
-
Posts
3,043 -
Joined
-
Last visited
Content Type
Profiles
Forums
Gallery
Events
Everything posted by kurtvd19
-
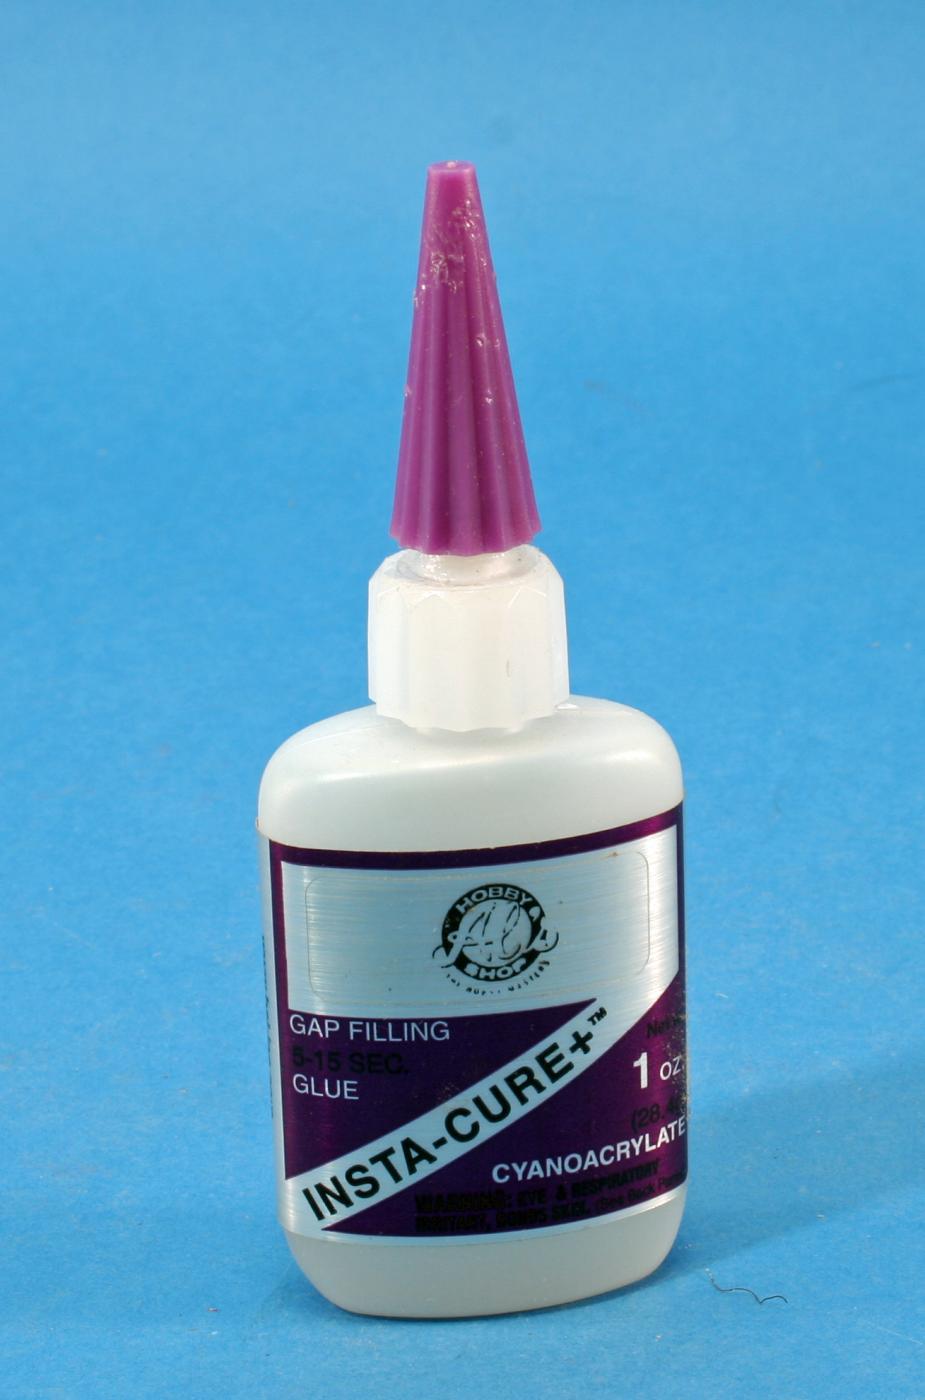
 Glen: I think C/A is fine for parts w/o stress on them over a long period. I have some parts that were attached with the original industrial super glues - Eastman 910 - back in 1968-69 that are still holding well. They are in a desk drawer and I come across them every so often and check them - last check all was well. I have models that are 20+ years old with C/A glued parts w/o any failures. I know your models are going into a museum but for the use on the boiler I wouldn't hesitate to use C/A. I have a model commission for a museum (unfortunately overdue for delivery) that I have used C/A on along with Titebond and I am not worrying about either glue. One thing about the C/A - I have used Bob Smith Industries C/A's for over 20 years and don't use any other kind. I am very leery of hardware store 'Super Glues" and wouldn't use any of them on a bet - who made it and when? Bob Smith stuff can be found with their name on the package but the stuff sold with the hobby shop's name on it is by Bob Smith - the Bob Smith name is there in small print but the hobby shop's is most prominent and essentially identical to the stuff under the bob Smith name. The hobby shop logo on the bottle in the photo replaces the Bob Smith logo/name. They also make excellent epoxies - with the same deal on the name on the label. Kurt
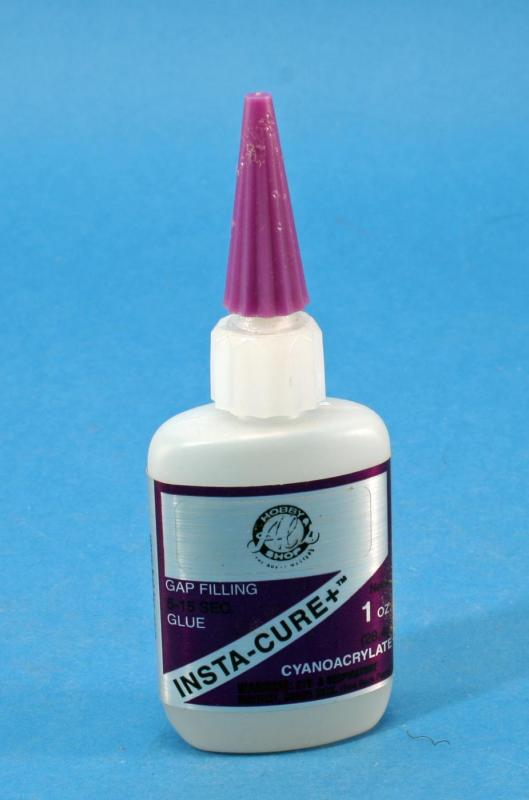
-
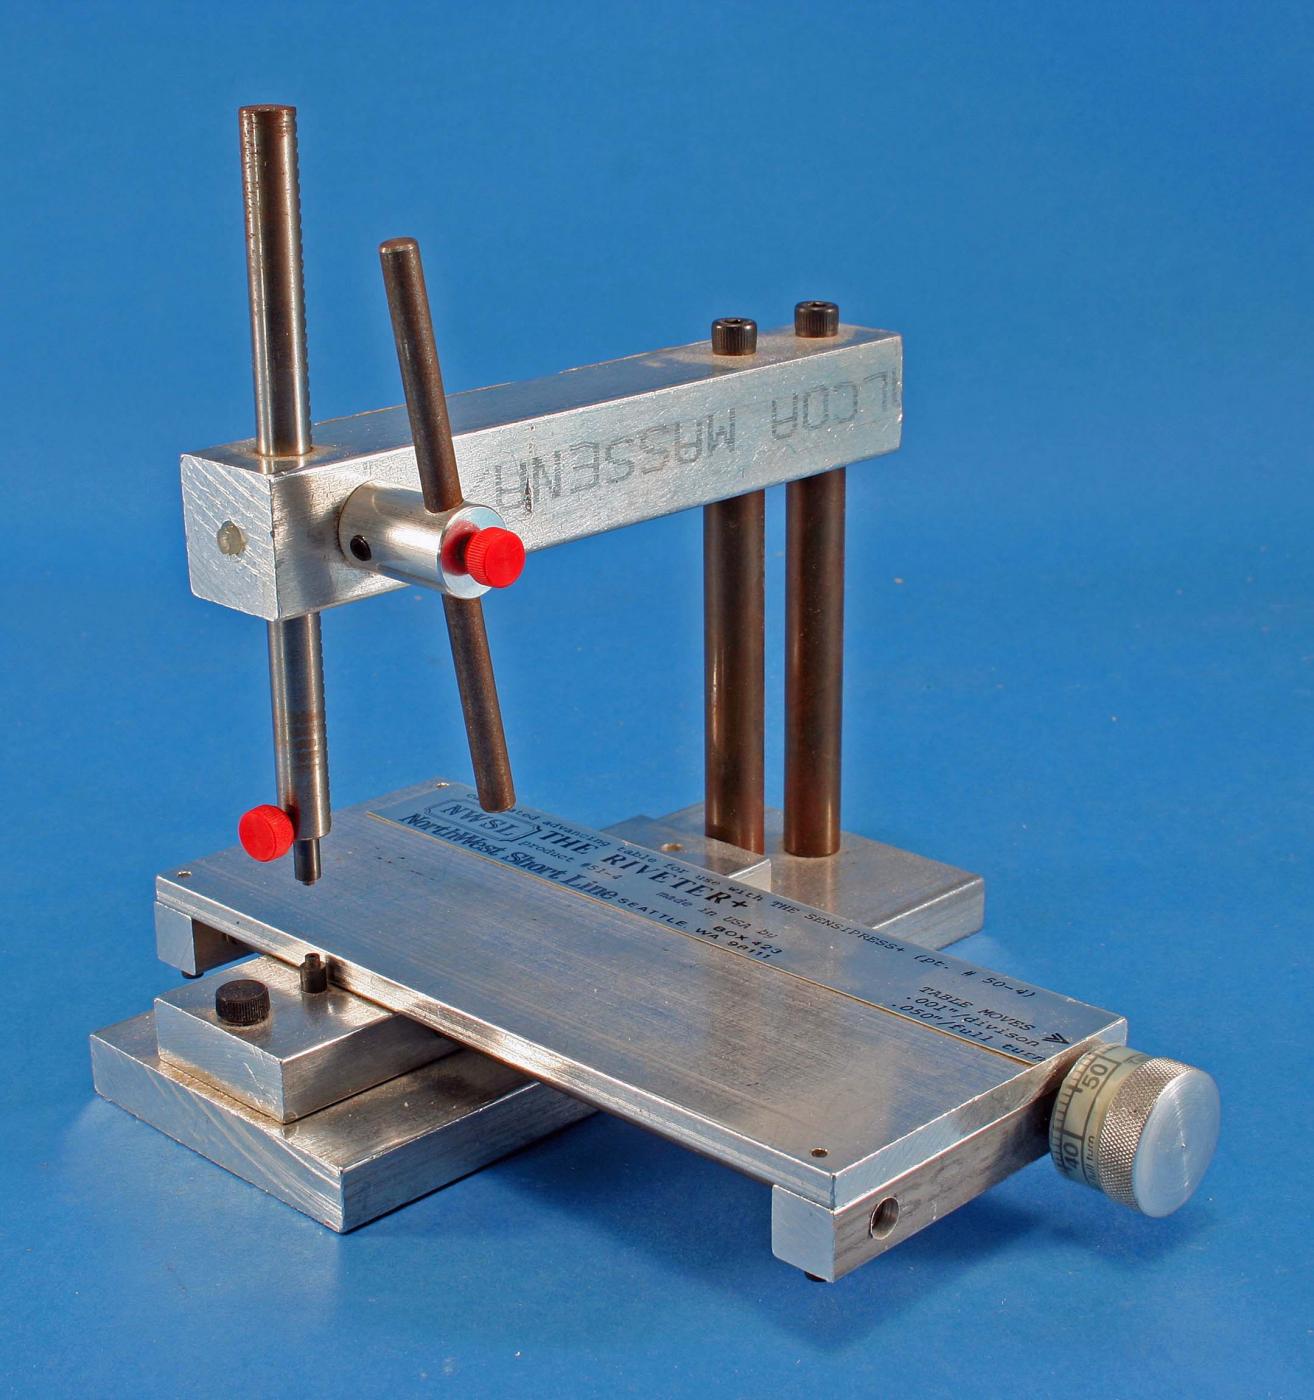
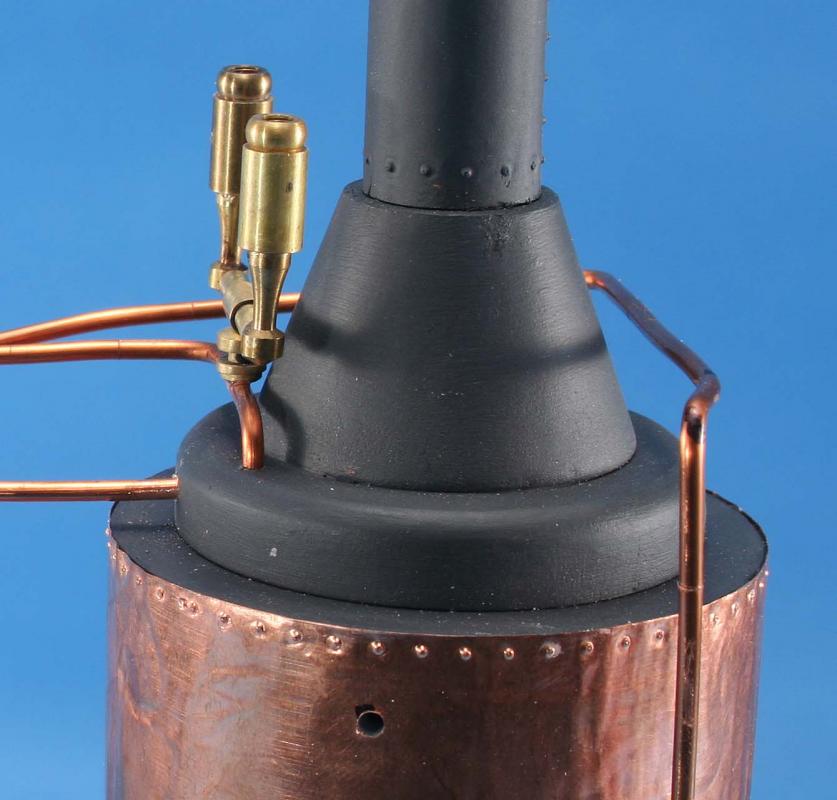
Glean: Great work and detail. For great looking rivets the Sensipress + along with the Riveter set up by Northwest Short Line Products can't be beat. The photos show the Sensipress with the Riveter table and the rivets on the boiler sheathing and smoke stack of my model of the African Queen (prior to paining the pipes). The arbor holds a male punch and the base holds a female die. A drill press or better yet a mill could do the exact same thing with your ability to machine the punch and die. The table makes even spacing a snap. Kurt

- 701 replies
-
- 16
-

-
Ditto the previous WOW. This alone is worth the price of admission here. Great work and another great tip Ken Kurt
-
Brian: OOPS, I got it - dug out the copies and then forgot to follow through. PM on the way. Kurt
-
There is a documentary video by the History Channel about this boat and the sinking of the Albemarle. I picked up the video when I built this model. I don't remember the cost but it was very reasonable. They painted the hull white or light gray probably due to the night attack would have made the boat almost invisible. Other than that it's a good film. Kurt
-
Ken: The NSL stuff I have used has been top notch. Have a bunch in the shop and use it regularly - have not bought any recently but stock is going down. Maybe Midwest will surprise me and answer your inquiry. Kurt
-
Ken: Great work and good tips. Please don't hold your breath waiting for a response from Midwest as I think with their past record you will turn blue long before you hear from them. I want to be sure you make it to the San Diego Conference! Kurt
-
Steamboats and other rivercraft - general discussion
kurtvd19 replied to Cathead's topic in Nautical/Naval History
Cathead: Thanks for starting this topic. I will be following and hopefully contributing. Kurt- 281 replies
-
- 7
-
-
- Steamboats
- riverboats
- (and 3 more)
-
Enamle vs Acrylic
kurtvd19 replied to Timothy Wood's topic in Painting, finishing and weathering products and techniques
I don't disagree about using gray primer under red paint - except when I paint the underwater oxide red. I always use a black primer or undercoat before painting the oxide red underwater portion of a hull as the dark primer tones down the red a bit. As to painting with both enamels and acrylics on the same model - it should be OK to put enamel over the acrylic - it's always OK to put acrylic over enamel However, I would always test any enamel over any acrylic before applying to a model until you know it's OK. Paint manufactures sometimes change their formulas w/o telling anybody so just because it worked before don't assume it will always work. I am a big advocate of testing. Weathering is usually done with differing paint types w/o problems. When spending so much time on the model to not take the time to test the paints is a mistake. I use paints from a single manufacturer and I did my testing long ago and do not do it now, but I also have a direct connection to the manufacturer and would be aware of any change in formulation before it happens. They recently released a new primer that I tested extensively before it's release on model materials but not my current models (until after the tests). The reason I advocate testing was backed up by an unfortunate choice of primer that was then painted over with an acrylic. The acrylic paint would not cure and was still sticky after days. It was assumed that the acrylic was bad and the whole thing was stripped and sanded. Another acrylic was applied with the same results. Testing ensued with several types of acrylics being applied over the primer - same results regardless of the acrylic color coat. Switched to a couple of different primers and then shot acrylics over the various primers w/o an issue. The conclusion was the primer was at fault. My friend had bought the primer in Racine, WI and thought it could be a problem with that can or the stuff shipped to the Ace Hardware in Racine. I had bought some of the same primer here in IL from a Home Depot because I needed a white primer for a special paint application I had planned. I tested acrylics over the primer I bought here with the exact same results. I used a couple of other primers with good results. We had to conclude it was the primer. Checking around I found that every professional modeler I consulted said "stay away from that stuff" and named the primer at fault. "Never use it - they change their formulas all the time and never for the better". You will never see a can of Rust-Oleum in my shop after this experience. I am very glad that my friend had the problem first - his model had broad expanses of hull where my job was a very intricate assembly that would have been near impossible to strip or sand adequately. The new primer I mentioned earlier was received just before I had to use a white primer so I would not have bought or used the white Rust-Oleum stuff for the job. Kurt -
Brian: Good luck on your surgery. I am just under 2 weeks since my cataract job - on my only working eye. Had 20/400 correctable to 20/20 with glasses my entire life. I could only read the big E on the eye chart. Day after the surgery I was seeing 20/30 and 1 week after it was 20/25 and they said to expect it to get better. I used to have excellent close up vision but right now I have trouble with reading let alone modeling. But they say I can get new glasses in another week and then reading and modeling will be good too. Using some drug store reading glasses and they are just barely OK, but the computer and my Kindle are OK so I can last another week OK. Just use the flash on manual. Using a digital camera you can tell if you have a good exposure. I do all my photography of the models using manual flash. I have a flash meter but long ago set up where I have my lights and only adjust the aperture depending what the subject is. As I have the lights set up and they don't move I know the exposure will always be right on. I only make adjustments when the subject is darker or lighter than normal. Check you camera's instruction manual on using the manual settings. Your camera's shutter speed is much slower than the flash duration and any slight lag of one flash to the other is well within the open time of the shutter. Kurt
-
Home made paint palette
kurtvd19 replied to hornet's topic in Painting, finishing and weathering products and techniques
Steve: Thanks for the great tip - I will be passing it along in my airbrush classes. I use a similar syringe and plastic dispensing needle for applying wood glues - will use the same set up when airbrushing - I will not interchange the set ups! Kurt -
Ropes were not coiled on the deck as shown in Ken's photos when operational but they were coiled like they are shown when the ship was being inspected and everything was to look ship shape. As most models are displayed on a set of stanchions, obviously not at sea, the coiled ropes would be appropriate. However, were the model in a diorama, at sea, then they would have been picked up as you said. Kurt
-
Elijah: Next time you are at a meeting take a couple of photos of my shop/tools to show your Mom - she will not think you have so much once she sees the photos. Kurt
- 701 replies
-
- 4
-
-
- phantom
- model shipways
- (and 1 more)
-
Ken: Your posts are always appreciated and educational. I have learned a few things reading your build log -and learned a lot of stuff from your book. One has to remember that there are always people who need to know some of the things than so many assume everybody knows because they learned the skill so long ago. There are always new modelers coming along who will benefit from tutorials of all sorts. You are providing information for all skill levels - I know for a fact that some very experienced guys do their chafing fish and mast cheeks just like the instructions show, relying on wood filler rather than fitting the faces of the strips together tightly. As I have said before, you have a skill for explaining the processes of building and are a great teacher. That's one of the reasons I asked you to be a speaker at the San Diego NRG Conference in October. Anybody wanting to learn first hand from Ken about working with brass come to San Diego. If you have Ken's book bring it with and I am sure he will autograph it for you (mine will make the trip) and I am sure he will bring some to sell there. This paragraph is a blatant plug for Ken, his book and the NRG Conference. Take care, Kurt
-
Very nice work Toni. I find myself using the dental machine almost daily - it's replaced my pin vises in most instances. Kurt
-
Cathead: I don't know. However, I will ask a true expert and get back to the group. I will ask Jack about tar paper and canvass coverings. It might take a bit as the professor can take some time to check his emails. Kurt
-
It appears that the roof covering is tar paper. The Texas decks roof shows port to starboard seams. I simulated tar paper on my Chaperon model using Silk Span strips, glued in place using Artist's Acrylic Matte Medium (AAMM). The AAMM was brushed onto the back of the strip then the strip was laid down onto the surface, overlapping the previous strip by a scale 6 - 8 inches. The entire roof area was done this way and then the surface was painted with a weathered flat black. I used some of the AAMM, after the painting of the tar paper, along the seams to make it look like tar had been applied as a repair to hold down an edge. These decks as you can see from the Shorpy photo were not used by the passengers. I have seen photos of planks laid over the tar paper to protect it from foot traffic. Caulked decks are not always as water tight as one might assume. These boats were not always maintained to the high standards associated with passenger traffic as we know it today. The use of tar paper or maybe canvass laid down with tar would go far towards making the roofs shed water - more so than a caulked deck. Remember these boats were very flexible and caulking wouldn't last long. During the 2006 NRG Conference in San Diego the vendors were inundated with rain coming through the caulking of the main deck of the San Diego Museum's Star of India and I am pretty sure this ship had better maintenance than the typical riverboat. The buckets in the racks are fire buckets that are immediately adjacent to water barrels. Sparks from the stacks on the roof could get a real fire going. The buckets were kept handy hanging on the racks so they would always be accessible and in the same place. Most fire buckets were also made with domed bottoms so that the buckets would not sit flat and would also hold a bit more water than a flat bottom. The rounded bottom made sure they were not removed by a crew member to use for another purpose so they were assured of being available when needed. This was true of all fire buckets not just those on riverboats. Kurt
-
Elmer's ProBond
kurtvd19 replied to Kurt Johnson's topic in Painting, finishing and weathering products and techniques
Kurt: I got some of the Pro Bond and tried it and dumped the whole thing in the garbage. It might be great for filling something on a rough sawn cedar fence but not on any model. There is a new formula for the Elmer's wood filler - the normal stuff - that is now much nicer than the original - give it a try. I have used it quite a bit and like it. Sands easy and fills small holes like your treenails. If you can't get it locally there is always eBay - with free shipping or Amazon. Amazon link - http://www.amazon.com/Elmers-E848D12-Carpenters-Filler-2-Pint/dp/B000LNR4XC/ref=sr_1_4?ie=UTF8&qid=1459349473&sr=8-4&keywords=elmers+wood+filler eBay link - http://www.ebay.com/itm/Elmers-Products-E848d12-1-2-Pint-Carpenters-Interior-Wood-Filler-/200632338865?hash=item2eb69e89b1:g:tX0AAOSwpDdVGo5j Kurt -
How Can I Identify Lead Fittings?
kurtvd19 replied to Bill Mitchell's topic in Metal Work, Soldering and Metal Fittings
Bill: Thanks for sharing your experience with the lead fittings. I didn't have the same experience thus my opinion. Your experience has changed my approach if I ever do another restoration - something I have vowed to have retired from. Luckily I know another modeler not too far away who wants the work I can refer people to now. How about a lead test kit from the hardware store? Might work. Kurt -
How Can I Identify Lead Fittings?
kurtvd19 replied to Bill Mitchell's topic in Metal Work, Soldering and Metal Fittings
We might have a metallurgist pitch in with pure facts, but in my experience if the model is old enough to need restoration and the metal parts are in good condition they are either pure lead or another metal. Pure lead doesn't seem to be a problem as there are lead containers several hundred years old and civil war musket balls are not rare to be dug up in fine condition. Bad lead fittings have a feathery sort of growth on them - some call it a "bloom". I have seen the lead be almost completely replaced by these growths. Had a pyramid of cannon balls on a very dirty and abused HMS Victory model that were covered with the white growth and when I took a tweezers to the pile to see if I could lift it off the deck there was virtually nothing under the whitish growth of feathers. In every instance of lead disease I have seen, the metal bends, breaks or crumbles if it's touched I would make sure the fitting you use for the restoration are not lead but I wouldn't remove good fittings be they lead or Britannia. Just my opinion and what I have done with restorations. Kurt -
Masking Problem
kurtvd19 replied to mikiek's topic in Painting, finishing and weathering products and techniques
Mike: I don't use liquid frisket. The frisket I use is a film with a tacky stickum on the one side. It canbe used for painting flames, etc on cars, helmets, etc. Also useful for models. The 3M and Tamiya tapes need to go ver smooth surfaces. Wood must be sanded smooth before being painted. If it's smooth enough for the paint then the tape will stick and seal. Maybe the better way to think about it would be that if the tape sticks and seals the wood is smooth enough to paint. Choice of woods is critical. Too open a grain and you can never seal it well enough with the tape. Kurt -
Masking Problem
kurtvd19 replied to mikiek's topic in Painting, finishing and weathering products and techniques
The Tamiya tape is also very good. I use both the 3M Fine Line and the Tamiya. Both are very excellent and resist any seepage under their edges when burnished down onto the surface. Here is something I did earlier today. Fine line tape masked off the waterline (bare eggshell) and then some frisket was placed on the fine line tape to mask off the rest of the egg. Painted the red first, removed the frisket and put it back onto the fine line tape to cover over the red - not having moved the fine line tape, sprayed the blue and then removed the frisket and then the fine line tape. Total time from first starting to mask until done was less than 20 minutes till I took the photo. Acrylics dry quickly. I keeping with the nautical theme here, the red is Badger Modelflex Anti-Fouling Red Oxide (16-401) and the blue is their Tug Medium Blue (16-434). The white waterline is the Chicken's natural Eggshell White. Kurt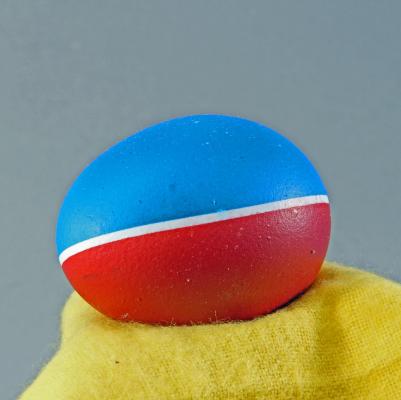
-
Masking Problem
kurtvd19 replied to mikiek's topic in Painting, finishing and weathering products and techniques
Mike: One of the reasons I like acrylics is the covering ability while being a very thin paint thickness. It is important to use model type paints due to the finely ground pigment vs the stuff from the hardware store (1 micron vs 37 microns). Several very thin coats is what I do starting with the first coat thin enough that it is barely recognized as paint with subsequent coats - still very thin - adding up to good coverage while maintaining the wood grain' visibility. When I say thin coats I don't meant to thin the paint out - just apply a thin coat. Kurt -
Masking Problem
kurtvd19 replied to mikiek's topic in Painting, finishing and weathering products and techniques
Mike: You are on the right track - always cover the lighter color with the darker color. When you have a ridge between colors try dragging the smooth top side of your fingernail over the ridge along the length of the ridge as soon as the tape is removed - always try to remove the tape as soon as possible. The paint must be dry to the touch but do it ASAP. I use acrylics and can unmask the edge within 5 minutes and then use the fingernail trick. Don't keep doing it as you might rub some paint off - once is enough - don't be afraid of using a bit of pressure. The nature of acrylics is to "lay down tighter" as they dry so the fingernail is just helping the process along. Acrylics can look a bit thick when first applied but they lay down soon. Hope this helps, Kurt -
Tools and Supplies for My "Shipyard"
kurtvd19 replied to daveward's topic in Modeling tools and Workshop Equipment
Dave: I am sure others might have comments about the various tools but I have a dislike of the light with the magnifier built into it. It's great for the jeweler or somebody working with small stuff on the bench surface as the magnifier can be set and left in place. With a ship model that ranges from small pieces where the magnifier works to the hull and/or rigging where it just gets in the way it's a tool that is useful only part of the time. I tried this light/magnifier combo years ago and got rid of it in a matter of a few days - luckilly I was able to trade a buddy for a tool he didn't use so we were both happy. I much prefer to use a head band type magnifier such as the Optivisor. I used one with plastic lenses but after being able to try out the glass lens version at a trade show I bought the glass lens version and couldn't be happier. These are available on ebay whereas the plastic lens versions are carried at the art stores such as Hobby Lobby, Michael's, etc. The link below is from a current ebay offer - I have both the #5 and the #10 lenses - using the #5 99% of the time as the drop down loupe is great for the extra magnification but the #10 is for when I am doing some extremely close work and you probably will never need the #10. My advice would be to get the glass lens version rather than the plastic as there is no comparison - at least two club members went out and replaced their plastic lens versions with the glass after they tried mine on at a recent meeting. http://www.ebay.com/itm/Donegan-OptiVisor-Headband-Magnifier-You-choose-from-6-Lenses-MADE-IN-THE-USA-/251919955964?var=&hash=item3aa79977fc:m:mOgsmPUjOYwsz_xL9S50mrA I see you are from WI. Do you know about the 40th Anniversary model boat show/contest at the WI Maritime Museum in May? There is info on their web site and here on MSW in the clubs, shows section towards the bottom of the mail MS page. Take care, Kurt