NRG Photographic Model Ship Competition - All eligible to enter - Reduced memberhsip fee - JULY 31 ENTRY DEADLINE
×
New Banner Ad Sponsor - Epic Engravers - Great plank bending machine (also bends thin metal sheets) and unique engraved coins to label your model displays!
×


EKE
-
Posts
231 -
Joined
-
Last visited
Content Type
Profiles
Forums
Gallery
Events
Everything posted by EKE
-
 Perhaps the 1981 title is a reprint?
 -
Just ordered a copy! Thanks! -EKE
-
I searched on Erycina (such a lovely name!) online, and found this book, which I ordered on Amazon. I’m going to do a bit of research while I wait for the kit to develop! Thanks so much, Chris! -Erik

-
So beautiful, Chris! I love the lines of these kind of working boats. I’m so excited that you are creating these kits.
-
Chris, can you give us a glimpse of what the rigs are like for the fishing boats? I found Erycina online, but she’s only shown as a gaff-rigged cutter, one mast.
-
The fishing boats look spectacular, Chris. Can’t wait to add to my fisher collection!
-
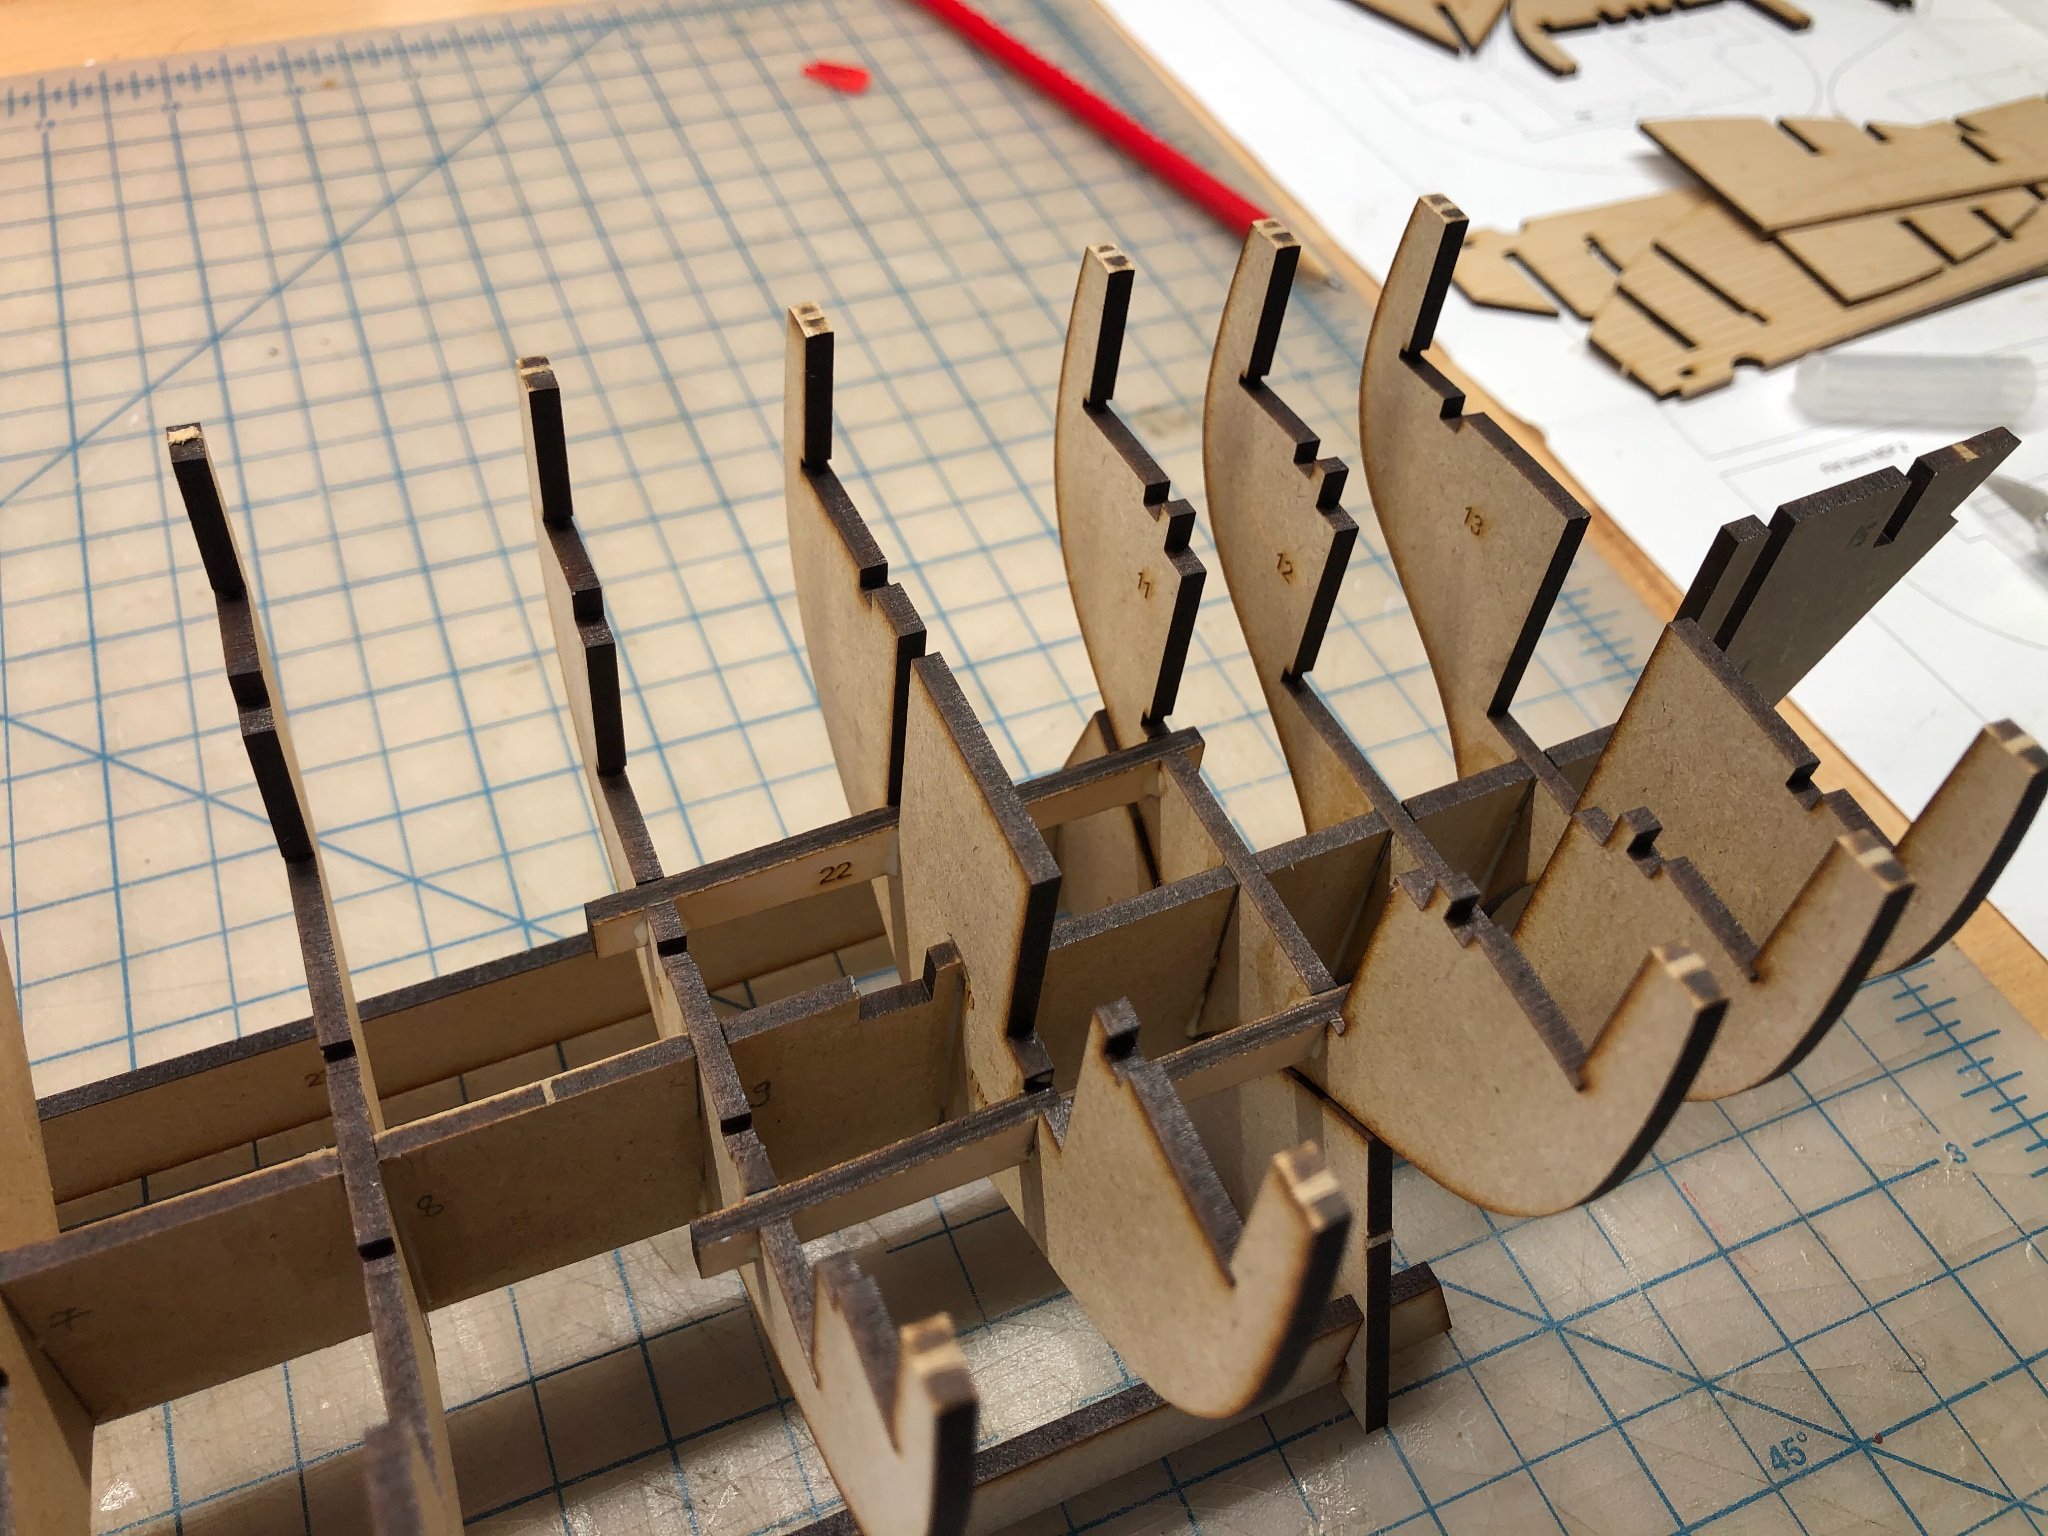
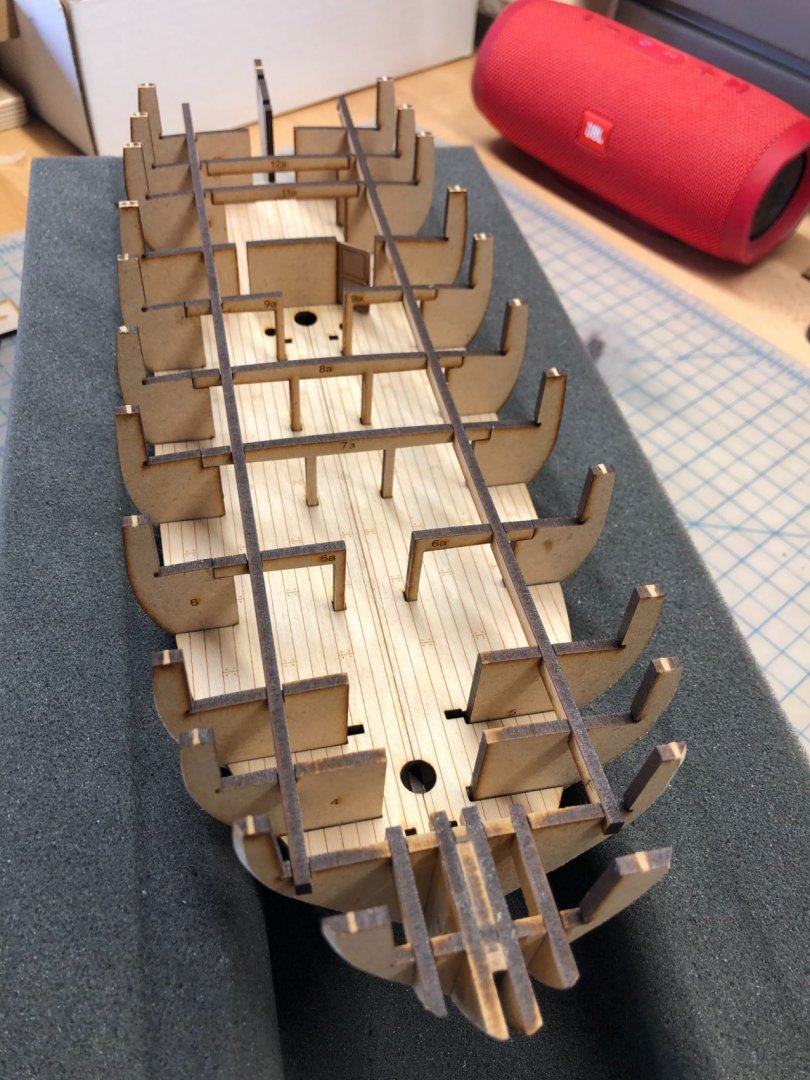
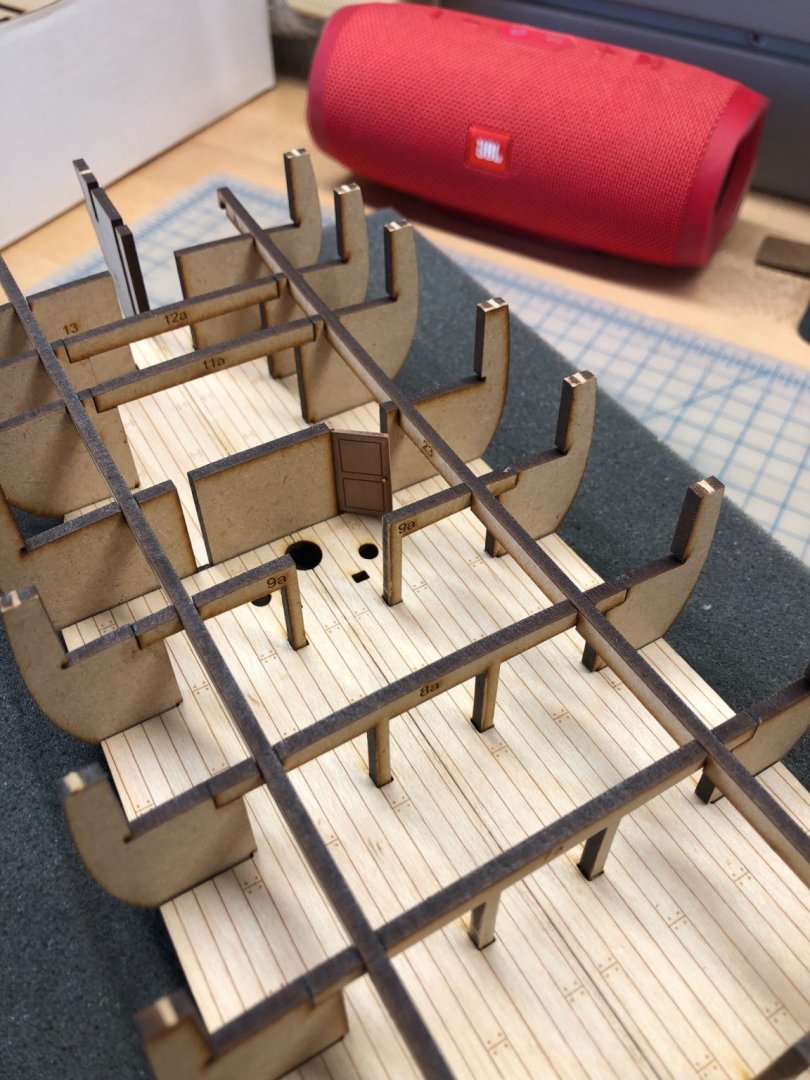
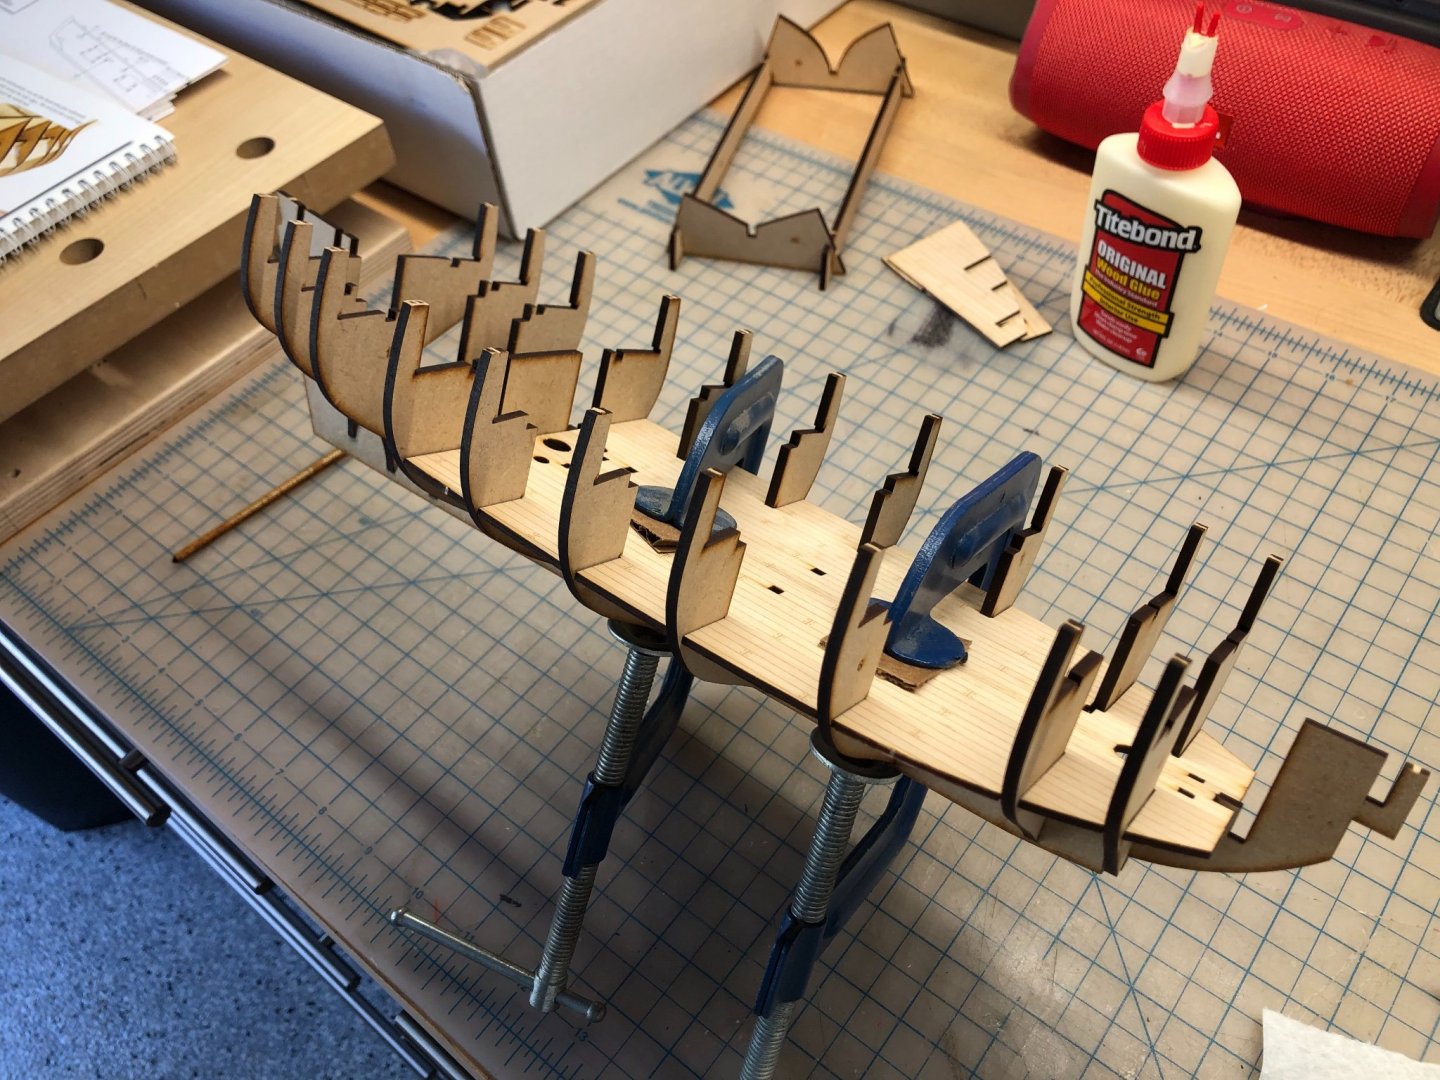
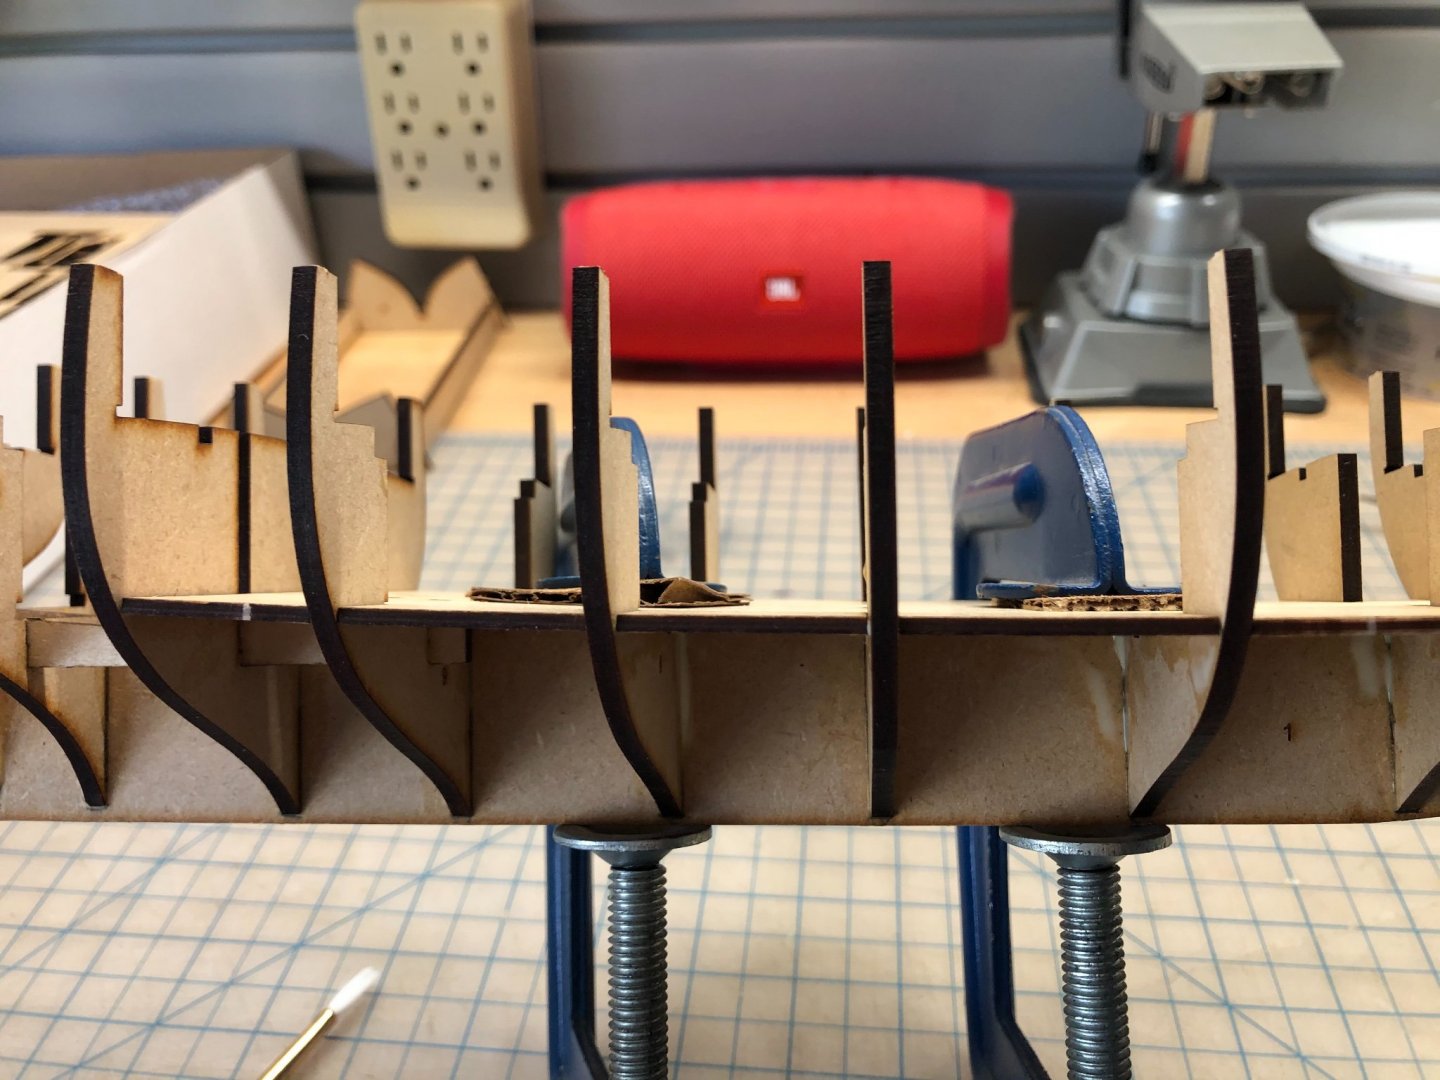
Now that the basic framework is fleshed out, I first added the cool little door at the bulkhead opening to the Captain’s Quarters. This is a pretty little part in pearwood, with a door panel detail etched into it. Very nice. Per the suggestion in the instructions, I cut the head off a brass pin and glued it on to simulate a door knob. This leads me to a question that perhaps could be answered by some of you who have completed this kit. I am thinking that if the door is visible through the the open hatch in the finished deck, I should perhaps paint the bulkhead a nice vintage color before proceeding much further. Can any of you give me an idea of how much of the interior is visible through the hatch? I suppose I should brush on a coat or two of varnish on the door, and the lower deck surface as well. Then I prepared and installed the deck support columns/frames and cross beams at stations 6, 7, 8, 9, 11 and 12. These parts all fit beautifully, with no trimming necessary. Easy peasy. In these photos, you can also see a test fit of the long longitudinal deck stringers which lock into the bulkheads, port and starboard. These also fit perfectly, which is a good sign that I have all my bulkheads straight and plumb. Gluing these in will need to wait until the last bulkheads and the transom piece are beveled and installed, but when these stringers are in place this will be a very rigid frame indeed. This is all so very well conceived and engineered. Thanks, Chris Watton! This brings you all up to date with where I currently am in the process. I’m out on vacation until Monday, soaking up a little sunshine and pool time. More soon. -E

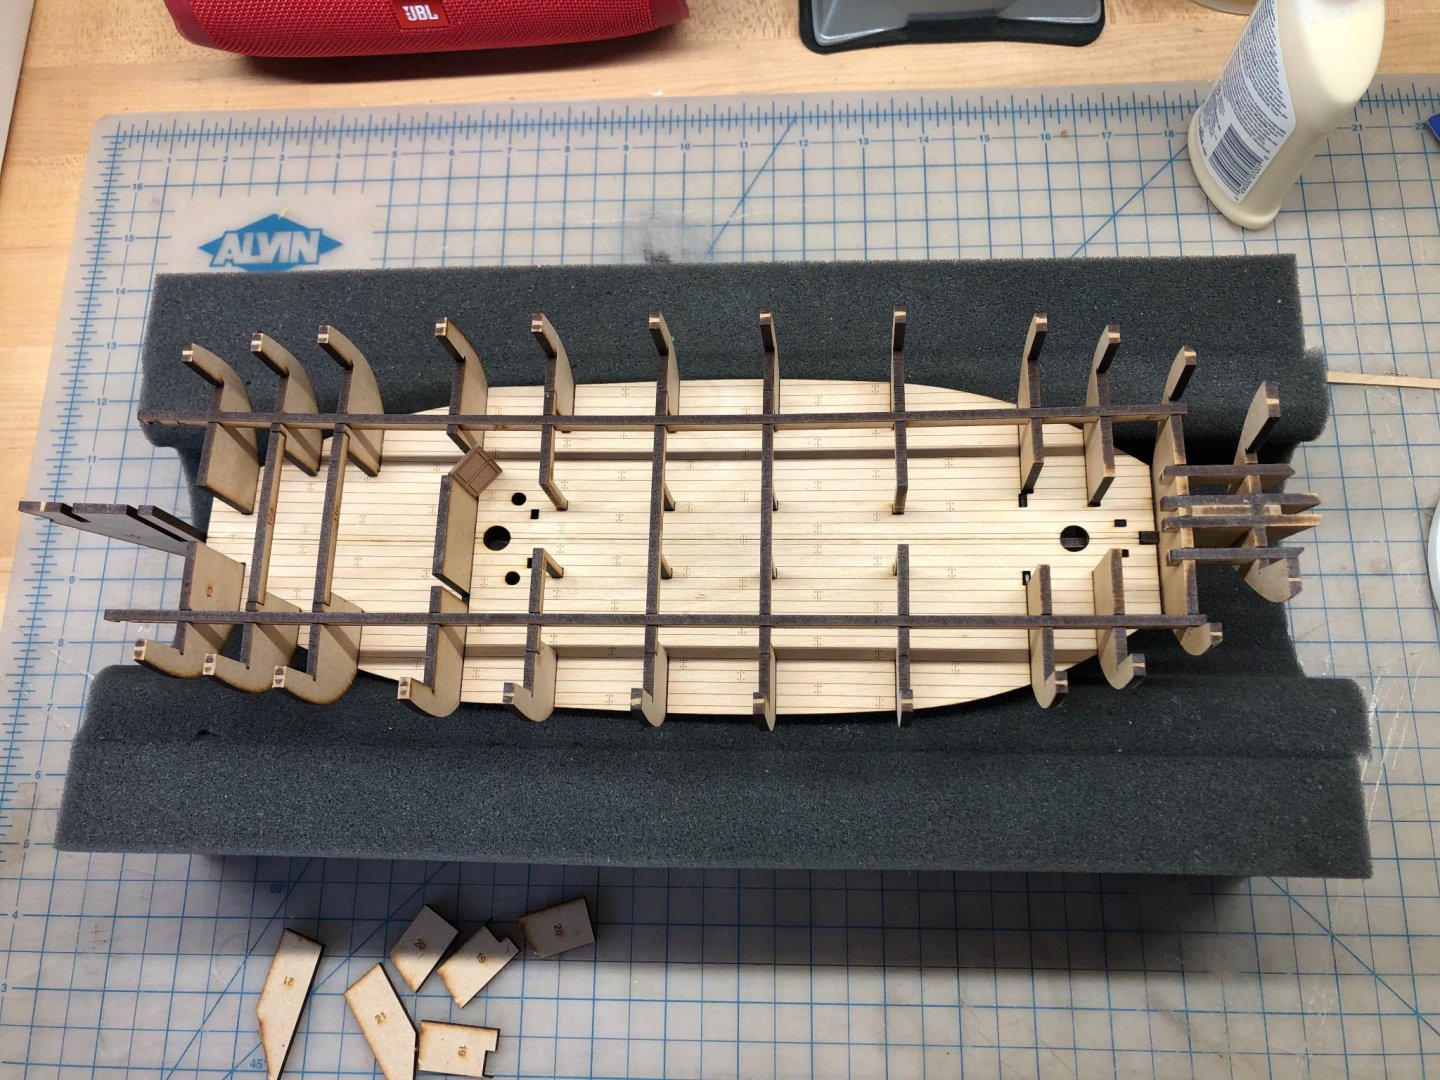

-
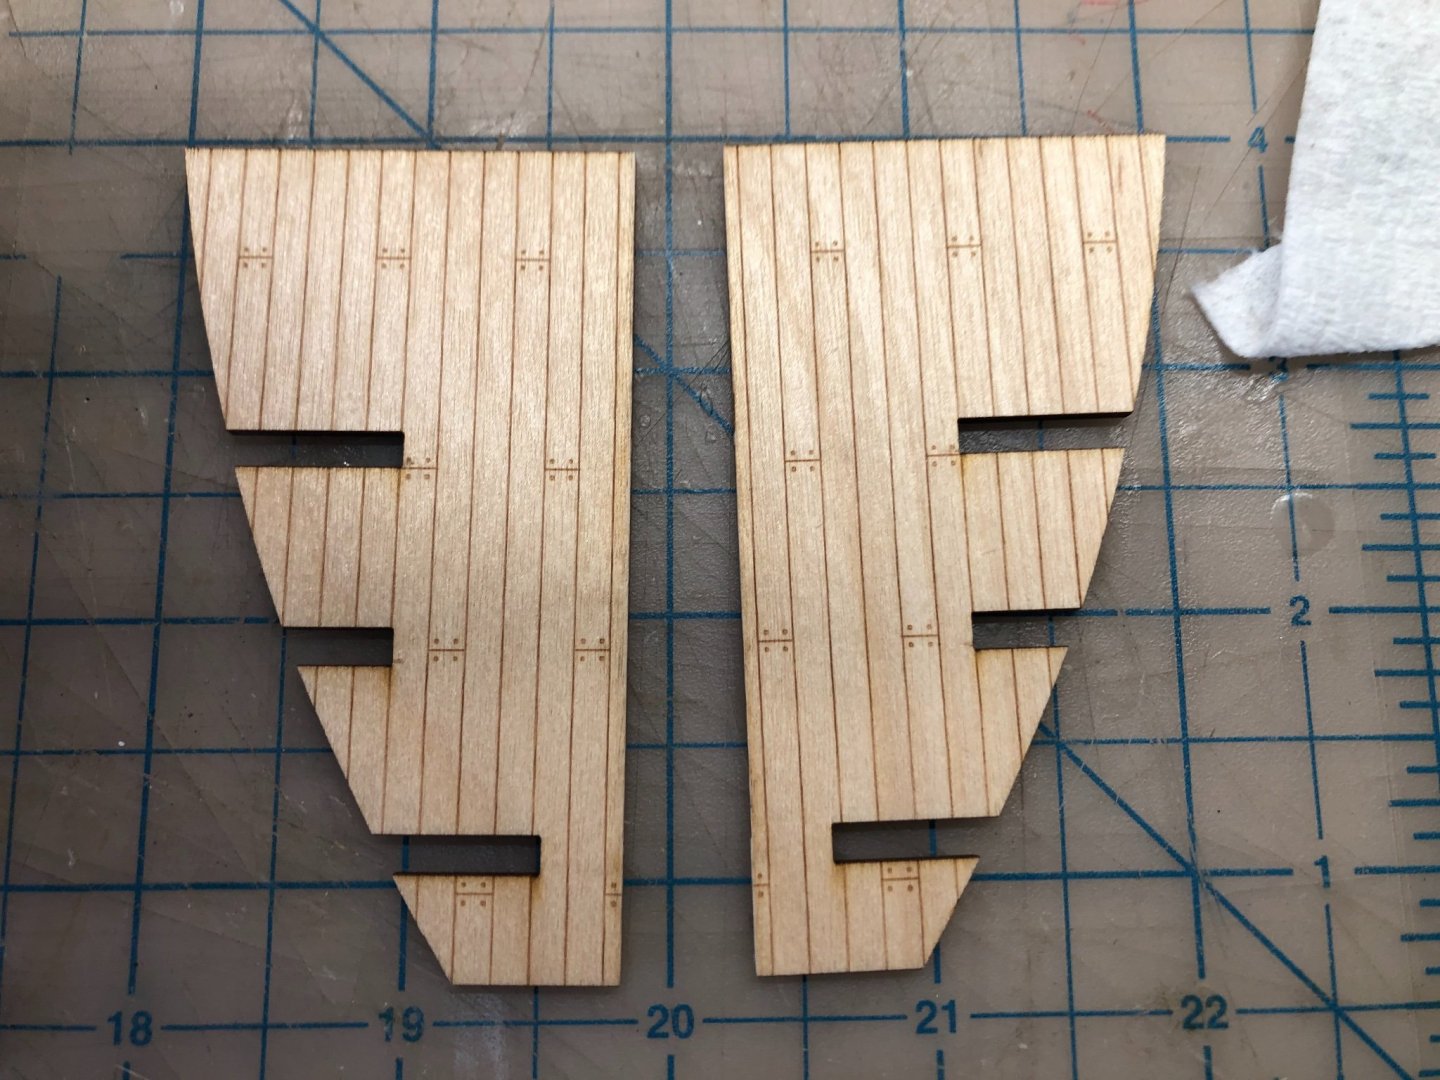
Once the basic frame was dry, I started adding additional components per the instructions. I did a rough pre-bevel of the bow bulkheads and filler pieces using my Dremel tool, and then glued them into position. Then I test fit, and installed the lower deck. This is a really nicely designed component. The lower deck comes in four quadrants, two main lower deck halves, forward, and two aft halves, for the Captain’s cabin deck. The parts are beautifully laser-etched with planking detail. These all slot nicely between the bulkheads, and fit perfectly. They also lock in and brace all of the bulkheads, creating a very true and rigid framework. So well designed. I glued them in, one quadrant at a time, and clamped them down with large “C” clamps at the keel. This way they conform perfectly to the very slight curve of the upper edge of the keel, and give a very tight joint at the margin between the port and starboard deck segments.

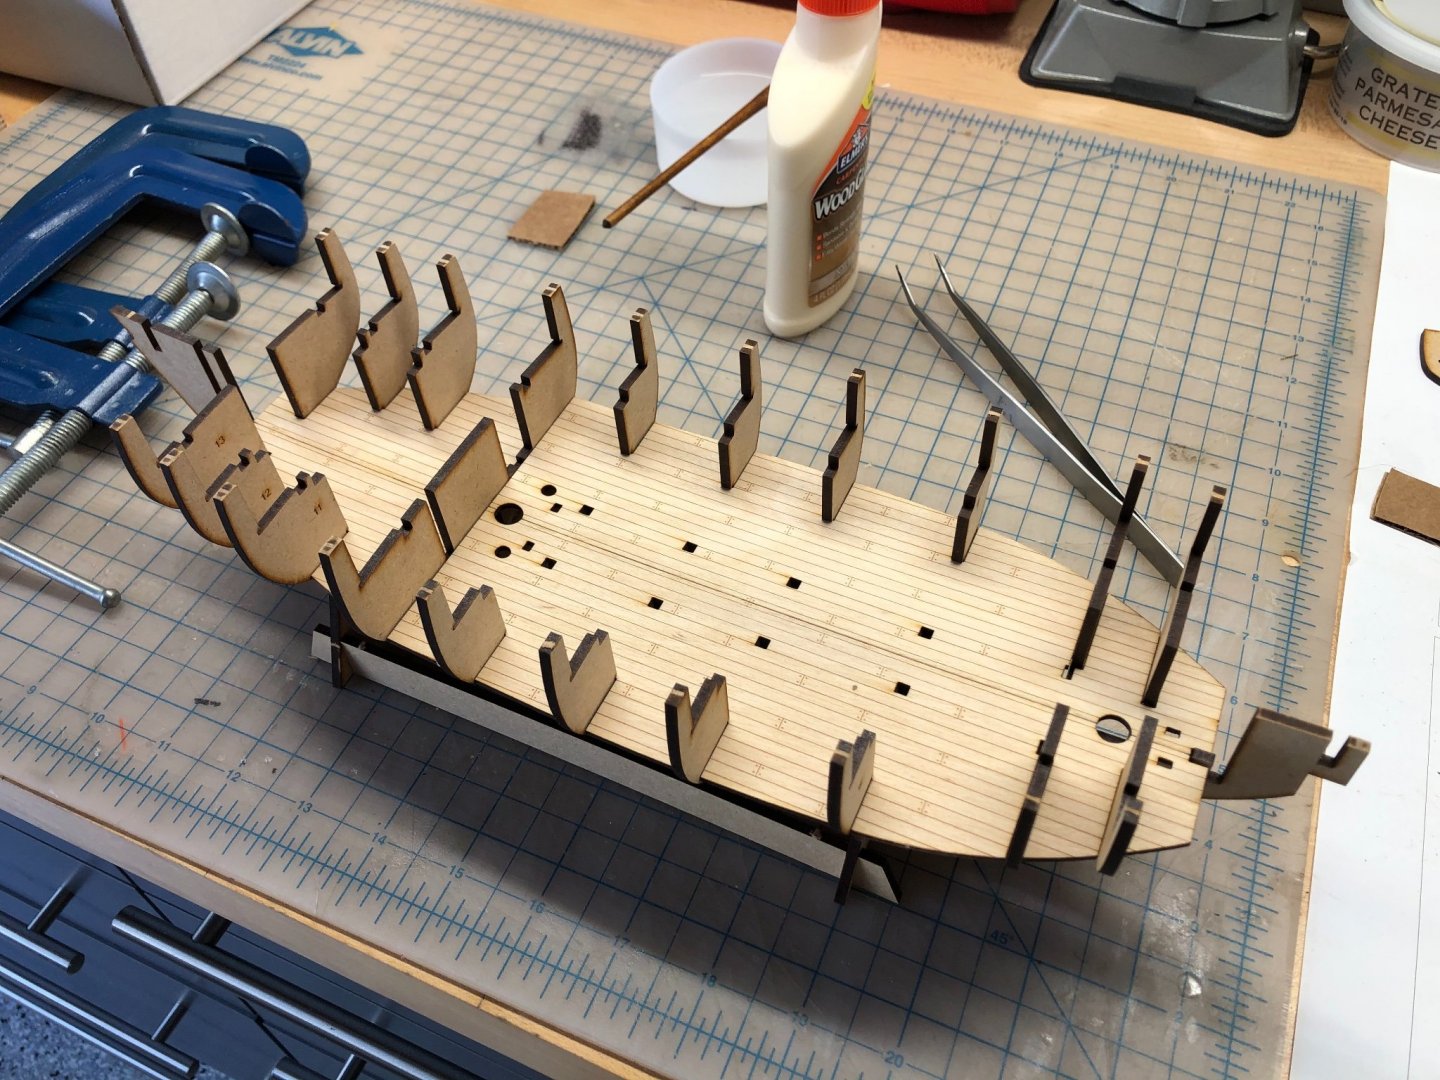

-
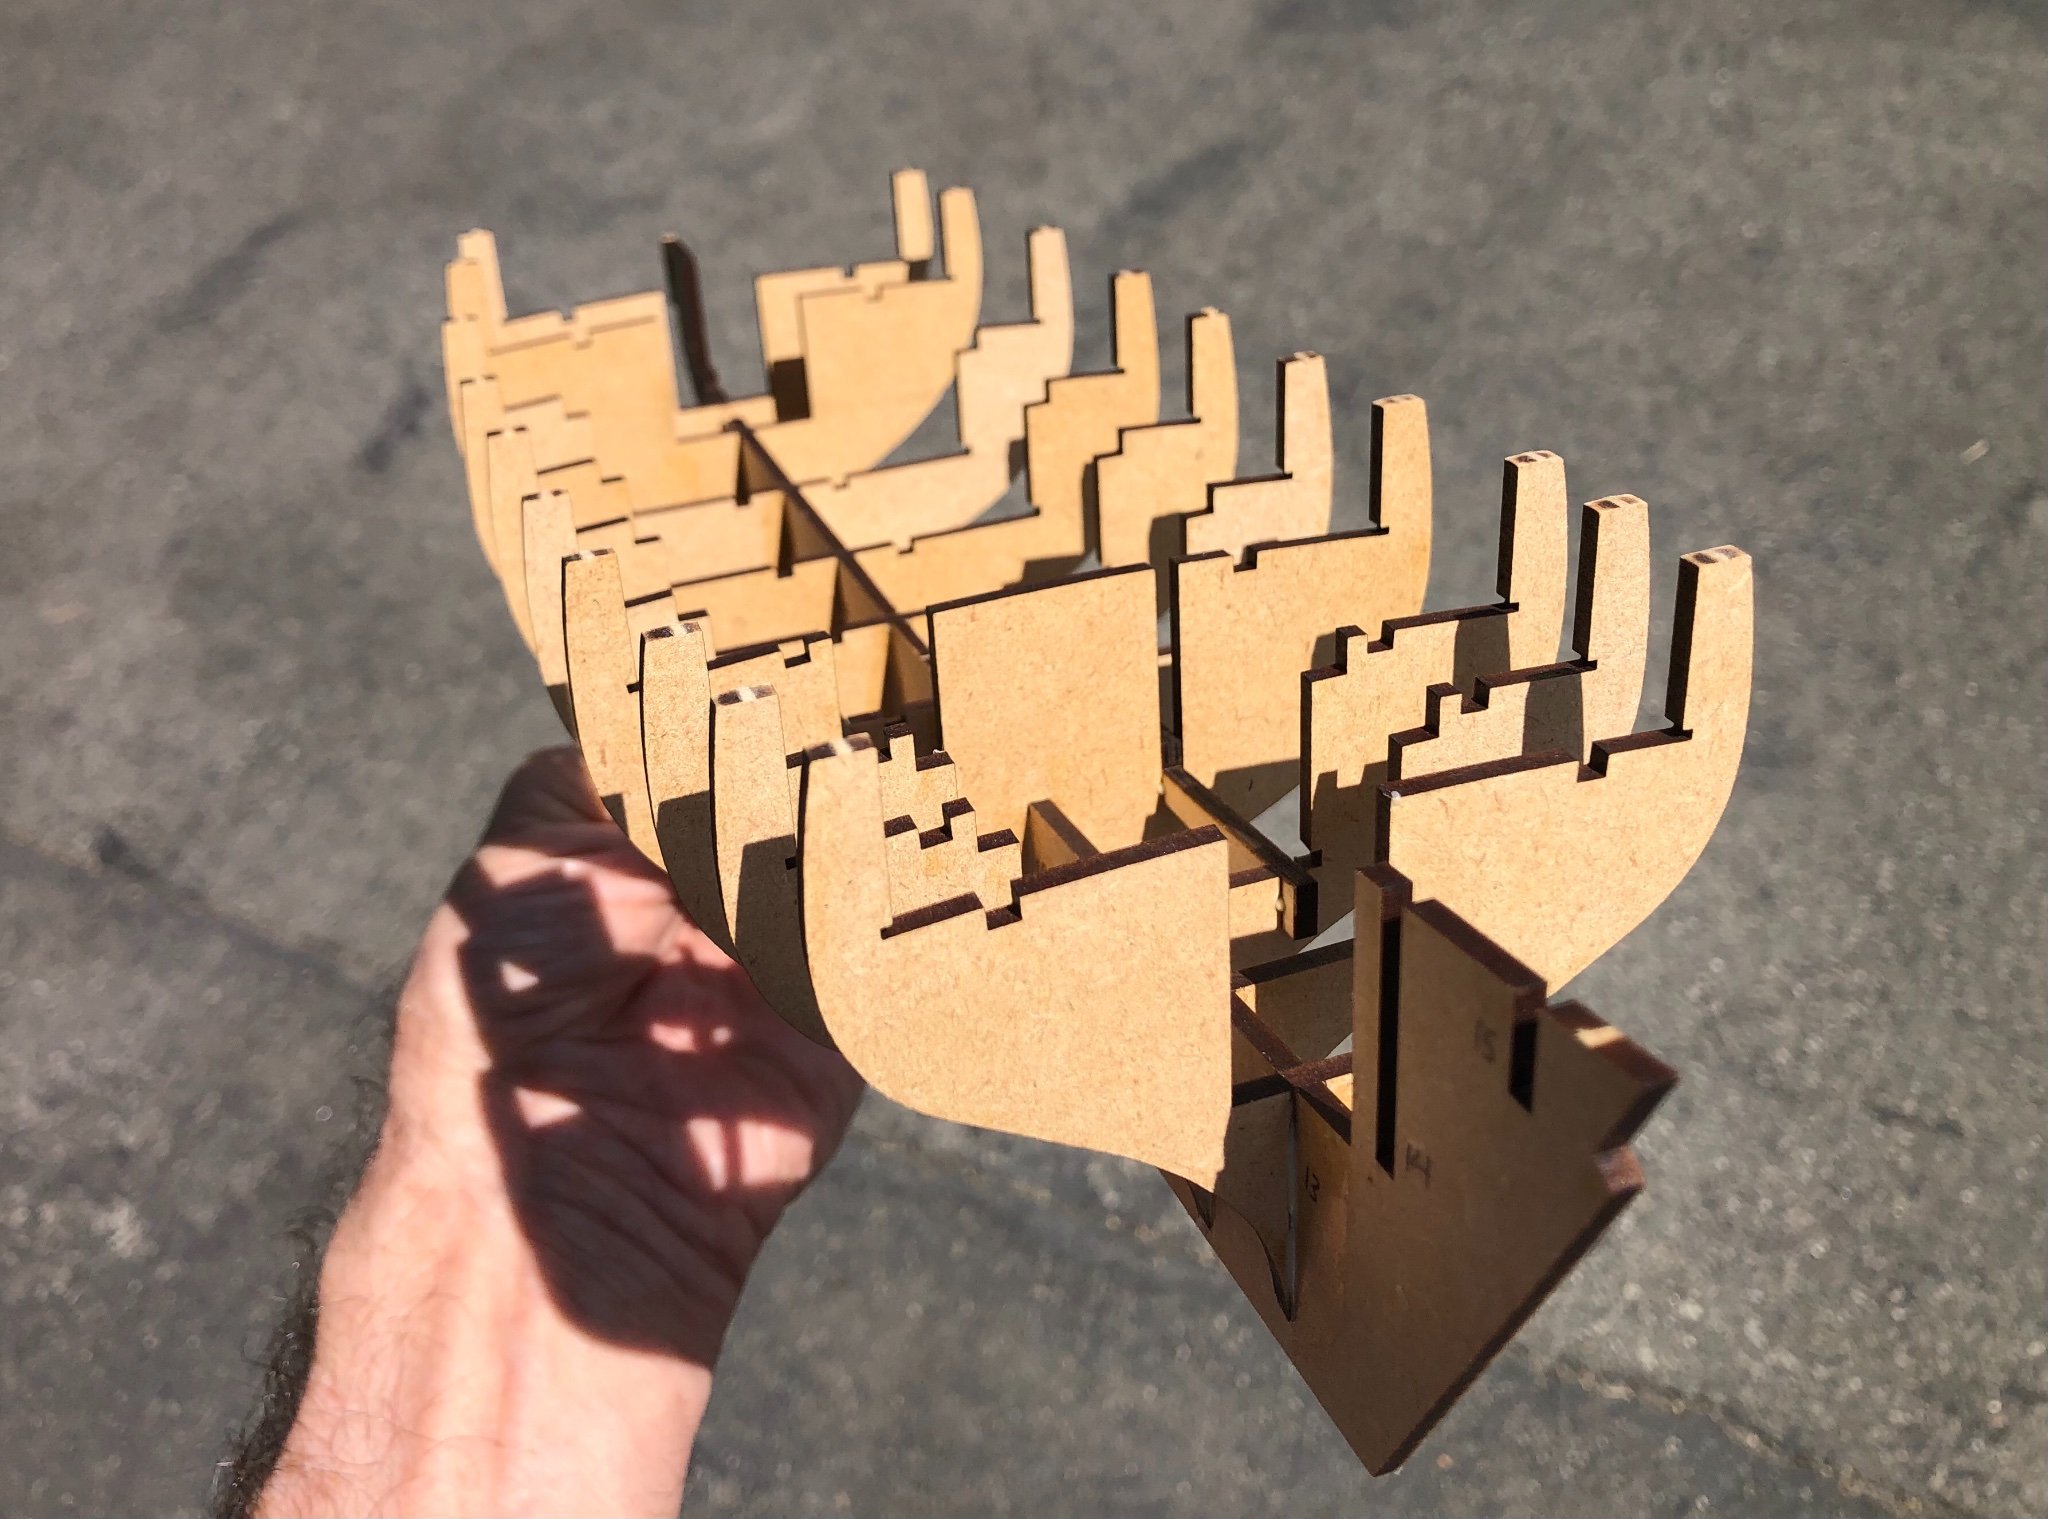
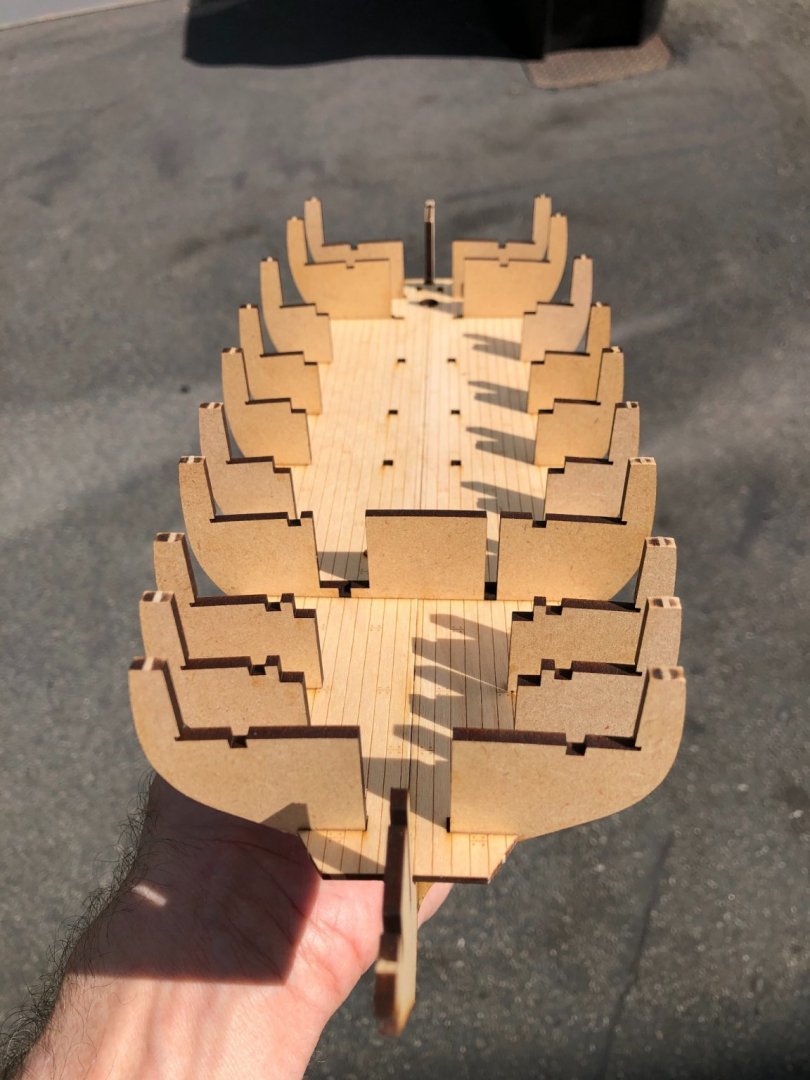
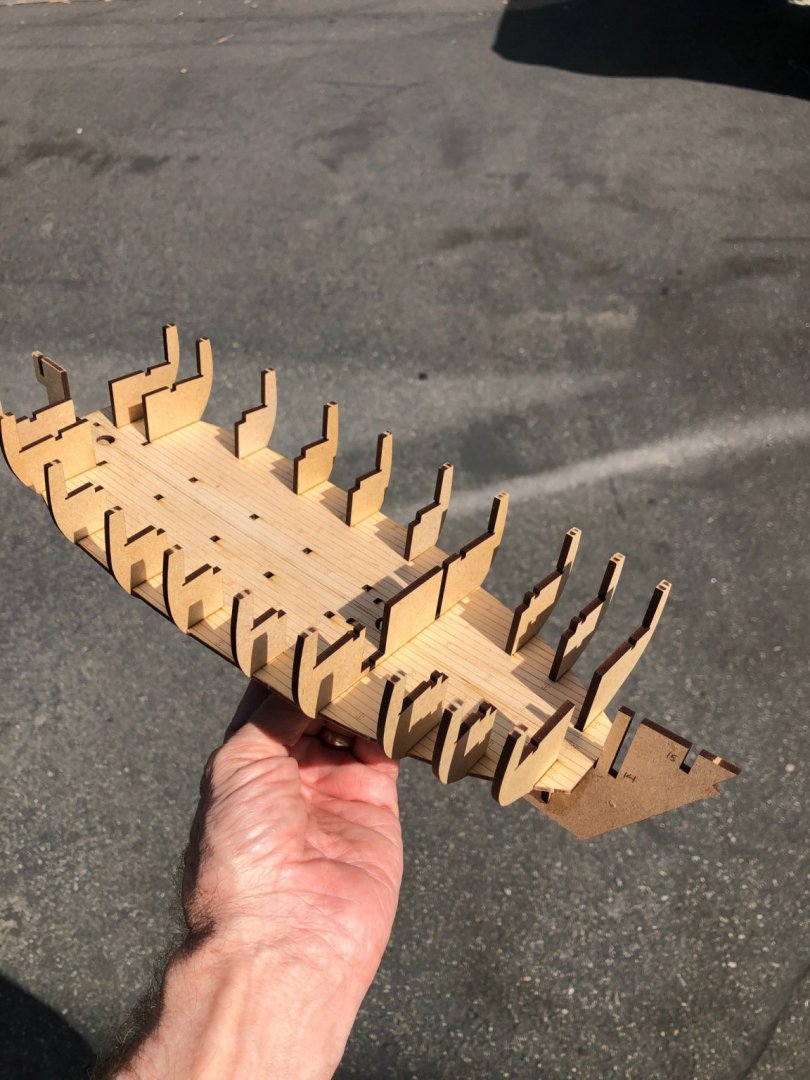
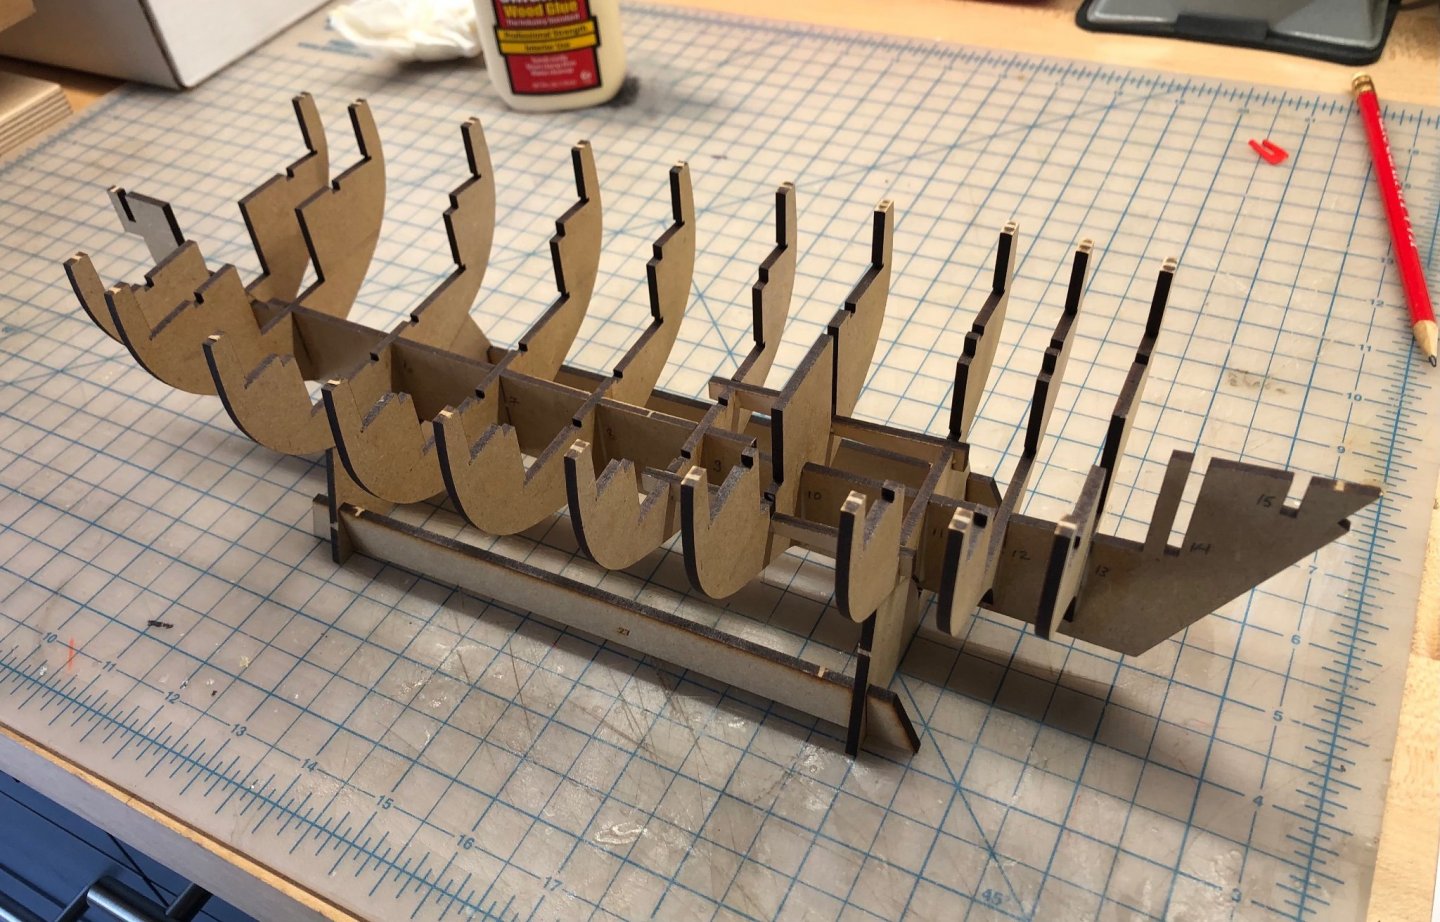
Here’s the basic framework all glued up. The parts fit snugly, and so precisely that I didn’t feel the need to use a jig of any kind to ensure all was square. I just gave them an eyeball check to make sure all looked plumb and true. I used Titebond to glue everything together.

-
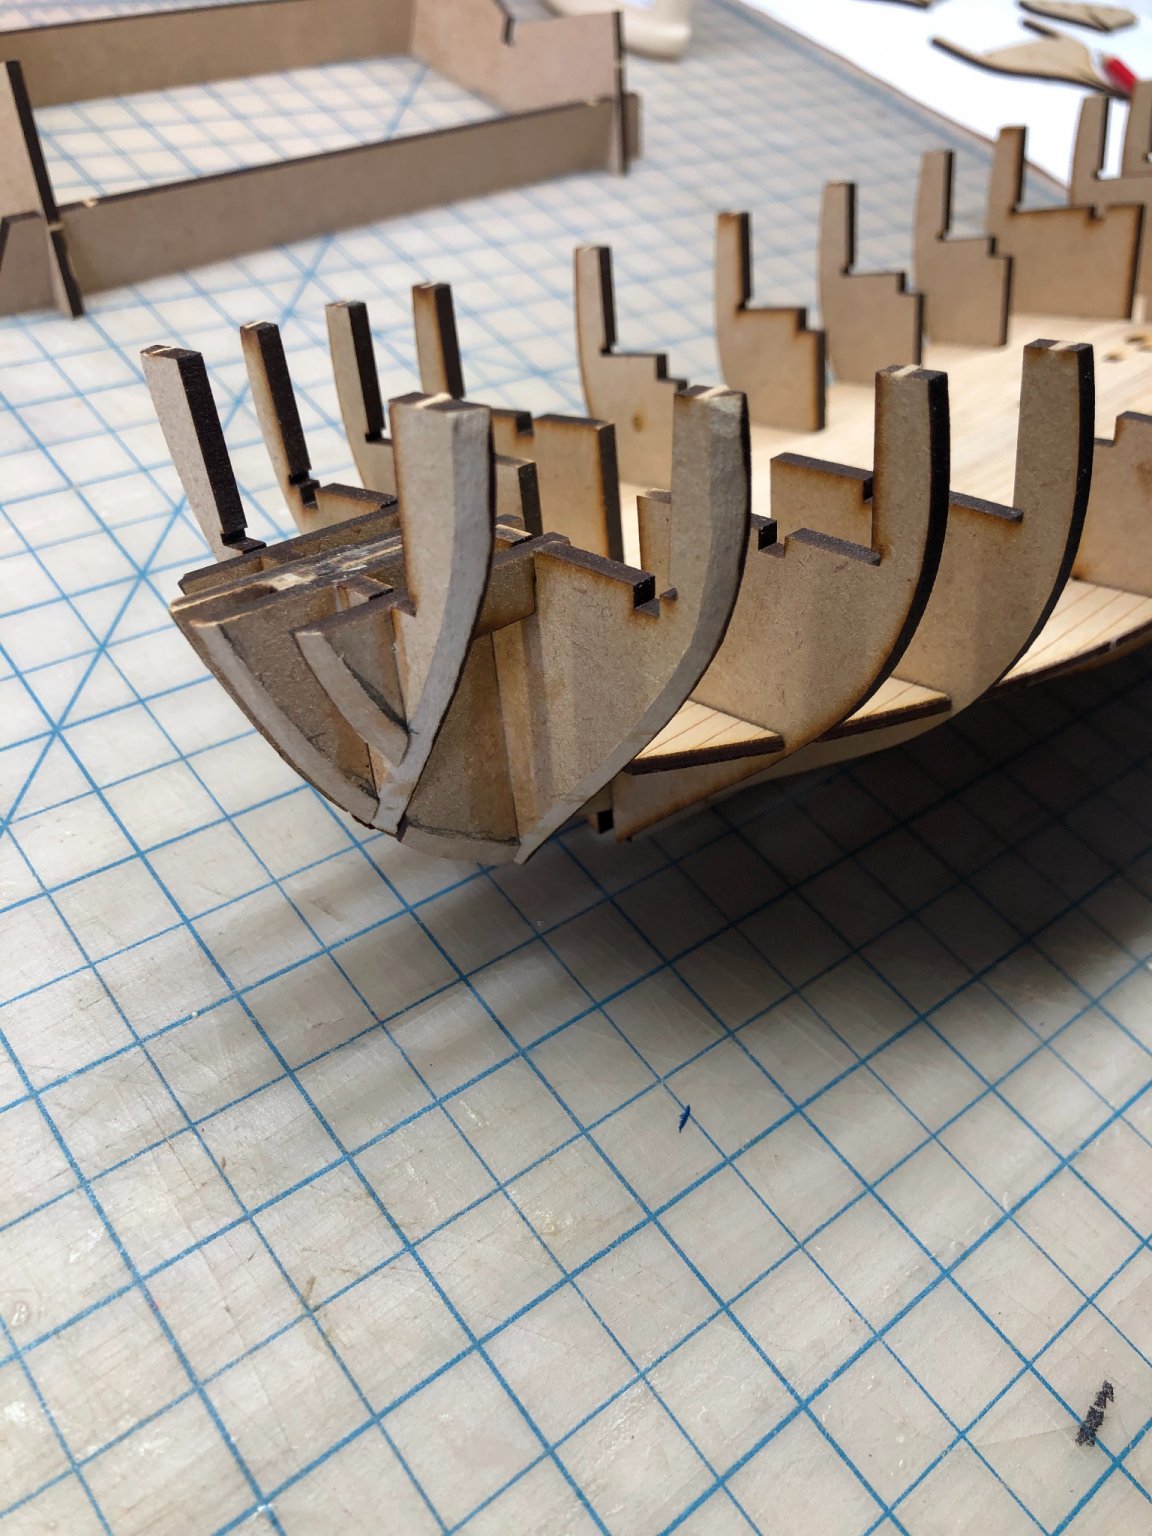
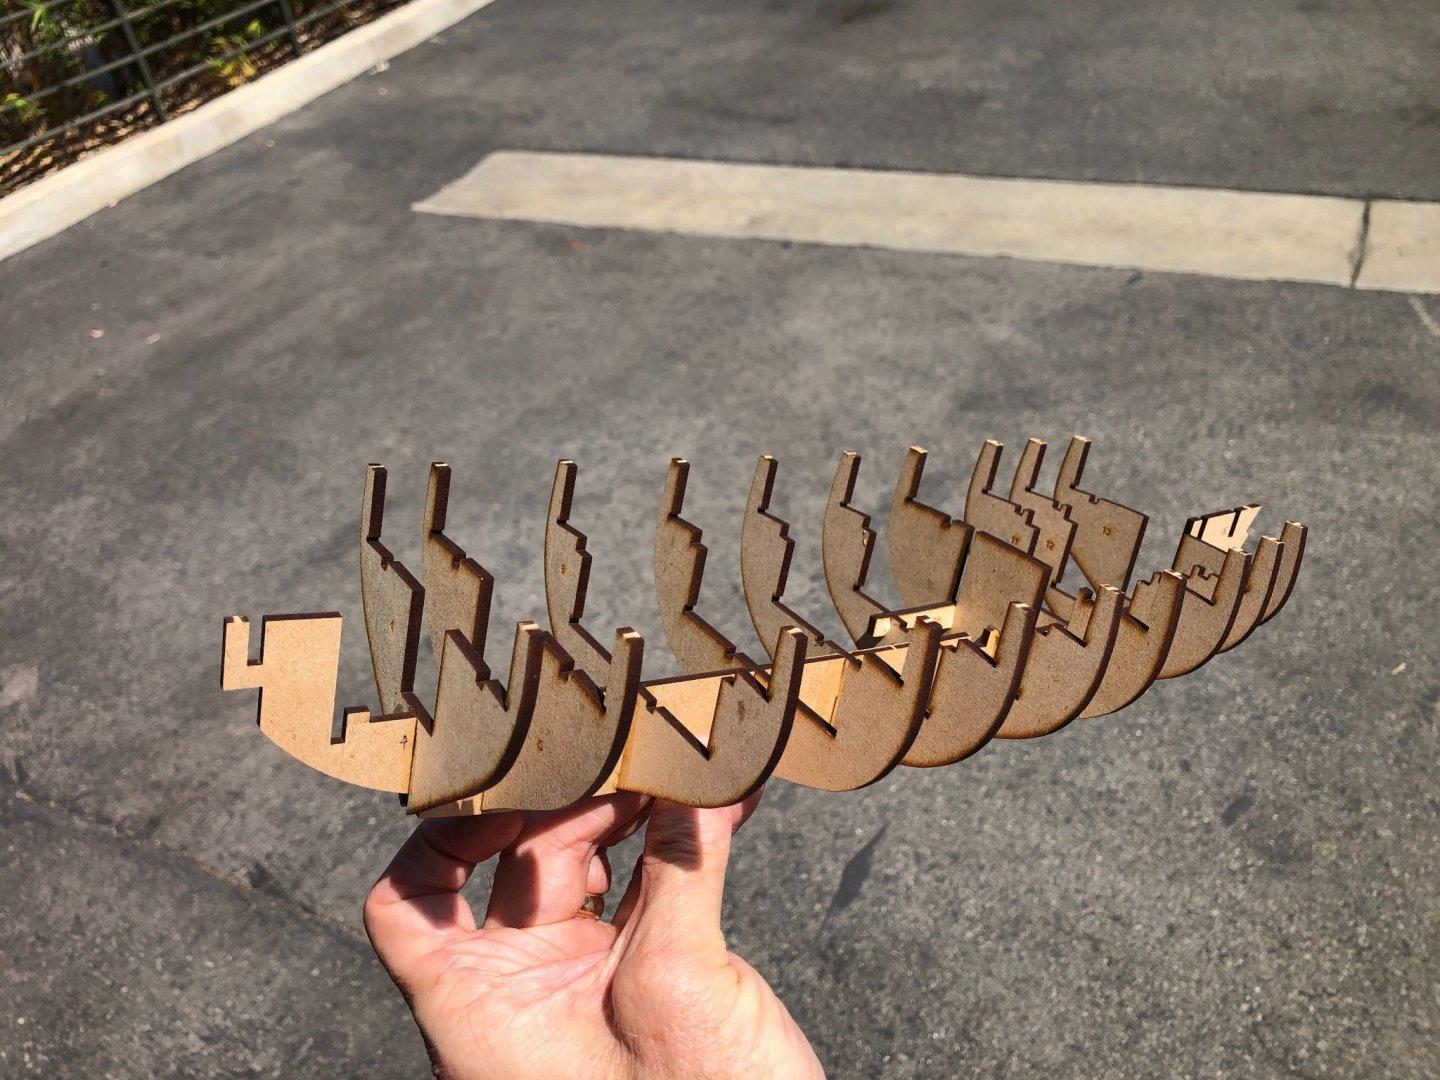
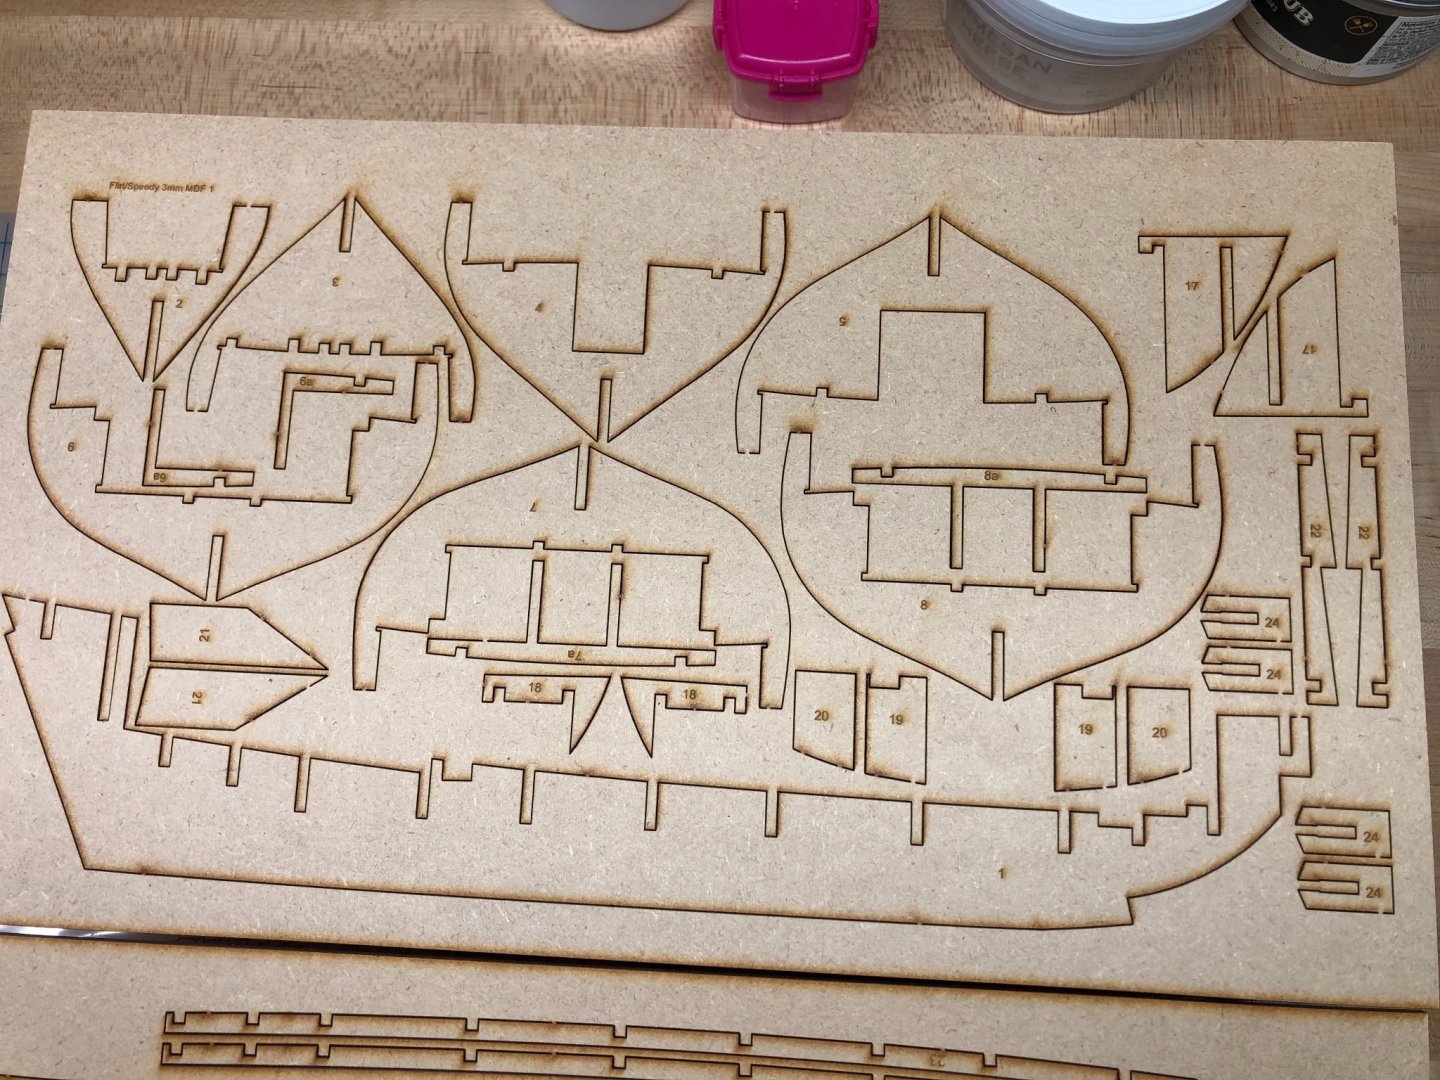
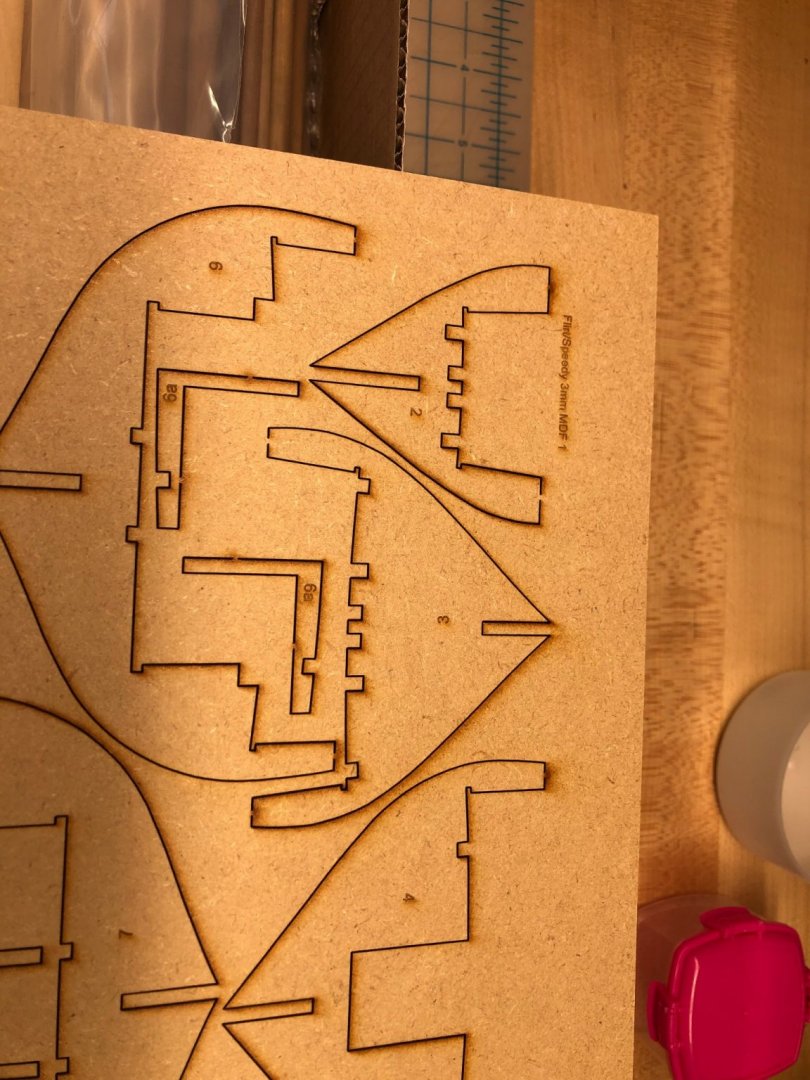
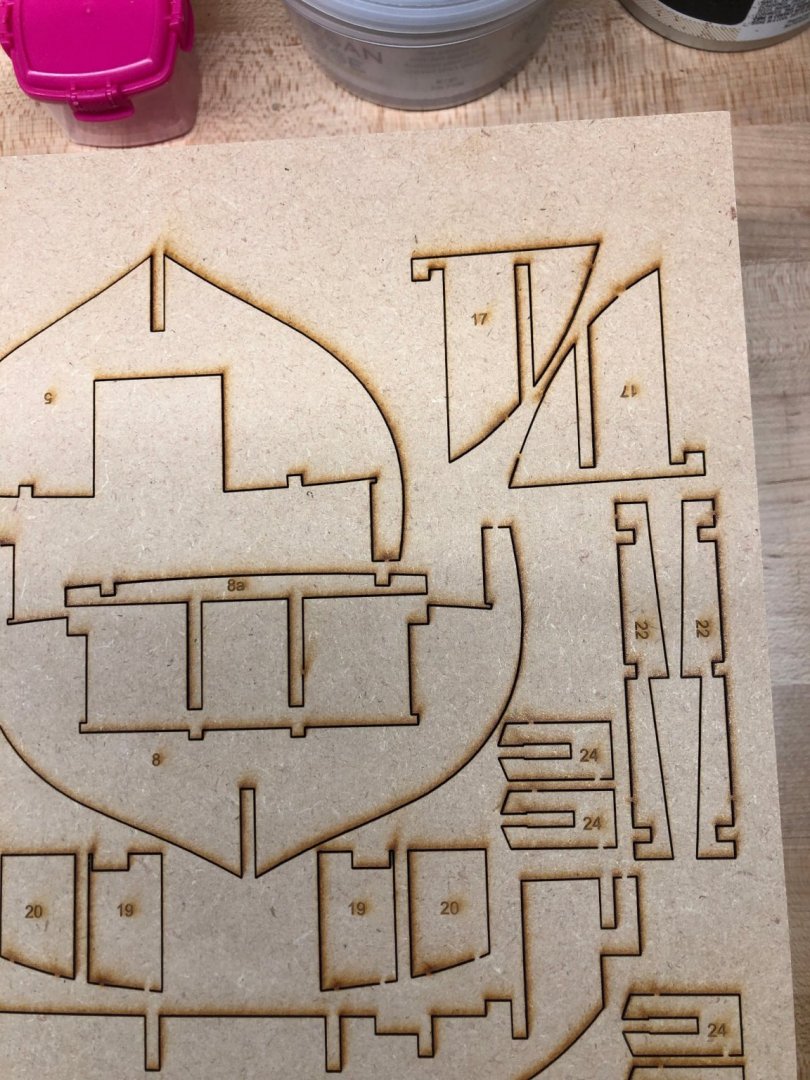
I cut out the keel and bulkheads, and test fit them together. Everything slots together perfectly, no ambiguity or slop whatsoever. The framework is really well conceived and engineered. For instance, there are these little floor braces (parts #22) which lock into bulkheads #9, 10 and 11 and serve to stabilize the end of the lower deck segments.

-
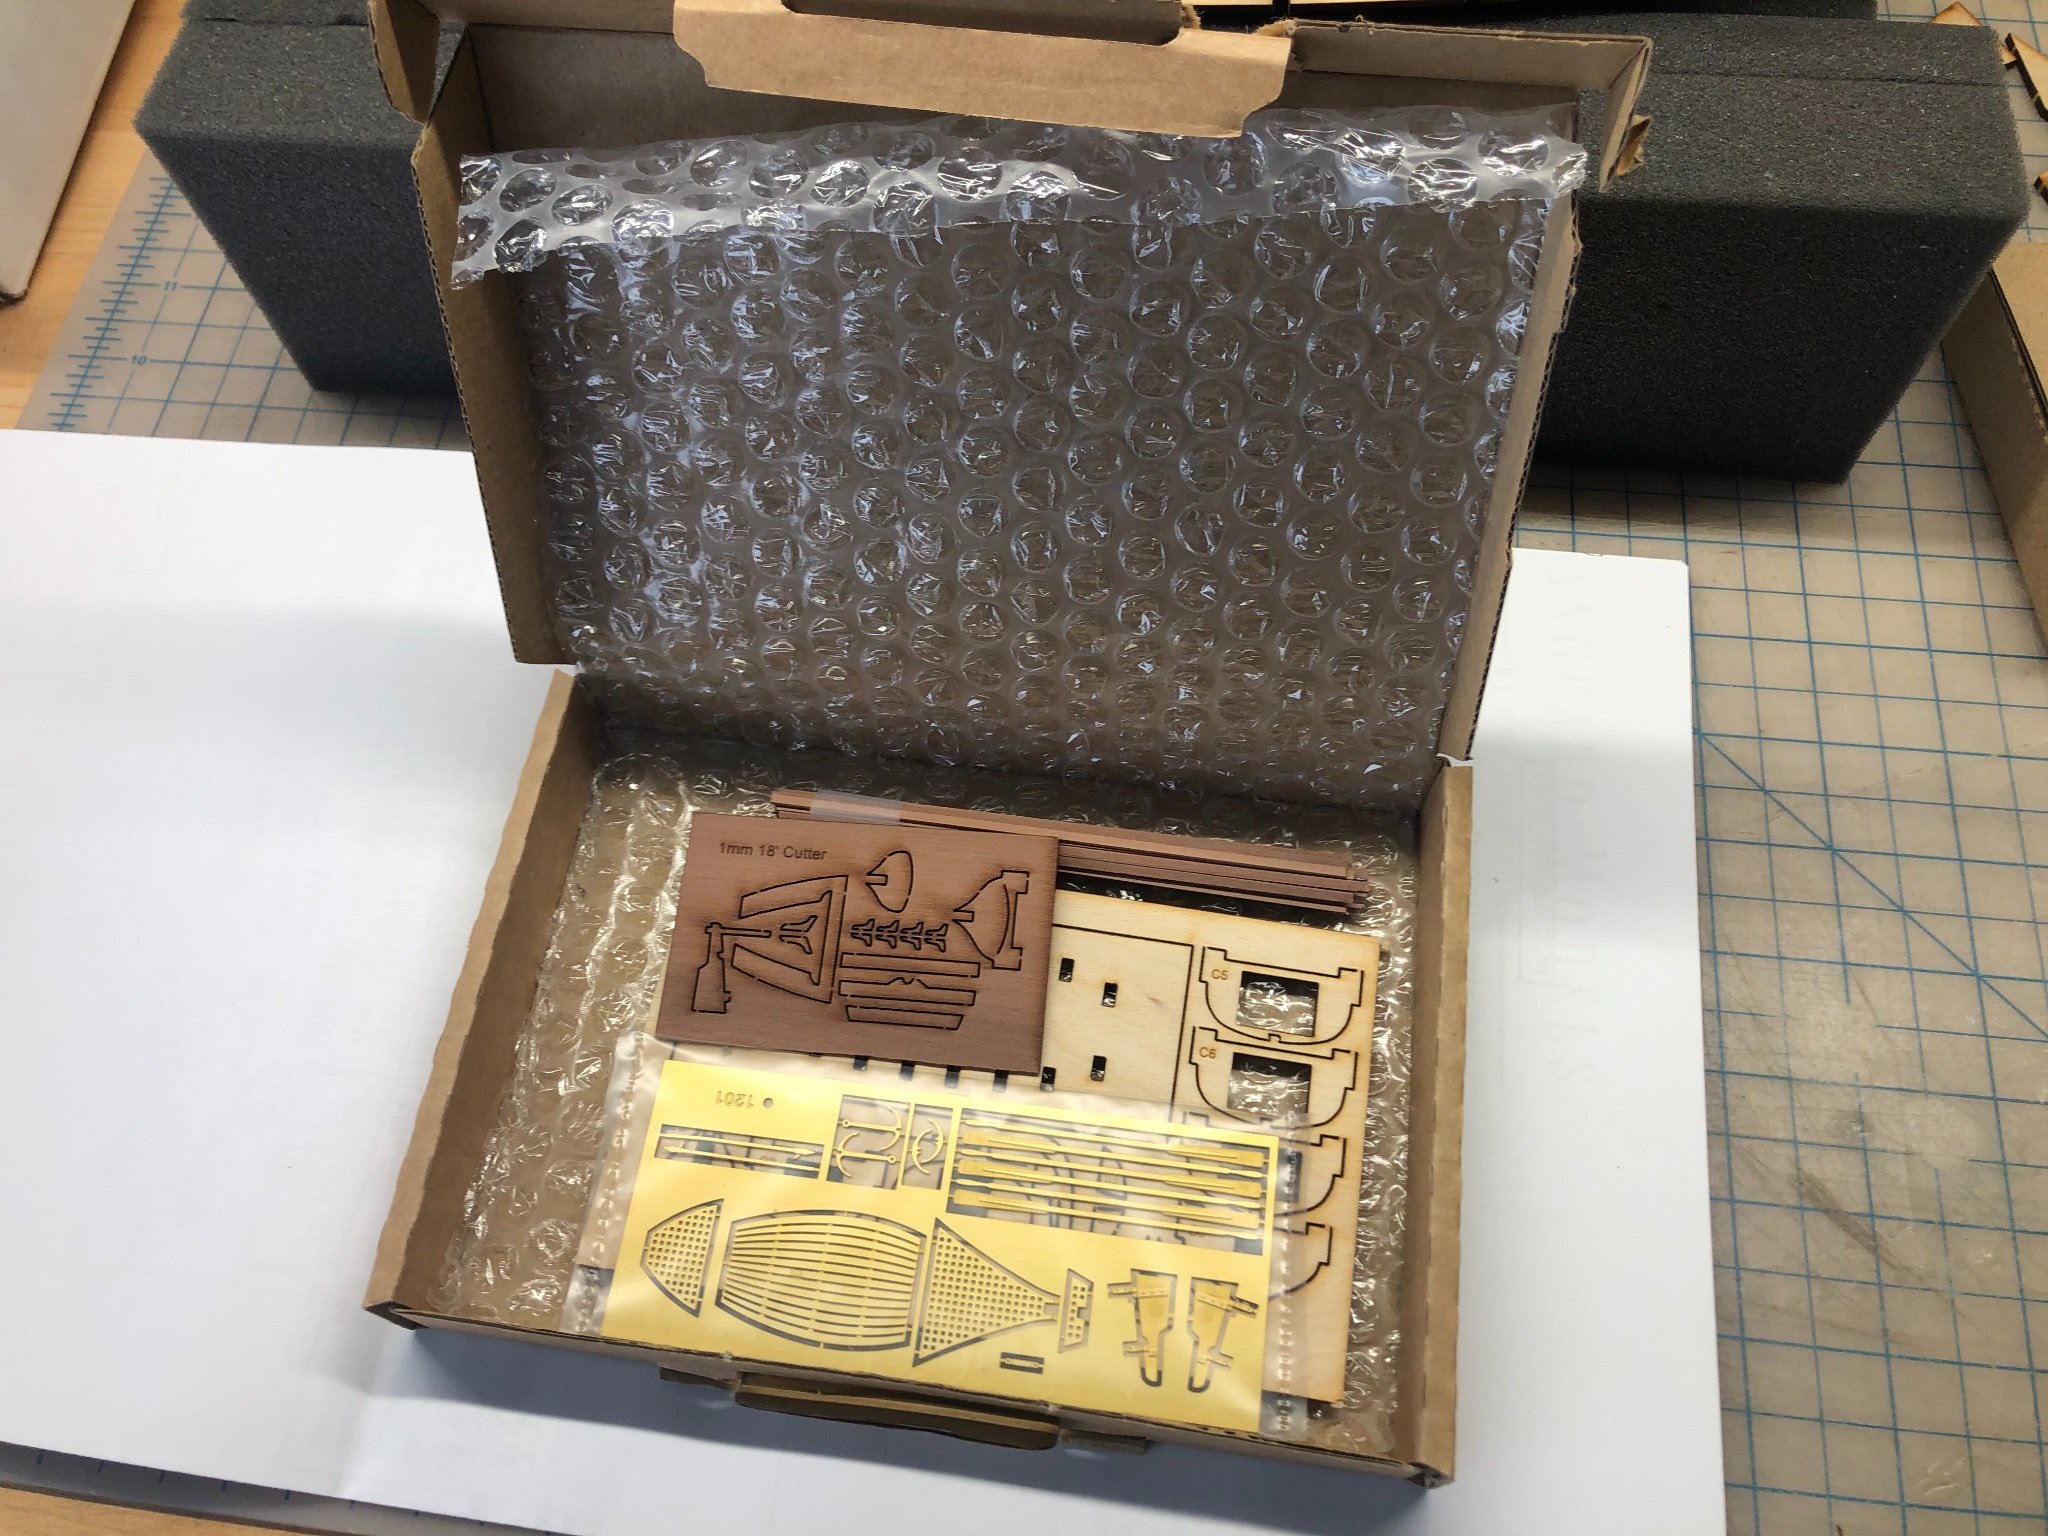
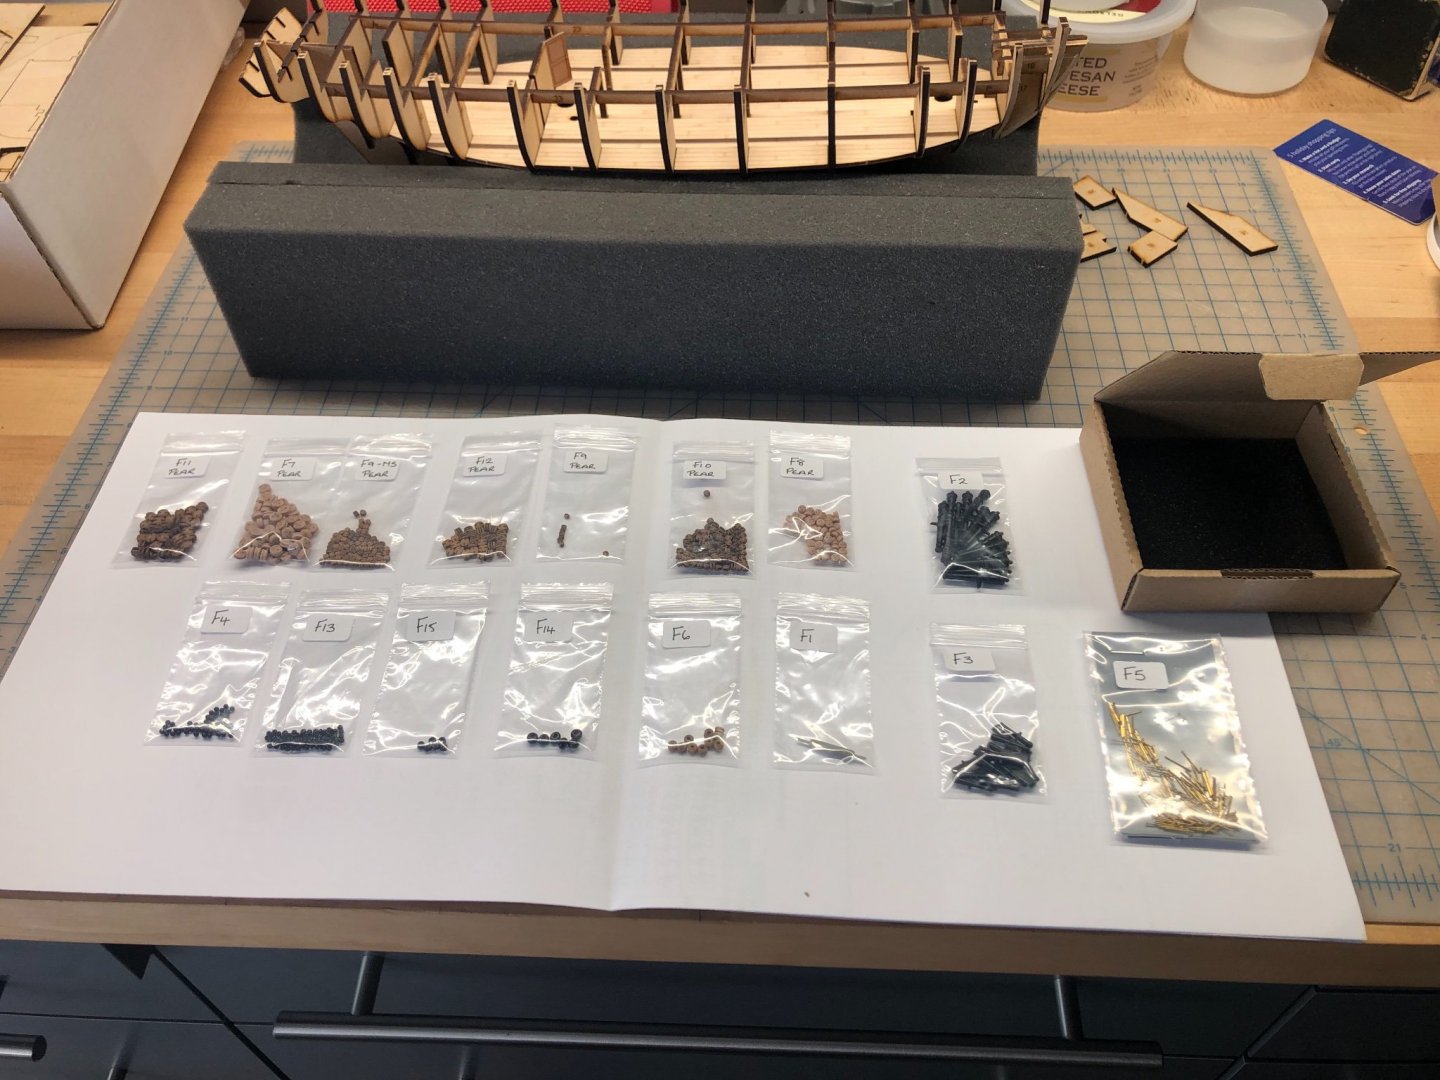
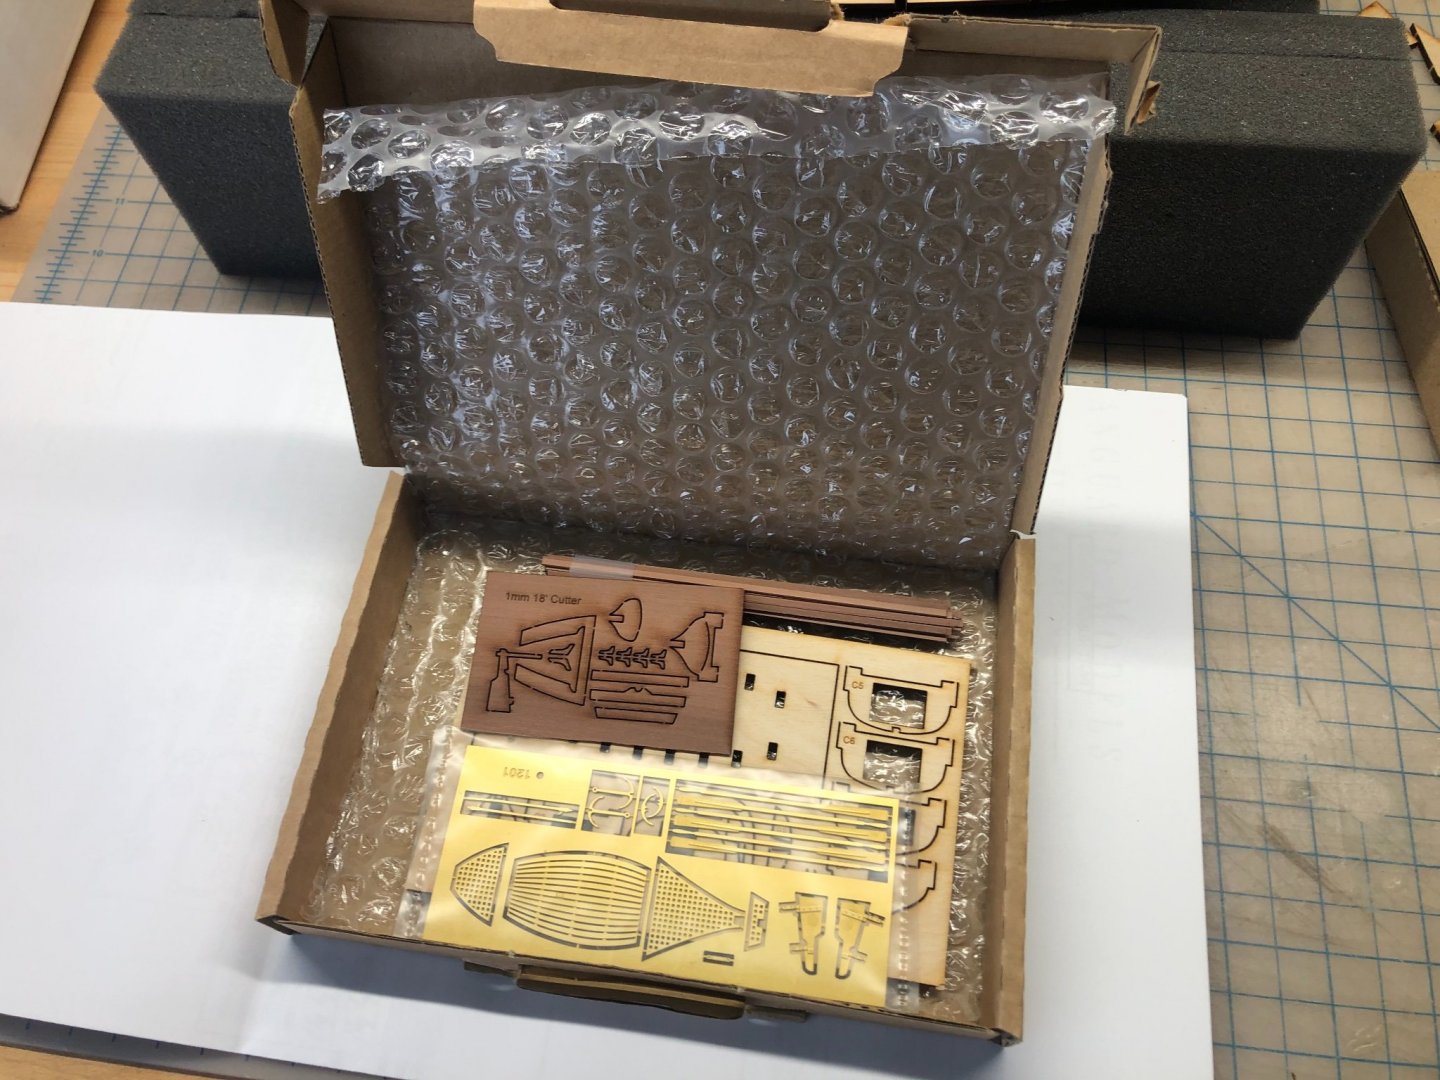
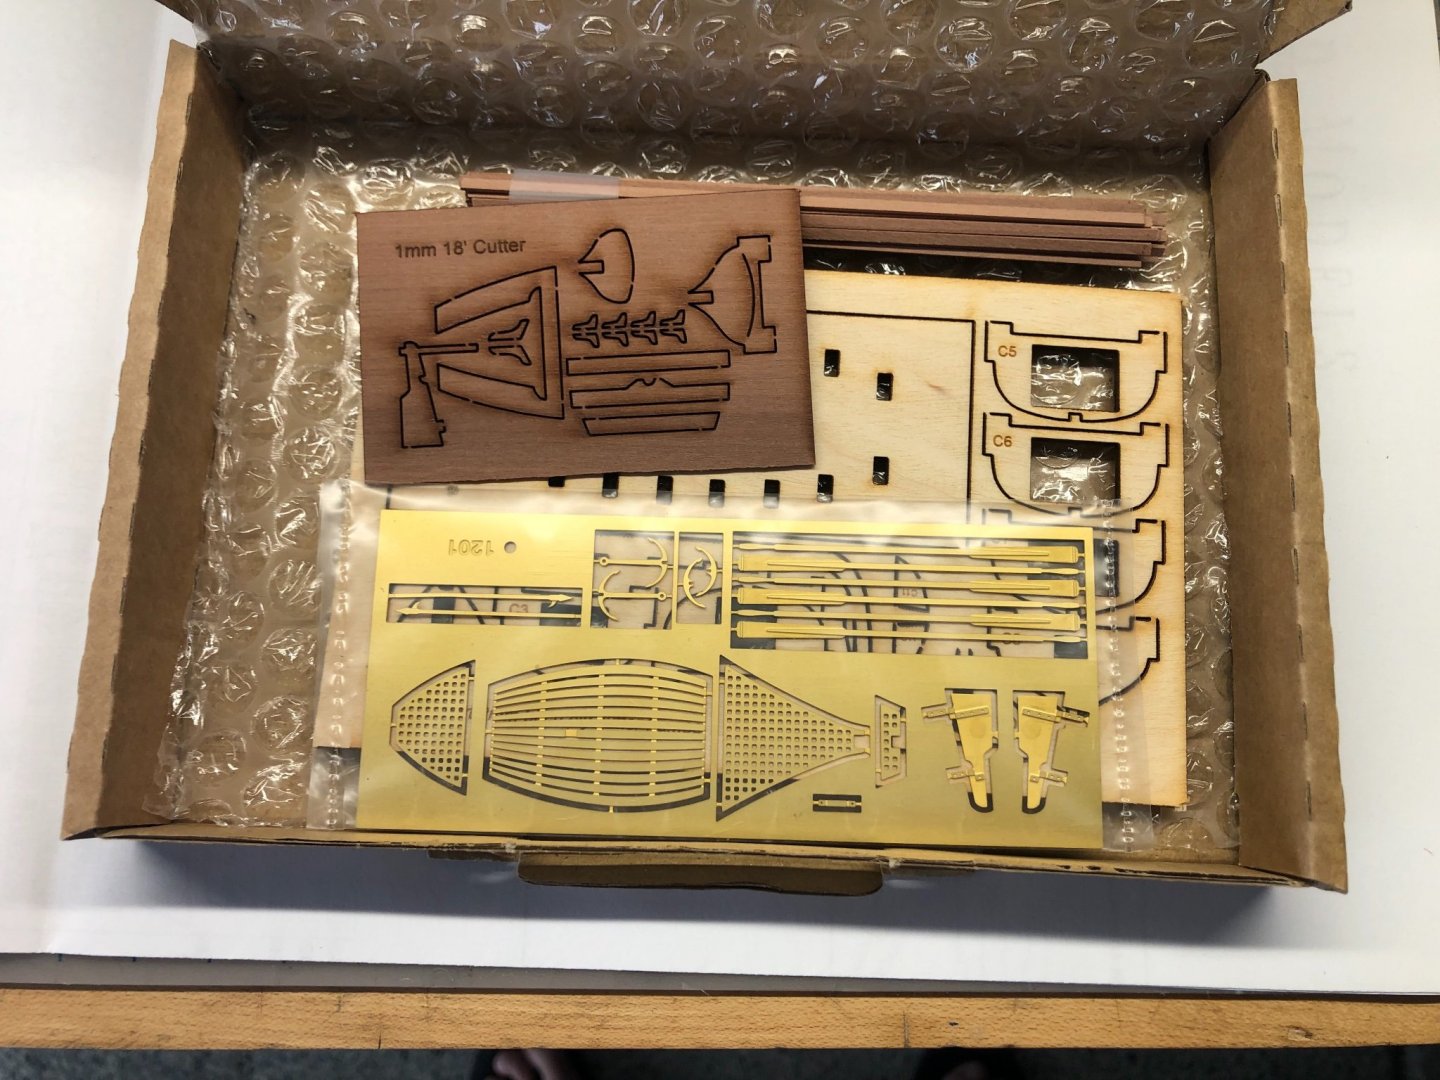
There are several other build logs on Flirt here on MSW, so I’ll try not to reiterate the same material, and I won’t go exhaustively through the contents of the kit. But a few introductory notes are worthwhile. Upon opening the kit, I was struck by how beautifully and carefully packaged it was. Chris clearly has made an effort to thoughtfully categorize all the components, and carefully protect them for shipping. Everything is thoroughly labeled, and bagged in plastic with care. As I said, I upgraded to the Master Shipwright pear block set, and this came in a little bespoke box. Very nice. All of the individual parts are carefully labeled in little plastic bags. The quality of the parts looks really good. The cannon look particularly well molded and detailed. The nicest surprise was the optional 18’ Cutter which I ordered. This came in another adorable little box, like its own little doll-sized kit. I see that Chris is offering several ships tenders in various sizes now on his website, so this kind of modularization make perfect sense. It’s such a great looking little boat kit, I can’t wait to try building it, if I can get my big, fat ham fingers to function properly enough to build something that tiny. As is the custom with Chris and Vanguard Models, the materials are top-notch, and the laser cutting is fine and precise. The cutter Chris is using must be pretty great, and it’s clear he has his settings dialed in, because there is very little over-burn on the parts.
-
Not at all! I’ve been working for a week on it, but I’m not retired. The modeling is not a full-time enterprise, sad to say. I grab an hour here, an hour there. I am just finishing the basic framing, and haven’t gotten to fairing or planking yet.
-
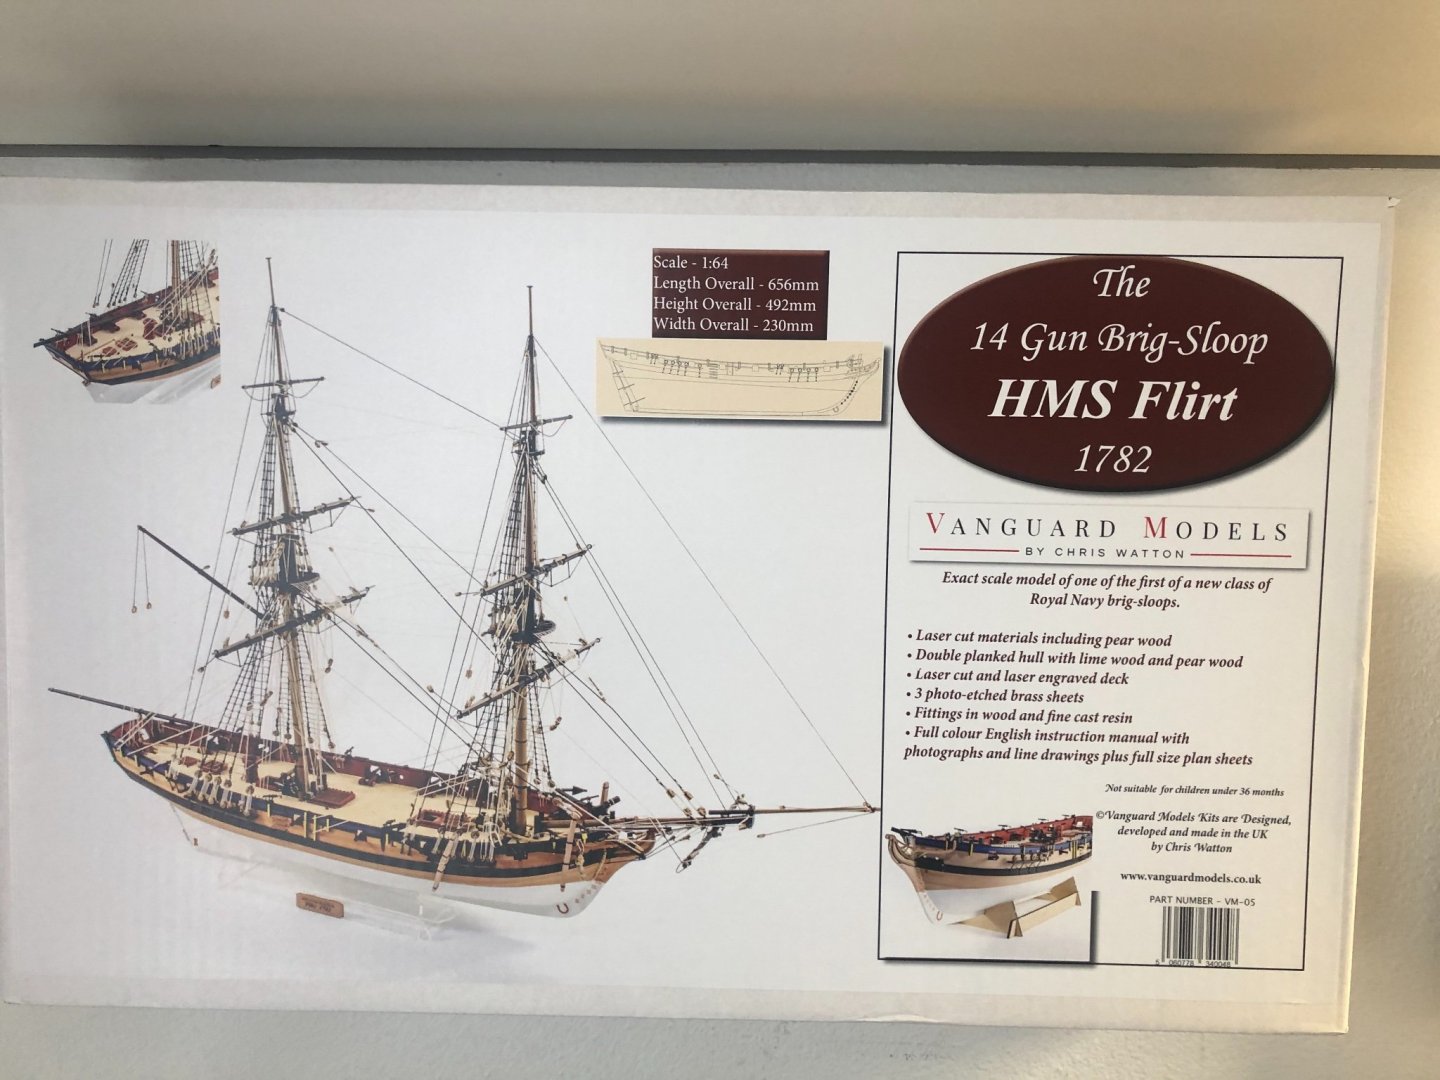
We’ll, I’ve got the itch again, and the only way to scratch it is…. Here we go again. By the time I was about halfway through my build of the Vanguard Zulu “Lady Isabella”, I was so impressed with the design, engineering and quality of the product that I thought I should get my hands on another of Chris’ kits, before they proved to be no longer available, for some reason. It’s pretty clear I didn’t need to worry, as it seems that Vanguard is a success, and I hope that Chris is making a go of the business. Nonetheless, I bought the HMS Flirt kit, and it’s been sitting on the shelf, waiting for me, since the middle of last year. I bought the standard version of the kit, because I just love the color and the quality of the pear wood. I know lots of folks love the boxwood material, but I just think the color and character of pear is preferable, at least to my eye. Personal taste, I suppose. But the Zulu had such beautiful details rendered in pear, and I really love it. I did purchase the optional pearwood block set, and the optional ship’s launch “mini kit” which comes in its own adorable little custom cardboard box. It’s almost like it’s a model for one of my daughter’s “American Girl” dolls. So, off we go. I’ve been building for about a week, so I’ve gone a little bit down the road. I’ve been taking some photos along the way, and I’ll be posting soon. My goals with this build is take on something a bit more complex and challenging than the Zulu, and to learn a lot as I go. I’m planning to stick pretty closely to the stock kit and Chris’ plans, but I’ll likely add a few custom details along the way, as appropriate and as I pick up skills and ideas (that’s pretty much how I approached the Zulu). I’ll probably rig up the cannons, for example. Any ideas you all have that you think would be helpful or interesting, I’m all ears.
-
And…. having a build log gives me a conduit with which to draw all of you smart, experienced modelers into answering my dumb questions! Be careful what you wish for, my friend.
-
OK, I’m in. Stay tuned.
-
I knew someone would say this.
-
Thanks Glenn! It's looking great so far. I just started my Flirt kit, so I'll be watching with interest. Not sure if I'll be doing a build log, as there are quite a few Flirt/Speedy logs covering the same territory. But I may jump in, as a build log is a way of assuring accountability. I see that you painted the bulkhead around the door to the Captain's cabin. I have been considering doing that, but it's a bit hard to tell how much of that area can be seen through the deck hatch of the finished ship. Can any other Flirt/Speedy builders offer an opinion? Looking good! -Erik
-
We knew you’d get back at it when you were ready, Bob. Looking forward to the next chapter.
-
Thanks so much, James. Understood! No worries at all. I’m really looking forward to building Flirt, and I’m blessed to have your build log here as a guide.
- 109 replies
-
- 1
-

-
- Vanguard Models
- Flirt
- (and 1 more)
-
I thought I should post a follow-up on my previous post. I’ve been in correspondence with Chris regarding the beveling of the parts. He was quite clear that bevel lines have never been a feature of either the Flirt or Speedy kits, as I’m sure those of you who have built them can attest. There is some language in the manual which is a bit ambiguous, and having just finished Chris’ Zulu kit (which features the bevel lines), I jumped to the conclusion that they should have been included with Flirt. My mistake. Thanks so much to Chris for the information, and for his excellent and personal customer support!
- 109 replies
-
- 1
-
-
- Vanguard Models
- Flirt
- (and 1 more)
-
Greetings y'all! I'm getting the itch again, and I'm starting to think about building Flirt. I've been reading the build logs, and studying the plans and the manual. I have an initial question for Chris and James. Regarding the pre-beveling of some of the bulkheads and frame parts: the manual explicitly states that there are engraved bevel lines on some of the parts, and James' build log suggests this. However, looking at my parts sheet, I don't see any bevel lines engraved into any parts. Am I missing something? If they are not there, is there a way to get a drawing of these lines so I could transfer them to the parts? I can't imagine trying to pre-bevel these parts without knowing where the lines are. Thanks for any advice you can provide! -Erik

- 109 replies
-
- 1
-
-
- Vanguard Models
- Flirt
- (and 1 more)
-
Beautiful work indeed, Derek. Thank you so much for taking the time to share your experience with all of us. It’s a blessing to have these kind of logs available for future reference. I have Chris’ FLIRT kit waiting for me, so this log will be a terrific reference. Beautiful model, congratulations on getting across the finish line.
- 725 replies
-
- 2
-
-

-
- vanguard models
- speedy
- (and 1 more)
-
James- Amazing! This is another spectacular build. Thanks for sharing all of the wonderful details. It certainly looks like more incredible design and engineering from Mr. Watton. The stern decoration is really marvelous. Bravo!
- 355 replies
-
- 4
-
-
- vanguard models
- Sphinx
- (and 1 more)
-
Thanks so much, Bradley!
-
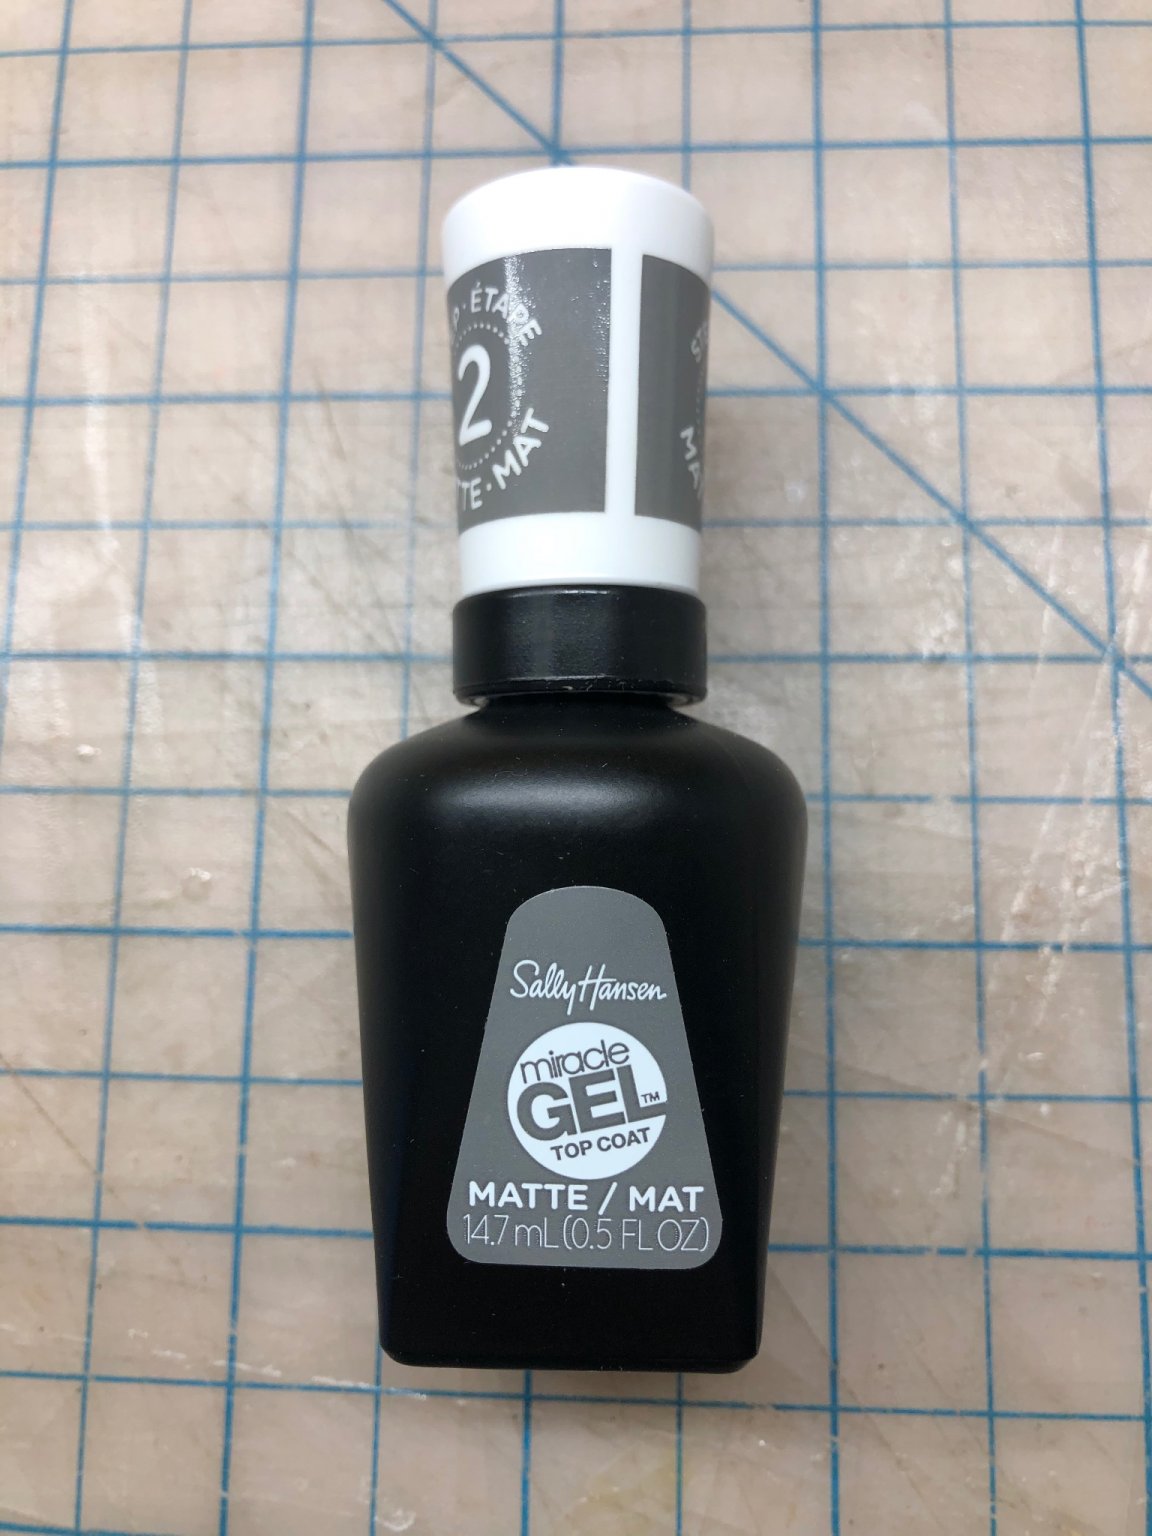
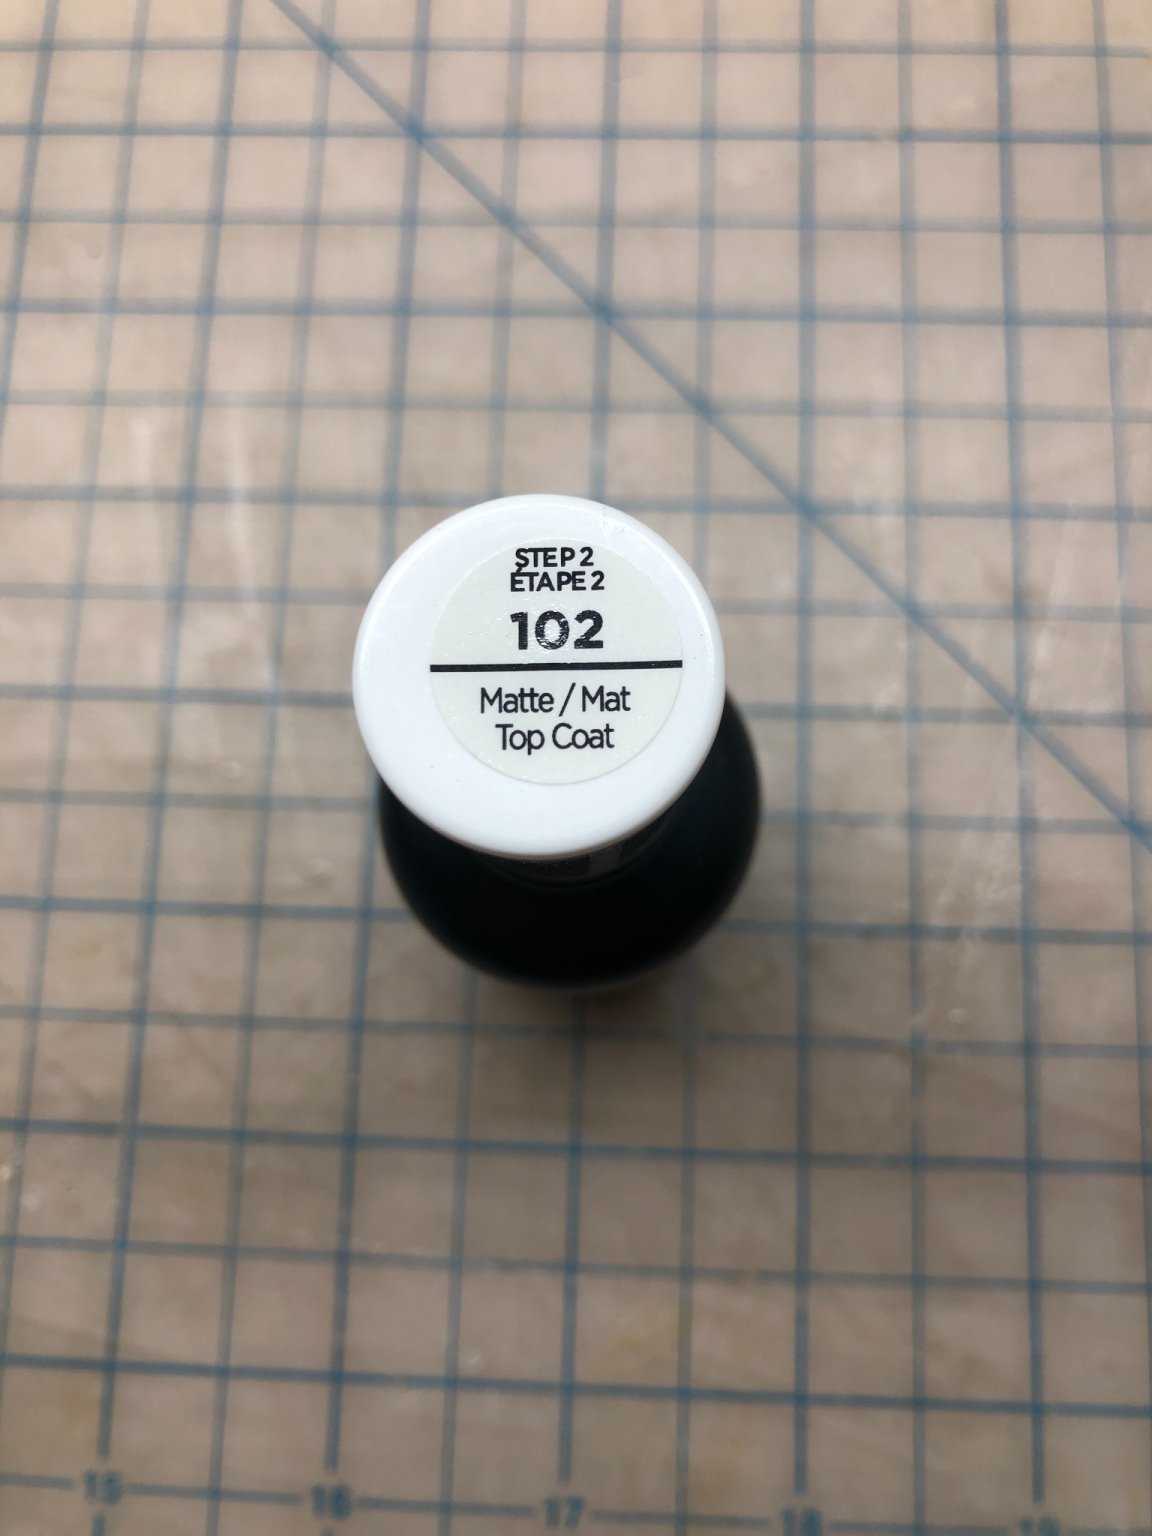
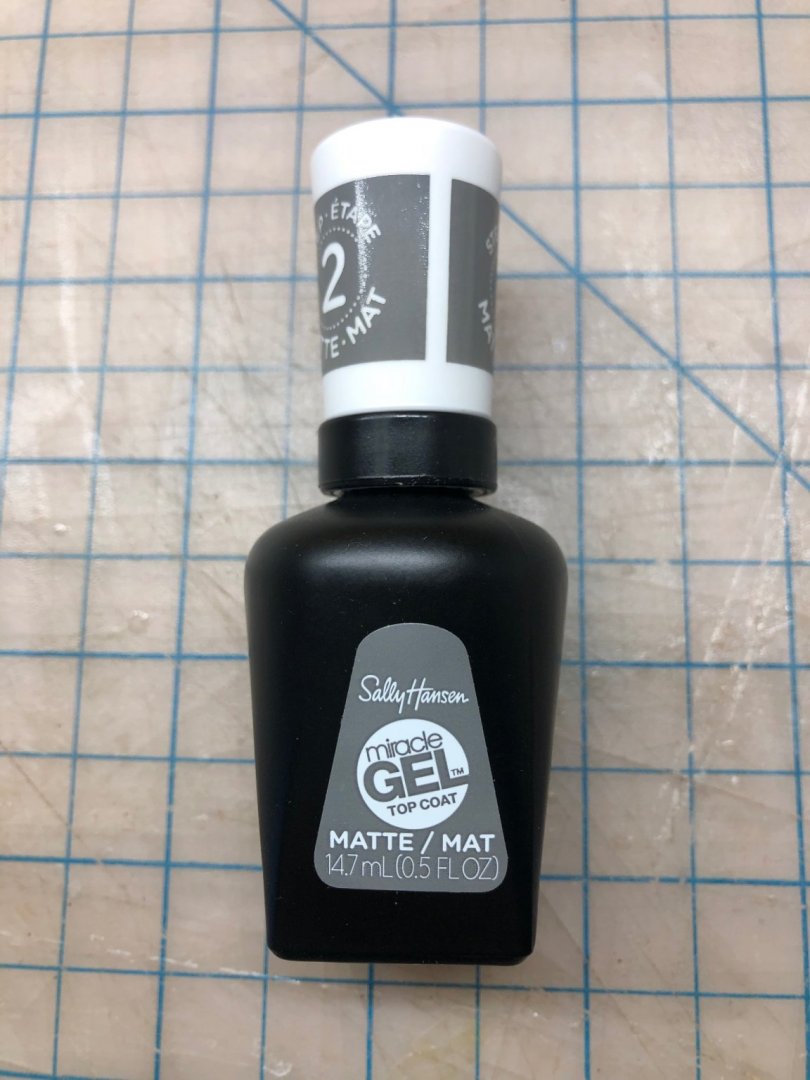
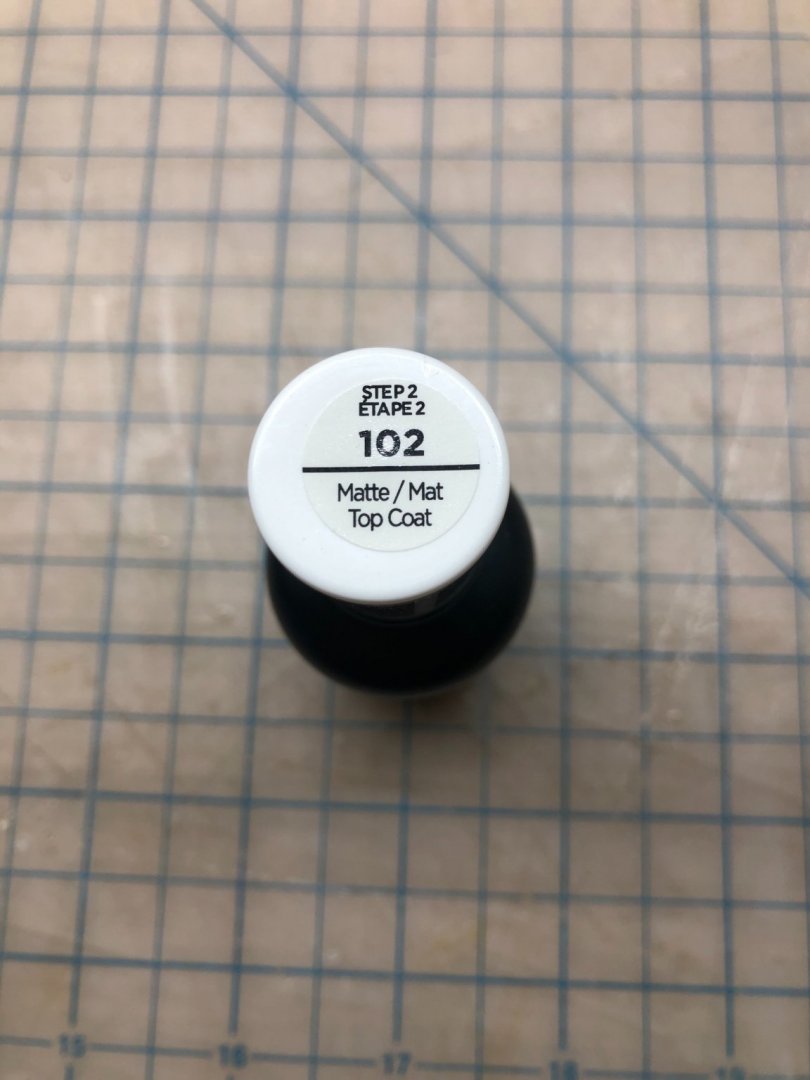
A follow up on the nail polish product. I received this from Amazon. It indeed seems to be the “secret sauce”. I tested it on on some scrap wood and threads. It is indeed lacquer based, quite viscous and controllable. Dries fast, with a nice matte finish. Looks very natural on thread and cord. I think this stuff, or something very similar, is the perfect product for setting knots, and controlling/fixing coils of lines and sheets. Recommended.
- 222 replies
-
- 3
-
-
- First Build
- Lady Isabella
- (and 2 more)