HOLIDAY DONATION DRIVE - SUPPORT MSW - DO YOUR PART TO KEEP THIS GREAT FORUM GOING! (Only 13 donations so far - C'mon guys!)
×


Jeff-E
-
Posts
699 -
Joined
-
Last visited
Content Type
Profiles
Forums
Gallery
Events
Everything posted by Jeff-E
-
Hi Rowand, I would like echo everyone else's comments and congradulate you on an excellent job on your first build. I attemted this model about 20 years ago and failed dissmally, it was my first attempt at a wooden ship. I have learned alot since then espeially from this site. Keep up the great work.
-
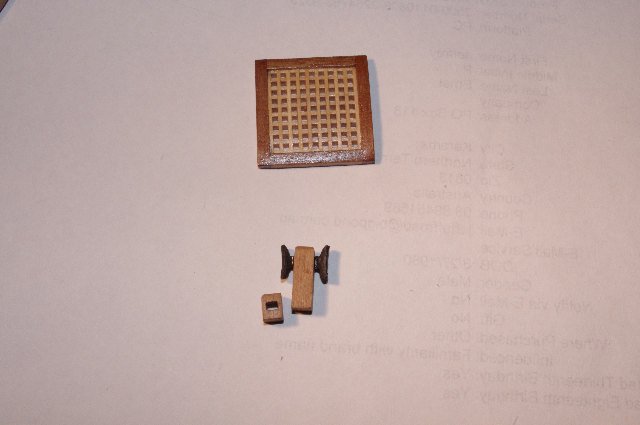
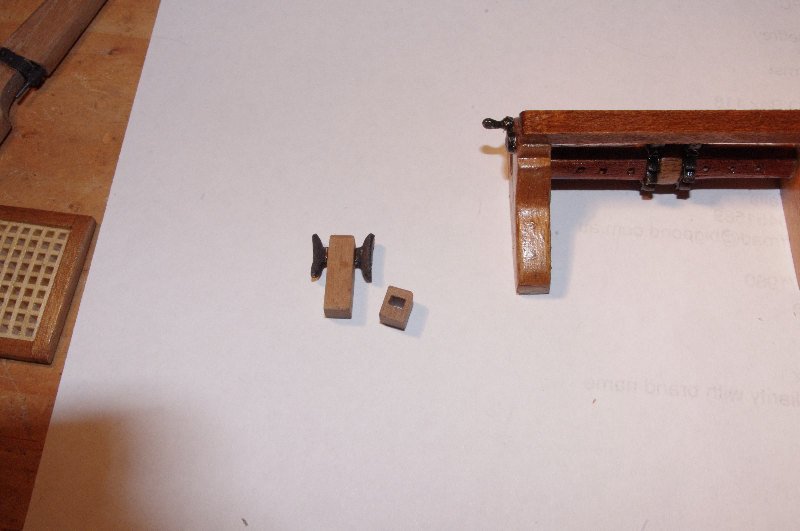
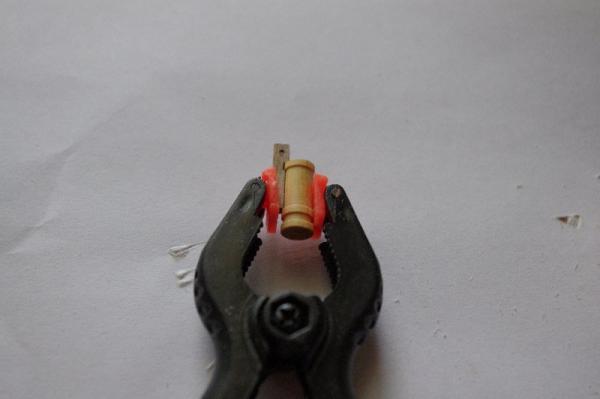
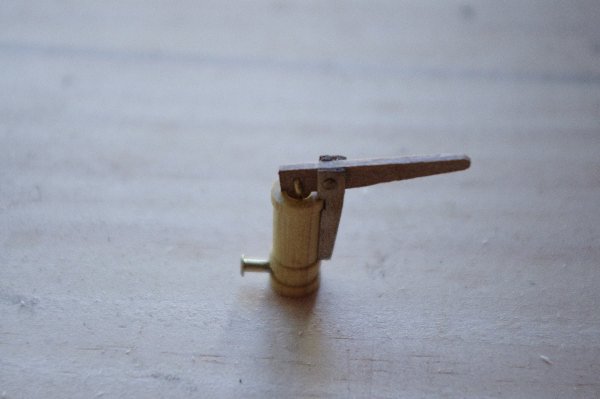
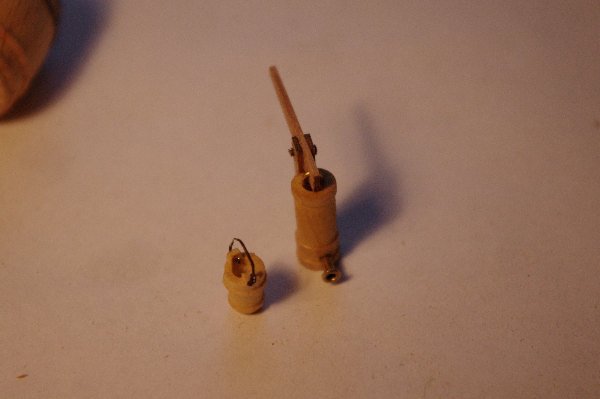
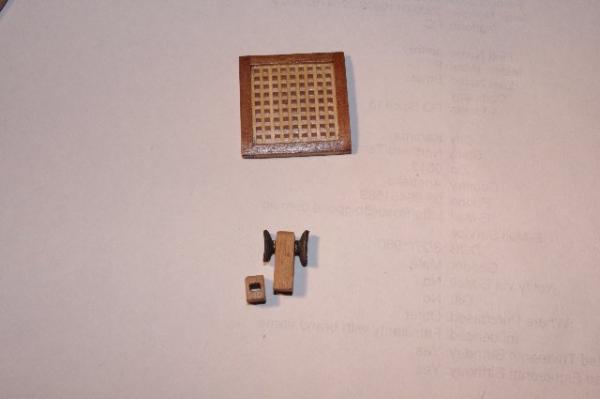
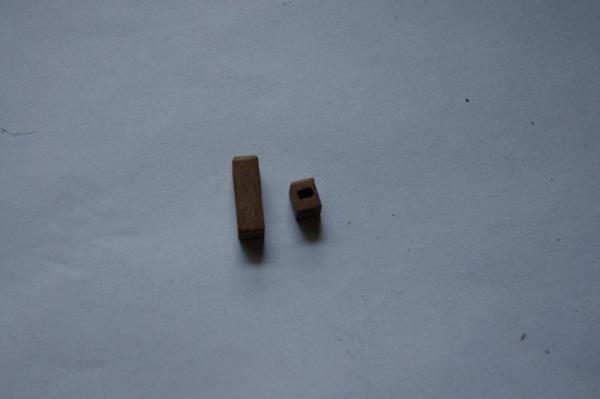
The pumps are the nextlot of pictures they were straight forward to make as they were supplied in a little kit of their own and I must add of very good quality
-
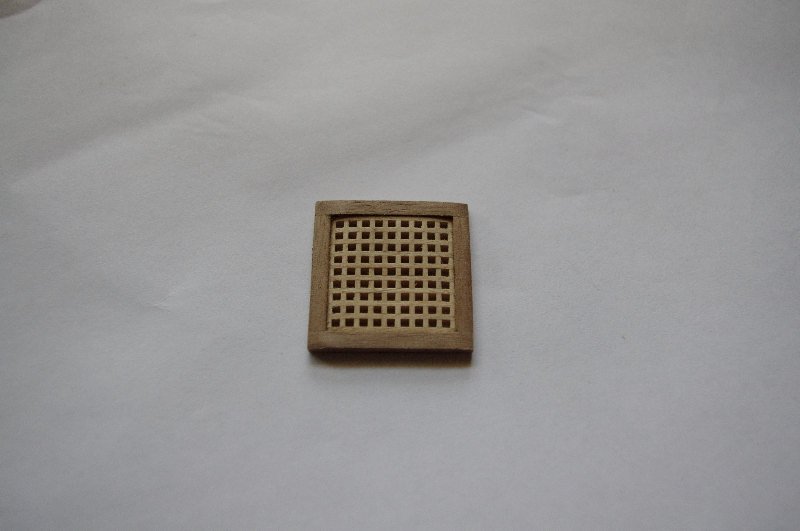
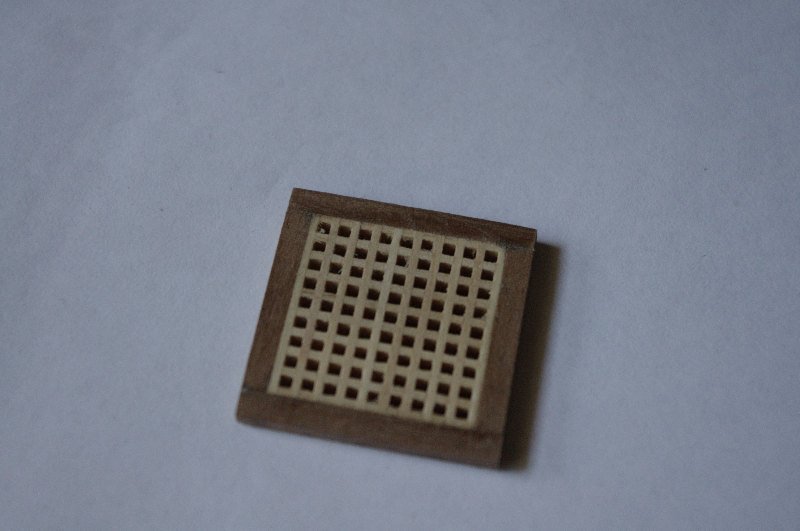
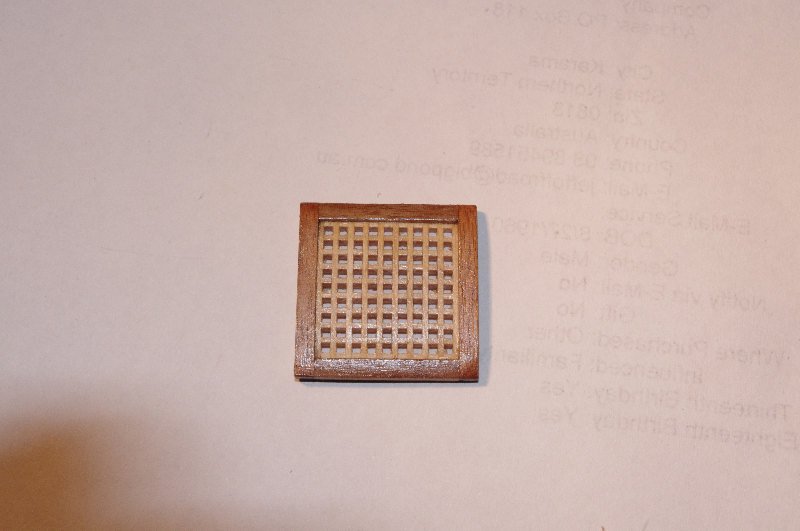
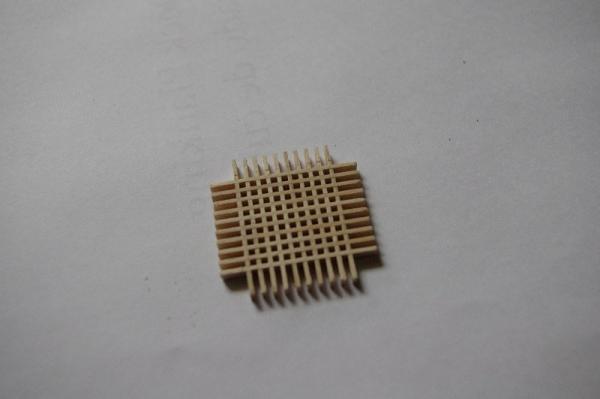
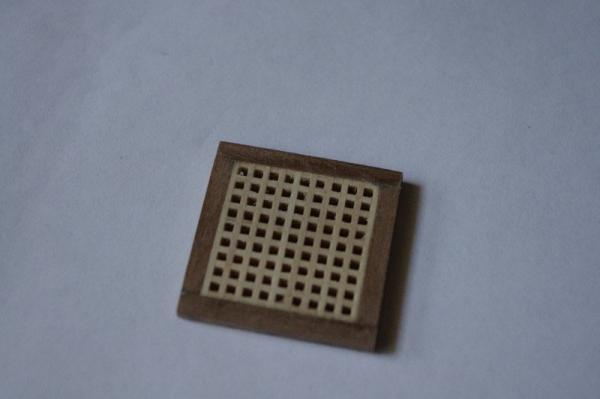
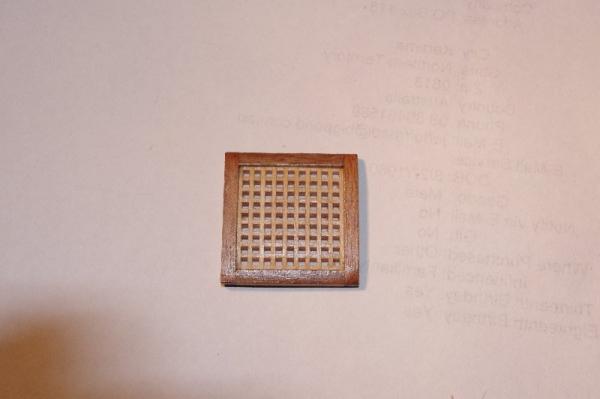
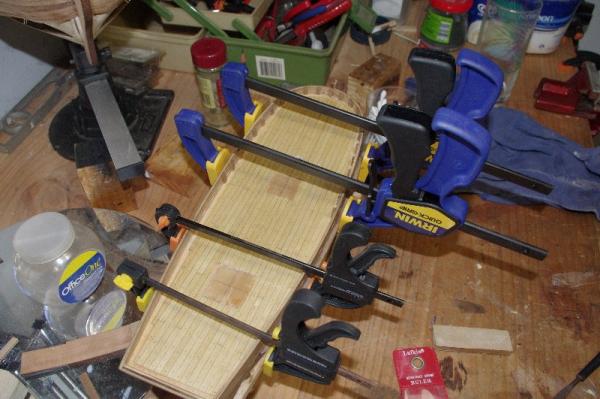
The next set of pictures show the costruction of the hatch grating this was made as per the instructions and when completed it was brushed with diluted PVA glue and sanded so it curved shape from port to starboard viewed from the bow or stern

-
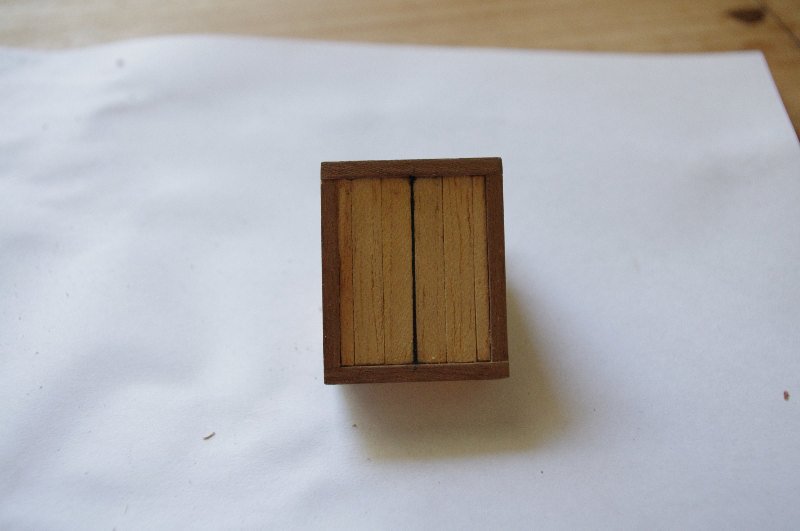
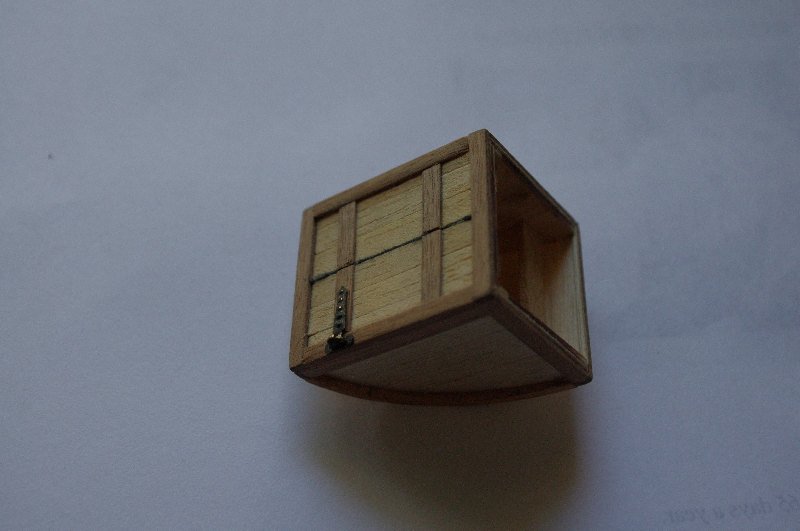
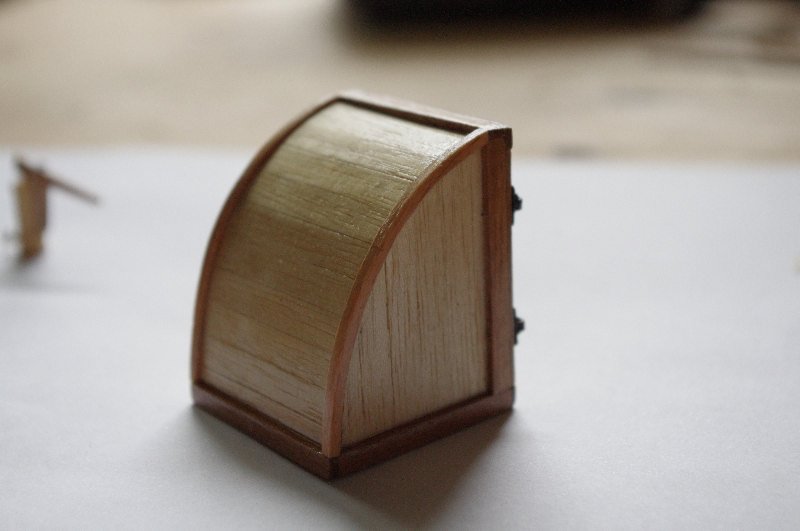
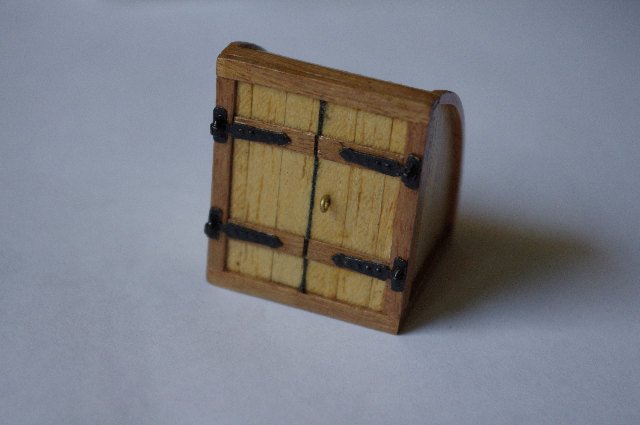
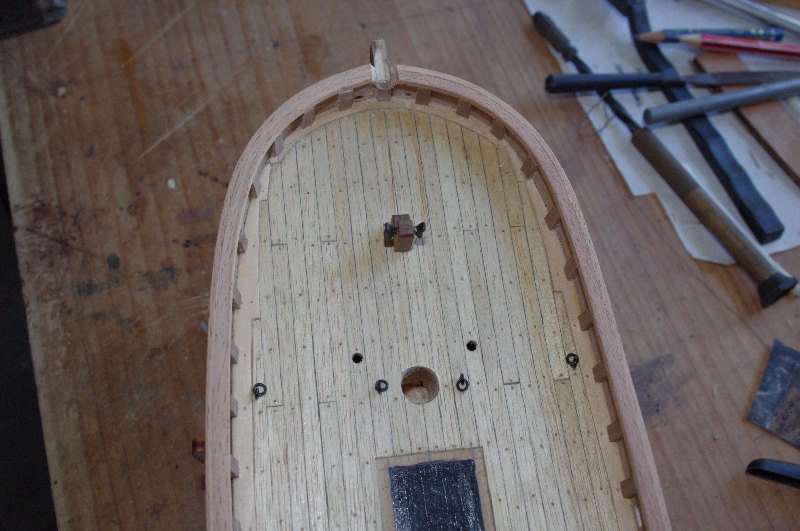
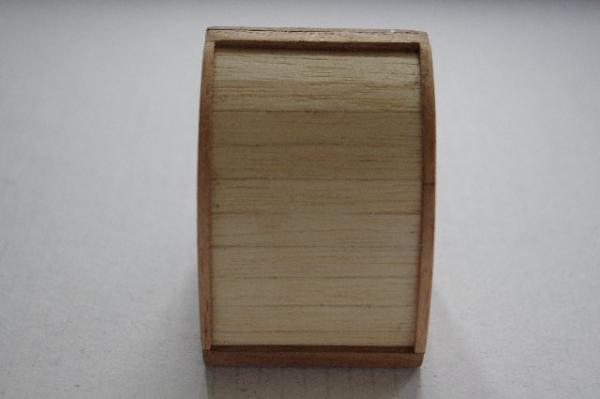
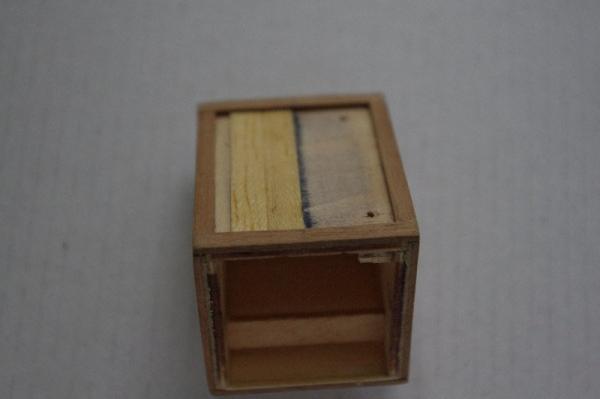
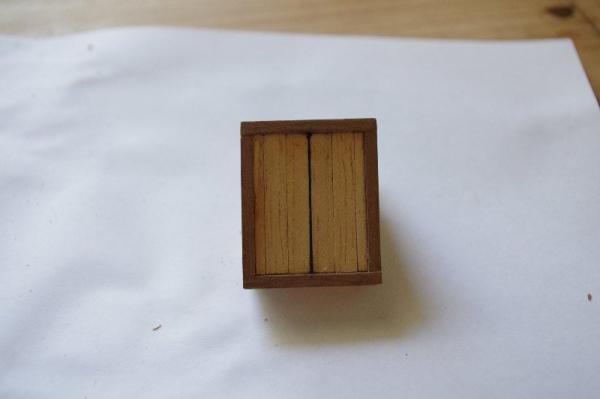
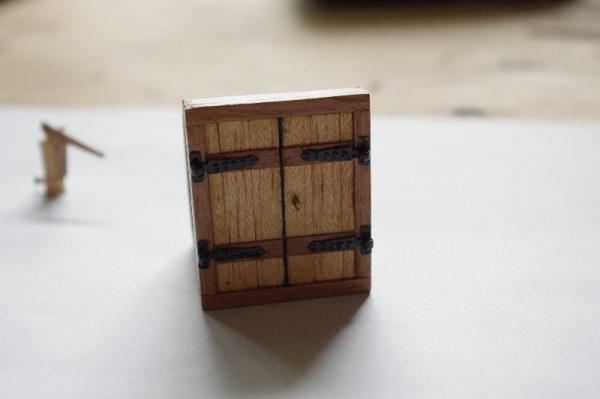
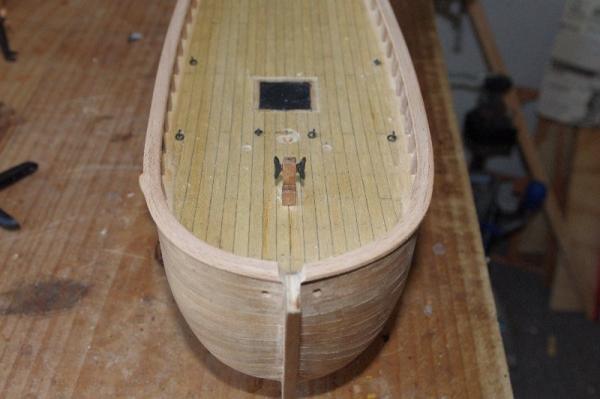
Hello everyone, The next step was to fit some of the deck funiture and the baulsters for the rear hand rails. The first lot of photos show the construction of the companionway, elmtree pumps and the water barrel stand the hatch grating . The door hinges on the compaionway were modified from the kit supplied ones as they were just a straight hinge with no means of pivoting, I cut some brass stip and bent some brass wire to represent the 'T' of the hinge. I also planked the doors differently from how the instructions show them.


- 98 replies
-
- 1
-

-
- norfolk
- modellers shipyard
- (and 1 more)
-
Hi Jason and Brian, Thank you both for your kind comments and for looking in Sorry to hear about your fish tank Jason hope you don't have to wait too long before you can order your new model . I am actually up to the rigging now. I've been trying to update the log reguarly to catch up to where I am at presently hopefully I can get this done over the next few days
-
Hi Anthony, Very nice work. I like the detail in these cross section models. I'm about half way through the first planking on the Victory Bow Section by Panhart but it's on hold at the minute while I finnish off the Norfolk . Will look forward to your next update
-
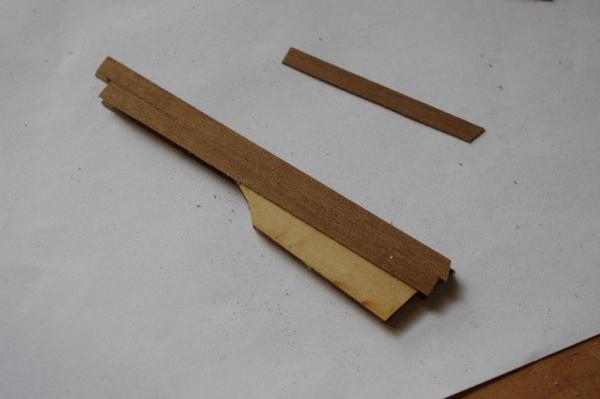
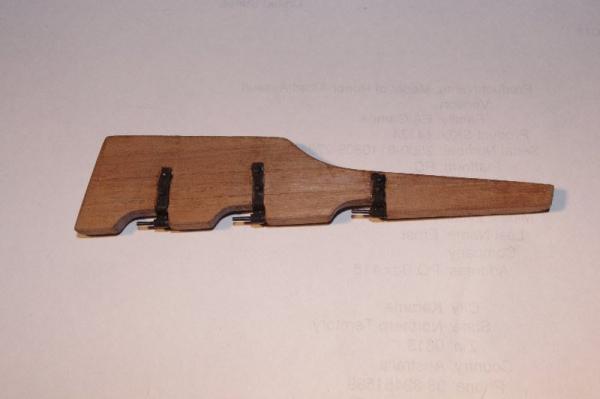
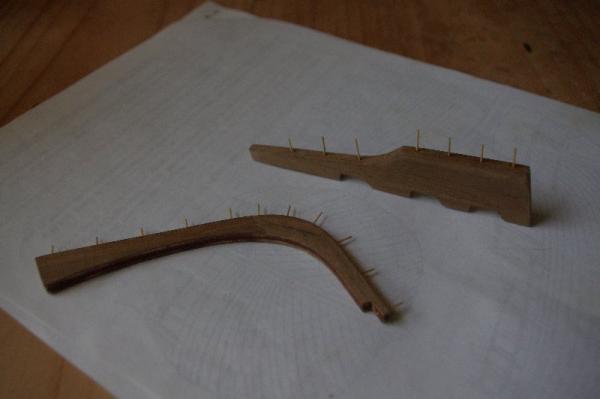
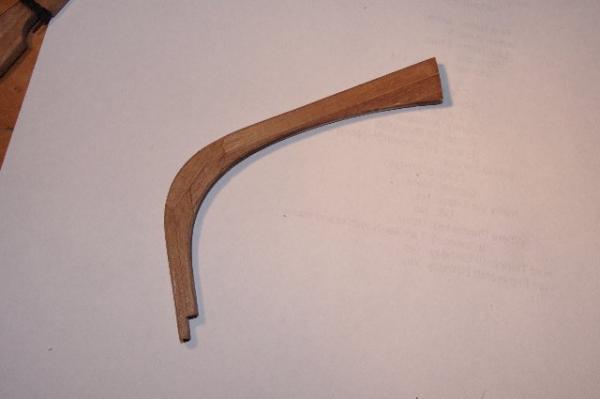
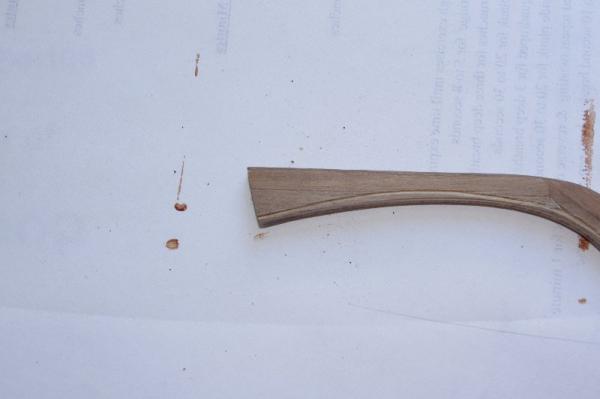
Hi All, My next task was to file the stem post and cap rail to take the bowsprit. After this was done I fitted the head stock, driiled the holes for the anchor rope and fitted the eye bolts to the deck. All of the eyebolt rings are soldered to stop them opening up when tension is applied to them. As with all the deck furniture the headstock was made some time ago. It is made from 4mm x 4mm walnut and was supposed to have a piece of brass rod inserted through it 5mm from the top to belay the jib traveller lines to. I decided to make 2 small cleats to attach to it instead of the rod, there were 4 of them laser cut on one of the 4mm plywood sheets which were not going to be used. They were a bit large so I filed them down to size and attached them to the headstock with small copper dowels. I also fitted the 5 foot grips to the deck. The first 2 pictures are of the headstock before ti was fitted. The second pic also shows the anchor winch which will be described later.

- 98 replies
-
- 1
-
-
- norfolk
- modellers shipyard
- (and 1 more)
-
Hi Brian, Thank you for looking in on my log and for your kind comments.
-
Hi Mark, Glad to see you are reposting your log as a lot of us have done. I think your planking turned out very nicely. I will pop in from time to tmie to see how you are progressing.
-
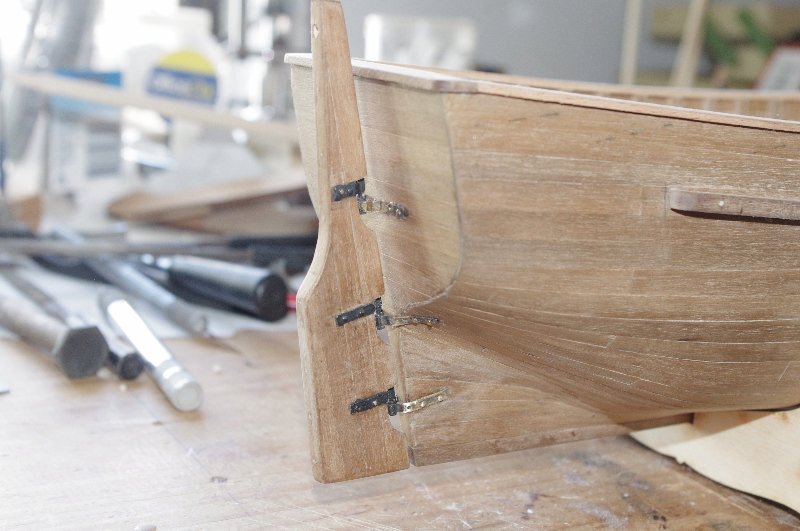
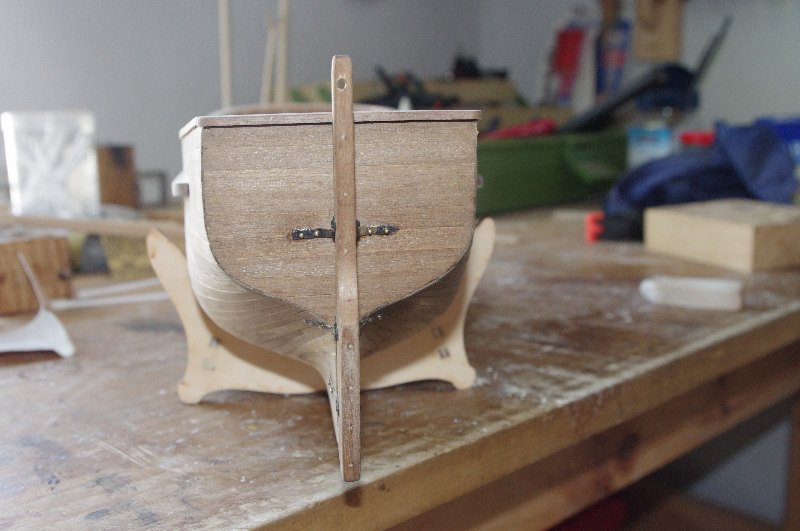
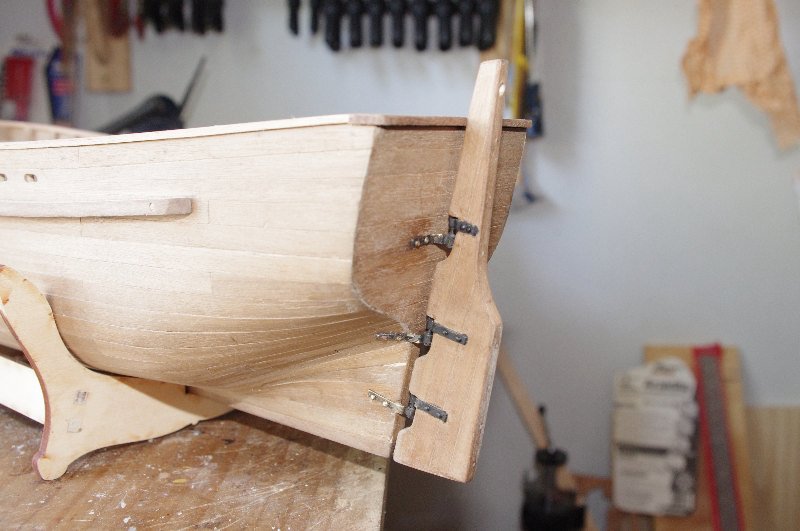
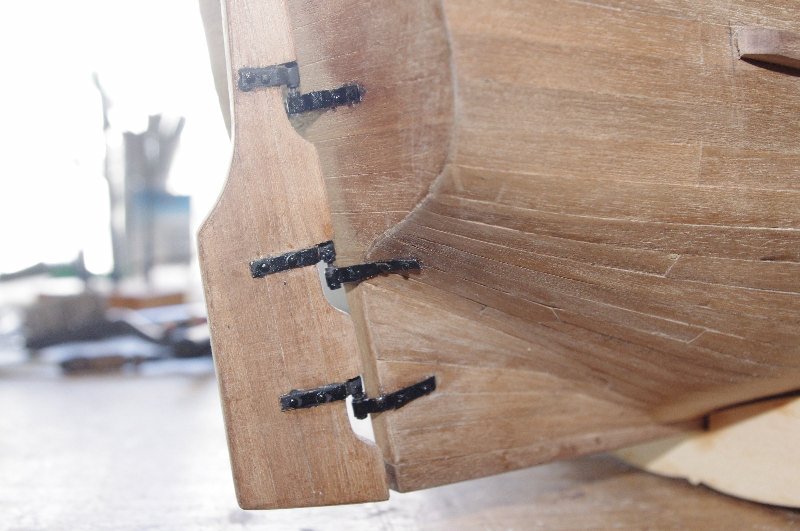
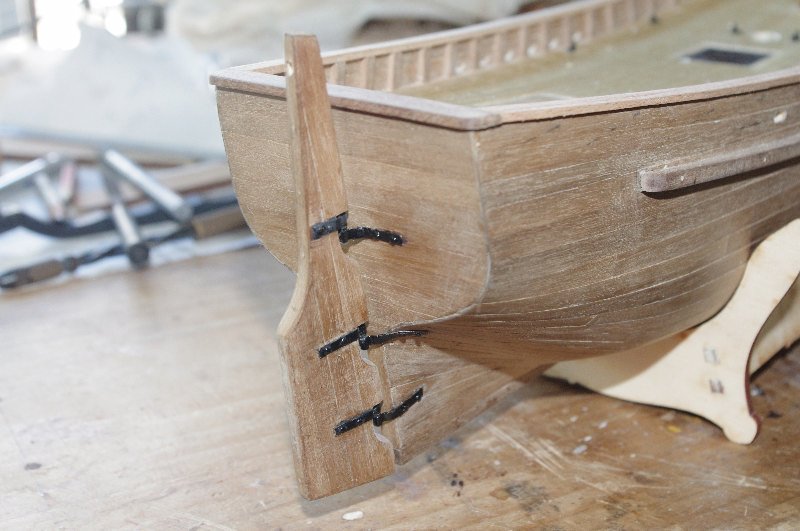
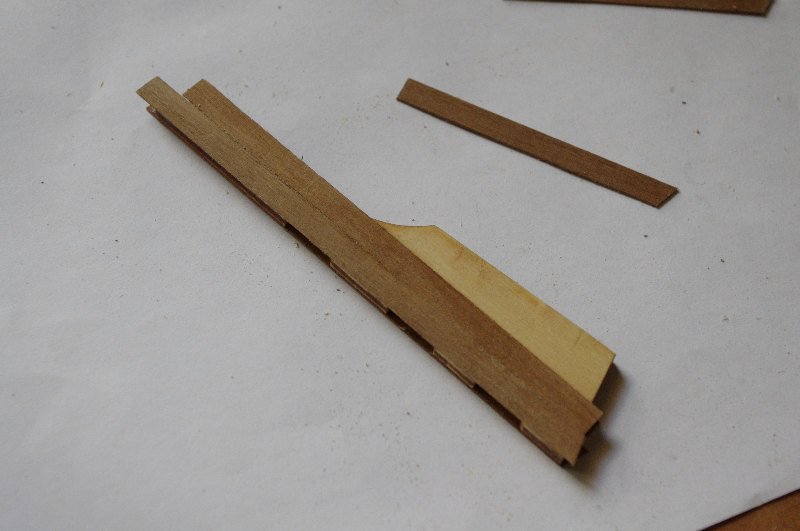
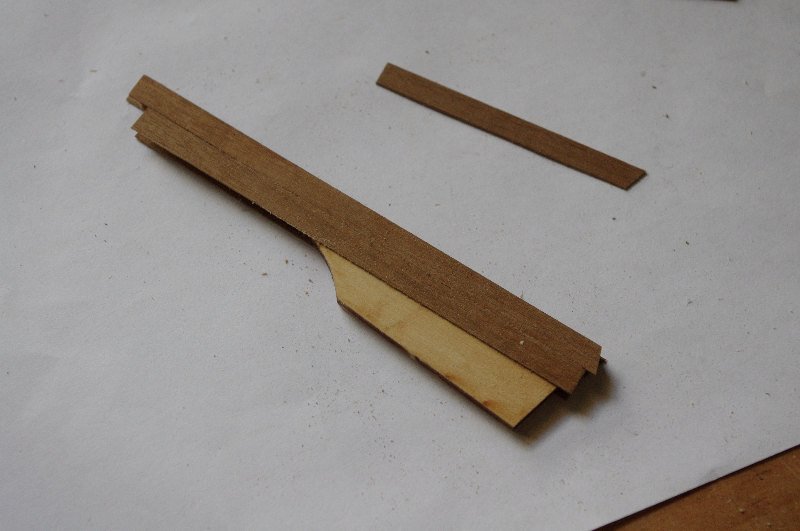
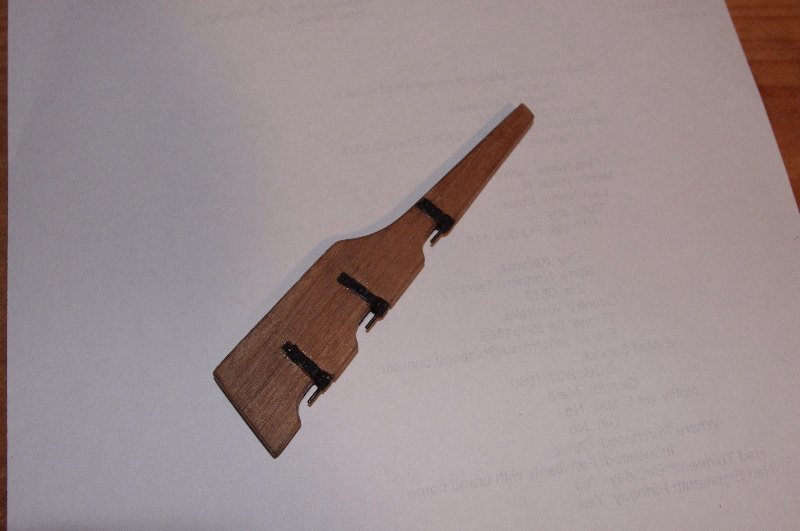
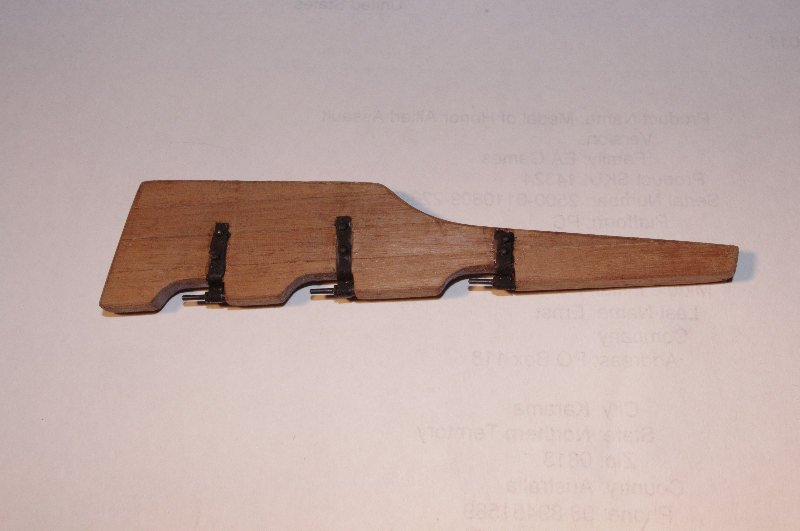
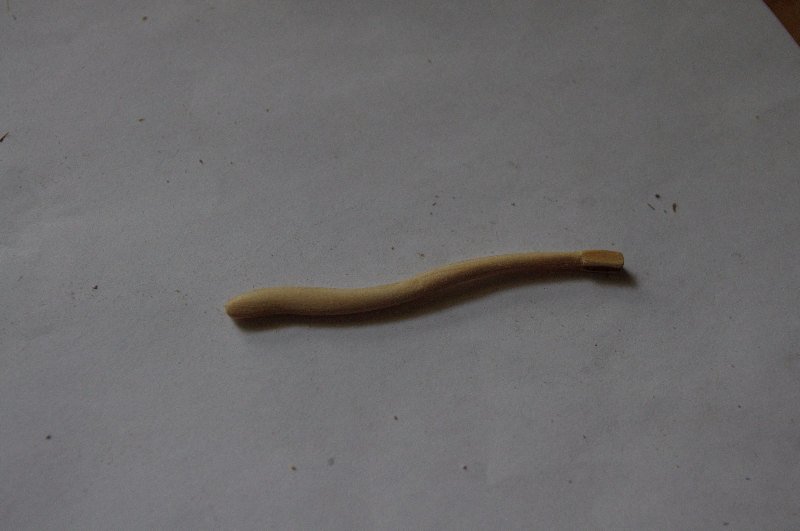
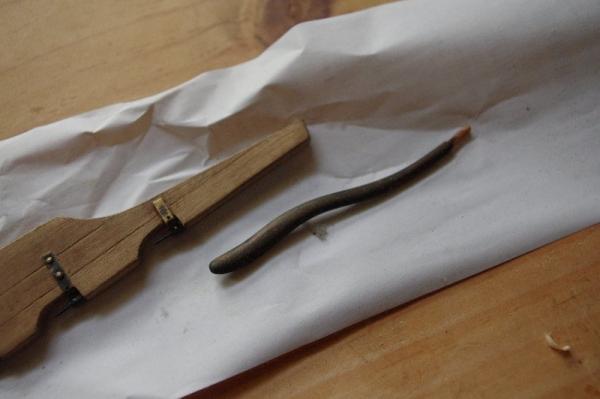
After the cap rail was fitted and sanded the next job was to fit the rudder. I had made the rudder while ago as a distraction from planking the hull. The supplied rudder is 4mm ply and has to be planked with 0.5mm walnut strips the slots for the hinges also need to be marked and cut out. The tiller is also made from 4mm ply, and although you can see the grains of ply while it is in it's raw state, it does not look to bad once it has been stained. I also added tree nails to the rudder to simulate the separate planks being nailed together. The rudder was then fitted to the transom. This post will show pictures of the costruction of the rudder and the next post will show the rudder fitted to the hull.


- 98 replies
-
- 1
-
-
- norfolk
- modellers shipyard
- (and 1 more)
-
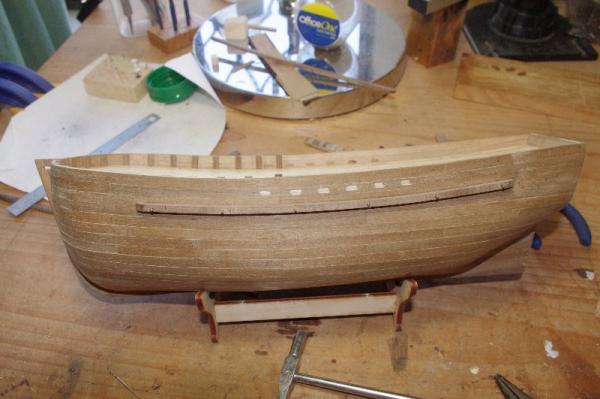
Hi All, The next step was to attach the cap rails. I was intending to make these out of 8mm x 2mm walnut but after a bit of experimentation found that it was going to be too hard to shape espeially in the bow area. the cap rail is meant to be 6mm wide. So in the end I went with the kit supplied flexible beech which was very easy to work. The kit supplied a 4mm x 2mm length which is glued on first and a 2mm x 2mm length which is then glued to the outside edge of the first strip thus giving the 6mm required. Some pictures follow


- 98 replies
-
- 1
-
-
- norfolk
- modellers shipyard
- (and 1 more)
-
Hi Danny, Thanks for the feedback. I've just had another look at page one and it seems I still have too many pic's in a couple of posts I will edit them again on the weekend
-
Hi All, I had PM from Dan Vadas yesterday regarding the amount of pictures in some of my posts, I had nearly 30 in one post. It seems that when viewed on some browsers the page goes black and the pictures cannot be viewed nor the text read. I was totally unaware of this and I thank Danny for bringing it to my attention . I have just gone in and edited these posts down to ten pictures each and I hope this has rectified the problem for any of you who could not view them. I was going to try and repost the deleted pictures order after each post but this cannot be done so if any one wants to see extra pictures of a certian part of the build please do not hesitate to ask and I will happily post them for you. I do apologise for any inconveniance caused.
-
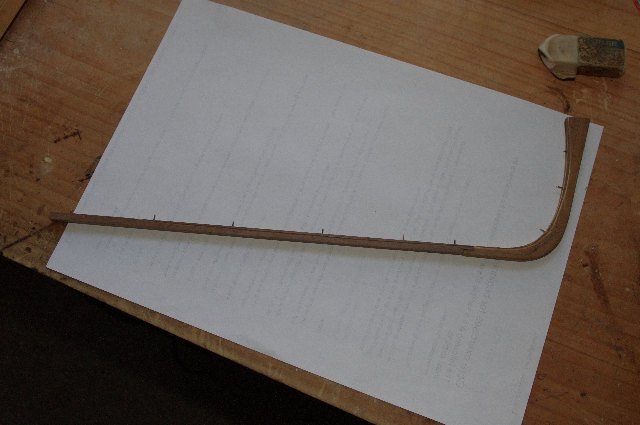
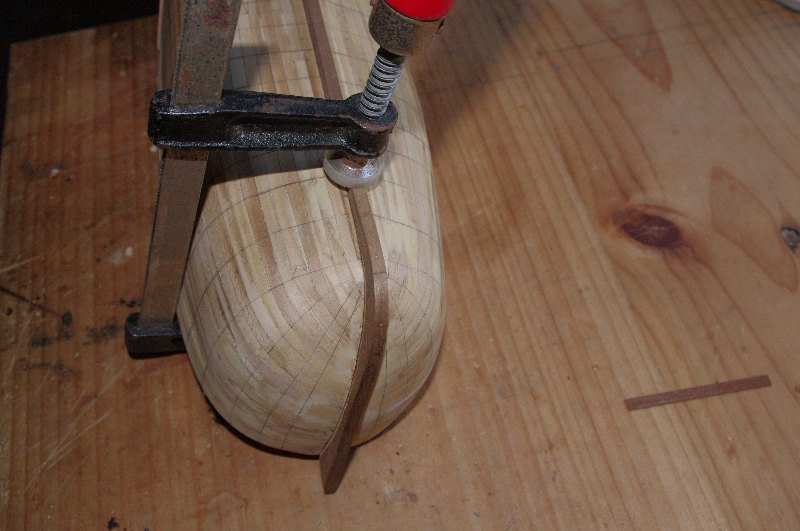
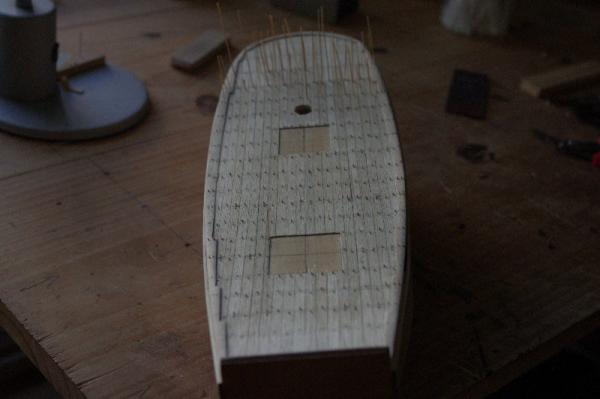
Hi All While I was fitting the false frames I also shaped and fitted the gunwales these are made from 4x4mm walnut 220mm long and are fitted 15mm below the cap rail. They follow the curve of the hull and also the sheer of the buwarks. I made a template of the hull from a thin plastic folder and traced the hull curve onto a piece of timber I then soaked the gunwales in hot water for about 30 minutes and the bent them to the line on the timber and let, holding them in place with nails on either side and let them dry. After they where dry I fitted them to the hull holding them in oplace with brass nails until they dried I then removed these and inserted bamboo treenails into the holes and sanded them back. Some pictures follow. P.S the 'jig' photo does not show the gunwales in the jig I took it after I had fitted them sorry


-
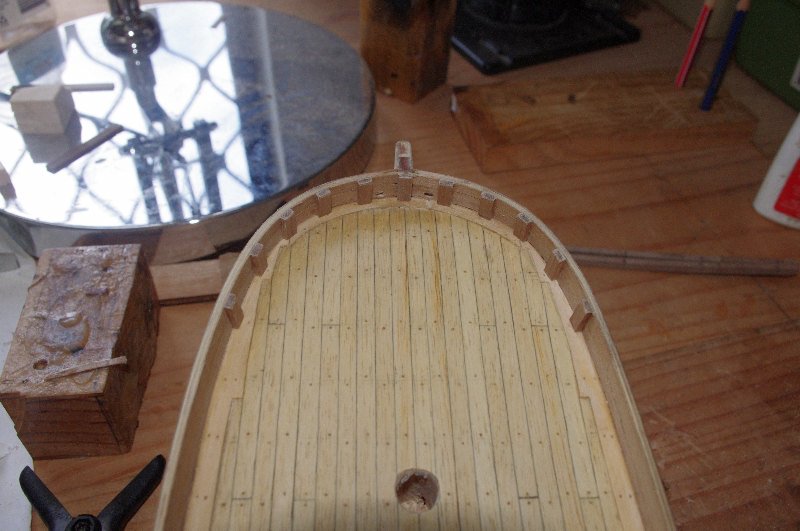
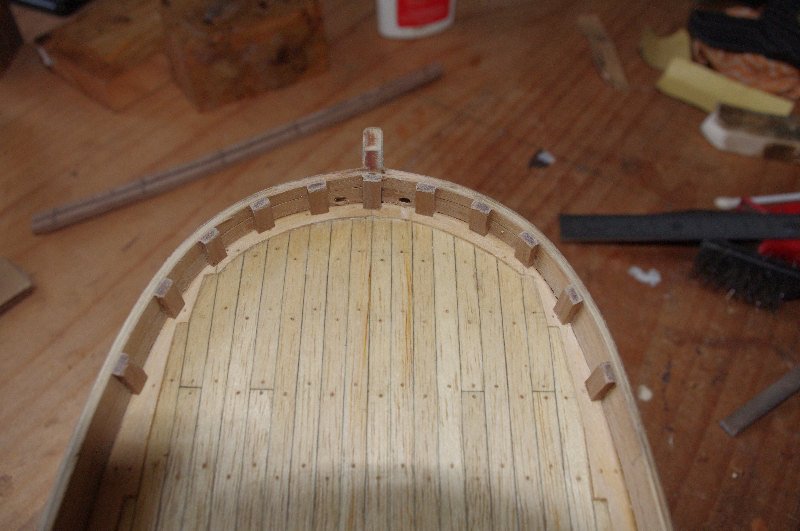
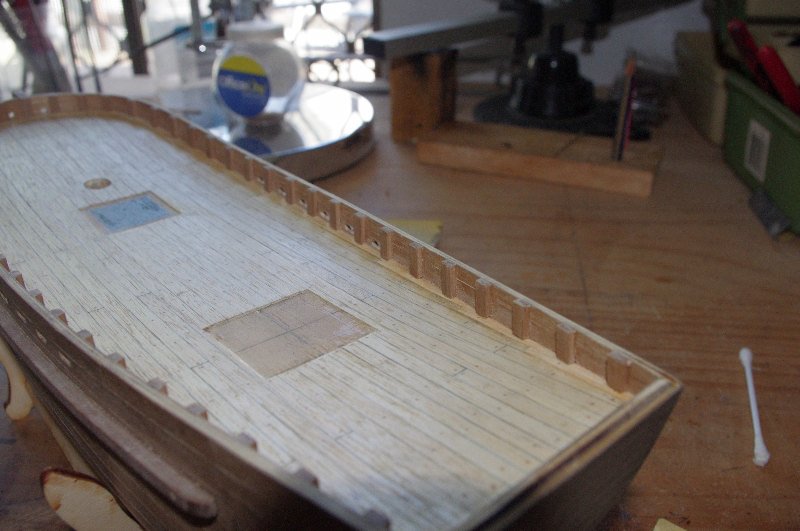
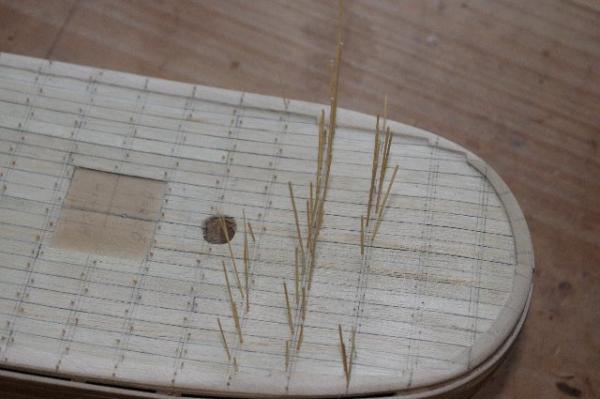
Hi All, The last lot of photos is about where I was up to on the old site.The Photos that follow will document my progress from the end of Febuary till now. I will try and post them as reguarly as possible so that I can bring you all up to date with where I'm at now with the build. The next step was to plank the inner bulwarks this was farly straight forward and posed no problems. After this was completed I then fitted the false frames, these were fitted at each row of tree nails. Some pictures of this stage


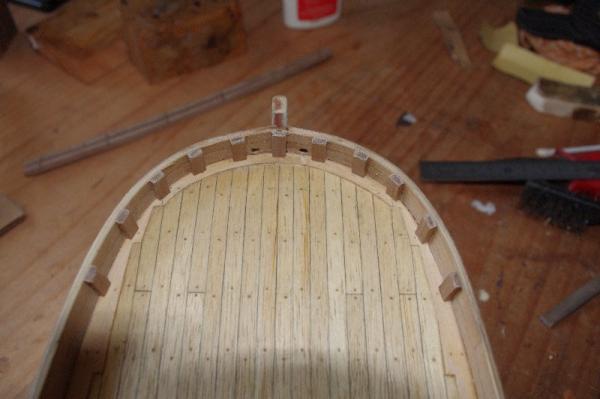

-
Hi All, I have a question I hope somebody can clear up for me. I am up to the rigging stage on this model and having rigged the shrouds the instructions then tell you to rig the forestays next and then the backstays, Keith Julier in his book " Period Ship Kit Builders Manual", seems to confirm this as he says that he rigs the backstays last. Where as Lennarth Peteerson in his book"Rigging Period Ship Models", shows the backstays being rigged after the shrouds. My question is in what order are the stays rigged on the lower mast? I do intend to rig the backstays last after the running rigging is completed but if they are next in sequence after the shrouds I can put them in place and let them hang to be rigged later. Thank You
-
Hi Danny, She is looking beautiful, your work as aalways is of a very high standard
-
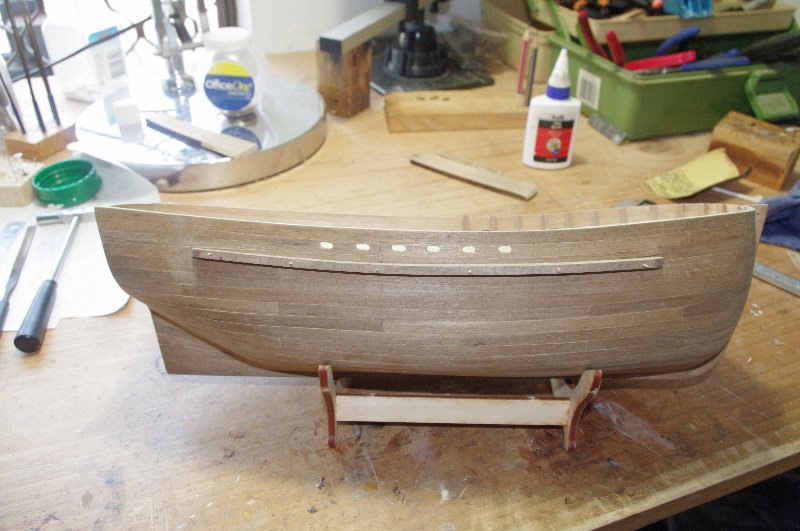
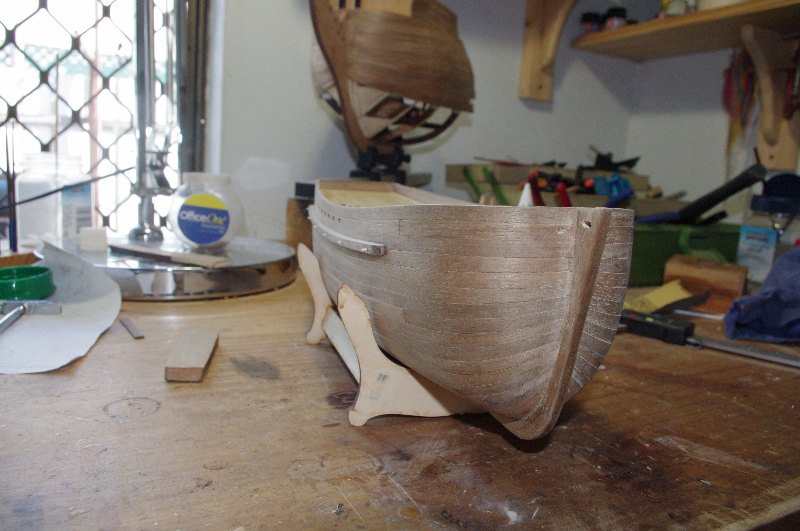
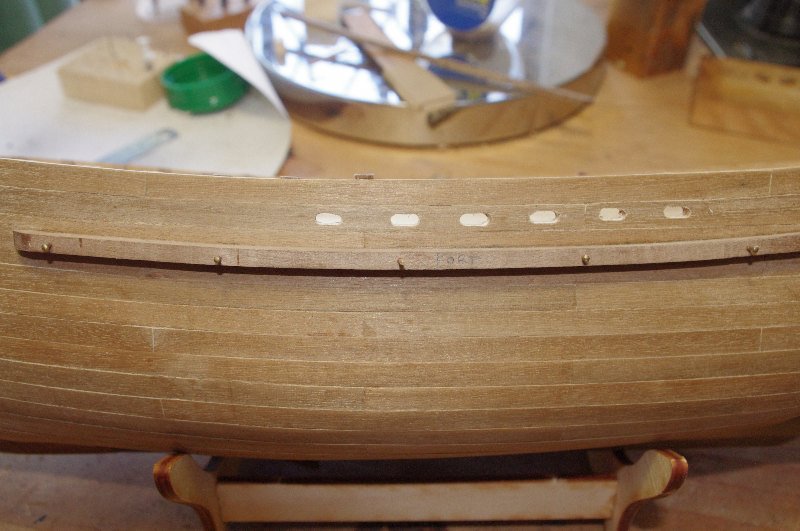
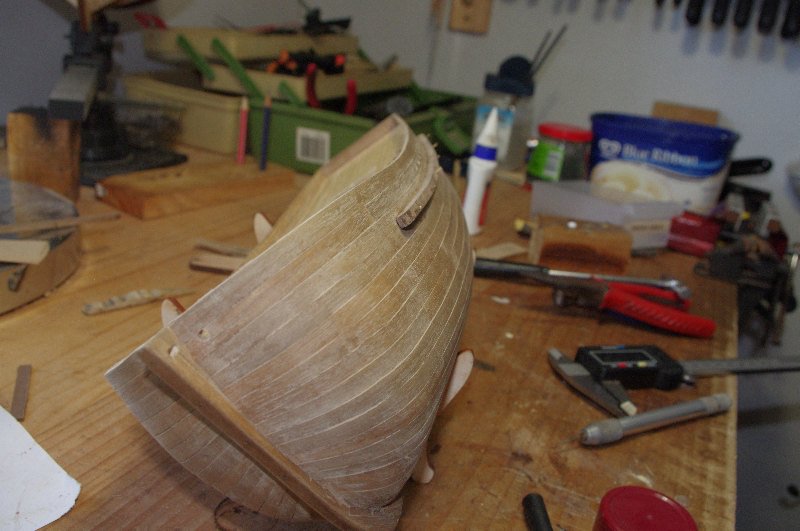
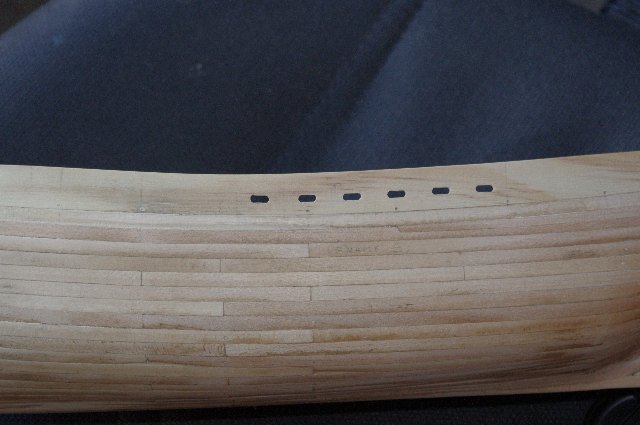
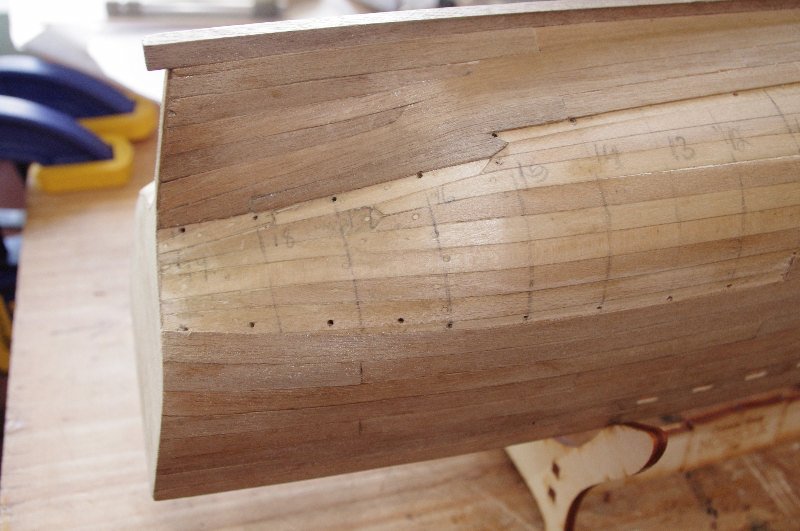
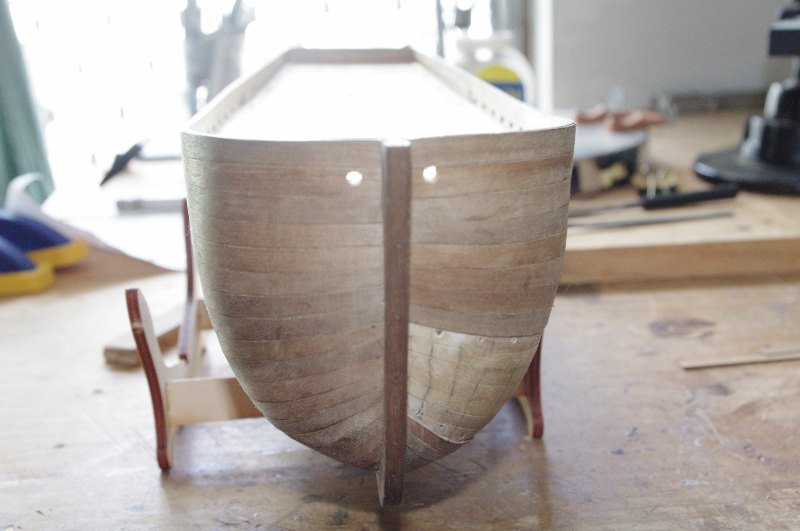
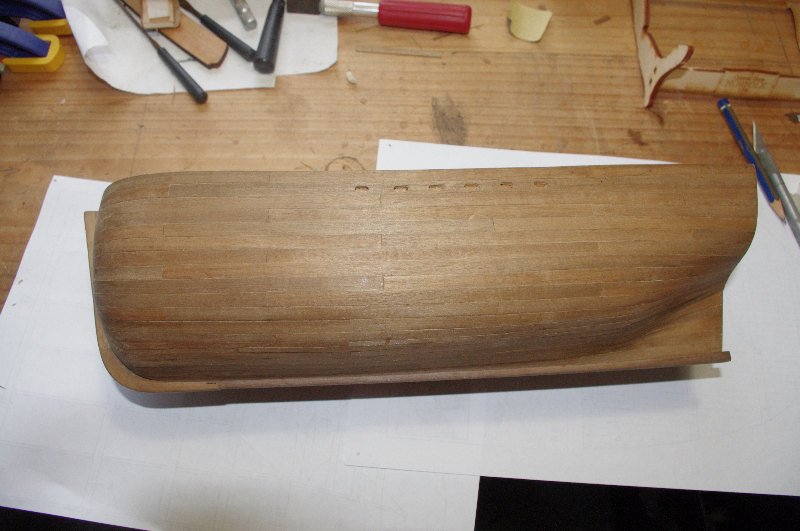
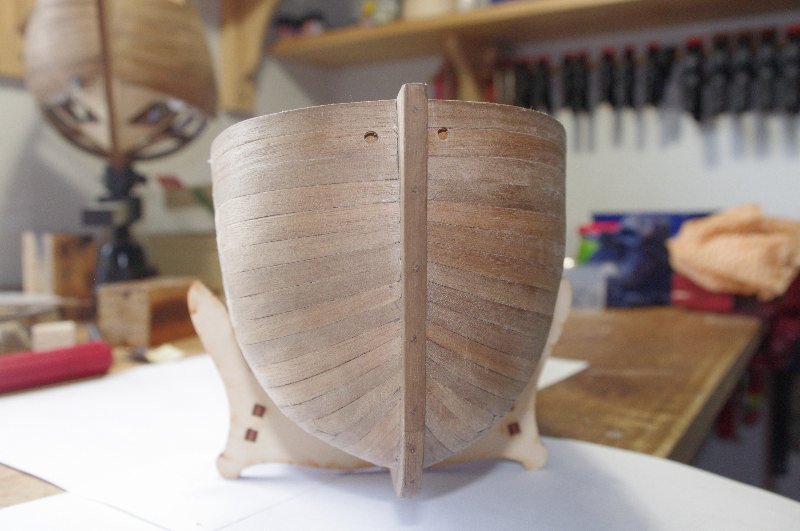
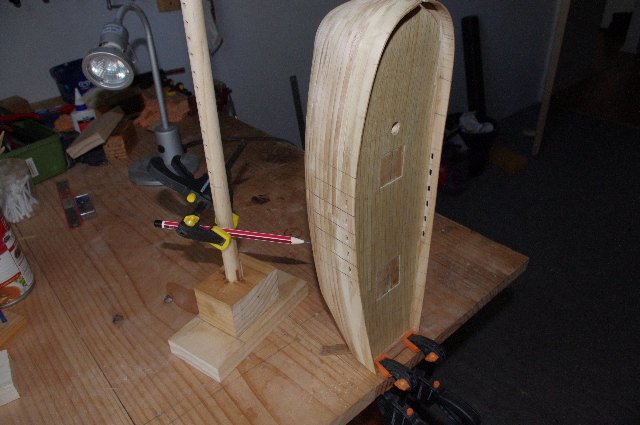
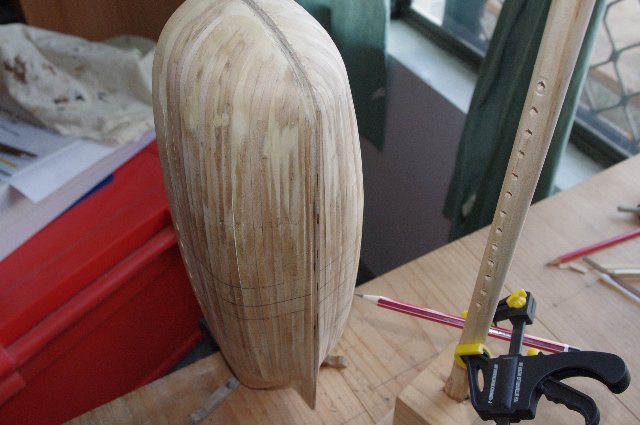
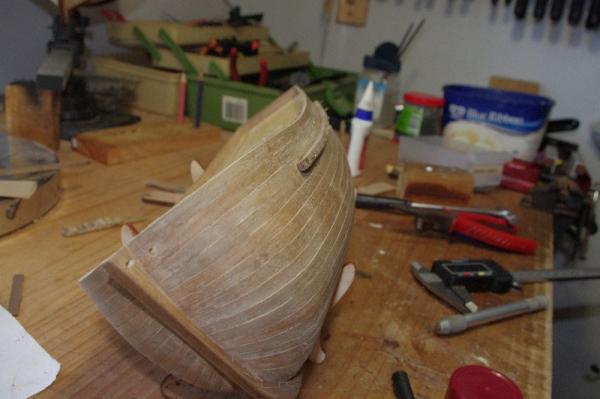
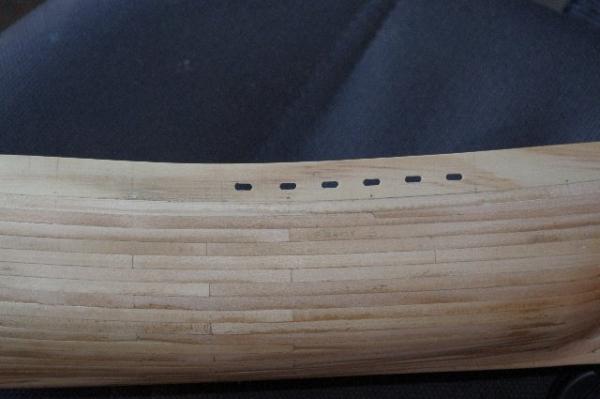
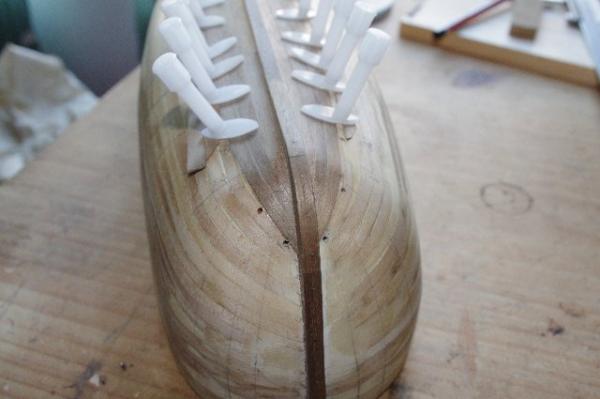
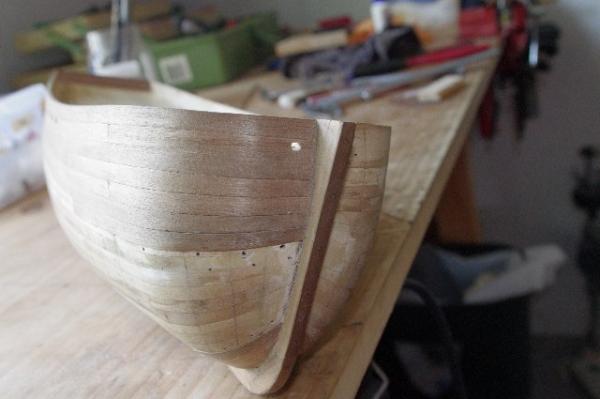
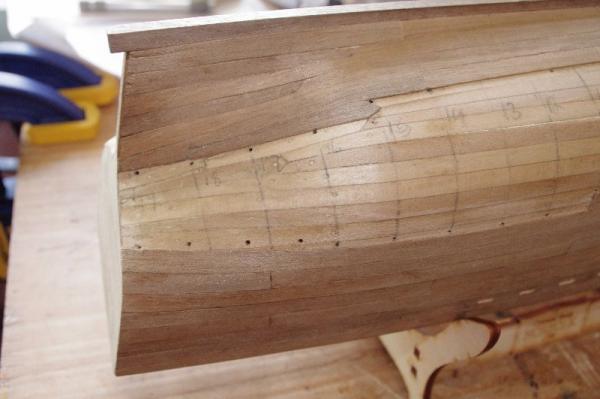
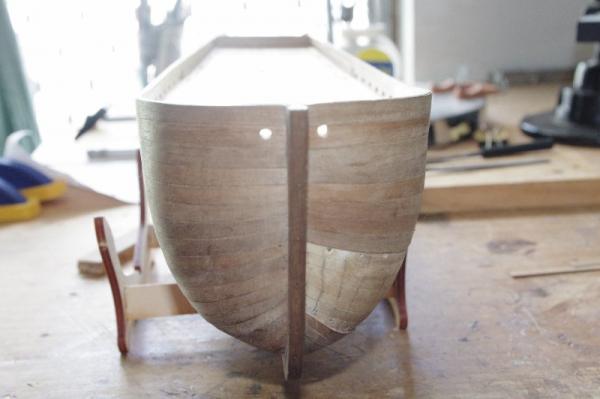
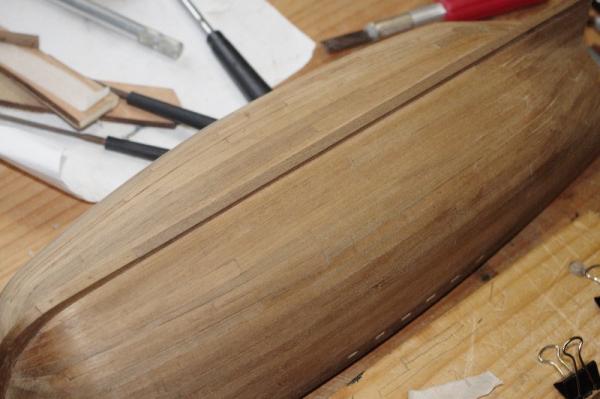
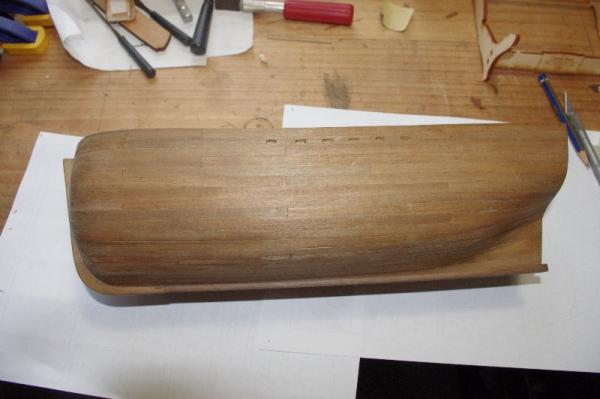
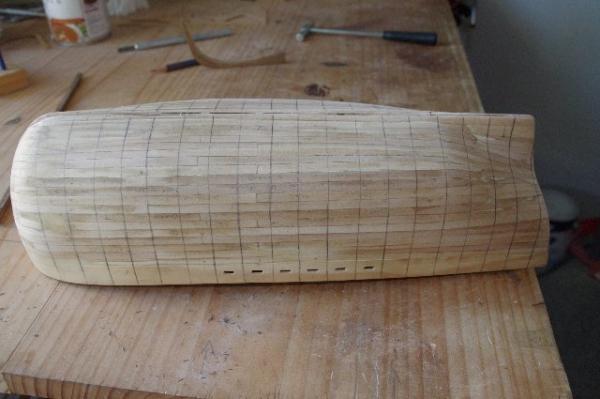
Hello All, After fitting the bulwarks and the keel I then marked out and cut the holes for the scuppers and drilled the holes for anchor cable. I did this now so that if I did have any slipups with the dremel I could cover them up with the second planking As I did with the first planking the second planking was done with scale length planks so it was basically a mirror image of the first, with a couple of exceptions. Because the second layer is wider , being made of 0.5 x 6mm walnut as oppsed to the 5mm width of the limewood first layer, I had to recalculate the widths of the planks at each frame but this was not a big problem. I started laying the second layer of planks from the keel up but after layiing about 4 planks on either side it became too confusing as to which side to put the taper so I reverted to laying them from the bulwarks down and I decided to only lay one side at a time so if I made any mistakes I only had to redo that side and the next side would go on a lot quicker as I already knew all the measurements for it. This made the whole process a lot eaiser to work out and I'm fairly happy with the final result. Following are some pictures of the second planking the first pic's are of the scuppers cut out and then the planking

- 98 replies
-
- 1
-
-
- norfolk
- modellers shipyard
- (and 1 more)
-
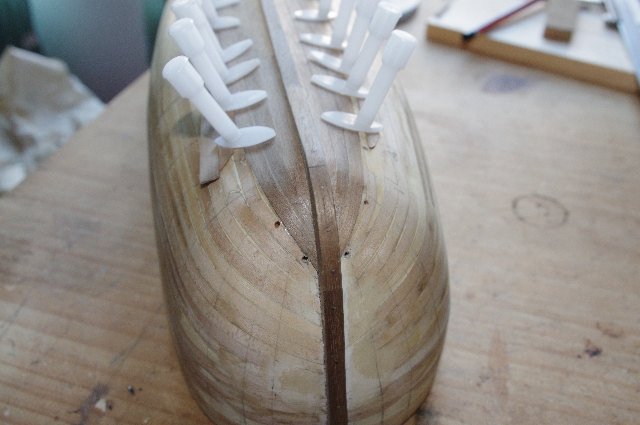
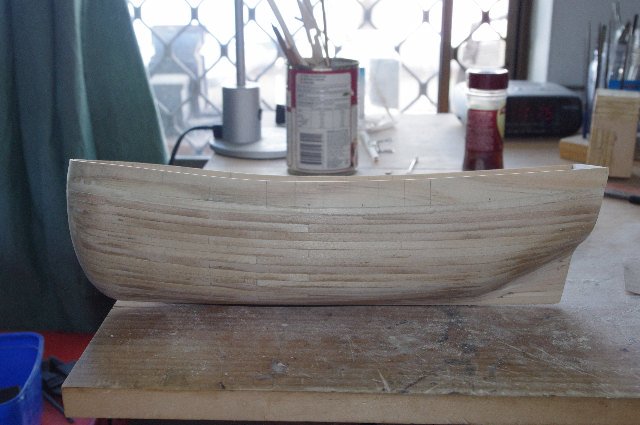
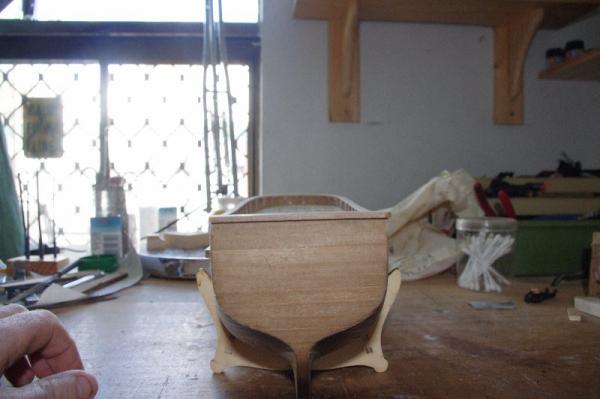
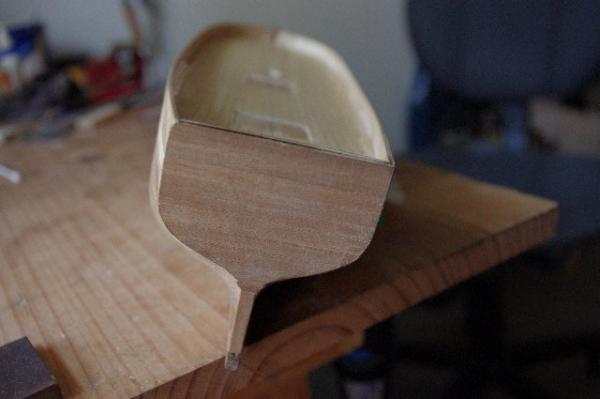
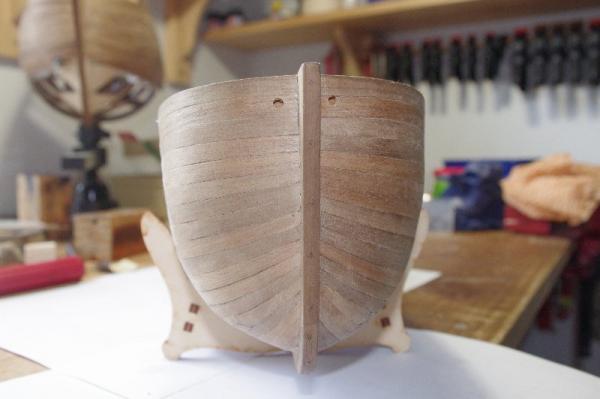
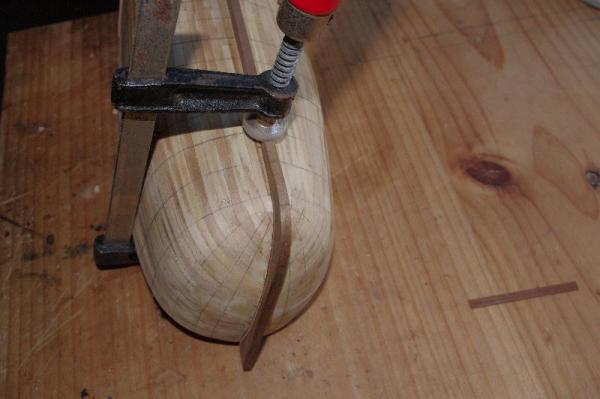
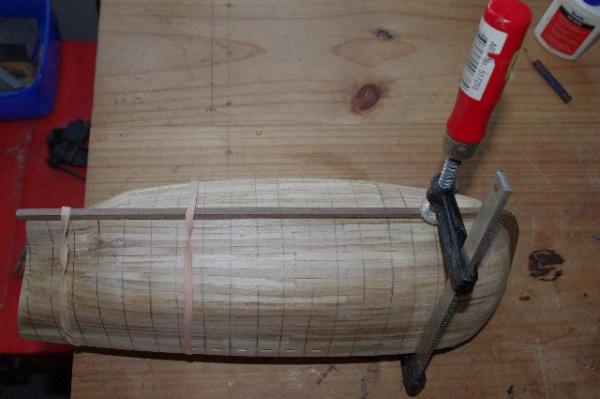
Hi All, After finishing the deck my next job was to fit the bulwarks. These were shaped to fit the bow area by soaking the end in hot water for aout 20 minutes and bending themusing nails driven into a board with the shape of the bow traced onto it. Unfortunately I don't have any pictures of the jig. The buwarks are spilled (preshped) to fit against the first plank laid, however in hindsight I would have temporaily fitted the bulwarks and then fited the first plank to minimize any gaps. After fitting the bulwarks I then marked the false frames on the hull for the second planking. I then planked the stem post as it made of 4mm ply and fitted the keel and stem post to the hull and marked a rabbet line for the second planking to fit into. After cutting the rabbet I then permanantly fitted the stem post and keel to the hull. The following pictures will probably explain it better This will be my last update for a week as I'm going on hoilday


- 98 replies
-
- 1
-
-
- norfolk
- modellers shipyard
- (and 1 more)
-
Excellent work Len , good to see you back
-
Hi Anja' Glad you had great day the resturant looks nice . Enjoy your trip to England
-
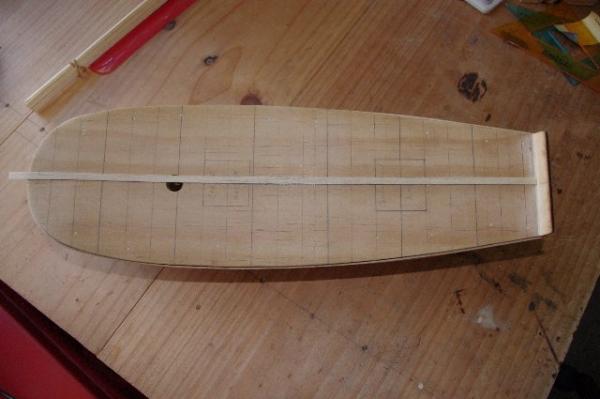
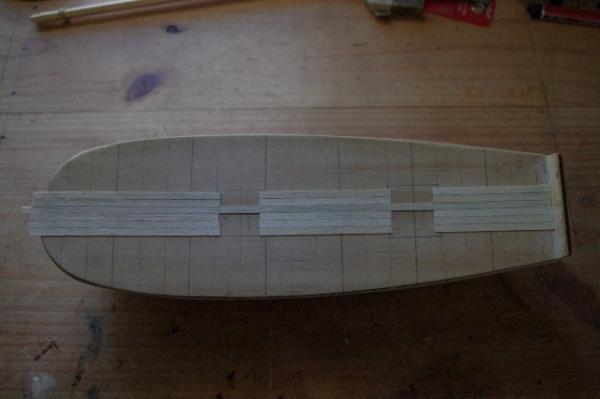
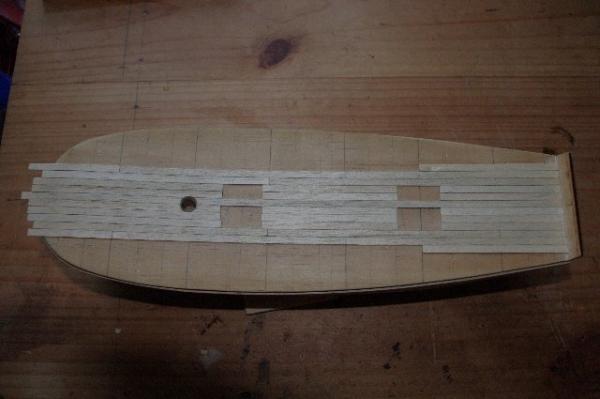
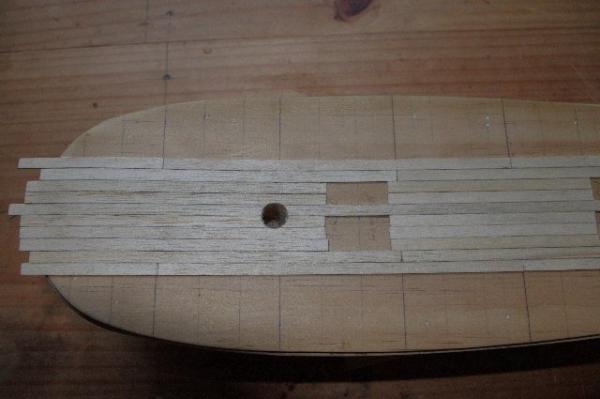
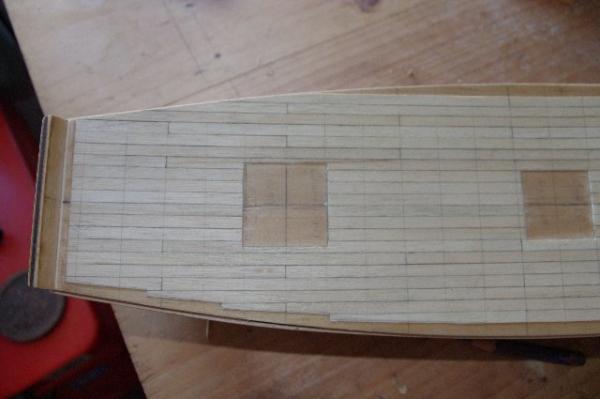
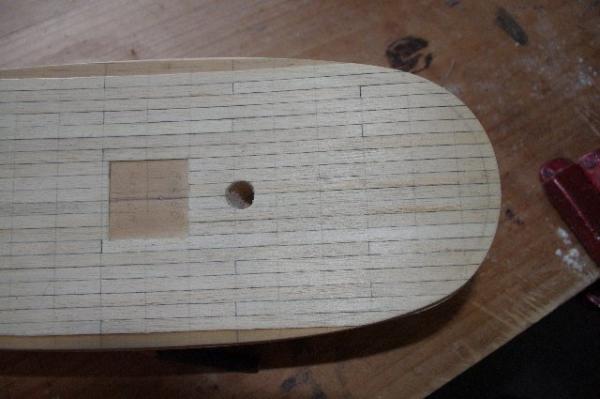
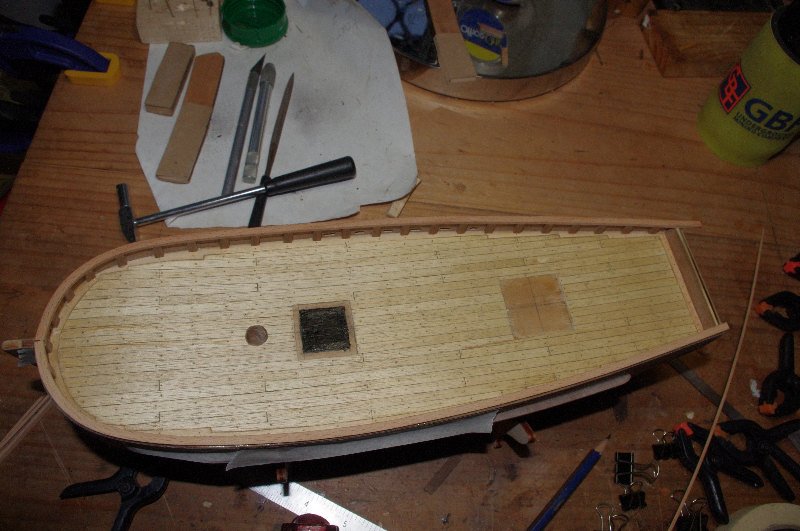
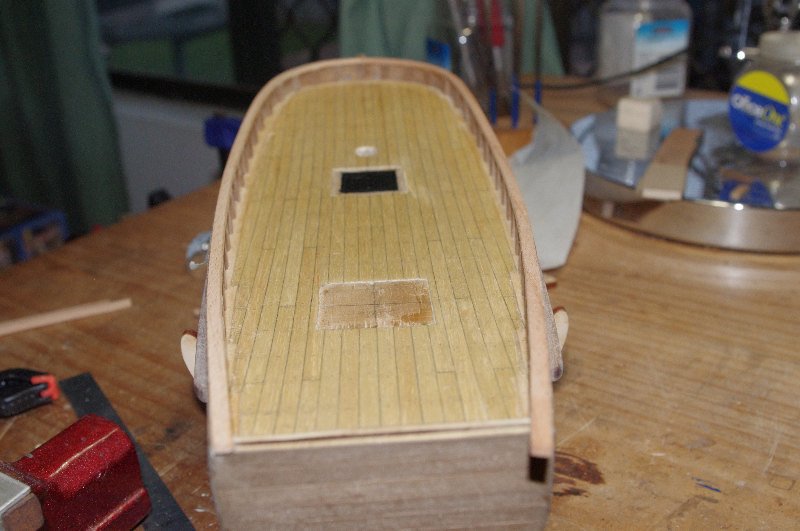
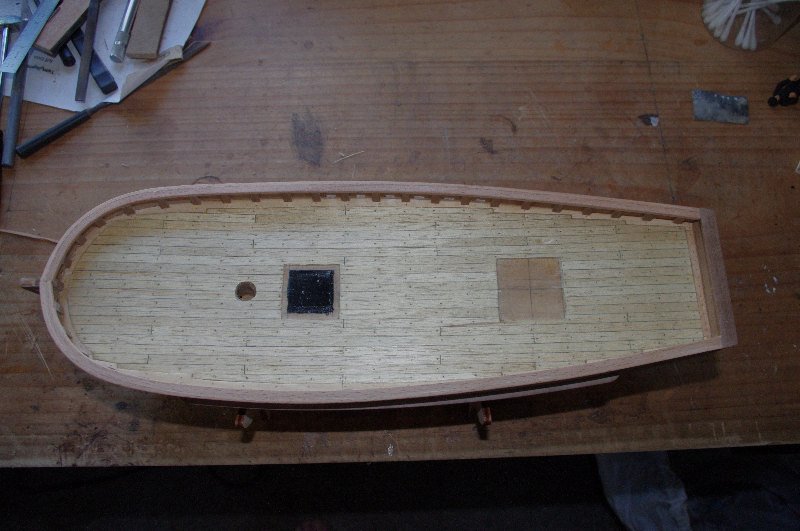
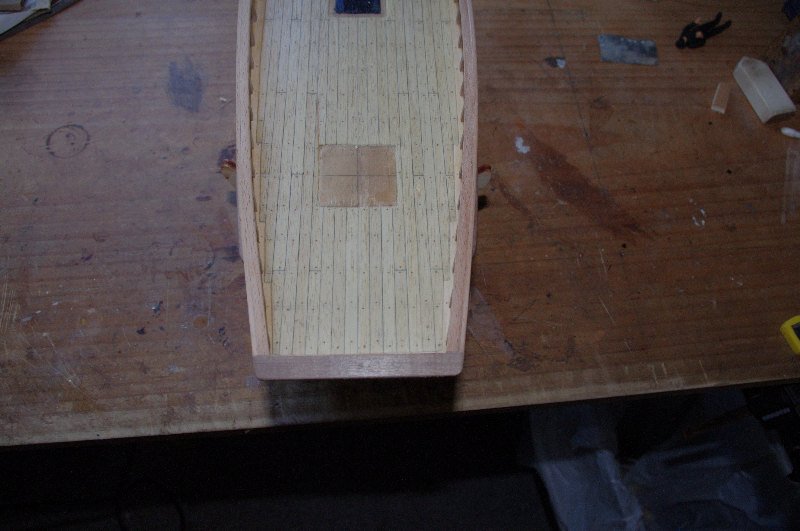
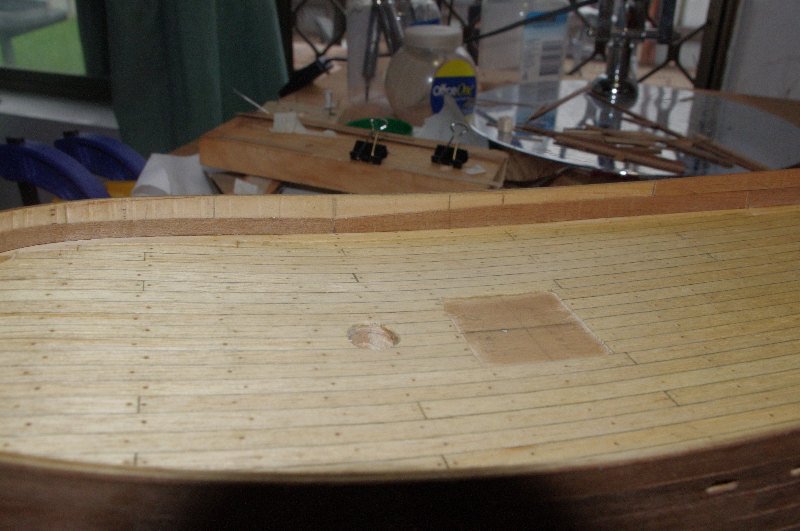
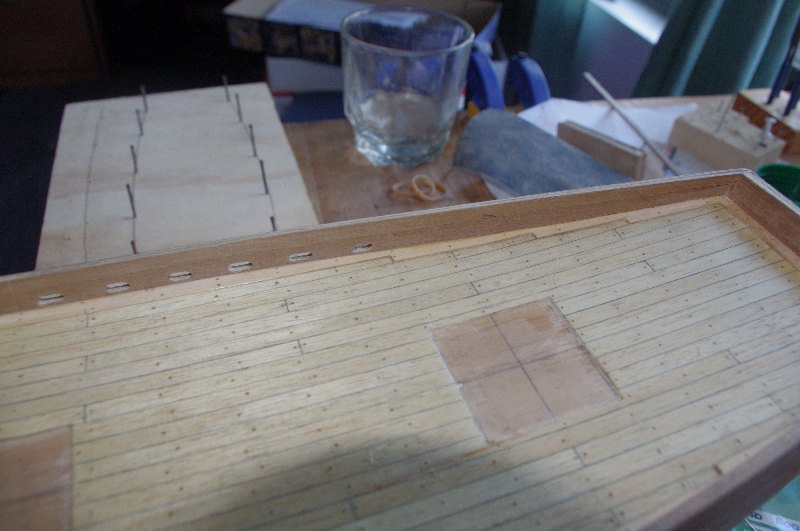
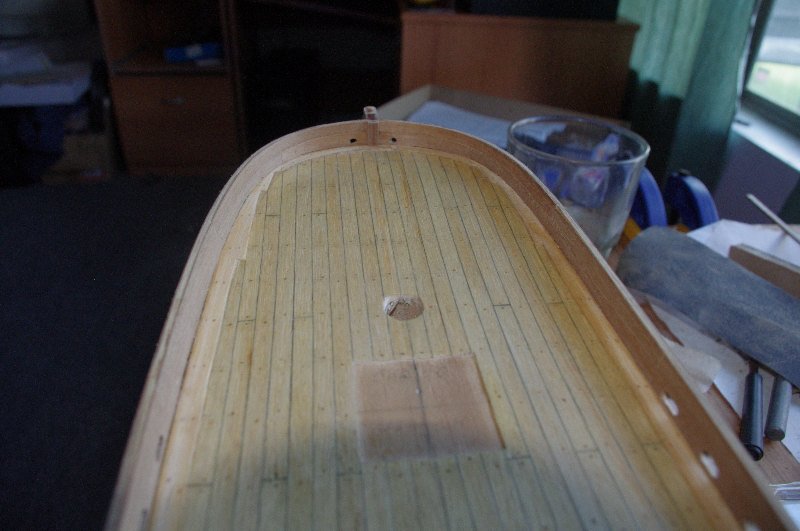
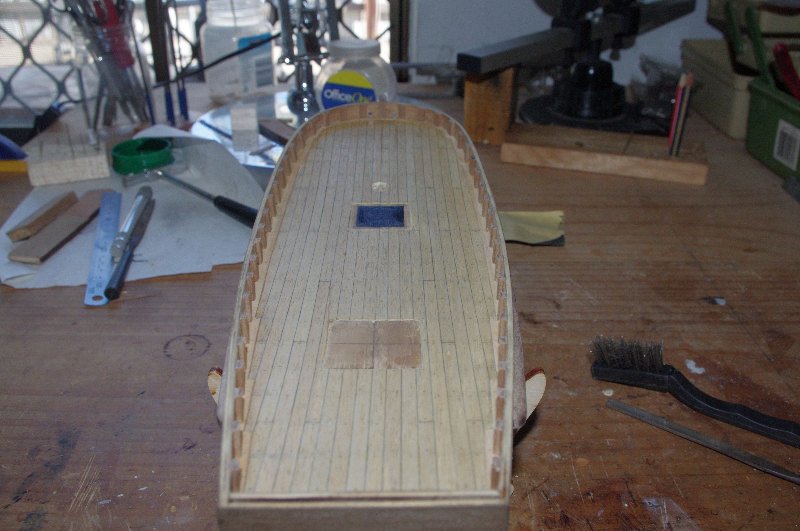
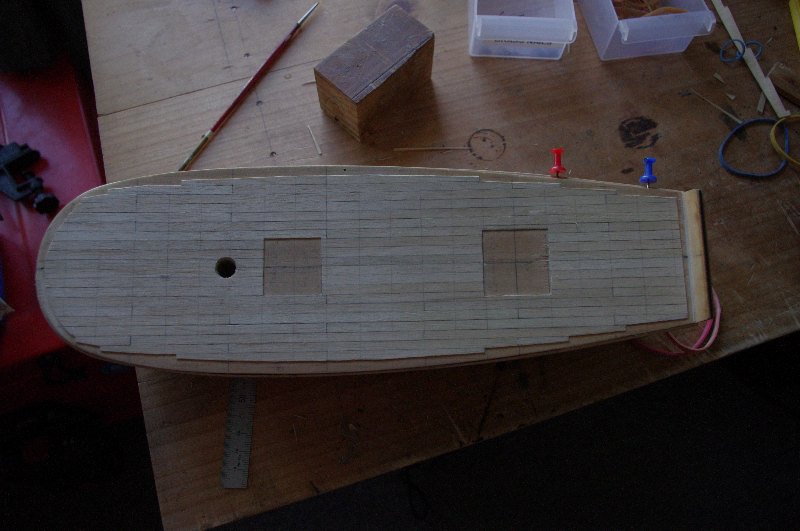
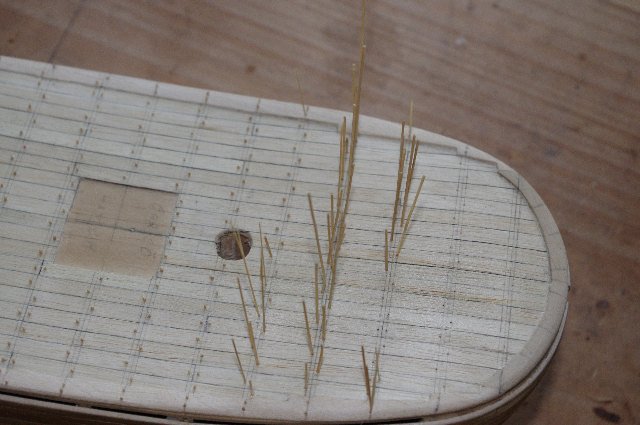
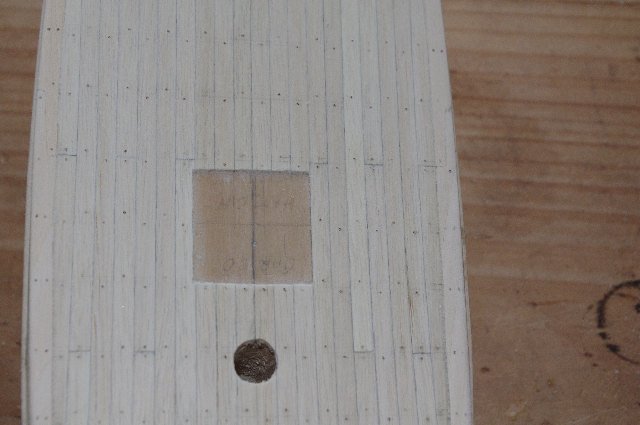
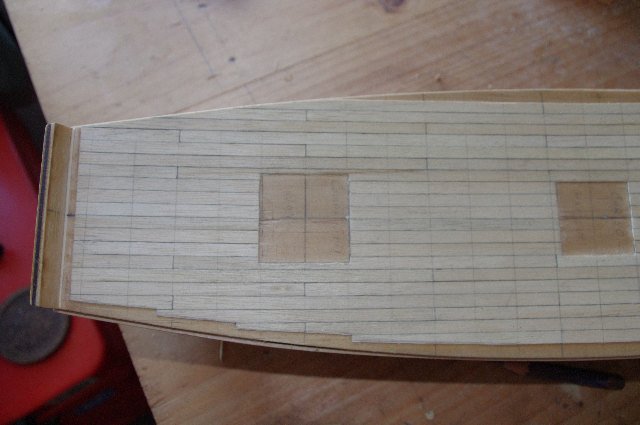
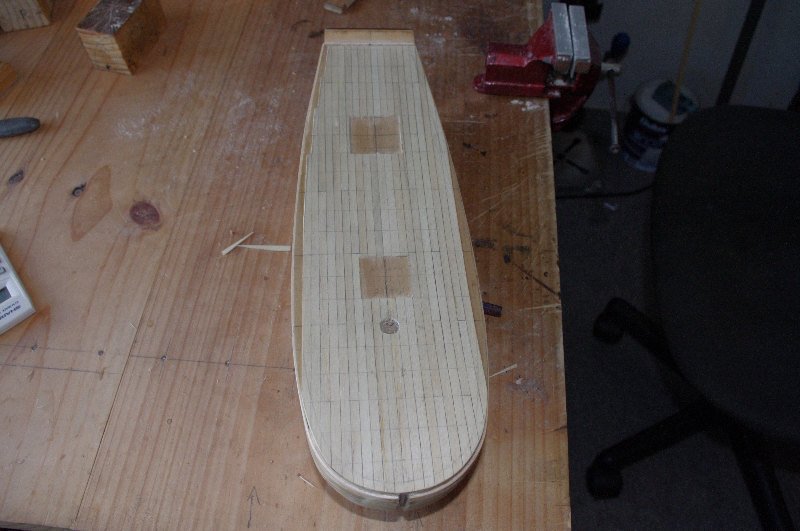
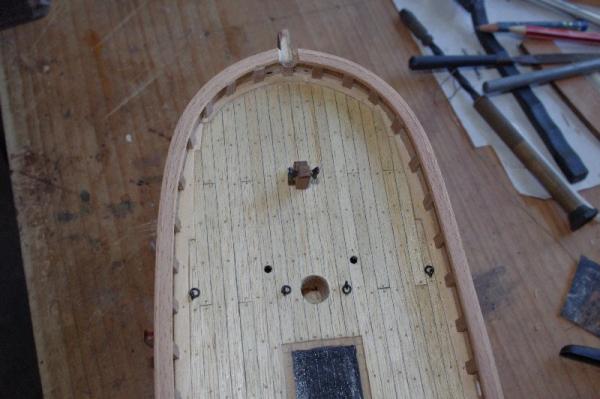
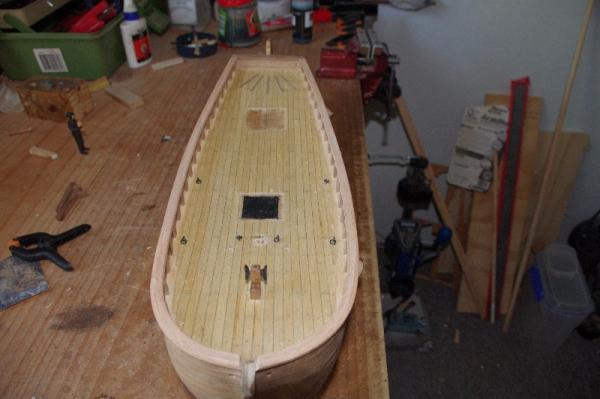
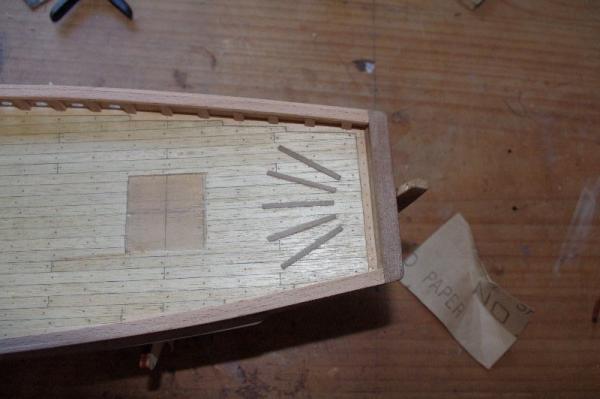
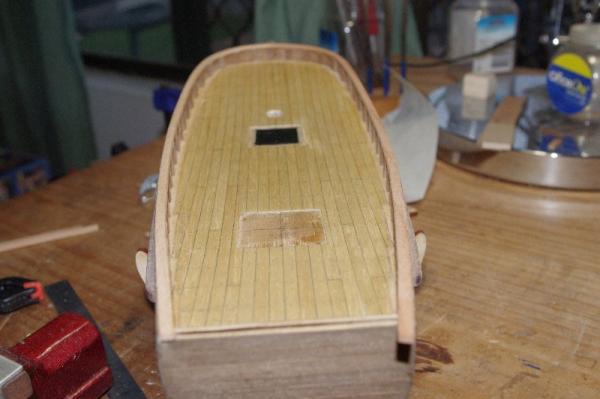
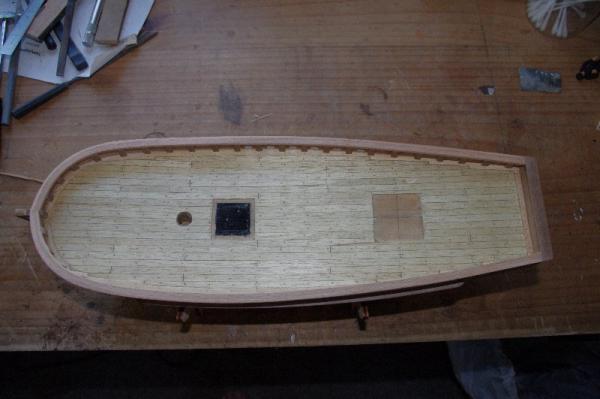
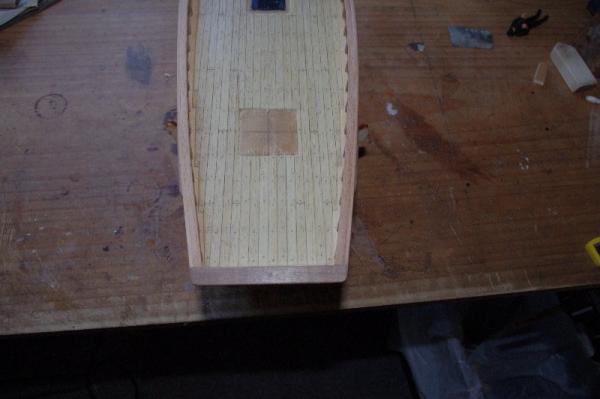
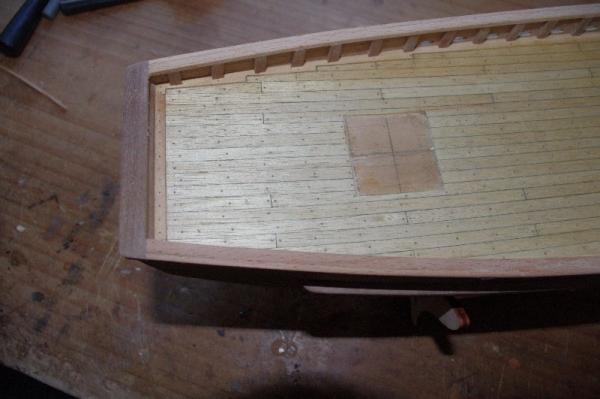
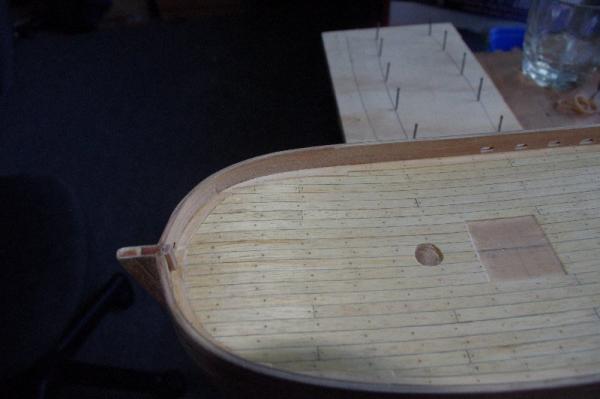
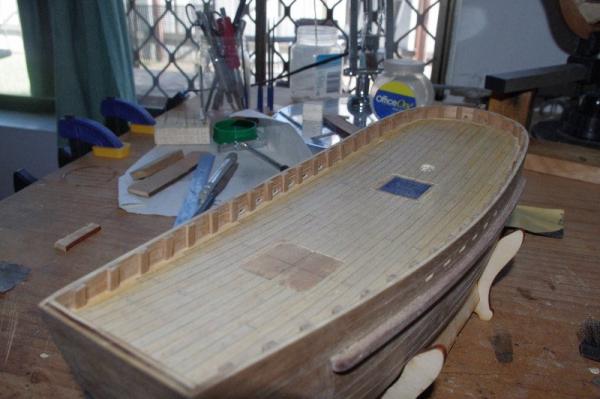
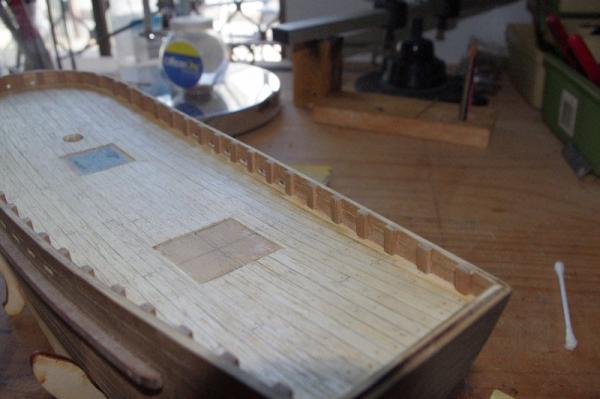
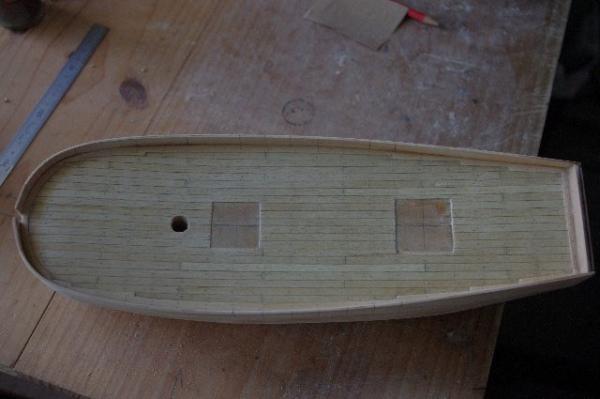
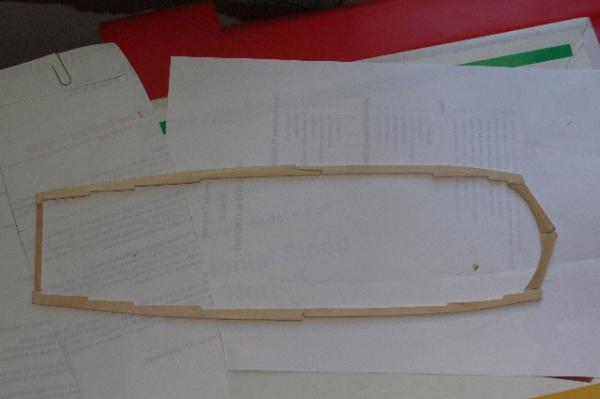
I made the margin planks next. These were made from 10mm x 1.5mm limewood. After they were completed I trmmied or joggled the deck planks to suit and fitted them. They were then sanded down to the profile of the false deck and flush with the deck planks amidships but left a little bit proud in the bow and stern. I then marked on the 'false frames' and tree nailed the deck with 0.5mm bamboo nails; after trimming them off I sanded the deck and gave it a coat of matt varnish. Some pictures follow I will post some more soon

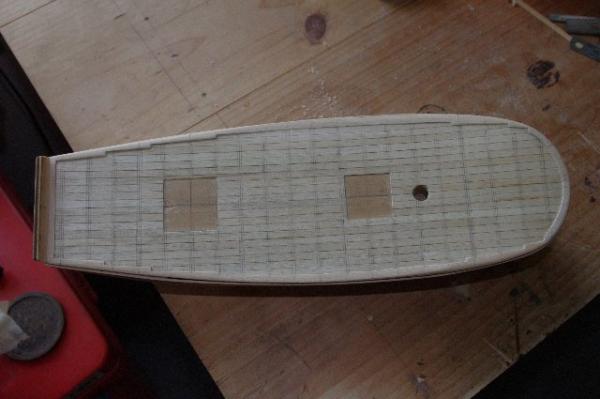
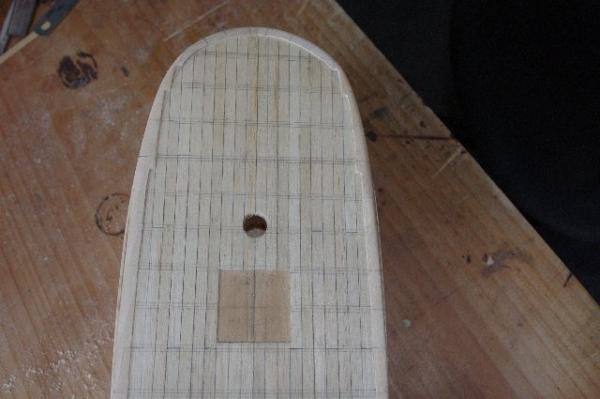

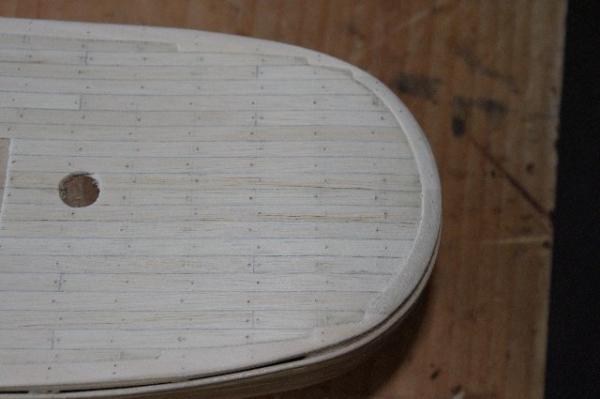
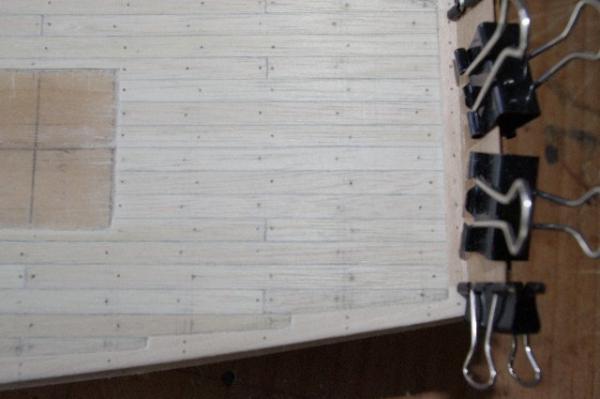
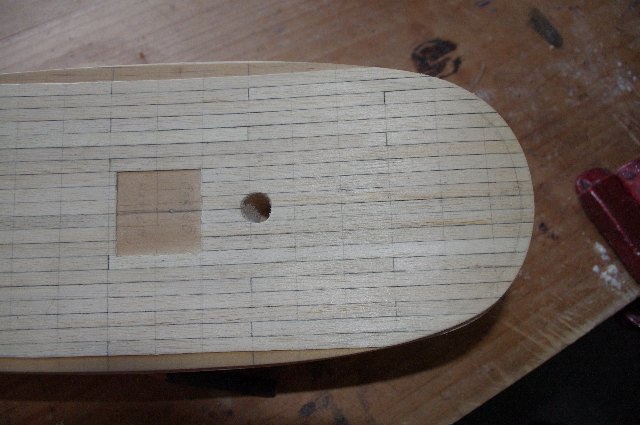
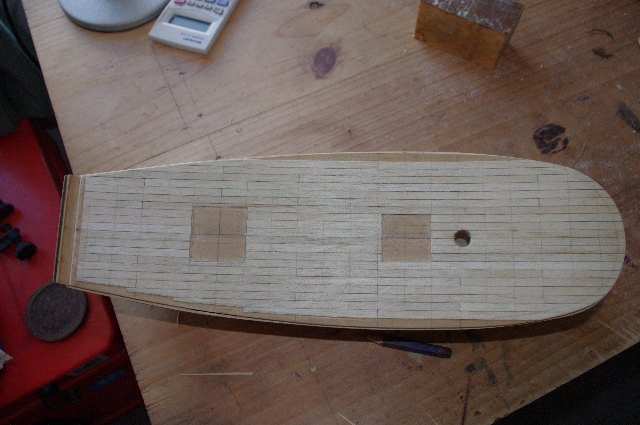
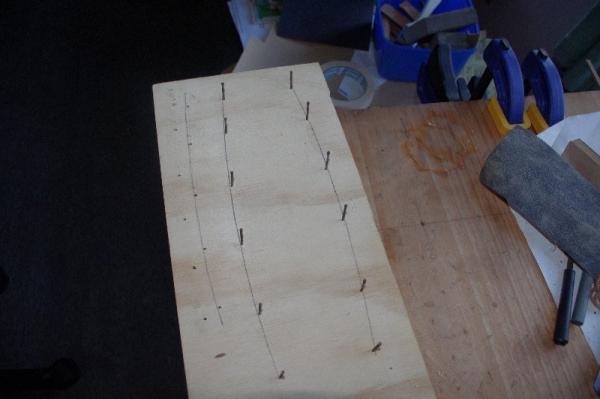
-
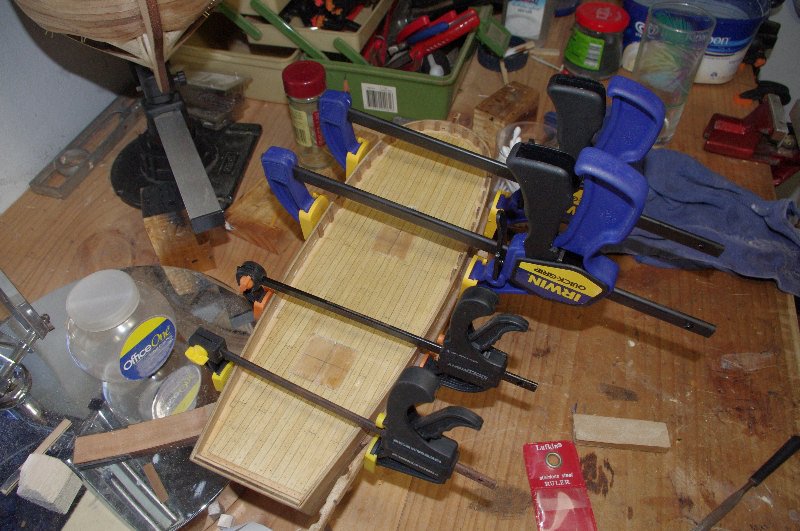
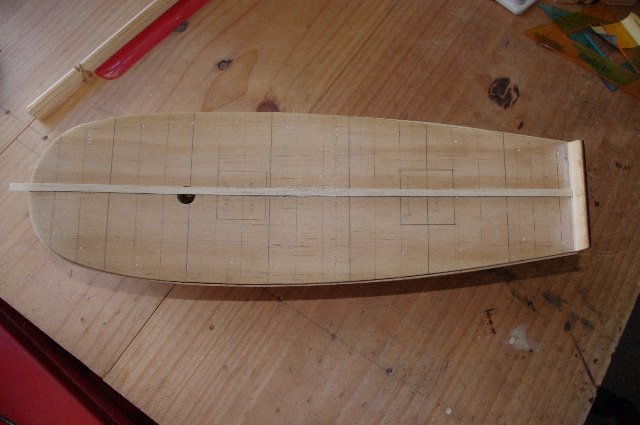
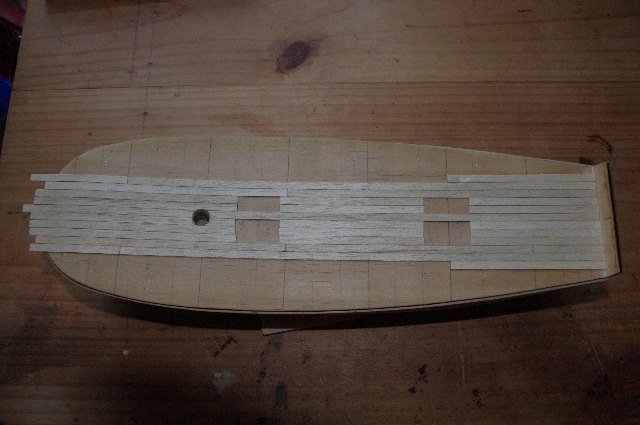
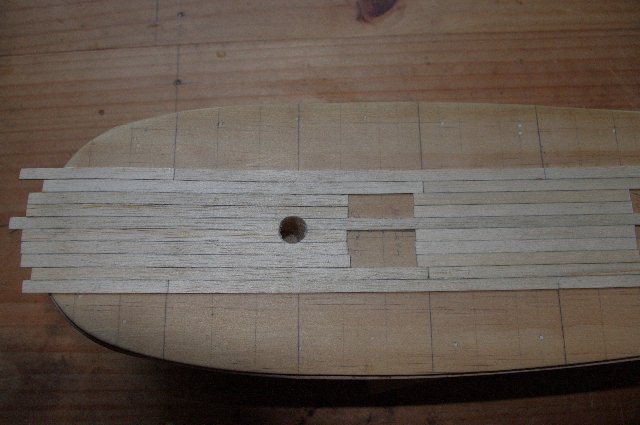
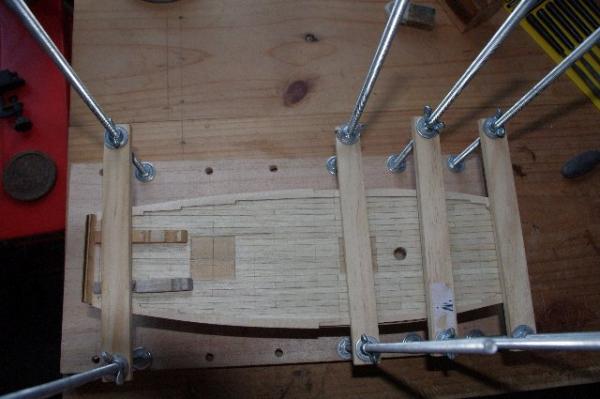
Hello Everyone, The next task was to lay the deck planks. this was also out of sycnh with the insructions as they tell you at this stage to fit the false deck and the bulwarks and then plank the deck. I find it eaiser to plank the deck without the bulwarks fitted, although this cannot always be done, because you can lay the planks without shaping each one to fit . They can then be shaped to the profile of the deck. I also wanted to fit a margin plank, which is not catered for in the kit and to tree nail the deck. My first job was to measure and mark the deck for the planking pattern I was going to use and to detemine the length of the planks. The pattern I decided on is a 3 butt shift and this will be done outside the main structures on deck these being the hatch, companionway, mast ect. I used a HB pencil to simulate the chalking which on this light wood I think shows up well and is not to thick. The first couple of photos show the marking of the deck and the next couple show the 2 main deck structures marked. The planking pattern will start outside of these.