HOLIDAY DONATION DRIVE - SUPPORT MSW - DO YOUR PART TO KEEP THIS GREAT FORUM GOING! (Only 24 donations so far out of 49,000 members - C'mon guys!)
×


Jeff-E
-
Posts
699 -
Joined
-
Last visited
Content Type
Profiles
Forums
Gallery
Events
Everything posted by Jeff-E
-
Congratulations John on a excellent build and your superb workmanship. I will watch closely for your next build
-
Hi Rowan, Thank you for looking in and your kind comments. The Corel cross section is a nice model and I will look in on your build when your kit arrives and you start a log
-
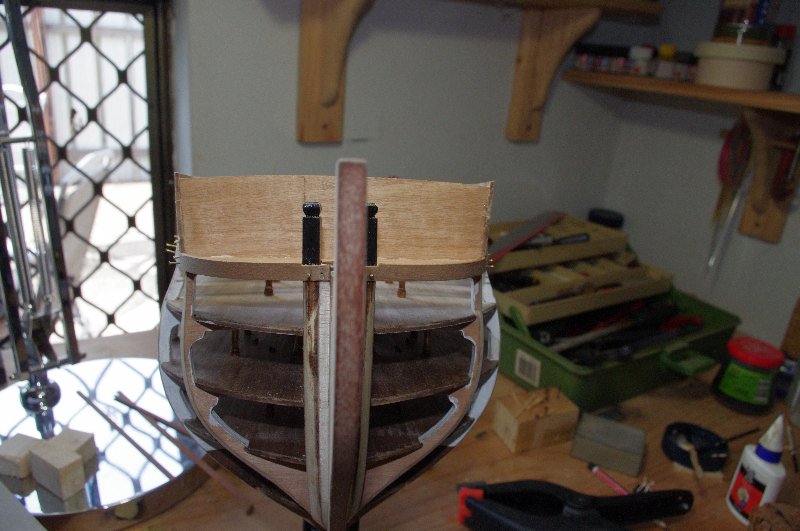
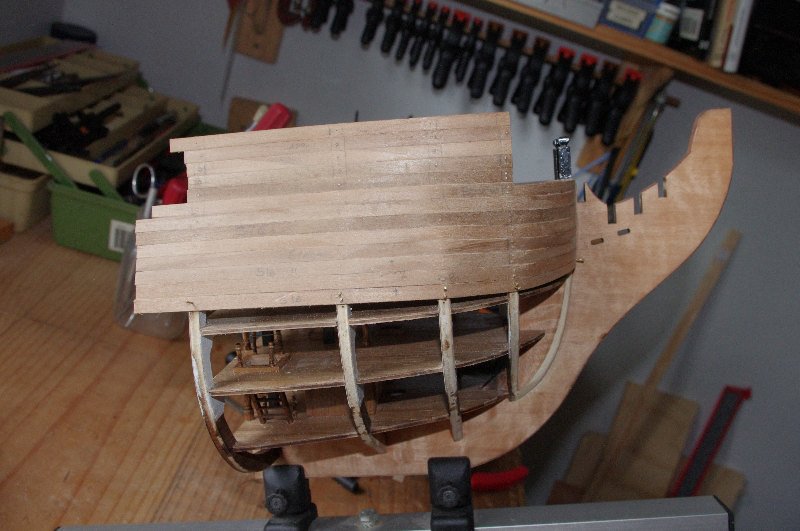
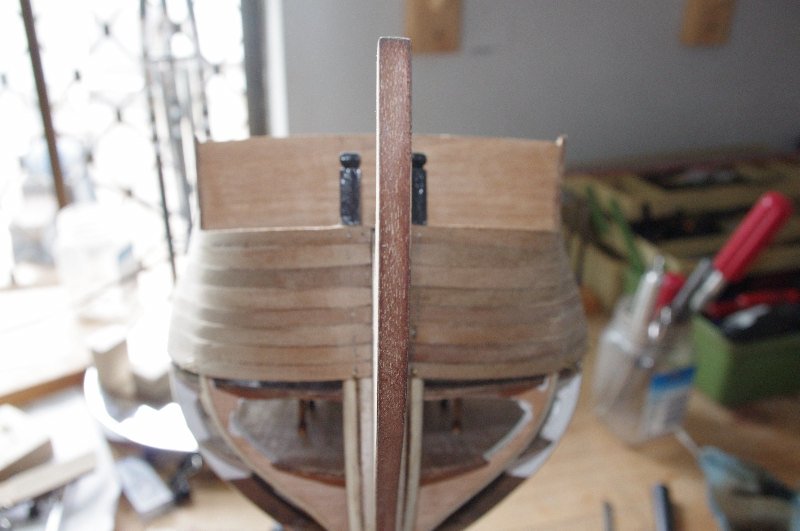
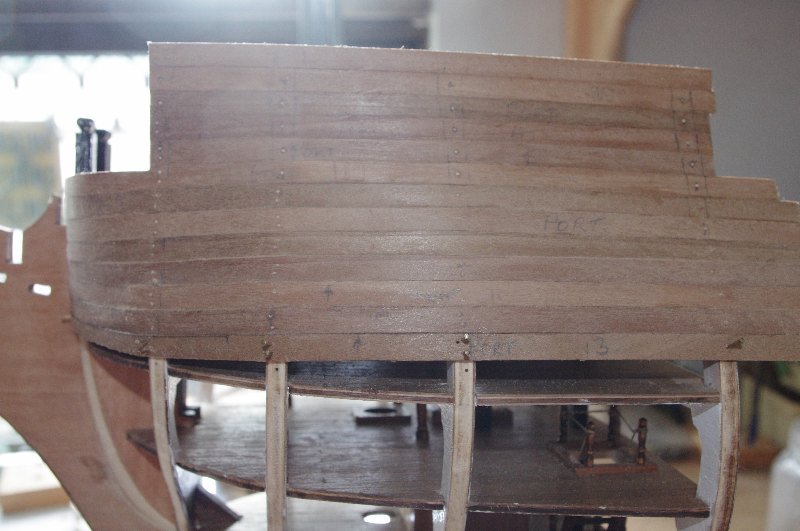
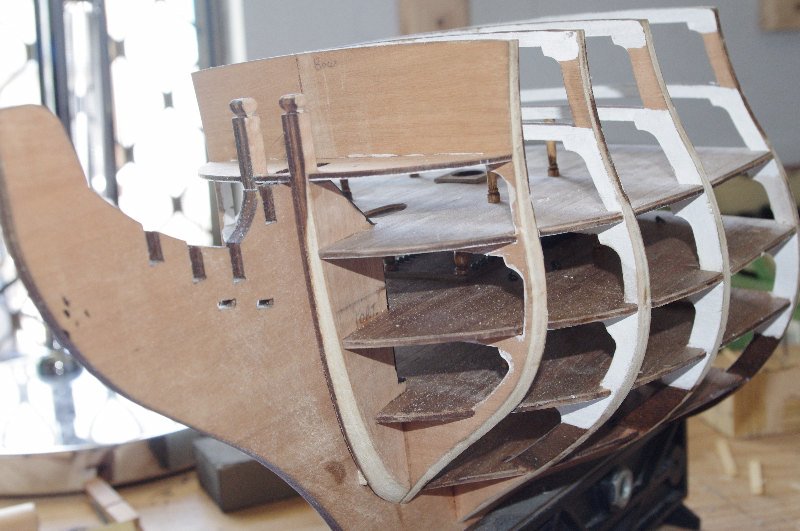
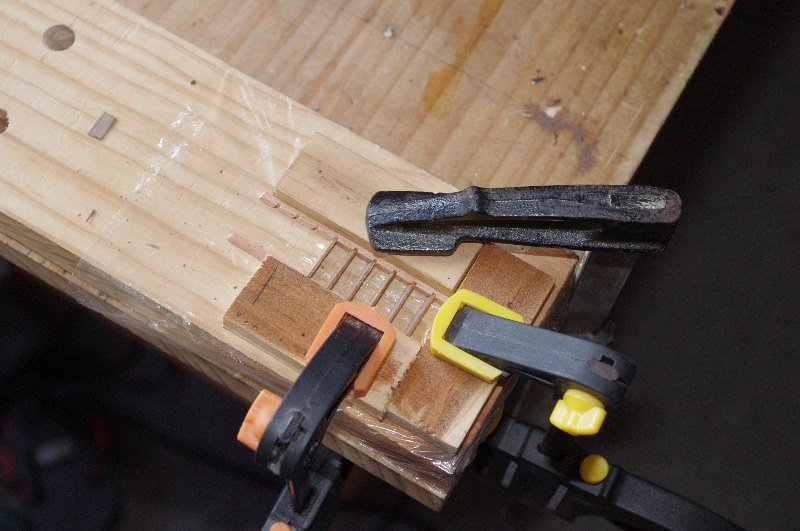
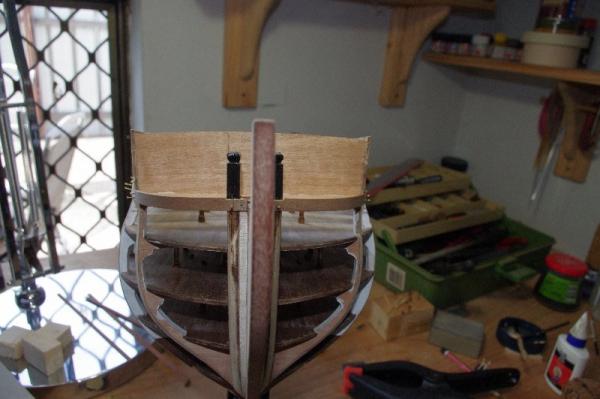
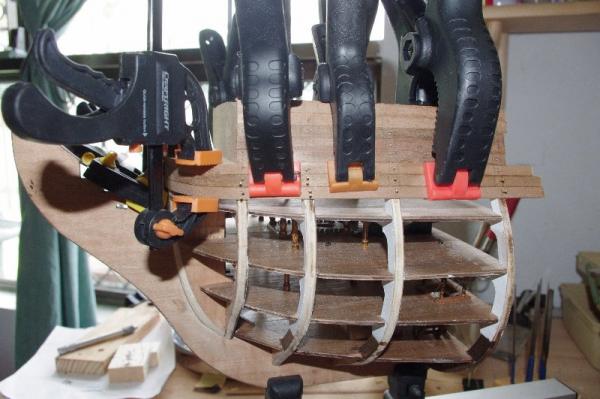
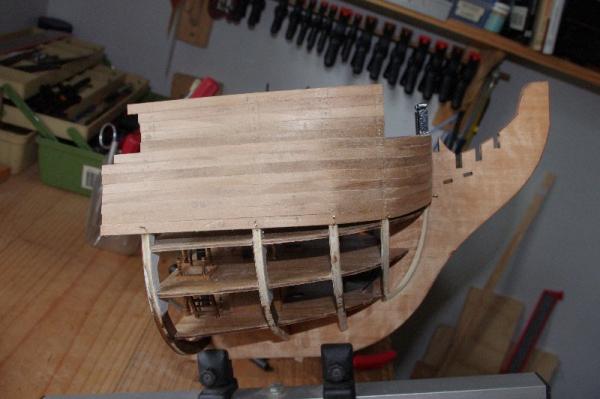
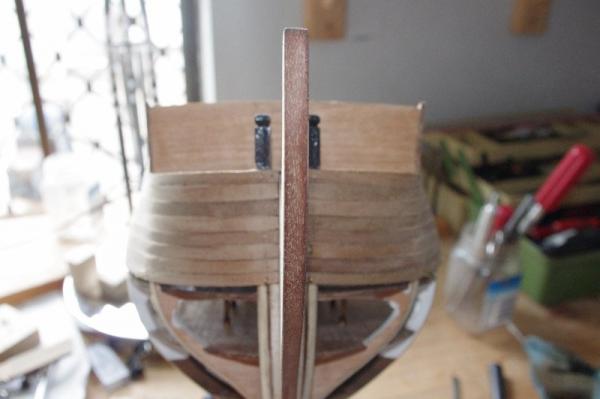
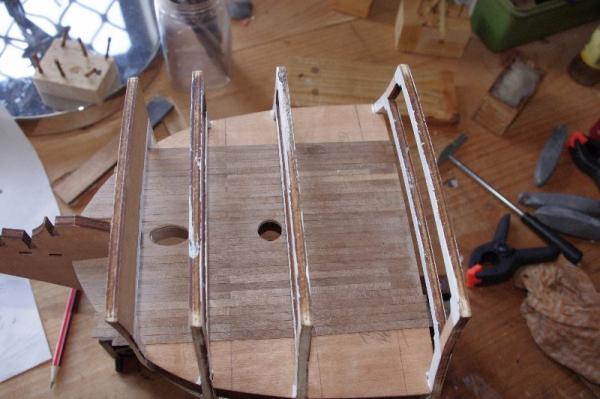
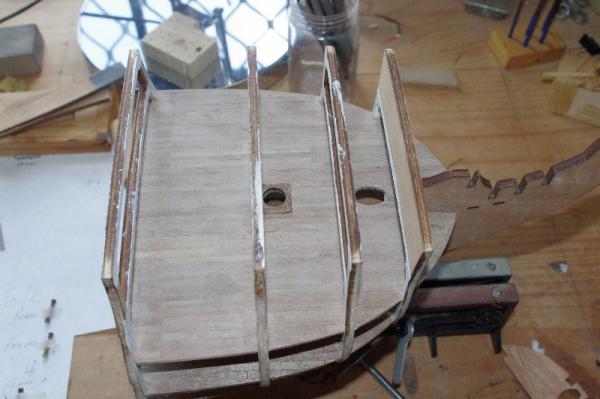
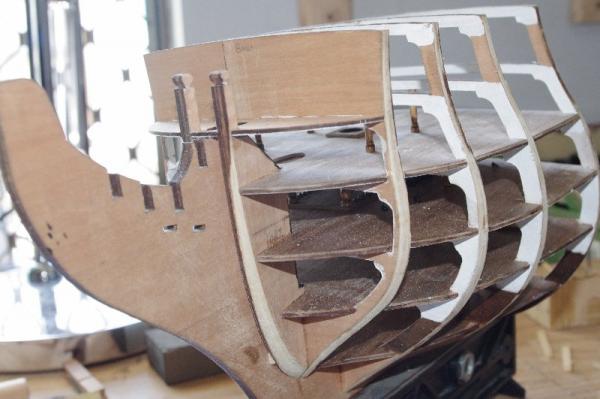
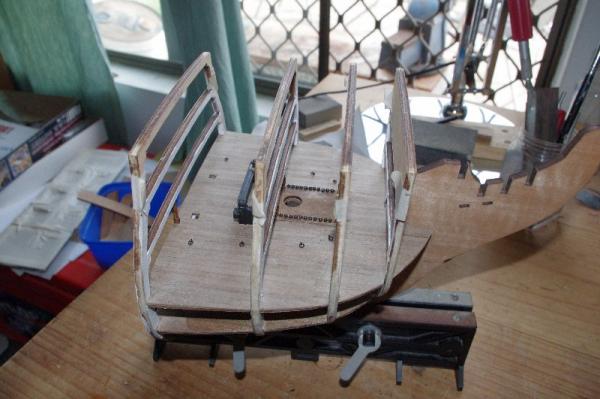
Now it came to the tricky part of shaping the planks around the bow and keeping their upper edge tight against the previous laid plank. To achieve this I soaked the planks in cold water for about 20 minutes and then shaped the curve around the bow with plank nippers I then pinned the plank to the frames and allowed it to dry. When it was dry I removed from the frames and made any small adjustments required and then glued it into position. I did not measure the frames or lay planking bands on this model as it only a section. I laid the planks by eye judging when and for how much of their length tapering was required. The first three planks around the bow are full width and then they taper slightly as they go down the hull. No plank is tapered to less than half of it's width. The supplied timber for the first planking is 6 x1.5 mm Walnut Some of the planks required clamps to keep the edges together and to help keep them flat so that minimal filling and sanding will be reqiured for the second layer, I hope I think this type of model is difficult to plank because you only have the 4 frames and the support pattrens to fix the planks to so they tend to want buldge outwards especially in the bow area and it was hard to try and hold a good shape, filler blocks can't be used as they block out the decks, but with a bit effort I am fairly happy with the result so far I should also mention that I filled the nail holes with bamboo treenails to give the planks a bit of extra security


-
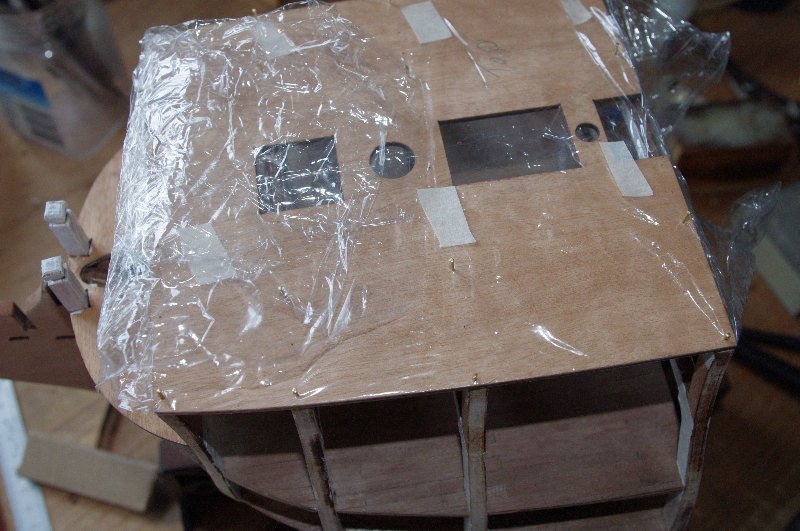
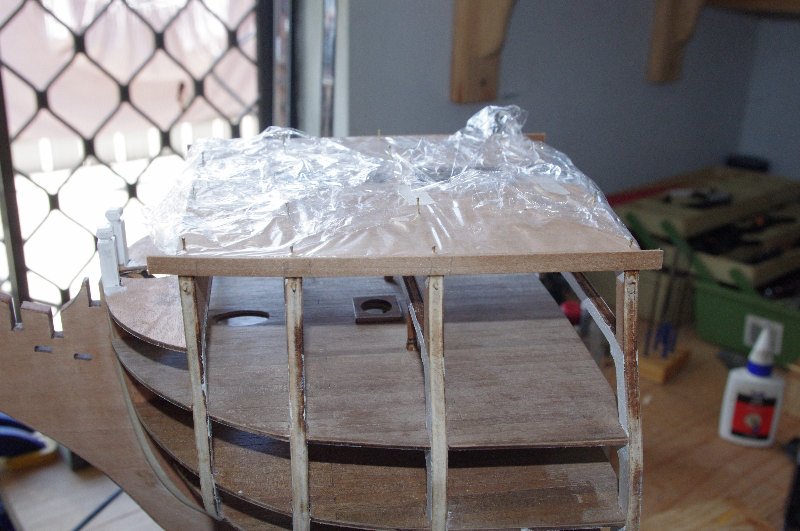
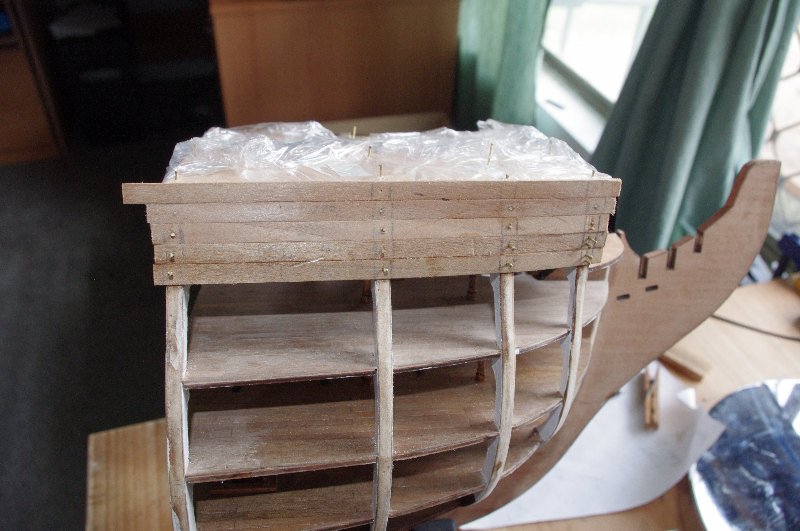
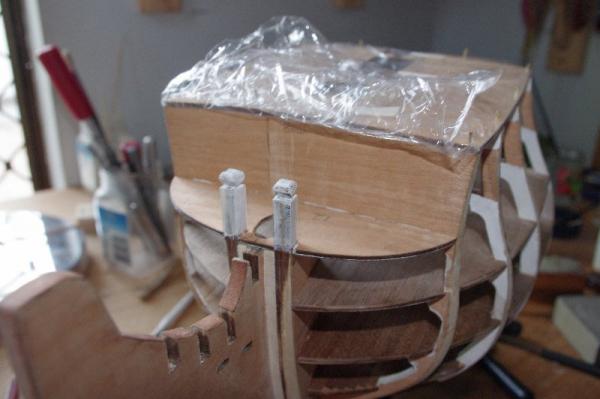
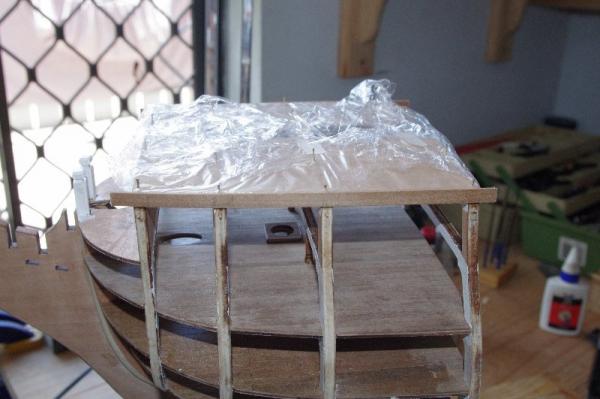
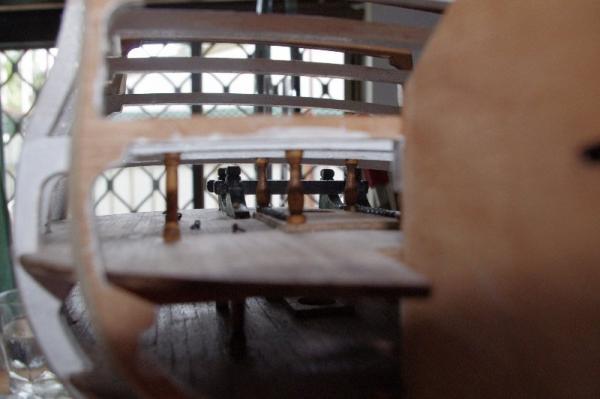
The Middle gun deck has been left unvarnished for now and it is the last deck that will permantly fixed in place until the outer hull is completed. I temporarily fixed the foc'sle deck in place so that I could accuately fix on the first plank, the plastic wrap is to stop the plank sticking to the deck The first plank was then laid The next four planks were then laid down to the beakhead deck without any problems.


-
Hi Slog, Your Bumkins and Catheads look great I think the varnished timber looks good and does show off the extras you put on them. As for the pumps I think the kit ones will look OK once you have blackened the parts with your brew, any way it can't hurt to make one up and see how it looks and if you don't like the result you can always scratch build them, just my 2 cents worth
-
Hi David, I rememberyour log from the old site thankyou for reposting it here. Conratulations on a superb build you should be really proud of her :D
-
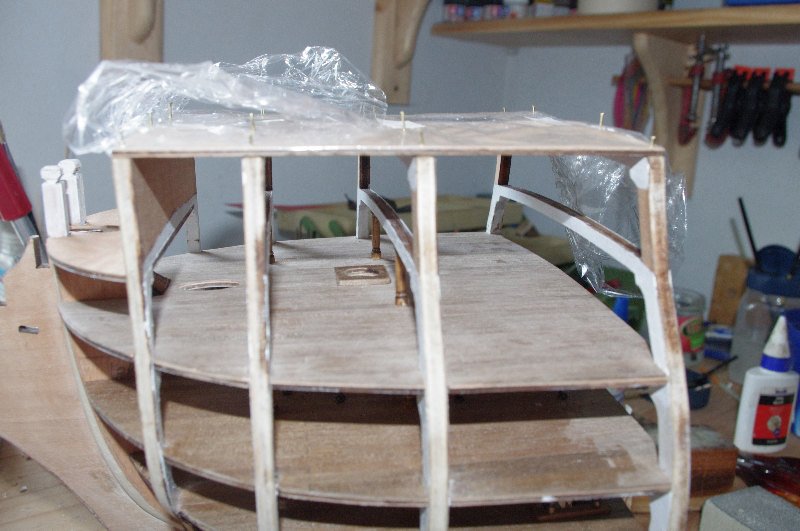
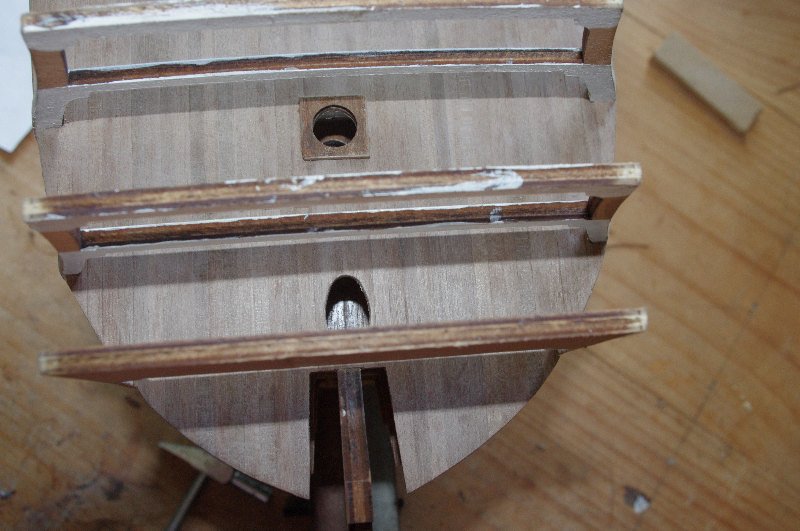
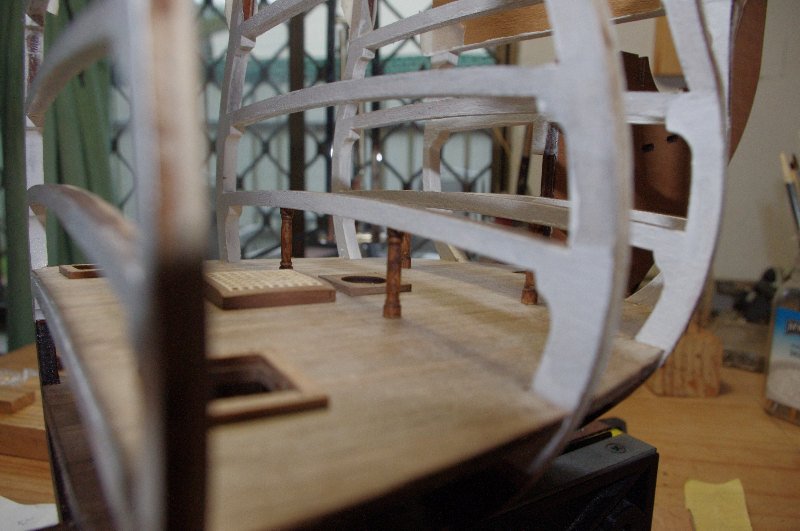
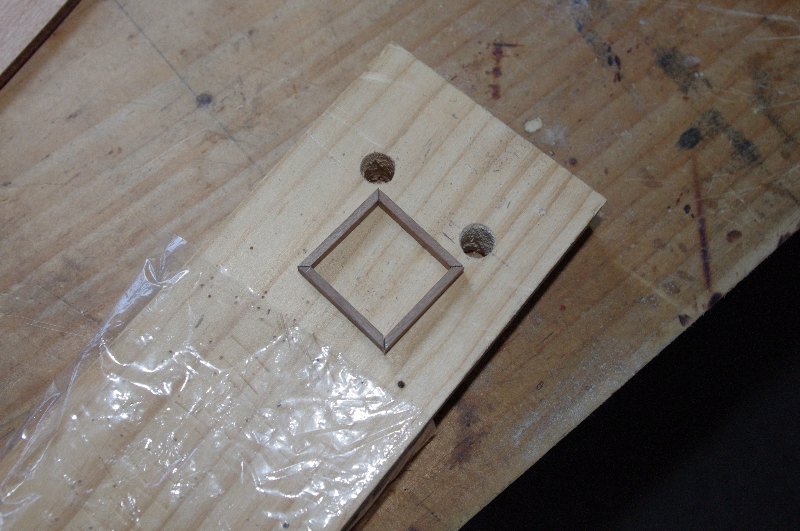
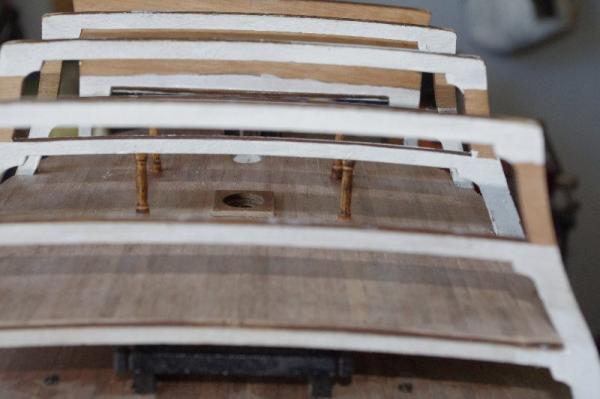
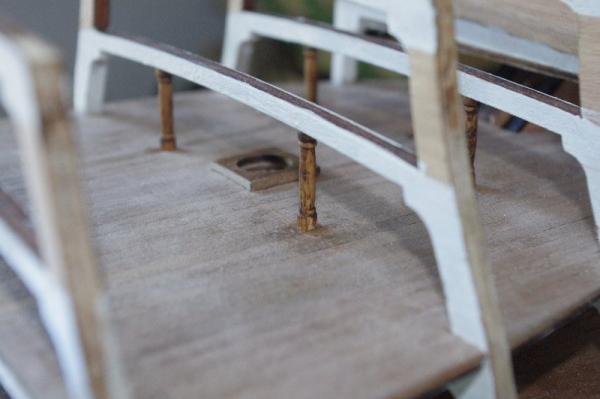
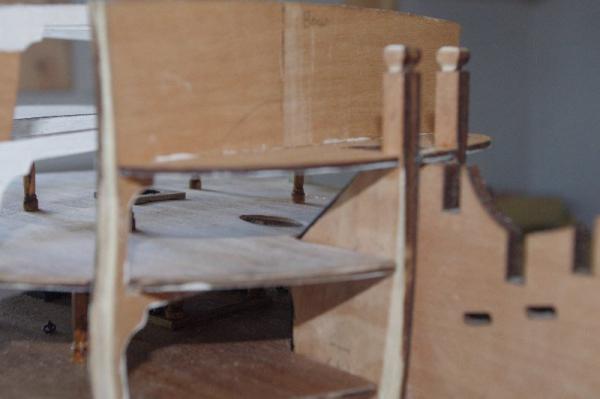
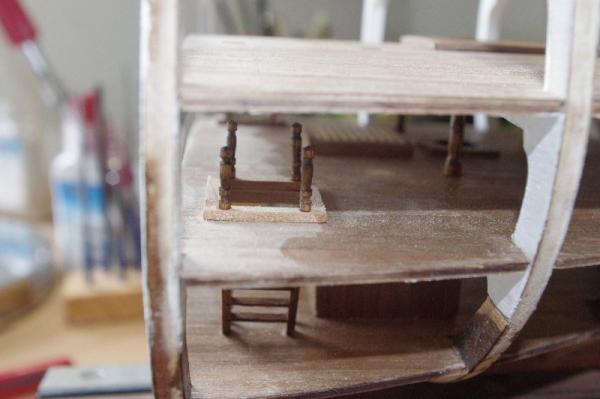
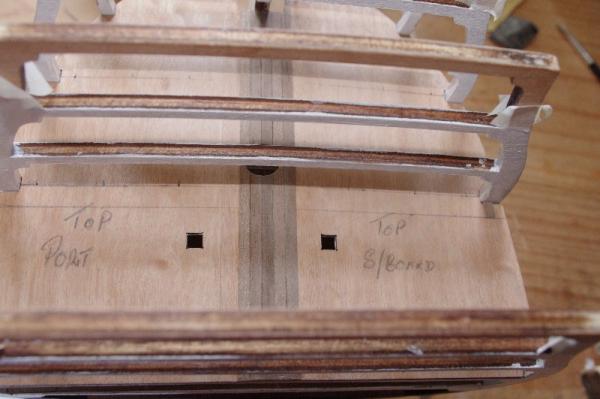
The last job to be done on this deck was to fit the stantions under the middle 2 frames
-
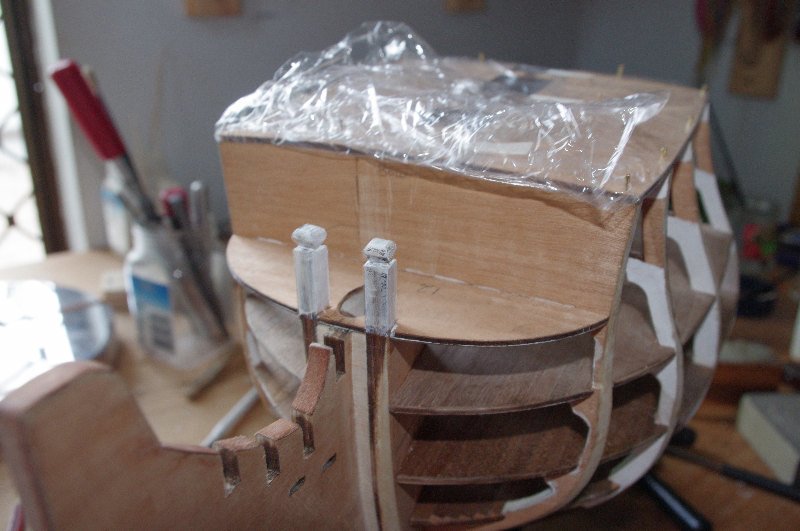
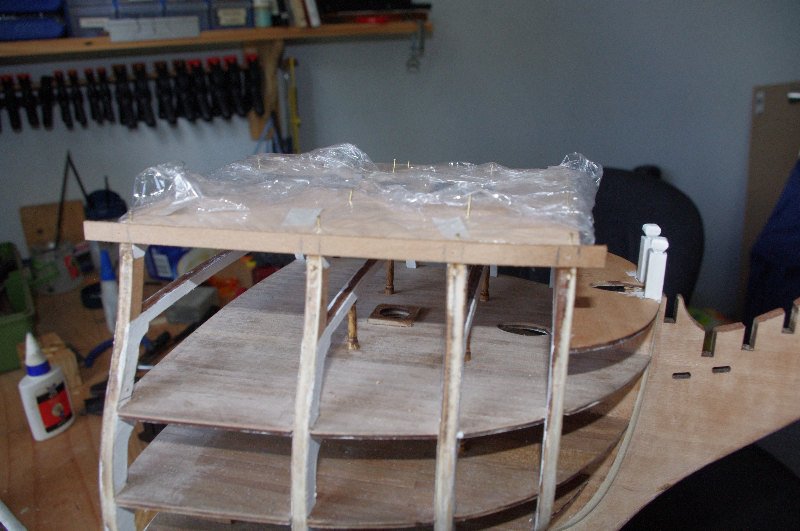
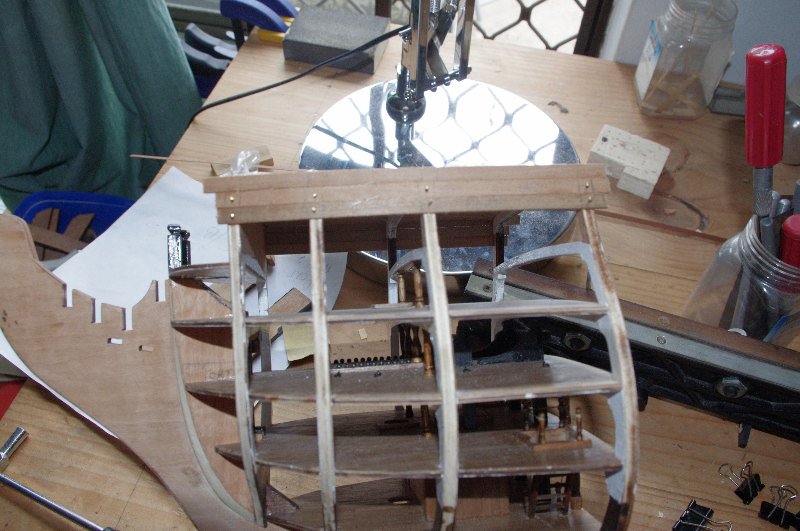
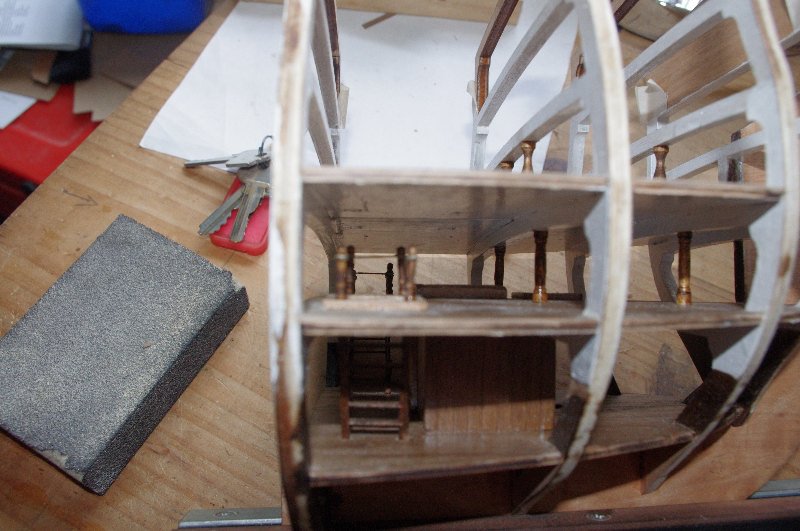
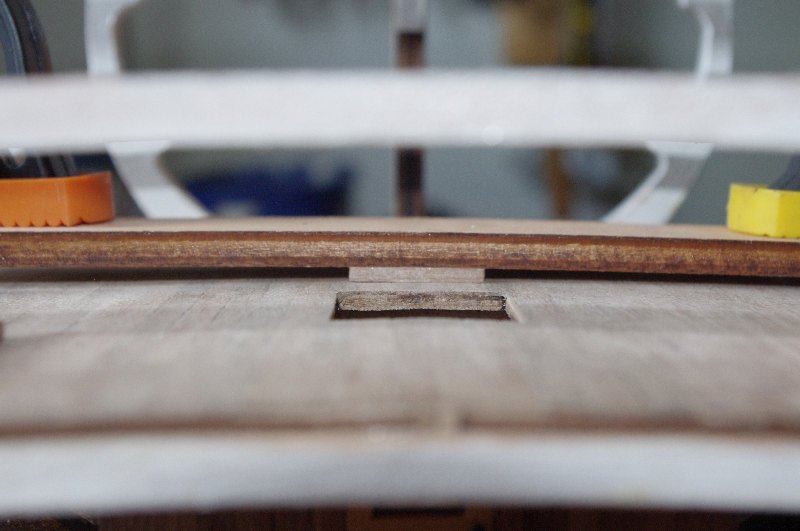
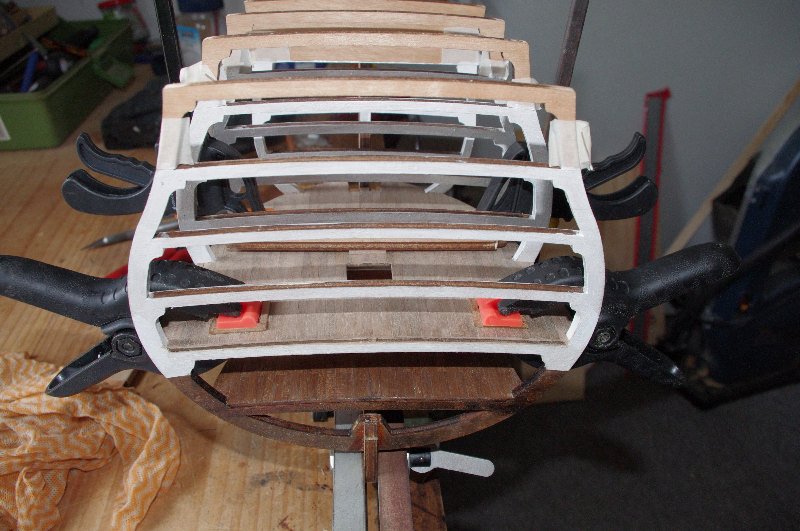
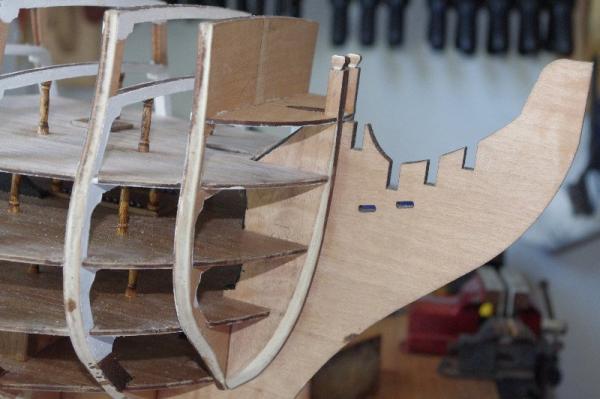
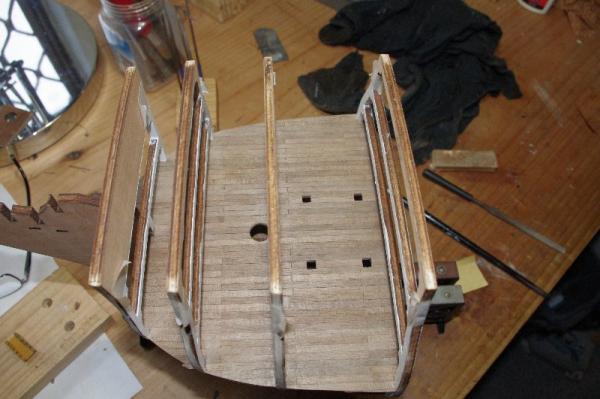
The middle gun deck was the last deck to be fitted before I began the first layer of planking. It was fitted in the same way as the other decks with care taken to make sure the mast holes were aligned and that the deck sat flush on the frames. It was then marked out and the deck planking was laid. I then fitted the bow plank termination supports and the false beakhead deck. The bow plank supports are fitted at an angle to the keel and this is another reason why the middle gun deck was fitted to get this angle correct at the top. I hope you can see in the following pics that it would be rather difficult to fit the middle gun deck after the planking was complete. The gap between the supports and the keel seen in the first picture was filled with balsa wedges and sanded flush with the supports


-
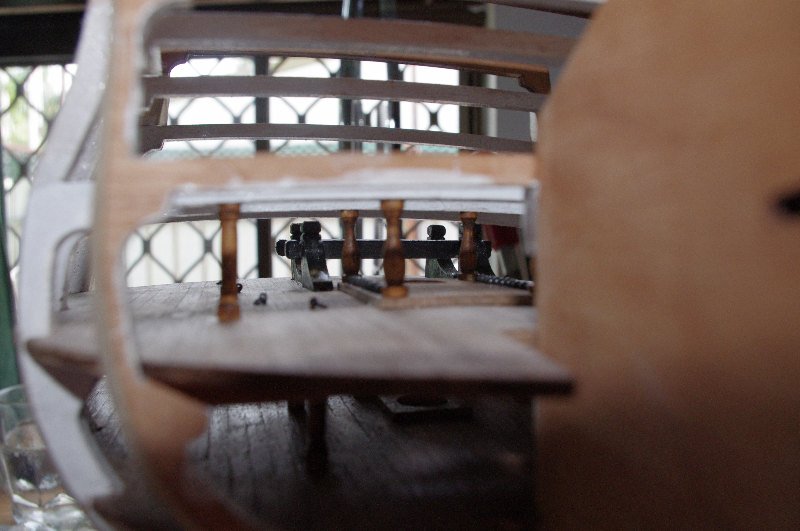
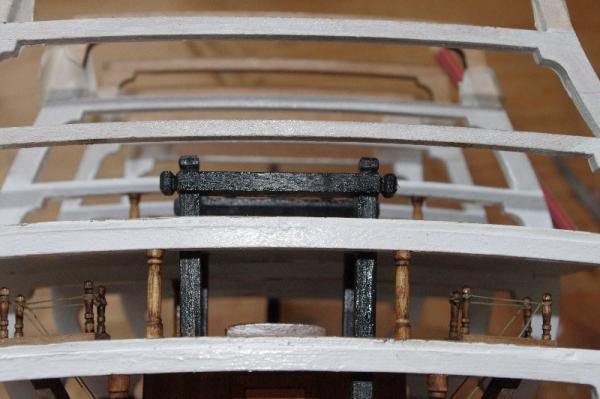
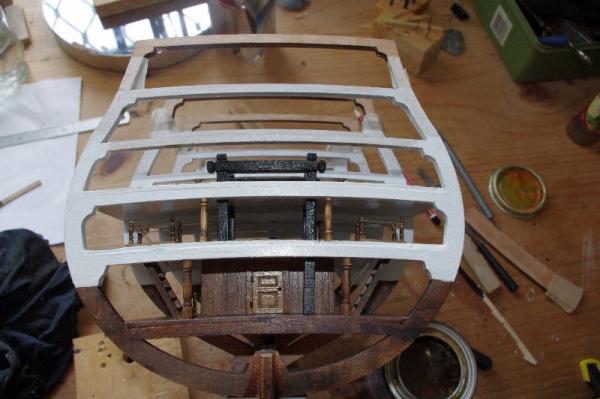
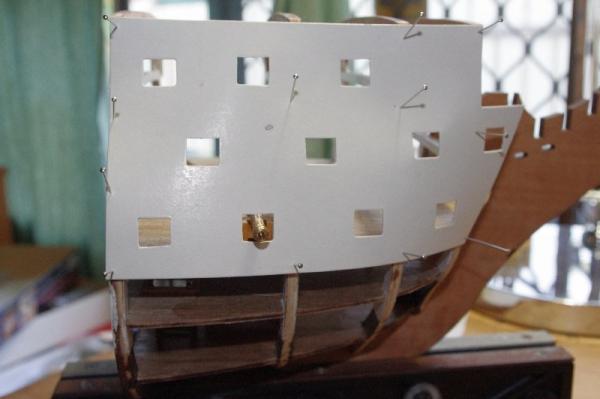
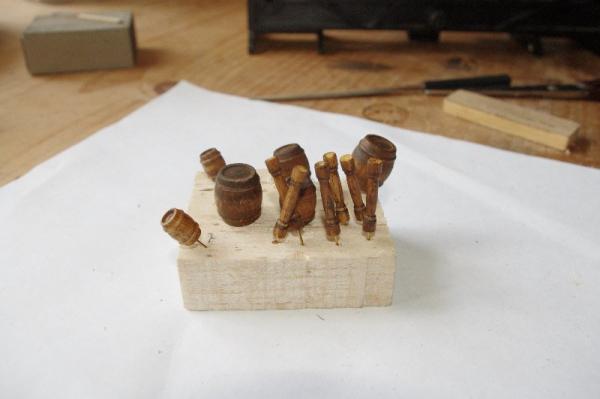
Hi All, The last thing to do on this deck was to fit the aft riding bit. The parts supplied for the riding bits were laser cut 5mm plywood and the uprights terminated on the orlop deck where McKay's ATOS shows them going down to the hold so I extended the aft set of bits down to the hold deck, the fore set wont be seen on this deck so they were left to terminate on the Orlop deck. A couple of more photos of the shot garlands from the bow


-
Hi Kester, That is a good idea of yours to build your gunports from the Lower Gun deck up, I wish I thought of that but I'm not sure how confident I would be at lining everything up, so I am going to complete the first planking and the cut out the gun ports using the pattern and any minor adjustments can then be made with the second planking. The gunport pattern may look a bit out in the spacing of the ports but I think this is to accomodate the their position in realation to the decks and frames of which the latter are not in the position they are on the real ship. Unfortunately it is a bit late to move the ring bolts on the Lower gun deck as the Middle Gun deck has been fitted and I no longer have access to it
-
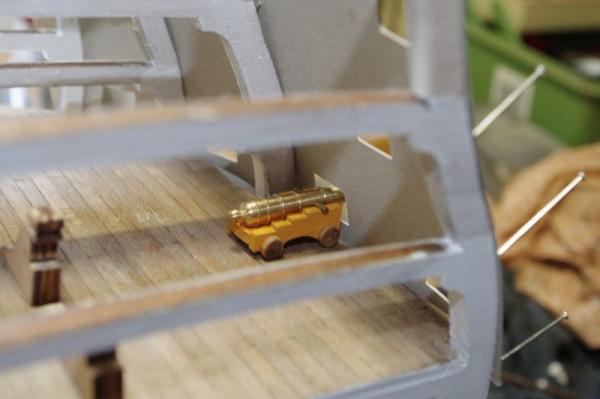
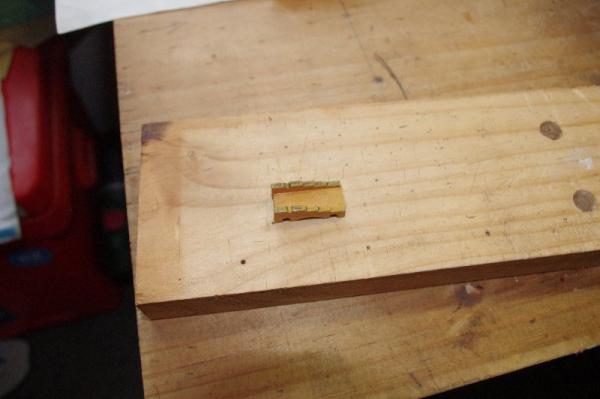
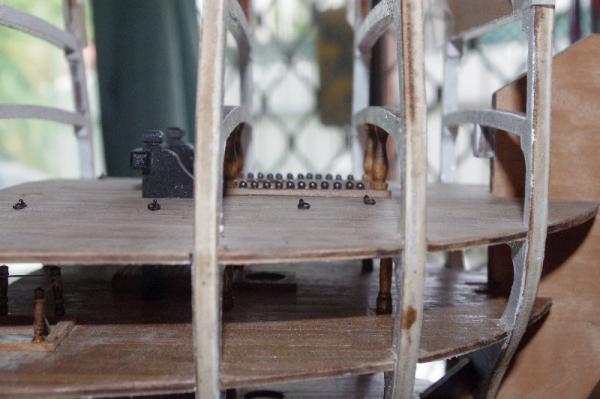
After test fittng the Middle Gun deck with the plank termination pieces fitted to the keel and the small beakhead deck fitted , I determined that I would not be able to fit this deck after the hull panking was complete without doing some serious modification to it. So I decided to fit the Middle Gun deck and then plank the hull. Doing it this way will limit my access to the Lower Gun deck cannons meaning that I will not be able to fully rig all of them but I will try to give them as much rigging as I can get on them. I temporarily attached the Gun port pattern to the frames to indetify the position of the guns on thr lower deck. I made up one 32 pounder gun carrige and marked the position for the ringbolts for the train tackle to be drilled into the deck. However I think I made a slight error here as after fitting them I have read a few logs here where they say that these bolts should be located as close to the centre line of the ship as possible, mine aren't because I made allowance for the anchor cable to pass behind them but I think it might be too much In the next few photos you can see the ring bolts fitted along with the Fore rining bits and the shot garlands in the mast partner.

-
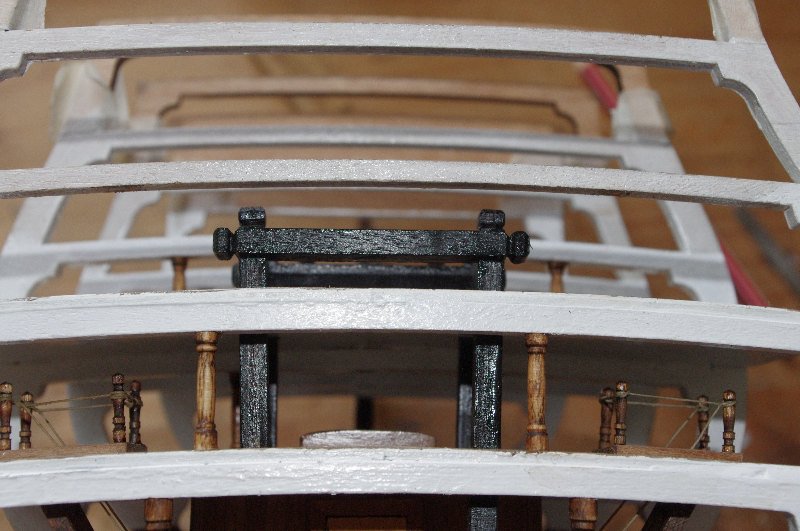
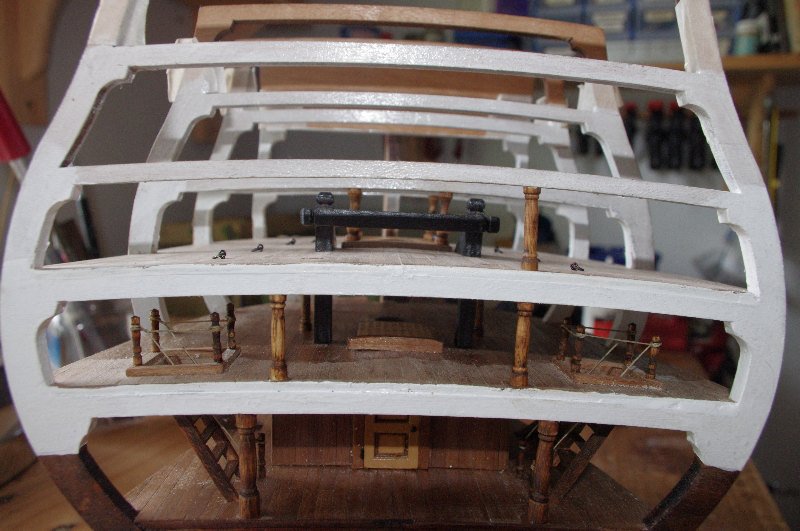
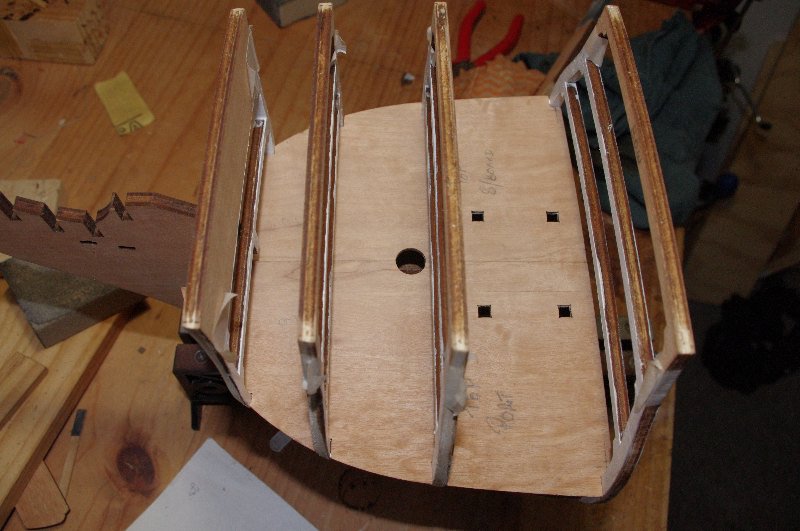
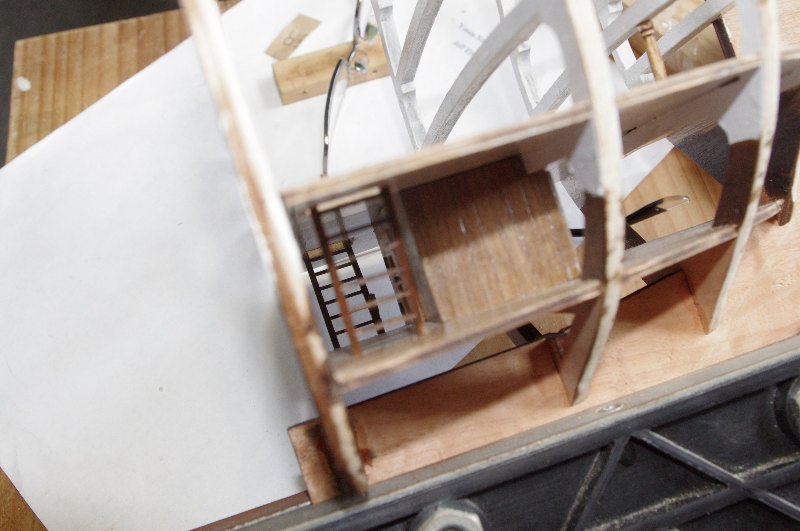
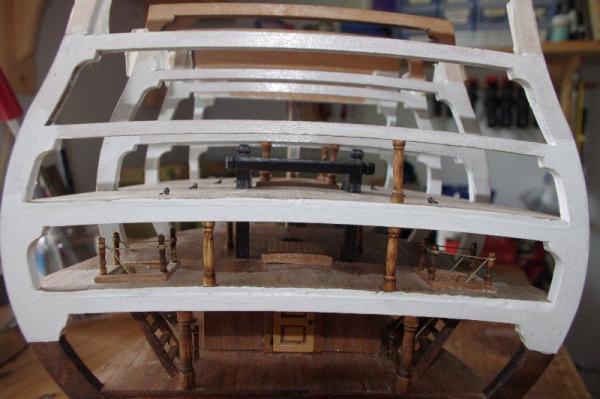
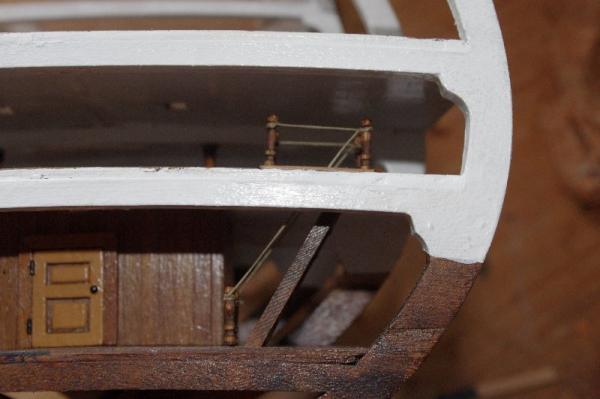
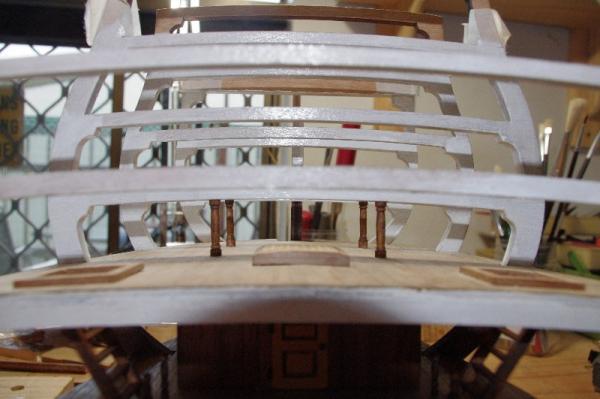
Hi All, After the deck planking was completed the next job was to fit the mast partner , this one differs from the other decks as it is larger and lines up under 2 of the frames above . It will have a stantion in each corner I will also make a shot garland down it's length on either side I also fitted the hand rails to the Orlop deck companionways and rigged them
-
Hi Kester, Thank you for your kind comments
-
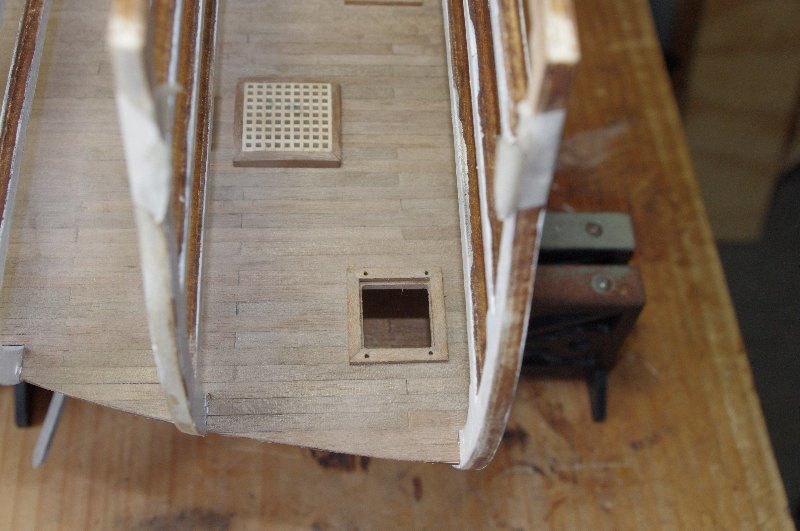
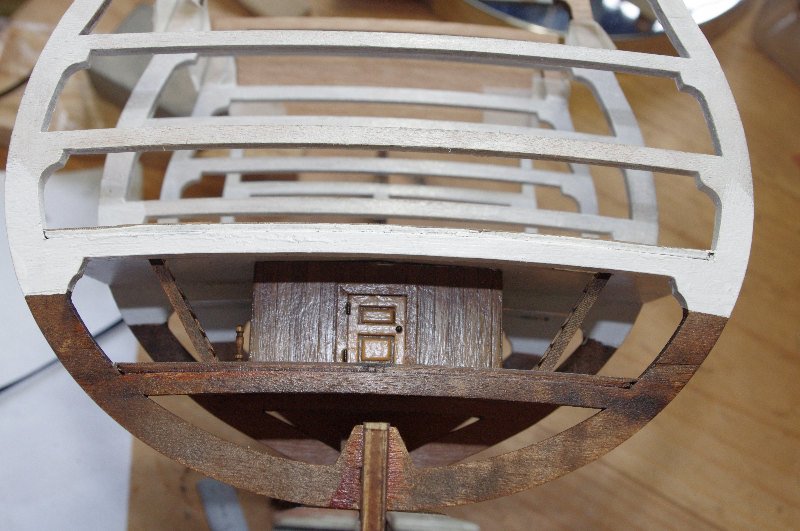
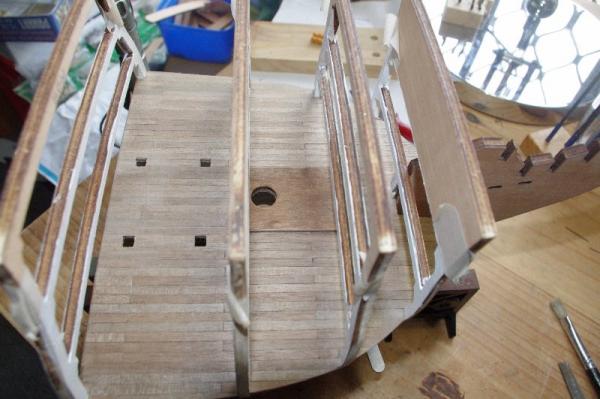
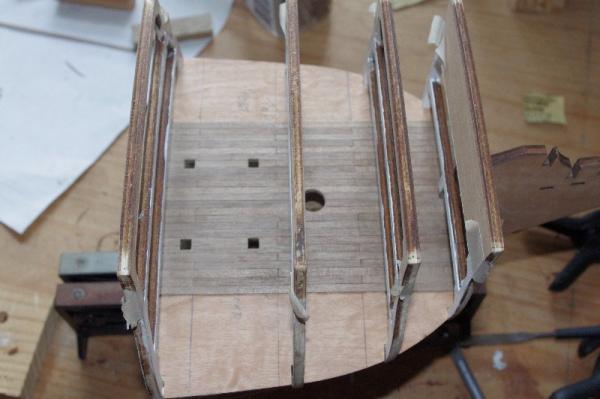
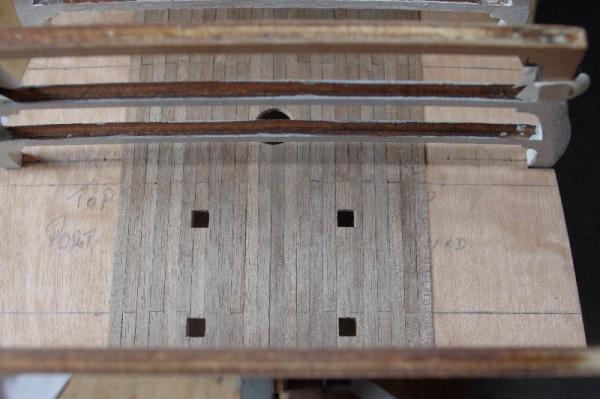
Hi All, On to the next deck, the Lower gun deck. The under side of this deck was painted white to form the ceiling of the Orlop deck and then it was glued into position The false deck was then marked out for planking and the planks laid

-
Hi Jared, Thank you for your kind comments, I never really noticed until you mentioned it but the stain does give it a bit of an antique look
-
Happy Birthday Kester I hope you have a great day
-
Hi John and Welcome to MSW Looks like you have a bit of challenge ahead of you with the Berlin although from the your photos the hull looks to be in fairly good nick. Was it complete model broken up when it was thrown out or in pieces already? Good luck with your reconstruction of the Berlin.Going on the job you have done on your Victory I don't think you will have much trouble repairing the Berlin. I will follow your build or should I say rebuild with interest Your Victory looks fantastic it looks like you have done a very professional job with her and is that the Corel cross section next to her? The two together make a very interesting display
-
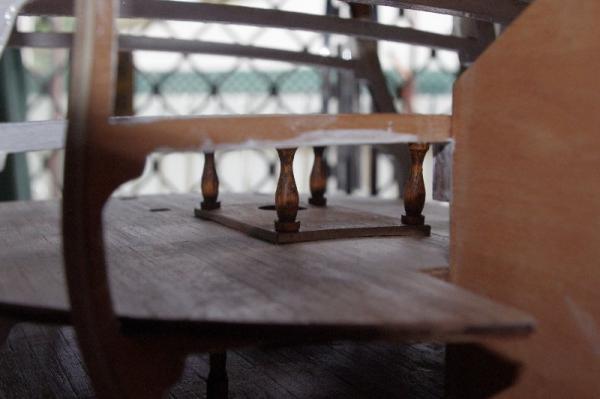
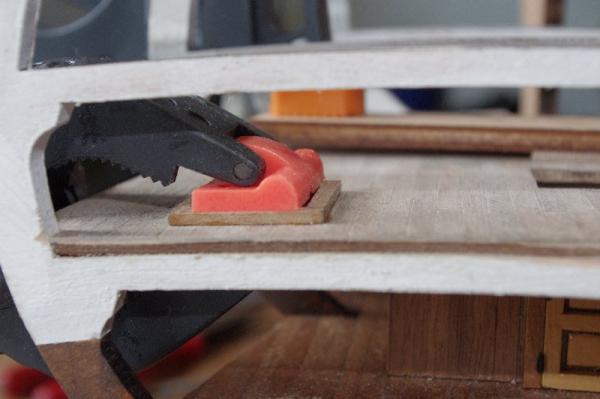
Hi All, The last job to do on this deck before it was varnished was to fit the stantions that help support the deck above. They are a pre made part and need to be filed down to fit between the deck and the frame they were then lightly stained with oak They were then glued into position at the distance shown on the plans

-
Hi Anthony, I just had a look through your log and you are doing an excellent job on your crosssection. The shot lockers and the pump housel look great and I see your doors are functional Now iv'e found your build I will follow it with interest
-
Thankyou Kester. It is unfortunate most of it will be covered up but it's good practice
-
Hi Anthony, Thank you. I am fairly happy with the quality of kit .
-
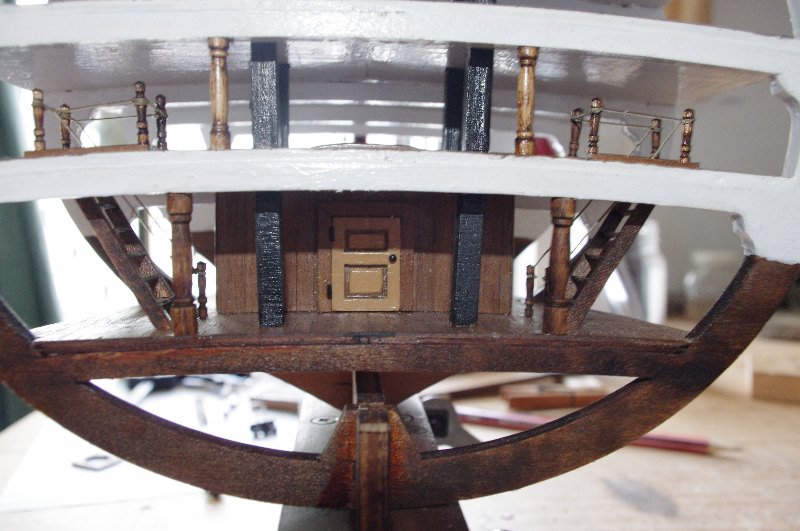
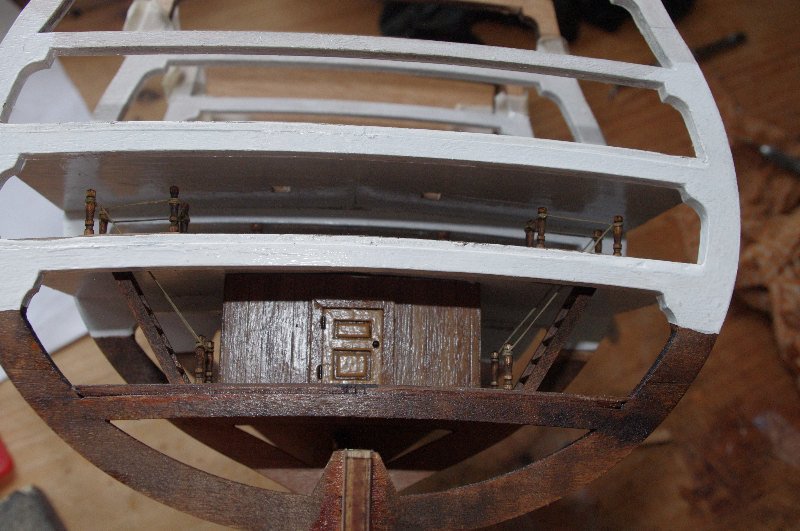
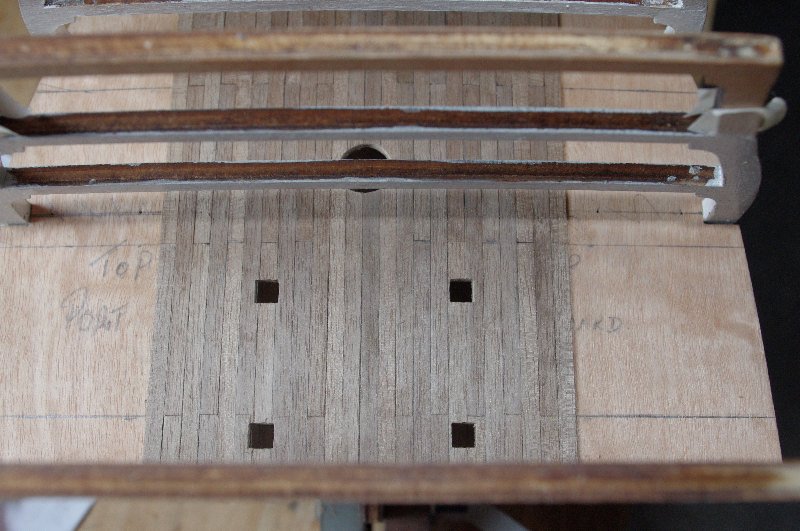
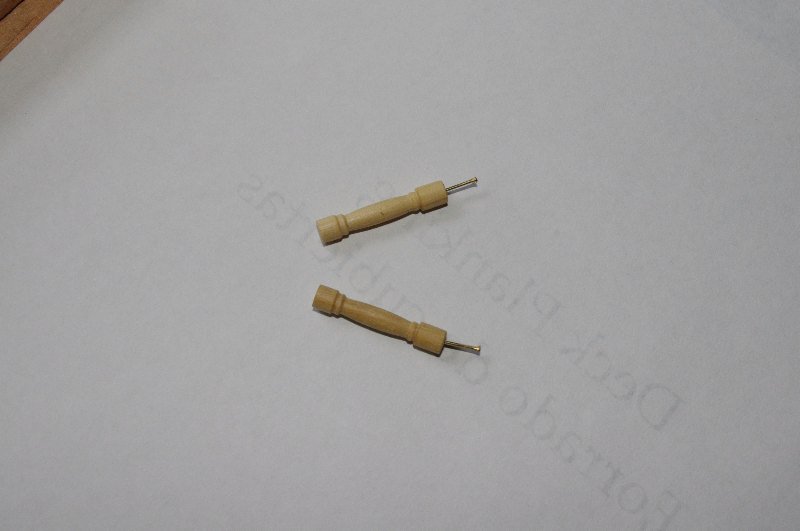
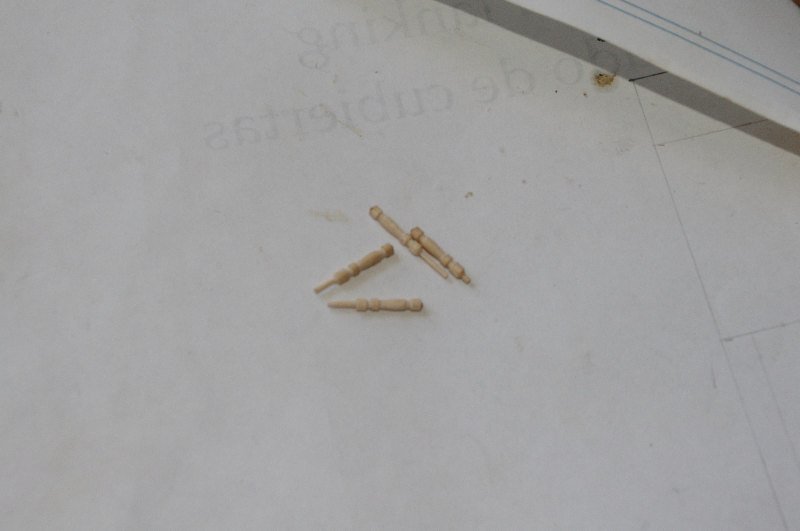
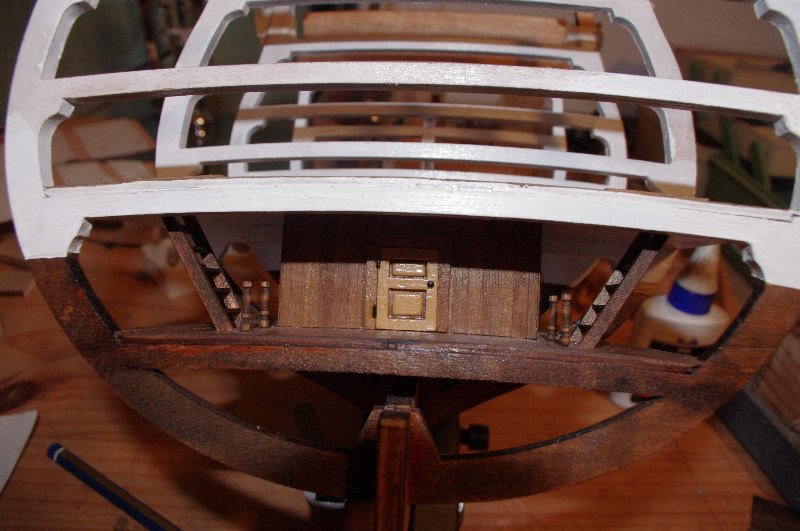
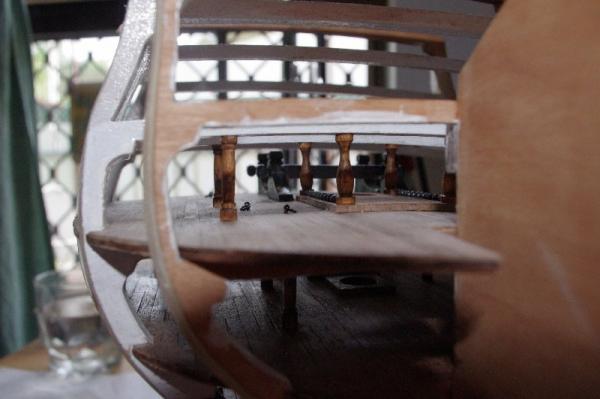
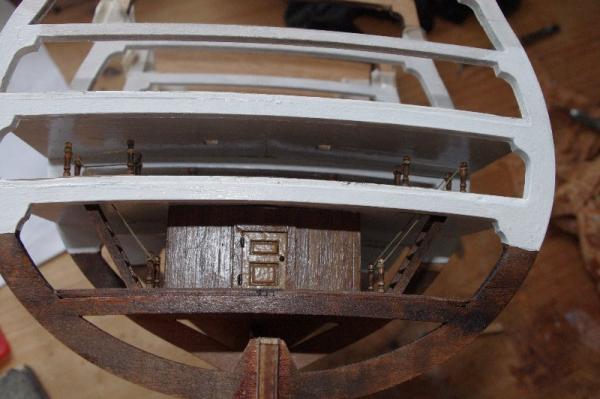
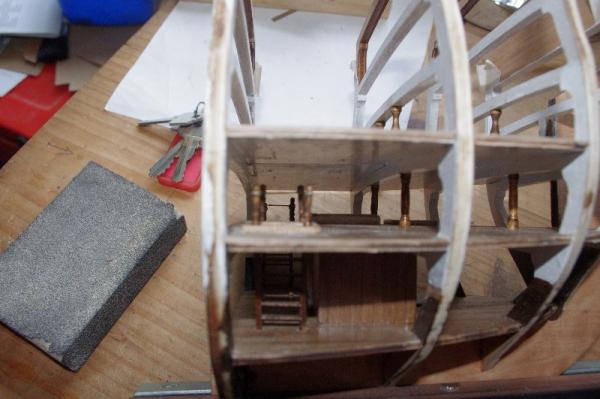
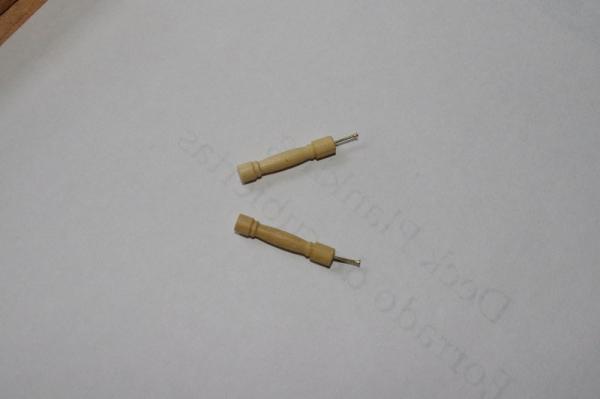
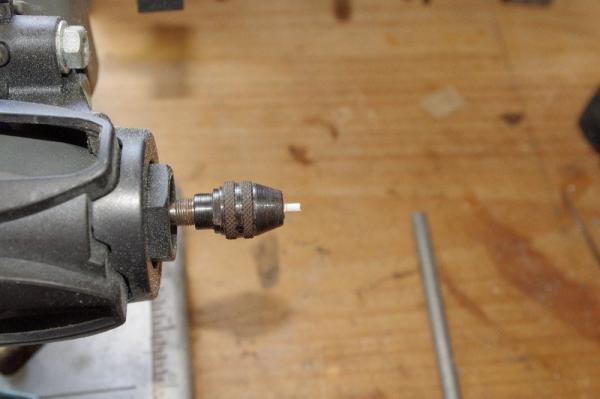
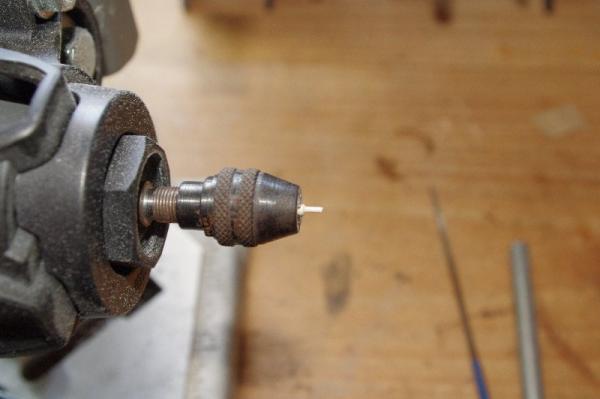
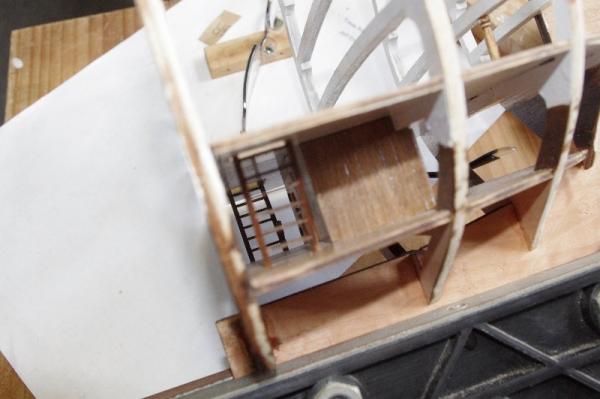
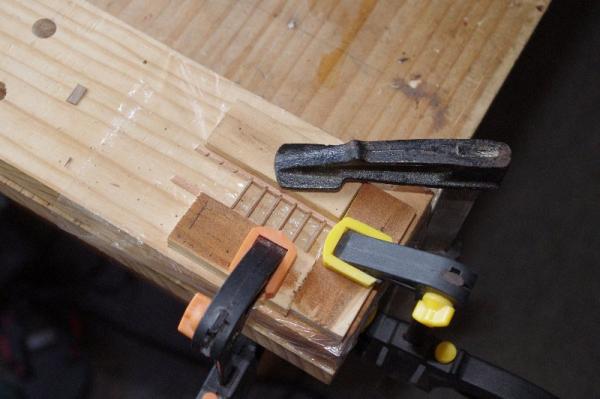
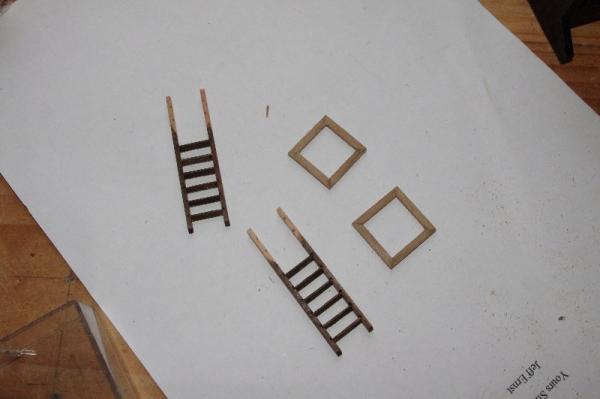
One of the mod ifcations I am making to this kit is to fit hand rails to the companionways. I don't know if they were fittited on this deck but as I said previously there was only one ladder leading to the hold deck in this part of the ship. I am going to make the hand rails out of tooth picks as they have a pattern already turned on the handle end and are about the right diameter. To make them I cut them to length plus a few millimeters and then turned the ends down in my dremel so I had a pin to locate into the holes I had drilled in the coamings. They were then stained with oak. The ladders were then fitted and the hand rail post were fitted to the Hold deck, the Orlop deck posts won't be fitted until the lower gun deck as fitted as they are fragile and may get broken off


-
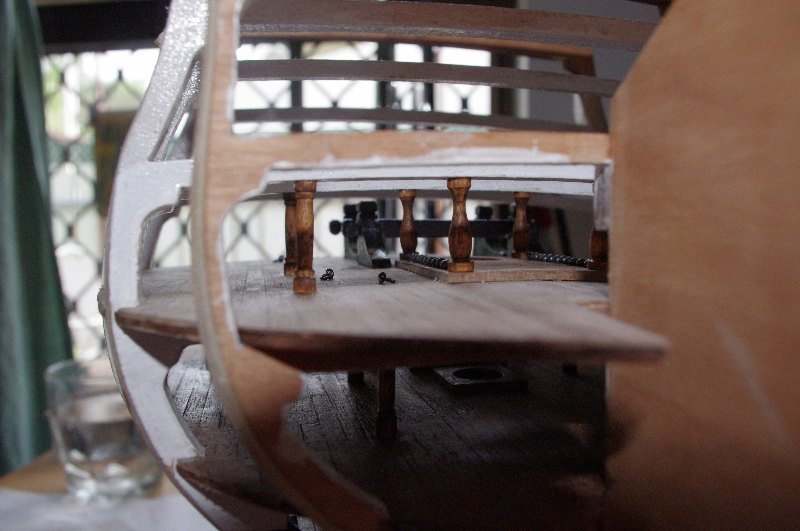
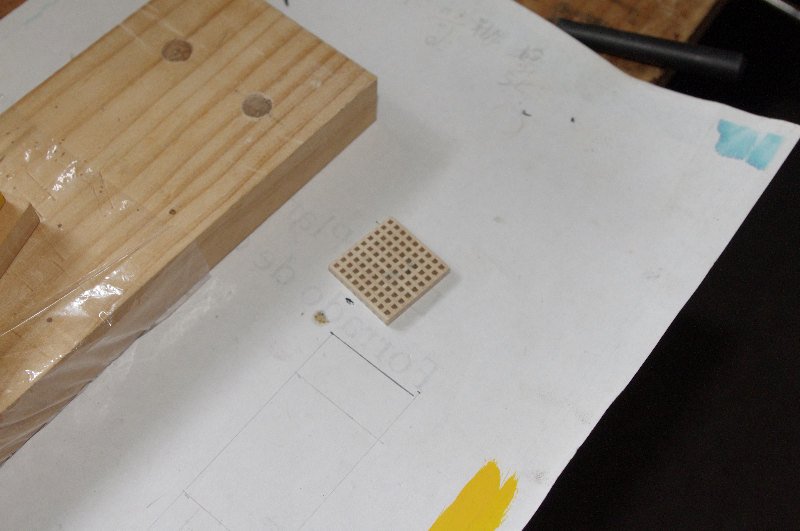
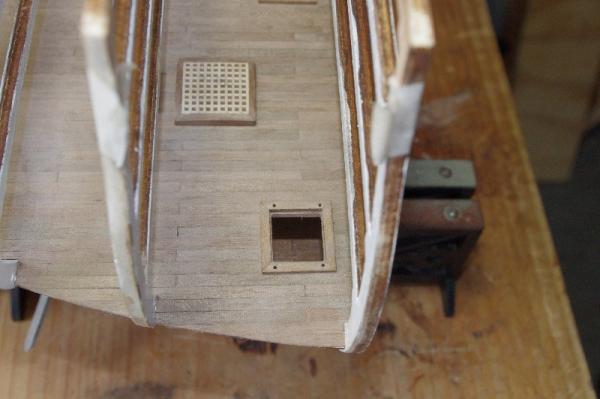
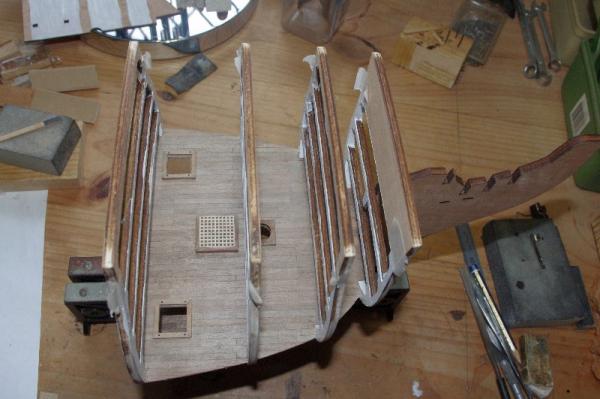
Hi All, While the deck planks were drying I made up the grating for the hatch and the coamings for the companionways and the ladders After these were made I fitted the companion way coamings and mast partner to the deck


-
Hi Richard, I just been reading your log, Nearly missed the starters gun It looks like a high quality kit going by your photos and she is going to be big, I should think it will be a nice change for you to work on a larger scale model and not have to deal with those smaller parts you had on the Pickle. I will follow your progress with interest You are off to a great start keep the please pictures coming
-
Hi Jared, No Problem. I'm happy to pass on any info that I can