HOLIDAY DONATION DRIVE - SUPPORT MSW - DO YOUR PART TO KEEP THIS GREAT FORUM GOING! (Only 13 donations so far - C'mon guys!)
×


Jeff-E
-
Posts
699 -
Joined
-
Last visited
Content Type
Profiles
Forums
Gallery
Events
Everything posted by Jeff-E
-
Excellent work on the windlass Richard, she is looking great. I hope to start mine next weekend
-
Hi Matthew, Very nice work so far on your Bounty and quick too
-
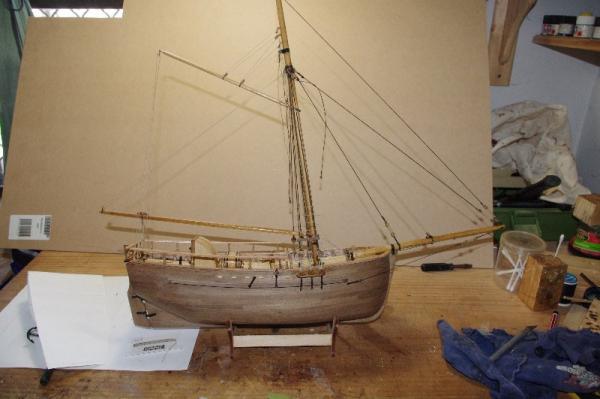
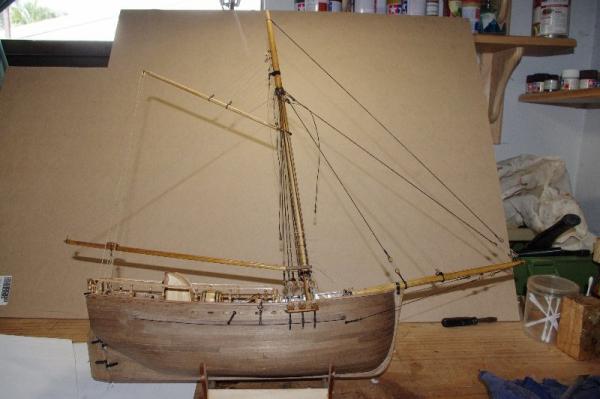
And so the last major part of this build is complete. All that needs to be done now is to make up and add some rope coils, which are in the process of being made now and to finnish off painting and varnishing the stand. I aslo raised the Ensign yesterday I will post some pictures of the finnished model over the weekend


- 98 replies
-
- 1
-

-
- norfolk
- modellers shipyard
- (and 1 more)
-
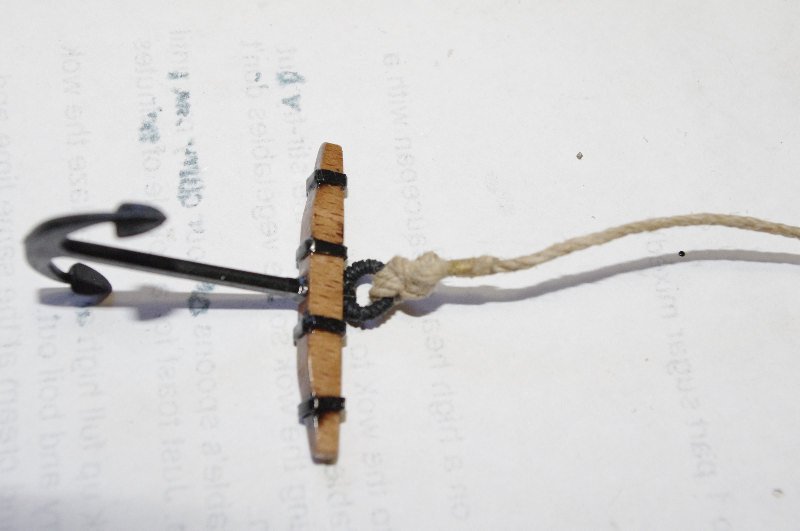
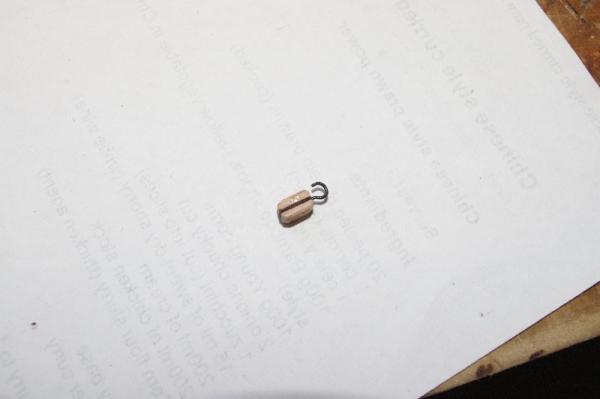
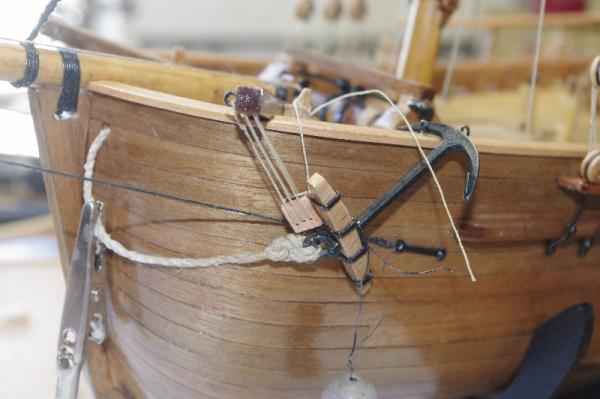
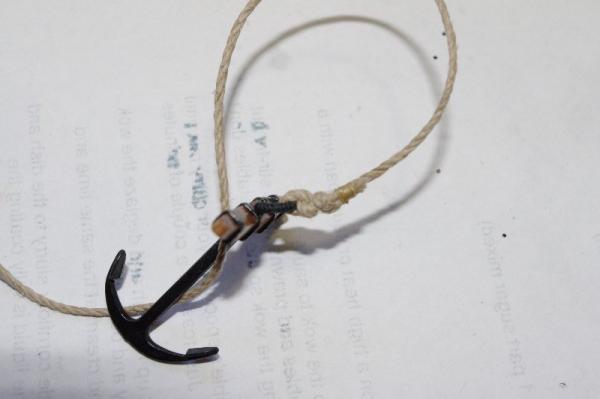
Thank you Richard for your kind comments. Hi All, The next job was to rig the anchors. This was fairly straight forward the anchor cable was fed through the hawse hole and wrapped twice around the winch, with the free end going into the cable hole in the deck. The cat head was rigged along with a three hole 7mm block which had a hook glued into one end of it, this was hooked through the anchor ring The block was rigged 0.25mm cord, starting at the eye pin on the cat head and reeving it through the block and cat head, finnishing at the cleat on the cat head. I got the cord to hang realistically by hanging a weight off the anchor ring and cable and painting it with a solution of diluted PVA glue. There was no provision in the kit for stowing the anchors. So I fitted two eye bolts to the cap rail on each side so the anchor arms could be secured


- 98 replies
-
- 1
-
-
- norfolk
- modellers shipyard
- (and 1 more)
-
Hi ZyXuz, Just had look through your log , excellent work especially the rigging you have done so far, very neat
-
Hi All , The next step was to fit the catheads and winch, the fitting of these was straight forward I had pre dilled holes iin the deck to take the pins attached to the legs of the catheads and winch supports I also filed the cap rails at an angle where the catheads would sit. The first picture shows this altough it is a lot earlier in the construction. The next two show the catheads fitted The next three show the winch fitted. I got a bit ahead of myself and had the port anchor partly rigged before I rembered to take a picture


- 98 replies
-
- 1
-
-
- norfolk
- modellers shipyard
- (and 1 more)
-
Very nice work on the deck funiture, Richard
-
Thank you kindly Brian
-
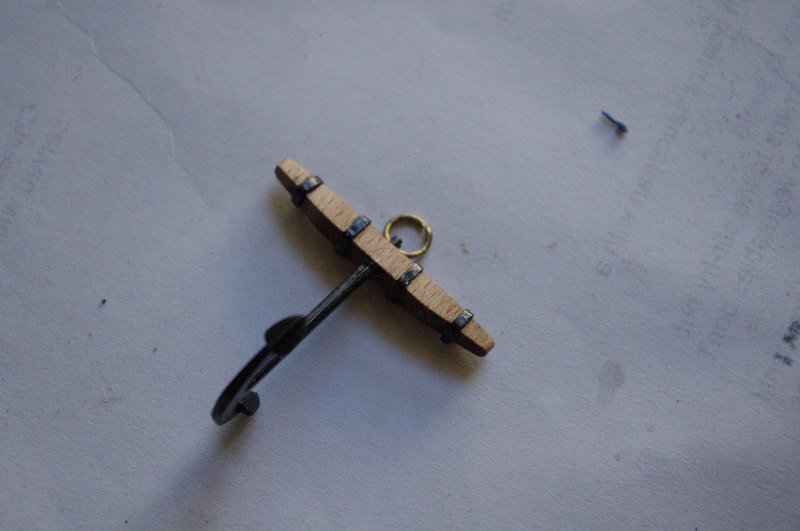
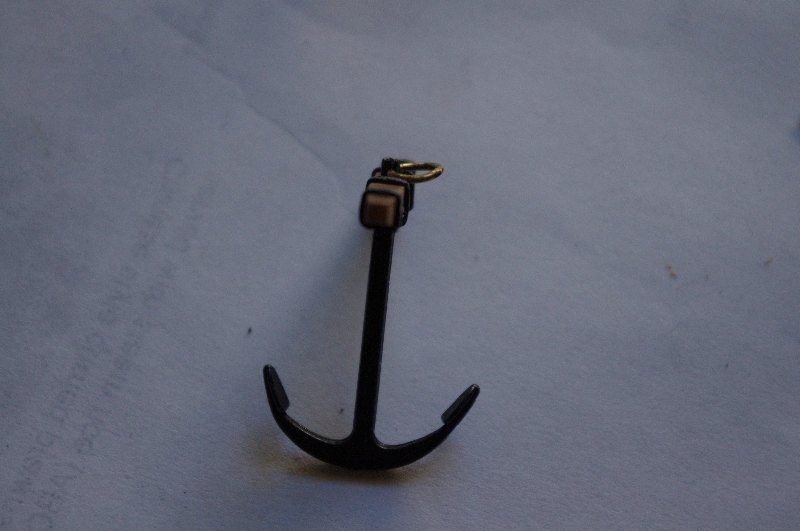
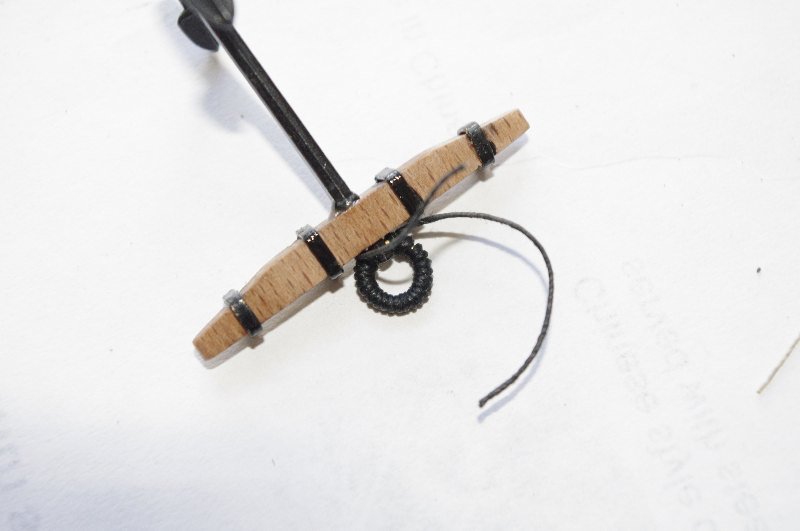
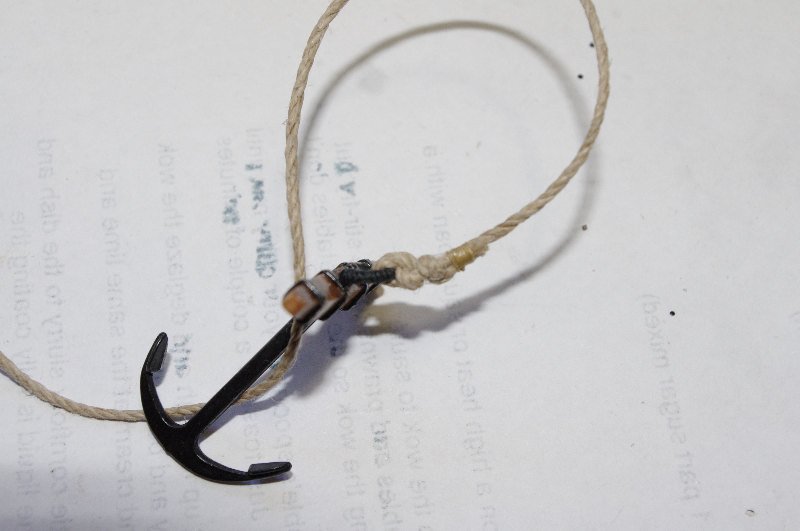
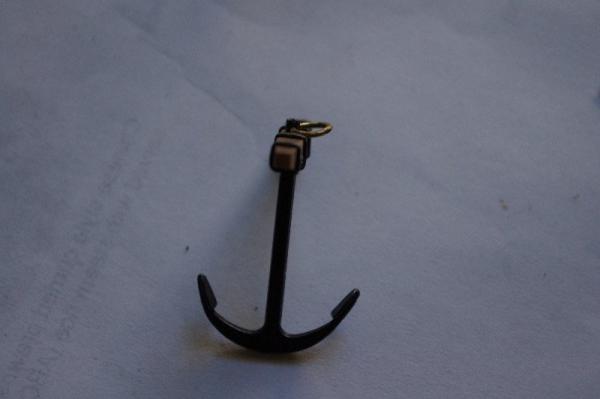
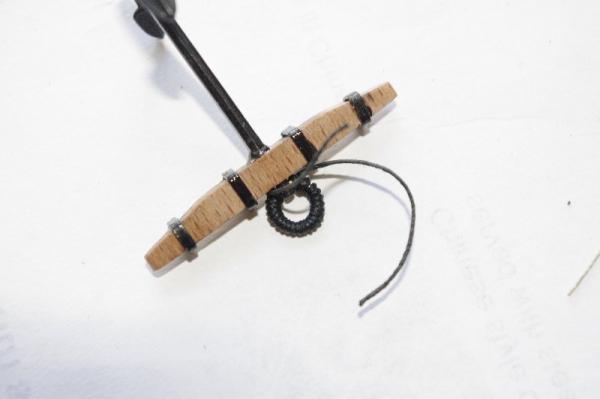
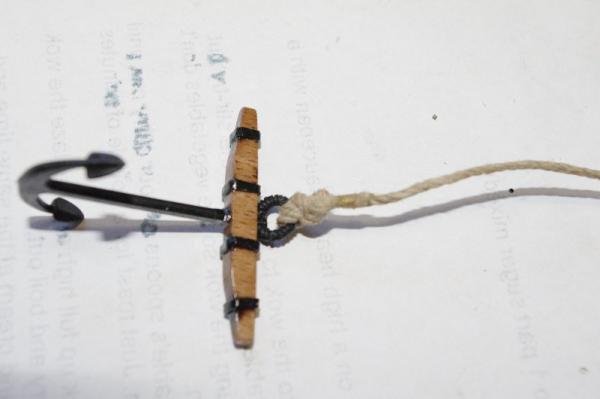
The stock was then glued to the anchor and the ring attached and soldered. The supplied ring was I thought to small so I used a larger one as I wanted to serve it The anchor cable was then tied to the anchor using a fishermens or anchor bend knot
- 98 replies
-
- 1
-
-
- norfolk
- modellers shipyard
- (and 1 more)
-
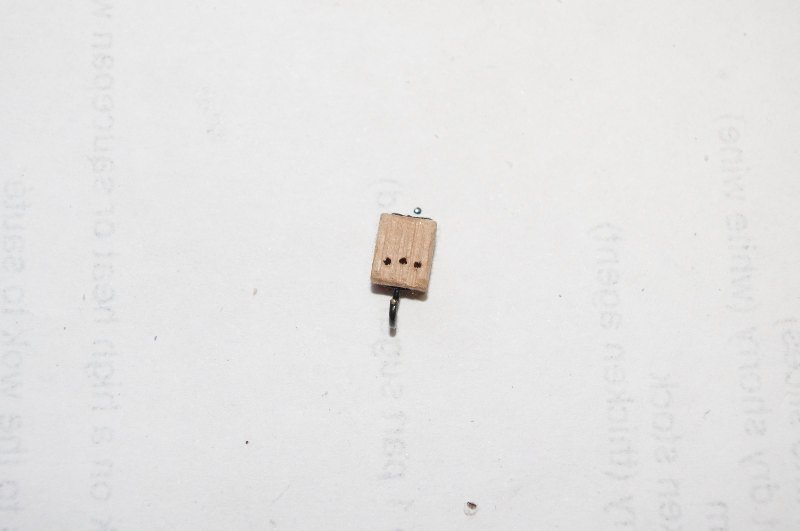
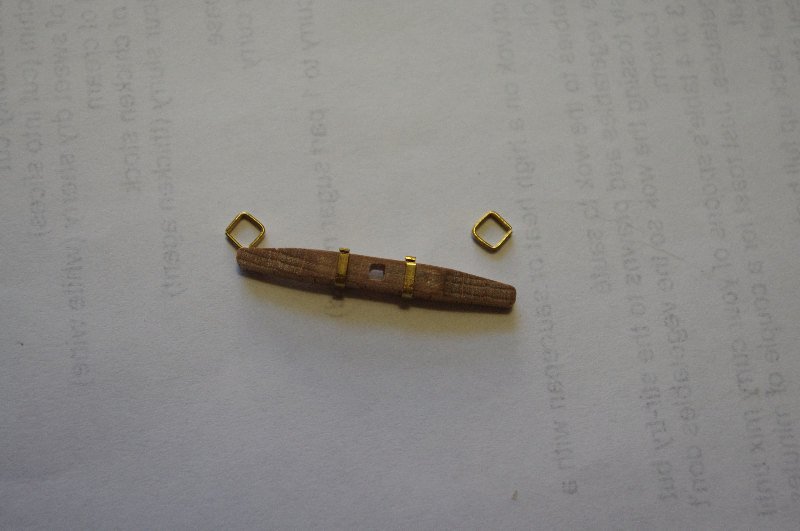
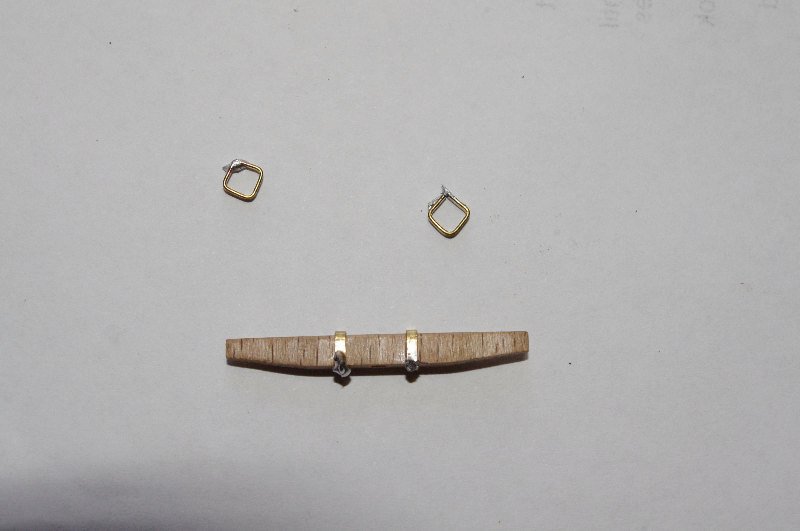
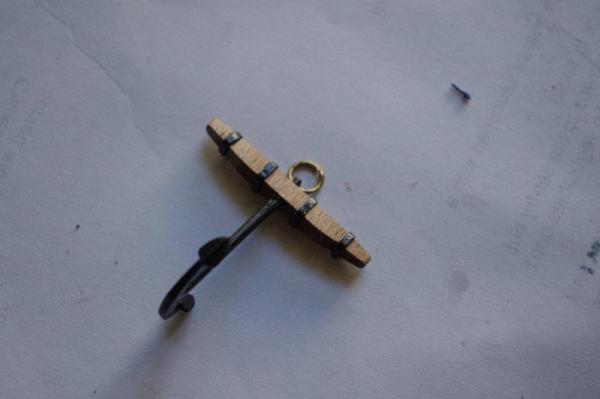
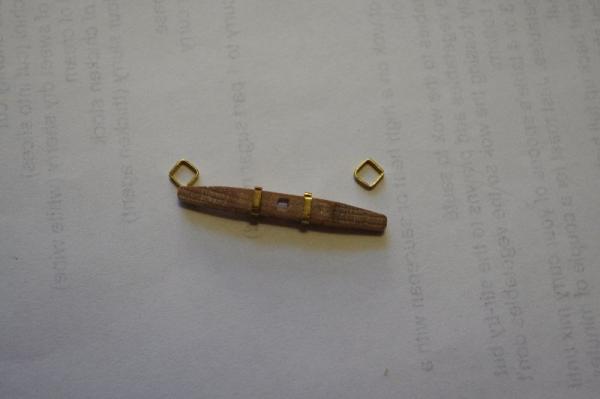
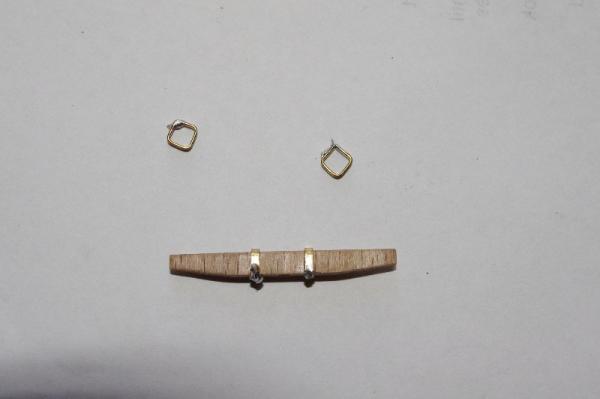
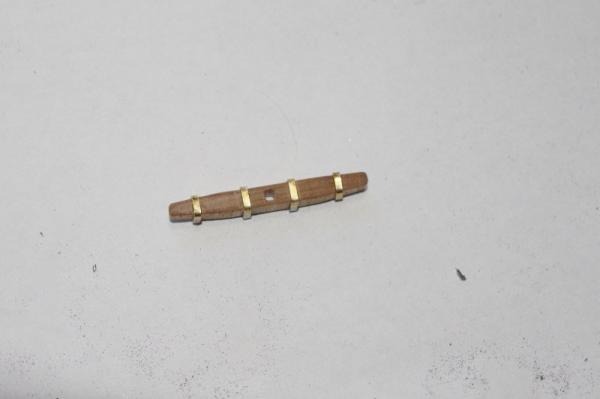
Hi All, The last parts to make up were the anchors. These also were supplied in a little kit. The first thing to do was to square the hole in the anchor stock and then to fit the four brass straps to it and solder the ends together They were then glued in place, filed smooth and painted black


-
Hi Danny, Thanks for looking in and for your kind comments and tips. I did consider fitting mast hoops but unfortunately thought of it too late after the mast had been asembled and fitted . I did try with brass wire to make the hoops but they looked ugly so I removed them. I have carved a small groove inbetween the holes in the cathead they are a bit hard to see in the photo
-
Thank you very much Frank
-
Thank you for confirming that Richard . I will follow your progress
-
Hi Brian, Richard and Slog, Thank you all for looking in and for your kind words
-
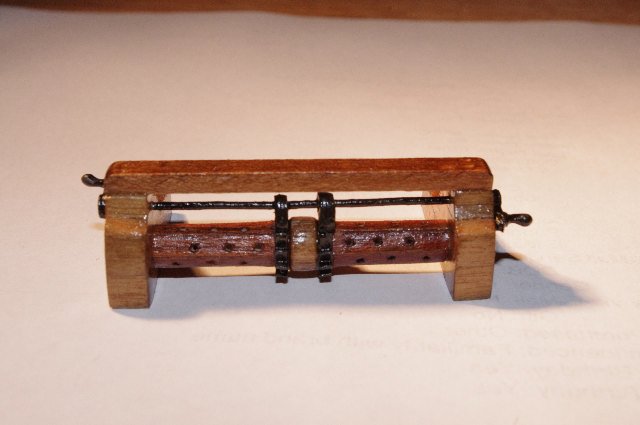
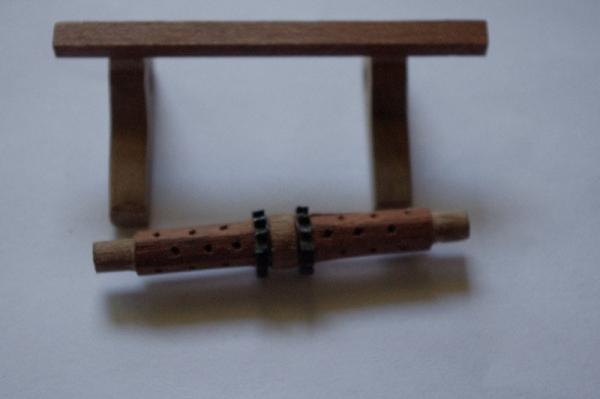
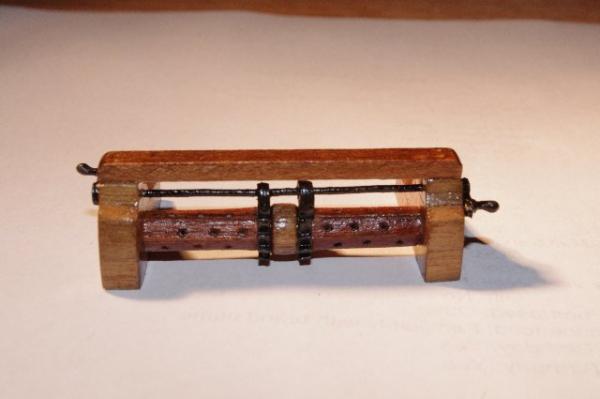
the winch is the next part to be described. It was supplied as a small kit although the all of timber parts needed to be treated in some way either planked with 0.5mm walnut stips or stained. The two end pieces were covered with 0.5mm x 6mm walnut planks which were then sanded to shape The windlass was shaped into a hexagon either side of the cogs and planked with 0.5mm x 3mm sappeli and holes were drilled to take the poles that turn the winch, these were made square by pressing a square needle file into the holes. The windlass was then glued between the two end frames A length of brass wire was then fitted through the end frames onto which the pawls and operating handles were fitted And finally the cap piece was fitted and the whole assembly varnished


-
Hi Richard, I've Just been reading through your log, vey nice work so far especially with the coppering. This will be my next build after I finnish the 'Norfolk' hopefully I will make a start next weekend . I like the idea you had of planking the deck off the hull as opposed to the kit Instructions of fitting it first and then planking it. I think I will do mine that way when I get to that stage as it will be easier to sand the planks to shape. Did you have any problems fitting it?
-
Hi Timmo, I've just been browsing through your build and I must say excellent work so far. I do like how you are adding your own touches to to the standard build like the rails and the flue cover I will keep that in mind for my future builds
-
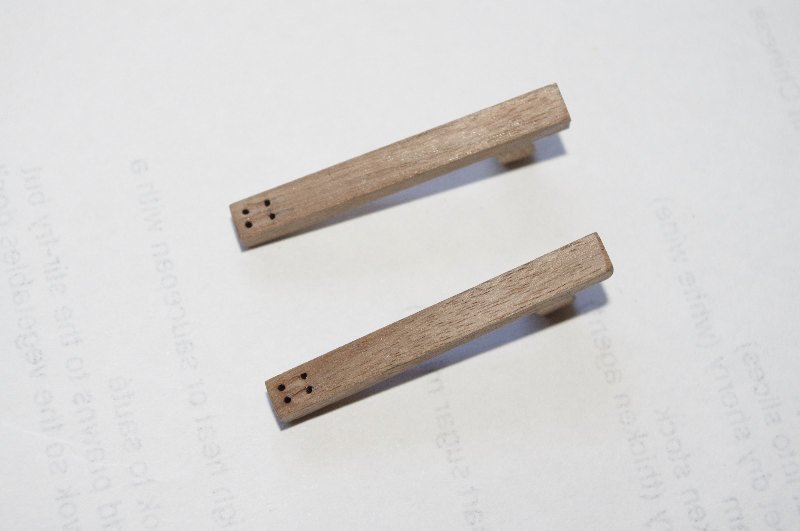
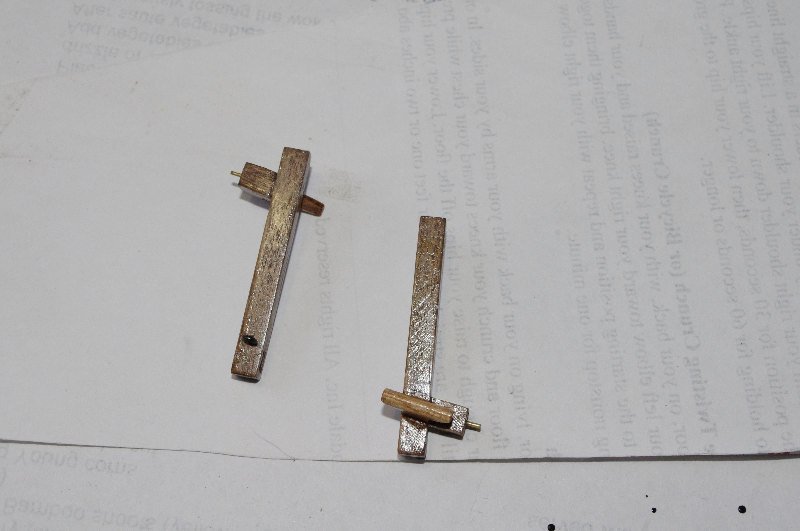
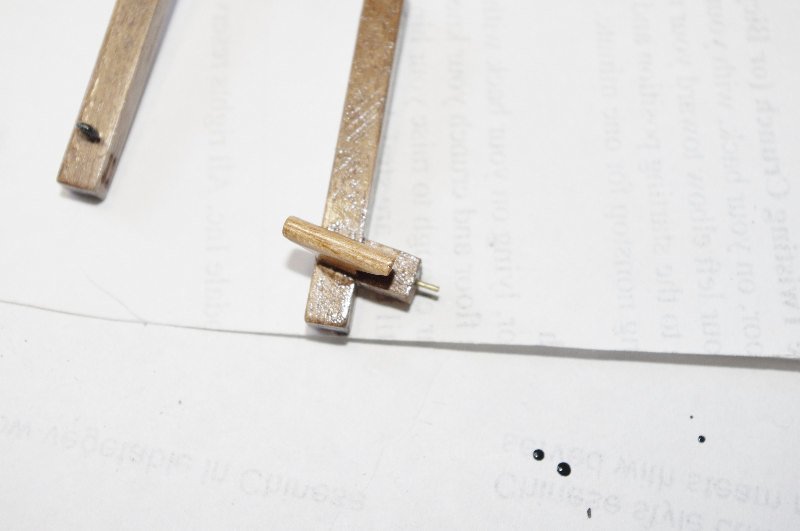
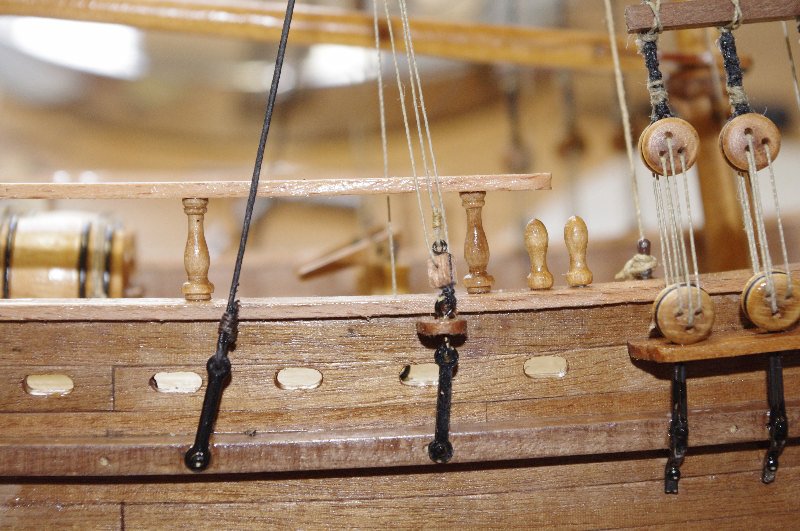
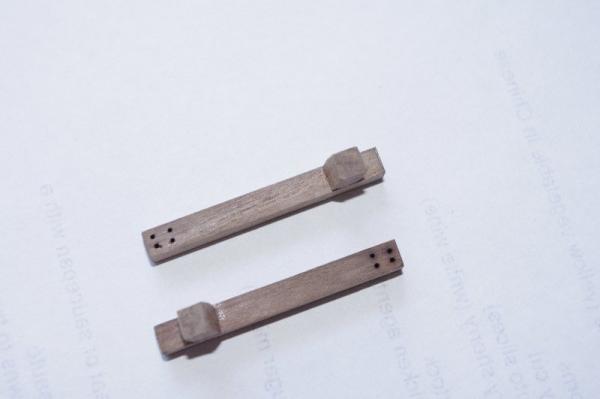
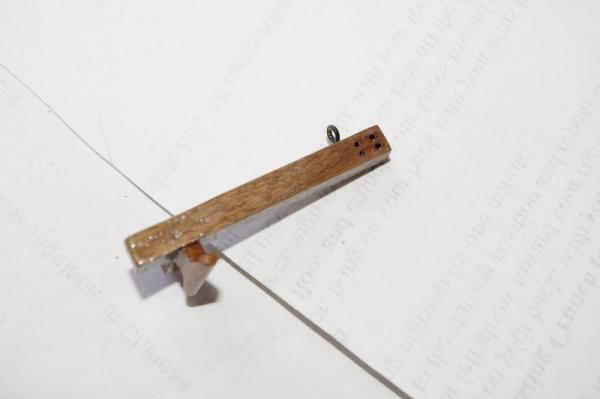
So I am finally up to the last major project on this build that being making and fittng the anchors, catheads and the anchor winch. I will deal with how I built each of these parts and then with how they were fitted and rigged together. As before most of these parts were made some time ago. The first part I will deal with is the cathead. There are two of them and they were made from 5mm x 5mm walnut. The longer pice had four 1mm holes drilled into one end and I filed a groove in between each set of holes so that the rope would lie neater when it was rigged. The support leg was then cut so that when assembled the cathead sits over the rail at a slight angle. These were doweled together wit two 0.75mm treenails. A cleat and eye pin were also fitted to each one and a brass pin fitted to the support leg for extra security when it is fitted to the deck


-
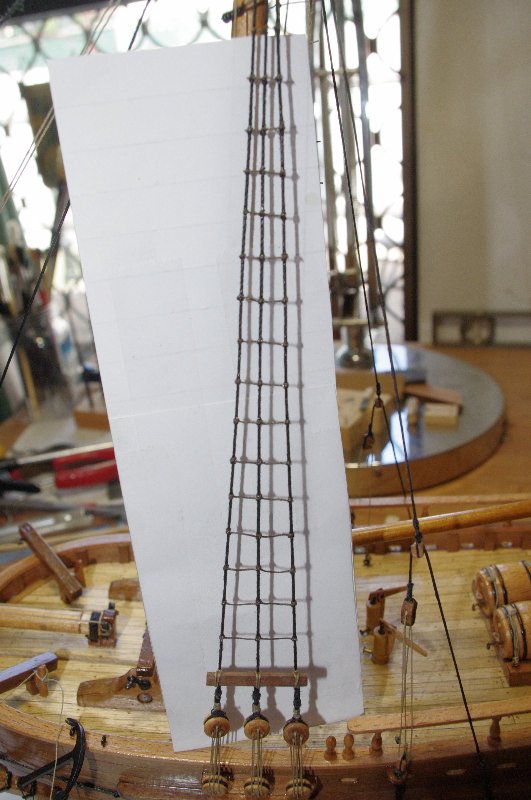
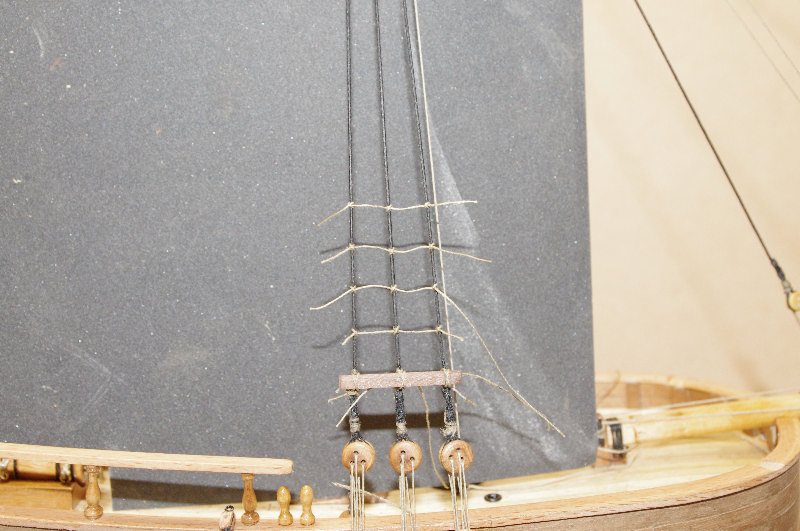
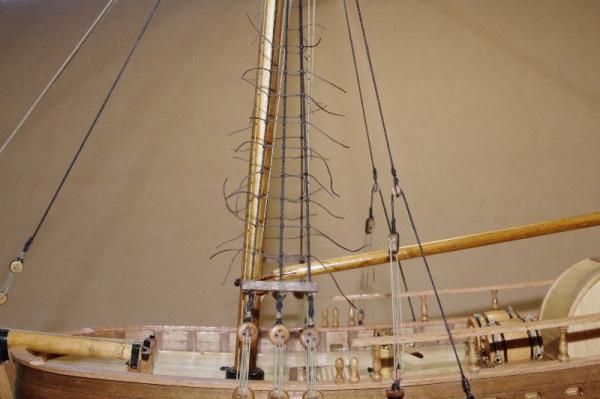
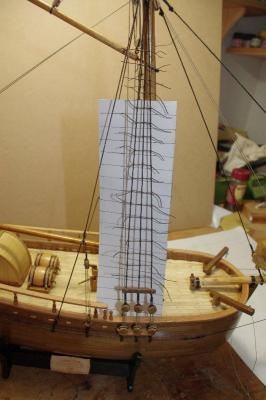
The next set of pictures are of the ratlines tied with the brown cord

-
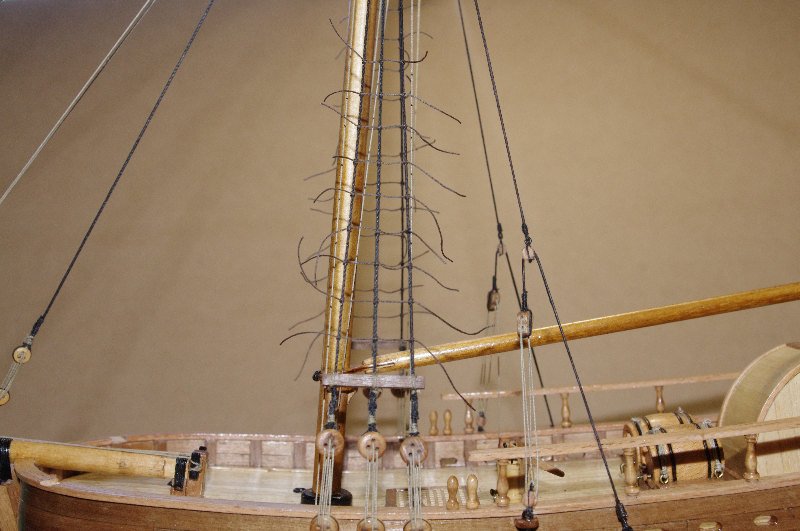
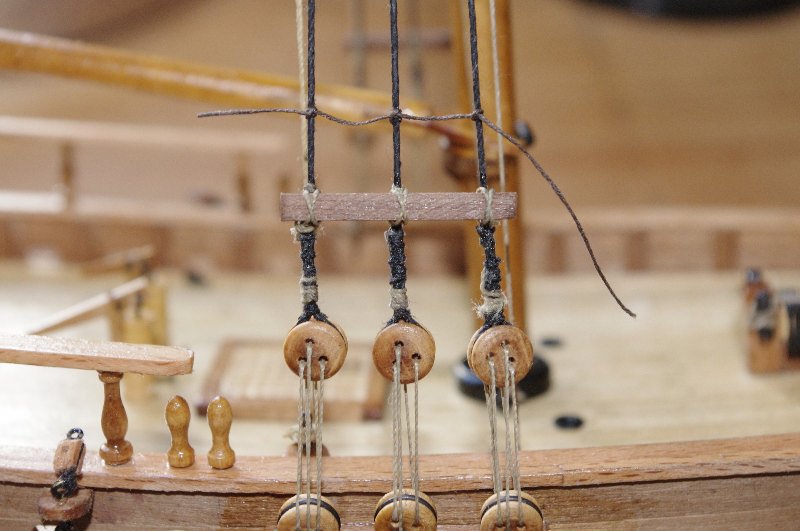
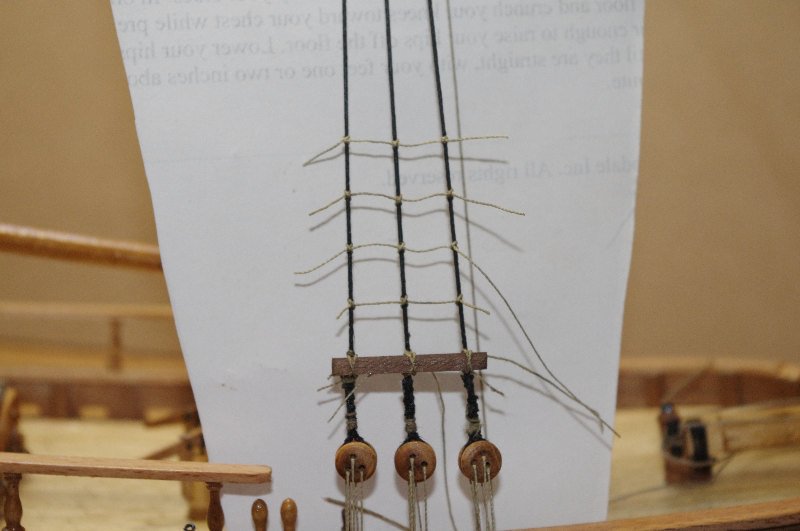
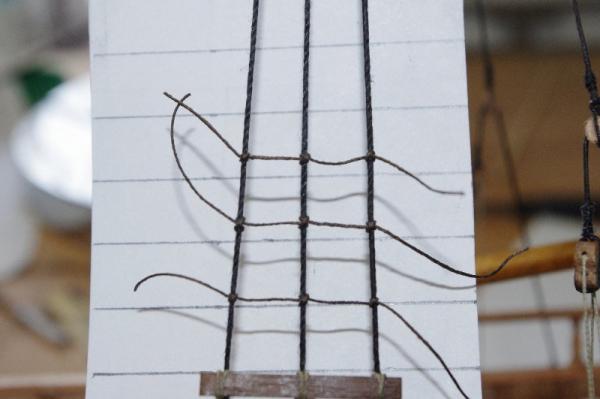
Hi All, So it was now onto the ratlines, this is my first attempt at tying ratlines; my other completed model The Swift did not have them. The first thing to be fitted was the lanyard strips , a piece of 2mm x 3mm walnut tied just above the siezings on the shrouds. Then came the tying of the ratlines. The instuctions tell you to use 0.25mm tan cord for the ralines and to space them 5mm apart, at this scale that works out to be about a 7" spacing in between each one, which I thought was to close. Keith Julier metions them being between 13" and 15" apart. I decided to space them at 10mm apart which works out to about 14" and it is a nice round number . I stared rigging them with the supplied 0.25mm cord and after the first couple had worked out a system of tying them on fairly quickly. However after finishing the starboard side I found that if I rigged the port side with this cord I would not have any left to rig the catheads for the anchors , so I made the decsion to unpick the starbord side and do the ratlines with some dark brown thread left oveer from the Swift build ( at least A.L. give you plenty of thread even if some of their other parts can be a bit dodgy), it is a little bit thicker about 0.30mm approx but I think it looks OK and it saves me dying the tan thread black which is what I was going to do The first pictures are of the lower ratlines rigged with the supplied thread


-
Hi Danny , Beautiful work ; as always. I do like the way you are going to make the light frames
-
Hi Brian , Thanks for looking in . I agree this is a excellent kit for a beginner to this great hobby, as I am, this is my second build. The main reason I chose it was because of it's bluff bow as I hoped it would teach me me how to plank this type of hull successfully so i could go on and build larger models with this type of hull shape like the Endeavour, Bounty And Victory
-
Hi Mobbsie, For your first attempt at copper plating you have done an excellent job. You should be proud of it , looks like you have done this many times before.
- 1,279 replies
-
- 1
-
-
- agamemnon
- caldercraft
- (and 1 more)
-
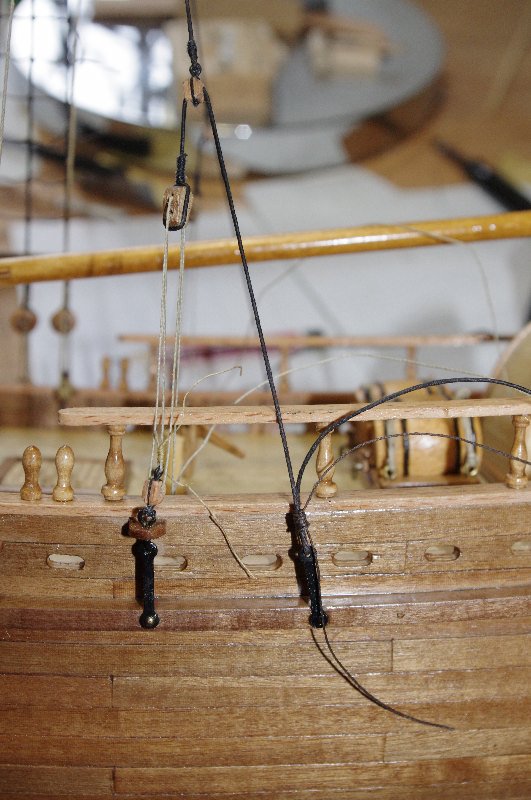
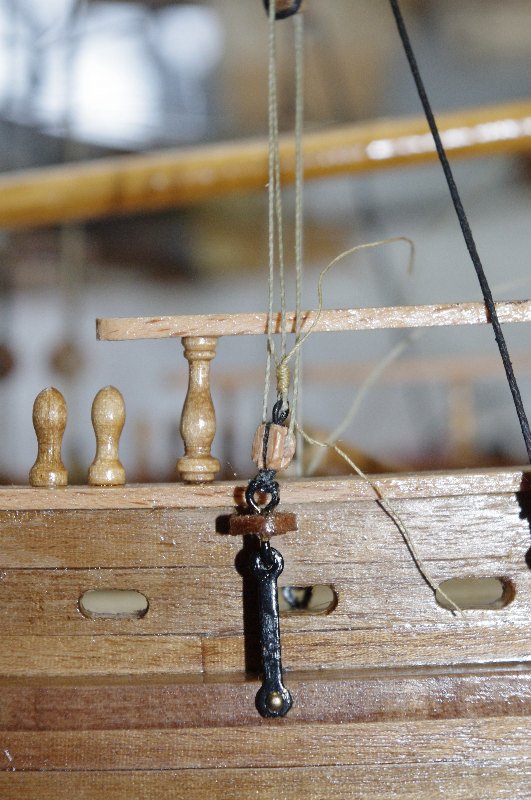
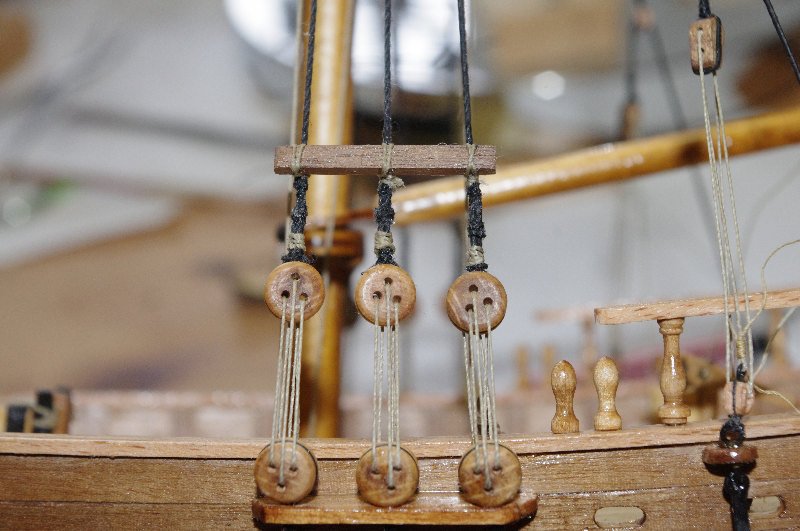
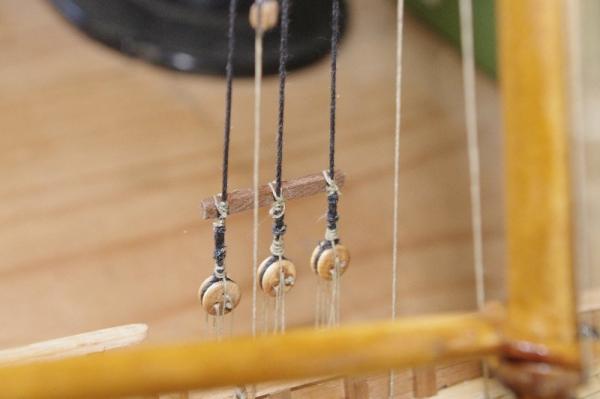
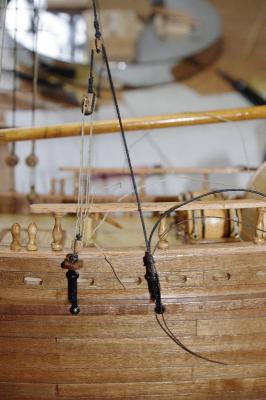
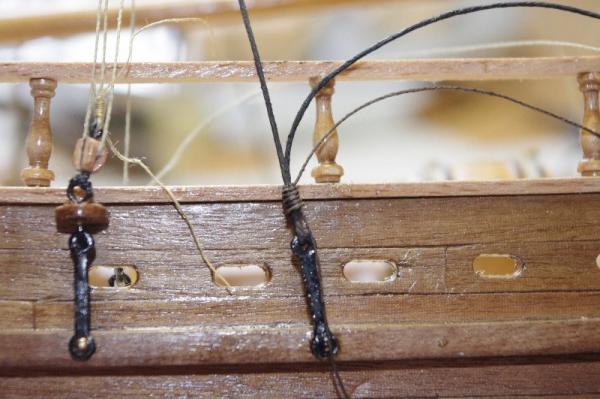
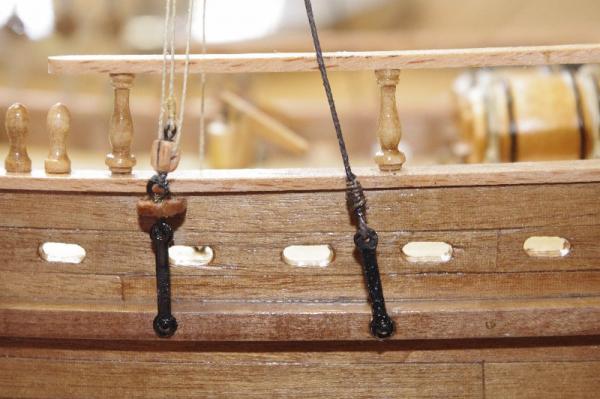
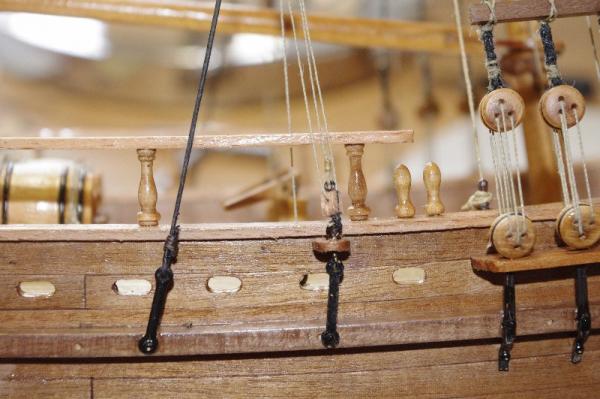
The last stage of the rigging before I tackled the ratlines was to rig the backstays. The stays had previously been siezed around the mast cleats and consist of a single line with a one hole block siezed to the end of it. Another length of black cord is then treaded through this one hole block and attached to the second dogbone fitted to the gunwale a double violin block is siezed to the other end of this line. The violin block is then reeved to the one hole block attached to the pedestal on the outside of the hull and belayed to the eyebolt fitted just inside the rail on each side.


- 98 replies
-
- 1
-
-
- norfolk
- modellers shipyard
- (and 1 more)
-
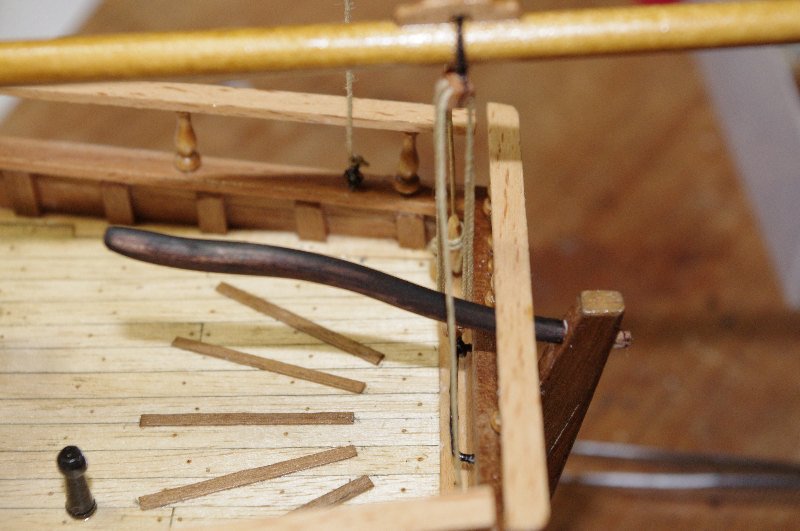
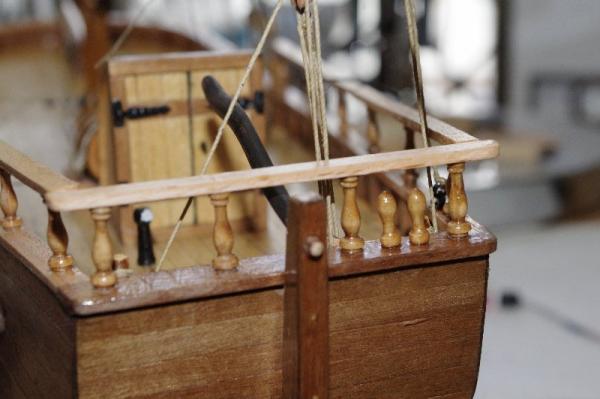
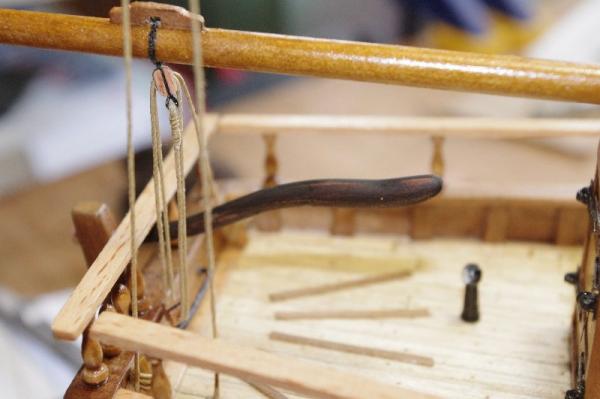
AS you can see in the last post the tiller has been fitted unfortunately some of the pictures I took of the rigged mainsheet were not very clear . The tiller was not fitted until all the rigging in this area was complete The next two pic's show another view of the boom rigging I then fitted the tiller to the rudder.

- 98 replies
-
- 1
-
-
- norfolk
- modellers shipyard
- (and 1 more)