

Lt. Biggles
-
Posts
339 -
Joined
-
Last visited
Content Type
Profiles
Forums
Gallery
Events
Posts posted by Lt. Biggles
-
-
On 12/29/2020 at 1:21 PM, Old Collingwood said:
What I found real useful with Vallejo putty is you can also use a cotton bud or piece of rag and wipe over the gap being filled, or even a finger - its that plyable.
OC.
Using a damp cotton bud has worked a charm thanks! Basically leaves it to dry already perfect and probably hardly needing a sand if at all!!
-
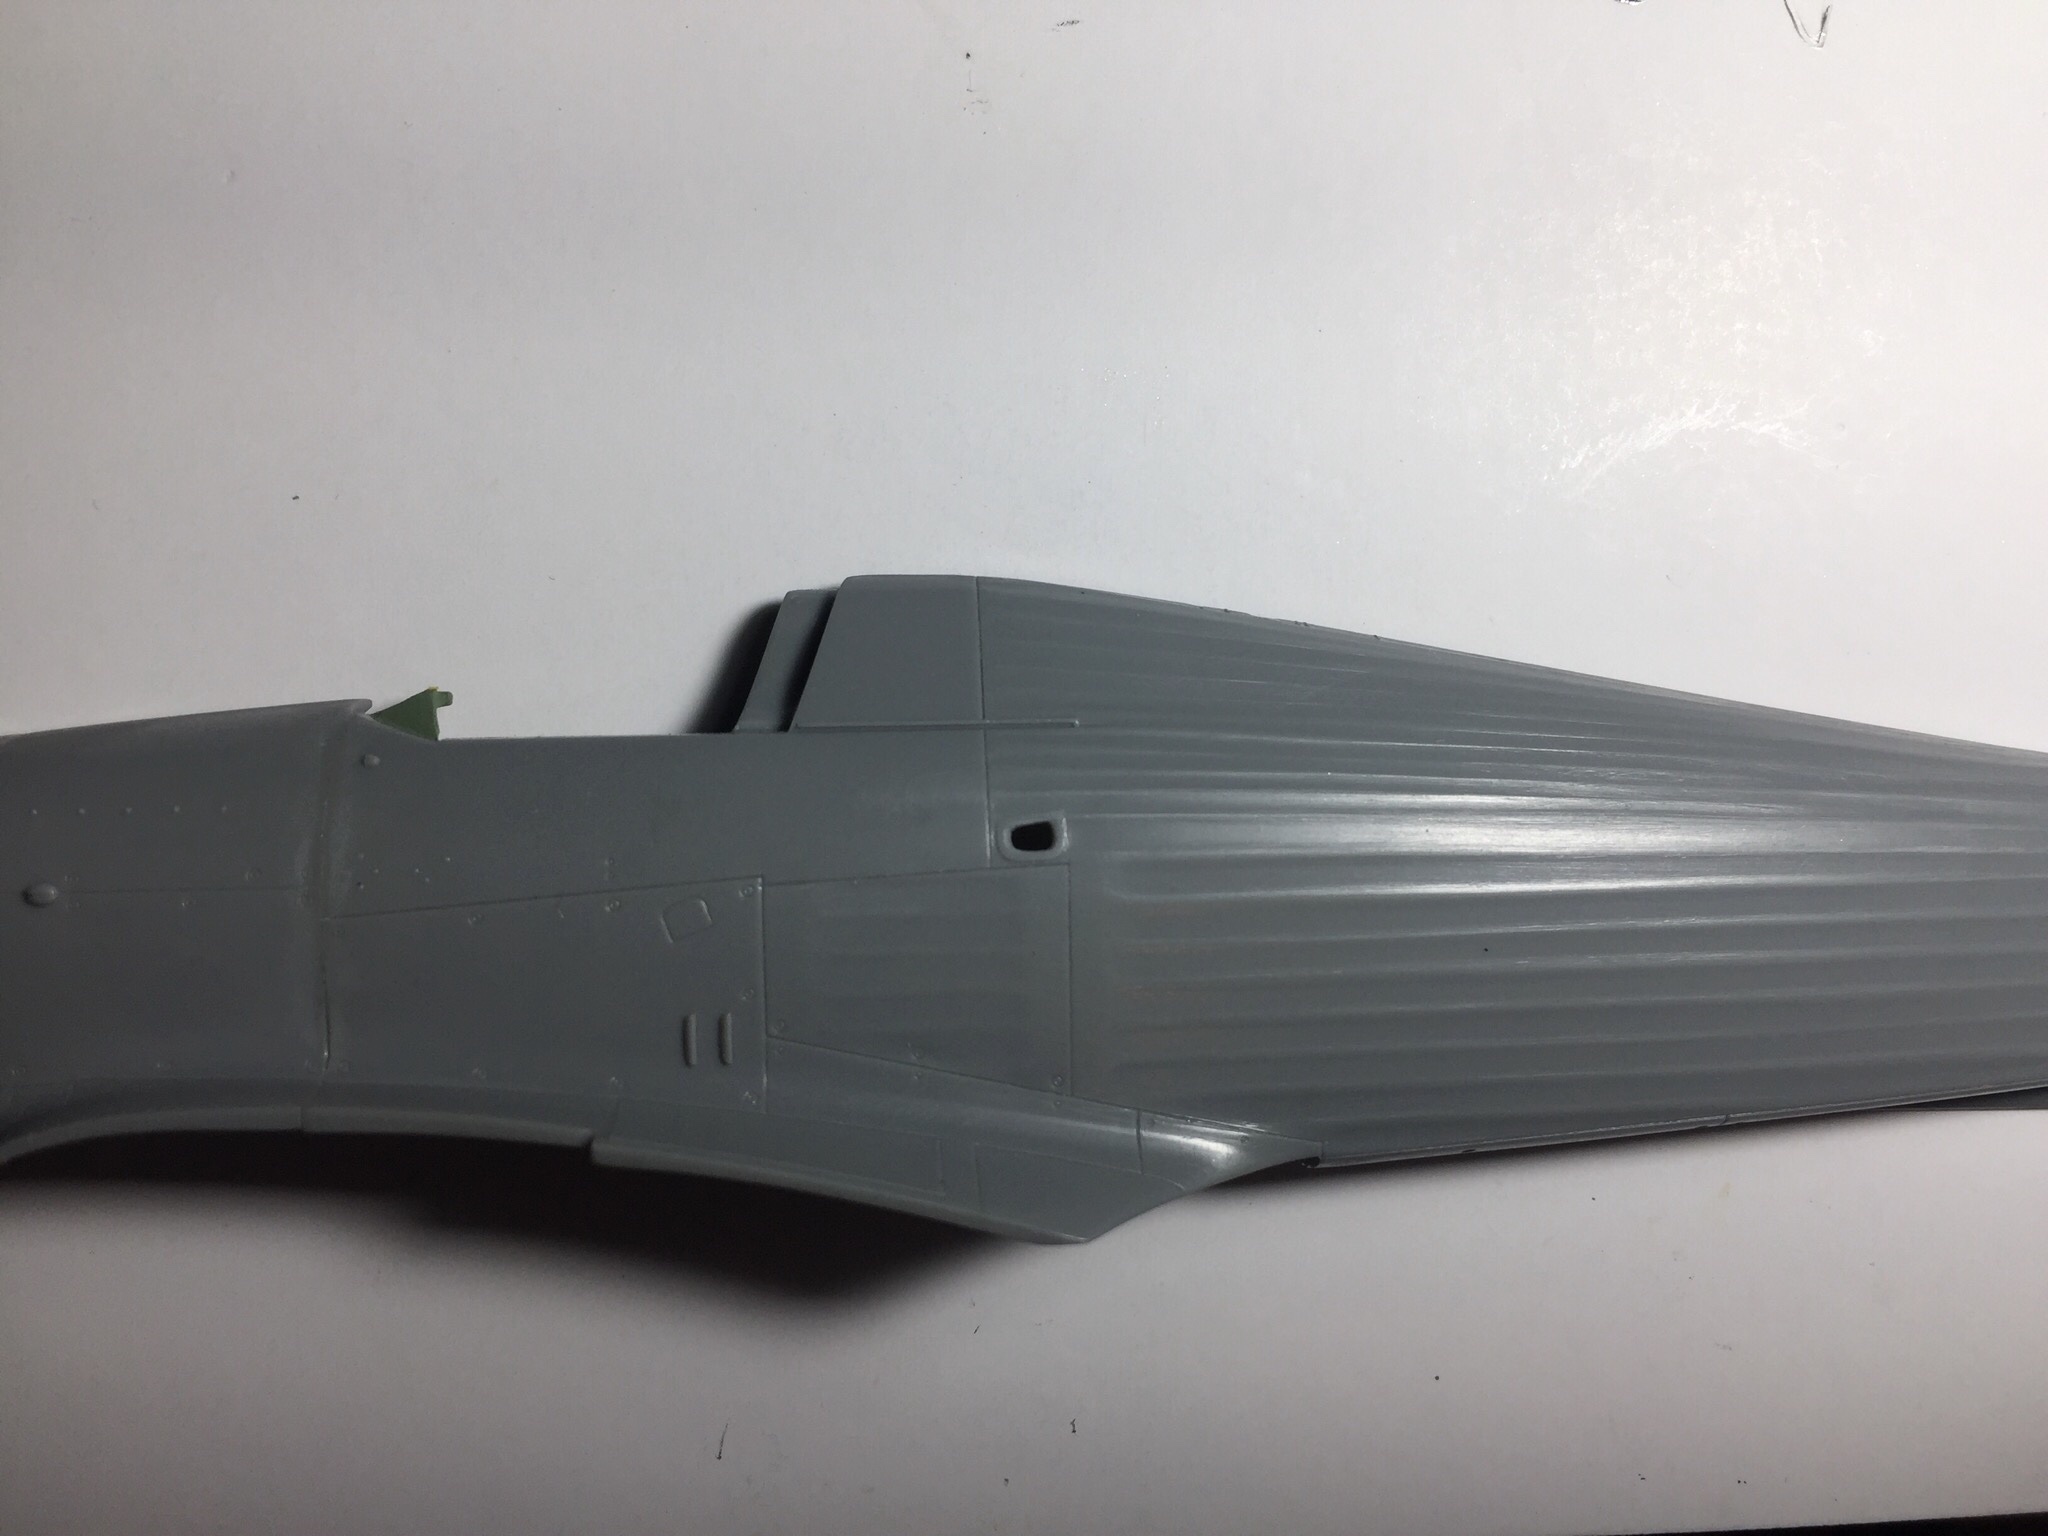
Well with the cockpit complete everything took a sudden huge leap! Was quite a surprise! Glued 3 joints and this was the result.
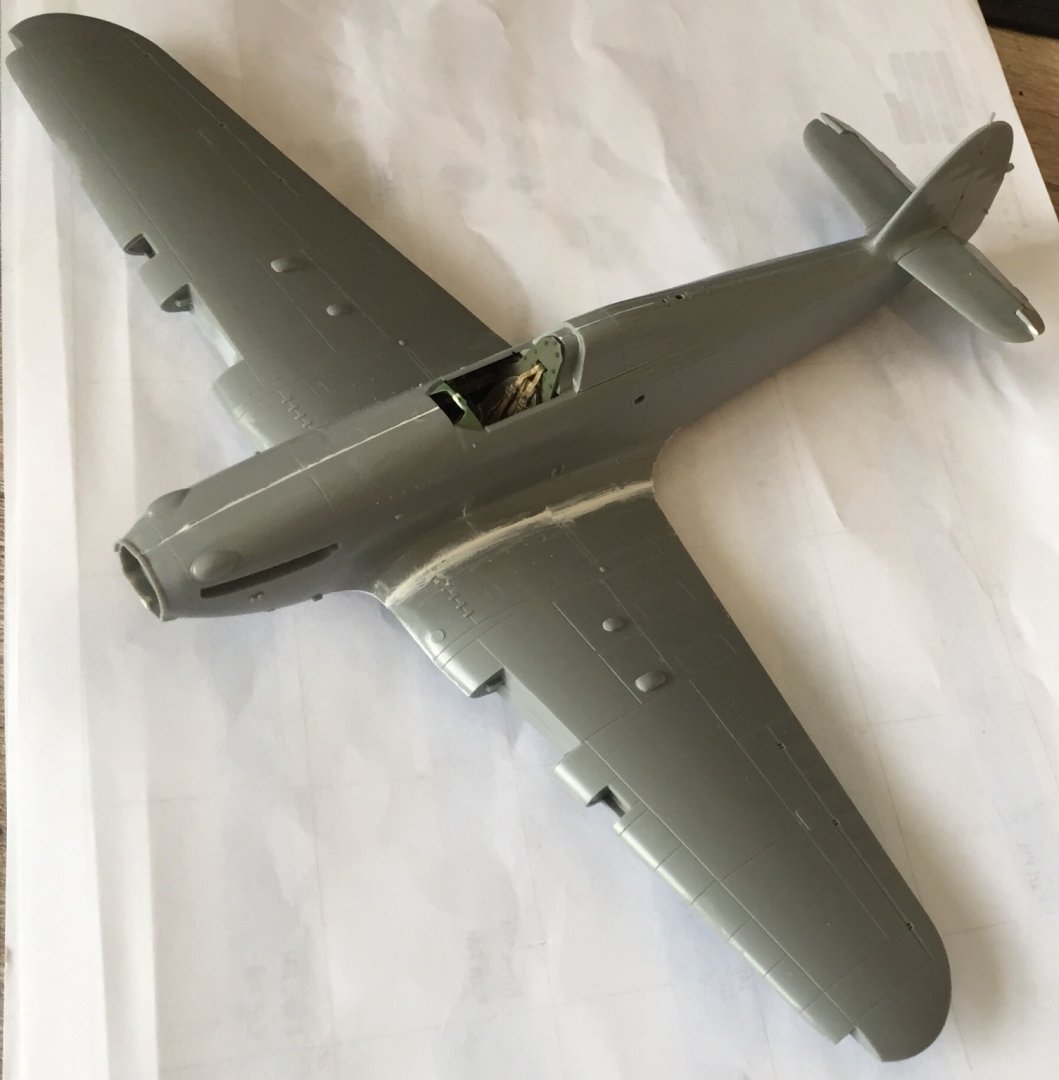
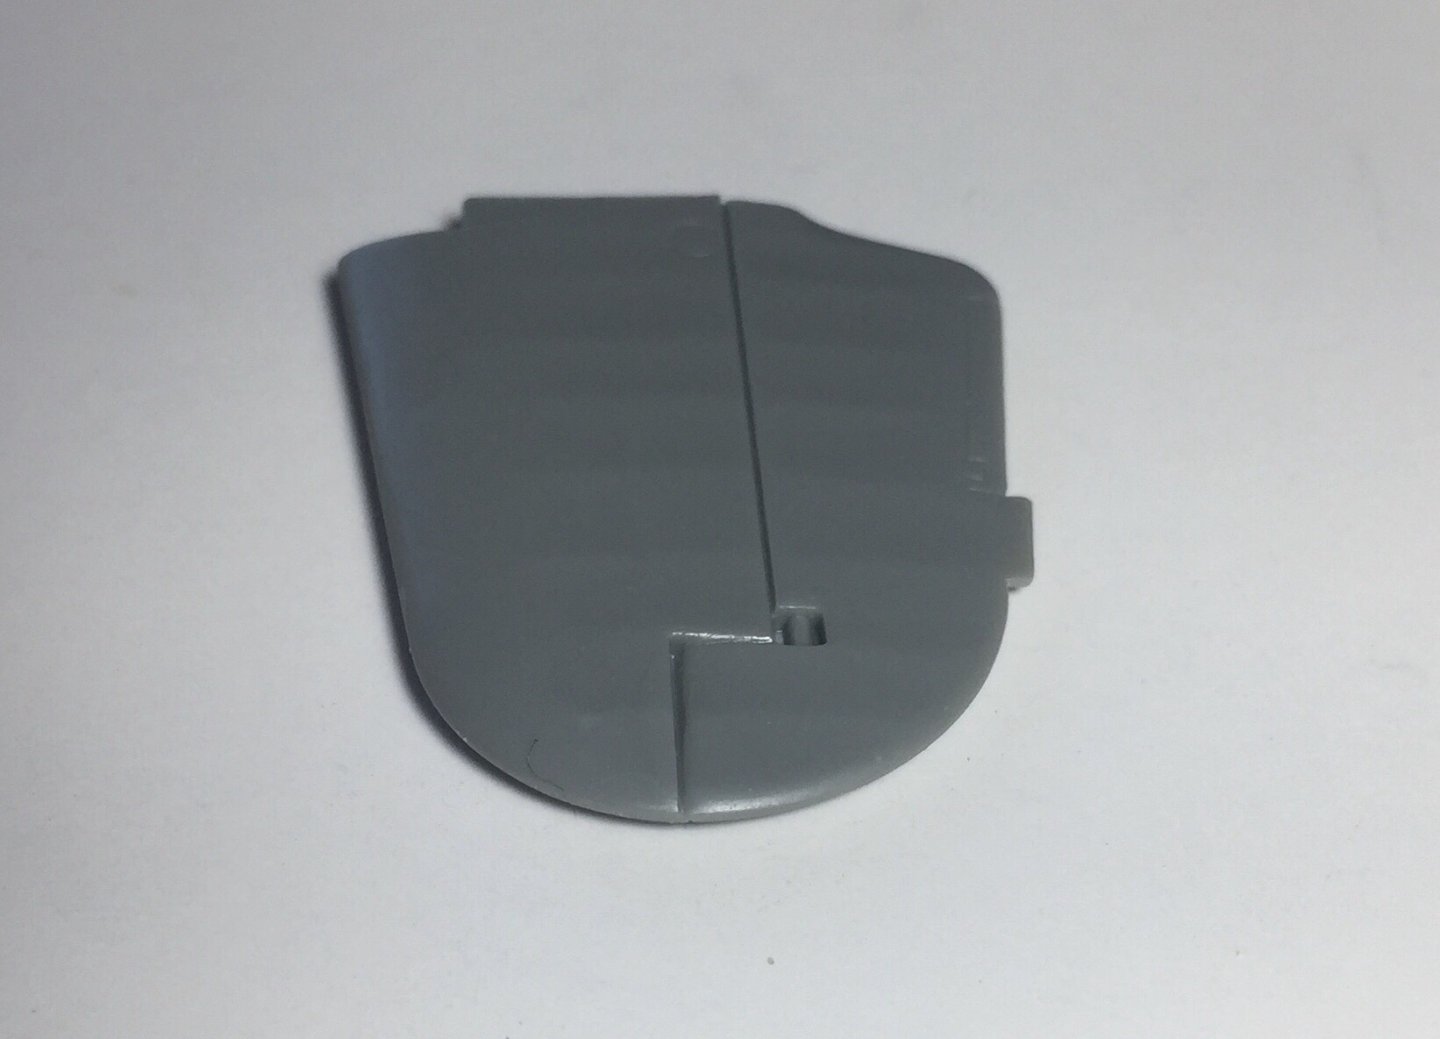
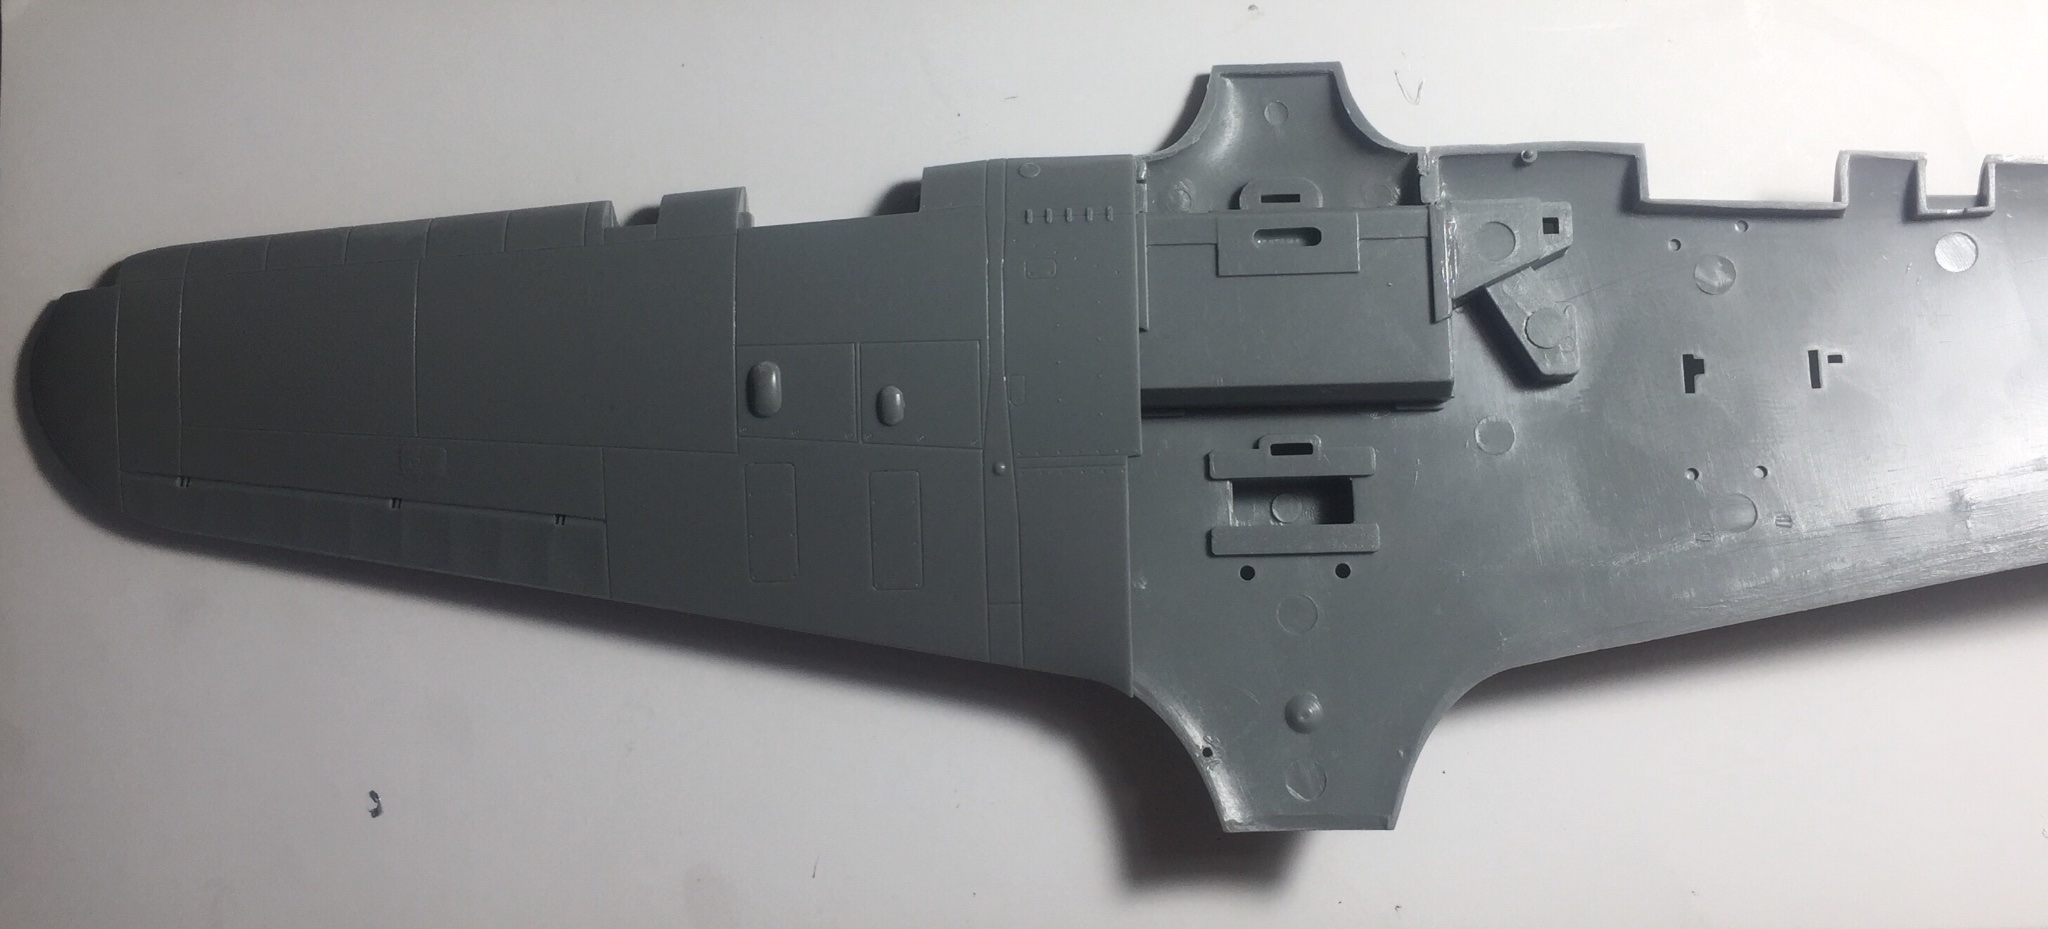
some big big gaps in the wing roots which I’d already mentioned and discussed, went with building the wings as per the instructions. Ended up getting both types of Vallejo putty bottles and I like how runny it is. Just wish It would dry a bit harder as I’m finding if I’m not really careful sanding that chunks of the filler come off. The good side to that issue is because it’s a bit rubbery it’s got lots of play so won’t crack when it’s flexed.
have a feeling it will take awhile to do all the filling and get the rest of the bits on before the prime.
- mtaylor, Old Collingwood, Canute and 5 others
-
 8
8
-
I remember reading through the first few pages of this build ages ago and learning a lot of history and things I’d never known! Good to see the build is well underway! I’ve a feeling it’s going to be a very accurate model!! Good stuff mate
-
Love the Mossie!
- Old Collingwood, mtaylor, Canute and 6 others
-
9
-
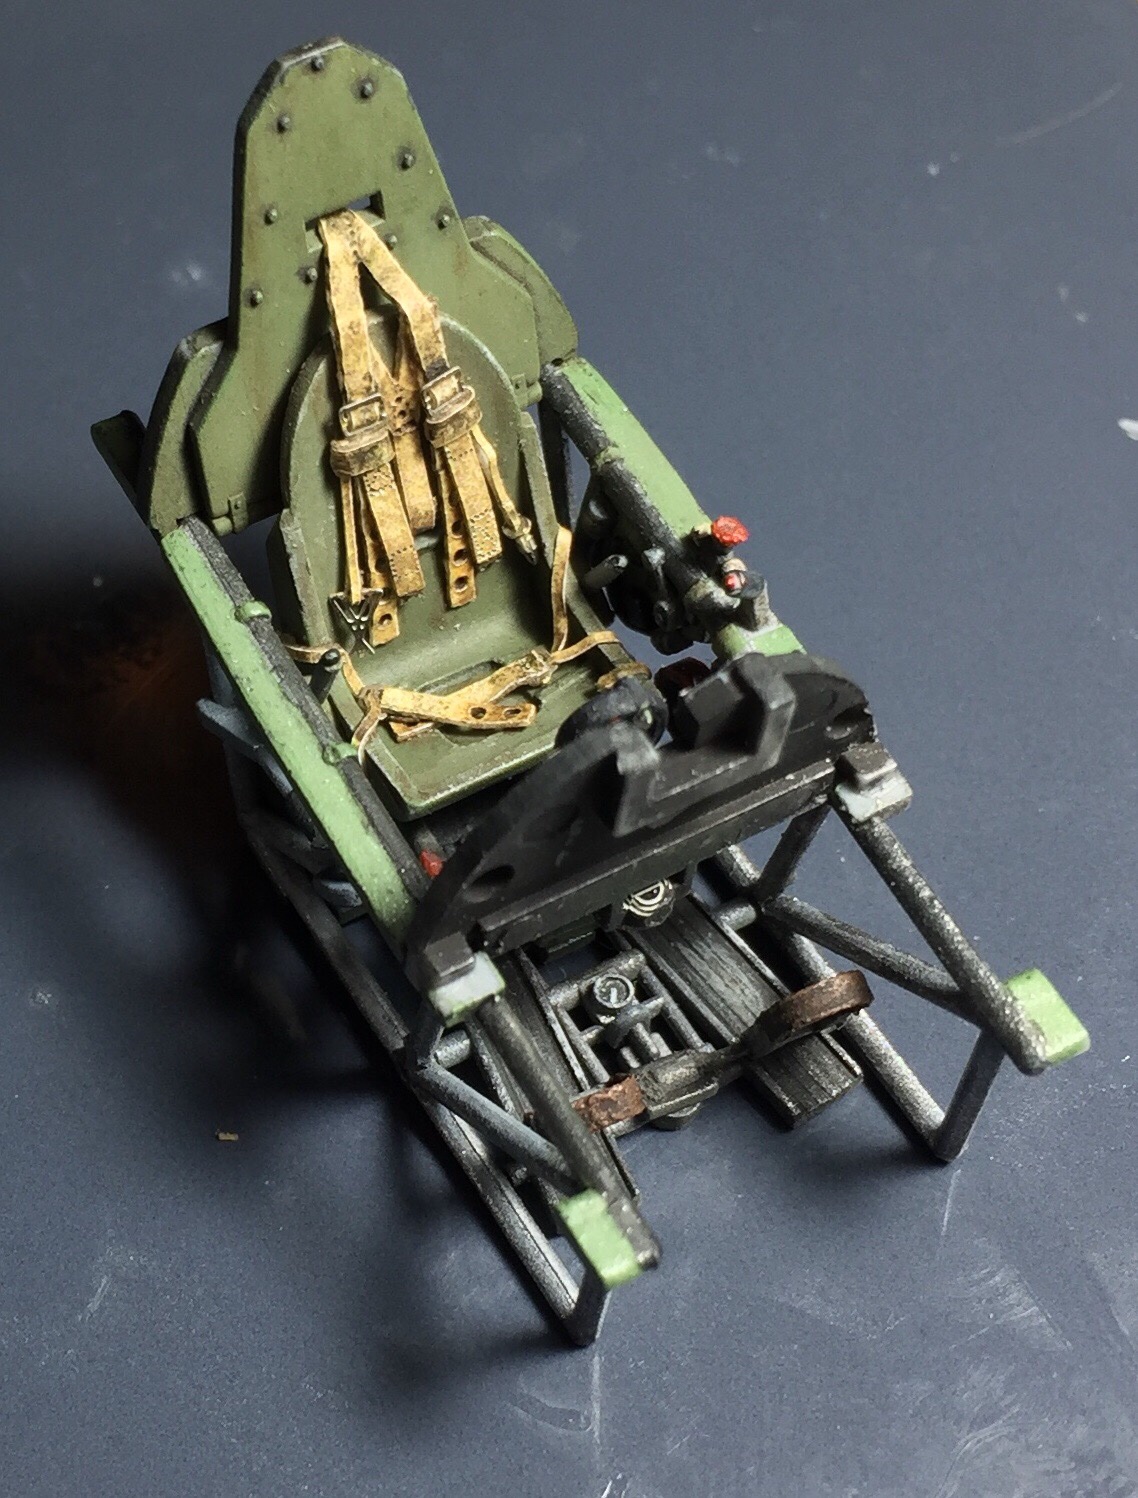
It’s less than 3 hours till Christmas and I’ve spent awhile working on the seatbelt which arrived a few days ago.
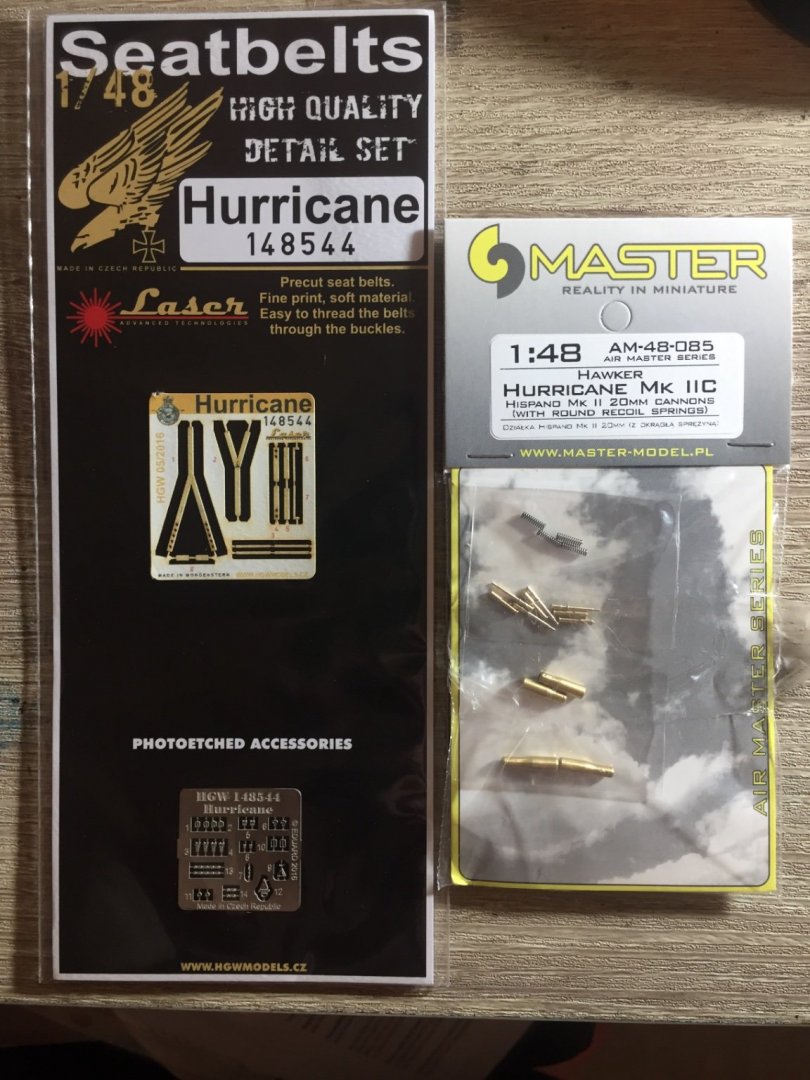
Was a lot more parts than I thought and how they go together was quite unclear even with google. But I think it looks better than no seatbelt and finishes off the cockpit well.

hope everyone one has a nice Christmas
-
Thanks.
I might look into Vallejo liquid putty. I’ve got a tamiya one but it’s pretty thick and tough to work with even when thinned a lot.
I like when you can clean up the edges well before it sets to reduce unnecessary sanding (which is my favourite job ever) sarcasm...
- popeye the sailor, lmagna, Egilman and 4 others
-
7
-
Thanks for the comments and tips. It was the pros and cons I had been weighing up so good to know I was thinking down the right line. Will have a good think about it
-
I’ve got a question for all you plane builders.
is it frowned upon to glue the top sides of the wings to the fuselage first.
then once on attach the underside and do whats needed to make them fit?
Pros would be the best possible fit on the upper surface meaning much less filler on the part you can actually see.
a con would be if the underside doesn’t fit with the top in correct place could be a disaster.
otherwise instructions say join wing halves together then attach to fuselage
which dry fitting shows an awful join.
any one attempted something like this before? Any ideas? Am kinda leaning towards glueing the tops to fuselage first at the moment just for that amazing join
- lmagna, popeye the sailor and Canute
-
3
-
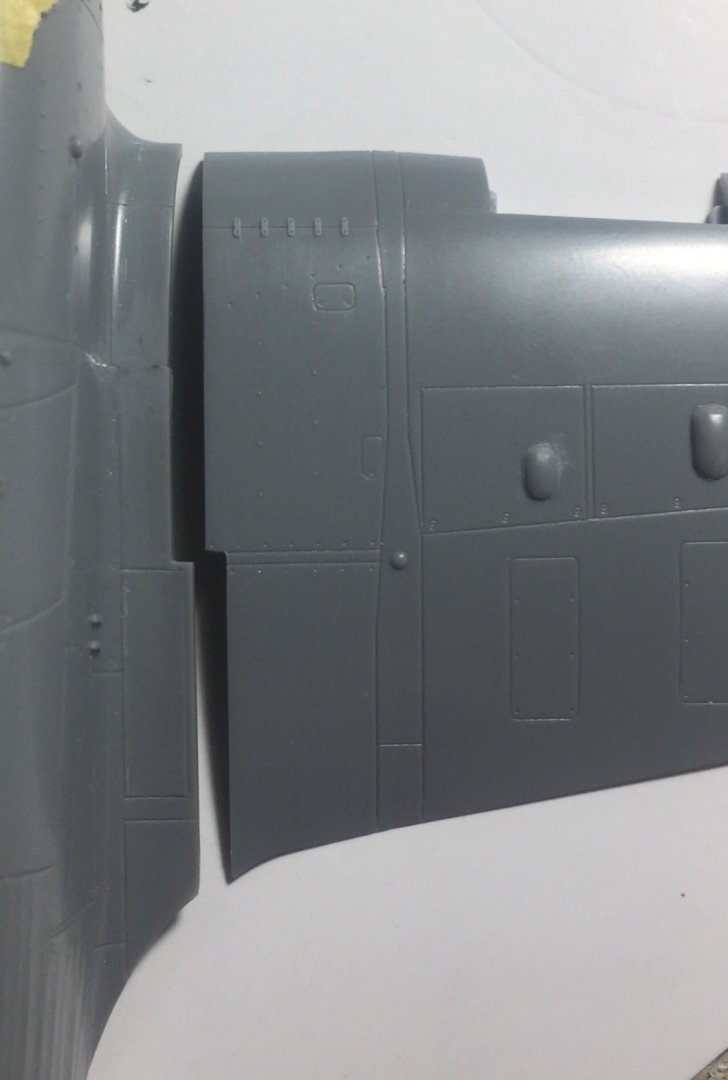
Where I can been working on the wheel bay. Seems out of the factory they were painted in a silver coloured dope and then with maintenance and new paints the colour could end up the same as the underside. So that how mine will be, well used and had a few coats of paint.

painted with 2 shades of grey and then darker grey for some highlights.
there are a few few pics of the wheel bay about so just mixed and matched. This part is pretty much never seen anyway.
ill match the rest of the undercarriage bays with what I’ve done so far.
- Canute, marktiedens, ccoyle and 7 others
-
10
-
22 hours ago, mtaylor said:
You're there. Add your flag and put her in a case or we'll have to send the critic to your workshop.

No need to send the critic!! 😅
You guys are right! I’ll leave her as is and add the flag and call it finished.
Im really happy with how she came out.
Ive ordered some flags and they will be here next year.
-
-
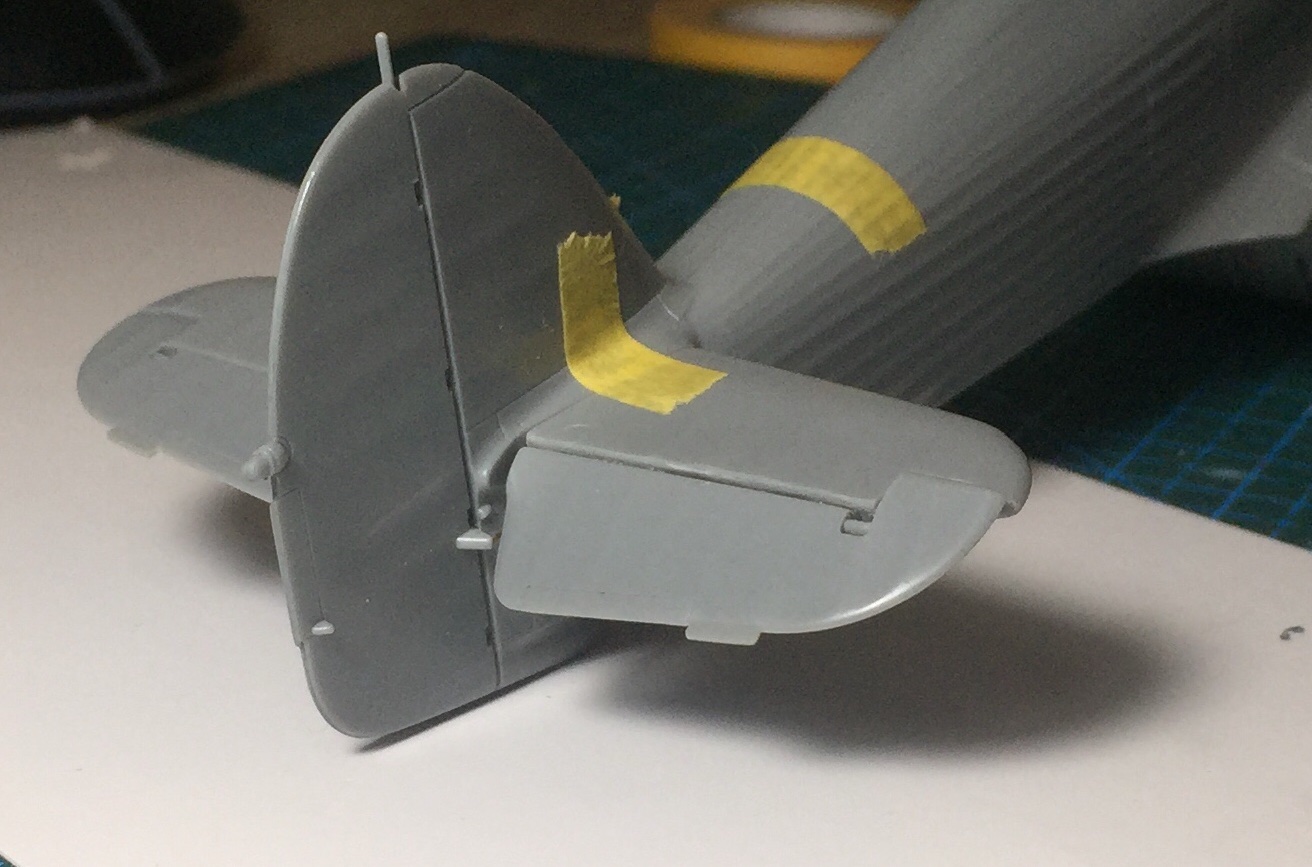
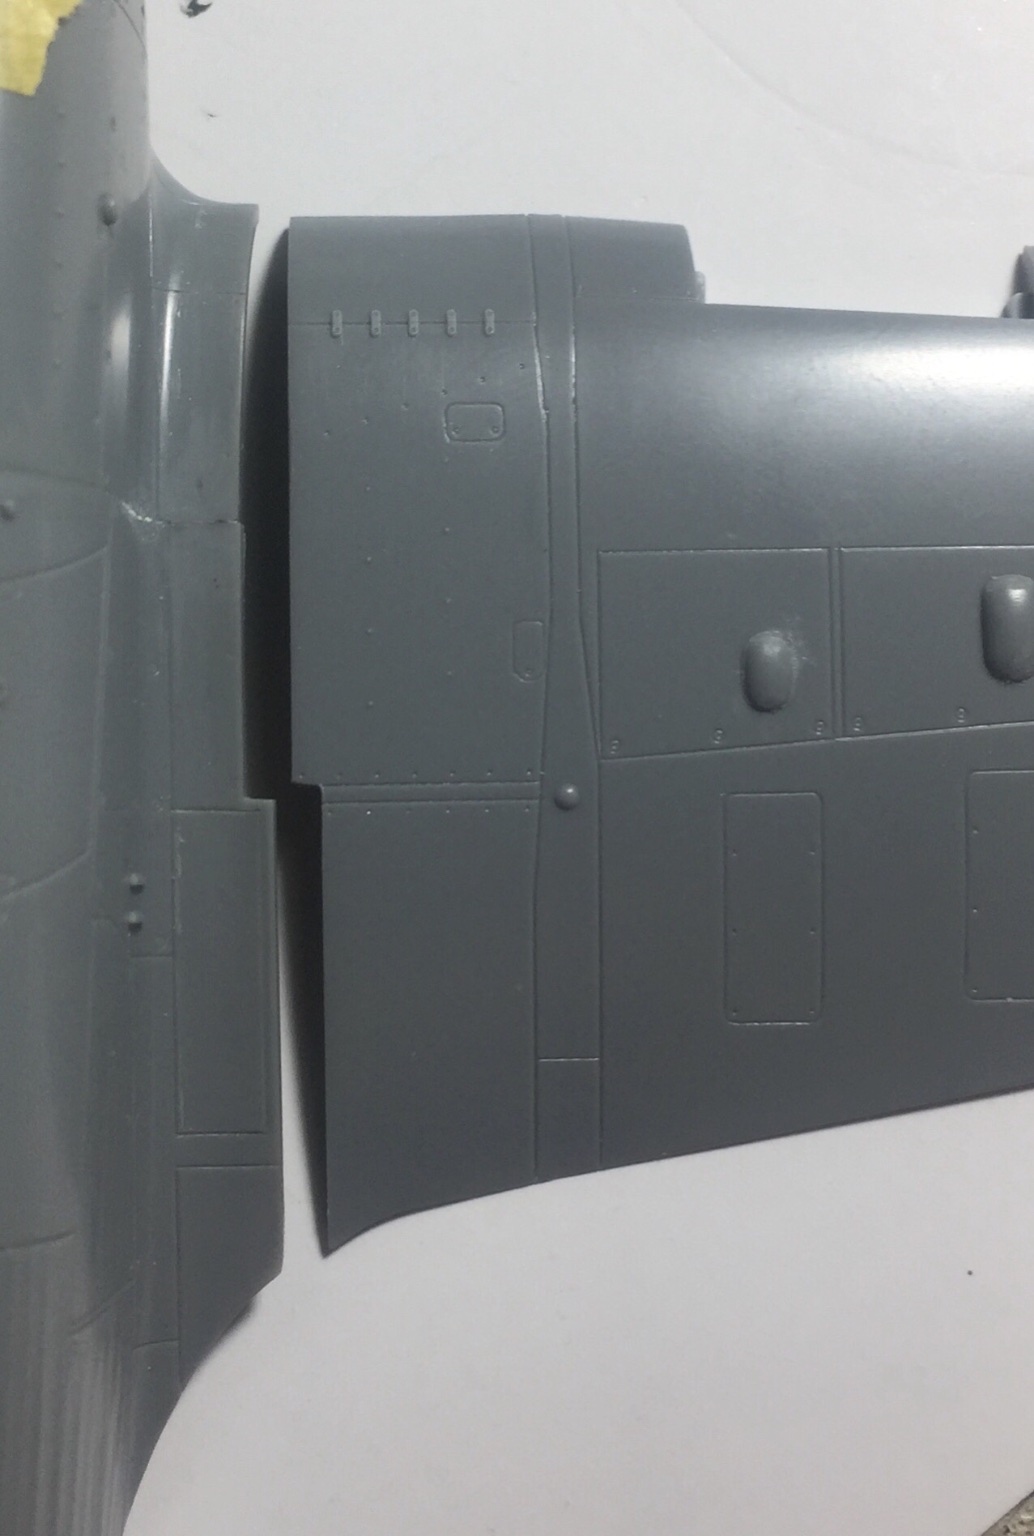
Decided I would model the plane with no control lock in place (I assume that’s the reason) so took the elevators and did a million cuts to separate them, breaking 2 brand new blade tips in the process!
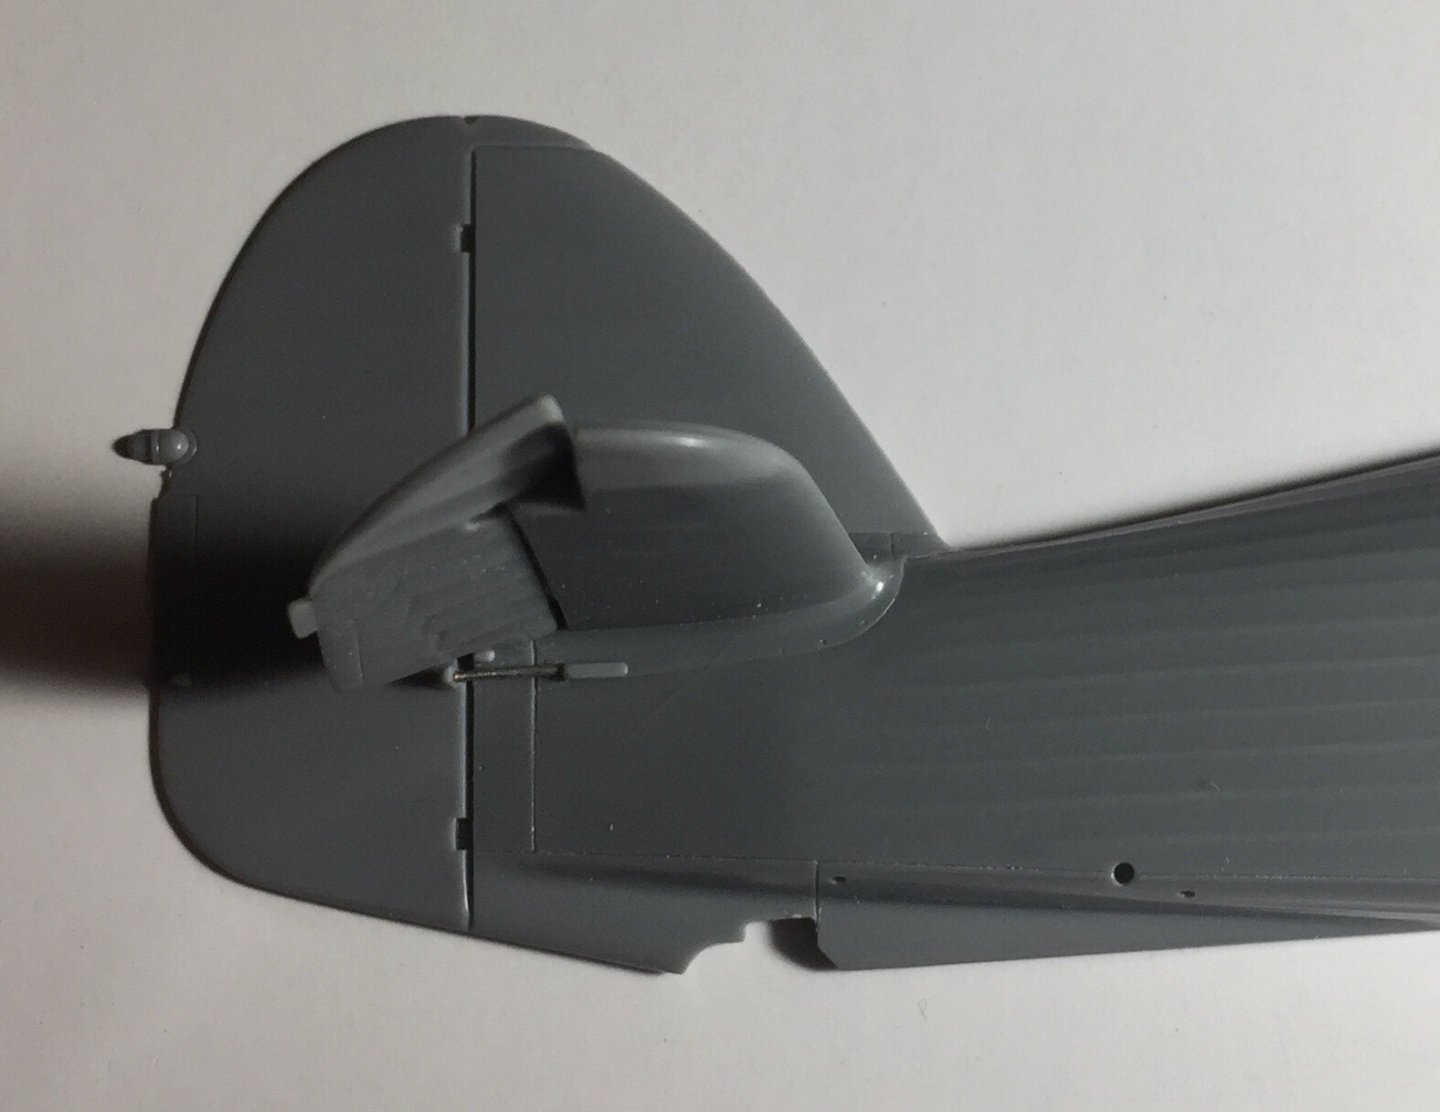
took some patience but got there in the end. I think it will not be directly noticeable but adds just a nice extra touch to the over all look.
half done

Managed to snap off one of the horn balances and it flew across my room and went through a grill and ended up inside my computer. So glued it up and sanded it so hopefully I’ve fixed it good enough that once primed it will be totally unnoticeable.
-
15 hours ago, Danstream said:
Nice to have the hand grip carved out. If you leave it open, you might want later to extend also the footstep located on the underside of the wing root. The two were mechanically linked (the hand grip opened when the footstep was extended).
Best regards,
Dan.
Hey Dan,
yea I’ll be putting the footstep on.
i had no idea the hand hold flap was connected to the footstep! Learnt something new!
- Canute, Edwardkenway, mtaylor and 4 others
-
7
-
2 hours ago, lmagna said:
I have given it some thought by using Neodymium magnets but nothing beyond the experiment stage. You need the right fuselage and everything needs to be balanced unless you use more than one "levitation" point.
For electro magnetic you could look into something like this; https://www.wish.com/product/5e03067a5e89a702daa90bde?hide_login_modal=true&from_ad=goog_shopping&_display_country_code=US&_force_currency_code=USD&pid=googleadwords_int&c={campaignId}&ad_cid=5e03067a5e89a702daa90bde&ad_cc=US&ad_lang=EN&ad_curr=USD&ad_price=27.00&campaign_id=7203534630&gclid=Cj0KCQiAzsz-BRCCARIsANotFgMuFyhUJyYZZzpPGB3vXMHkkUZZz6a_d4BFGDrmZRTp52L2lvnQ83gaArjPEALw_wcB&share=web
Here is a commercial version in use; https://www.youtube.com/watch?v=TFWeEL63Hzs
And if you really need extra lift; https://www.youtube.com/watch?v=TFWeEL63Hzs
Wow there are a few little gadgets out there! Thanks for the links. Seems the technology isn’t quite ready for them to be used on a model plane... imagine it moving and snapping down on the base 😂
with all my projects so far I’ve tried to include something new, my ship I did the ocean base and a few years ago I built a uboat and put it in resin so that’s now my lamp. Thought it would be cool to try have an aircraft in flight for real!
I cant do much on my hurricane until the seat belt arrives and then I can join the fuselage halves.
i did cut out the hand grip though.

its all I’ve done
-
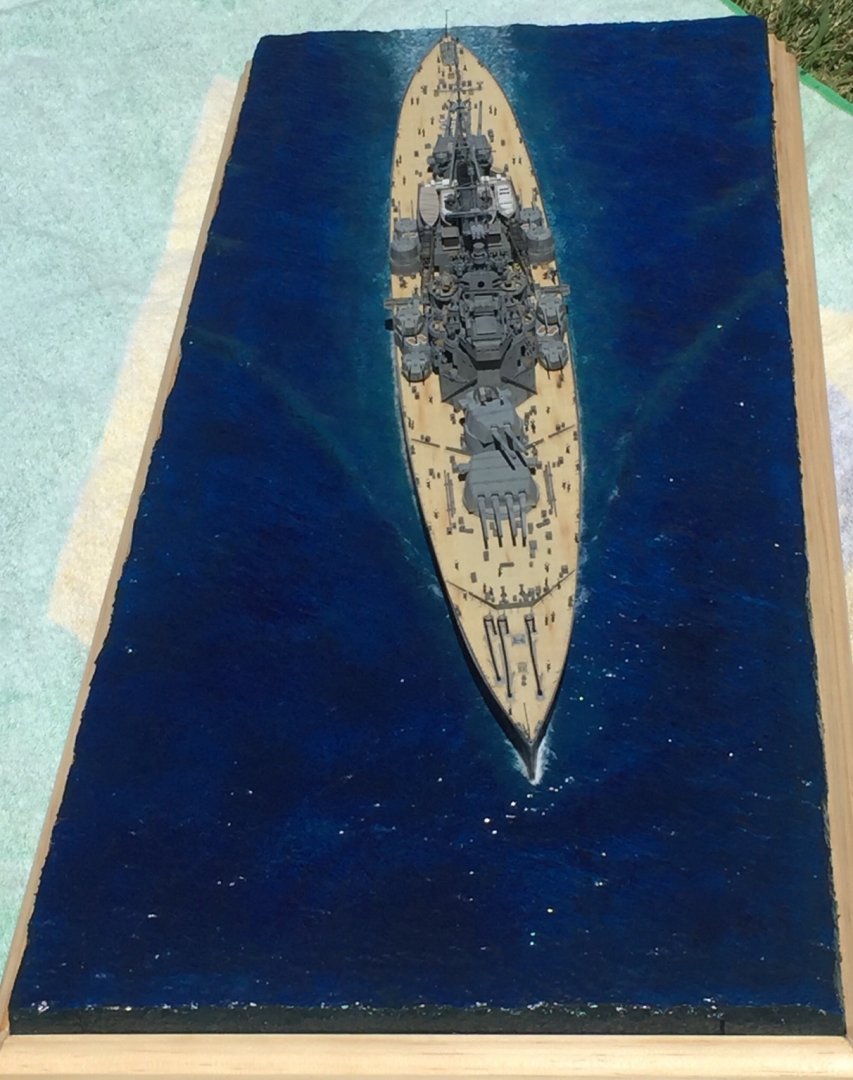
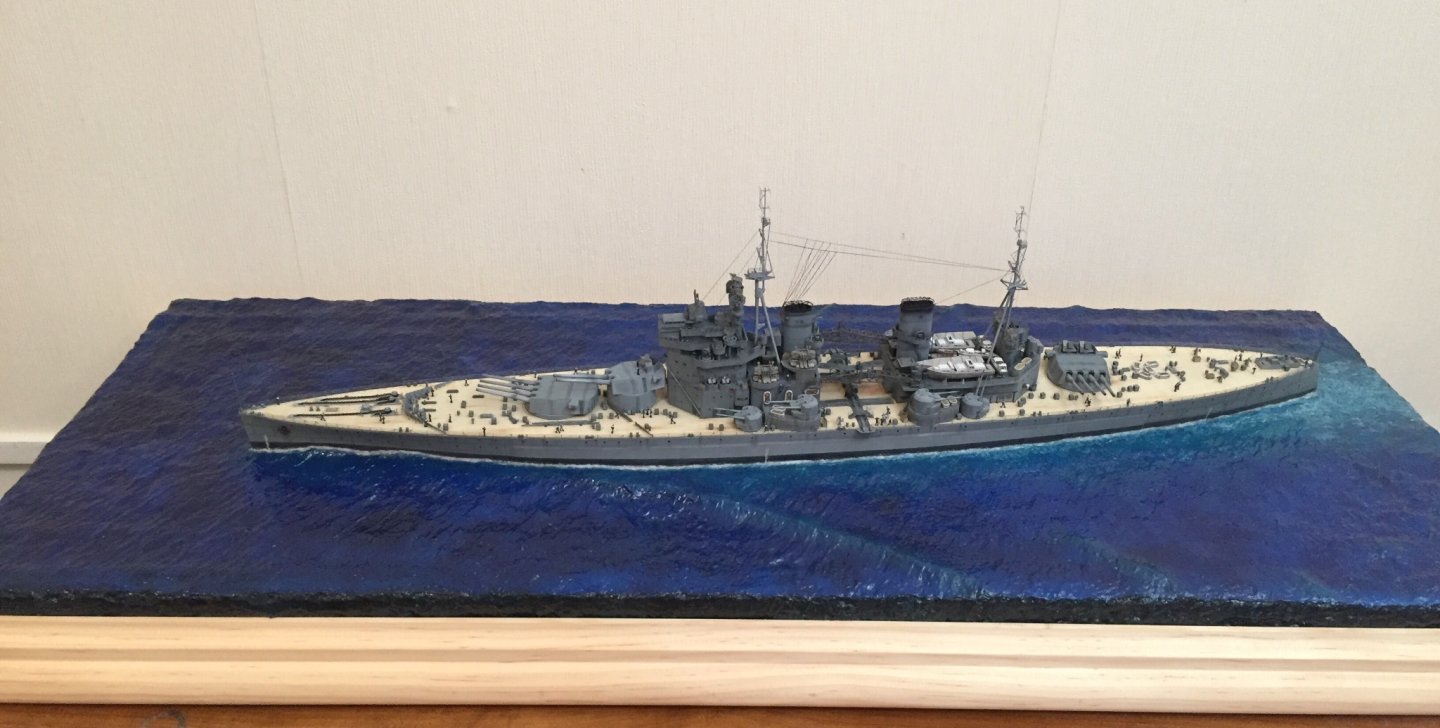
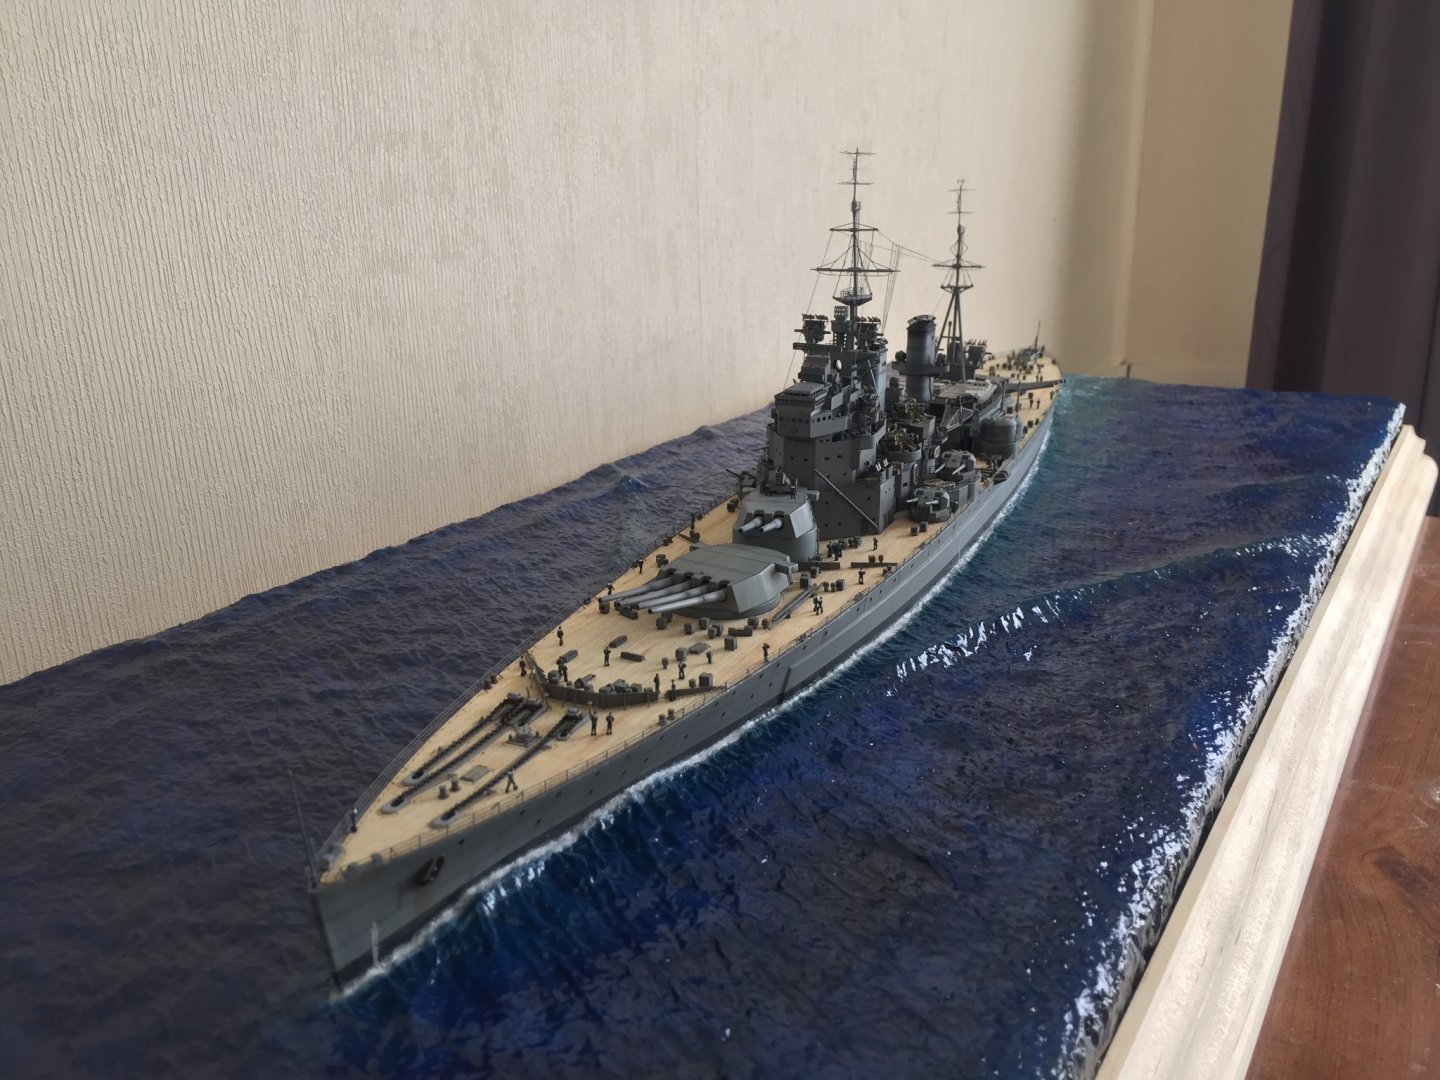
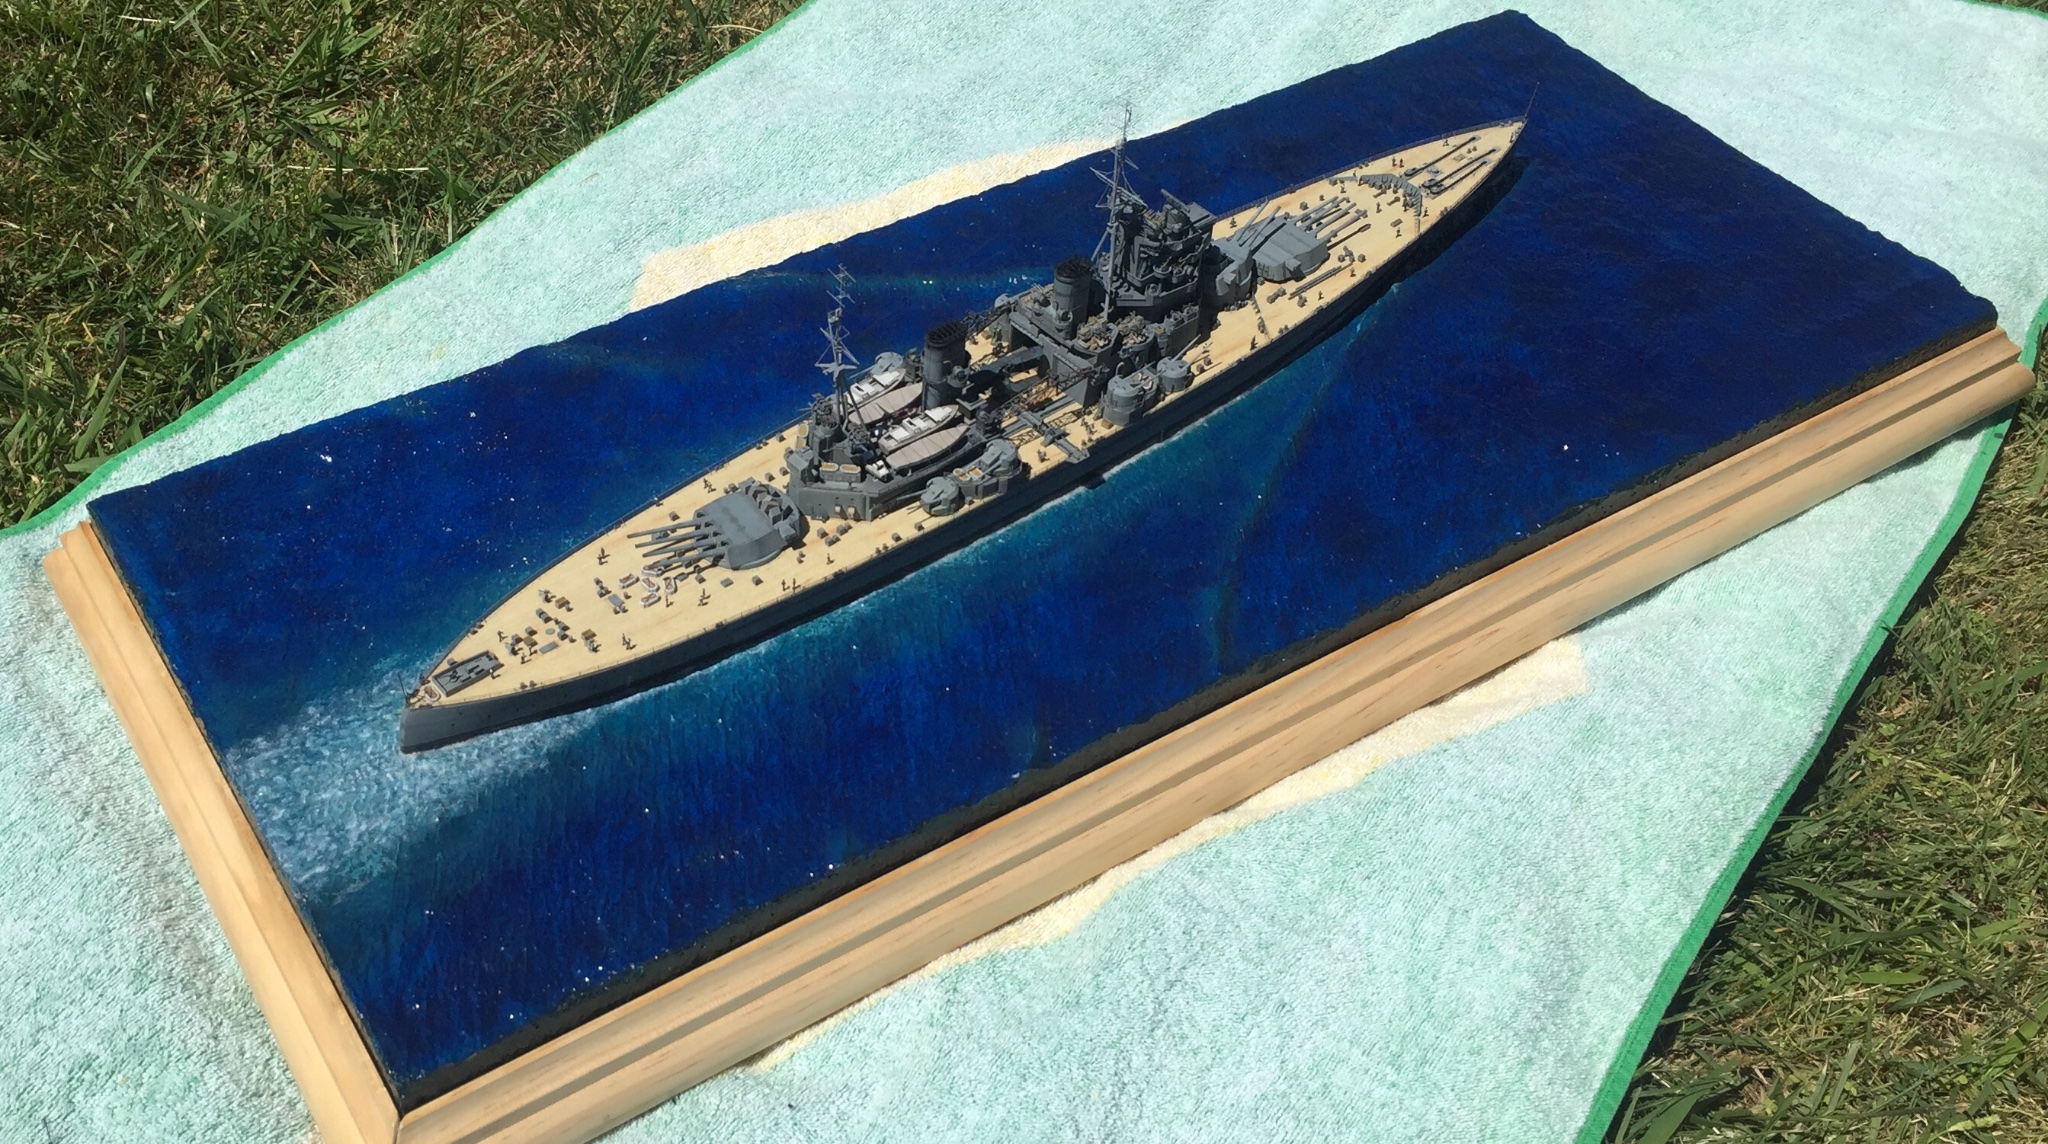
Thanks everyone for the kind words and more importantly for the tips and advice that’s been given! I’ve learnt way more than I ever wanted to know about this ship and the sea (in a good way though)
I touched up the wake and for a few minutes thought she was finished!!
Took some pics in the sun.
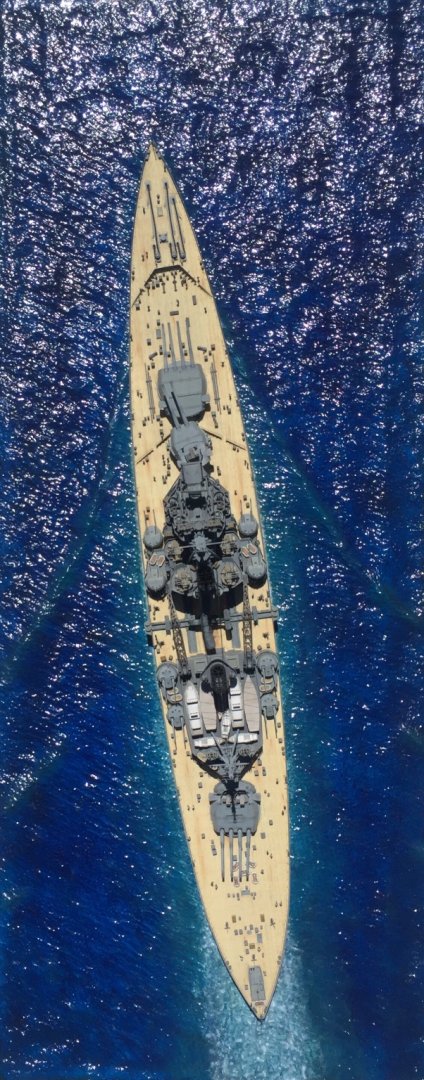
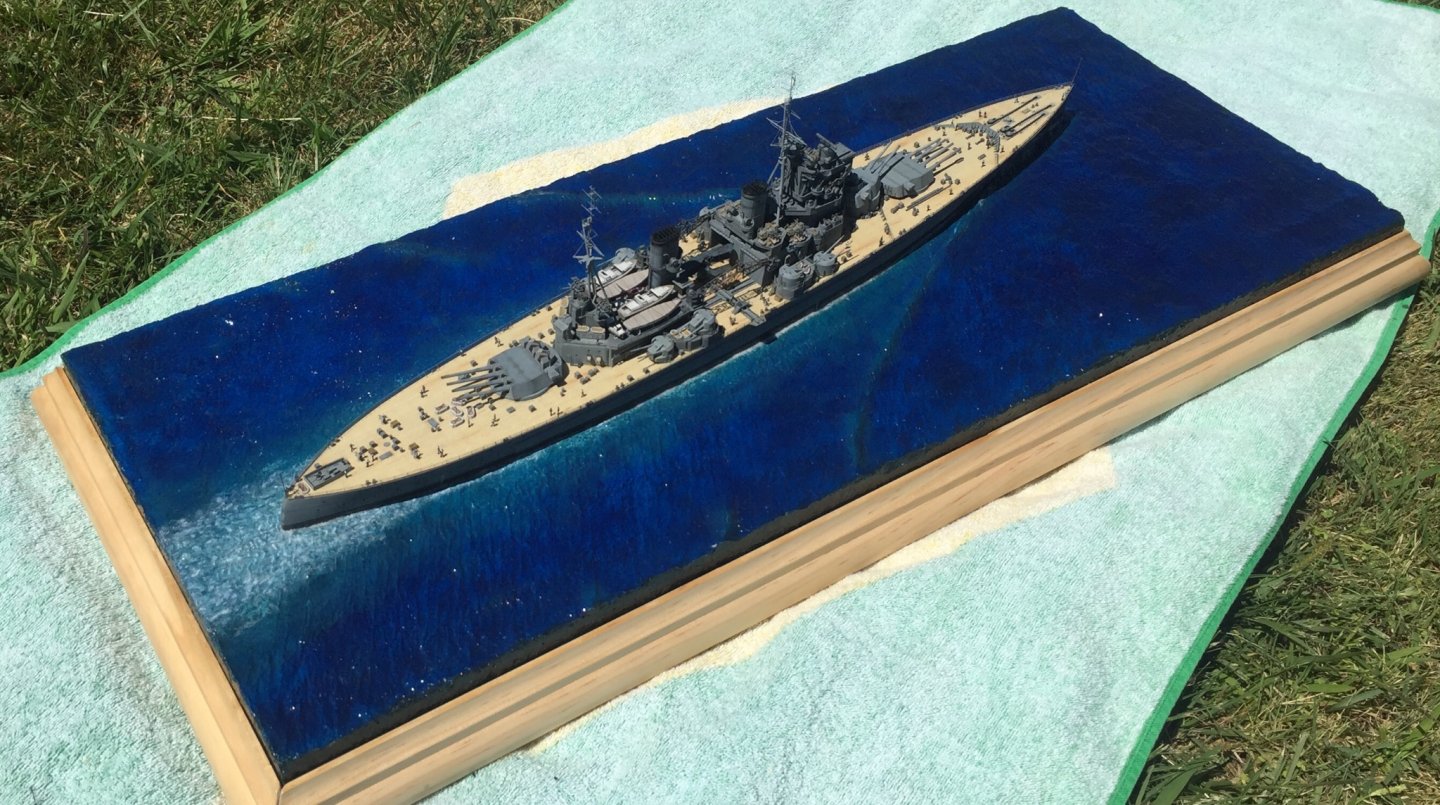

Then I remembered about the ensign as I’d looked it up but had found no pics of her sailing with one flying until I did find some...
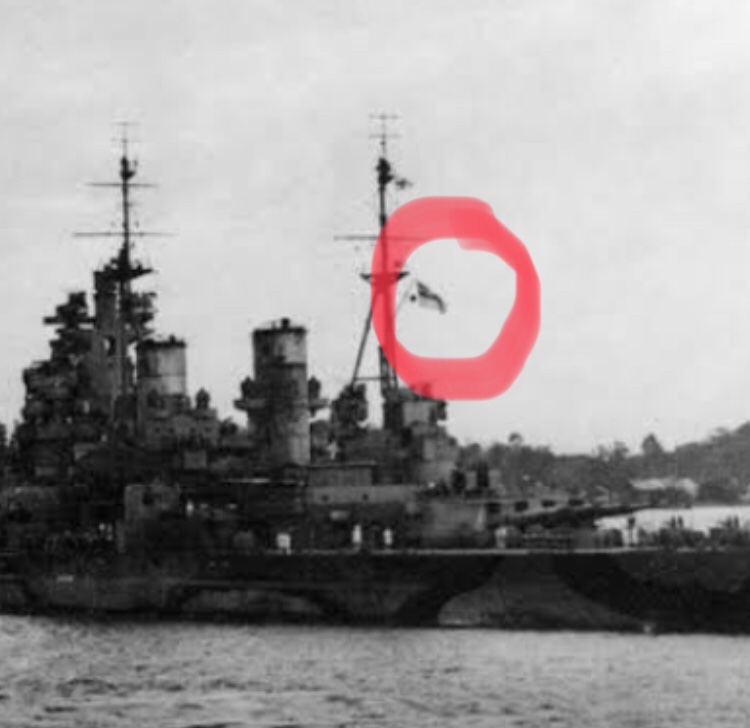
so did more research and read the rules and etiquette of flags at sea and it says
“an ensign must be flown when in foreign waters during daylight hours”
so unless I’ve missed something that’s what I’ll now research and do.
Is there any way to find out the correct halyard setup for flying flags and ensigns? All the official plans only have the main rigging but can’t find anything on all the small stuff. That pic shows the flag flying where there is no rope on any plans, drawings or pics I’ve ever seen.
- lmagna, mtaylor, Old Collingwood and 3 others
-
6
-
-
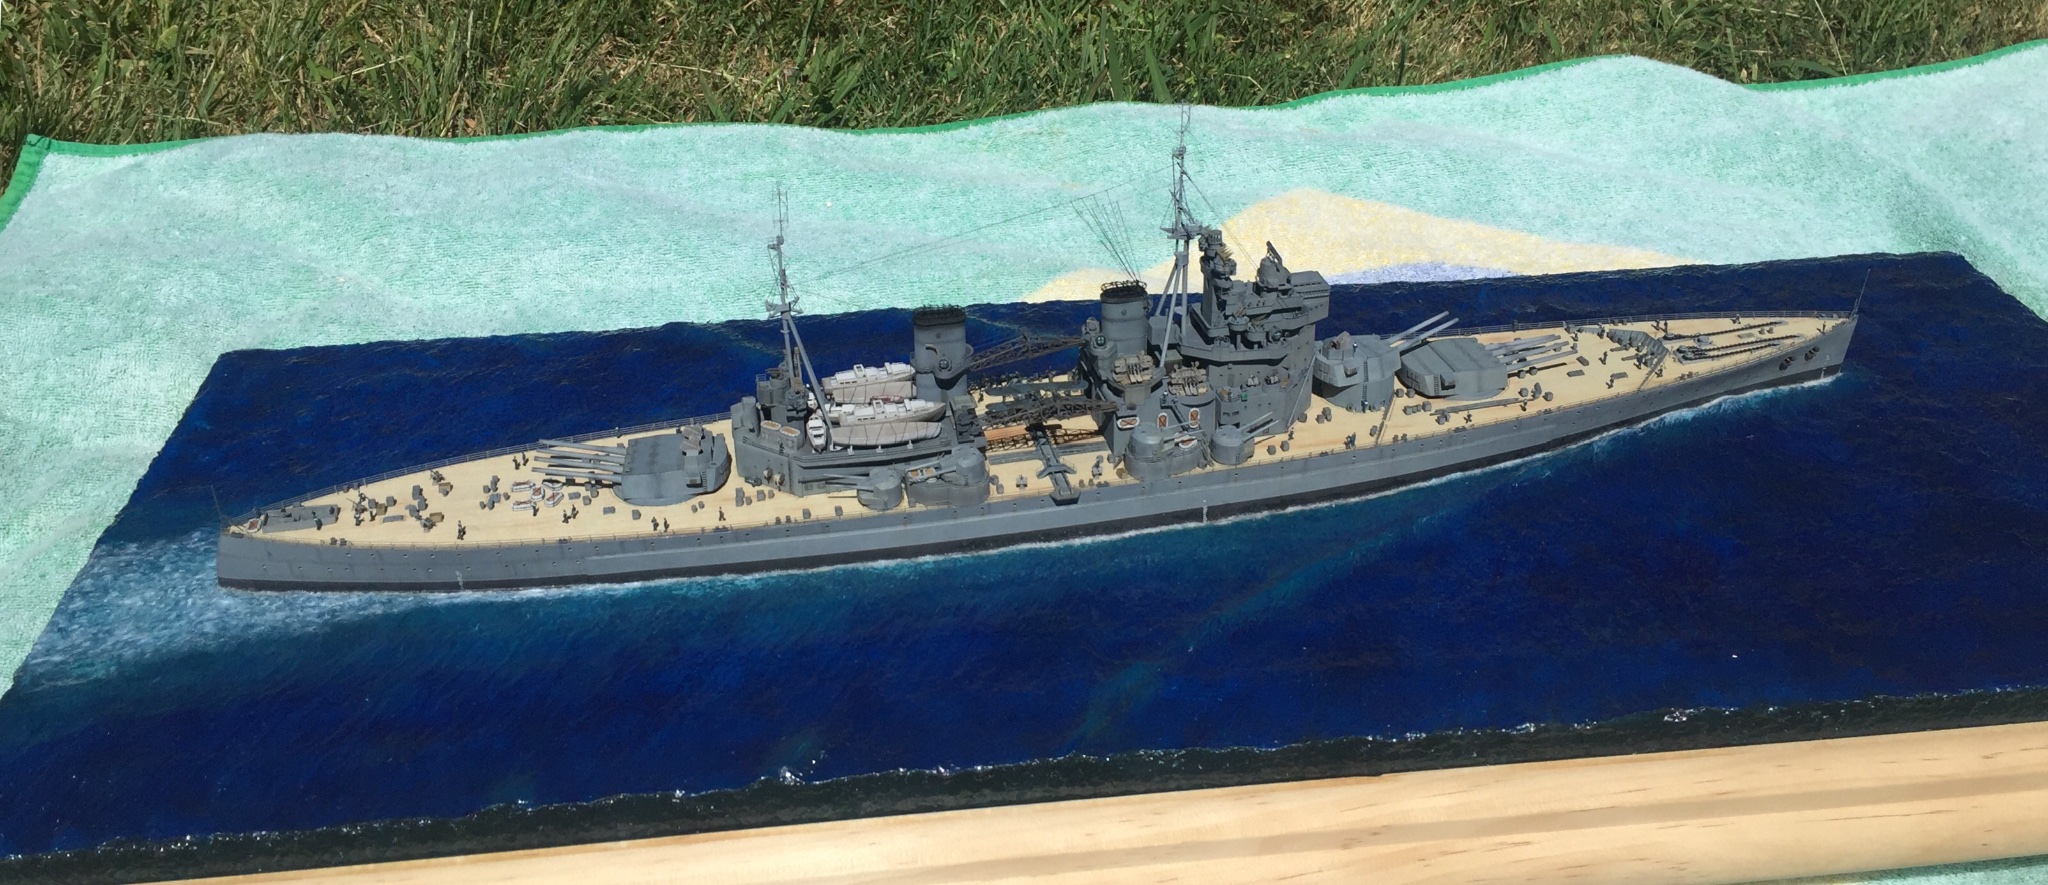
With the new information about white water this is the result.
hope it’s not over done. Just prop wash to finalise.
- Landlubber Mike, yvesvidal, mtaylor and 4 others
-
7
-
Thanks all for the tips and sites! Looks like those 2 coffees really did their job this morning LandLubber Mike!
seems I had the right rough idea! But now have some good places to start my searching! It’s abit like researching a build, looking for those gems in all sorts of places!
Move got enough aftermarket for this Hurricane but wondering if my next build is as internal as external. No idea what a/c that will be though but I do like the WW2 era European theatre.
- Egilman, Old Collingwood, mtaylor and 5 others
-
8
-
10 hours ago, Egilman said:
Not so much looking for trouble, but ready for it if it comes.....
And my opinion is you've nailed it......
Well done my friend....
I hope she is ready for trouble if it comes as I’ve put brass barrels on her!
haha
i had to fill in some gaps between ship and water so just did another thin round and tomorrow I’ll go over it and fit it to size with a coat of varnish.
thanks again for the tips
- Old Collingwood, Canute, Egilman and 1 other
-
4
-
-
Thanks heaps for those. The only way I was finding aftermarket parts was by looking at build logs and hoping they said that upgrades they used then google and hunt them down. Not ideal!
-
Is there a special site that has all the aftermarket parts for each model?
Landlubber Mike has got me wondering what bits are available even not for this build but for a possible next...
Id like to have an open cockpit for this build but the kit one is too thick and cast closed. But any google searches just brings drips and drabs of available parts and for all the hurricanes not just my particular brand. Maybe there is a one stop info page with what’s out there that I’ve been kept in the dark about. I see Aires talked about a lot.
-
Looks great! And all the open panels and having all the internals to fit looks like a huge job! Good work
- Old Collingwood, Egilman, Canute and 4 others
-
7
-
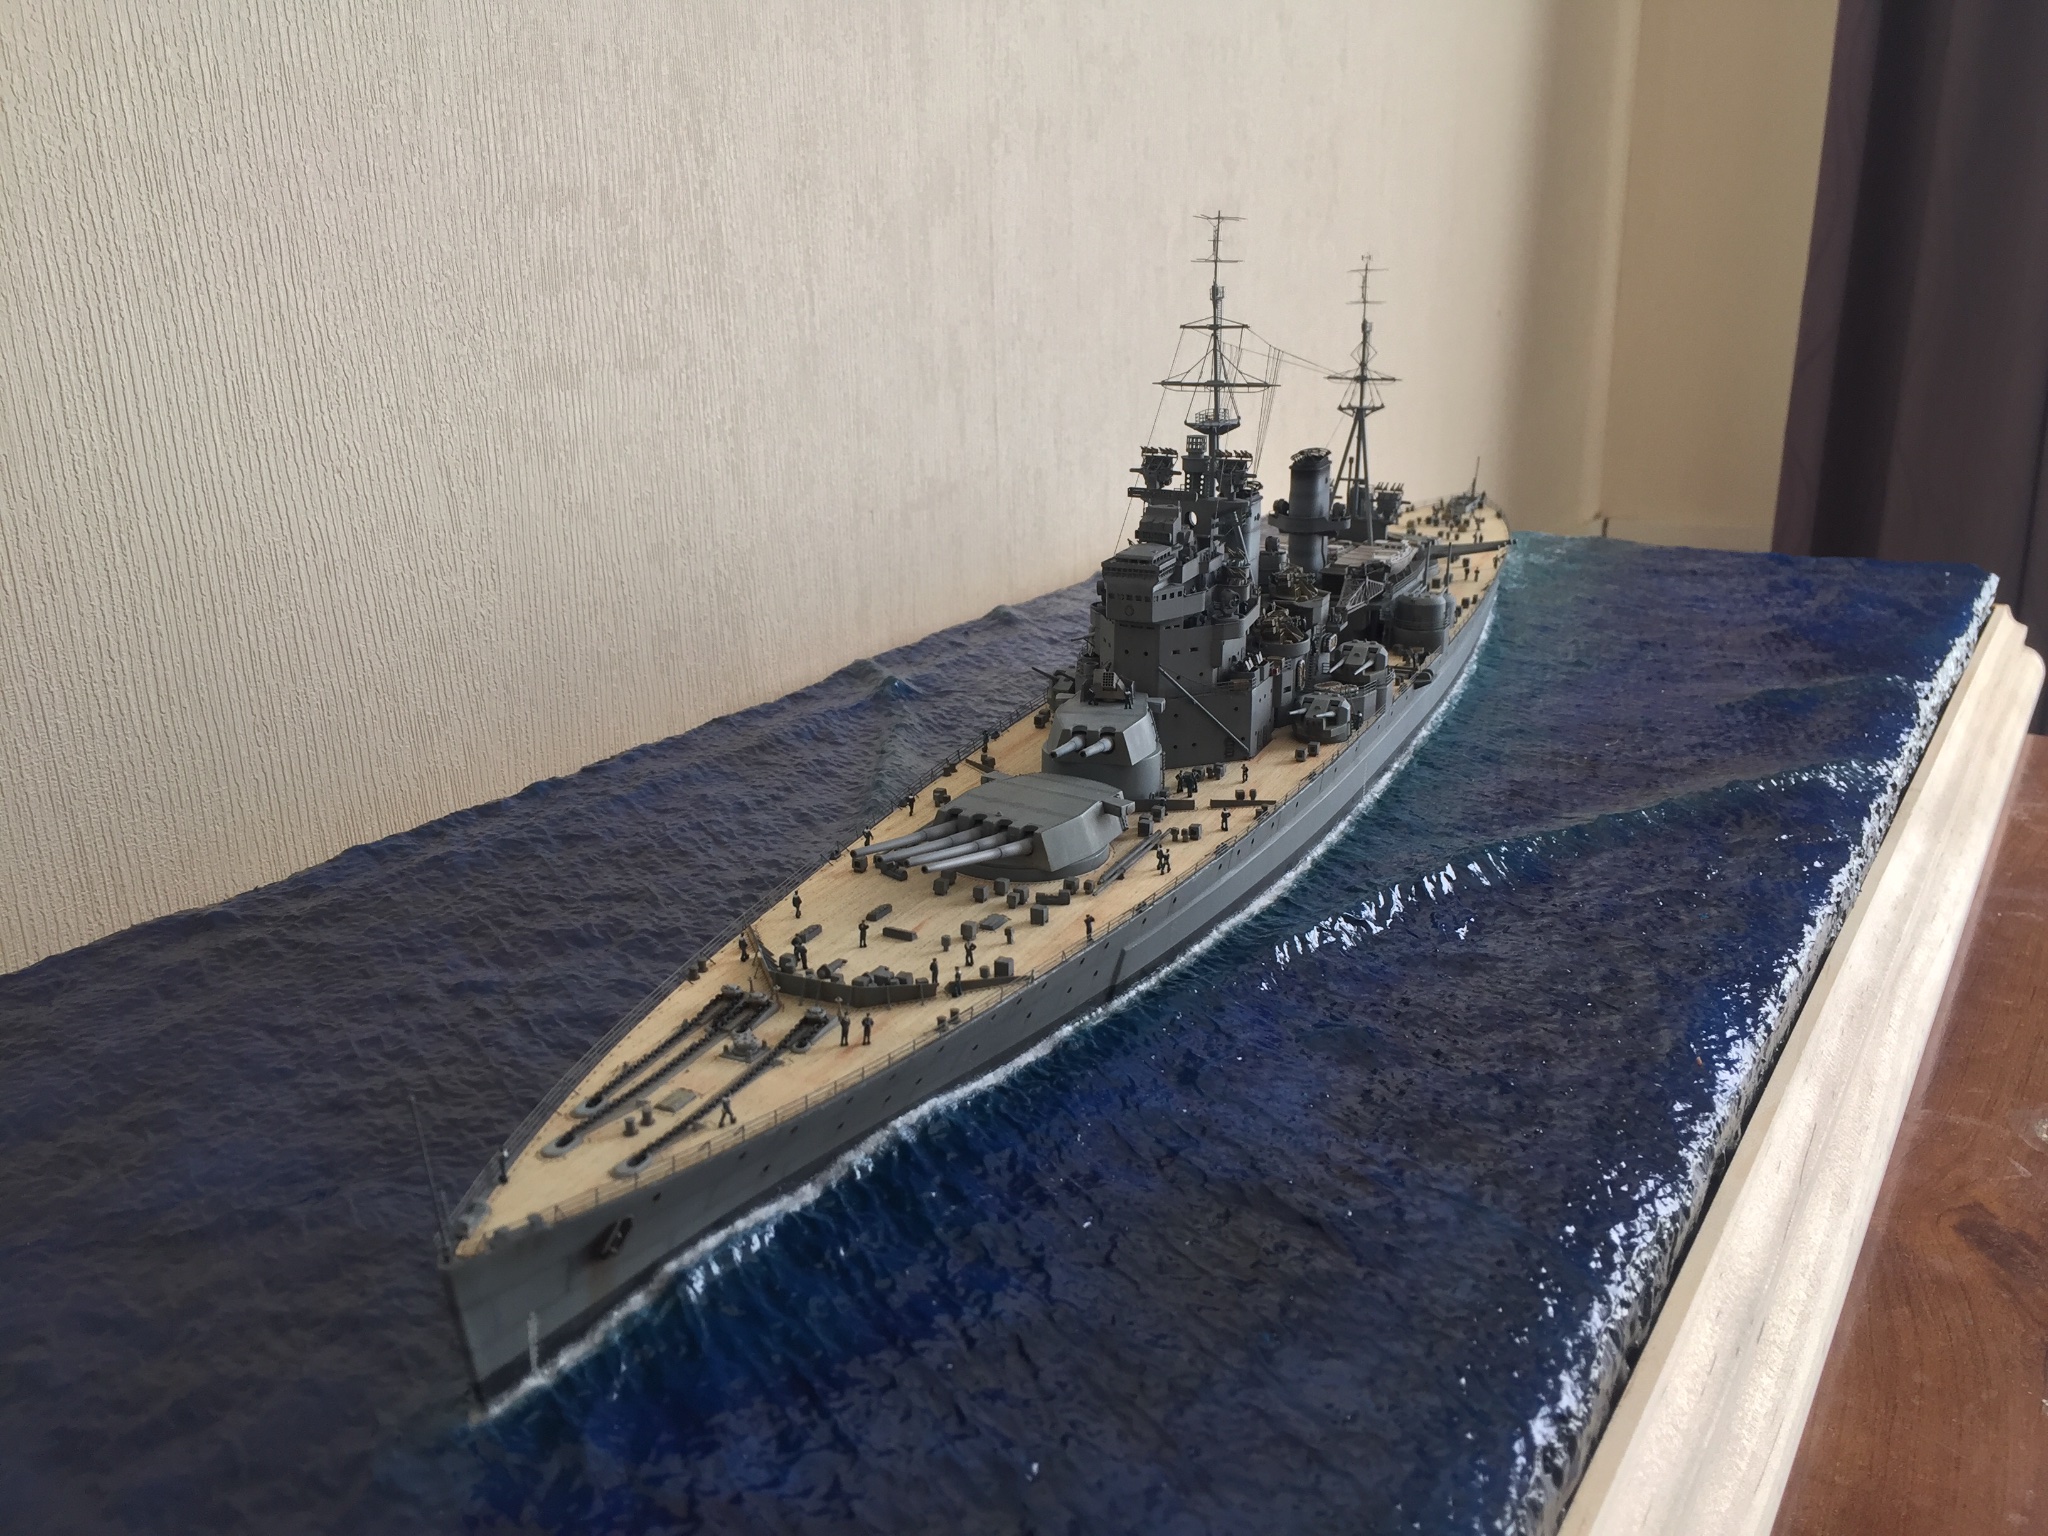
2 hours ago, Egilman said:
That's not really a bow wave my friend, A bow wave would swamp a small boat encountering one, that's a bow ripple, exactly as it should be....
Something you will never see unless the light hits it just the right way... You post a bow on pic that is absolutely perfect....
You don't need any white water to show action..... If you create a sea state with 5'-20' swells THEN you will have white water, particularly if your running under some power, if you create a ship traveling at 27-30 kts you will have white water and a rooster tail with a huge wake... (and yes battleships could and did put up rooster tails)
You have a beautiful depiction of a ship on cruise, easy water and smooth sailing...... But the water is live, the ship is live, together they depict a classic understated power.....
Exactly what a classic british battleship should state...
You have managed to capture something that few modelers can.... and many try....
I wouldn't change a thing.... It's stunningly beautiful....
Thanks for the input. You have changed my mind on what to do. I’ll fix up the boundary layer wake that has some gaps and also touch up the prop wash area but I’ll not add white water to the “bow ripple” haha. I’ll keep the white water down to a minimum.
After seeing pictures of ships going fast and the whole rooster tail wash it’s a mess and would be very hard to replicate well without heaps of practice which is why I went for the cruise look.
My intention was having her cruising about quietly confident while looking for trouble type impression.
- Canute, mtaylor, Old Collingwood and 2 others
-
5


Hawker Hurricane Mk IIc by Lt. Biggles - Hasegawa - 1/48 - PLASTIC
in Non-ship/categorised builds
Posted
Hope 2021 is treating everyone well!
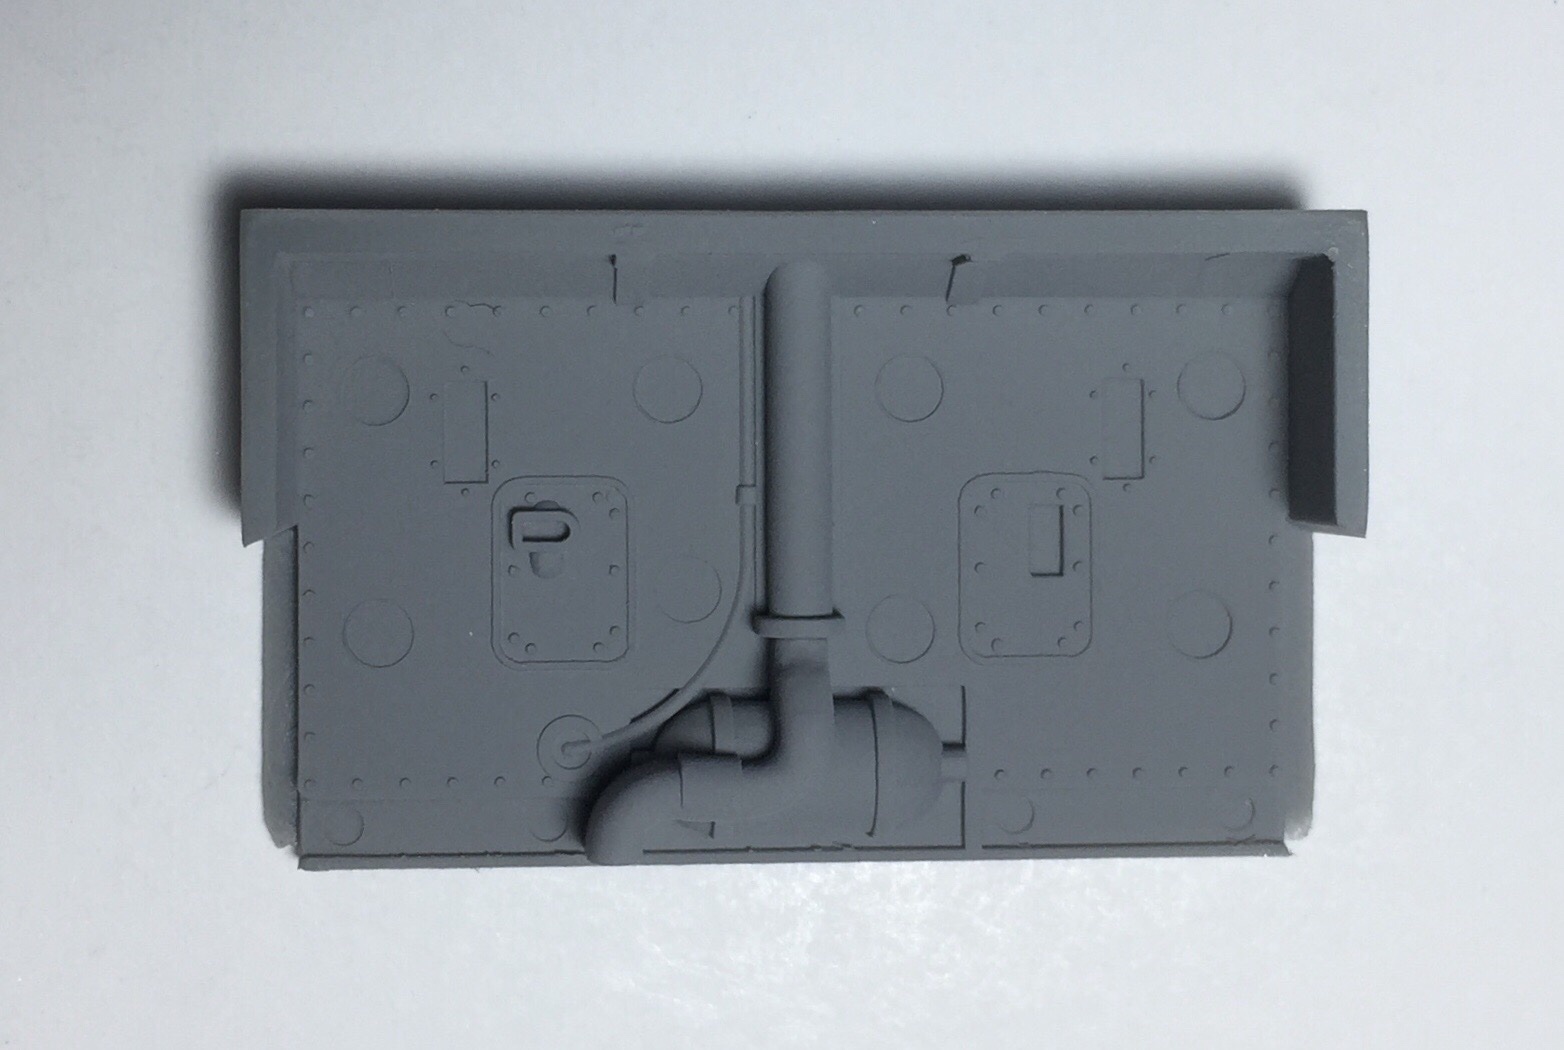
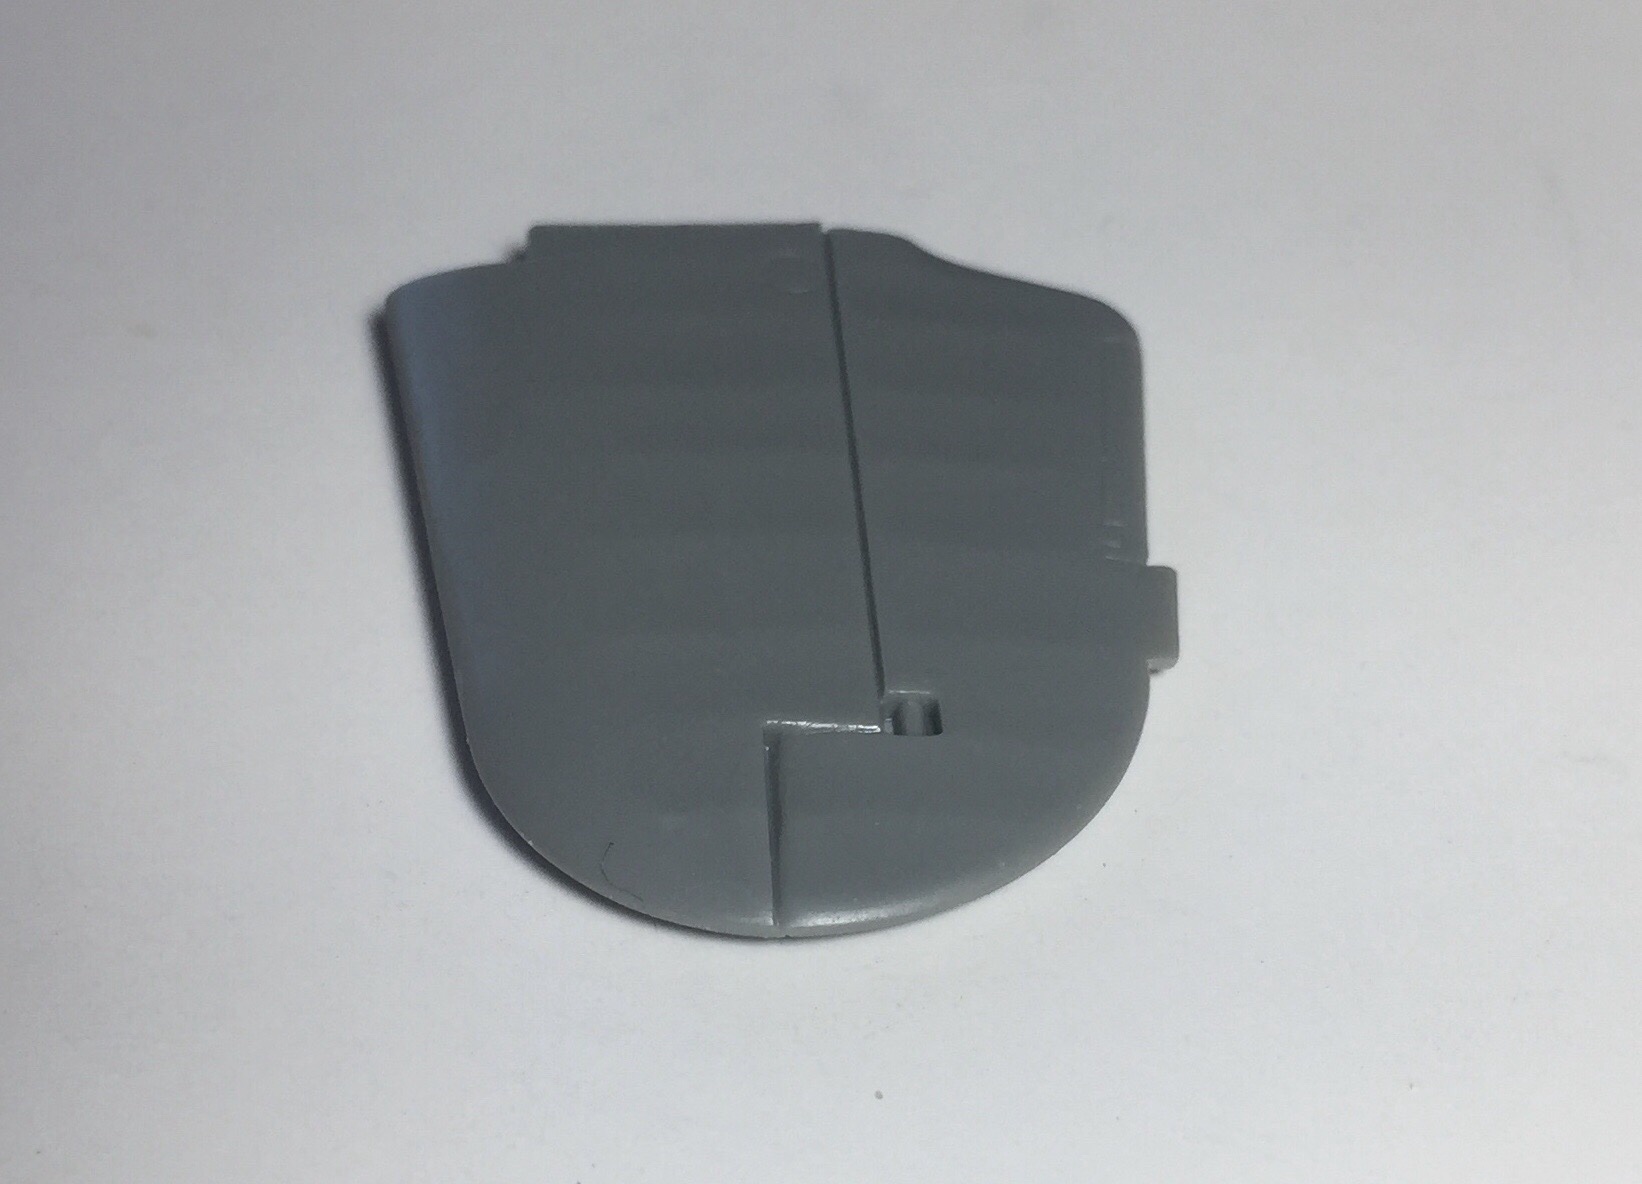
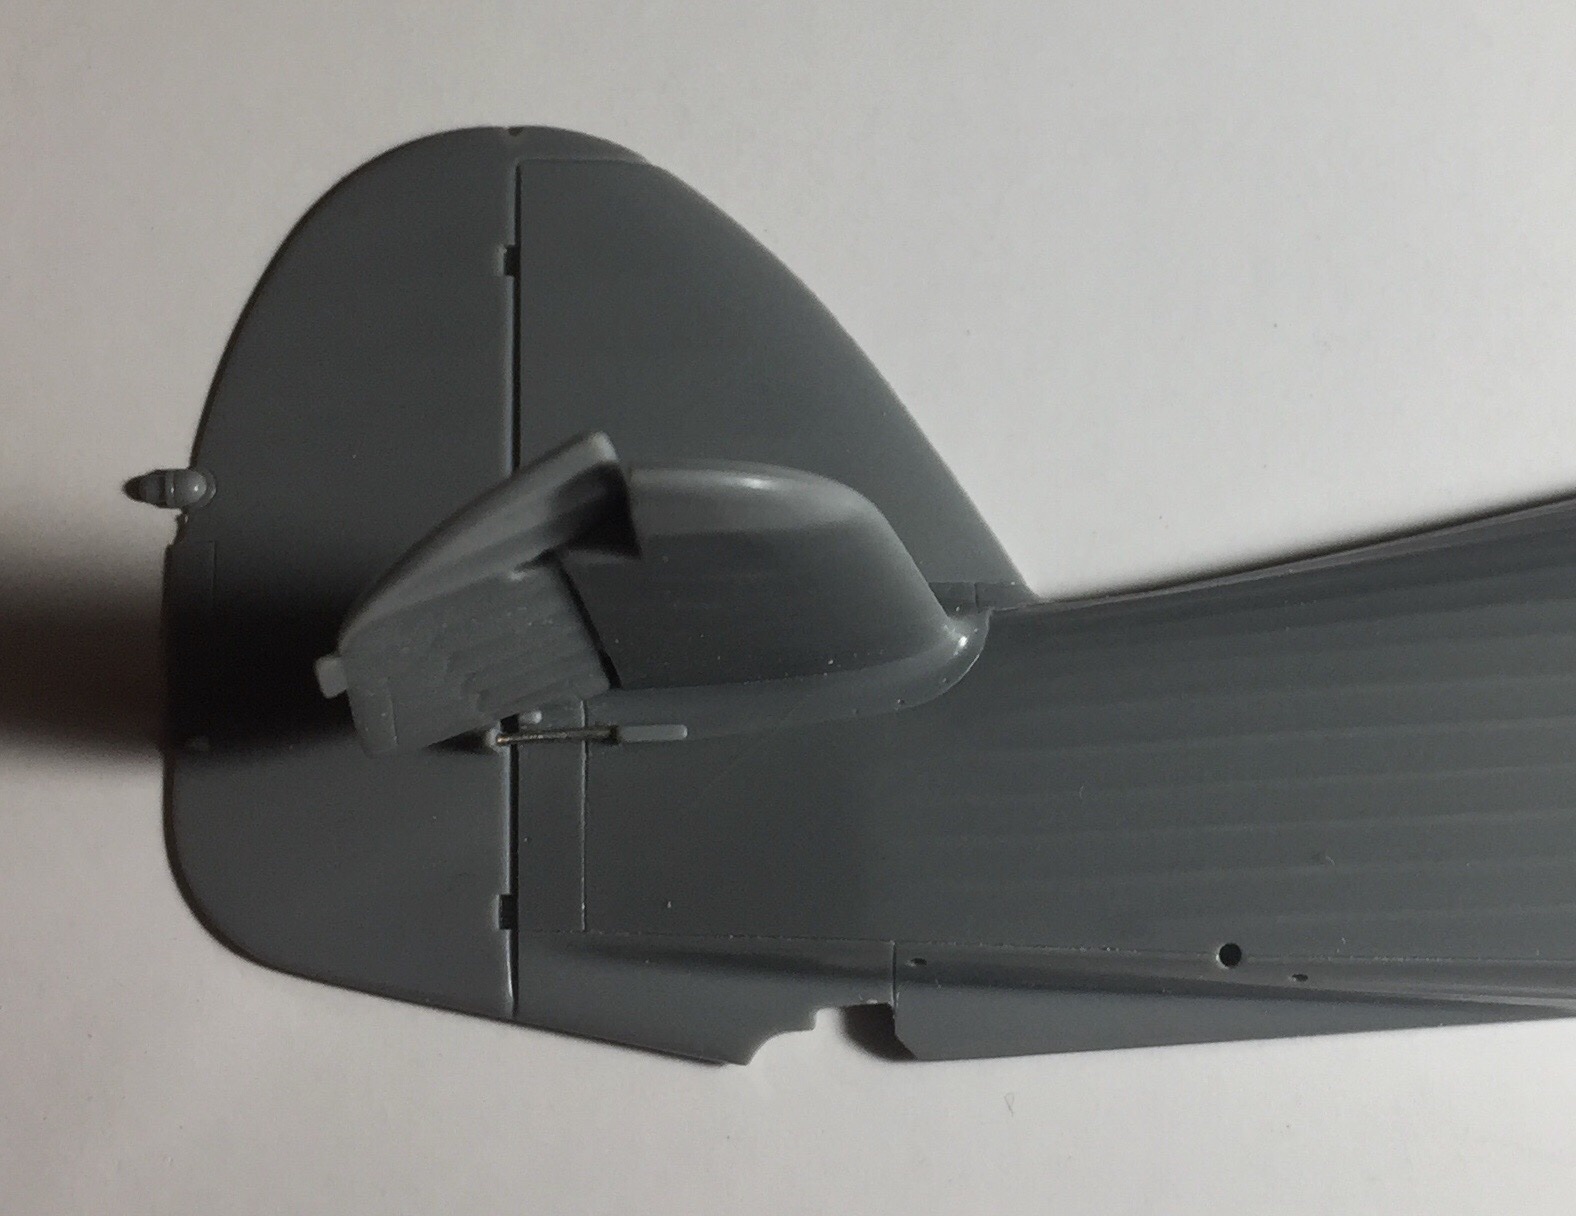
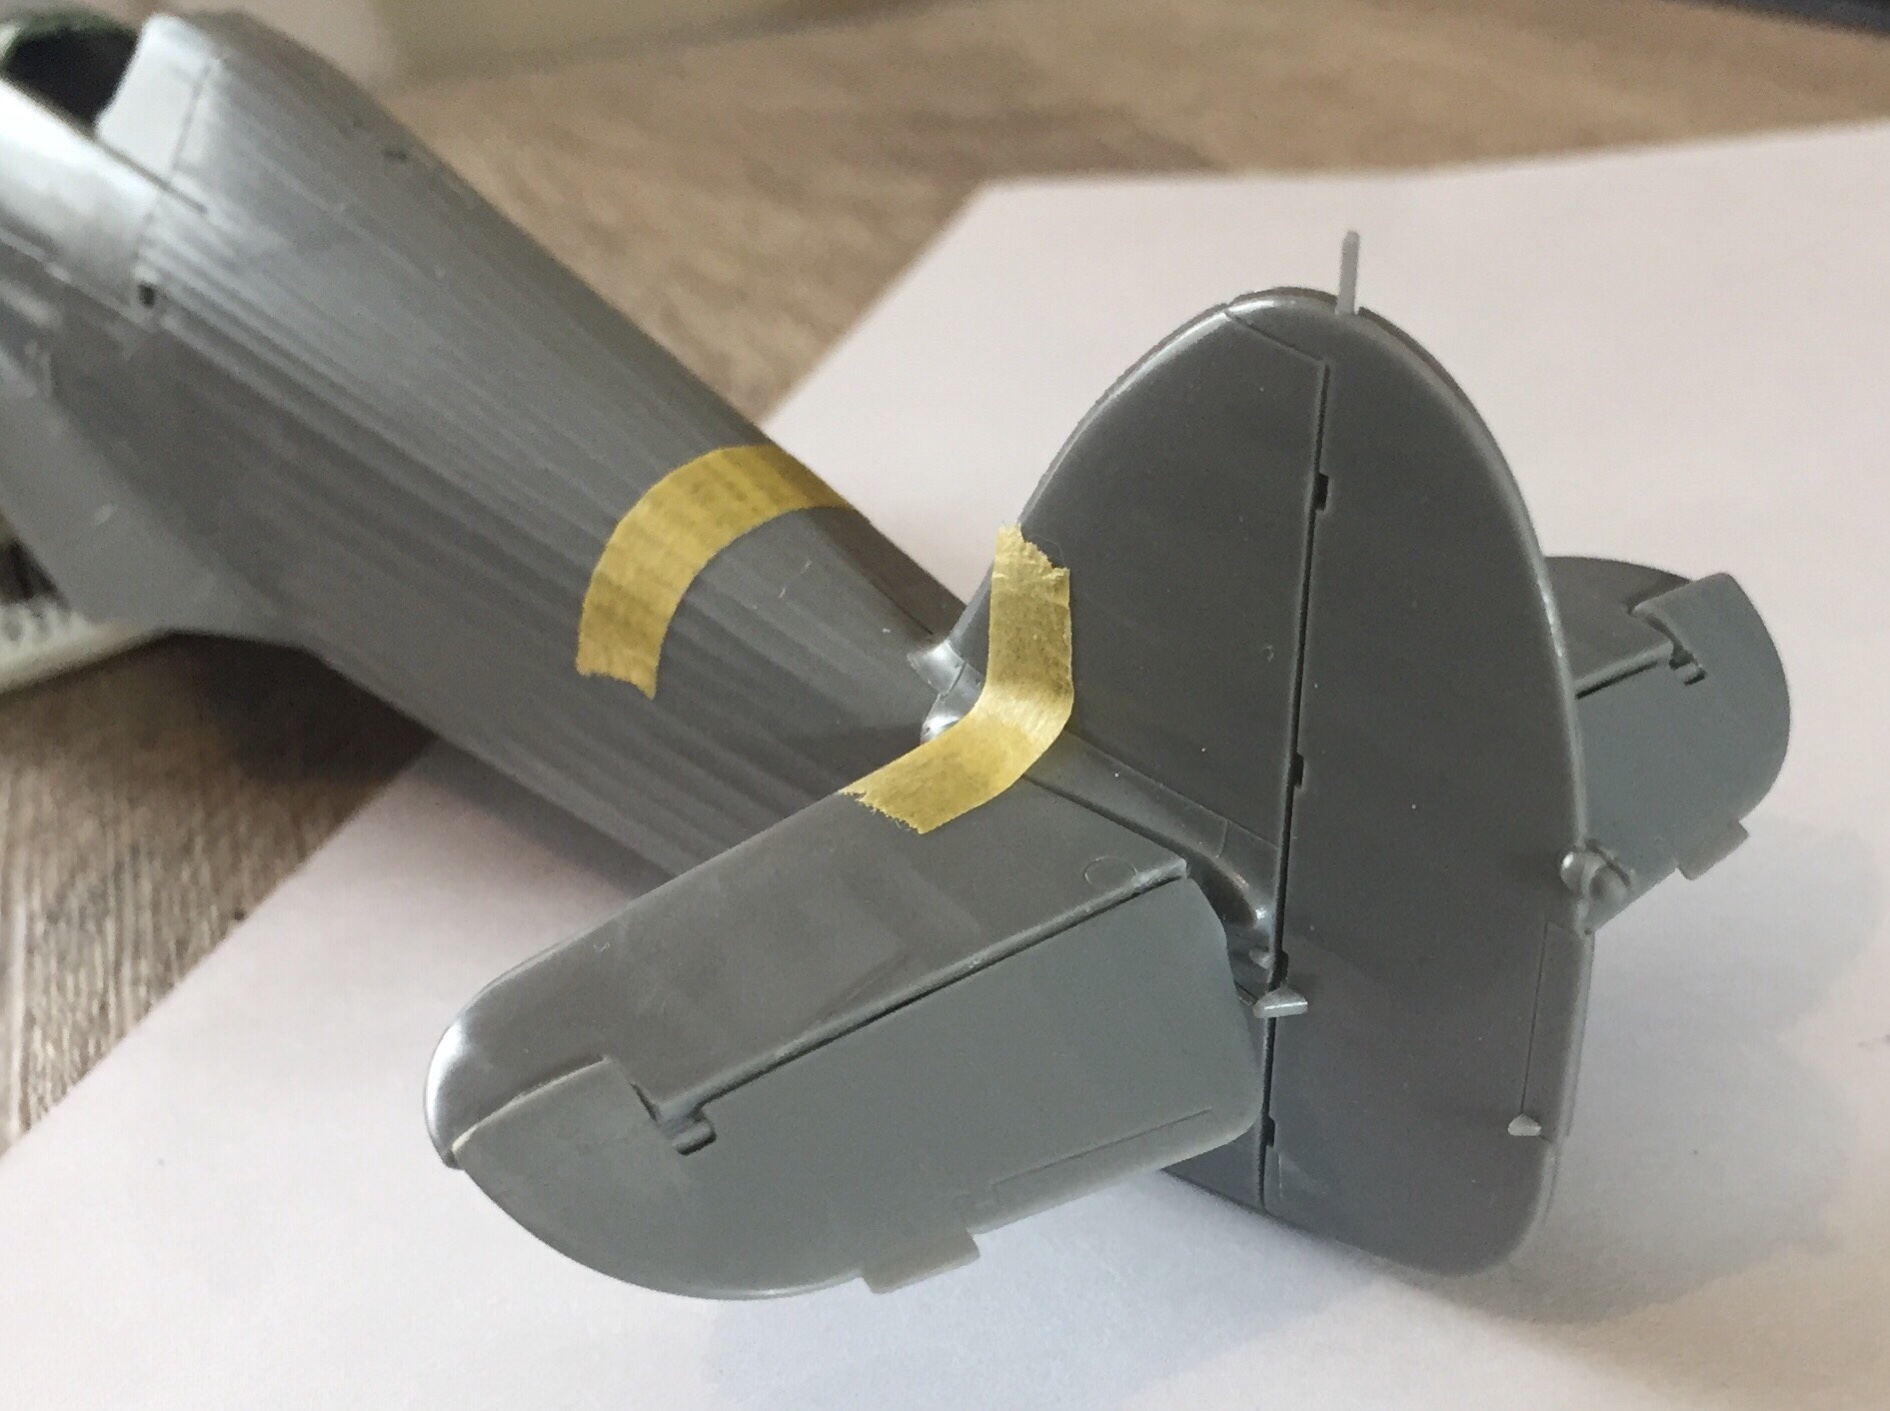
ive been busy covering everyone’s shifts so they can have a holiday so haven’t done much on the hurricane. But put the carburettor intake together.
and using a bit of spare PE from my HMS POW ship build added the grill.
next is the radiator fairing and then the brass gun bases and basically ready for the base prime... whenever I get to that point!