Supplies of the Ship Modeler's Handbook are running out. Get your copy NOW before they are gone! Click on photo to order.
×


dafi
-
Posts
2,405 -
Joined
-
Last visited
Content Type
Profiles
Forums
Gallery
Events
Everything posted by dafi
-
 As being an old incremetalist I chose the smallest possible headway - I fixed an anchor :-) Some loops around the stock and the timberhead ... ... a chain around the shaft and a loop around the palm should do the trick for the small display. Luckily the inside can´t be seen ;-) Cheers, Daniel
 -
The ingenious trick really is, that holes inside the sprue keep the same proportions - everything just scaled down :-) XXXDan
-
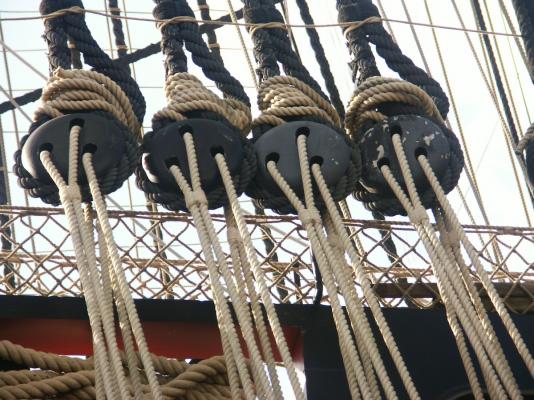
And here we go again for the big things in life ... ... ... a bit of sprue of 4 mm, a hole of 2 mm drilled in the middle, one pick glued on each side, slowly warmed up on top of a candle and very sloooooooooowly pulled ... ... cut to length, and rewidened the holes using broken 0,3 and 0,5 mm drills: Used a wire hook to glue them onto the backside of the shroud ... ... bound them too for having a stable fixation during rigging ceremony and ready are the shroud trucks. And then came a nice summer bouquet of assorted halyards, sheets, bunt lines, clue lines and tricing lines in a rich assortment of thicknesses. Some clamps still free for the stun´sail´s rigging And now you see the reason, why I went through the task of adding the clamps. But equally exciting was to fix the lines onto them as I had no access from the back ... ... later I will still add some bights. Kenavo, DAniel
-
Thank you Philippe and Jan :-) The binnacle is straight after the dimensions given in McKay, I think lLongridge has them too. @amateur Jan, the meet was a bit too tough, they are still chewing on it ... ... or they might just be faking, having heard you mentioning the splicing jobs ... :-) XXXDAn
-
Thank you Steve, Popeye and Jan. @amateur : I did not decide yet. The earliest mention I have is ca. 1862 but still it is tempting and it would make big sense to me, as the lanyard is only secured by one half hitch as mentioned in all the literature. Could be tried here and to wait for a possible shitstorm ;-) http://modelshipworld.com/index.php?/topic/6923-securing-the-lanyards-of-the-deadeyes/ The nice thing on such a model is, that one has so many small projects in their own sense, and I believe it to be pure coincidence, that they form a bigger model in the end ;-) Blocks for ... ... another shifting backstay ... ... and the tye for the top mast yard. As everything was well planned before execution, I had to drill some holes in hidden places, so my barbecue skewer drill was asked for, here 0,7 mm it also sets the scale in the picture ... ... and new parts already fixed, to be seen in the second row, or to hardly be seen because mostly hidden and unsharp. . Here is the new grammatical comparisson: tight-more tight-I love it :-) And yes, one more thing, the main tack is also in place. Grüßle, DAniel
-
Orgies- we want orgies! The breast backstay is in place, a model in it´s own sense. 3 different types of blocks, 5 different sizes of rope ... ... as I said ... ... orgies - we want orgies! XXXDAn
-
Thank you Frank ! And Popeye, this reminds me nicely on an issue we had already :-) ... Nelson: "Damn it man! We are on the eve of the greatest sea battle in history. We must advance with all dispatch. Report from the crow's nest please." Hardy: "That won't be possible, sir." Nelson: "What?" Hardy: "Health and Safety have closed the crow's nest, sir. No harness; and they said that rope ladders don't meet regulations. They won't let anyone up there until a proper scaffolding can be erected." Nelson: "Then get me the ship's carpenter without delay, Hardy." Hardy: "He's busy knocking up a wheelchair access to the foredeck Admiral." Nelson: "Wheelchair access? I've never heard anything so absurd." Hardy: "Health and safety again, sir. We have to provide a barrier-free environment for the differently abled." Nelson: "Differently abled? I've only one arm and one eye and I refuse even to hear mention of the word. I didn't rise to the rank of admiral by playing the disability card." ... See: http://www.strategypage.com/humor/articles/military_jokes_200782222.asp http://modelshipworld.com/index.php?/topic/3609-politically-correct/?hl=%2Bpolitically+%2Bcorrect XXXDAn
-
Popeye, Mark, Jan and Grant: Thank you for the very indulgent words :-) XXXDAn
-
BannnnnnAnnnnna! I still owe you my banana ... ... small but important detail: As the man with the lead has no hand to hold himself, he uses a breast belt that is fixed in between the lanyards of the deadeyes. And here he hangs in his belt, throwing the lead far to the front, while the line runs quickly through his fingers, him watching the marks, 2 fathoms leather with 2 stripes, 3 fathoms leather with 3 stripes, 5 fathoms white, 7 fathoms red, 10 fathoms leather with hole 13 fathoms blue, 15 fathoms white, 17 fathoms red - the line stops, the lead is on the ground, one can hear the chant "By the deep 17". Cheers, BannnnAnnnnaDAn
-
STOP-STOP-STOP Mark, big mistake, you held the plans upsidedown ! I hope you get the message in time to fix it still ;-) Hoping the best, Daniel
-
... and as bighearted as I am, I gave already a hint for the banana in the last pictures :-) XXXDAn
-
Thank you both! @amateur Jan, that´s not another bug - it´s a feature ;-) It´s almost straight the rest is the simulation of gravity that sags down the shroud inwards and also sideways! XXXDAn
-
Thank you Jan! But this only was a deadly-horned-ridge-back-bug, 30 cm diameter. I thought it would eat me! Who ever looked at the right hand corner of the ladybird pictures saw already my new ventures :-) Right, it was time fore shake-rattle-and-roll! To add a new shade to the old black-and white discussion, I would like to widen up the discussion. Classically the two colors for the british ships is a neutral pitch-black for the standing rigging or natural hemp for the running parts. As stockholm tar has a more brownish color, I already added a brown touch to my shrouds. The contemporary literature mentions the ratlines as "tarred". Also the hammock netting and the cover over it is mentioned to be tarred. But does it mean that it was black? We had some interesting discussions in our german forum segelschiffsmodellbau.com with the remark, that it was also used to impregnate cloth to wear :-0 So I opted for a shade that is darker than the natural hemp but much lighter than the dark shrouds. So I mixed the two of them. The thickness was already tested out quite a while ago and I found a thickness suitable for both looks and handling. So I took my tart section and placed a template behind the shrouds - have a look at the shortened hair clips - my girly is gonna kill me ;-) The template proved to be to thick in the lines, couldn´t see my lines properly ... ... so replaced it with a newer version where a filmsy line in an apart softgreen trhat proved to be more suitable. Also I used the hint not to rattle up (or better saying down) in one go, but to always half the distances to avoid the curving in of the outer shrouds. So it got slowly more and more full ... ... the backstays I did bend out of the way, there are rumors of modelers rattling them in also ... The lower lines were tough, had to find a logical way to work my way through, remembering in which row they were done on the original. As the ratlines were the last items, so they had to go over everything. But even this mess I managed to clear considerably :-) And then comes the point of taking out the guiding template. Still had to clear the half hitches of the outer shrouds and arrange the sagging ... ... and up they can go :-) XXXDAn
-
ancre LE BONHOMME RICHARD by Jeronimo - FINISHED
dafi replied to Jeronimo's topic in - Build logs for subjects built 1751 - 1800
What a dream, thank you for showing, cheers, Daniel- 662 replies
-
- 1
-

-
- bonhomme richard
- frigate
- (and 1 more)
-
Just received two shipyard inspections right now. One itzy-pitzy-teeny-weeny little tiny red spot with 6 legs and two antennas that was racing all over the model in such an incredible speed, that I couldn´t shoot it. The second one I got some nice shots off :-) Looks there were no complaints on the way the rigging was done as she (LADYbird) left without further remarks ... XXDAn
-
No port (nor rum) - the spirits are just allowed in the night time ;-) XXXDAn
-
One point goes to Popeye - because of asking for the rope. It is fitted by now :-) XXXDAn Two more hints - no pajamas involved and neither those gentlemen http://m.youtube.com/watch?v=l924olE7ZJU
-
Thank you Sörrs :-) And @amateur ... ... what did I do now ? You are always expecting sooooooooo cruel things here to happen - unbelievable ;-) XXXDAn
-
So, the good news first ... ... all the lanyards replaced :-) While doing this I felt a bit observed untill I remembered a long forgotten detail :-) XXXDAn
-
Wonderful work, love it :-) Cheers, DAniel
-
Thank you very much Popeye :-) But if the paths are really correct ?!? I think everybody will have to decide for themselves :-) The truth lies in the eye of the bebuilder ;-) XXXDAn
-
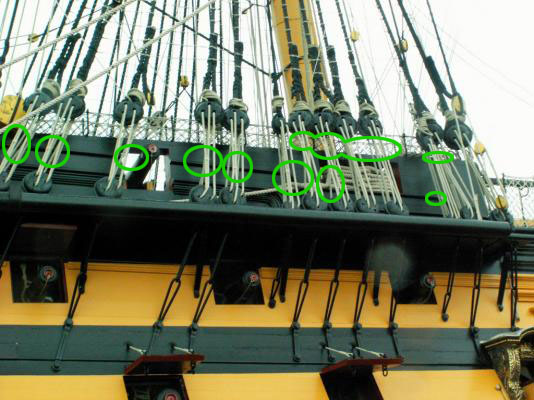
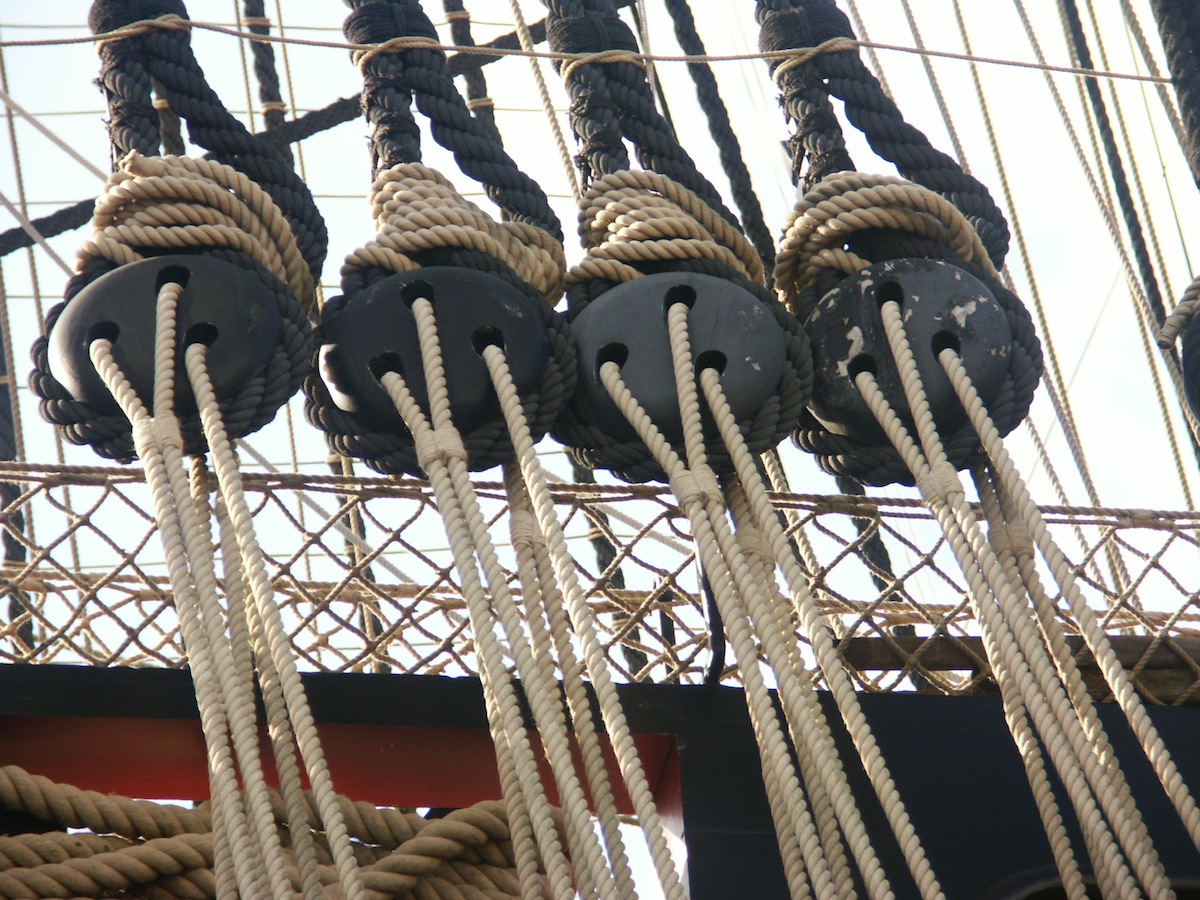
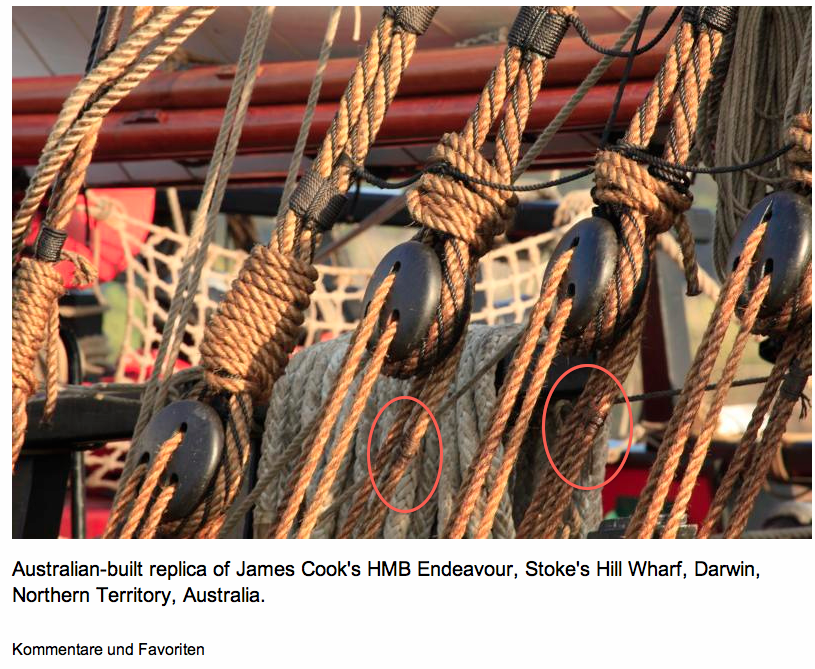
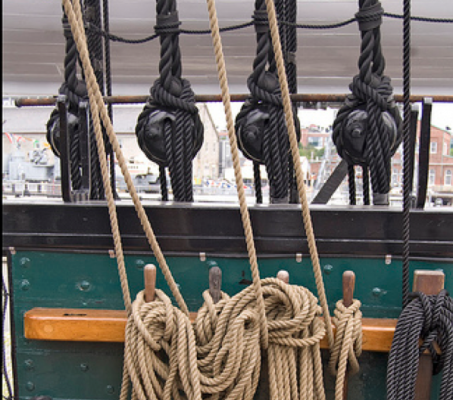
It is like one of those searching games, one has to know where to look at :-) Victory Endeavour Göthebourg Constitution: It looks like the seizing is used to secure the free end, but I believe having seen those seizings also on the front side. XXXDAn

-
Hello Tadeusz, if one looks close, you can see the things on the picture of the Vic :-) XXXDAn