

Robert29
-
Posts
375 -
Joined
-
Last visited
Content Type
Profiles
Forums
Gallery
Events
Posts posted by Robert29
-
-
Ian,
Thank you for your comment and for your advise. That's all I needed to convince me, I will do the filler blocks.
Nick,
Thank you for your comments. With a second advice coming in, I will definitely do the filler blocks.
Yes, about the wiring, that is something that keeps coming back in my mind. What if I cut a wire when the lower decks are all covered!!! Apart from testing frequently, what I did is I wired the lights for the lower and middle gun ports in a Ring Circuit. As you might have noticed the led's are wired in parallel, looped from one to the other. The two wires from the power supply feed the first led, the others are looped from on led to the other. The last looped led is again wired to the power supply. So basically you are feeding the led's from two sides. It is the same way the socket outlets in a domestic house are wired. That way if one of the wires is cut the lights will still all be supplied from one side.
Thanks Nick, I will let you know when I visit Victory.
Robert
-
Really nice planking Ian, it's a pleasure following your build.
Robert
- Seventynet and Canute
-
 2
2
-
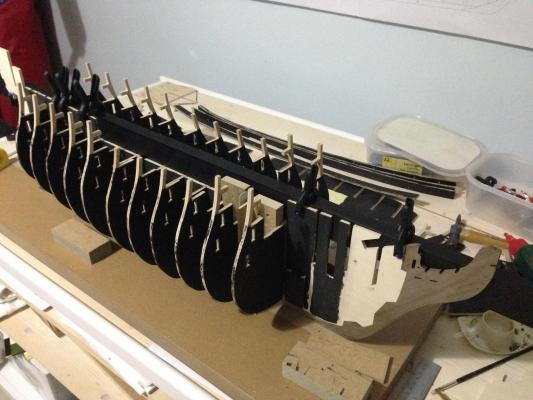
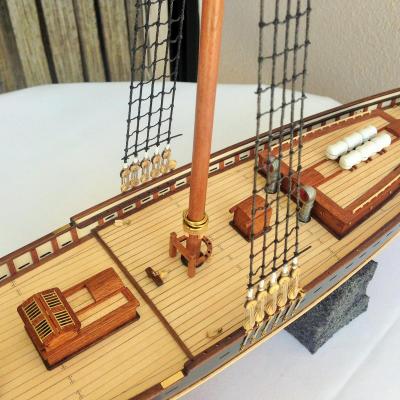
A little more progress. Fitted the middle gun deck and the bow forward supports. Fitted also the stern extension. Finished the lights for the middle gun deck as well.
Next step is to fit the gun port patterns. I am thinking of making filler blocks for the bow and stern.


From the circuit boards supplying the gun port lights I wired six led's to light the inner middle deck so that light will be emitted through the deck gratings and also light the ladders leading to the upper deck.

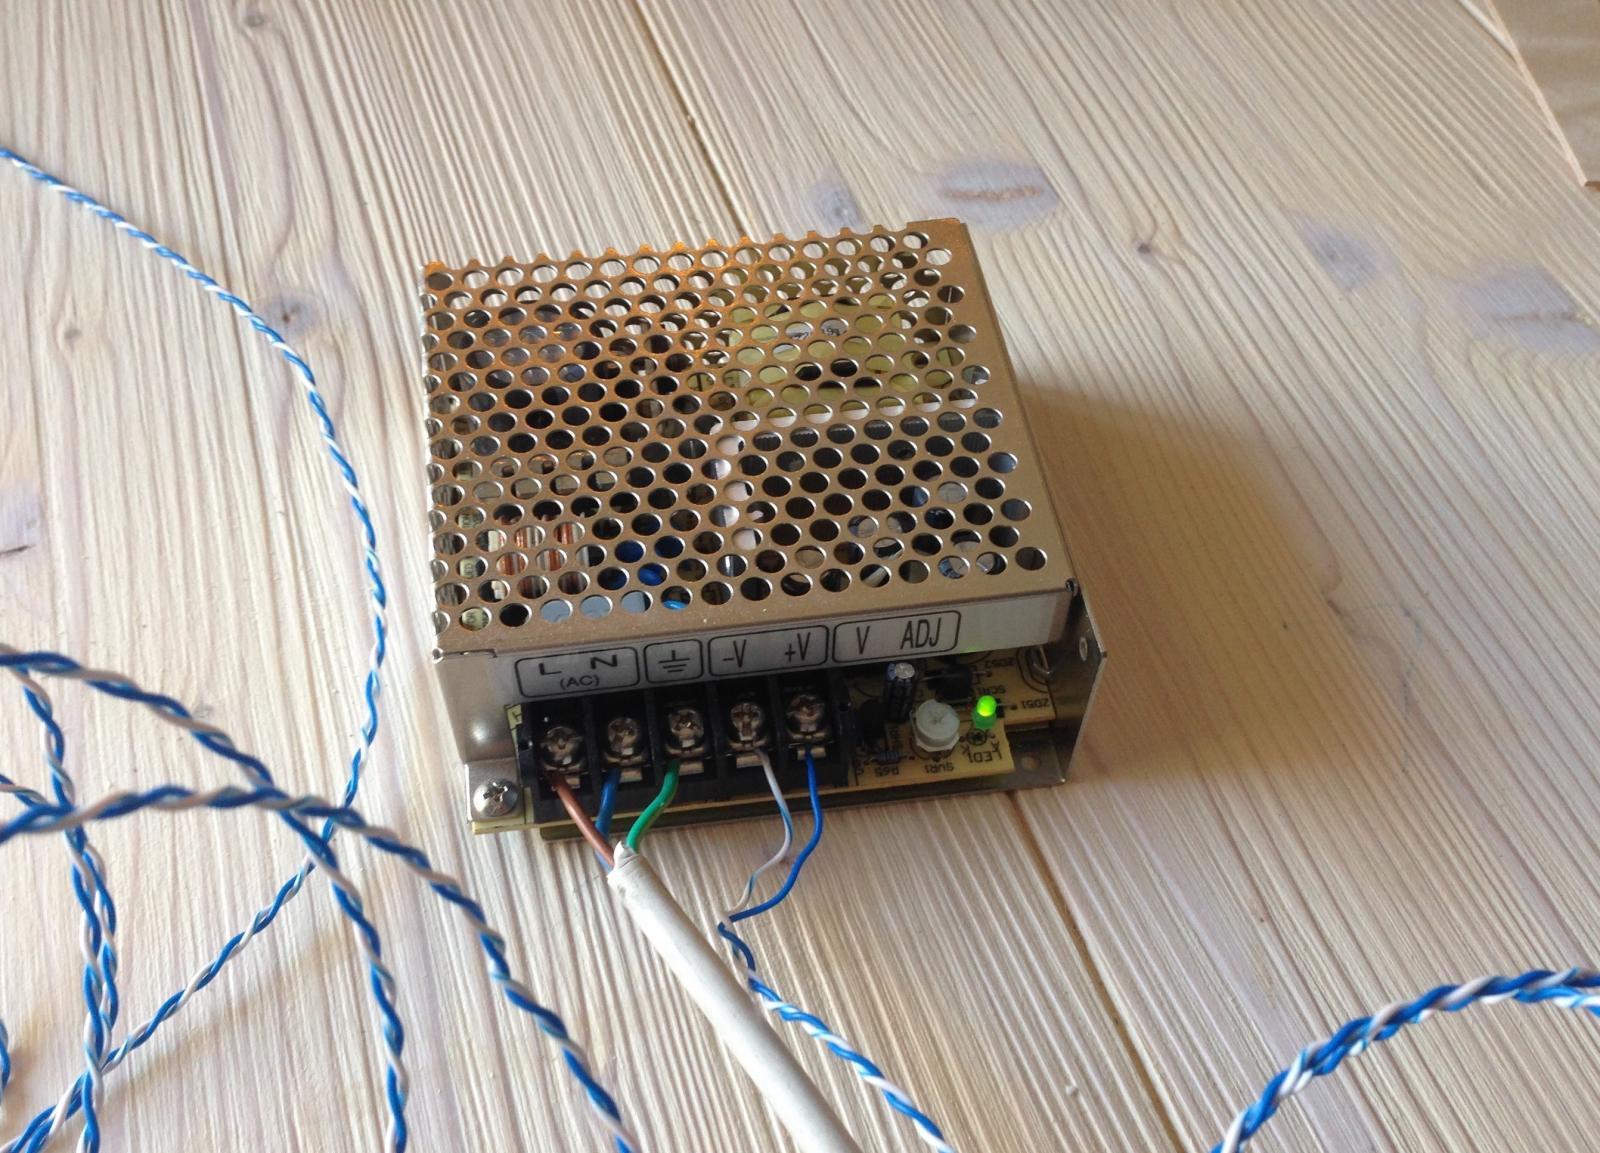
This is the power supply that I will probably be using for the lights. It has an output of 12V DC, 4 amps.
Later on I will try to take and upload a video of the flickering lights.
Robert
- mtaylor, zoly99sask, Sjors and 2 others
-
5
-
Awesome work Nick. Just started my Victory. I will be visiting your build.
Robert
-
Hi Mark,
Thanks for your comment. The gunports are positioned on the very side of each space between the bulkheads. I positioned the lights up and on the other side of that space, so basically they are more or less the position you have suggested otherwise as you have rightly so suggested I will not have that subdued effect.
Thanks again, appreciate any suggestions. I will visit your Constellation build.
Robert
- Seventynet and mtaylor
-
2
-
Hello Ian
Thank you for visiting my build. Yes it is an incredible site, I learned a lot from it during my previous build of the Bluenose II. I think I will soon be calling on you when I come to the planking. I will be moving at a slow pace too as I don't have much time left after a day's work.
Hi Rob
Thanks to you too for visiting my build. I don't think I will be ahead of you and I'm sure I will get tips from you. I will visit Pompey's build. Hopefully I will visit the real Victory later on this year. My daughter lives in Stratford-Upon-Avon and I have already prepared her that on my next visit to her we have to visit Portsmouth and of course the Victory.
Robert
- mtaylor and Seventynet
-
2
-
Hi Rob,
Very nice work, just started a log for my new build of the HMS Victory. I will be visiting your build.
Robert
-
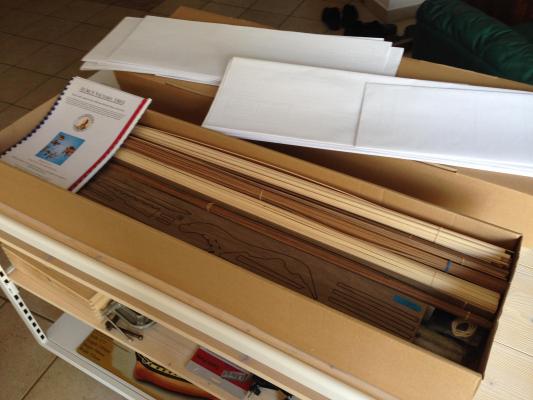
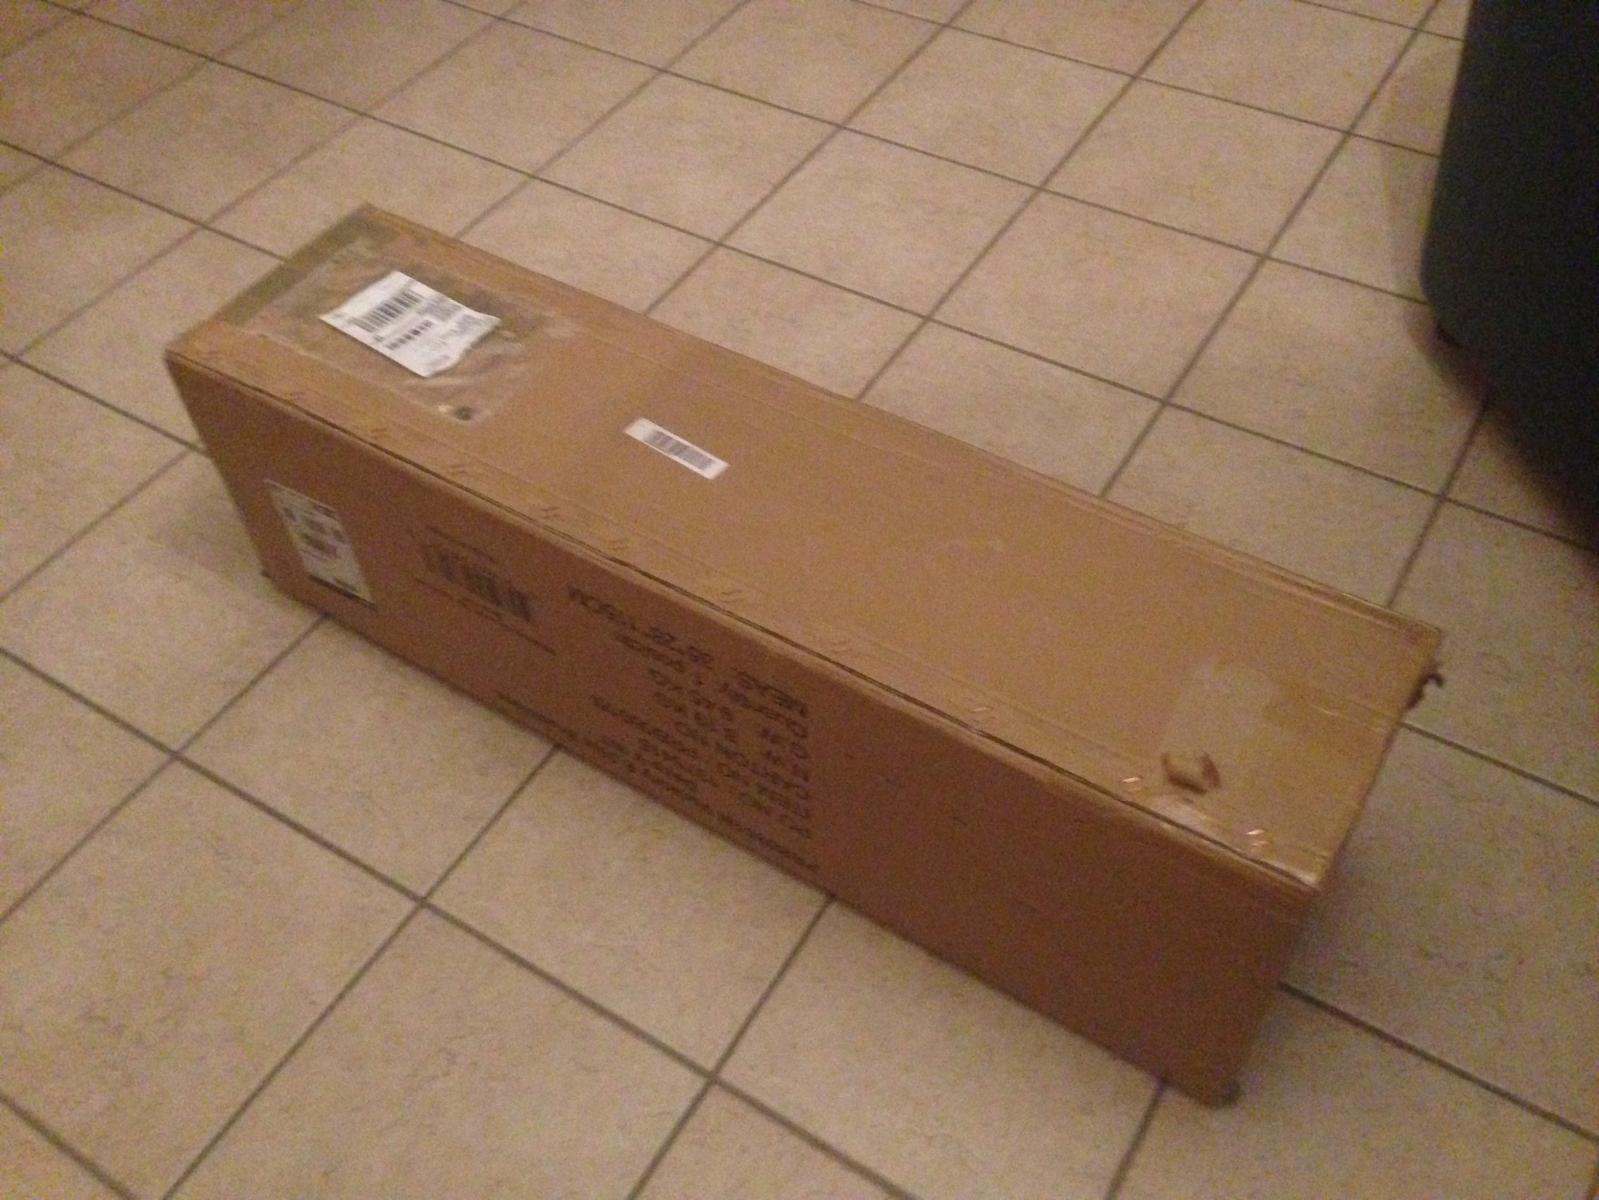
Hello to everybody.
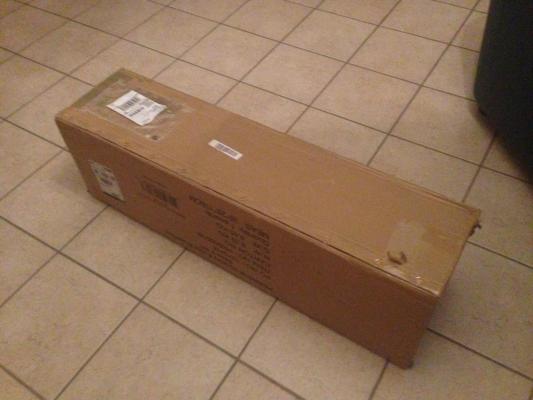
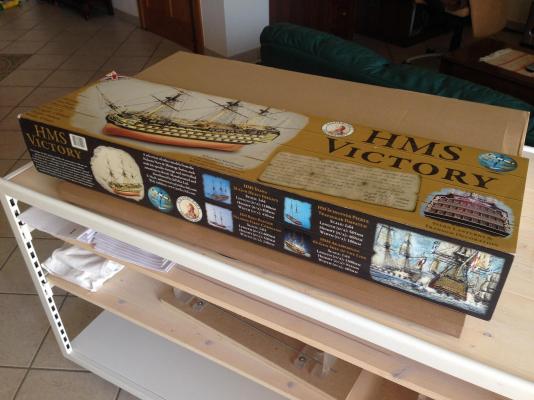
Finally started the long voyage. I ordered HMS Victory Caldercraft from CMB and received it just a few days later by UPS, very well packed. I was a bit busy and could not start on it right away. Apart from that I was still undecided whether to install lights on it or not. In the meantime I prepared a rotating board to build it on and did some research on available led’s. I was also browsing HMS Victory Caldercraft builds on MSW. Very nice builds going on, congratulations to Gil Middleton, Seventynet, Rob G, Heinz746, Robert22564 and Dominic. I enjoyed going through their builds and tried to absorb some ideas.
So my first decision to make was ‘lights or no lights’. If I opted for the lights I knew it was going to delay the start of my build as I had to do some planning beforehand. After some research on lights available and on builds with lights, I decided to go for it. I think the end result will be worth the extra effort. I sourced small 3mm yellow flickering led’s, candle effect and ordered some of them together with the resistors to see their effect. I dry fitted the keel and bulkheads and literally spent hours looking at it trying to plan how to put the lights in the lower and middle deck gunports. I don’t want the boat to look like the Titanic lit up for its maiden voyage. I decided to put a led in each gunport. I experimented a bit and tried to put the lights in a position where they give a very subdued light, as of course there is nothing to see in the lower gunports, except the dummy rails for the cannons. I wanted to create the effect of a very dim light where the gunports are still a bit dark but you can still see a very dim light with a candle effect. Finger crossed the final result would be what I am hoping for. I also planned from where to pass the wiring for them and for the upper decks. Another thing which was bothering me was the power supply for the lights. I do not want to use batteries as in the future I intend to put it in a glass case and it would be very inconvenient to have to remove the glass case each time you want to switch it on or off. On the other hand I do not want any cables showing coming out of the model. I decided to take out the cables from under the keel and through one of the mountings and base board of a future glass case. I drilled three holes under the keel, two to take the mounting rods and the middle one to pass the wires through.
Now that I have visualised more or less how to install the lights for the lower and middle deck gunports I prepared the holes for the wiring in the bulkhead as it is much easier to drill them at this stage, painted the inside of the bulkheads black, and started gluing the bulkheads in place, taking care to have them all at right angles with the keel.
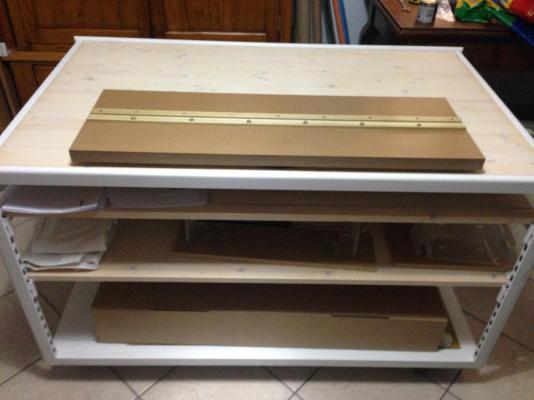
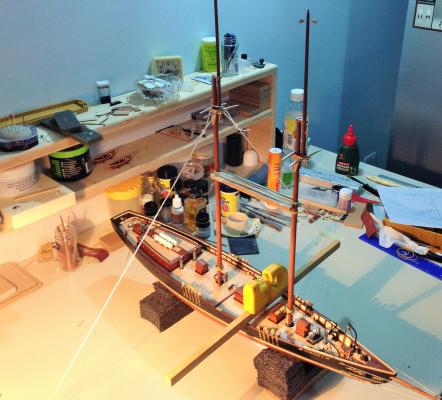
Here goes a few images of my working table I prepared and the start of my build. It is going to be a slow start because of the lights.
HMS Victory Kit arrived by UPS very well packed.
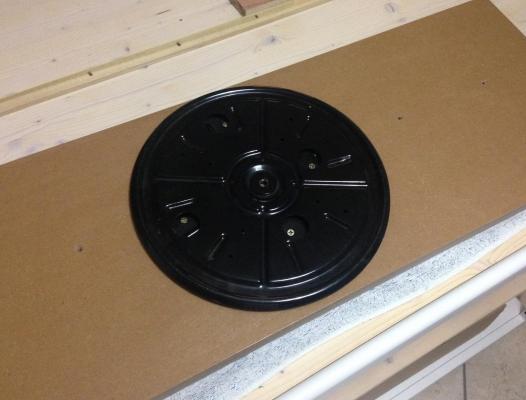
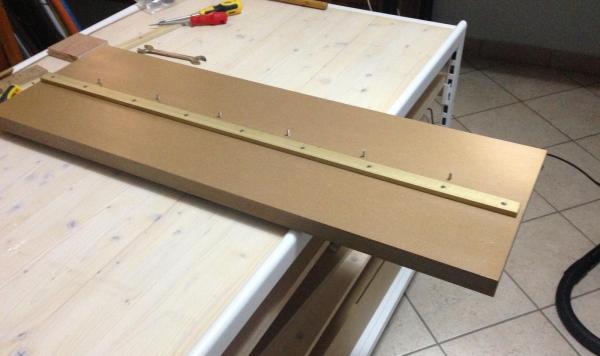
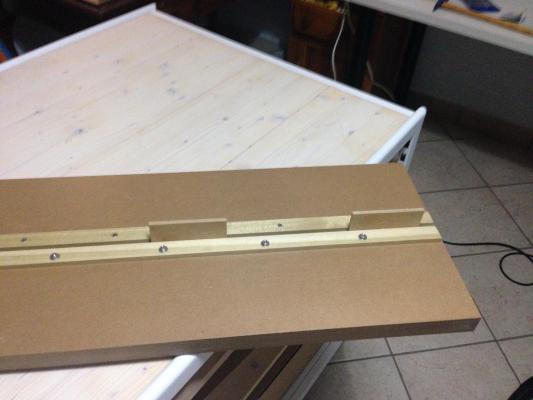
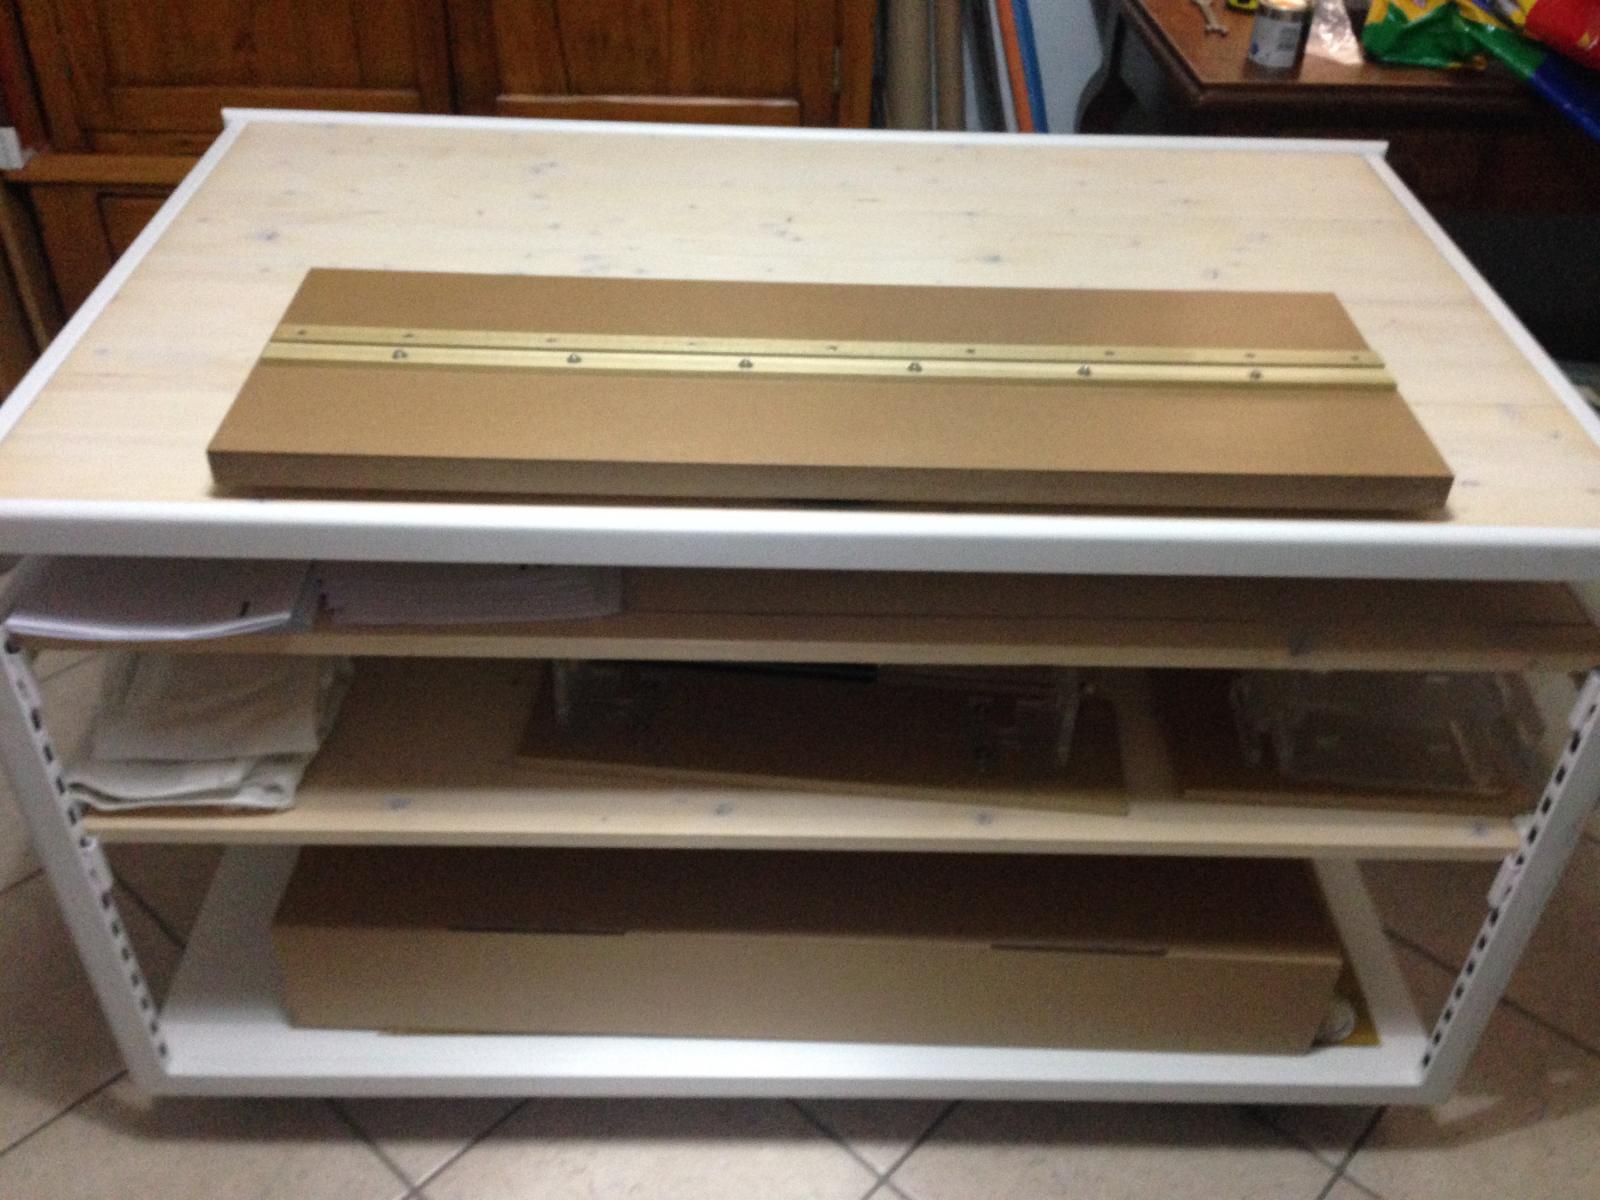
Prepared a rotating working table for the model. Cut a tick MDF board, fitted a tv turntable to it and fixed to the table. The table is on wheels as well.
Glued the walnut Stem and the front keelson to the main keel.
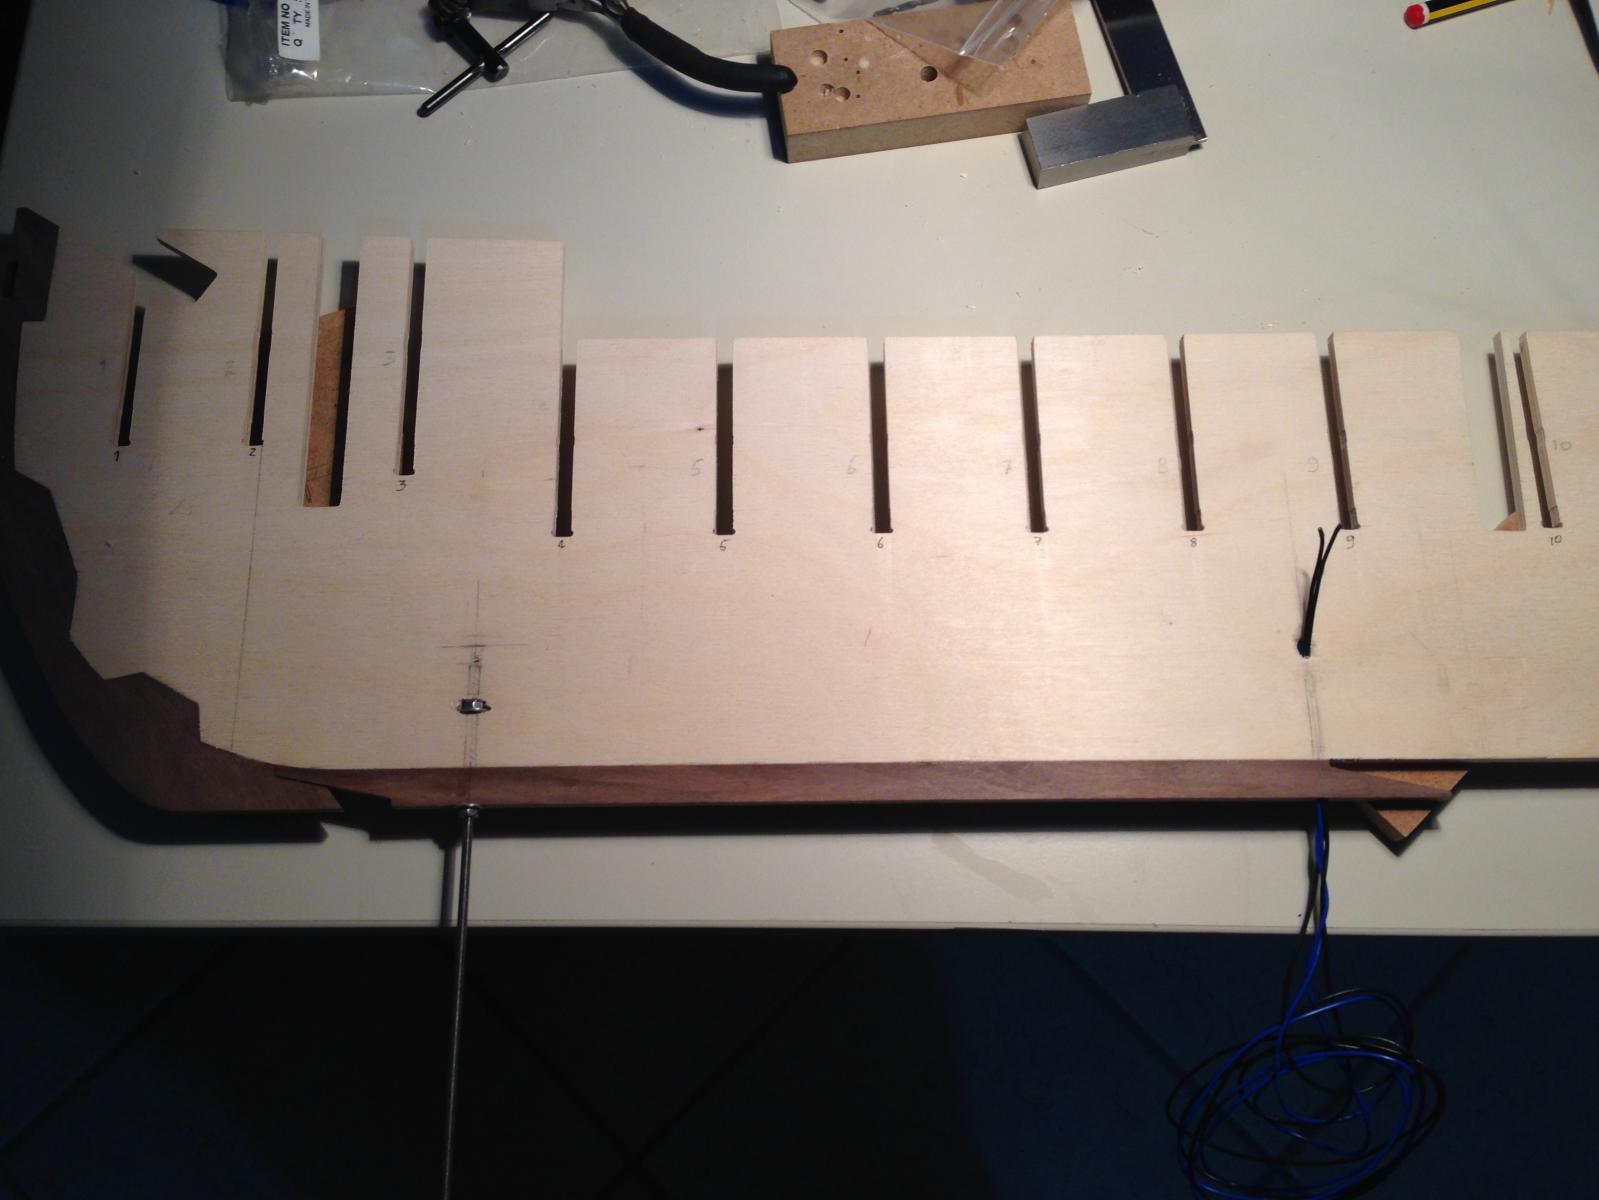
Prepared and numbered the bulkheads. One of them was not pre-cut properly and repaired.

Drilled the holes in the keel for the mounting studs and the hole through which the power will be supplied to the model. Fitted a nut inside the keel to take the mounting studs, and also reinforced the sides of the holes.
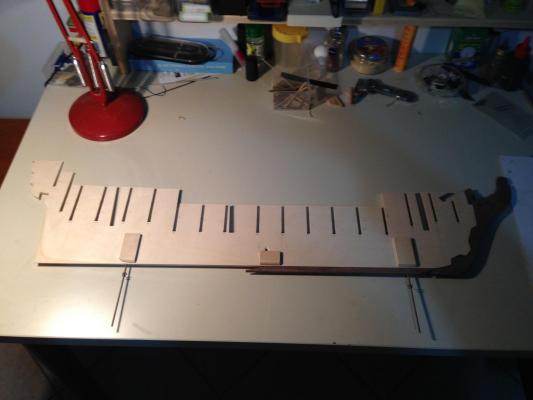
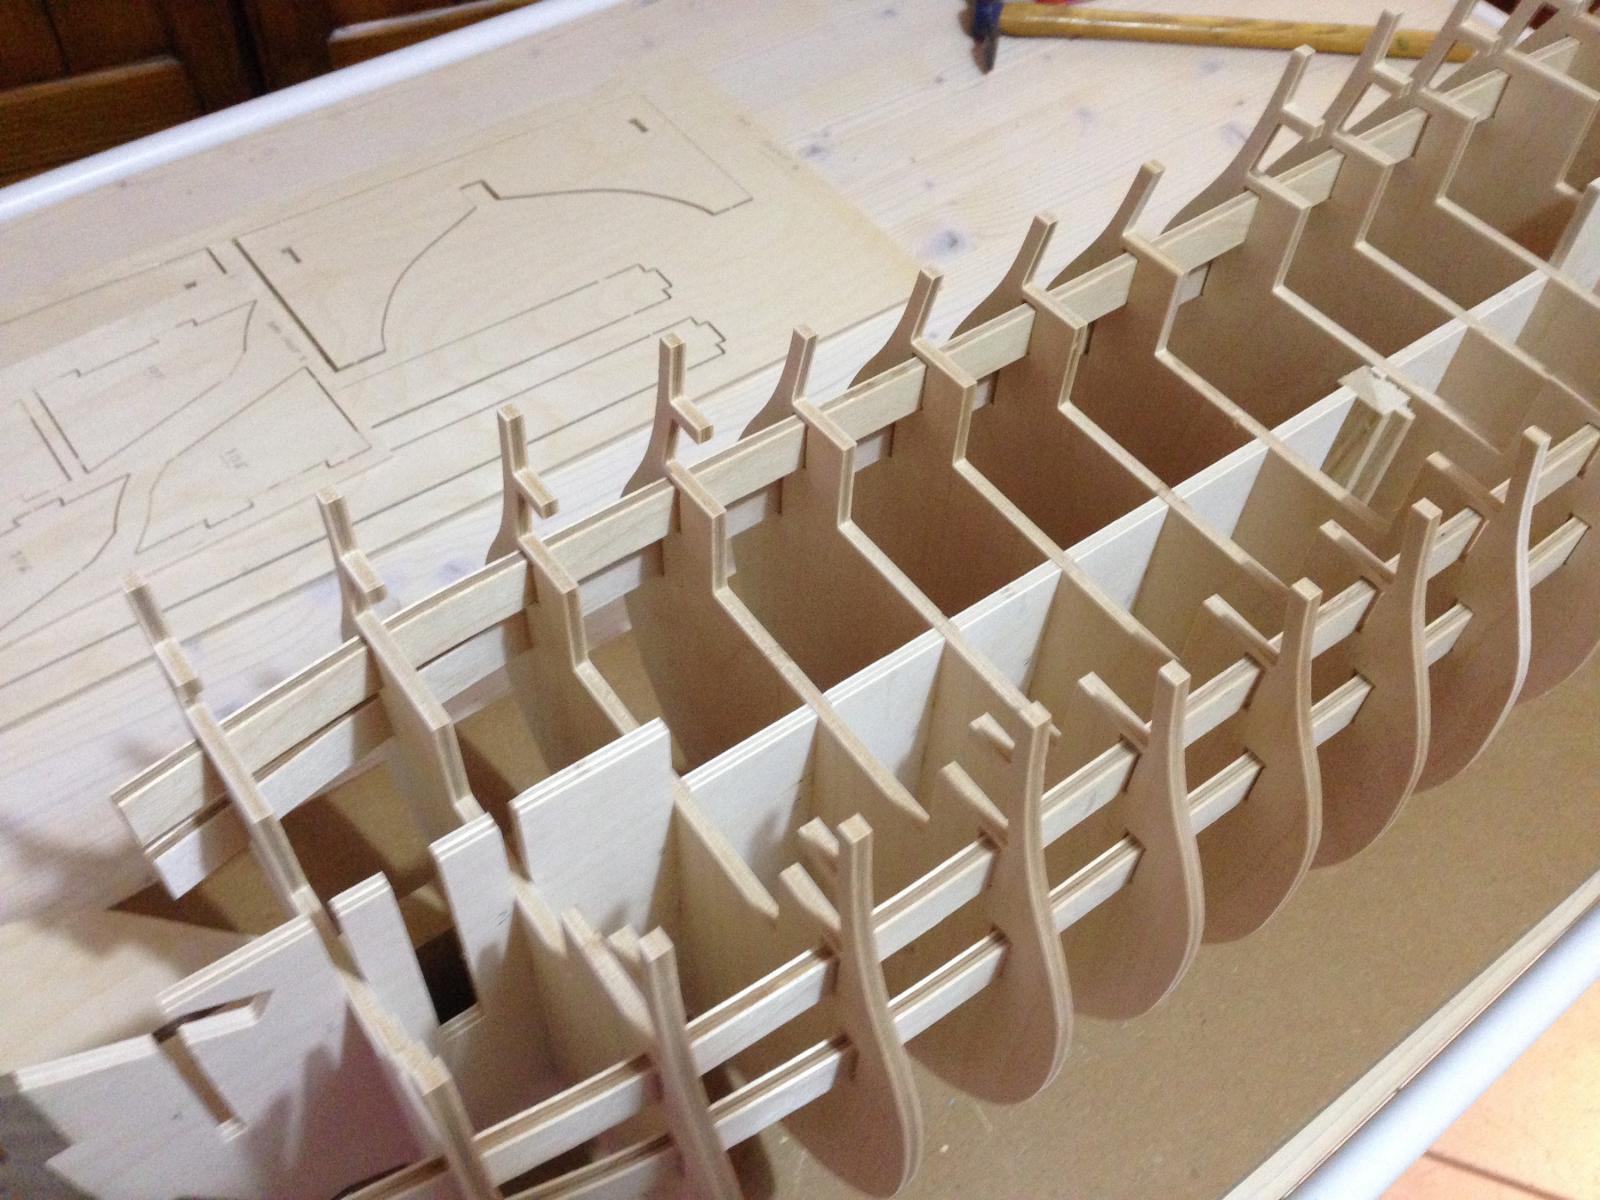
Dry fitted the structure, sanding and making sure the joints fit without needing to use force.
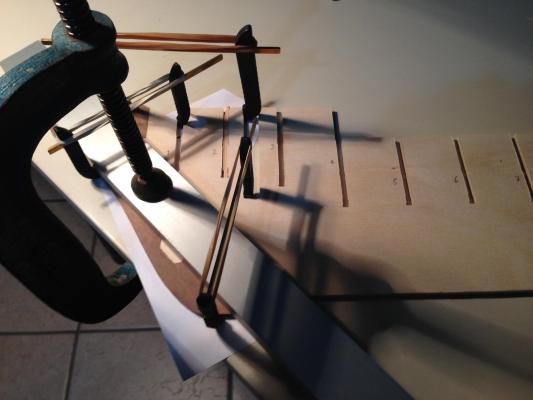
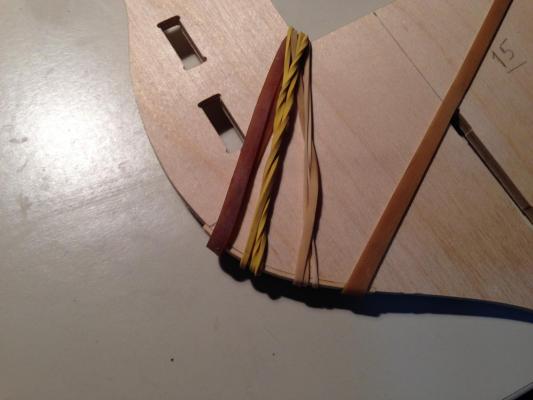
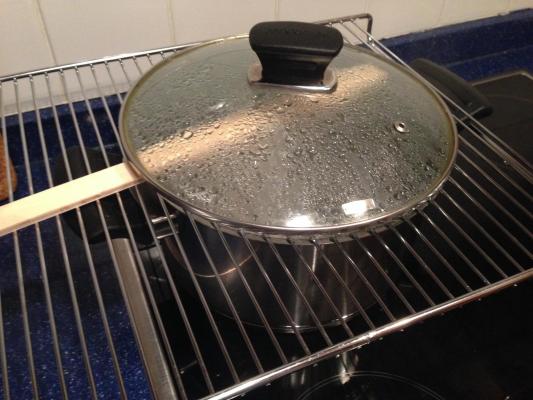
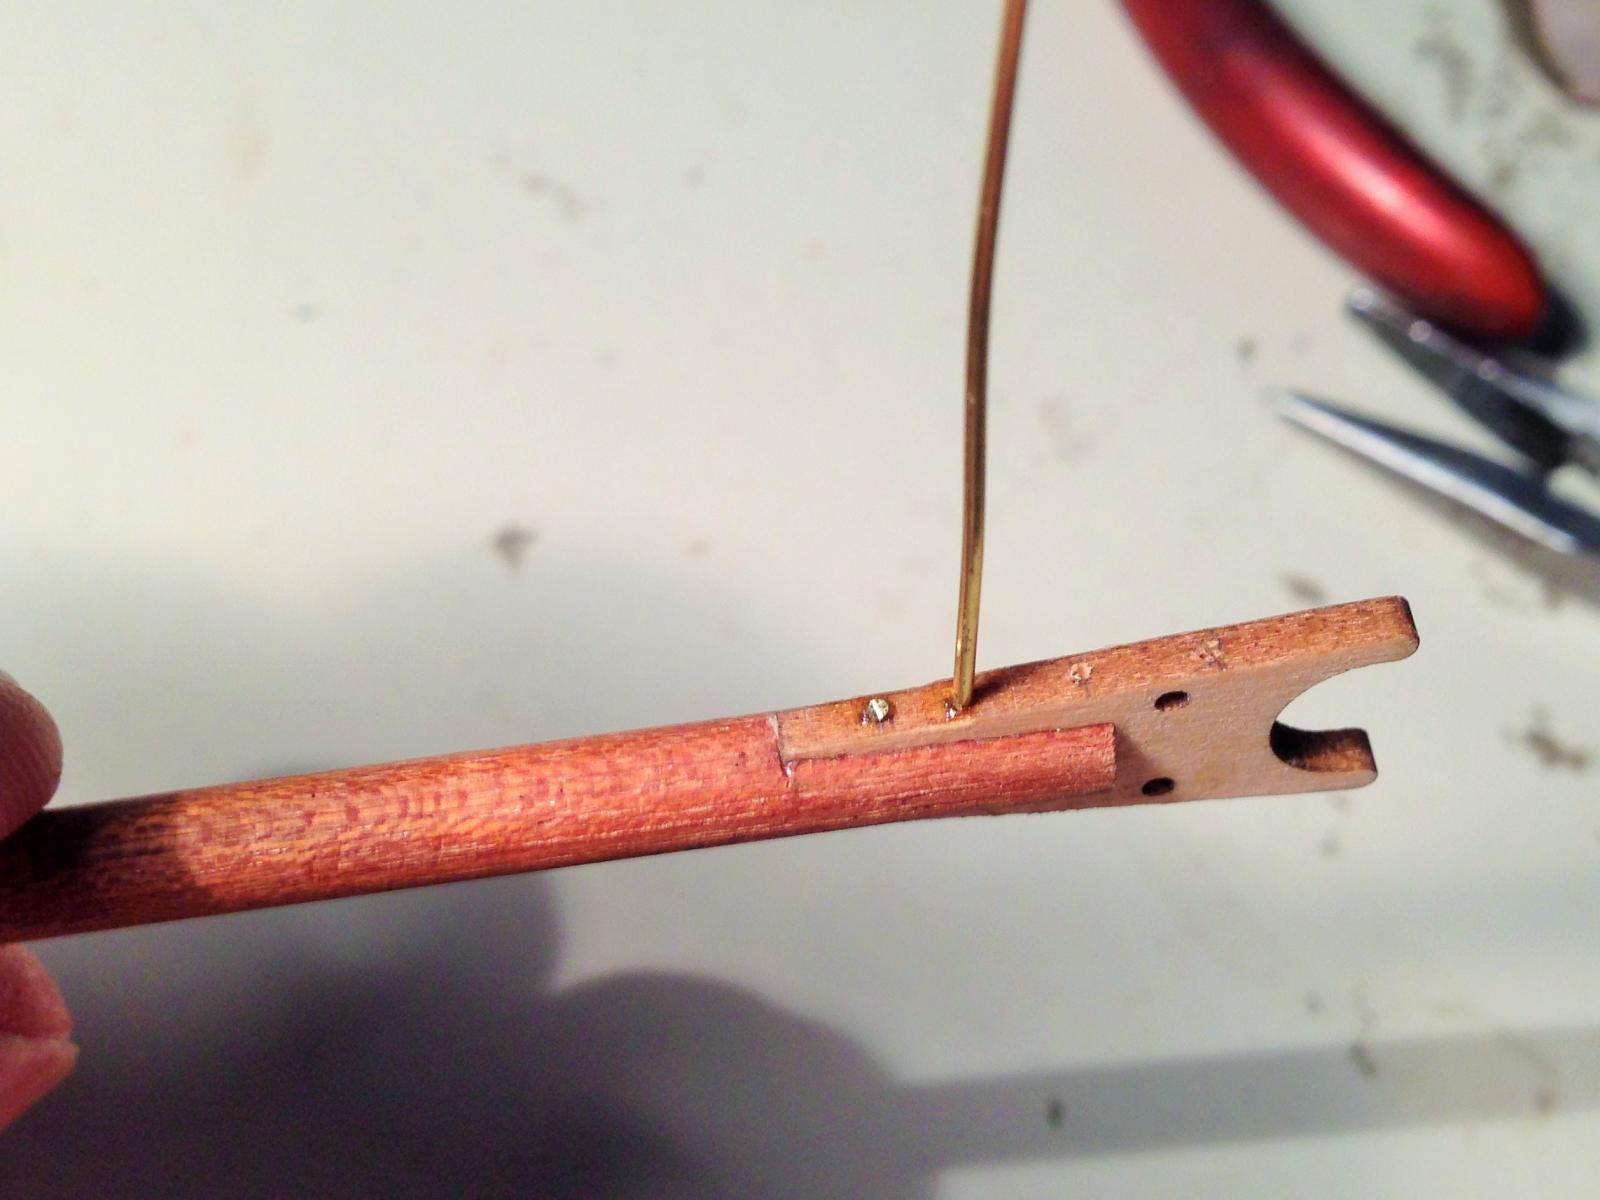
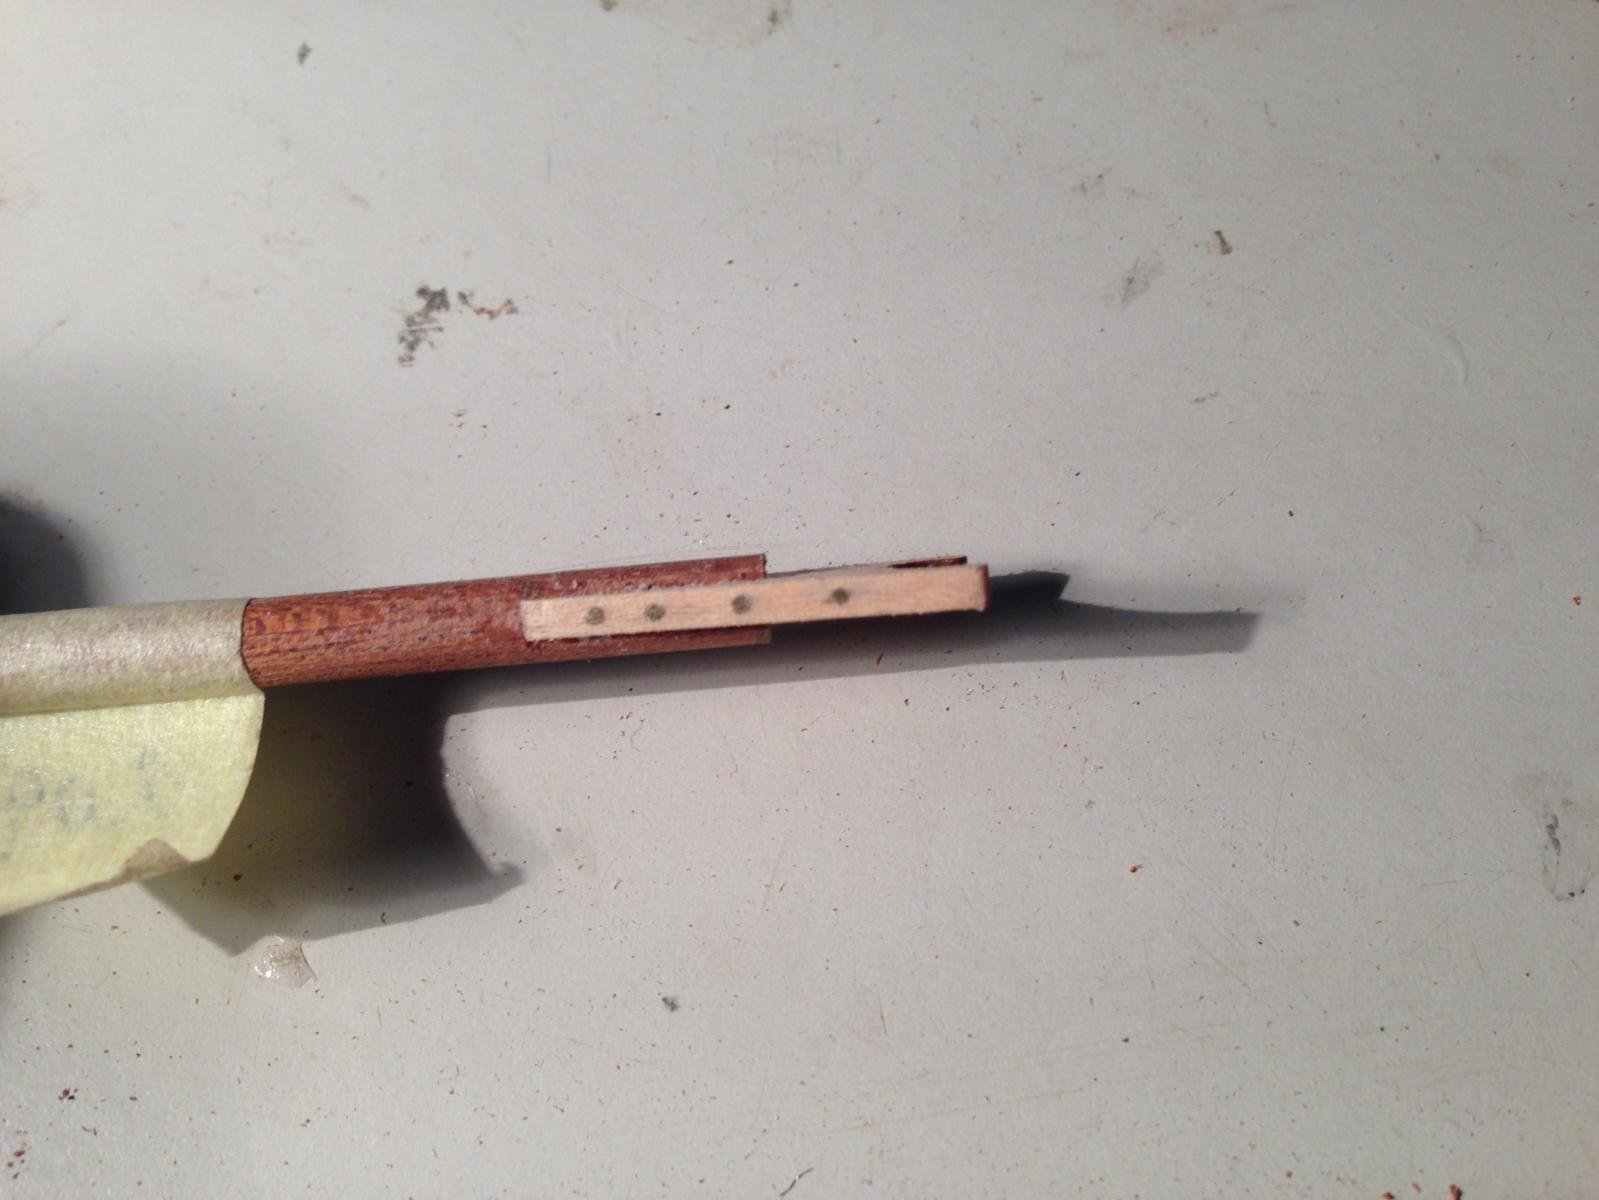
This is the method I used to bend the dummy barrel strips. I steamed the strip in a pot then put it on a flat surface and while rolling a jam jar over it, pull up at one end, repeating this process until the desired bend is achieved. Immagine there are better ways to do it, but for the moment worked fine.
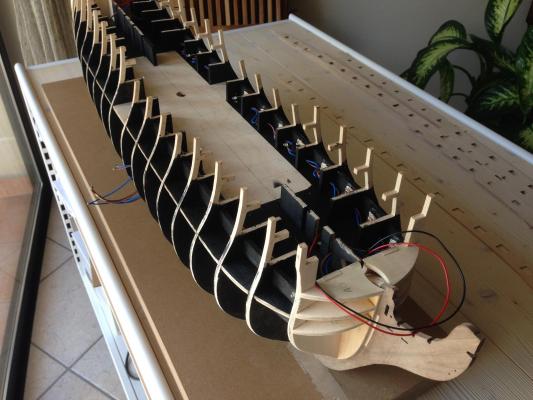
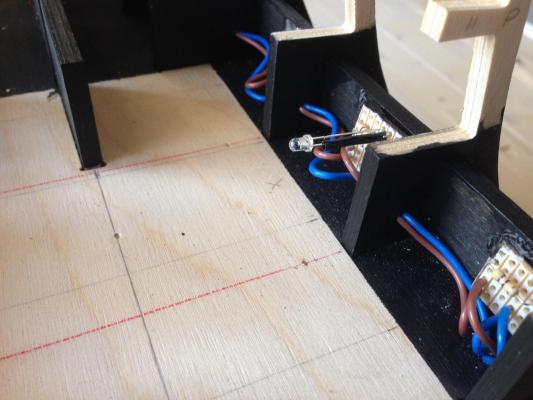
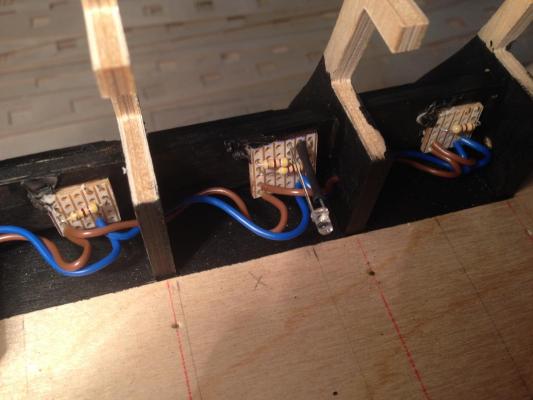
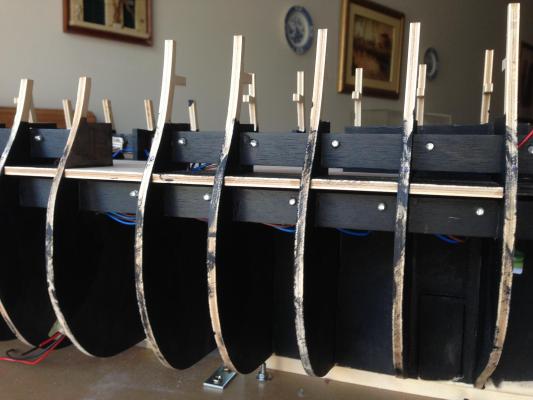
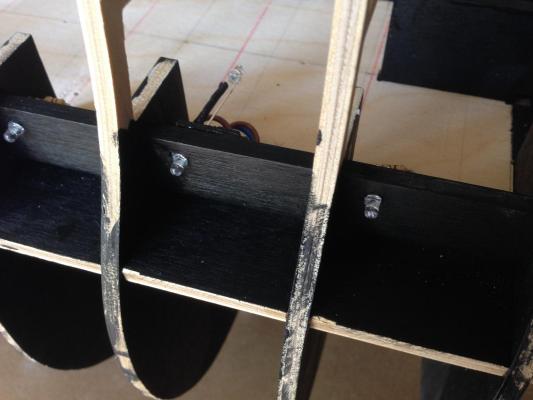
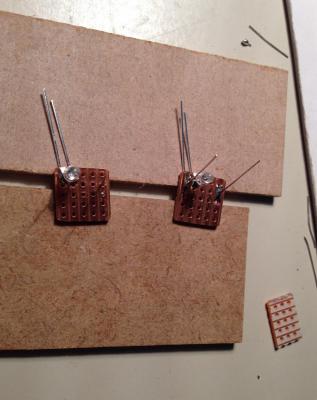
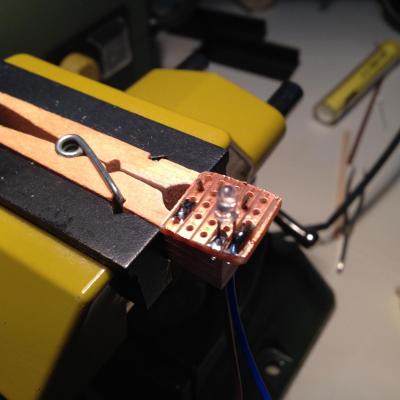
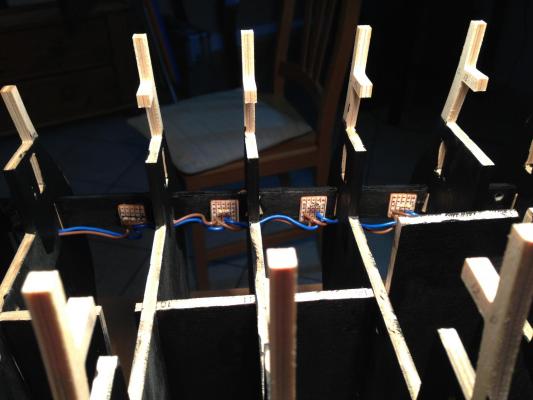
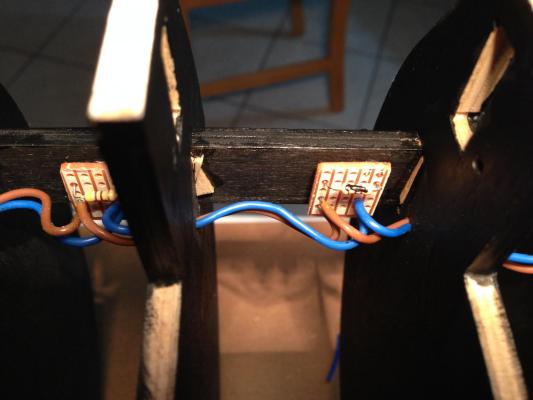
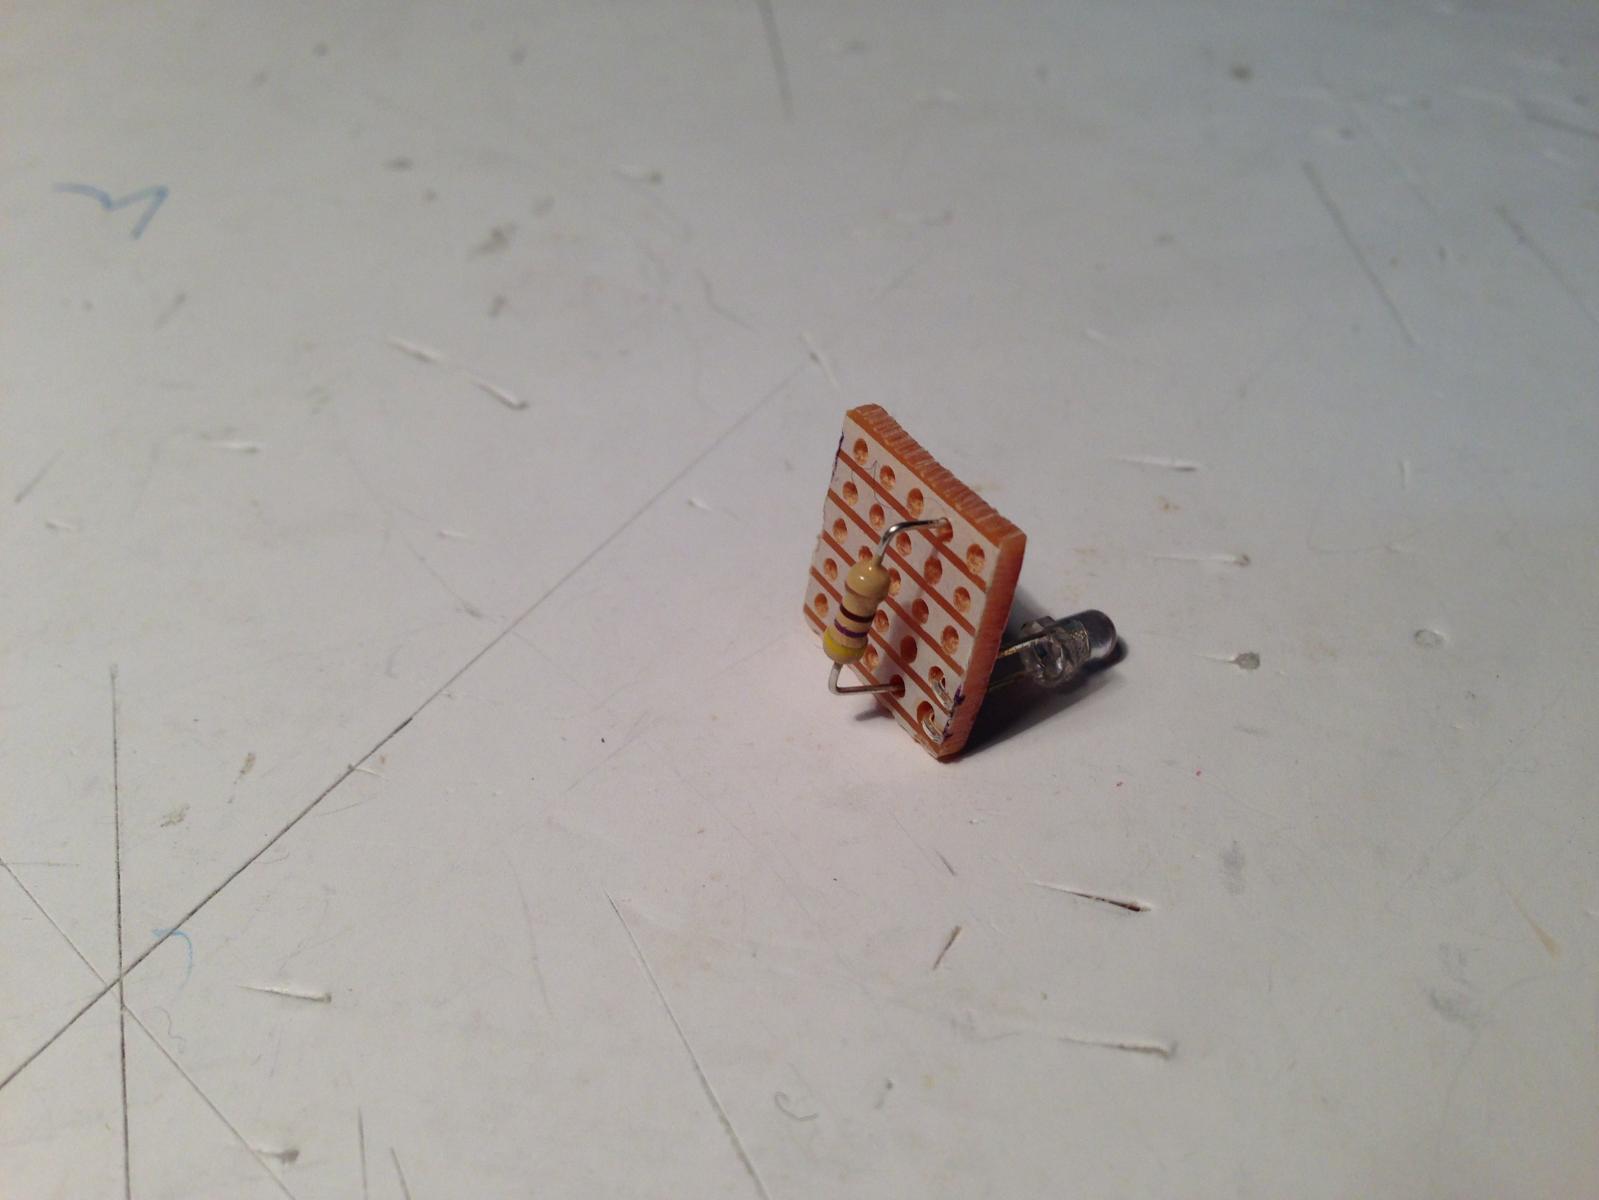
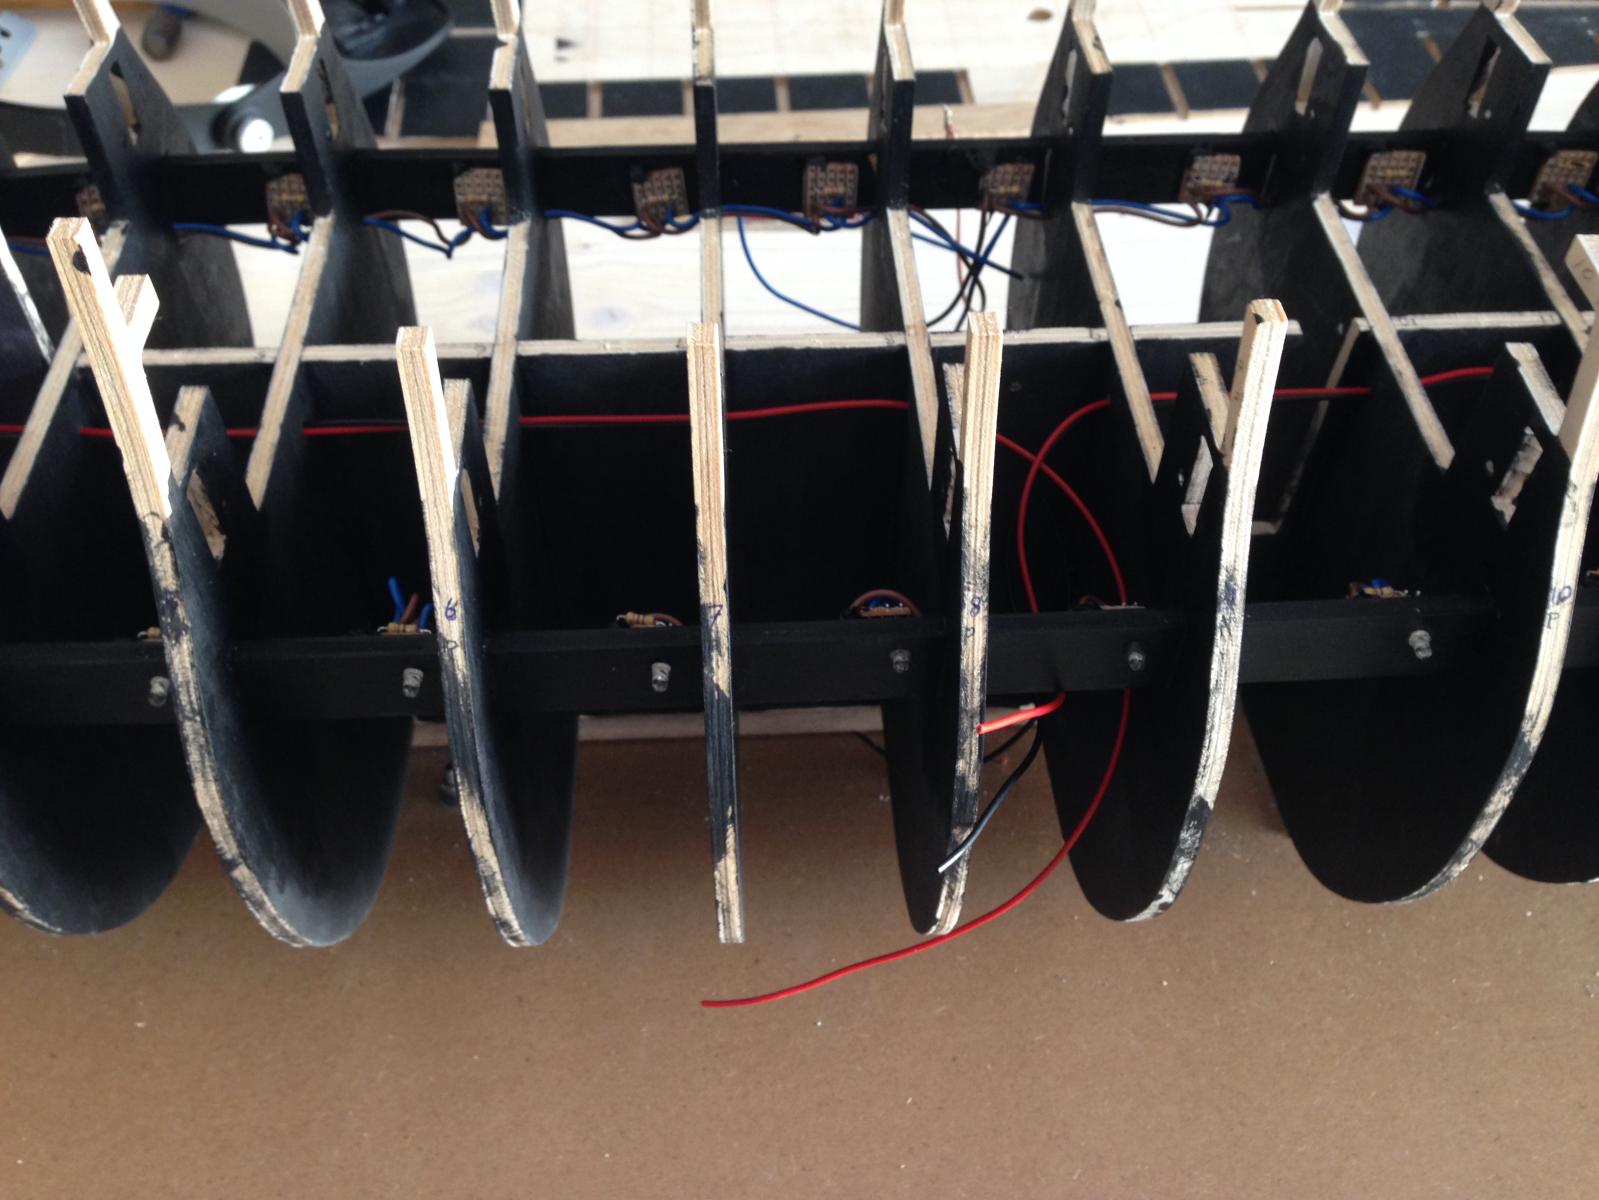
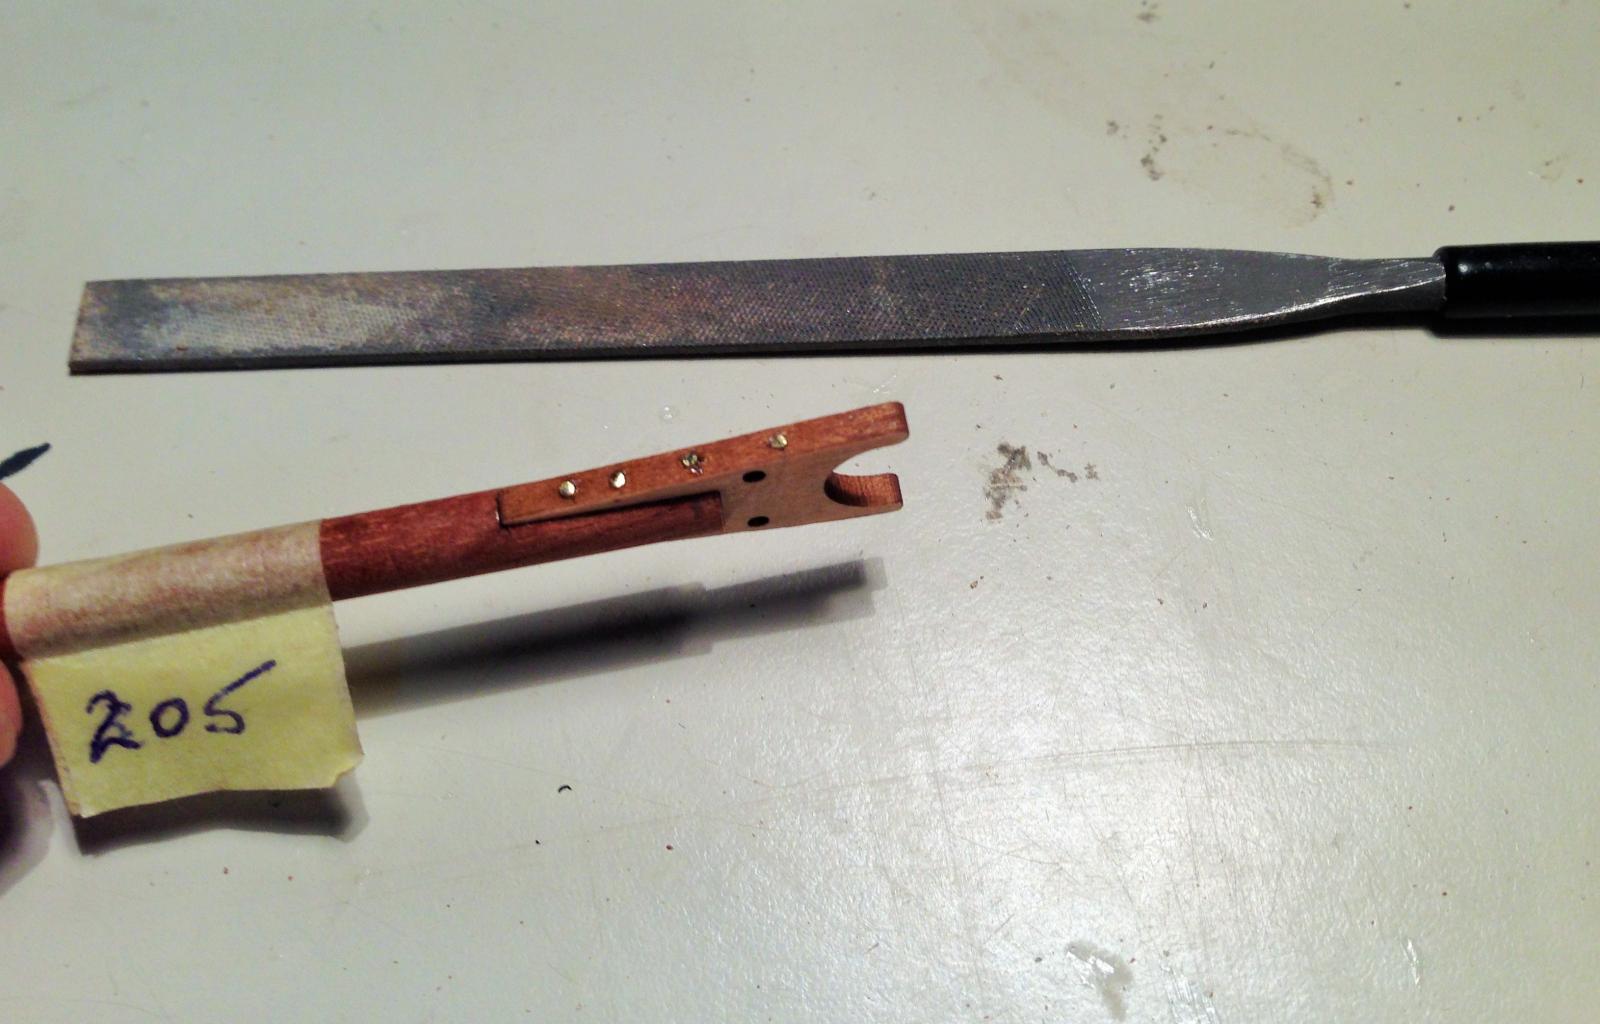
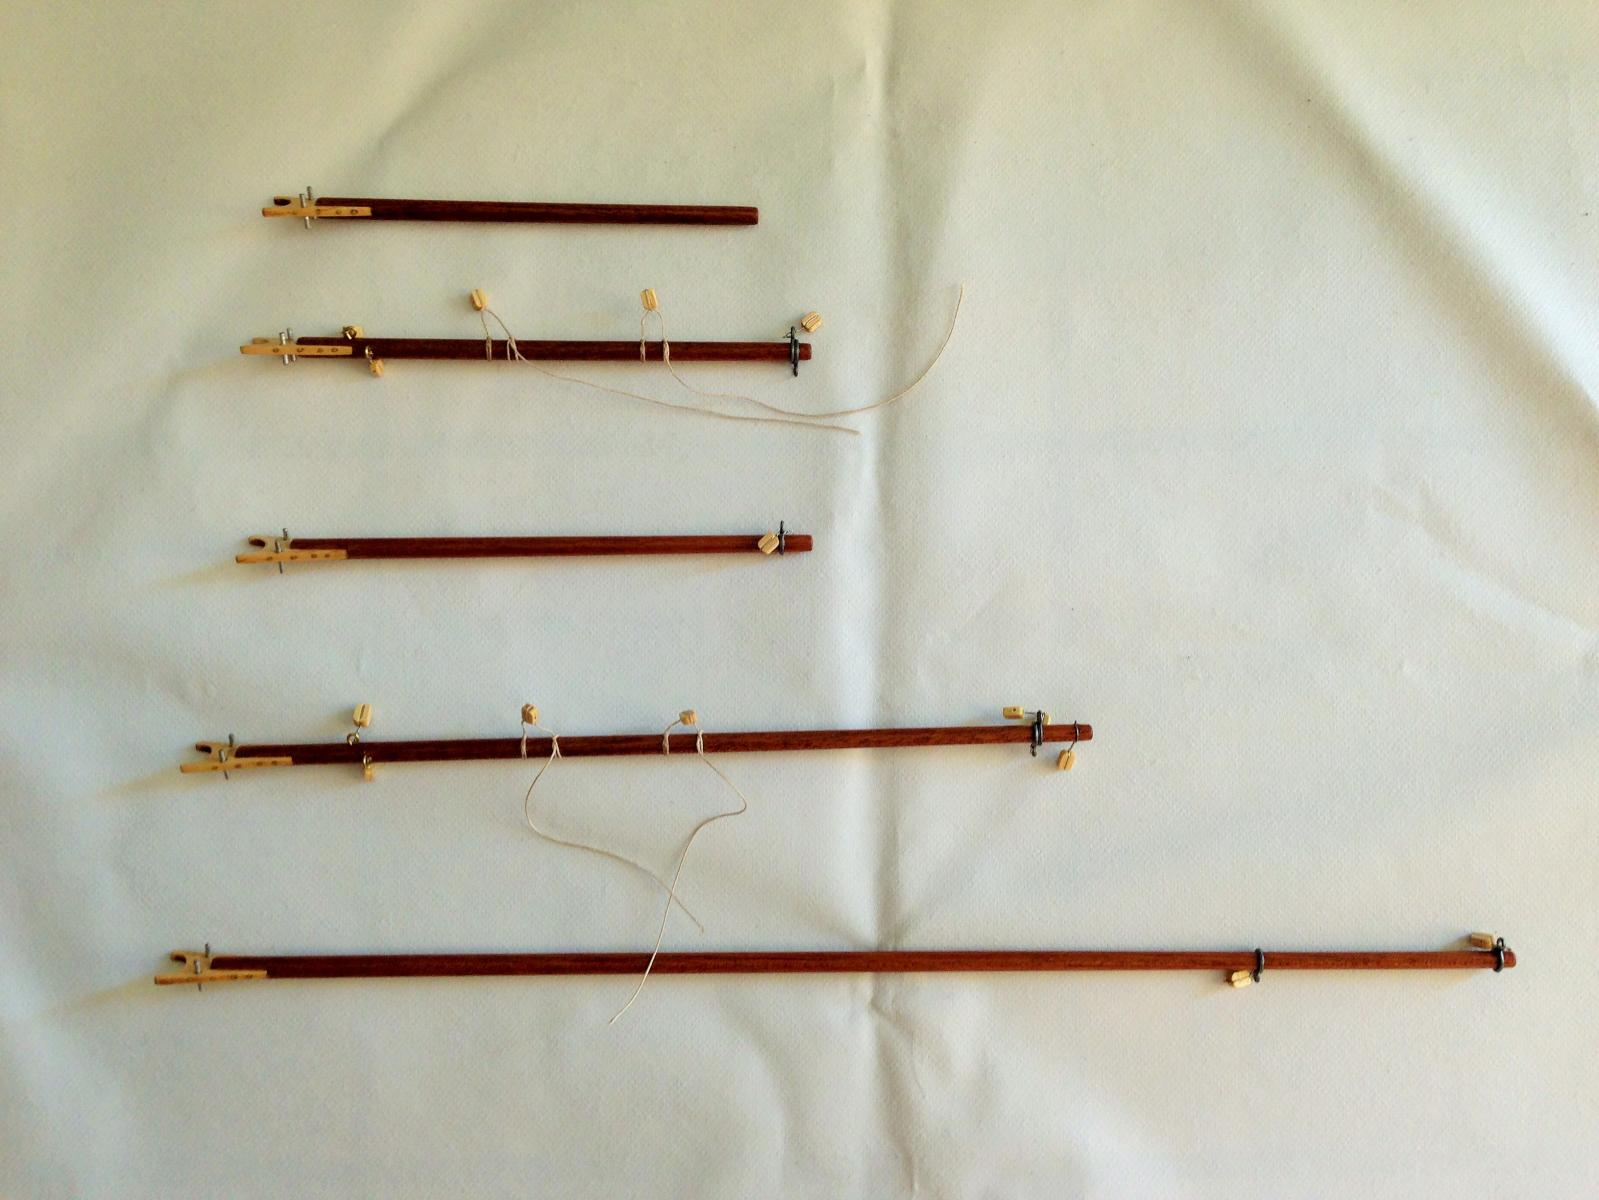
Started work on the lights. I cut small squares from a circuit board on which I mounted a led, resistor and a pair of wires. I drilled a whole in each gun port on the dummy barrel strips through which the led’s protruded from the back. This way I did not have to do all the soldering on the model, all I had to do in place was to loop the pair of cable to the next one. Each time I soldered one in place I checked all is lighting up so I don’t find any surprises later on. On the led’s if you switch polarity, it will not light up.

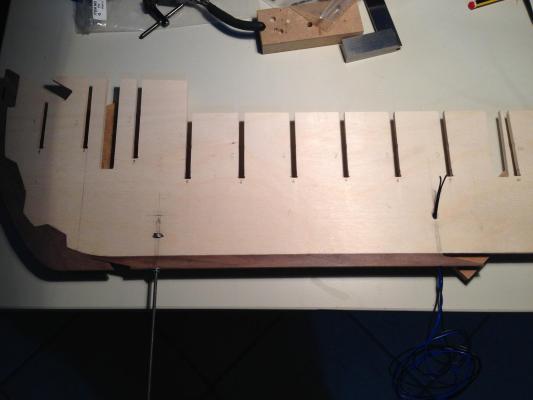
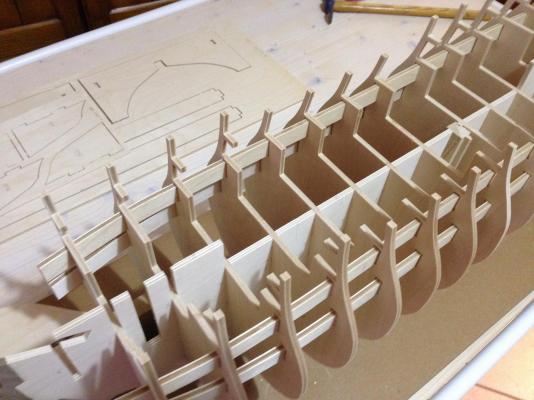
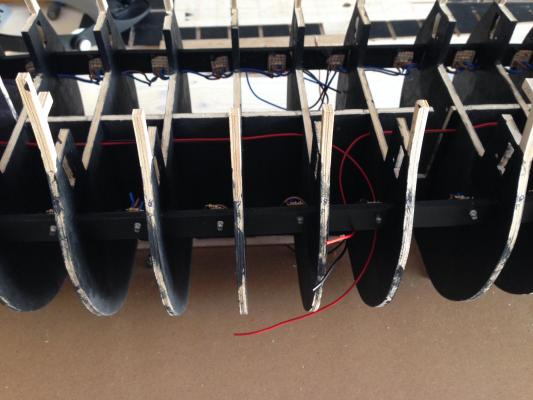
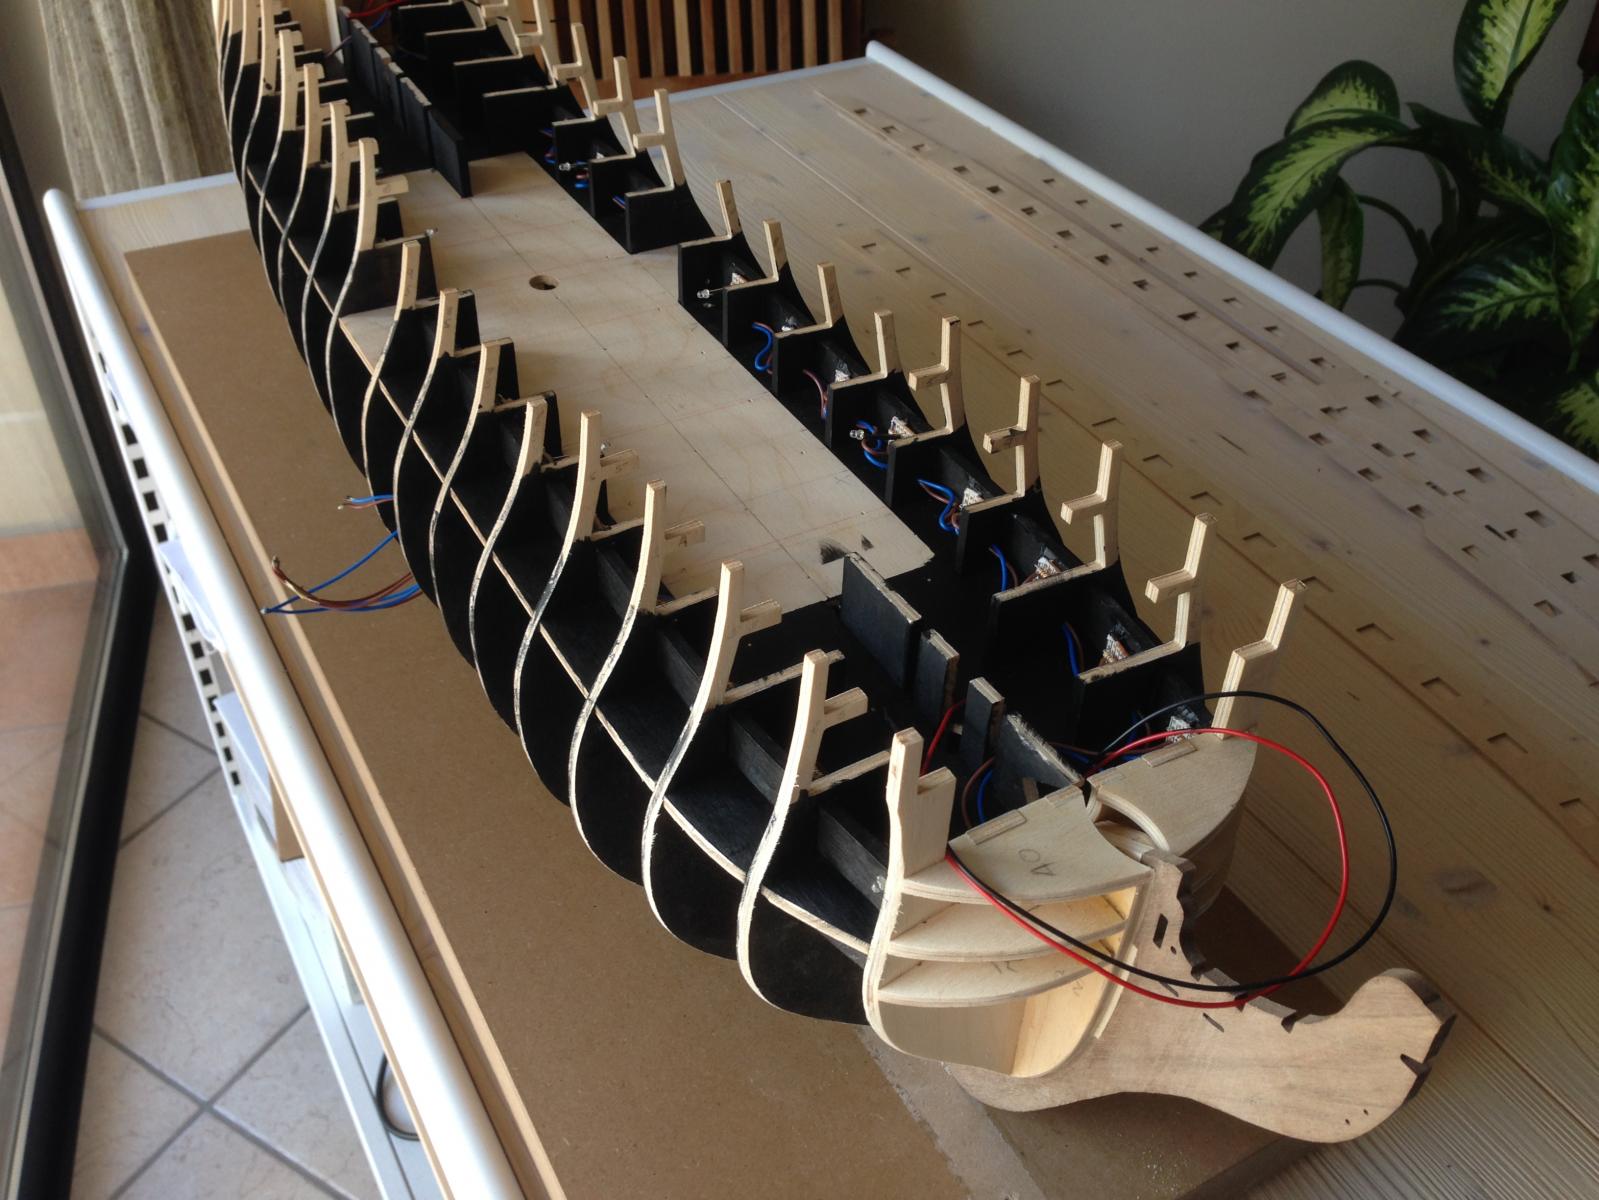
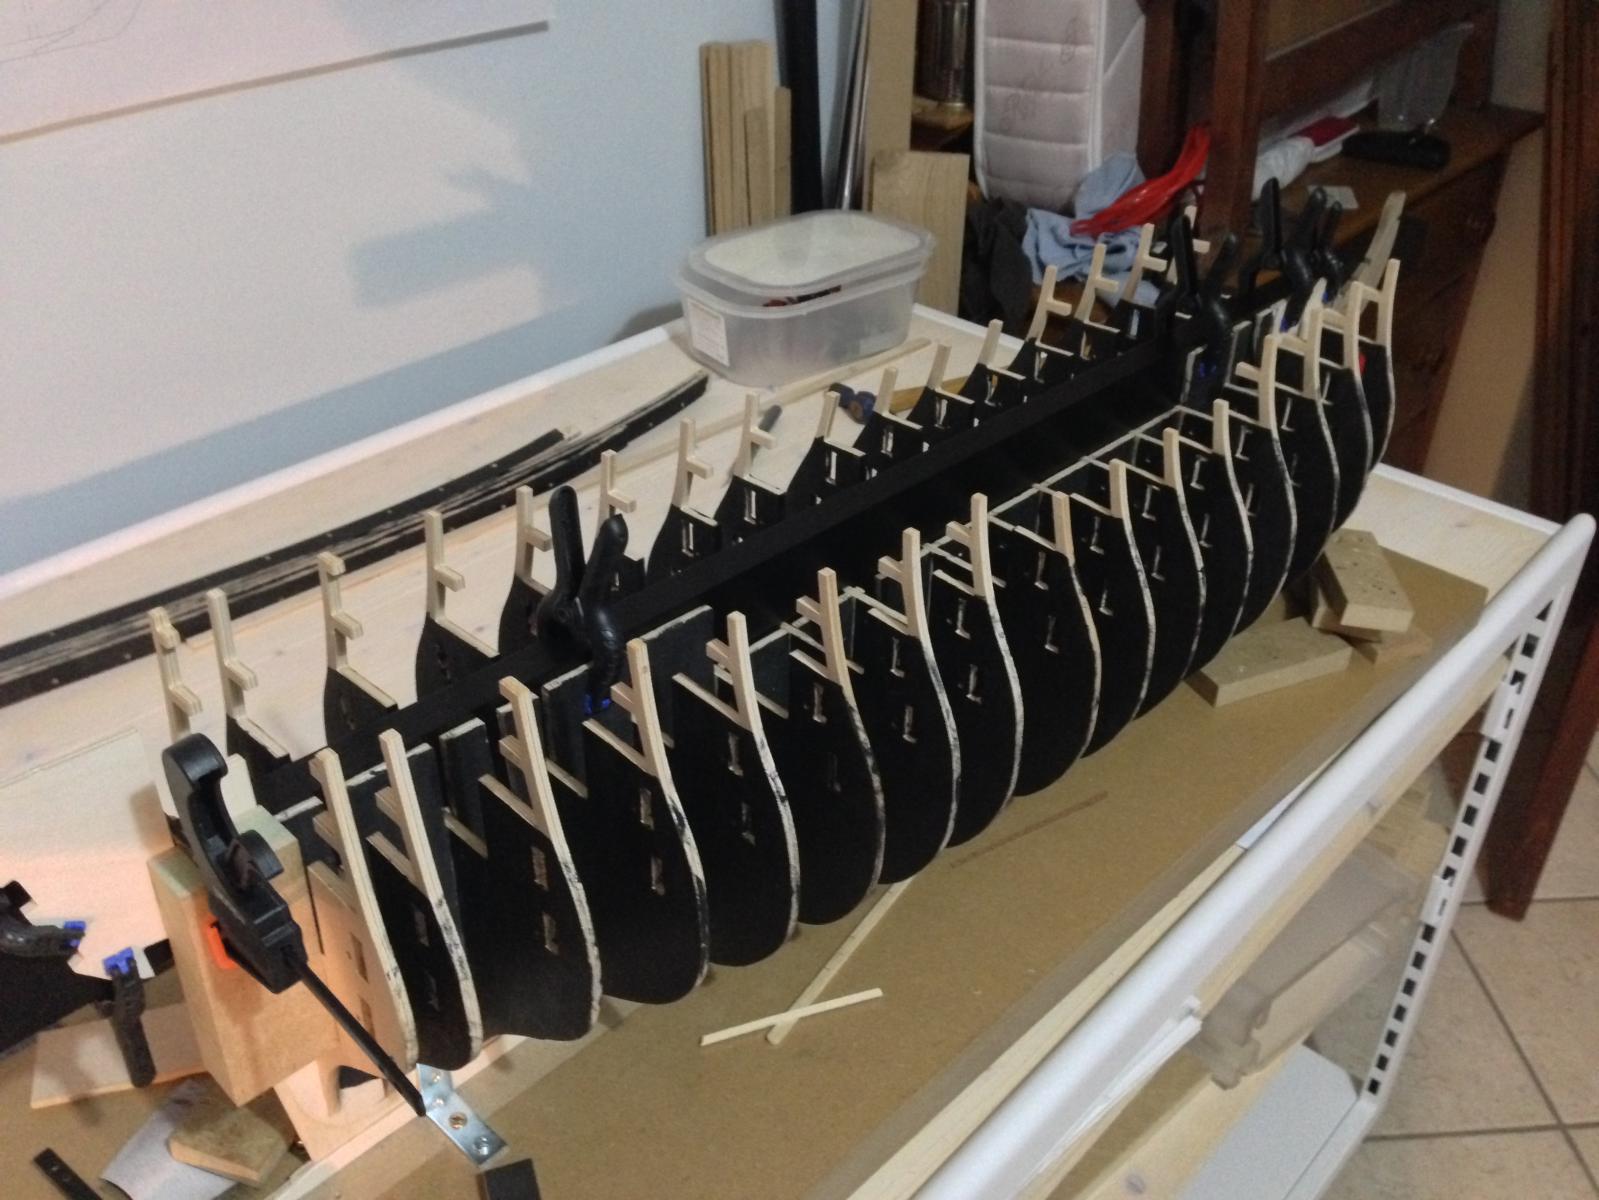
Painted black and started gluing the bulkheads to the main keel making sure they are perfectly square. The middle gun deck is only dry fitted for the moment. I have to do the wiring for the lower gun deck first.

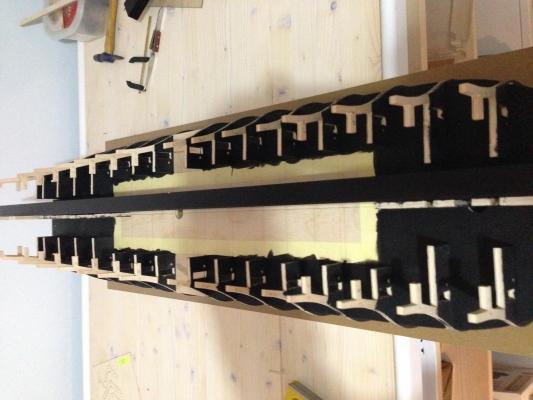
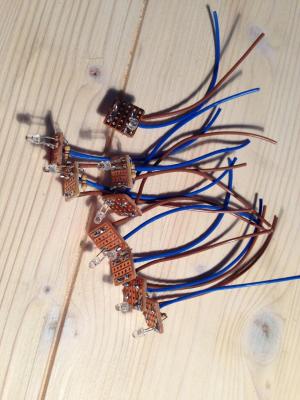
Installing the lights. The red and black wires are to supply the upper deck lightings, which I still have to plan as I go along.
Will appreciate any comments where I can improve, change or am doing any tasks the wrong way.
Robert
- Rainbow, zoly99sask, Sjors and 6 others
-
9
-
Beautiful work. Impressive detail.
- thomaslambo and husky1943
-
2
-
Gil,
Thank you for your nice comment. Have fun on the original Bluenose.
Cheers
Robert
-
I just got my kit of the Bluenose a couple of days ago. which is going to be my first build, and looking at your build here... All I can say is WOW!!! excellent work!
Thank you for the compliment. Welcome to this great forum. Good luck on your first build. Going through the builds in this forum you will learn a lot and get a lot of ideas. I found it of great help. I think Bluenose is a good model to start on.
Robert
-
Hi Bob,
Just gone through your build. Really nice work. I like the way you go in detail. I will follow your log. In my two builds, Juan Sebastian Elcano and Bluenose II I didn't do much changes and additions from those supplied with the kit, except for a few minor things. On my next build I will keep a sharper eye to see where I can improve the build. Keep it up.
Robert
-
Hello Gil, I have built two kits, the first one was Juan Sebastian Elcano and the second one which I have just finished, was bluenose II. My ambition is to build HMS Victory and was going through some builds to get an idea what it involves. I came across your build and it is just stunning. With so much detail I can refer to I am even more eager now to take the plunge. Not that I will be anywhere near your level of craftsmanship but I'm sure I will find your posts of great help. It is very nice of you to take so much of your time to share your build and go in so much detail. Congratulations and thank you again for sharing.
Robert
-
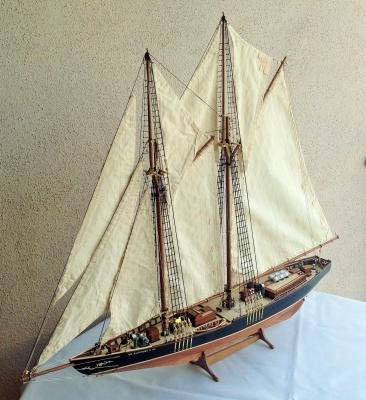
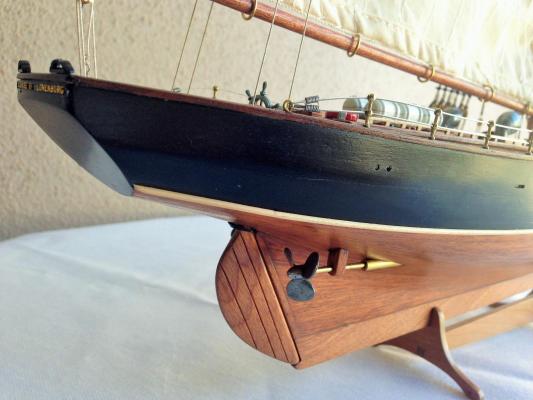
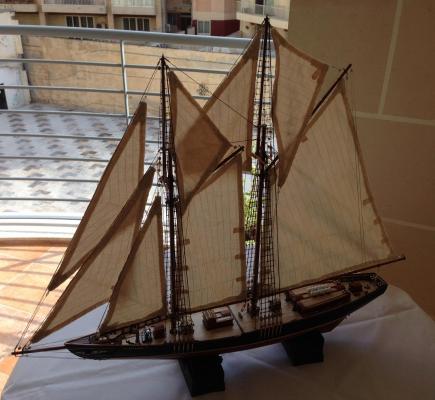
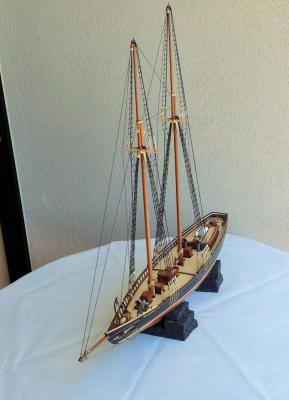
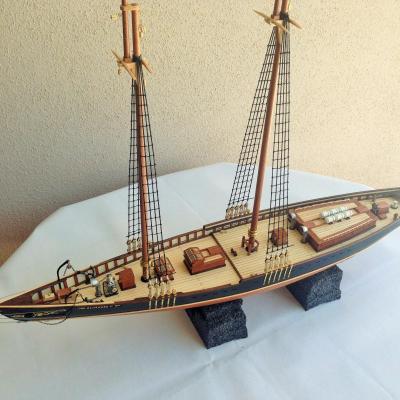
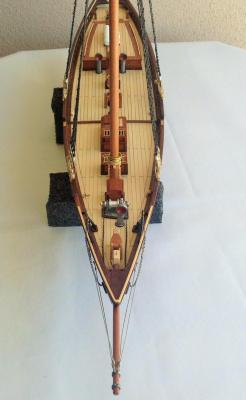
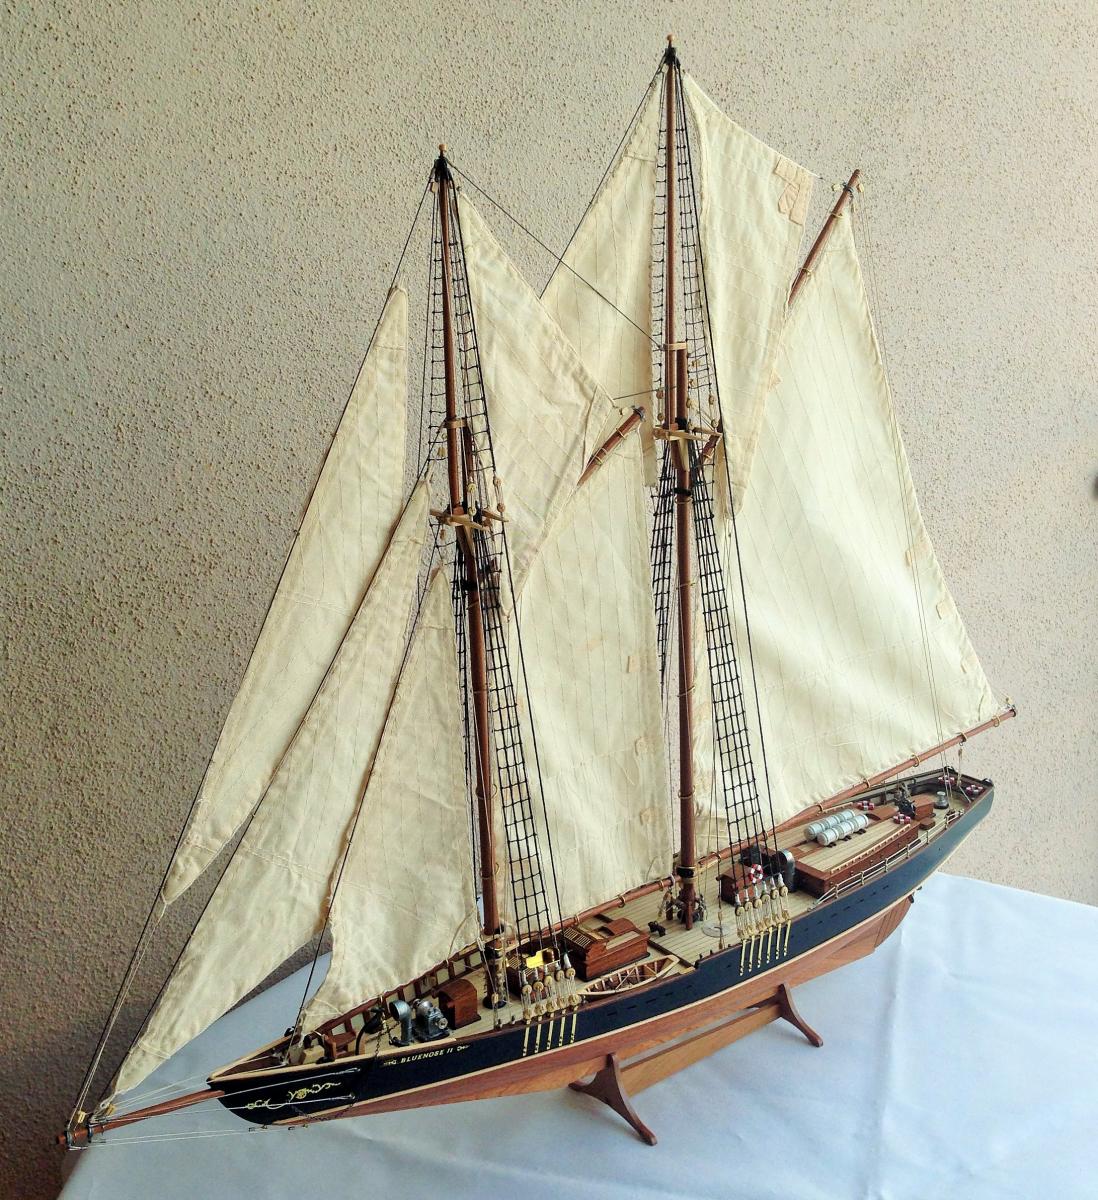
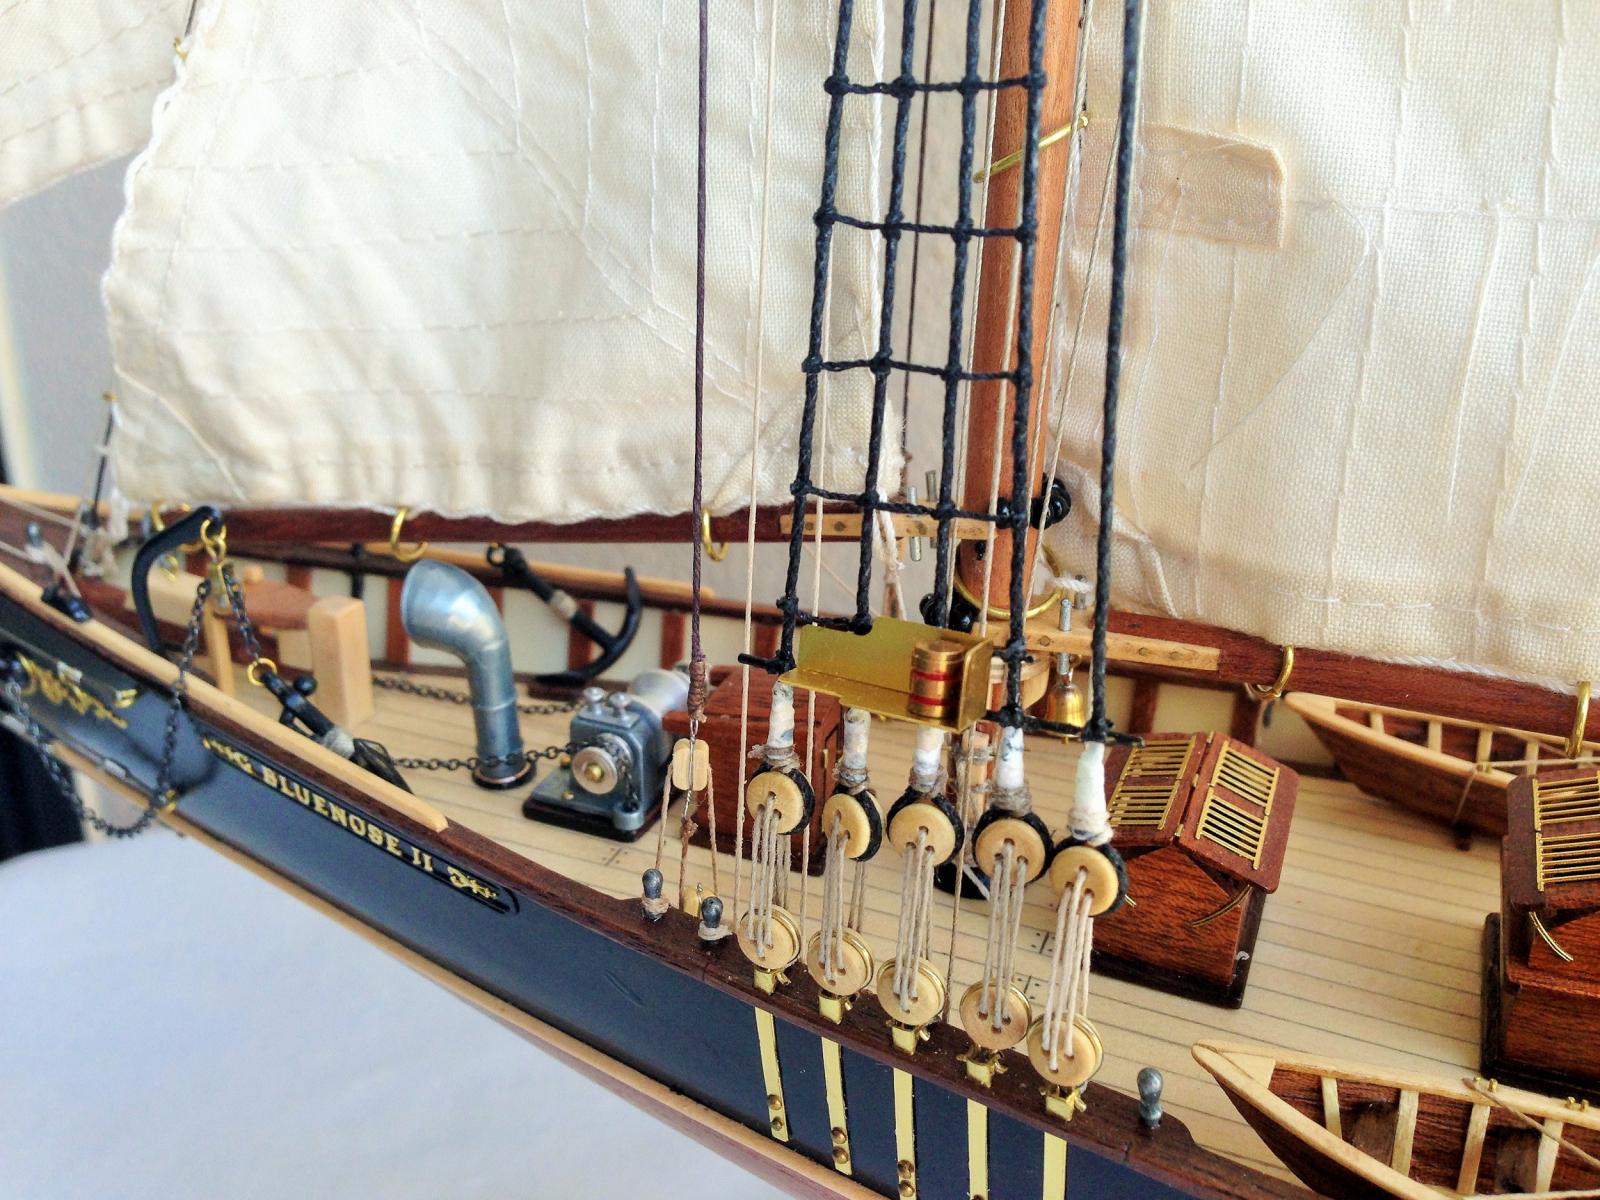
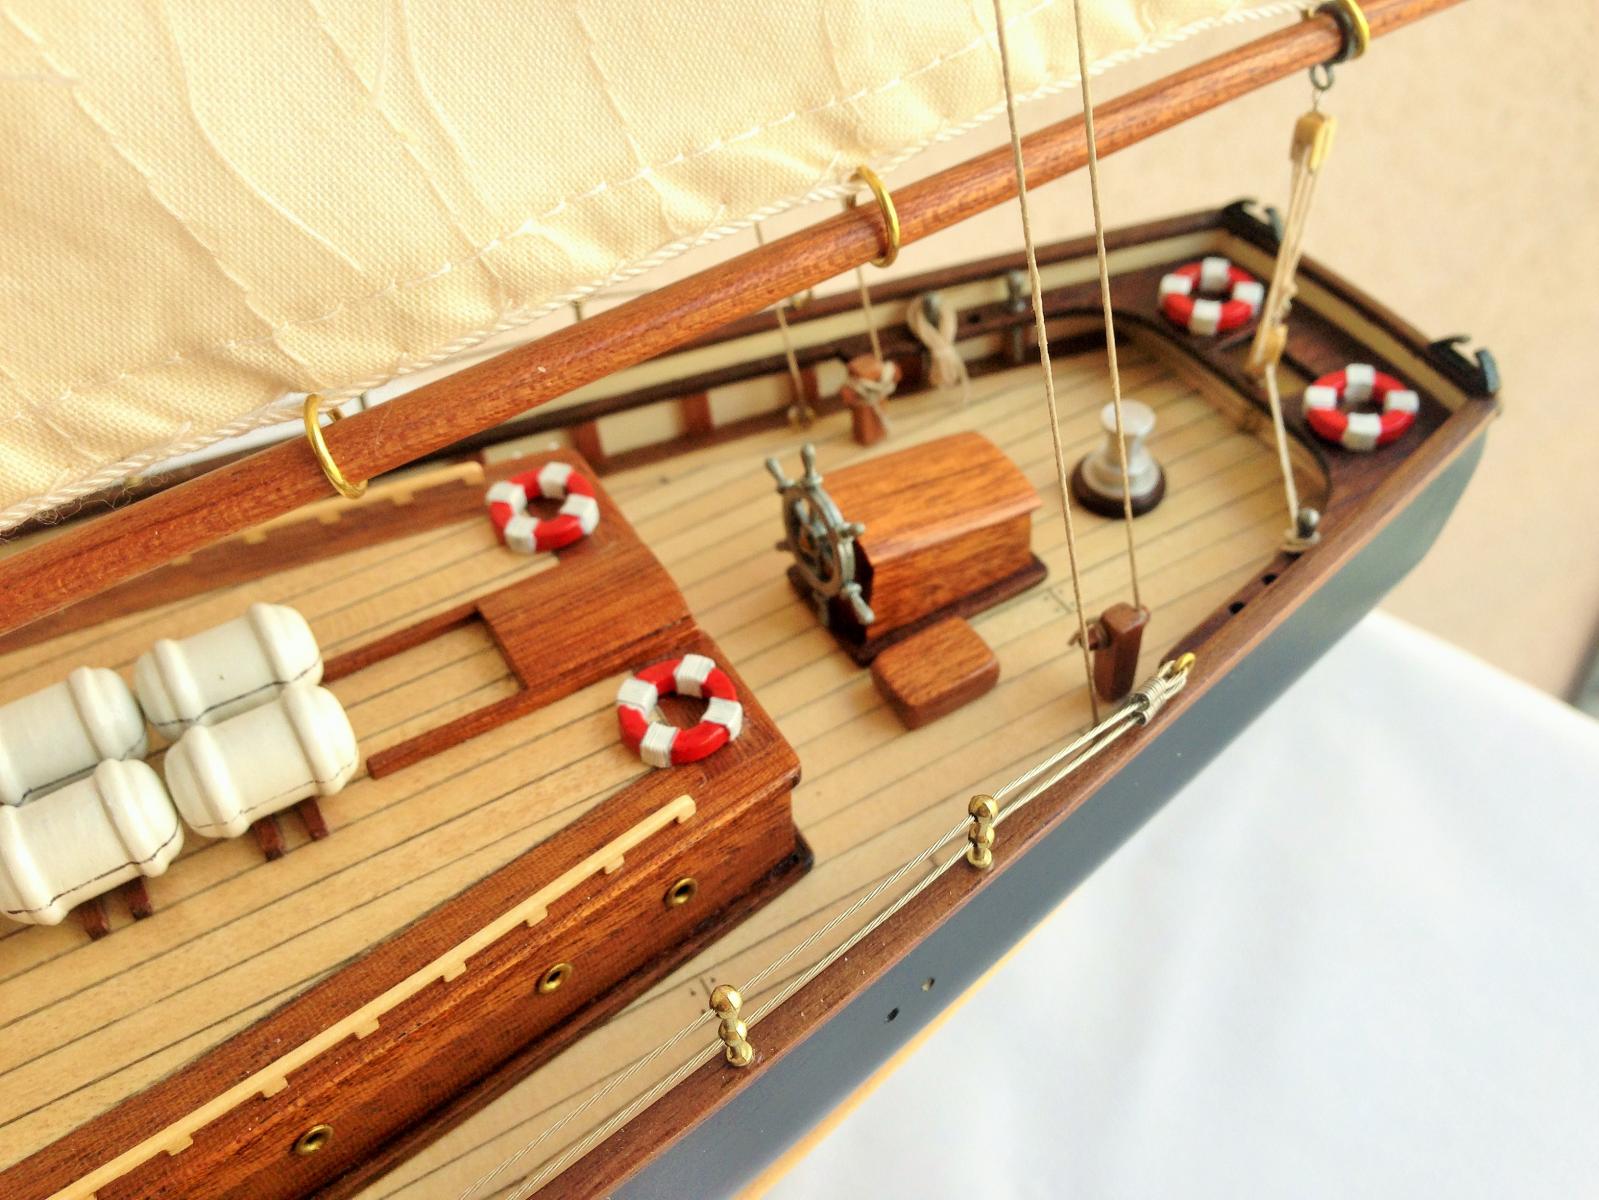
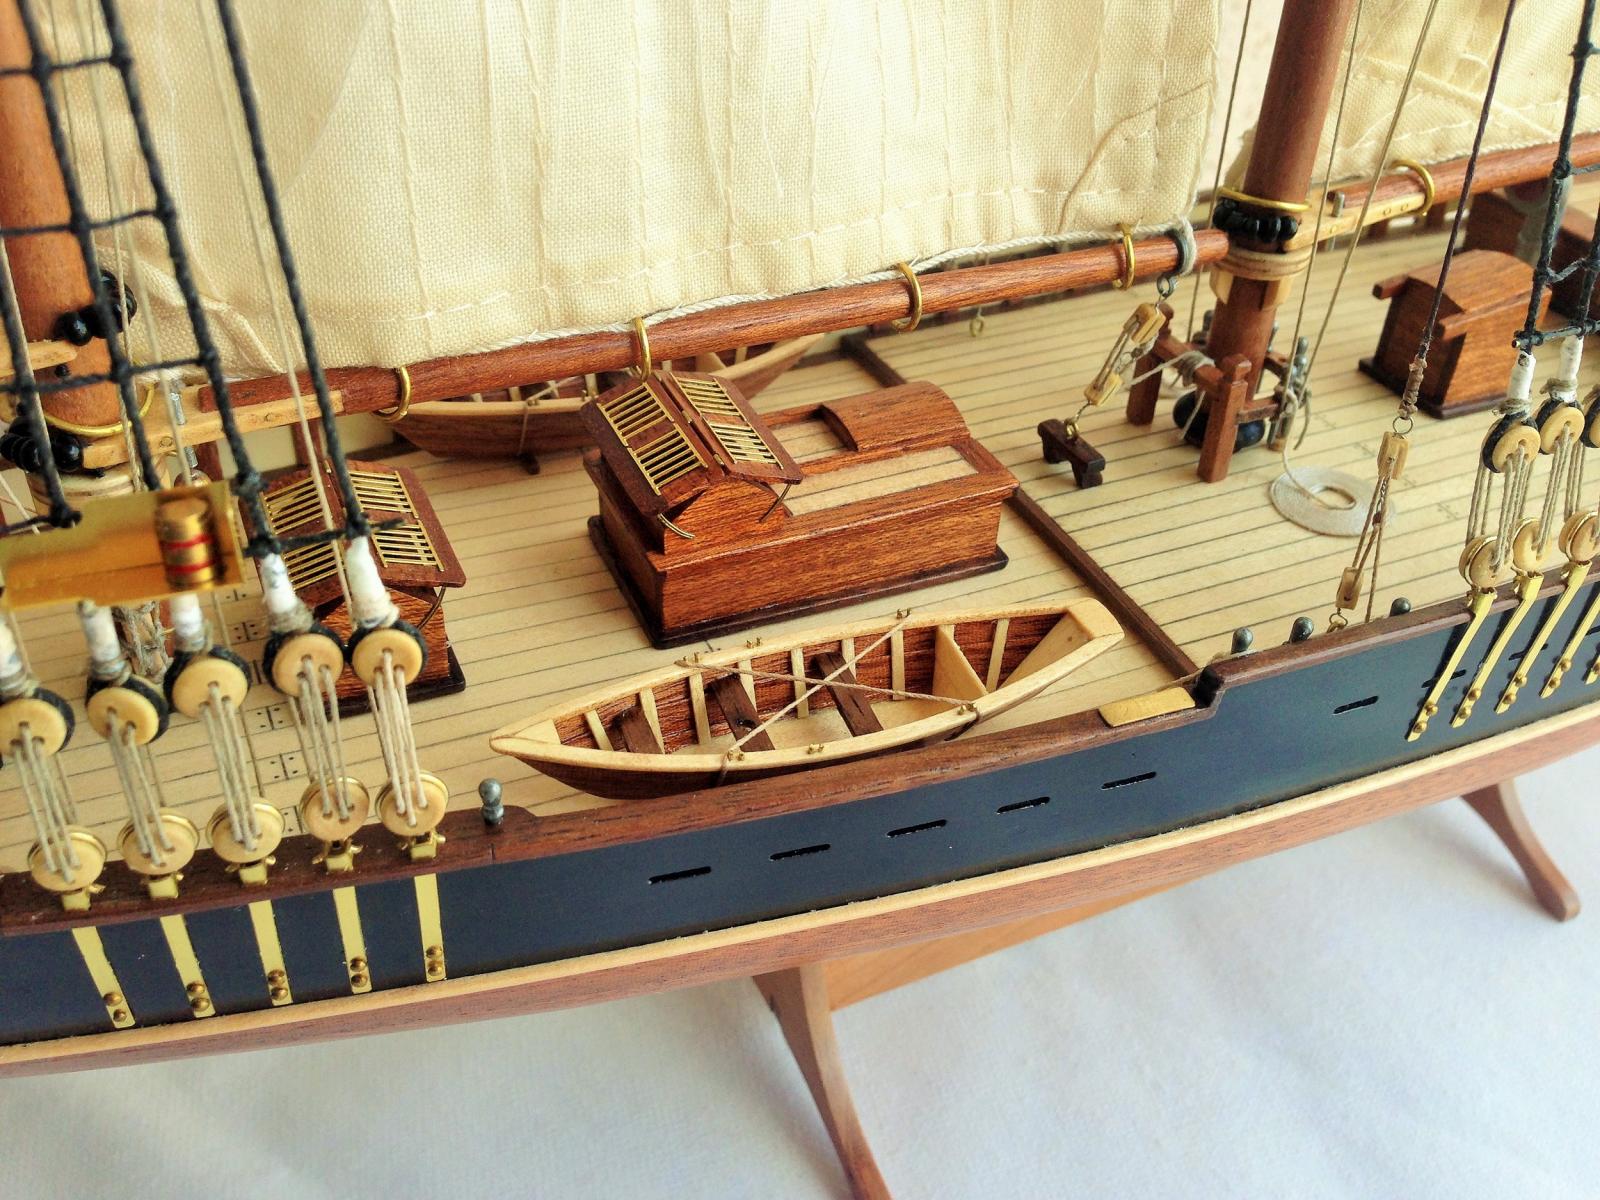
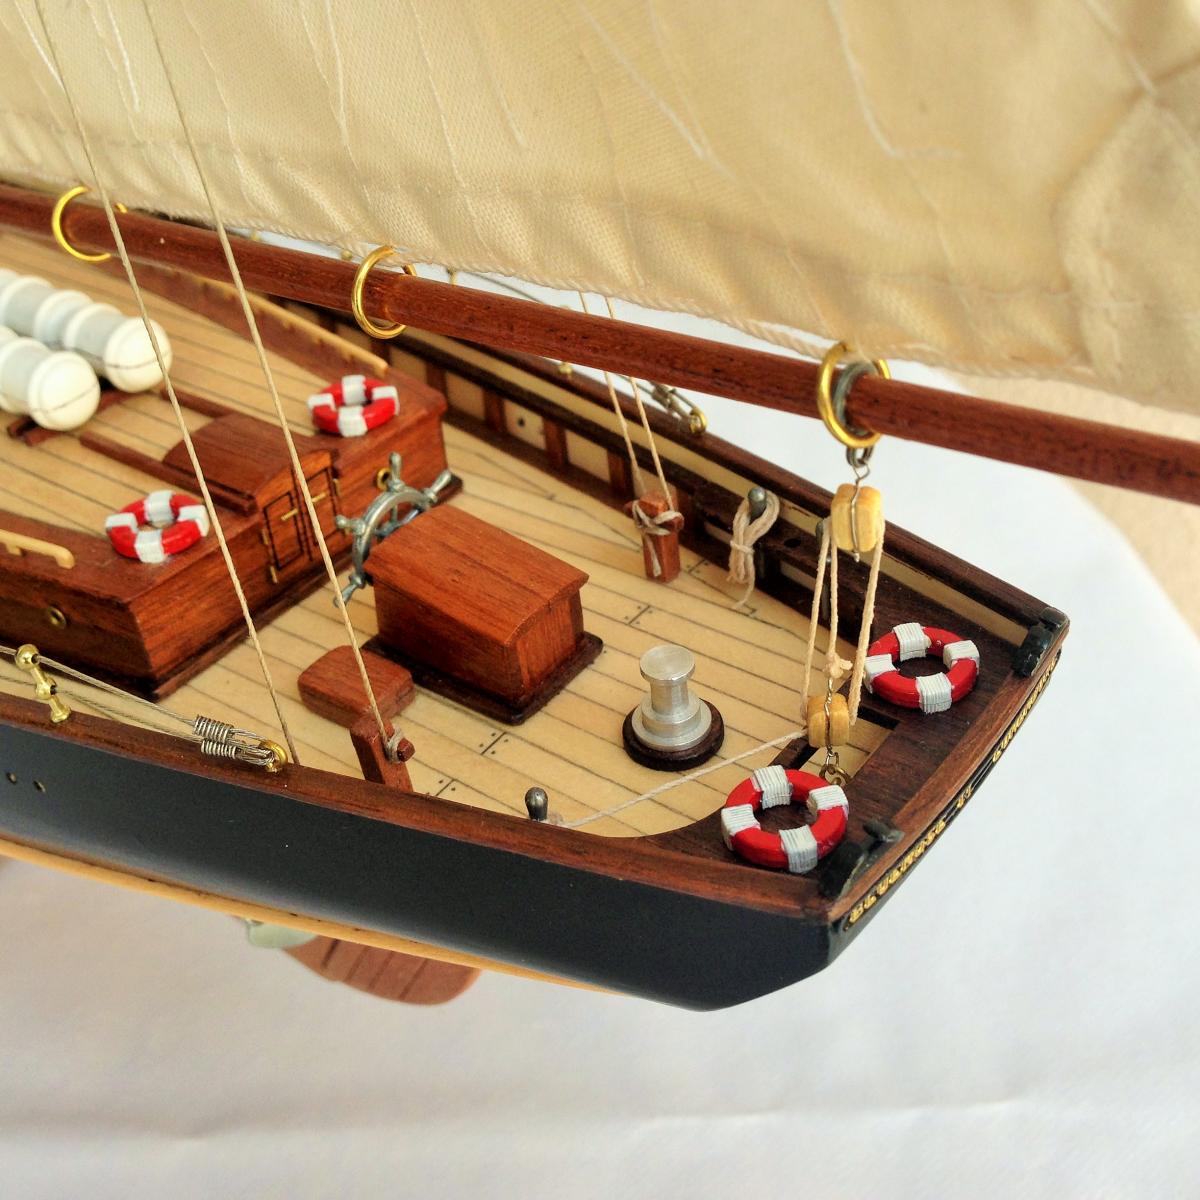
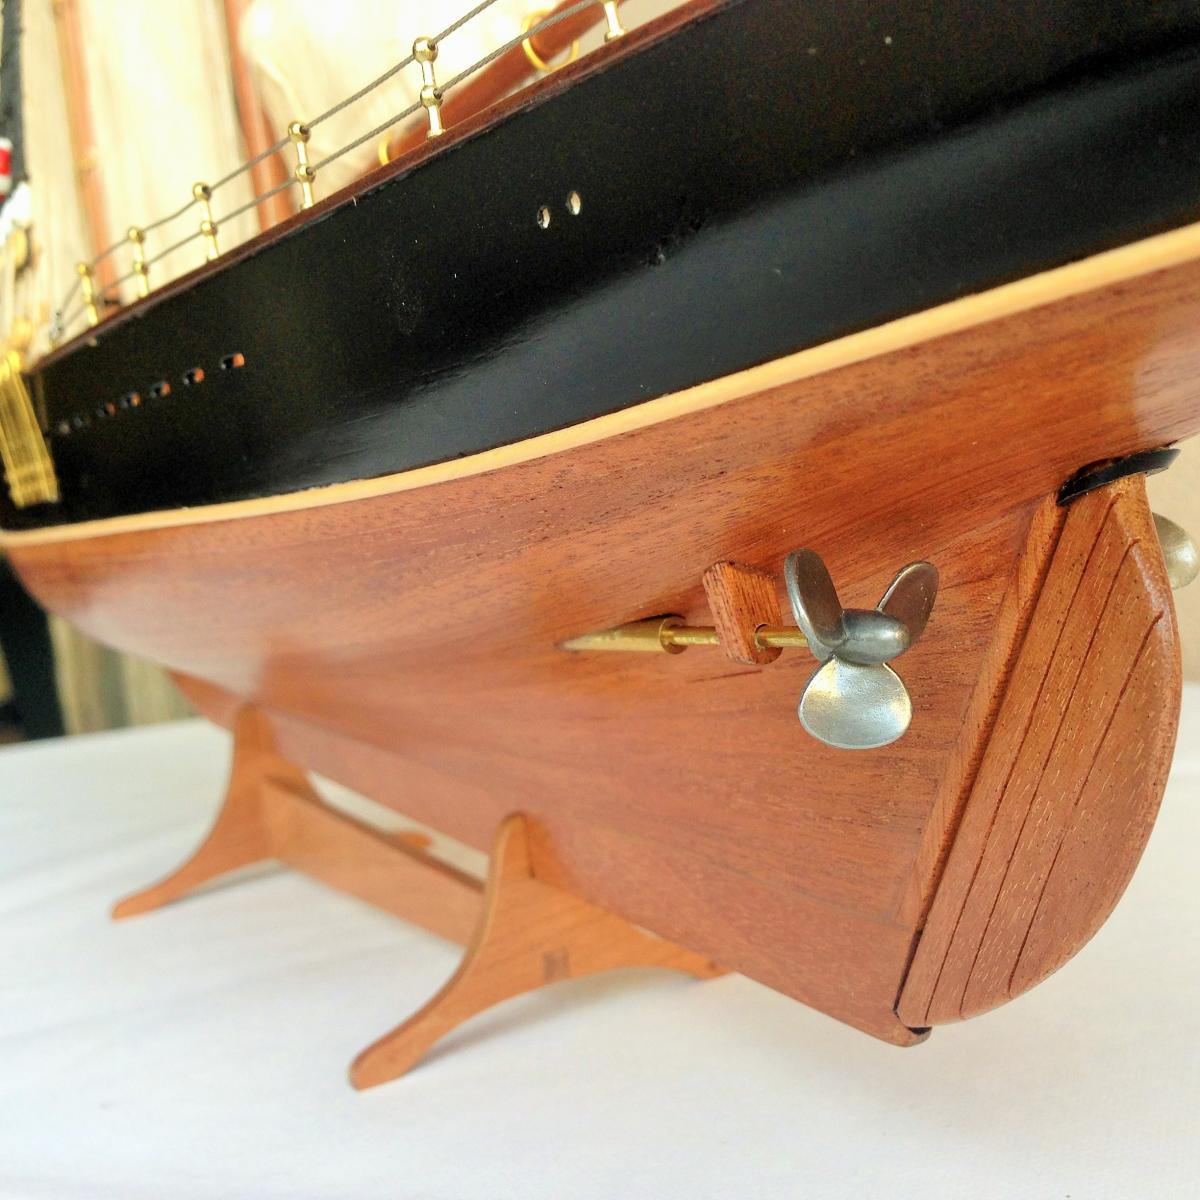
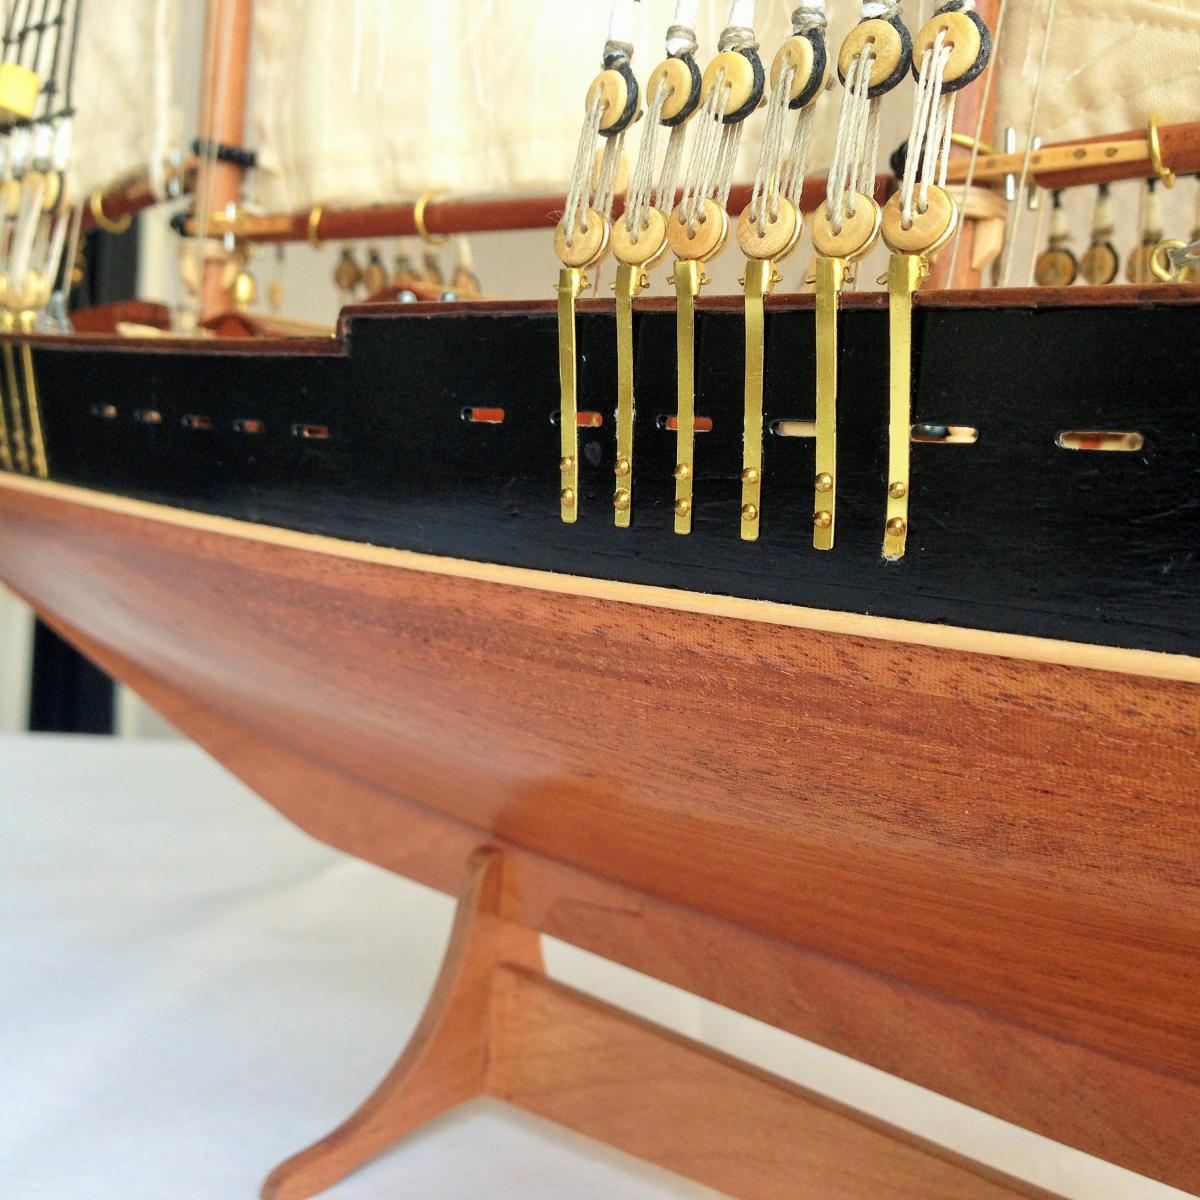
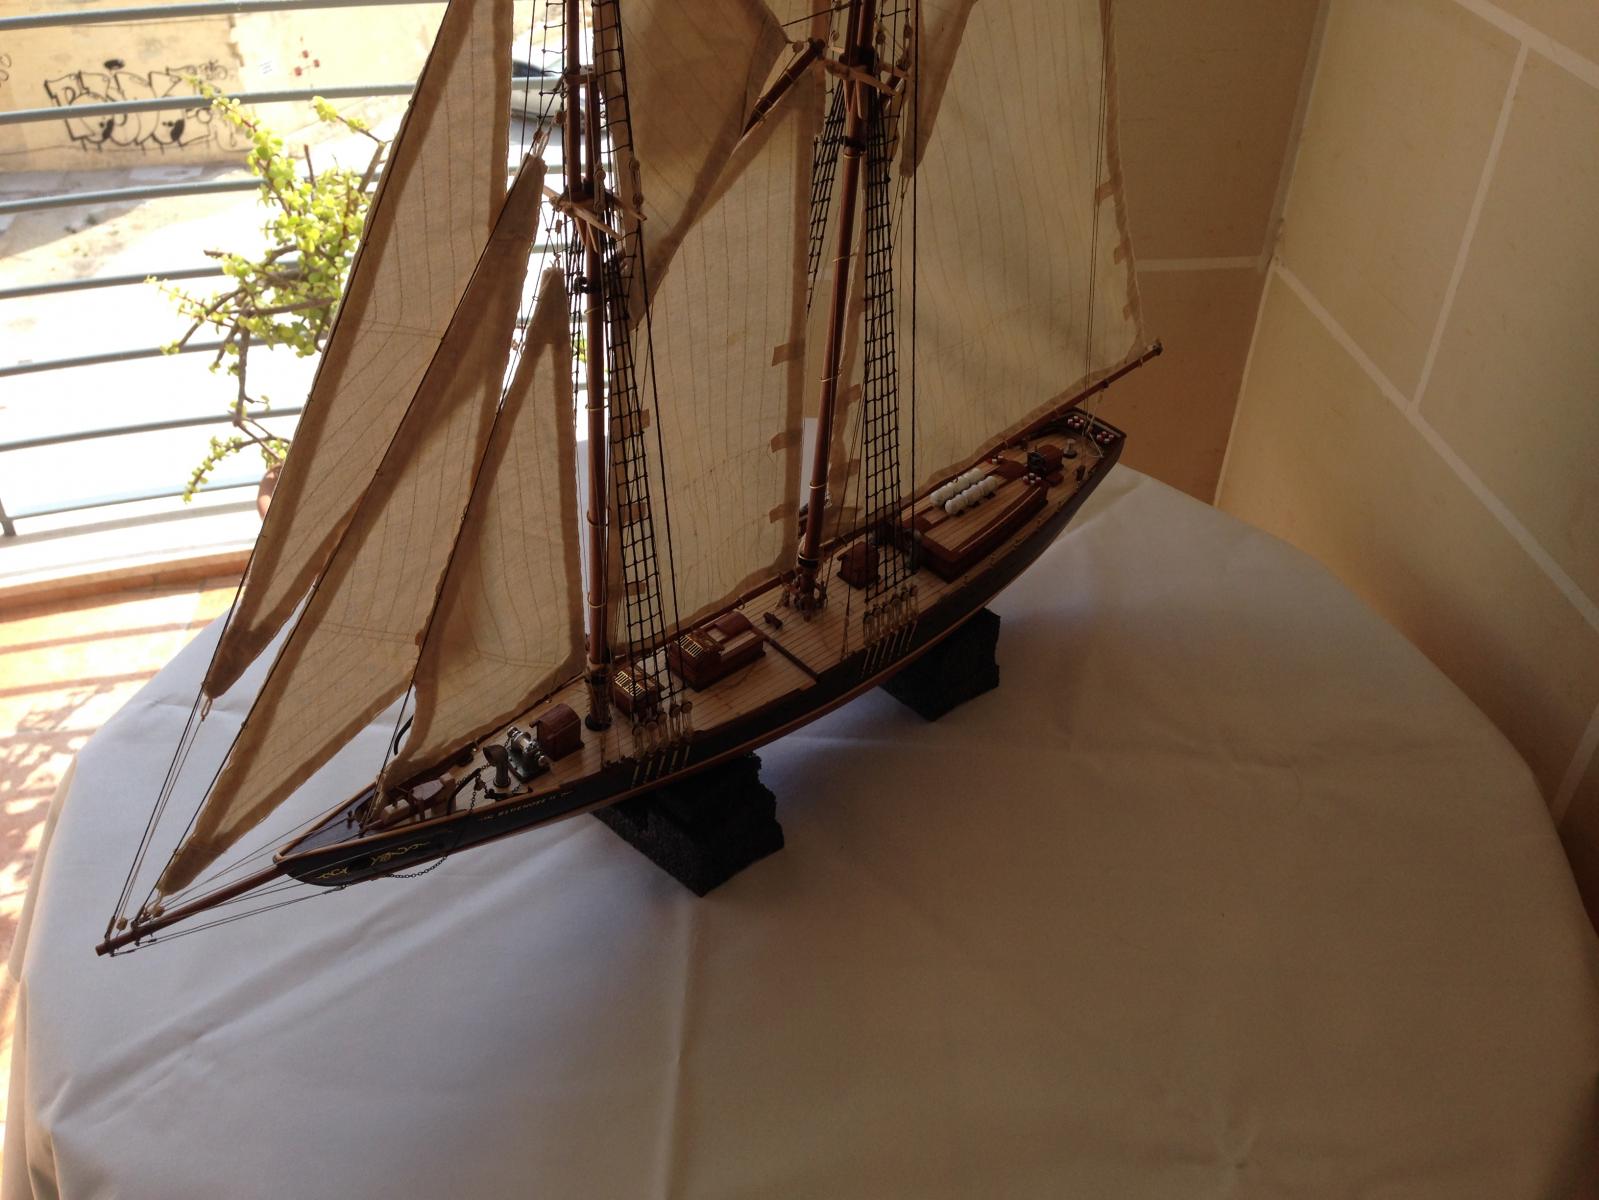
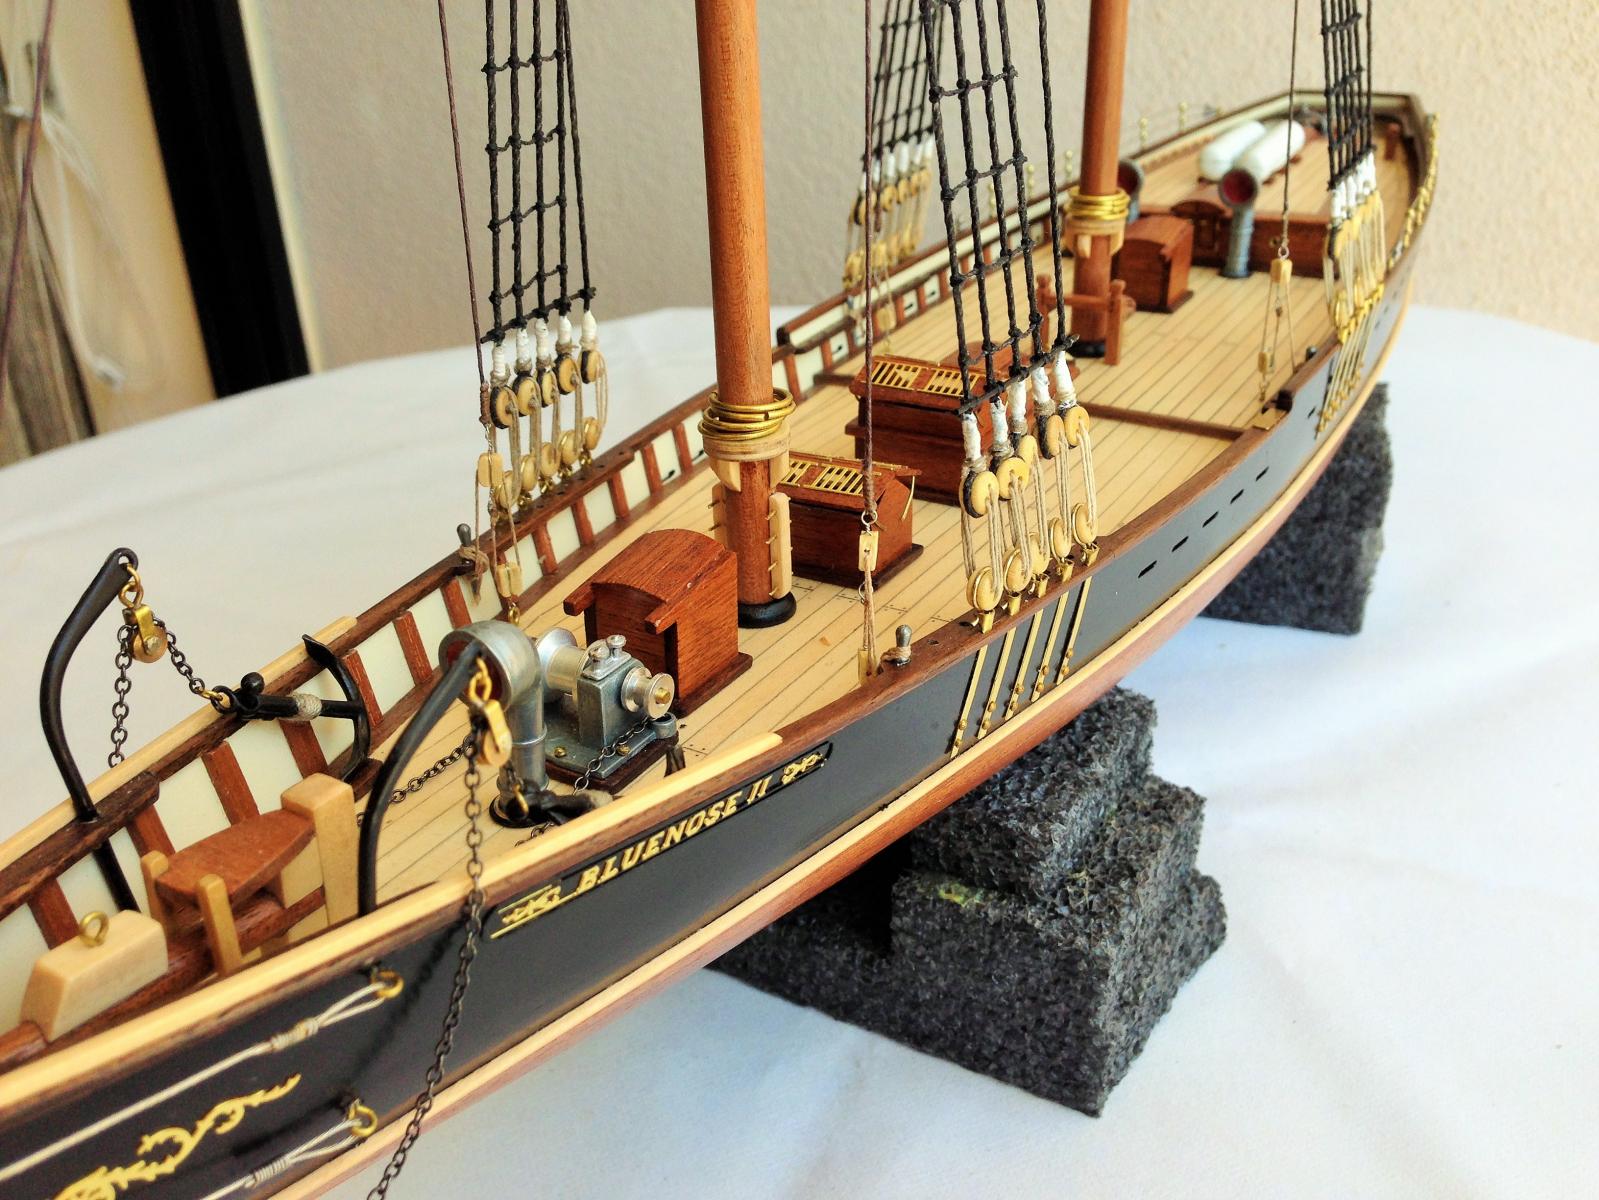
Finally finished. Here are a few images of the finished Bluenose II. I enjoyed building it. My choice for going for this kit was to gain some experience especially in planking and rigging before going for a more challenging project. This was my second build, my first build 'Juan Sebastian Elcano' had a solid hull. Now I am tempted to go for the HMS Victory 1:72!!!!
I would like to thank all those who posted the likes and the comments in my Build Log. I would also like to thank those who followed my build and also the visitors. If I go for the HMS Victory I will definitely start a build log from the very beginning as I am sure I would have a lot of questions along the build.


Robert
- IgorSky, jbford, Seventynet and 6 others
-
9
-
Hi,
Your BN2 looks fantastic! Really like how it came out. Congrats!
I'm a newbie. I'm also building this kit. Did you double plank your hull? I really like the color of your hull in natural color(unpainted). Did you use the same kit planks supplied? How did you get that rich reddish color? I'm thinking about double plank the hull with Crown Timberyard Swiss pear planks. Any advice would be greatly appreciated!
Here's the link to my build log.
http://modelshipworld.com/index.php/topic/11195-bluenose-ii-by-roubaix-artesania-latina/?view=getnewpost
Thanks.
Shaun
http://www.crowntimberyard.com/swiss-pear-strips.php
Hi Shaun,
Thank you for the compliment, I am quite a newbie myself. This is actually my second built, and the first with a planking hull. My other first built was the Juan Sebastian Elcano with a solid hull. It is in this Forum's Gallery. I chose Bluenose II to gain some experience in planking before going to something more challenging.
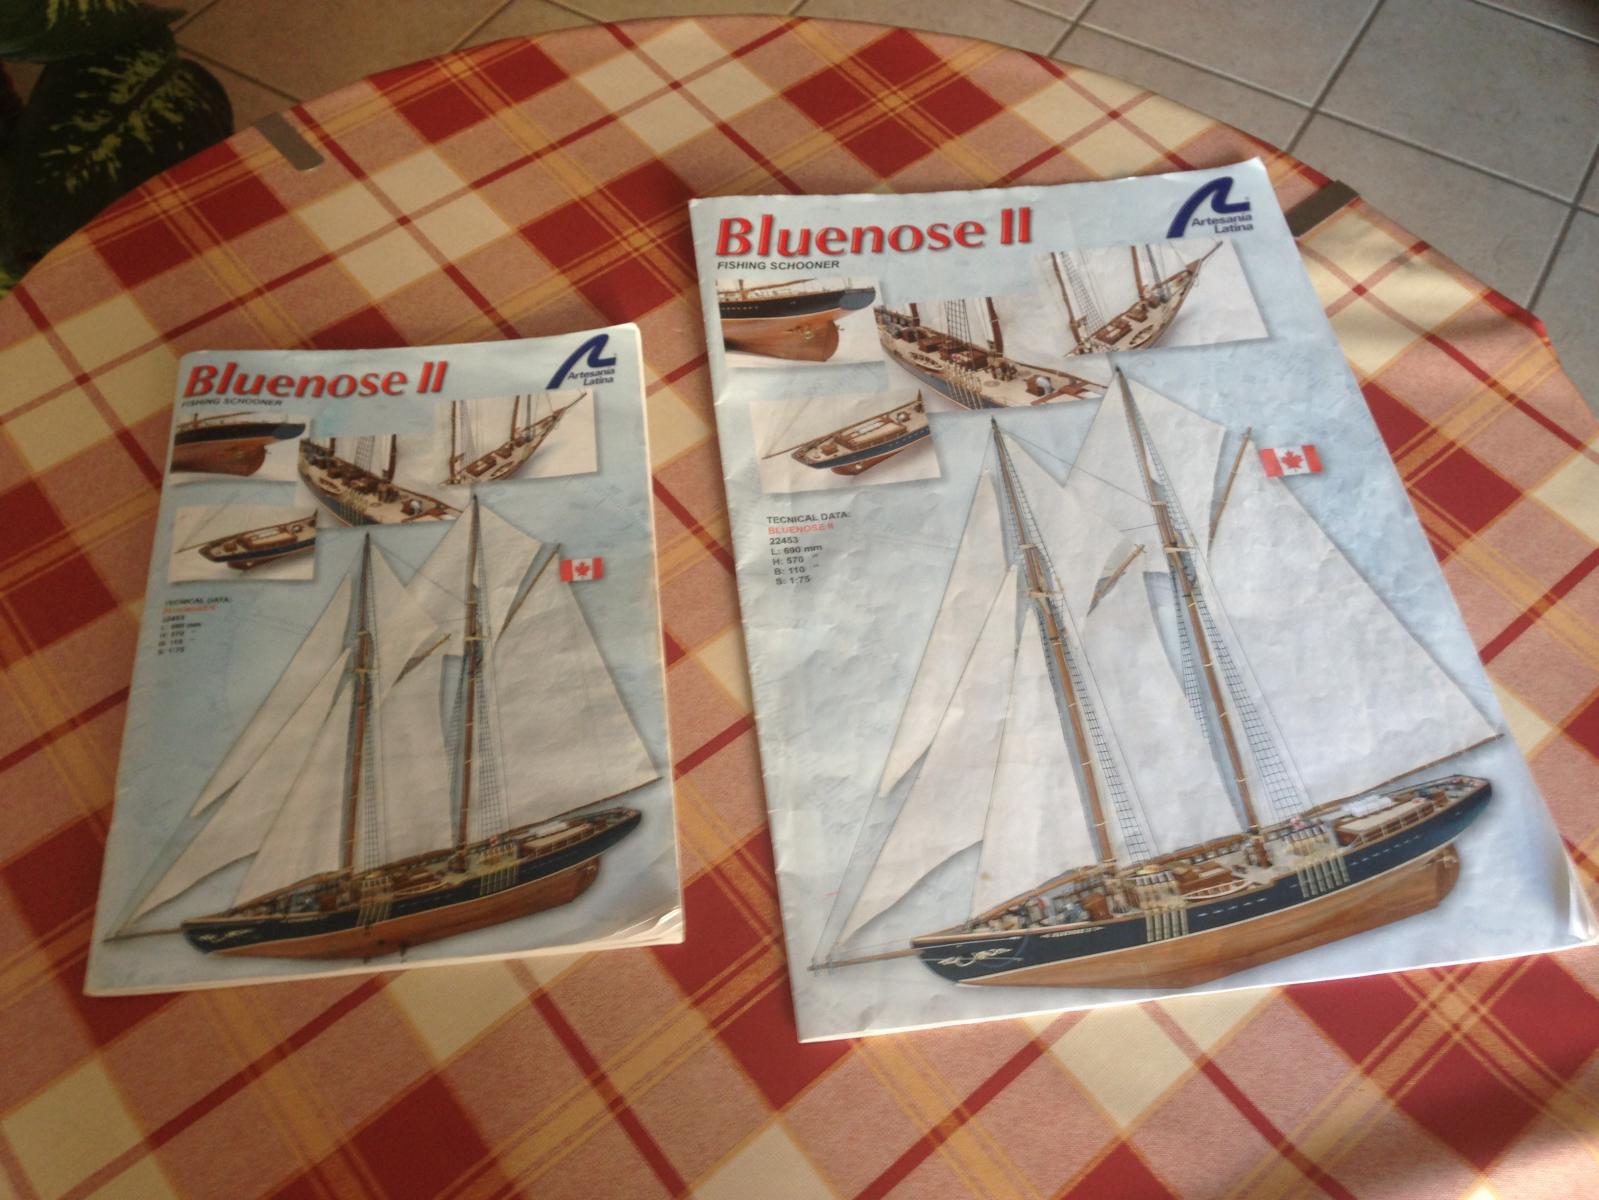
Although my kit is also manufactured by Artesania Latina like yours somehow they seem to differ from each other.
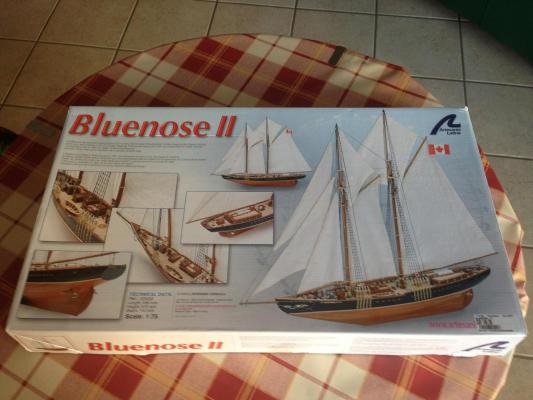
This is the packaging for my kit.
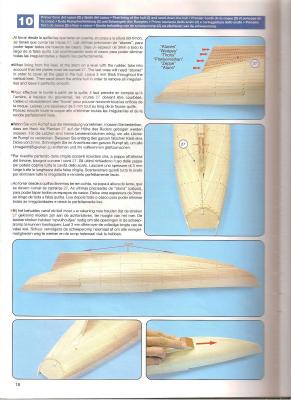
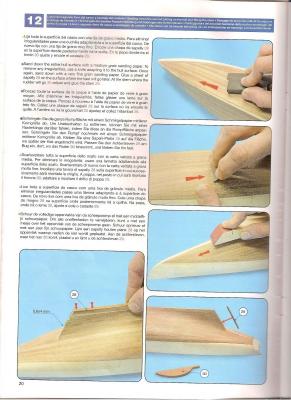
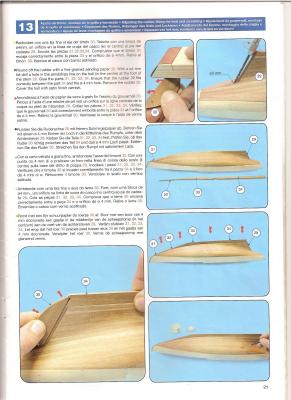
These are the instruction booklets with it. I don't know what instructions you have with it. From your images I noticed you have a plan. I don't have any with mine, just two booklets one with the instructions for the hull, deck, fittings planking, etc, the other for the masts, sails and rigging.
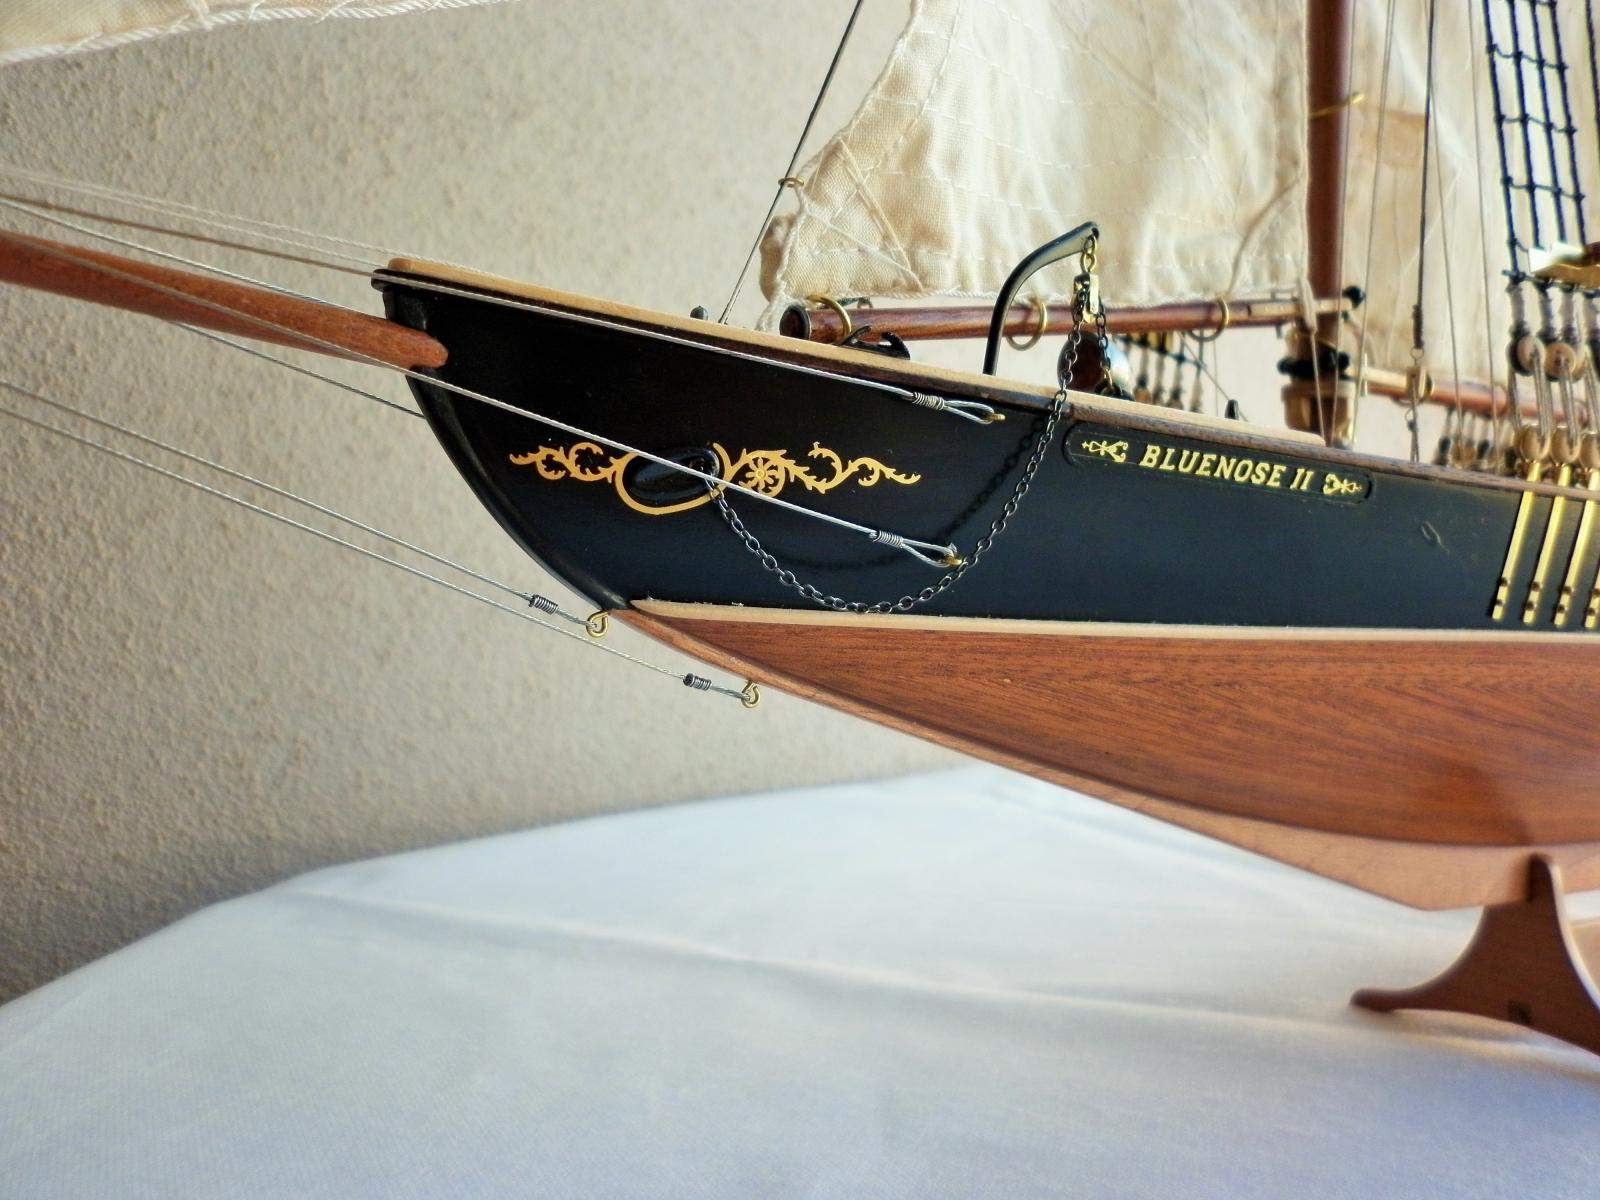
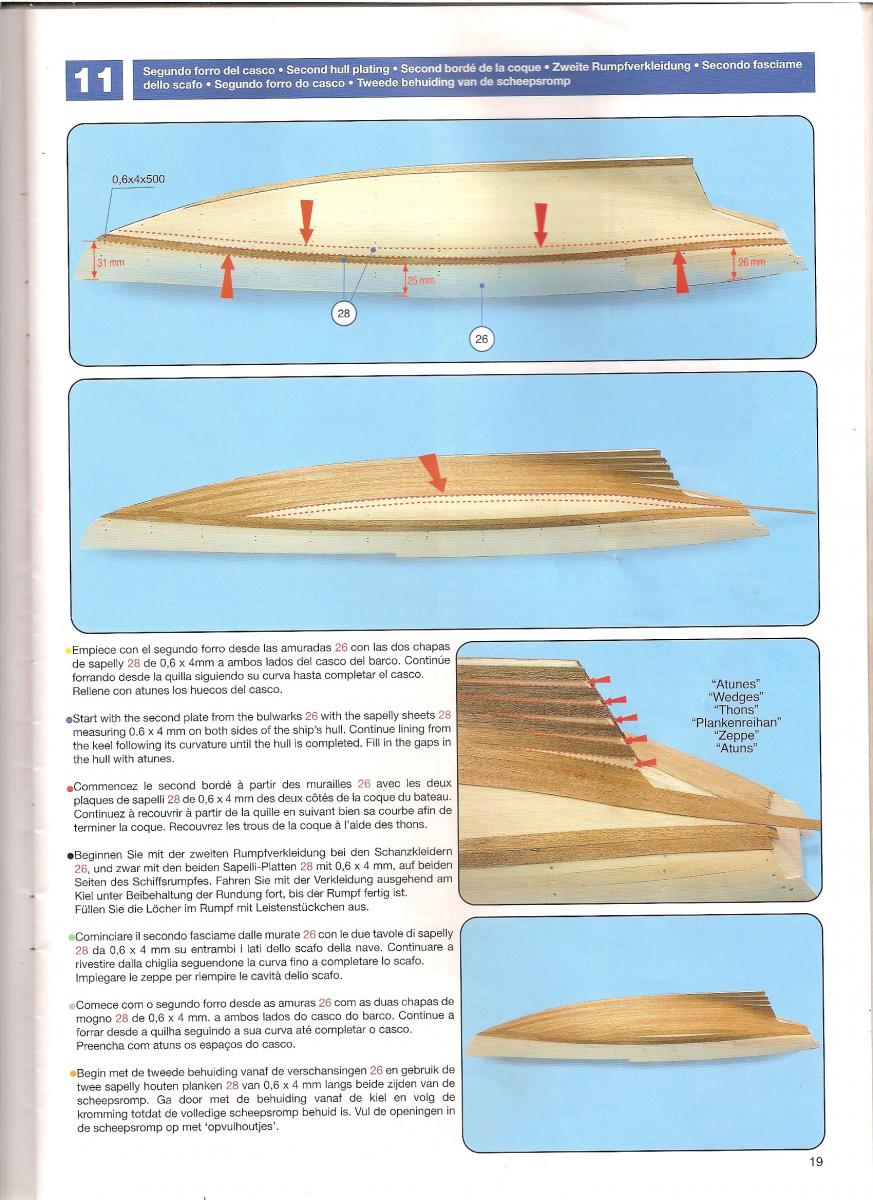
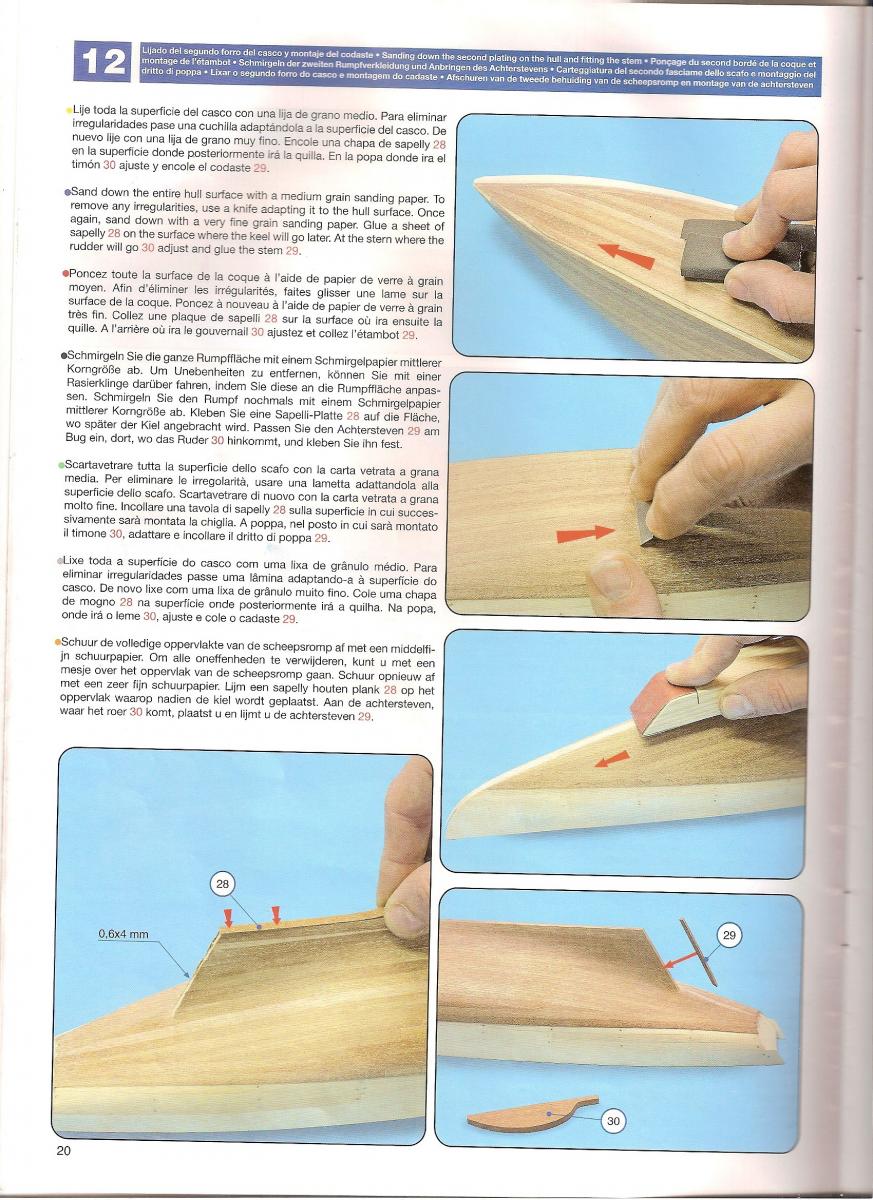
Yes it is double planked. The first layer is basswood 1.5 x 4mm. The second layer (the finish) is sapelly sheets 0.6 x 4mm. It is quite thin and it was supplied with the kit. The first layer must be sanded to remove any irregularities and leave it perfectly smooth. Then the sapelly plates are glued on this smooth surface. I used normal white carpenters glue. Every plate you fix wipe immediately the excess glue with a damp cloth and you should have no problem. After all hull is covered sapelly and well dried you have to sand it again. To get the nice smooth finish sand it very lightly. Do not use coarse sandpaper firstly because you do not want to remove a lot of the material, as the plates are very thin and secondly a coarse sandpaper will leave a lot of tiny scratches which will be difficult to remove with a finer sandpaper on such a thin surface. I first used grit 280 then finished with grit 400. Then I painted with normal water based varnish with a satin finish. Do not use matt varnish, the grain comes out much better with satin finish. You have at least to give it three coats and sanding very lightly (grit 400) between each coat after well dry. I usually leave a couple of days before giving the next coat. Obviously do not sand the last coat. I did not use any dyes, just clear satin finish varnish.
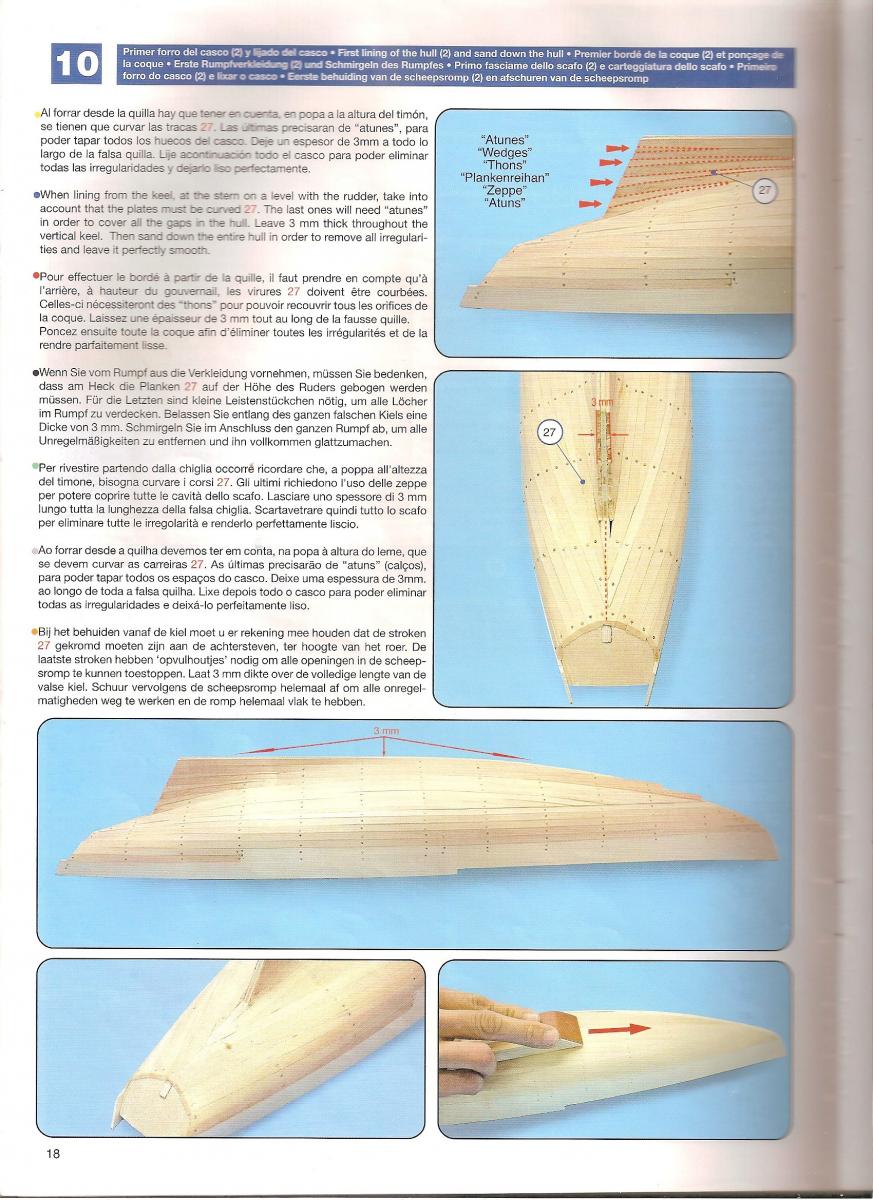
I have scanned a few images from my instruction booklets which may be of some help to you. I don't know if you have the same instructions with your kit.

To be honest with you I never used the swiss pear planks, so I can't tell you what finish you are going to get. But if as it says on the supplier's site it has an ebony finish, stand to be corrected if I am wrong, it has a dark finish and not much grains show. To be honest with you the sapelly I used was quite workable, I did not have any issue with splintering.
Good luck Shaun

-
a beautiful build Robert,
hull, fitting out, masting and rigging excellently done
Nils
Thank you for your comments Nils. I've gone through some of your projects, they are awesome. I will go through them in more detail, can learn a lot from skilled modellers like you.
Robert
- Mirabell61 and thomaslambo
-
2
-
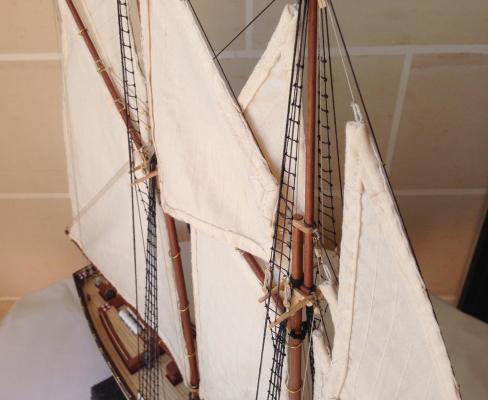
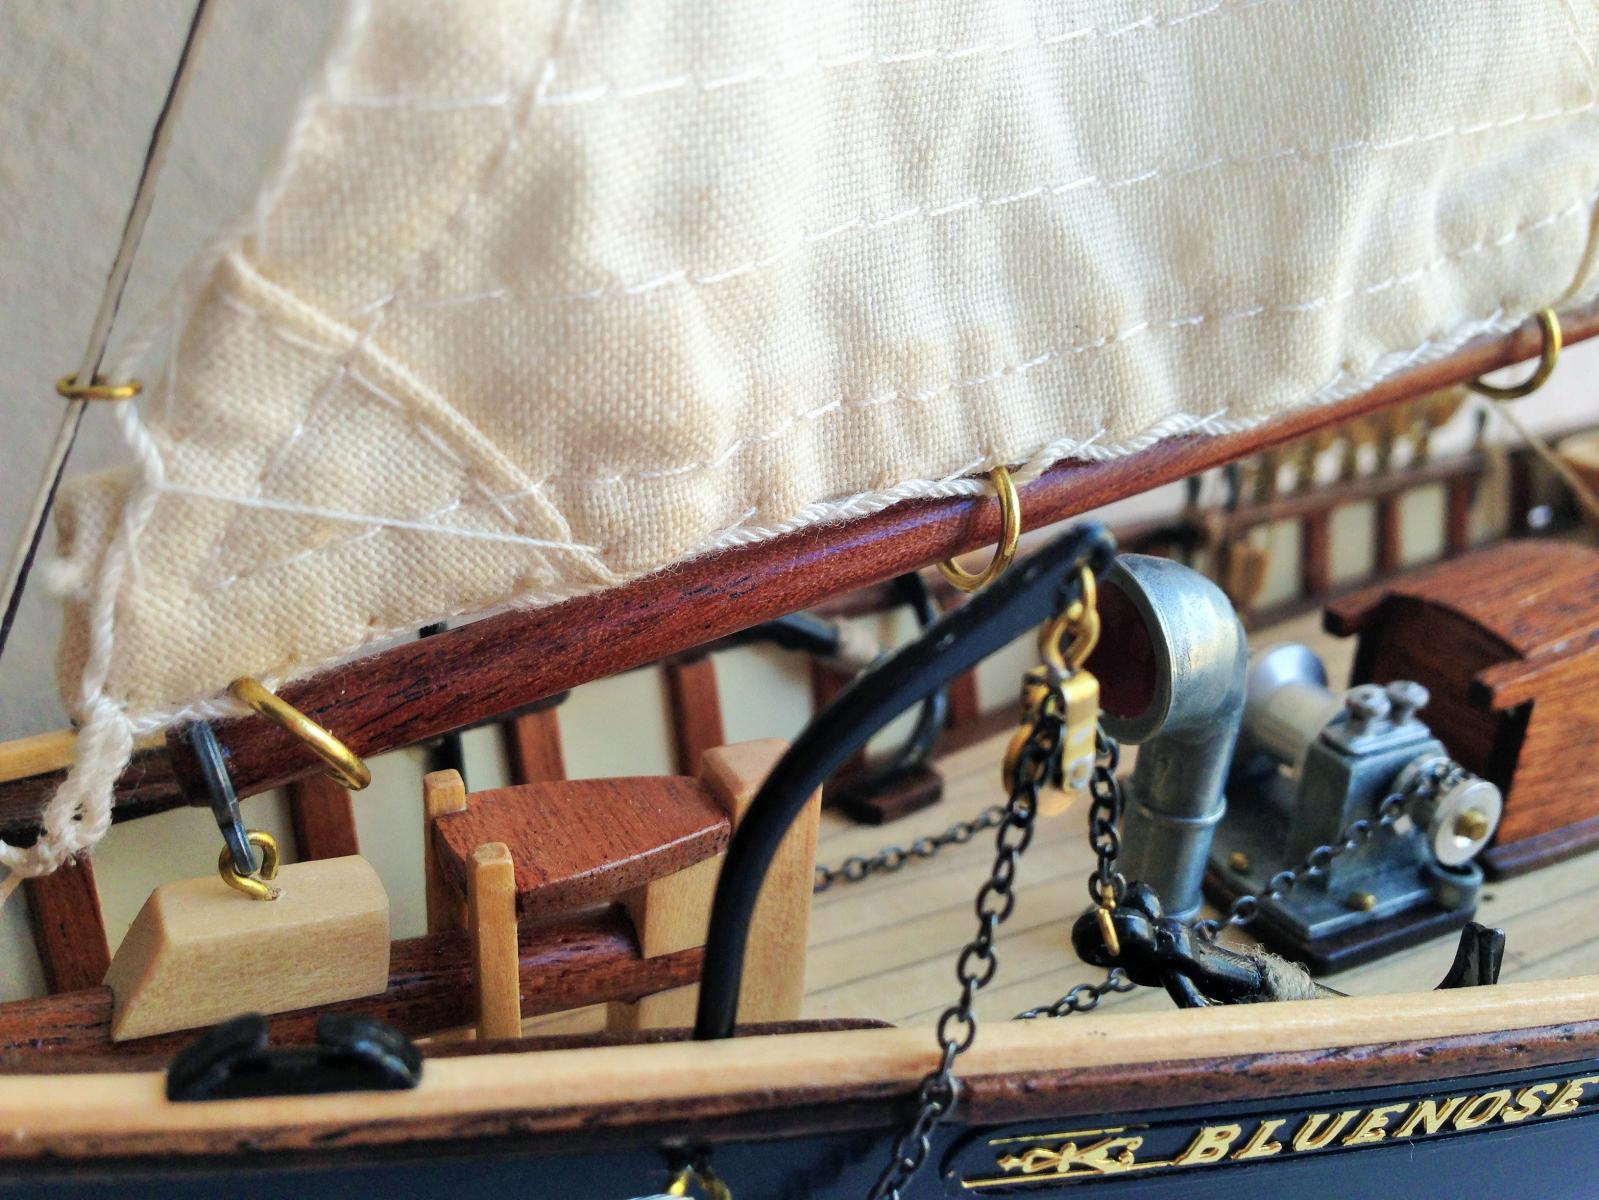
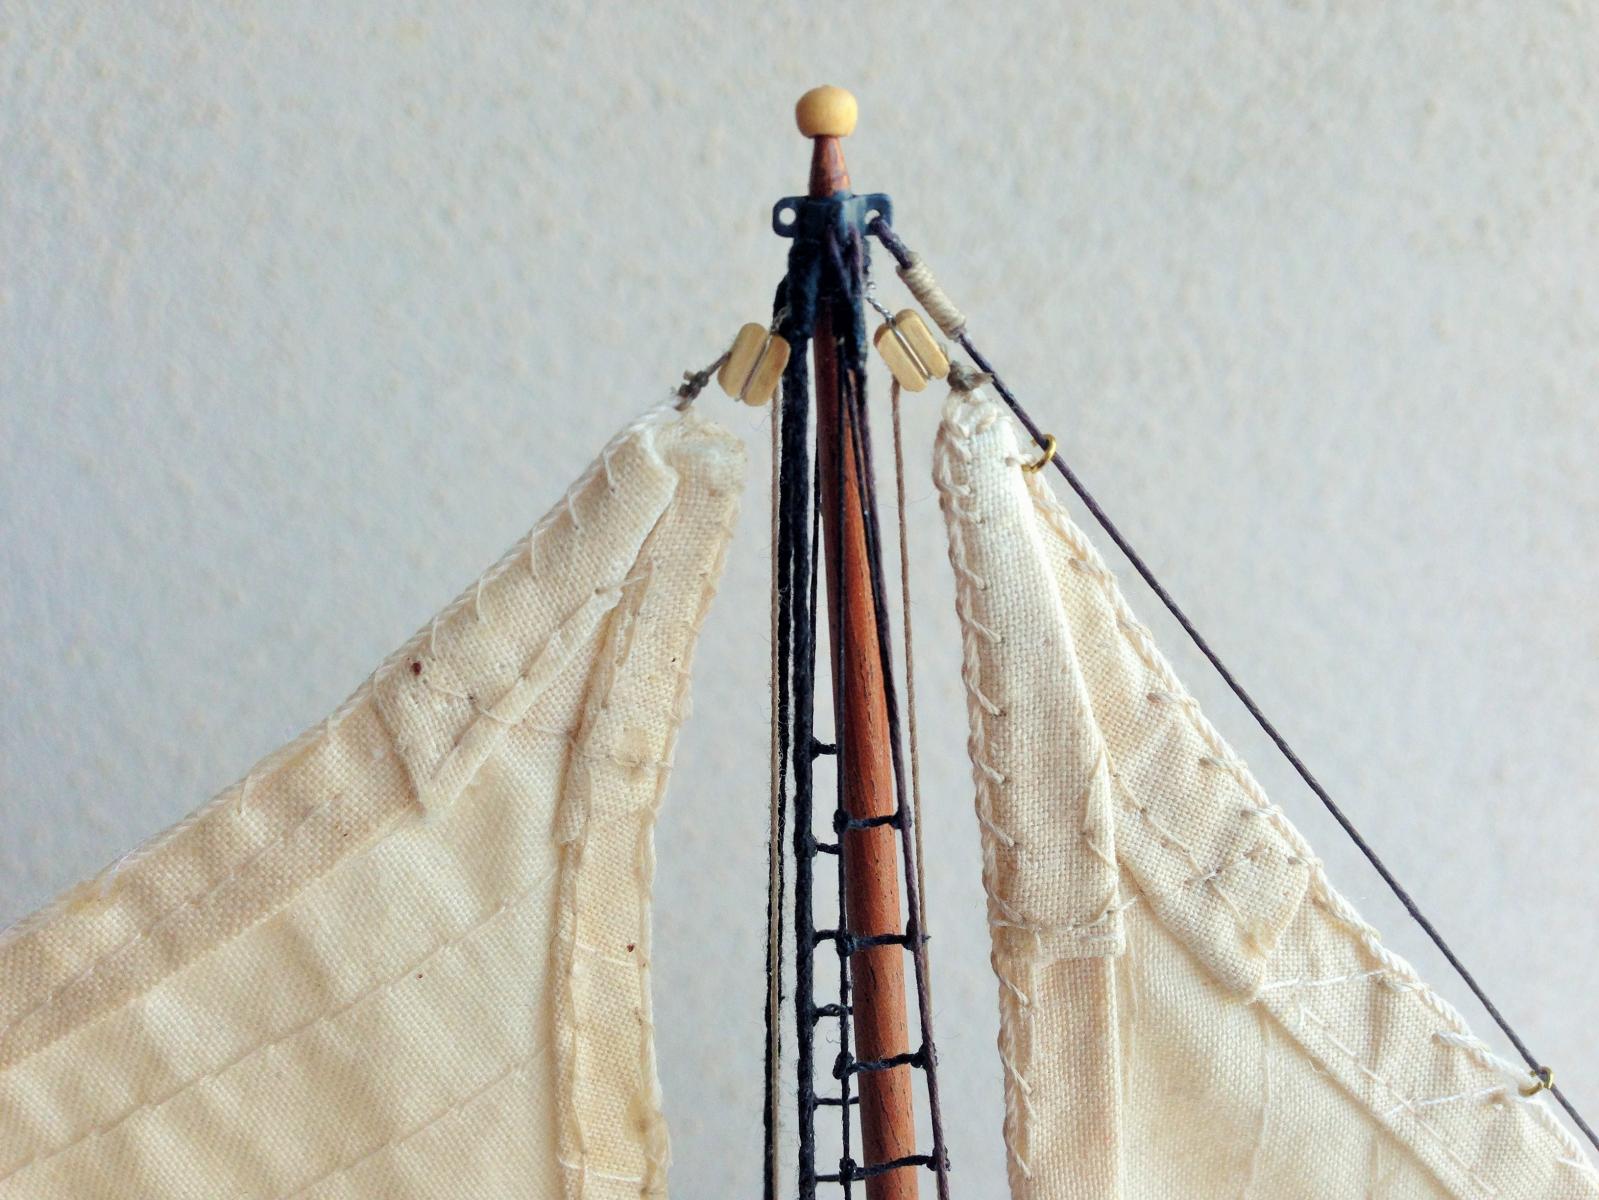
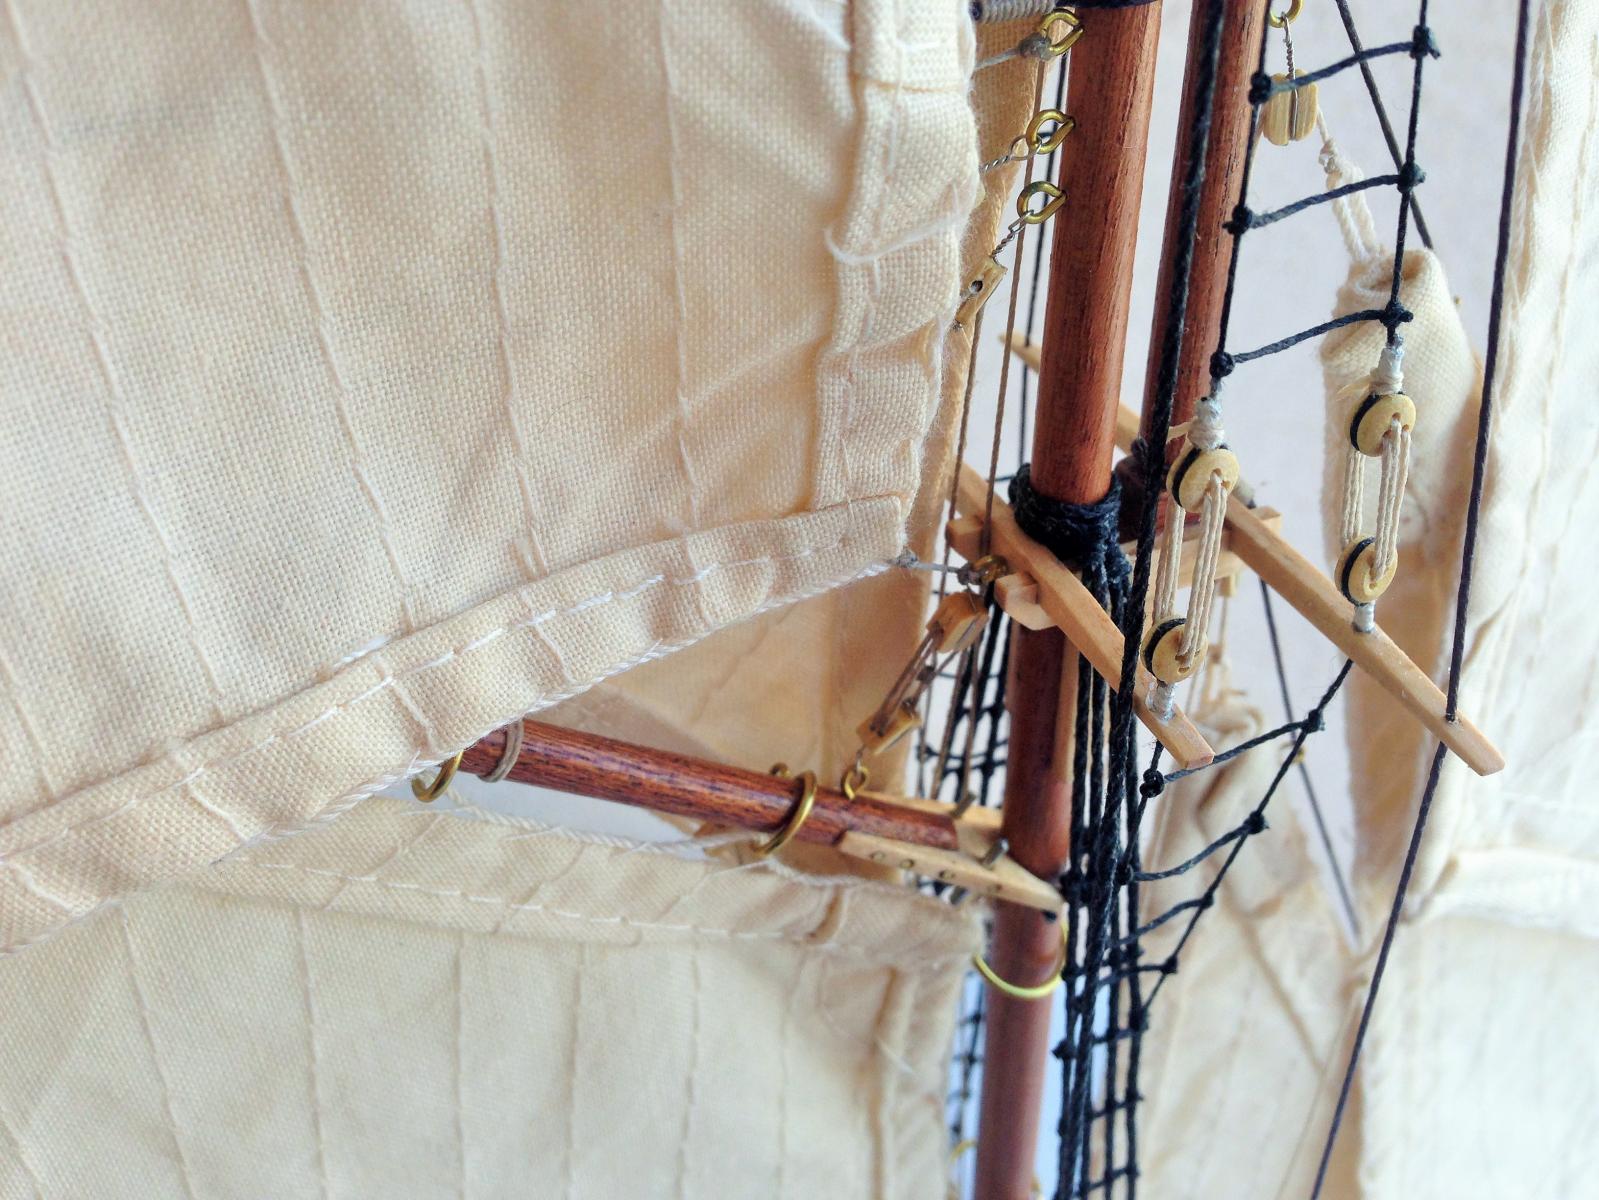
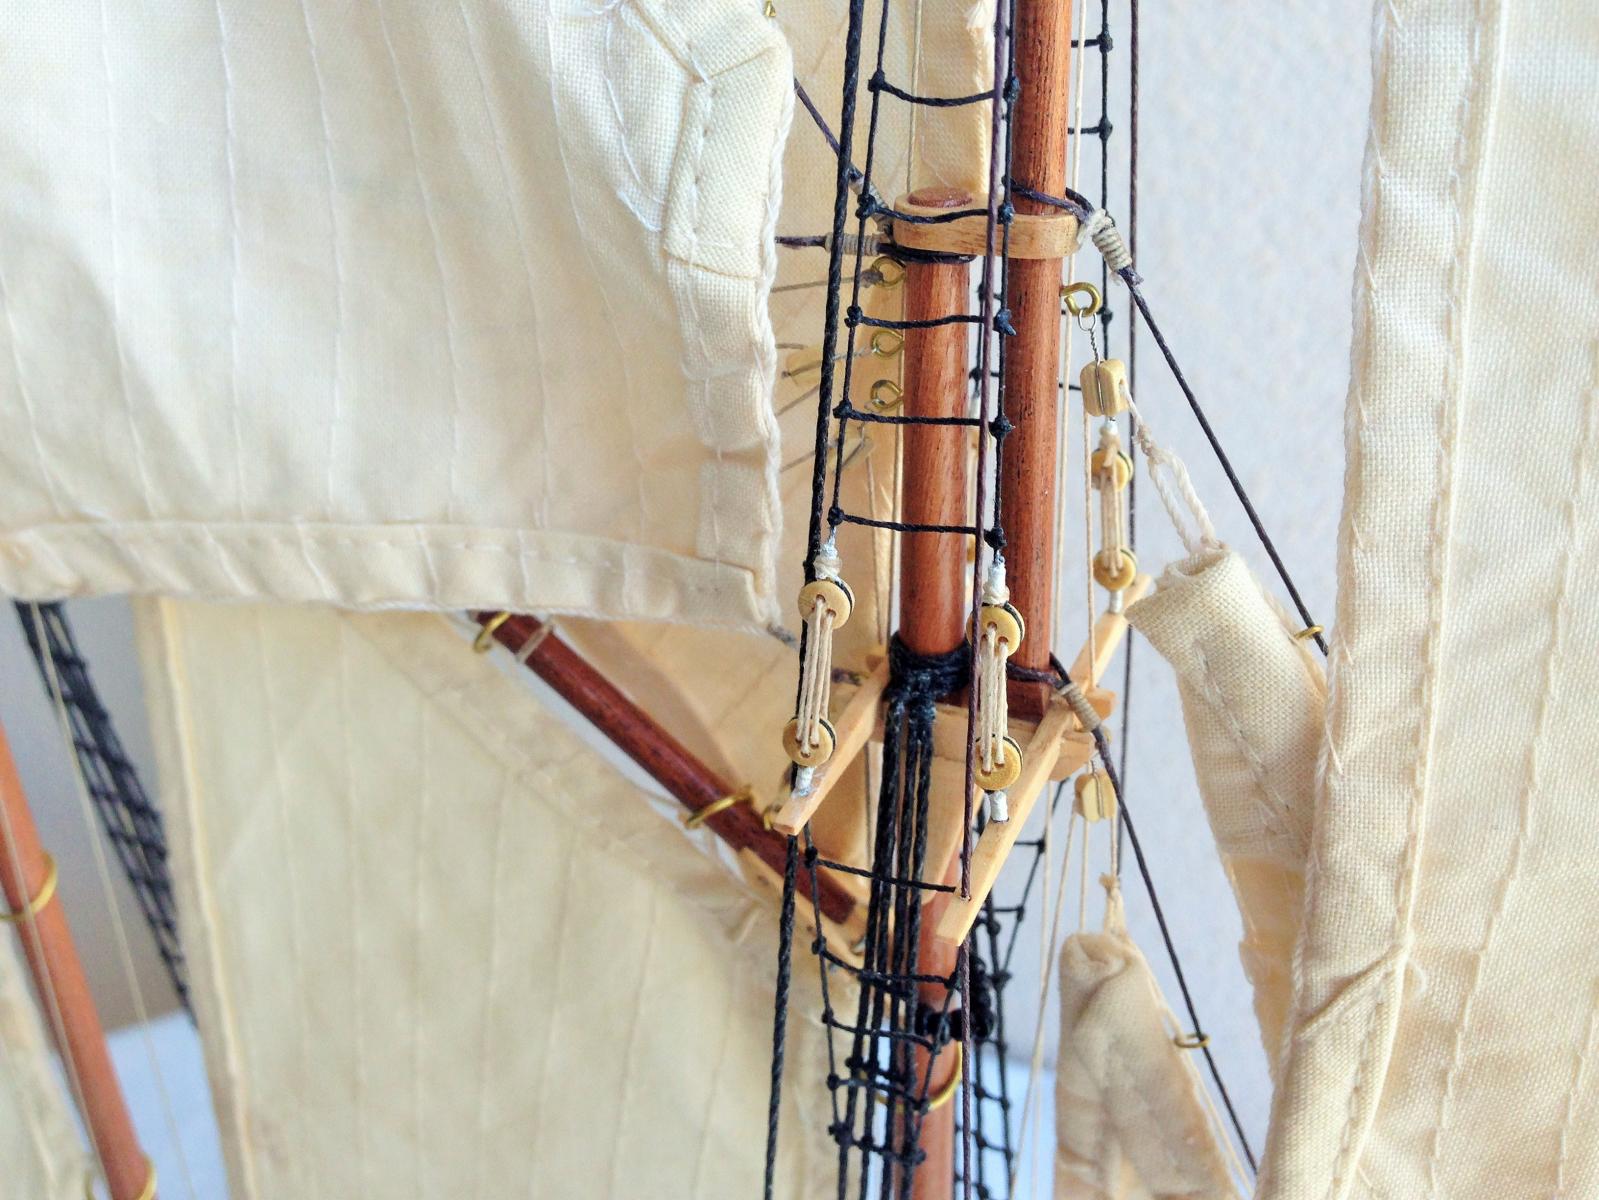
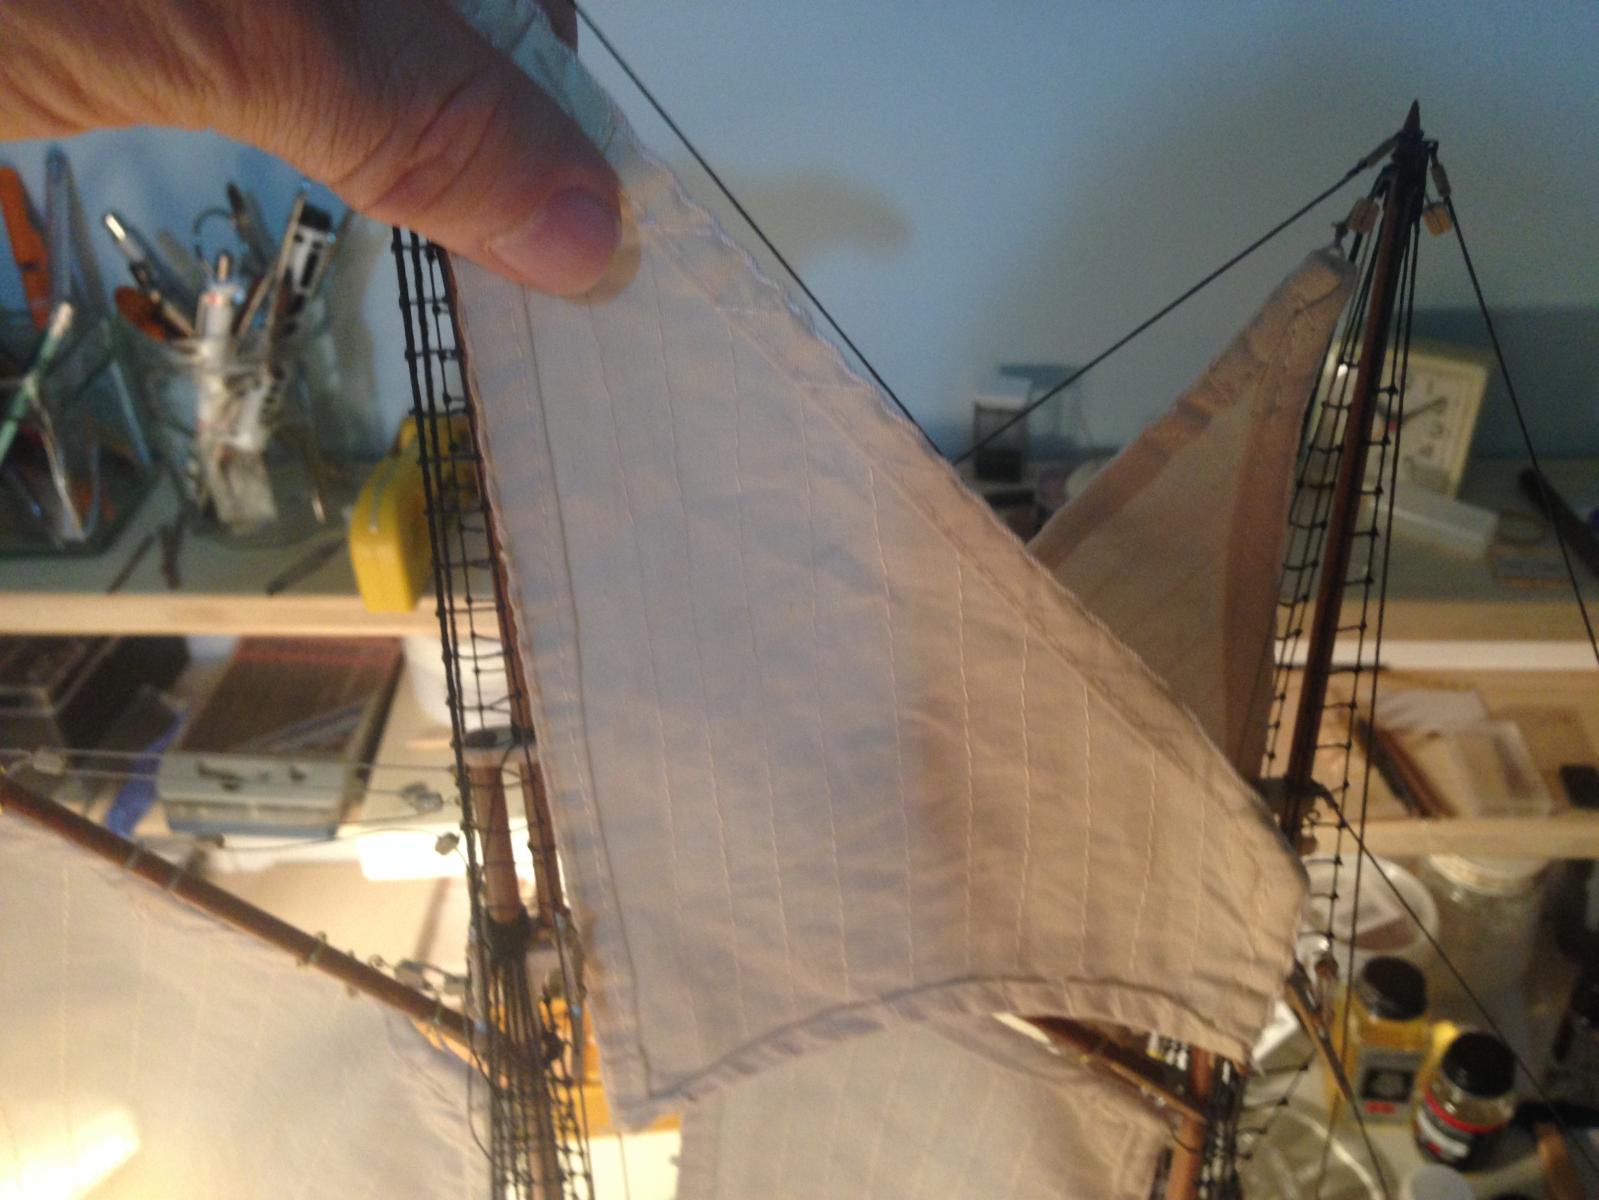
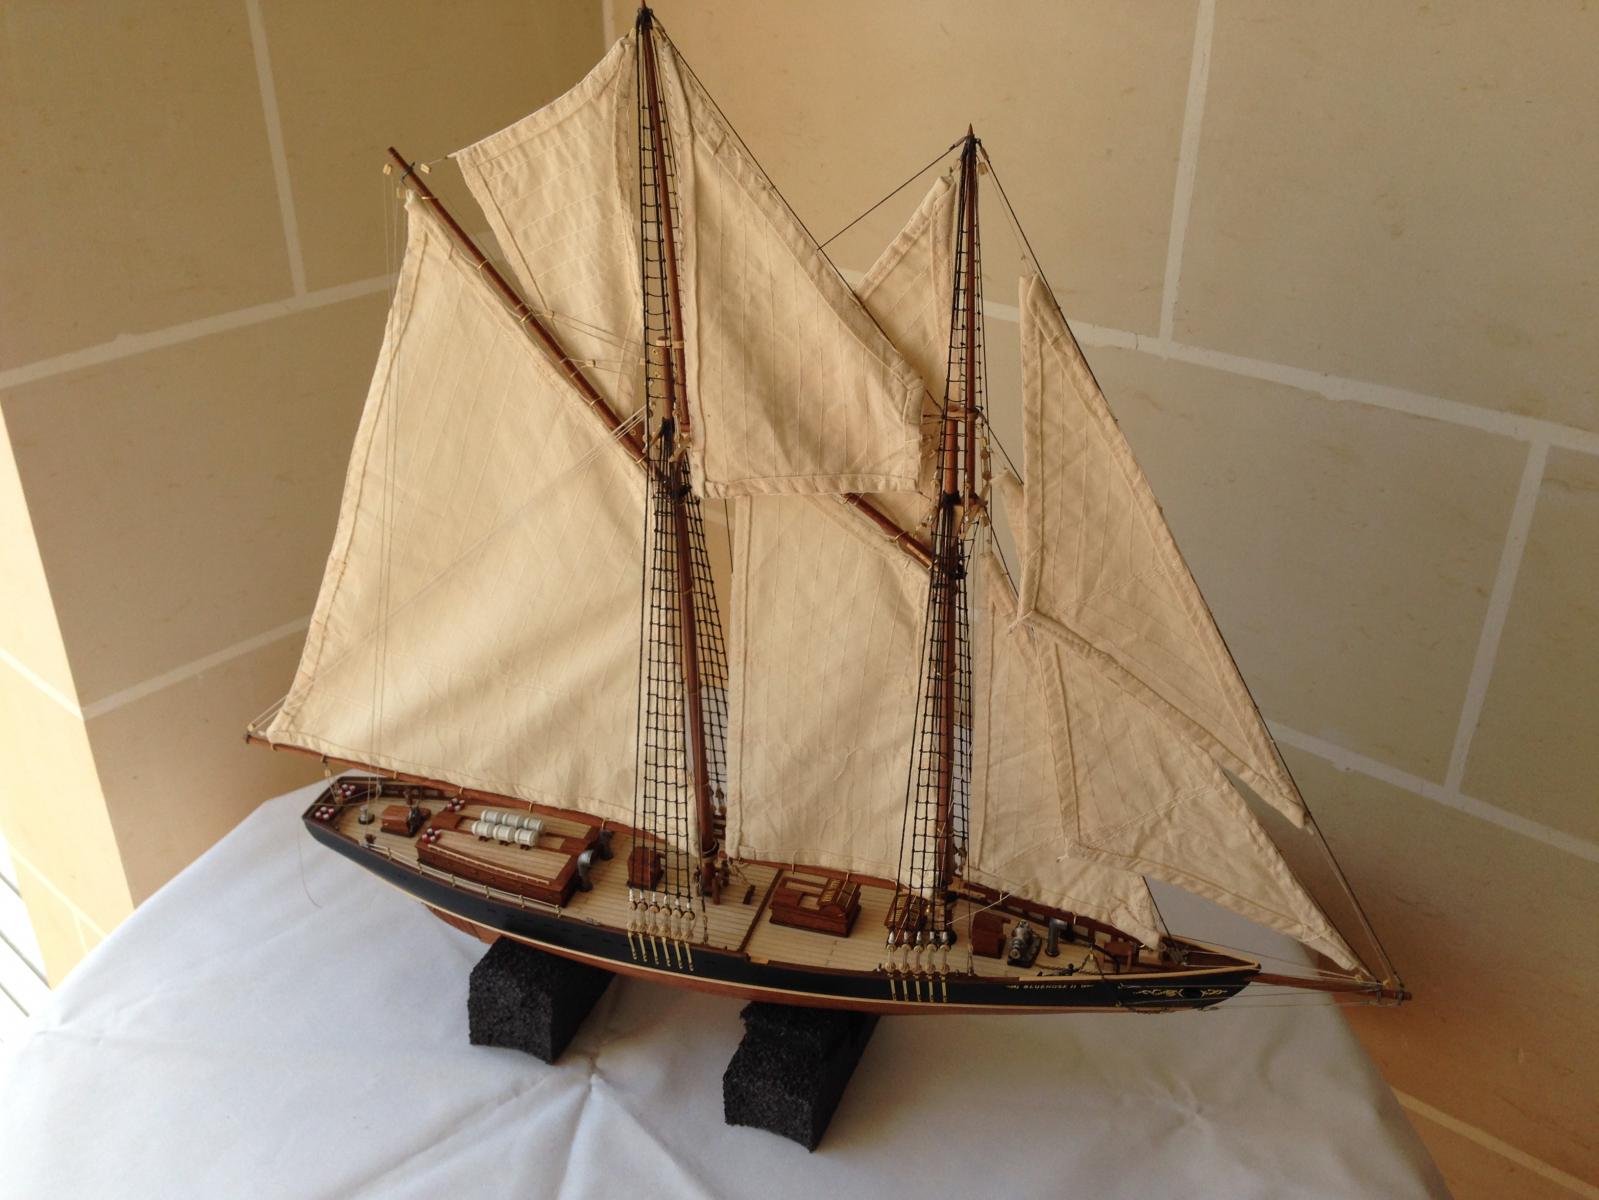
Fitted the sails. Had quite a few problems with them. The sails came ready sewn with the kit and some of them were just too big!!! For some of them I had to relocate the blocks on the mast a bit higher than indicated on the instructions. But a couple of them I had literally to un sew two corners of the sail cut the extra material and sew again.
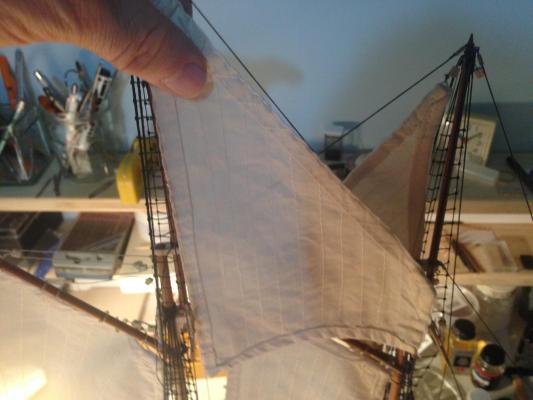
Sail too big, it overlaps on the foremast. whilst it should be short by about 1/2 an inch.
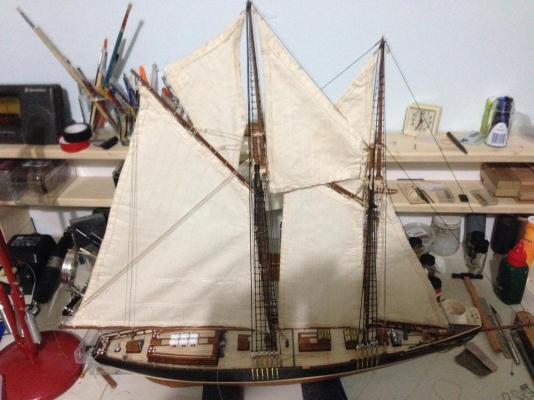

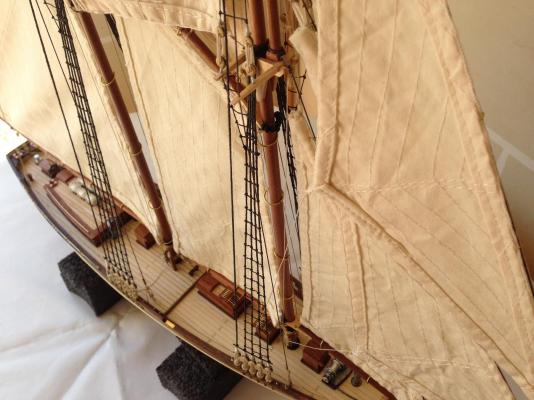
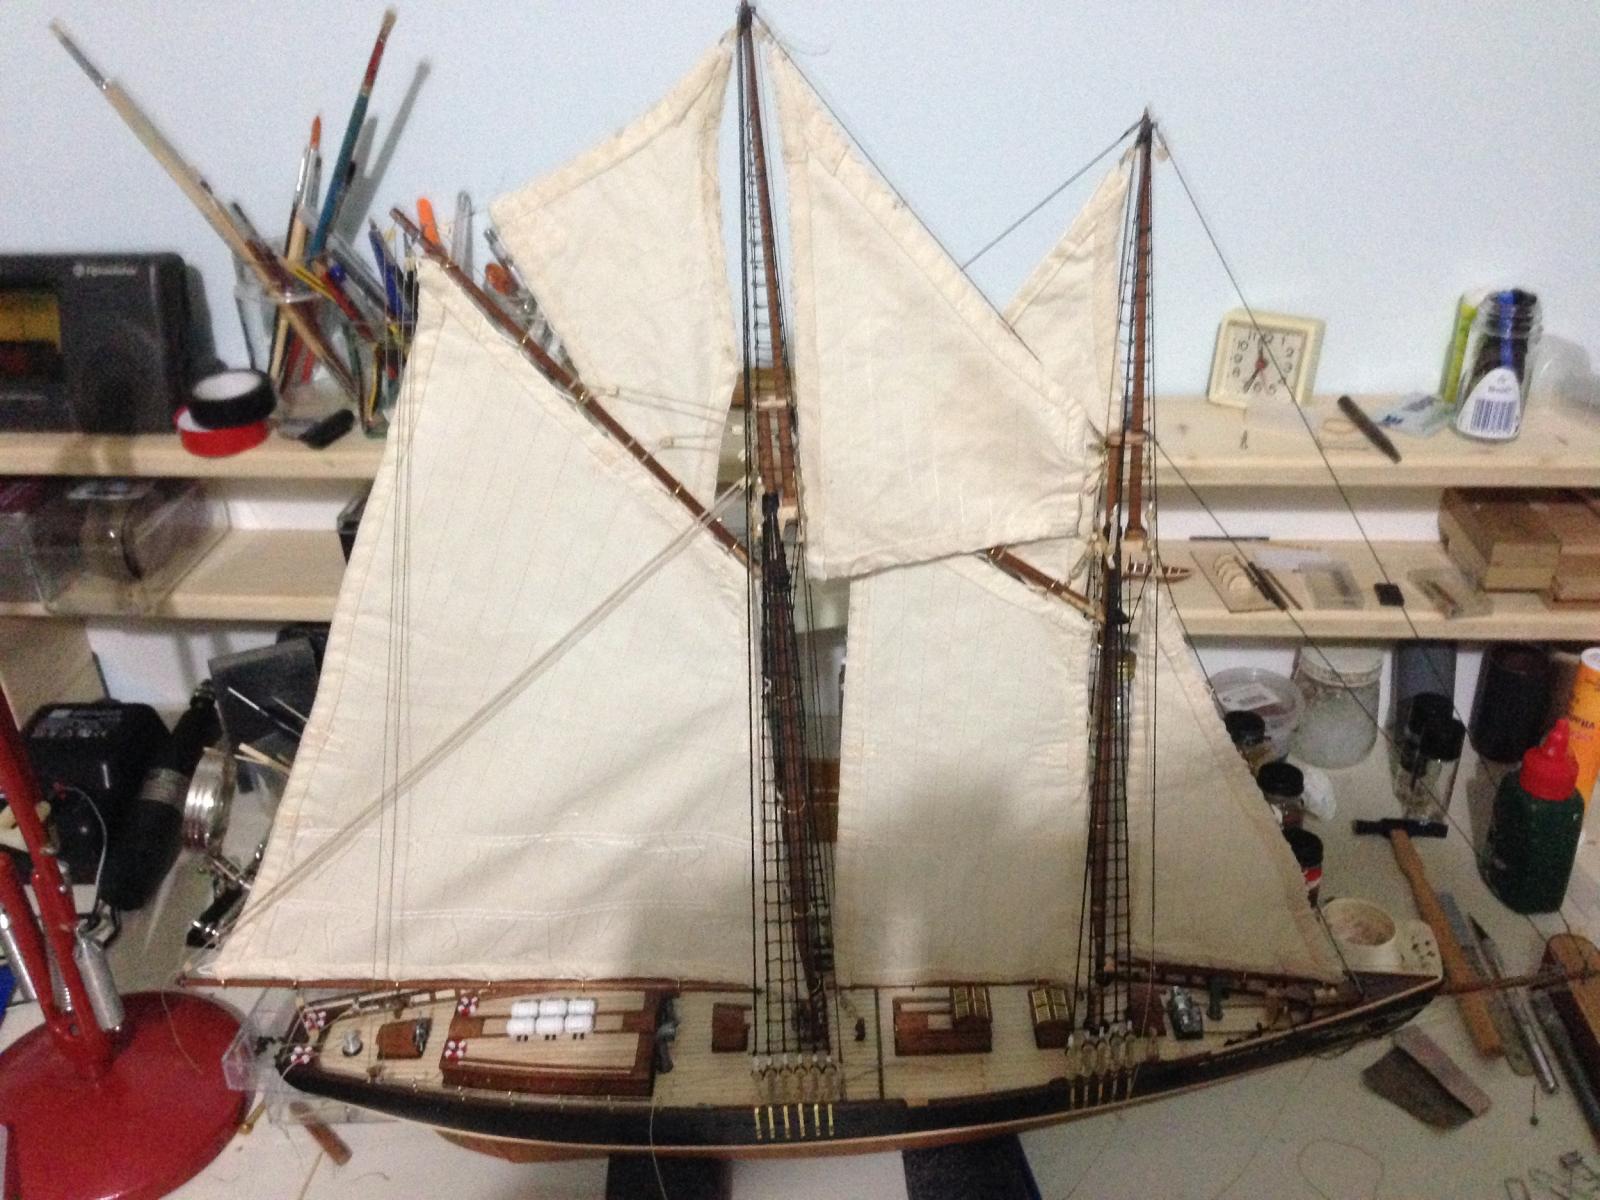
Trimmed and fitted correctly.
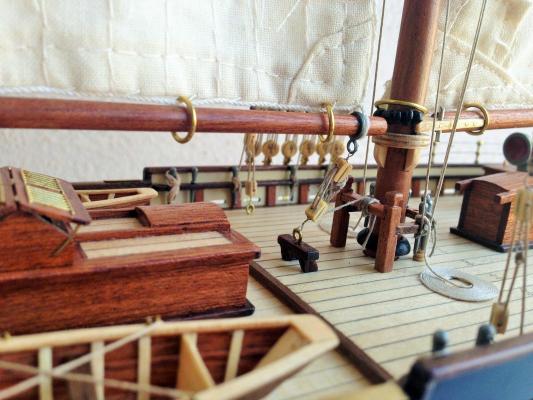
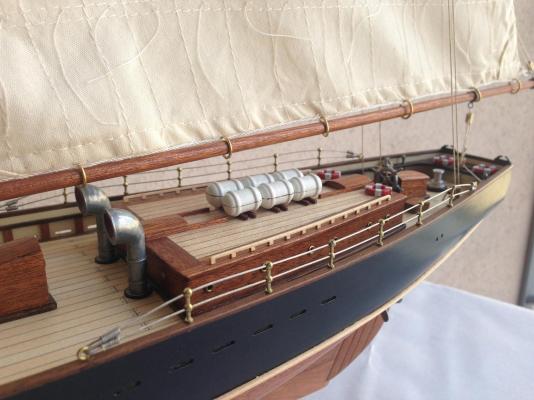
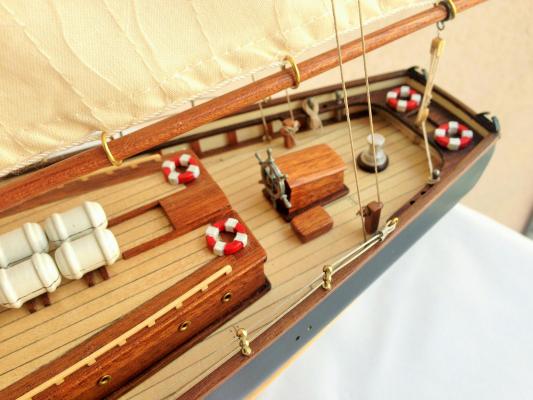
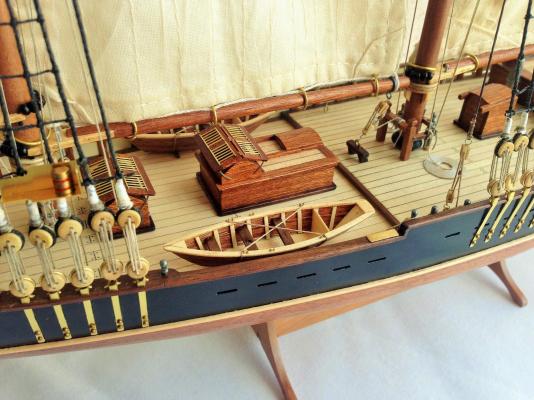
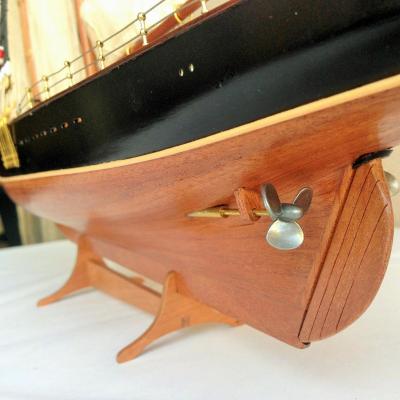
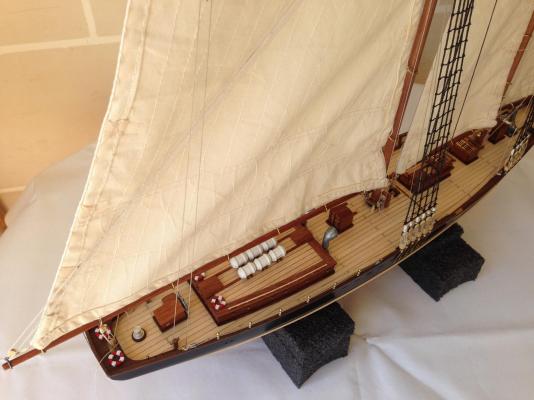
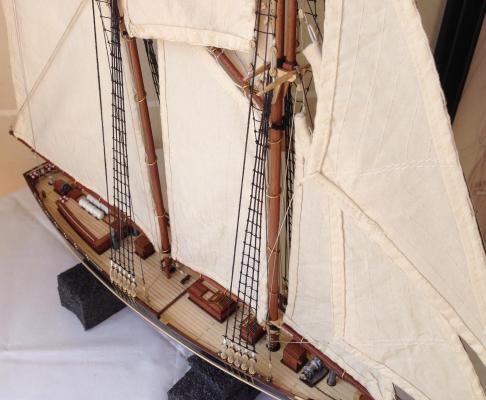
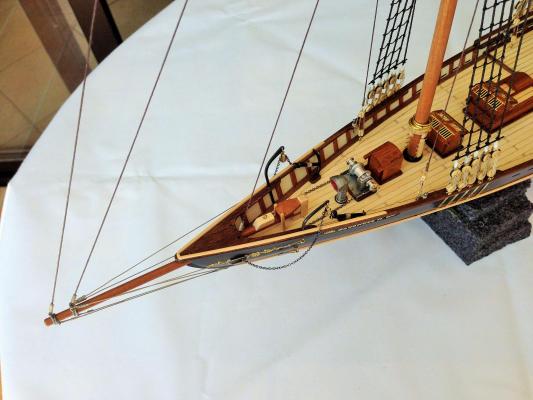
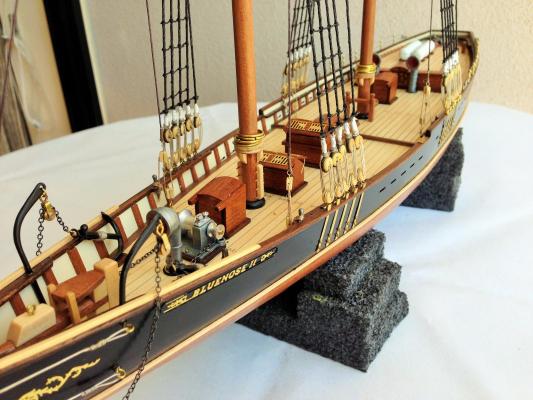
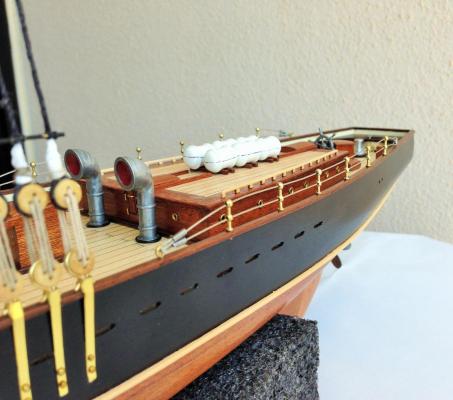
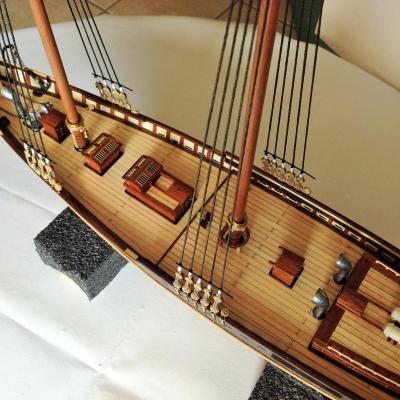
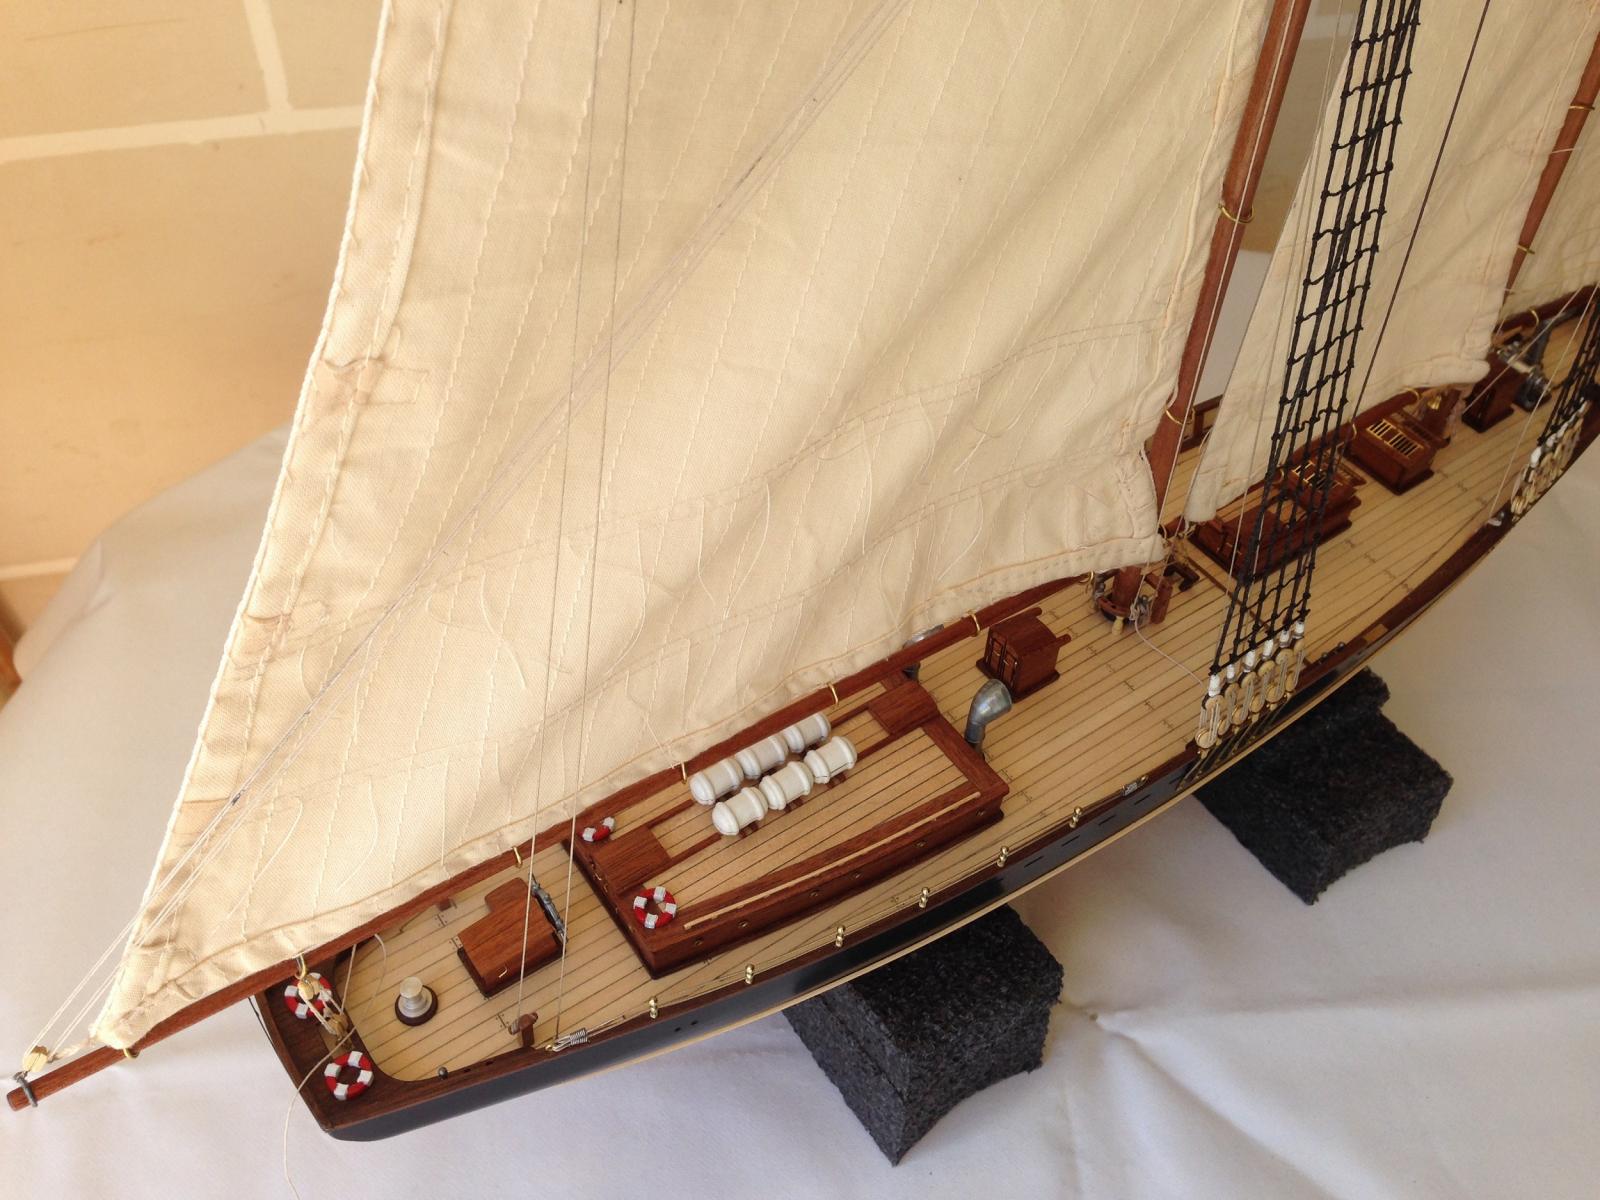
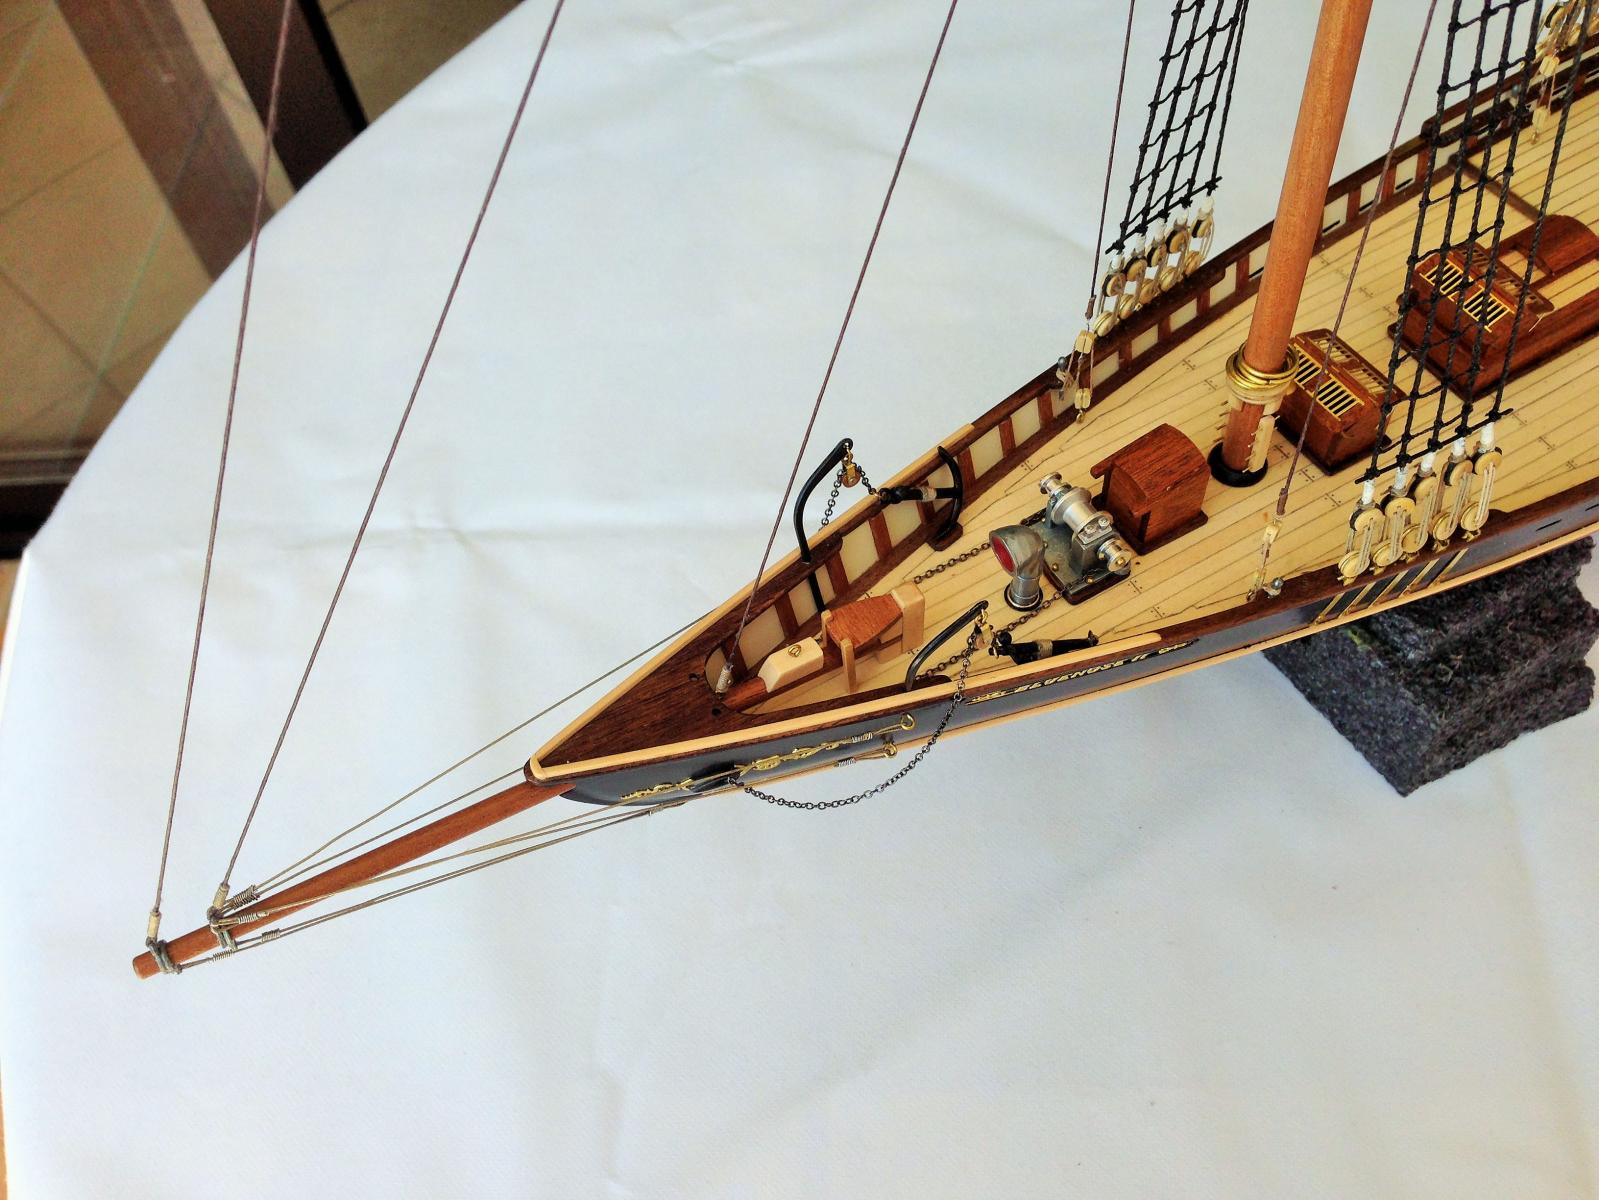
Some photos of the nearly finished boat. Still some deck finishing to go.


Robert
- GuntherMT, Dimitris71, Seventynet and 3 others
-
6
-
David B and Augie - Thank you for your nice comments. Wish I have more time to spend on this beautiful hobby. Hope to have more pictures coming soon.
Robert
-
Some more progress. Still going slow, wish I had more time I could spend on the model.
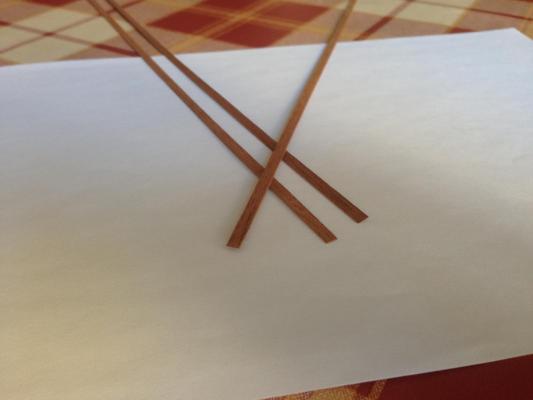
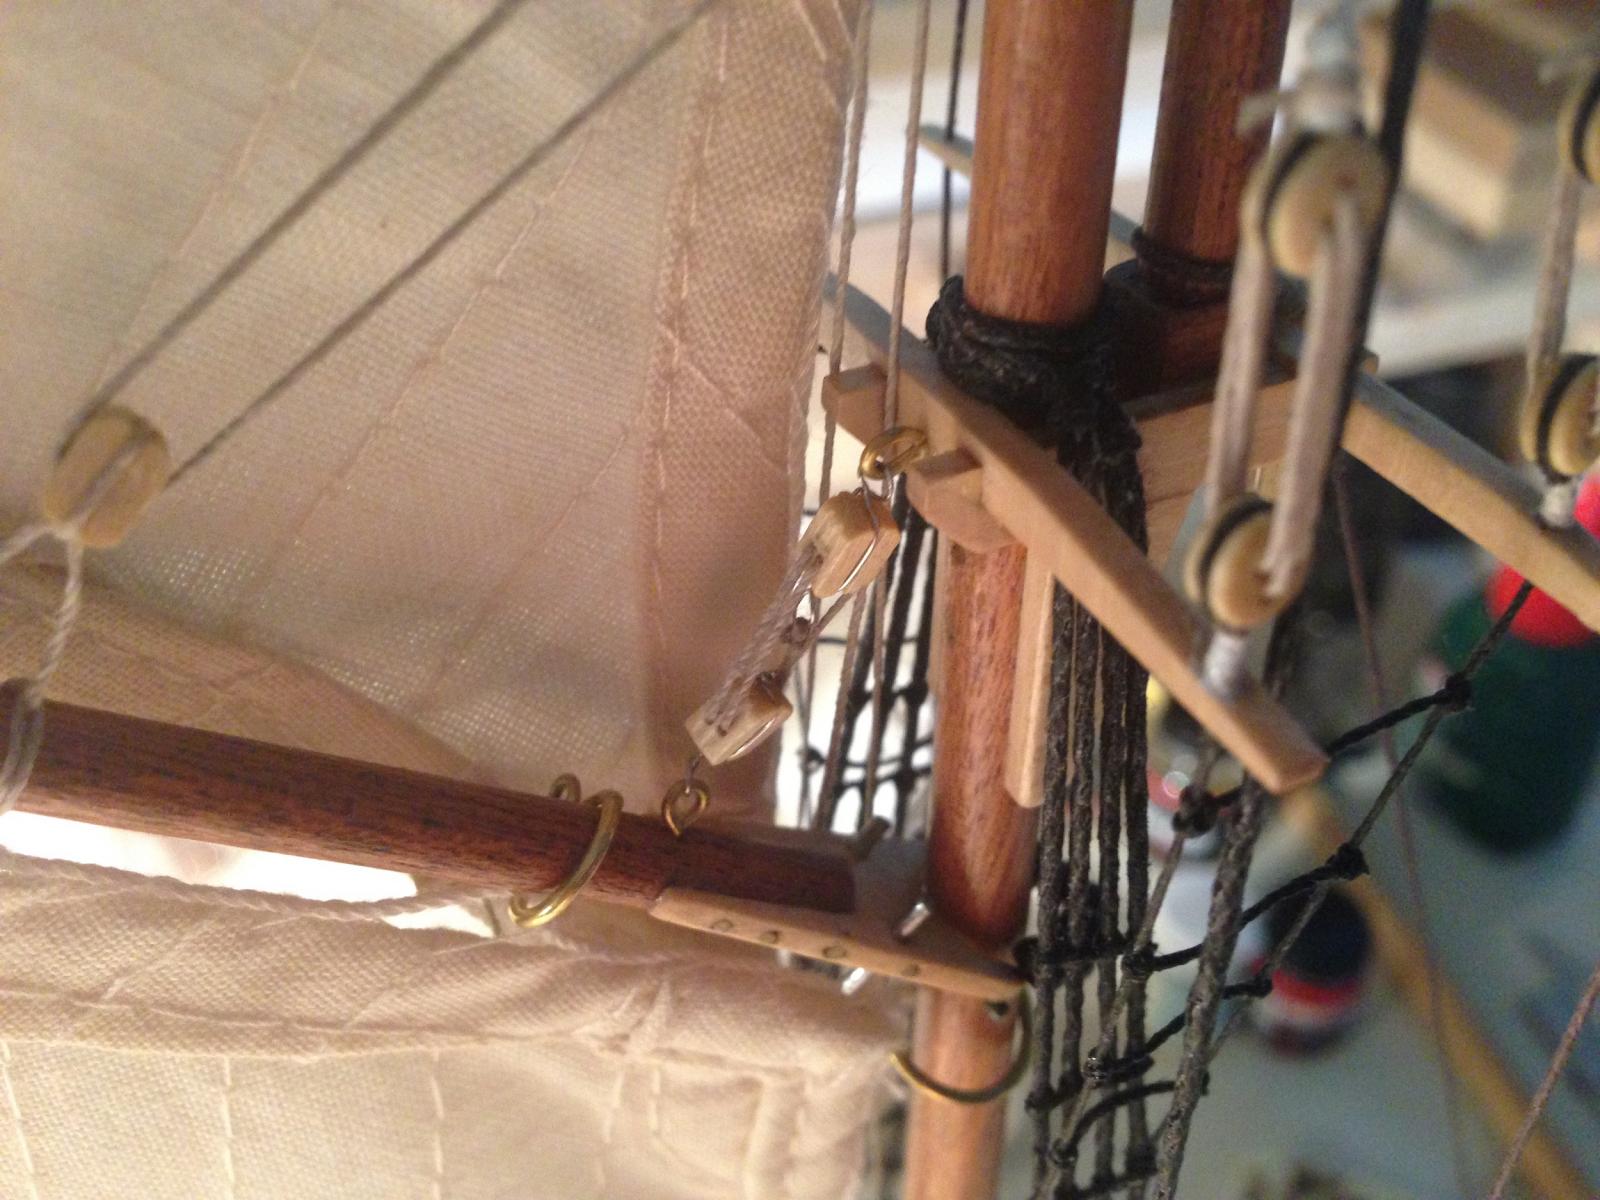
Finished boom jaws.

 .
.Finished Booms and Gaffs

Mor rigging and fixed stanchions and handrails.


Robert

- Mirabell61, Seventynet, mcpwilk and 4 others
-
6
-
 1
1
-
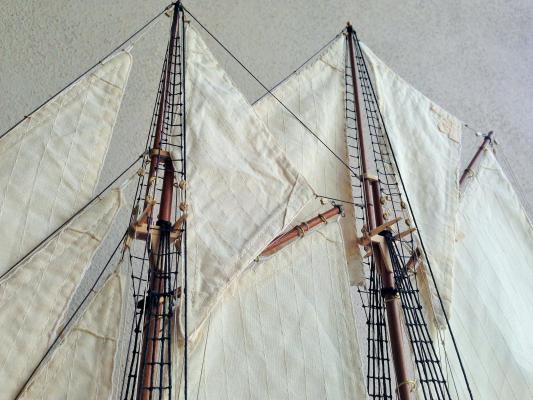
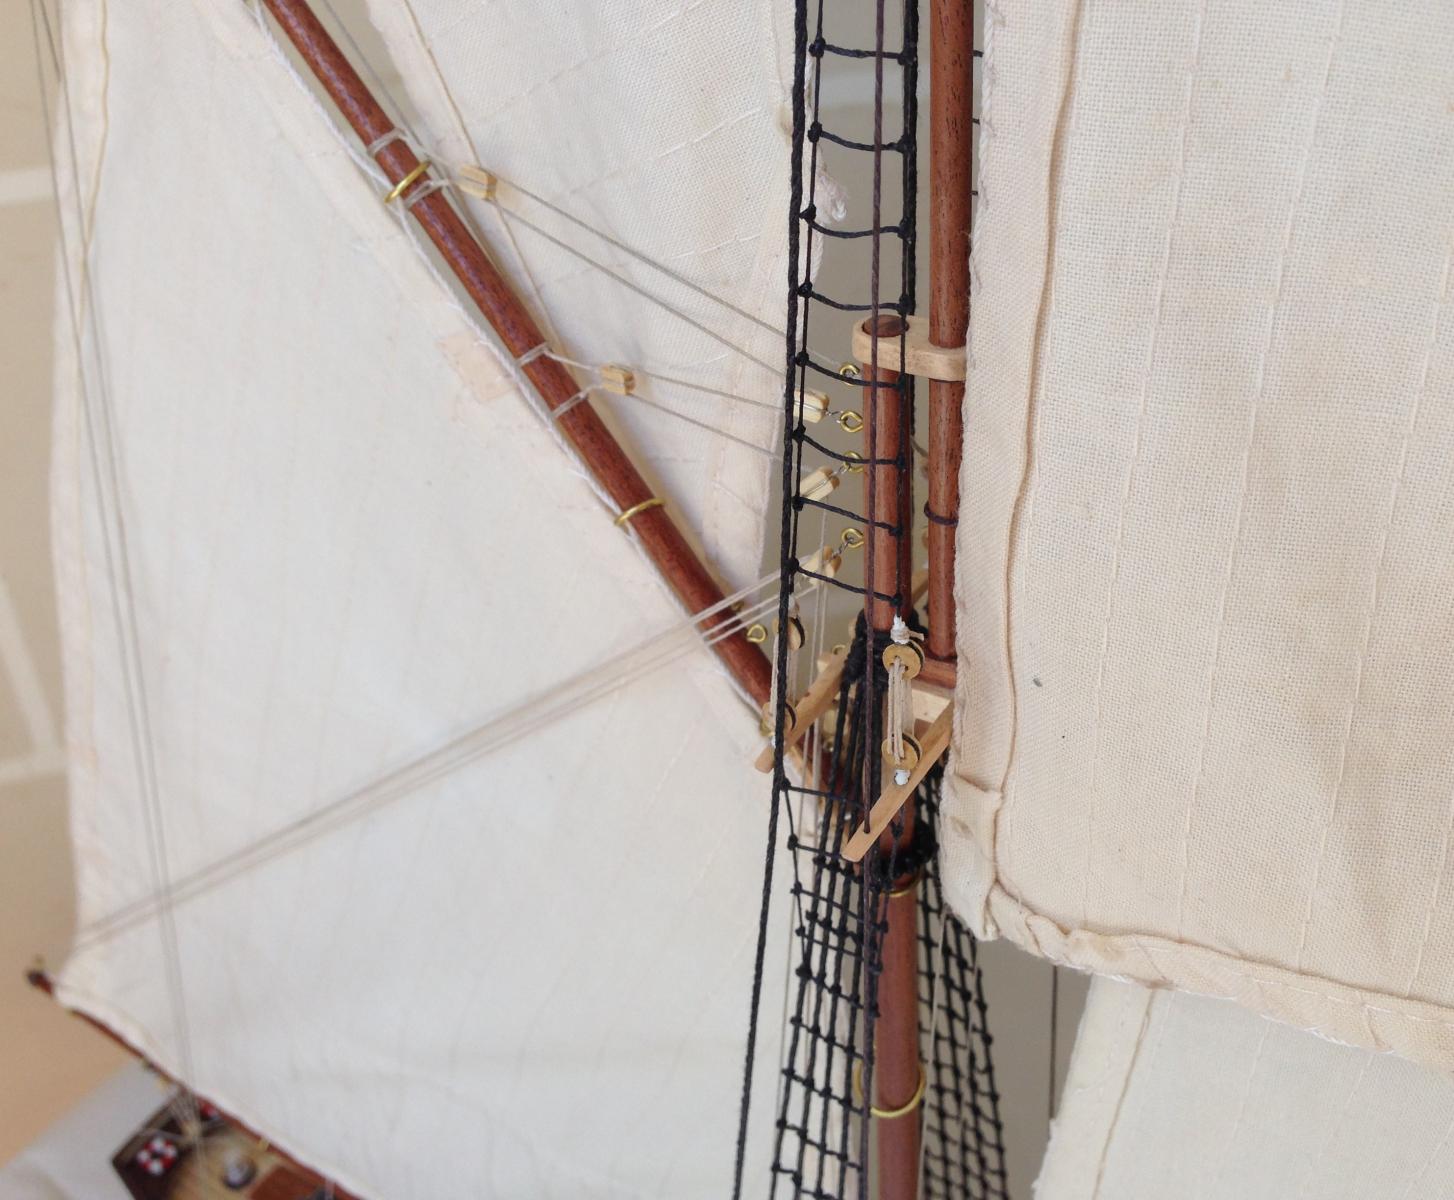
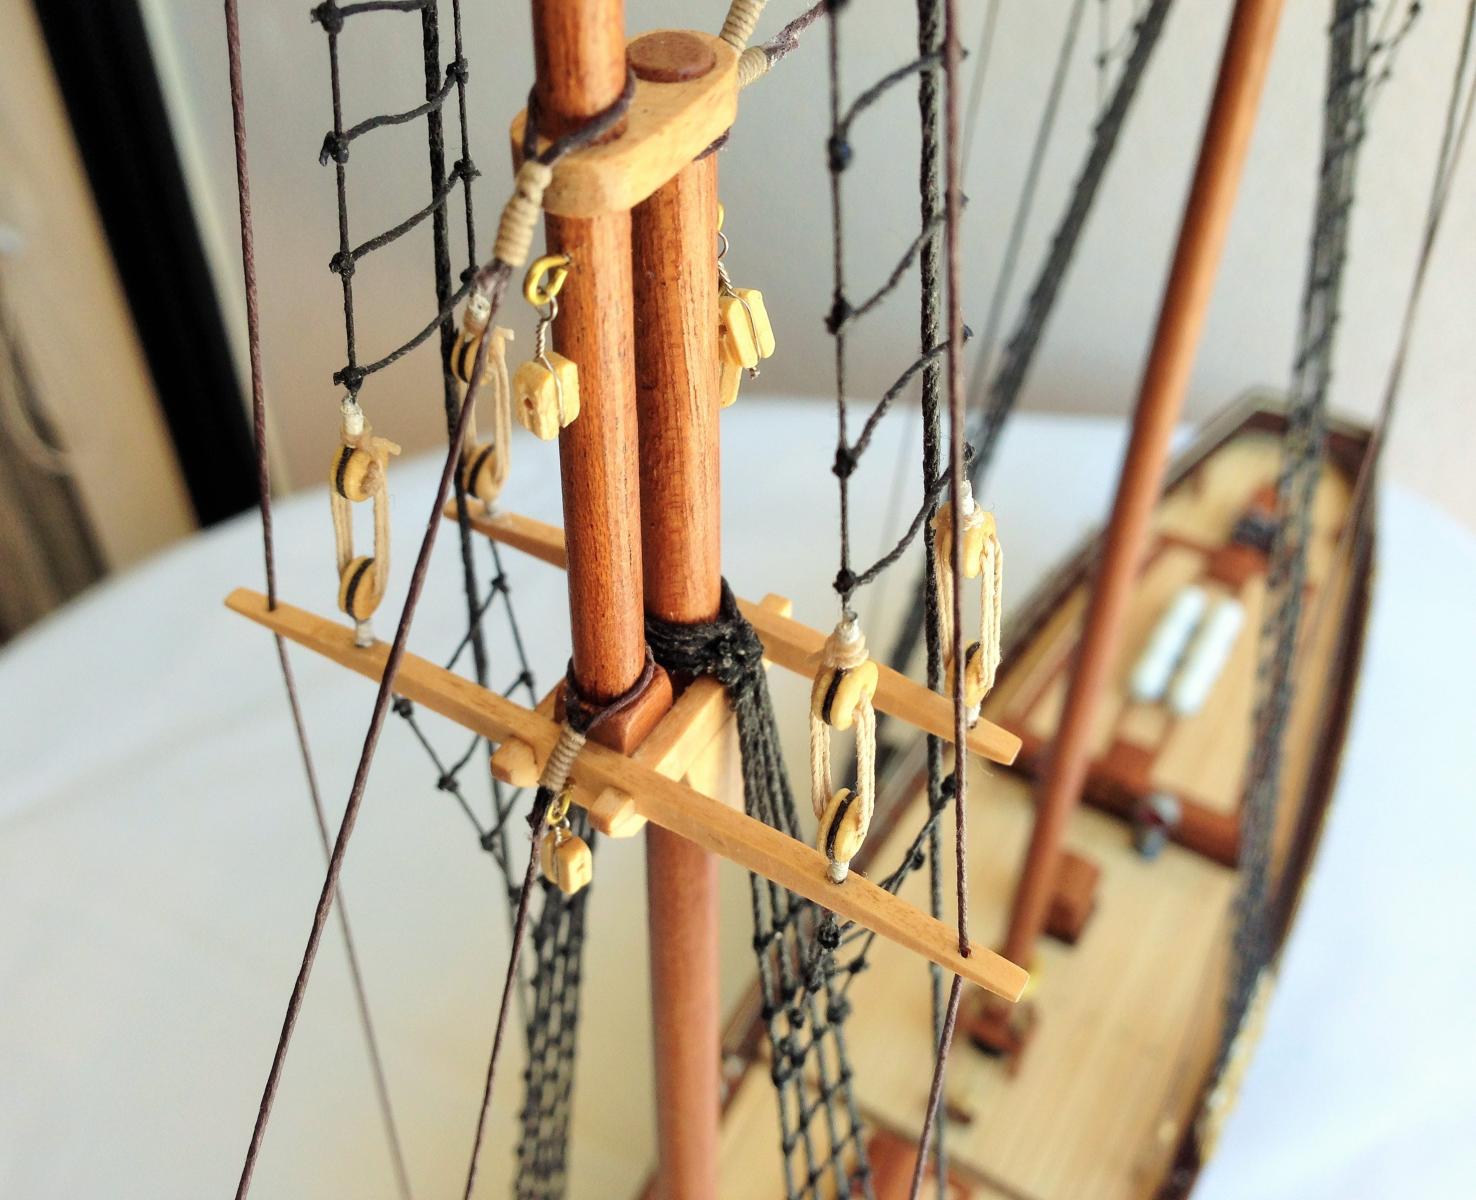
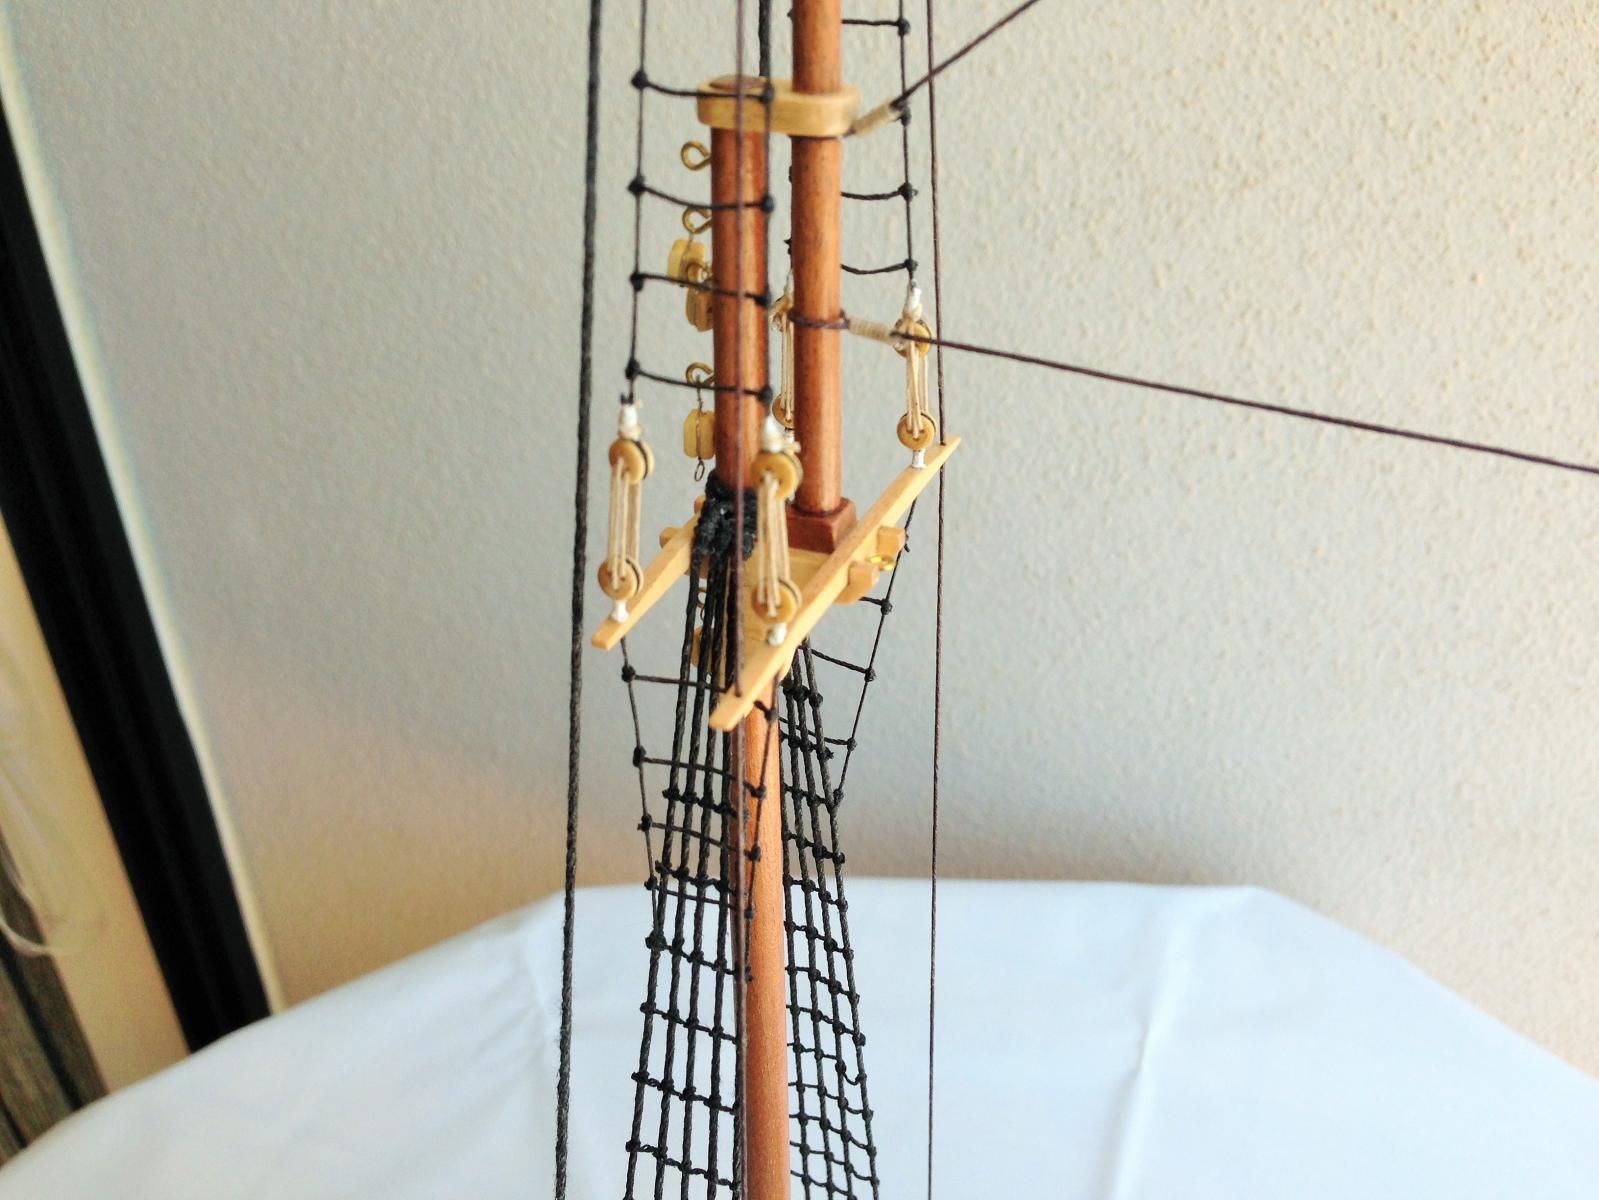
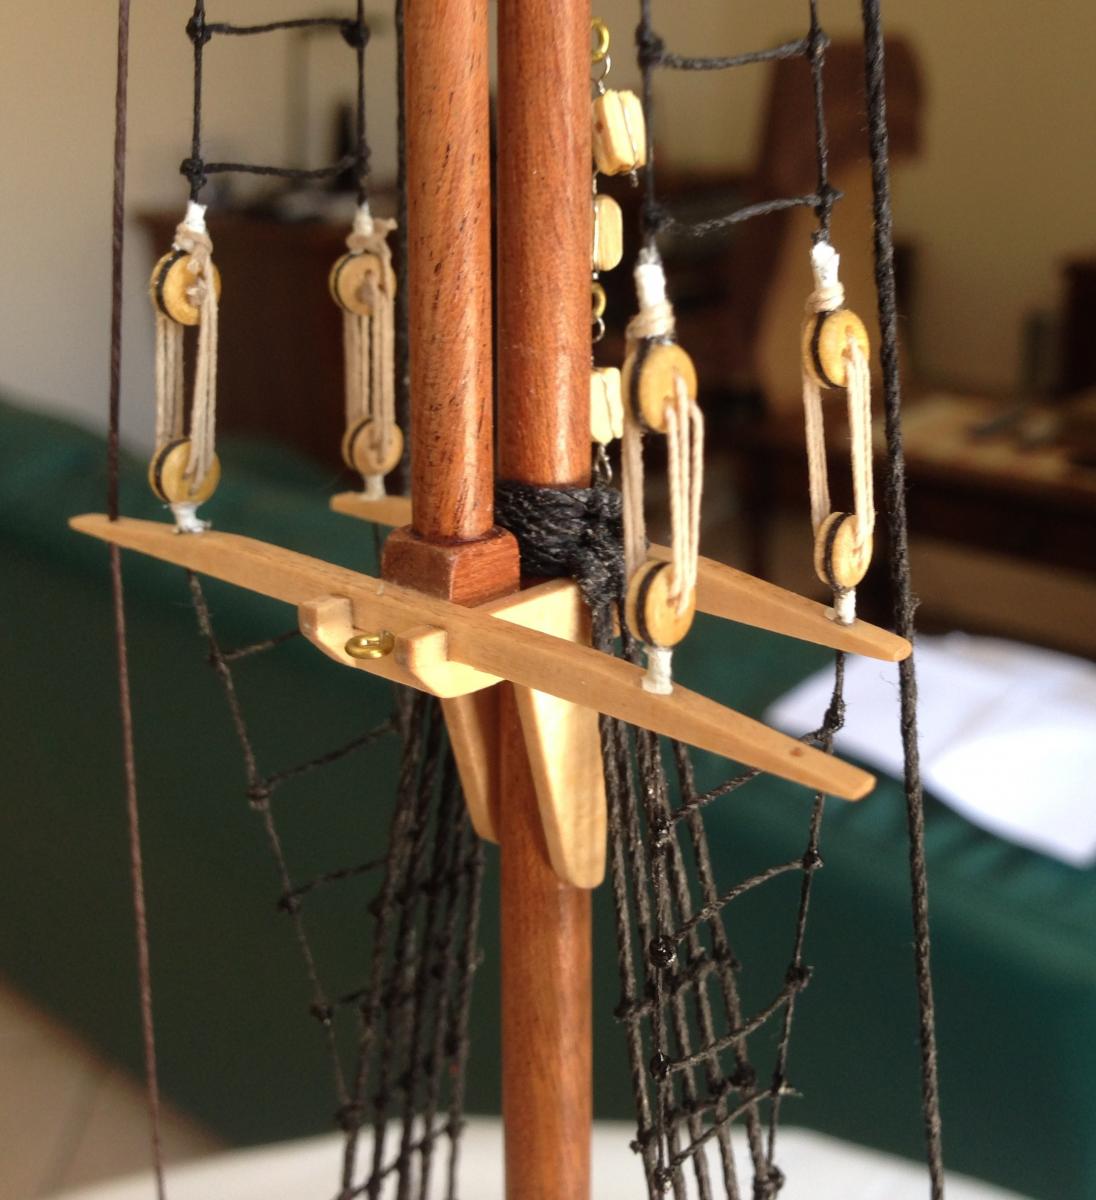
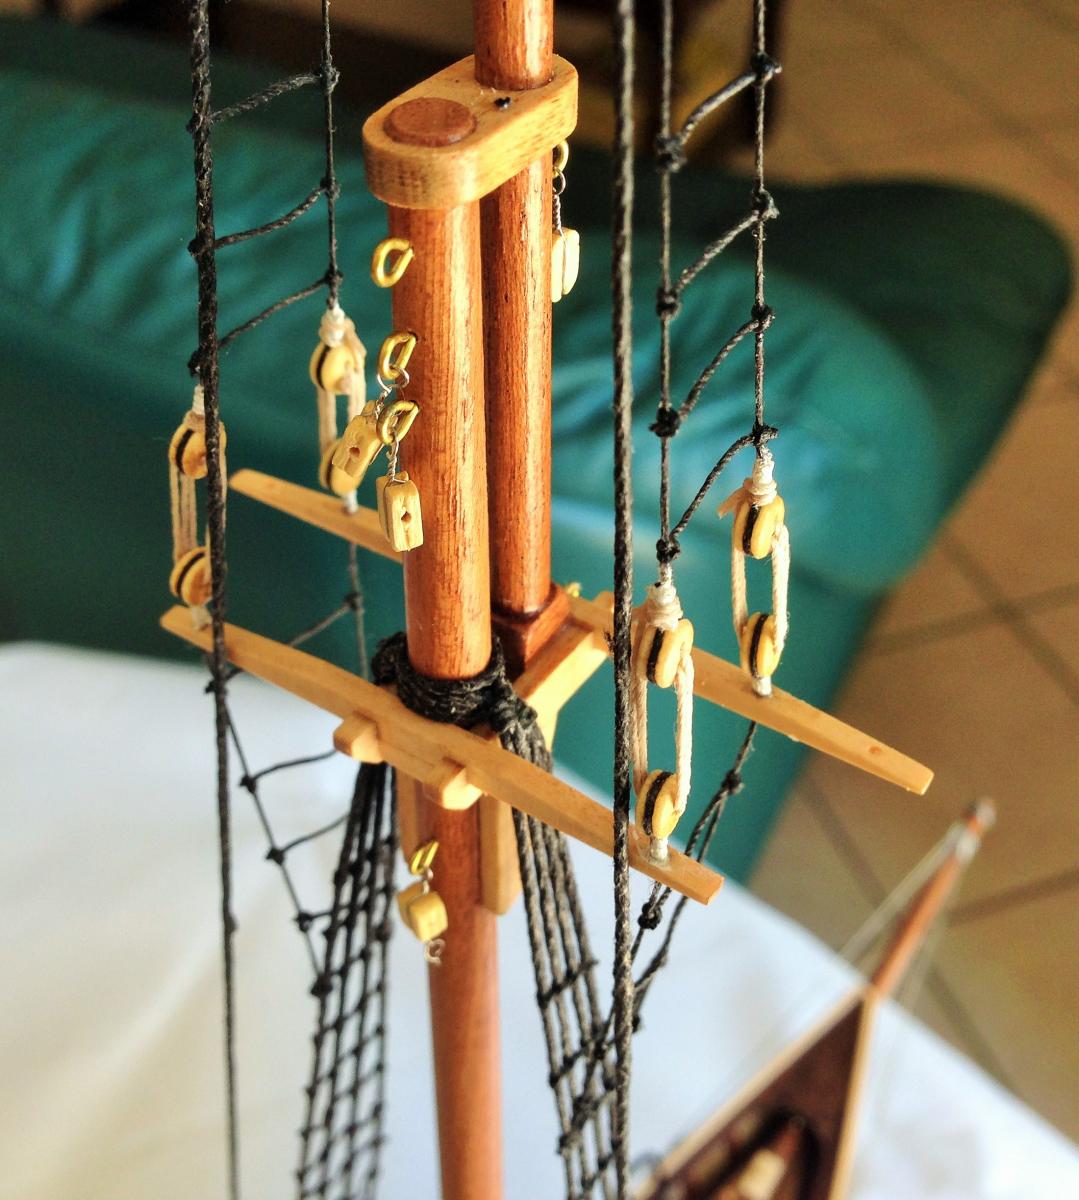
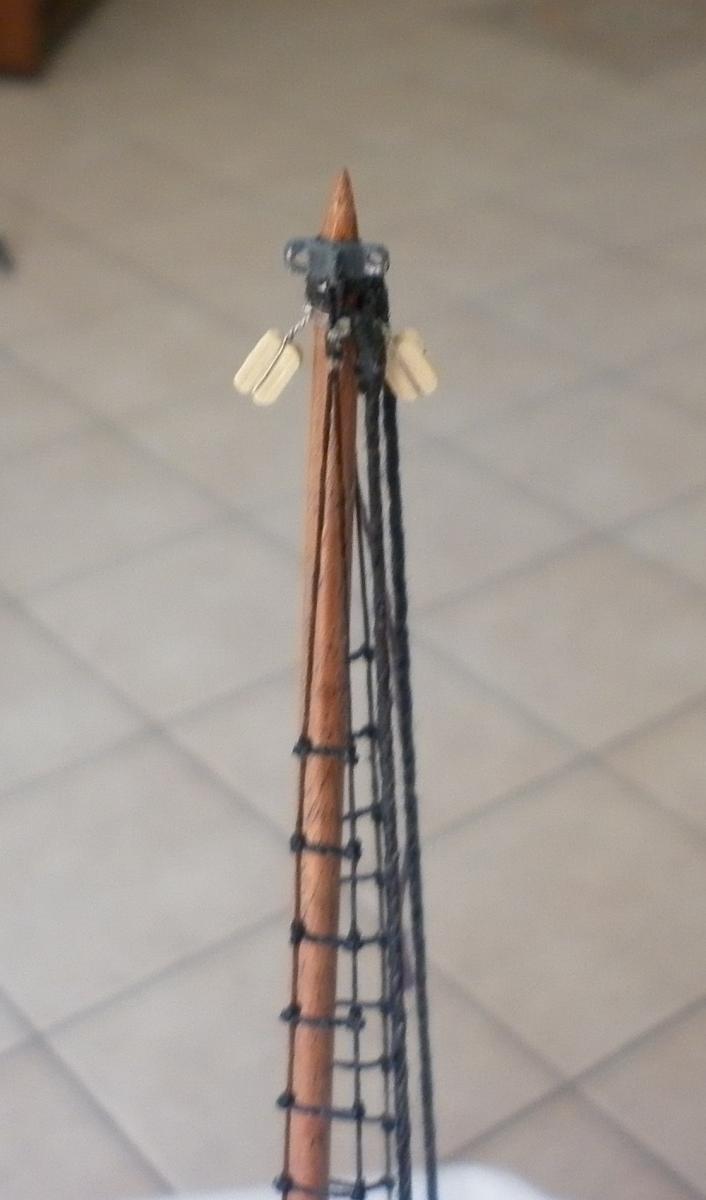
Ratlines for Topmasts ready and Backstays in place.


 .
.Now working on remaining stays.

Robert
- dgbot, thomaslambo, Dimitris71 and 1 other
-
4
-
Some more pictures. Ratlines for lower masts ready.
- dgbot, thomaslambo, Mirabell61 and 1 other
-
4
-
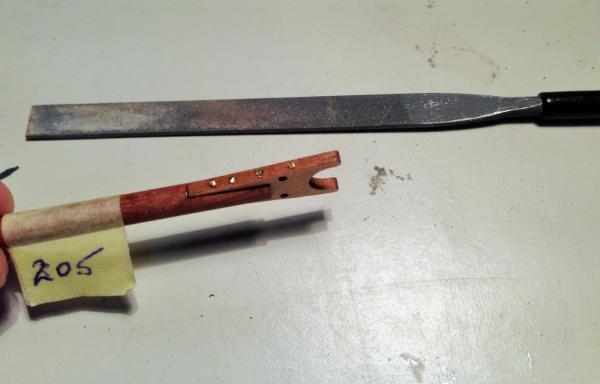
Thanks for the comment Jerry. I cut the vents on the bulwarks before I fitted and before I painted them, contrary to the instructions. First I marked all the vents on the bulwarks with the help of the template provided with the kit. I drilled three holes for each vent, two at the sides and one in the middlt. With a knife I trimmed out the remaining material. Then I finished them with a small flat file and a nail file trimmed to fit the vents I think it is easier to cut them before you fit the bulwarks in place.
-
Very detailed. I can imagine she is going to be magnificent when finished.
- Omega1234, Dimitris71 and thomaslambo
-
3
-
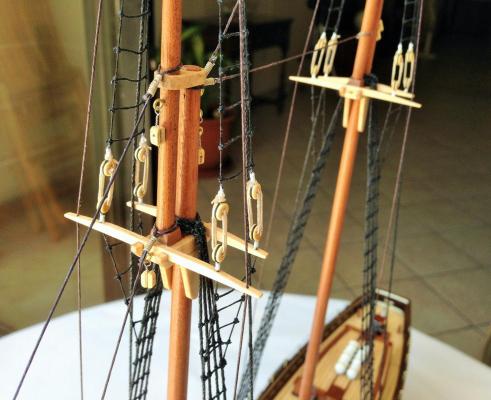
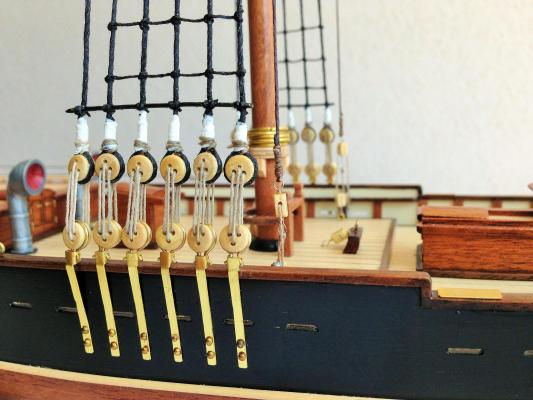
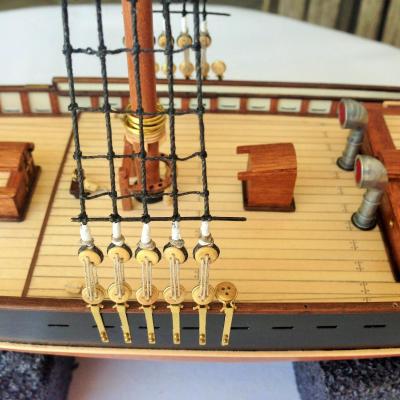
Some more photos.
Masts fixed on deck. Used carpenter's white glue to give me ample time to adjust alignment.
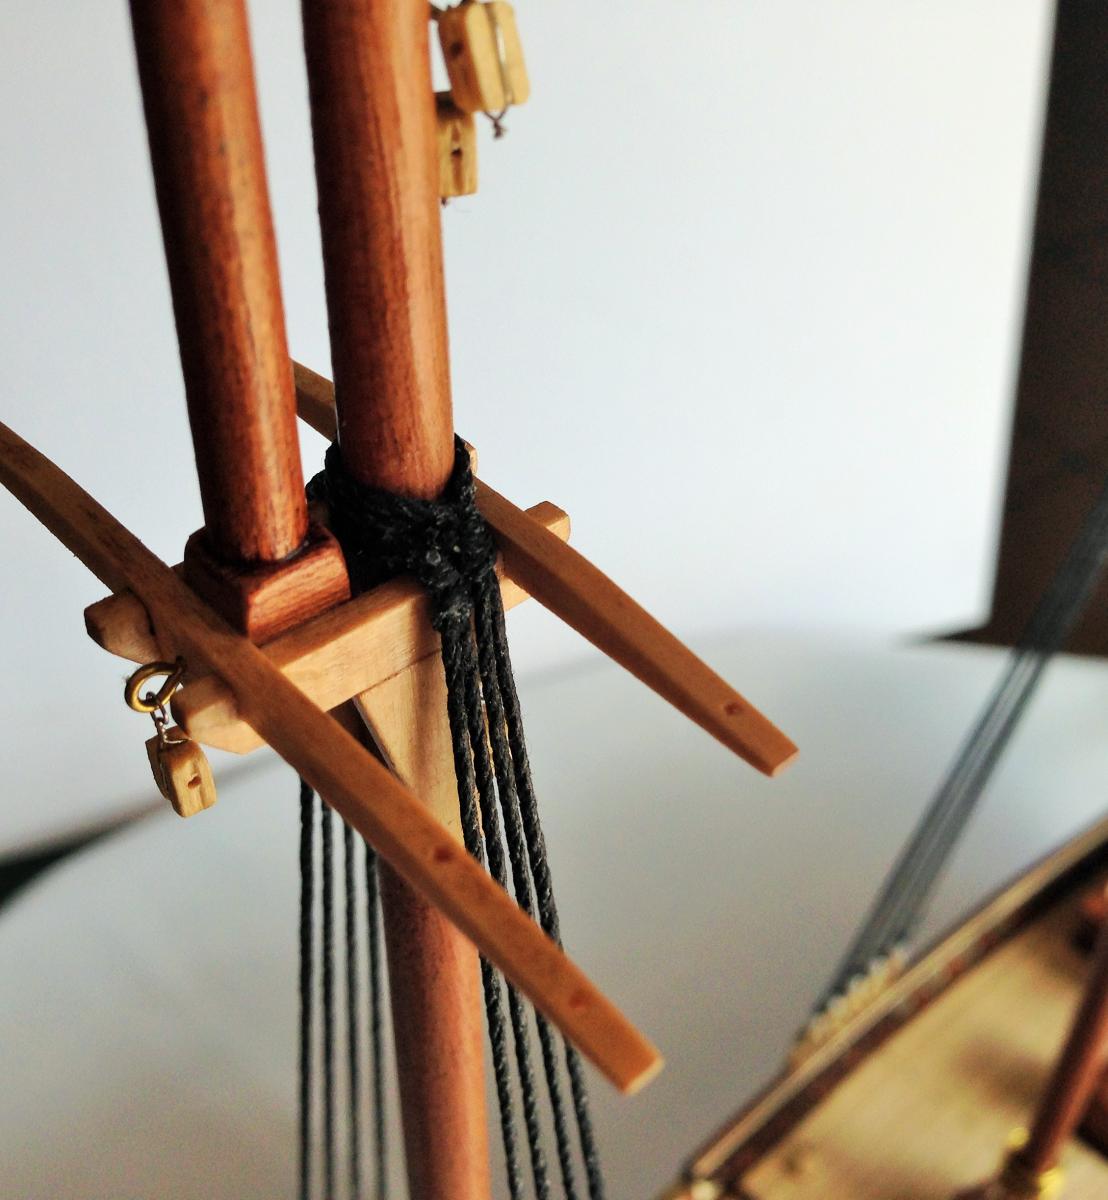
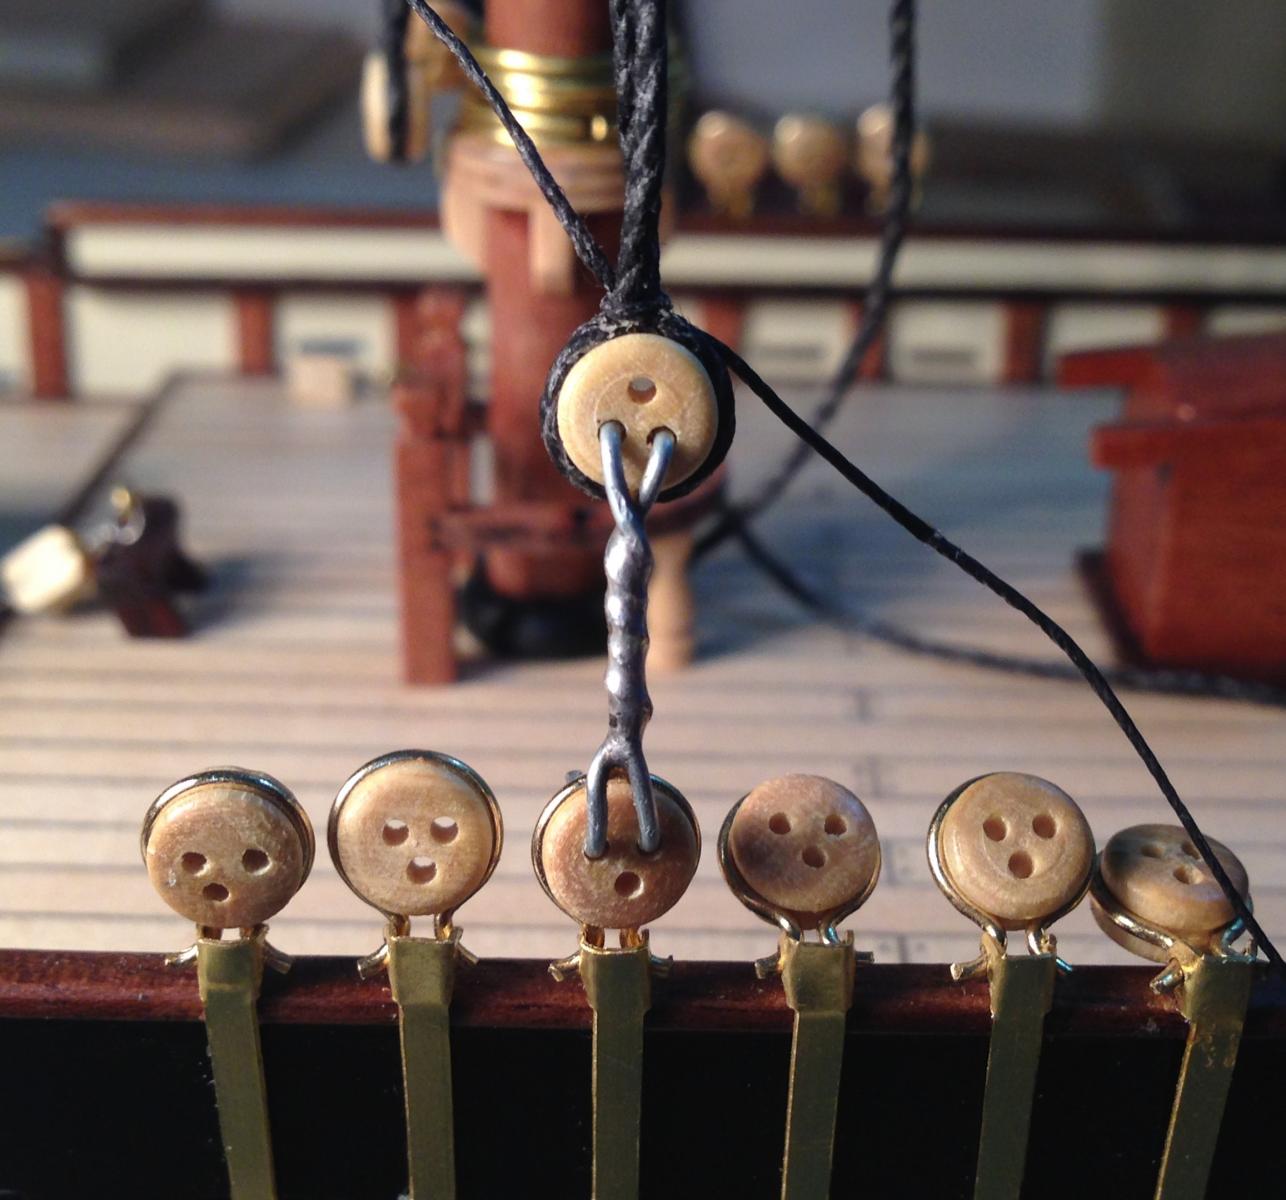
Shrouds tied on masts.

I made a jig for the dead-eyes to have the shrouds as close as possible to the right length. I've seen this idea in one of the forums, don't remember which.

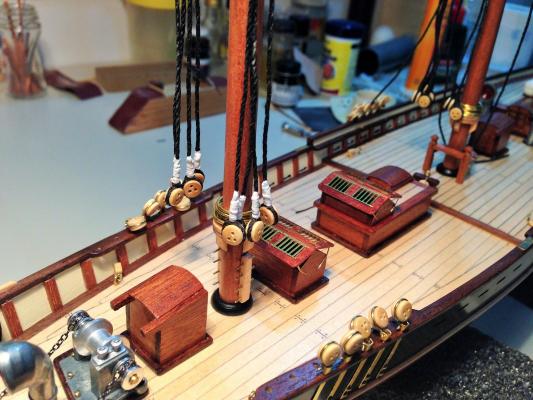
Dead-eyes for the lower mast all in place.

Ready for the ratlines.
Robert
- Mirabell61, smokepole, GuntherMT and 3 others
-
6


HMS Victory 1805 by Robert29 - FINISHED - Caldercraft - Scale 1:72
in - Kit build logs for subjects built from 1751 - 1800
Posted · Edited by Bertu
Not much progress. Had a busy week.
Cobr@
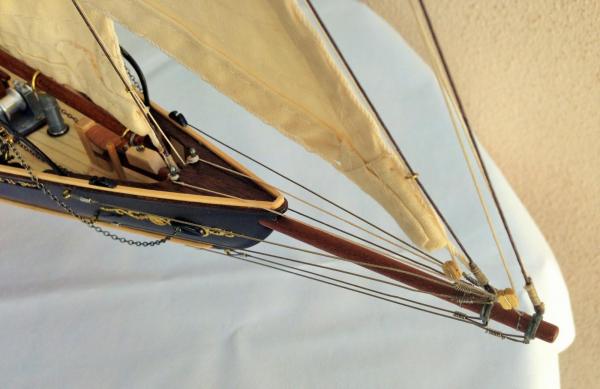
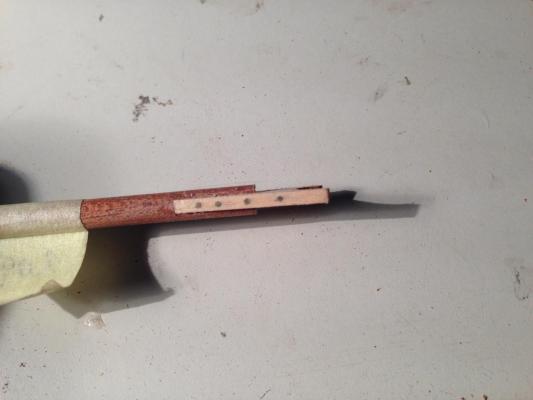
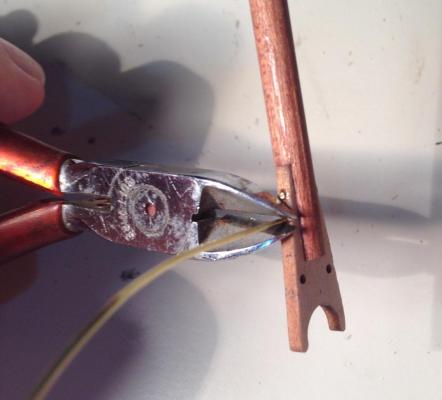
Thank you very much for bringing that to my attention. Hadn't noticed that yet and I think I could have easily overseen it until it's too late. It sure needed a lot of trimming to take the bowsprit dowel and as you said there is no way you can trim it without having to remove again the front part.
Nick / Ian
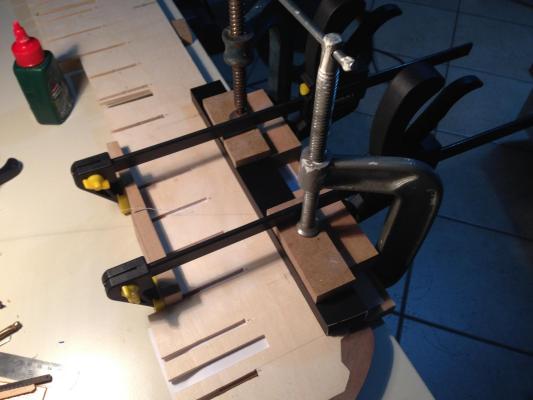
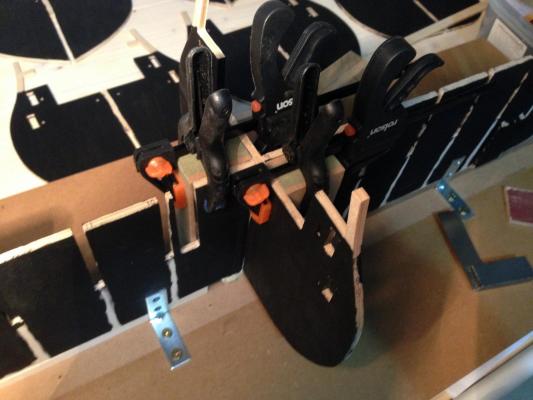
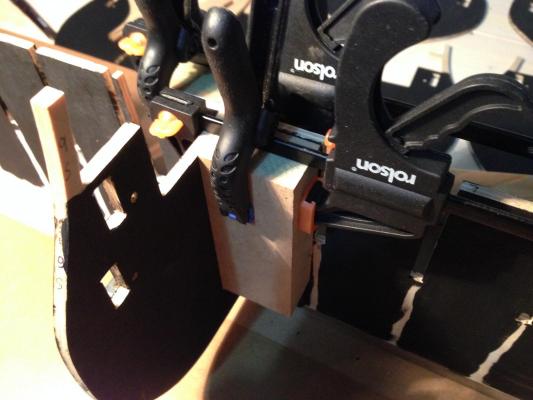
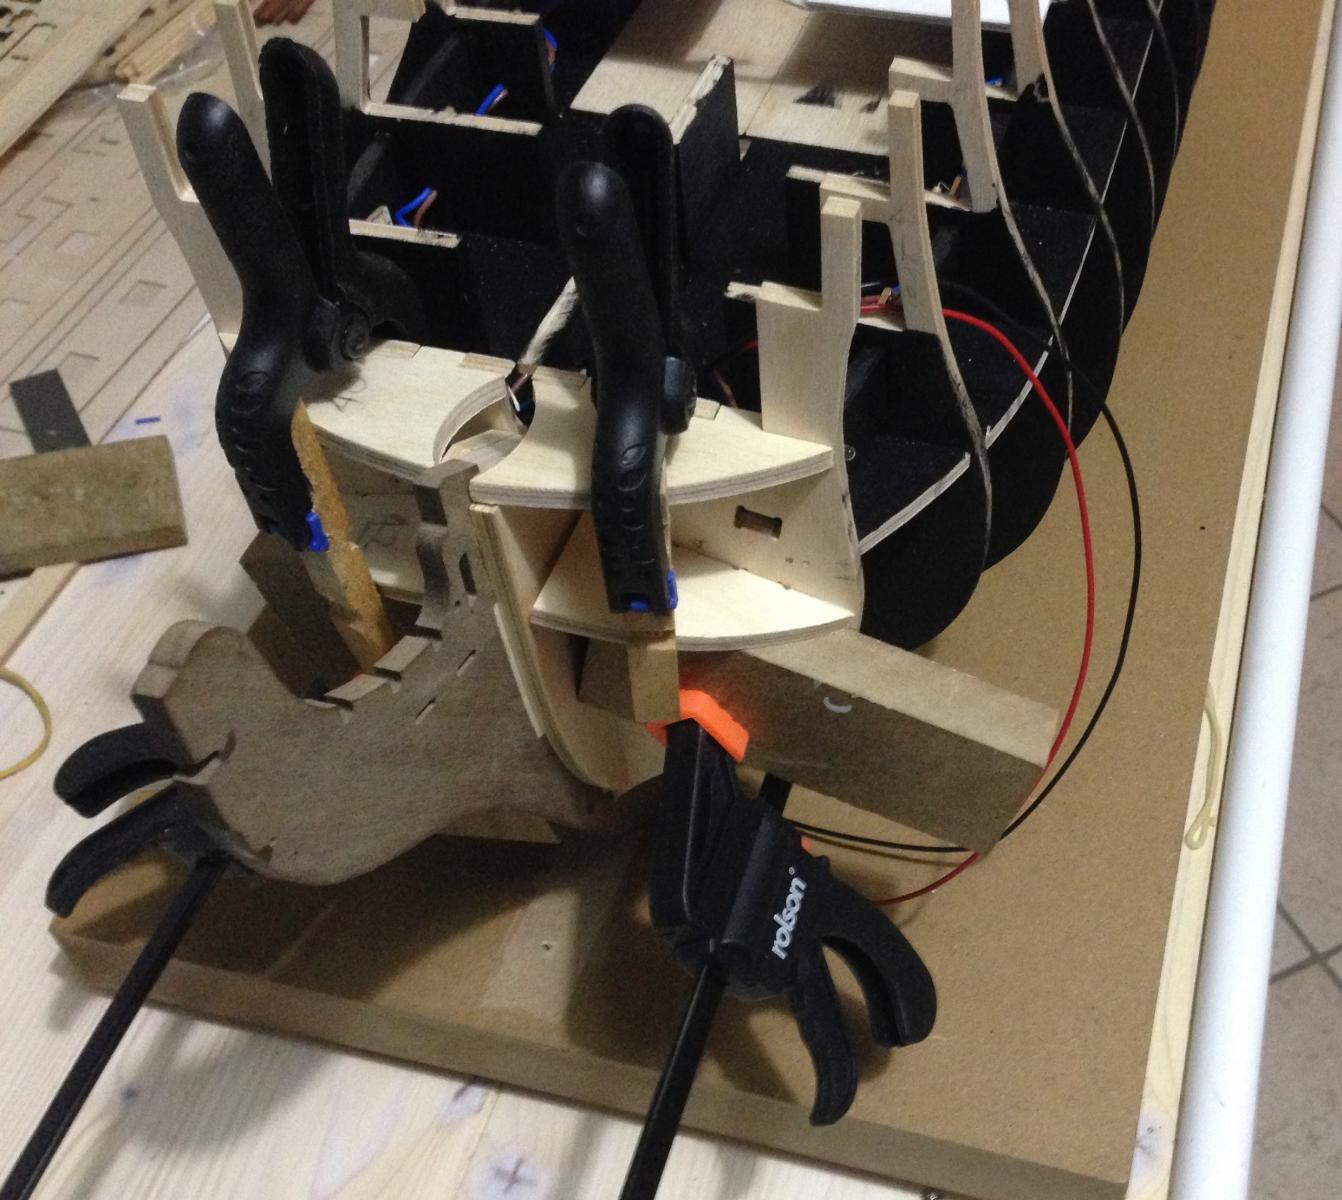
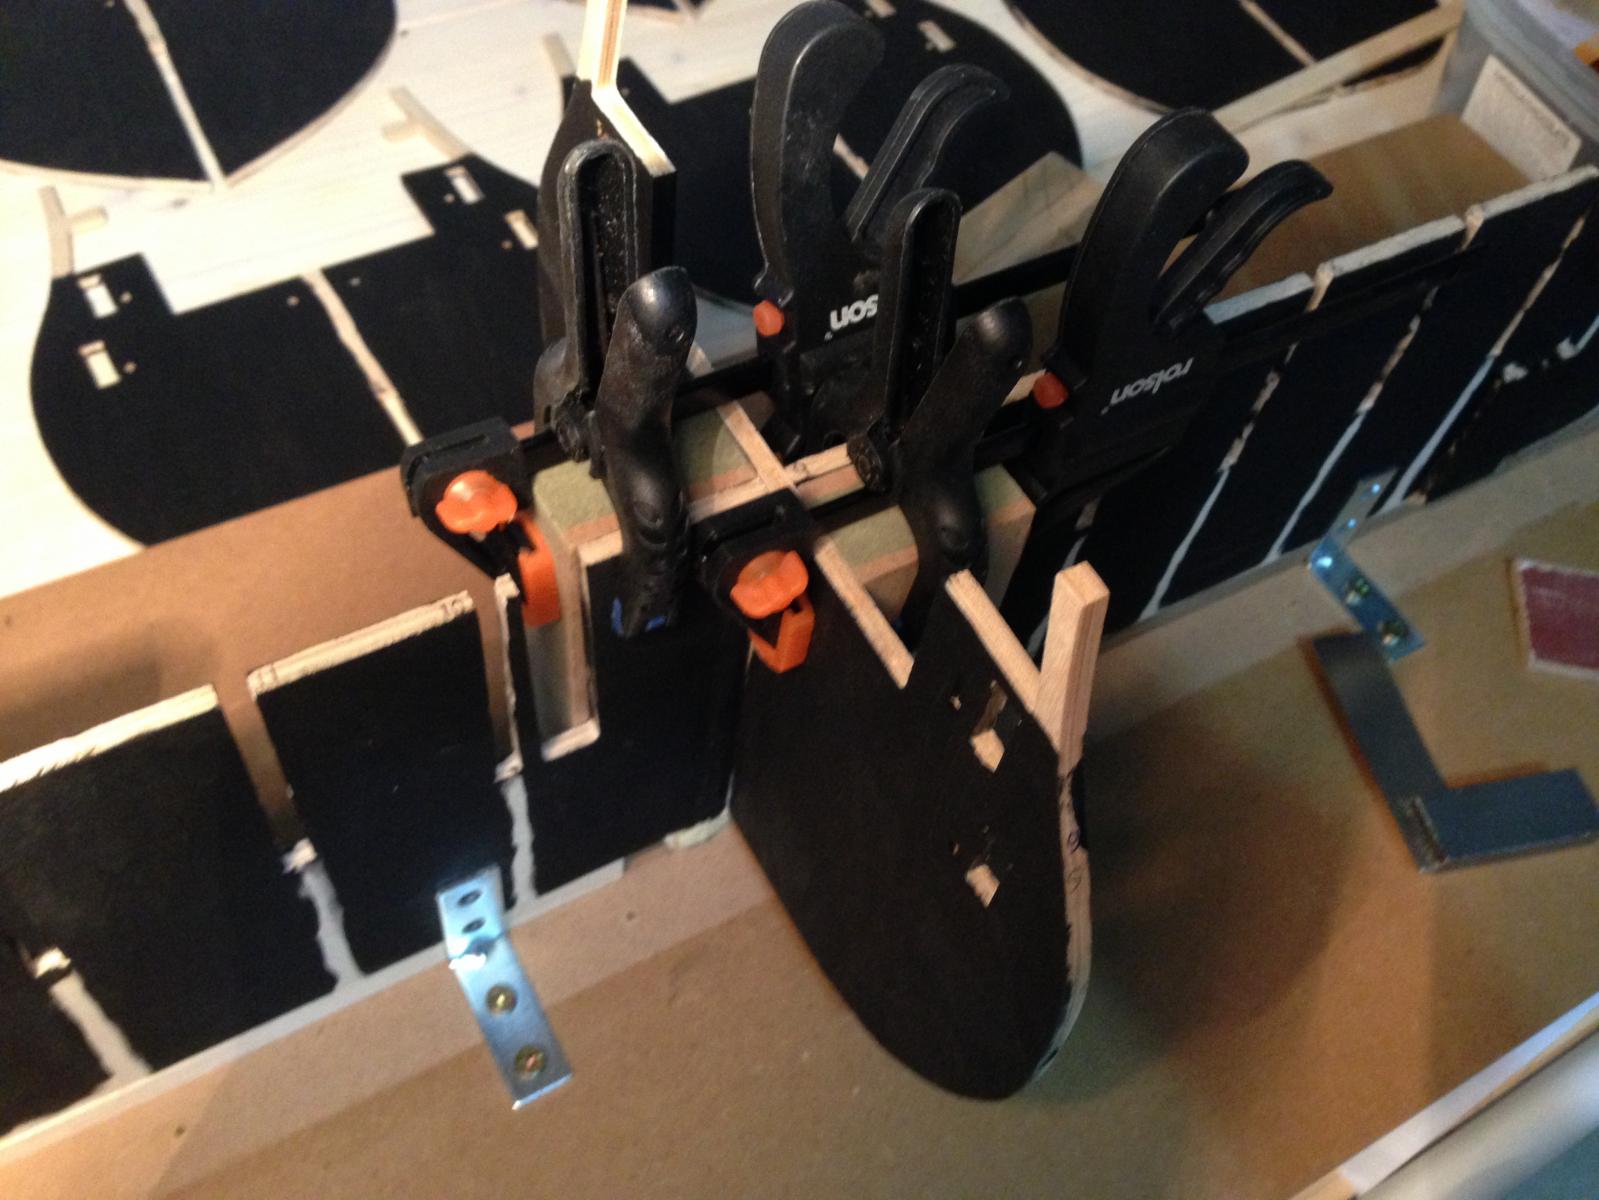
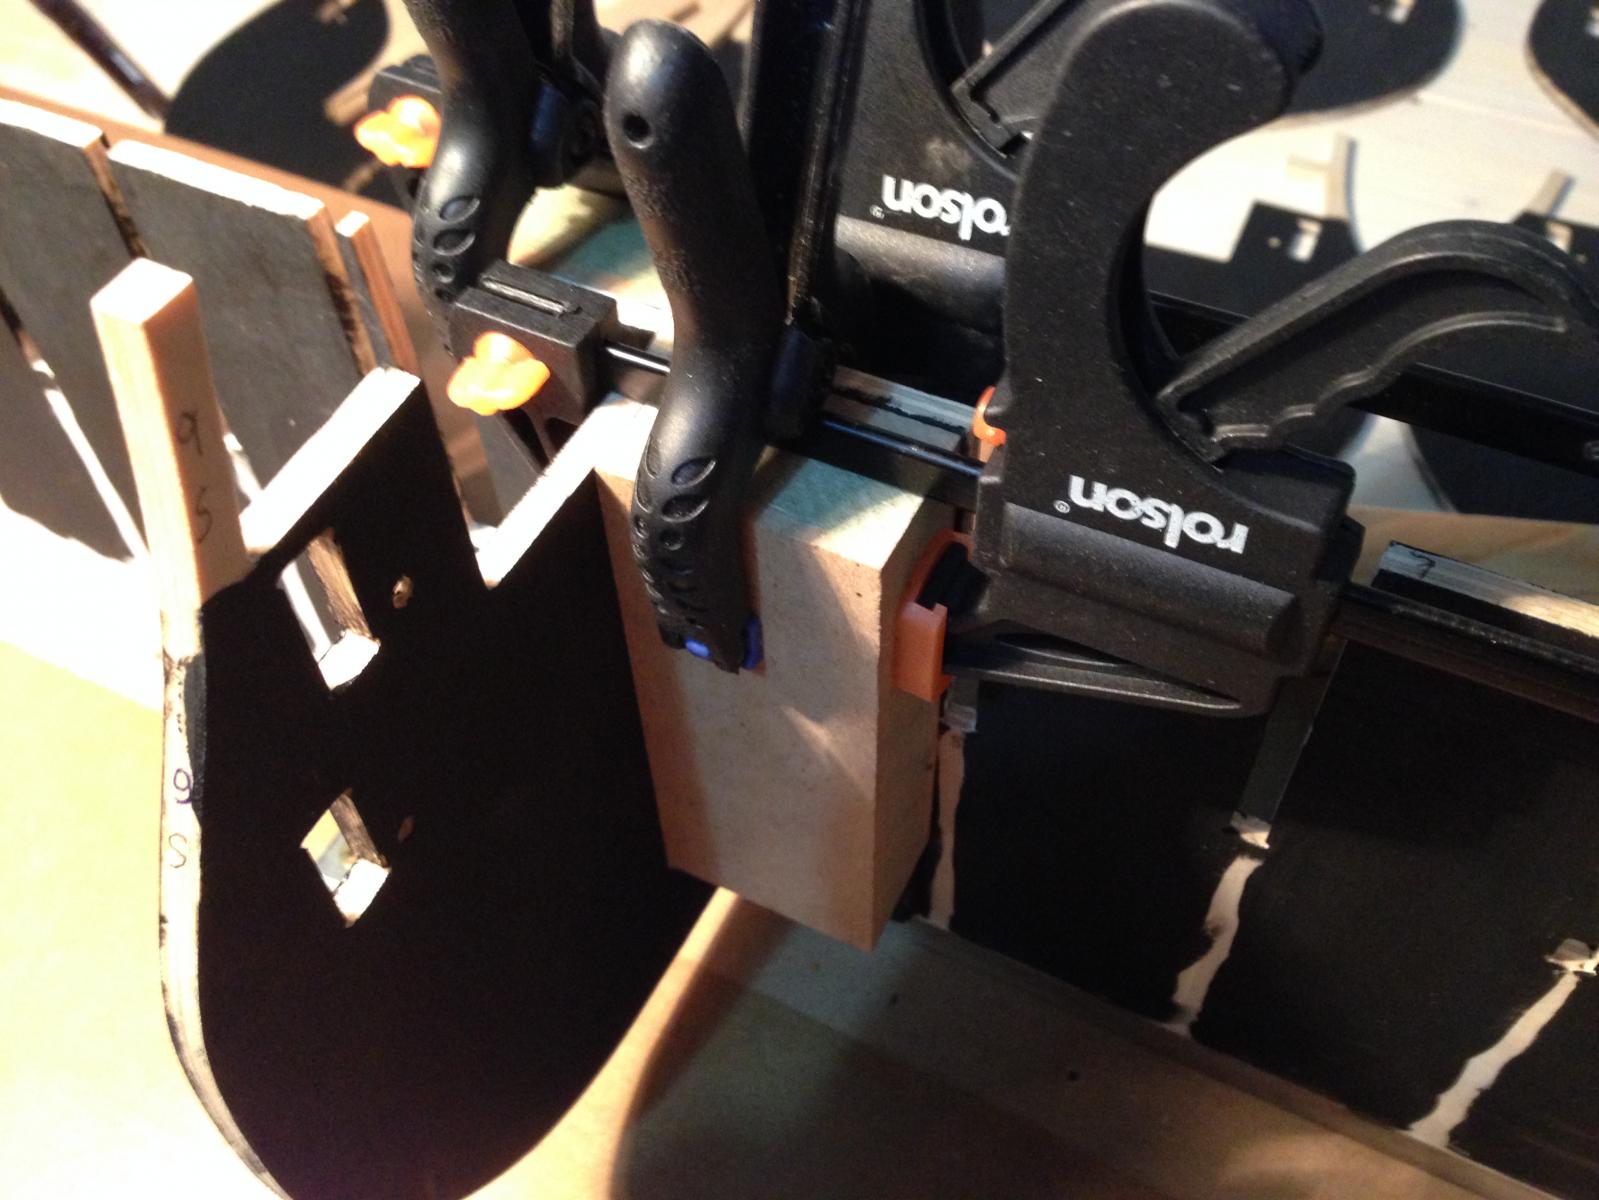
Finished the filler blocks as you suggested. I can see now how much easier it will be when it comes to planking.
Mtaylor / Rob
Thank you for your nice comments.
Here are a few images:
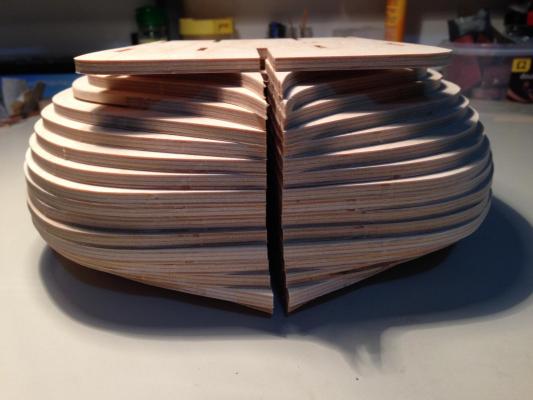
Bow Filler Blocks
Stern Filler Blocks
Ready for the final sanding
Thank you for the likes. My next step is the gunport patterns.
Robert