rafine
-
Posts
2,932 -
Joined
-
Last visited
Content Type
Profiles
Forums
Gallery
Events
Everything posted by rafine
-
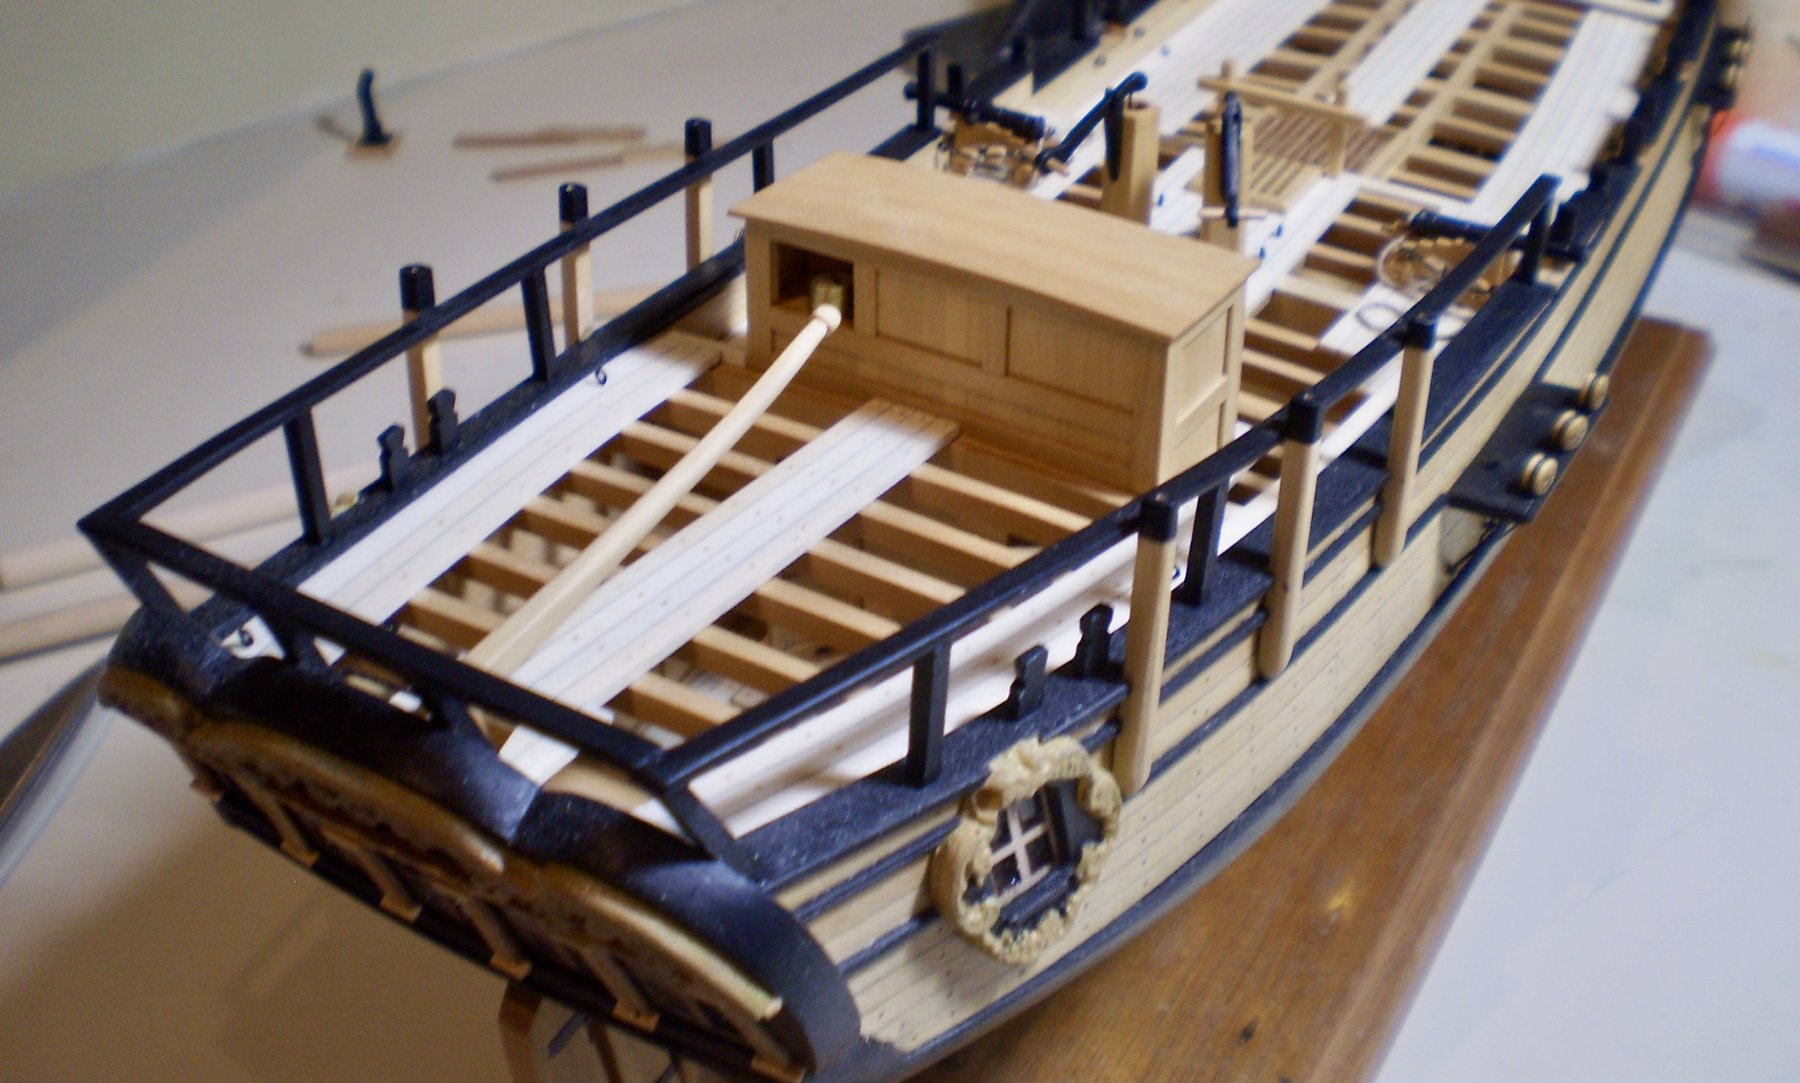
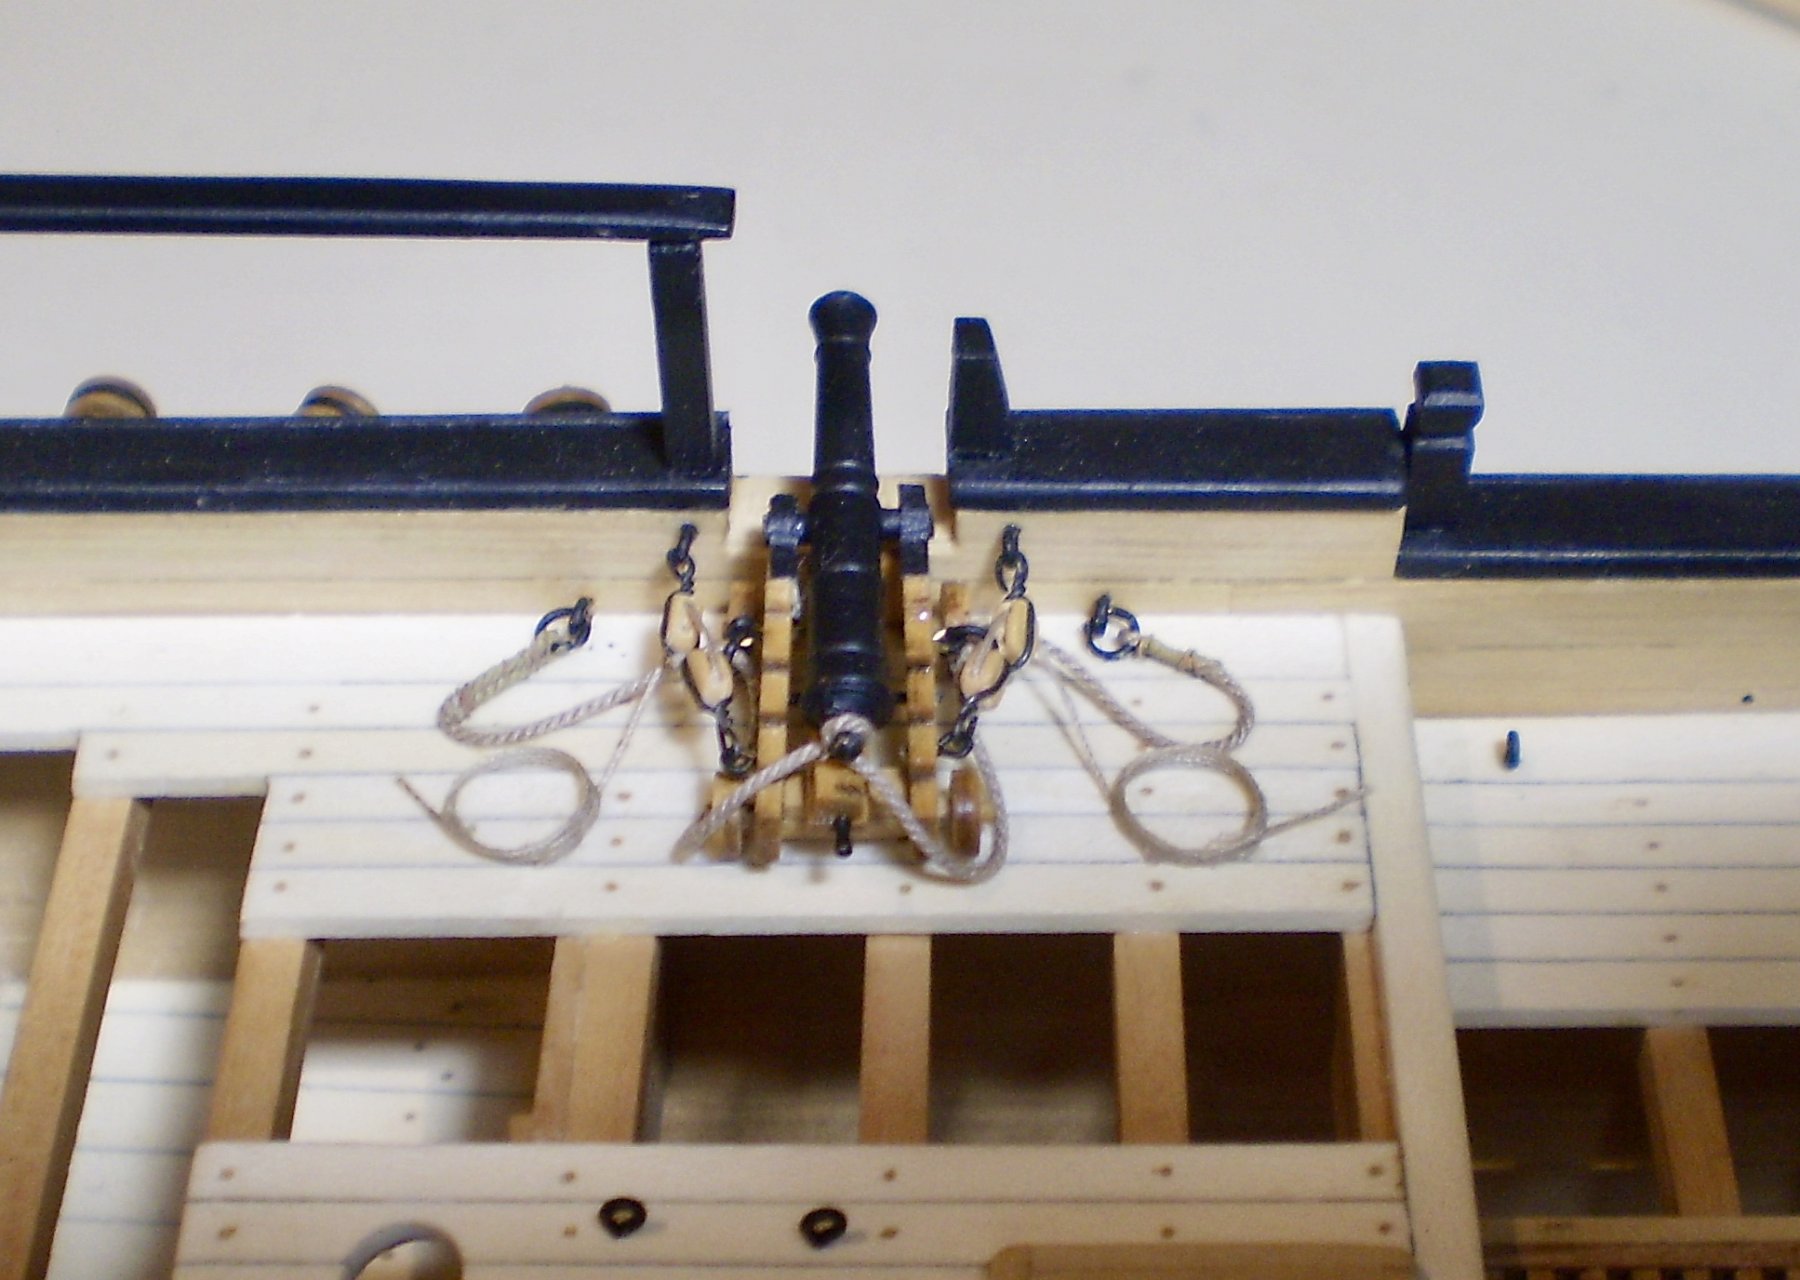
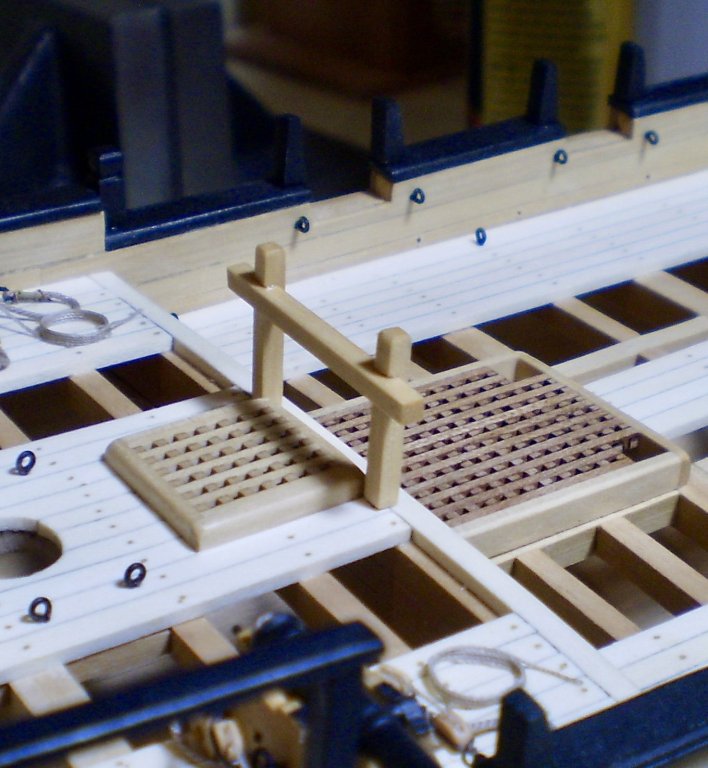
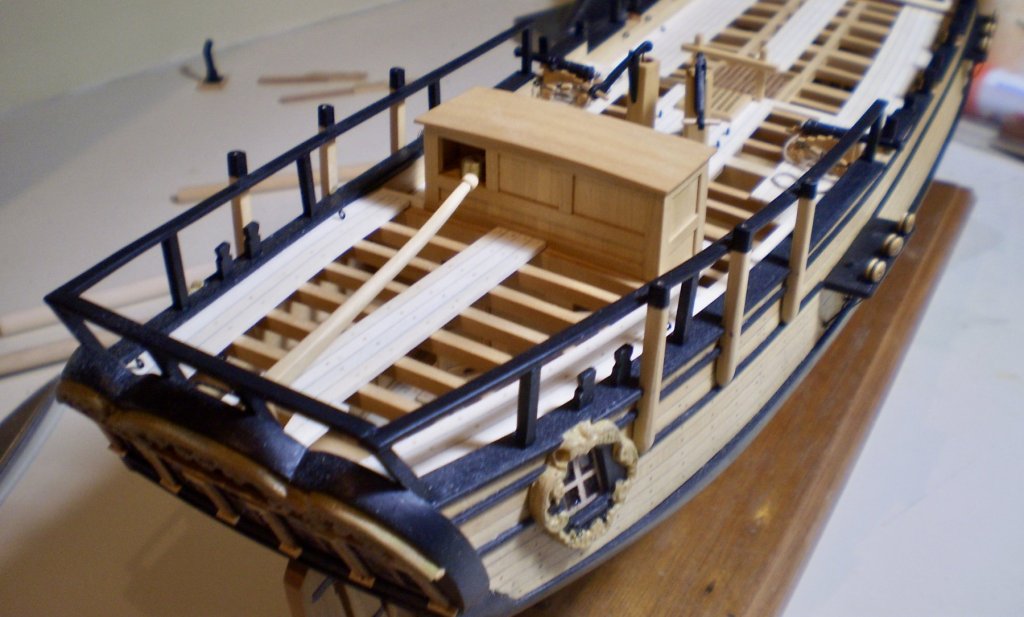
 I'm almost to the end of work on the deck. I've now mounted and rigged the remaining four guns, added the cross piece to the fore bitts and permanently mounted the previously made stack for the galley stove. I also threaded the anchor cables through the hawse holes and up through the openings on the forecastle deck (a ticklish job that probably should have been done earlier). All that remains to be done is the windlass and probably a few cleats for rigging attachment. I'm still working out how to go about doing the windlass. Bob
- 682 replies
-
- 28
-

-
- halifax
- lumberyard
- (and 1 more)
-
A wonderful piece of work B.E. Why would we expect anything less from you. Are you going to do Cheerful next? I think that you would really enjoy it. Bob
- 91 replies
-
- 2
-
-
- 18th century longboat
- model shipways
- (and 1 more)
-
Thanks so much Rusty, Michael and John for the nice comments and thanks also to the "likes". Greatly appreciated. Bob
- 682 replies
-
- 5
-
-
- halifax
- lumberyard
- (and 1 more)
-
Thanks so much Elijah, Denis and the "likes". Elijah, all of the unpainted wood is finished with Minwax satin wipe-on poly. One or two coats, usually applied with a cloth, rubbed down with 000 steel wool, and buffed with a soft cloth. Bob
- 682 replies
-
- 7
-
-
- halifax
- lumberyard
- (and 1 more)
-
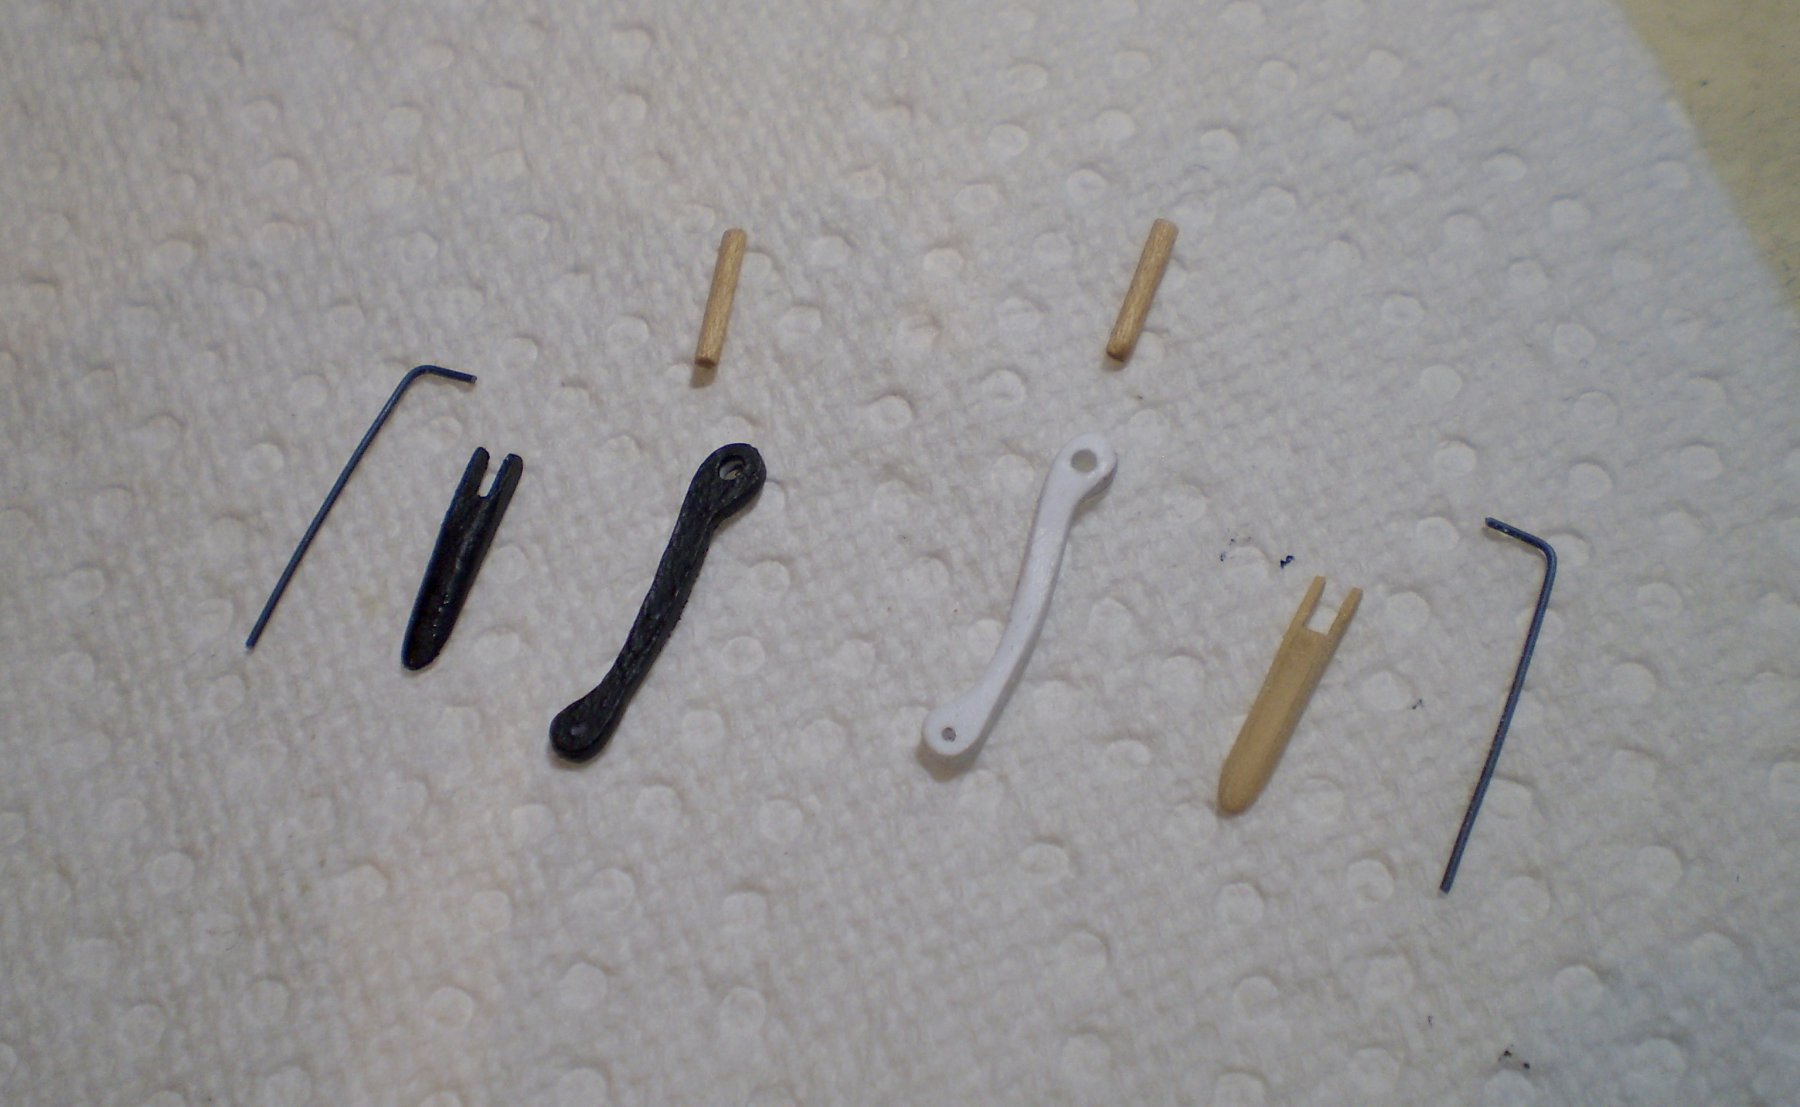
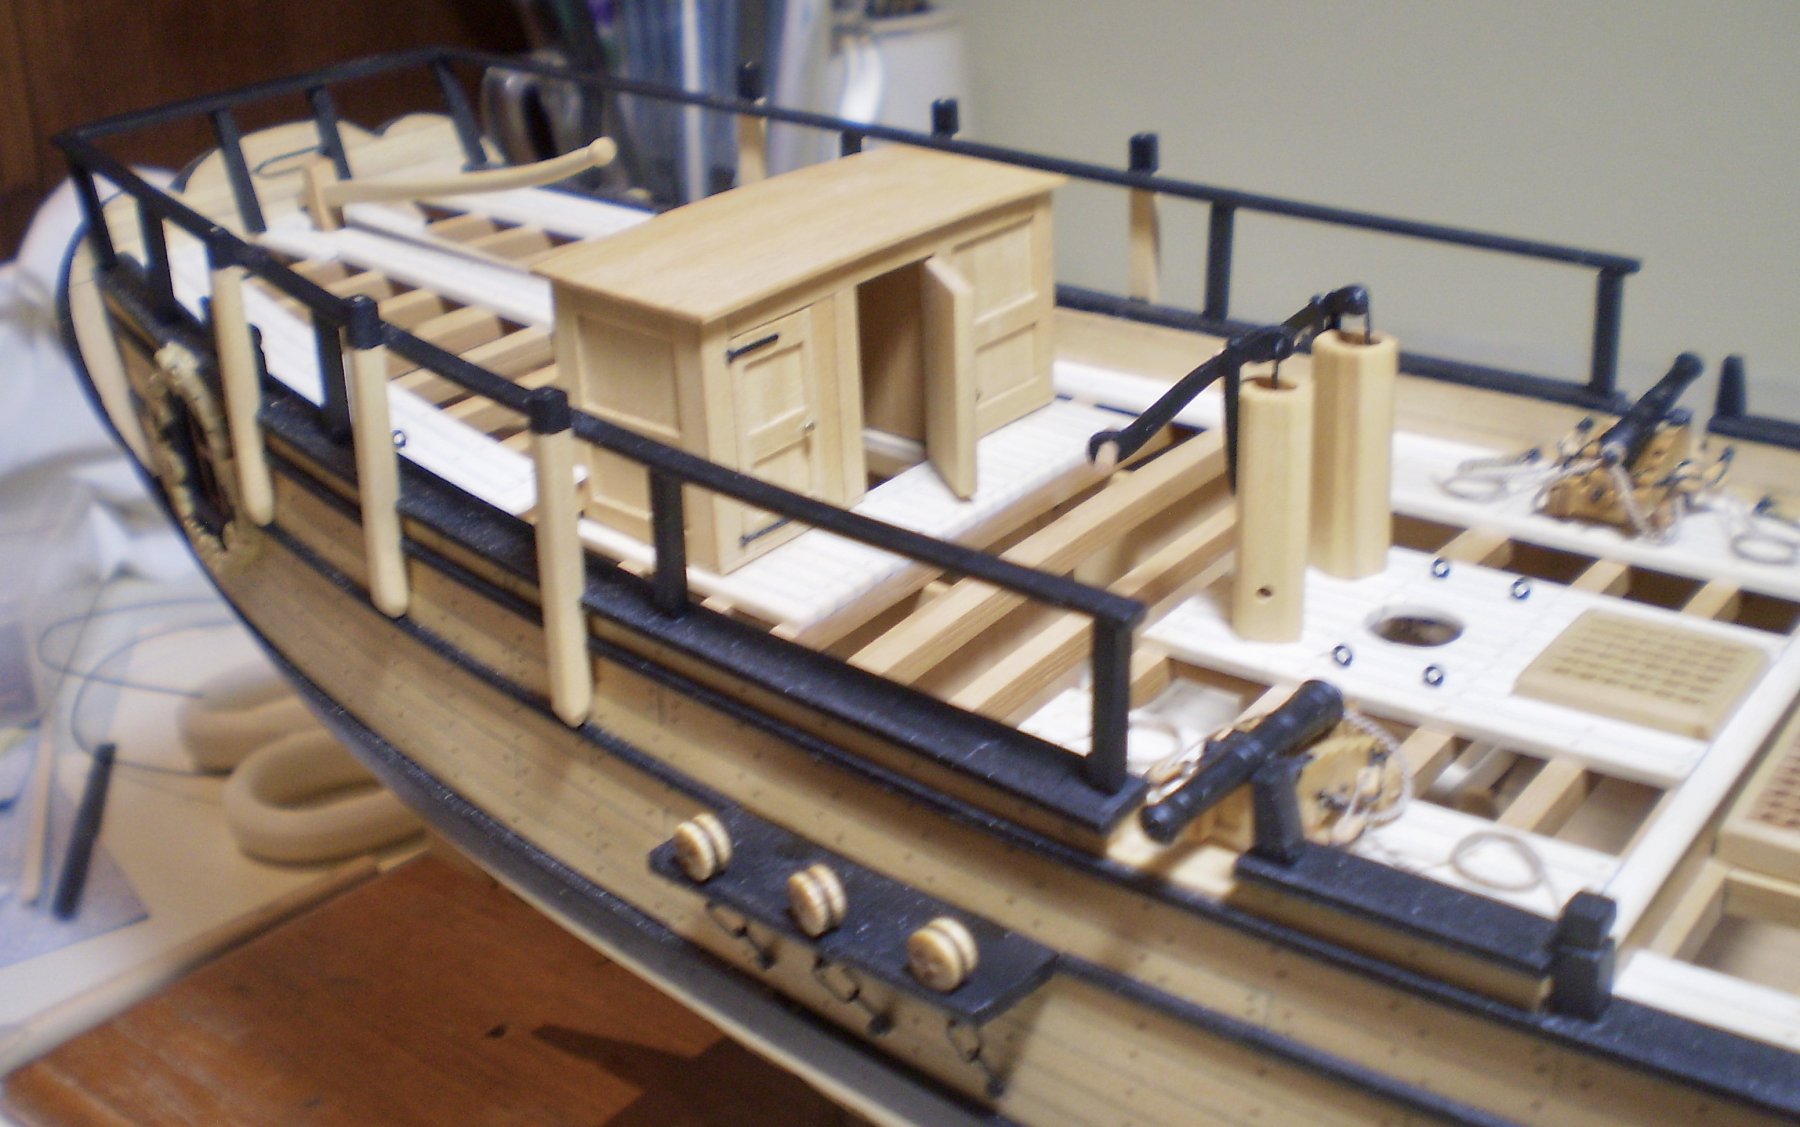
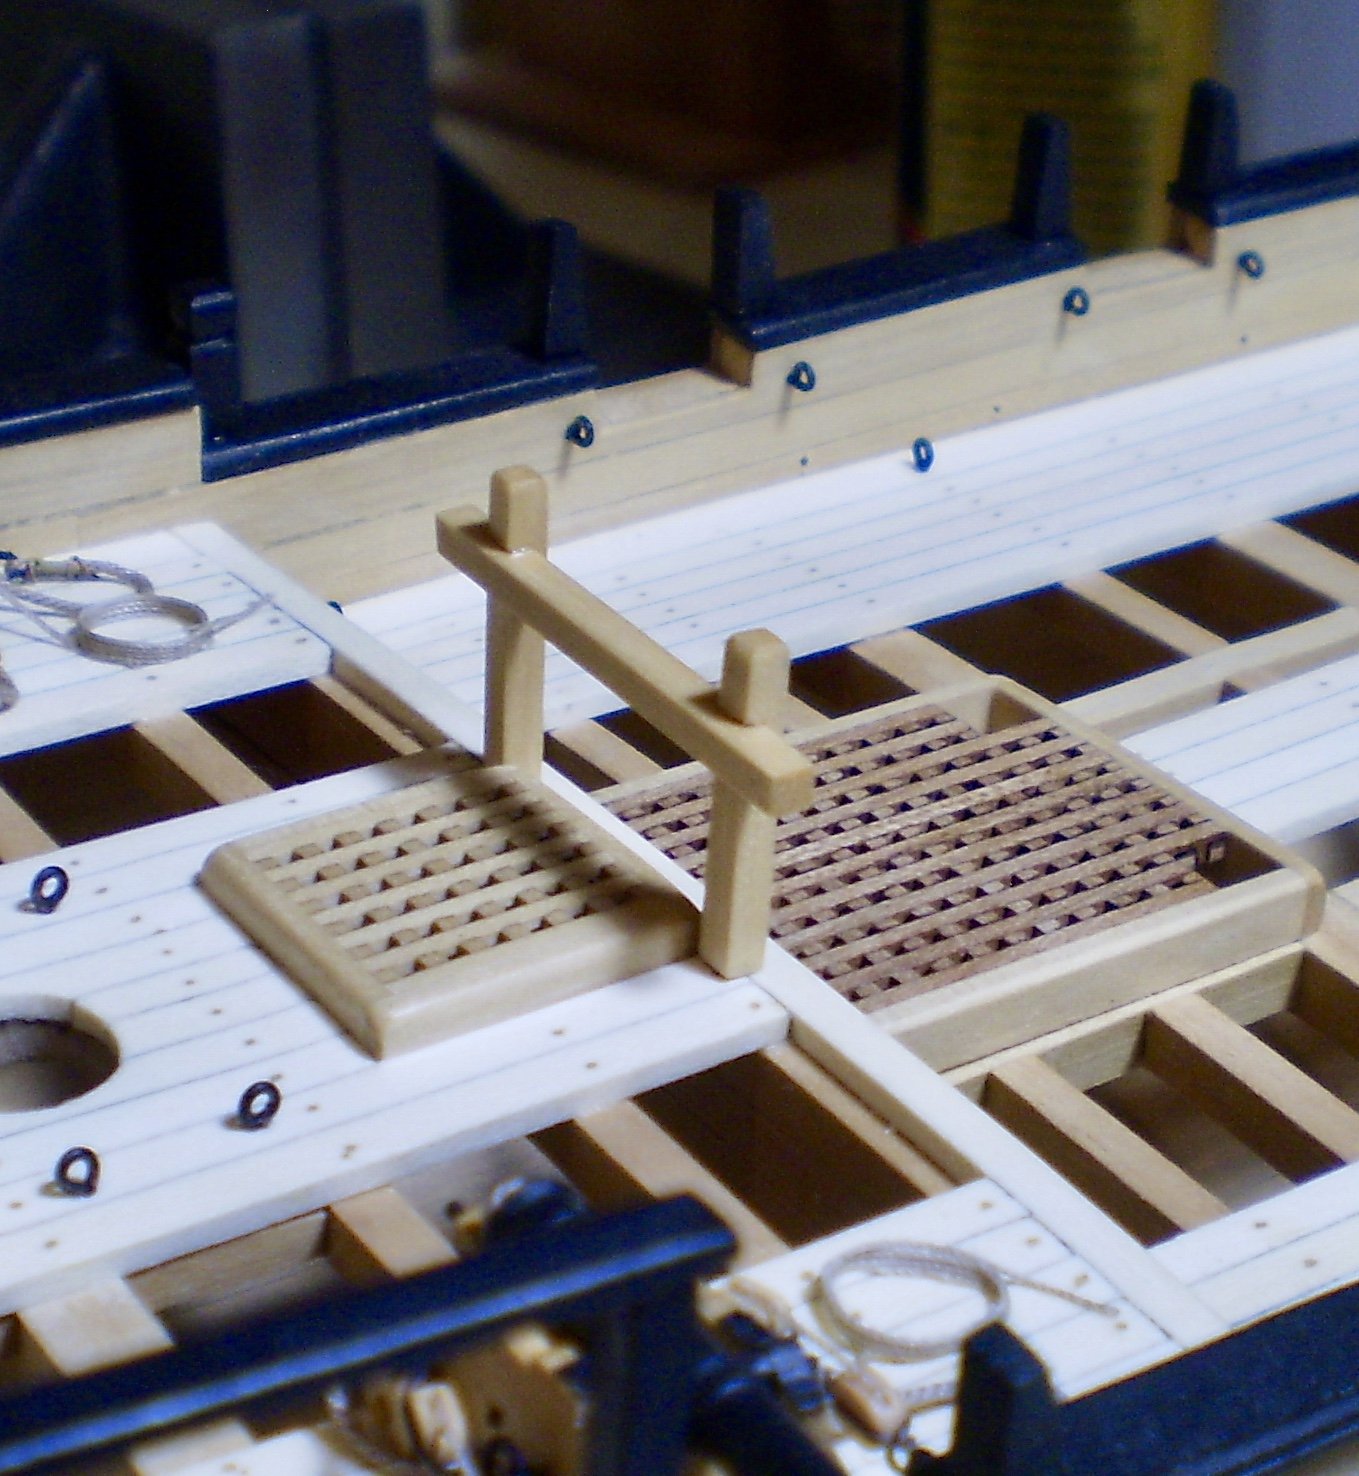
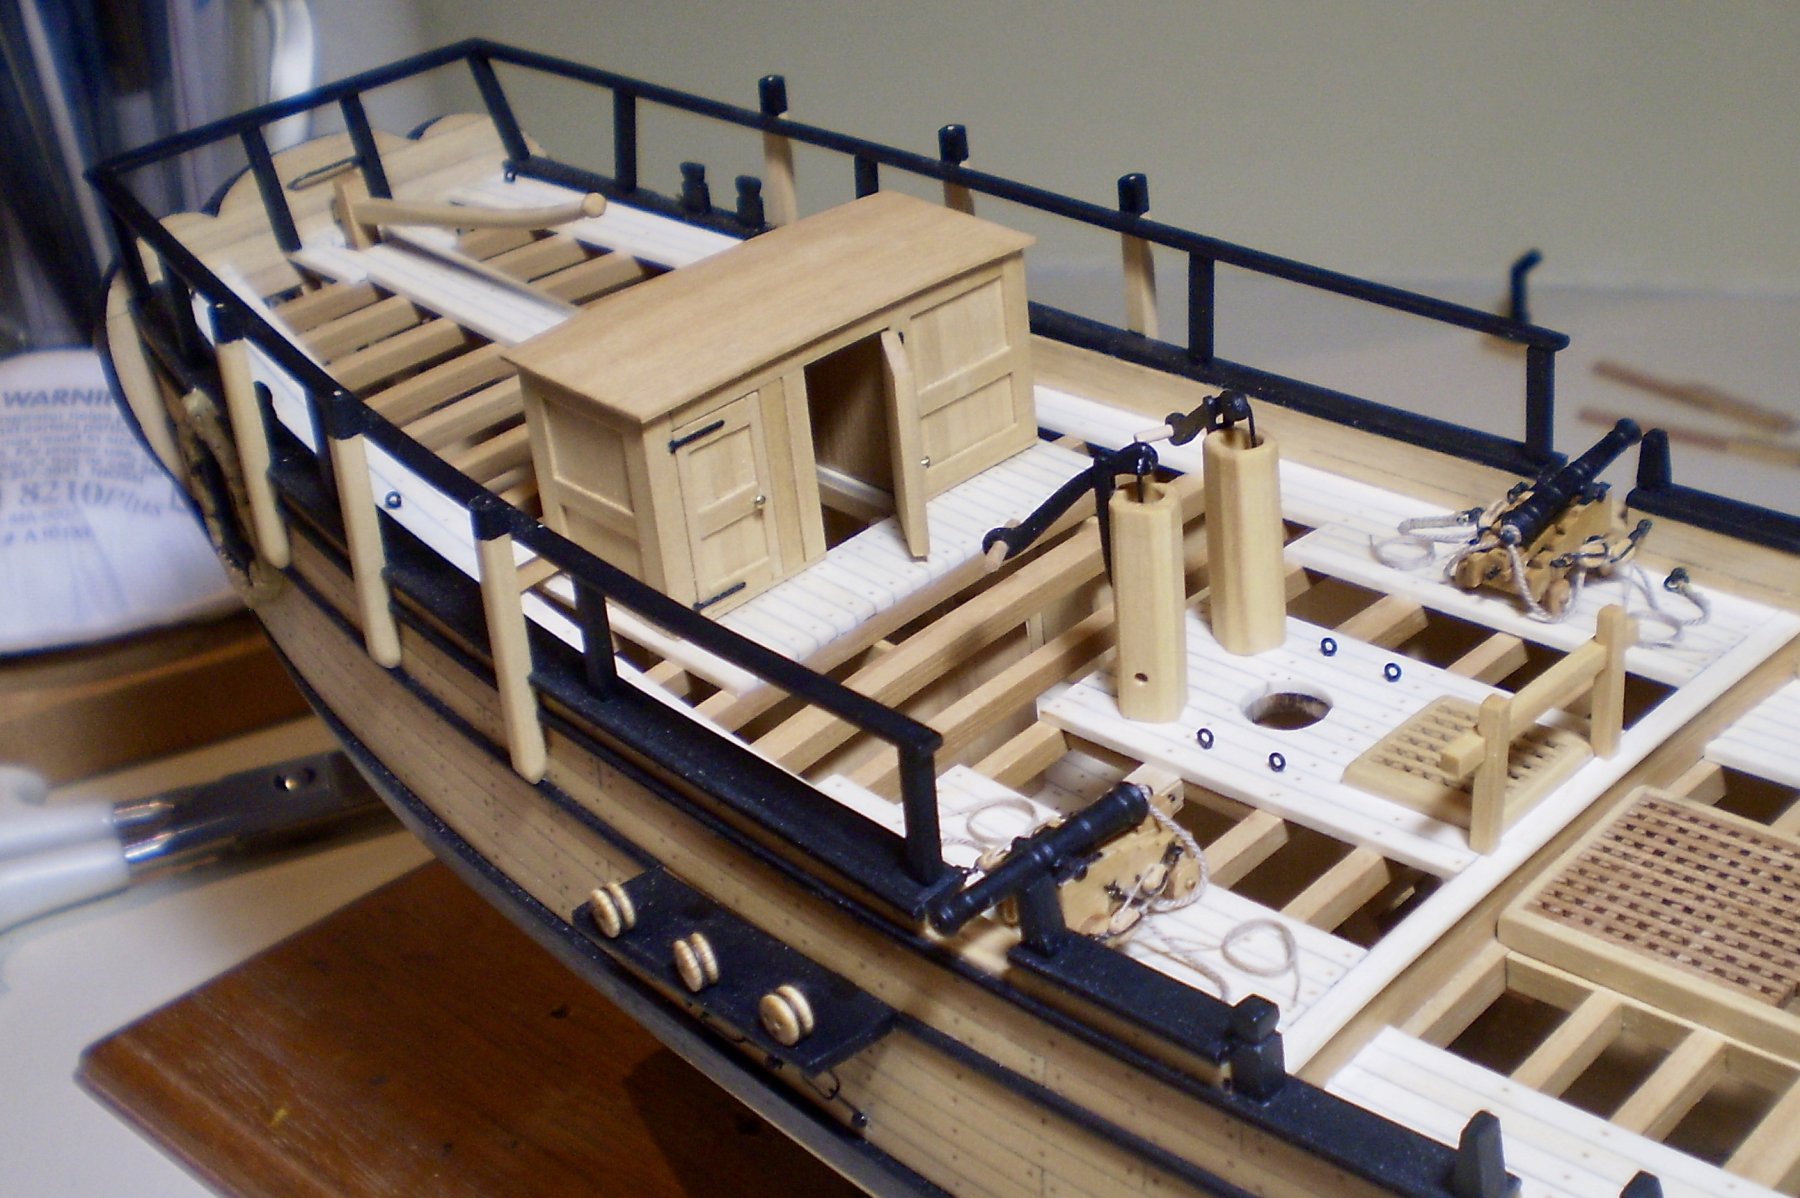
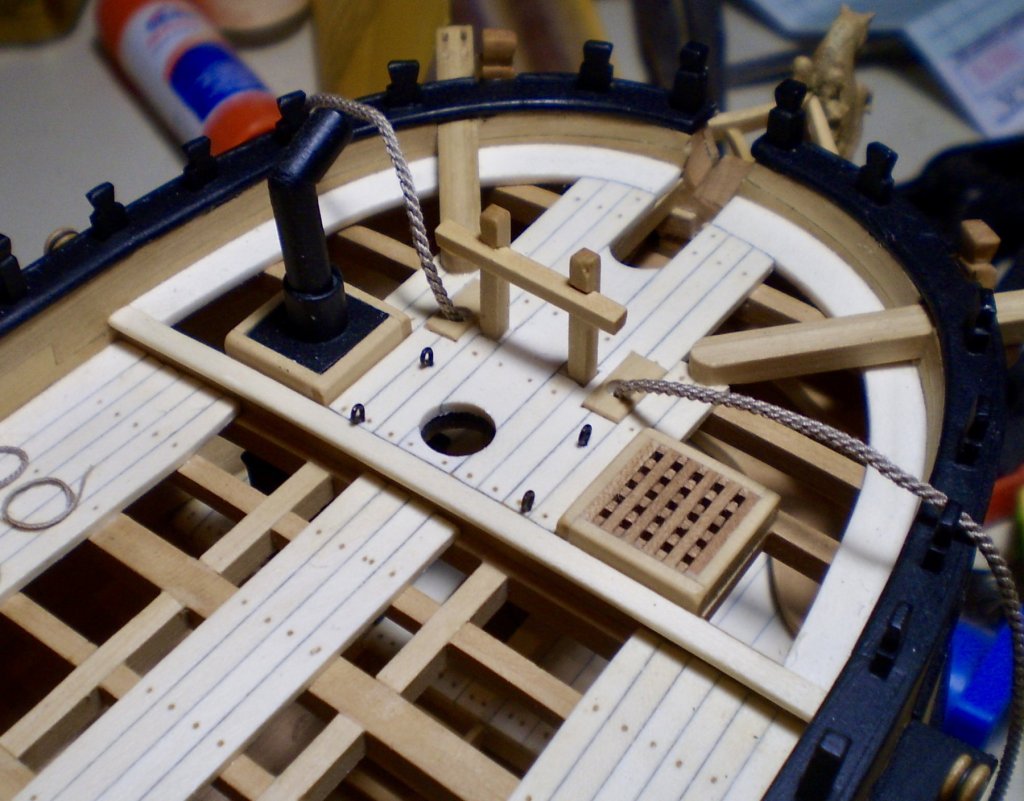
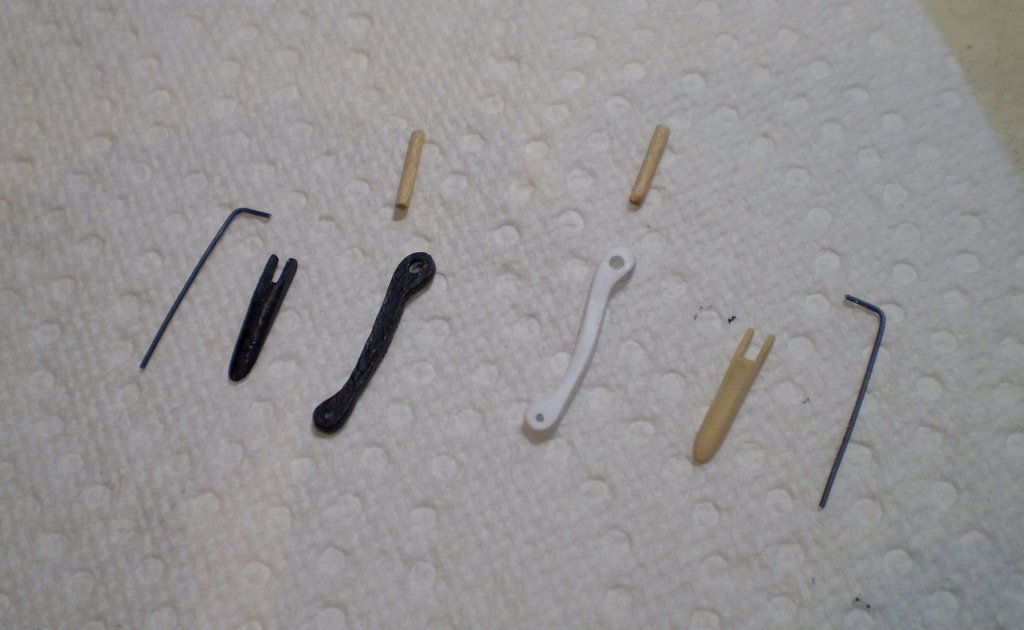
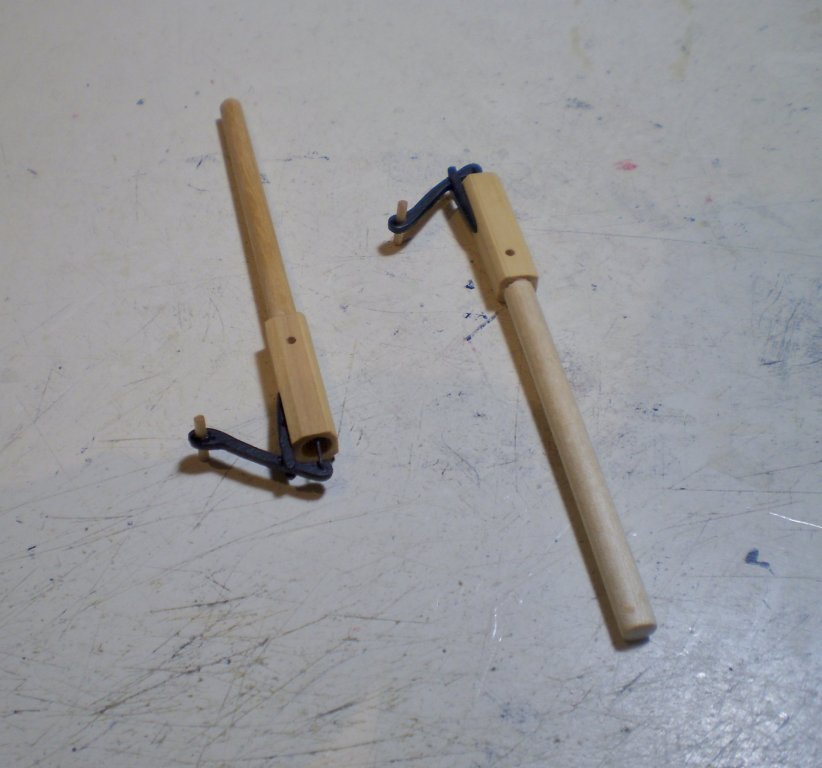
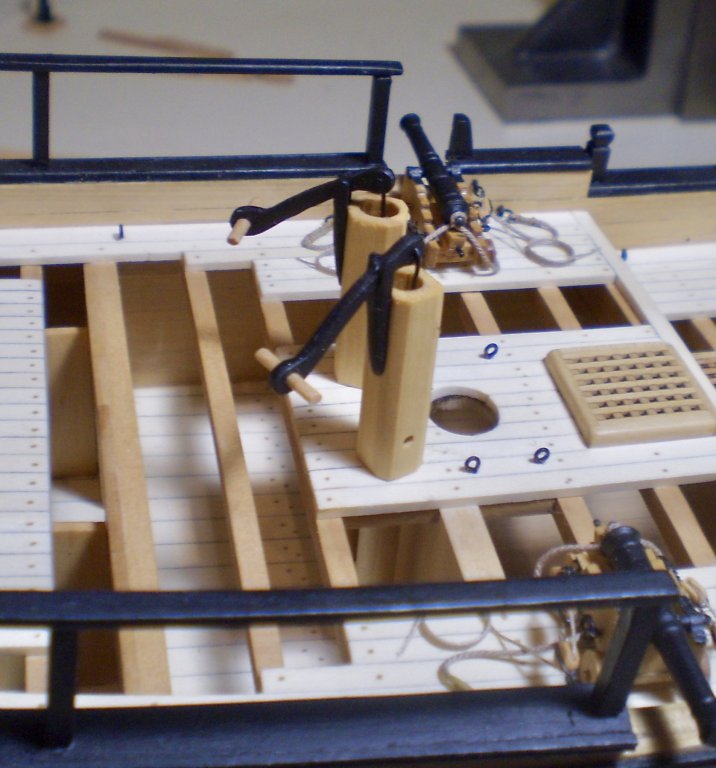
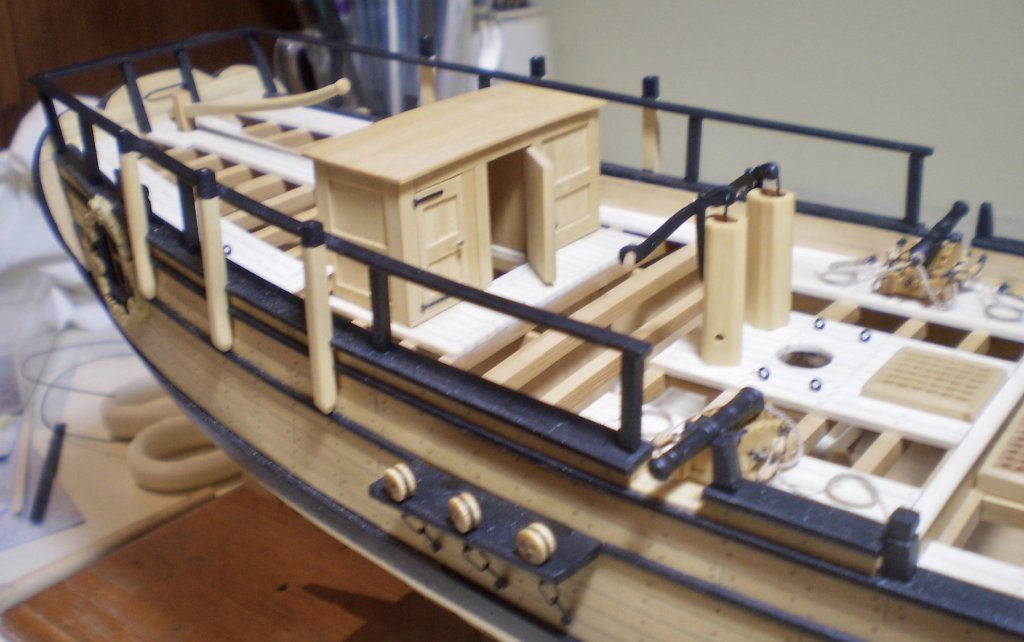
As a break from work on the guns, I decided to complete the detailing of the aft portion of the decks. This involved making and mounting the topsail sheet bitts, finishing and mounting the pumps and permanently mounting the deckhouse/companionway. The bitts were easy, consisting of boxwood strip pieces slotted with a file for a secure fit together, and pinned and glued to the deck. The pumps were more work. The tubes had been made and fitted previously (as shown in a prior post). At this point they were completed by making up the mechanism. This consisted of handles cut from styrene sheet, filed to final shape and drilled for small dowels and wire, and brackets for the handles made from wood strip, but painted black to simulate metal. The completed pumps were then mounted through the openings previously made through the upper and lower decks. The deckhouse/companionway had been made previously (as shown in a prior post) and was merely glued in place at this time. Now it's back to rigging guns. Bob

- 682 replies
-
- 24
-
-
- halifax
- lumberyard
- (and 1 more)
-
Nothing to say but "perfect" Rusty. Bob
- 310 replies
-
- 3
-
-
- cheerful
- Syren Ship Model Company
- (and 1 more)
-
Thanks so much B.E. for the kind words, and also the "likes". Bob
- 682 replies
-
- 5
-
-
- halifax
- lumberyard
- (and 1 more)
-
Thanks so much Thomas, Albert, Mike and the "likes". Greatly appreciated, as always. Bob
- 682 replies
-
- 5
-
-
- halifax
- lumberyard
- (and 1 more)
-
Al, I don't really remember just how long it took, but I'm sure that it was at least two or three weeks. Bob
- 682 replies
-
- 4
-
-
- halifax
- lumberyard
- (and 1 more)
-
Thanks so much Zappto, Michael, Al and the "likes". Michael, they are a pain to rig, but really not that difficult and not to be feared. Al, I'm expecting great things from yours and look forward to it. Bob
- 682 replies
-
- 5
-
-
- halifax
- lumberyard
- (and 1 more)
-
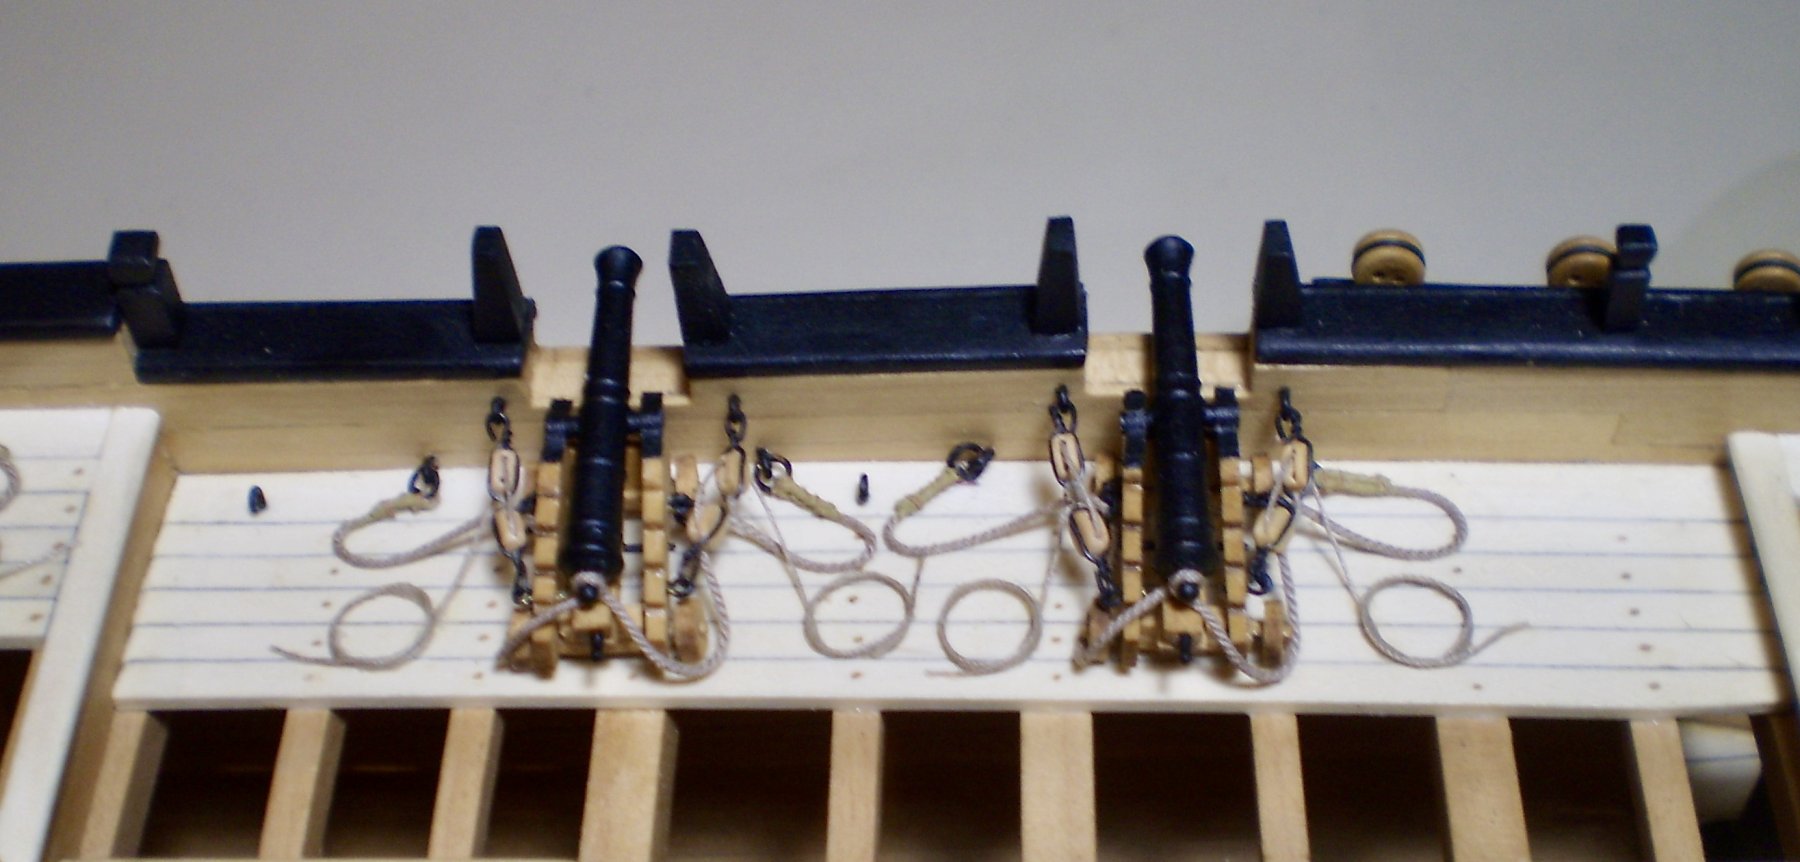
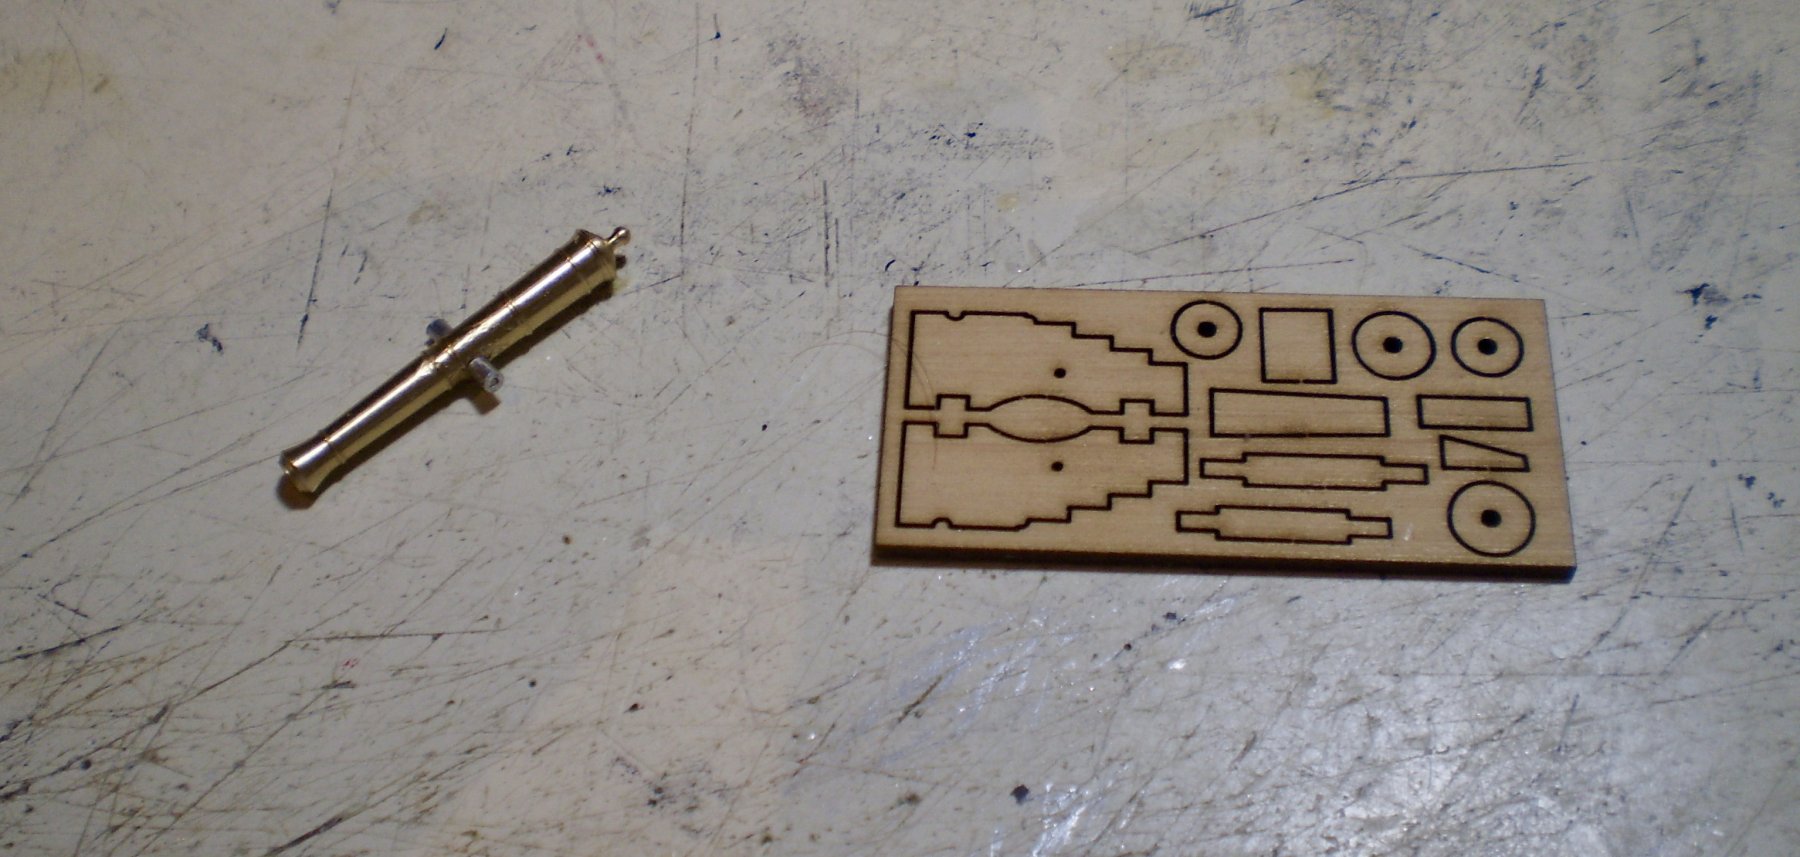
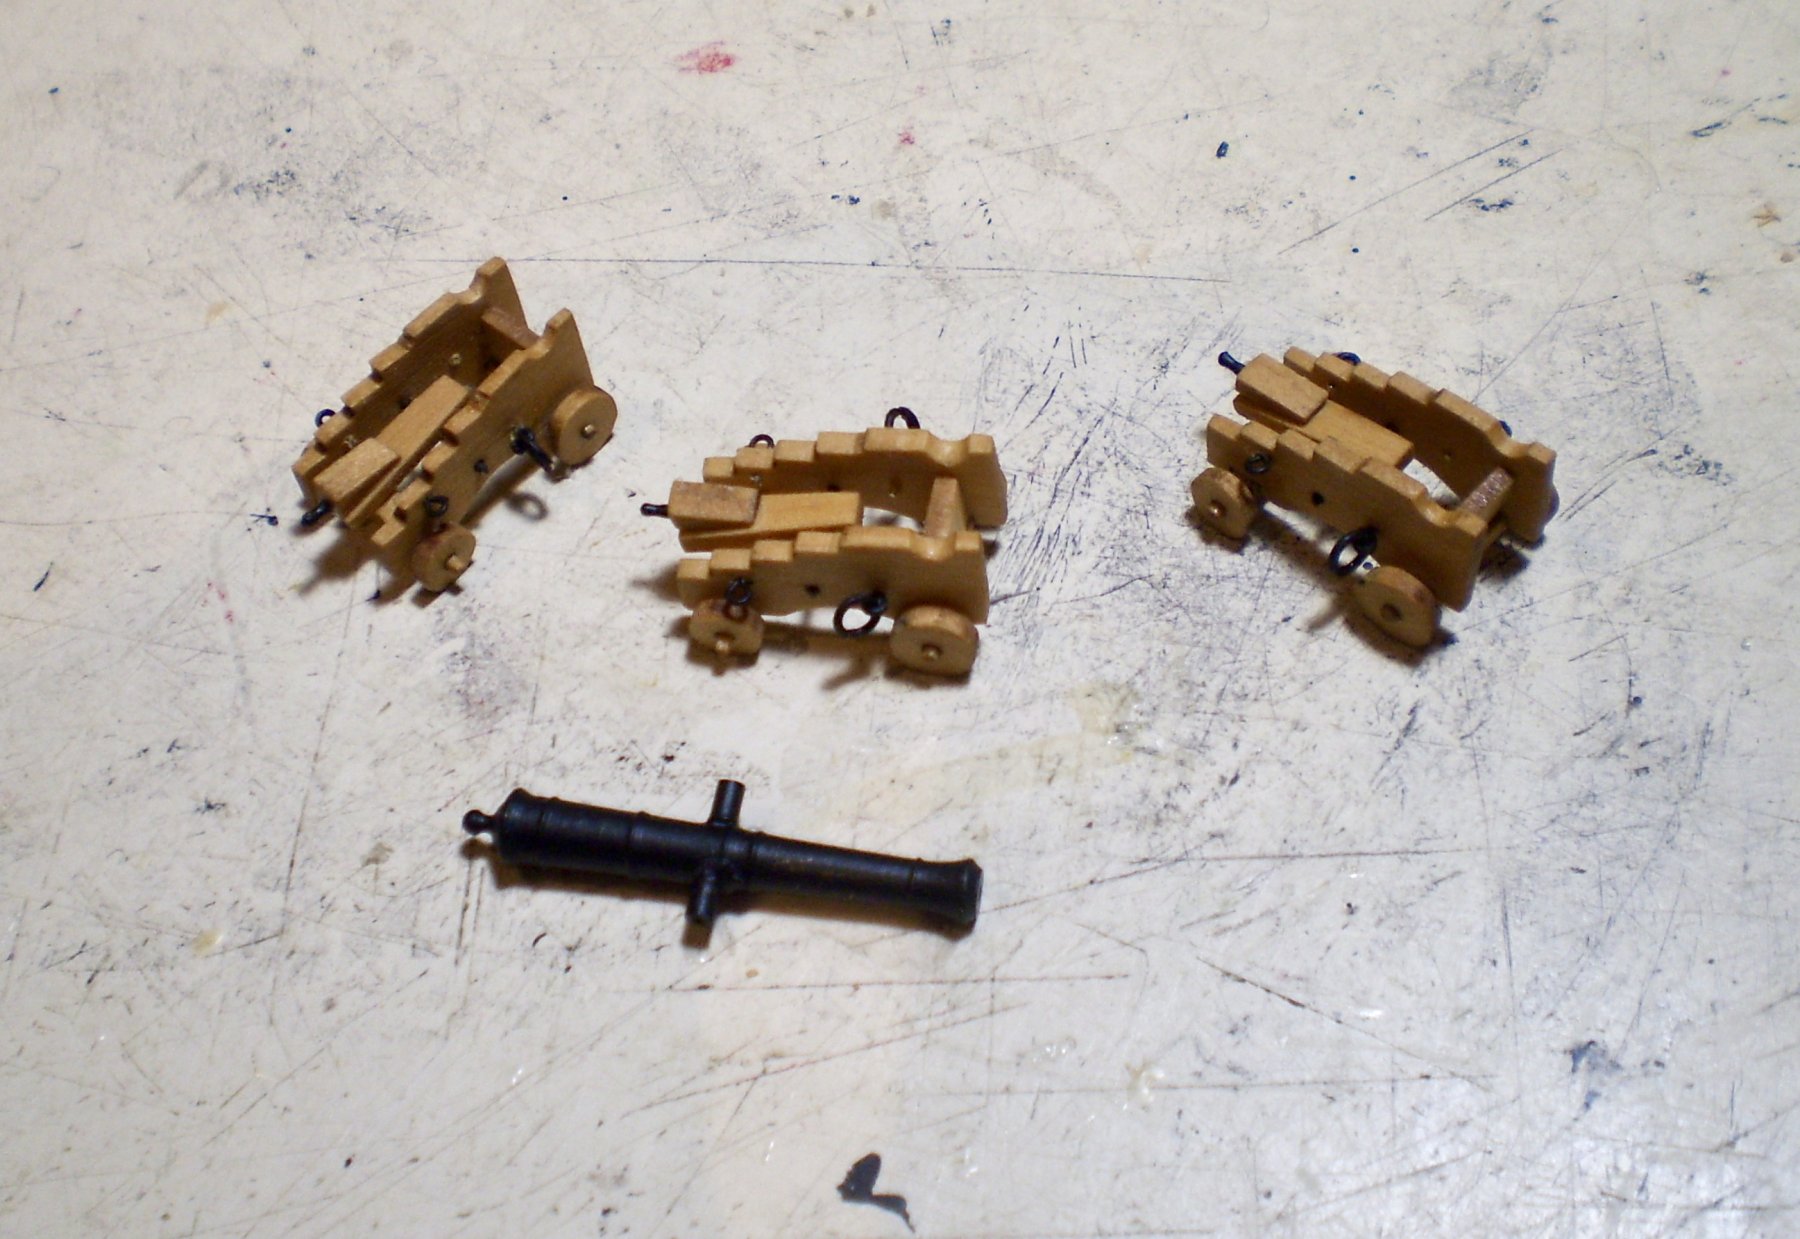
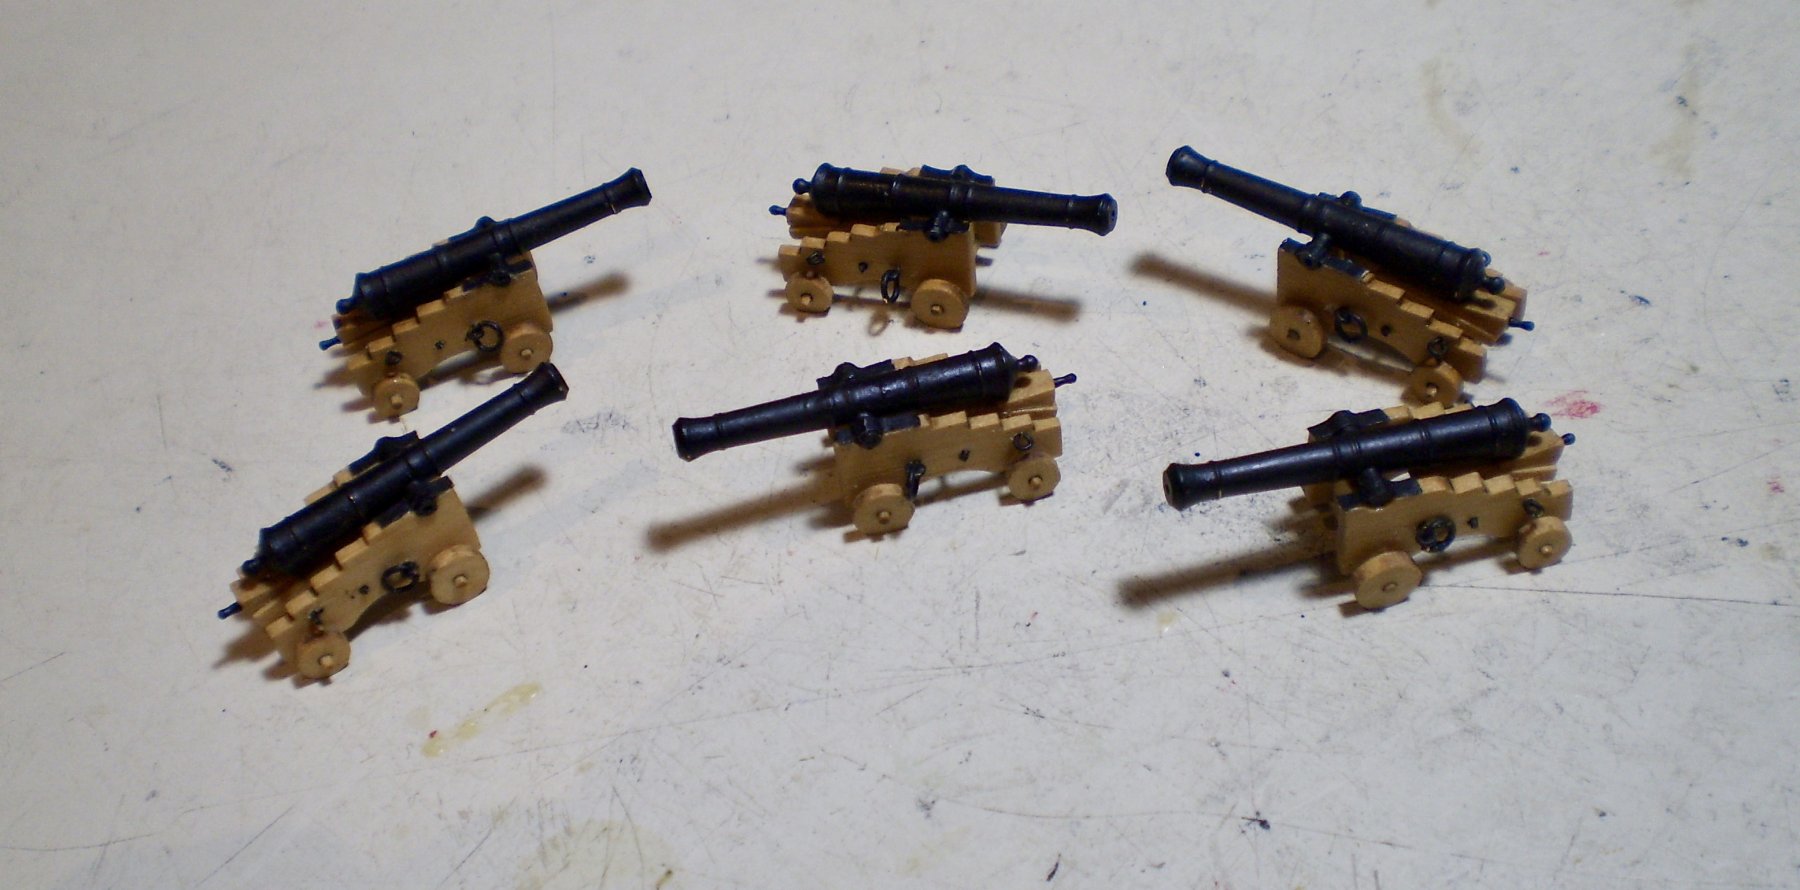
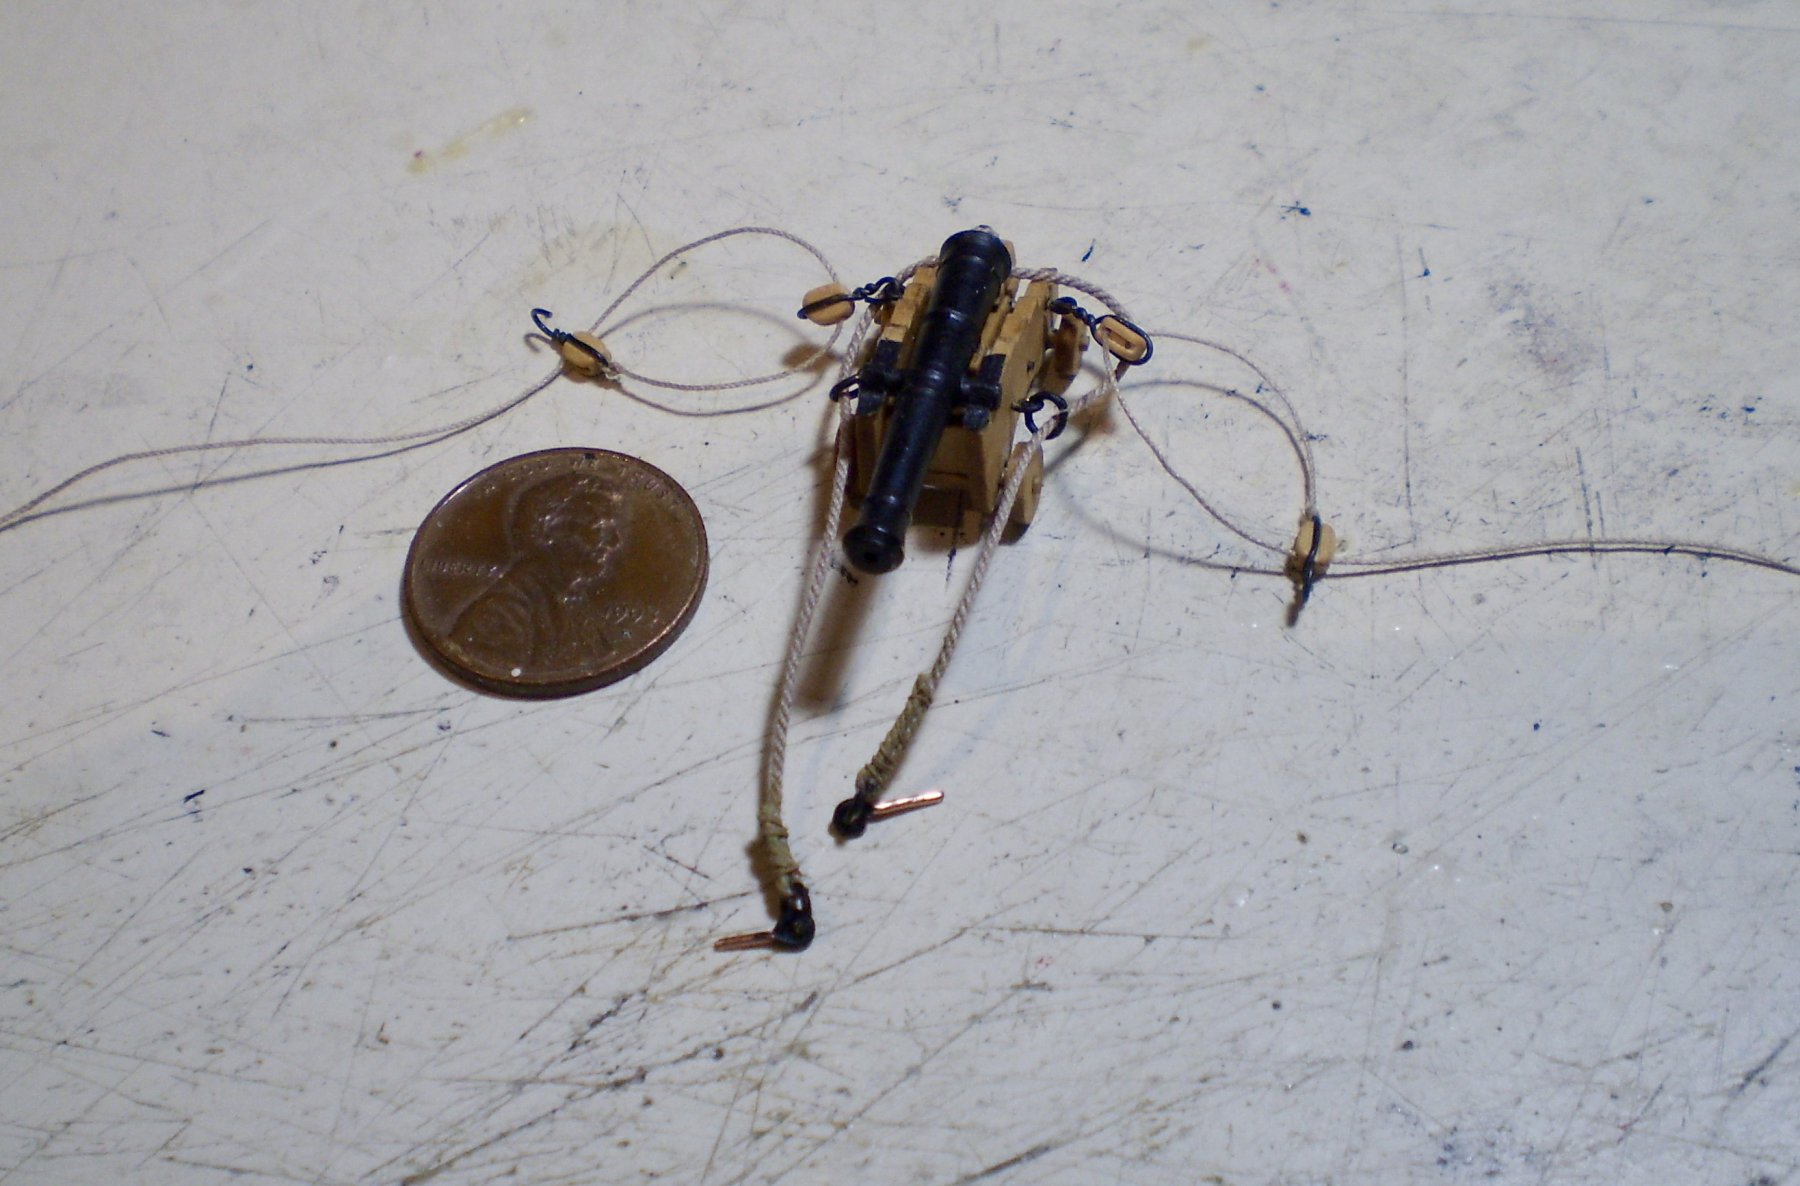
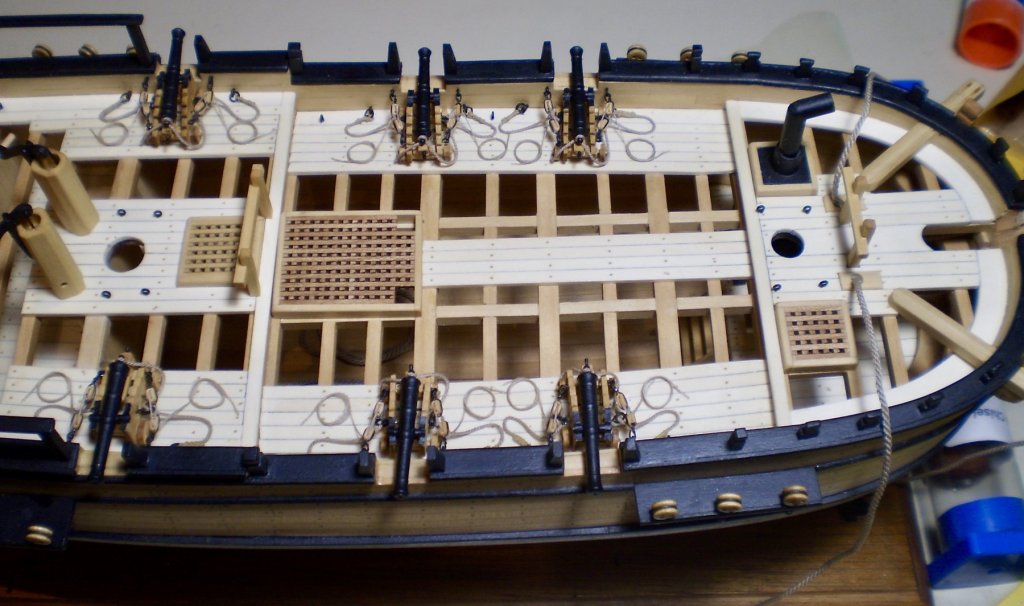
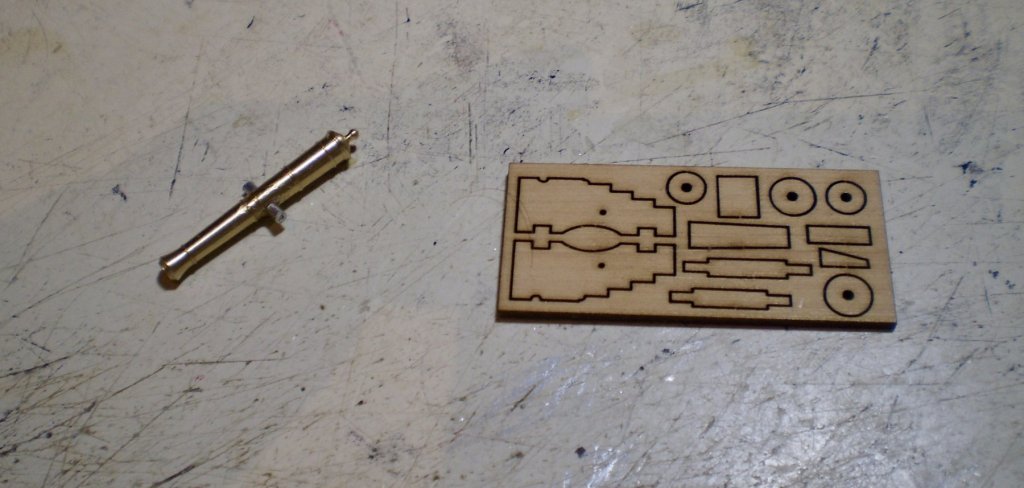
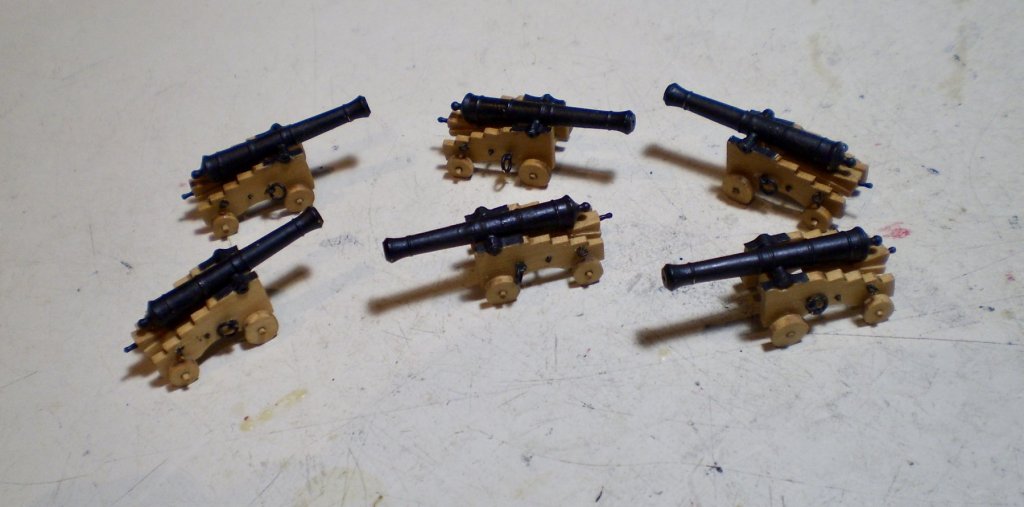
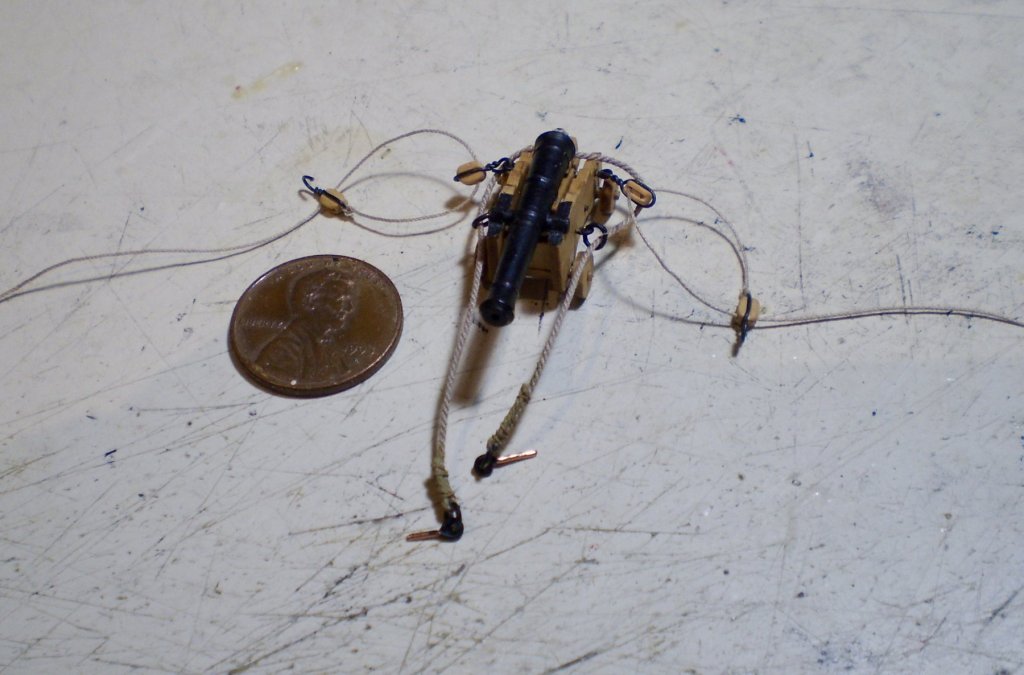
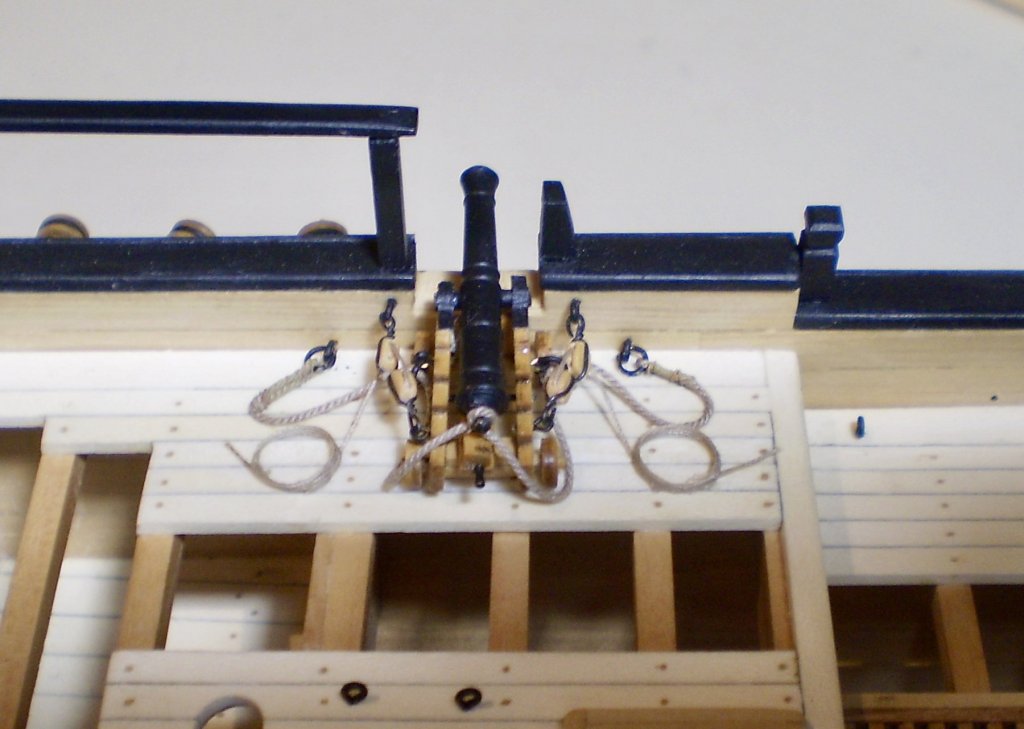
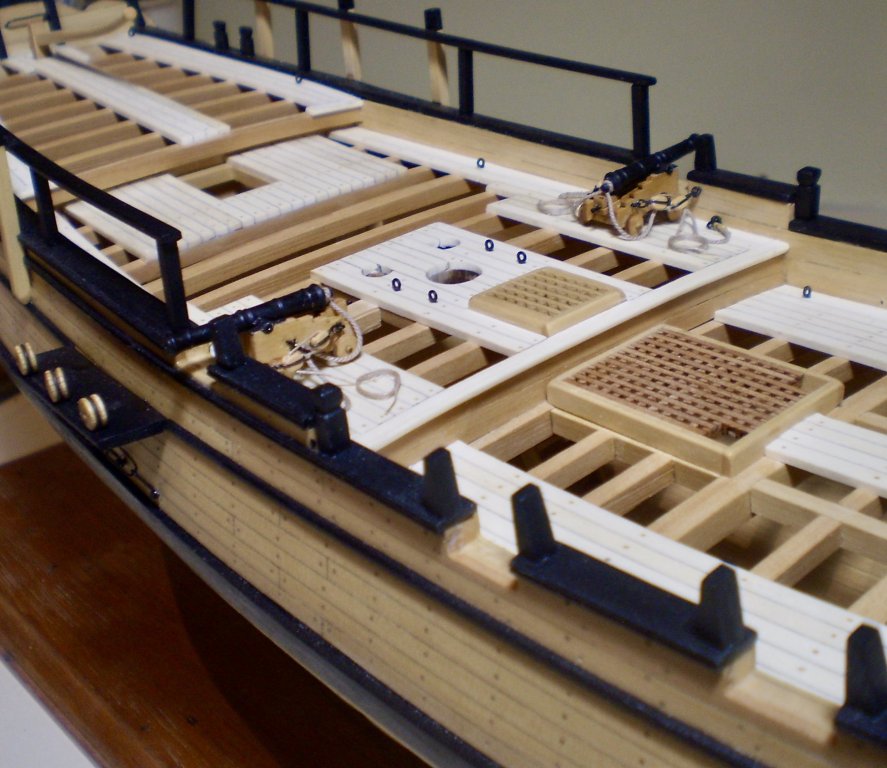
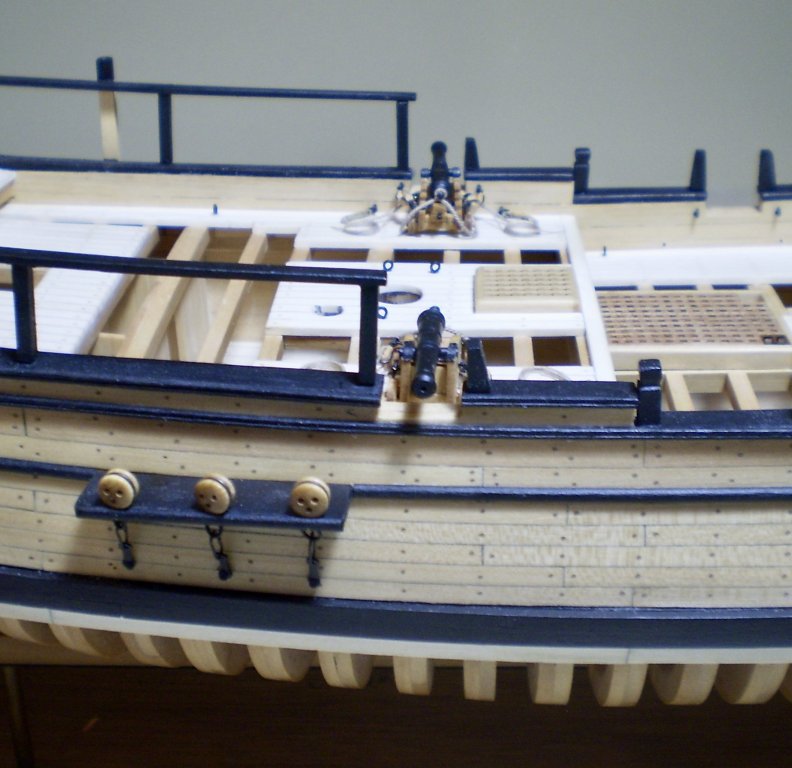
After turning my attention back to deck fittings and furniture, the first item was to make up the guns. There are six 3 pounders (very small ). I decided not to use the carriages and white metal barrel castings provided by the Lumberyard (the barrels were too large when compared to the plans), and substituted carriages and brass barrels from Syren. I used the 1:64 6 pounders (1 11/64" barrels) which fit the plans almost perfectly. I made one modification. The trunnions appeared too small, but I did not want to get involved with trying to drill through the brass barrels to add larger trunnions, so I added tiny bits of tubing to build them up. After making up the carriage kits, I added the needed eyebolts and ring bolts from blackened brass. I also added the quoin handles, using the smallest brass belaying pins that I had on hand. I then started to rig the guns with their breech ropes and tackles. For the tackles I am using Syren 1/8" (3mm) blocks, which are the smallest that I can handle at this point, and Syren .008 line. After rigging two of them, I had had enough, so decided to mount them and move on to something else for a while. After mounting, I added separate rope coils to the tackle lines. Bob

- 682 replies
-
- 38
-
-
- halifax
- lumberyard
- (and 1 more)
-
Beautiful work Mike. Bob
-
Congrats on a wonderful piece of work Don. However good the kit may be, you have made it far better. Now I'm looking forward to Stefano. Bob
- 653 replies
-
- 6
-
-
- trabakul
- marisstella
- (and 1 more)
-
The planking is coming along really nicely. I particularly like the viewing cutouts. Bob
- 692 replies
-
- 3
-
-
- eagle of algier
- chebec
- (and 2 more)
-
I'm glad that I can get back to just saying "beautiful work Rusty". Bob
- 310 replies
-
- 2
-
-
- cheerful
- Syren Ship Model Company
- (and 1 more)
-
Thanks so much Don and the "likes". Don, that's almost exactly what I do. I twist twice, snip off one legend pass the remaining one through the channel. I've never found it necessary to either solder or glue the loop beneath the channel. Denis, I just noticed that you had posted at virtually the same time that I did this morning. Thanks for the compliments, but please don't stay quiet, since I always enjoy hearing from you. Bob
- 682 replies
-
- 6
-
-
- halifax
- lumberyard
- (and 1 more)
-
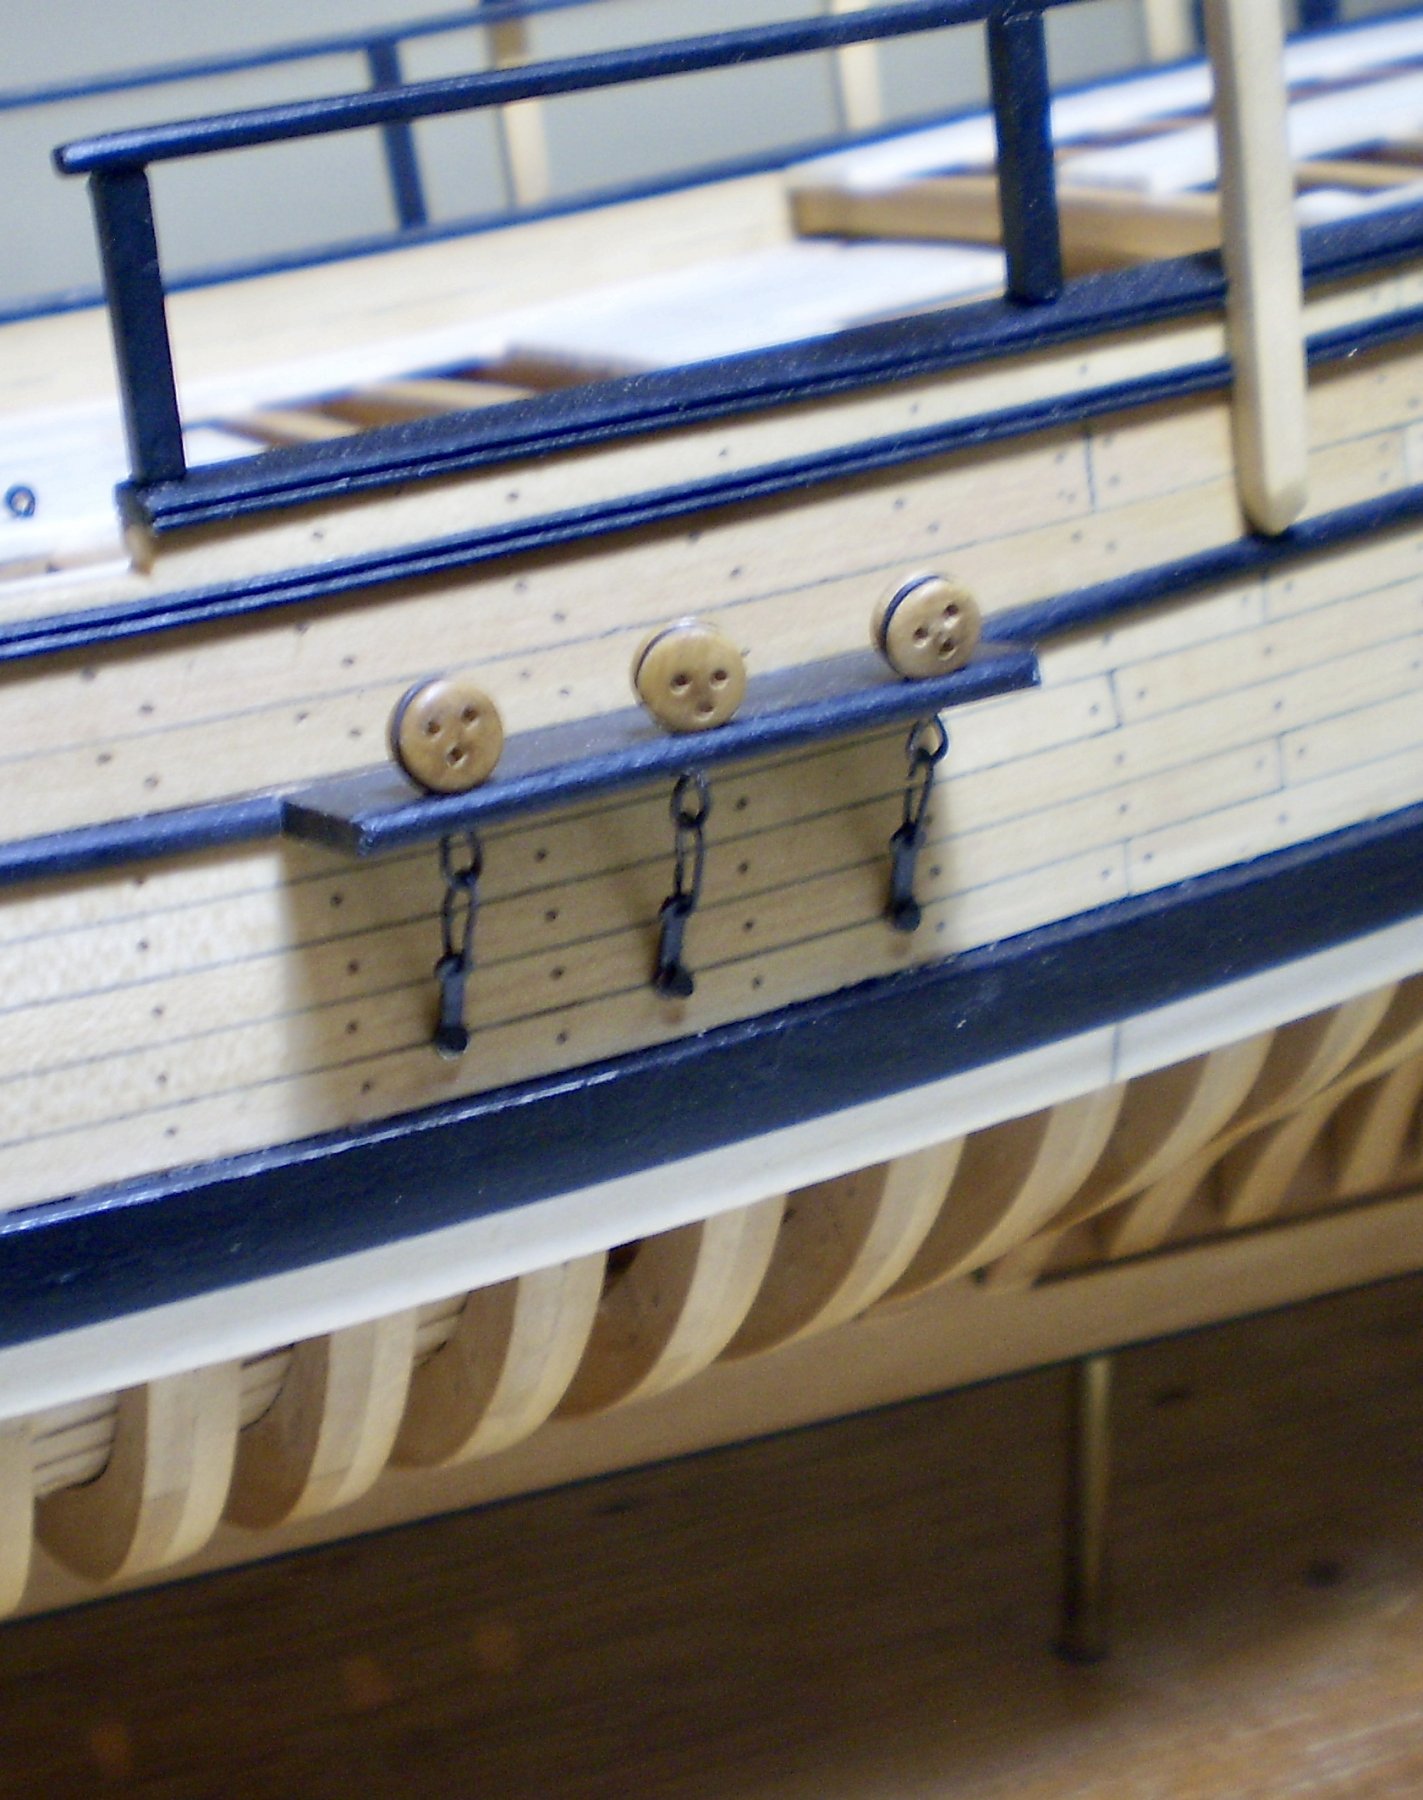
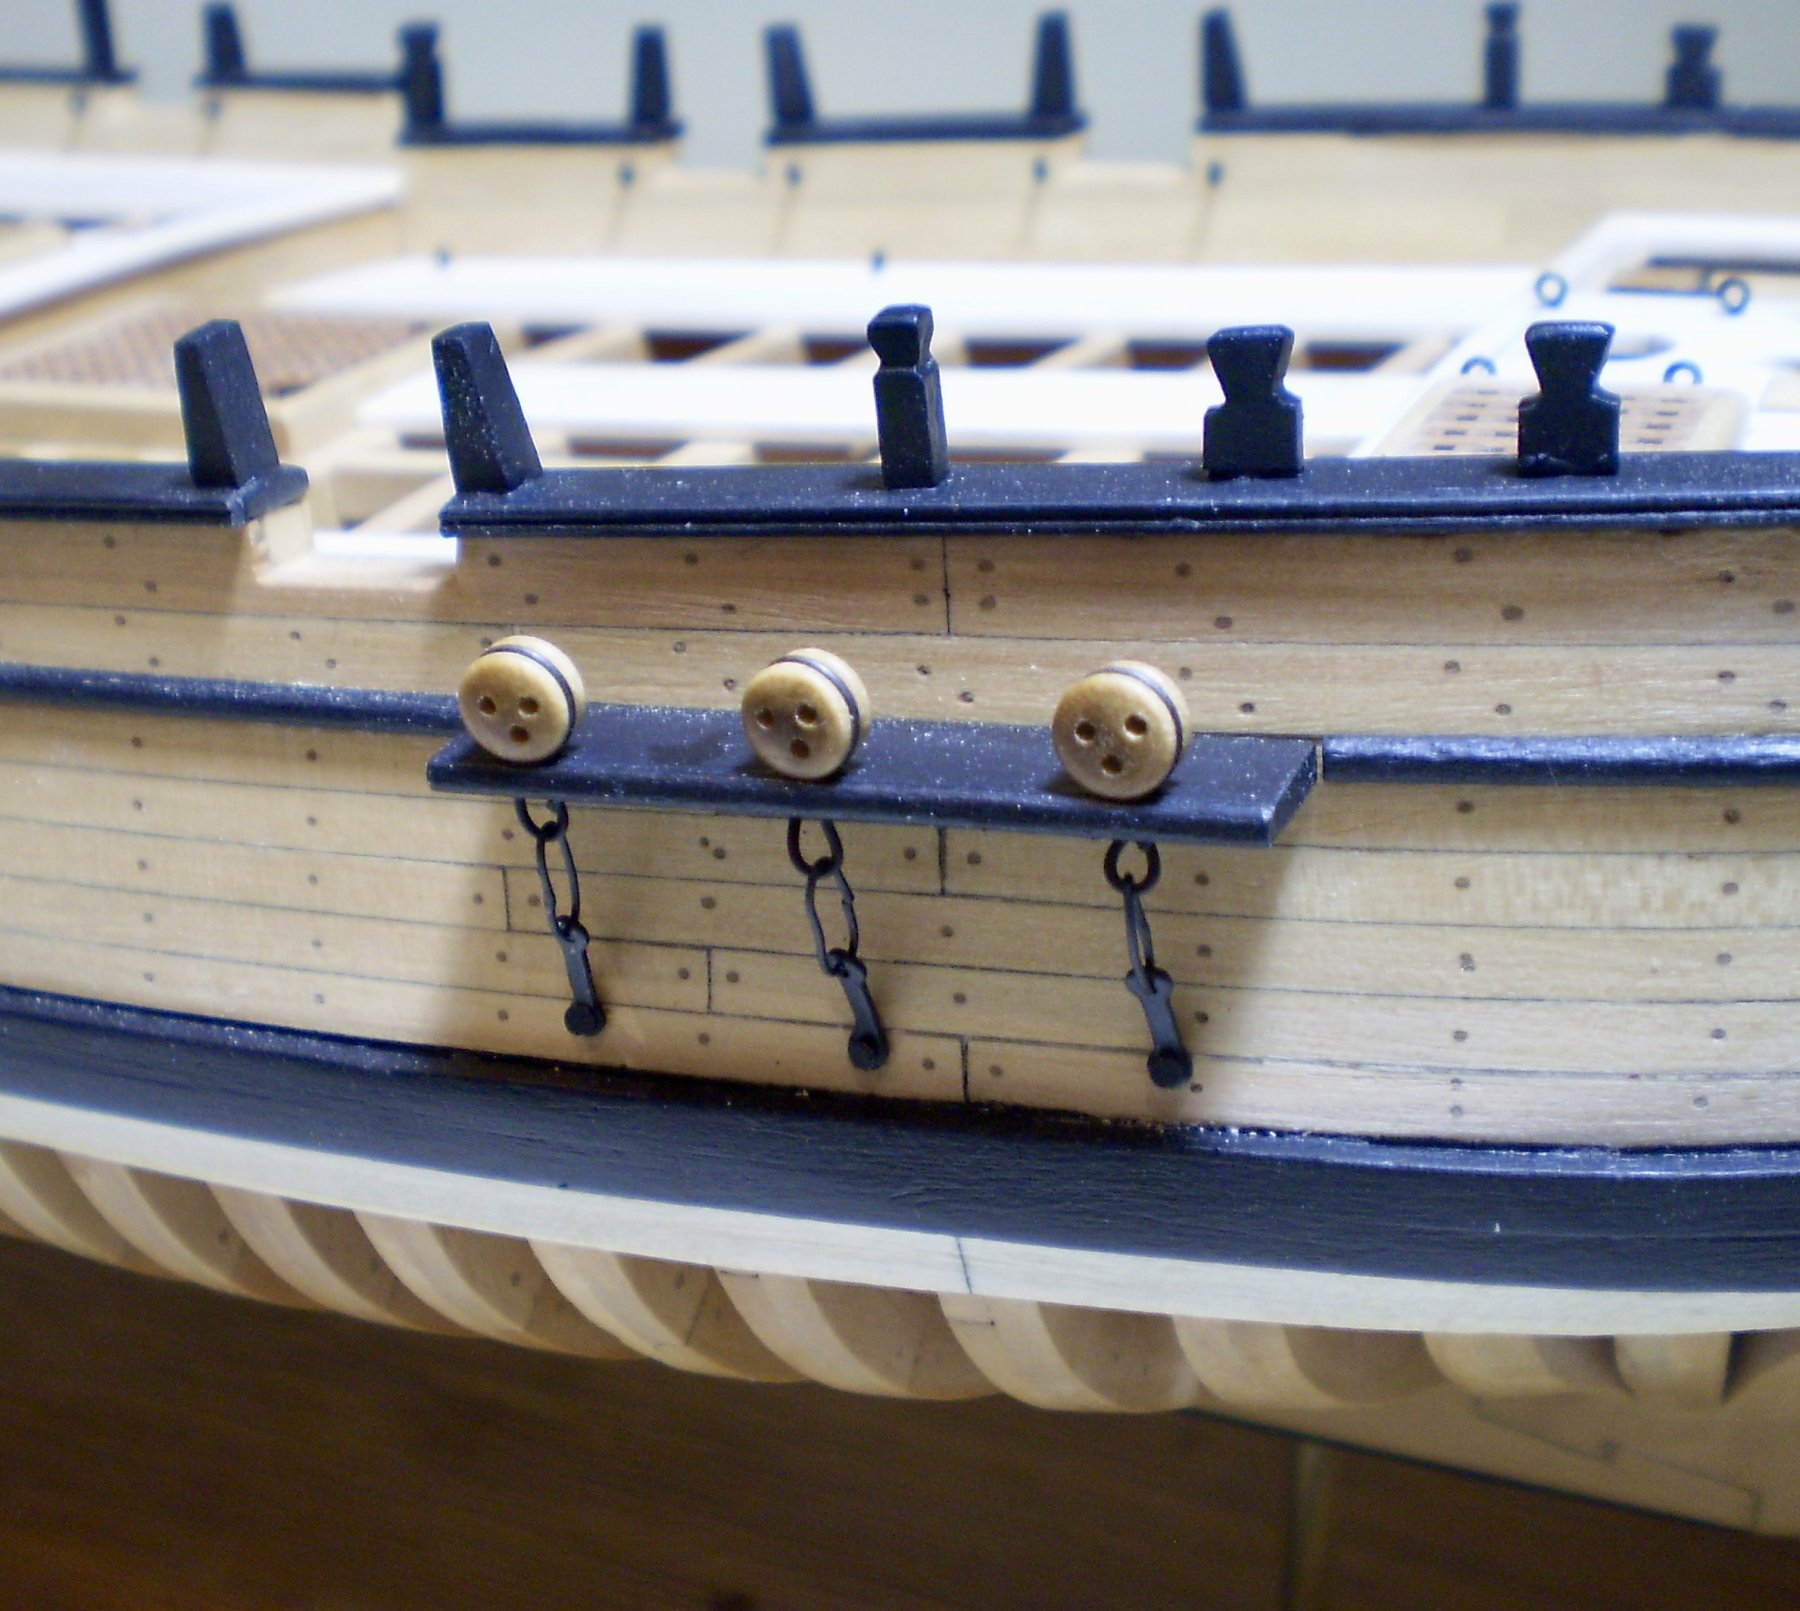
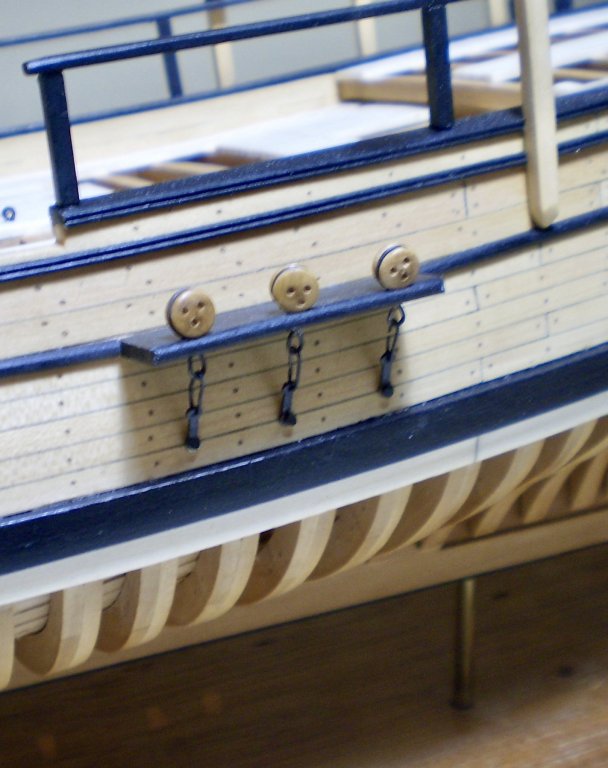
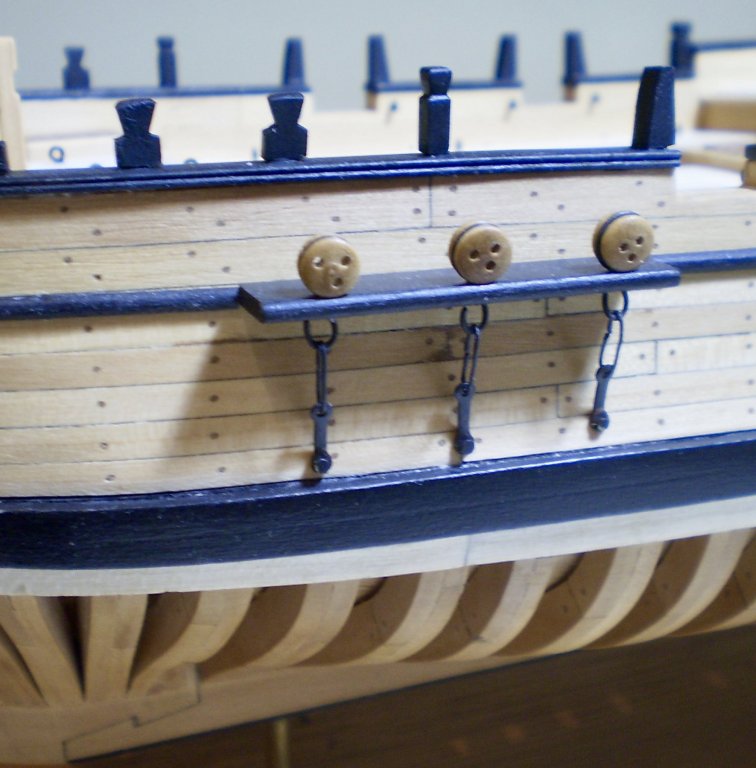
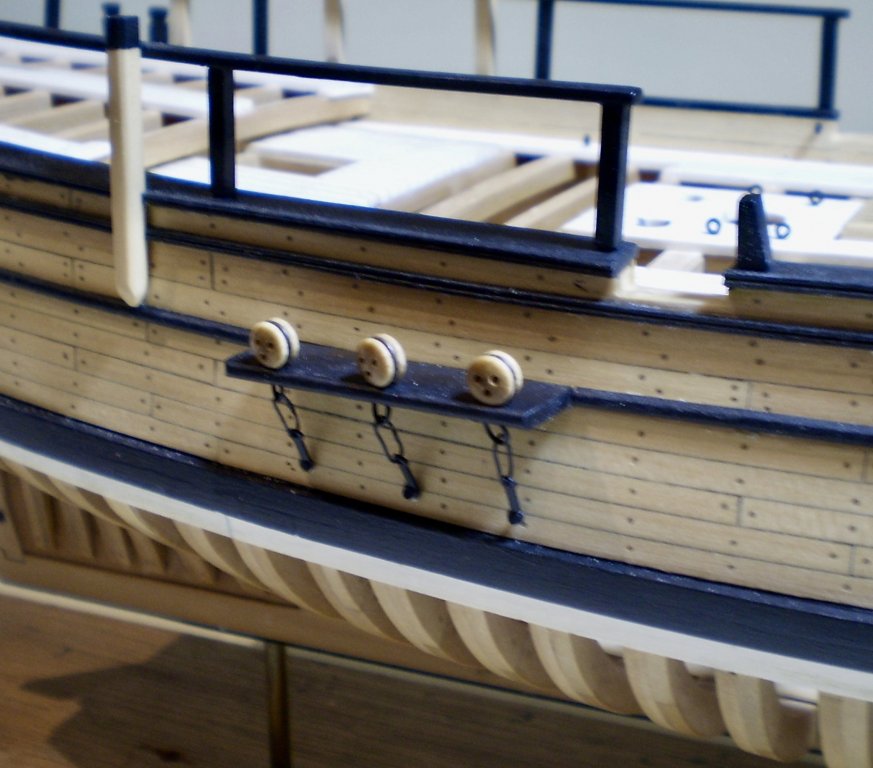
I've now done the deadeyes and chains. Fortunately, there aren't that many. The chains consist of three parts: the deadeye straps, which are made from wire; the middle links, which are made from wire bent to loop shape using a simple jig made from two small nails in a block of wood; and the lower links, for which I used brass backing links that I had on hand from some past project. The deadeyes are also commercial products that I had on hand. This work completes the work on the outer hull. I am now returning to do the remaining deck furniture and fittings.


- 682 replies
-
- 17
-
-
- halifax
- lumberyard
- (and 1 more)
-
Thanks so much Martin.The grain is a problem, no matter how you do it. I have to tell you that I broke more than one piece. I've used the lamination technique in a number of ways, and find it very useful. Bob
- 682 replies
-
- 4
-
-
- halifax
- lumberyard
- (and 1 more)
-
Thanks so much Mobbsie, B.E., Dave and the "likes". As I said, work on the head is not my favorite, but it's very satisfying to get through it and have it so appreciated by all of you. Bob
- 682 replies
-
- 5
-
-
- halifax
- lumberyard
- (and 1 more)
-
Al, as it turned out, I used only the windows from the laser cut sheet. I found the laser cut carvings far too fragile for my clumsy efforts. I wasn't happy with the one piece resin stern casting, so I ended up using the laser cut windows (thinned considerably), cut the carvings from the resin casting, discarded what remained of the casting and scratch built the stern. I did use the resin quarter badges, with the windows cut out and replaced by the laser cut pieces. I'm sure that I could have used the castings virtually "as is", but I enjoyed doing the scratch stern. Bob
- 682 replies
-
- 7
-
-
- halifax
- lumberyard
- (and 1 more)
-
Thanks so much Hamilton, Al, Thomas and Robin for the very kind words, and thanks also to the "likes". Al, I'm really gratified that you have decided to do Halifax based on my work. I don't think that it's silly at all, and you will enjoy the challenge. I look forward to watching. Bob
- 682 replies
-
- 6
-
-
- halifax
- lumberyard
- (and 1 more)
-
Sorry again to have been the bearer of bad news, but this looks much better. BTW, you are hardly alone in having brain cramps. I thought that I had the monopoly on them. Bob
- 310 replies
-
- 5
-
-
- cheerful
- Syren Ship Model Company
- (and 1 more)
-
Thanks to all for the very generous comments and the "likes". As always, I greatly appreciate your interest. Bob
- 682 replies
-
- 7
-
-
- halifax
- lumberyard
- (and 1 more)
-
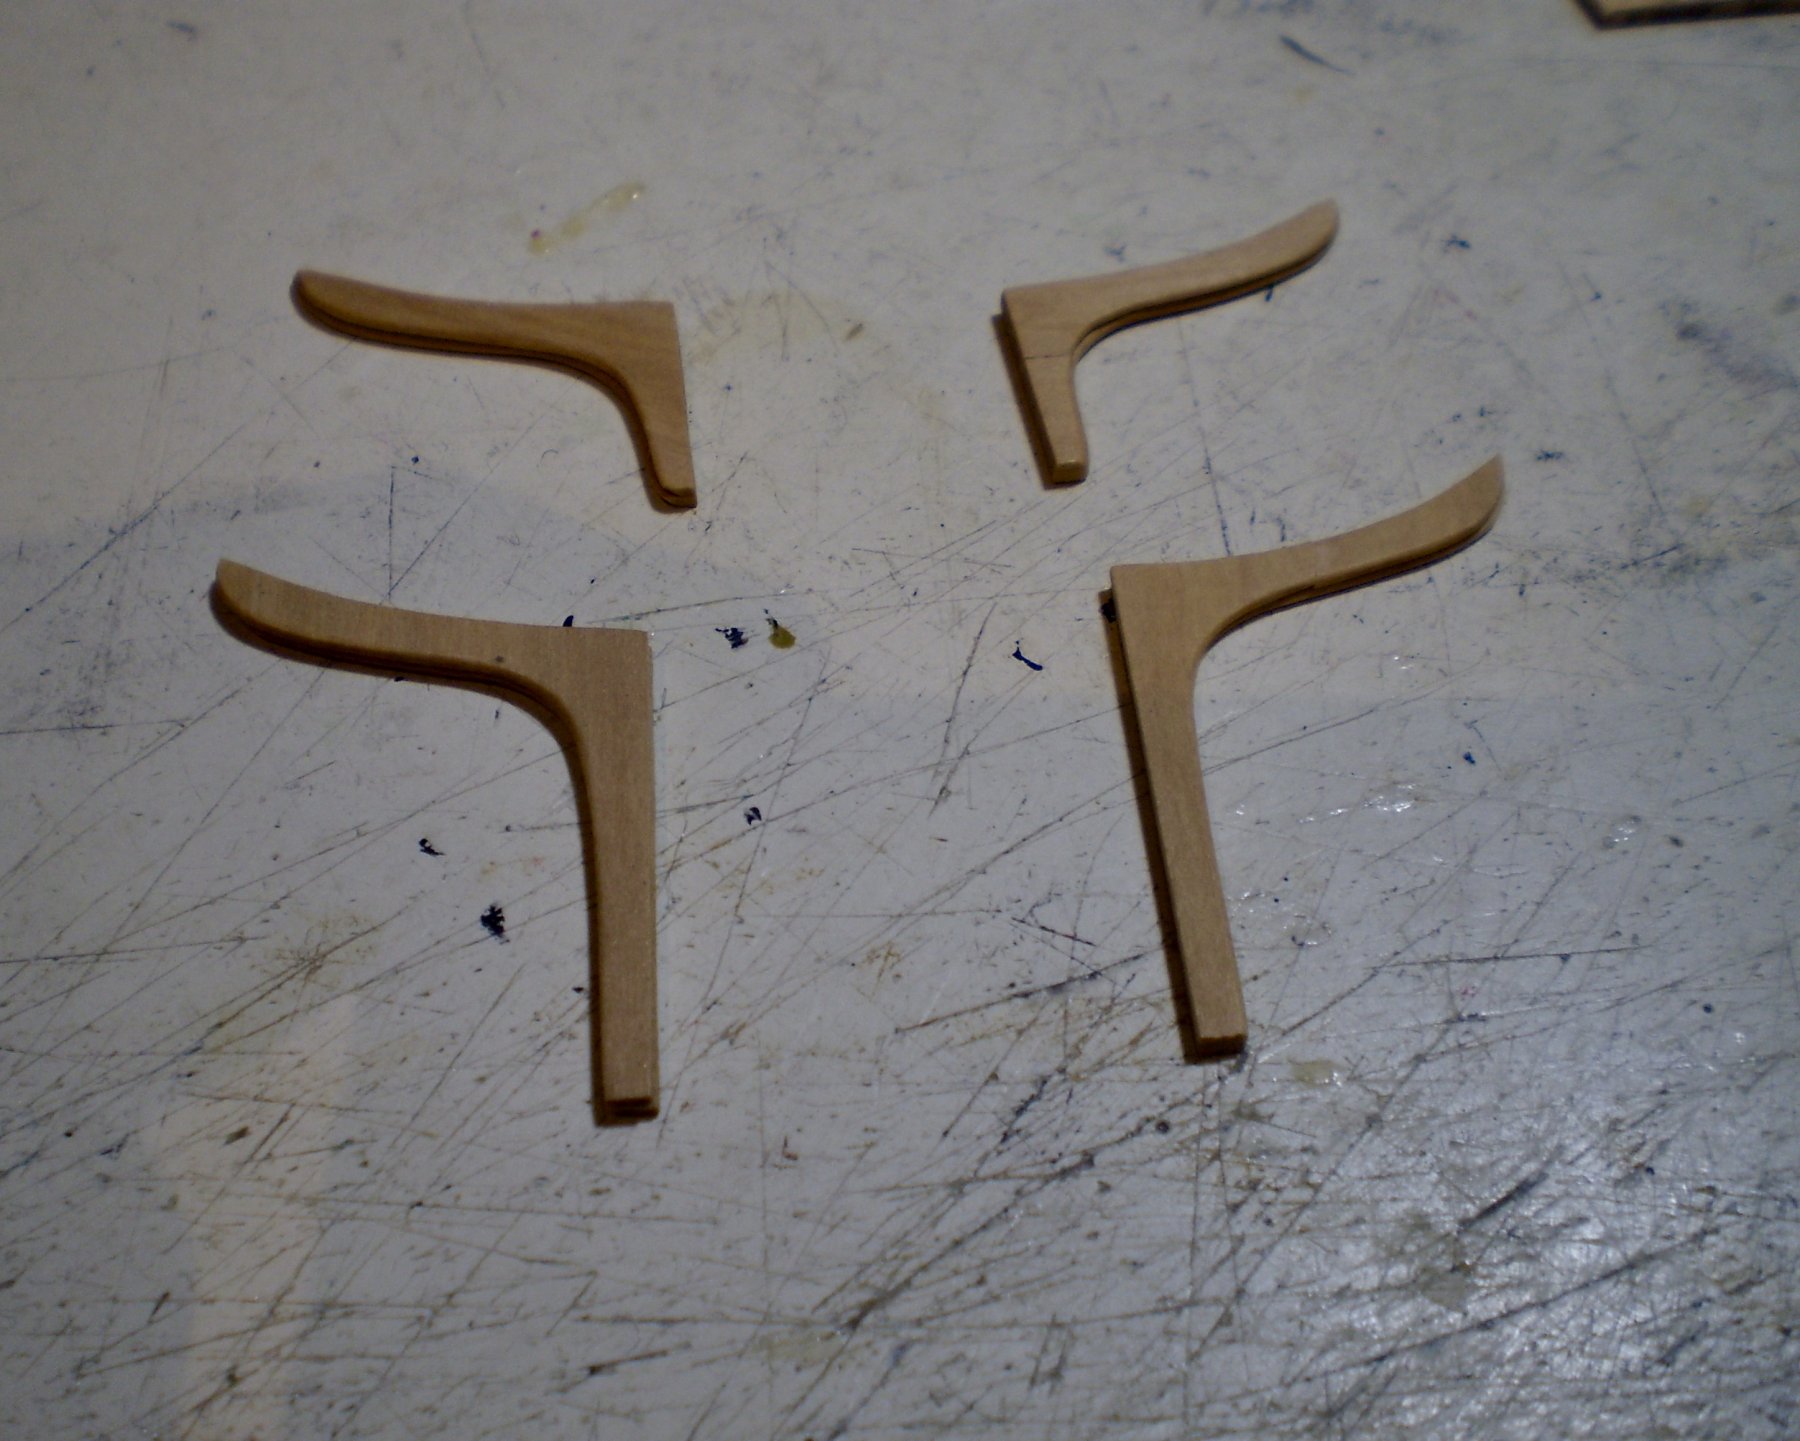
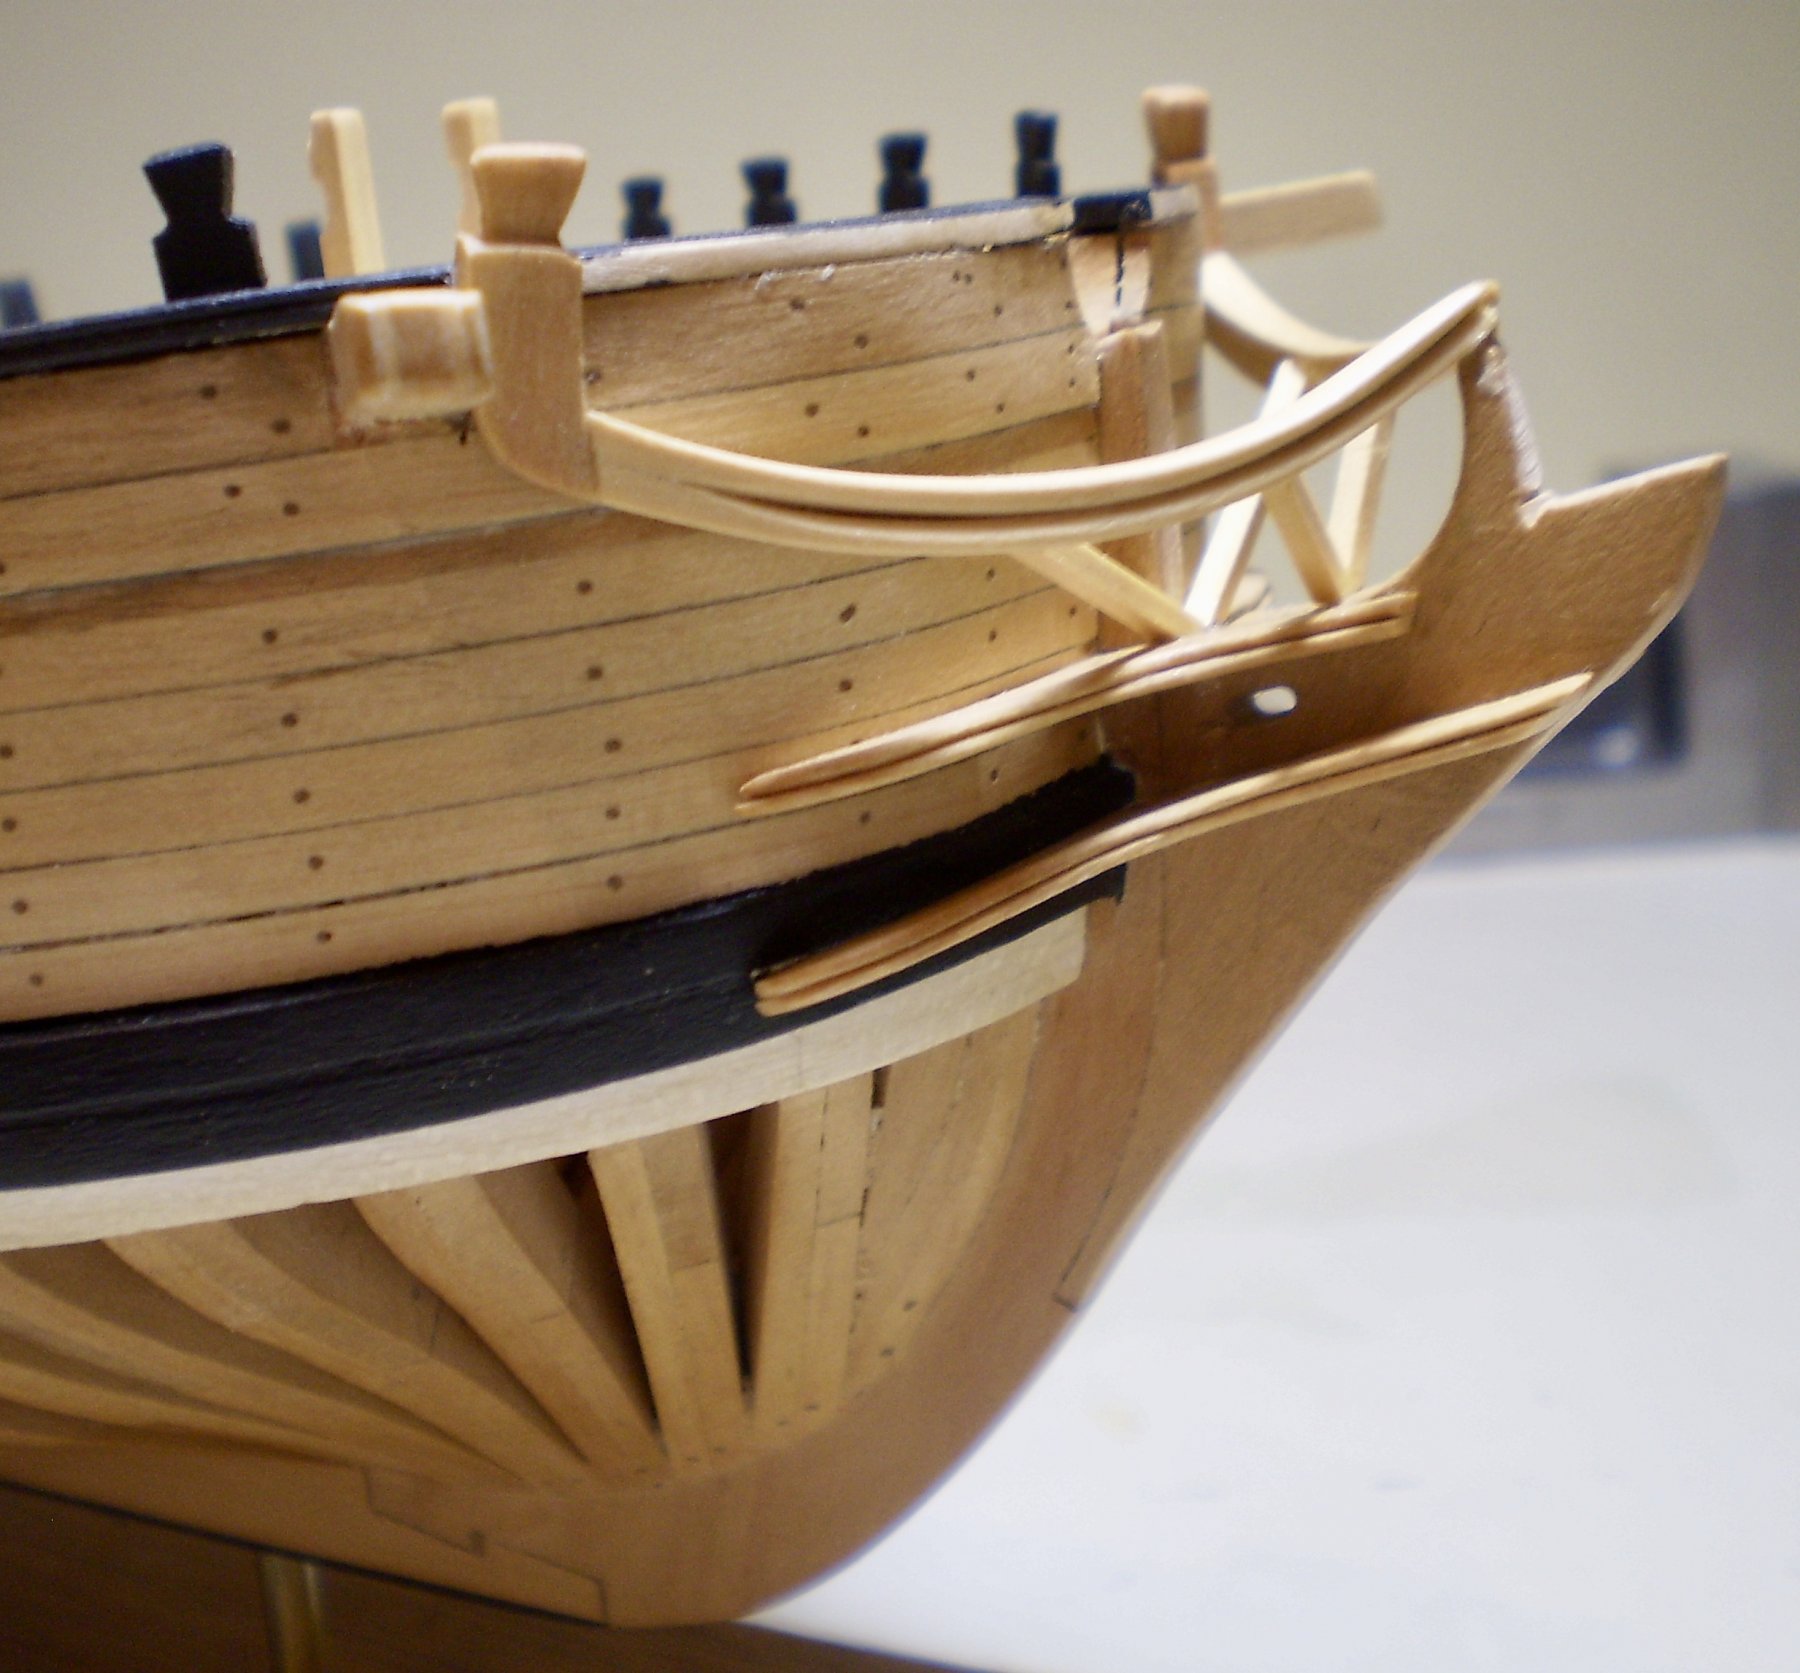
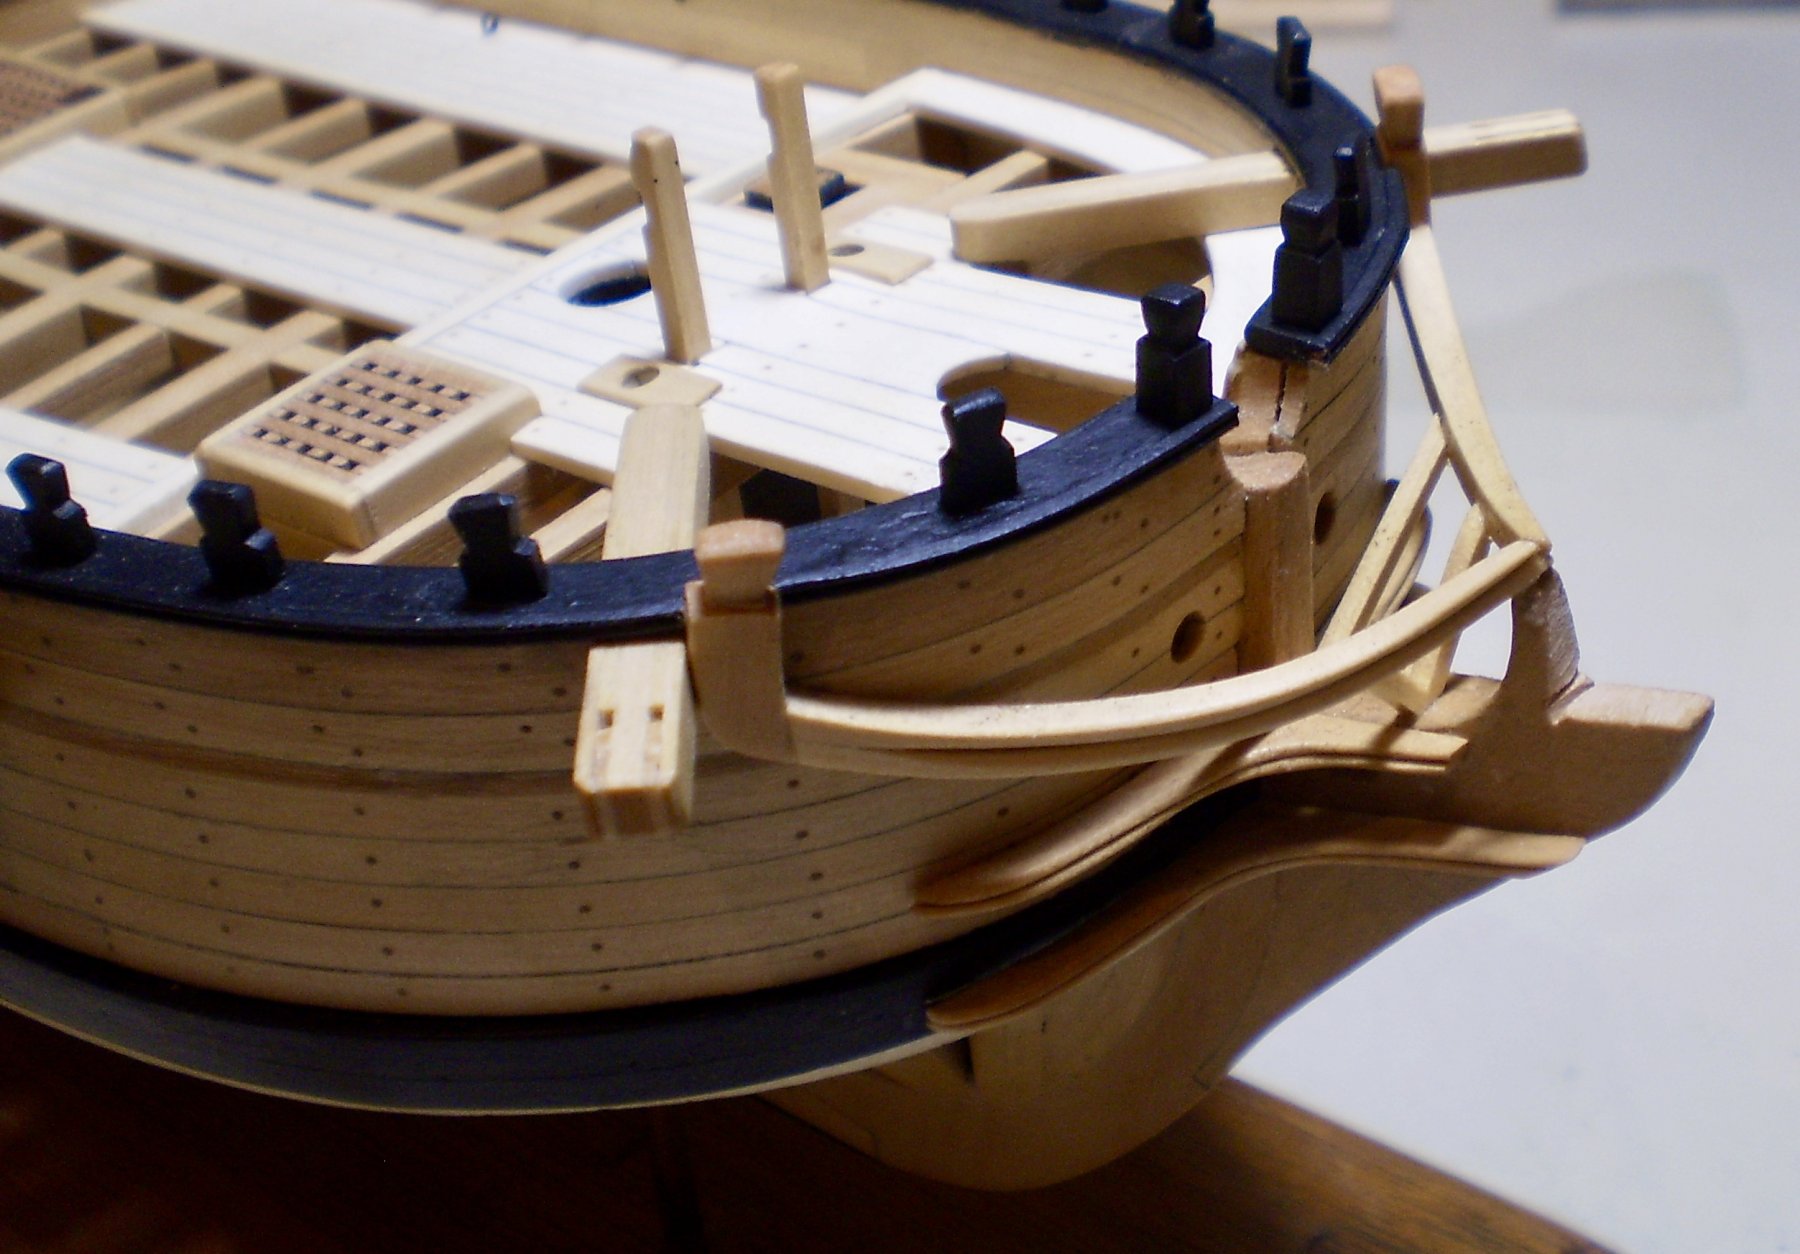
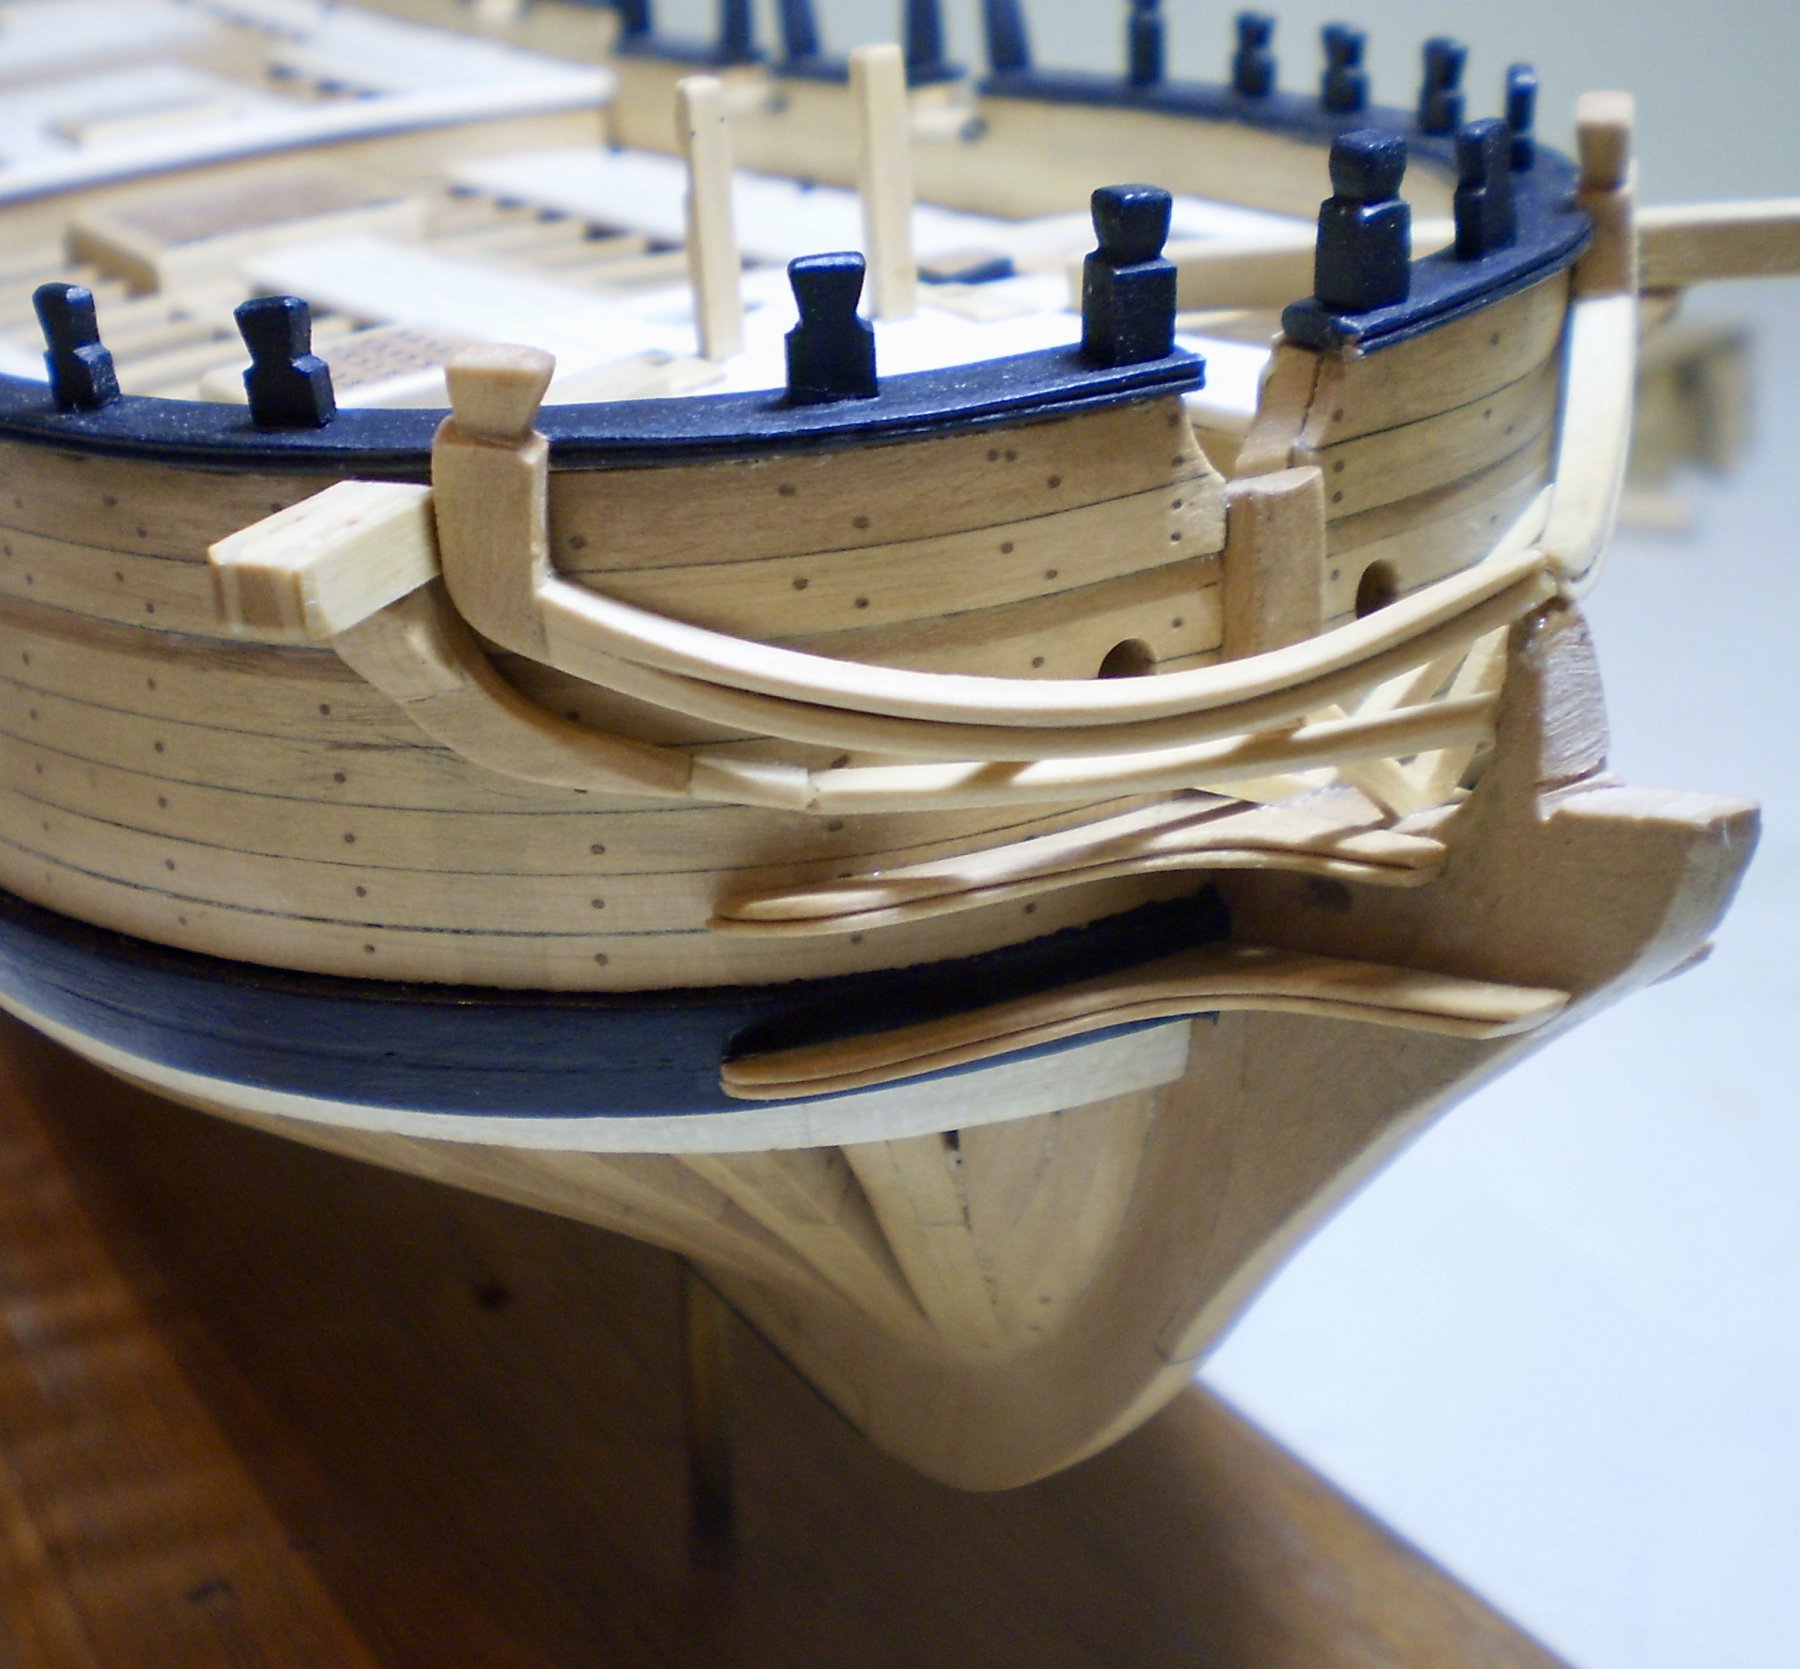
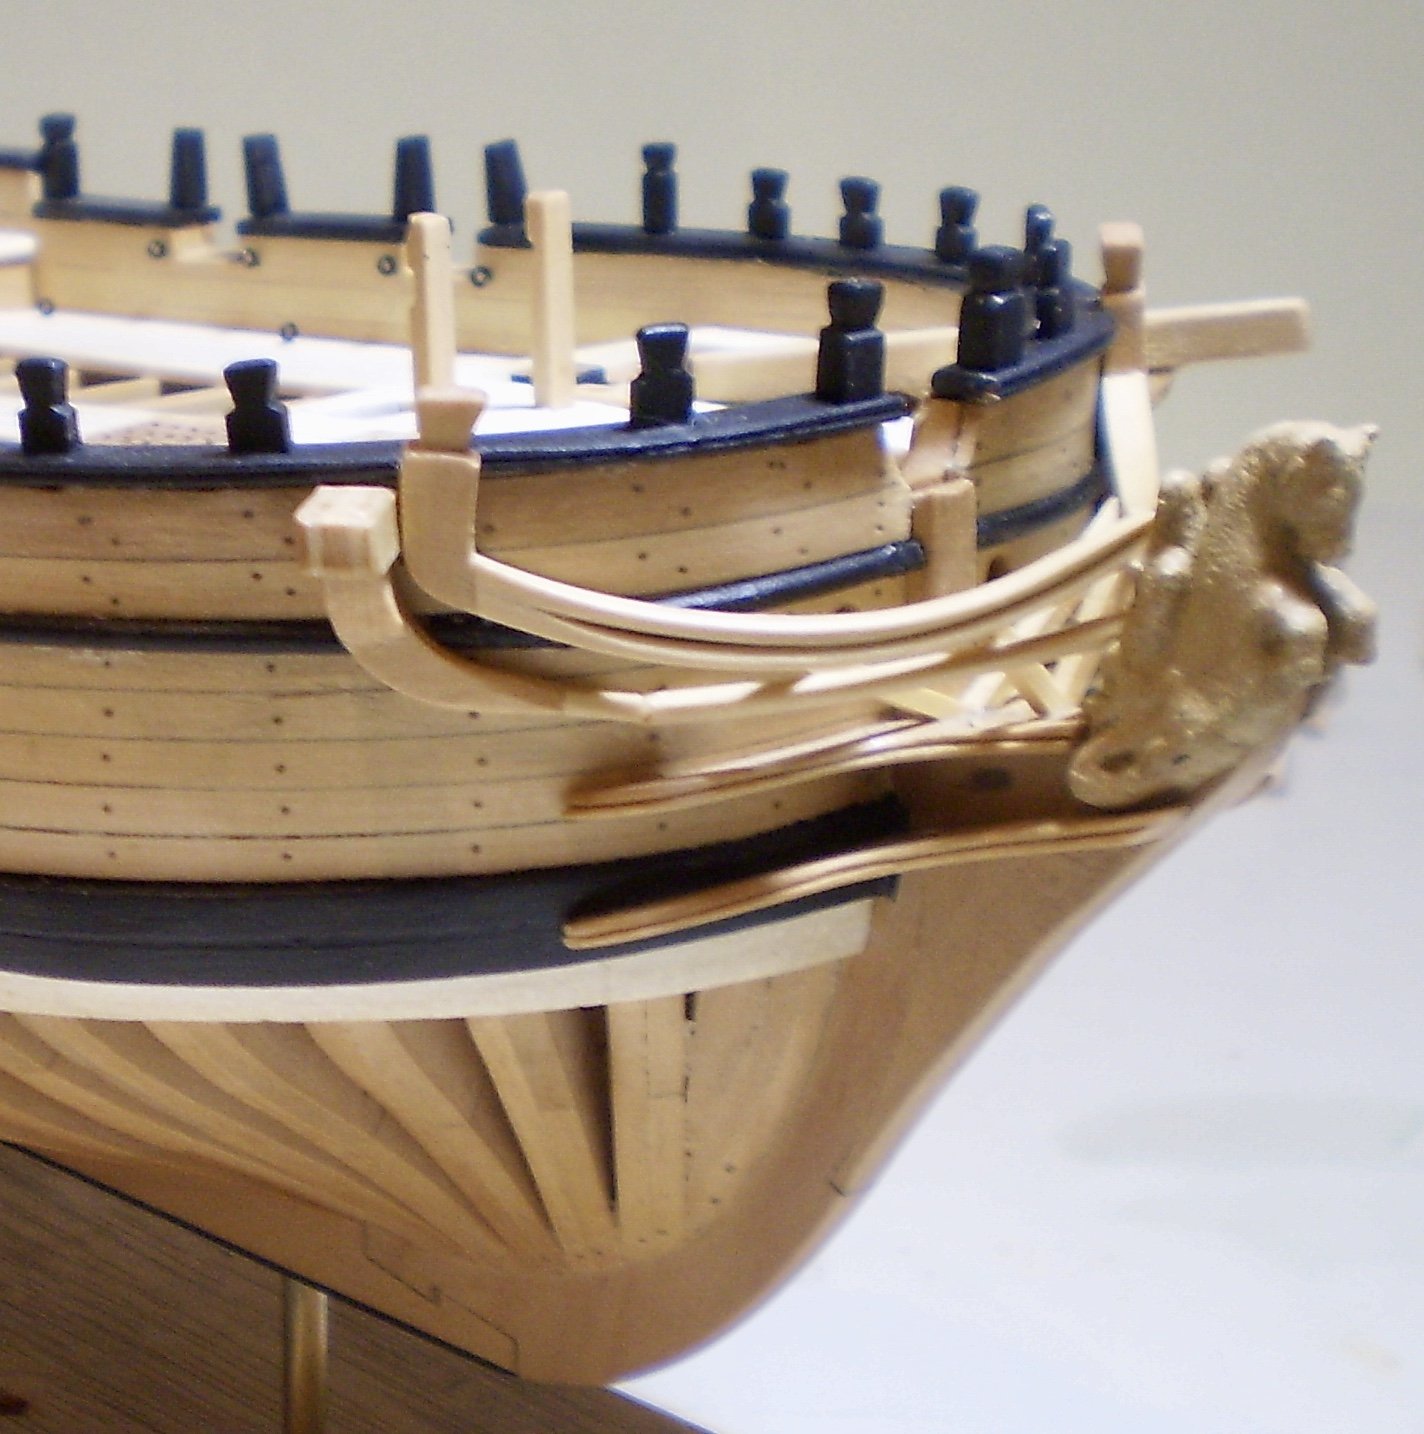
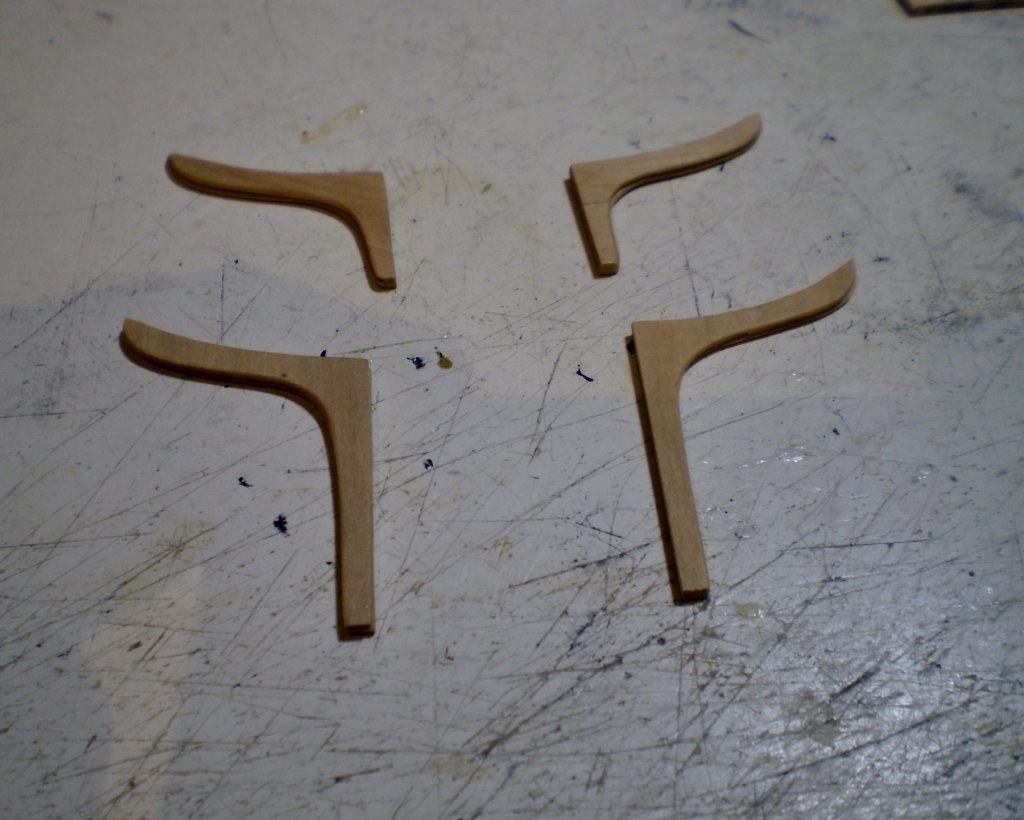
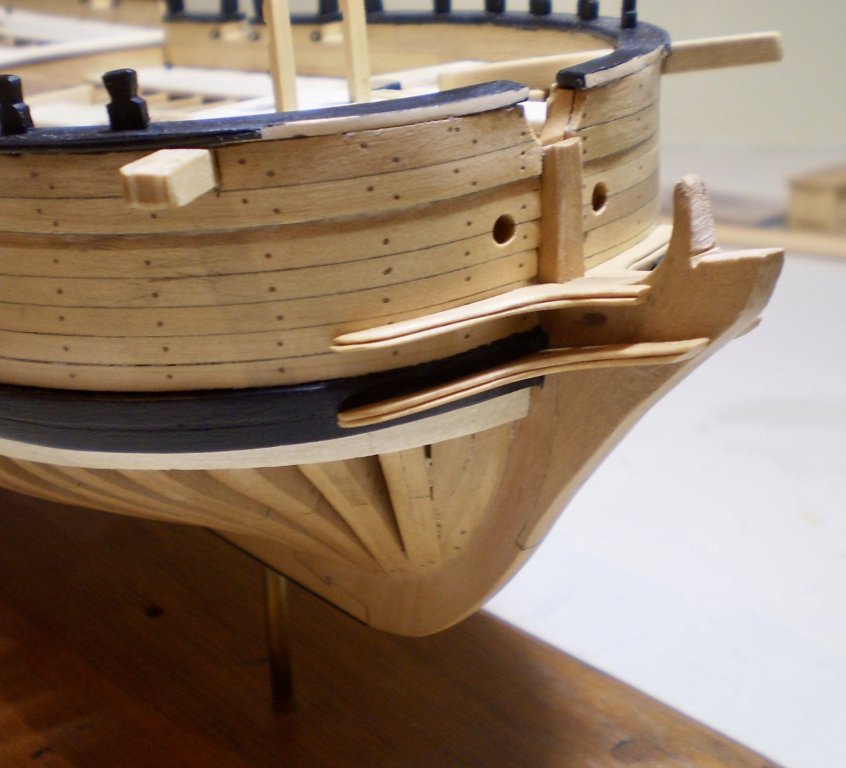
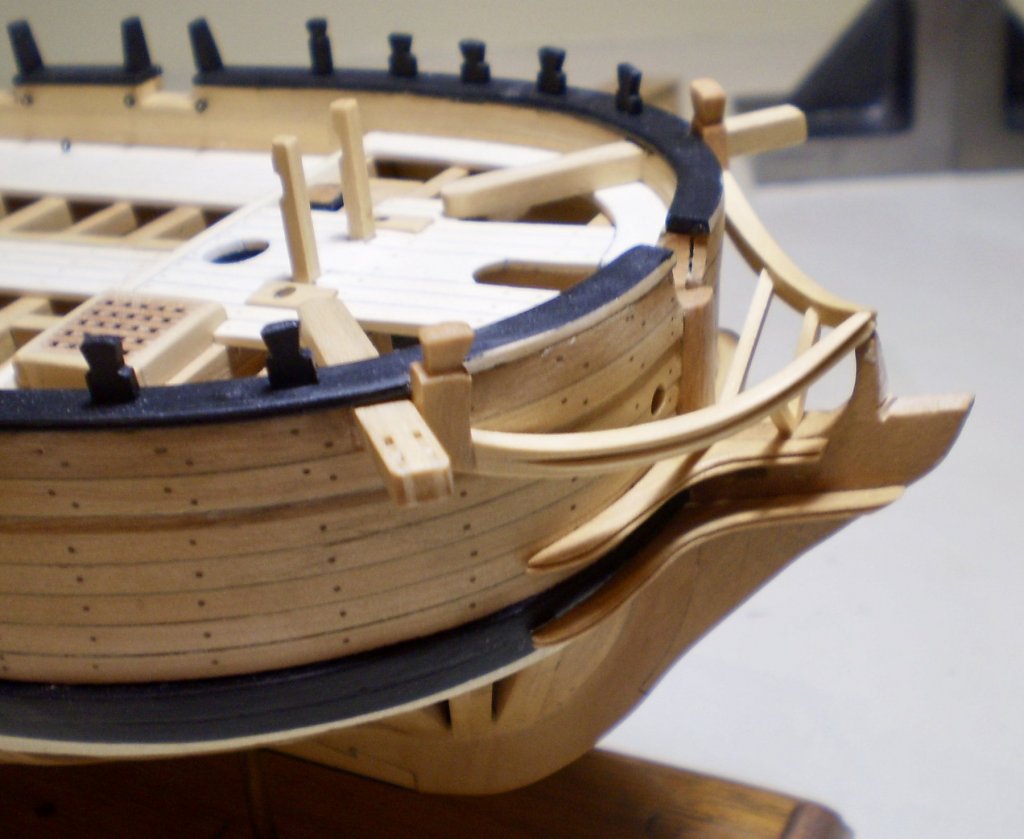
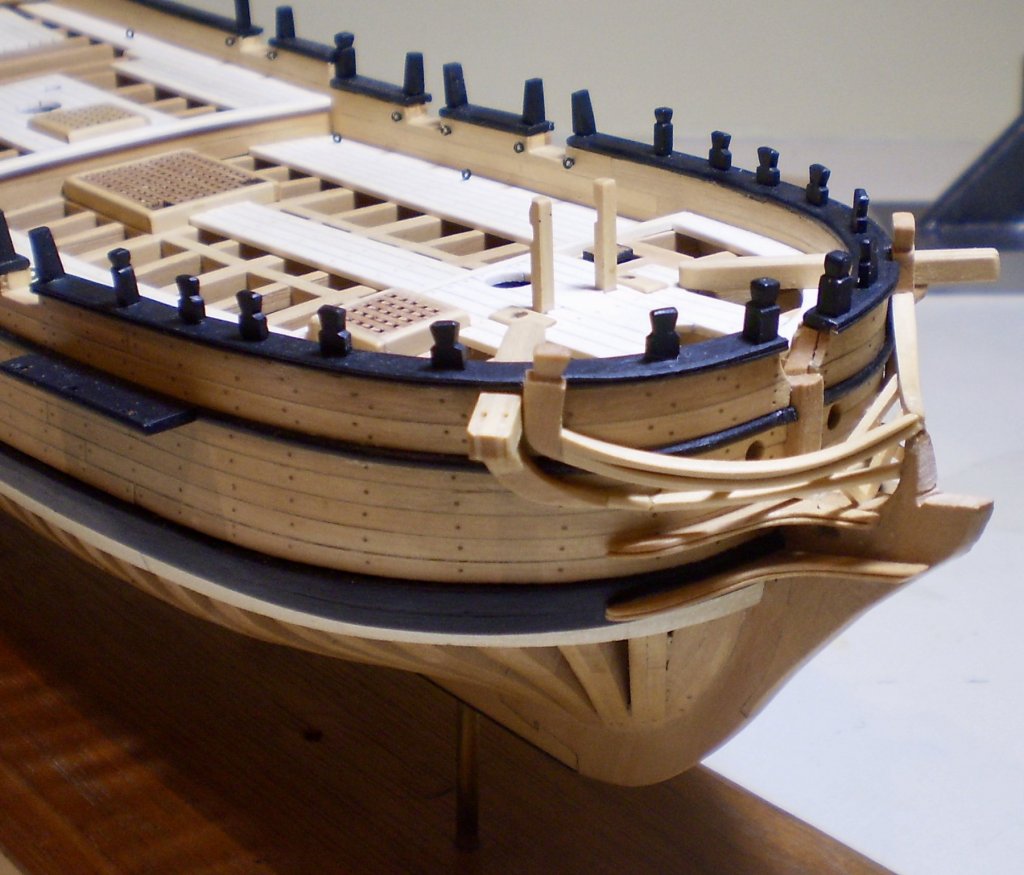
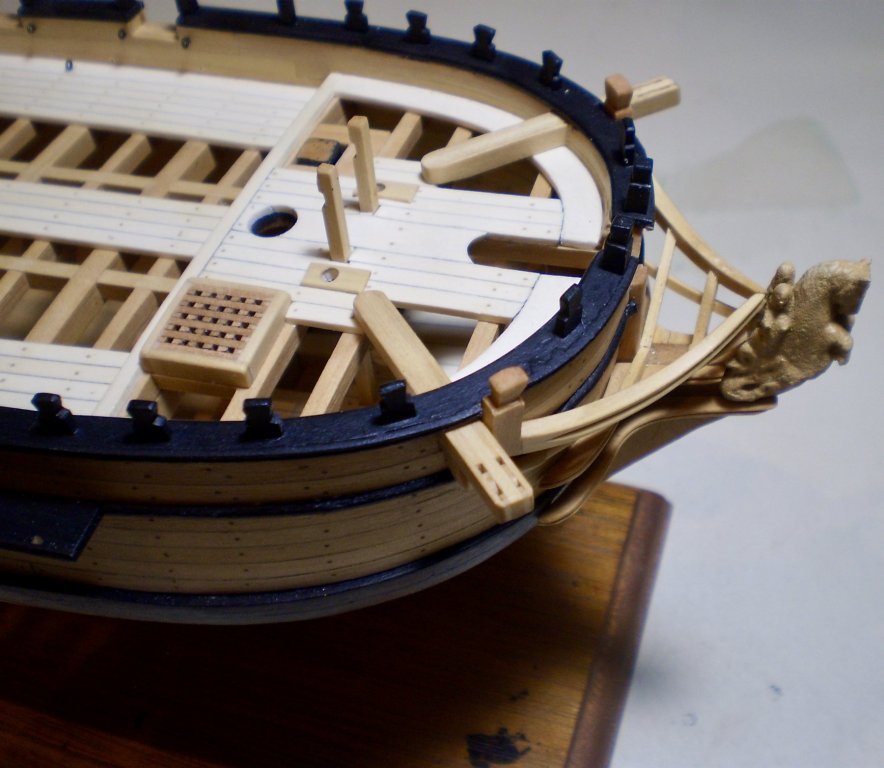
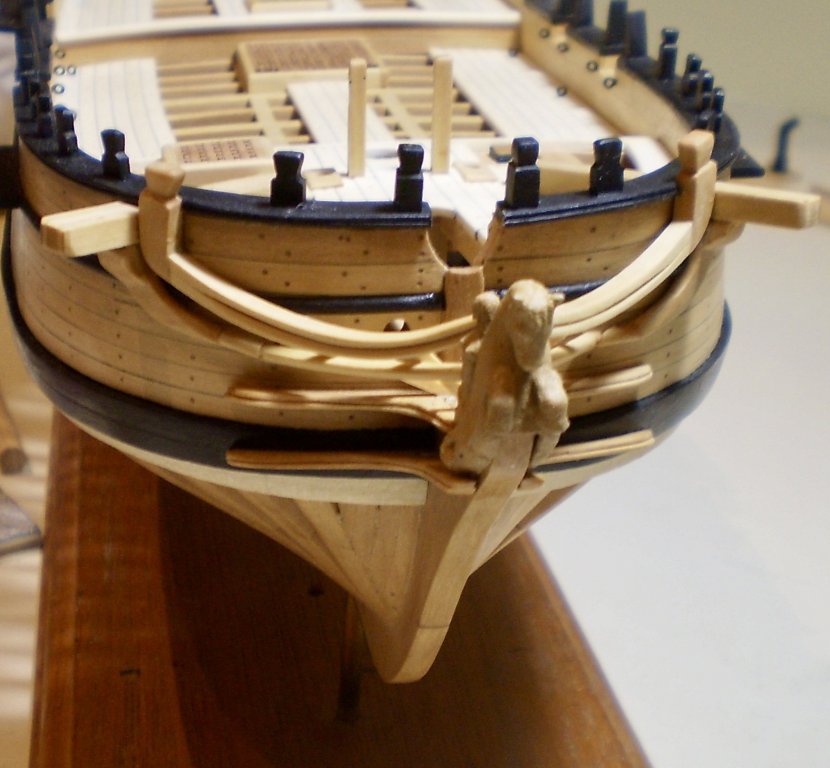
Work on the head is now complete. It was the pain that it always seems to be, but there is also a sense of accomplishment. At he risk of boring you all, I will go through it on a step by step basis, with photos of each successive phase. I began with the cheeks. These were each done as laminations of two pieces cut from thin boxwood sheet, then sanded on their facing edges before being glued together and then final fitted to the hull. Card templates were used to get the initial shape. Once the cheeks were in place, I made up the main rails. These too are made as laminations from thicker boxwood sheet, using card templates. After lamination, each rail was sanded to their tapered shape. The timber head shape was then filed into the upper end. The rails were then final fitted to the hull and glued into place. At this point, I chose to make and add the upper molding and then the knight heads and timber heads at the bow. These were filed to shape from two sizes of boxwood strip, painted black and then pinned and glued in place. Next were the head timbers, which were made from boxwood strip and fitted,, with what seemed like endless trial and error, until they fit between the main rails and the cheeks. The next, and possibly the most difficult, task was to do the cathead supports and the lower rails .These were done in segments. The first segment was the lower rail, which was made from boxwood strip bent to shape and fitted between the stem and the hull and glued in place to the head timbers. Then came the most difficult piece in the process, the cathead supports. These were first cut from thick boxwood sheet, using card templates, and then filed and sand to shape. This was a task, since they had to fit the hull contours, as well as the angles of the catheads and match up to the position, size and shape of the lower rails. I found it necessary to use very small filler pieces of strip to mate the two segments. I the added the final pieces of the lower hull molding at the bow and between the fore channels and the cathead supports. The last item was to paint the 3D printed resin figurehead from the kit and glue it into place. Bob


- 682 replies
-
- 42
-
-
- halifax
- lumberyard
- (and 1 more)