HOLIDAY DONATION DRIVE - SUPPORT MSW - DO YOUR PART TO KEEP THIS GREAT FORUM GOING! (Only 20 donations so far - C'mon guys!)
×


rafine
-
Posts
2,932 -
Joined
-
Last visited
Content Type
Profiles
Forums
Gallery
Events
Everything posted by rafine
-
 Thanks so much Michael, Christian, Mike and the "likes". Appreciated, as always. Christian, I have been replacing kit wood for a long time. Once you do it is very hard to go back. The castello boxwood and holly that I work with is just so much easier to use. It cuts cleaner, holds an edge better and sands smoother. It doesn't chip or splinter. You should give it a try (although you seem to be doing great with what you're using). Bob
- 682 replies
-
- 6
-

-
- halifax
- lumberyard
- (and 1 more)
-
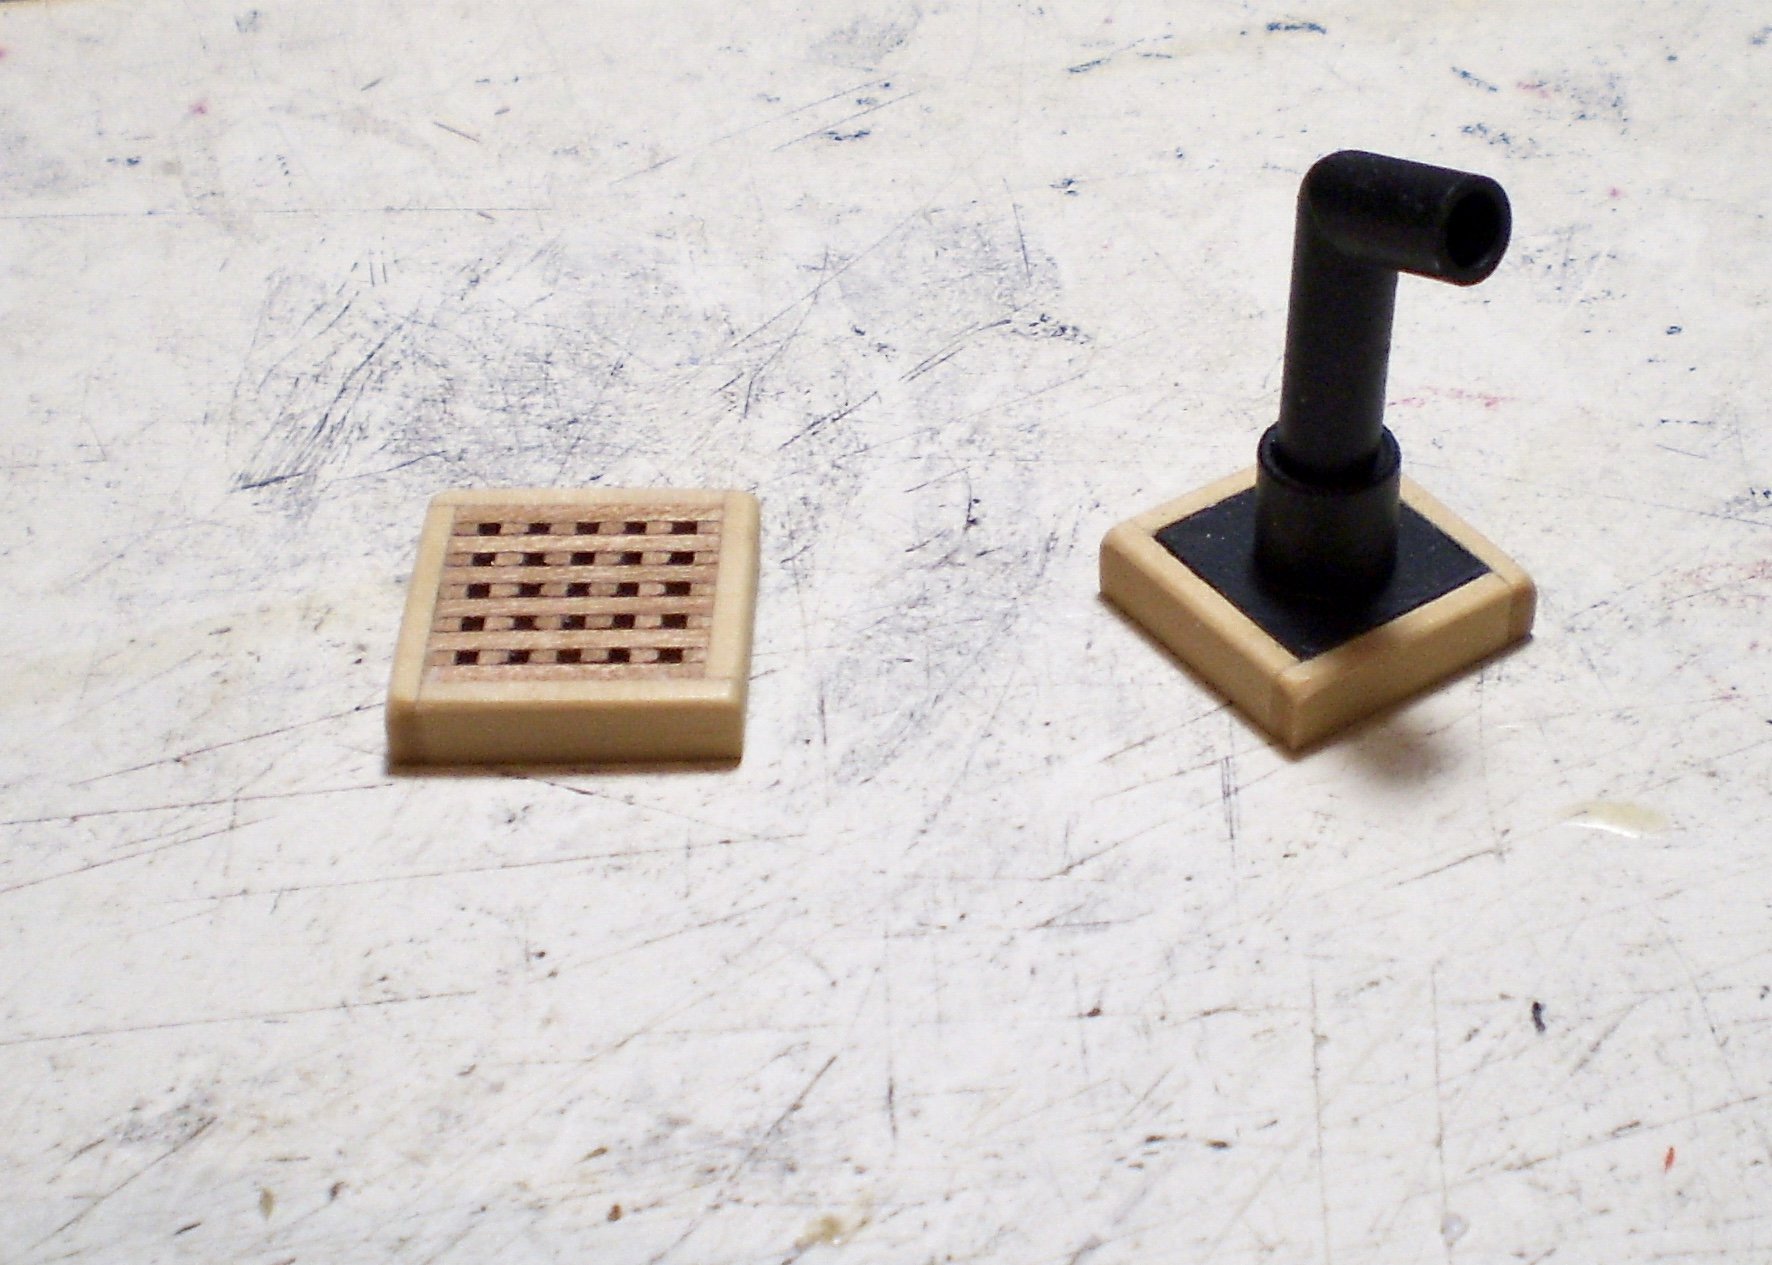
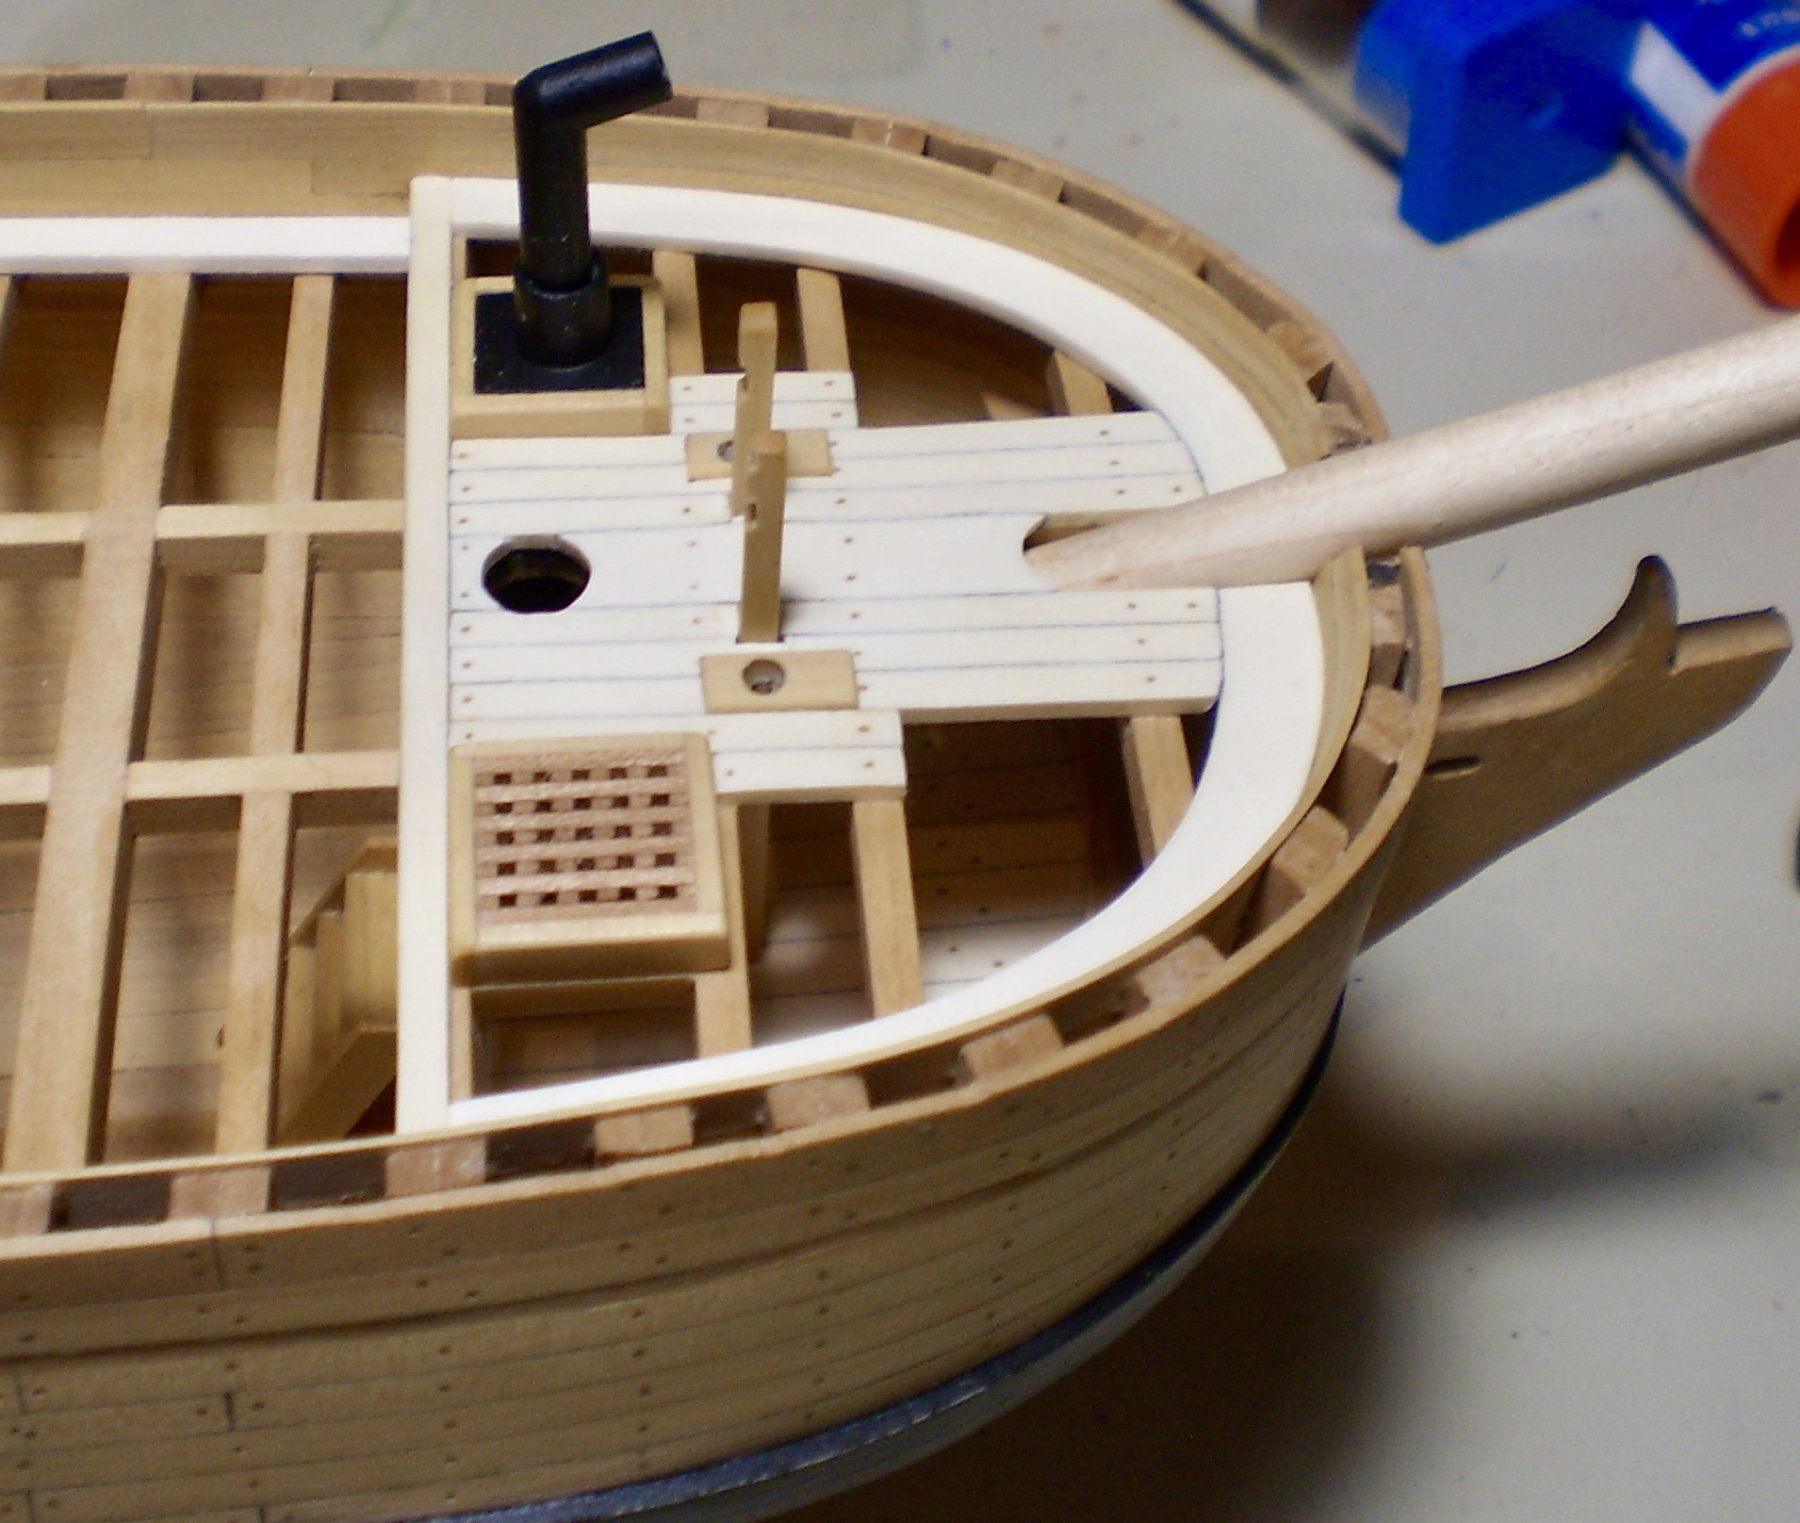
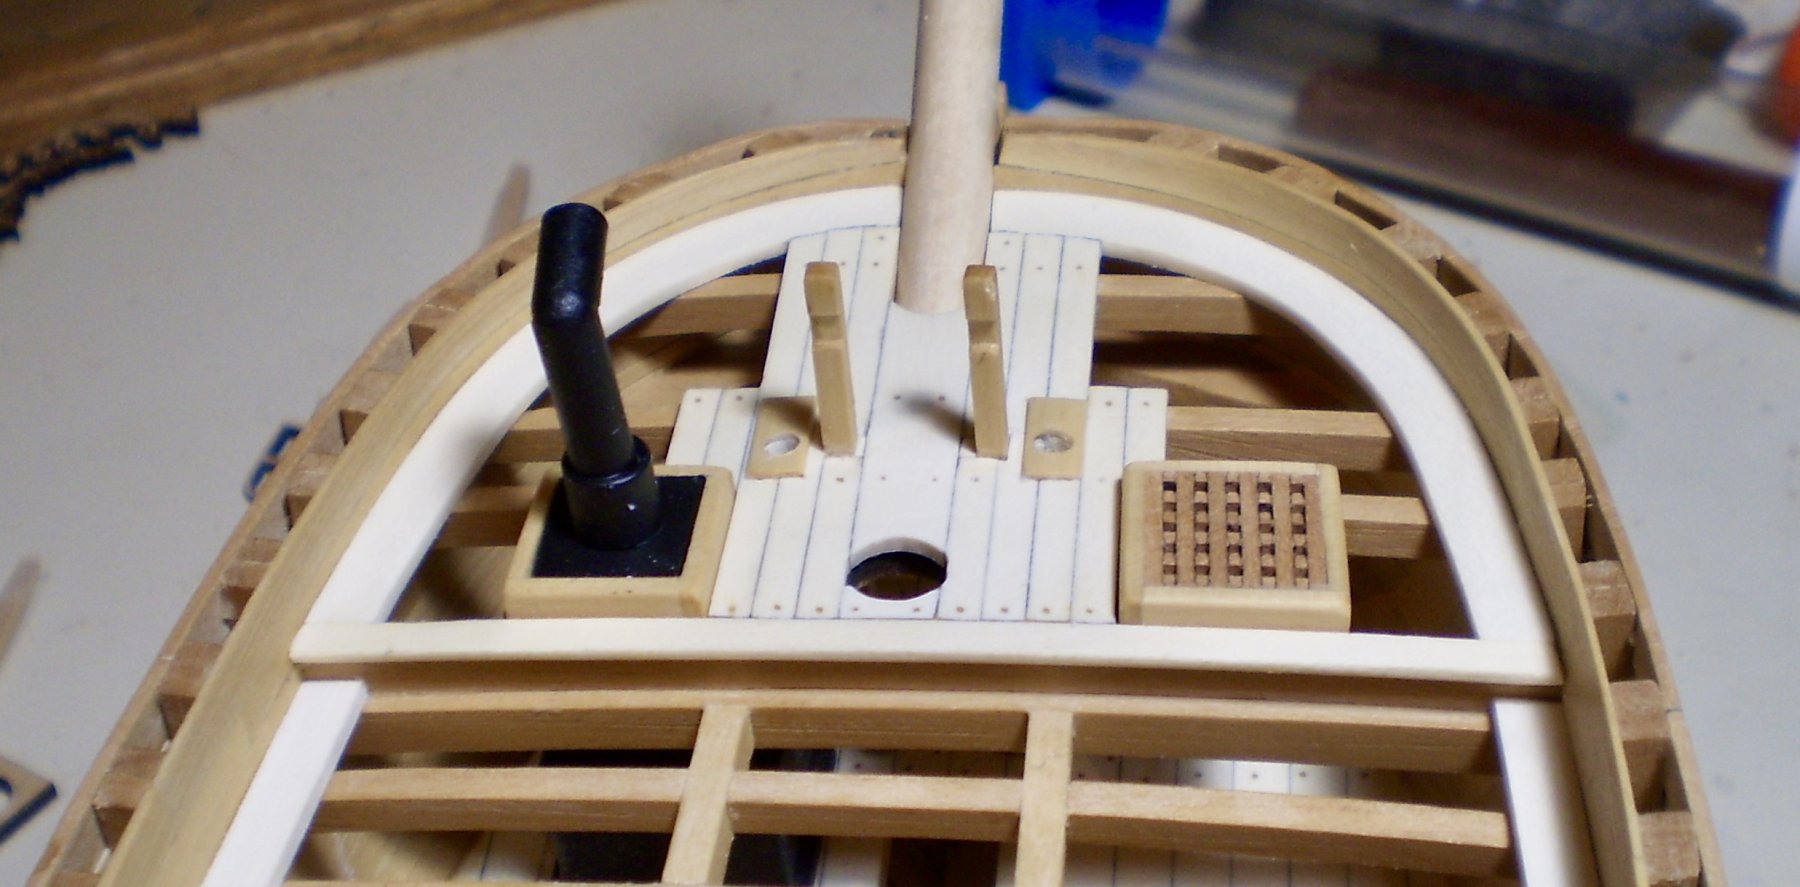
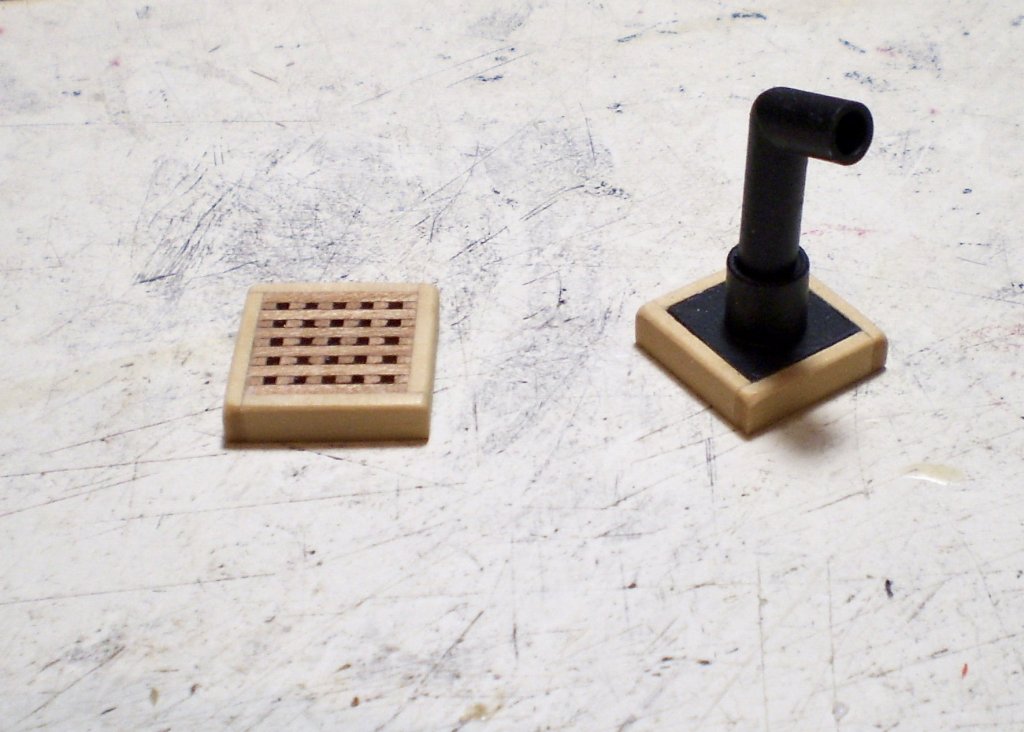
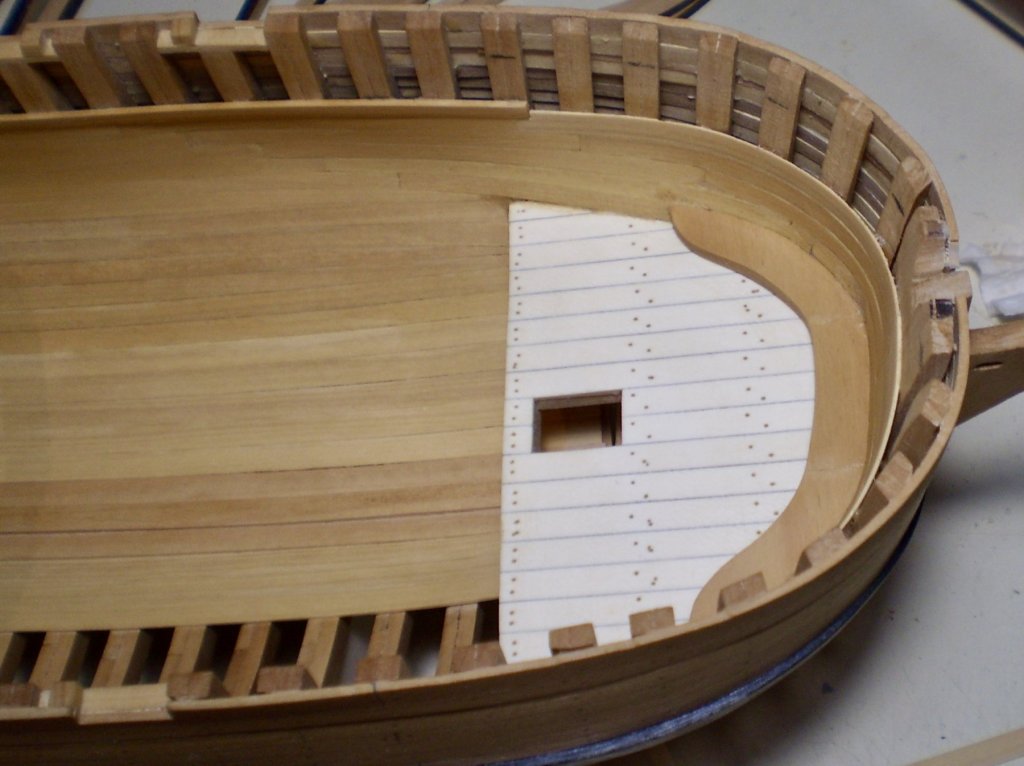
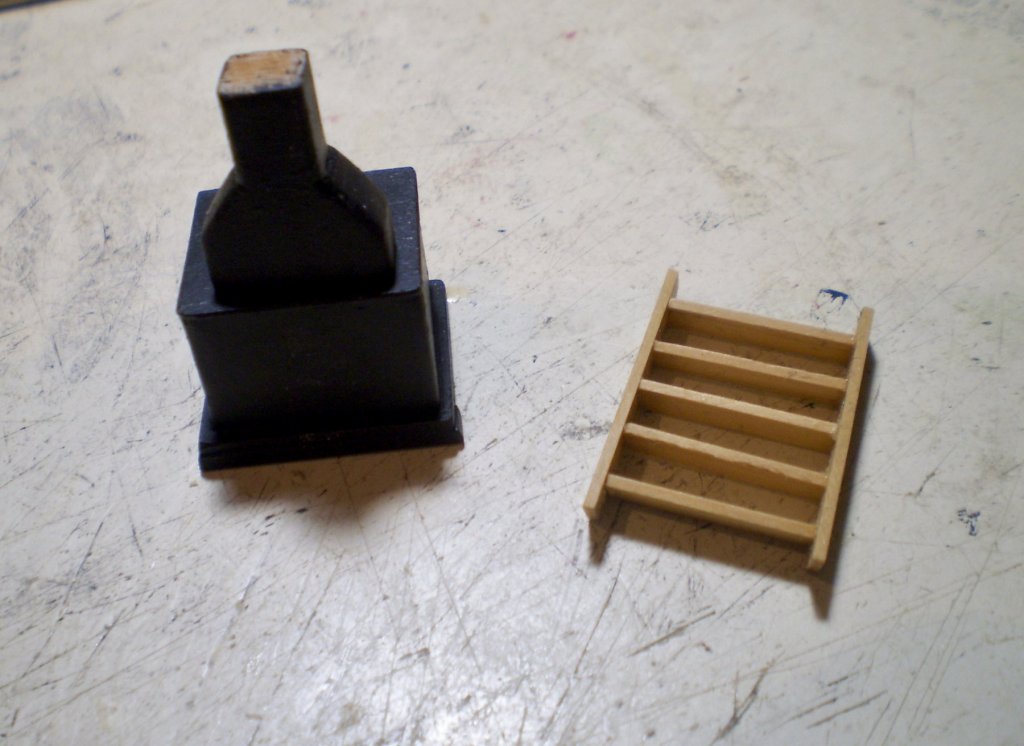
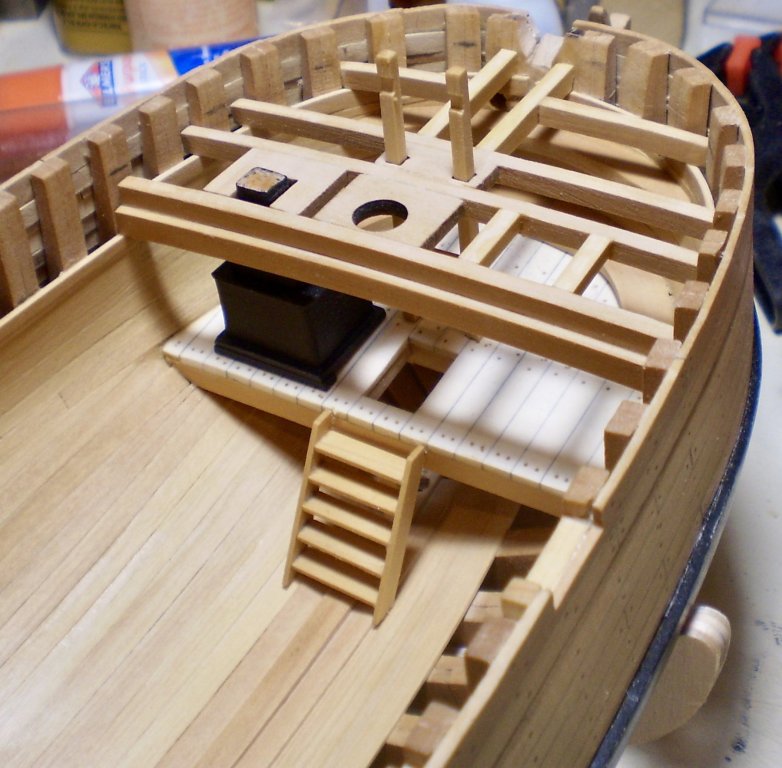
I've been moving along a little more quickly than usual, This has been for two reasons: first, there has been some rain that's cut down on golf time; second, and more importantly, I've been enjoying this build as much as any that I can remember, and I'm finding it hard to stop whenever I start working on it. As a result, this past week I've done the interior bulwark planking, the forecastle deck planking (to the extent that it will be done), the stove pipe and the forecastle scuttle. The bulwark planking was done with boxwood strip of various sizes, but all 1/32" thick. This was pretty straightforward, with the exception of the compound curves at the bow, which required considerable bending and twisting using wet heat. I have chosen to leave the bulwarks in natural wood (as did Hahn in the book), and they were finished with Wipe-on Poly. I began the forecastle decking by cutting the margin planks from holly sheet using card templates. The remainder of the limited planking was done with holly strip. In order to do the deck planking, I needed to make up the stove pipe and scuttle coamings. I simulated the deck treenailing with golden oak filler in drilled holes. Halifax had an unusual arrangement where the the anchor cables came up through the forecastle deck. I drilled holes in the decking for these and then added pieces of drilled boxwood strip as reinforcement. The coamings were made from boxwood strip and formed around the grating and the stovepipe base. The grating was done from some precut grating material I had on hand. The stovepipe base was styrene sheet and the stovepipe itself was made from two sizes of styrene tube. These were painted black. The last photos show the stovepipe and scuttle temporarily in place and also a dummy bowsprit which i used to fit the deck planking. Bob


- 682 replies
-
- 37
-
-
- halifax
- lumberyard
- (and 1 more)
-
Looking great B.E. Bob
-
Thanks so much Thomas, Elijah, svein erik and the "likes". Thomas, if I'm almost finished, how come there's so much left to do? Elijah, I've been working on the forecastle area this week and the stove has just about disappeared, so I guess that it is good enough. Svein erik, glad to have you aboard. Bob
- 682 replies
-
- 7
-
-
- halifax
- lumberyard
- (and 1 more)
-
Thanks so much Denis and Tom for the very kind comments. Thanks also for the "likes". Bob
- 682 replies
-
- 4
-
-
- halifax
- lumberyard
- (and 1 more)
-
US Brig Syren by Gahm - Model Shipways
rafine replied to Gahm's topic in - Kit build logs for subjects built from 1801 - 1850
A wonderful piece of work Thomas. She is beautiful. Bob -
Thanks so much Mike, Michael and the "likes". Always appreciated. Bob
- 682 replies
-
- 3
-
-
- halifax
- lumberyard
- (and 1 more)
-
Thanks so much Rony, Christian, John, Zarkon, Grant and Dave for the nice comments and thanks also to the "likes". No worry, Christian. I'm going to leave as much as possible open. At this point, the only thing that I know for sure is that I'm going to do a margin plank around the perimeter after I finish the bulwark planking. Bob
- 682 replies
-
- 5
-
-
- halifax
- lumberyard
- (and 1 more)
-
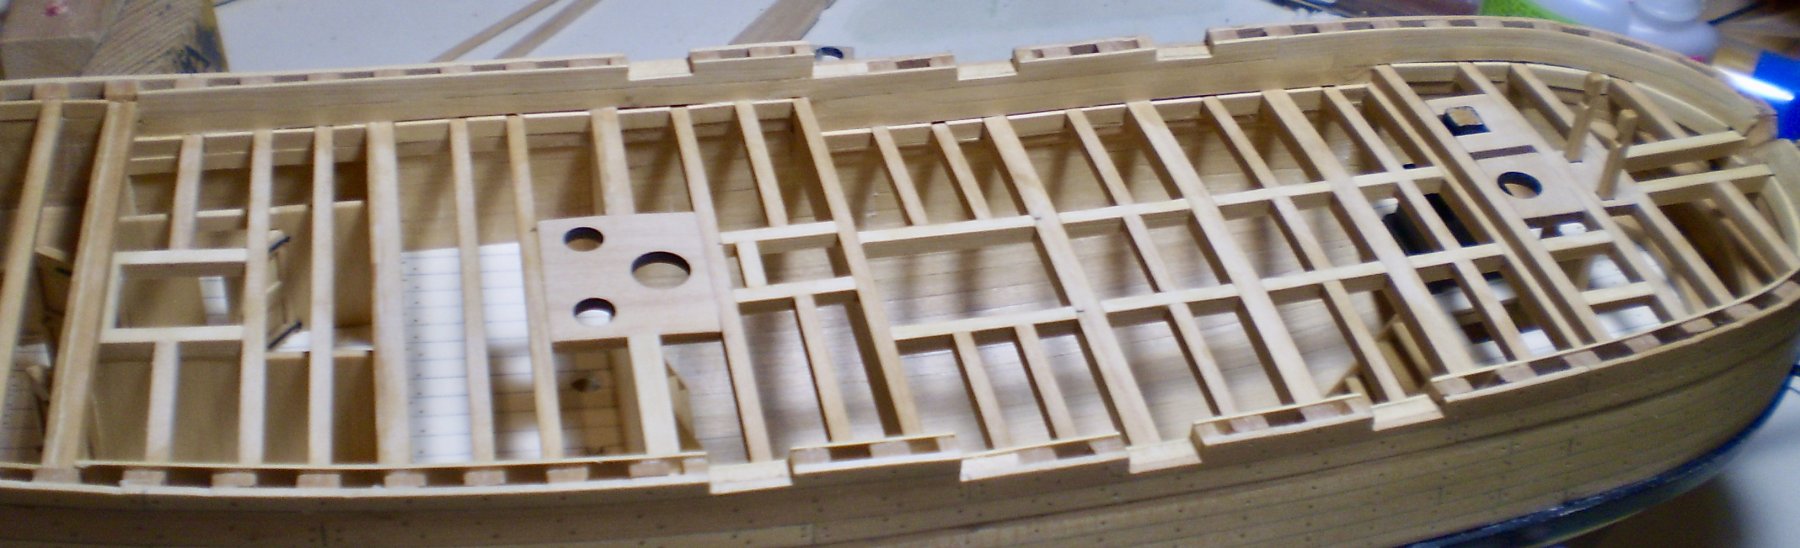
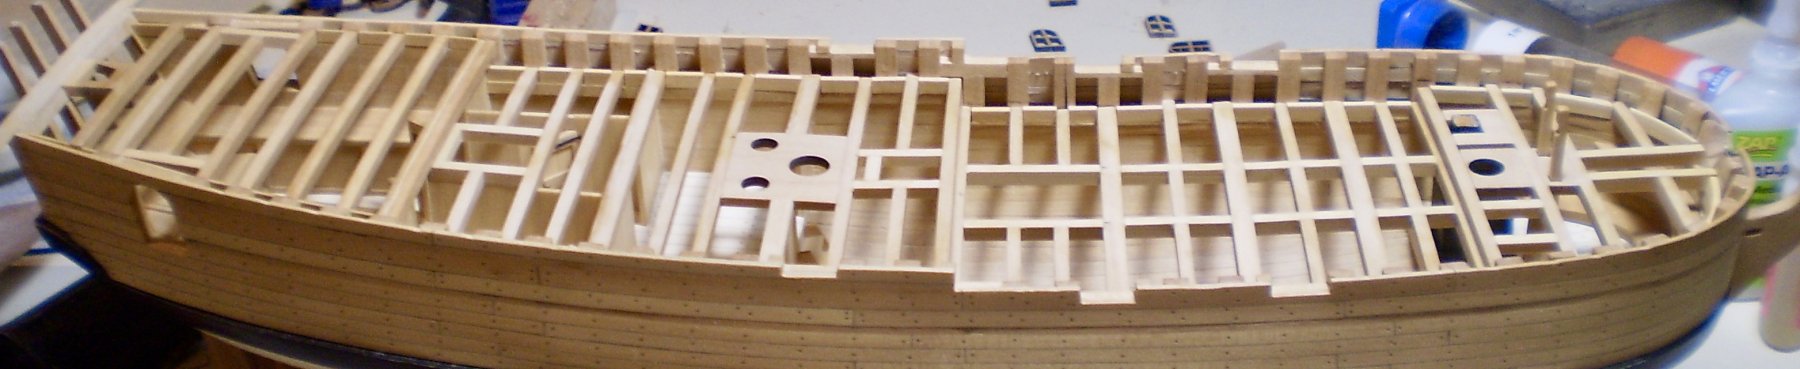
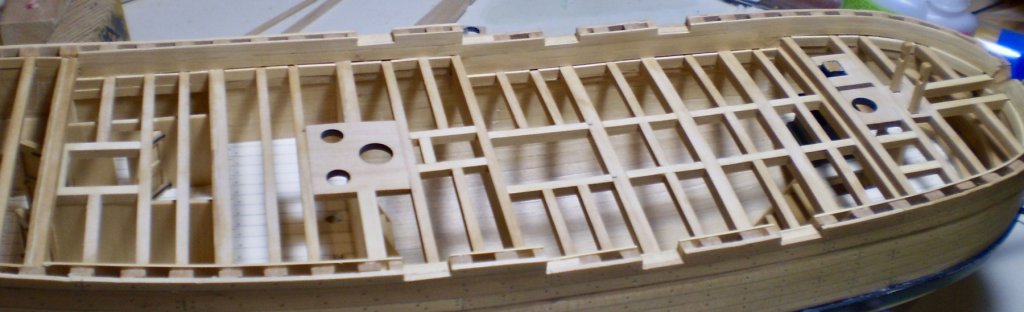
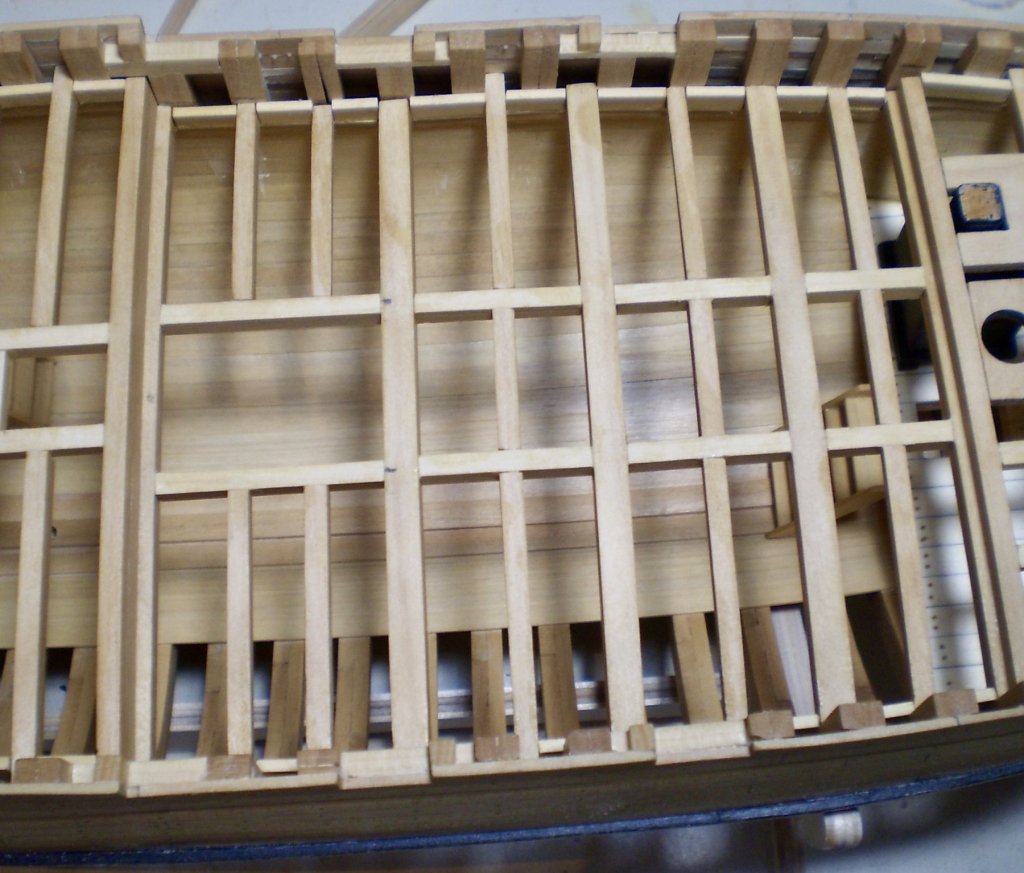
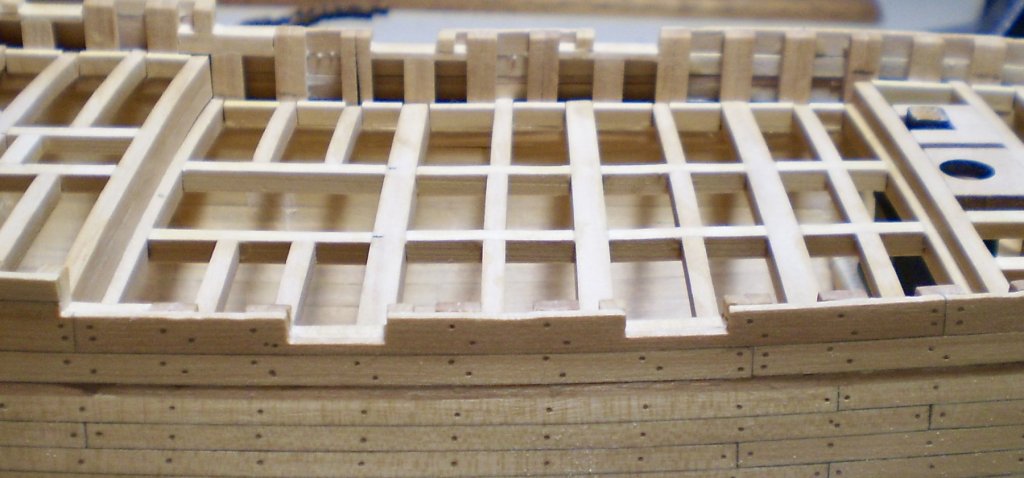
After spending some time away with family, I've returned and completed the deck framing. This consisted of two tasks: framing the midship portion of the deck, and filling in the spaces between all of the deck beams with inner hull planking. While I wondered if there would have been knees between the beams, neither the drawings nor the book photos show any, and I went with the planking. In any event, the perimeter of the decks will be covered by deck planking, which will conceal this detail. As with the other deck segments, I used the laser cut pieces for the beams and ledges and boxwood strip for the carlings. Boxwood strip was used for the planking, which had to be cut and fitted for each individual space. Next will be the planking of the inner bulwarks above the decks. Bob


- 682 replies
-
- 37
-
-
- halifax
- lumberyard
- (and 1 more)
-
Really nicely done Sjors. Bob
-
Great to have you back Mobbsie. She's looking wonderful. Bob
- 129 replies
-
- 8
-
-
- armed launch
- panart
- (and 1 more)
-
That is a truly spectacular piece of work Grant. Congrats on a great accomplishment. Bob
- 339 replies
-
- 6
-
-
- dumas
- Chris-Craft
- (and 3 more)
-
She's looking great Dave. Bob
-
Don, she looks better and better with each new addition. Bob
- 653 replies
-
- 3
-
-
- trabakul
- marisstella
- (and 1 more)
-
Thanks so much Dave, Nils and the "likes". Dave, I spent many hours detailing the stove on my Essex only to watch it disappear completely as work progressed. I just decided to use my time on other things this time. Hopefully, I won't regret it later. Bob
- 682 replies
-
- 5
-
-
- halifax
- lumberyard
- (and 1 more)
-
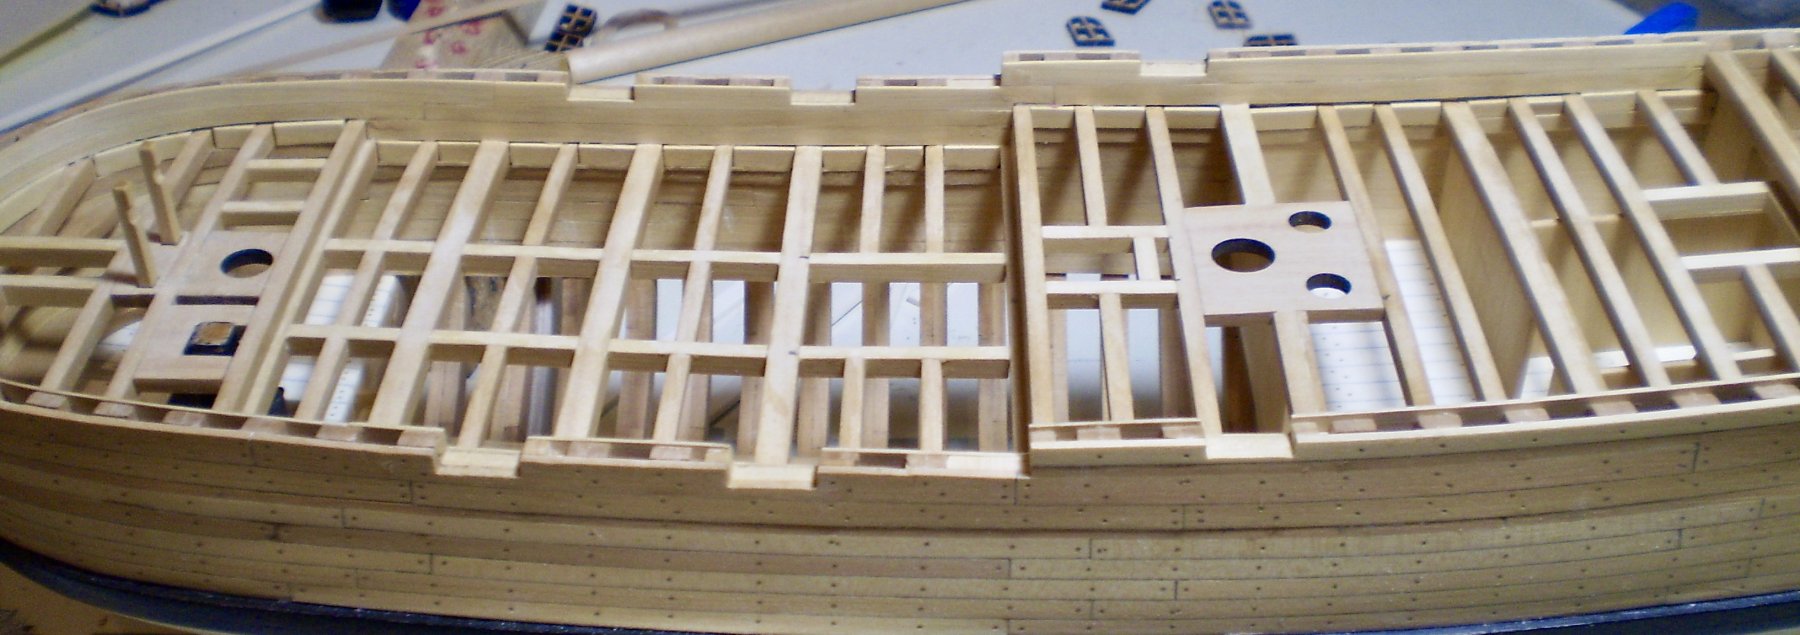
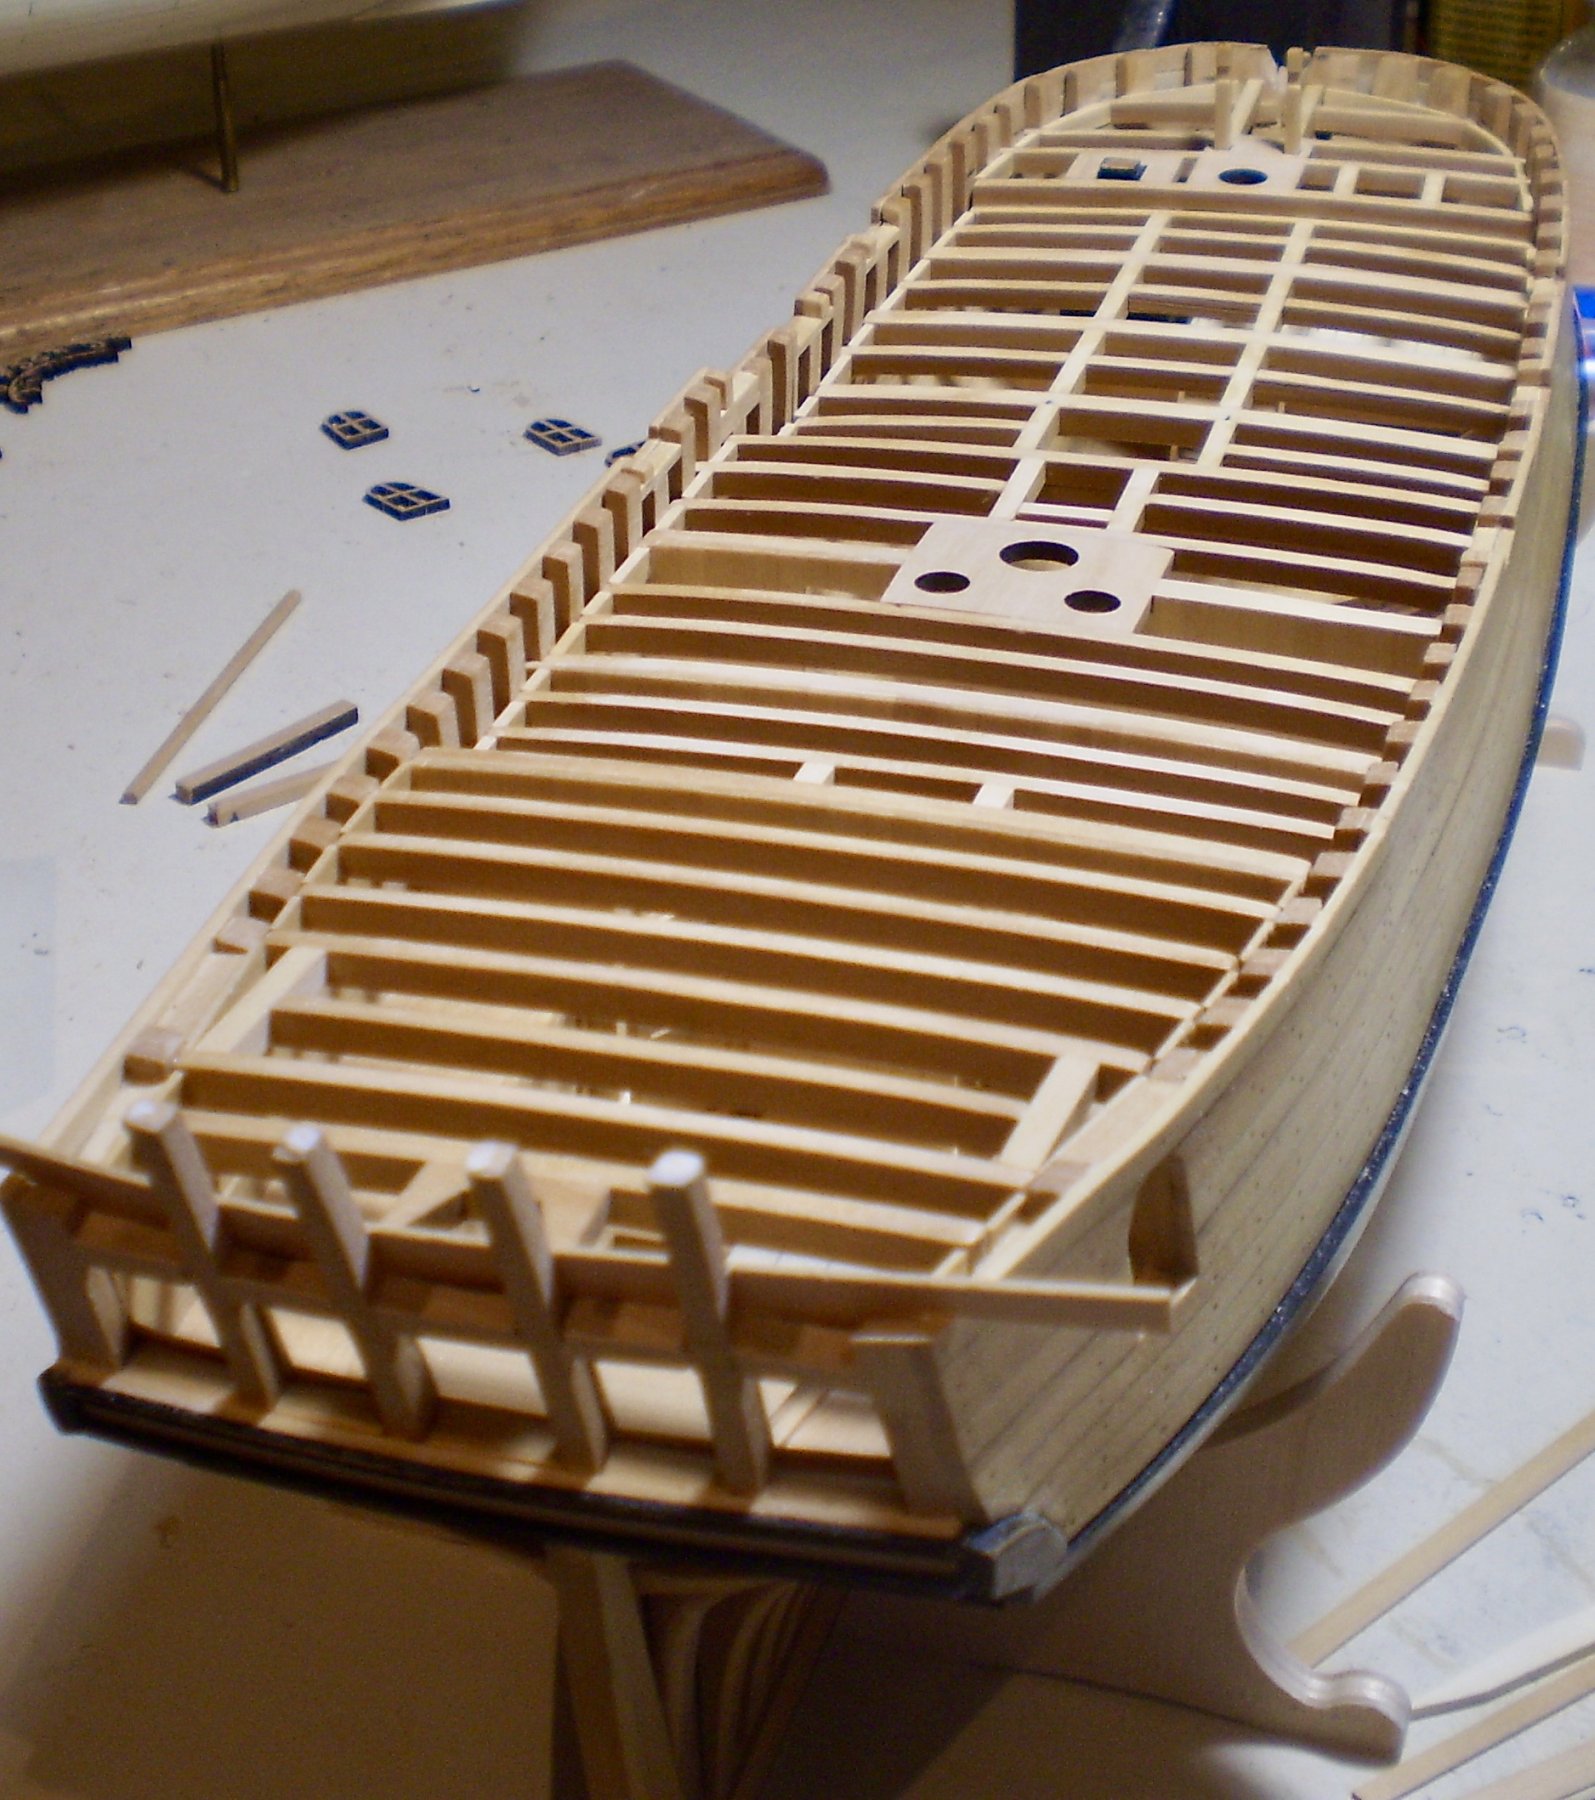
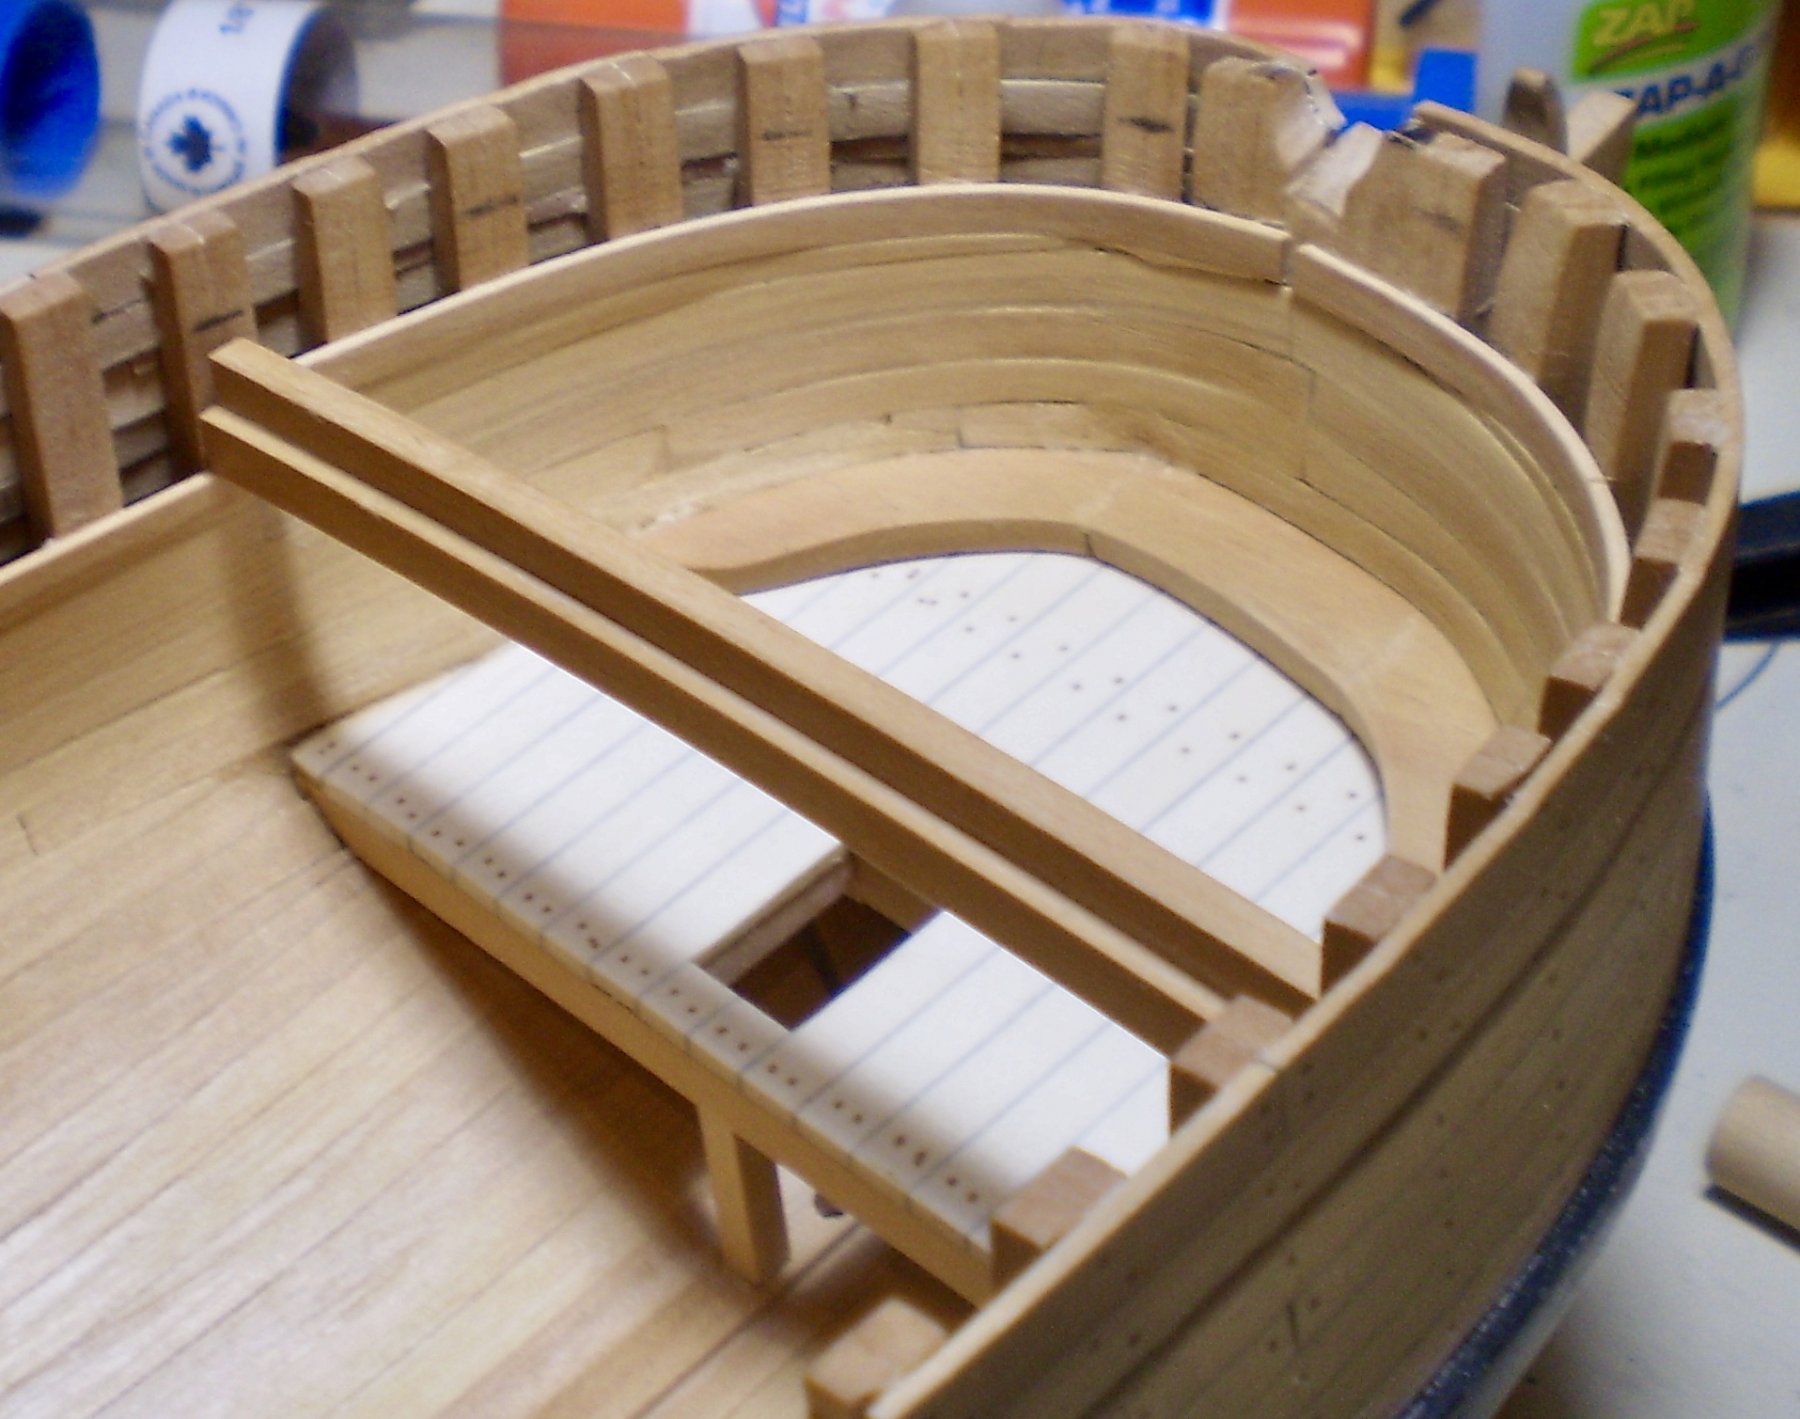
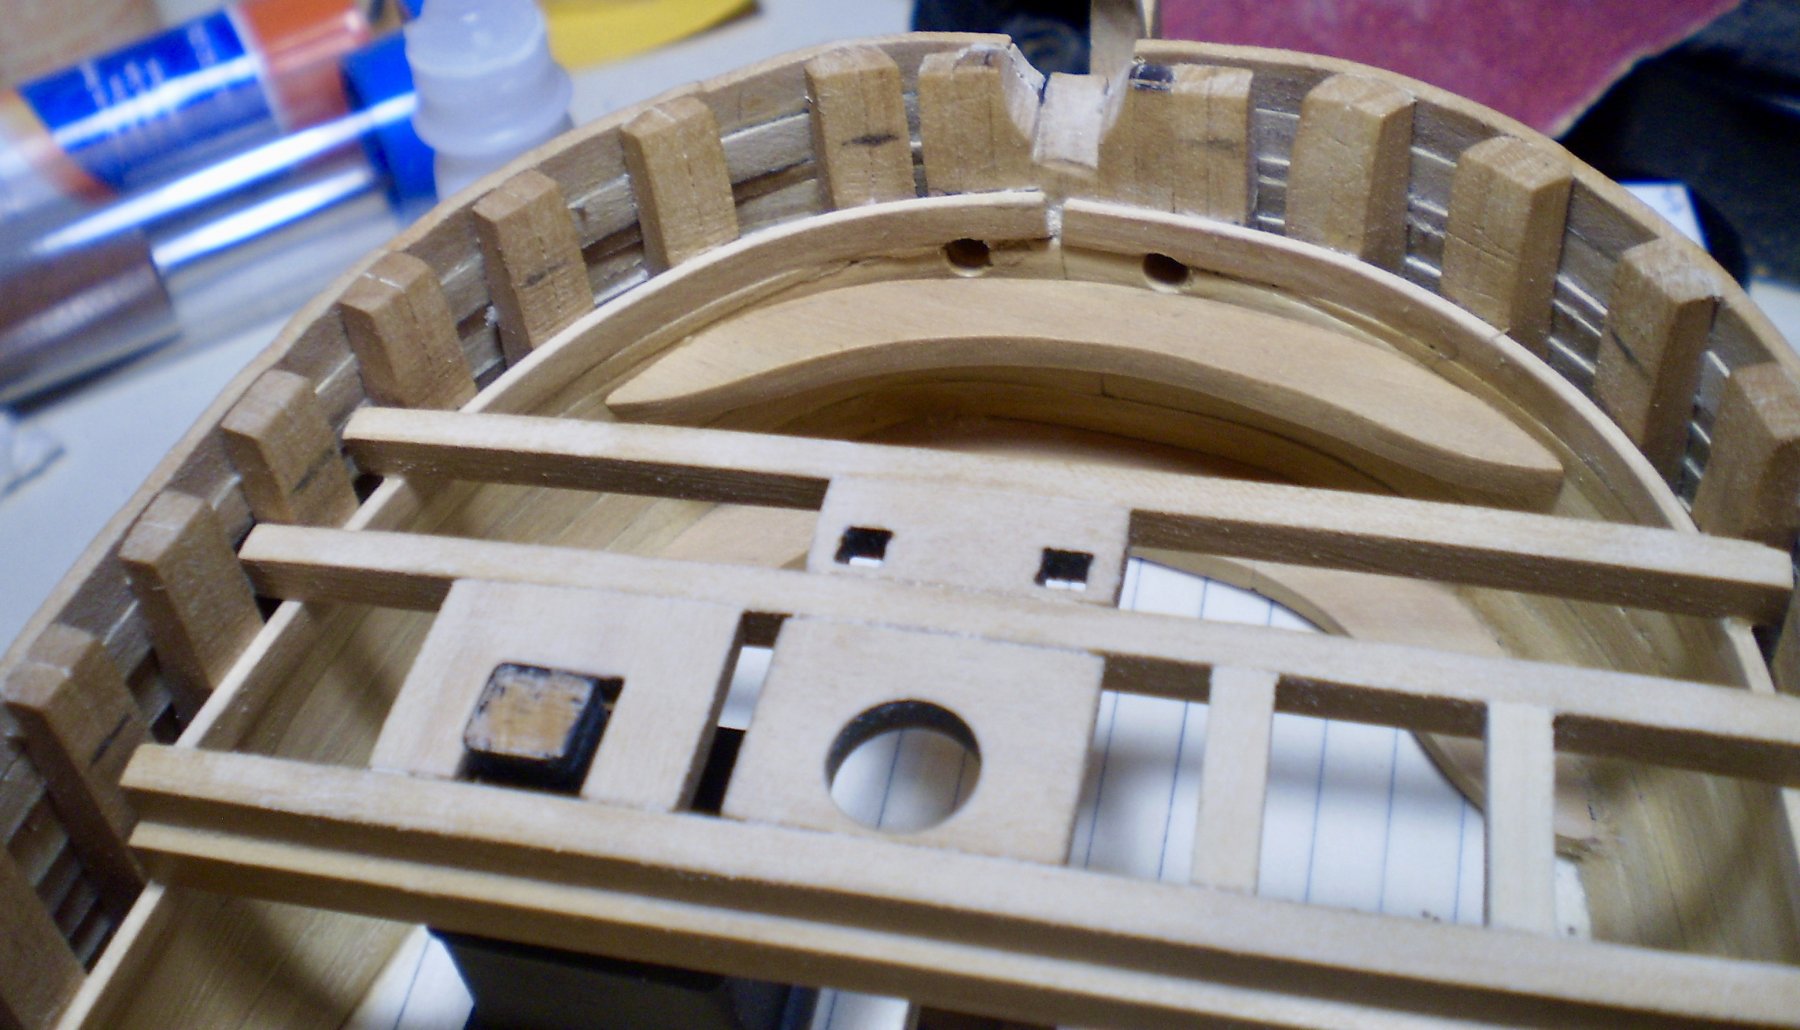
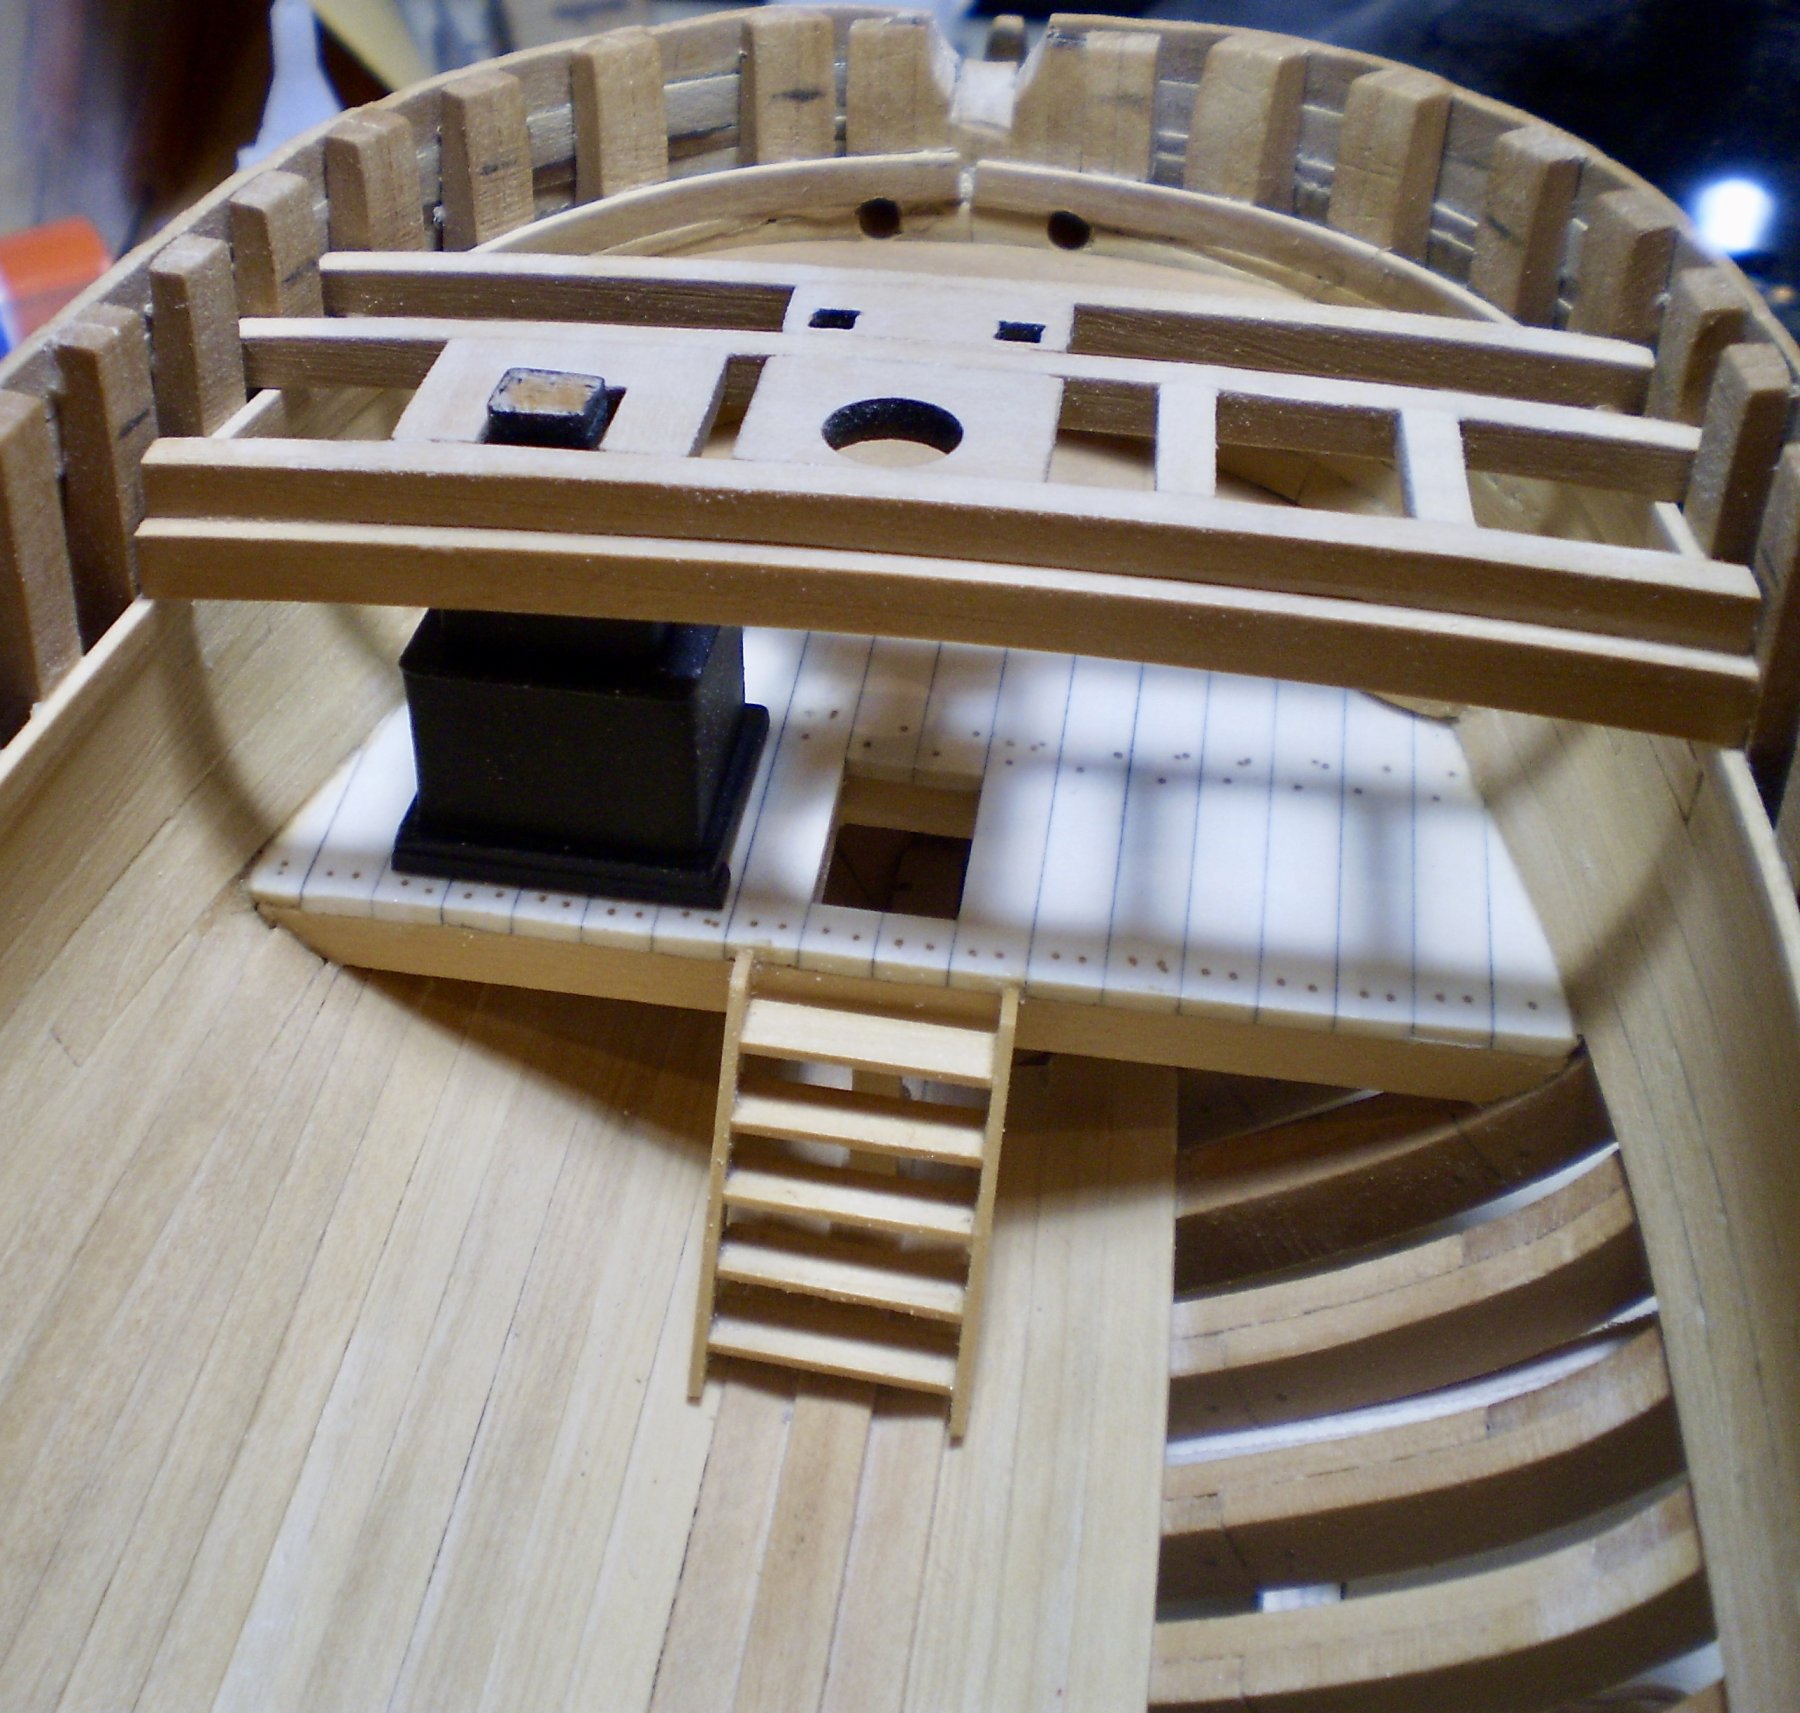
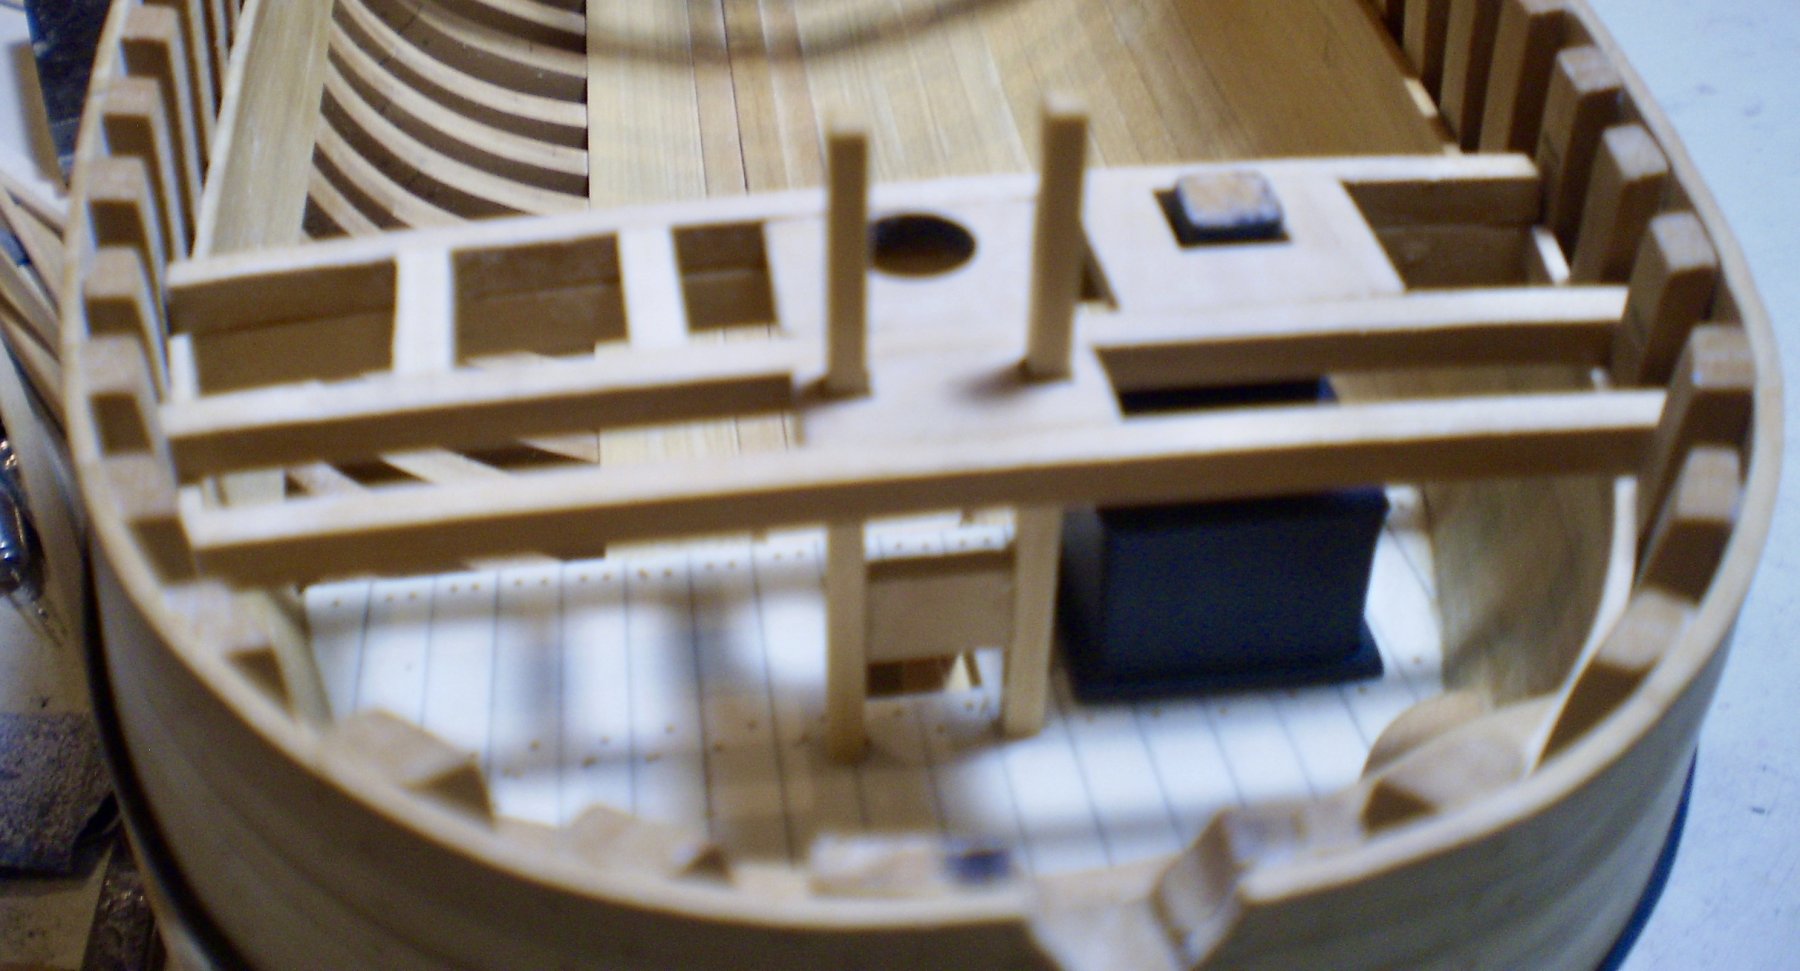
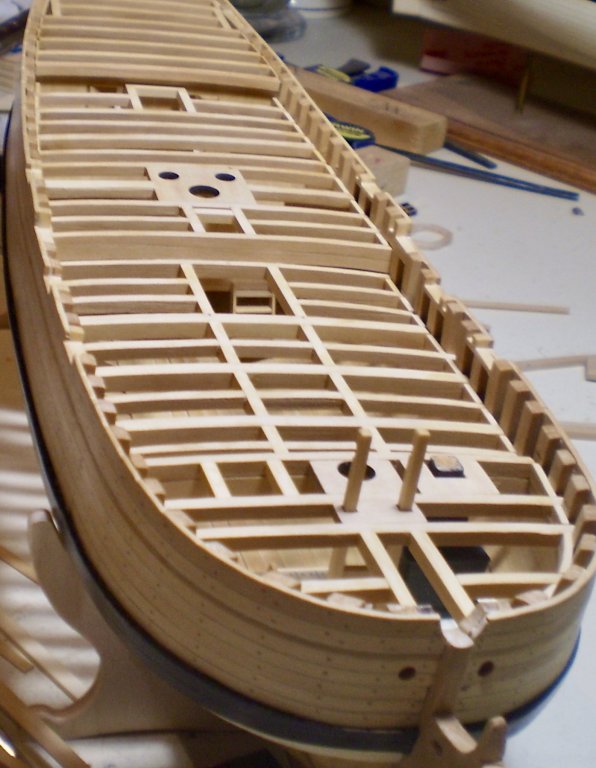
The bow area is now done. This involved a variety of items: Planking of the forward part of the interior hull, including deck clamps. This was done with various sizes of boxwood strips, as with the earlier similar work. I must admit that it was difficult work to fit the curves and i'm not very happy with some of it. Fortunately, it will be barely visible. Two breasthooks. There is no detail of these in the drawings and dimensions were estimated from book photos and limited info in the drawings.They were made from boxwood sheet, using card templates. I also had to drill the hawse holes in the hull to establish the position of the upper breasthook. Upper deck framing was done in the same manner as previously, using laser cut beams and a couple of miscellaneous laser cut pieces. The fore bitts. These extend down through the upper deck to the lower deck. They also provide the rear support point for the bowsprit, between the decks, so I had to fit a dummy bowsprit at this point, since it will be impossible to do this at any later time. The bitts are boxwood strip.The above deck cross piece will be added later. The stove and a ladder. For the stove, the drawings show only a generic looking box without much detail. The book photos give no further help. Since the stove is very small, and will be virtually invisible, I decided to go with the generic box. It was made from styrene sheet and painted black. The ladder down to the hold from the lower deck was made from boxwood strip. I will now complete framing of the main deck in the mid-ship area. Bob


- 682 replies
-
- 28
-
-
- halifax
- lumberyard
- (and 1 more)
-
She's looking great Sjors. Bob
-
A beautiful piece of work Christian. Bob
-
Thanks so much Thomas , Denis and the "likes". Denis, no one does more detailing than you, but imagine the inner workings of a trawler. Bob
- 682 replies
-
- 4
-
-
- halifax
- lumberyard
- (and 1 more)