HOLIDAY DONATION DRIVE - SUPPORT MSW - DO YOUR PART TO KEEP THIS GREAT FORUM GOING! (Only 20 donations so far - C'mon guys!)
×


rafine
-
Posts
2,932 -
Joined
-
Last visited
Content Type
Profiles
Forums
Gallery
Events
Everything posted by rafine
-

HMS Naiad 1797 by albert - FINISHED - 1/48
rafine replied to albert's topic in - Build logs for subjects built 1751 - 1800
As always, Albert, your work is flawless. Bob -
Rusty, in looking back at your photos, I just noticed that you had the shrouds wrapped around the the top mast, rather than the head of the lower mast. Sorry, but I don't believe that can be right. Bob
- 310 replies
-
- 4
-

-
- cheerful
- Syren Ship Model Company
- (and 1 more)
-
You're moving right along Mobbsie -- and very nicely. Bob
-
Glad to see you back at it Don. I'm looking forward to watching your progress on what seems to be a really interesting kit. Bob
-
Thanks so much Don, JP and the "likes". Don, we all know how deceiving such looks can be. Bob
- 682 replies
-
- 7
-
-
- halifax
- lumberyard
- (and 1 more)
-
Thanks so much Thomas, Denis and Mobbsie for the very generous comments and thanks also to the "likes". Denis, the best part will be when I get by the head work . Bob
- 682 replies
-
- 5
-
-
- halifax
- lumberyard
- (and 1 more)
-
Very nice Don. I know nothing about doing sails (and don't want to ), but I like the look of your's. Bob
- 653 replies
-
- 5
-
-
- trabakul
- marisstella
- (and 1 more)
-
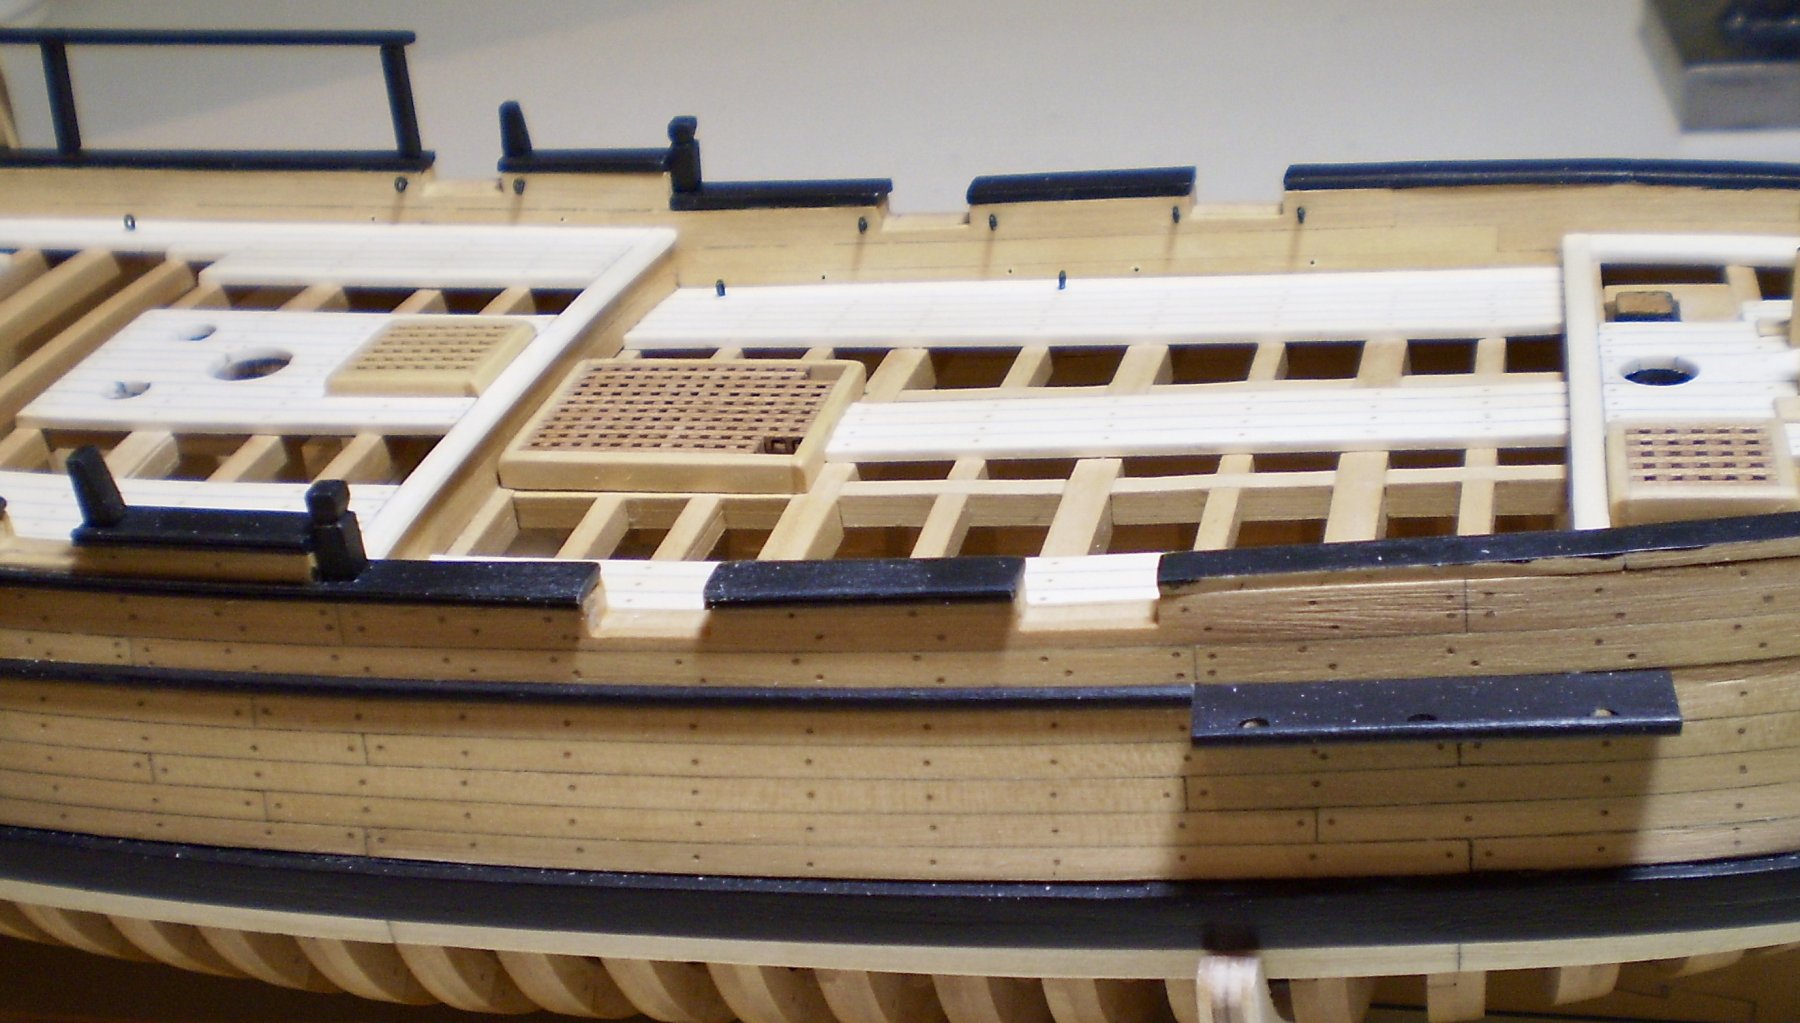
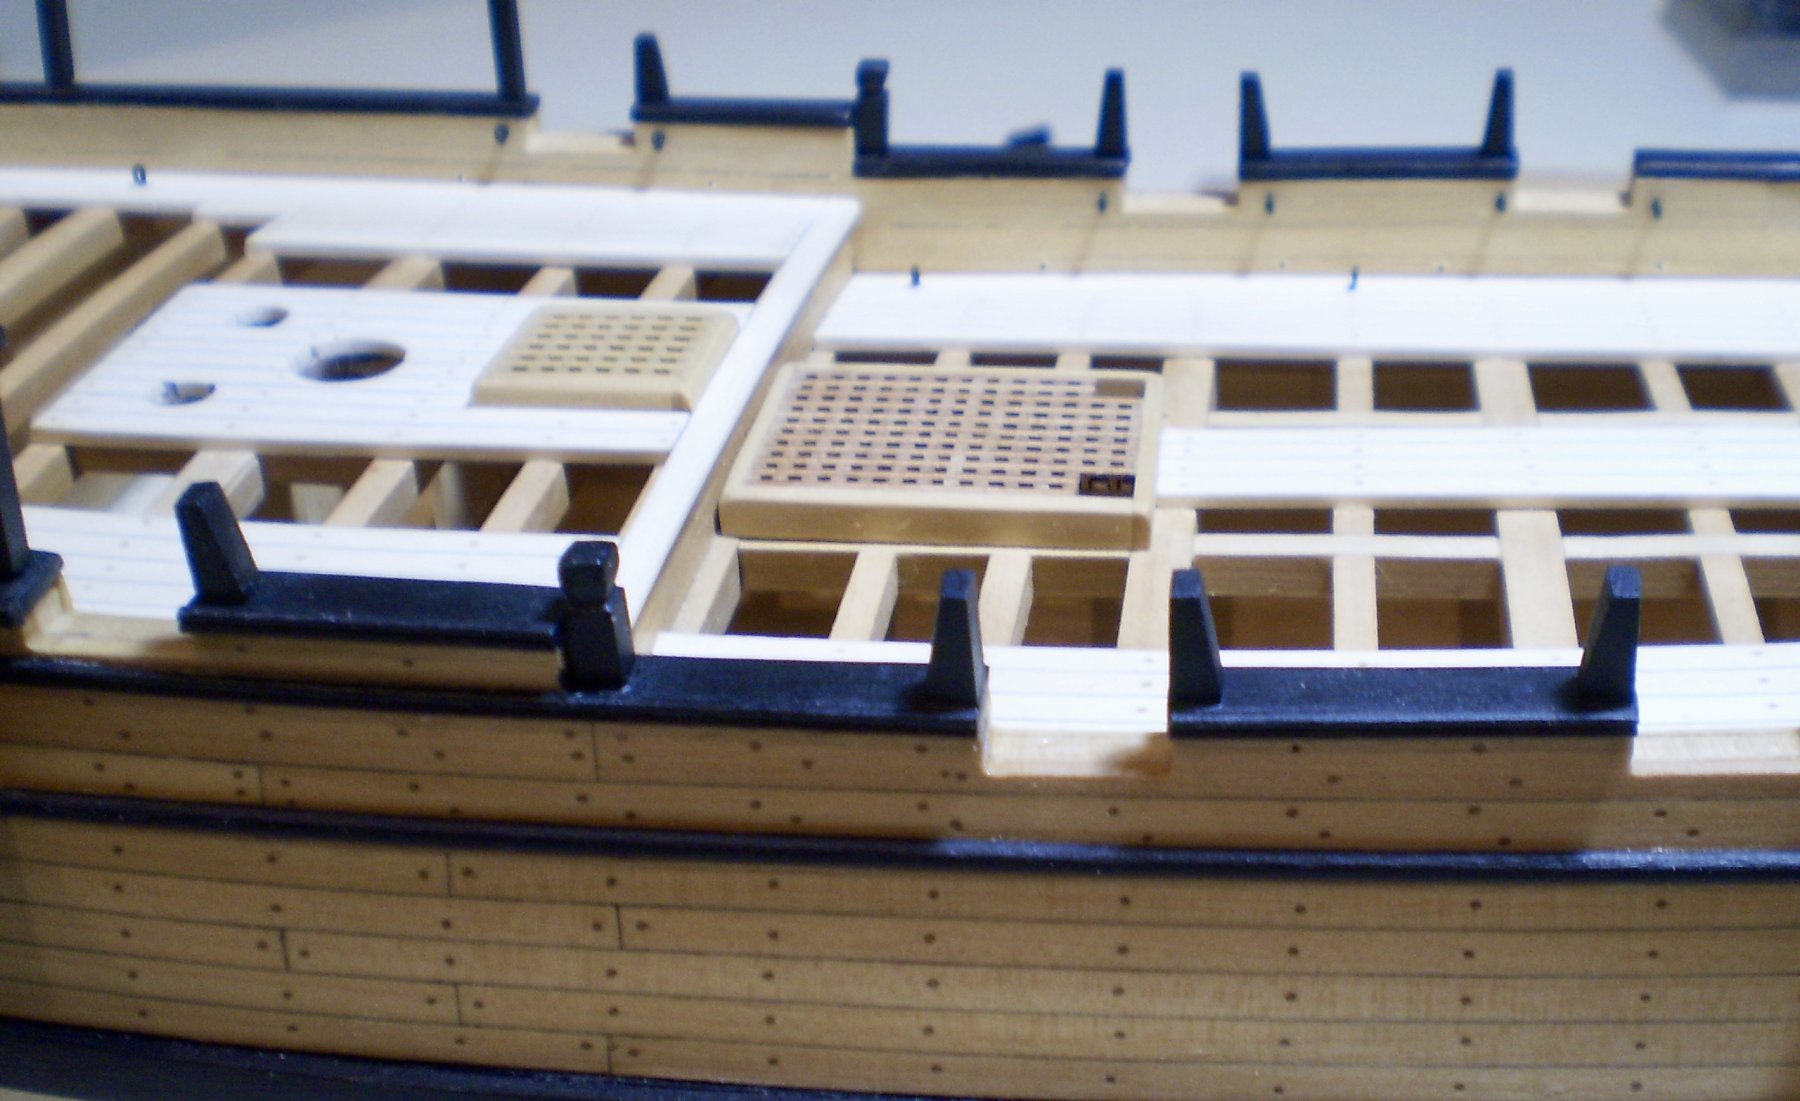
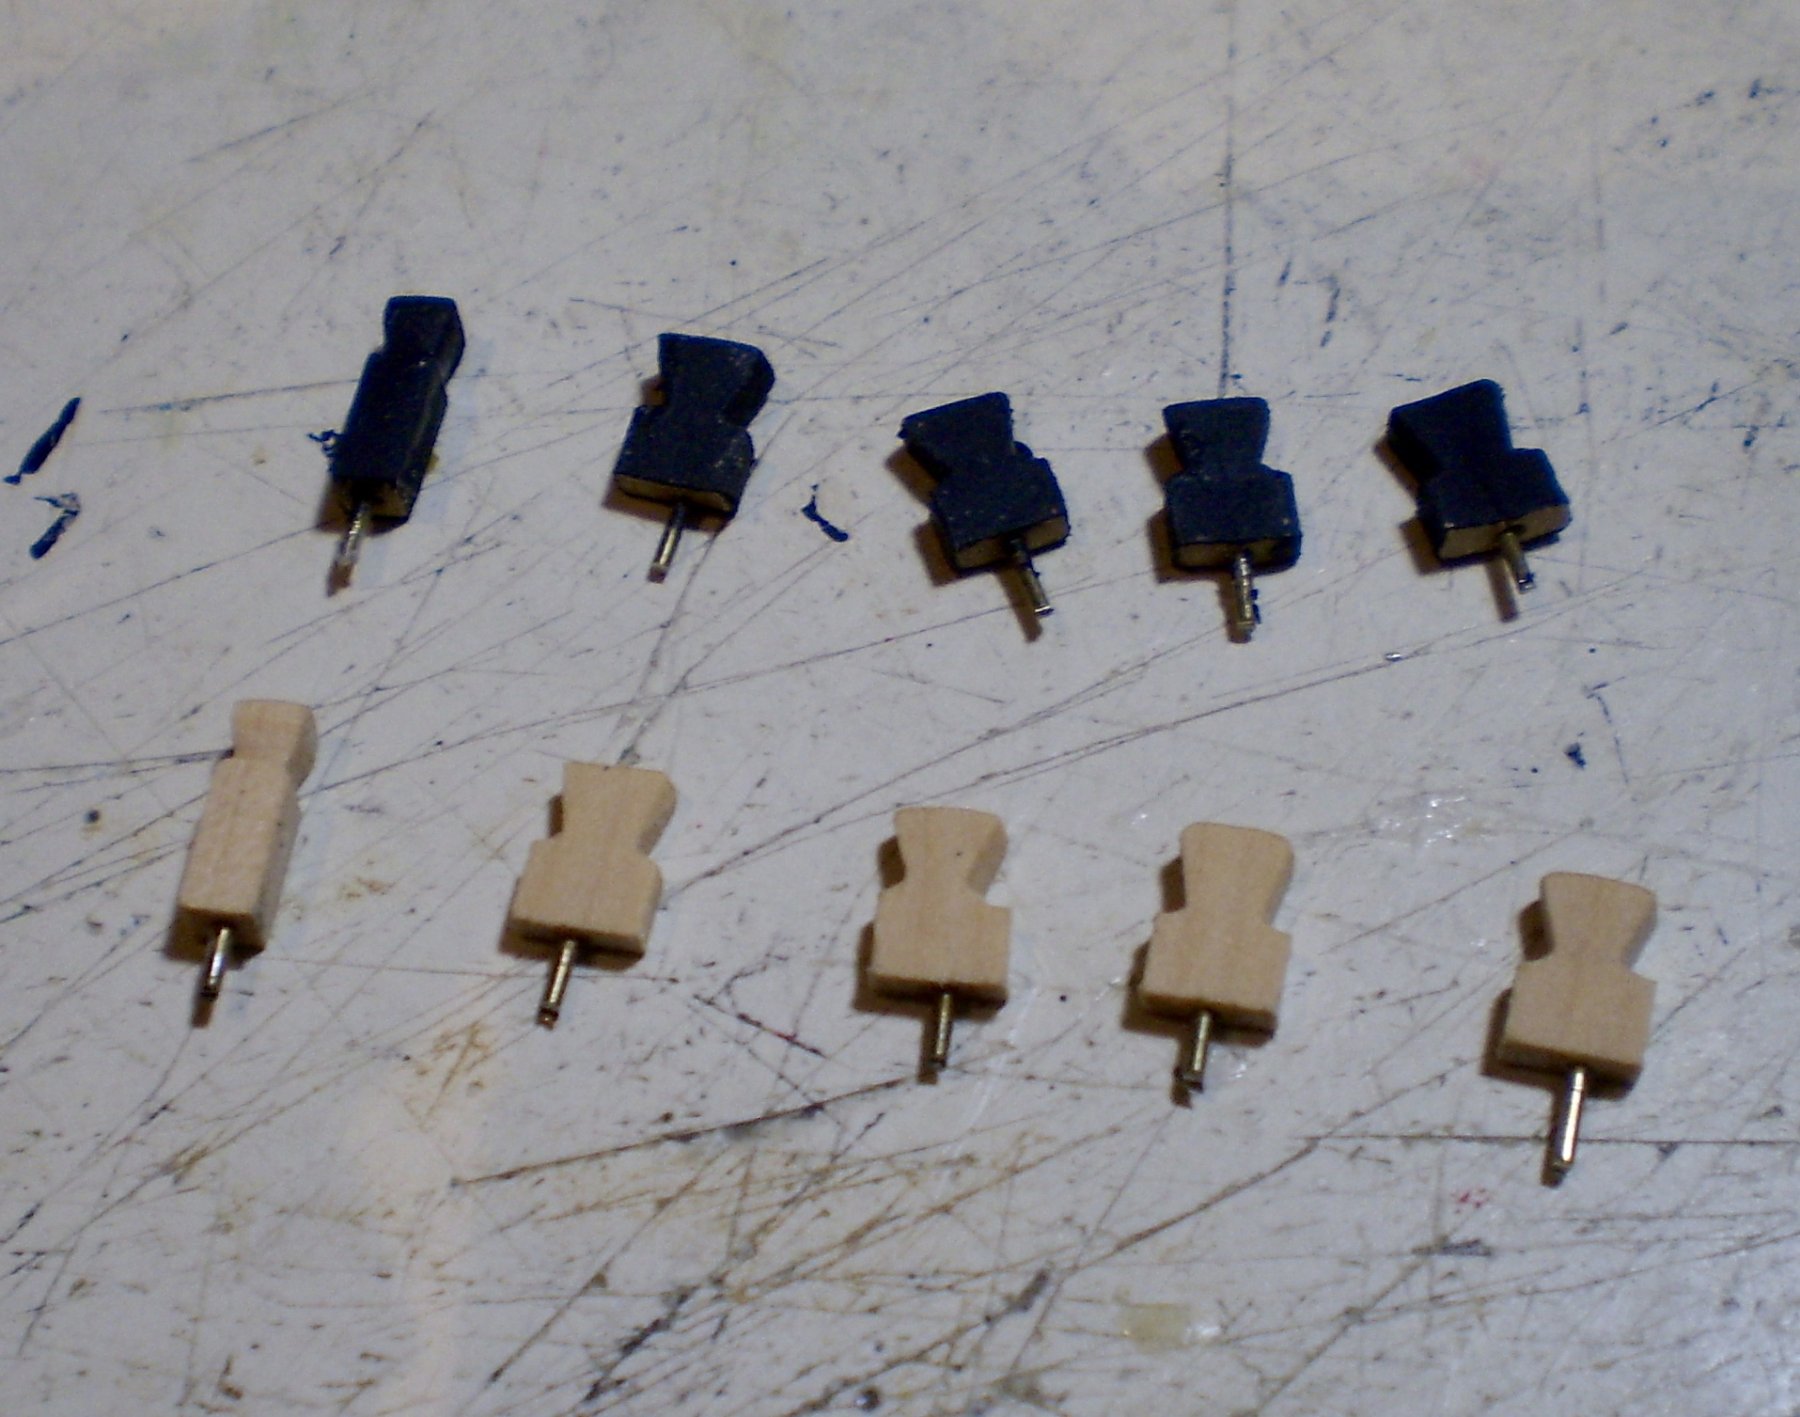
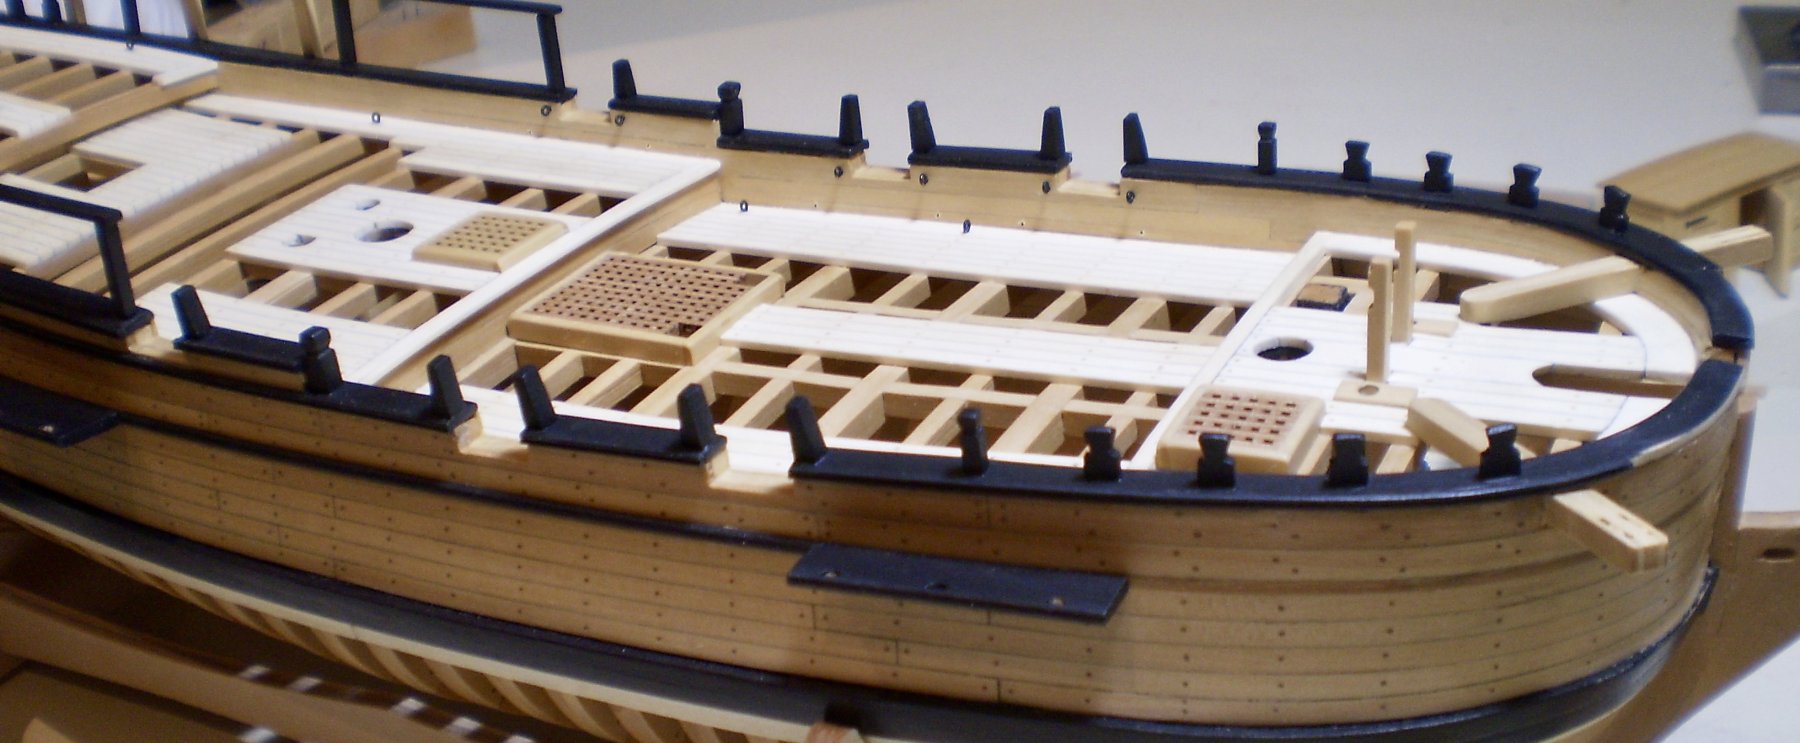
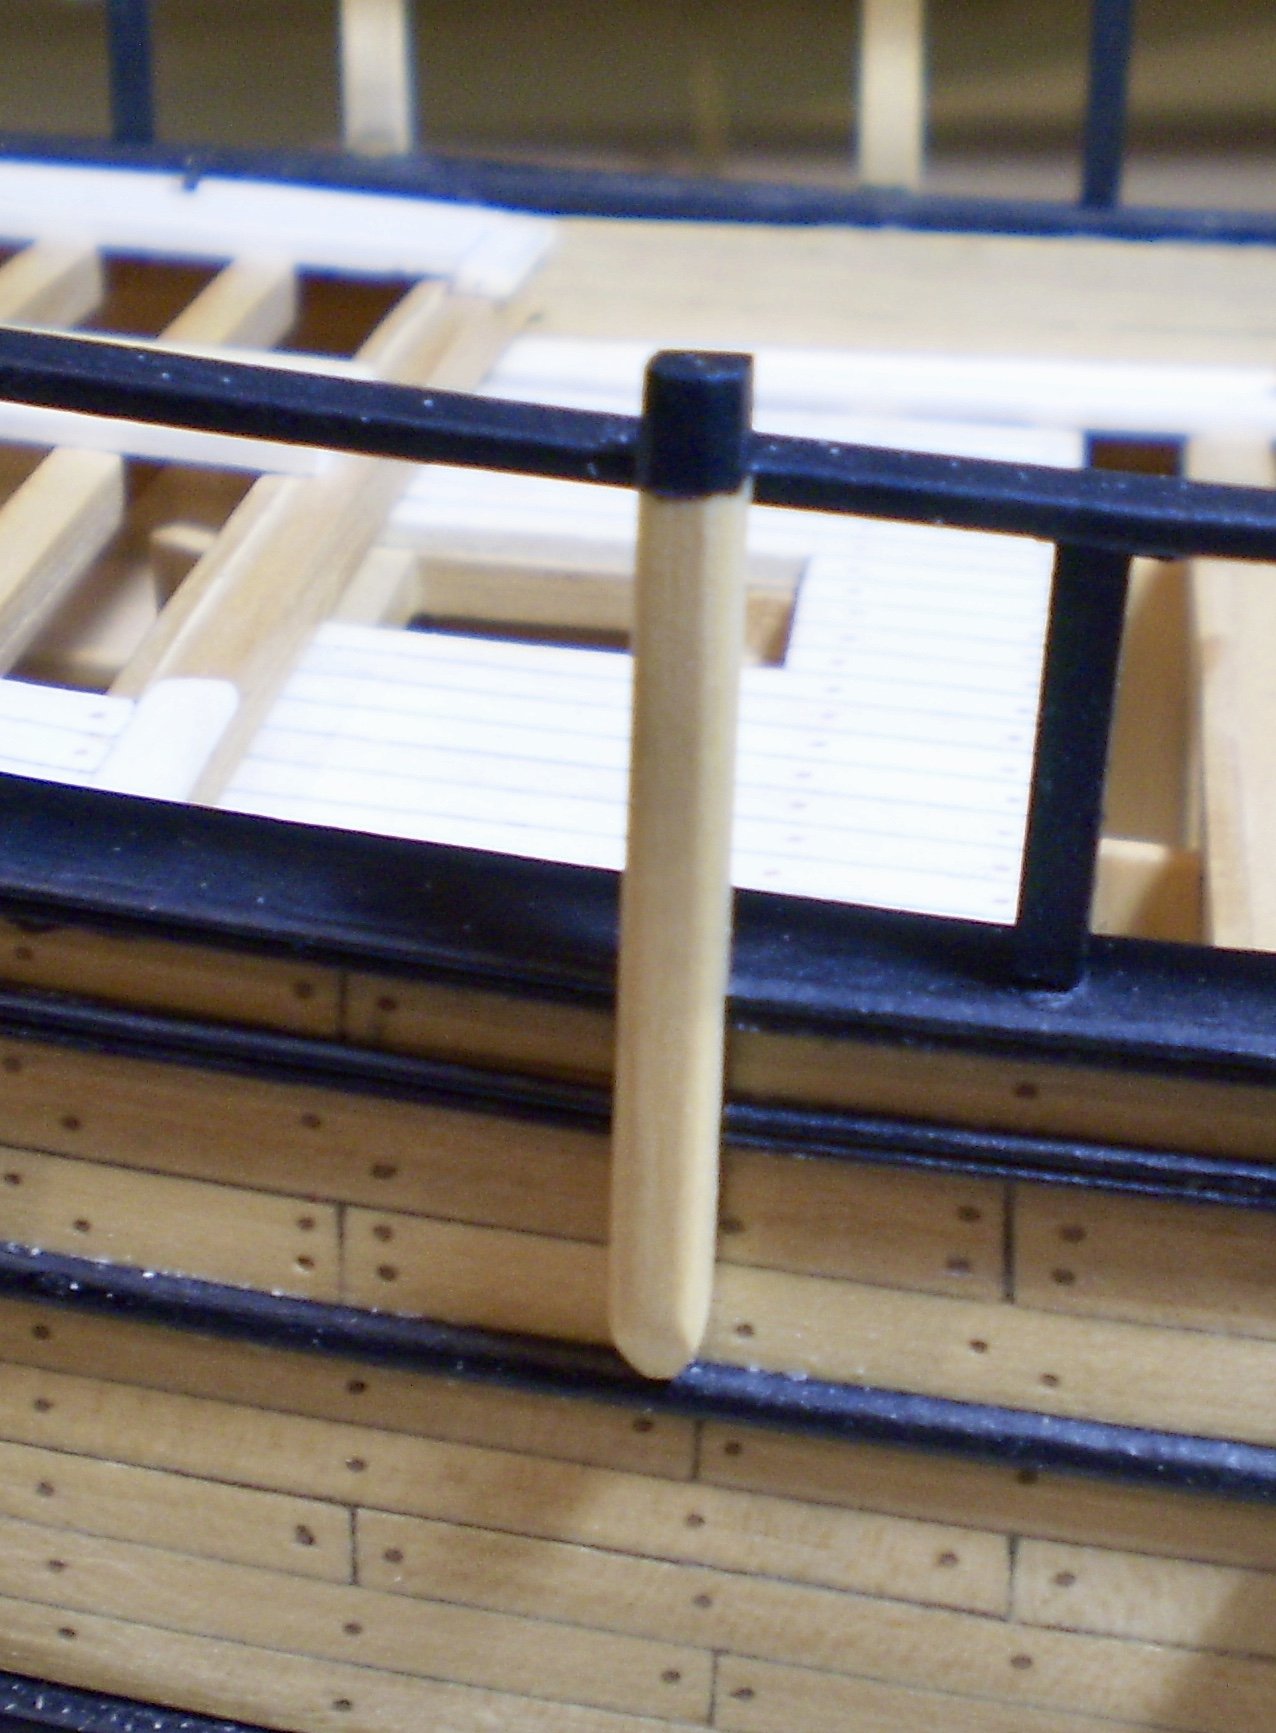
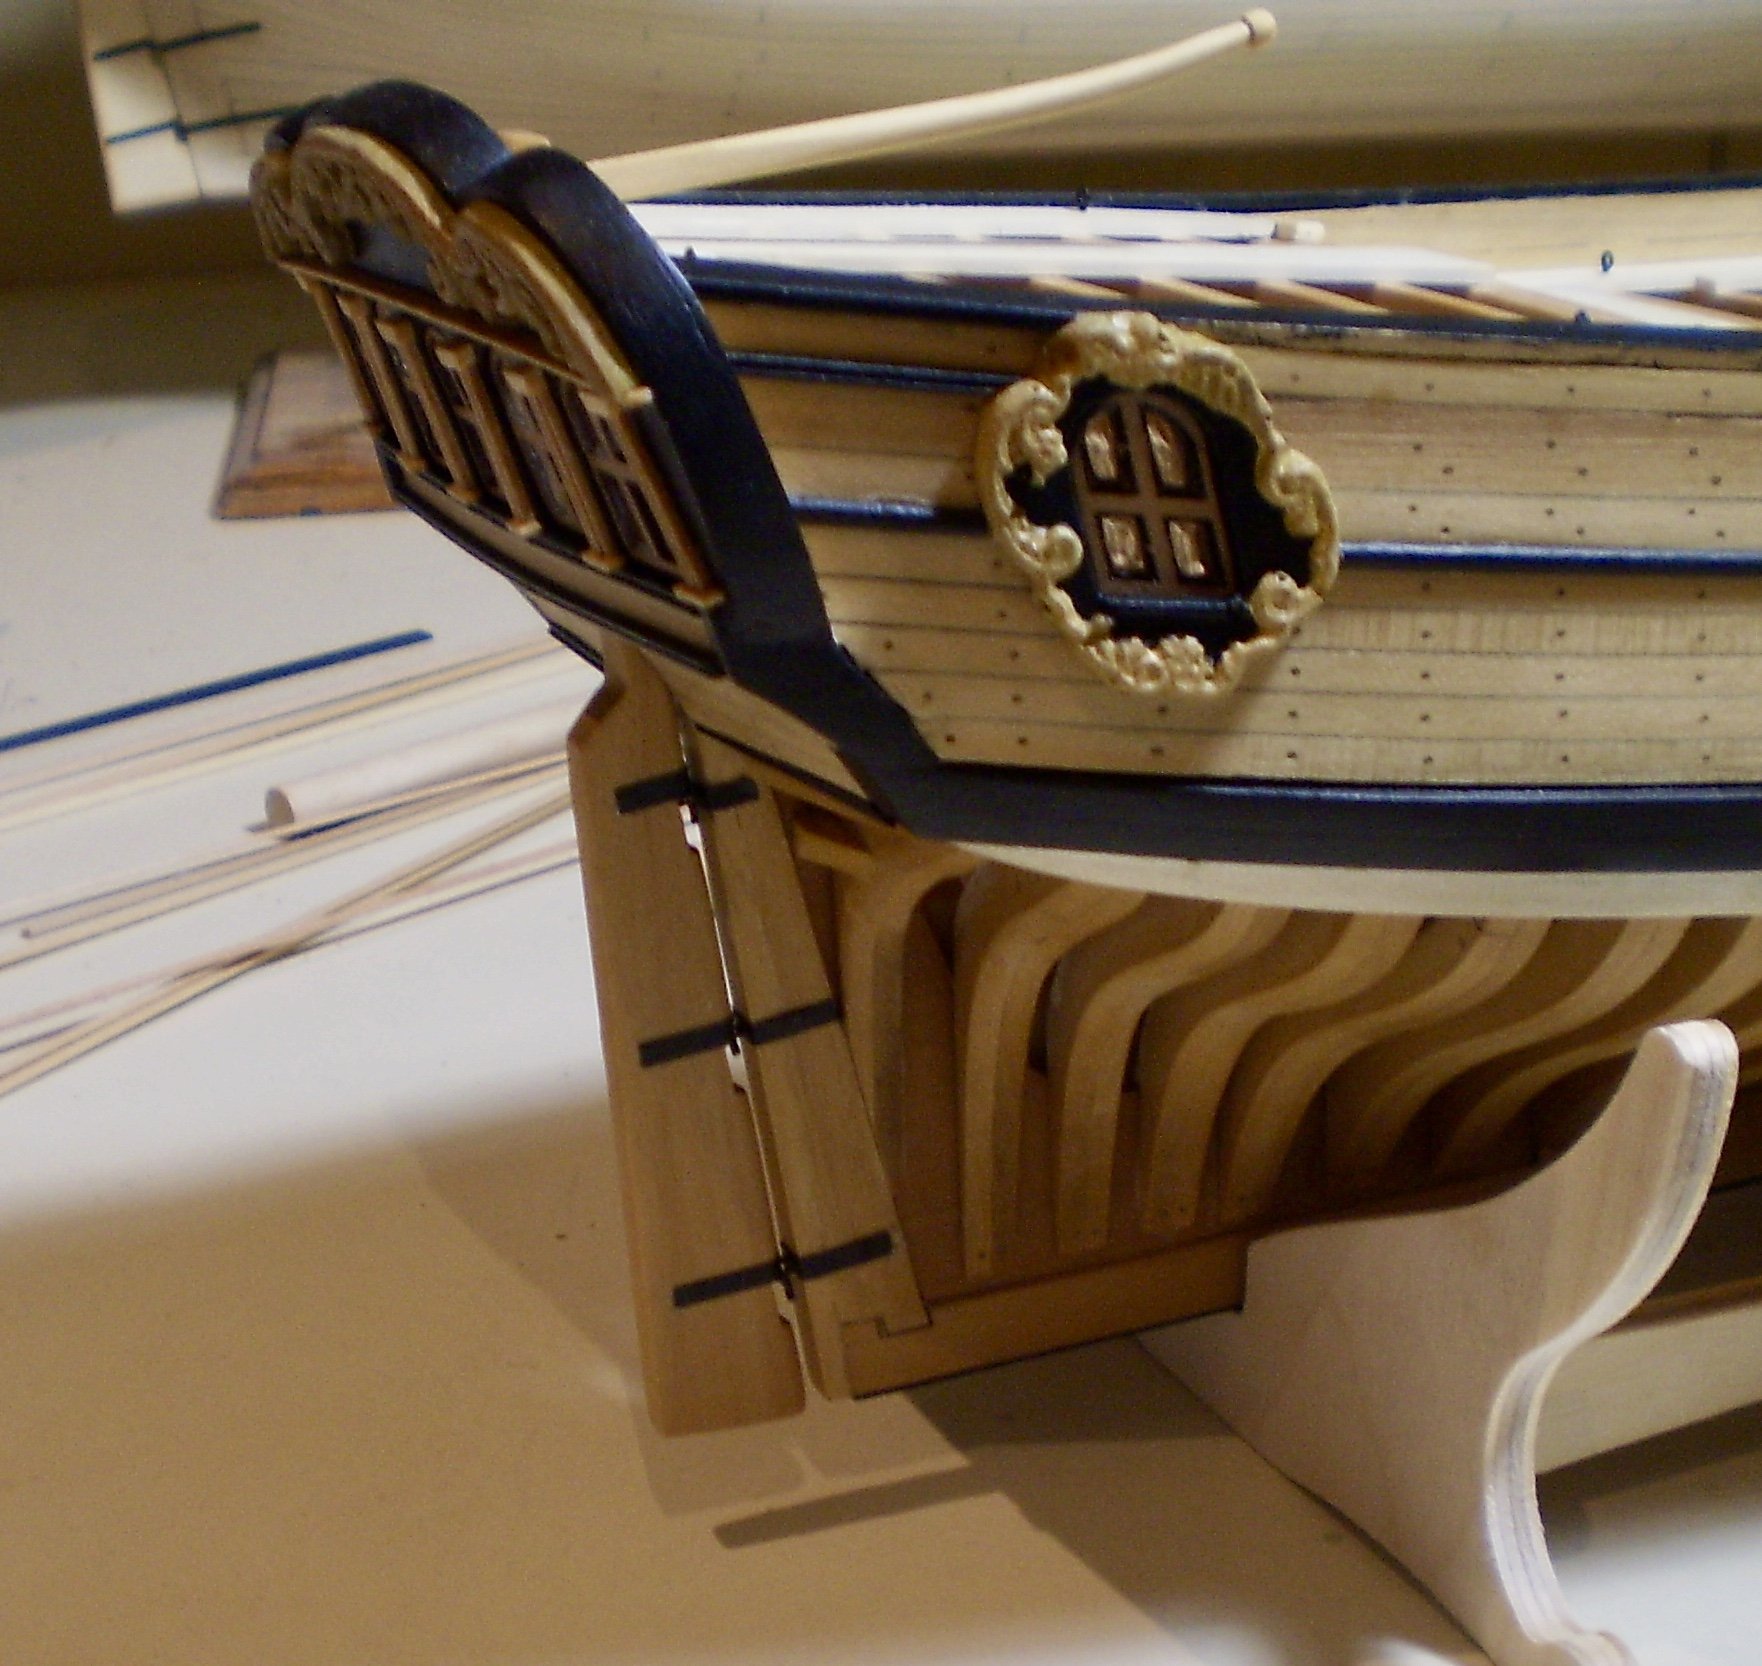
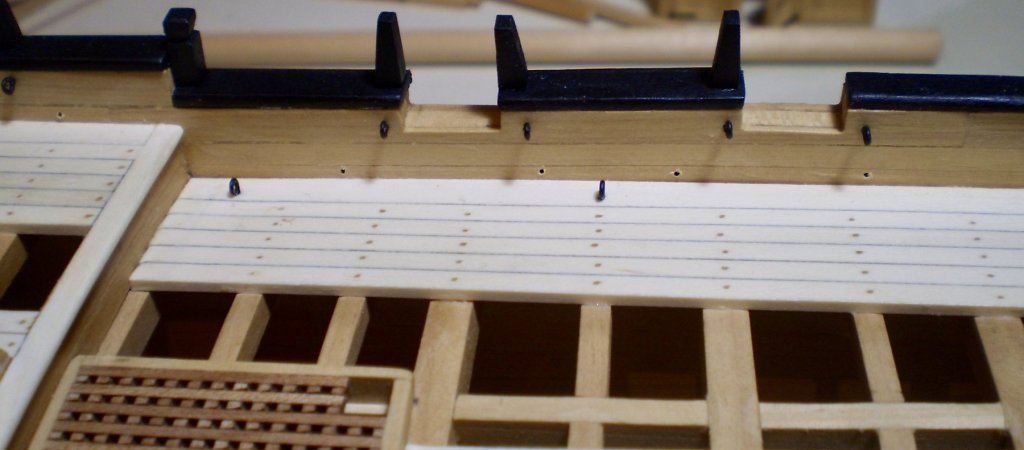
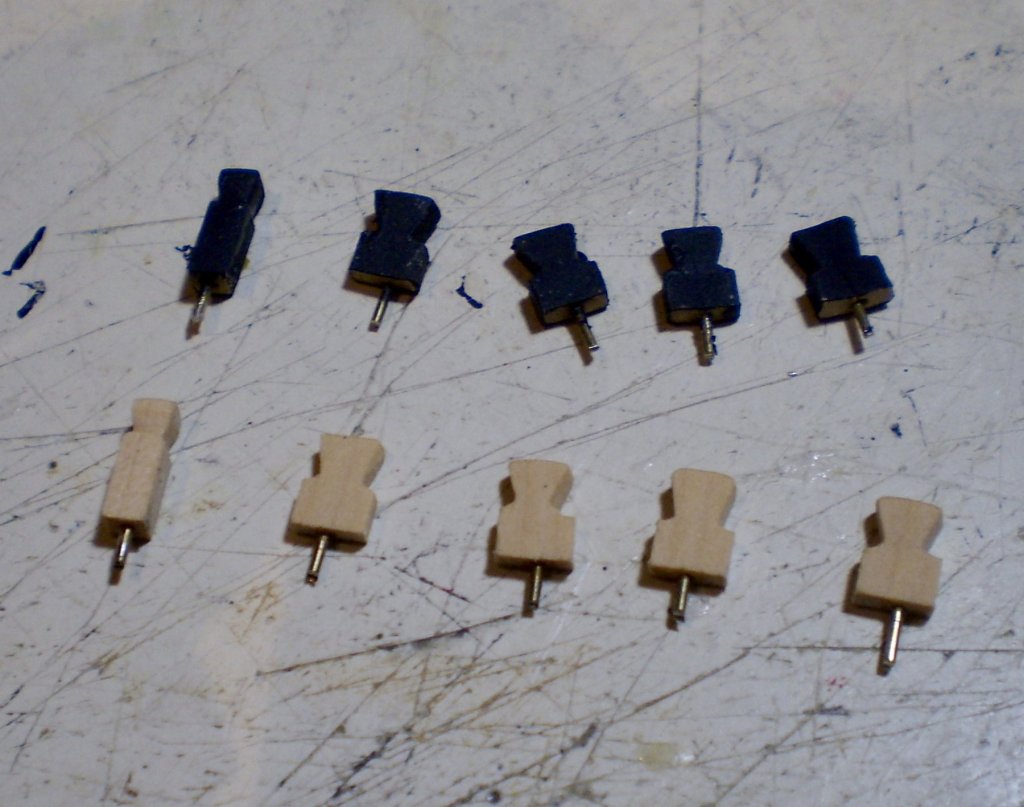
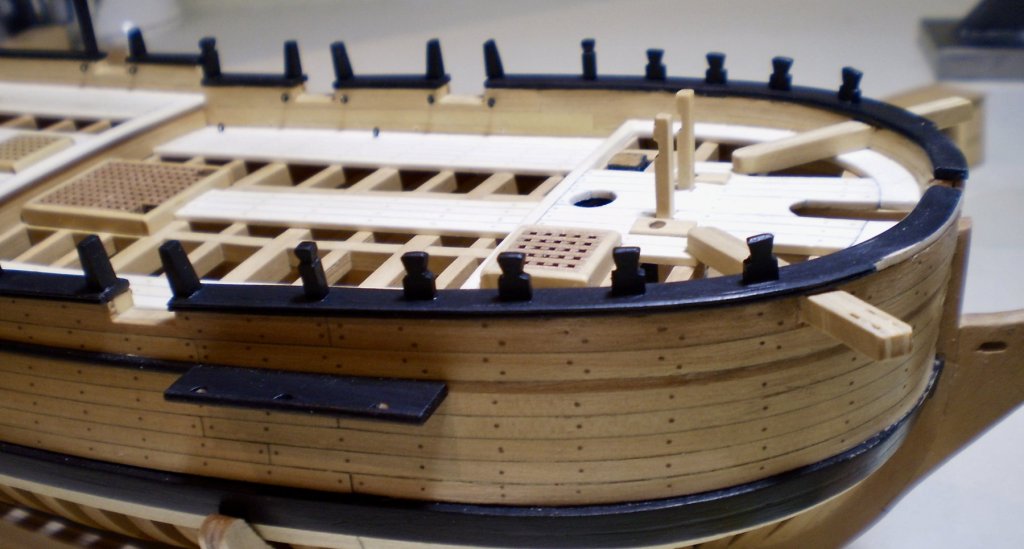
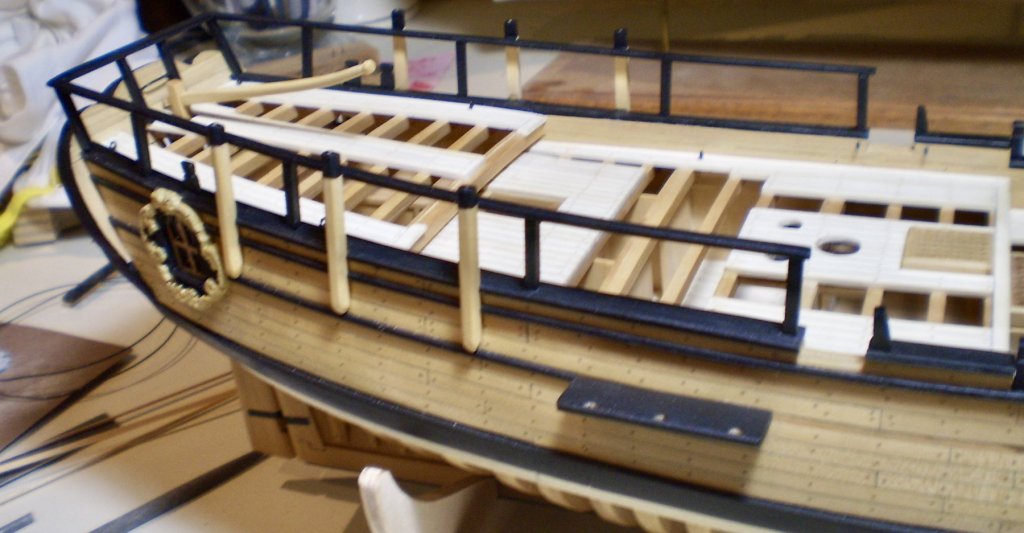
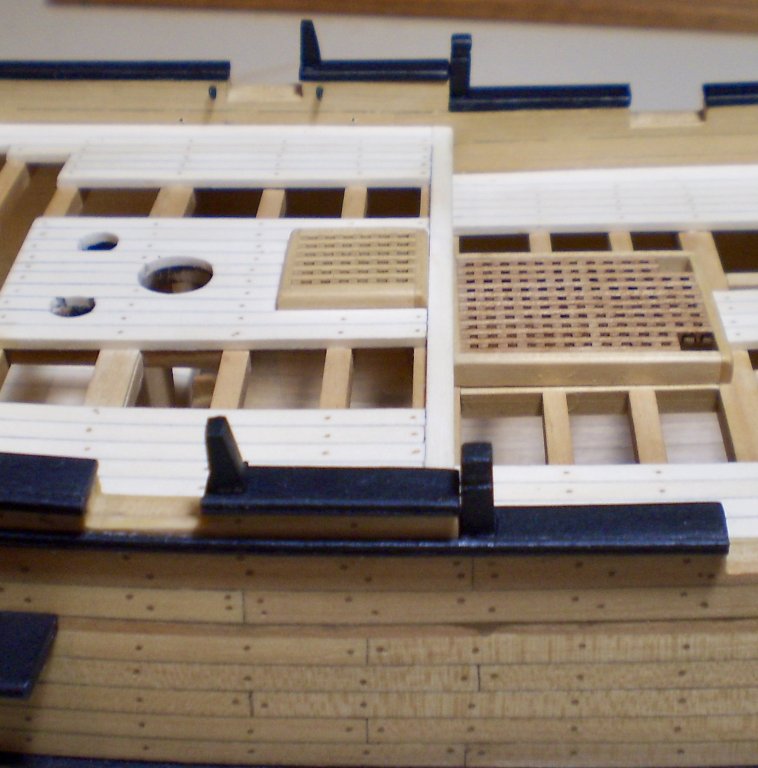
Moving forward along the hull, from midship toward the bow, I've added a variety of items. These include the fore channels, additional hull moldings and various sizes and shapes of timber heads. I've also added eyebolts for gun tackles and rigging attachment to the interior, as a matter of convenience at this point (holes were also drilled for the breeching ropes but the ringbolts won't be added until the guns are done). The various timber heads were all made up from boxwood strip. They were fully shaped with files on the strip wood stick before being cut off to length, brass pins added, painted black and then mounted in holes drilled in the caprail. The last attached photo is an overall shot that shows the work on the hull to date. Well, there seems to be no escaping the fact that it's time to do the headwork (always my least favorite part of a build), so that will be the next order of business. Bob


- 682 replies
-
- 32
-
-
- halifax
- lumberyard
- (and 1 more)
-
I really like the look of her, B.E. Bob
- 91 replies
-
- 5
-
-
- 18th century longboat
- model shipways
- (and 1 more)
-
Thanks so much Patrick. Unfortunately, I have no photos of the process I use, so I'll try to explain. First, I will admit that what I do is not "correct", but merely an attempt to create the impression of proper pintles and gudgeons. Age has caused me to resort to some tricks. For the pintles, I begin by gluing an "L" shaped piece of wire into a hole drilled in the rudder. Next, I glue a piece of black painted thin card to the rudder so that it hides the horizontal portion of the wire. For the gudgeons, I glue the black painted card to the stern post and then add an eyebolt in a hole drilled through the card. At small scales, this seems sufficient to fool the eye into seeing a seemingly proper rudder mounting. Bob
- 682 replies
-
- 7
-
-
- halifax
- lumberyard
- (and 1 more)
-
Thanks so much Denis, Dirk, Dave, Nils, Christian, Albert and Al for the very generous comments. Thanks also to the "likes". I have to admit that I'm very pleased with the way she is turning out so far. Bob
- 682 replies
-
- 7
-
-
- halifax
- lumberyard
- (and 1 more)
-
Congrats Michael. She is a beautiful piece of work and looks great in her new home. BTW, is that Constitution in the background now ready to come off "on hold"? Bob
-
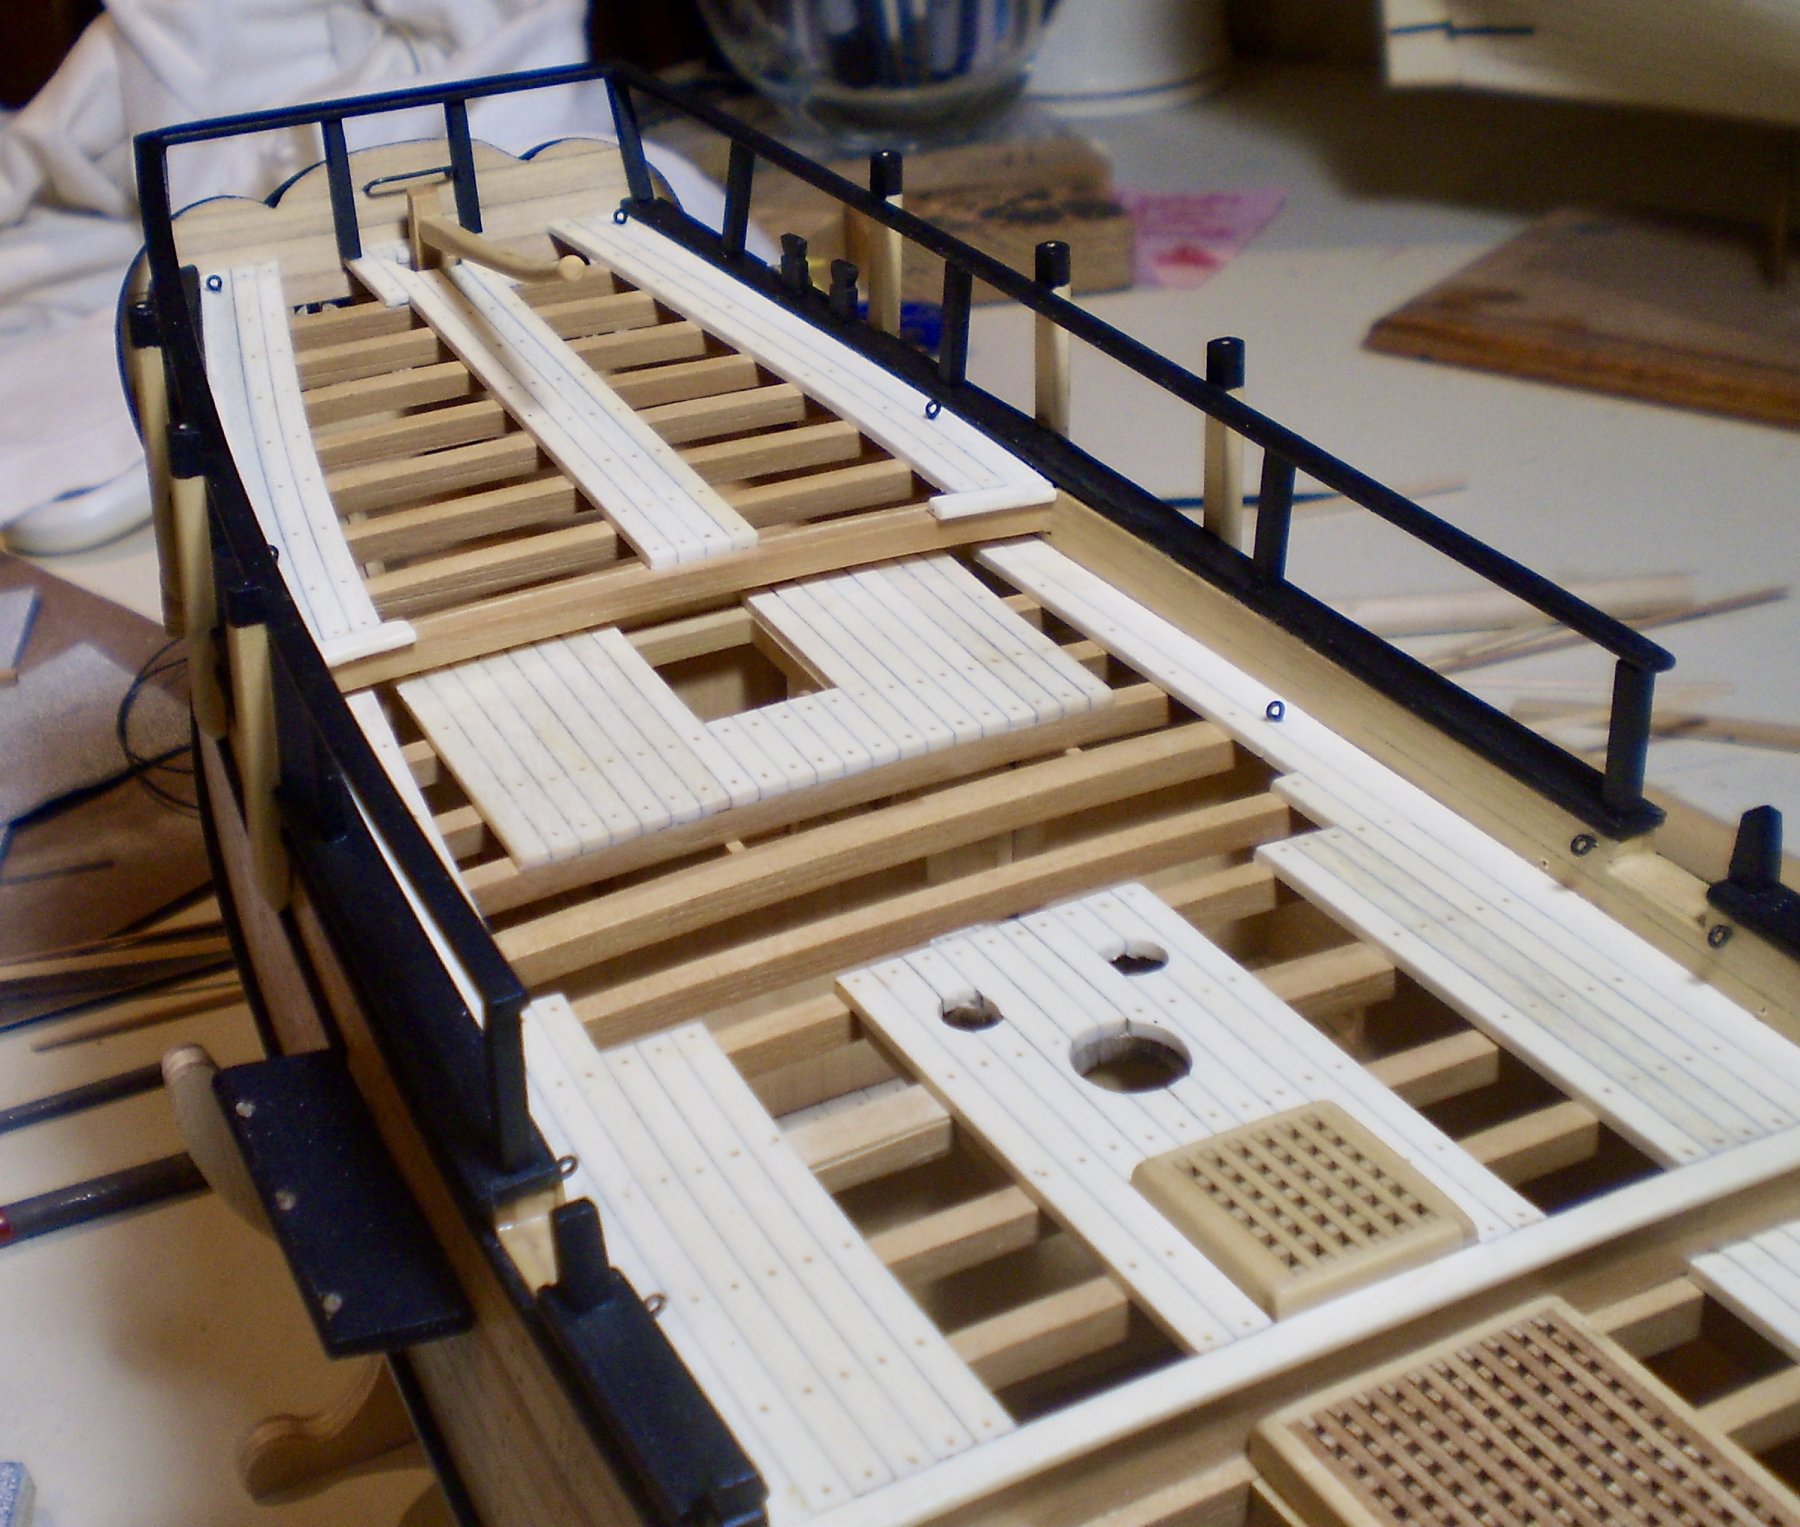
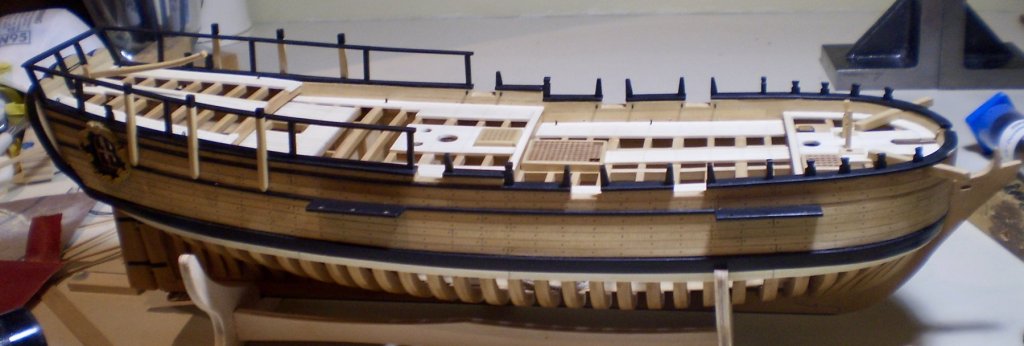
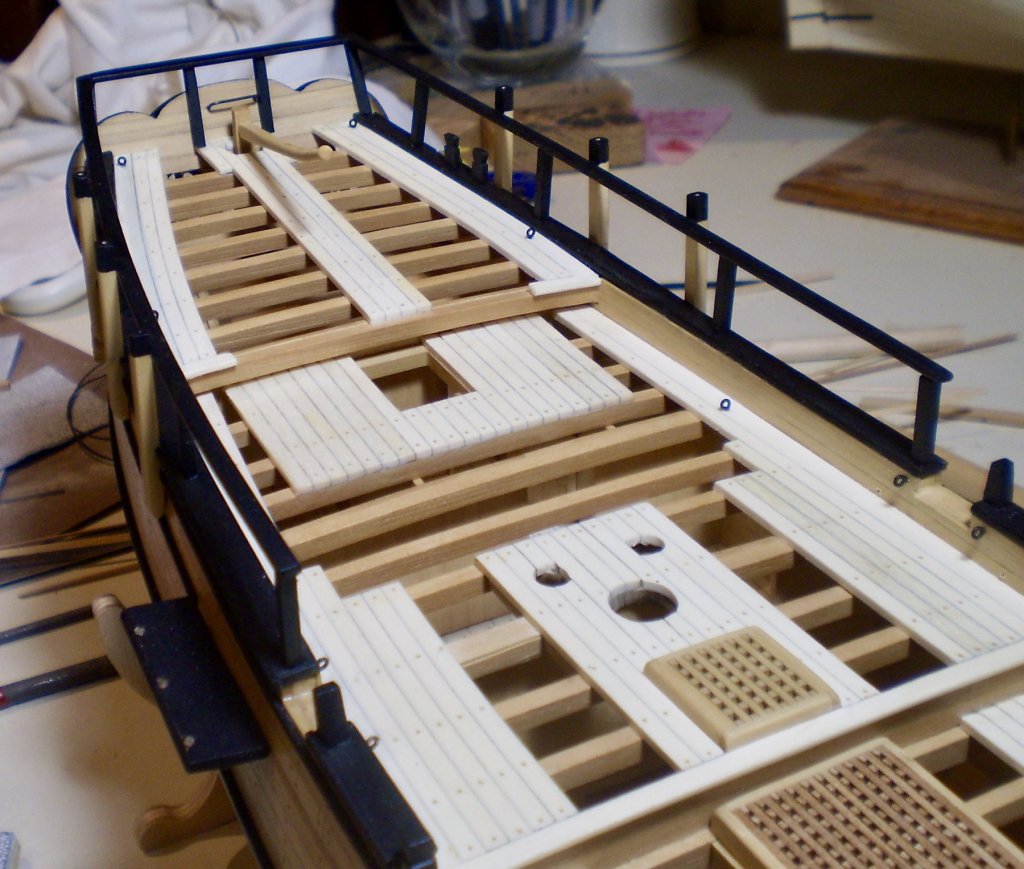
This week's work finished up the aft portion of the outer hull. This included doing the quarter deck rail, the swivel gun pedestals and the remaining hull molding in that area. The largest part of the work was done on the rail, which was a complex task. I'm sorry that I didn't do any construction sequence photos, but the process was as follows: A piece of boxwood strip for the rail was bent to shape to match the cap rail and its edges sanded round; pieces of square boxwood strip were cut to length for the rail stanchions and holes were drilled in both ends of each for brass pins; holes were drilled in the cap rail for the mounting pins; beginning with the forward most stanchion, each stanchion was fitted into it's hole in the caprail and then the railing was fitted above it and a hole drilled through the railing for the upper pin; the stanchions were then glued and pinned to the railing in turn, making sure that the full assembly fit as each stanchion was added: when the assembly was complete on each side of the hull, they were painted black and then glued into the caprails as units; the stern end rail was made up and fitted after the side rails were in place. I chose to use pins at both top and bottom of each stanchion because I expect some rigging to be tied off to the rails, creating stress that glue alone wouldn't take care of. The next work was to make up and mount the six swivel gun pedestals. This was straightforward, involving cutting boxwood strip to length, filing them to hexagonal shape, drilling mounting holes for the guns in the pedestal tops, finishing them with wipe-on poly and black paint and gluing them in place. The last work was to fill in the moldings, which required cutting and fitting the prepainted molding pieces. Bob
- 682 replies
-
- 34
-
-
- halifax
- lumberyard
- (and 1 more)
-
I love the interior wall Nils. How much of this will remain visible? Bob
- 692 replies
-
- 5
-
-
- eagle of algier
- chebec
- (and 2 more)
-
Rich, the Lumberyard kit included cast resin (3D printed?) pieces for the transom and the quarter badges. These included the carvings. I cut away the carvings and discarded the rest of those pieces. I then painted them to match the hull wood. Bob
- 682 replies
-
- 7
-
-
- halifax
- lumberyard
- (and 1 more)
-
She looks great with the finish Sjors. Bob .
-
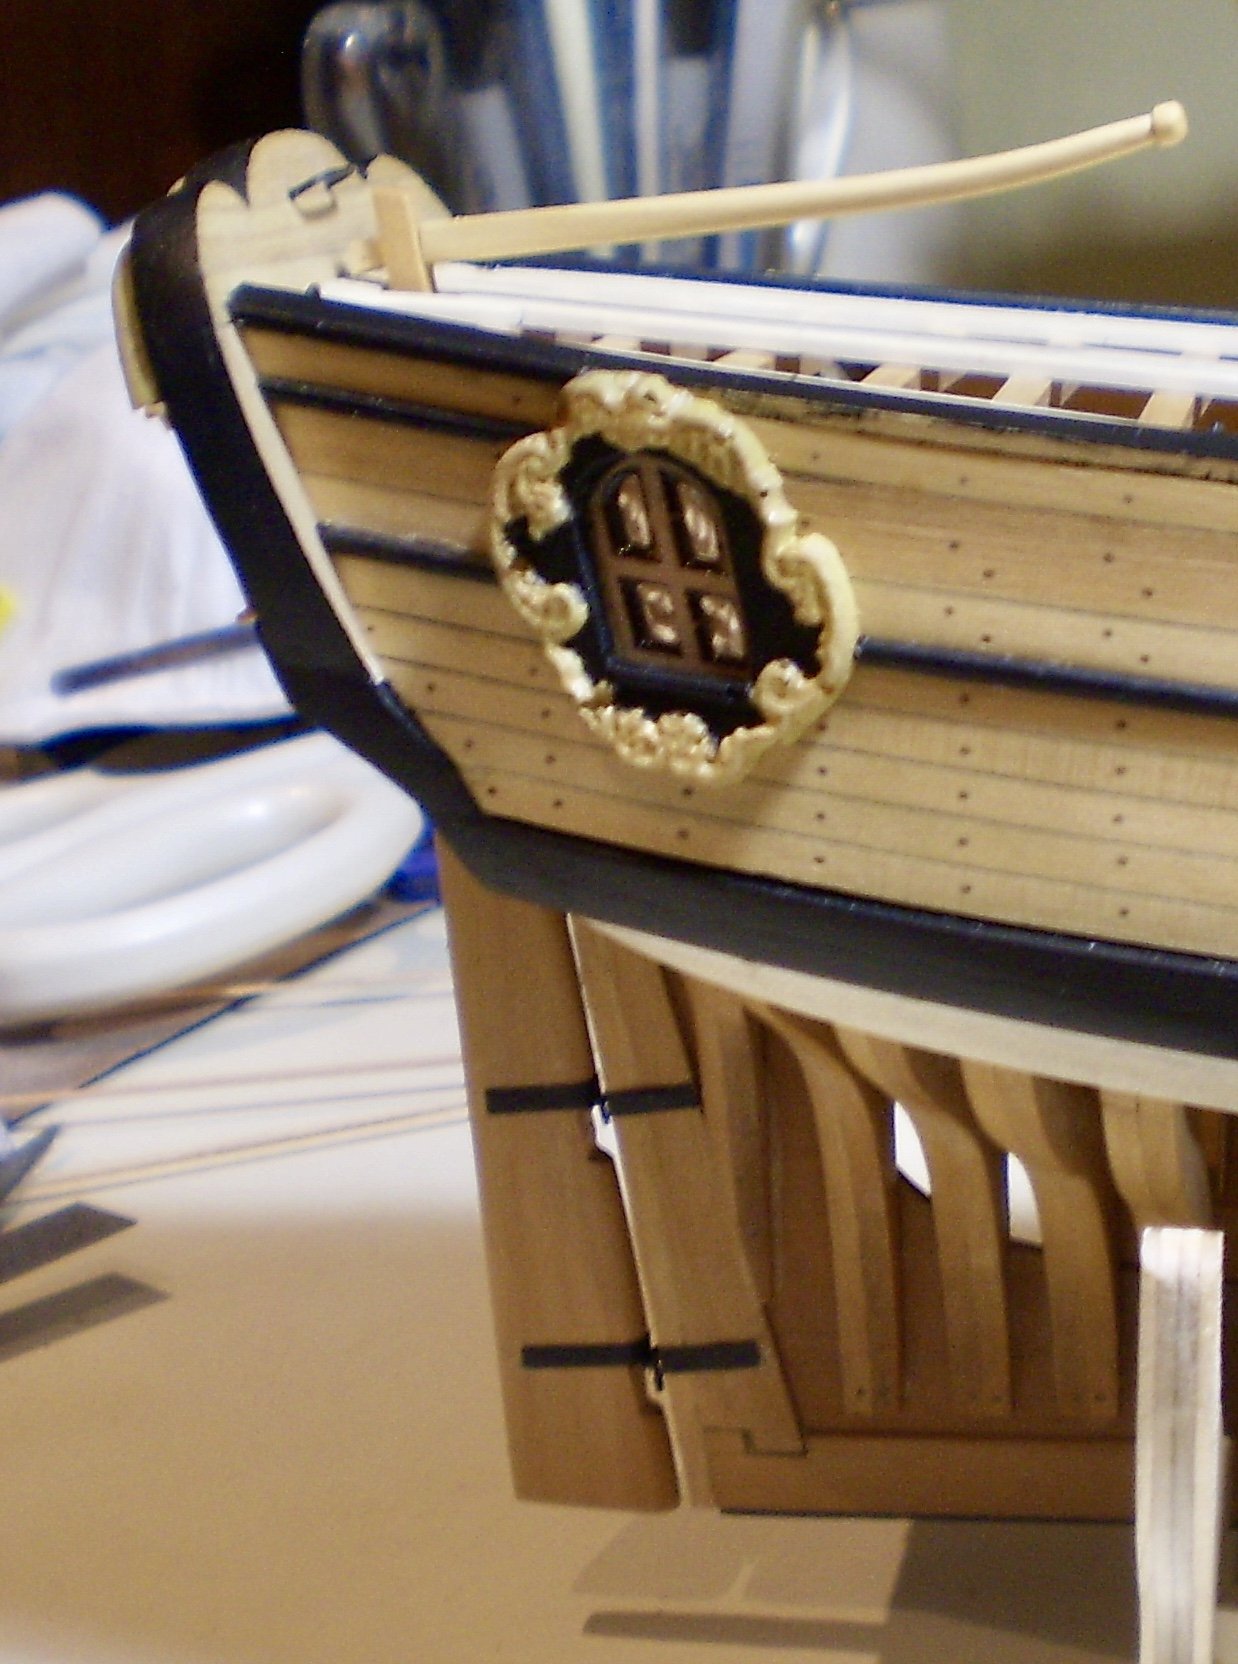
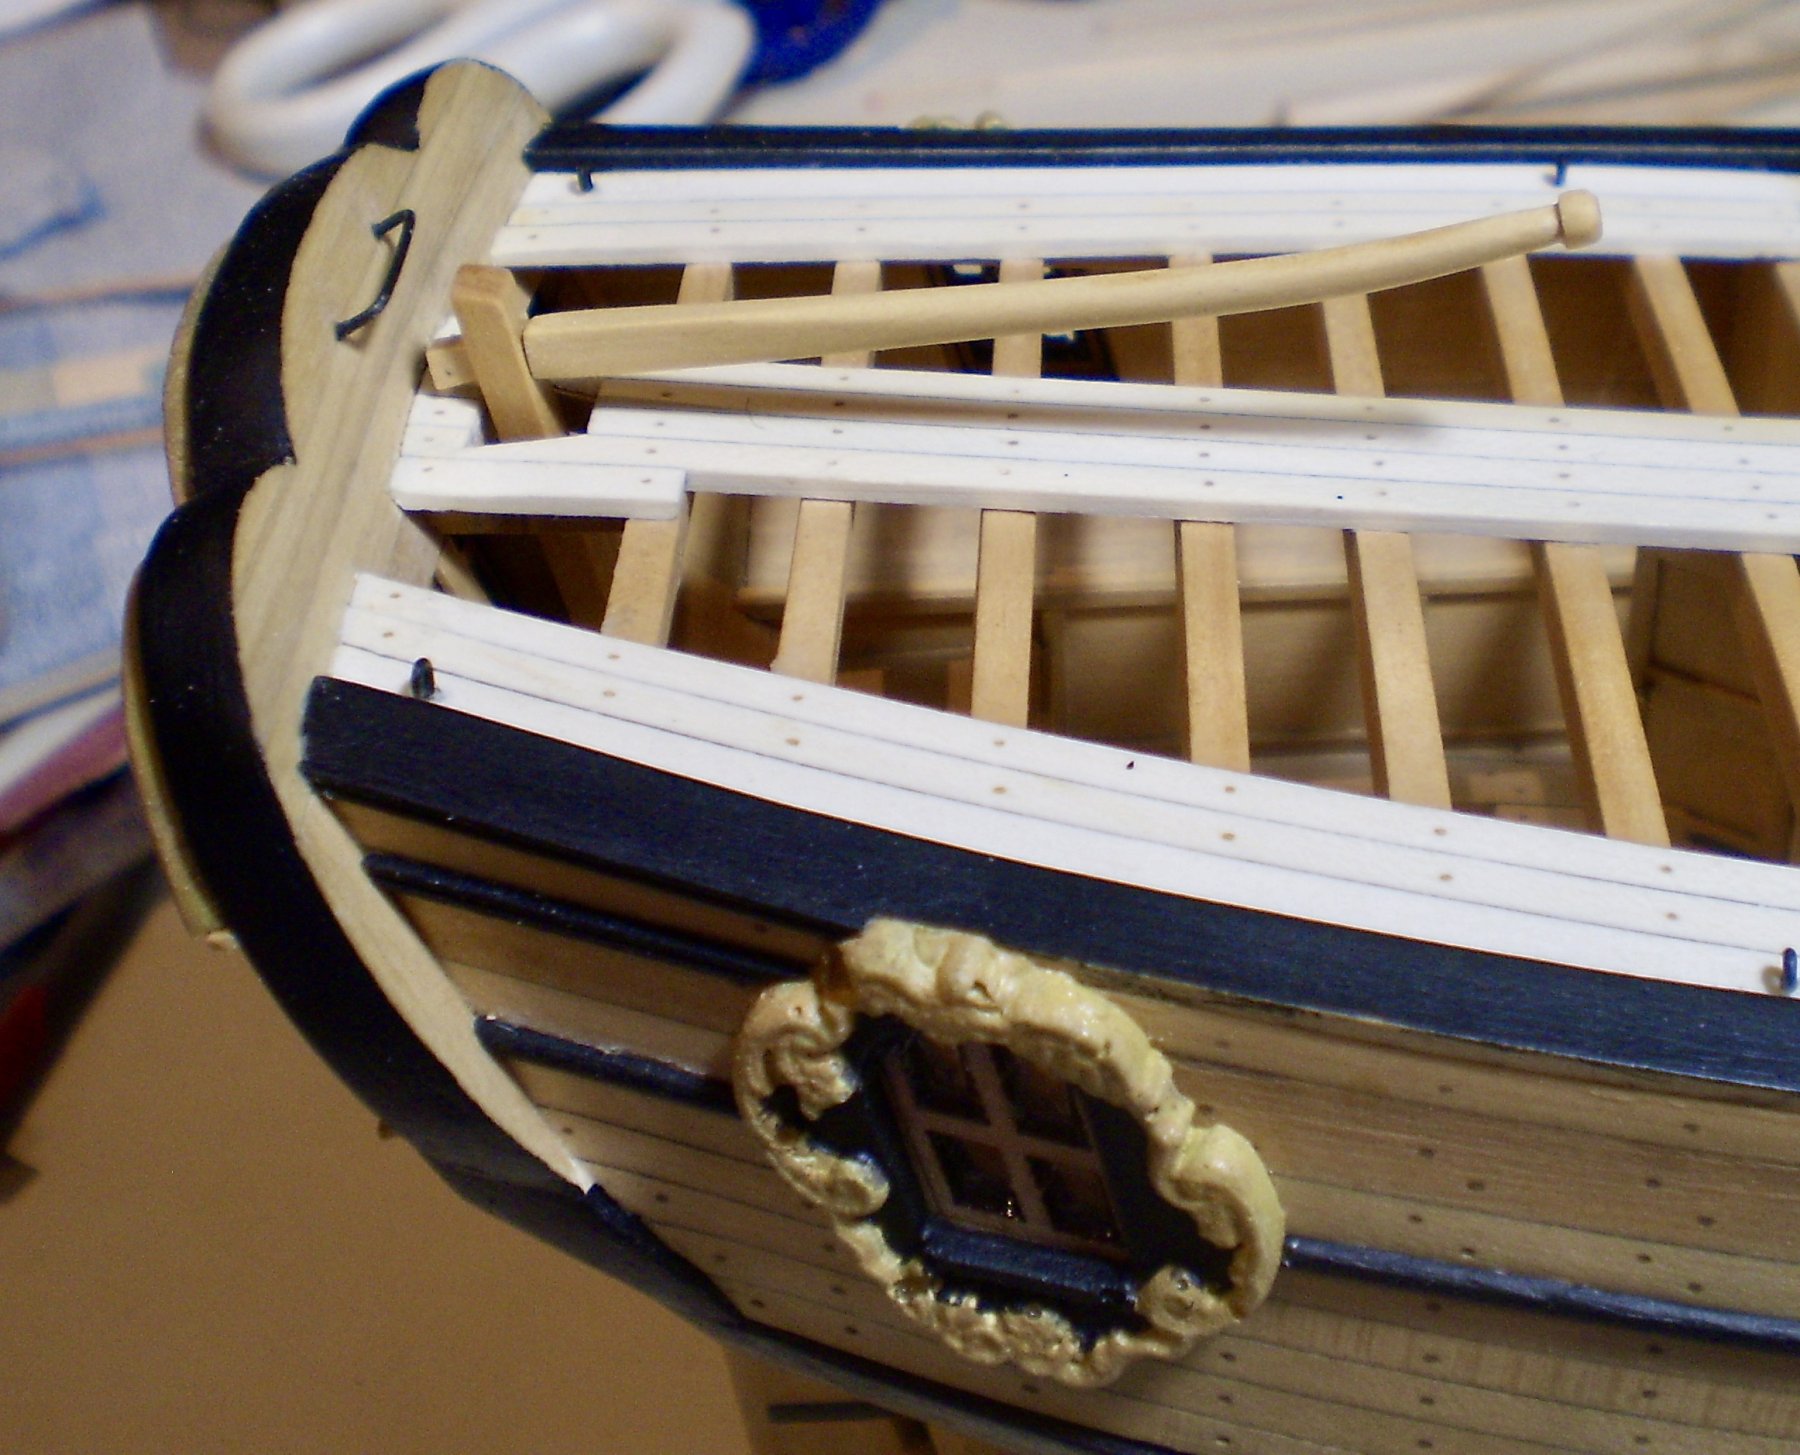
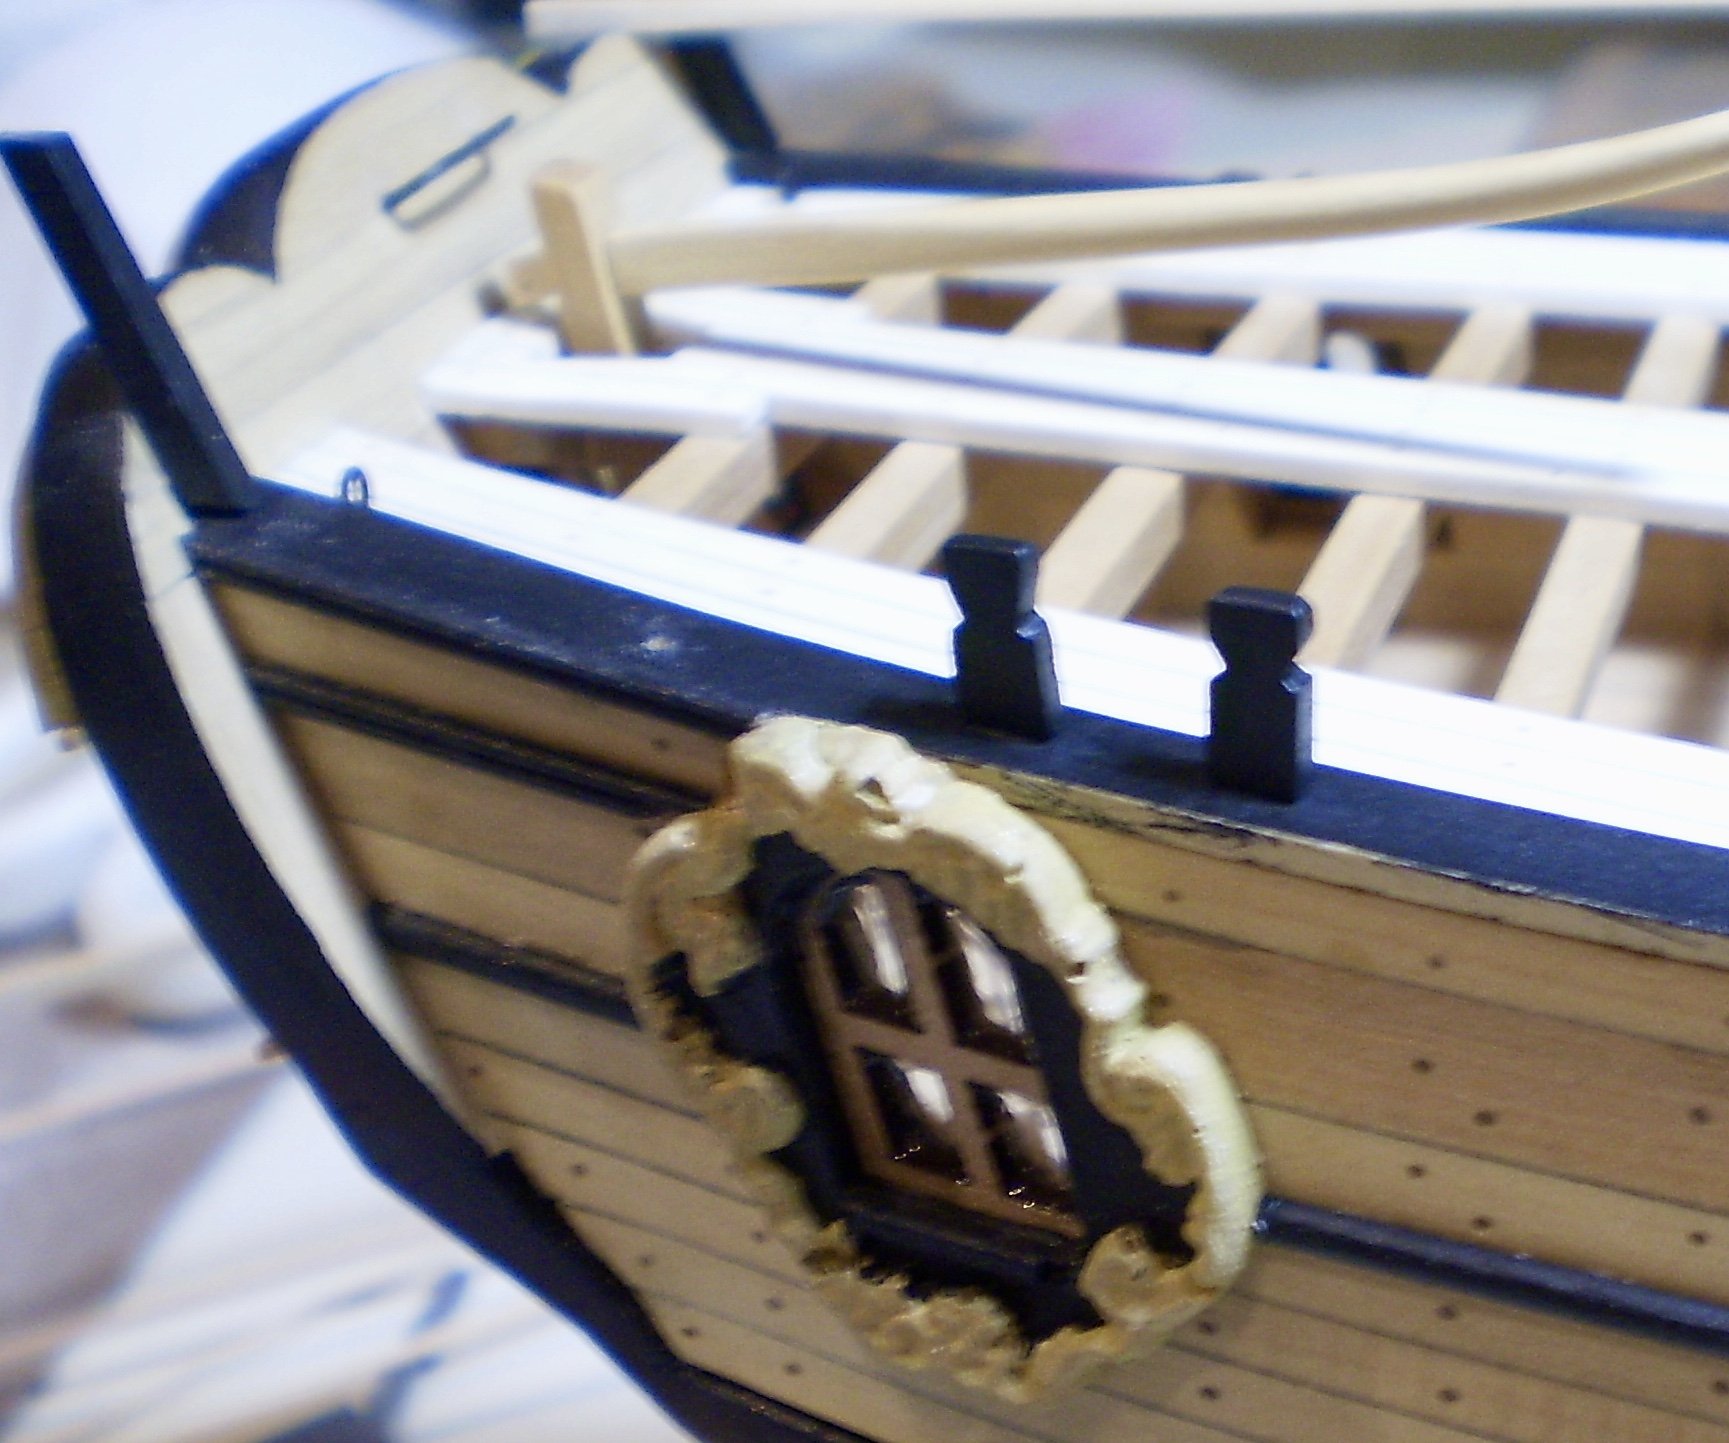
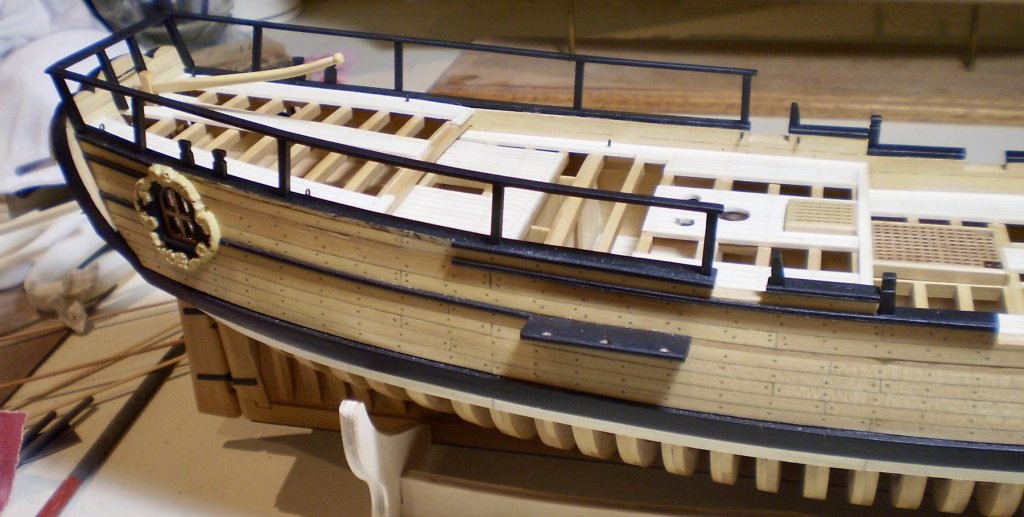
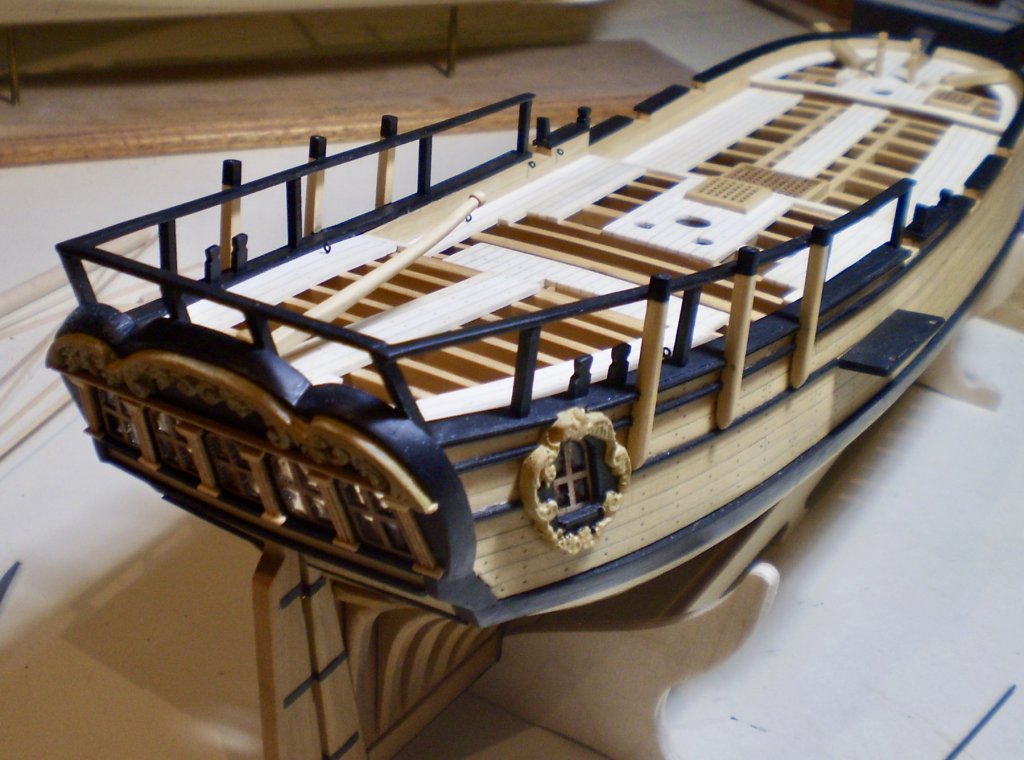
Once again, some rainy weather led to extra modeling time. I accomplished a few things. First, image and mounted the rudder. The basic piece was the laser cut part from the kit. I had to add a piece to the upper portion to enable a proper fit through the deck. I then shaped the fore sideband tapered the aft side. The pintles and gudgeons were done with black painted paper (I avoid metal work whenever possible) with blackened brass for the working parts. The tiller was cut from boxwood sheet and rounded where appropriate. It was then attached to the rudder after the rudder was mounted. I then started making and mounting the various timber heads. These were made from boxwood strip, shaped with files, painted black and mounted to the cap rail with pins and glue. Lastly, while access was still easy, I started drilling holes for, and mounting eyebolts for future rigging attachment, including the aft most guns.Many others remain to be done. I also added a black wire horse for the boom sheet, on the inner transom. Bob


- 682 replies
-
- 28
-
-
- halifax
- lumberyard
- (and 1 more)
-
Thanks so much Zappto. Yes, I used Micro Krystal Klear. It is very easy to use. You just dip a tooth pick in it and then swirl the toothpick in the window frame opening until it it is filled. Each pane is done individually. Bob
- 682 replies
-
- 4
-
-
- halifax
- lumberyard
- (and 1 more)
-
Thanks so much Thomas, Martin for the generous comments and also the "likes". Bob
- 682 replies
-
- 3
-
-
- halifax
- lumberyard
- (and 1 more)
-
Thanks so much B.E. and the "likes". B.E., the glazing actually looks better in person than in the photos, which have some glare. Bob
- 682 replies
-
- 4
-
-
- halifax
- lumberyard
- (and 1 more)
-
Thanks so much Don, Michael, Elijah and the "likes". Appreciated, as always. Bob
- 682 replies
-
- 4
-
-
- halifax
- lumberyard
- (and 1 more)
-
It's coming along beautifully Elijah. Well done. Bob
- 228 replies
-
- 3
-
-
- gunboat
- model shipways
- (and 1 more)