rafine
-
Posts
2,932 -
Joined
-
Last visited
Content Type
Profiles
Forums
Gallery
Events
Everything posted by rafine
-
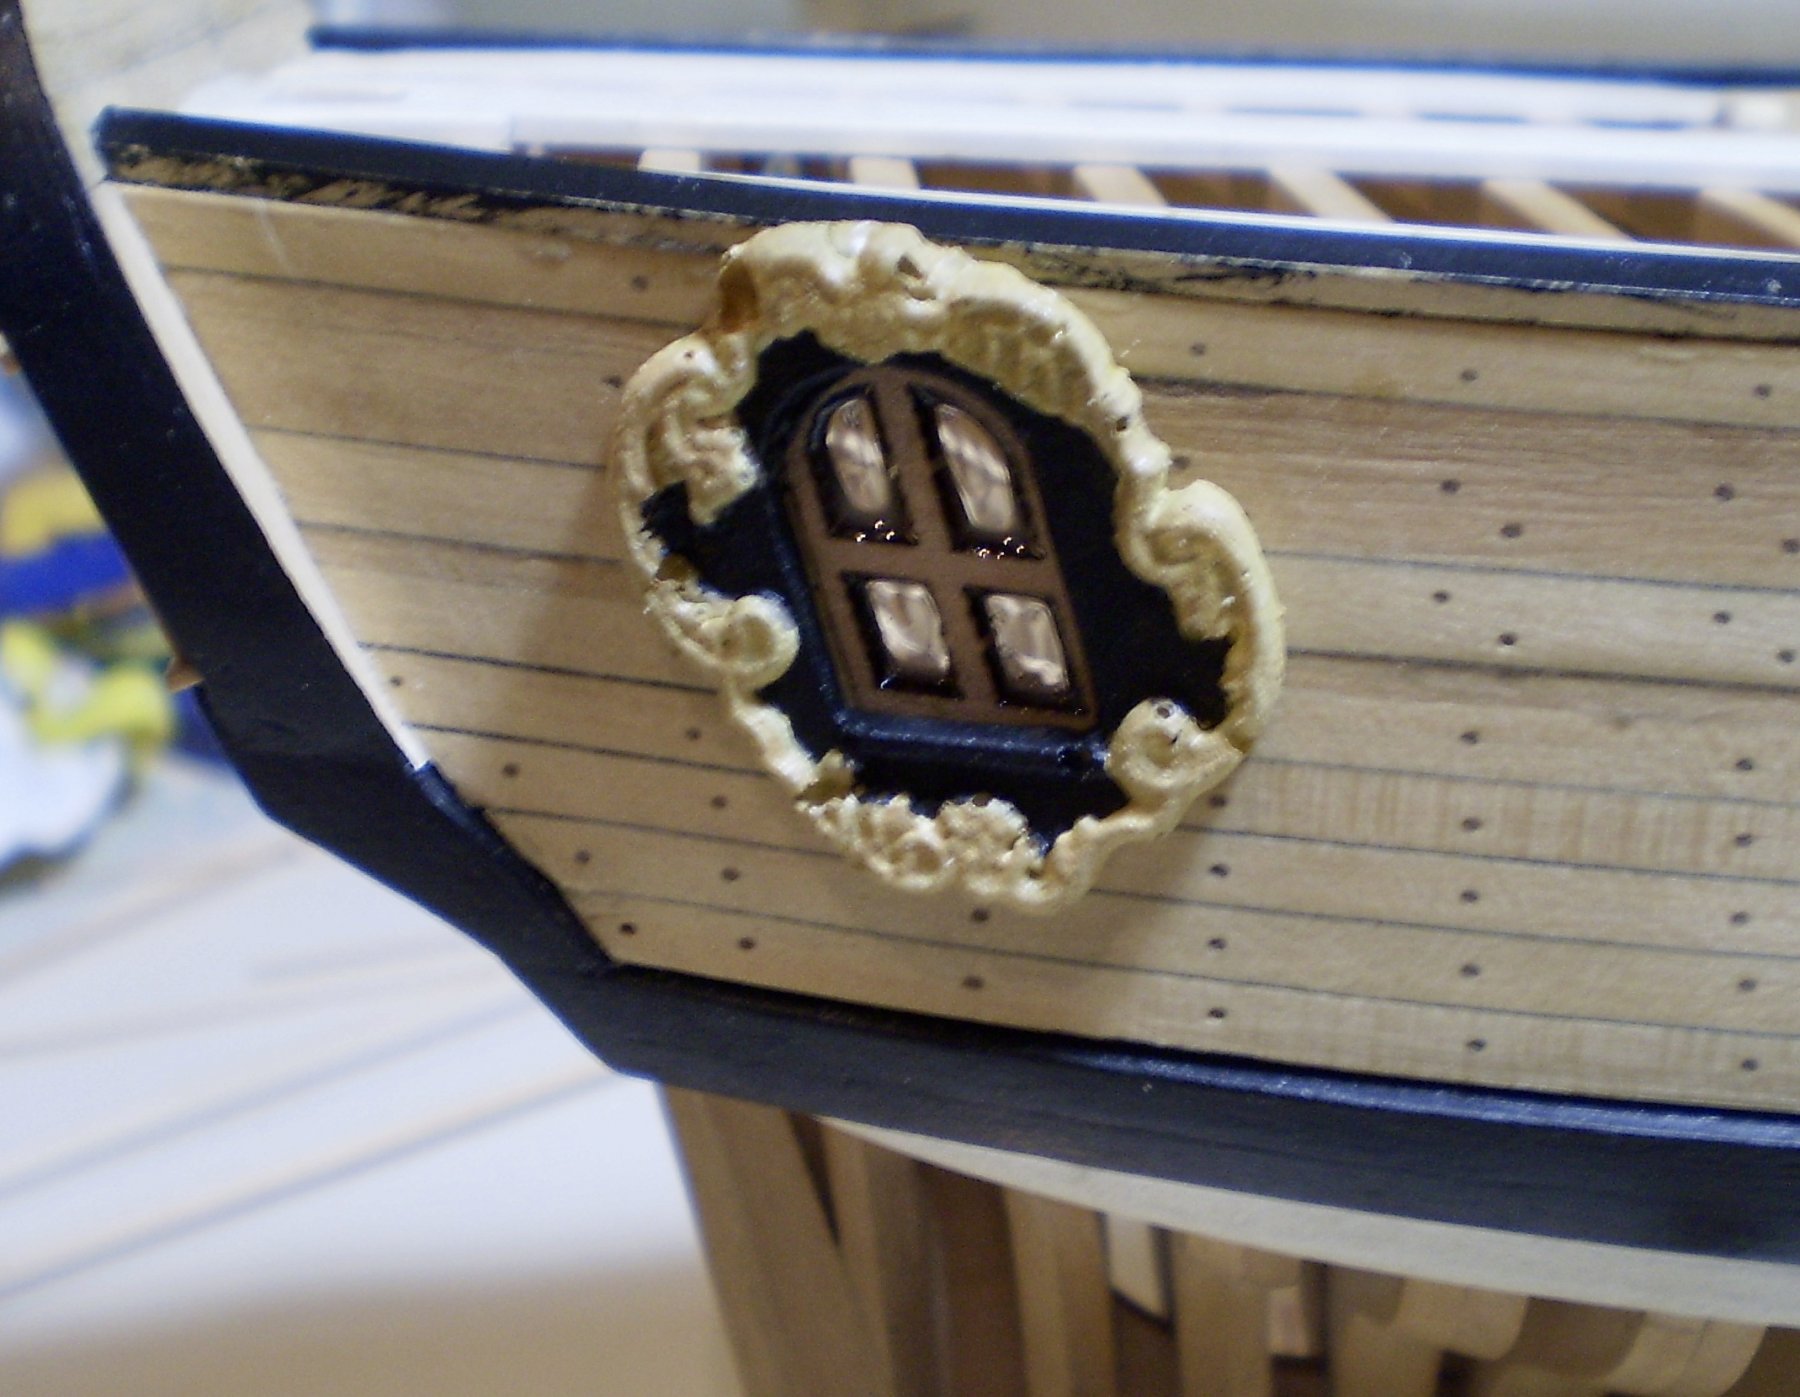
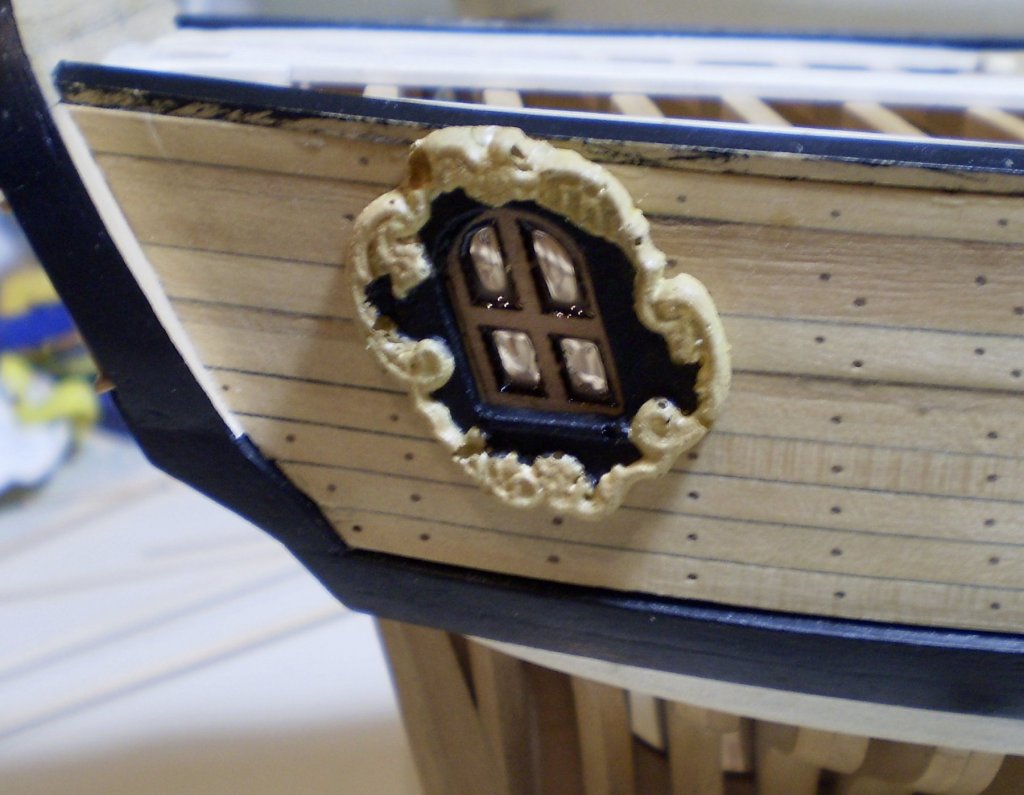
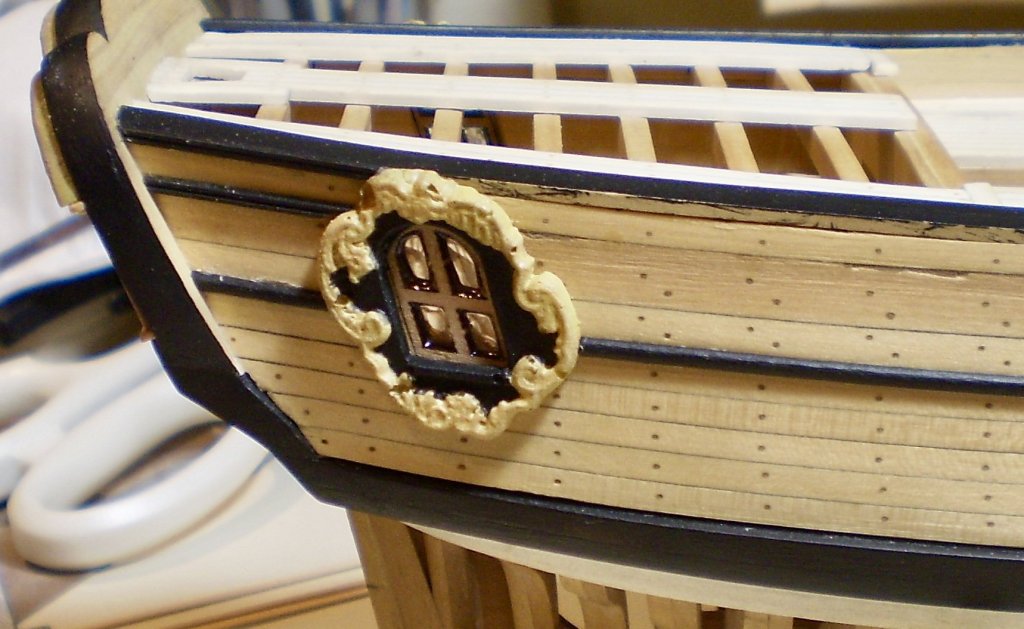
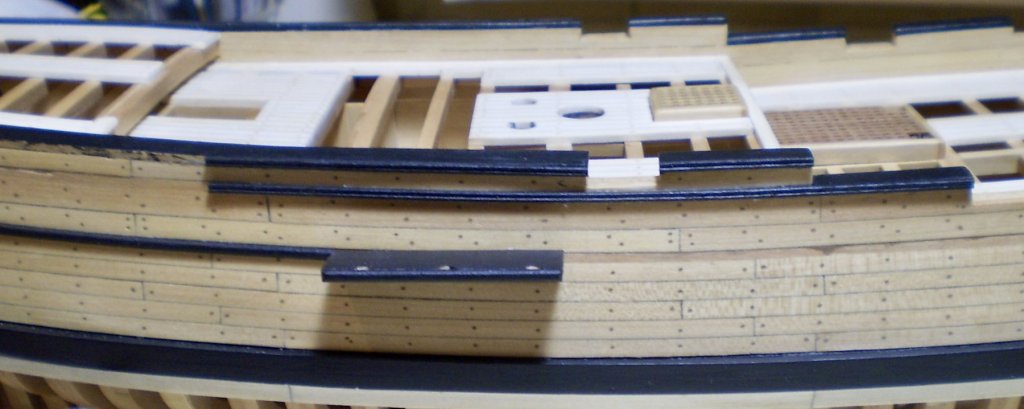
 Work on the outer hull began with the quarter badges. As with the transom, i needed to make a decision as to how to handle the carvings. My answer was essentially the same; I couldn't make my own; I couldn't use the laser cut carving pieces from the Lumberyard; so I had to use the resin castings from the kit. To use them, I first cut out the windows from the castings and then painted them to mach the hull wood, with a bit of black background. I liked the paint better than what I had done on the transom, so I did some repainting on the transom to try and match. The windows are, again, the Lumberyard laser cut ones, again thinned down considerably. The glazing is again Micro Kristal Klear. I then made up the main channels from boxwood strip, painted them black and glued and pinned them in place. Lastly, I started to add moldings to the hull sides, The lowest is half round and the others are a simple double bead. All of the moldings will be painted black. The moldings were simple to place because when planking the hull I had used base pieces for the moldings in the planking and was able to just follow those base pieces when attaching the final molding pieces. Bob
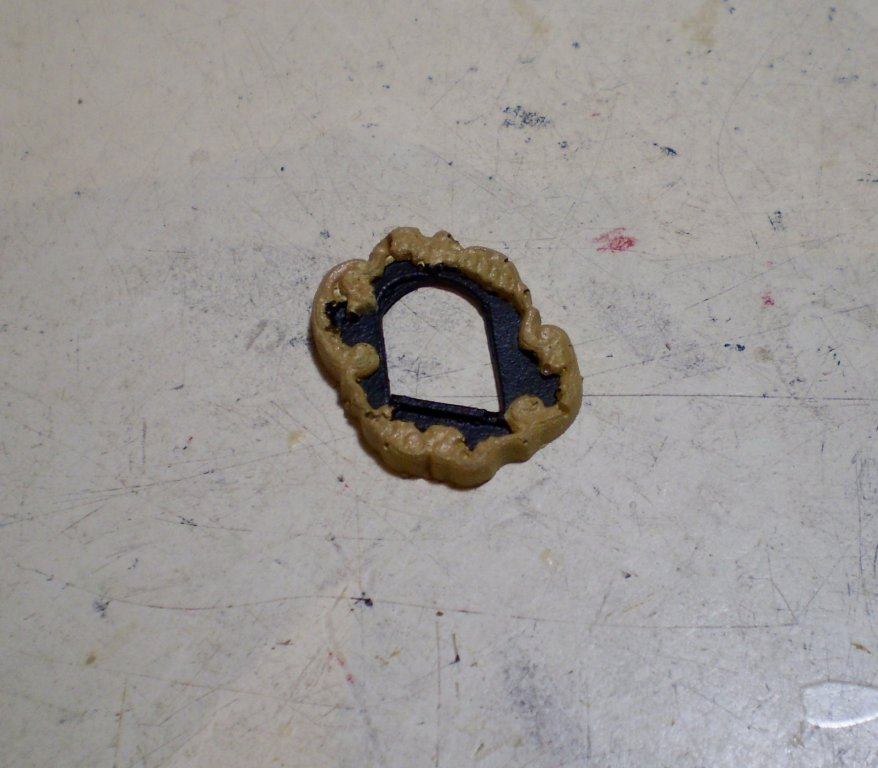
- 682 replies
-
- 33
-

-
- halifax
- lumberyard
- (and 1 more)
-
Well done B.E. I think that you will really enjoy doing Cheerful. Bob
- 91 replies
-
- 3
-
-
- 18th century longboat
- model shipways
- (and 1 more)
-
She's wonderful, Christian. Bob
-
Thanks so much Hamilton. It's good to hear from you. You're right about this being a fun project. Bob
- 682 replies
-
- 4
-
-
- halifax
- lumberyard
- (and 1 more)
-
Thanks so much Jeff and Robin. Your comments are greatly appreciated. Bob
- 682 replies
-
- 5
-
-
- halifax
- lumberyard
- (and 1 more)
-
Thanks so much Grant, Michael, Rusty and Jim for the kind words, and thanks also to the "likes". Jim, I'm afraid that with age the skills become more tricks than physical abilities, but I appreciate the thought. Bob
- 682 replies
-
- 4
-
-
- halifax
- lumberyard
- (and 1 more)
-
Thanks so much Dave, Nils, Denis and the "likes". I'm still playing with the paint on the "carvings". Bob
- 682 replies
-
- 7
-
-
- halifax
- lumberyard
- (and 1 more)
-
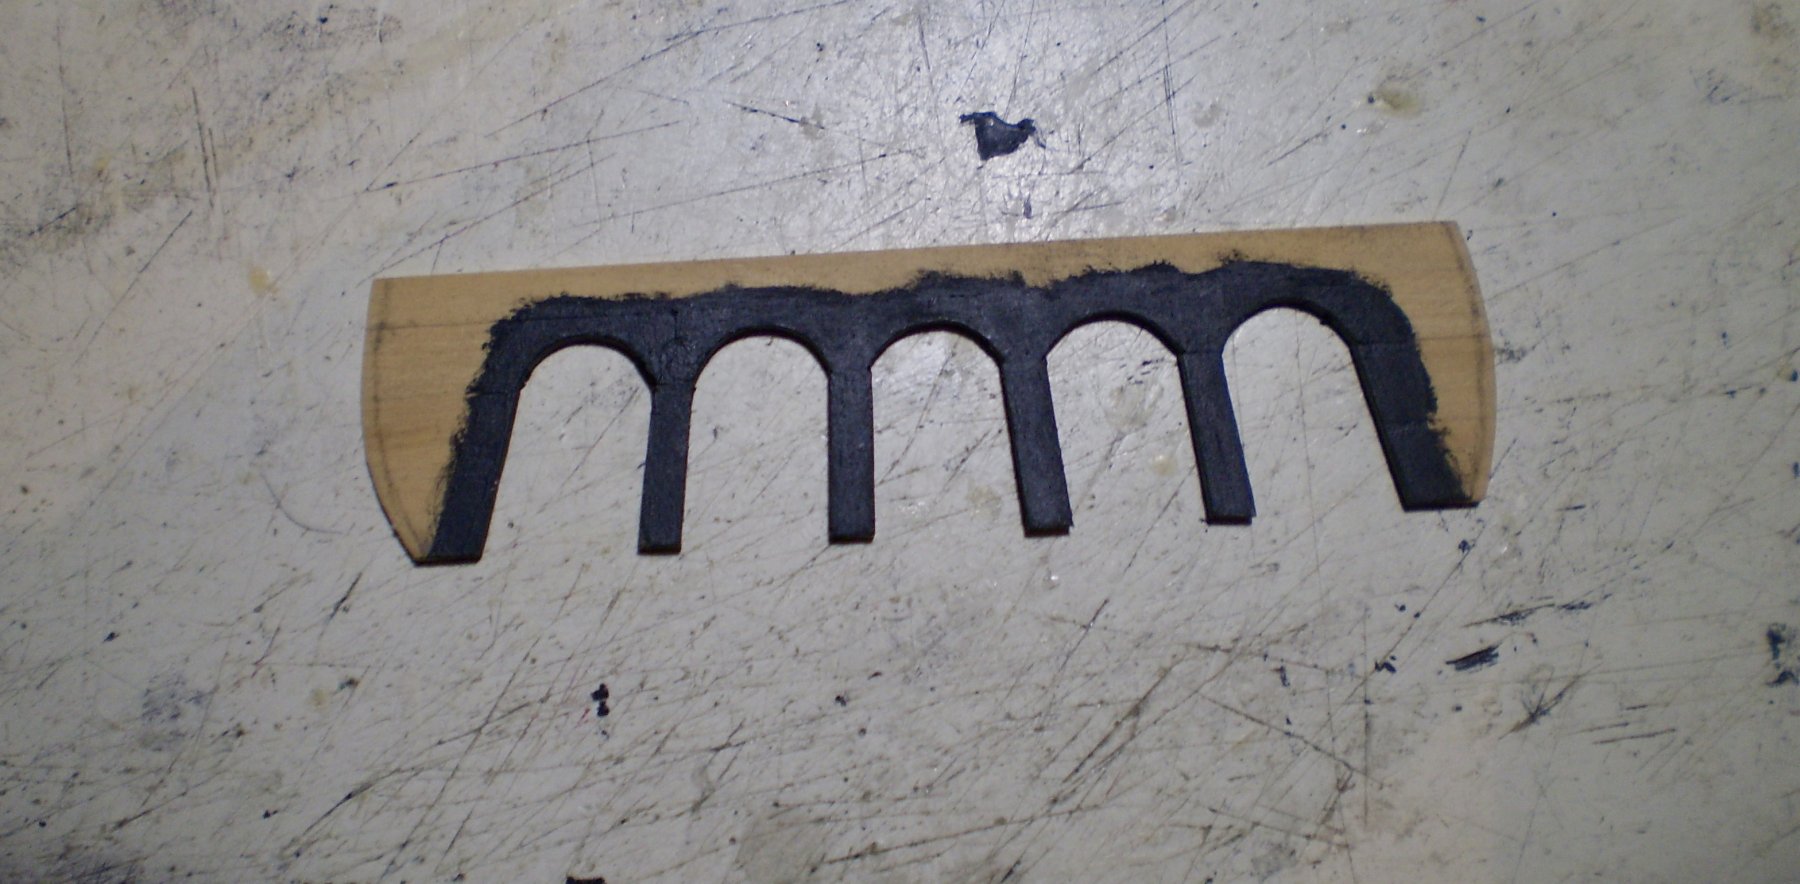
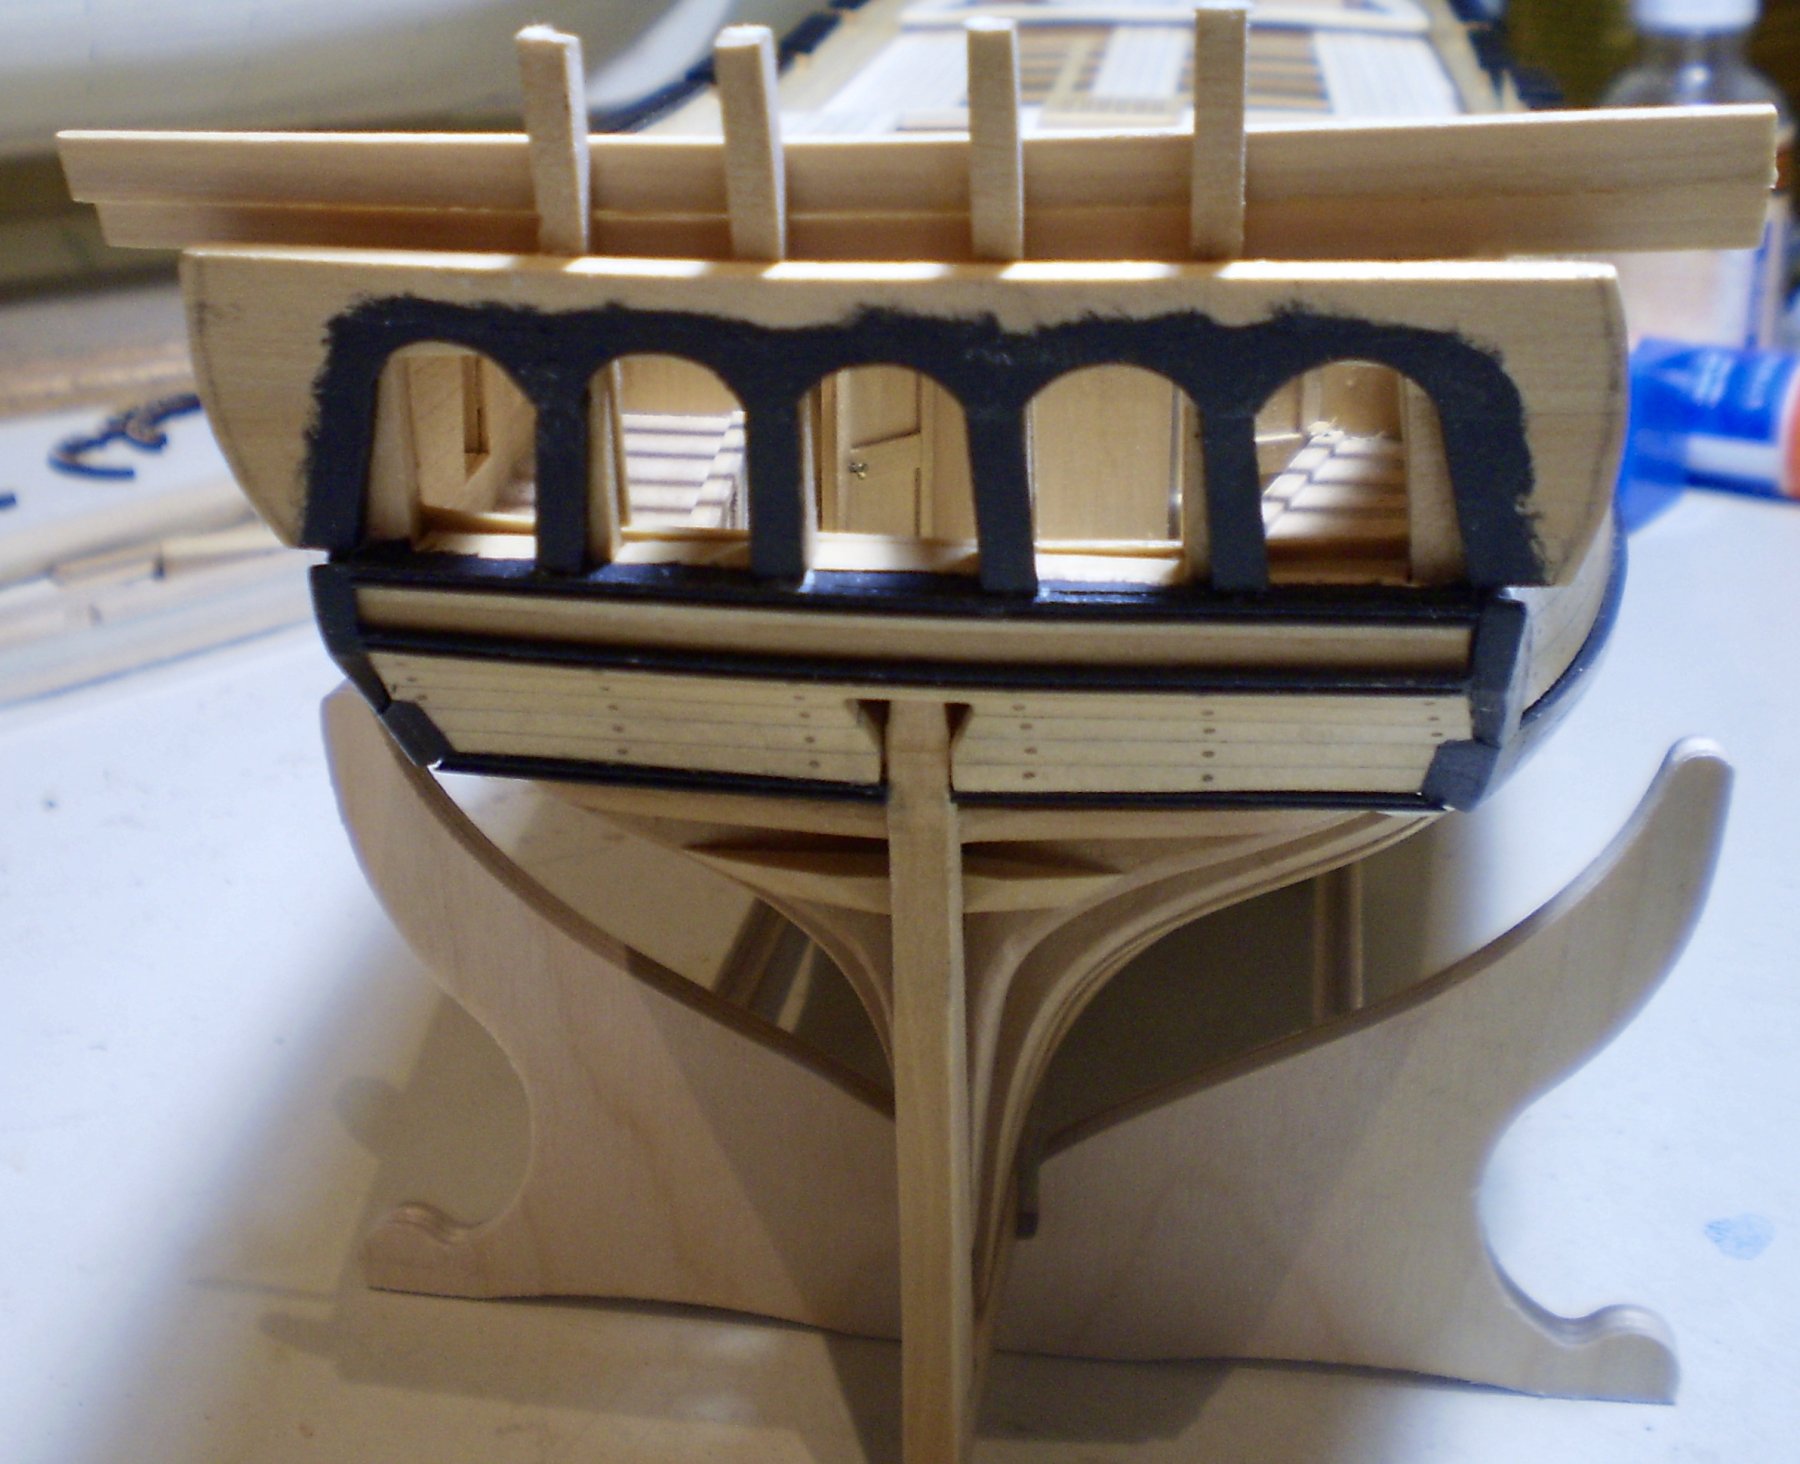
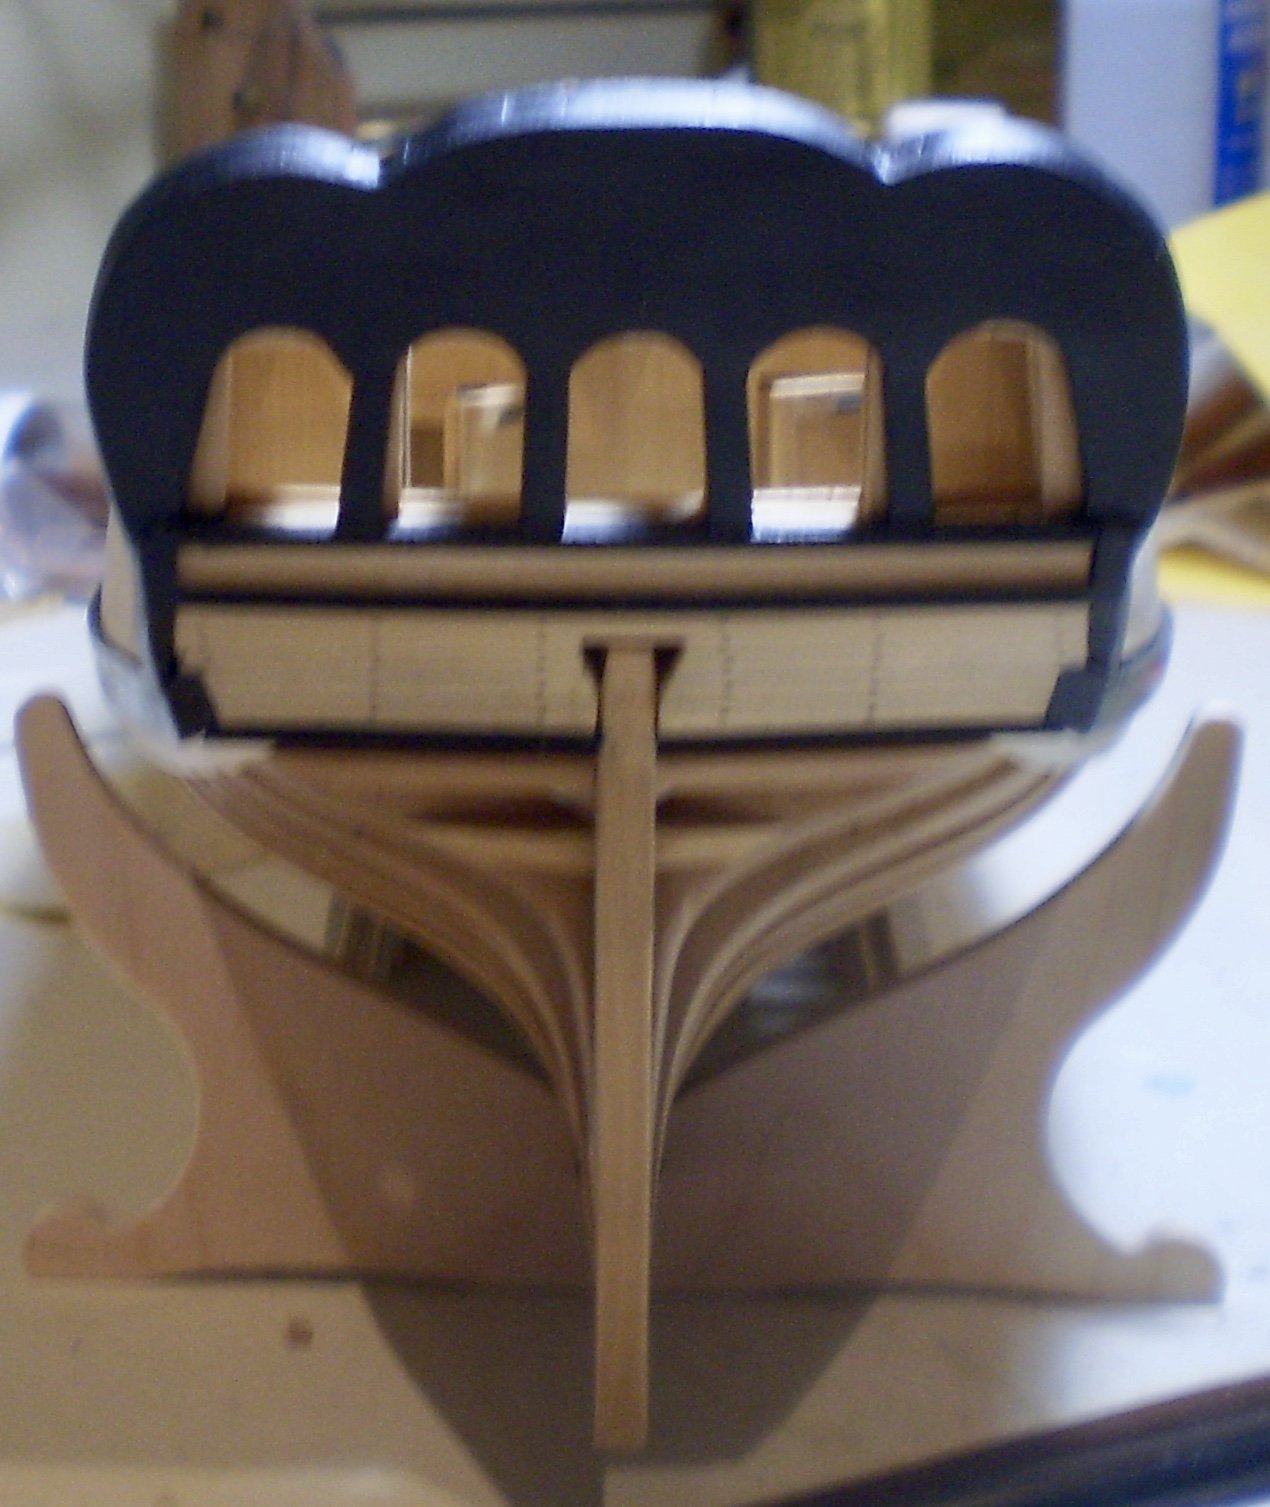
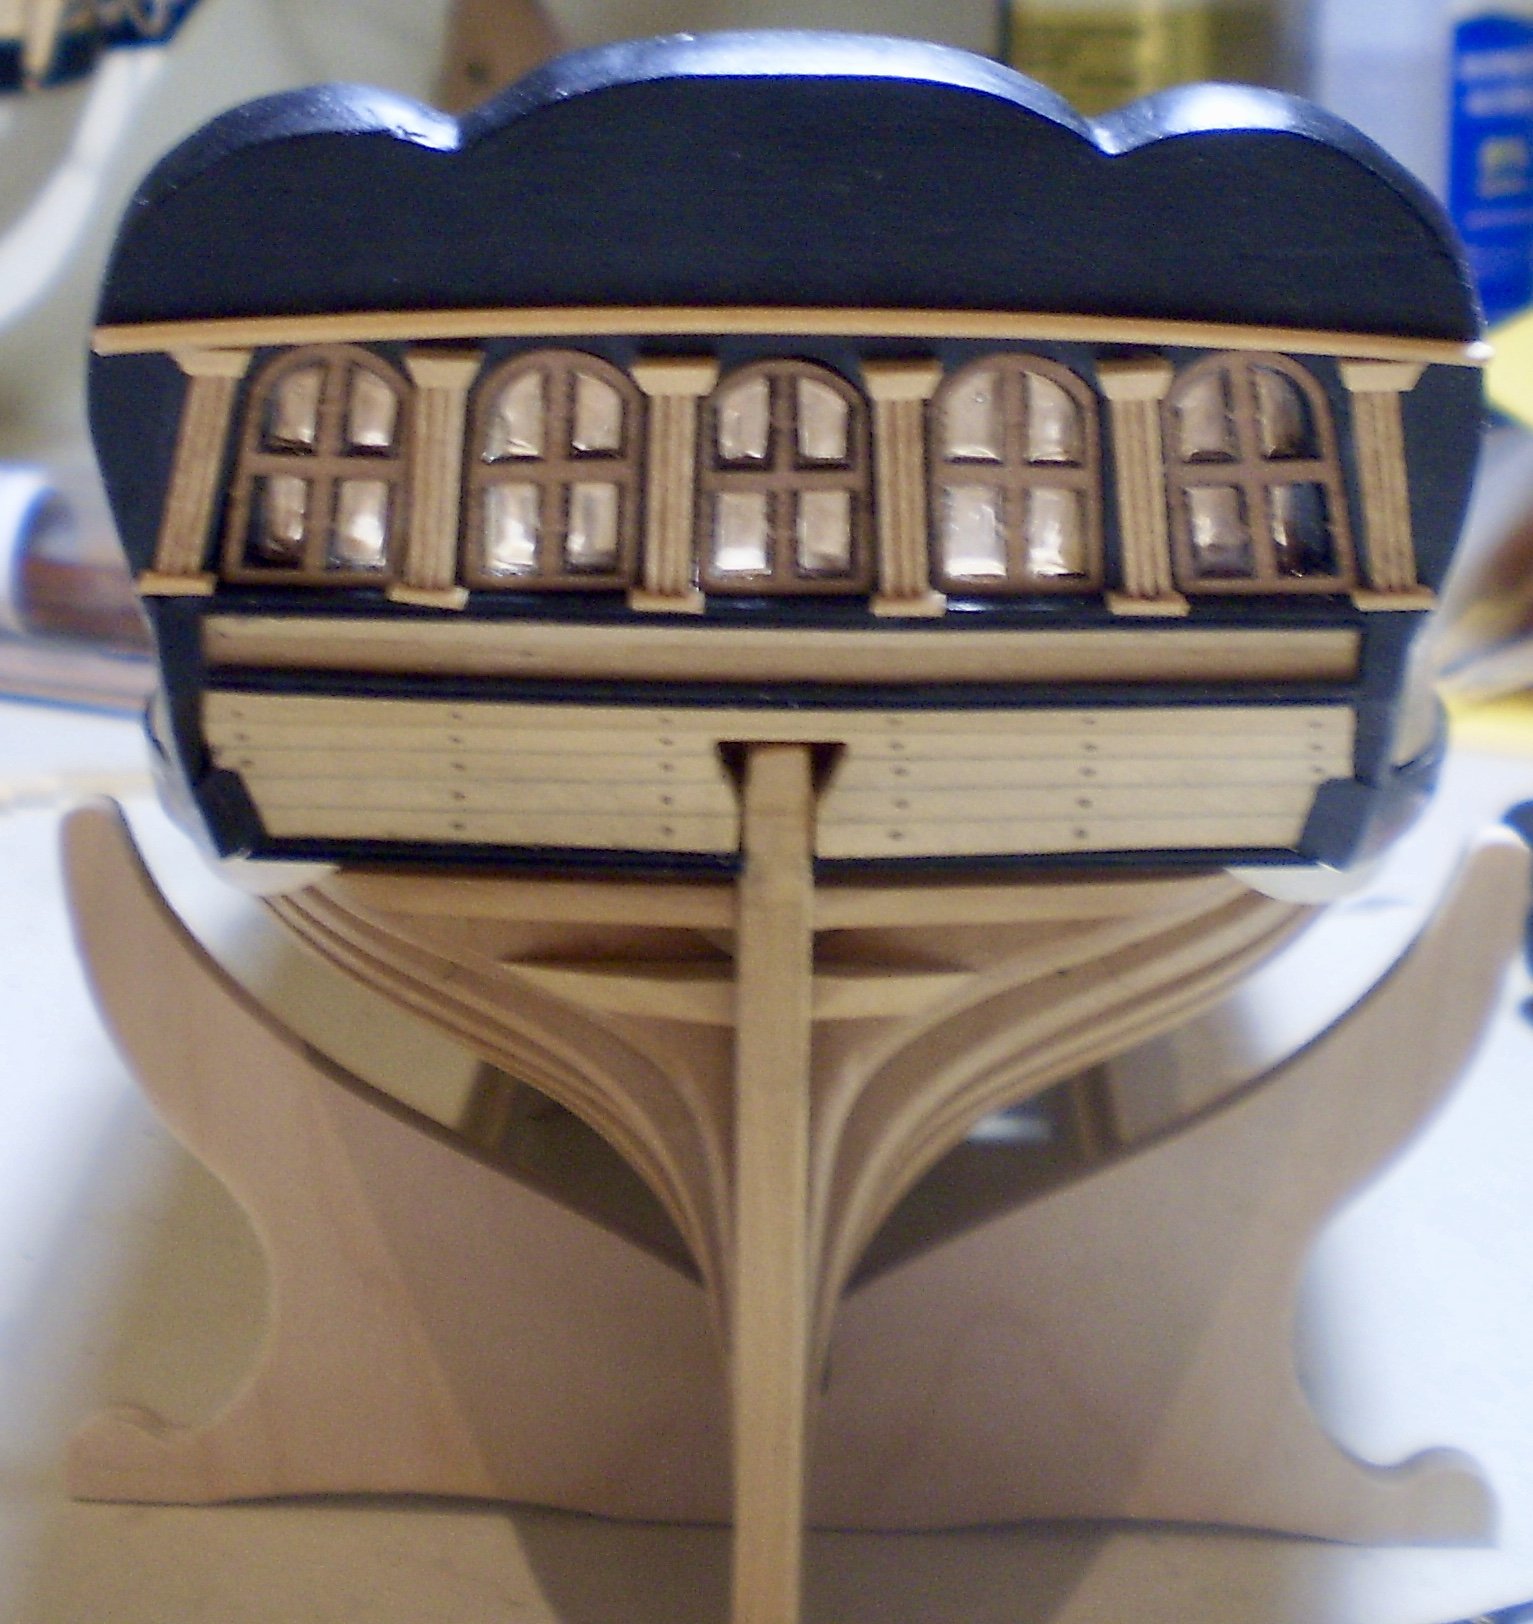
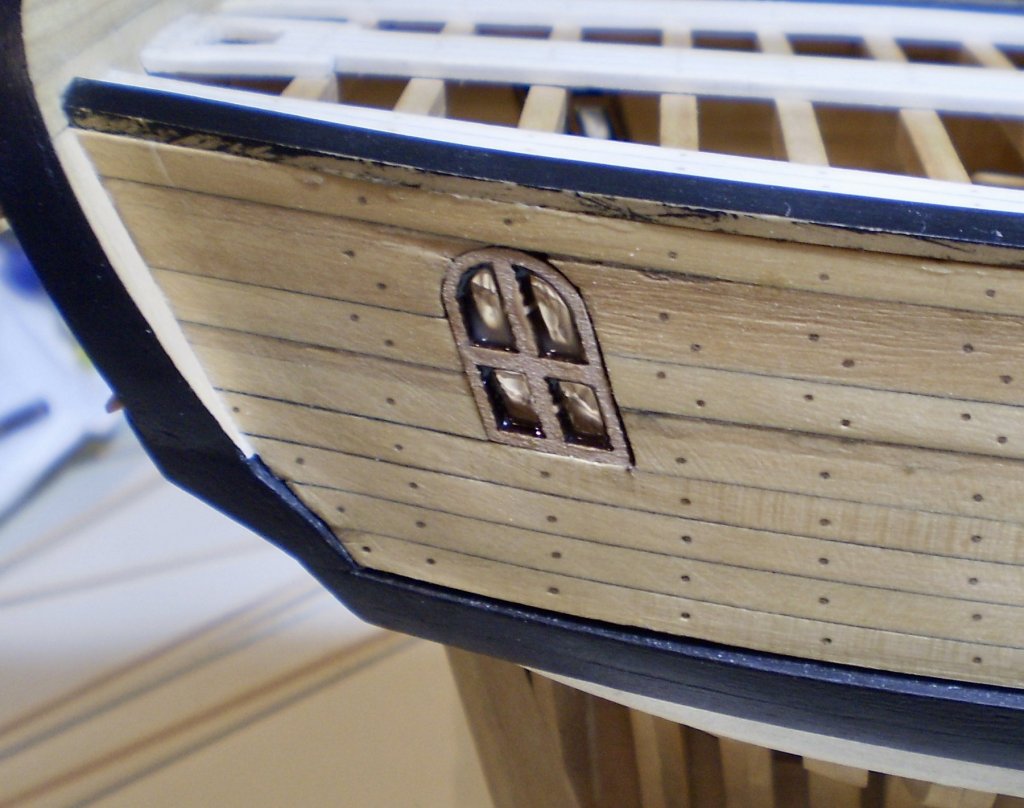
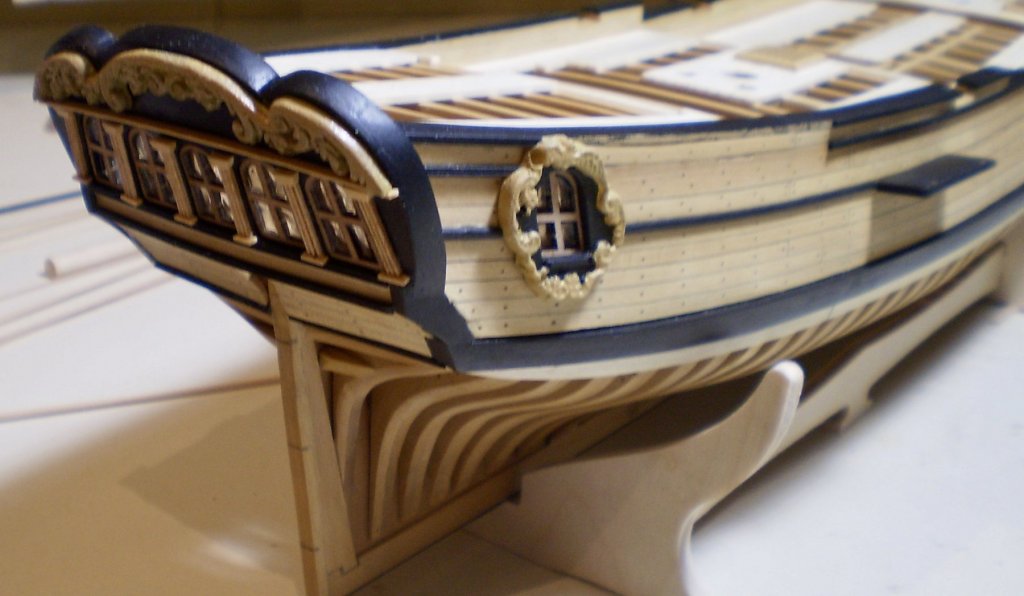
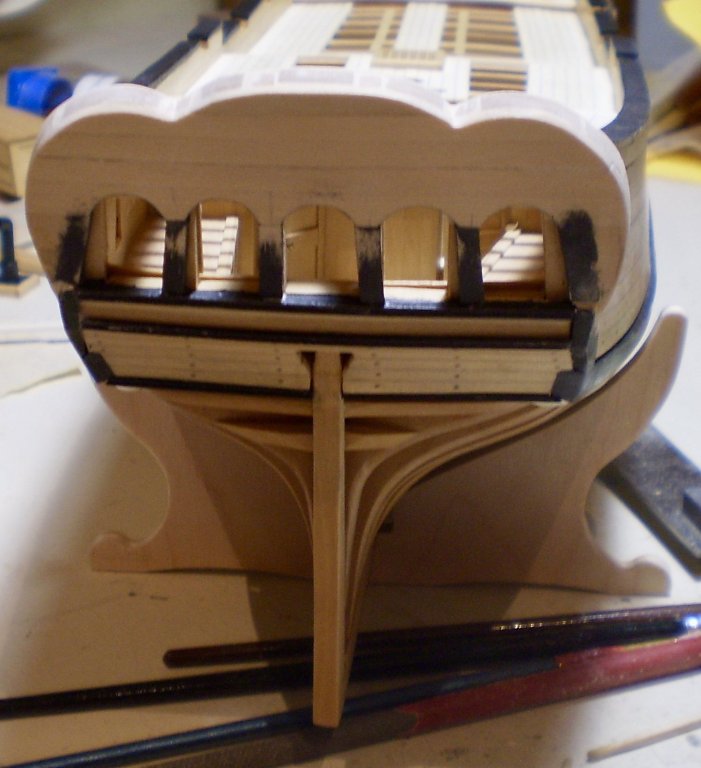
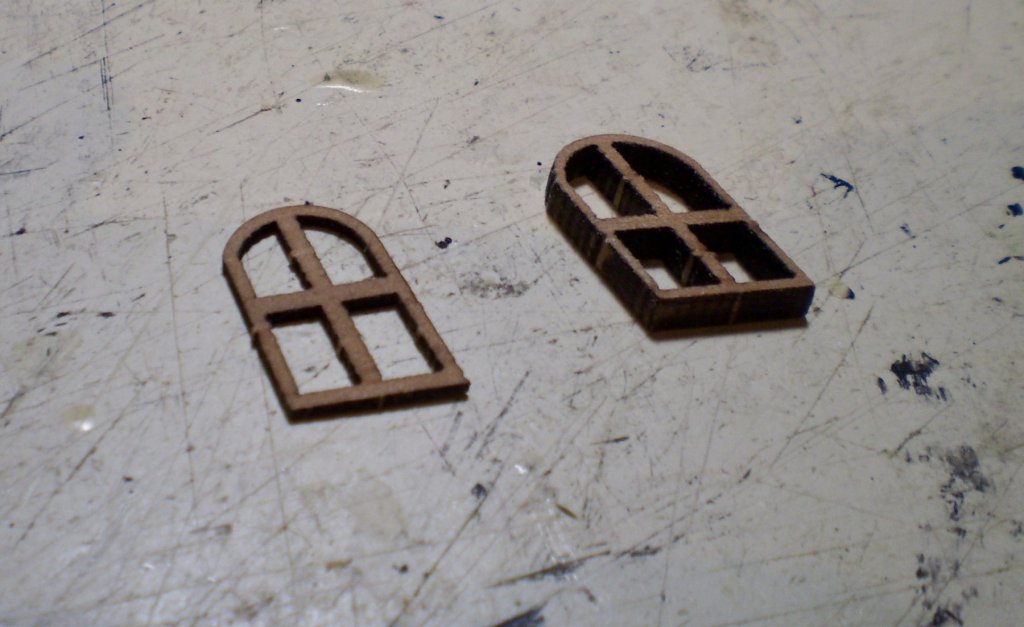
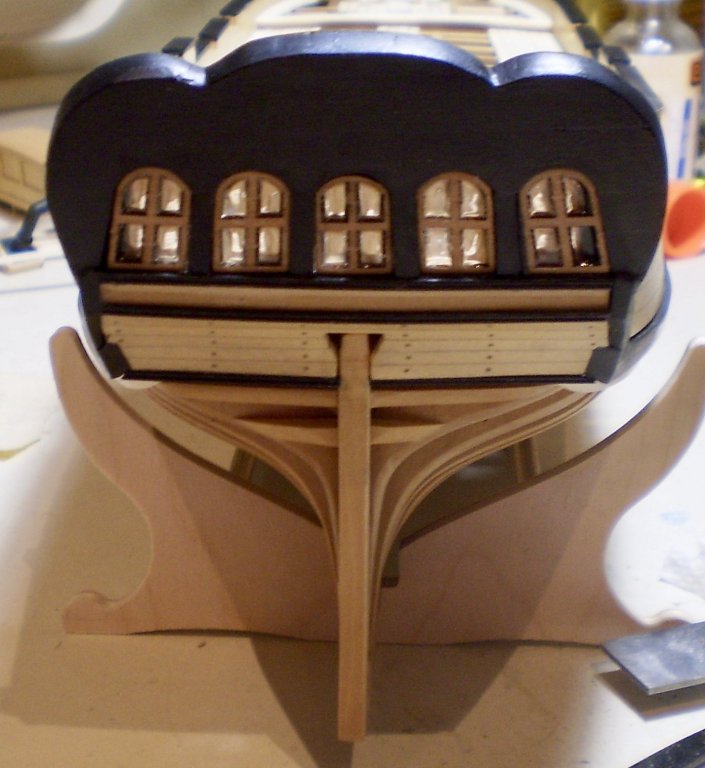
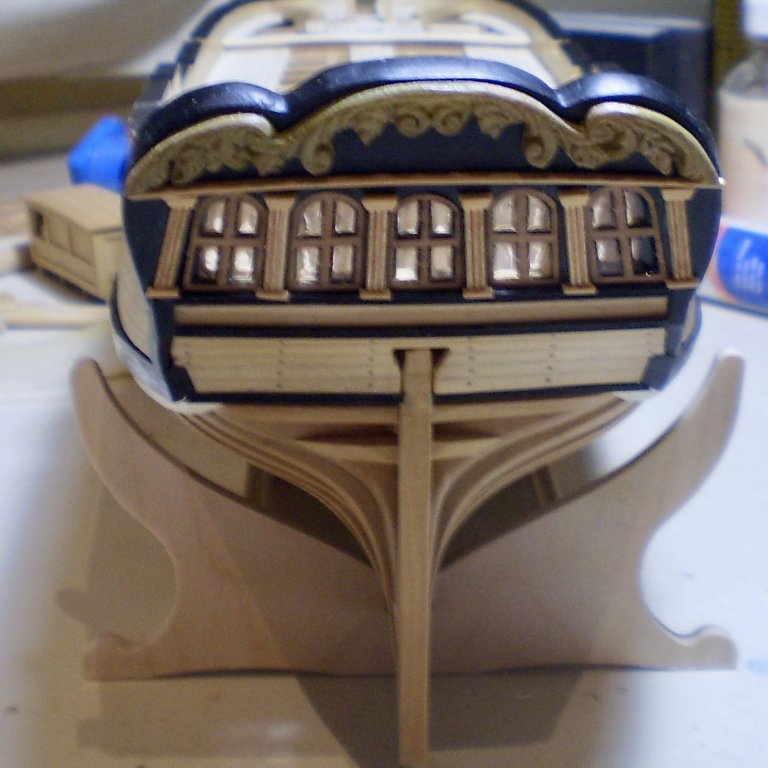
I've spent the last week on the stern, which is now finished. A few general thoughts first: the Hahn plans are a reconstruction from the Admiralty draughts, which only show the general shape of the transom and windows; I have generally followed the Hahn plan, but not exactly; my deviations reflect both some artistic license and limitations on my skills. The transom was built up from scratch from boxwood strip and sheet, using a card template following the shape shown on the plans. the windows are laser cut from the Lumberyard, but substantially reduced in thickness. The transom was built to fit these windows. Window glazing was done using Micro Krystal Klear, which leaves a clear translucent surface. The outer surface of the transom was painted black and the inner portion left natural to suit my taste. The pilasters along the windows were made up from boxwood strip, as was the molding above the windows. The carvings at the top of the transom created the biggest problem. Bearing in mind my utter lack of any artistic ability, I needed to find a way to do the carvings. I had a laser cut carving piece from the Lumberyard, but it was much too fragile to withstand my clumsy efforts to bring it to final shape. I then made an equally feeble effort carve my own from scratch. Finally, I turned to a part from the kit: the kit contained a complete transom piece cast from a flexible resin (?); I had rejected the idea of using it for the transom, but decided to try cutting the carving portion from the part and painting it to match the hull wood. I may still tinker with the painting, but I'm reasonably satisfied with the overall effect. Now, it's on to completing the outside hull. Bob


- 682 replies
-
- 31
-
-
- halifax
- lumberyard
- (and 1 more)
-
Thanks so much Mobbsie for the generous comments. I'm looking forward to your start on Pickle. Bob
- 682 replies
-
- 4
-
-
- halifax
- lumberyard
- (and 1 more)
-
A wonderful model Ken. You have every reason to be very proud of your work. Bob
- 481 replies
-
- 2
-
-
- rattlesnake
- model shipways
- (and 1 more)
-
Jason, I'm prejudiced because I enjoy rigging, but I think the model will look spectacular rigged. Bob
-
It's good to have you back doing important work again. Looking great. Bob
-
Thanks so much Martin. Your continuing interest is always appreciated. Bob
- 682 replies
-
- 4
-
-
- halifax
- lumberyard
- (and 1 more)
-
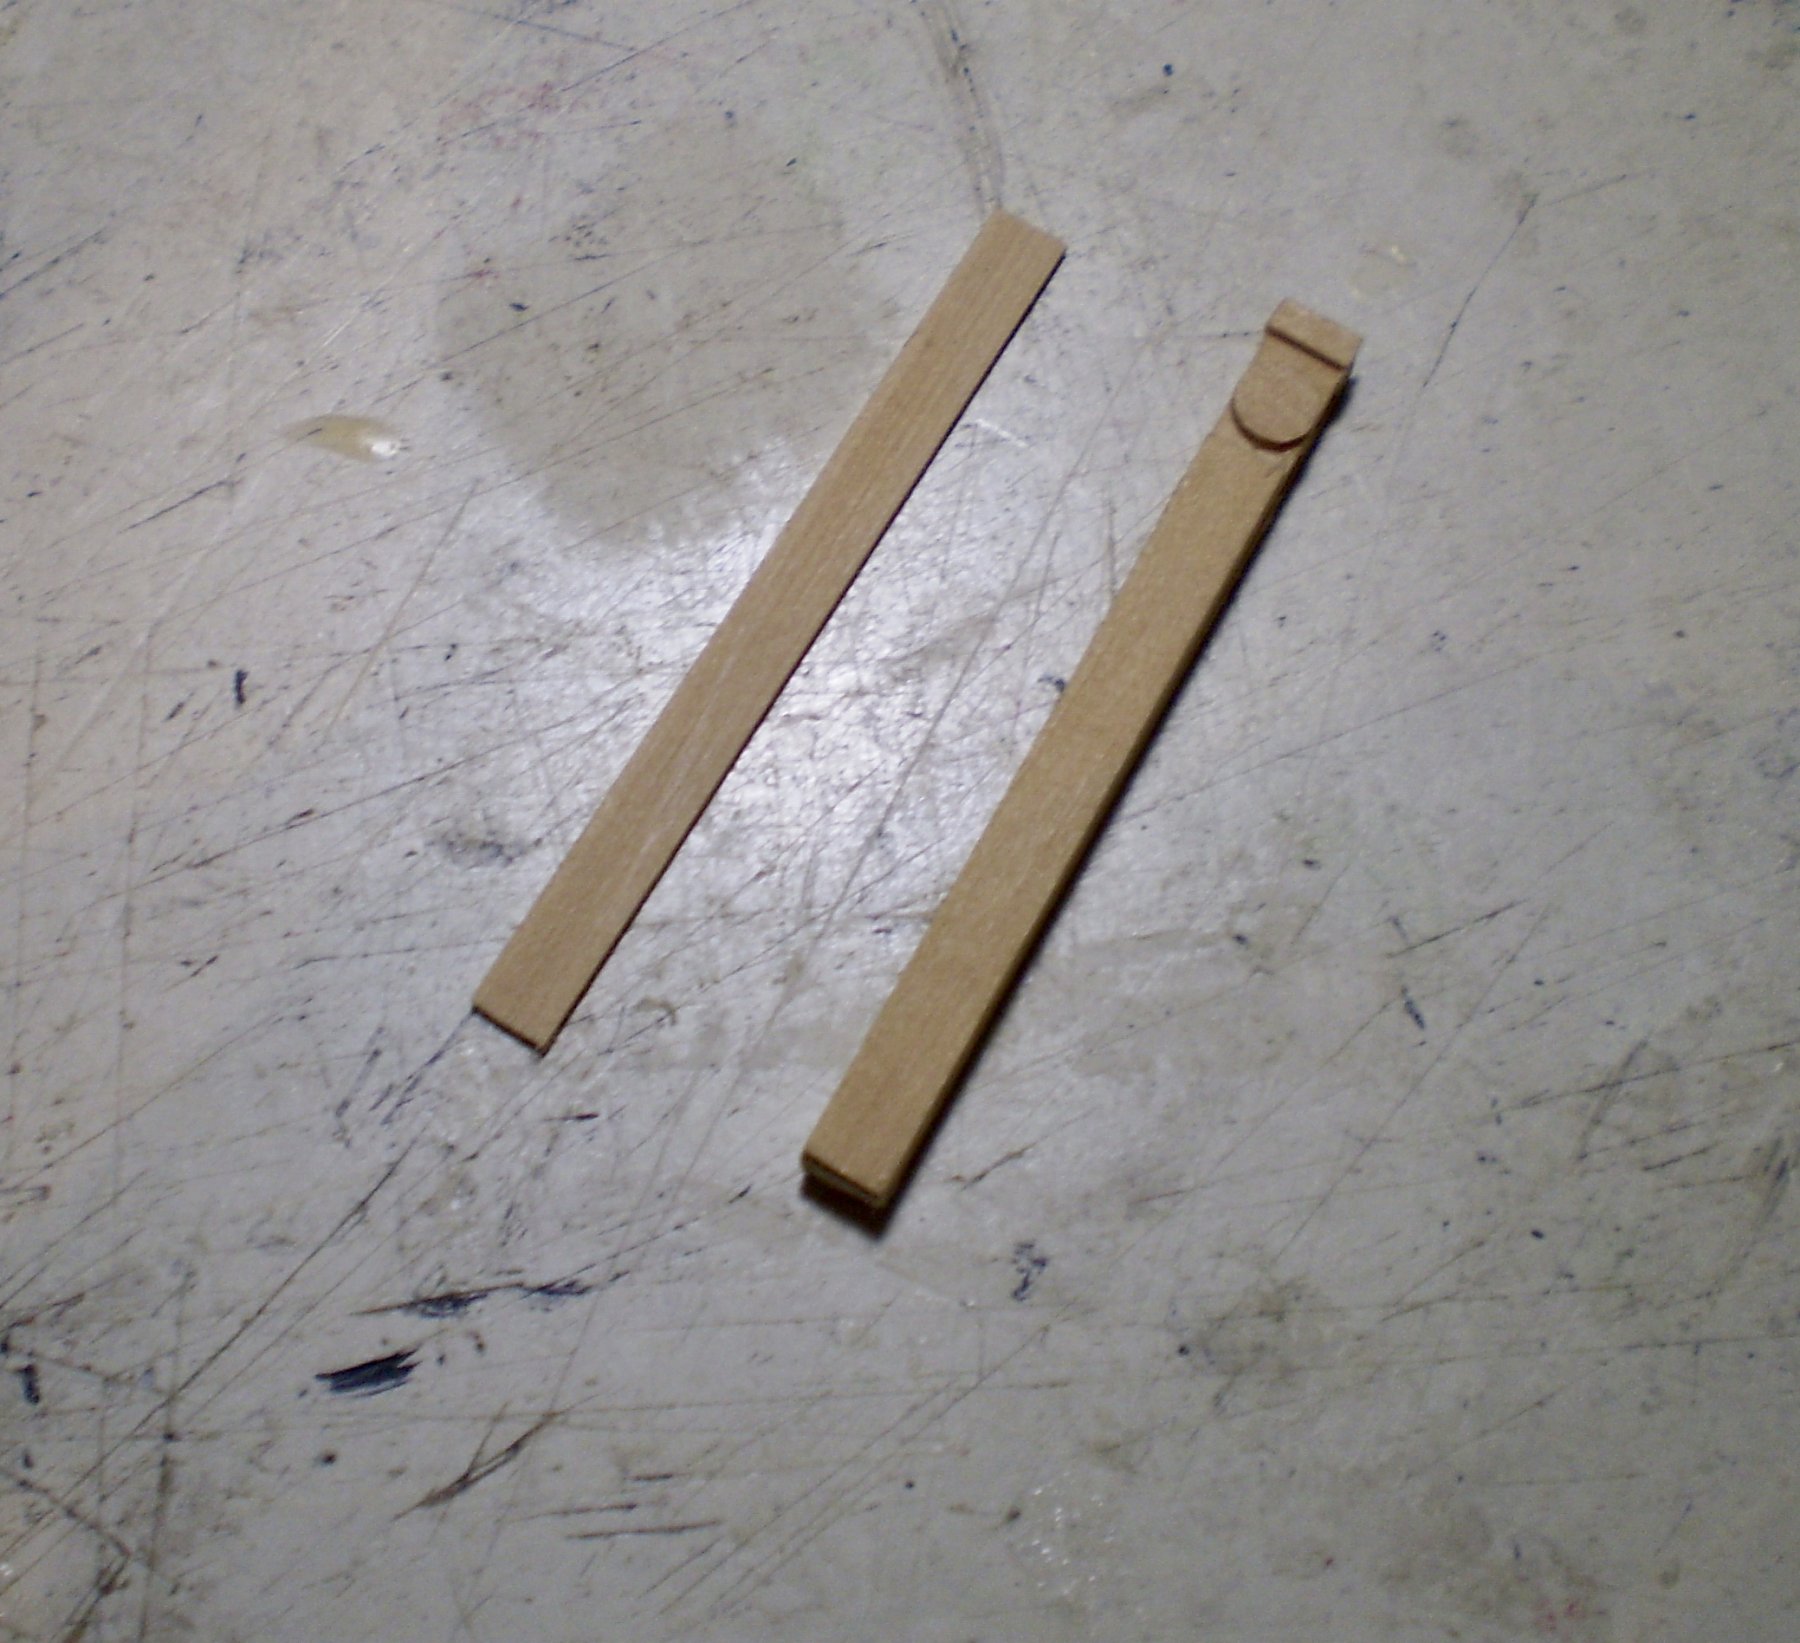
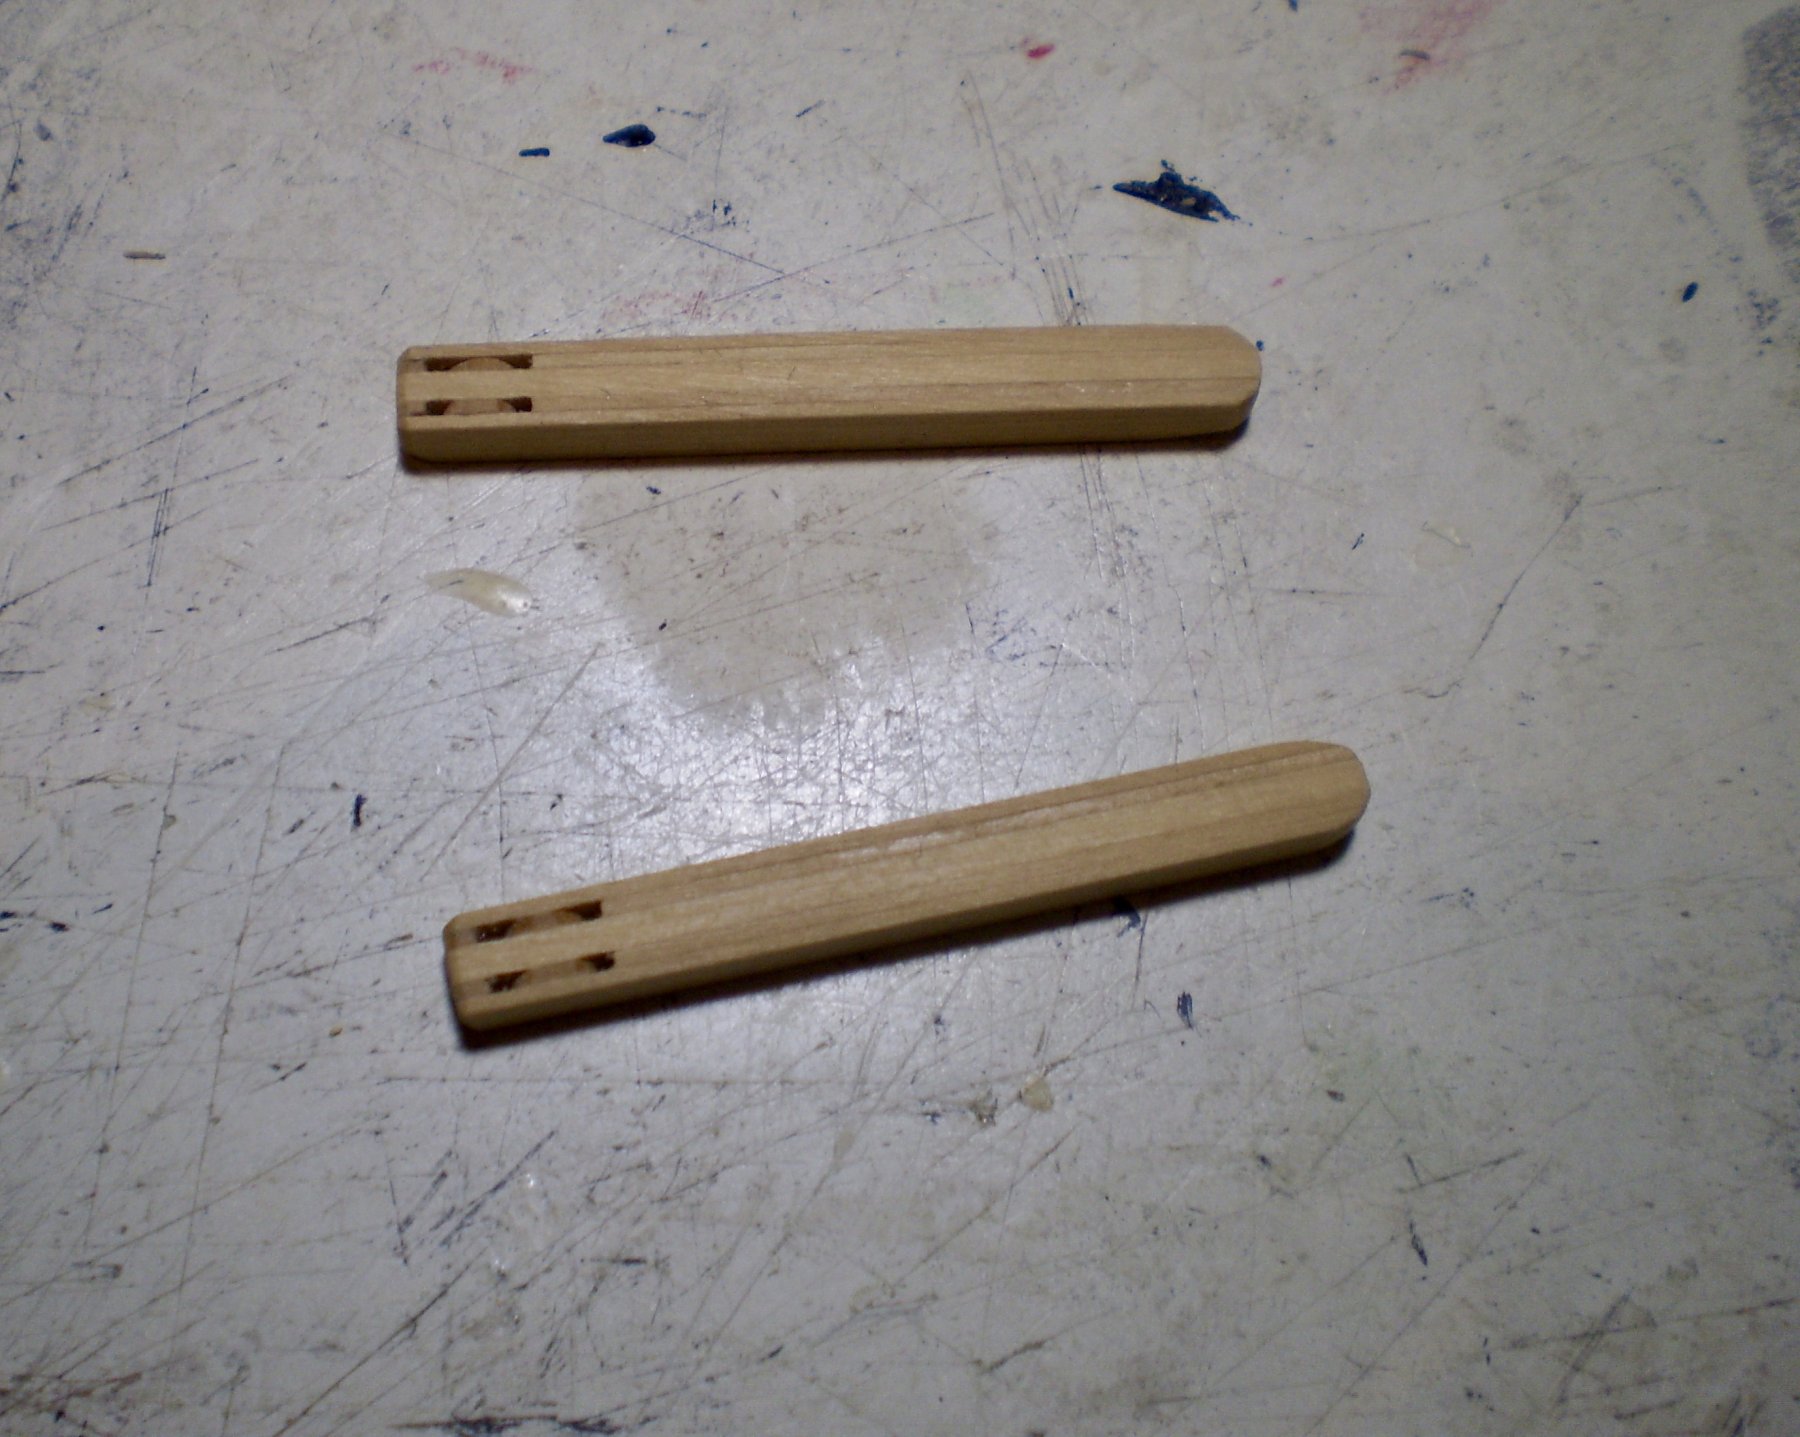
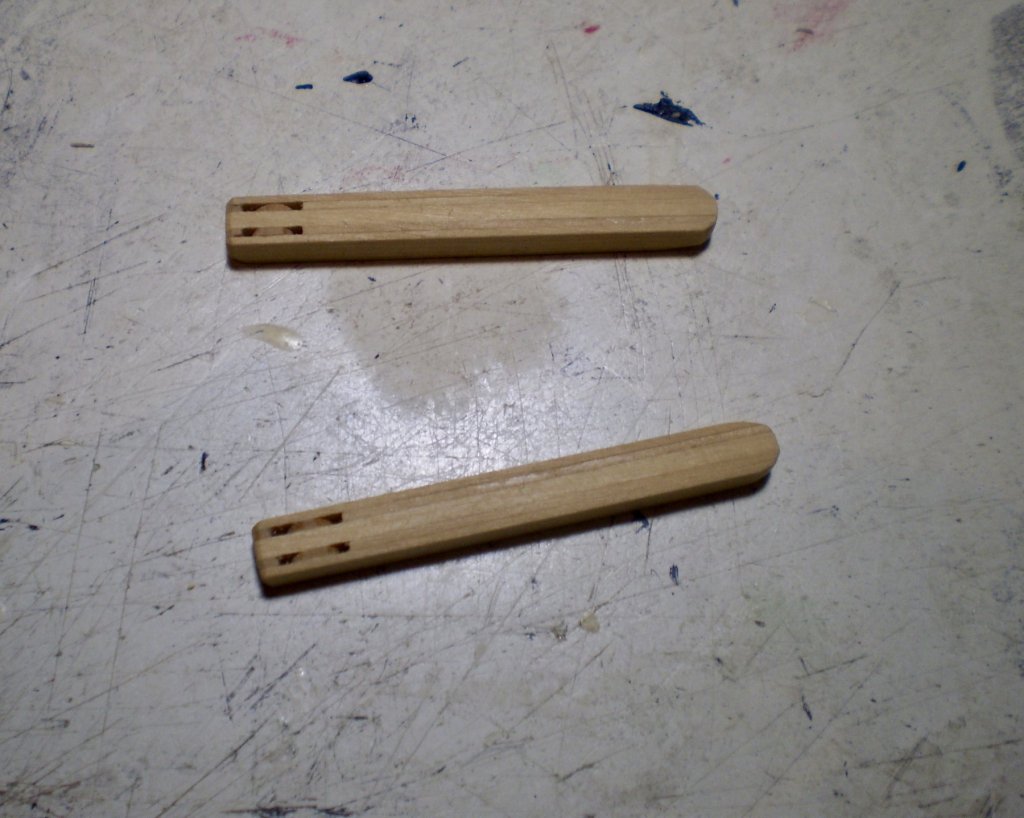
Thanks so much Carl, Elijah, Sjors, Jim and Dave for the great comments and thanks also to the "likes". I've used lamination for catheads for quite a while now. I will probably also use it on the head rails as well, as I have done on some prior builds. The technique makes up for deficiencies in aging hands and a lack of tools such as a mill. Just another example of the old cliche about necessity being the mother of invention. Jim, the disks are just pieces of strip filed to a circular shape. Bob
- 682 replies
-
- 5
-
-
- halifax
- lumberyard
- (and 1 more)
-
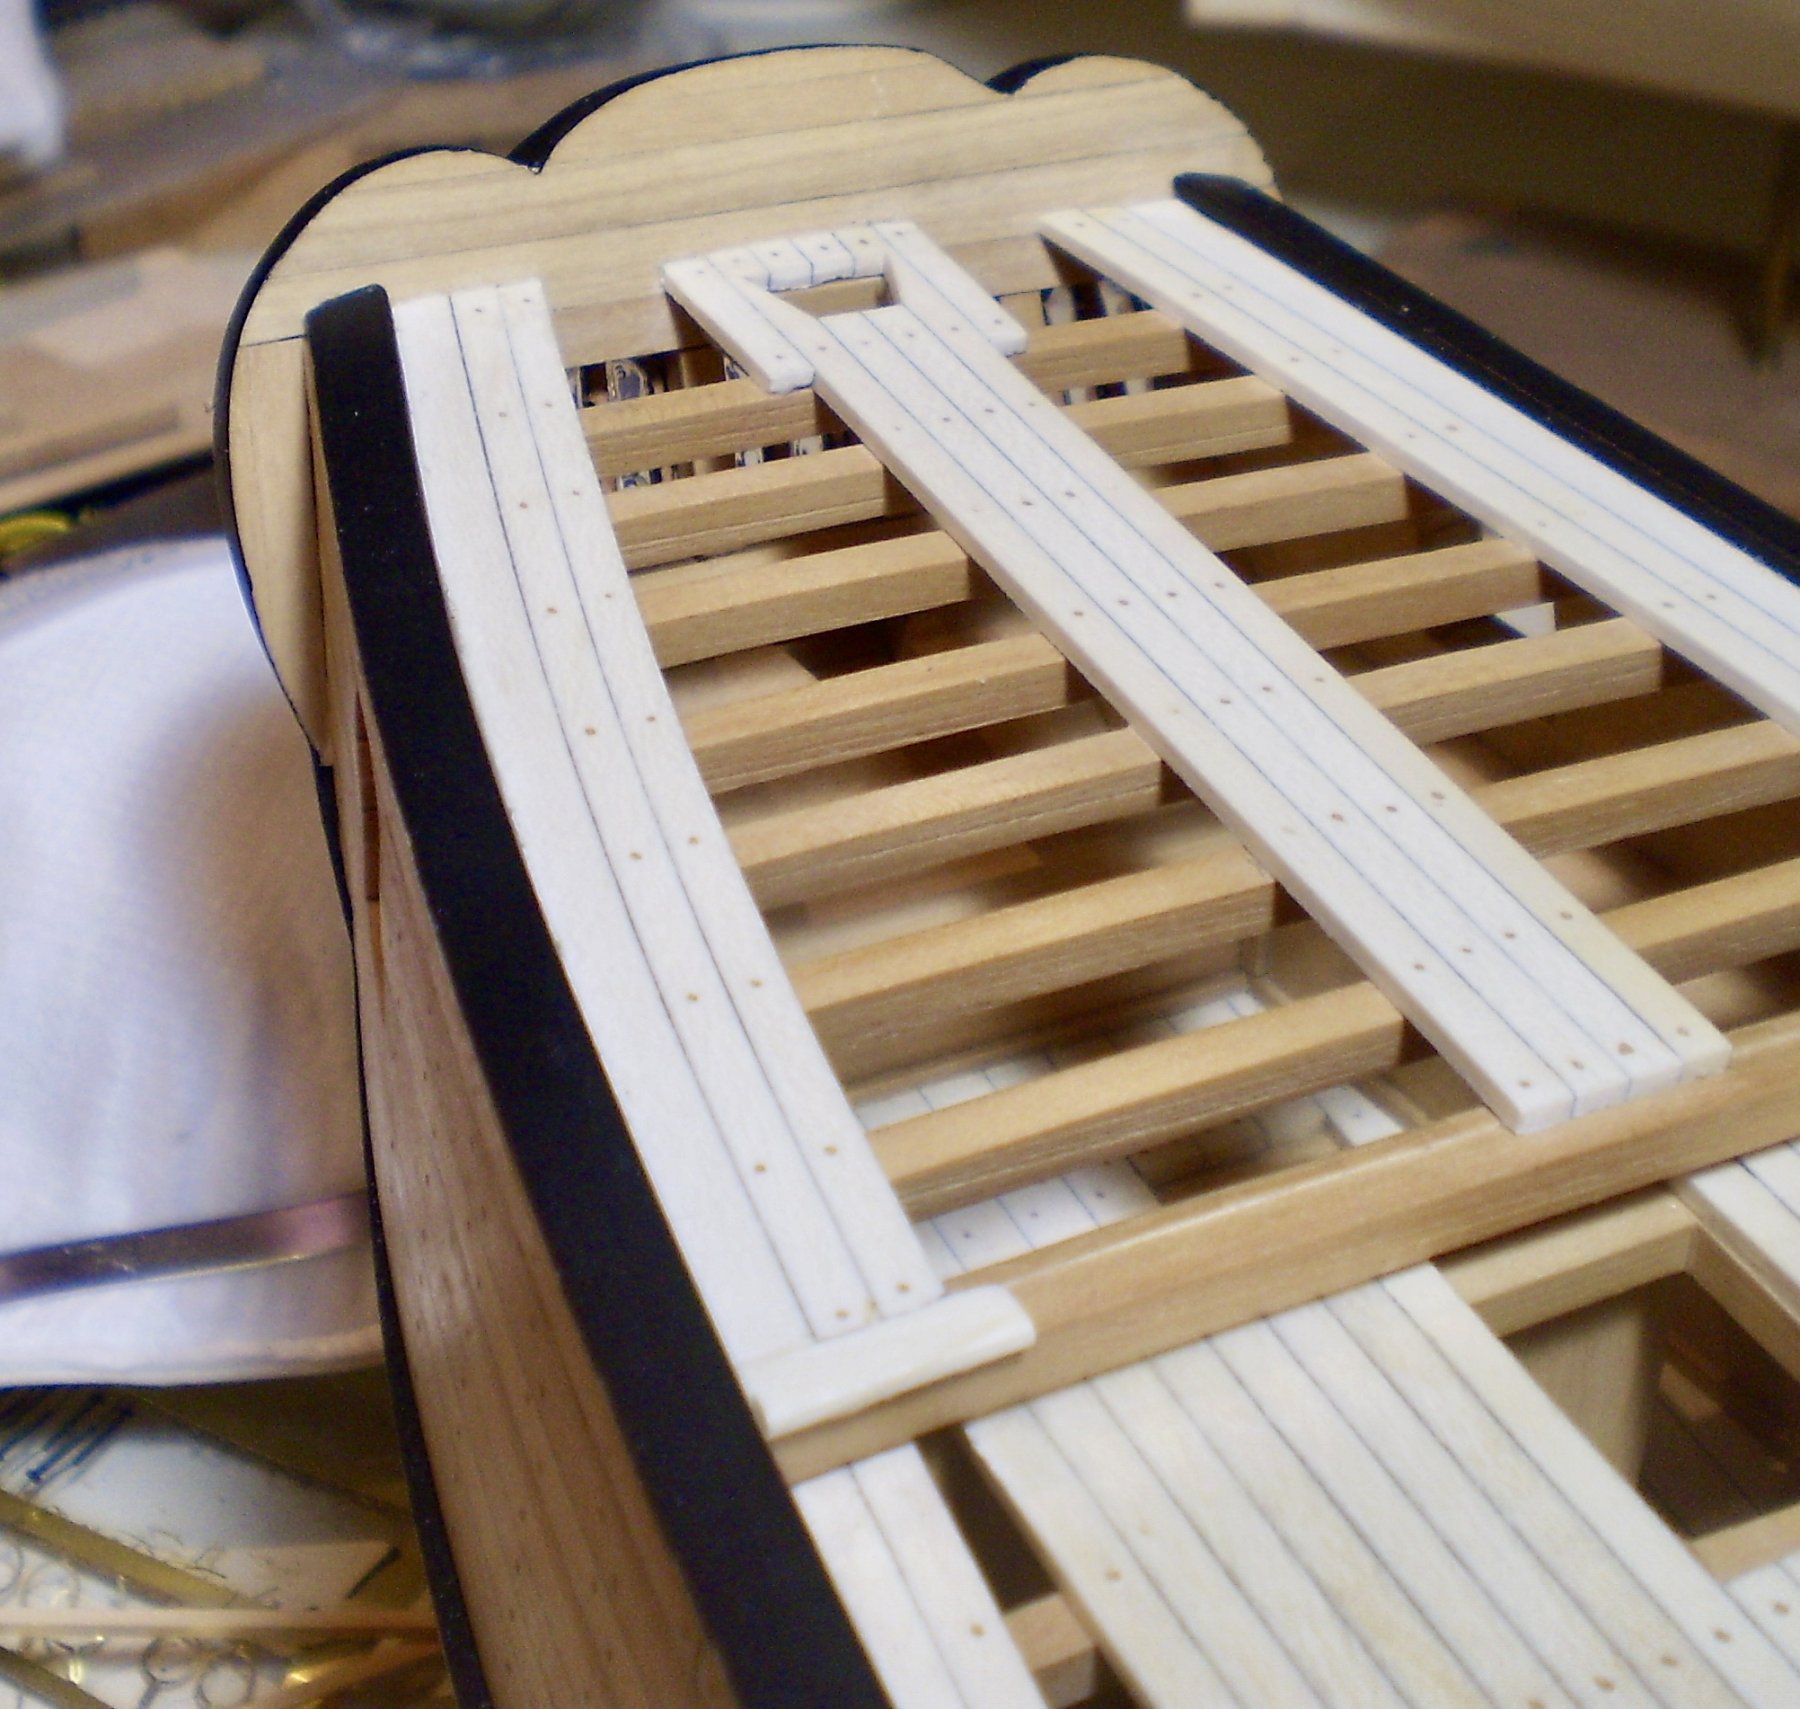
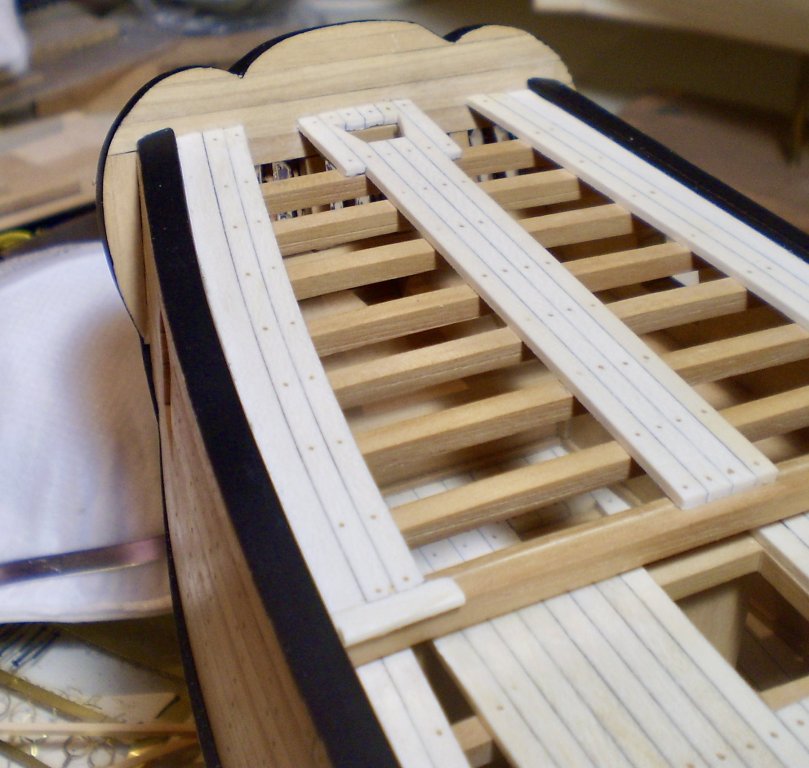
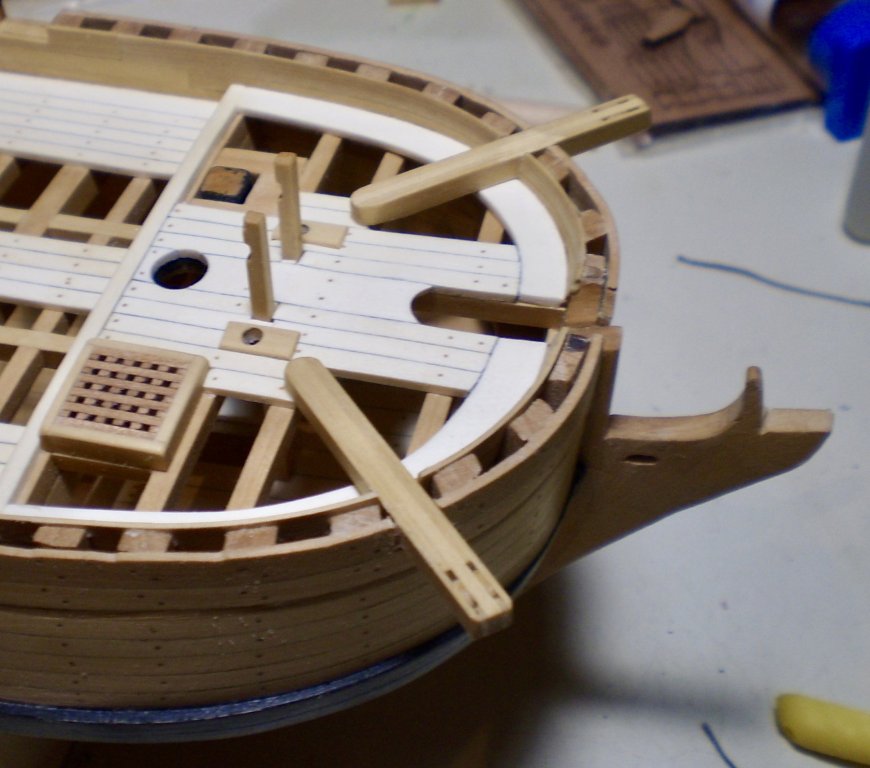
I've now added the cap rails and the the catheads. The catheads were made and added first because they needed to be in place before the cap rails could be added in the bow. They were made from laminated strips of boxwood to avoid having to make slots (which I find difficult. if not impossible, to make). The sheaves are boxwood disks glued in place. Mounting the catheads required that openings had to be cut in the hull planking. This is never a task that I look forward to for fear of damage, but it went fairly smoothly, using a razor saw for the vertical cuts, a blade for the horizontal, and files to clean it up. The cap rails were made from boxwood strip, except for the bow, which was cut to shape from boxwood sheet, using card templates. All of the rails were painted black before mounting them. The outside edge of the rails still needs to have a molding attached to them. This will be done at a later time as work proceeds on the outer hull. Next up will be work on the stern. Bob


- 682 replies
-
- 33
-
-
- halifax
- lumberyard
- (and 1 more)
-
Steve, I've become an advocate for the glue and sawdust fill approach and find it very useful to correct minor planking issues. I use two methods: in corners or similar areas, I dip a toothpick in a very small amount of glue and then roll that in sawdust, then push that into the gap and clean it up with a toothpick or a finger; on flat areas, I apply some glue to the area and then sprinkle sawdust liberally on the area. In both instances, I let it set and then sand smooth. It usually does the trick. Bob
- 190 replies
-
- 11
-
-
- pinnace
- model shipways
- (and 1 more)
-
Thanks so much bigcreekdad for the overly generous compliments. Please don't burn your ships. Bob
- 682 replies
-
- 4
-
-
- halifax
- lumberyard
- (and 1 more)
-
Thanks so much Rich and Jim. Jim, if you're looking for what is essentially a scratch build, but with most of the basic framing laser cut (as I was) then you should be pleased with this package. Bob
- 682 replies
-
- 5
-
-
- halifax
- lumberyard
- (and 1 more)
-
Thanks so much Elijah for the very kind comments. Sorry, no other photos. Bob
- 682 replies
-
- 4
-
-
- halifax
- lumberyard
- (and 1 more)
-
Nils, you're off to a flying -- and really good looking -- start. I have no doubt that she will be a beauty. Bob
- 692 replies
-
- 5
-
-
- eagle of algier
- chebec
- (and 2 more)
-
She looks better and better with each update Dave. Really well done Bob
-
Thanks so much Dave. I suppose it shouldn't be a surprise that the things you really enjoy doing turn out better. Bob
- 682 replies
-
- 6
-
-
- halifax
- lumberyard
- (and 1 more)