rafine
-
Posts
2,932 -
Joined
-
Last visited
Content Type
Profiles
Forums
Gallery
Events
Everything posted by rafine
-
 Thanks so much Rusty and the "likes". Always appreciated. Bob
 -
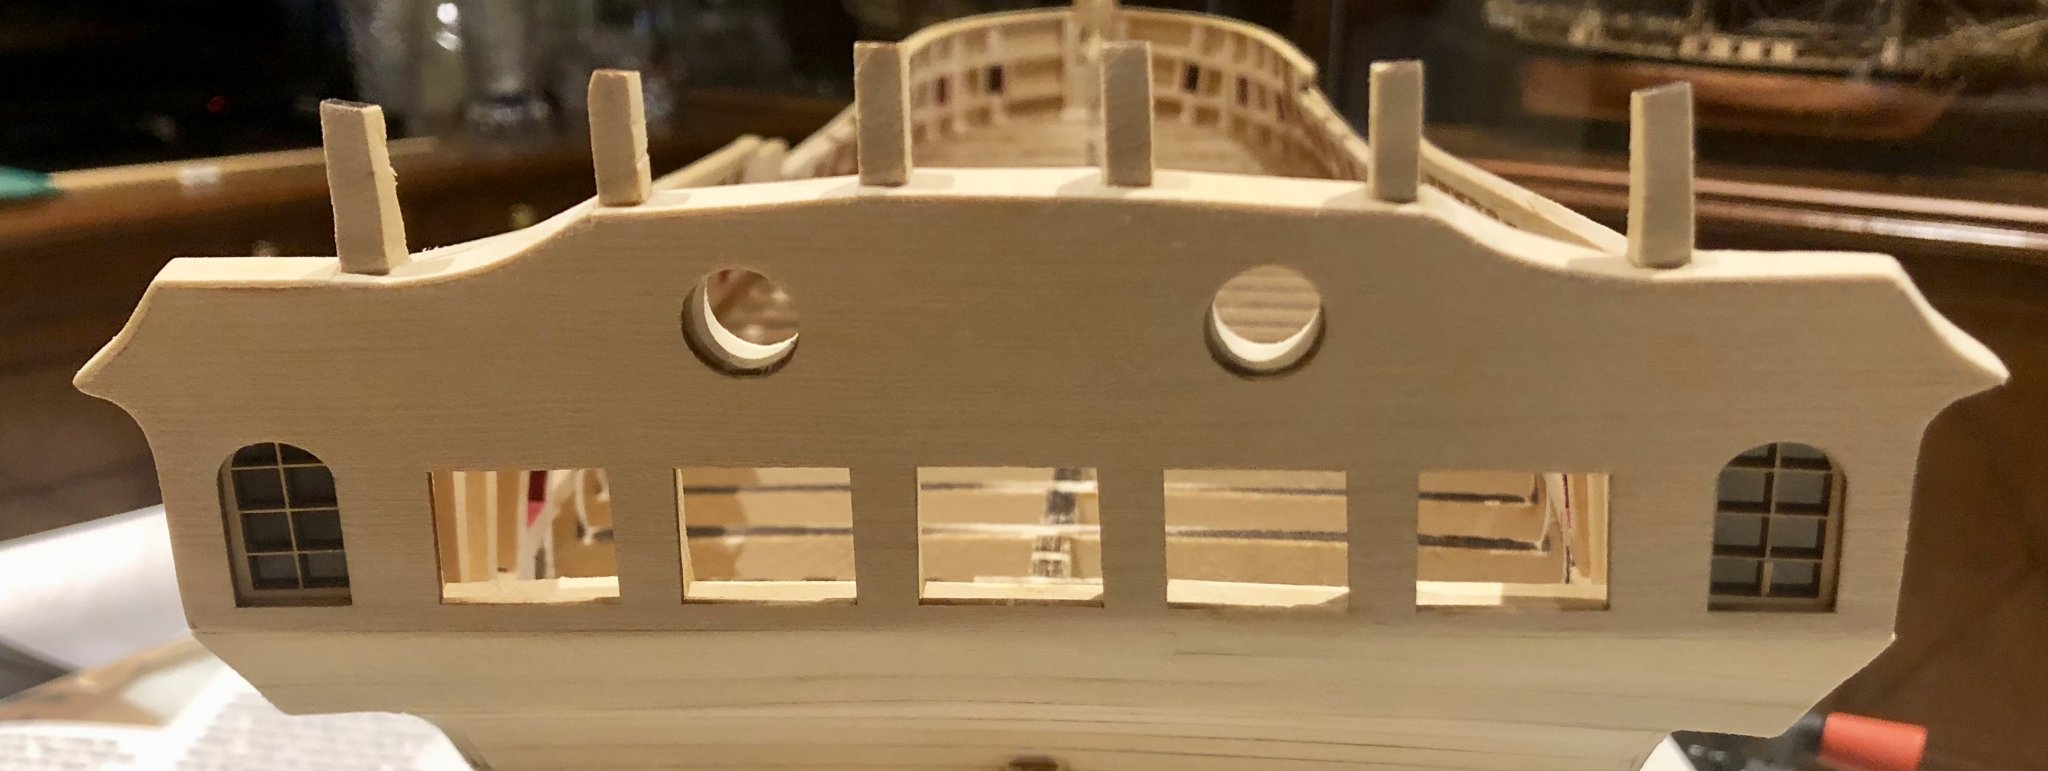
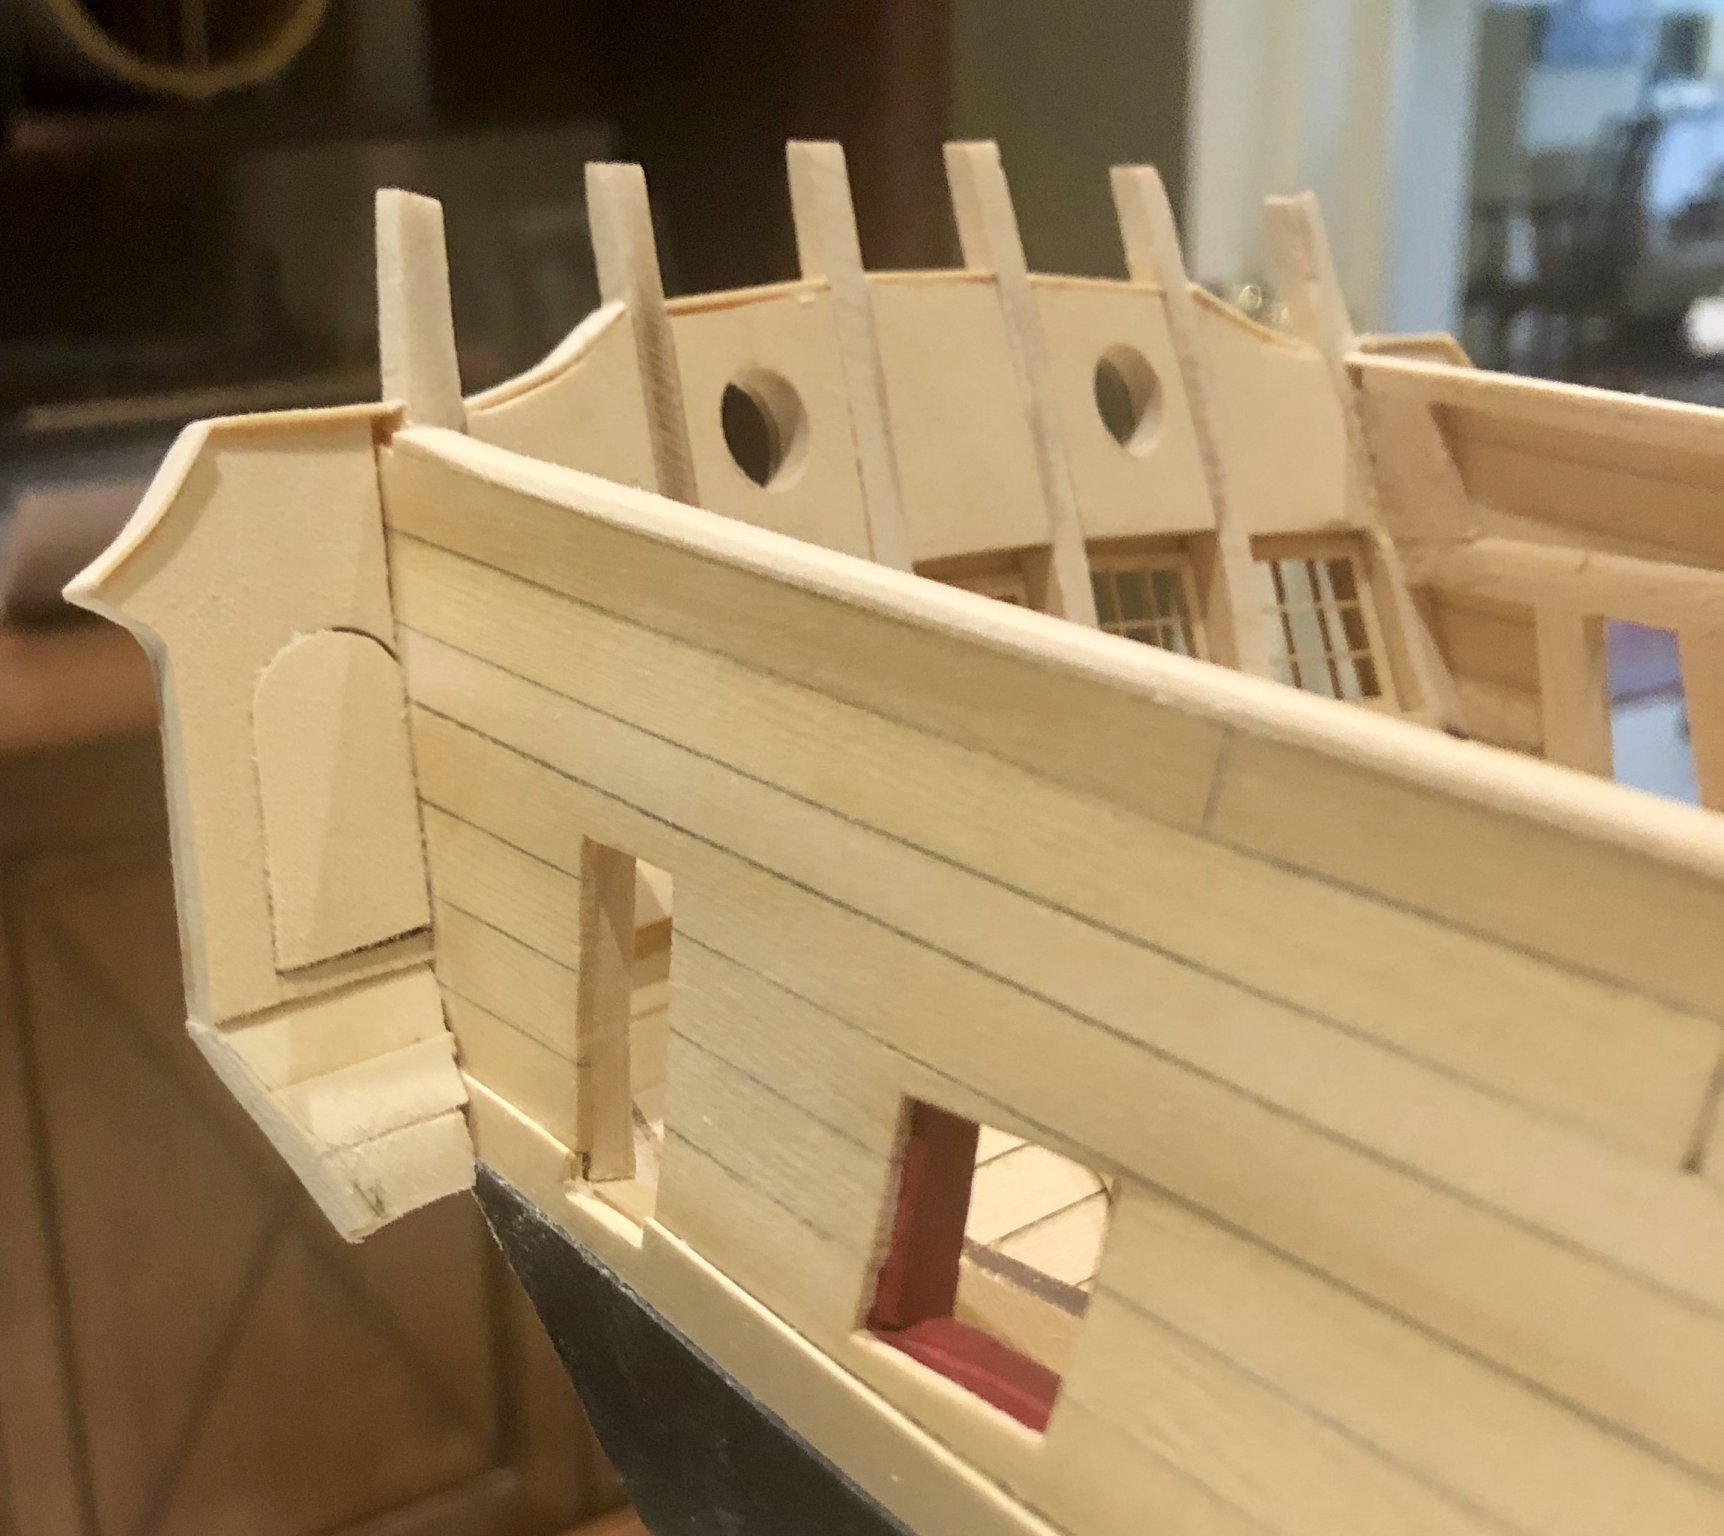
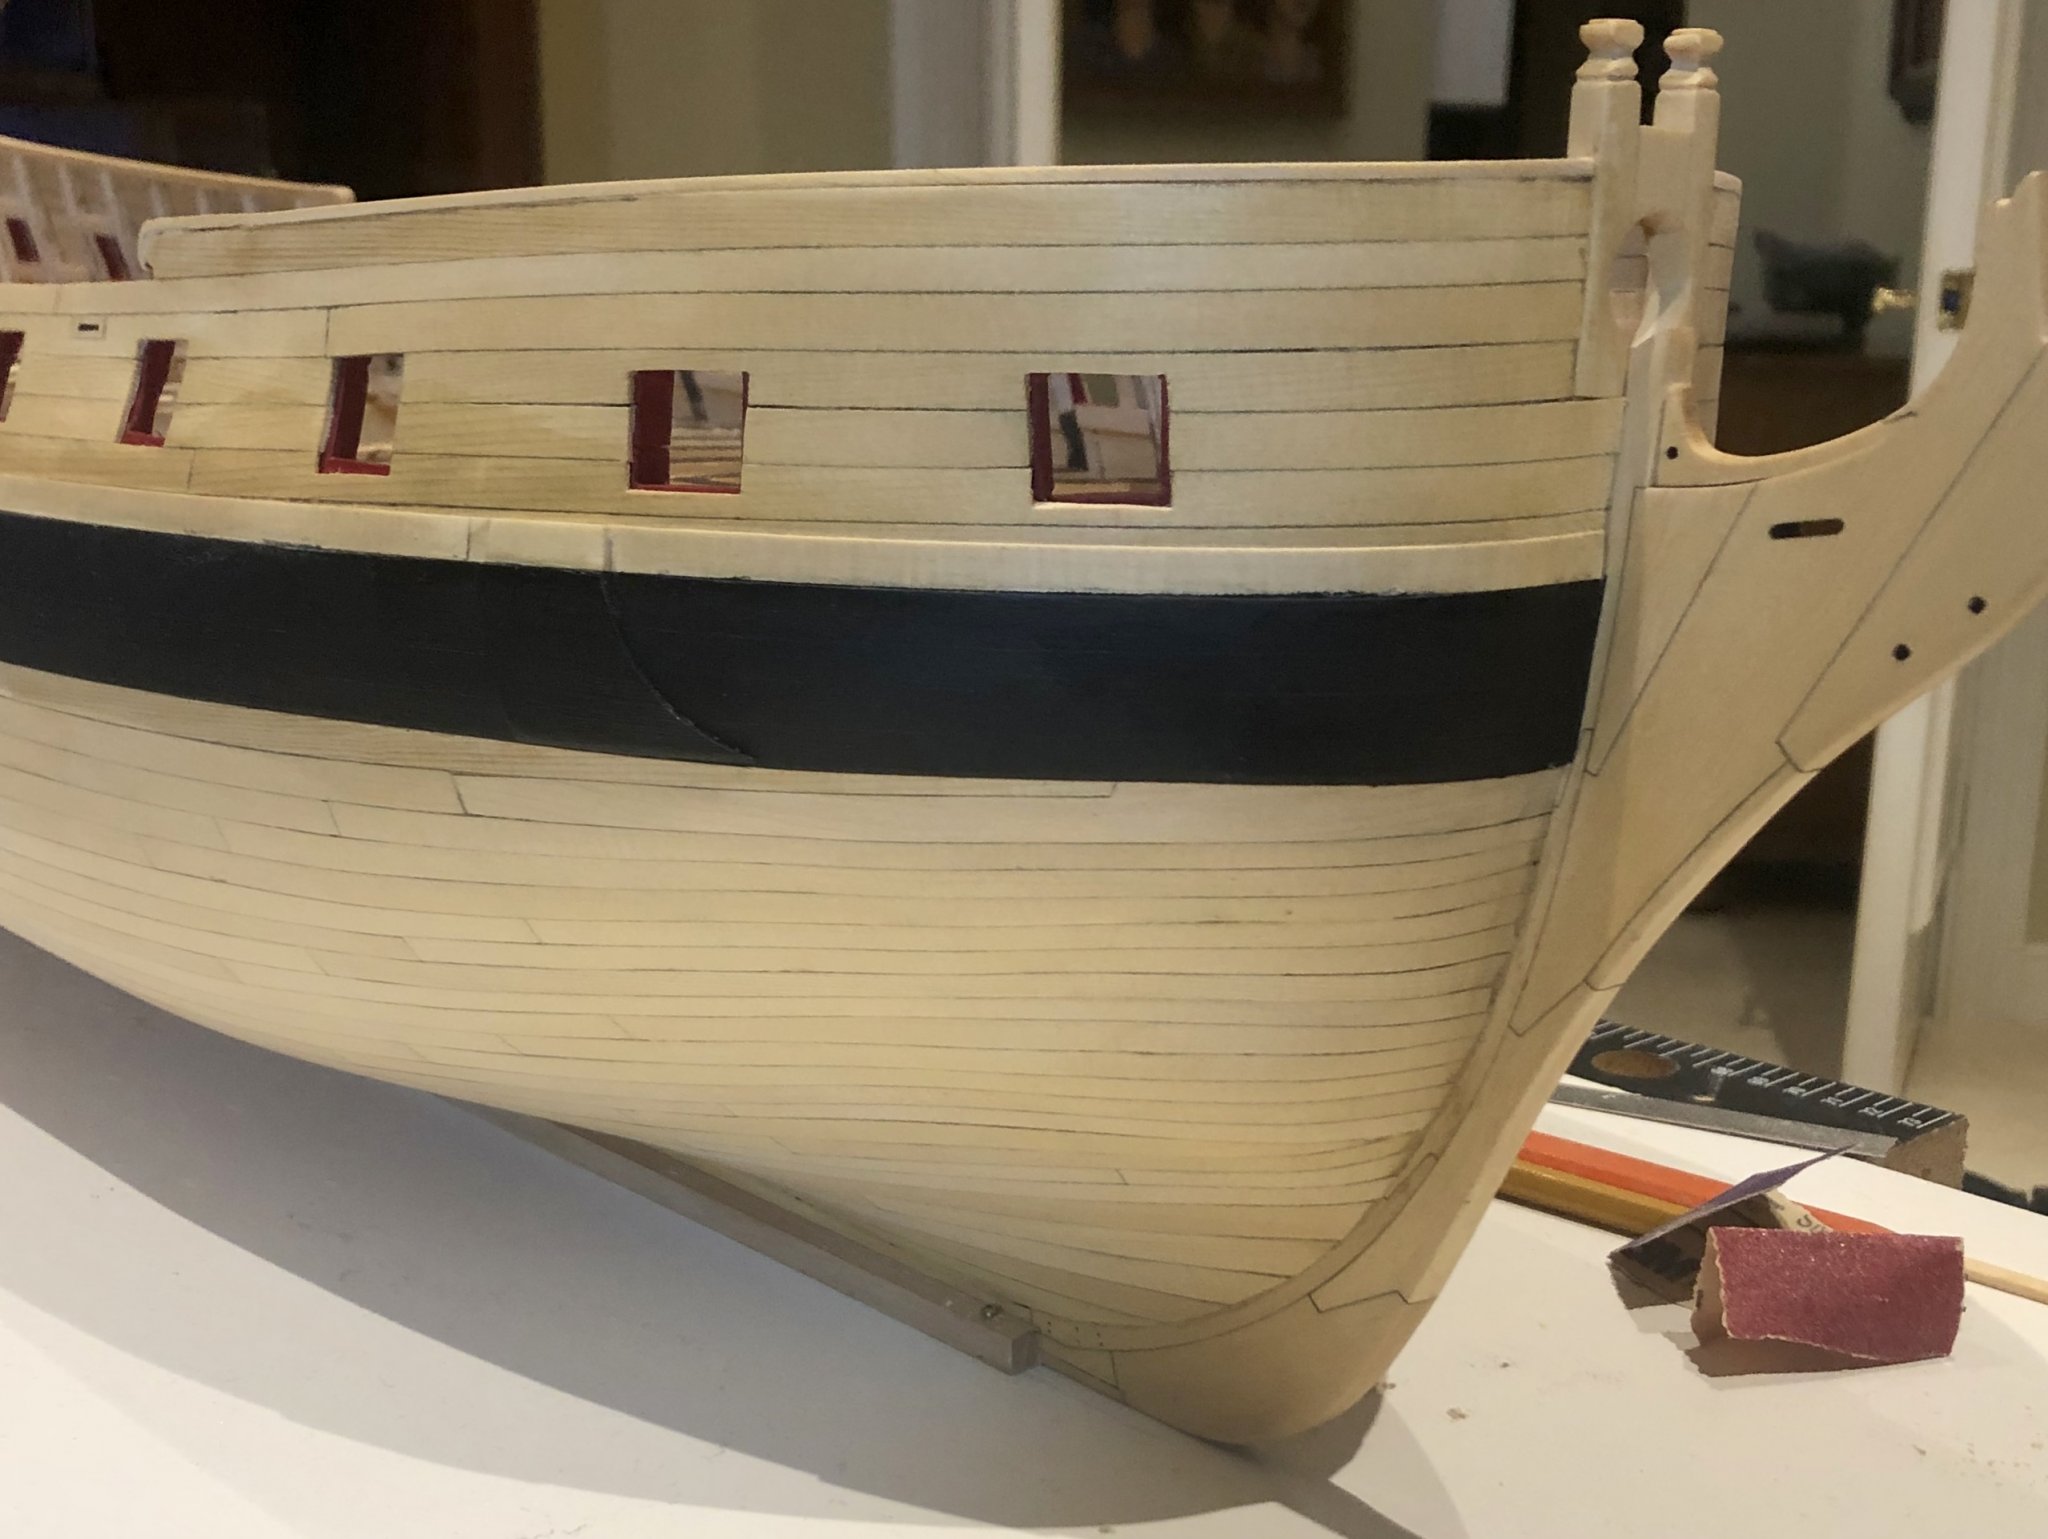
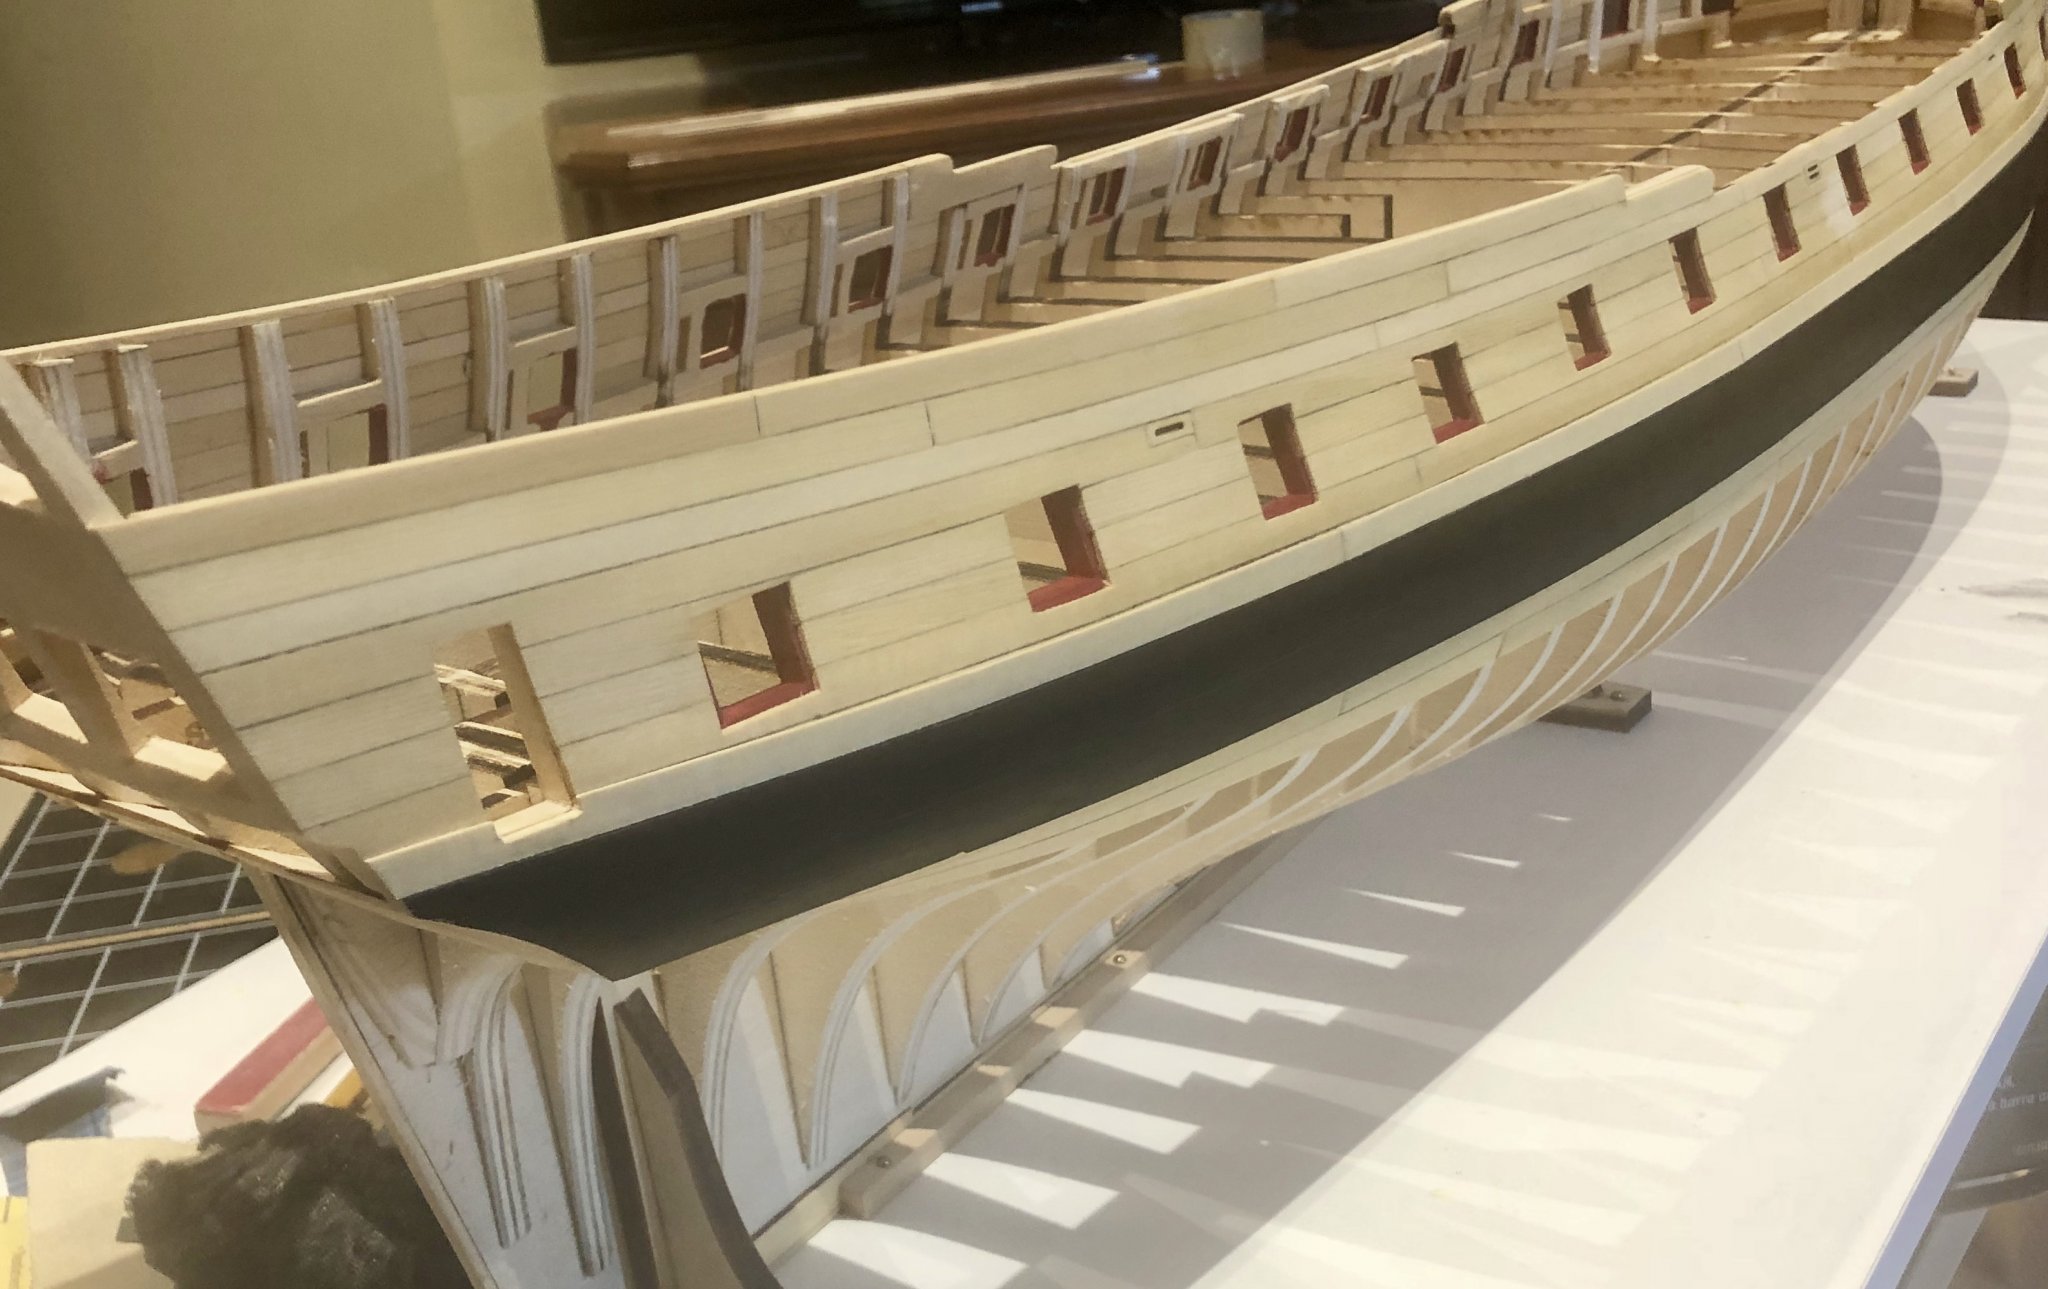
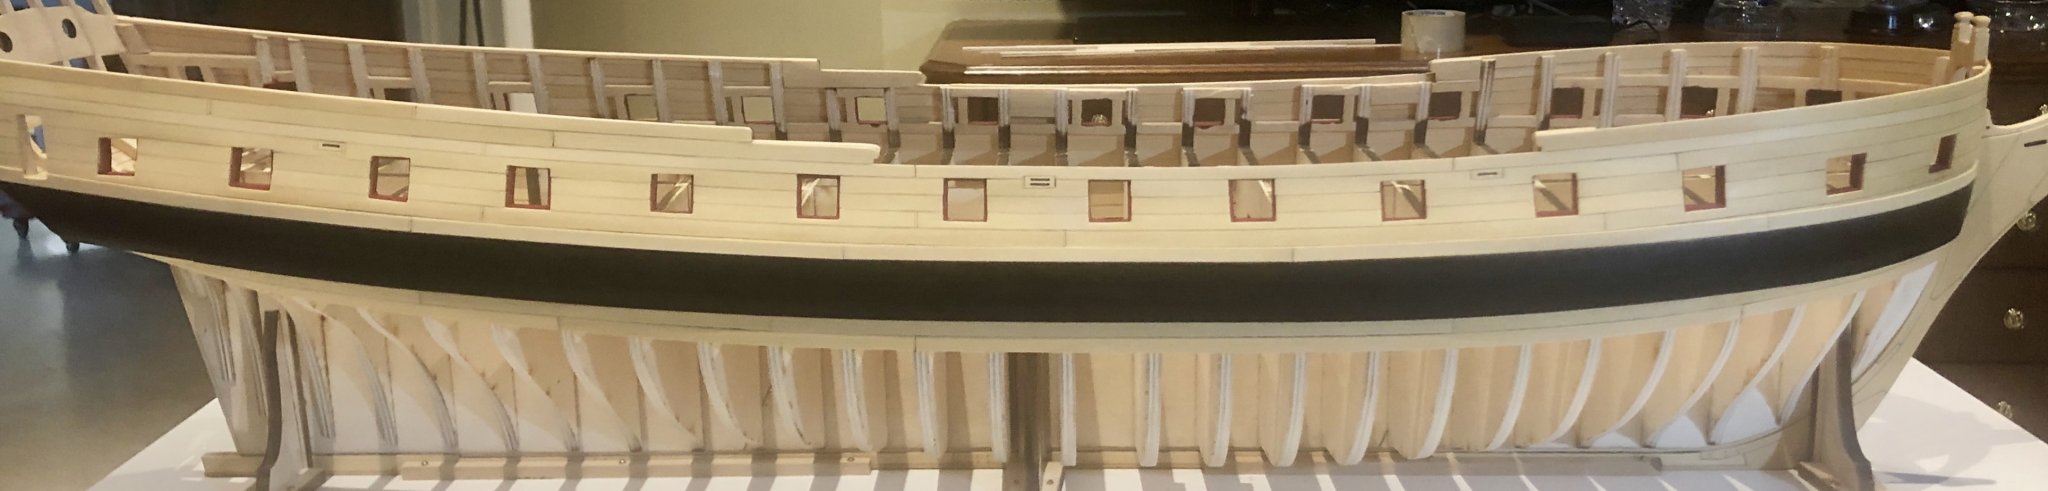
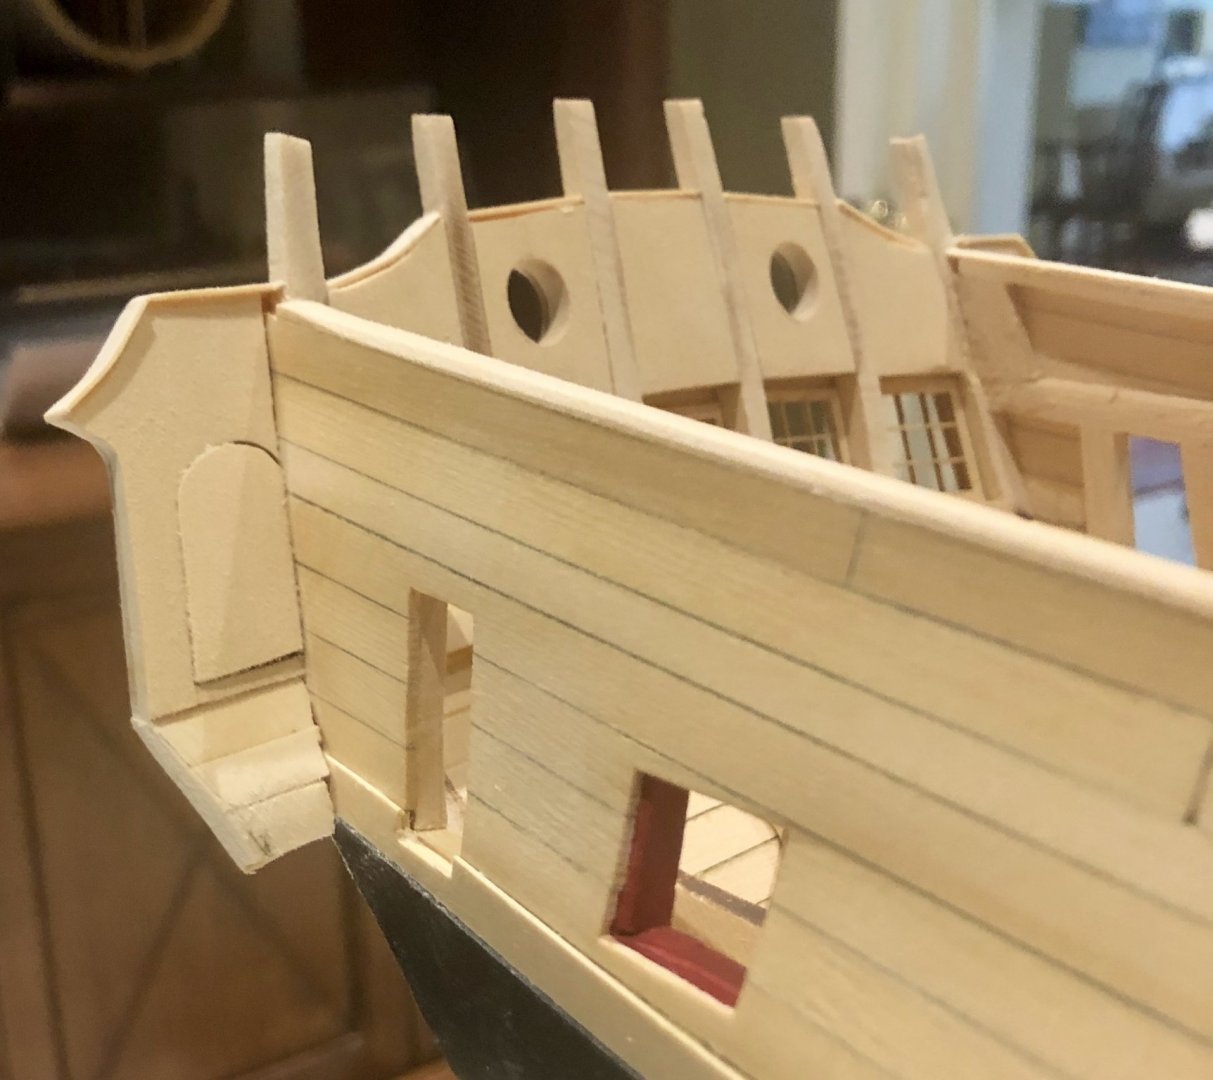
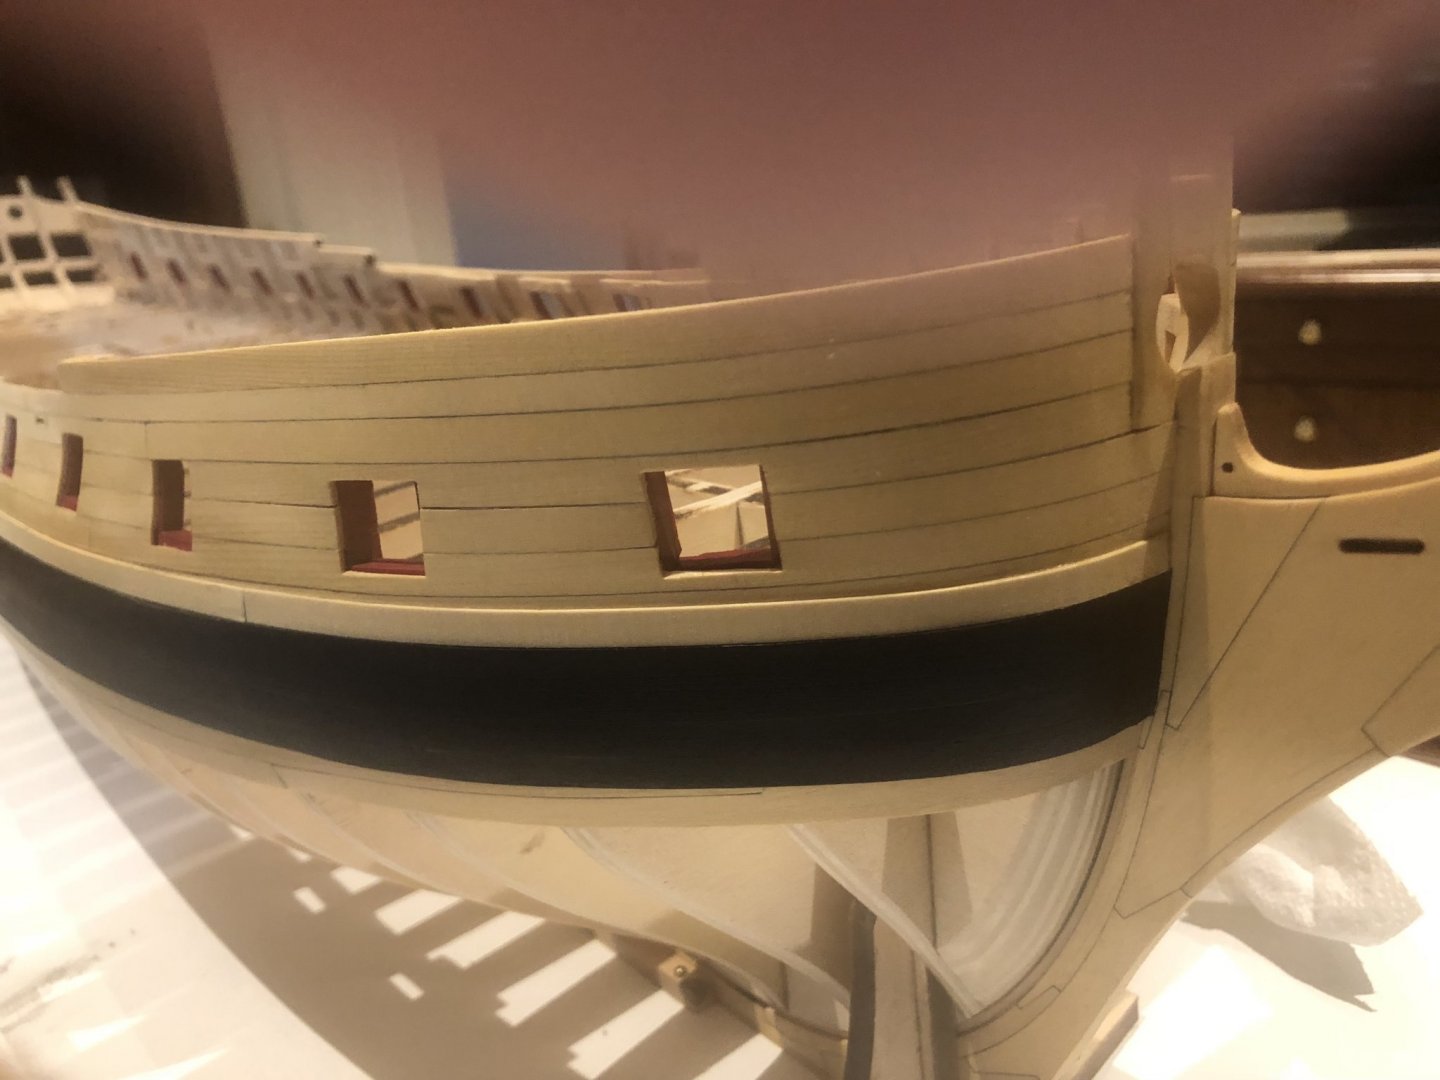
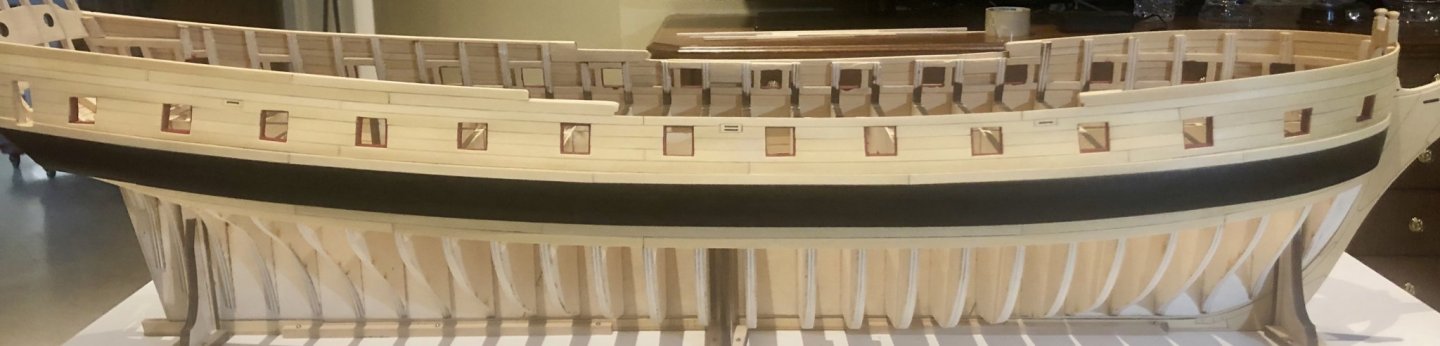
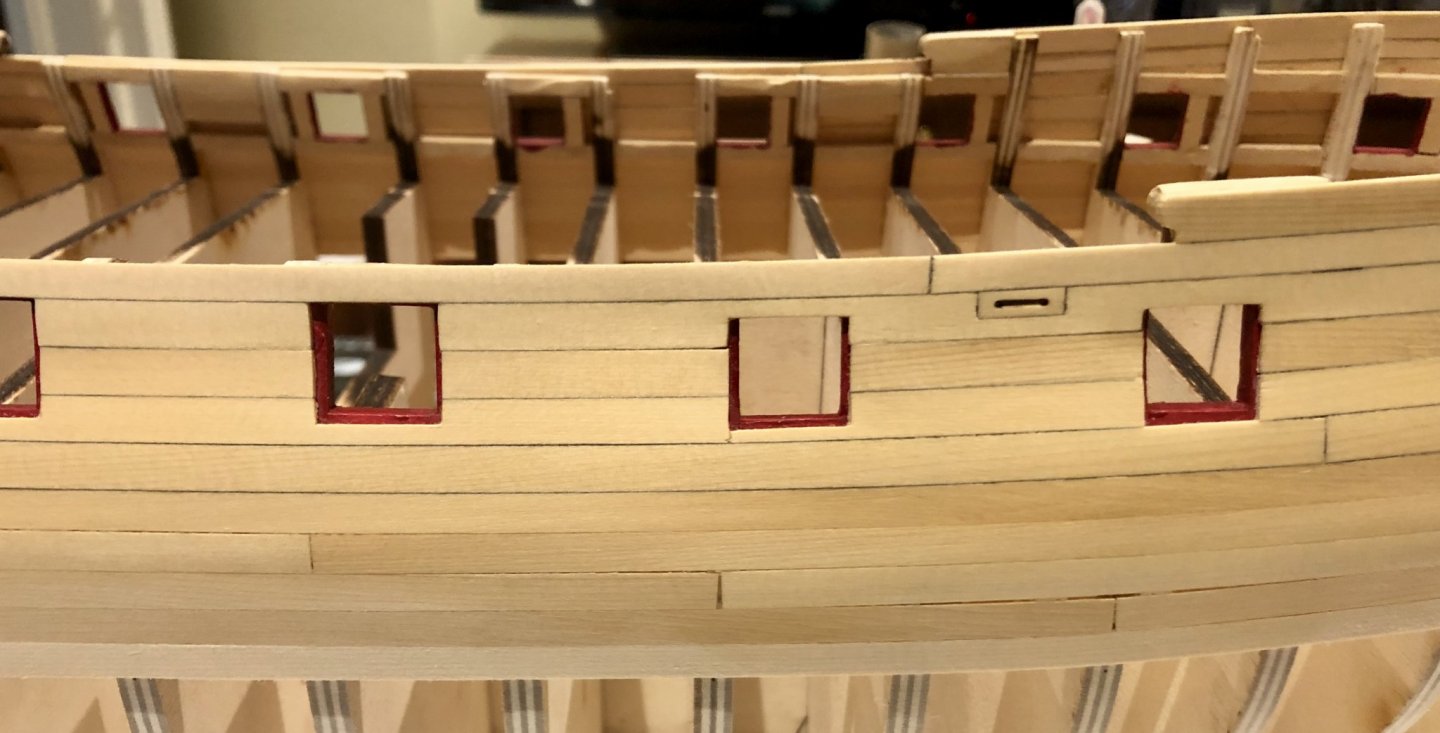
After completing the planking, the first thing I did was to remove the hull from the base brackets and then remove the brackets themselves. My preferred method for permanent mounting of a model is to use brass rod drilled and glued through the keel. The rod is inserted into brass tubing drilled and glued into the base. Rather than use a cradle, I chose to install the rods now and insert them into tubing drilled into the construction base board. It is strong and stable, and the hull is easily removable, if required. After this mounting, I moved on to the transom. After marking and sanding, it was glued into place.The windows were all test fitted, but only the gallery windows were permanently installed, with their laser cut "glass" and their backing pieces with theft sides painted black. I then did the upper counter planking, including the thickening planking on the fore sideThe final work was to add the capping pieces to the top of the transom. Quarter galleries next. Bob
-
Wonderful work Rusty. Looks great. Bob
- 642 replies
-
- 2
-

-
- winchelsea
- Syren Ship Model Company
- (and 1 more)
-
Thanks so much Chuck, Rusty, Thomas and the "likes". Chuck, while it may be hot for golf, it beats staying in the house all day. Rusty, I can only hope that my quarter galleries turn out anywhere near as good as yours. Bob
-
US Brig Syren by Gahm - Model Shipways
rafine replied to Gahm's topic in - Kit build logs for subjects built from 1801 - 1850
Thomas, I just realized that in my time away from modeling, I had had not seen your Syren in a long time. It looks absolutely great. It seems, however, that you, like me, have not used the virus lockdown time for modeling. Bob -
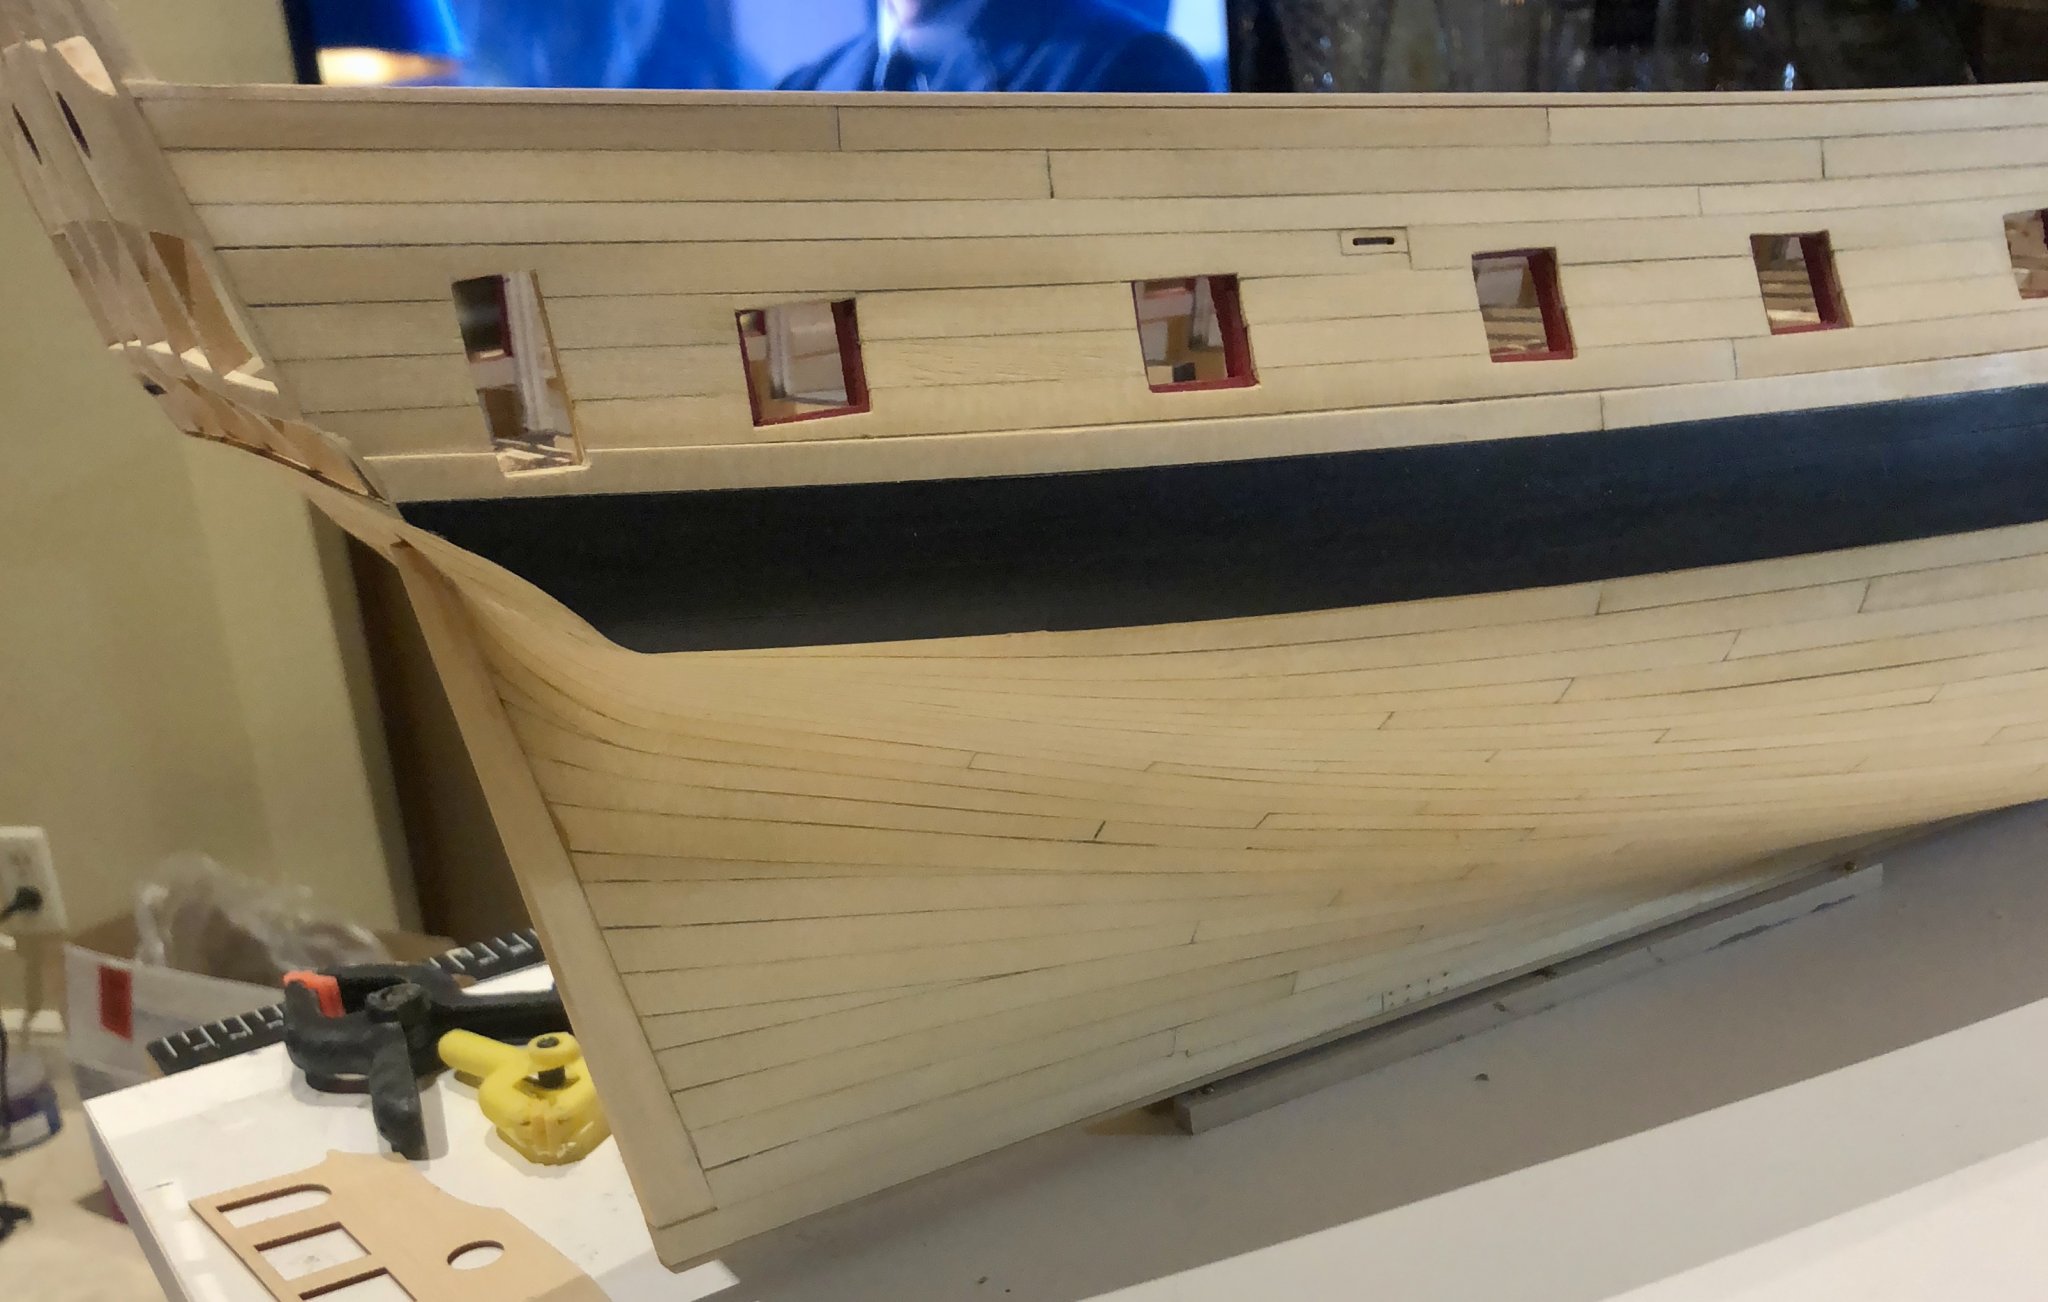
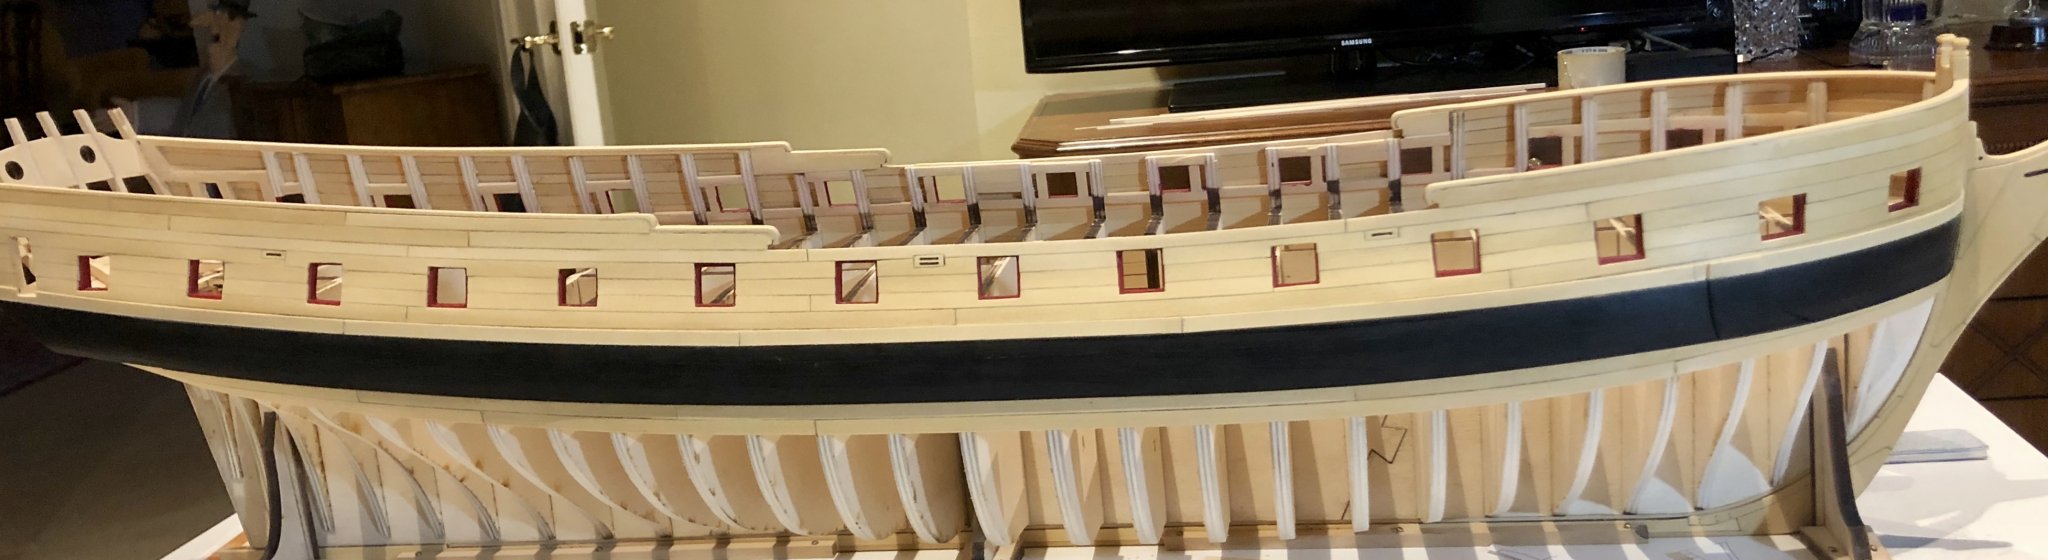
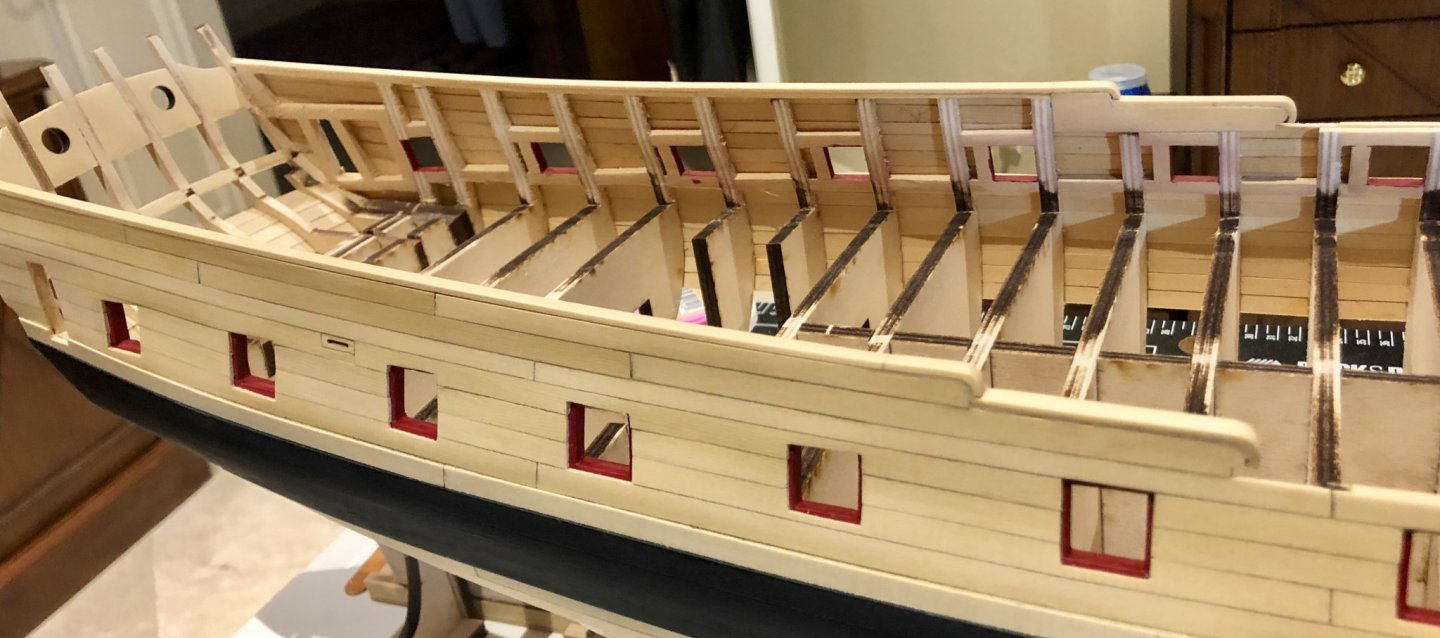
It seems like an eternity since I last posted any progress -- in fact, it has been five months. Multiple factors combined to bring this about. First, I was unhappy with the way that the lower planking was progressing and couldn't decide how to proceed, so I just stopped. Then came the virus situation. You would have thought that being trapped at home for months would have spurred a surge of modeling work, but it had the exact opposite result. A sort of malaise settled in, where I didn't want to do much other than binge watch numerous TV series that I had never seen before. At first, I thought that I was alone in feeling like that, but it seems to me now that there have been numerous other MSW members whose modeling and posting have similarly dropped off in recent months. This might provide an interesting discussion topic on the site. In any event, this has been a long way to say that I have just finished the lower hull planking after a recent surge in modeling desire and activity. The good news is that it is done and doesn't look too bad if you don't look too closely. The bad news is that it doesn't stand up to close scrutiny, and I'm still no happier with it than I was five months ago. I'm now ready to move on to the next phase of the project with the hope that my new burst of enthusiasm will continue. Bring on the stern and quarter galleries. Bob


-
I'm afraid, Old Fart , that I have have no current knowledge of the MS Essex kit, nor any knowledge at all about the Occre kit .Under no circumstances would I consider the MS Essex appropriate as a first build. I think you would do far better with either the Medway longboat or the Cheerful, both from Syren. Bob
- 1,477 replies
-
- 3
-
-
- essex
- model shipways
- (and 1 more)
-
Thanks so much Alan. Let's just say that aging eyes and arthritic hands guaranty that I won't attempt another like it again. Bob
-
Looks great Rusty. I wish mine looked as good. Bob
- 642 replies
-
- 2
-
-
- winchelsea
- Syren Ship Model Company
- (and 1 more)
-
Thanks for the concern Rich. It's taking a lot of time to do the lower planking. I will post when the port side is done. Another couple of weeks probably. Bob
-
Thanks so much Bob. Judging by your work so far, the rigging should be great. Bob
- 78 replies
-
- 1
-
-
- medway longboat
- Syren Ship Model Company
- (and 1 more)
-
Looks great Mark. Bob
-
Thanks so much OC and the "likes". Bob
-
Thanks so much Rusty, Chuck and the "likes". Chuck, I appreciate the "heads up". I think that I will wait to do any tweaking until somewhat later, when I can see more clearly what needs to be done to make everything fit properly. Bob
-
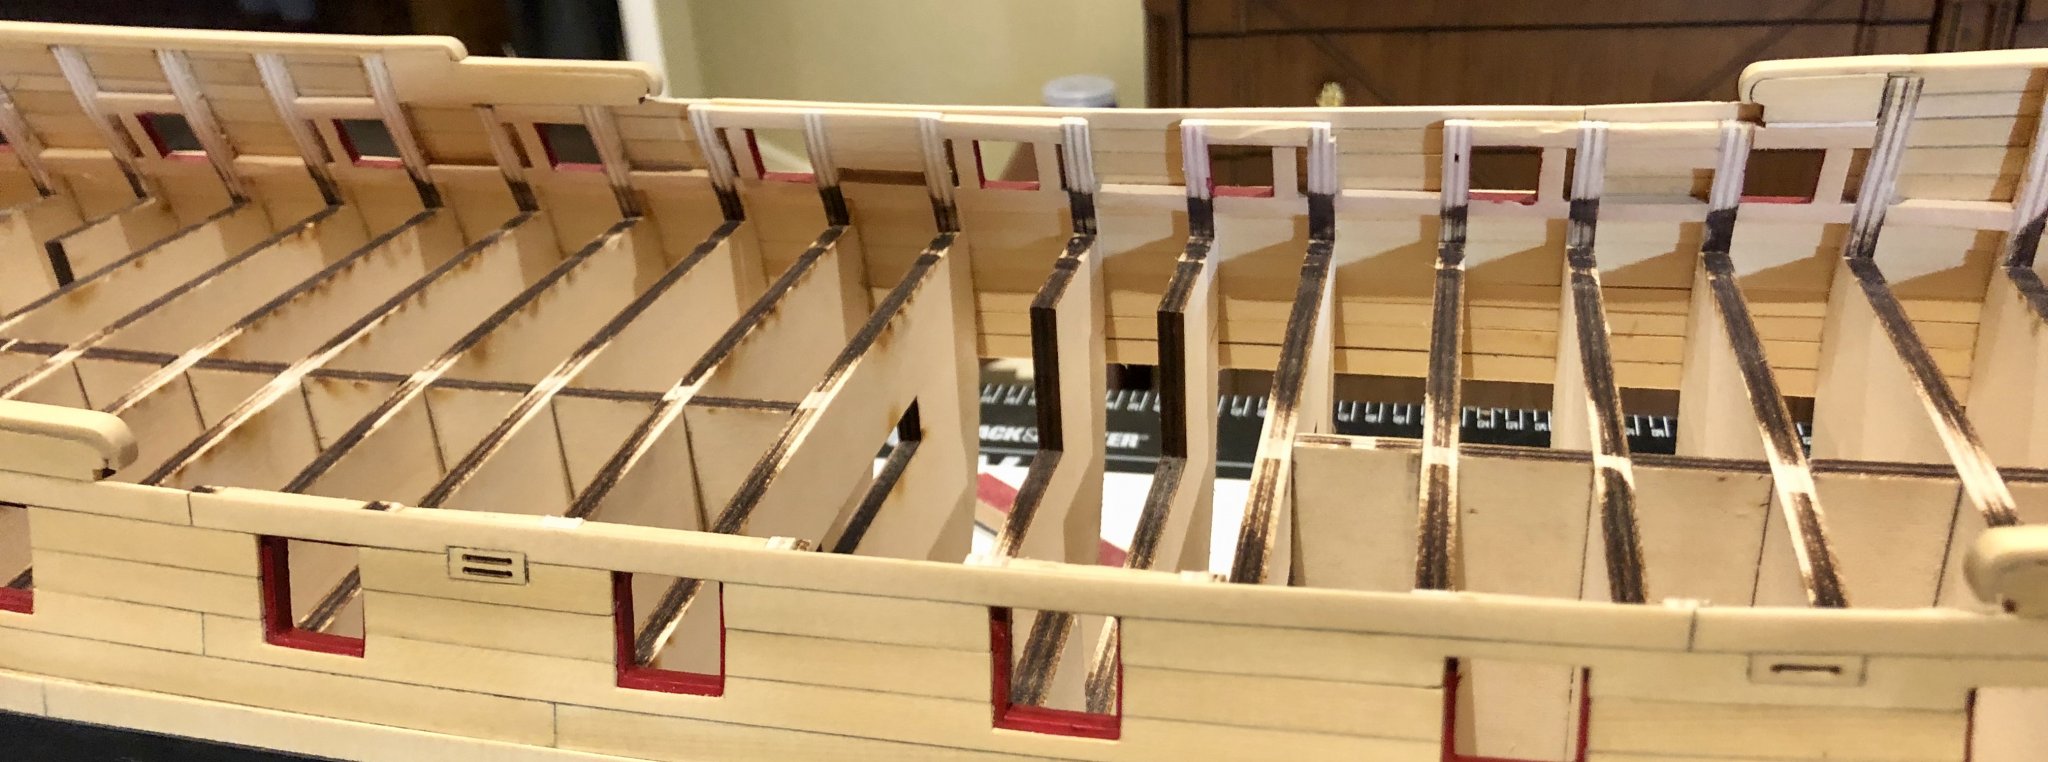
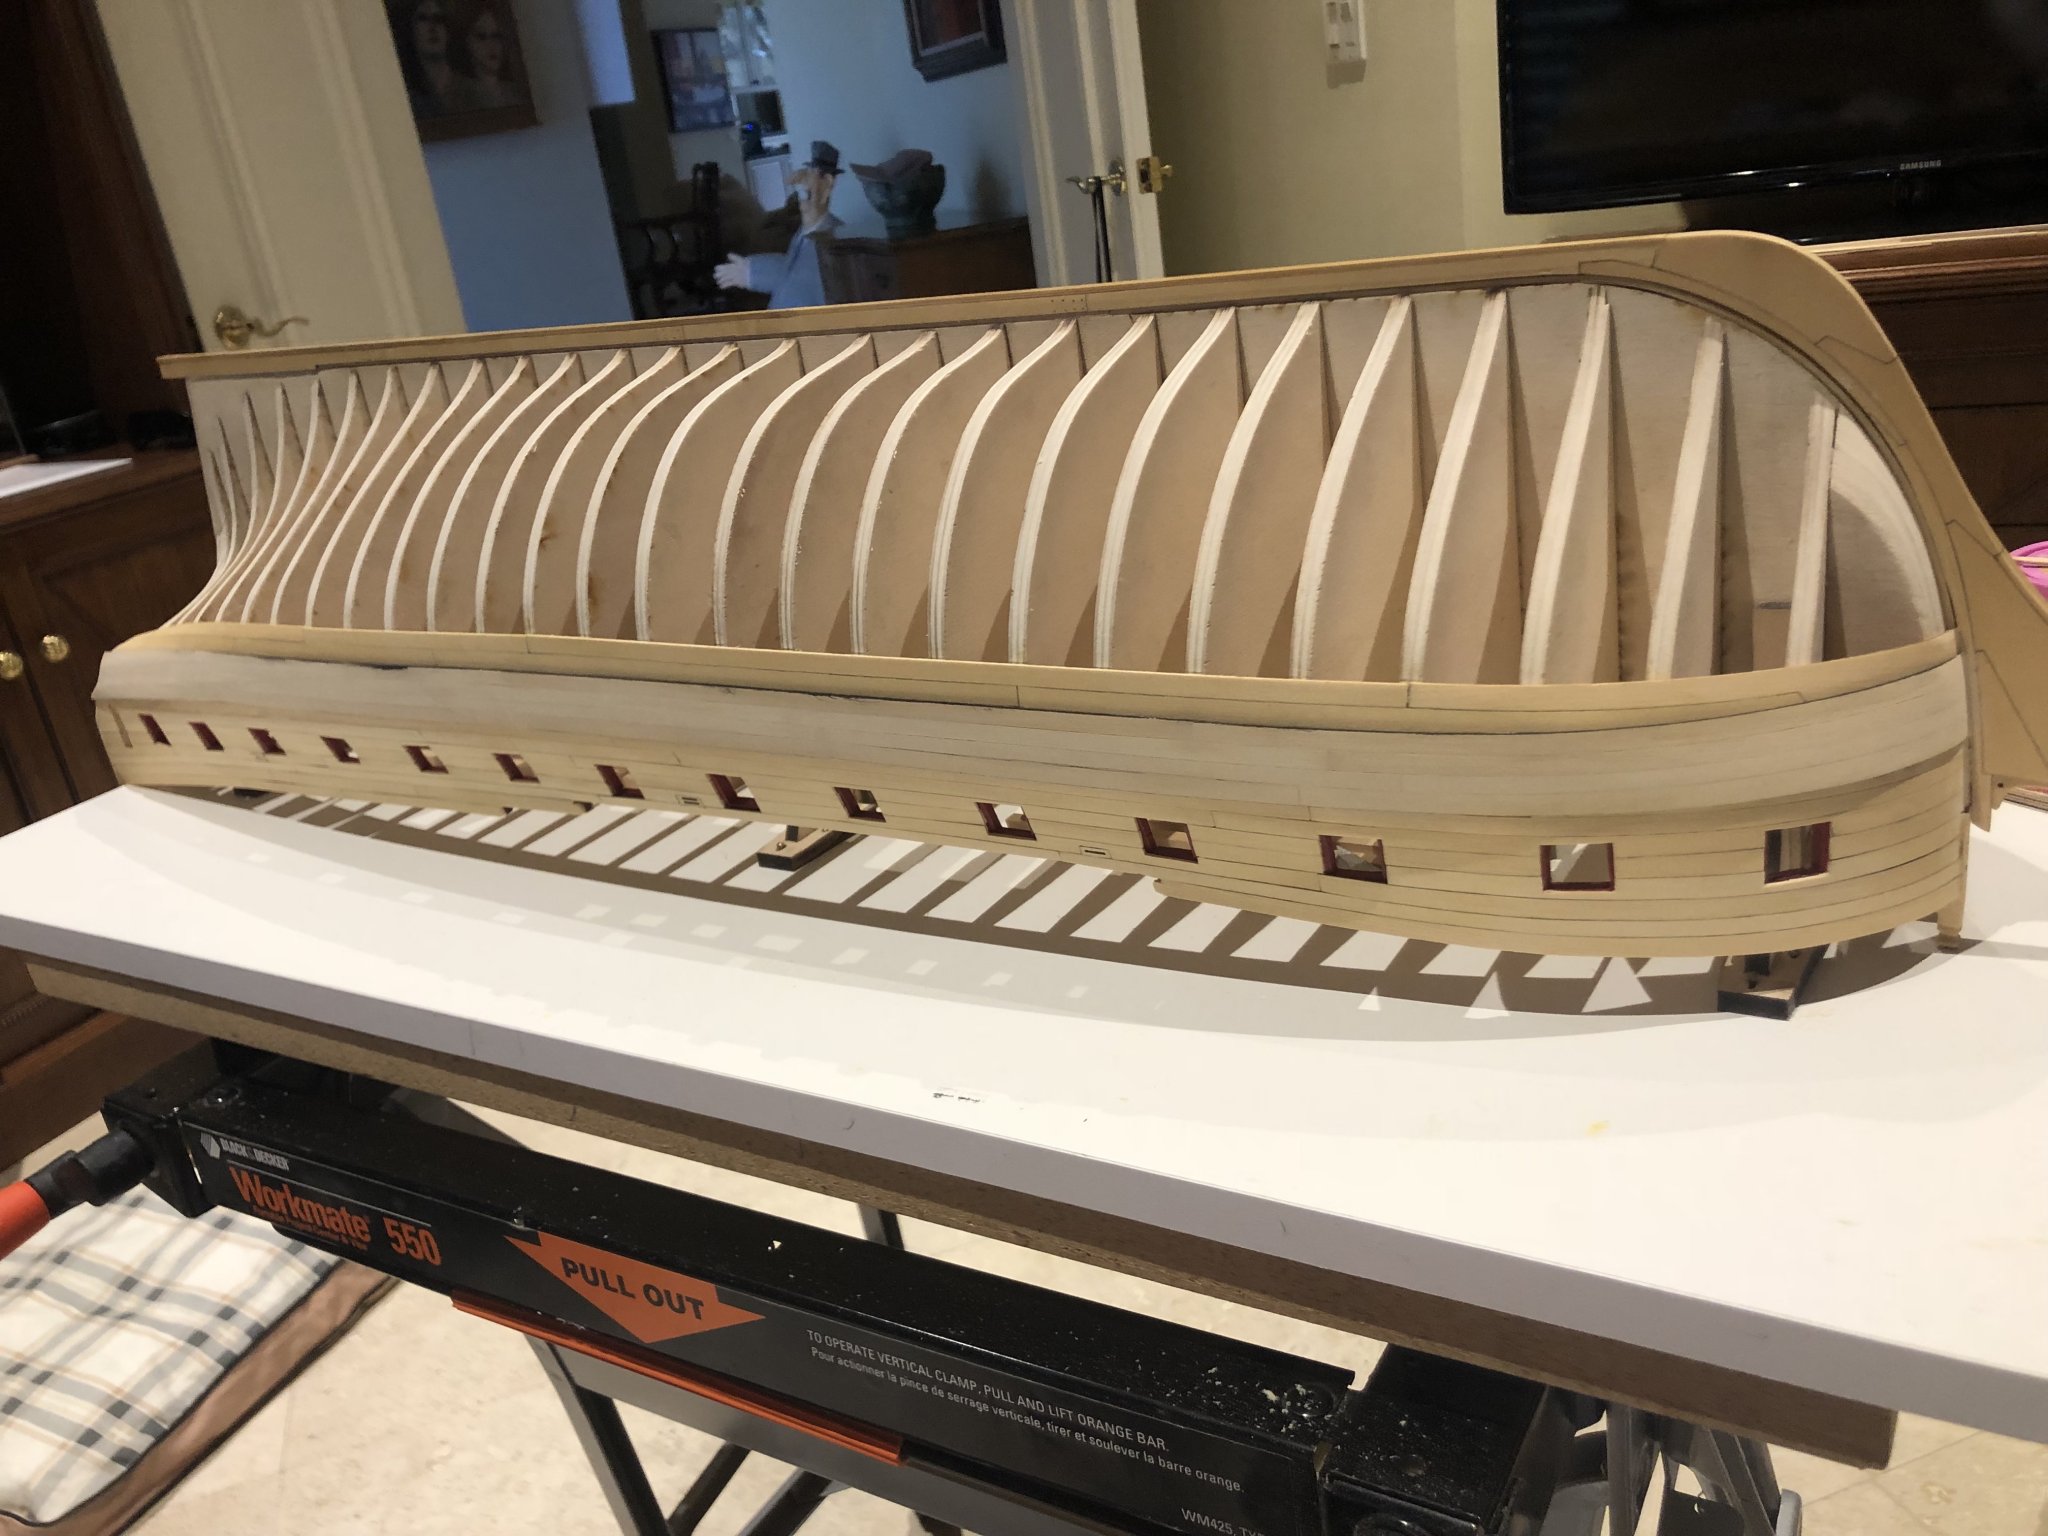
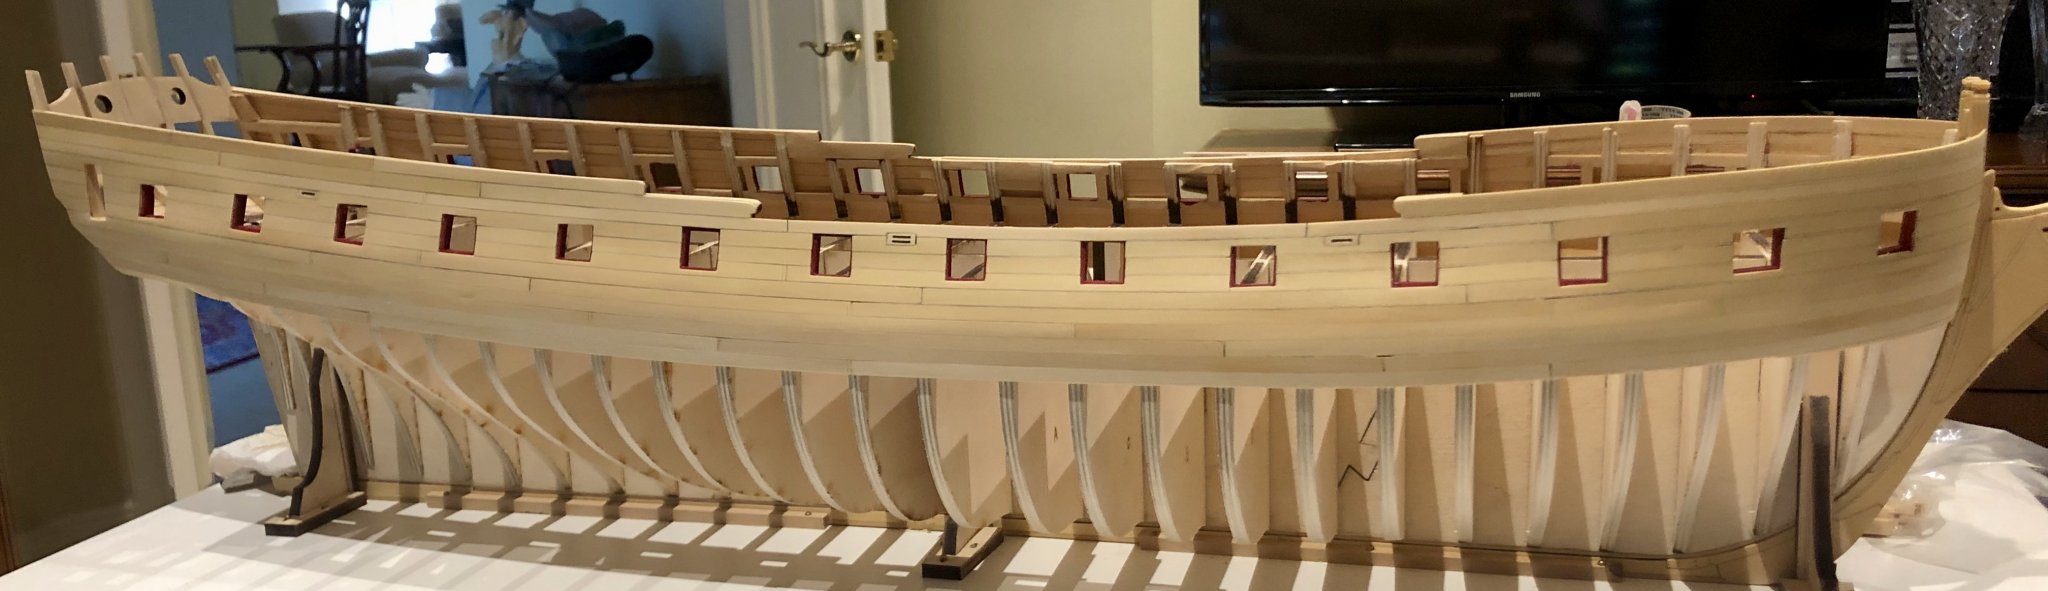
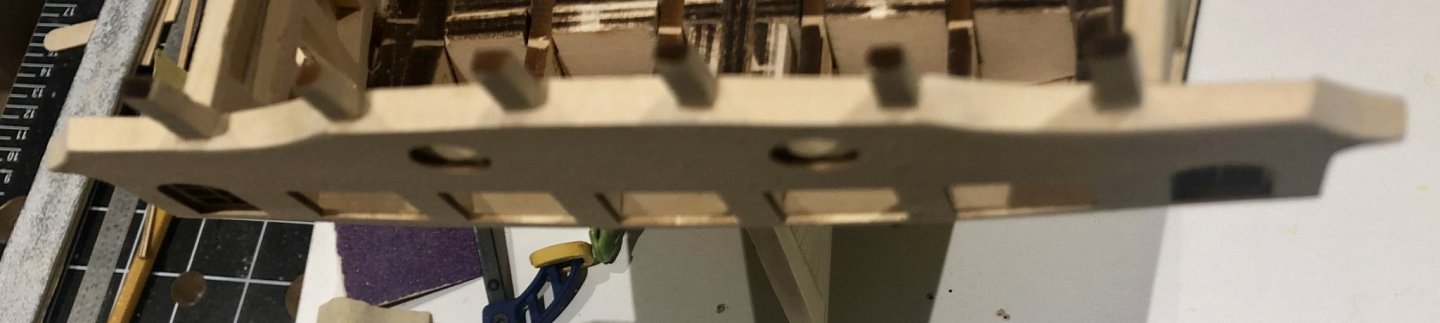
I just completed the last steps before moving on to the lower hull planking. First, I added the anchor lining using the laser cut parts and strip. Next, I did the fairing cap, using the laser cut hance pieces, strip wood for the quarter deck pieces and for the temporary waist pieces, and pieces cut from cedar sheet for the bow pieces. After all those pieces were in place, I completed the fairing of the inner bulwarks. This was tedious, but not as bad as it might have been , since I had done a good deal of the fairing before. Now, it's time to dig in and line off the lower hull and do the planking, a formidable looking task. Bob


-
Thanks so much Ben. It only seems fast because I have so much time to spend on her. Bob
-
Thanks so much Elijah, Art and the "likes". Always room for one more, Art. Bob
-
Thanks so much Captain Poison, Rusty, OC and the "likes". Always appreciated. Bob
-
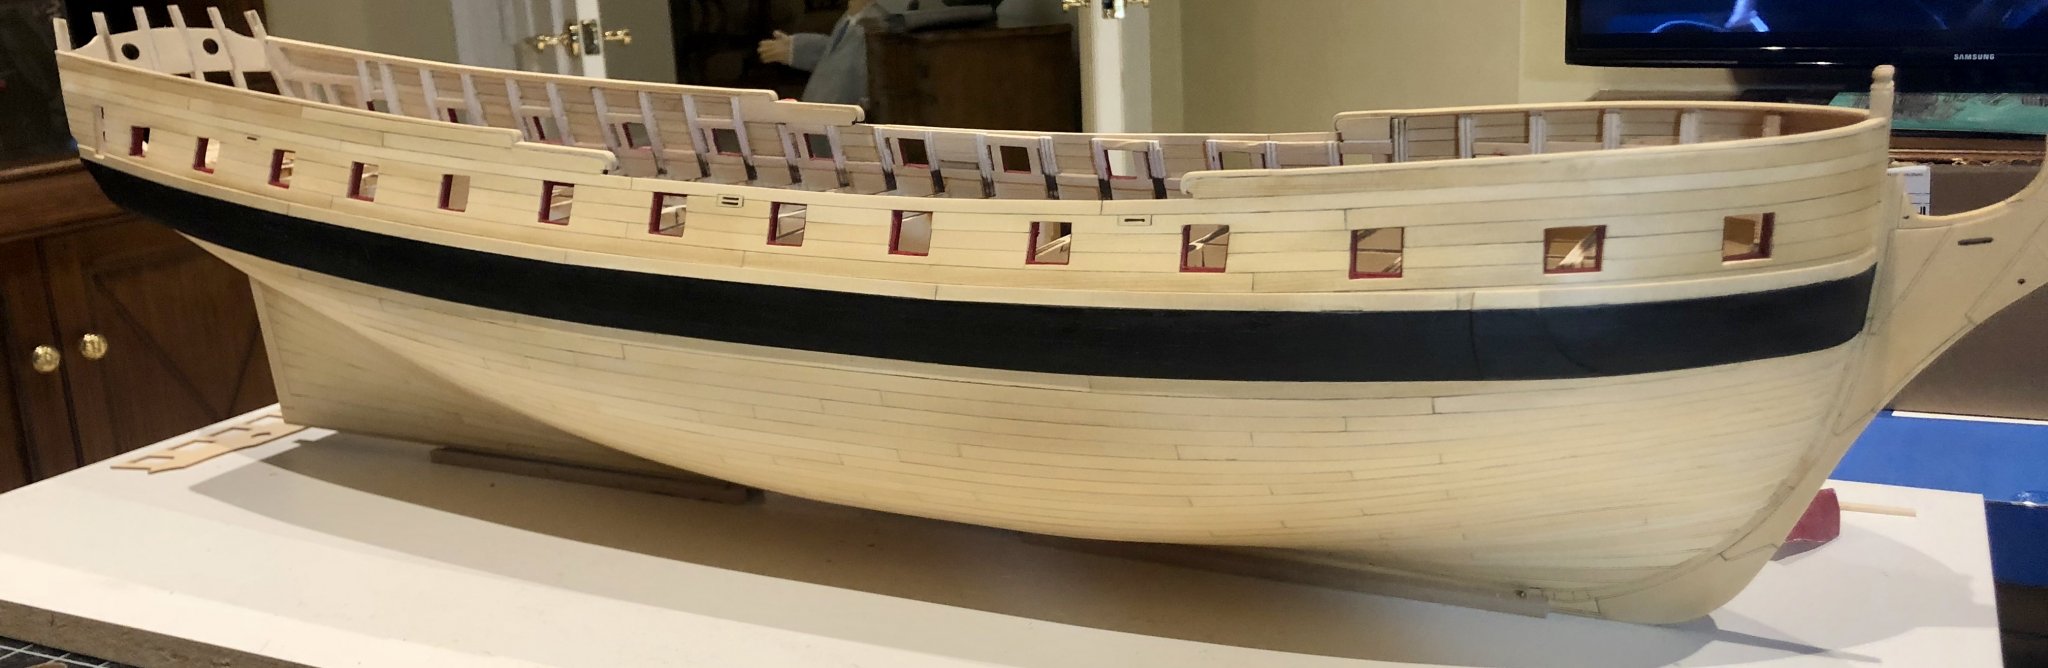
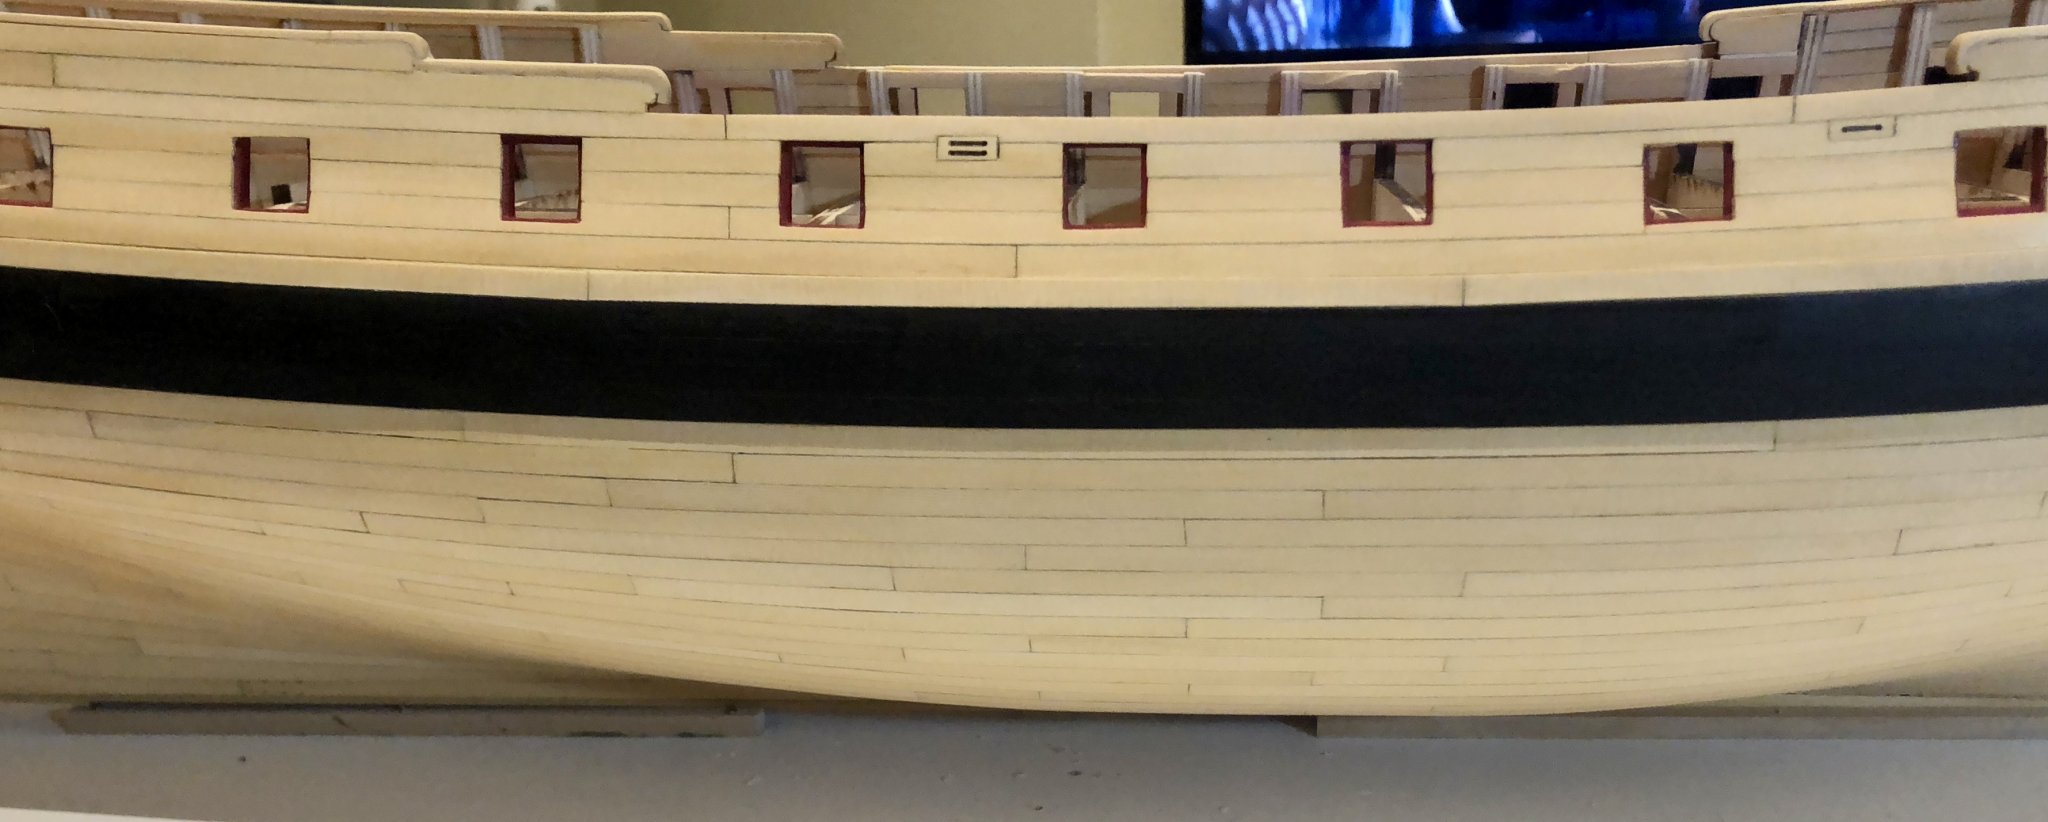
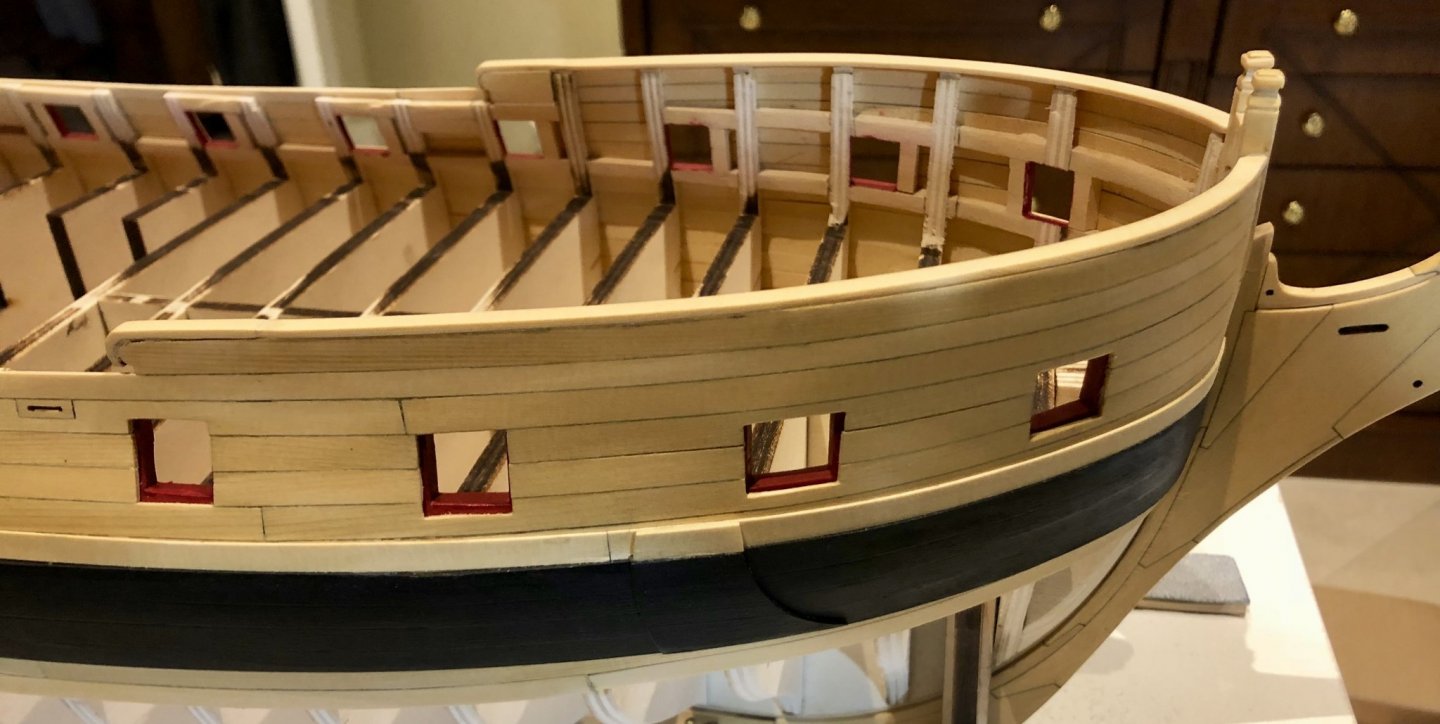
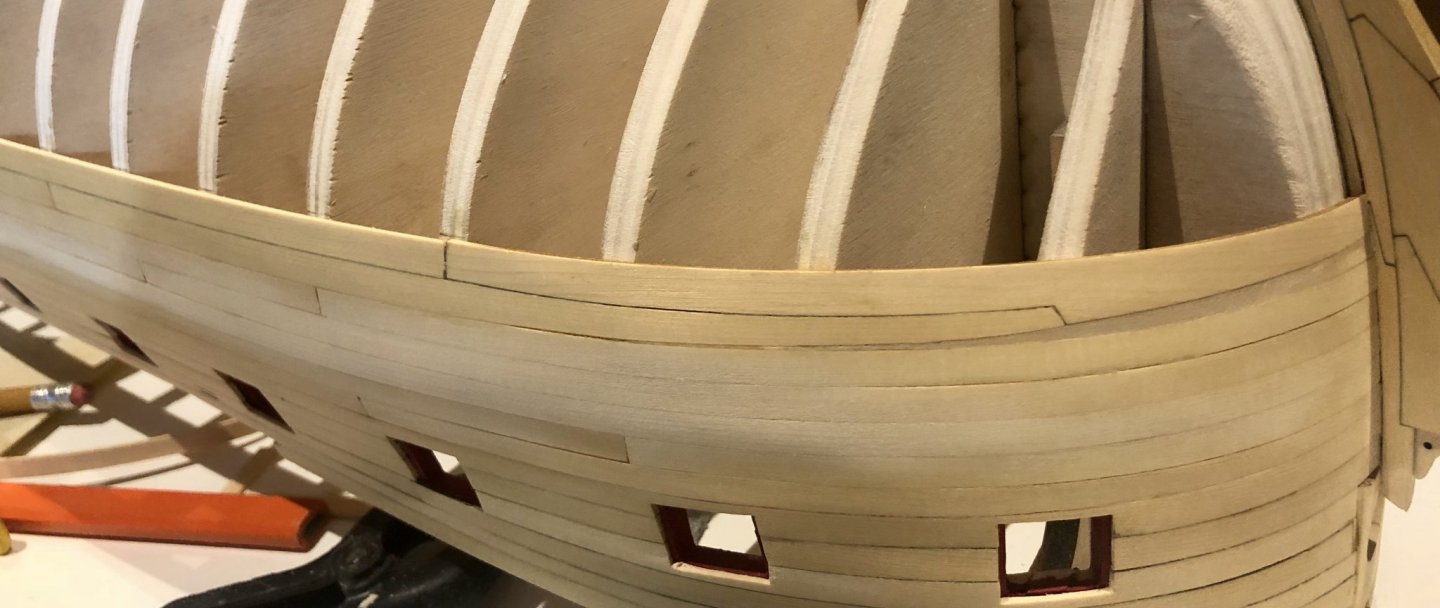
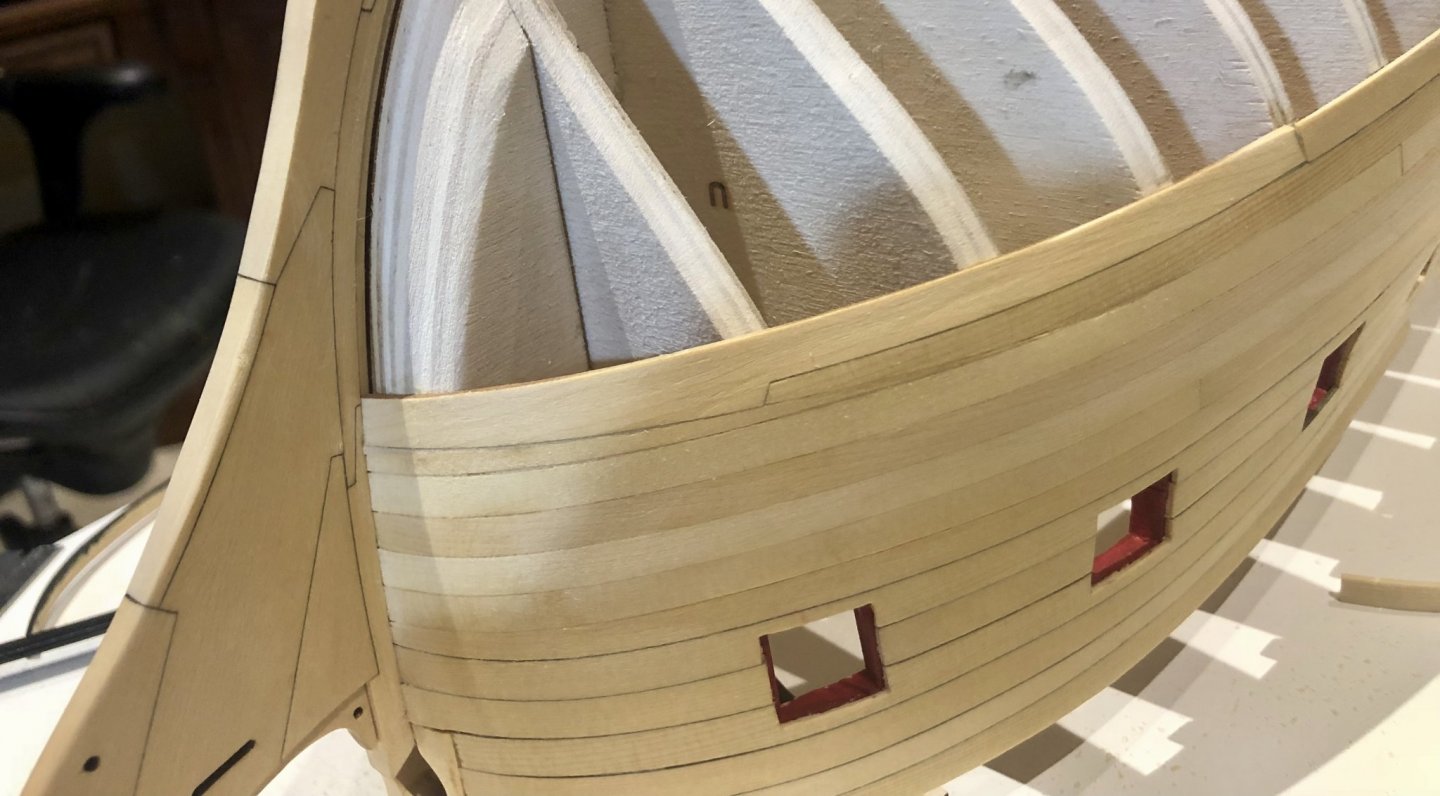
I've now completed the following: the drop planks and the first two strakes below the wales; the second layer of wale planking and painting the wales black; and the black strake above the wales. I began the drop plank installation by following Chuck's two plank tool suggestion to line off the two strakes below the wales.Although the laser cut drop plank was a big help, I still found the fitting process a bit tricky. The second layer of wale planking was straight forward and simply followed the first layer. The forward portion of each strake was sanded down to appear to fit into the rabbet. I painted the upper edge of the top strake and the bottom edge of the bottom strake before gluing them in place, ensuring a clean edge. The wale was painted with multiple coats of Modelmaster engine black acrylic. The black strake was made using 1/64" planking strips and was left unpainted. There are a few miscellaneous tasks left before beginning the lower hull planking. Bob


-
Great looking planking. Bob
-
Thanks so much Joe, Matt,Dirk and the "likes". Matt, the caulking is pencil on one side and one end of each plank. Easy. Bob
-
I've now completed the upper planking of the second (starboard) side. It has been sanded and a coat of Wipe-on Poly applied. As could be expected, it went on easier and better than the first side. I still had to make small adjustments to get the plank widths right, particularly in the area of the hances. Following Chuck's sequence, the next work will be the drop plank and the first two strakes below the wales. Bob


-
Thanks so much Rusty and the "likes". Rusty, I'm sure that your planking will turn out great, as always. Bob