HOLIDAY DONATION DRIVE - SUPPORT MSW - DO YOUR PART TO KEEP THIS GREAT FORUM GOING! (Only 13 donations so far - C'mon guys!)
×


G.L.
-
Posts
1,553 -
Joined
-
Last visited
Content Type
Profiles
Forums
Gallery
Events
Everything posted by G.L.
-
 I would like to make them like you but your splice skills surpass mine in large extent. G.L.
 -
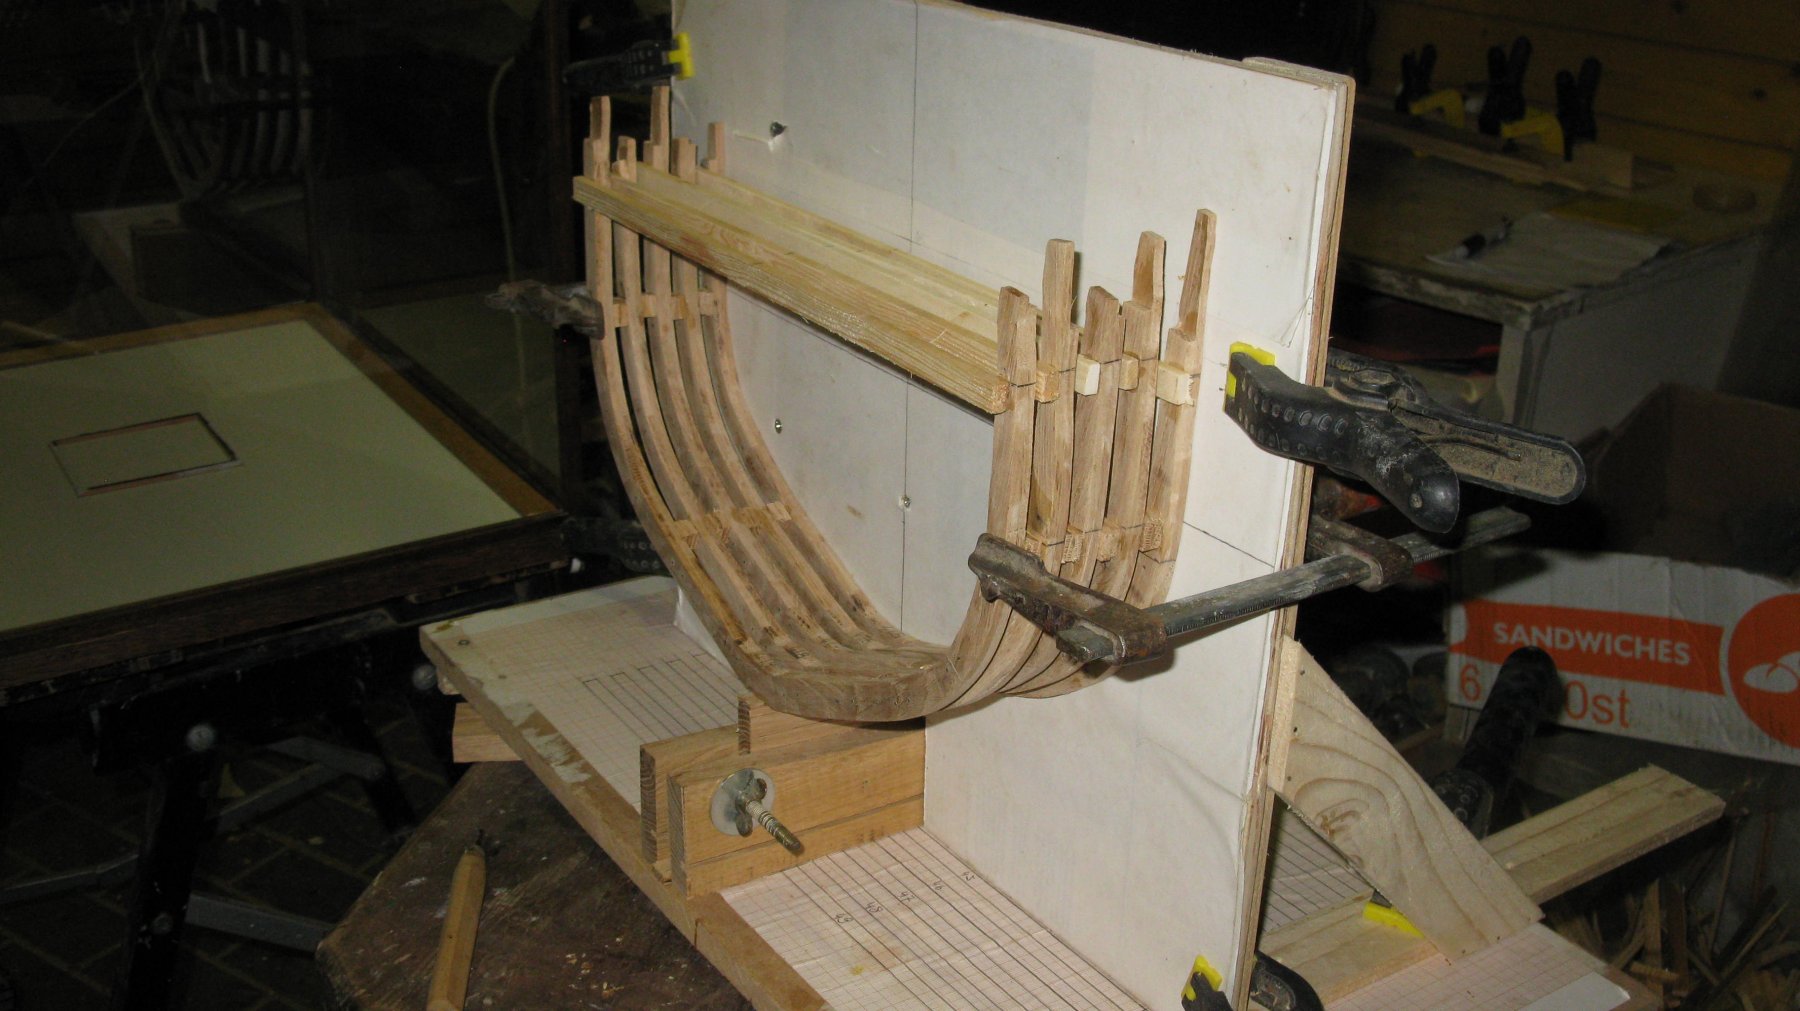
Seven frames in place. Still seven to go. G.L. Completed projects: HMS Triton cross section - FINISHED - Scale 1:24 Current projects: Oostends schipje (Ostend shrimper) - scale 1:20 Cross section Fishing Smack - Scale 1/20, POF, approx. 1920

- 219 replies
-
- 11
-

-
- smack
- cross-section
- (and 2 more)
-
Thanks for your comment Carl and all the others for the likes. Five frames set. G.L. Completed projects: HMS Triton cross section - FINISHED - Scale 1:24 Current projects: Oostends schipje (Ostend shrimper) - scale 1:20 Cross section Fishing Smack - Scale 1/20, POF, approx. 1920

- 219 replies
-
- 9
-
-
- smack
- cross-section
- (and 2 more)
-
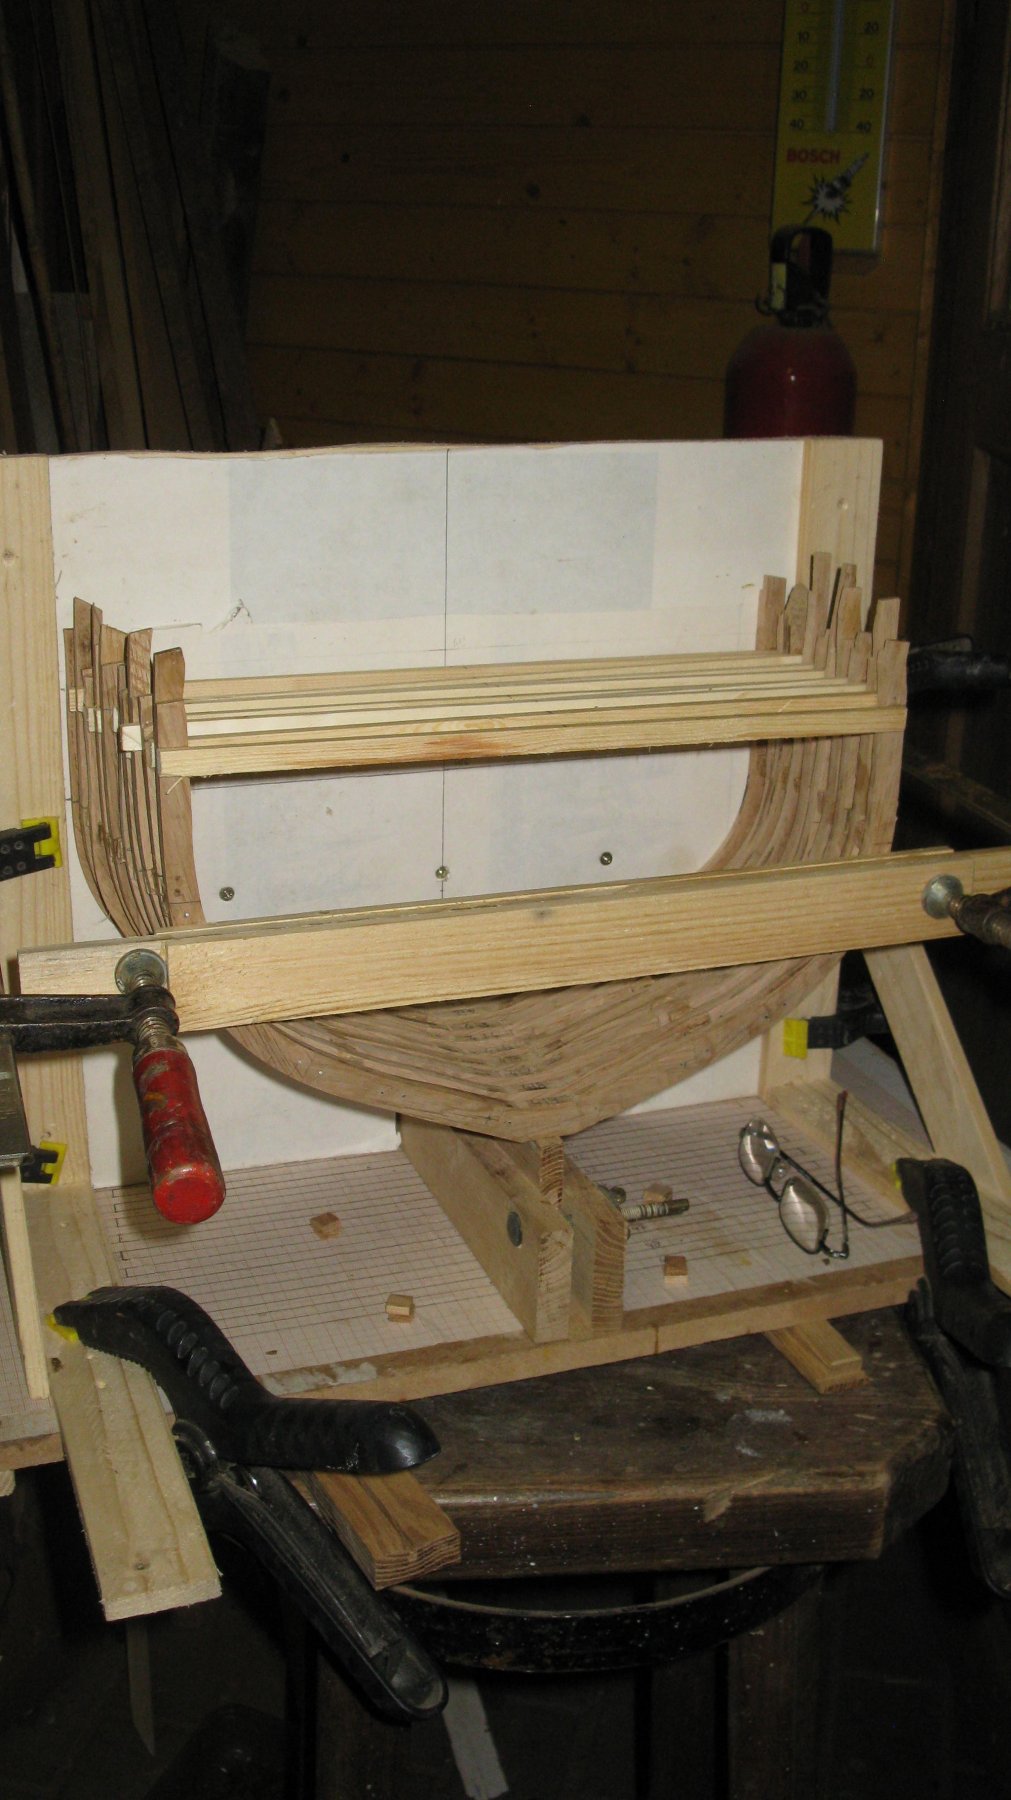
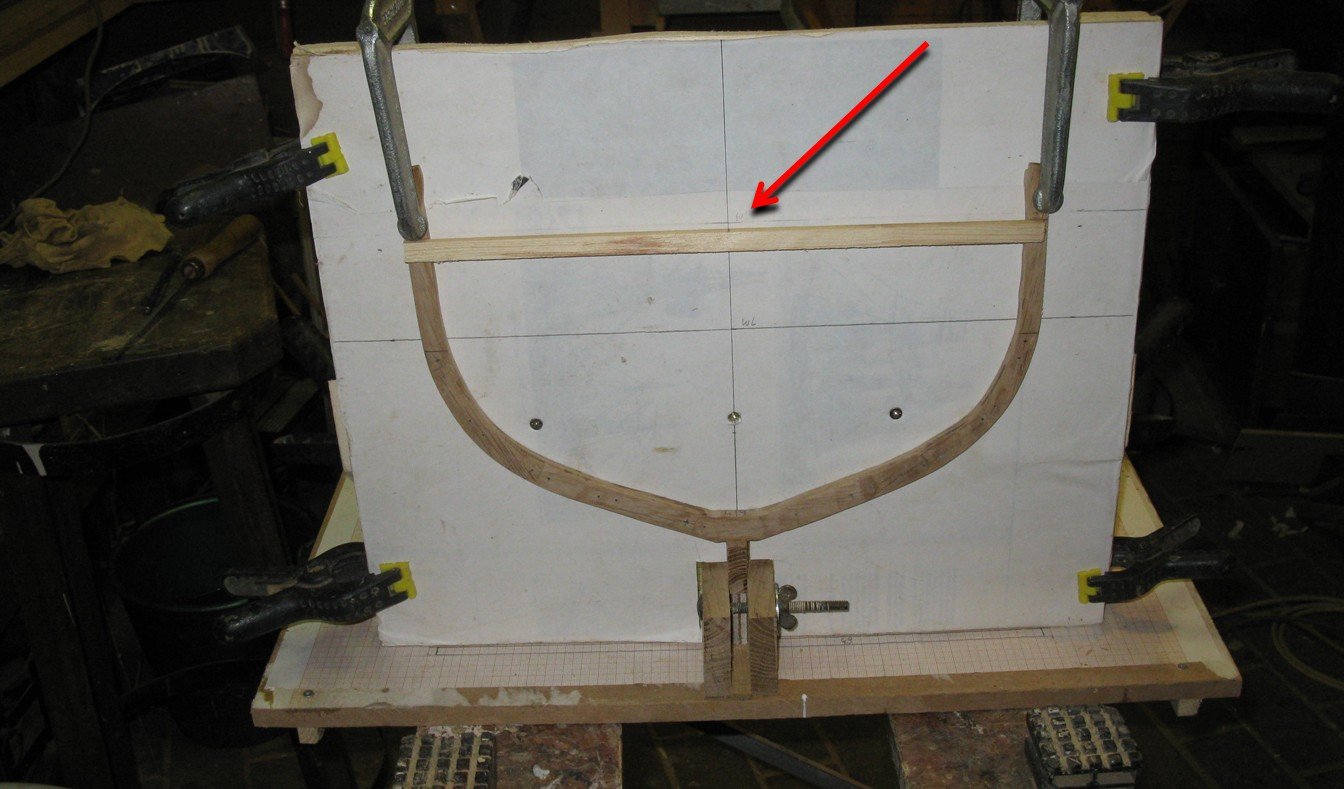
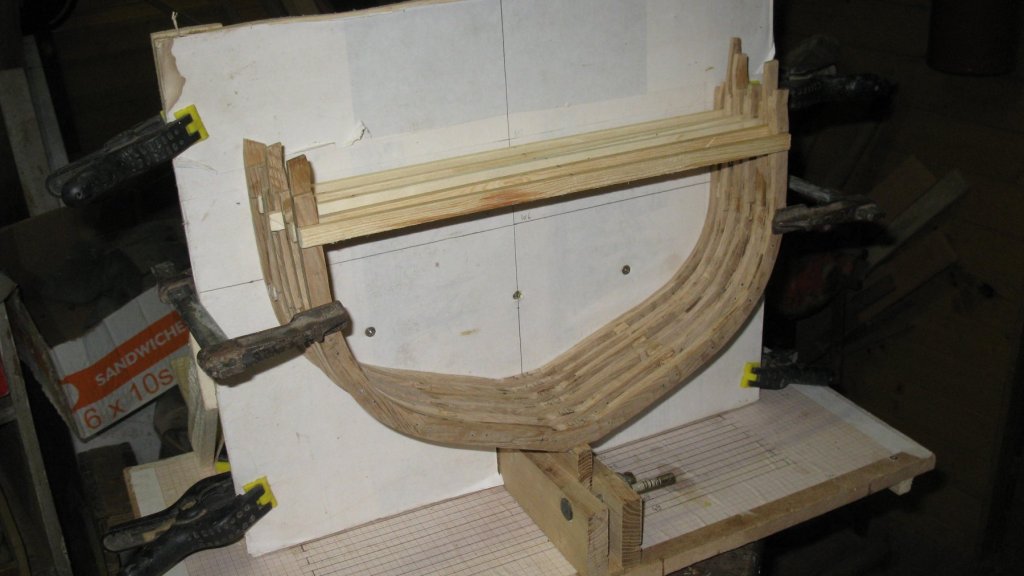
Here we go, Pat! Part 5: Mounting the frames To mount the frames vertically, I place a board perpendicular on the base of the slipway. The board can be moved over the full length of the keel. To center the frame tops, on each horizontal support the middle is marked. This mark must match the center line on the board. Two frames placed. To keep the space between the frames equal, I glue temporally some spacers between each frame. G.L. Completed projects: HMS Triton cross section - FINISHED - ;Scale 1:24 Current projects: Oostends schipje (Ostend shrimper) - scale 1:20 Cross section Fishing Smack - Scale 1/20, POF, approx. 1920
- 219 replies
-
- 18
-
-
- smack
- cross-section
- (and 2 more)
-
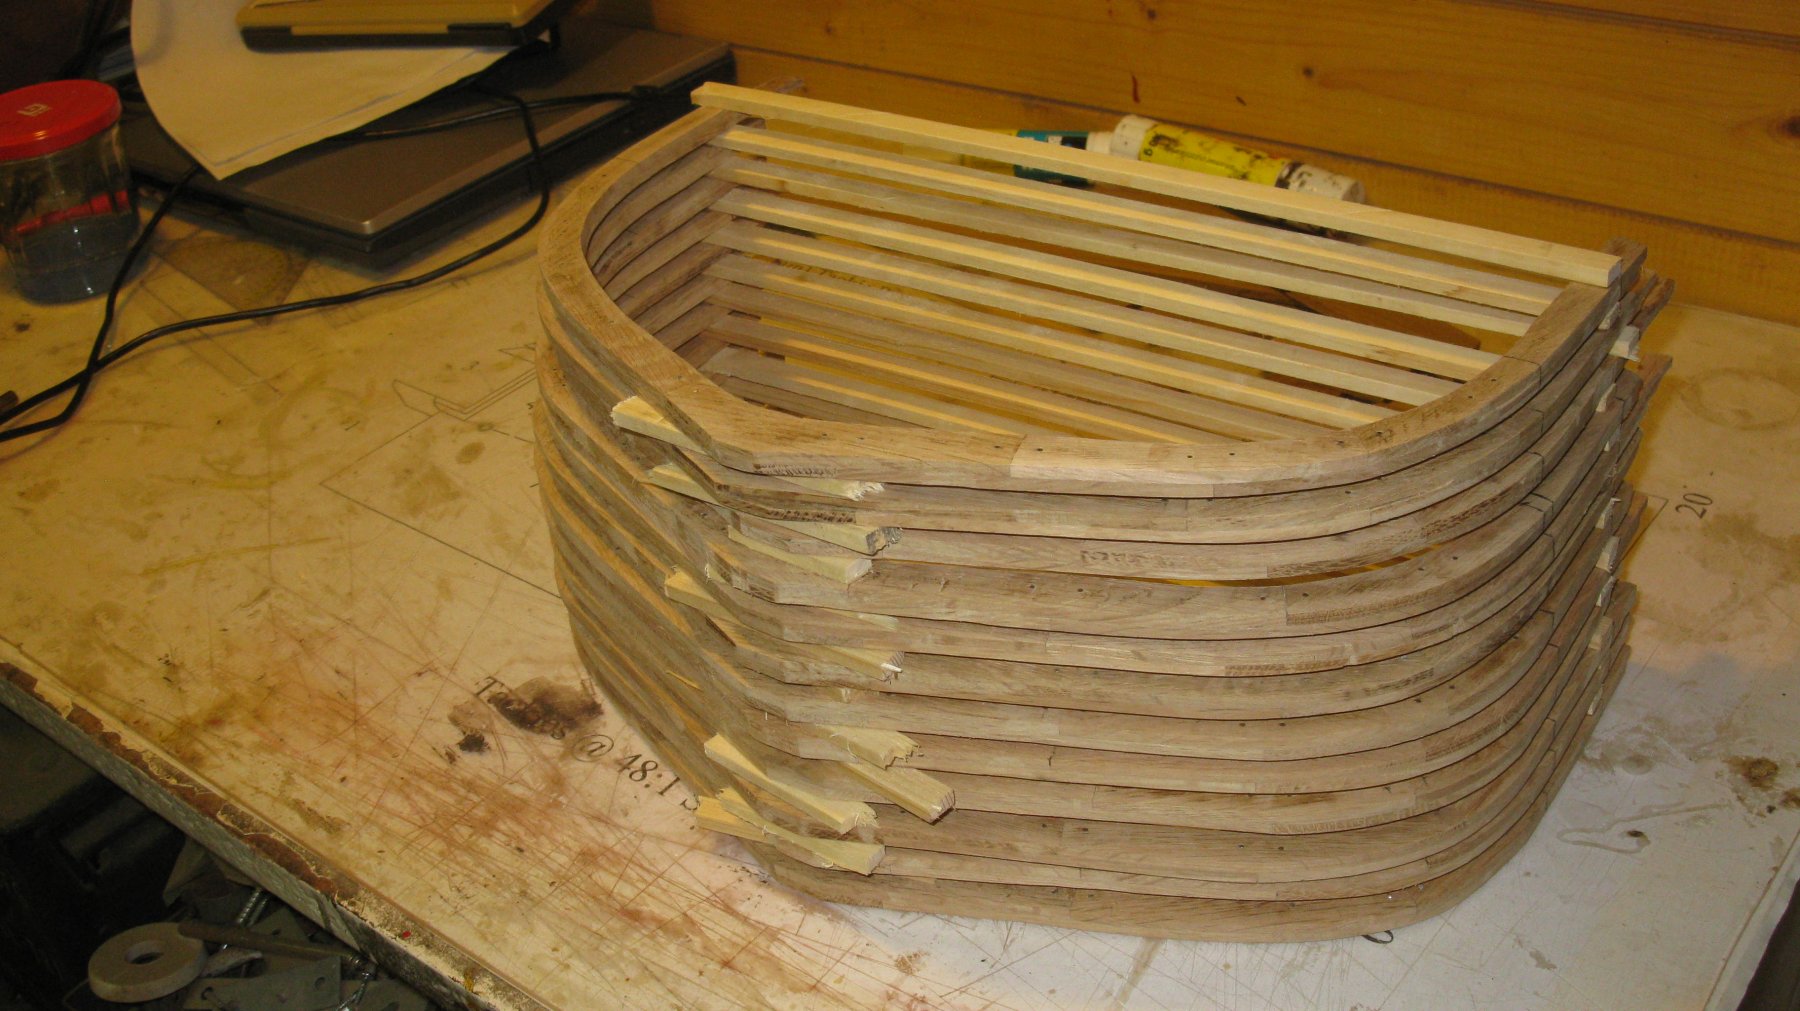
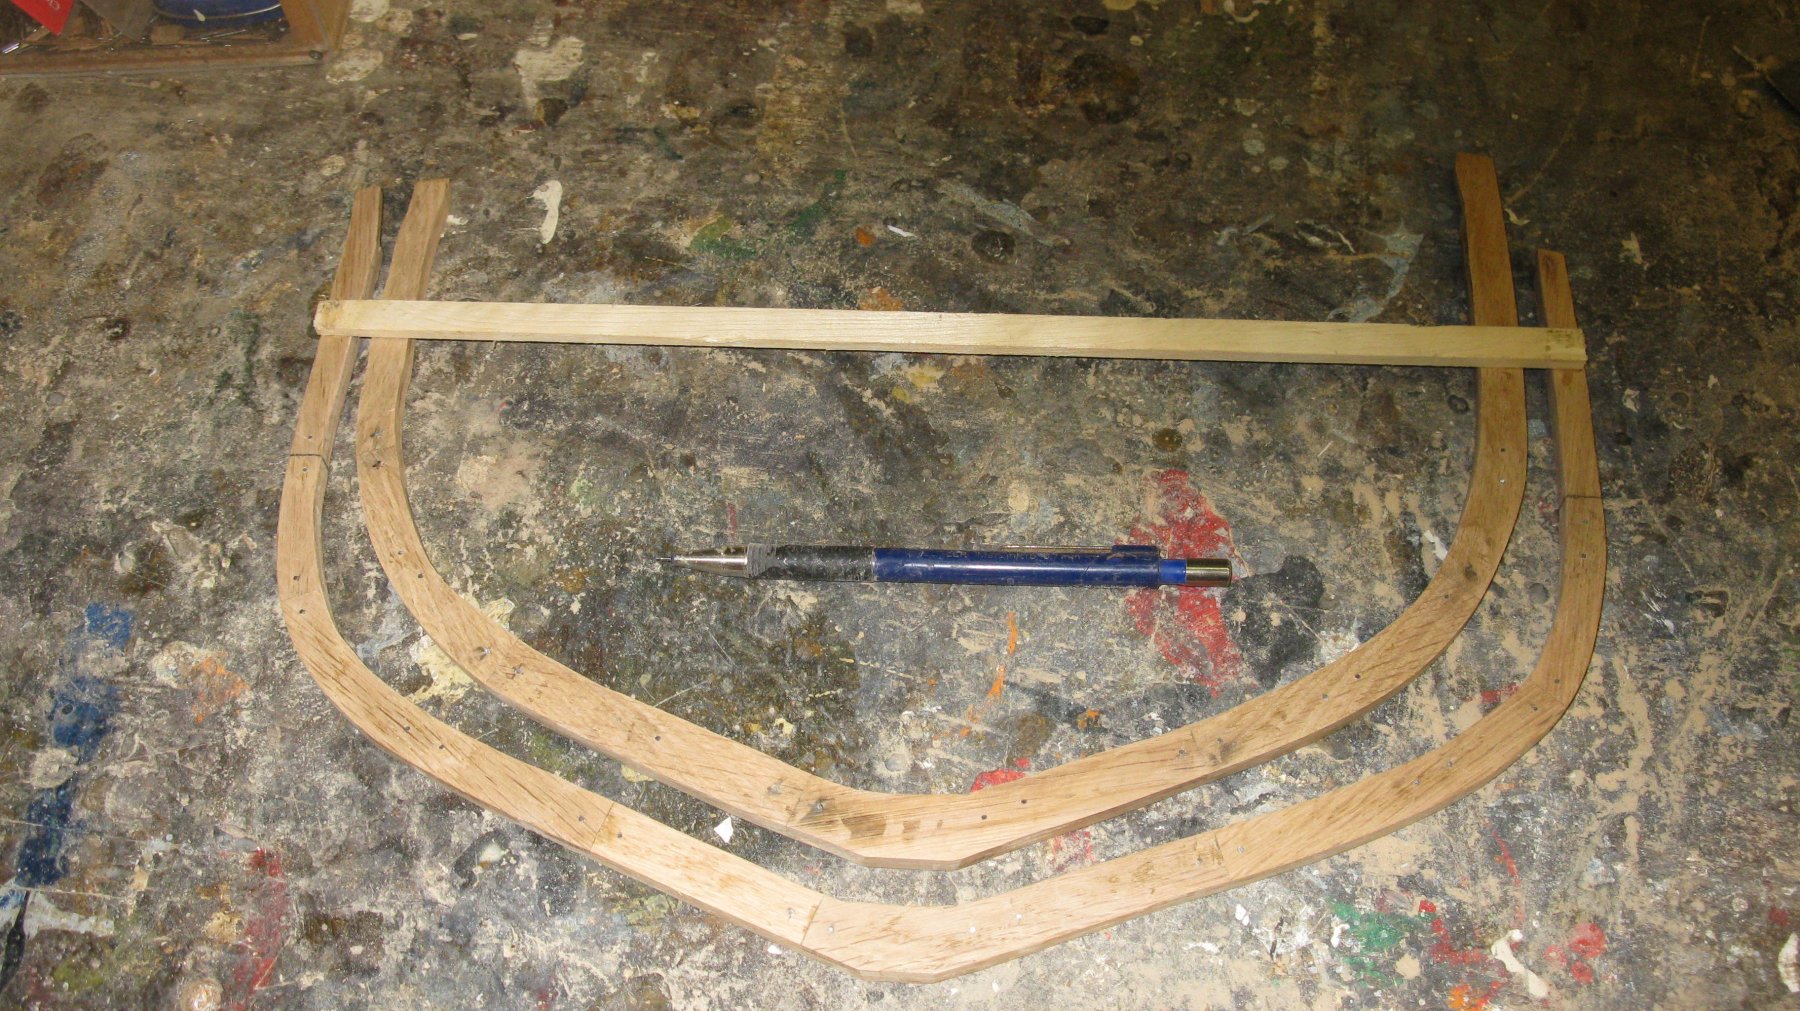
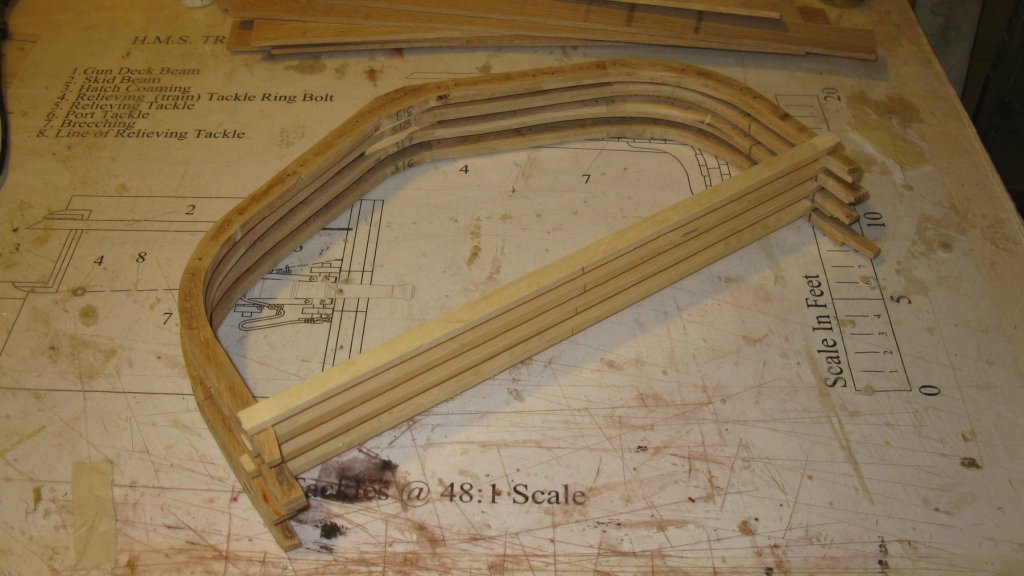
All 14 frames are finished. Here you see the most forward frame (the smallest) together with the most afterward (the biggest). G.L. Completed projects: HMS Triton cross section - FINISHED - Scale 1:24 Current projects: Oostends schipje (Ostend shrimper) - scale 1:20 Cross section Fishing Smack - Scale 1/20, POF, approx. 1920


- 219 replies
-
- 12
-
-
- smack
- cross-section
- (and 2 more)
-
Patrick, my advice: Play tennis with one arm at the same time 😁. G.L.
- 756 replies
-
- 2
-
-

-
- galleon
- golden hind
- (and 2 more)
-
Welcome on board, Mark. I am an interested follower of your 28 feet Ranger yacht build. Magnificent model and also a beautiful yacht! G.L.
- 219 replies
-
- 2
-
-
- smack
- cross-section
- (and 2 more)
-
Making frame after frame. The frame production goes on. Still 7 to go. G.L. Completed projects: HMS Triton cross section - FINISHED - Scale 1:24 Current projects: Oostends schipje (Ostend shrimper) - scale 1:20 Cross section Fishing Smack - Scale 1/20, POF, approx. 1920
- 219 replies
-
- 10
-
-
- smack
- cross-section
- (and 2 more)
-
Patrick, I believe that your first emoticon is a bit undue. I just follow the instructions written by Mr Georges Verleene in his excellent handout. Thanks for the reaction anyway. G.L.
- 219 replies
-
- 2
-
-
- smack
- cross-section
- (and 2 more)
-
John, I share your respect for the fishermen. They have hard and dangerous job, just a month ago a Belgian boat capsized, with the loss of two of the five crew members. I searched for the movie Captain Courageous on YouTube and saw some trailers. It is a movie that I want to see, didn't find the full movie yet, but I continue searching. G.L.
- 219 replies
-
- 1
-
-
- smack
- cross-section
- (and 2 more)
-
G.L.

-
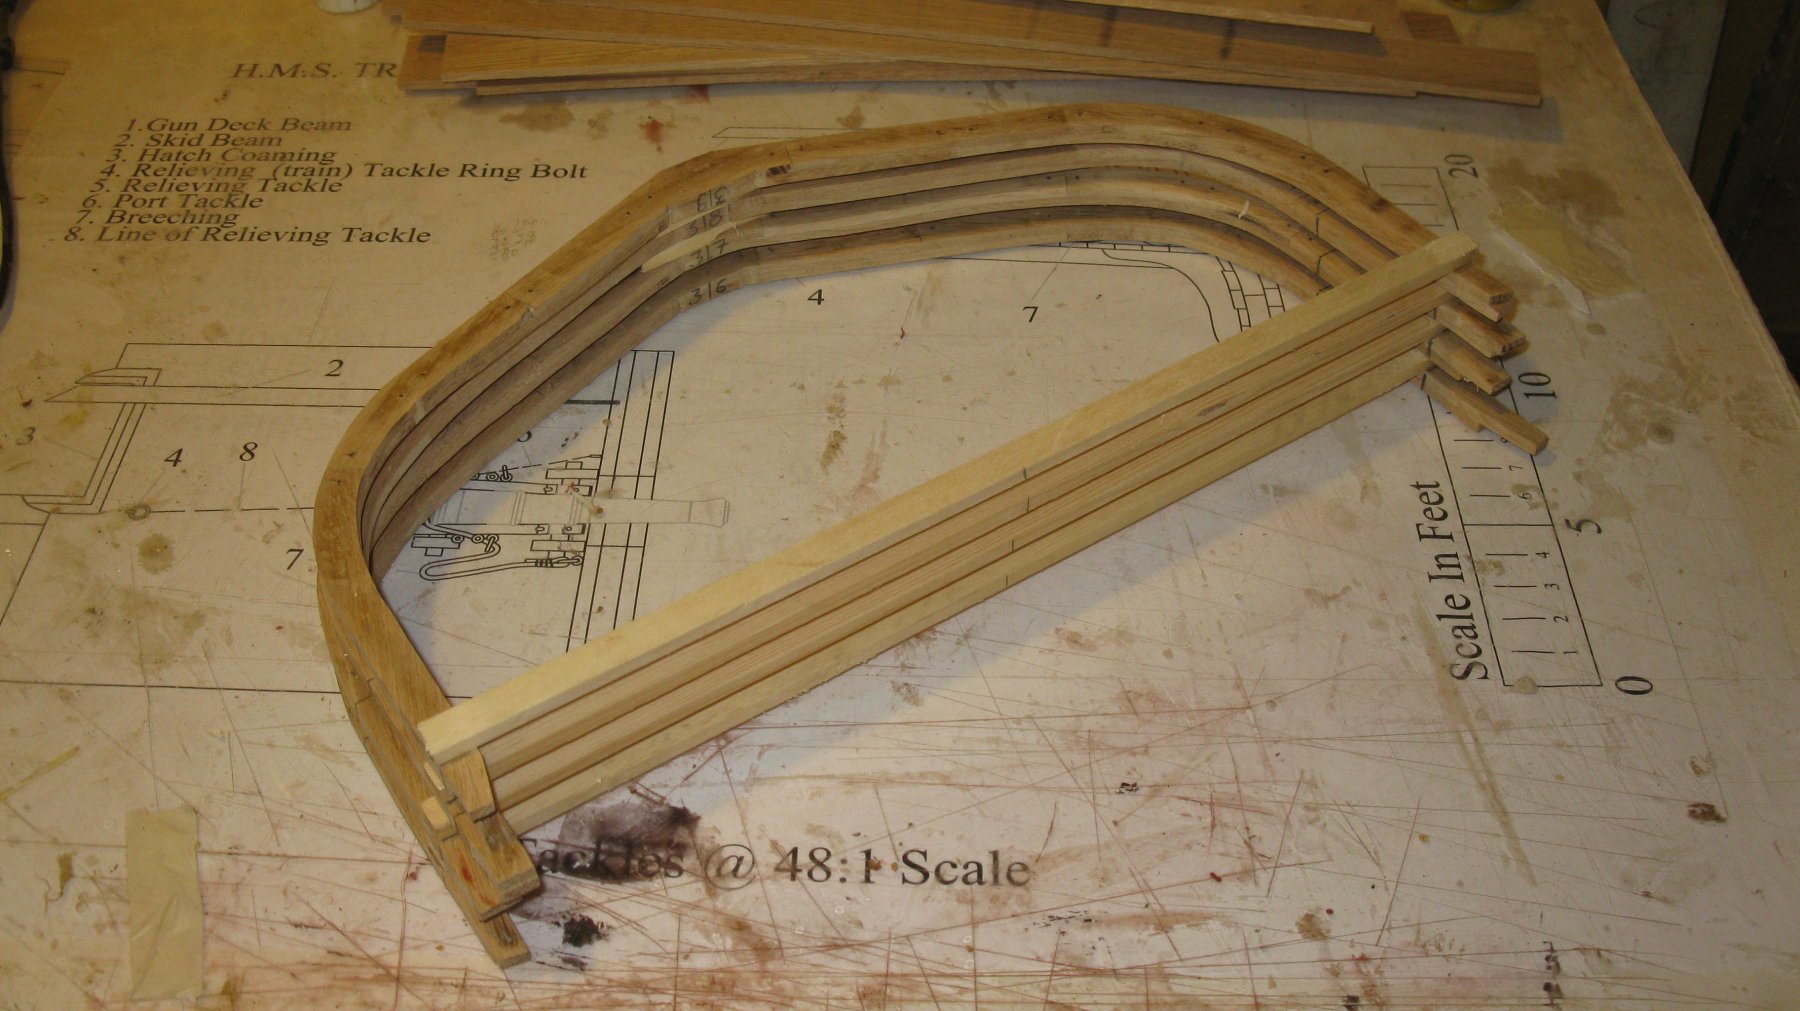
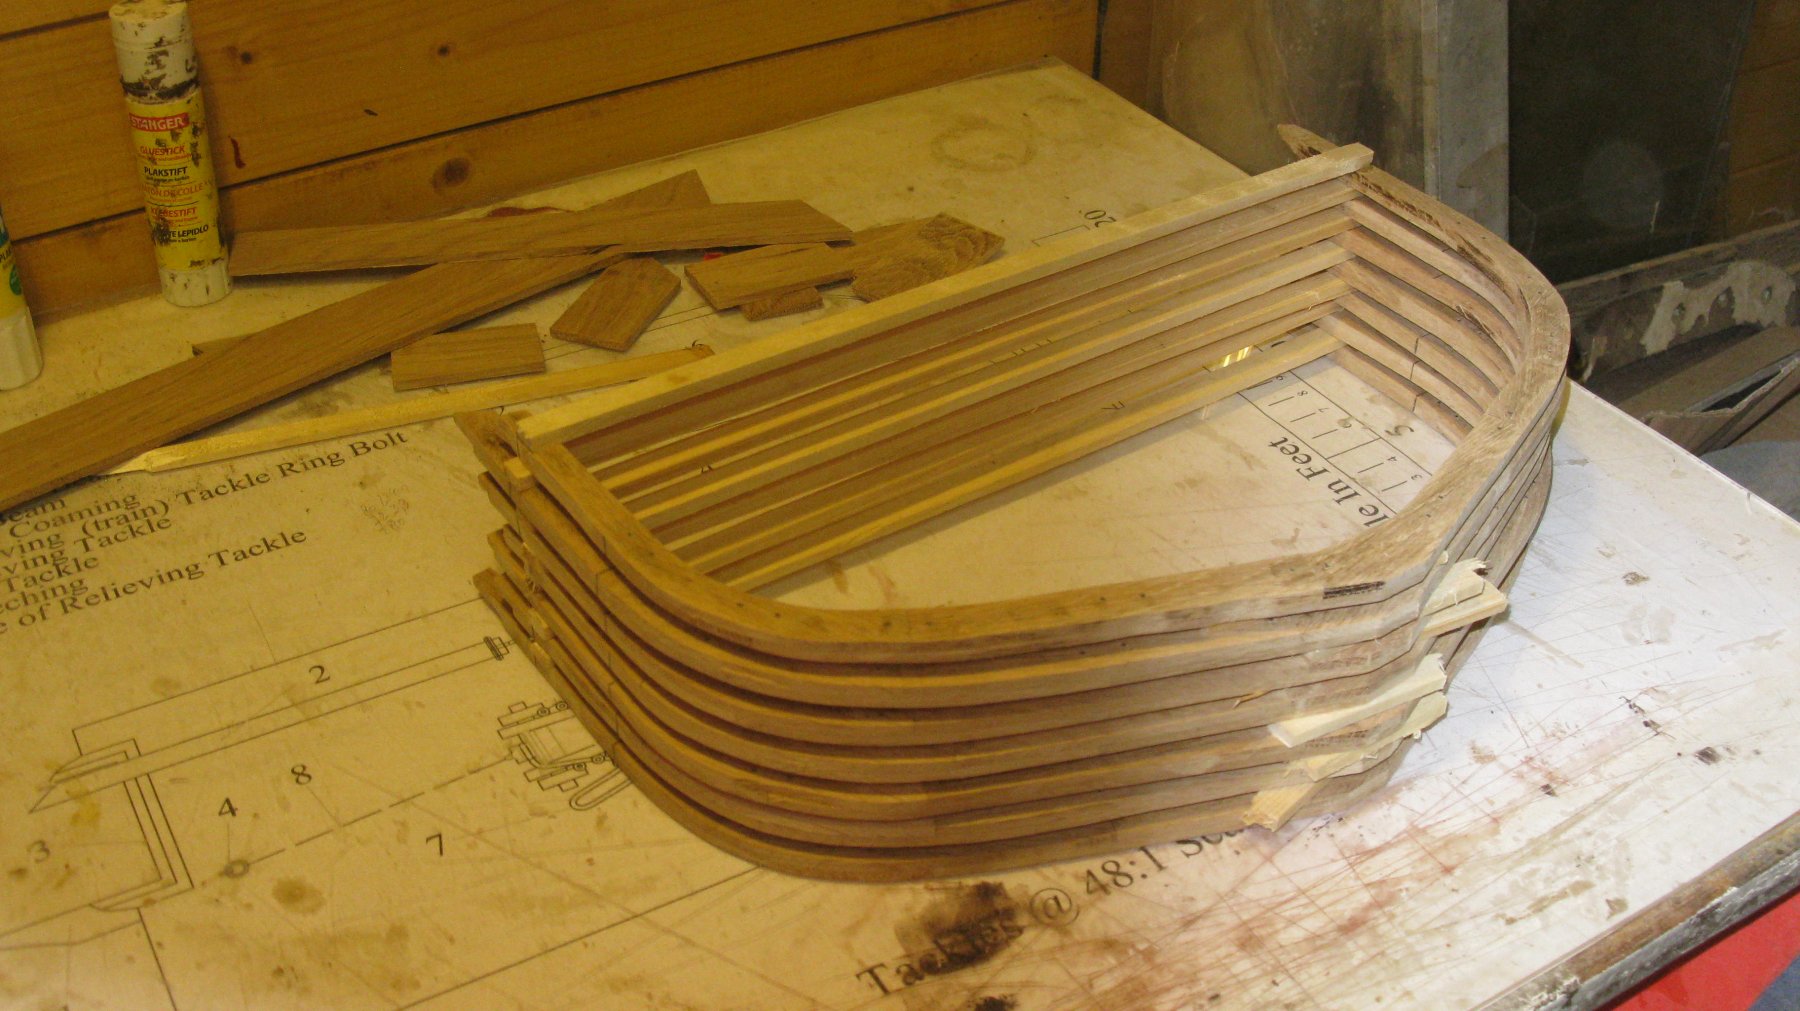
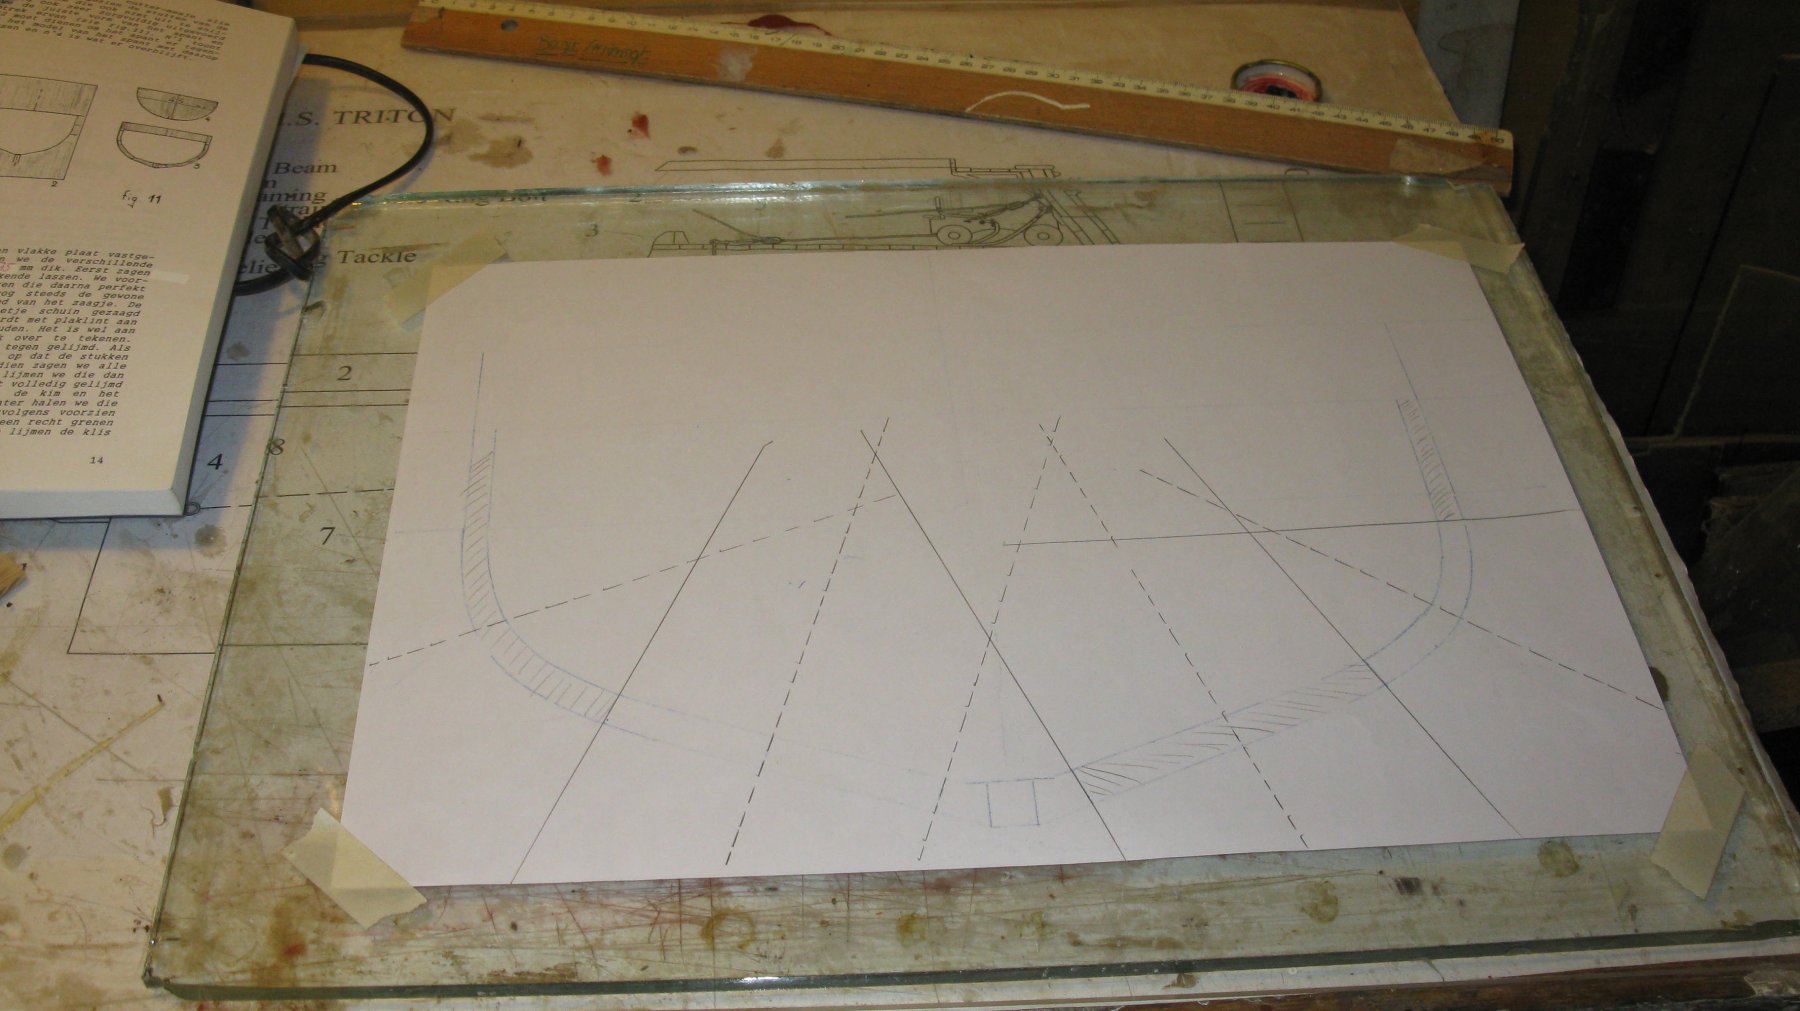
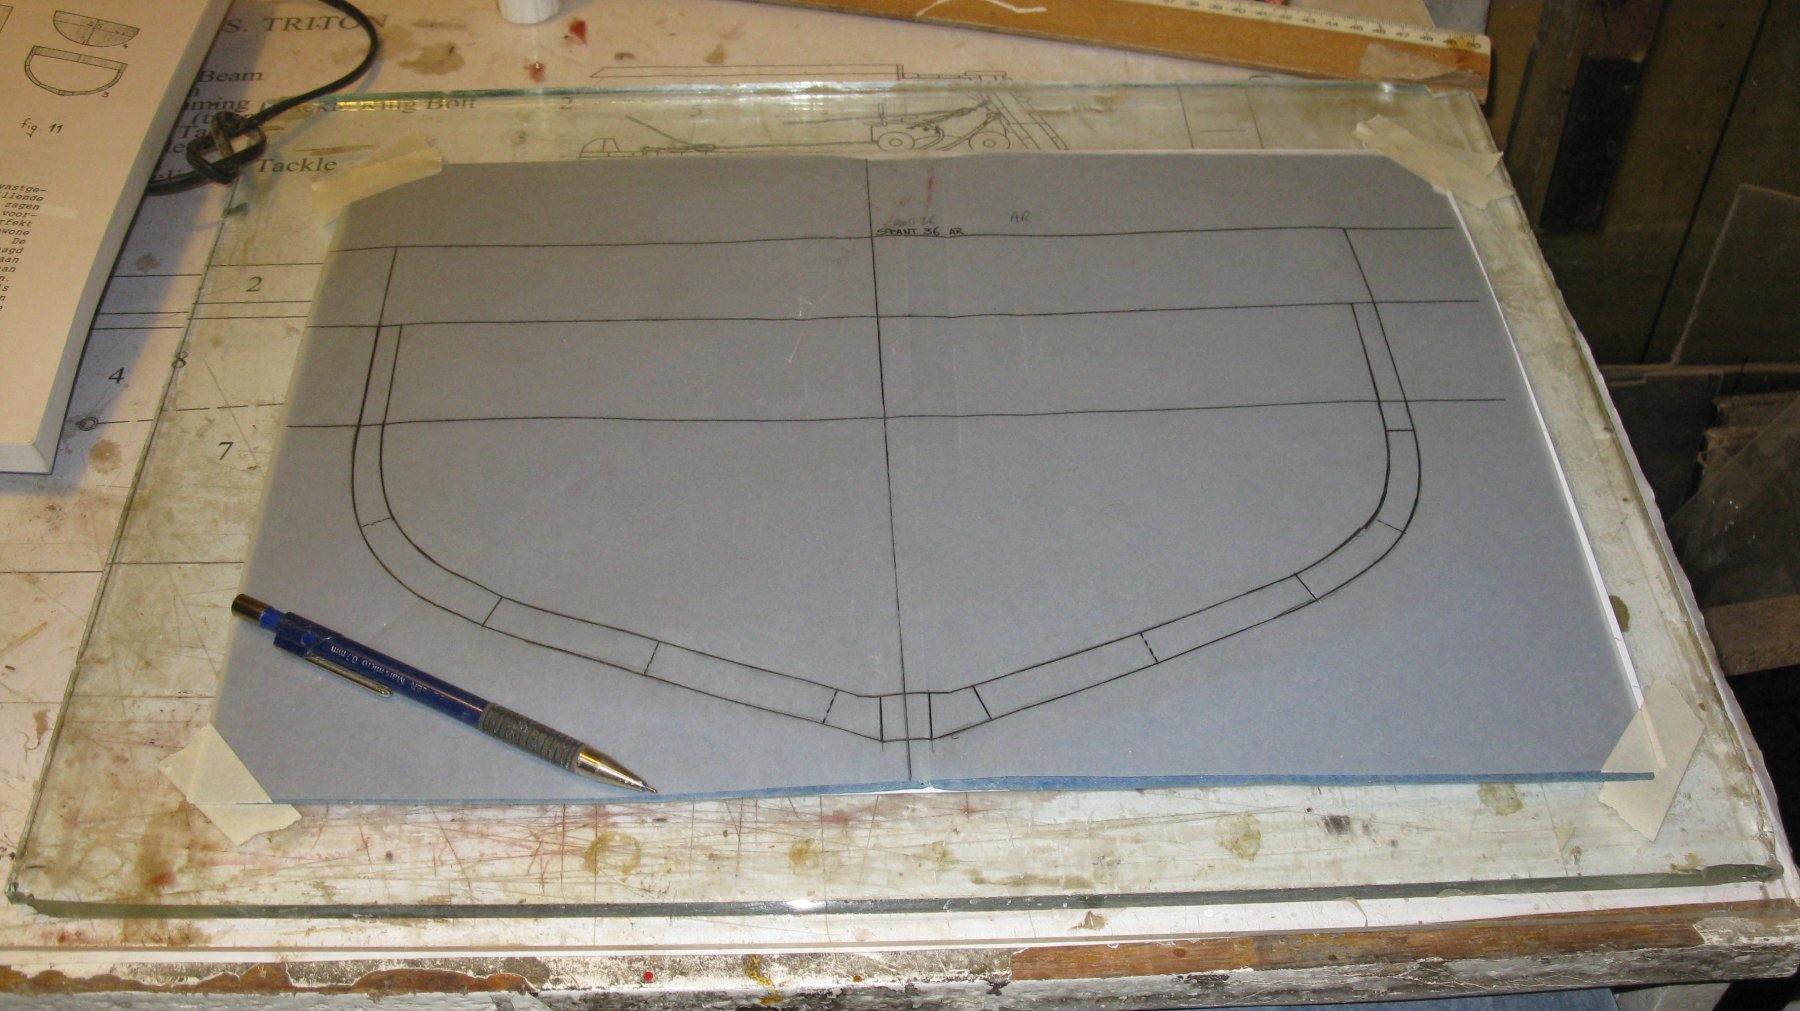
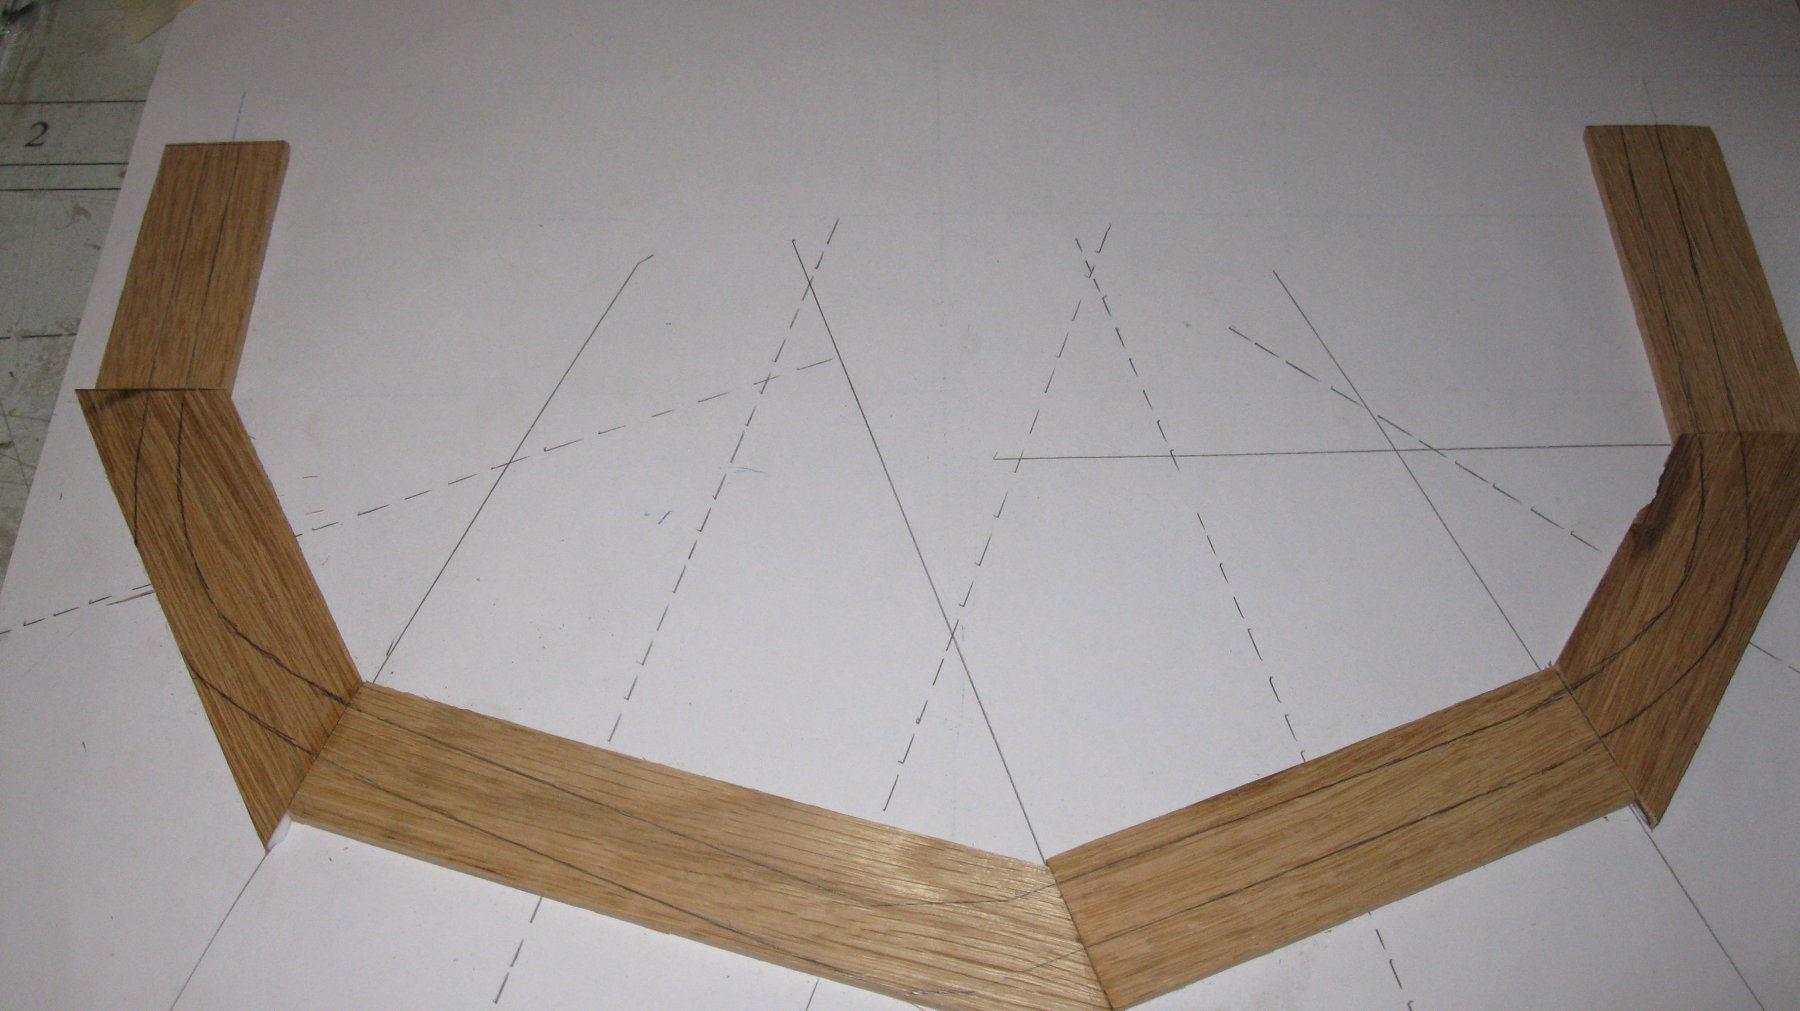
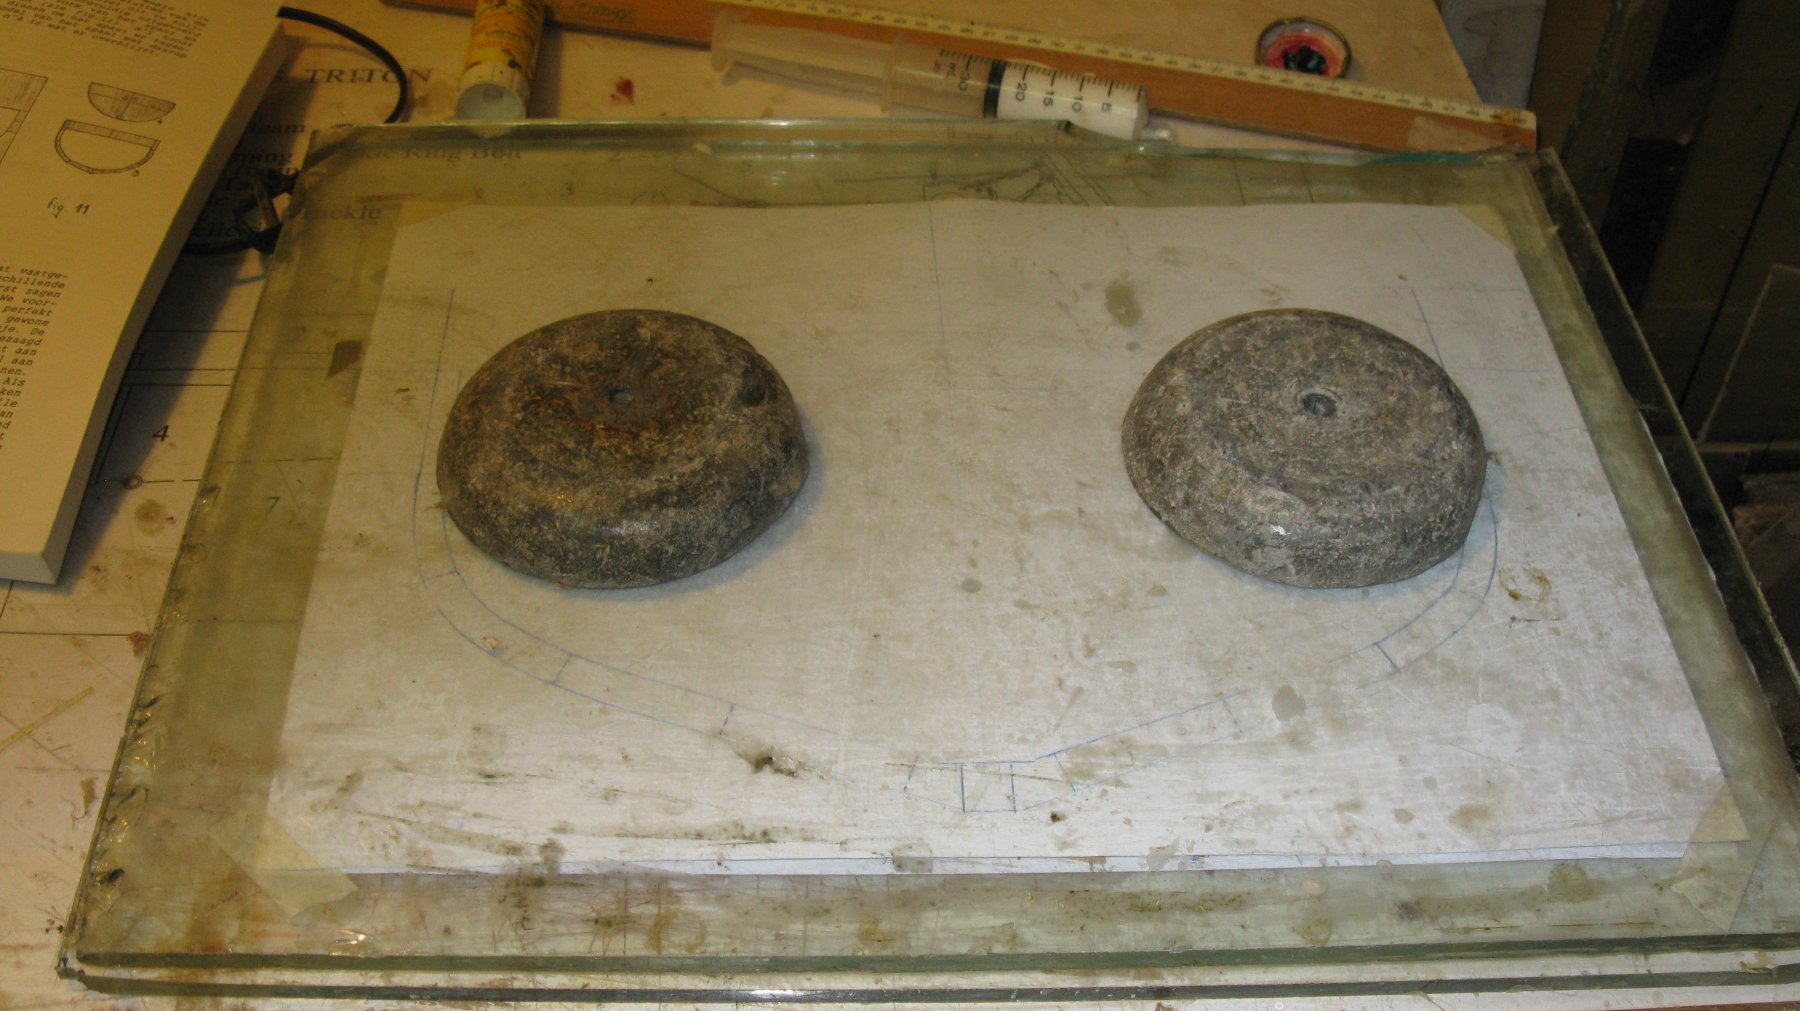
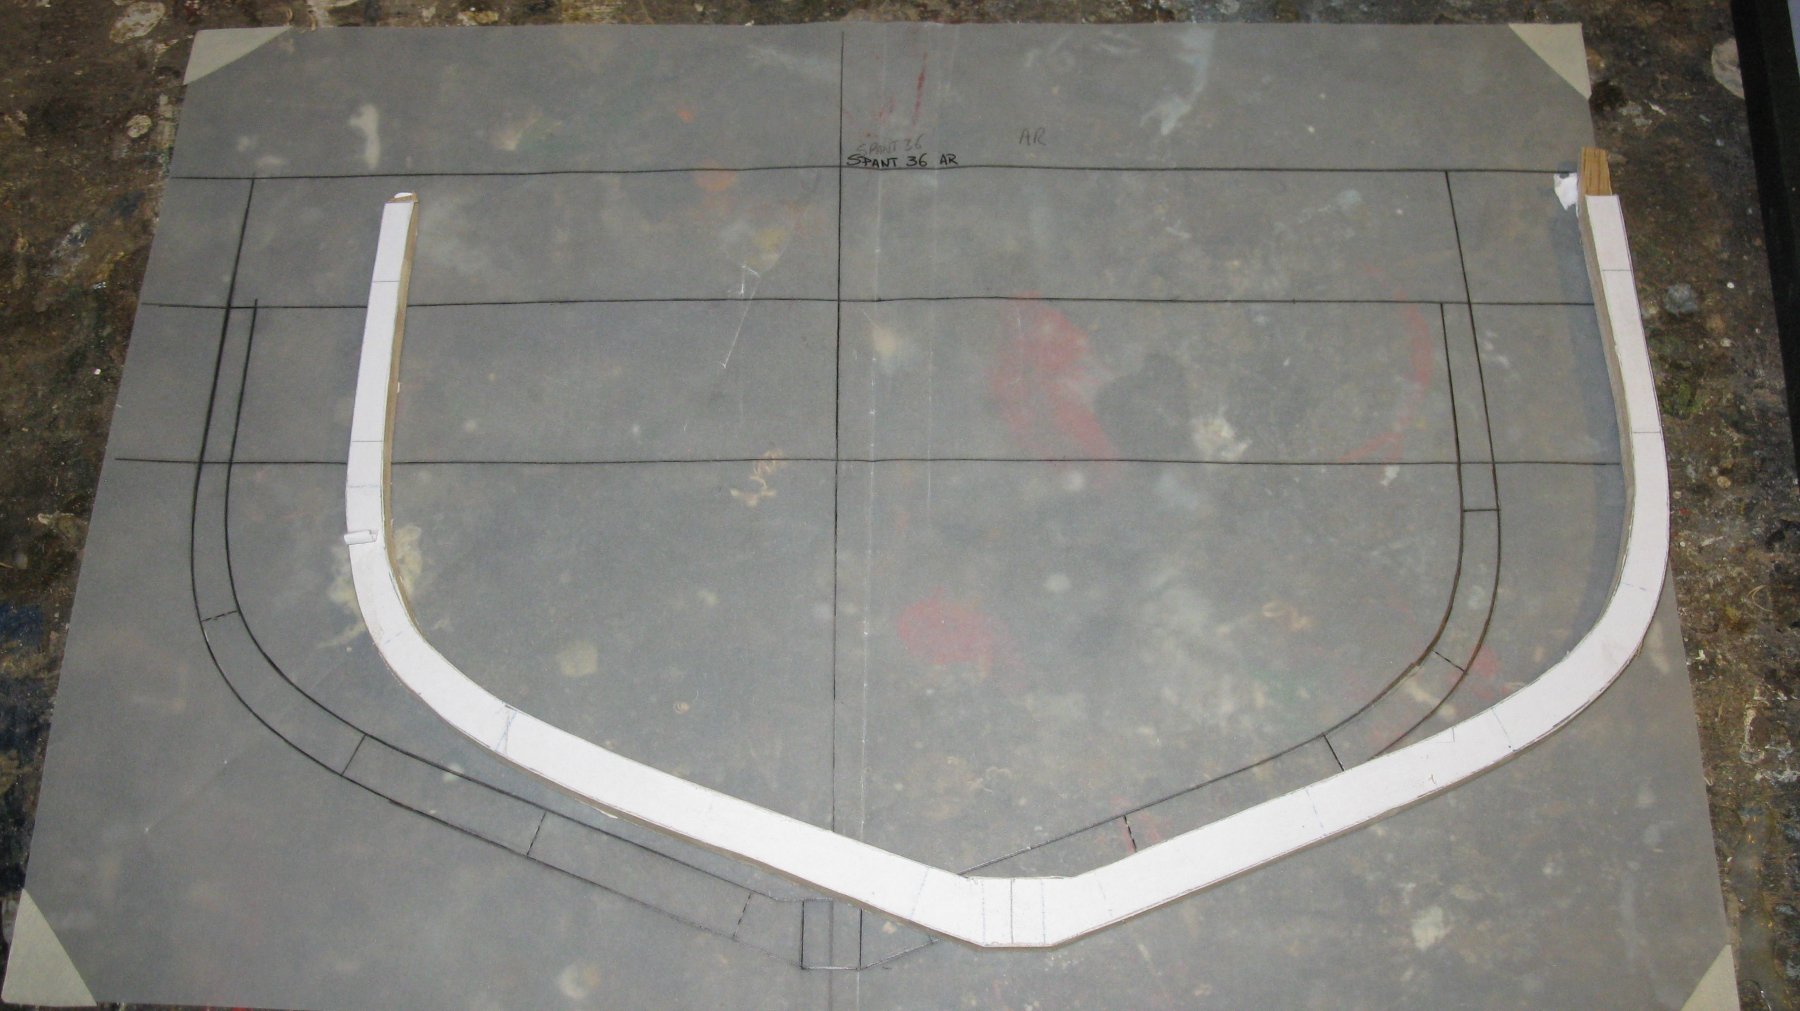
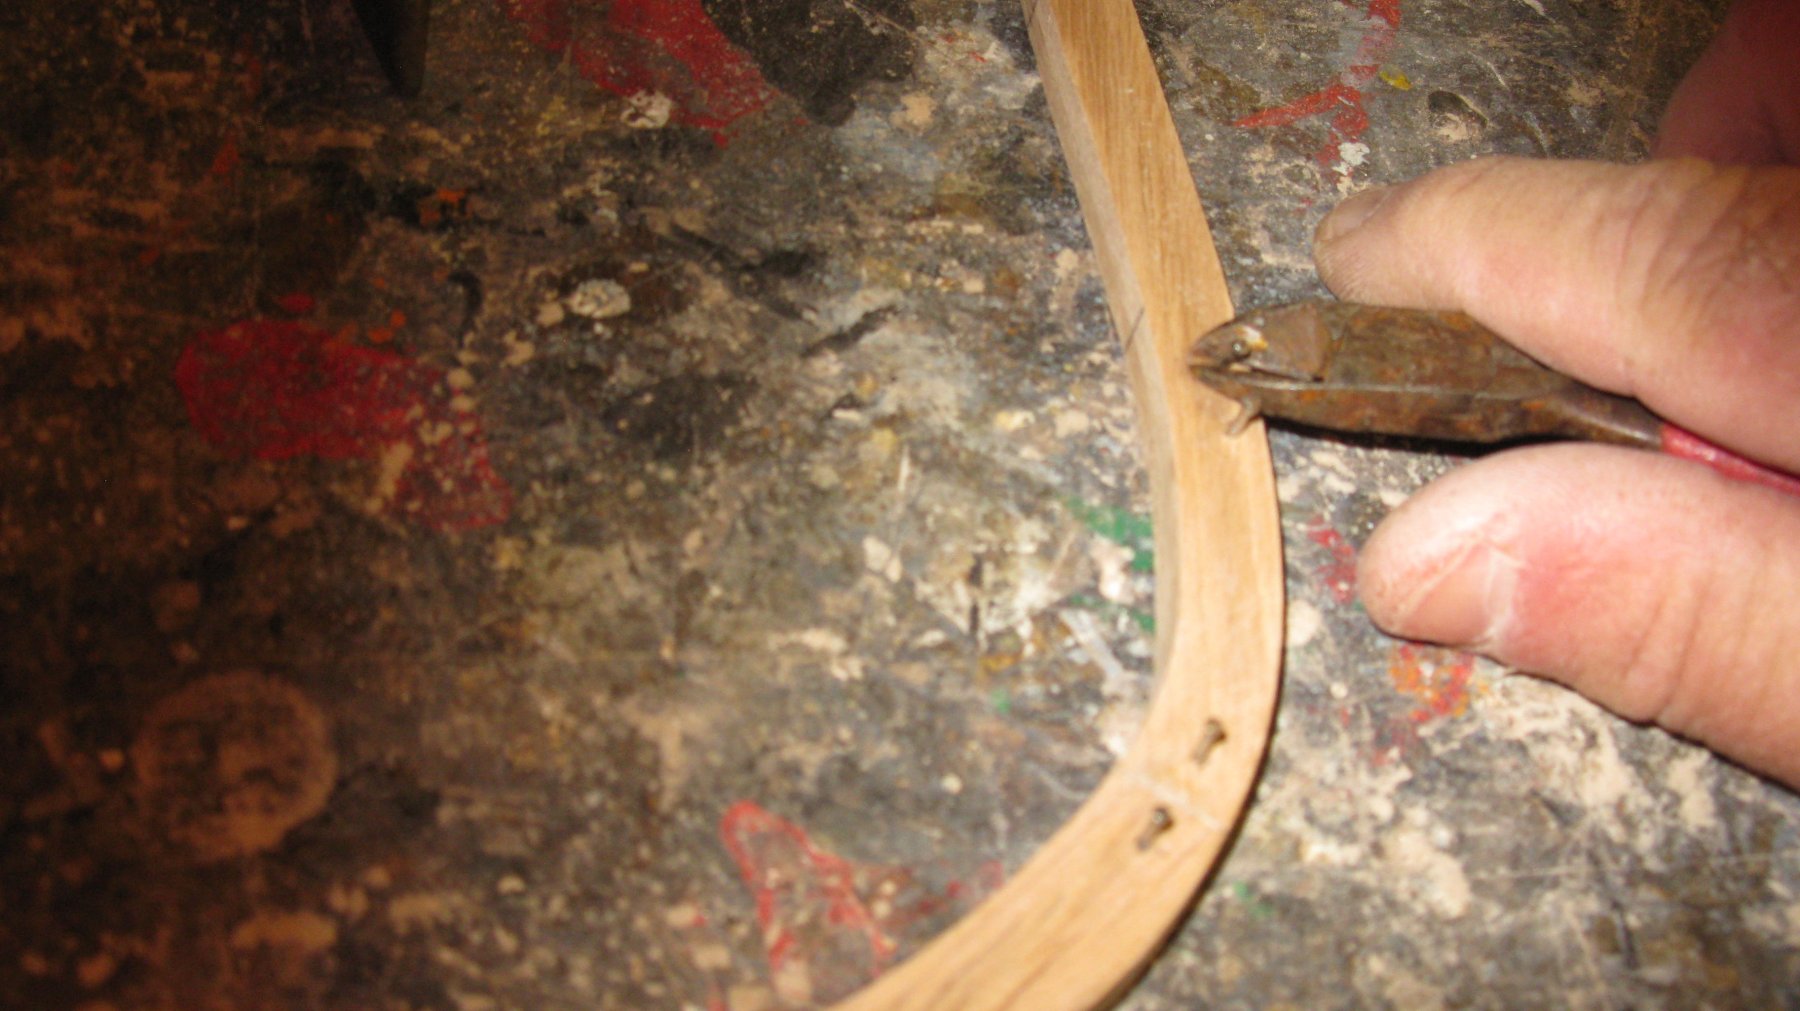
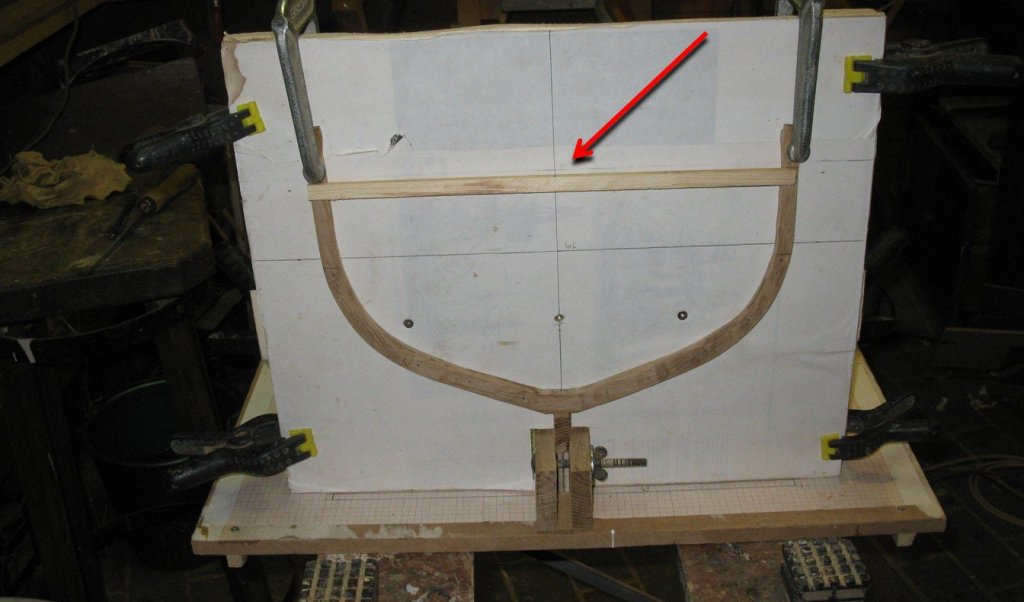
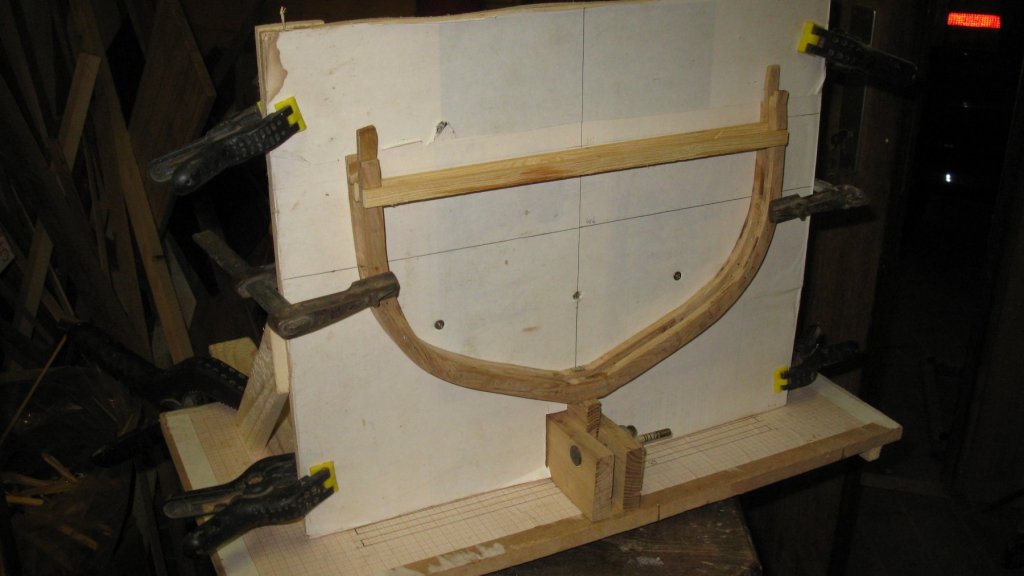
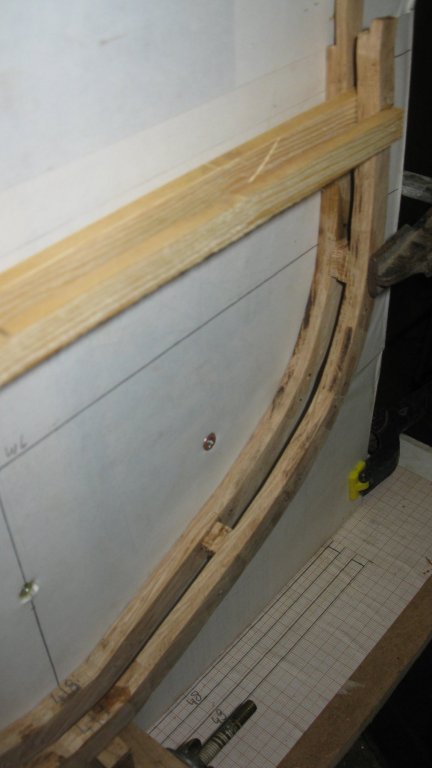
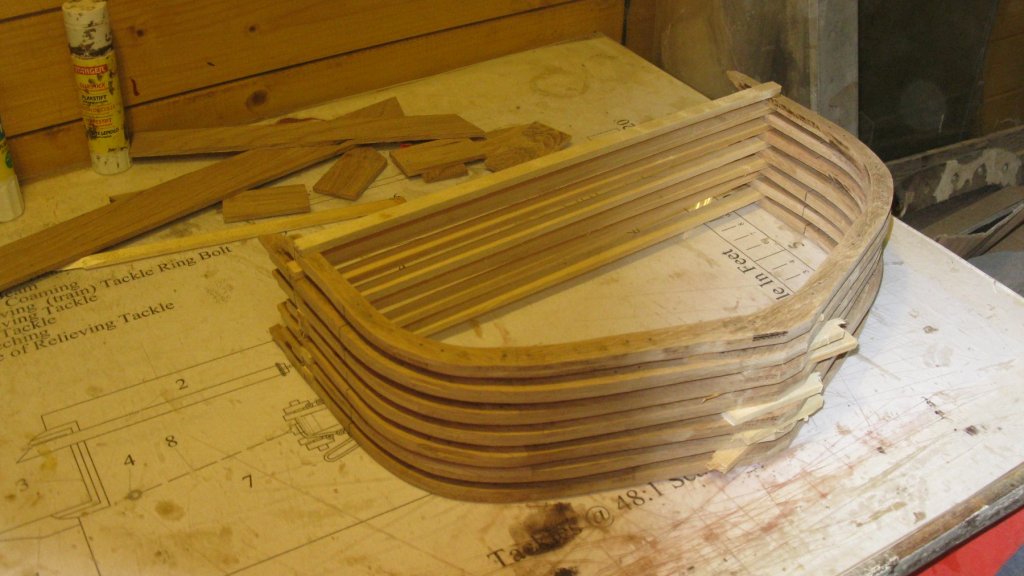
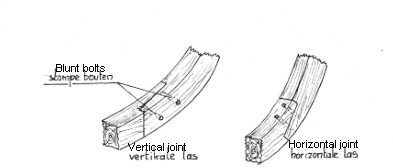
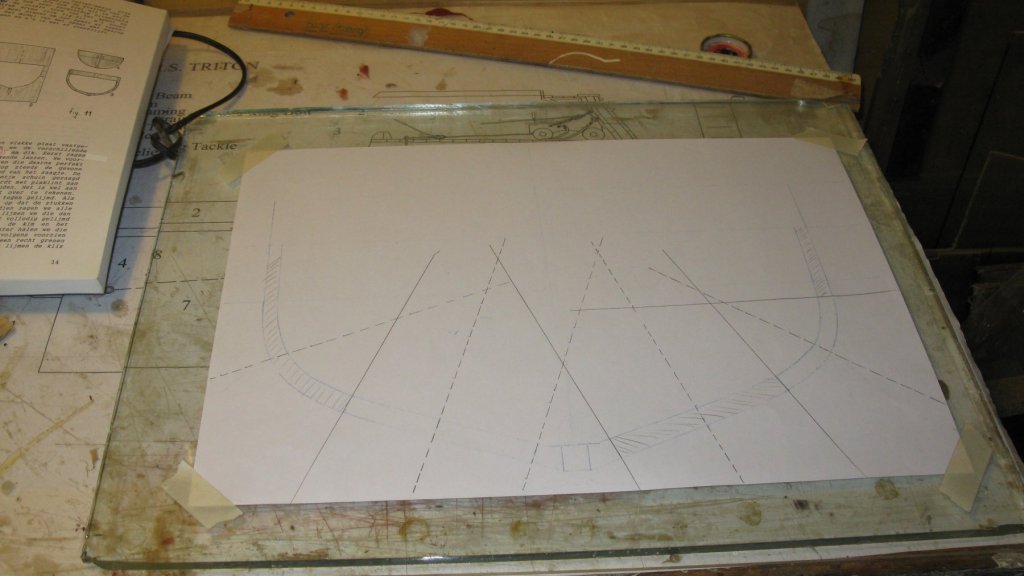
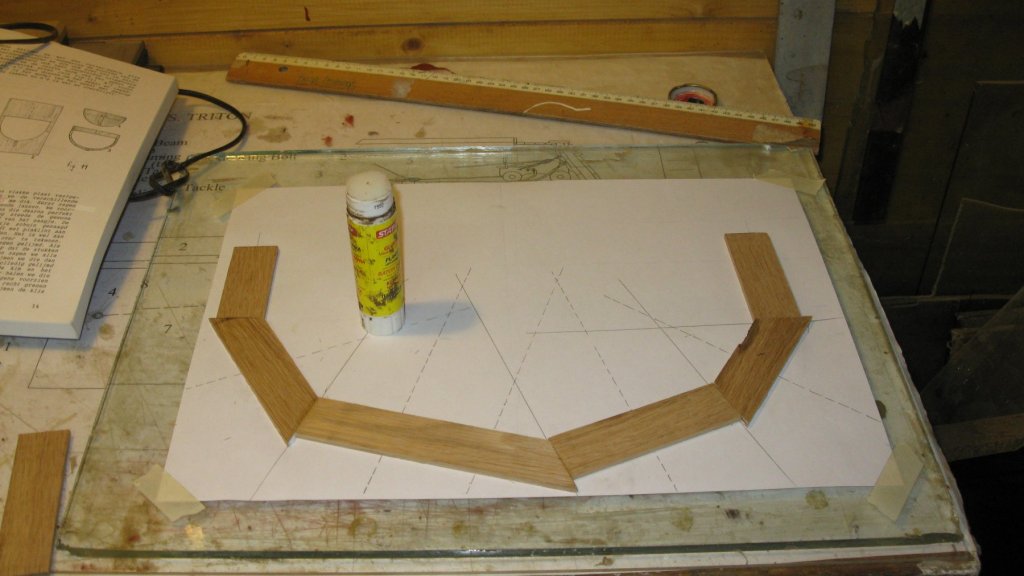
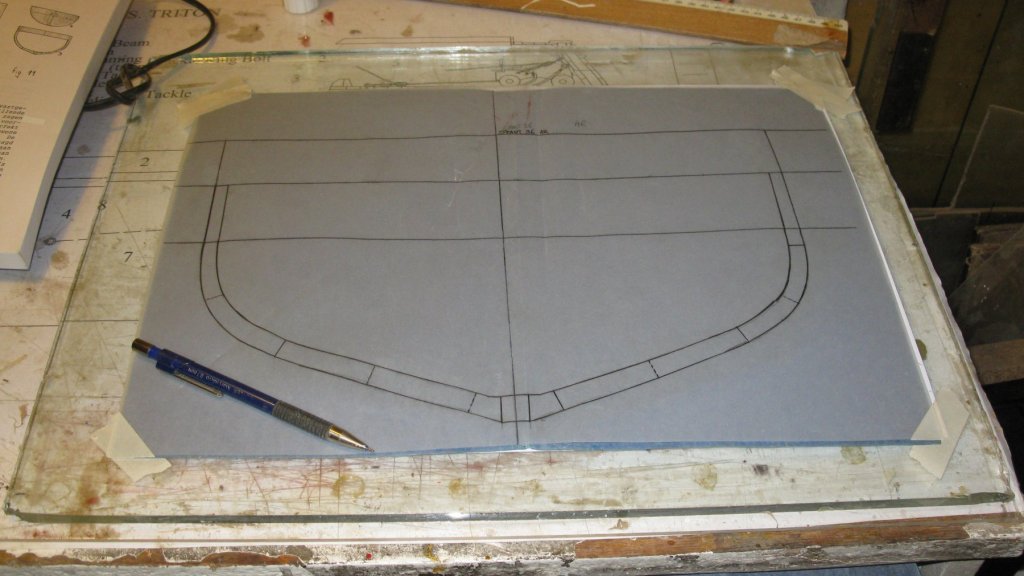
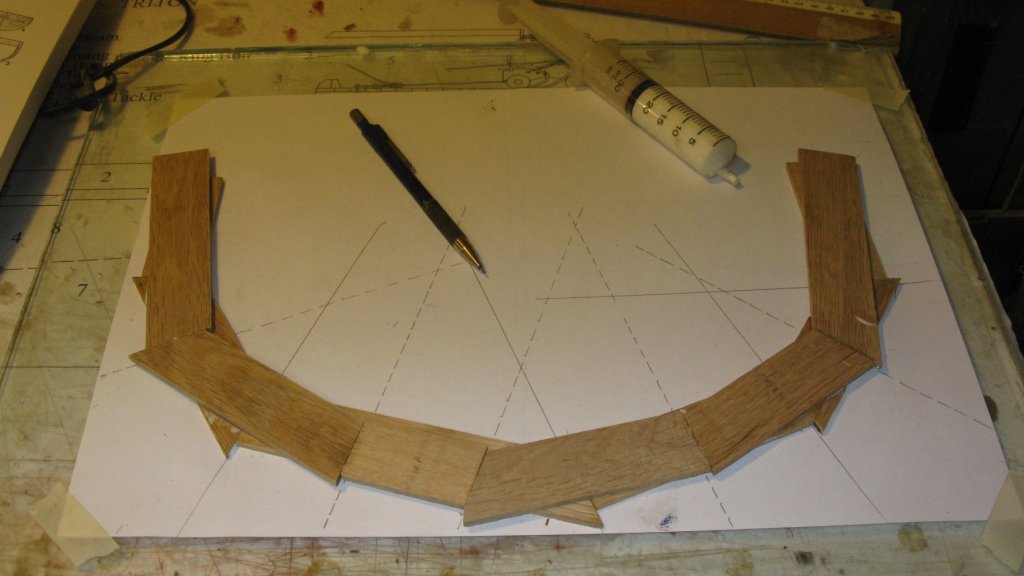
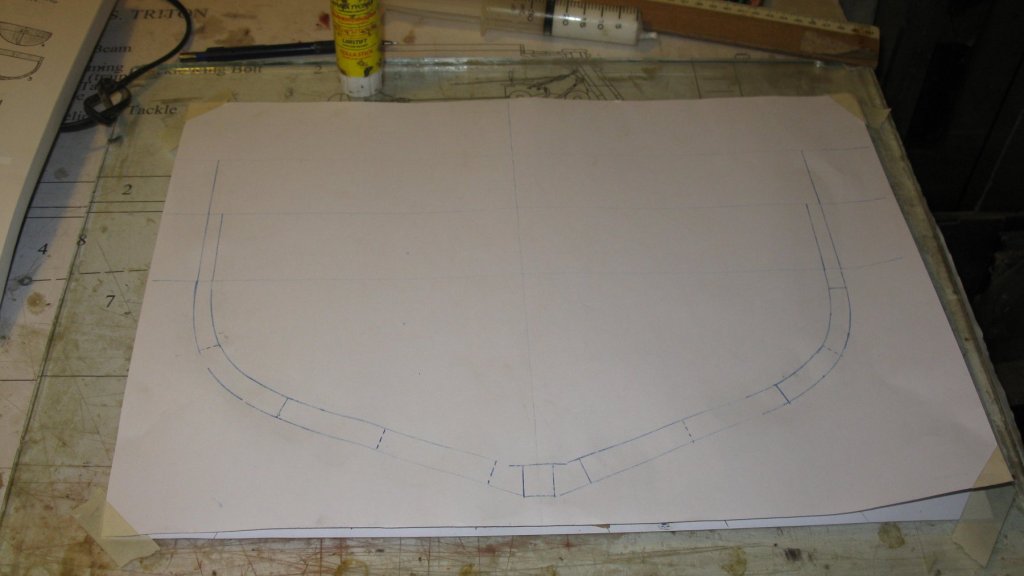
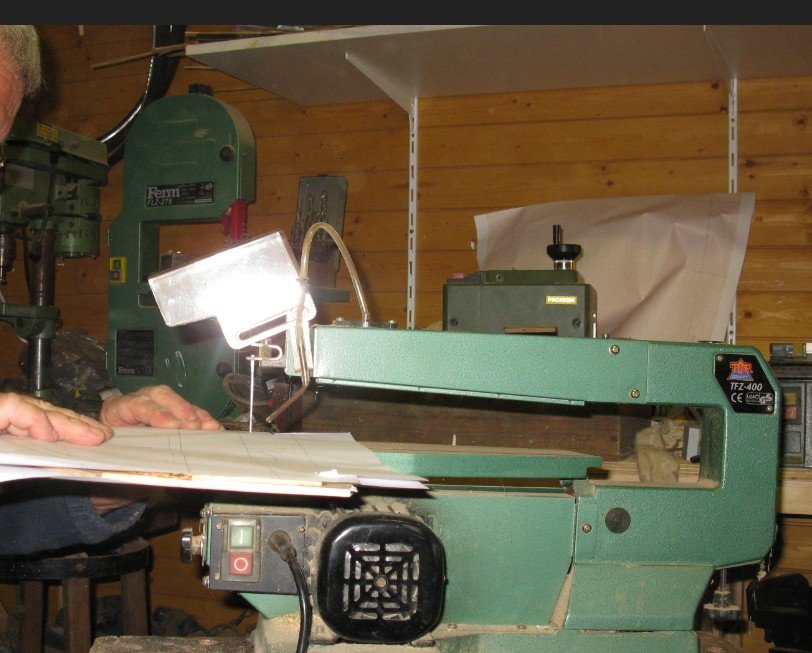
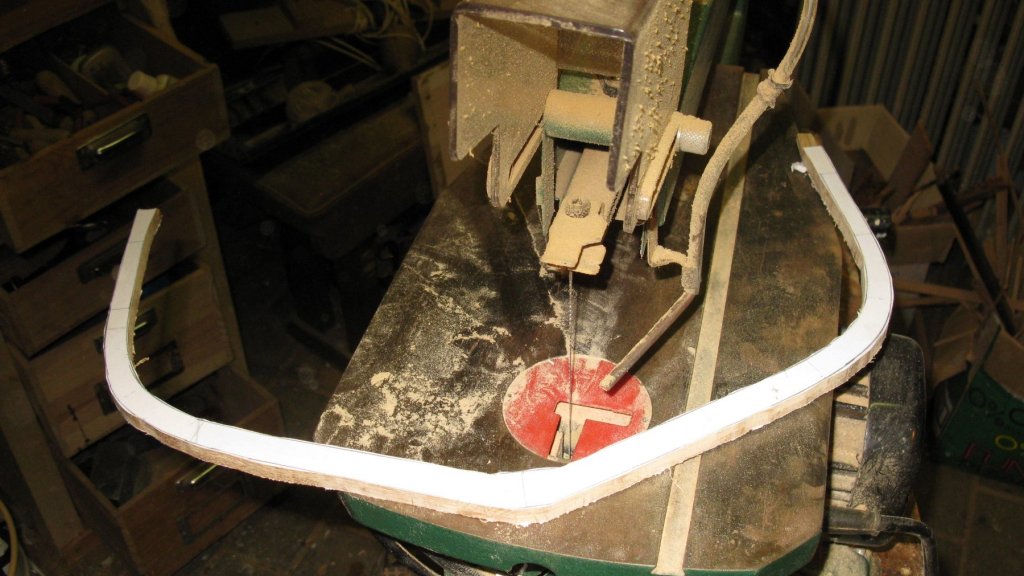
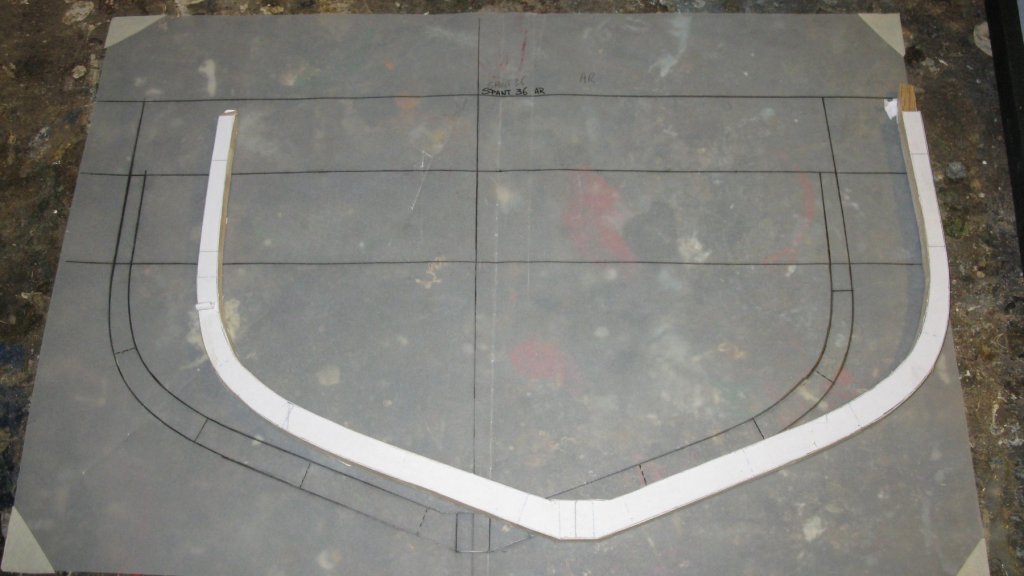
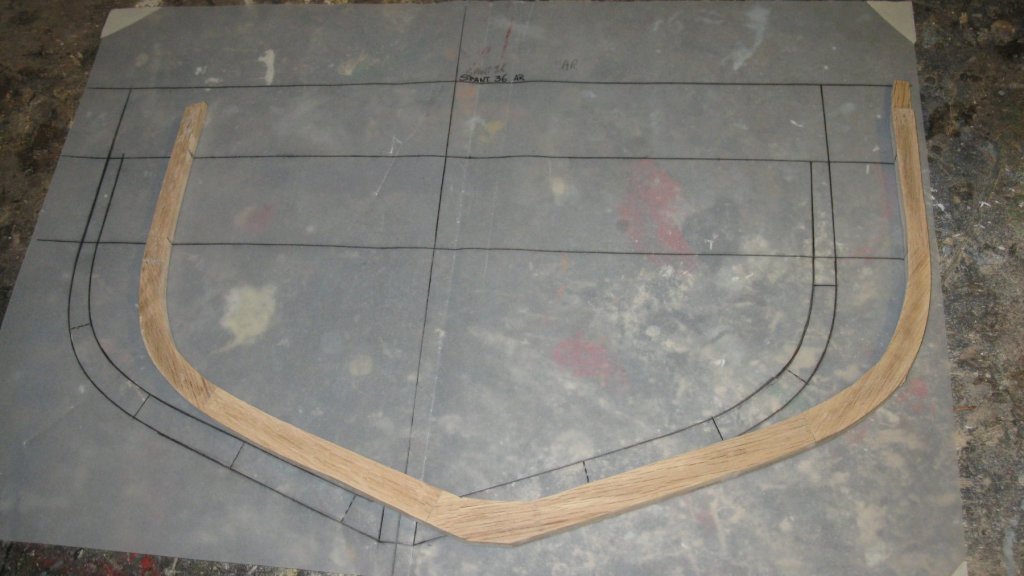
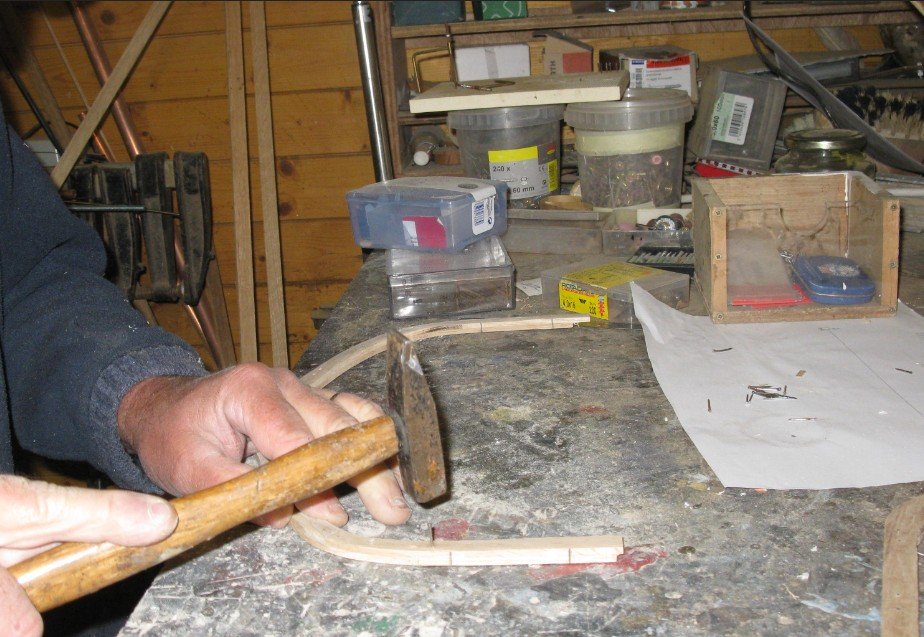
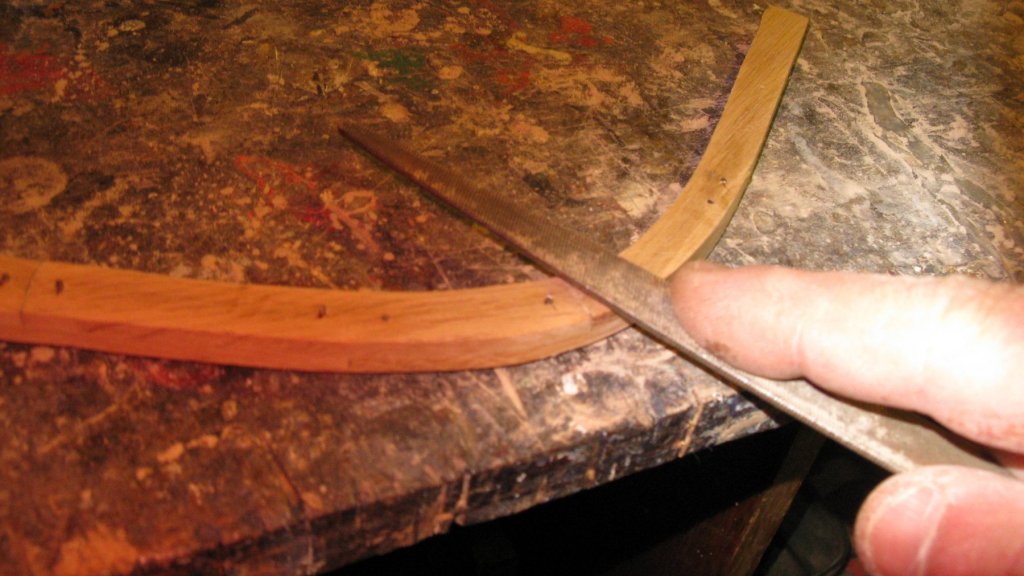
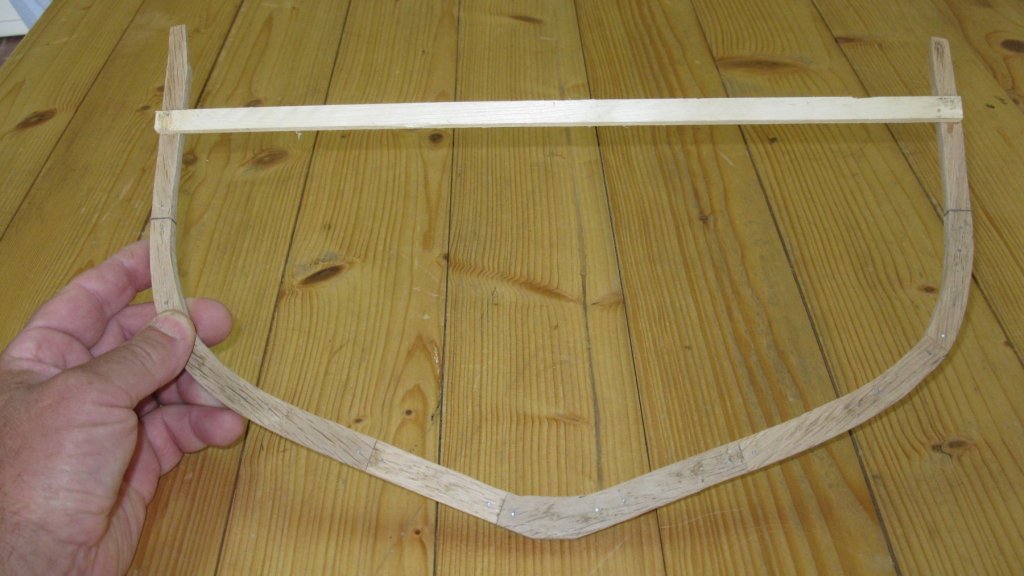
Part 4: The frames The building method of frames for smacks in the United Kingdom was usually with one layer of futtocks which were assembled with horizontal or vertical joints. I will build my cross section in the Belgian way with two layers of futtocks like described in the practicum of Mr Verleene. I first draw the frame plan on a piece of paper (A3 format) with under it a piece of carbon paper, carbon side on top. In that way the picture of the frame is visible on both sides of the paper. I lay the frame plan on a piece of glass to have a perfect plane surface to glue my frame. I glue the different parts of the bottom futtock with paper glue on the paper. To make sure that there is a full overlap of the upper futtocks with the bottom futtocks, I draw the frame outline on the bottom frame with the help of carbon paper. Then I glue the second layer of futtocks with wood glue. On top of the frame I glue another copy of the frame plan and cover the whole with a second glass plate and some weights. Next day the glue is dry and the frames can be sawn out. A sawn out frame. And sanded. On Belgian built smacks the two layers of futtocks were firmly riveted one to another with stubby steel bolts. An each side of each joint a bolt was punched. The distance between the two bolts was ± 20 cm. Before placing my bolds I pre drill holes in which I nail small nails. The excesses on each side are pinched off and finally I file the nails until they have a flat surface with the frame sides. I glue a temporally support at the topside of each frame to avoid as much as possible deformation of the frame. G.L. Completed projects: HMS Triton cross section - FINISHED - Scale 1:24 Current projects: Oostends schipje (Ostend shrimper) - scale 1:20 Cross section Fishing Smack - Scale 1/20, POF, approx. 1920


- 219 replies
-
- 20
-
-
- smack
- cross-section
- (and 2 more)
-
Wishing you a speedy recovery. G.L.
-
Patrick, is that the kind of stair you are searching for? G.L.
- 756 replies
-
- 2
-
-
- galleon
- golden hind
- (and 2 more)
-
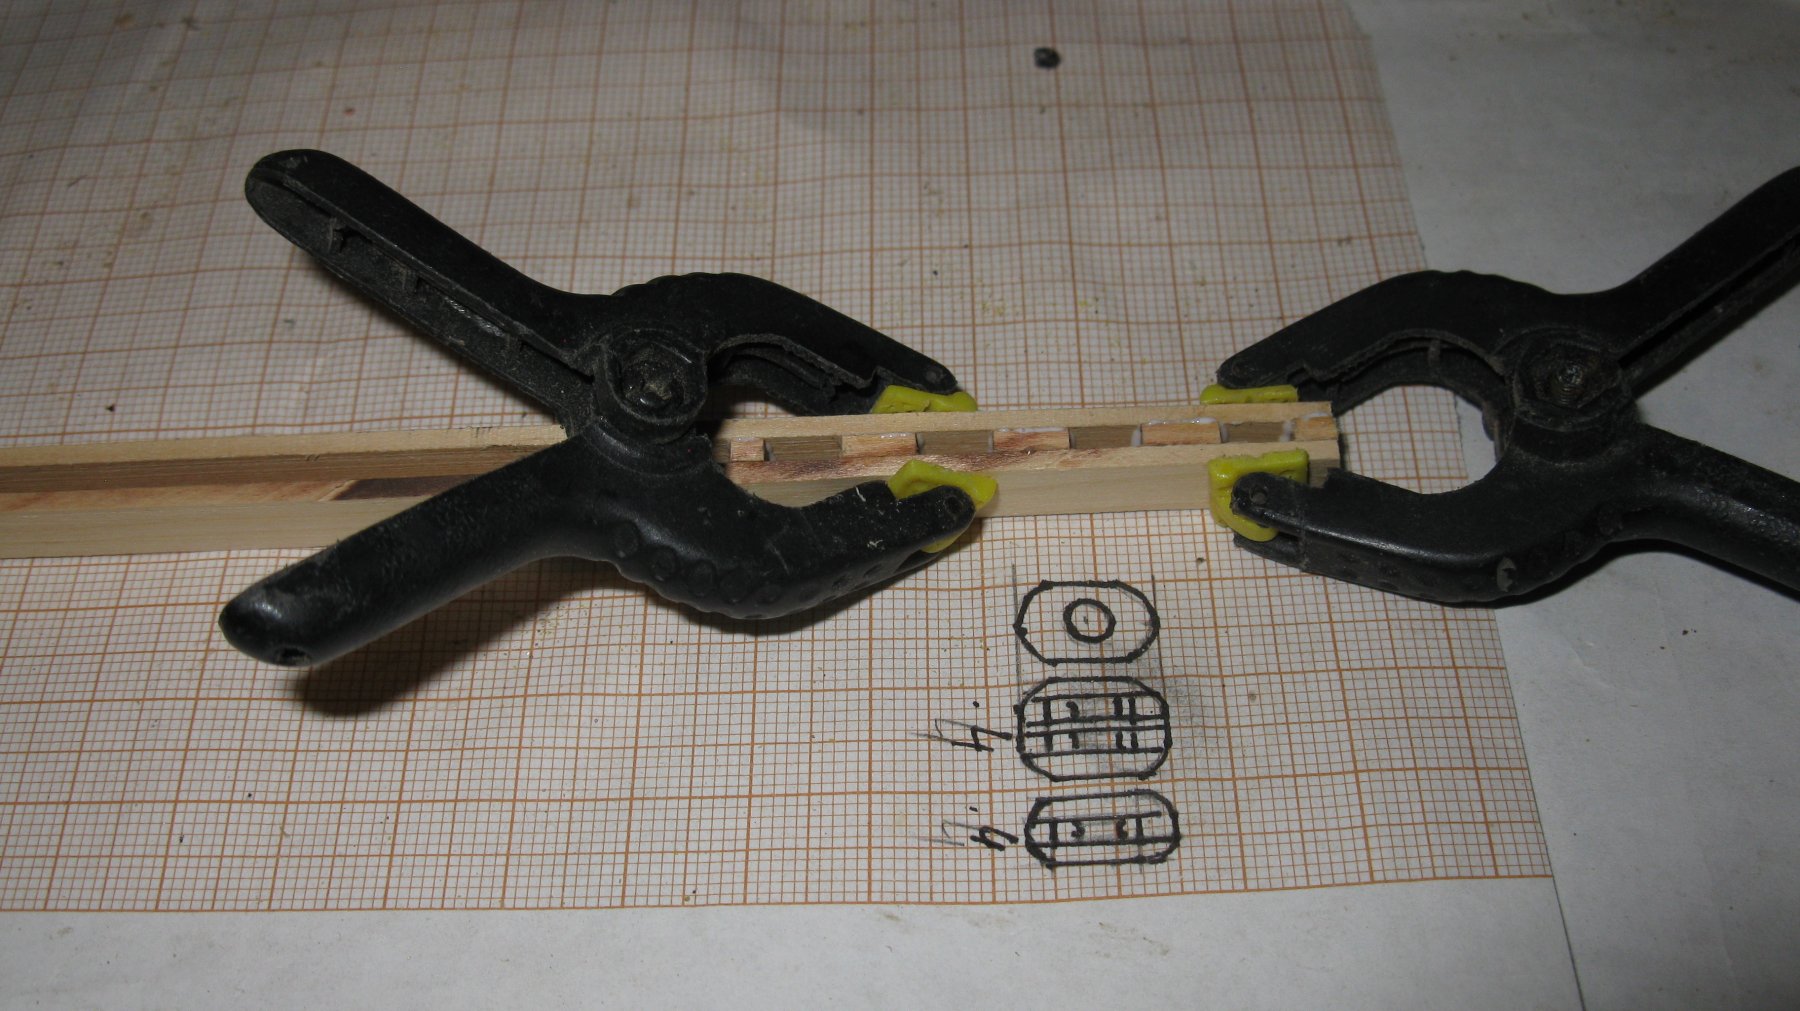
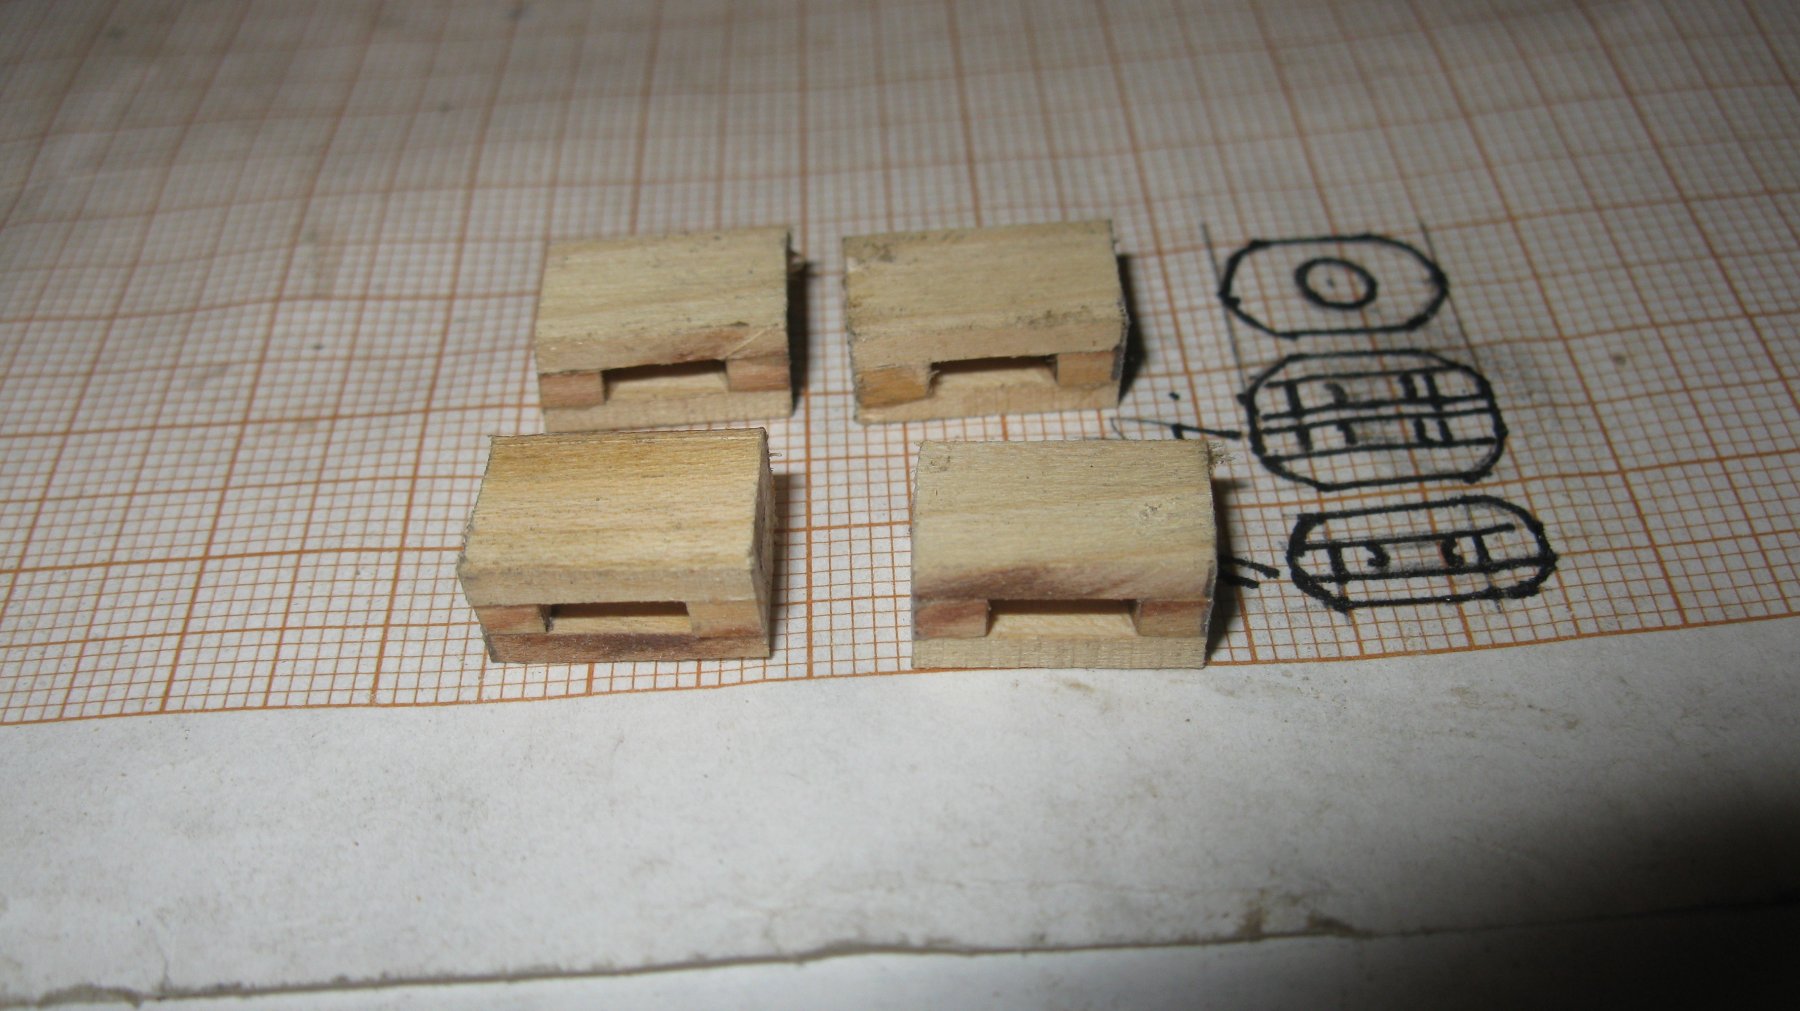
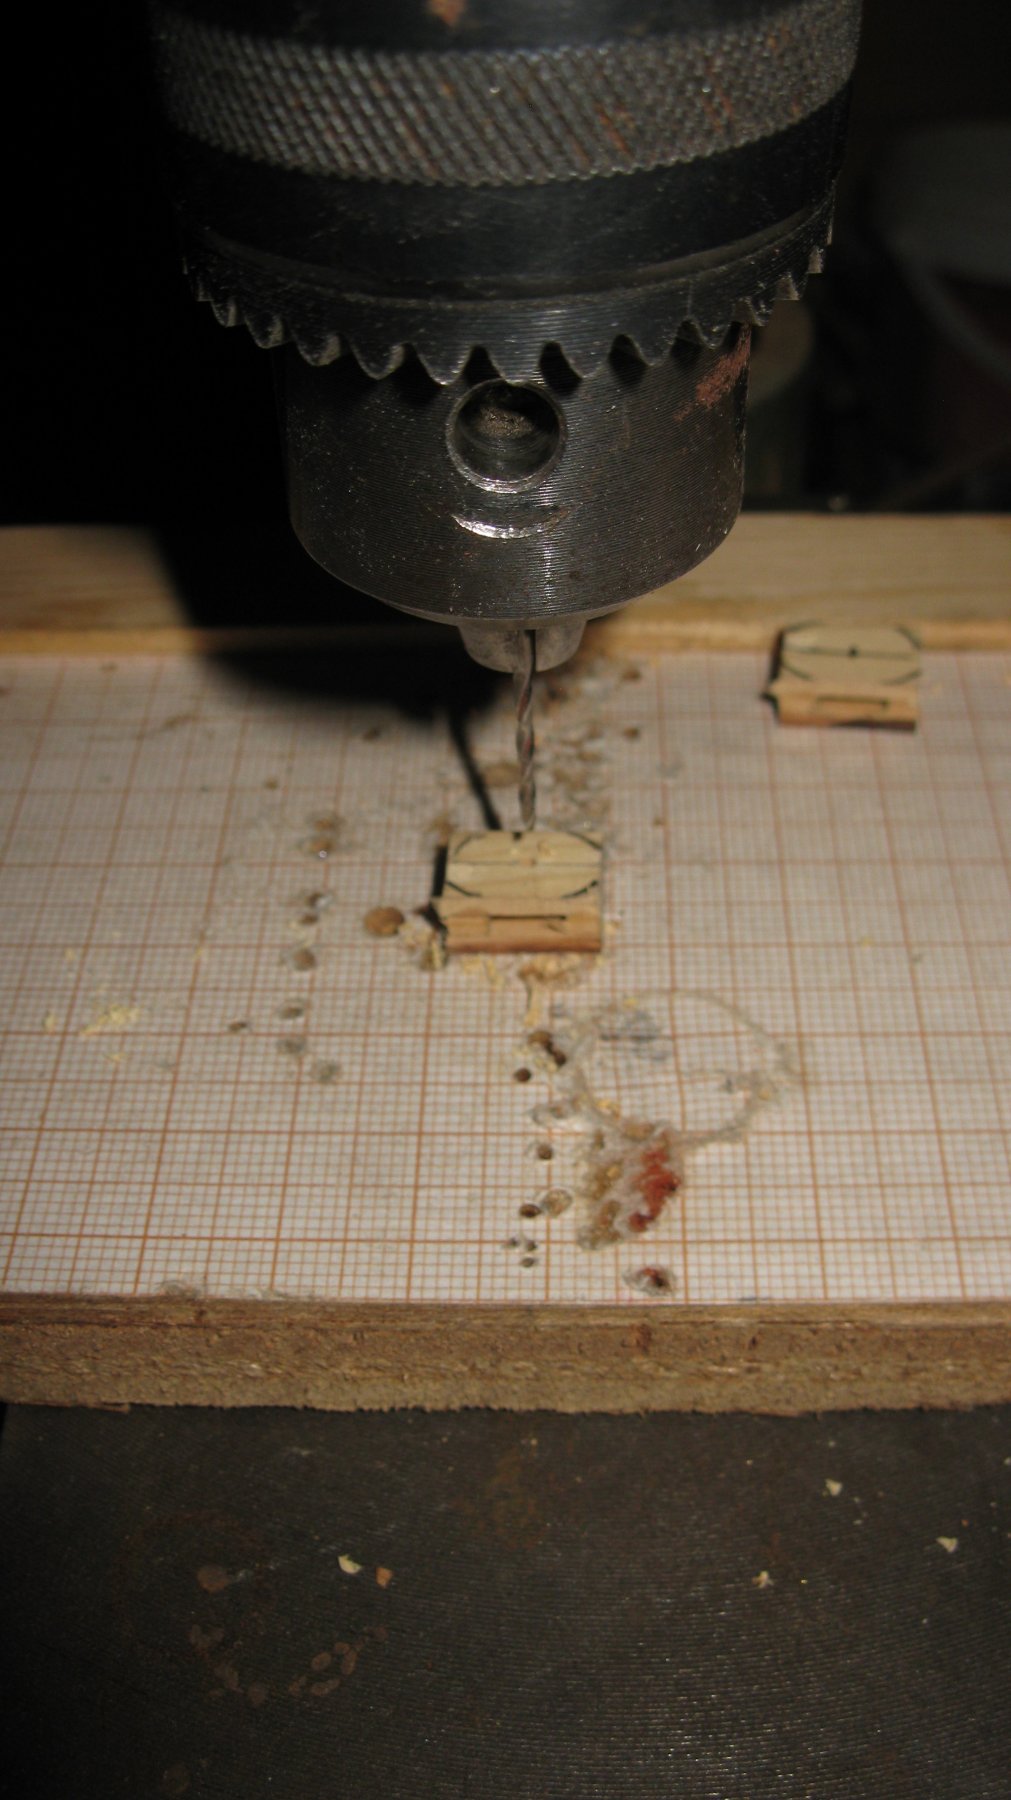
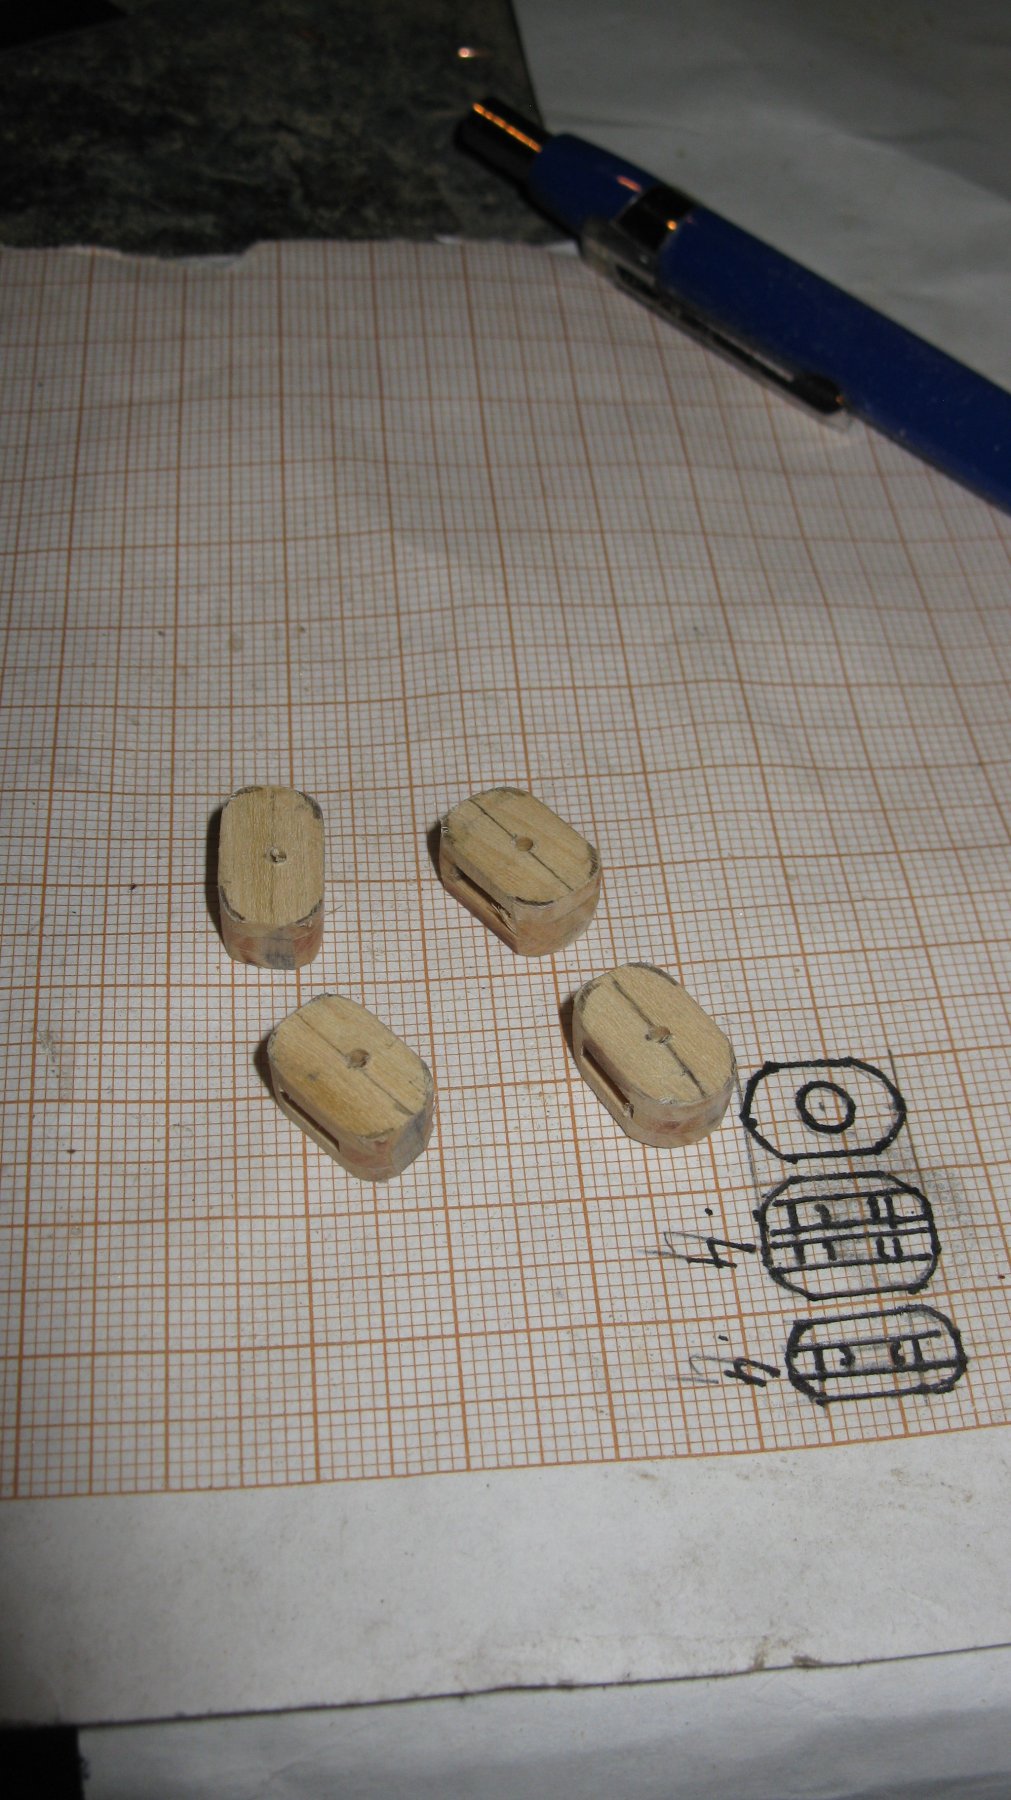
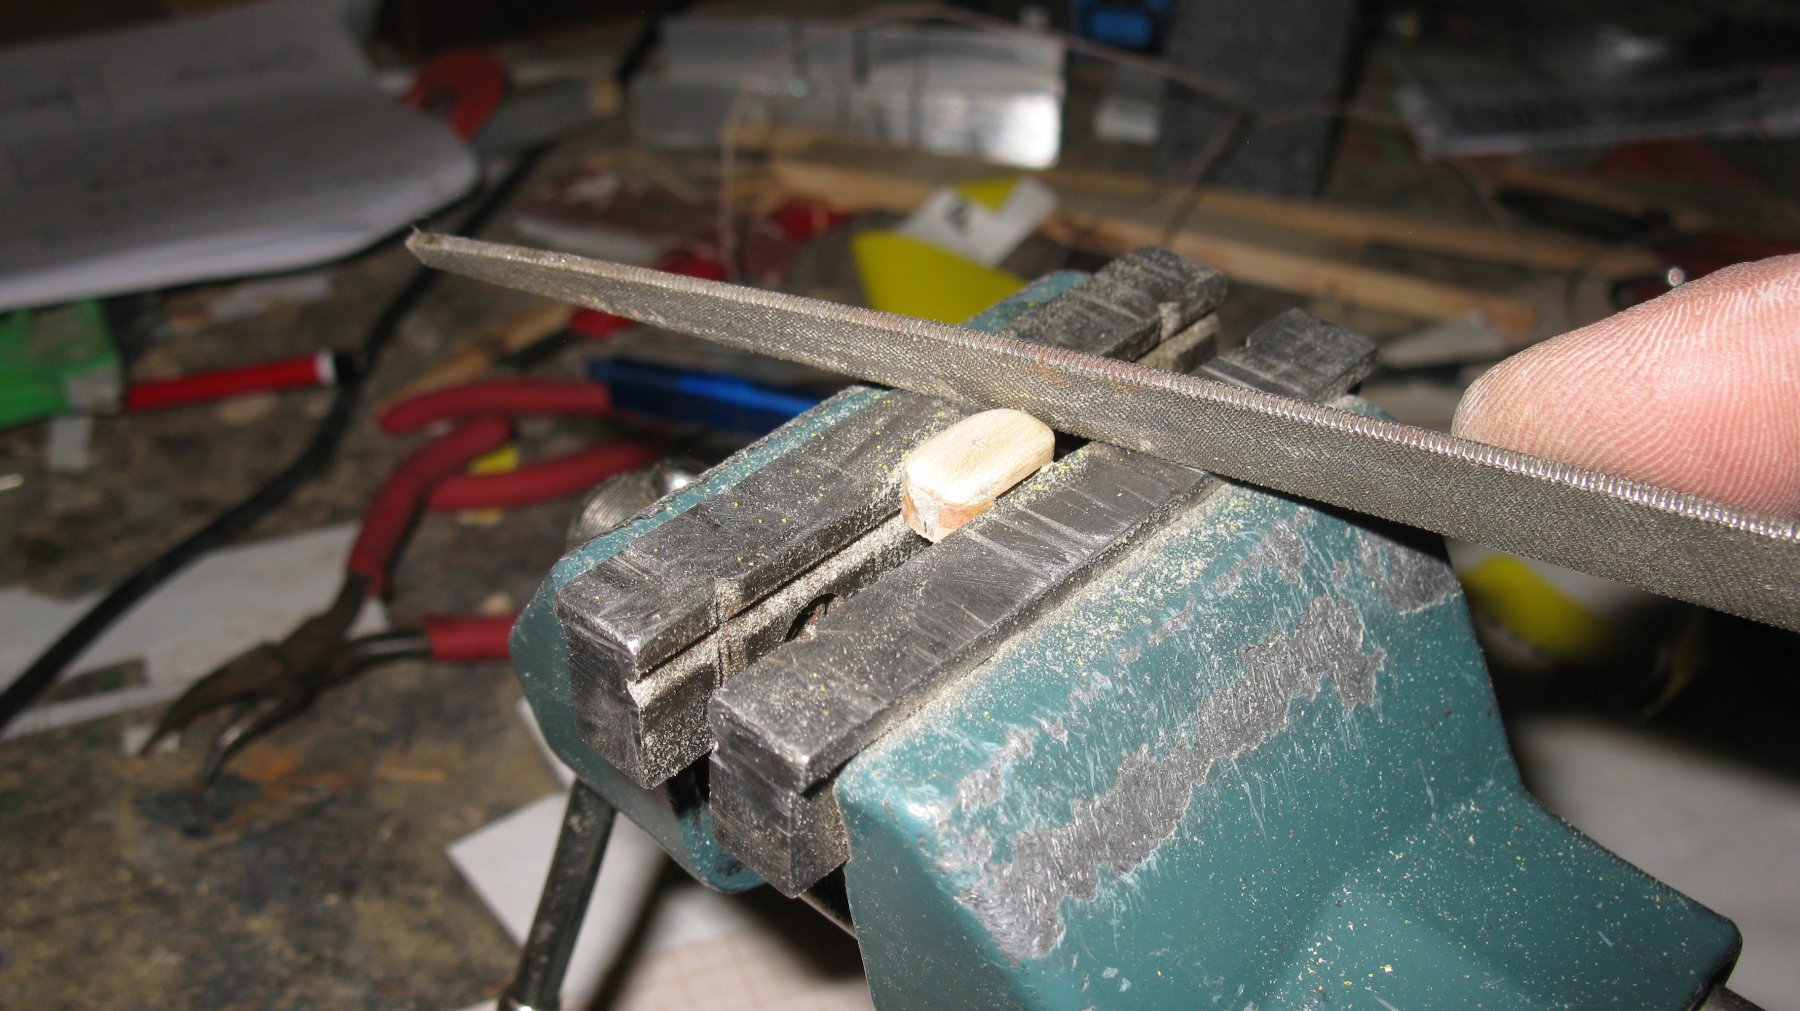
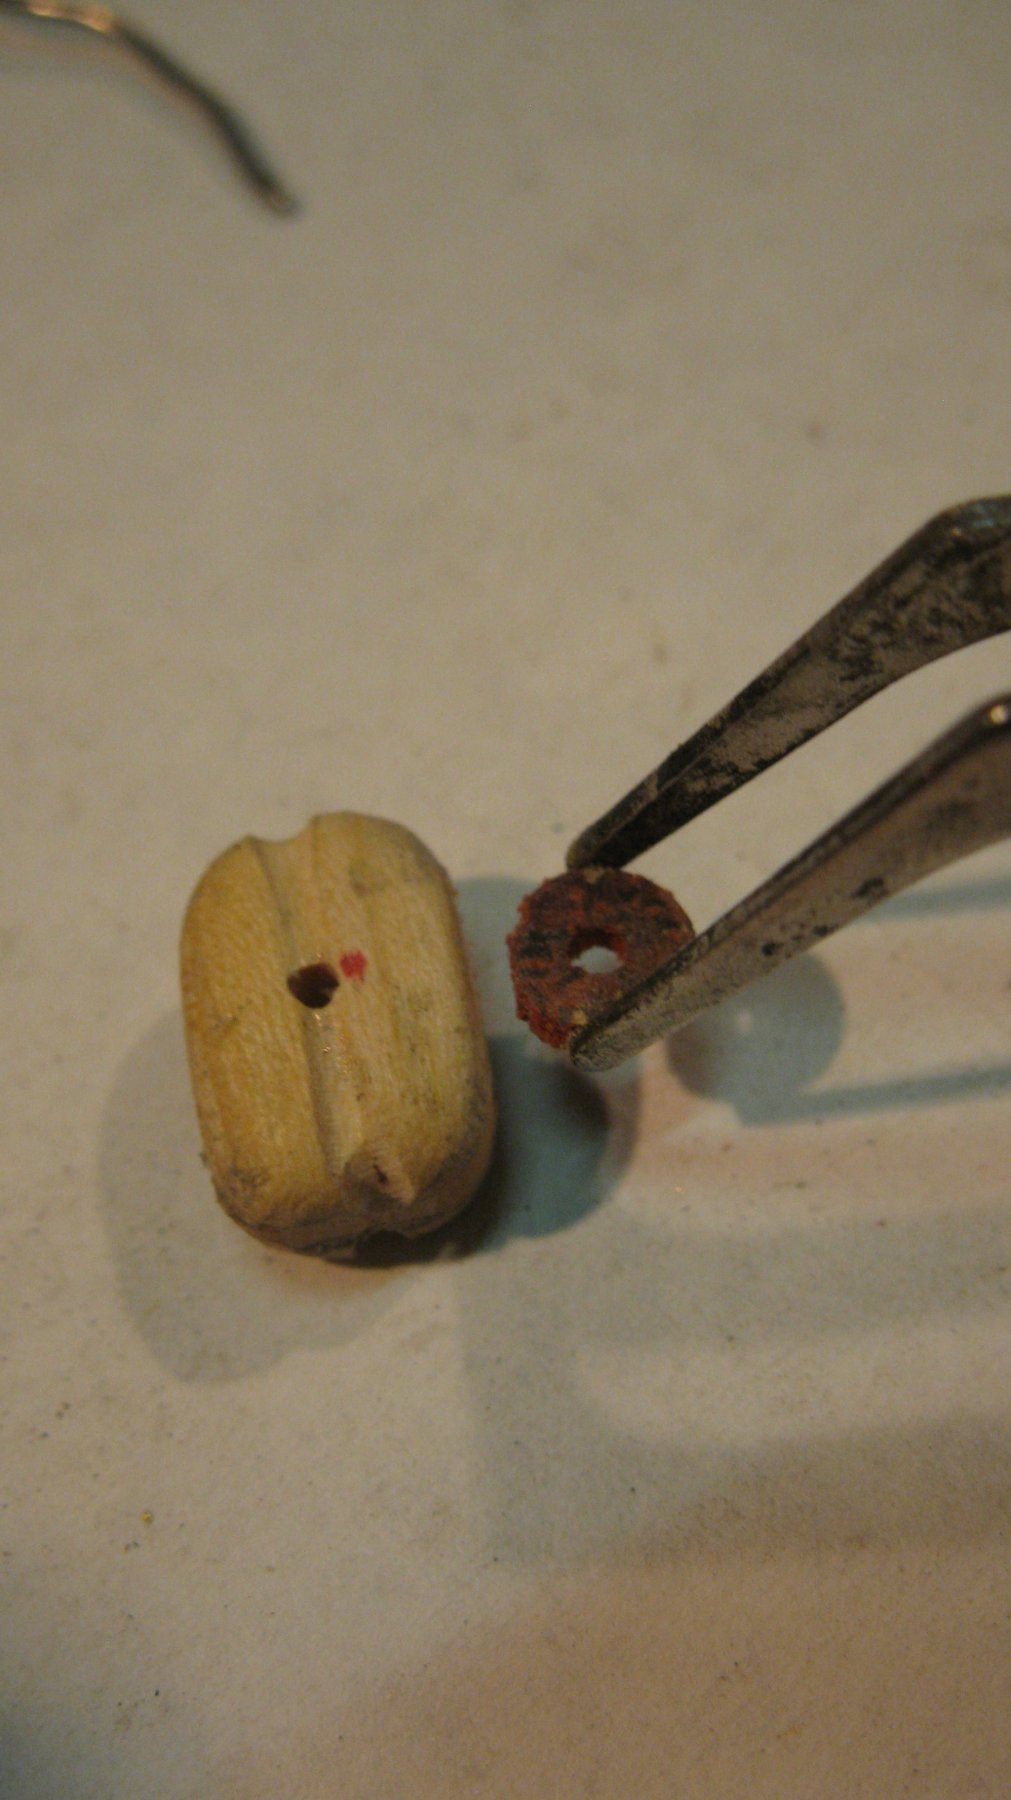
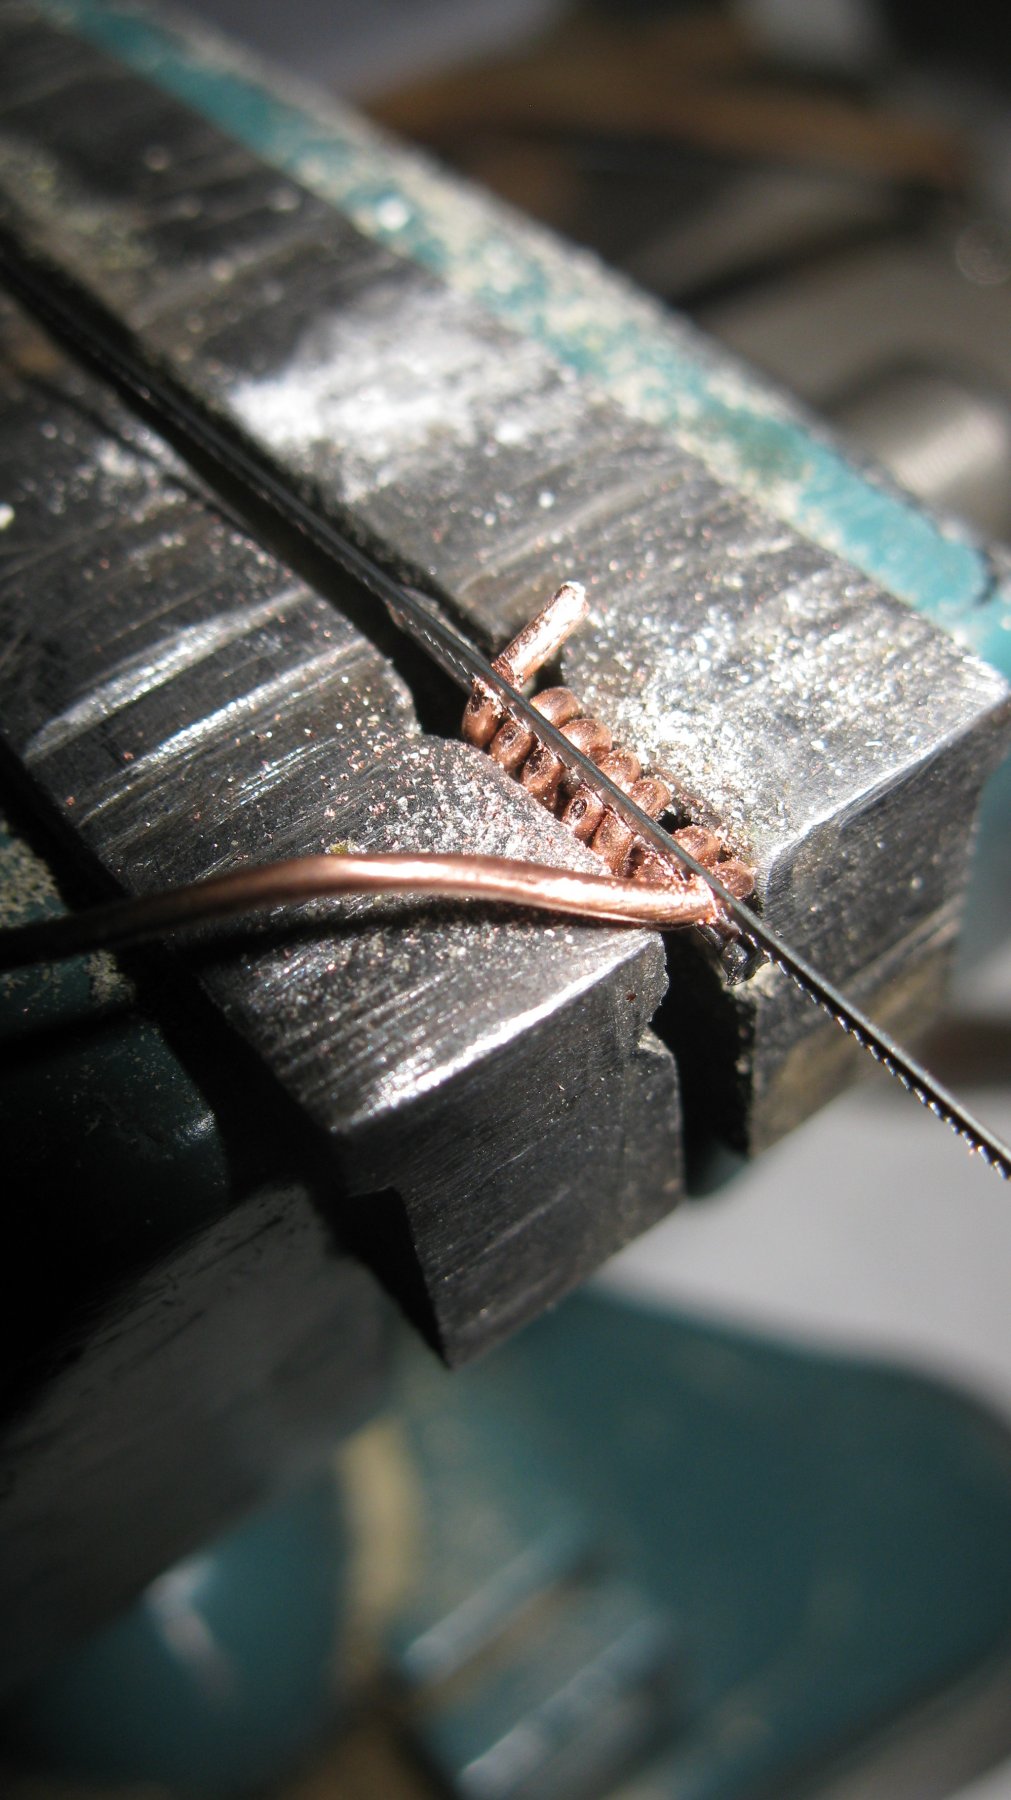
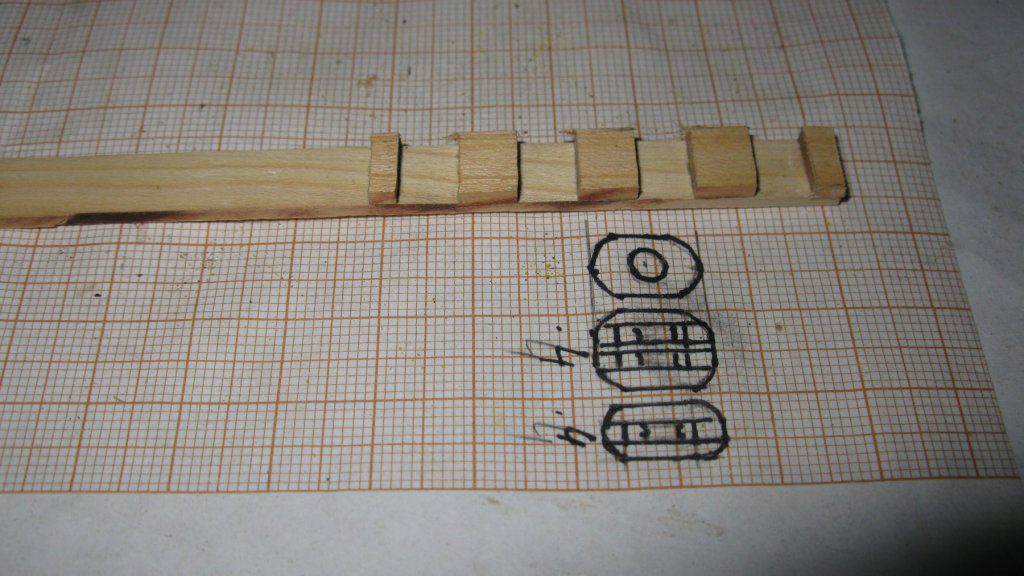
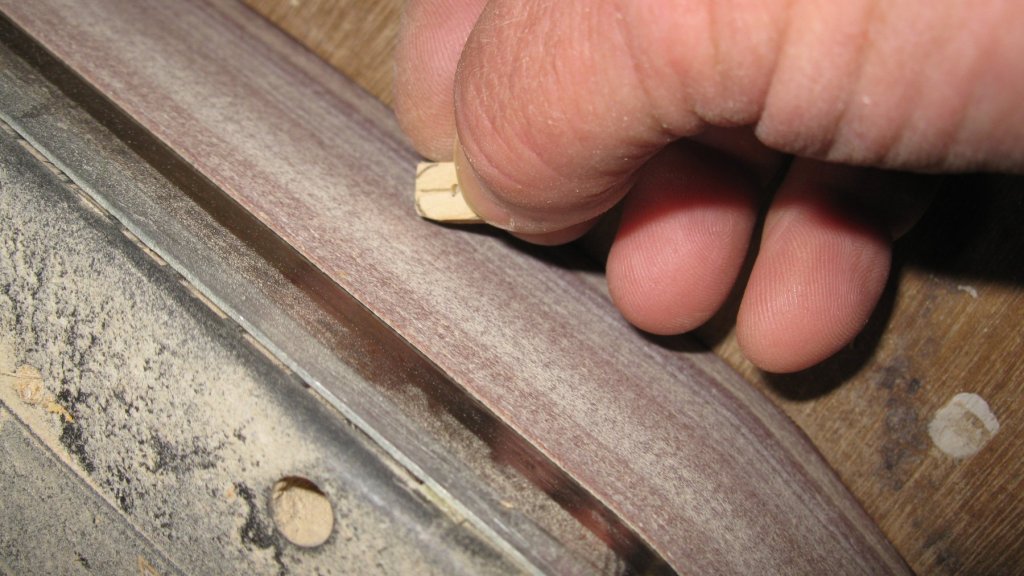
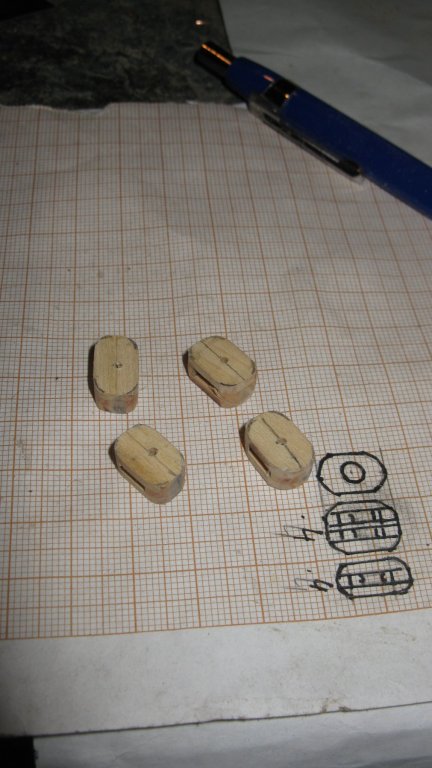
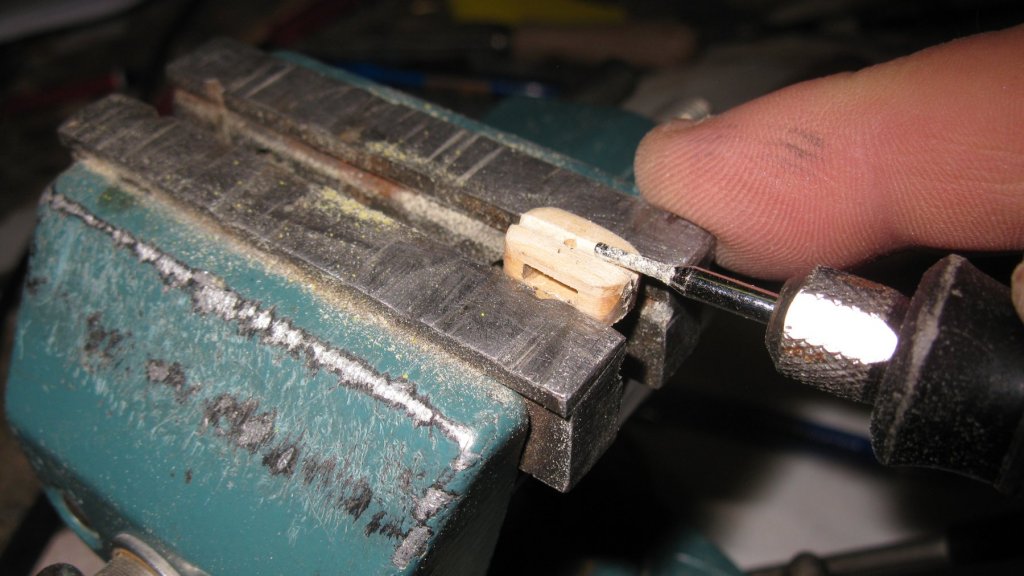
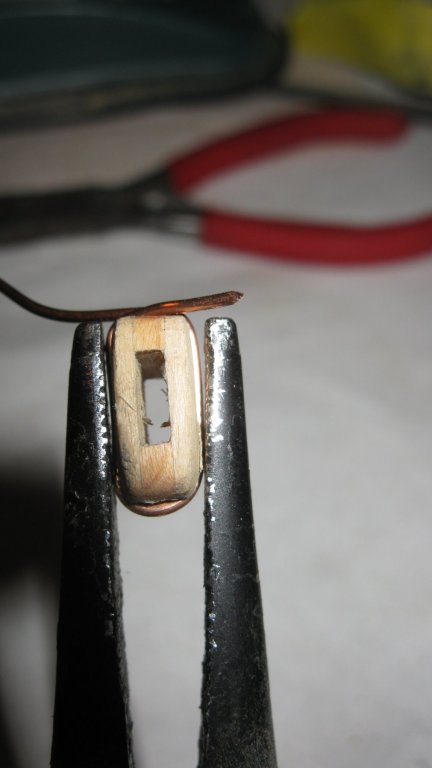
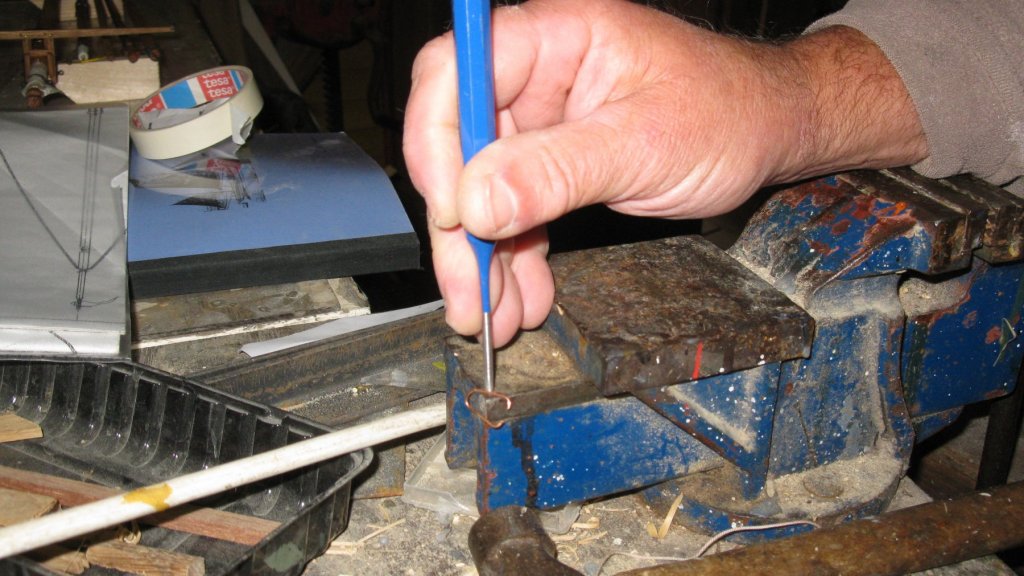
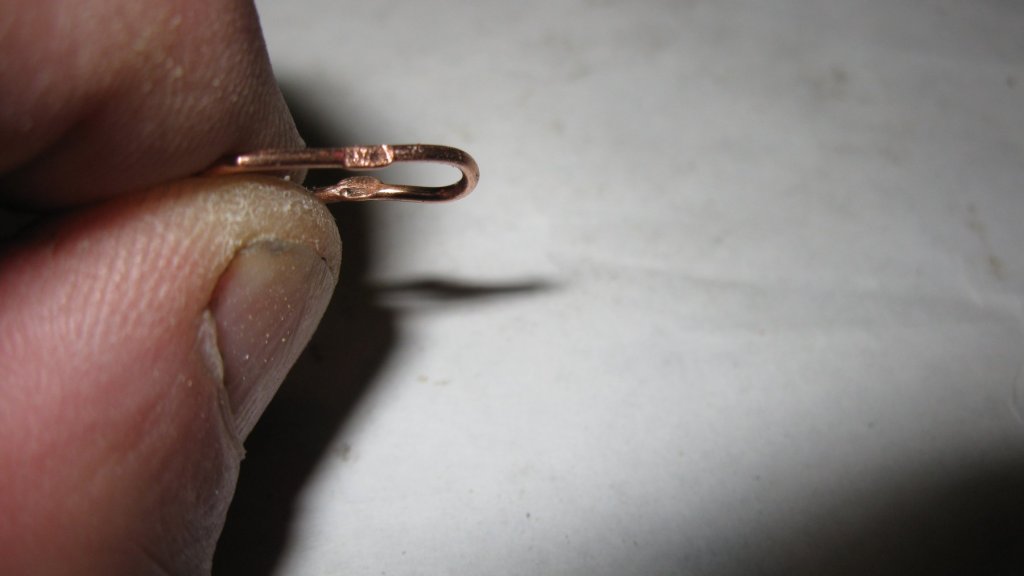
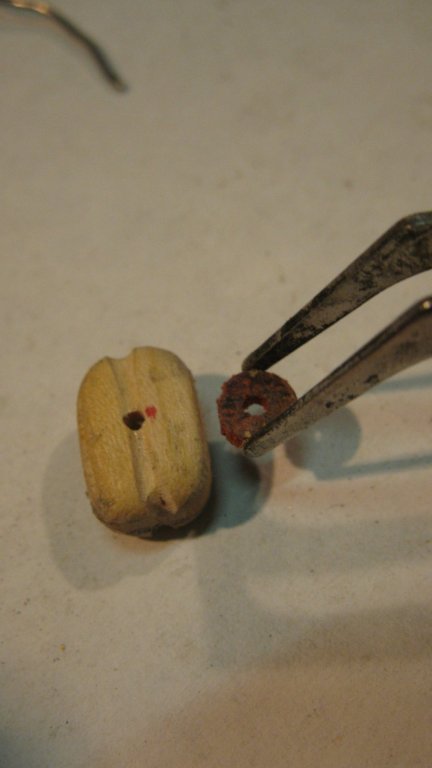
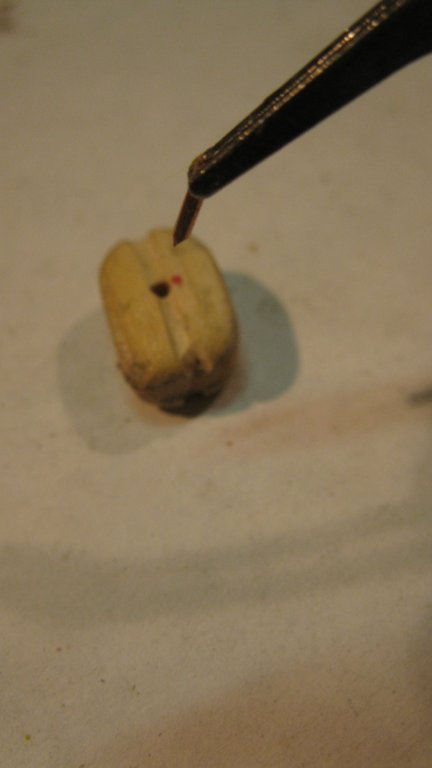
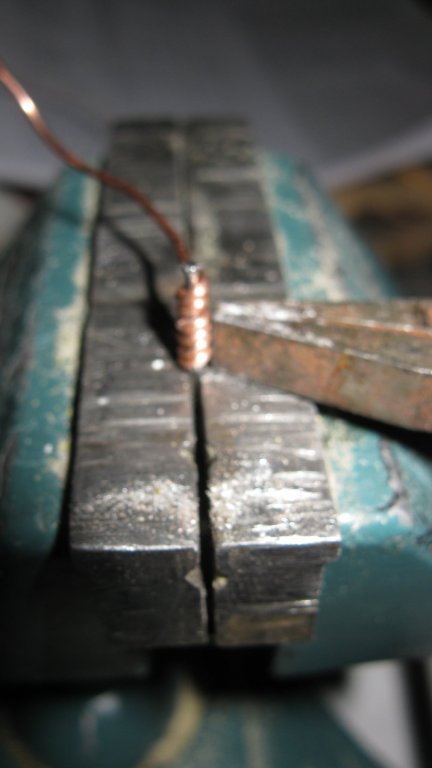
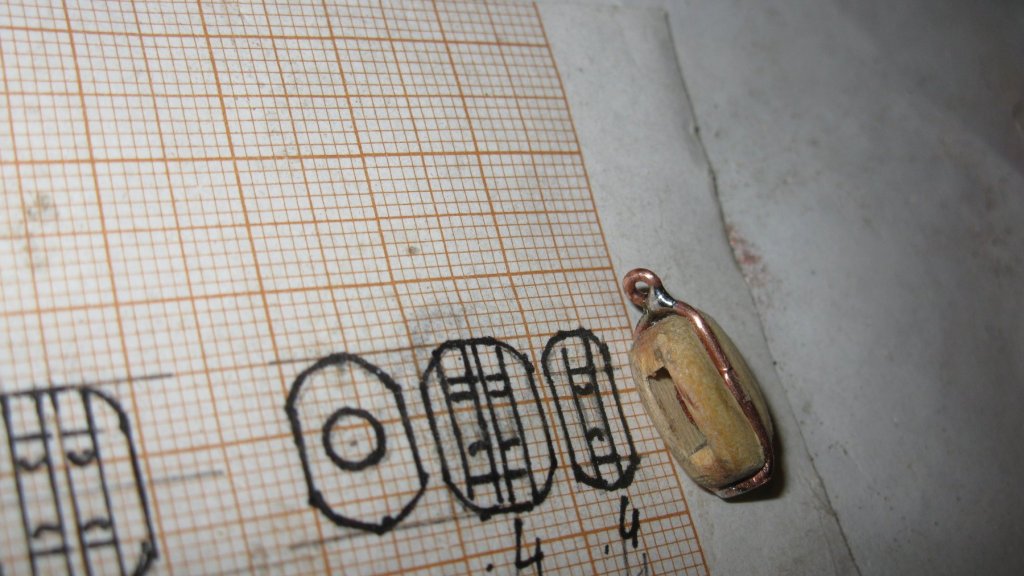
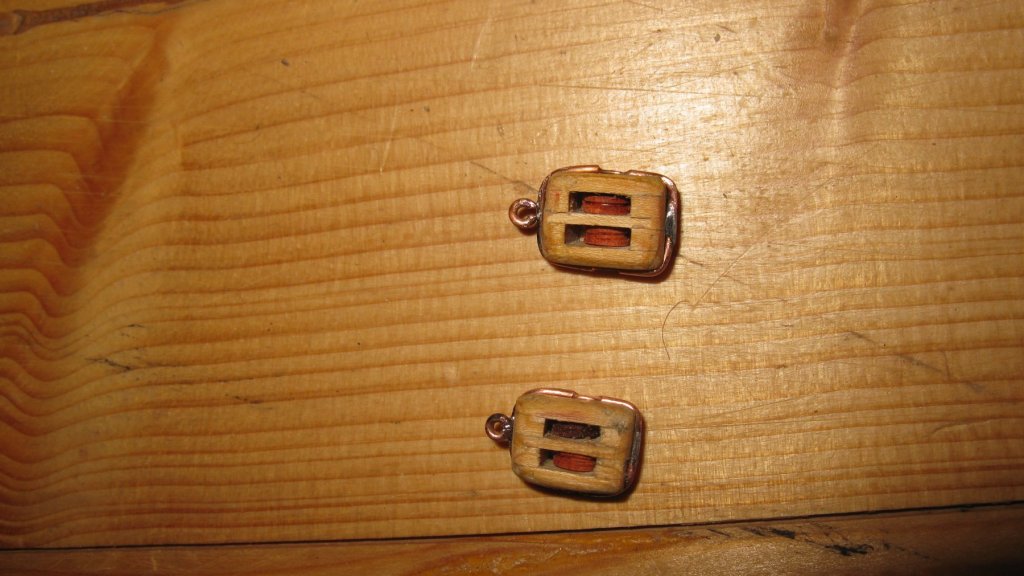
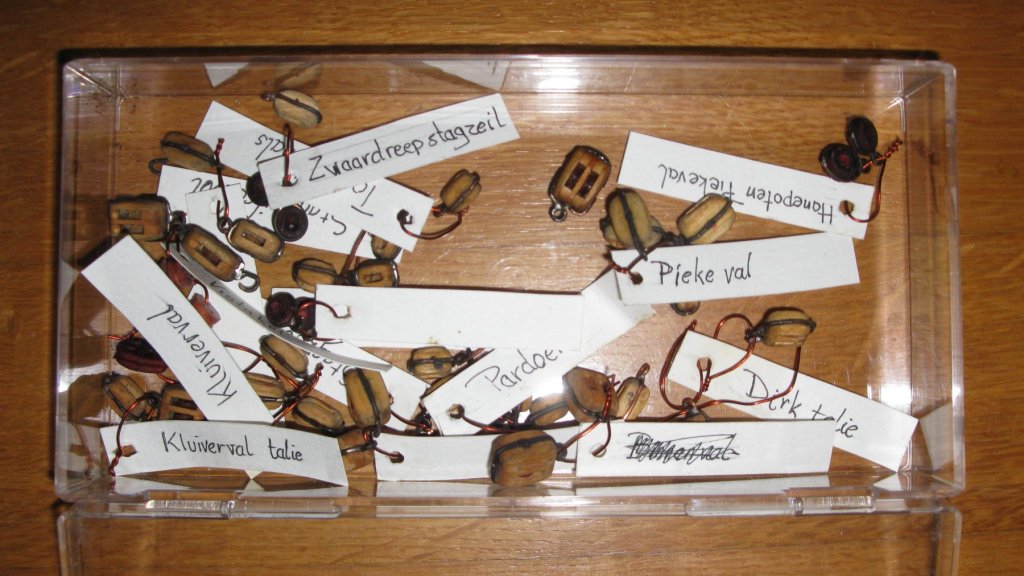
Thank you Betamale. Part 17: Rigging 17.1 Rigging. Making the blocks For my shrimper I need an inventory of about 25 blocks and 15 chocks in different sizes. I start making blocks with gluing pieces of wood at regular intervals between two small wooden laths. After drying, they are sawn into individual pieces. I drill a hole for the sheave spindle. The block gets its basic shape with the band sander. Final shaping is done with a file and the Dremel mill. I fold a copper wire around the block and cut it to size. Where they will cover the spindle hole I hammer the wire flat. The sheaves are made of hardwood. I slide them in the block and fix them with a copper pin. I make rings of the same type of copper wire and solder them on top of the strap. It takes a while before all block are ready and labeled. G.L. Completed projects: HMS Triton cross section - FINISHED - Scale 1:24 Current projects: Oostends schipje (Ostend shrimper) - scale 1:20 Cross section Fishing Smack - Scale 1/20, POF, approx. 1920


-
Sorry Patrick. Next time I will give you a heads up when I start an new project. You didn't miss a lot, the keel is just laid. Time for a Tripel! G.L.
- 219 replies
-
- 2
-
-
- smack
- cross-section
- (and 2 more)
-
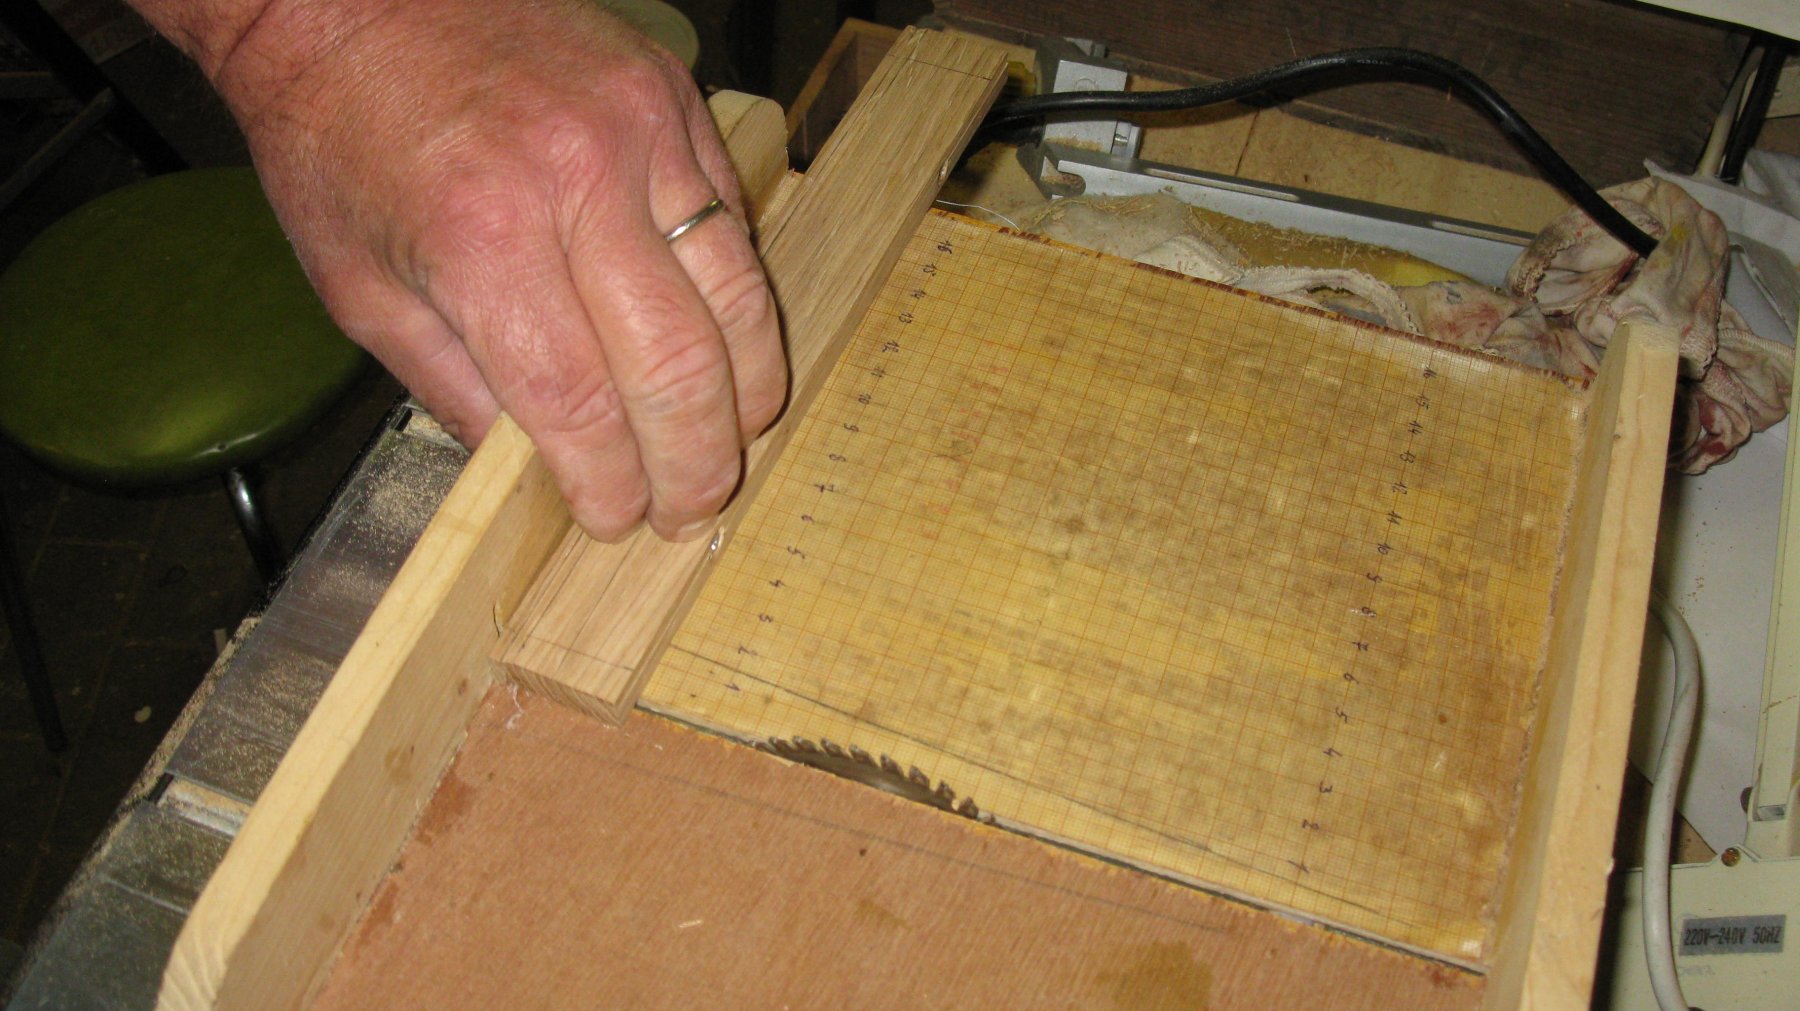
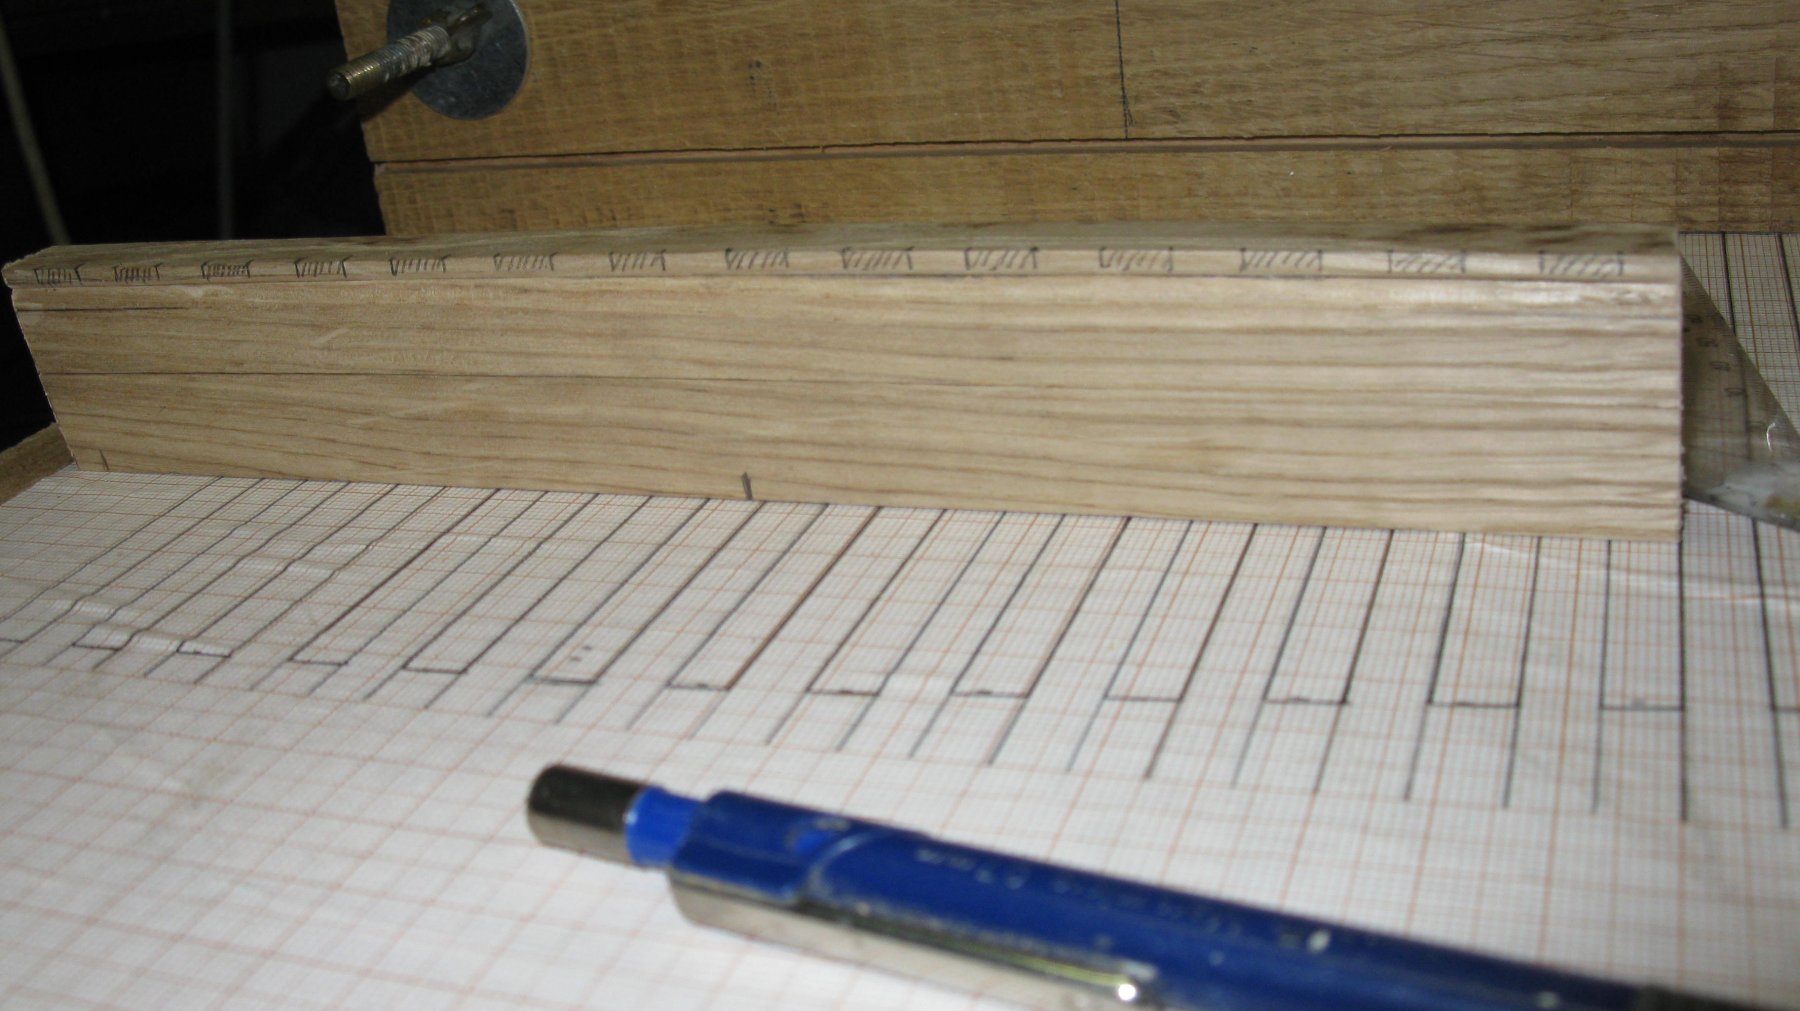
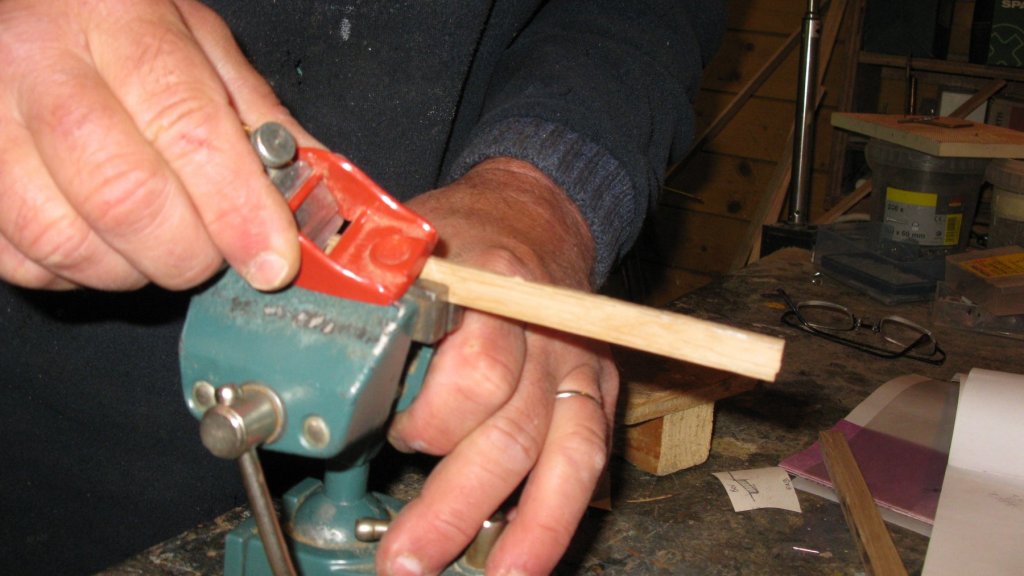
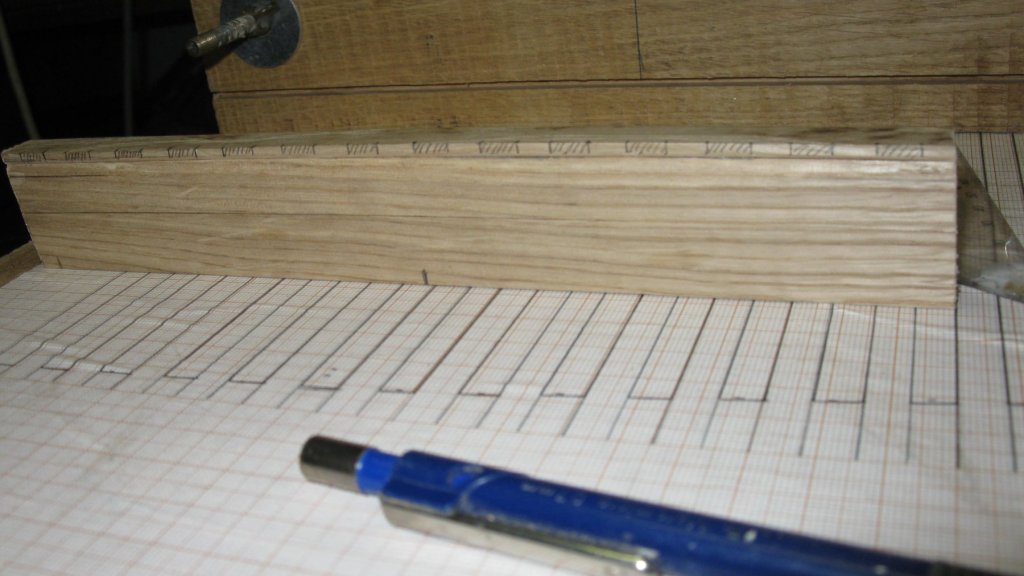
Well Carl, I will try not to disappoint you. Part 3: The Keel The keel is made of two pieces of oak, laminated on each other to easier the making of the rabbet. Of the two pieces two corners are planed to a well determined angle. The two parts of the keel are now glued together with the planed angles against each other. The joined planed angles now form the rabbet. At the bottom of the keel a 1.5 cm thick plank is screwed to give some more workspace below when the model stands on the slipway. Later it will be removed again. I place the keel on the slope of the slipway to draw off the angles of the keel edges. The keel edges have to be sawn perpendicular to the ground plane. Foto Now I mark the notches in which the frames will rest. I saw them with the circle saw and file the notches out. The finished keel on the building board. G.L. G.L. Completed projects: HMS Triton cross section - FINISHED - Scale 1:24 Current projects: Oostends schipje (Ostend shrimper) - scale 1:20 Cross section Fishing Smack - Scale 1/20, POF, approx. 1920


- 219 replies
-
- 14
-
-
- smack
- cross-section
- (and 2 more)
-
Peter, In my opinion your colours look perfect. G.L.
-
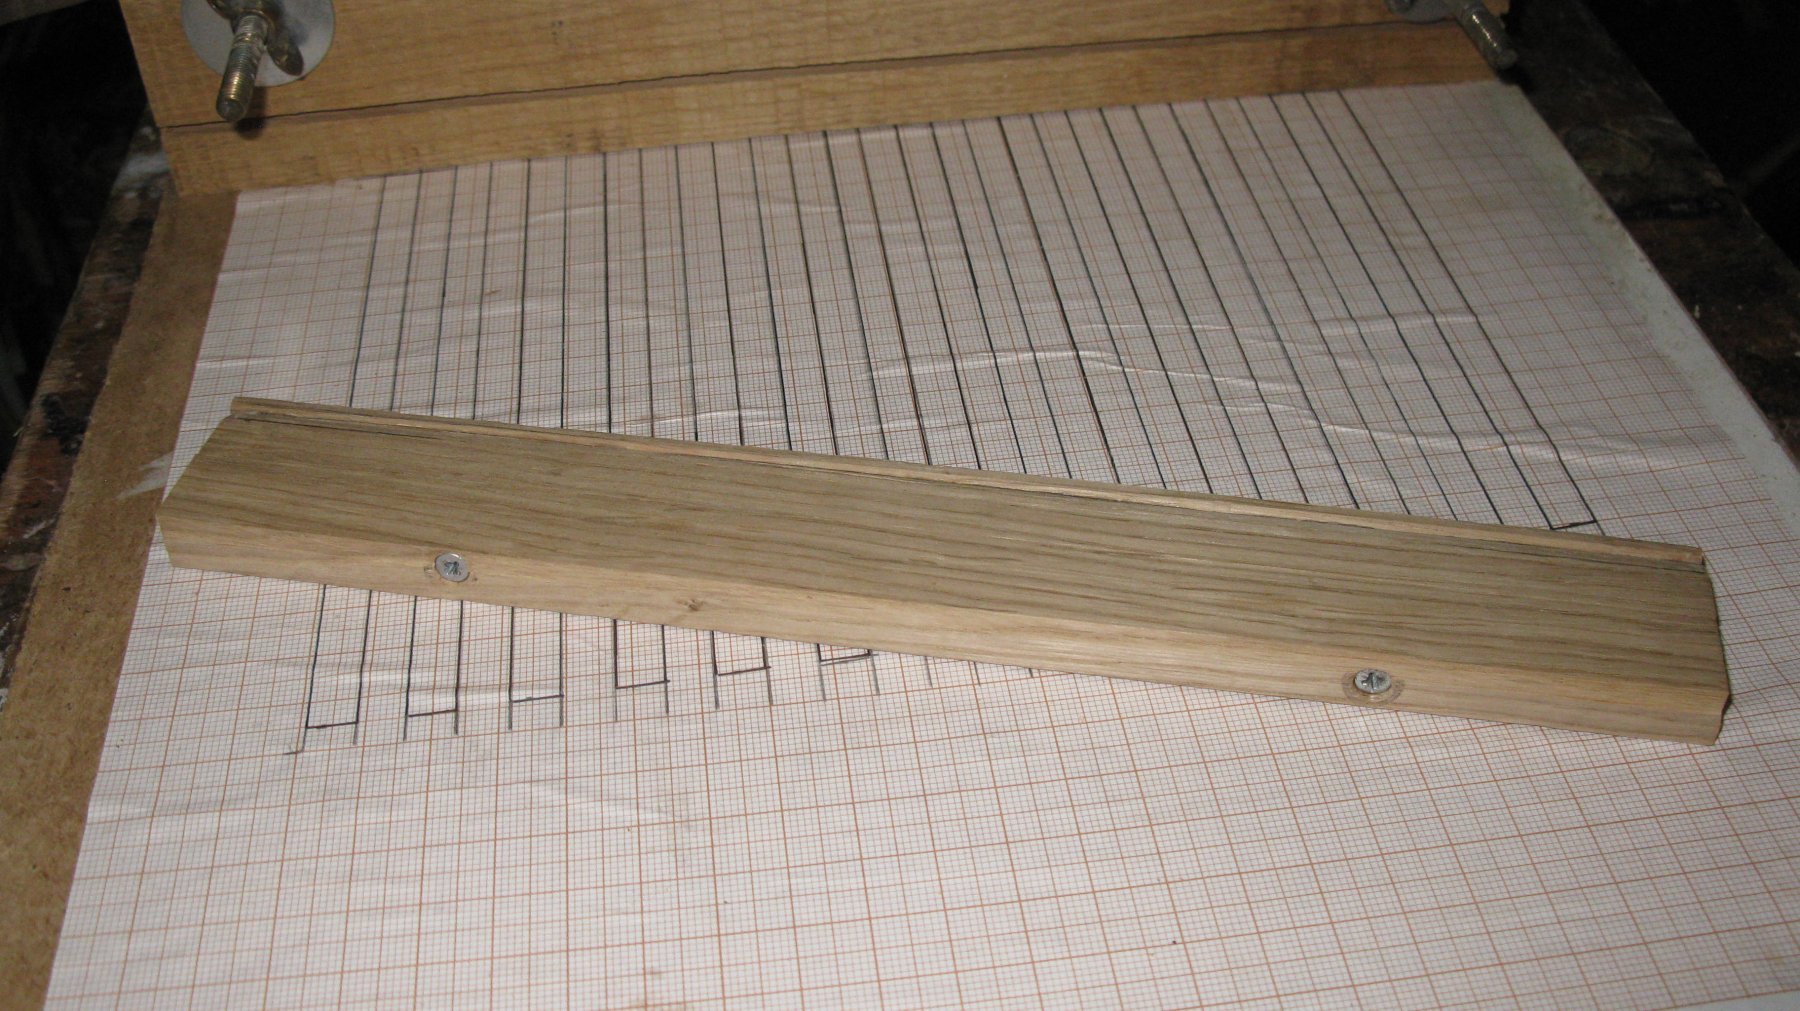
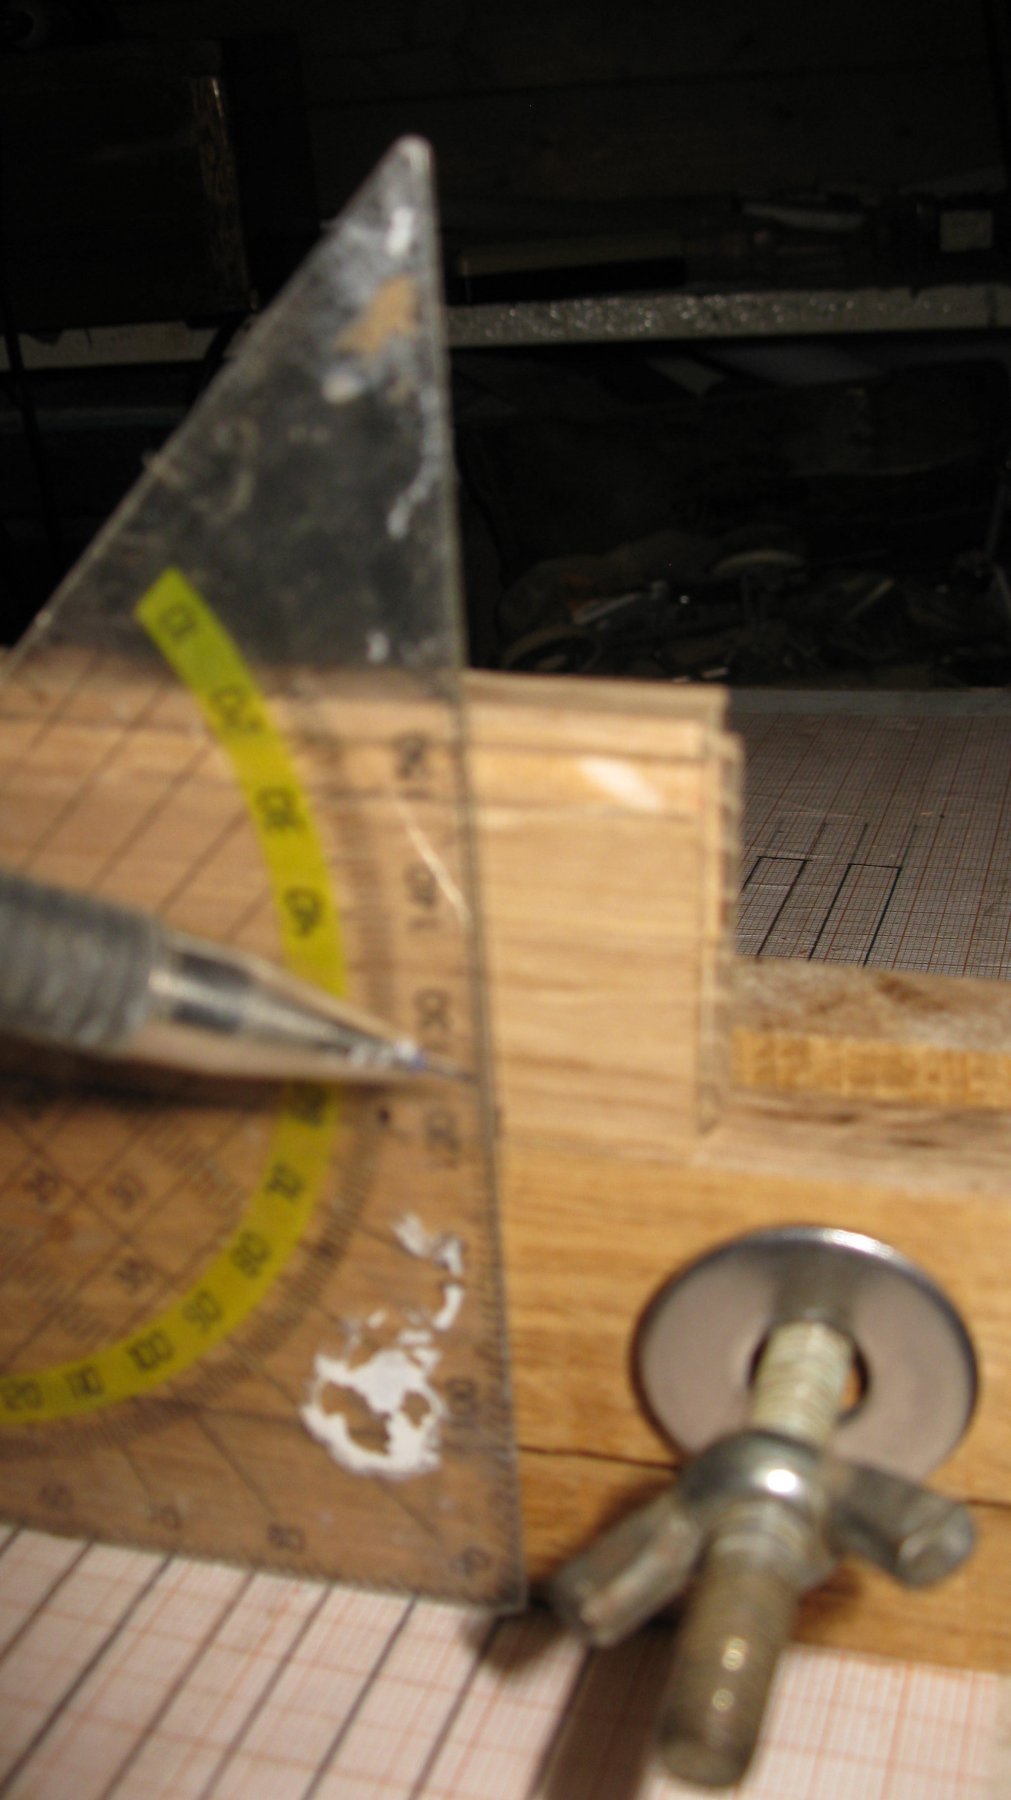
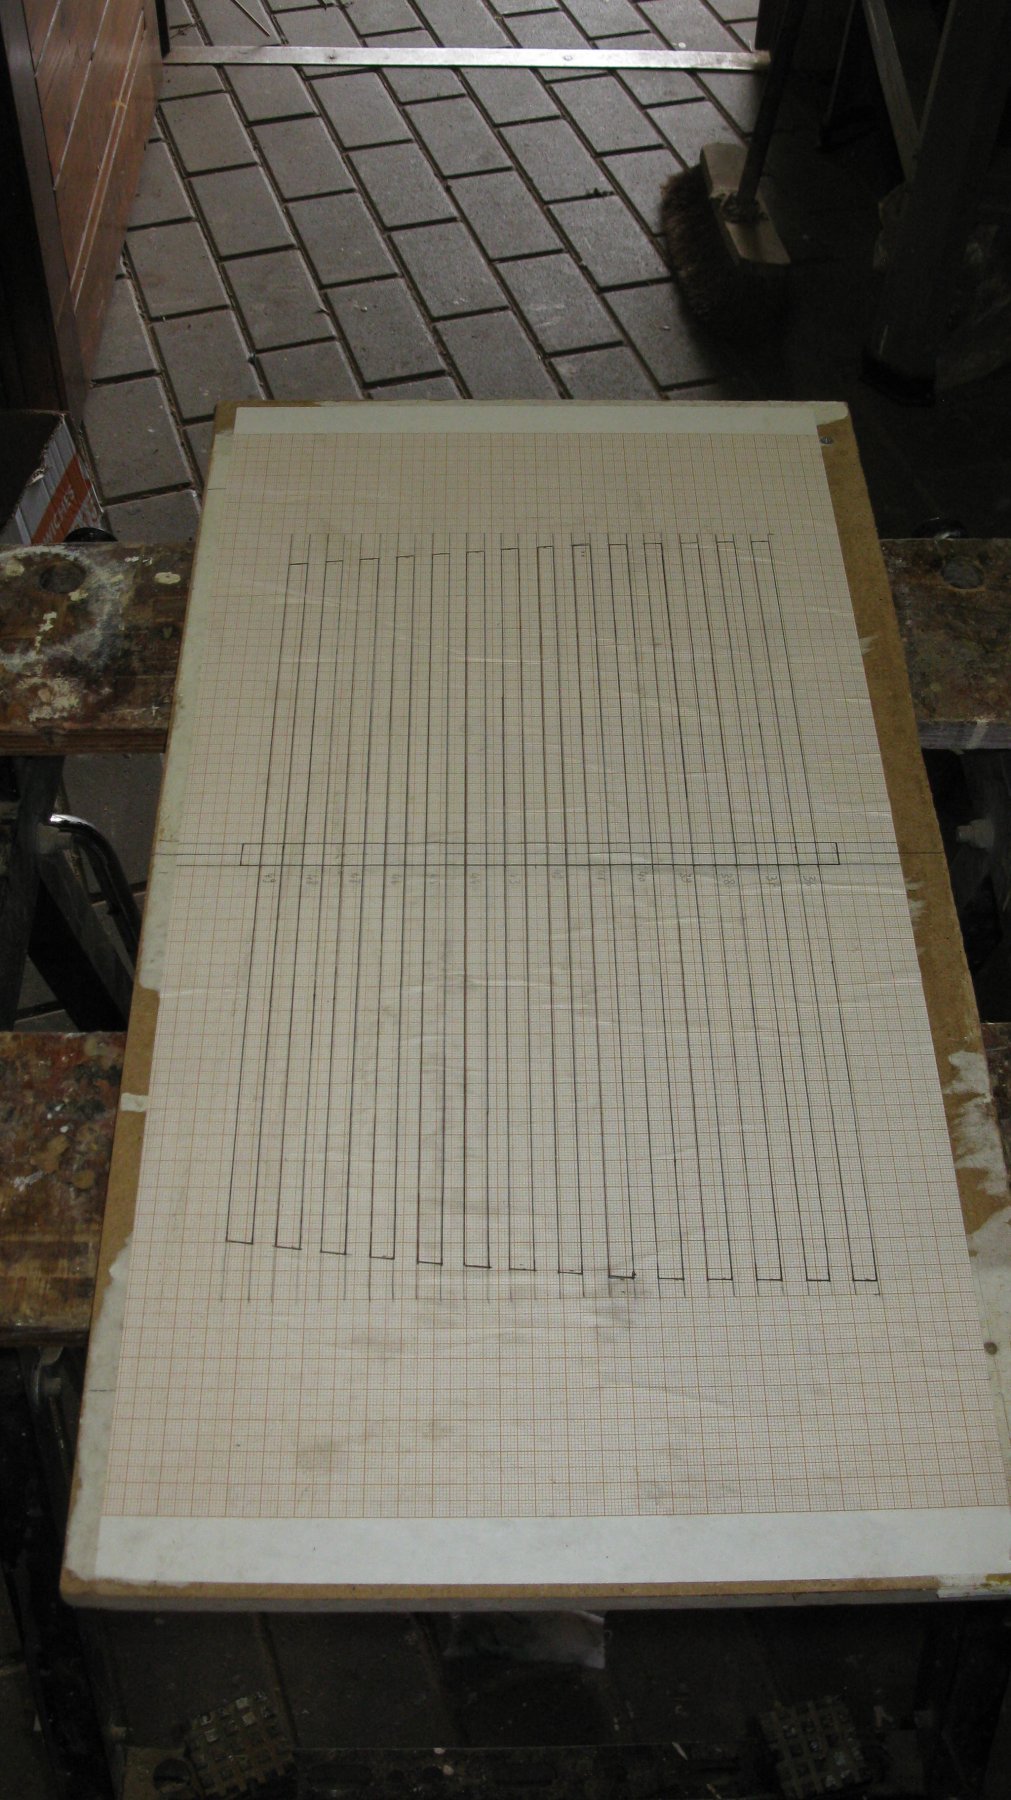
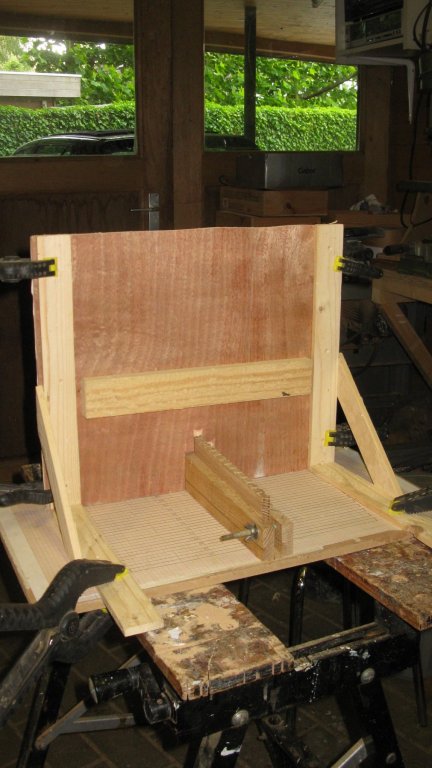
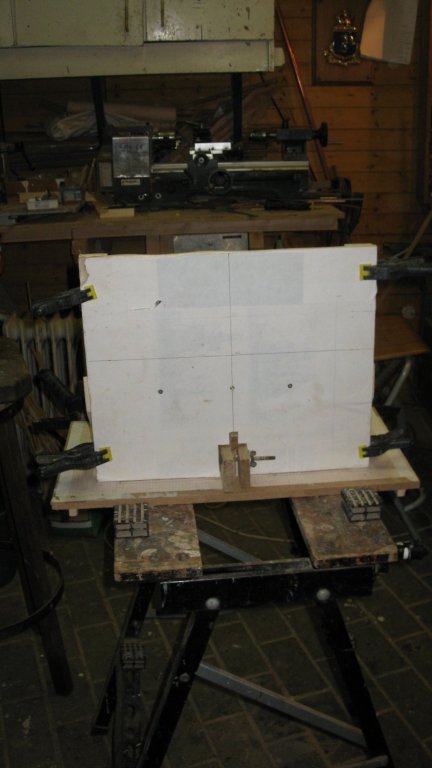
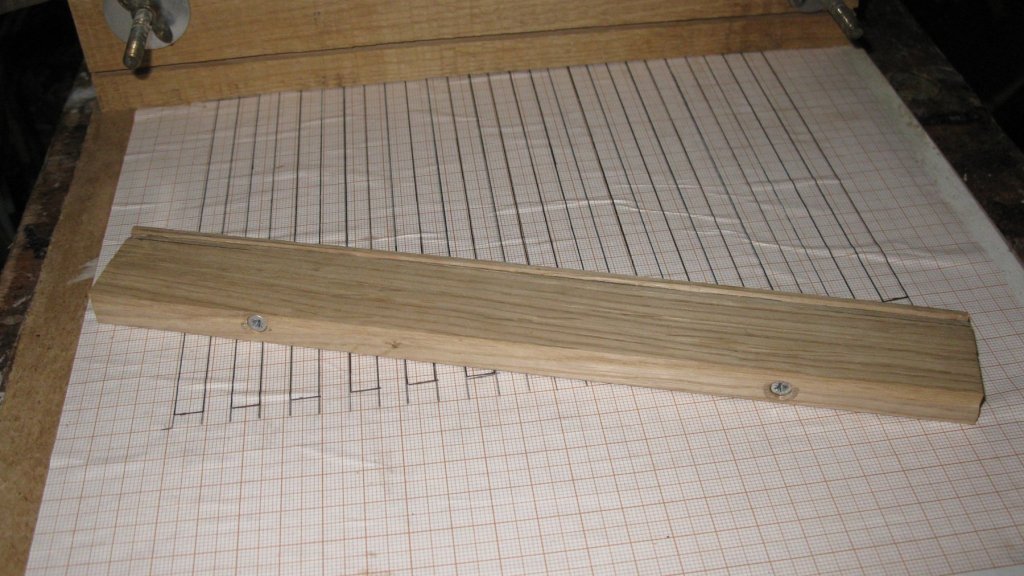
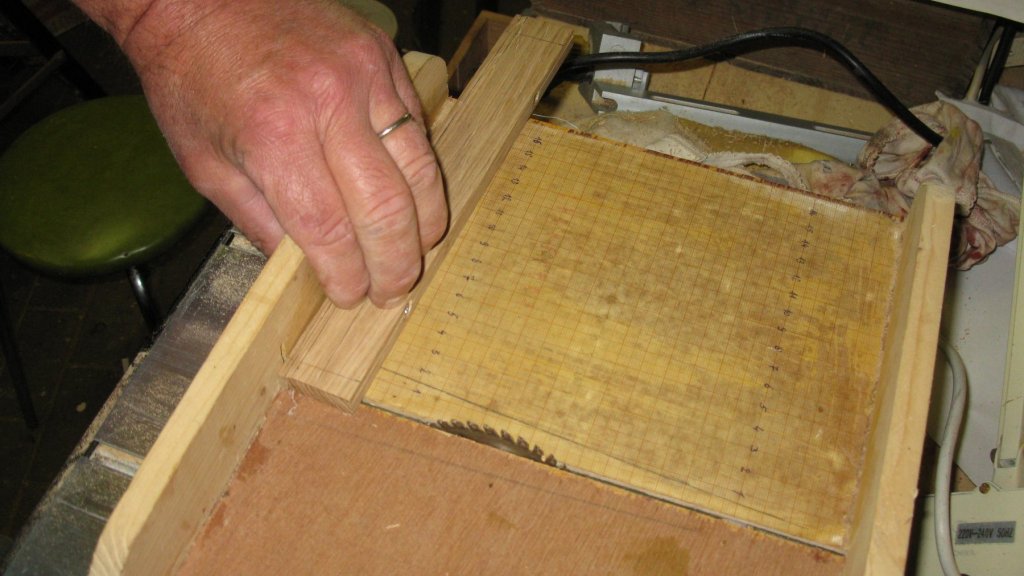
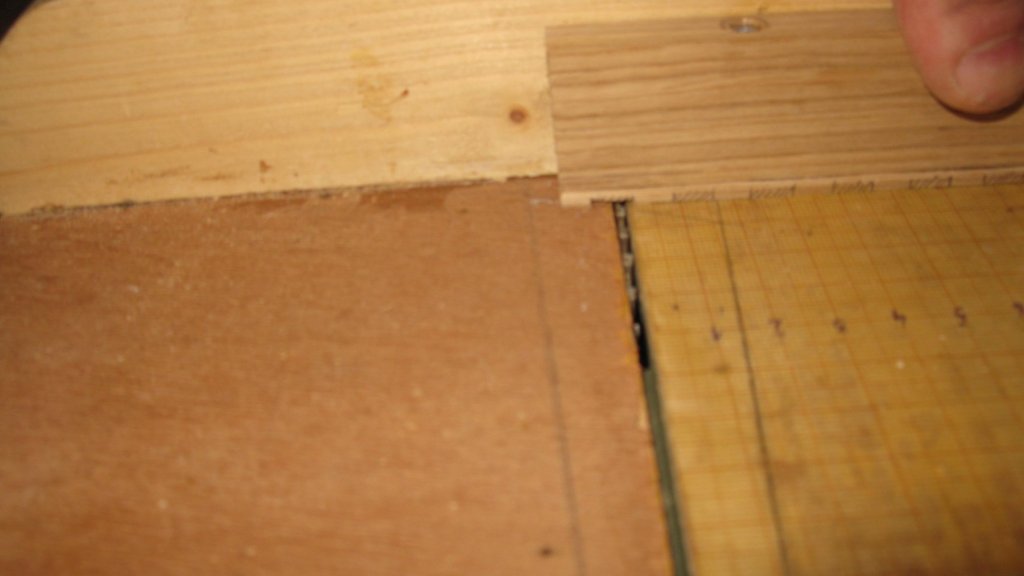
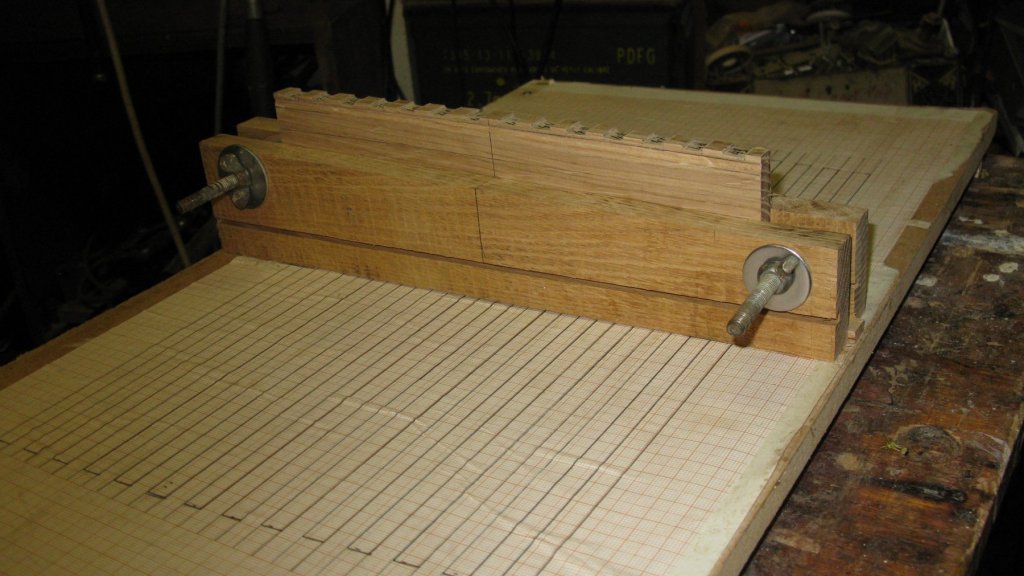
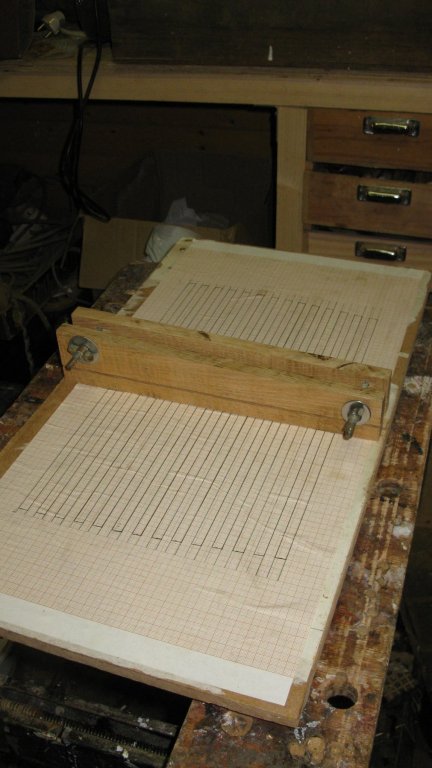
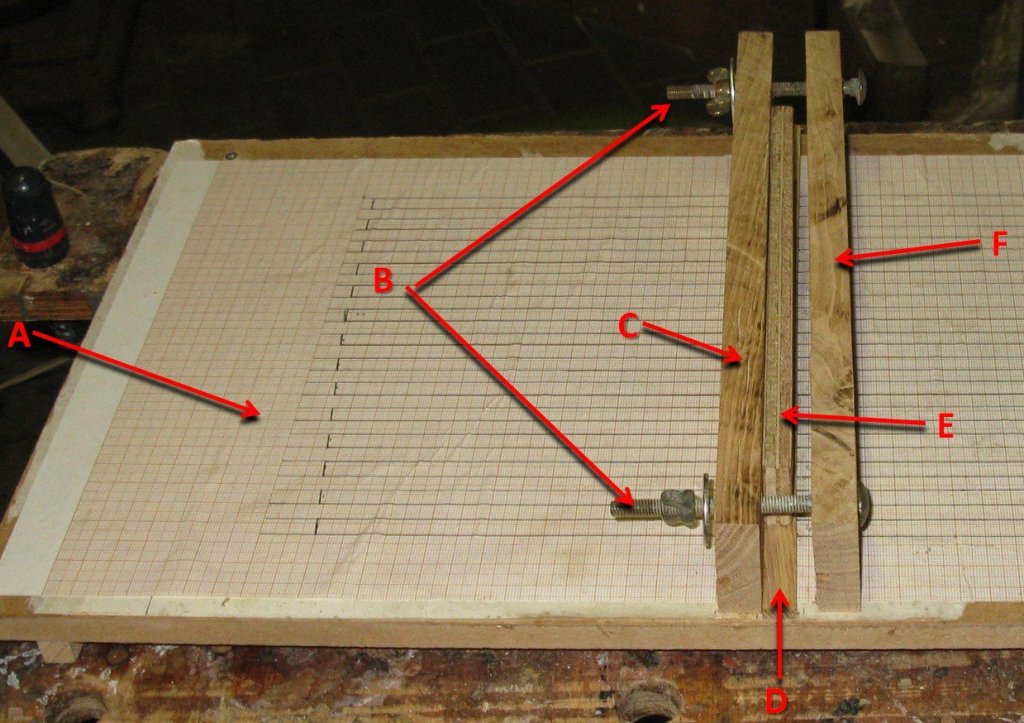
Michael, Pat, Wayne and all the likers, I am flattered by your interest. I will do my best to keep your attention until the completion of this project. This week I started the build with the making of a building platform. Part 2: The building board Before starting with the construction of the model, a slipway has to be built. I make my building board as described in the practicum. I first draw the outline of the cross section frames on millimeter paper and glue it on the base plank. A smack was down at the stern, therefore the building board must have a downward slope towards the after end. In the middle of the base plank comes a kind of clamp in which the keel will be clamped. This clamp has the same downward slope. The frames will be placed perpendicular with the base plank on the keel. Building board in detail: A: Base plank with outline plan of keel and frames. B: 2 bolts with wing nuts. C Clamp plank, screwed an glued to the base shelf. D Thin lath with the same width as the keel thickness. E: Plank, 1 millimeter thinner than the keel thickness, 9 millimeters lower than the clamp planks, glued to clamp plank C. F: Adjustable clamp plank to secure the keel on the slipway with the wing nuts. G.L. Completed projects: HMS Triton cross section - FINISHED - Scale 1:24 Current projects: Oostends schipje (Ostend shrimper) - scale 1:20 Cross section Fishing Smack - Scale 1/20, POF, approx. 1920

- 219 replies
-
- 9
-
-
- smack
- cross-section
- (and 2 more)
-
Mark, In our region usually they used canvas ad mast coat. It was made waterproof by impregnating it with tar. Leather was more used on state vessels as pilot boats and yachts. G.L.
-
Thanks for the kind words Ian and Russ. This log on that went a more or less to dormant mode, I urgently need to inject some life into it. G.L. Completed projects: HMS Triton cross section - FINISHED - by G.L. Scale 1:24 Current projects: Oostends schipje (Ostend shrimper) by G.L. - scale 1:20, building first POF Edition 2 Cross section Fishing Smack by G.L. - Scale 1/20, POF, approx. 1920.
-
Patrick, You did a lot of work. She looks really nice! G.L.
- 756 replies
-
- 6
-
-
- galleon
- golden hind
- (and 2 more)