G.L.
-
Posts
1,553 -
Joined
-
Last visited
Content Type
Profiles
Forums
Gallery
Events
Everything posted by G.L.
-
 Two models at the same time. That is what they call mass production!👍
- 756 replies
-
- 4
-

-
- galleon
- golden hind
- (and 2 more)
-
Here she is, at least one of the three. In winter they prefer the warmth of the central heating in the living room above my cool workshop.

- 219 replies
-
- 8
-
-
- smack
- cross-section
- (and 2 more)
-
Those were the days!😉 You can see that everything on board was made bright and shining for the visit of the two emperors. Looking to the amount of ventilation pipes you will have a lot of electro forming work.
-
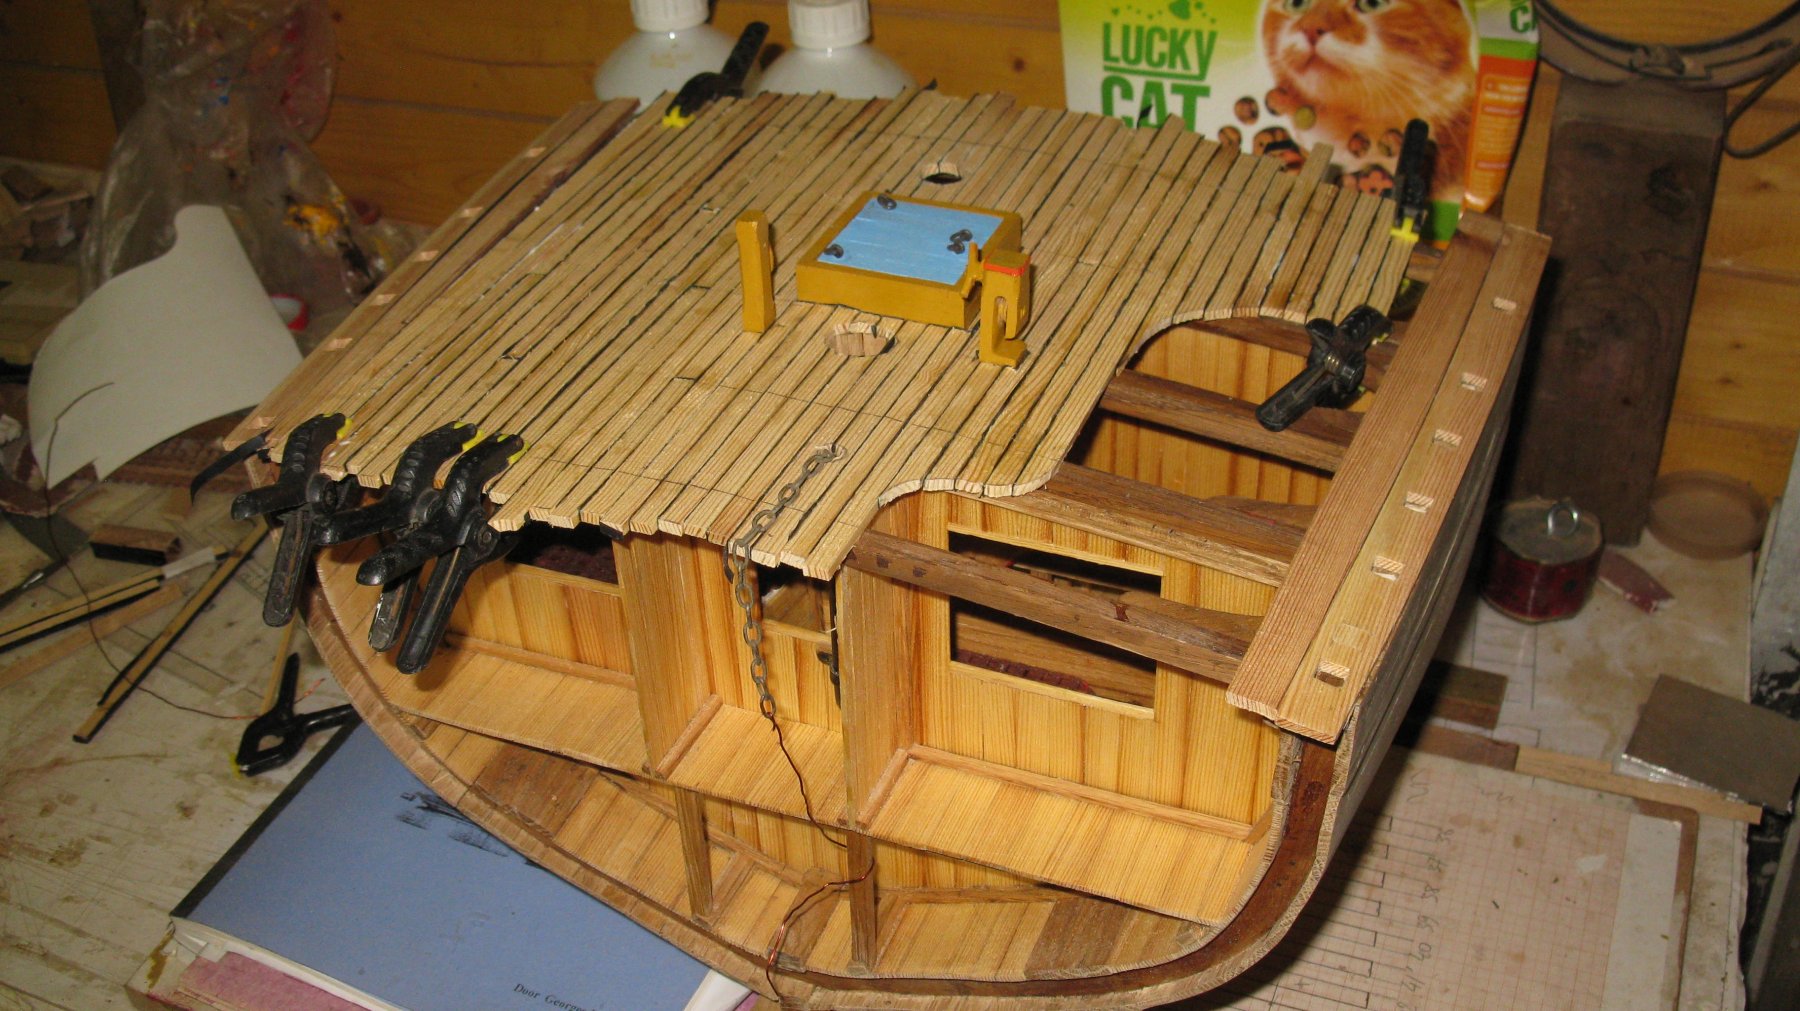
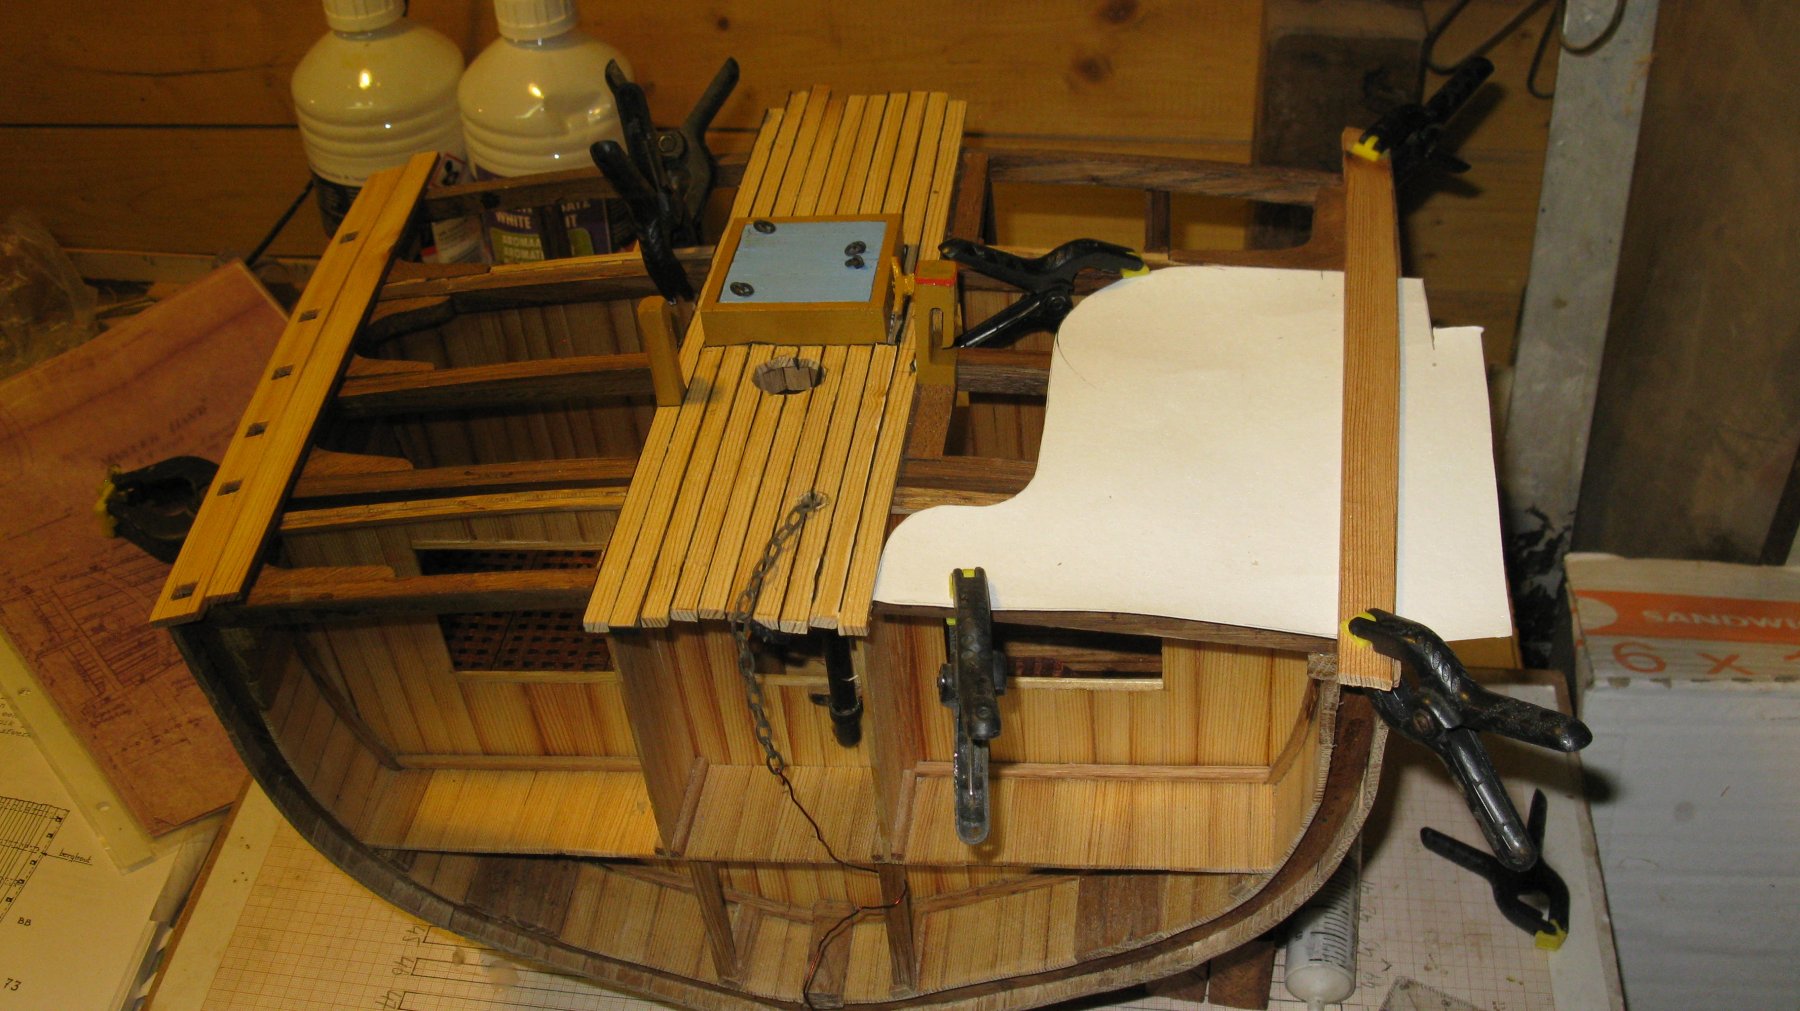
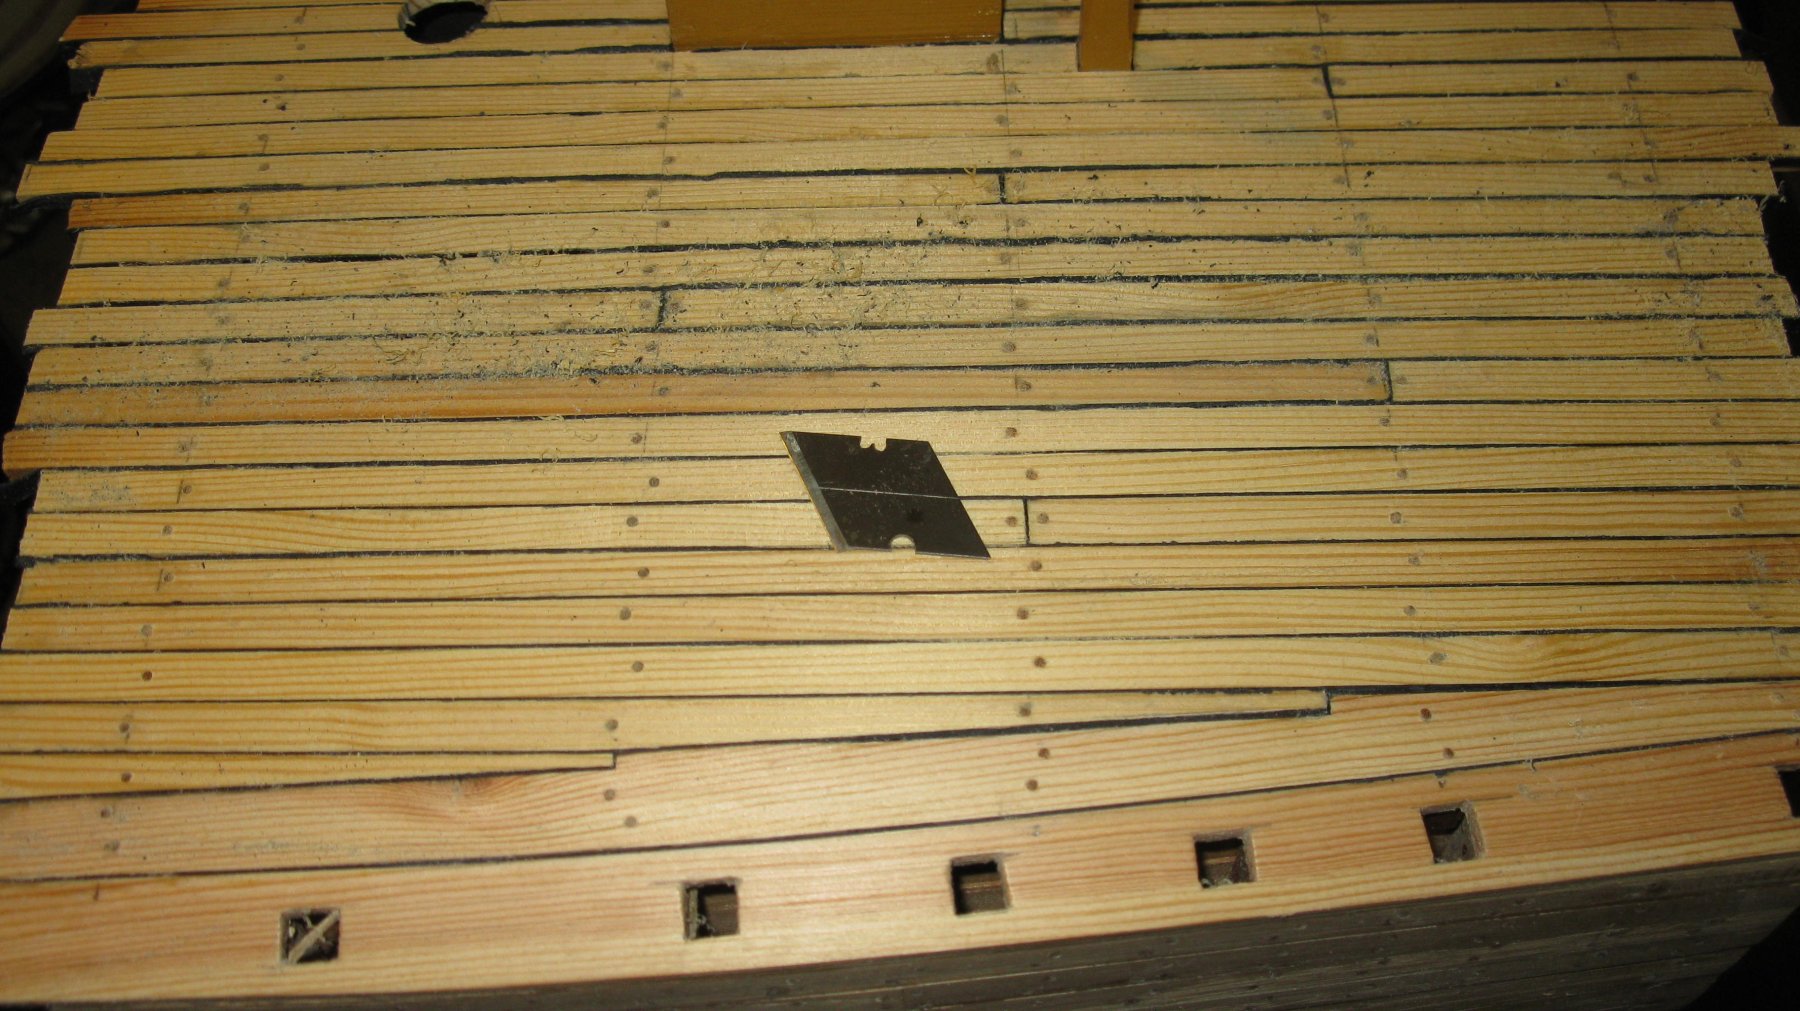
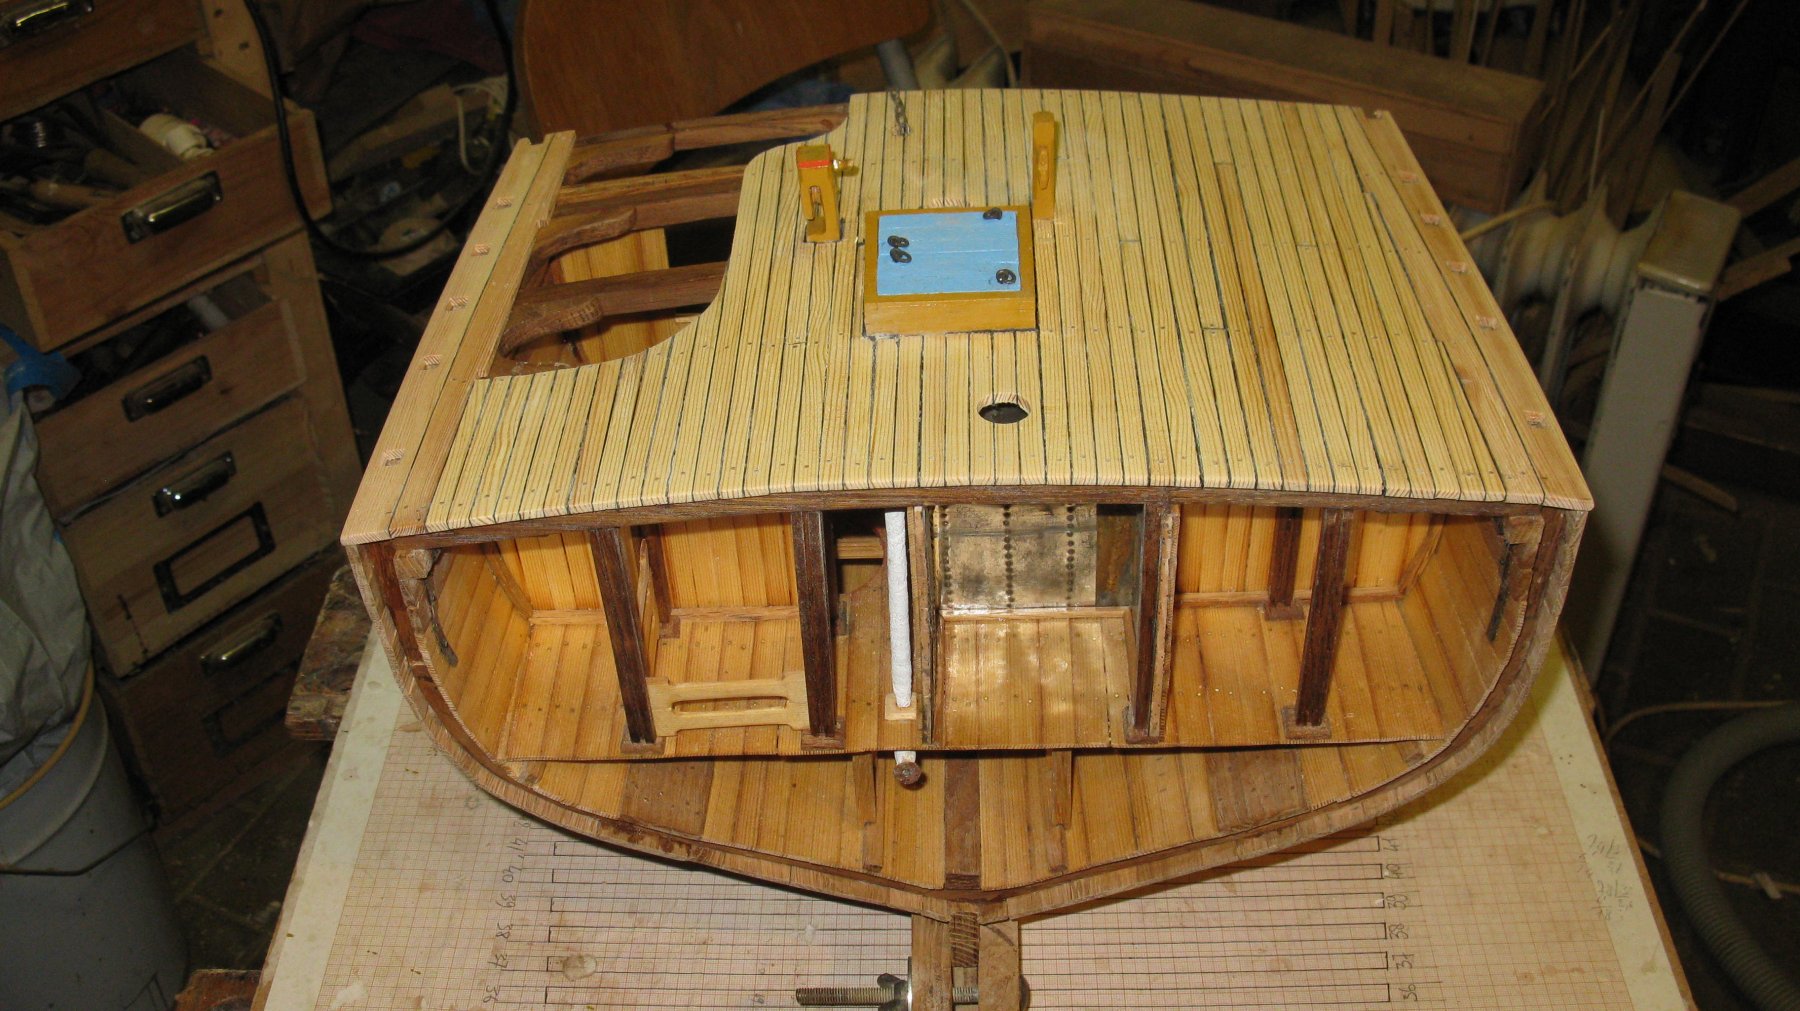
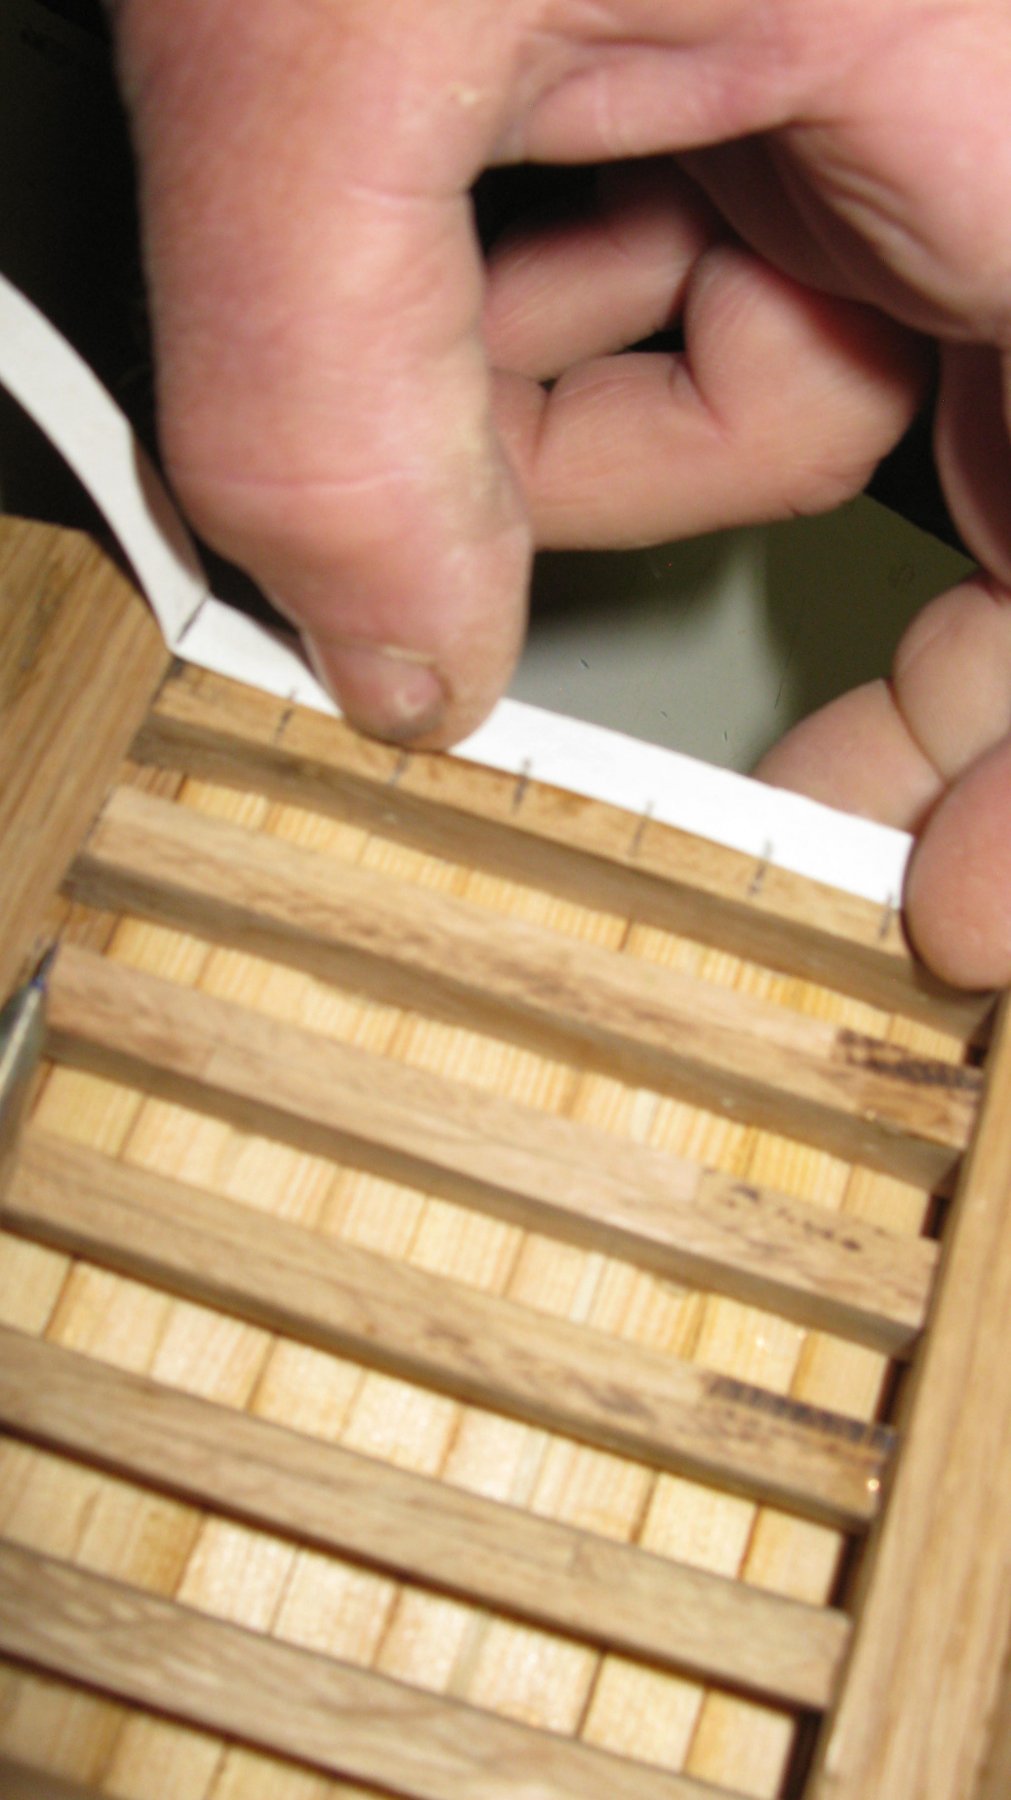
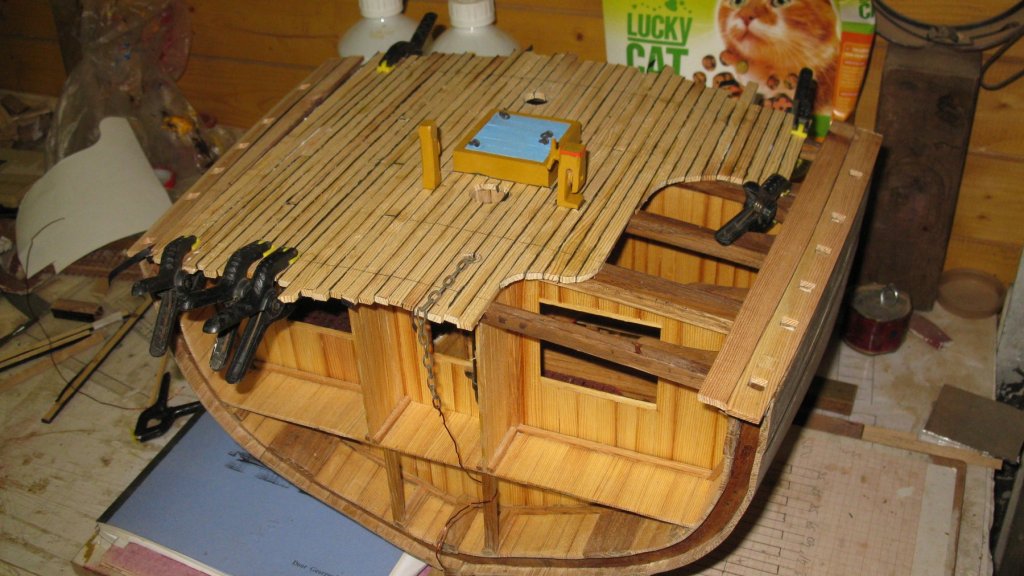
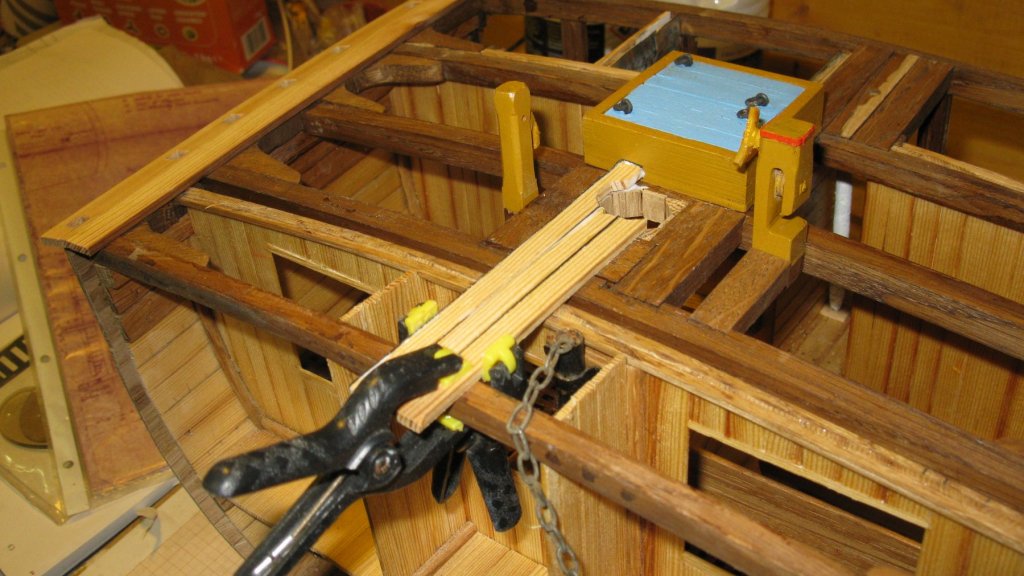
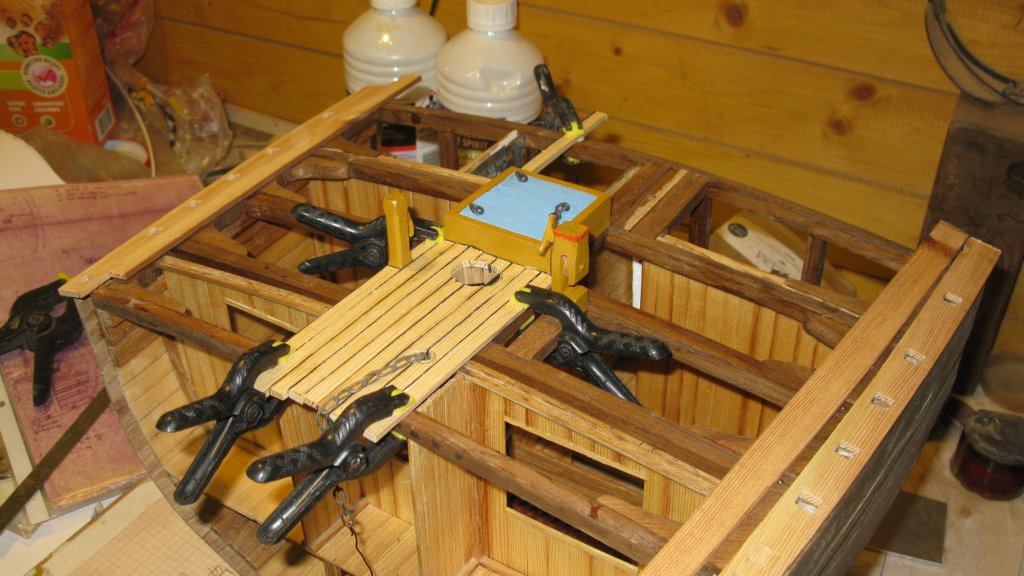
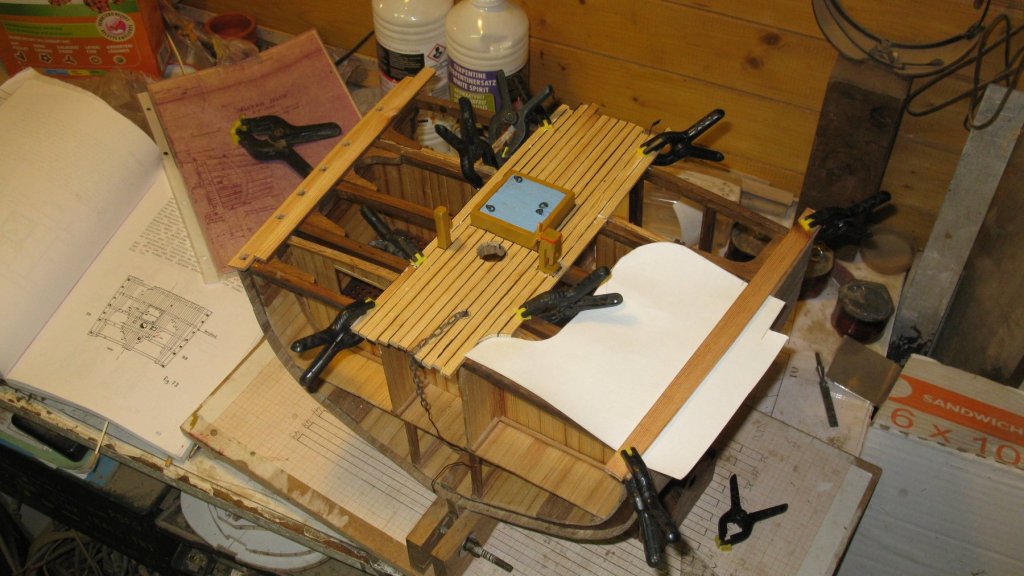
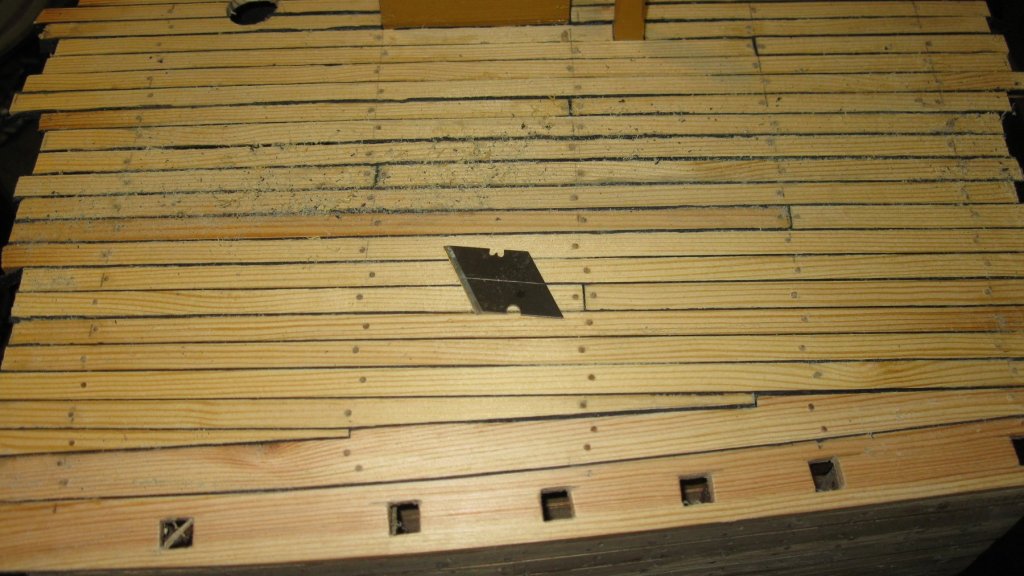
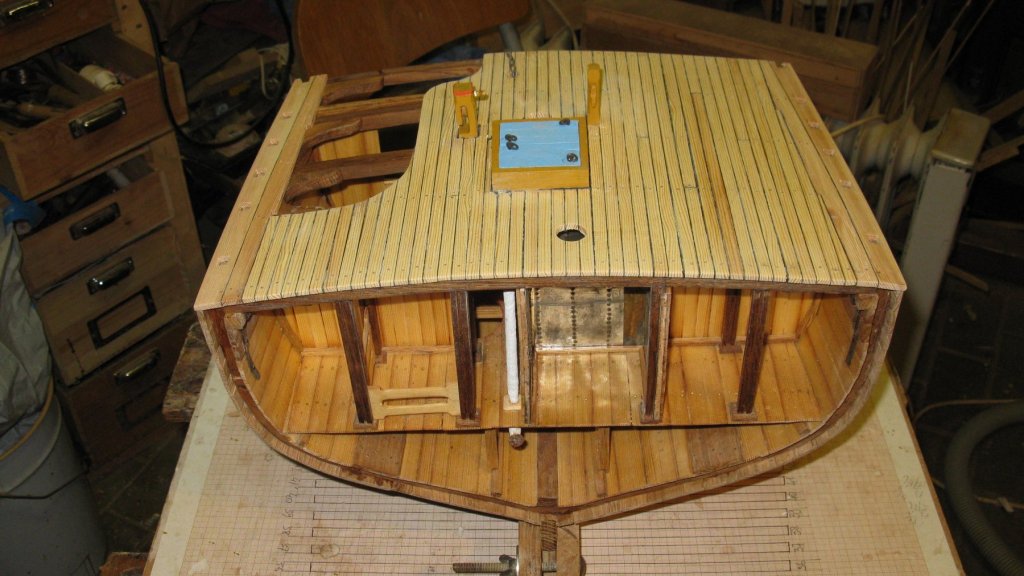
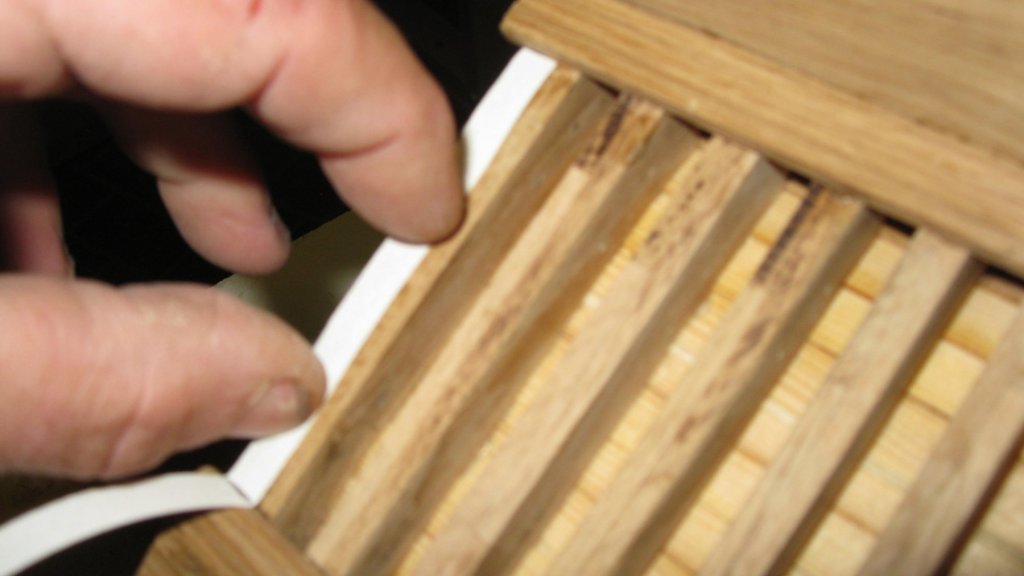
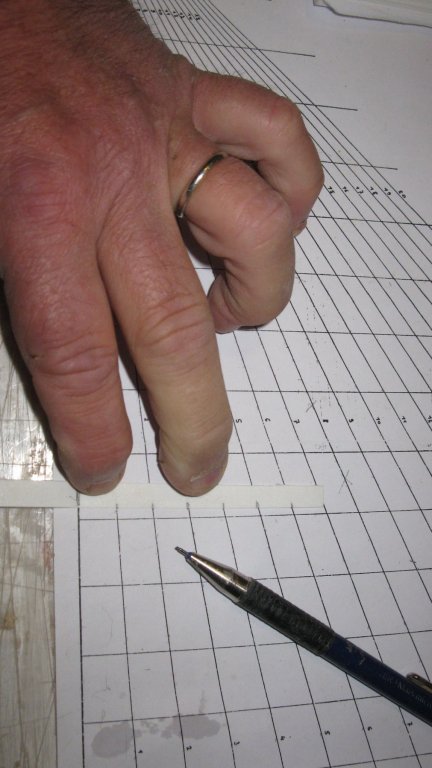
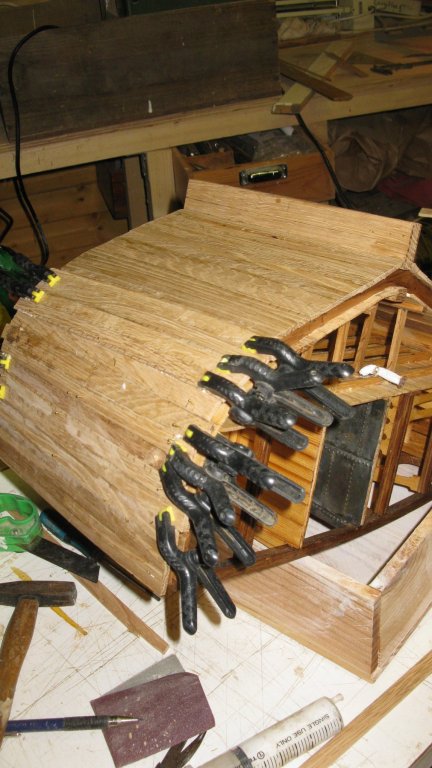
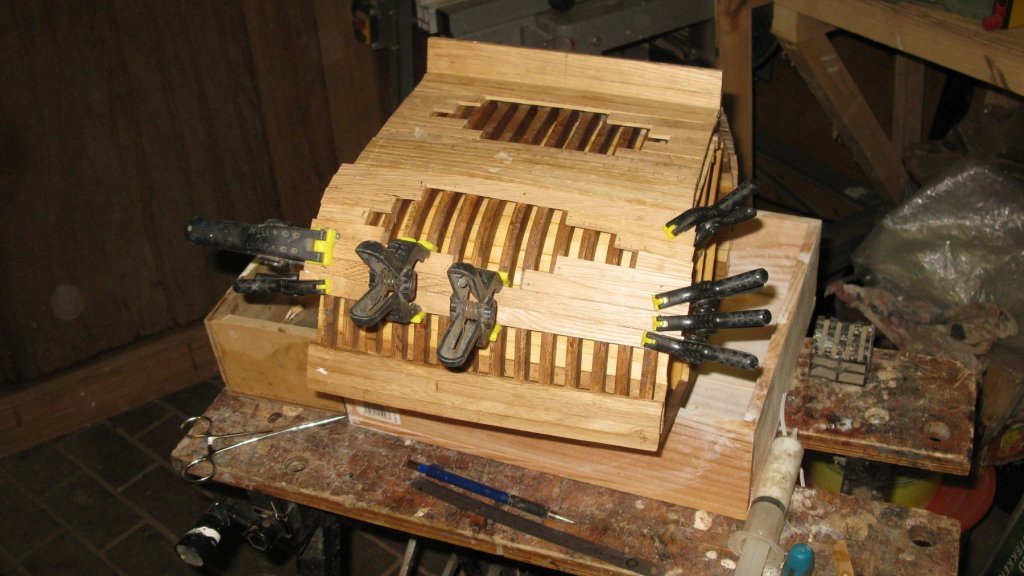
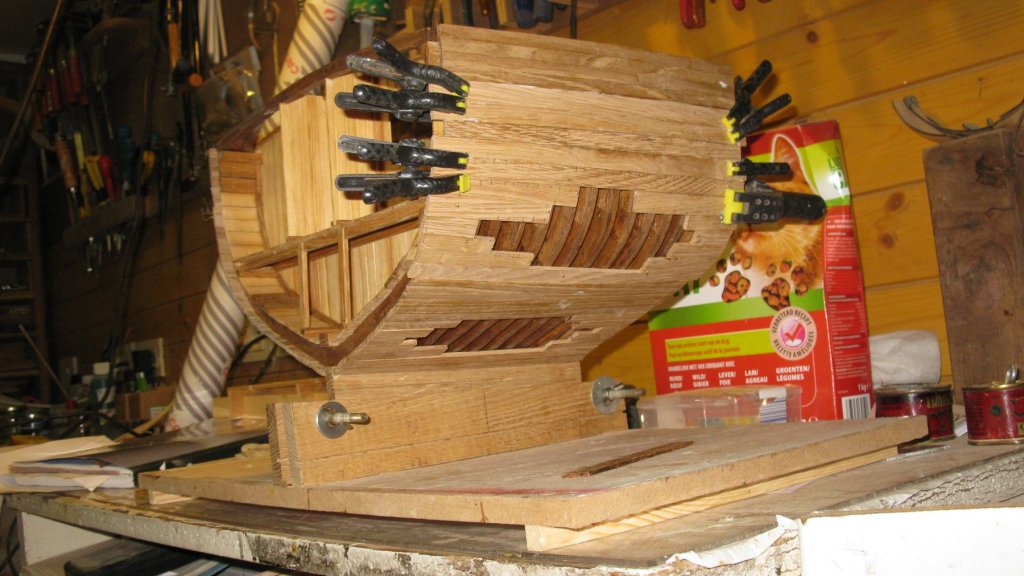
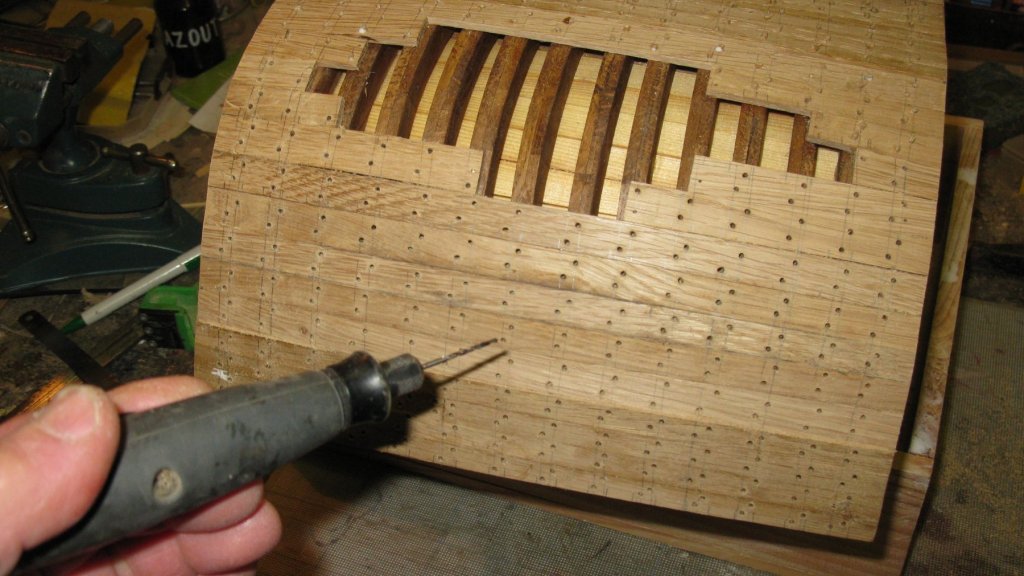
18.5. Laying the deck I start with the making of the covering boards Starting to lay the deck on the midline. At portside I will leave a part of the deck uncovered to give view to the inside of the hull, the deck beams and the knees. The paper template shows the shape of the opening. After a couple of hours. When the deck is completely laid and tree nailed, I scrape it with a piece of cutter blade. The deck after scraping and sanding and making the edges straight.

- 219 replies
-
- 12
-
-
- smack
- cross-section
- (and 2 more)
-
Nice precision work, both the woodwork and the soldering. Well done!
-
Happy birthday Jung!🎂
-
Aviaamator, I would stain the boat dark. It will be a good contrast with the varnished hull of the Jacinthe. I would use a color system that leave the woord grain visible and apply a matt varnish afterwords.
-
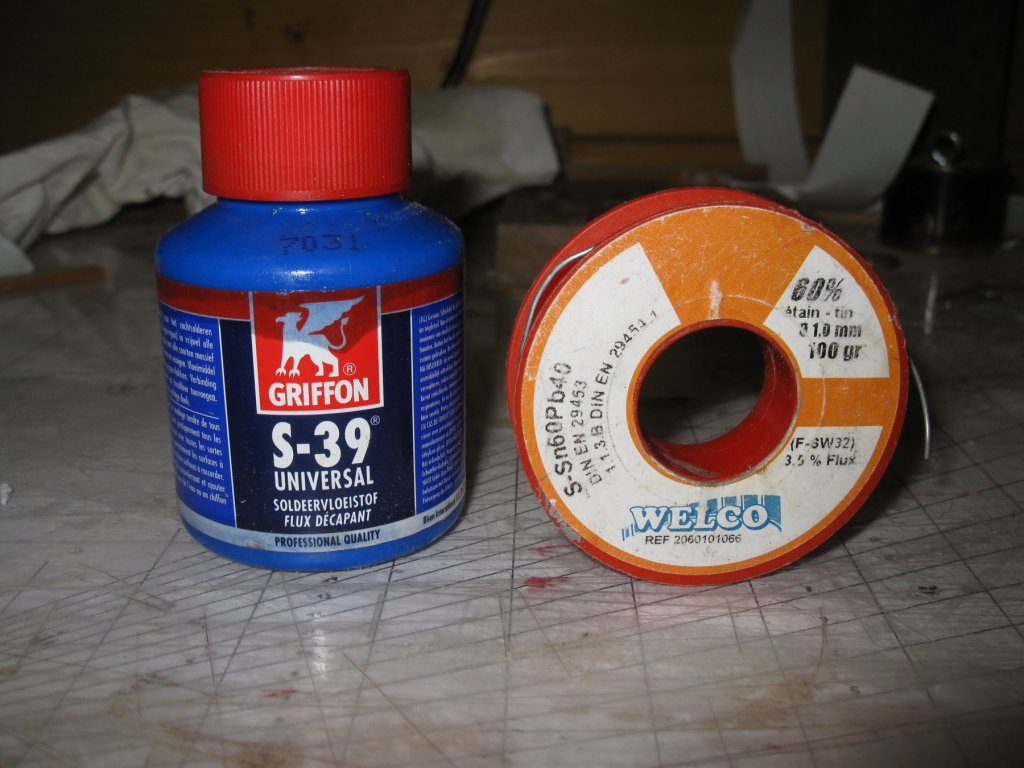
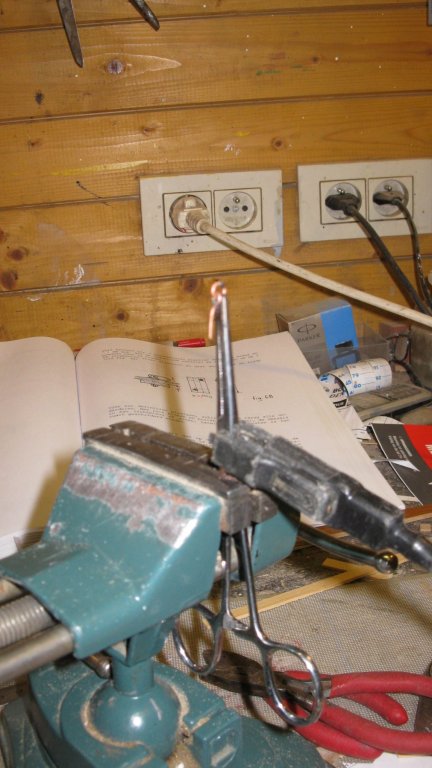
Thank you Carl. I use the resistance soldering method and I use common soldering flux and soldering tin.
- 219 replies
-
- 3
-
-
- smack
- cross-section
- (and 2 more)
-
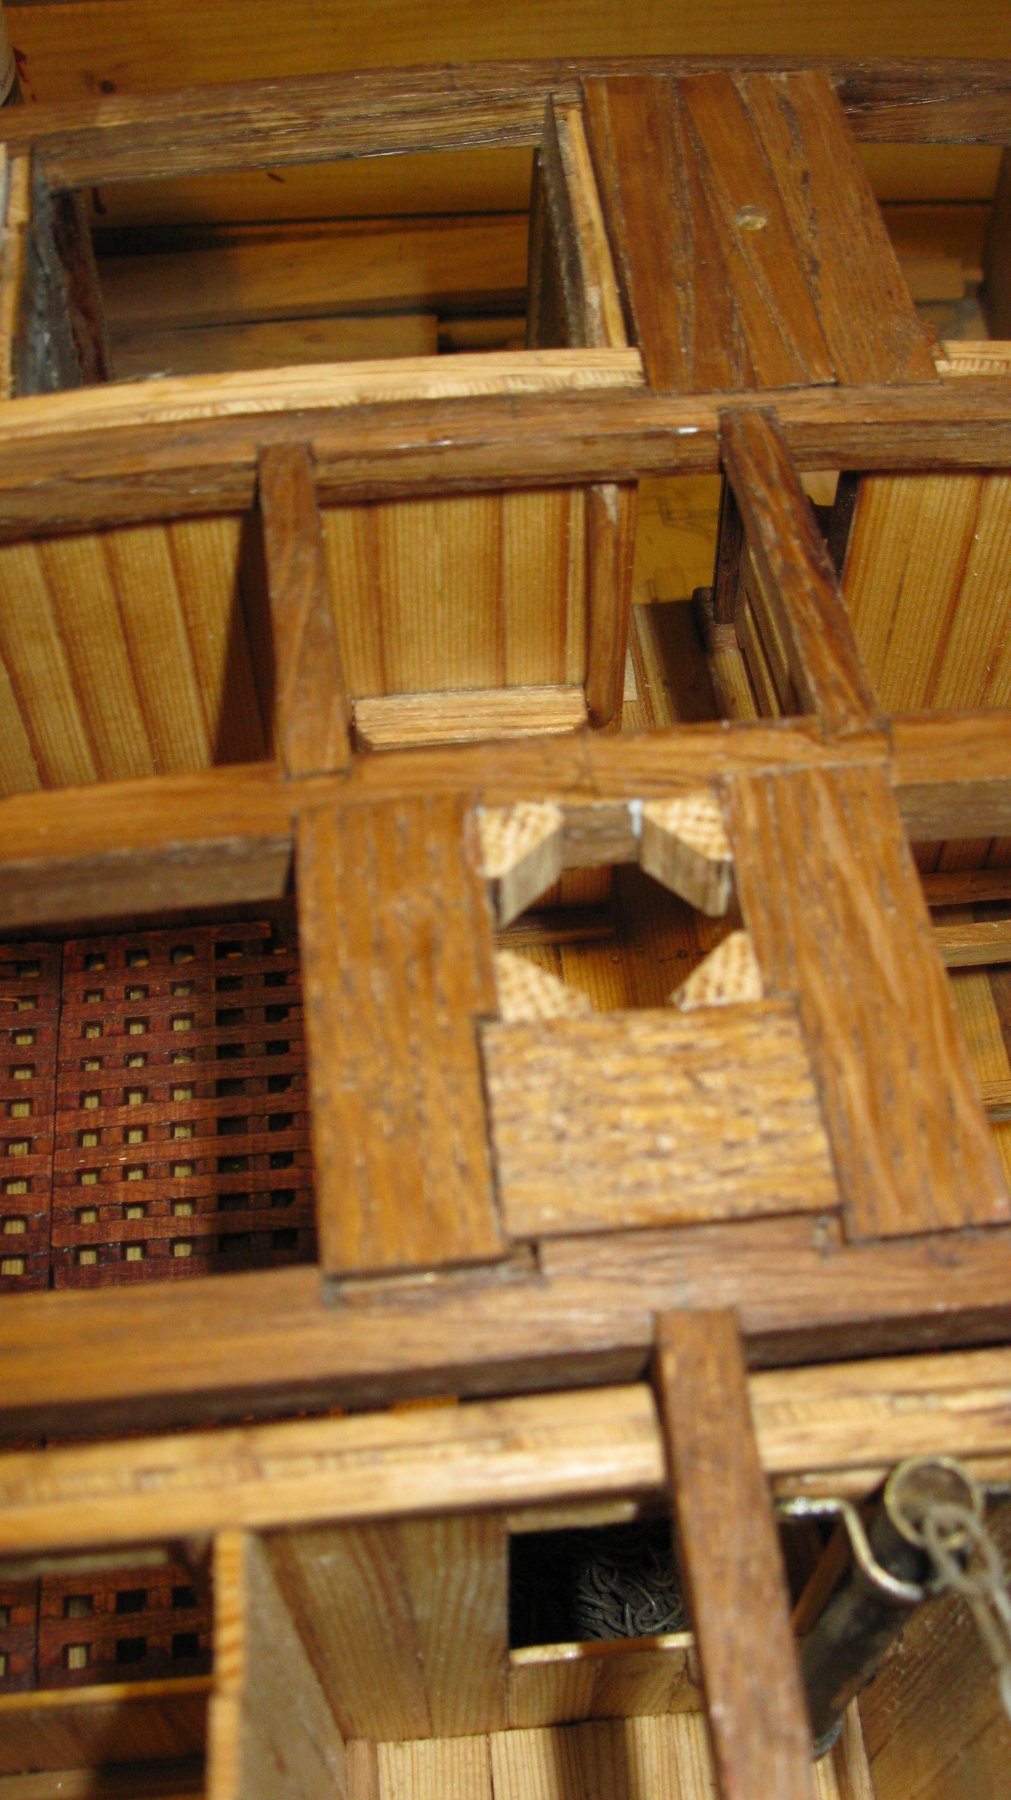
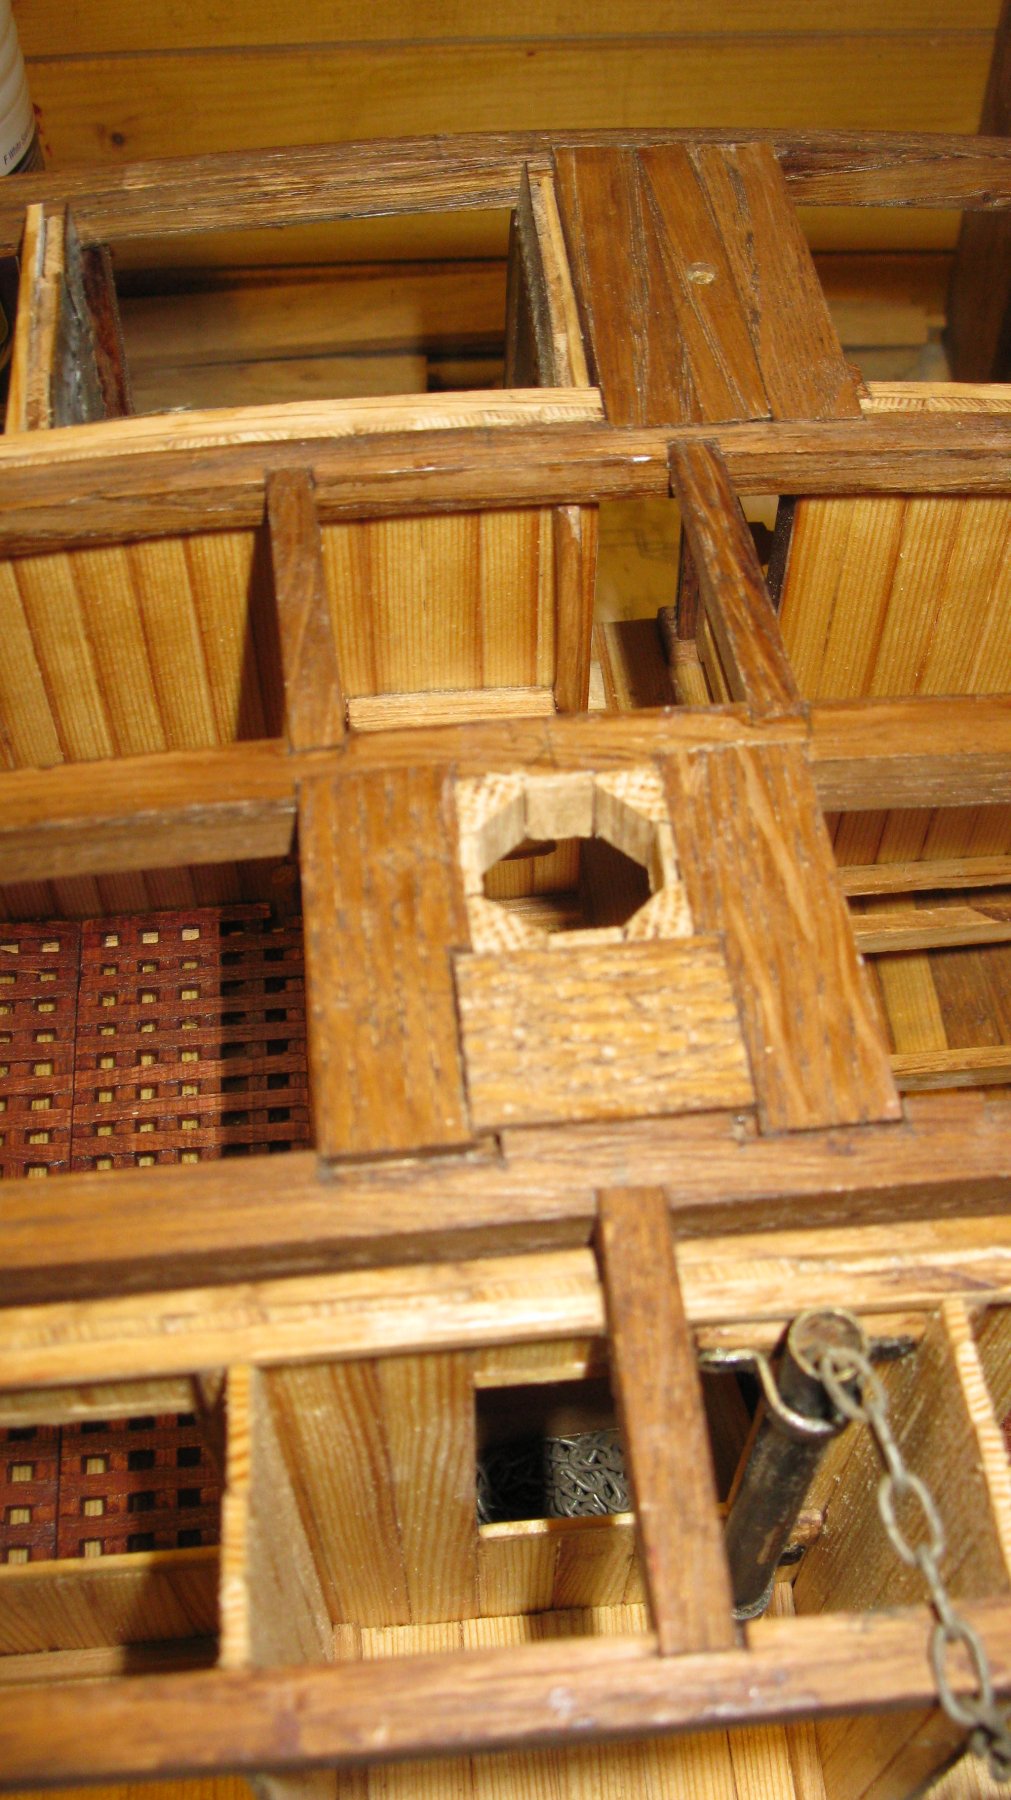
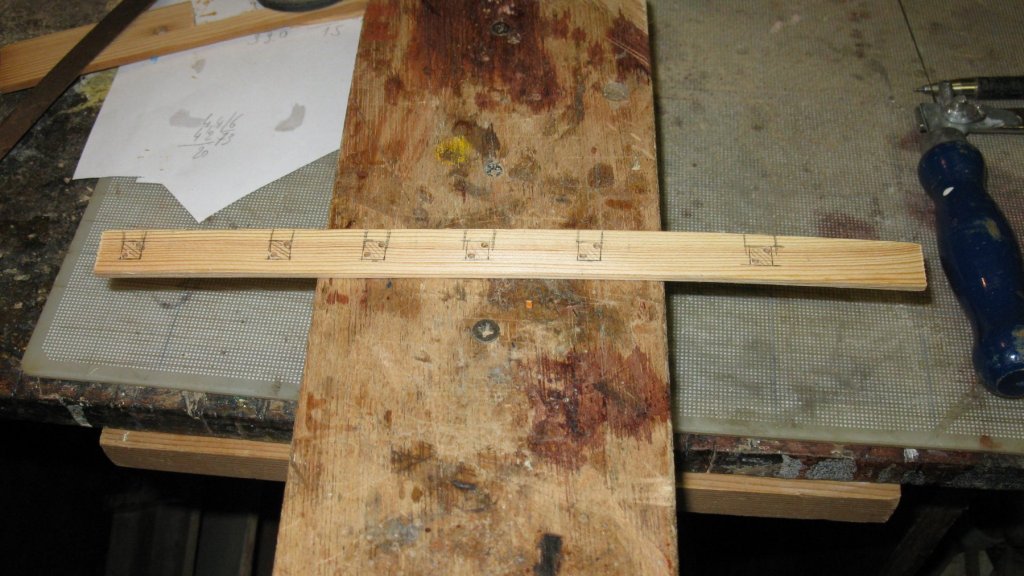
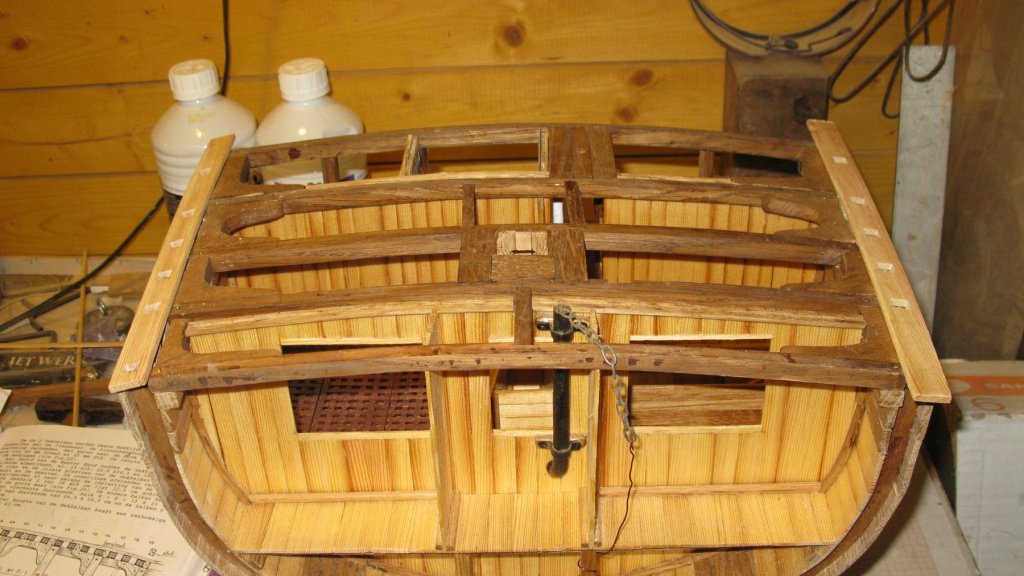
18.4. Preparing to lay the deck. Prepairing the mast opening The mast opening, now quadrangular, has to be octagonal. Four keys in the corners ... ... and four boards in between.

- 219 replies
-
- 12
-
-
- smack
- cross-section
- (and 2 more)
-
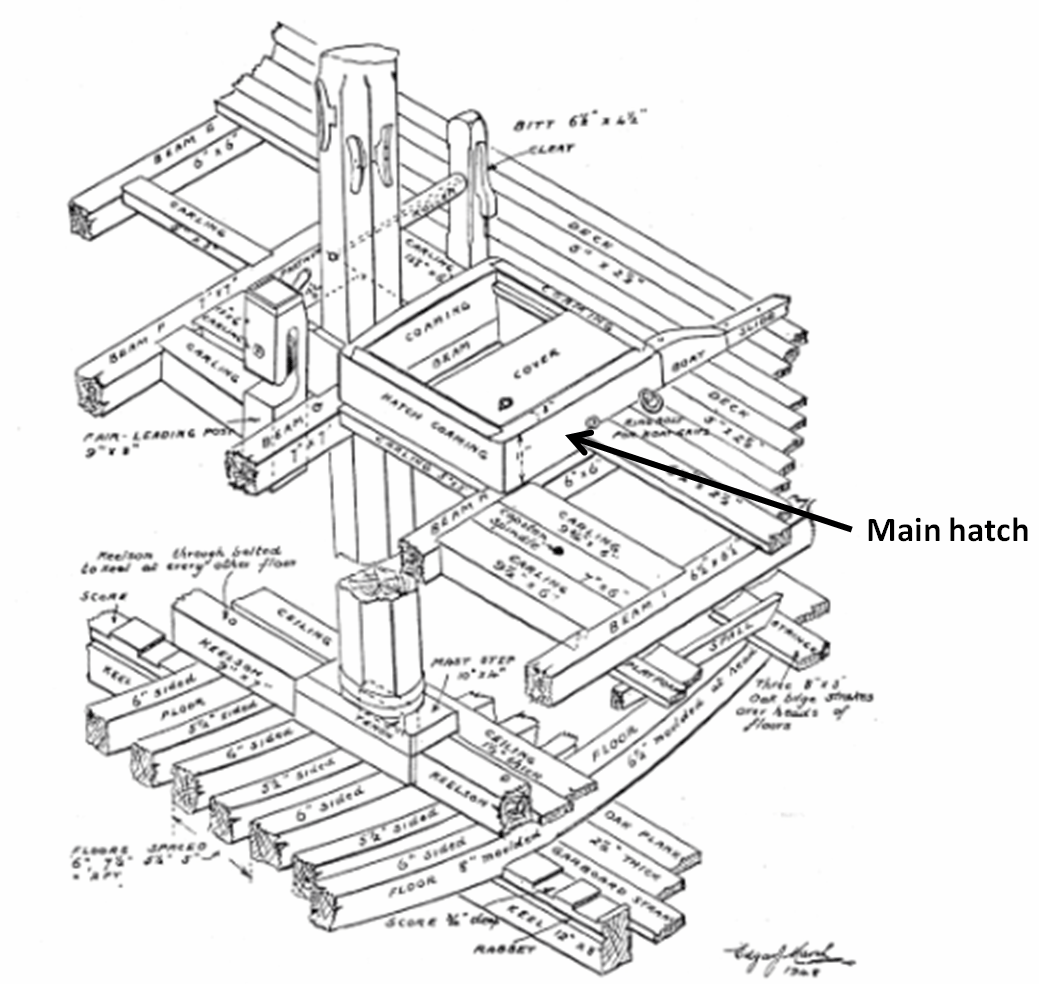
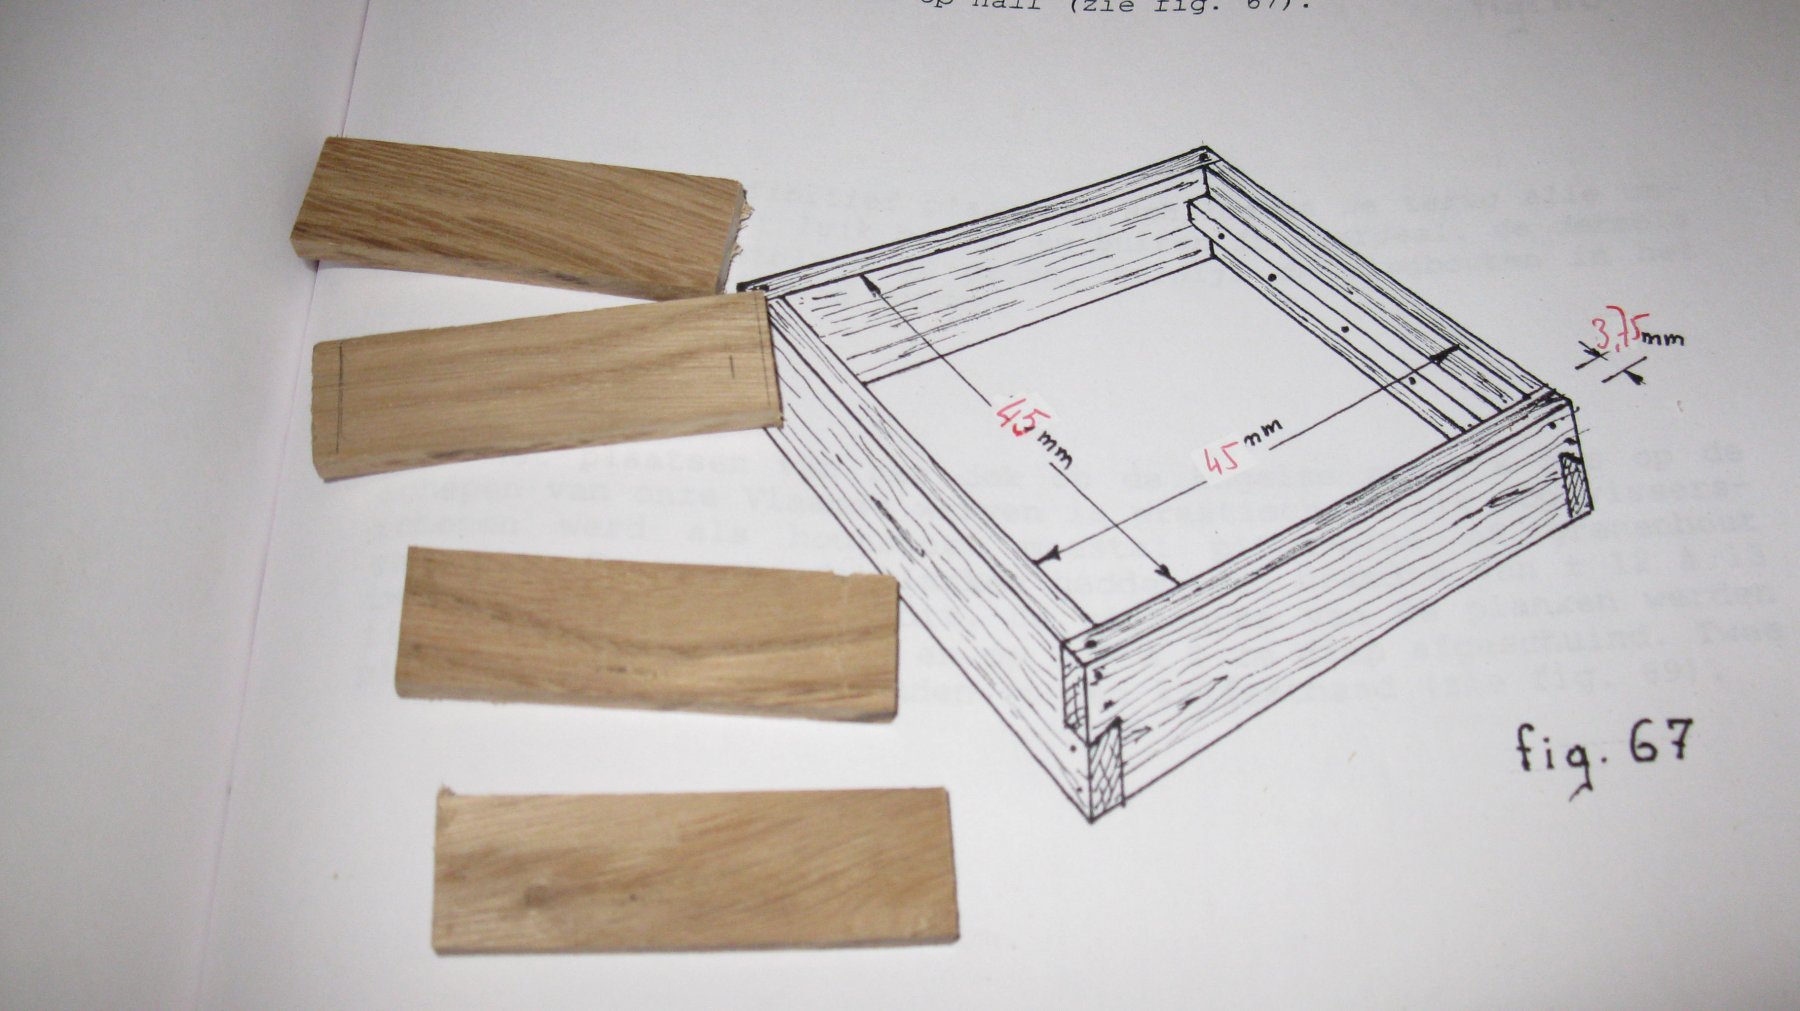
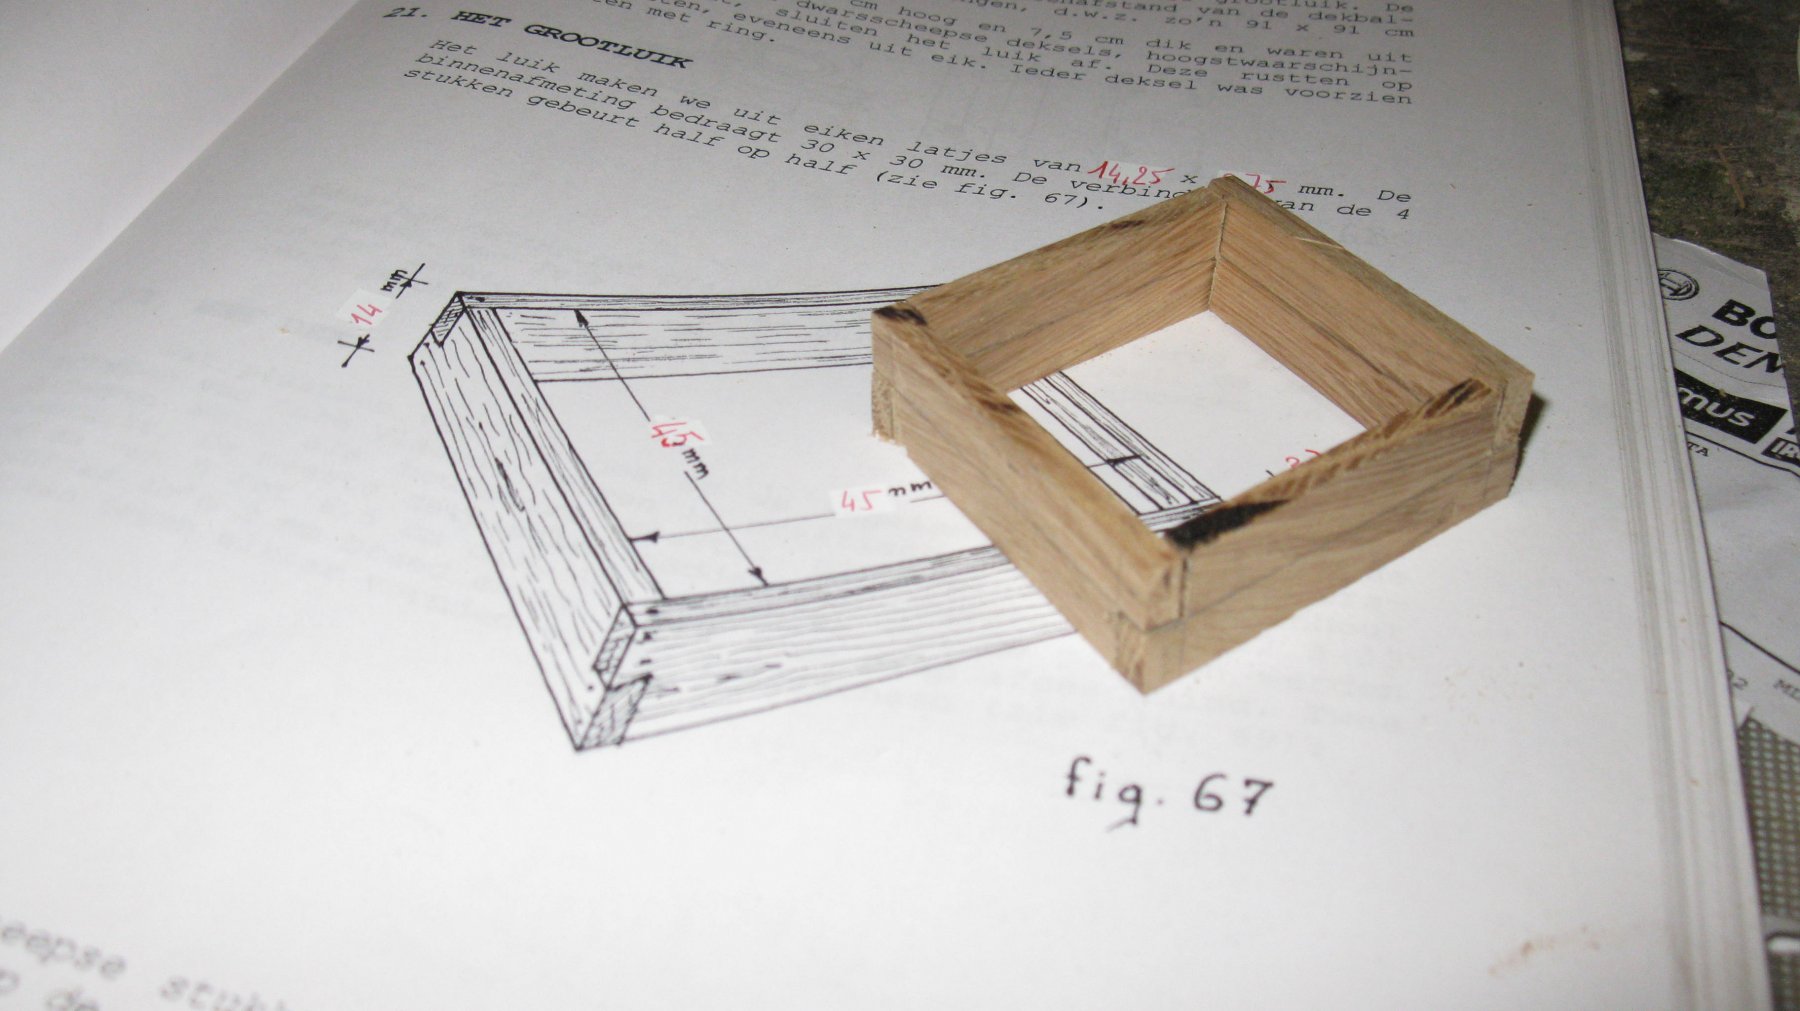
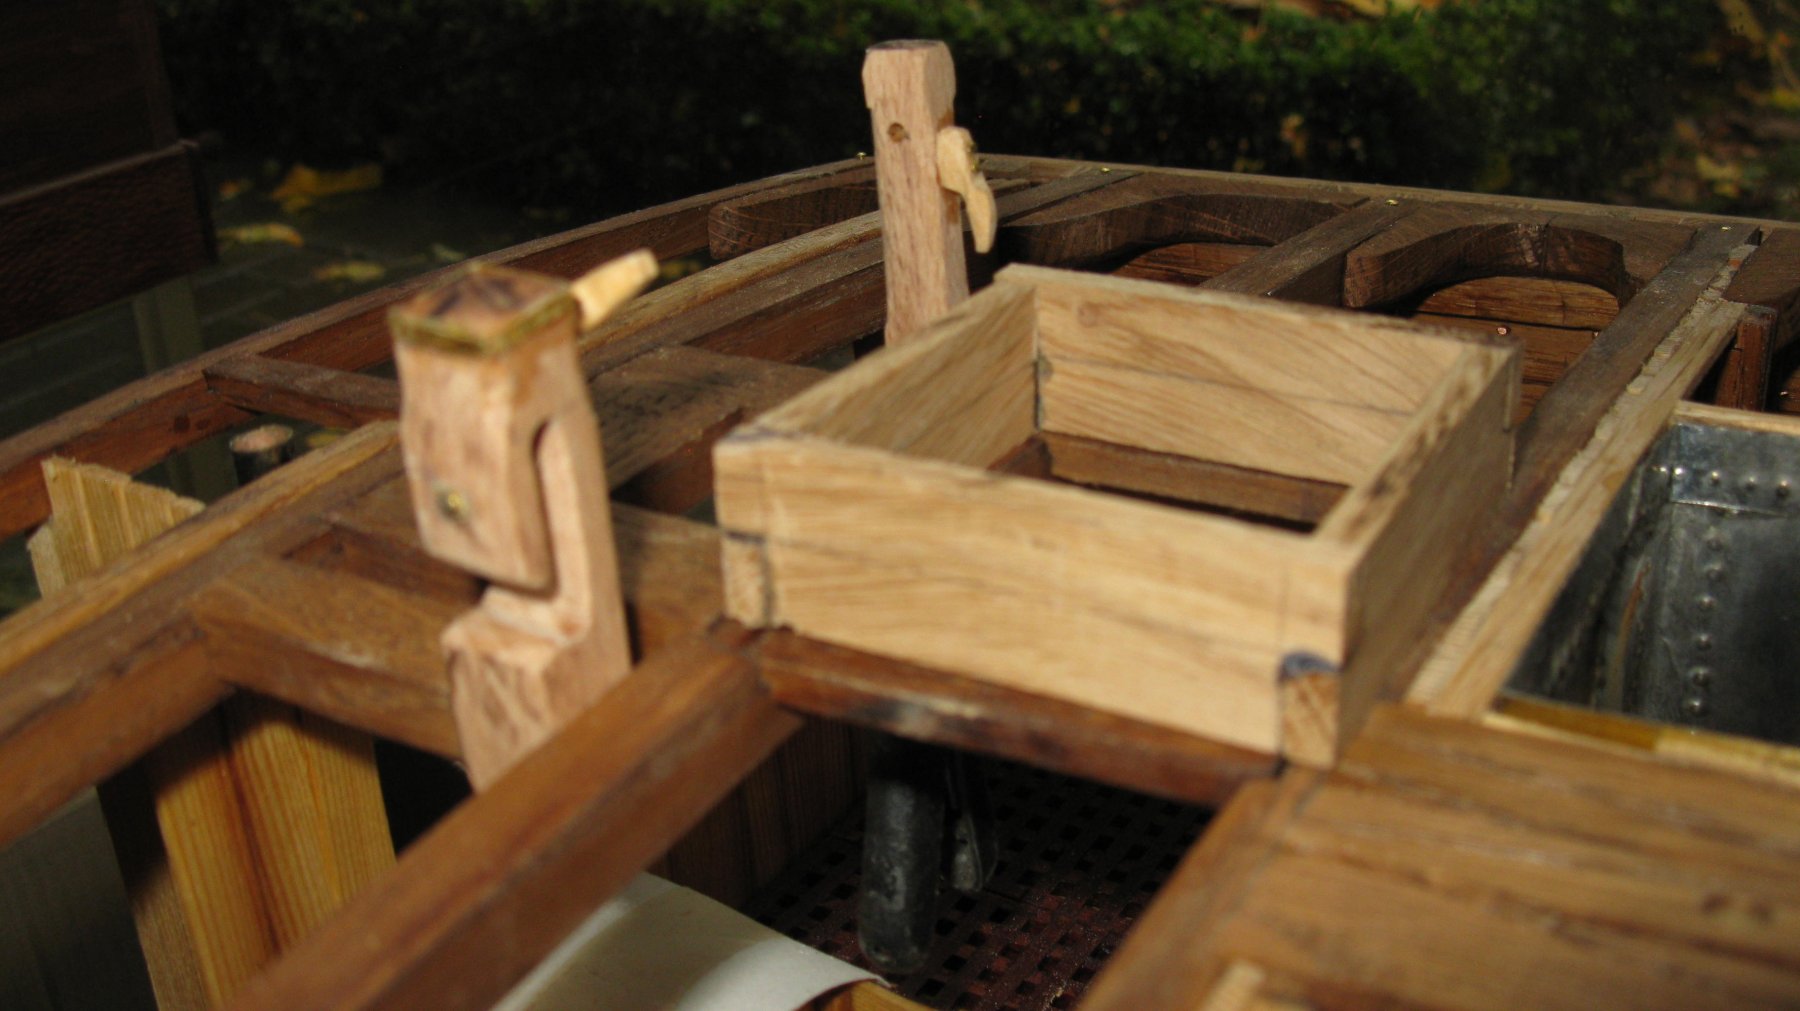
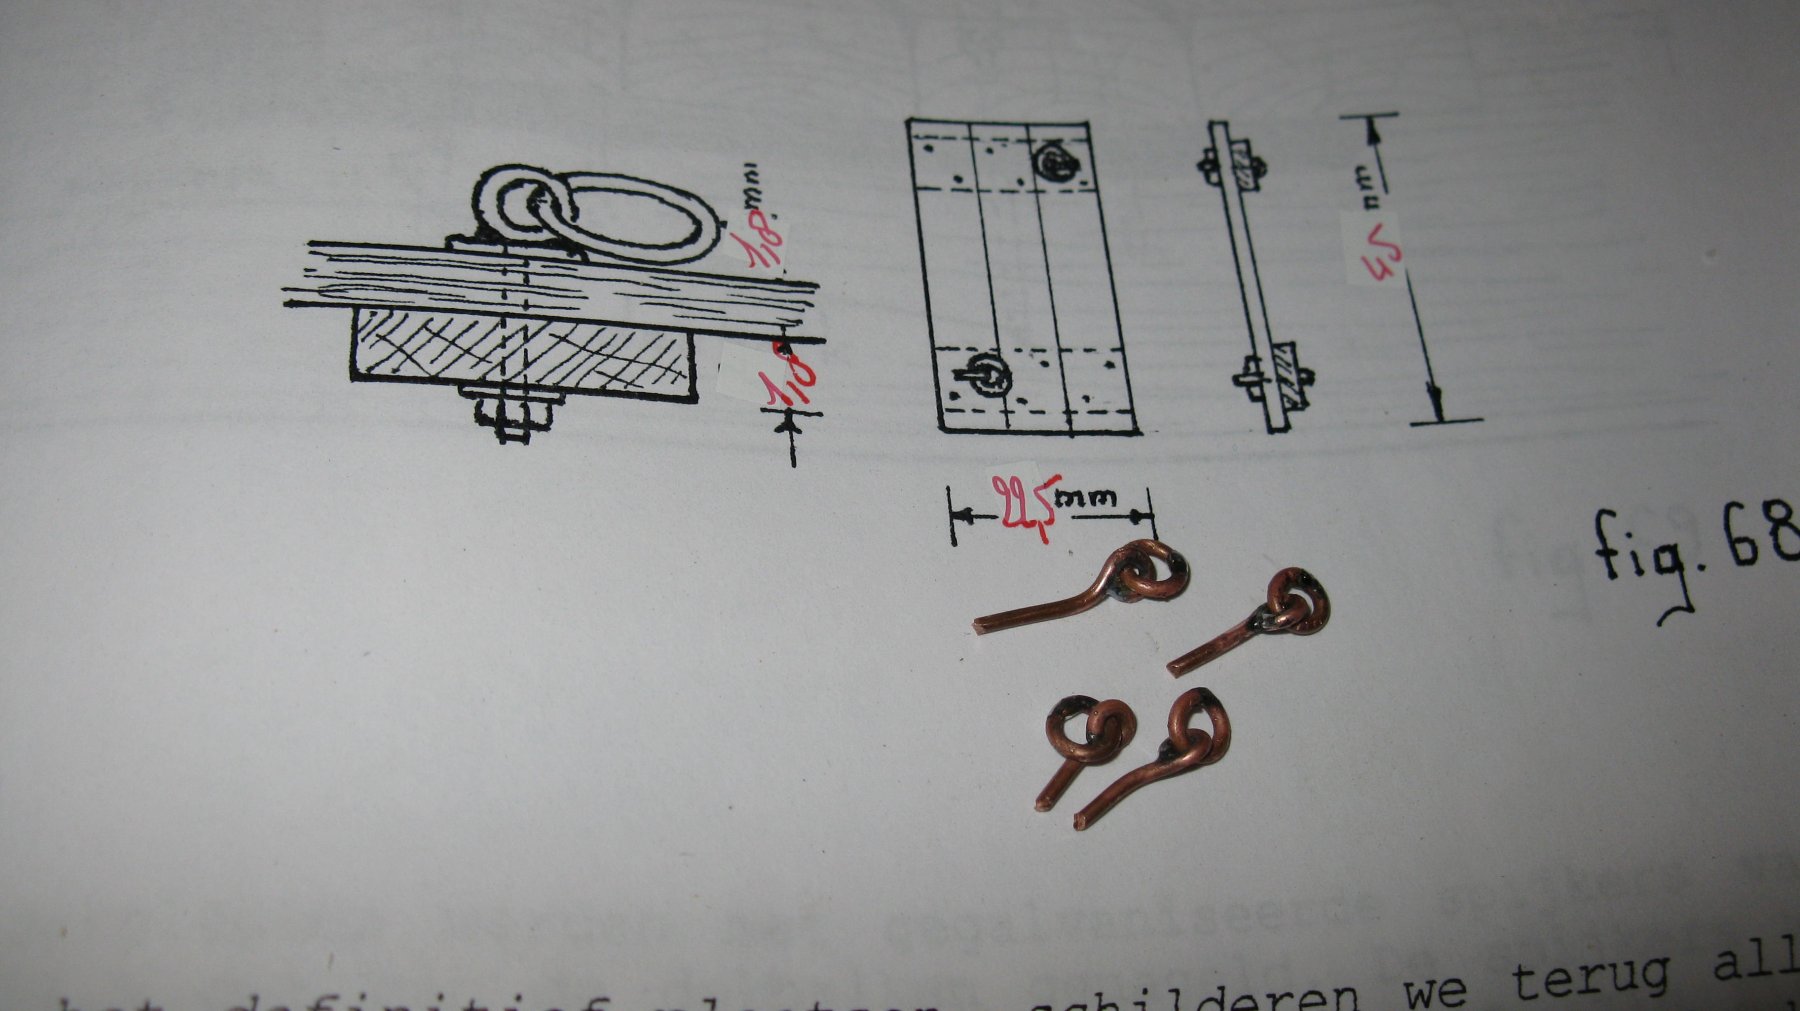
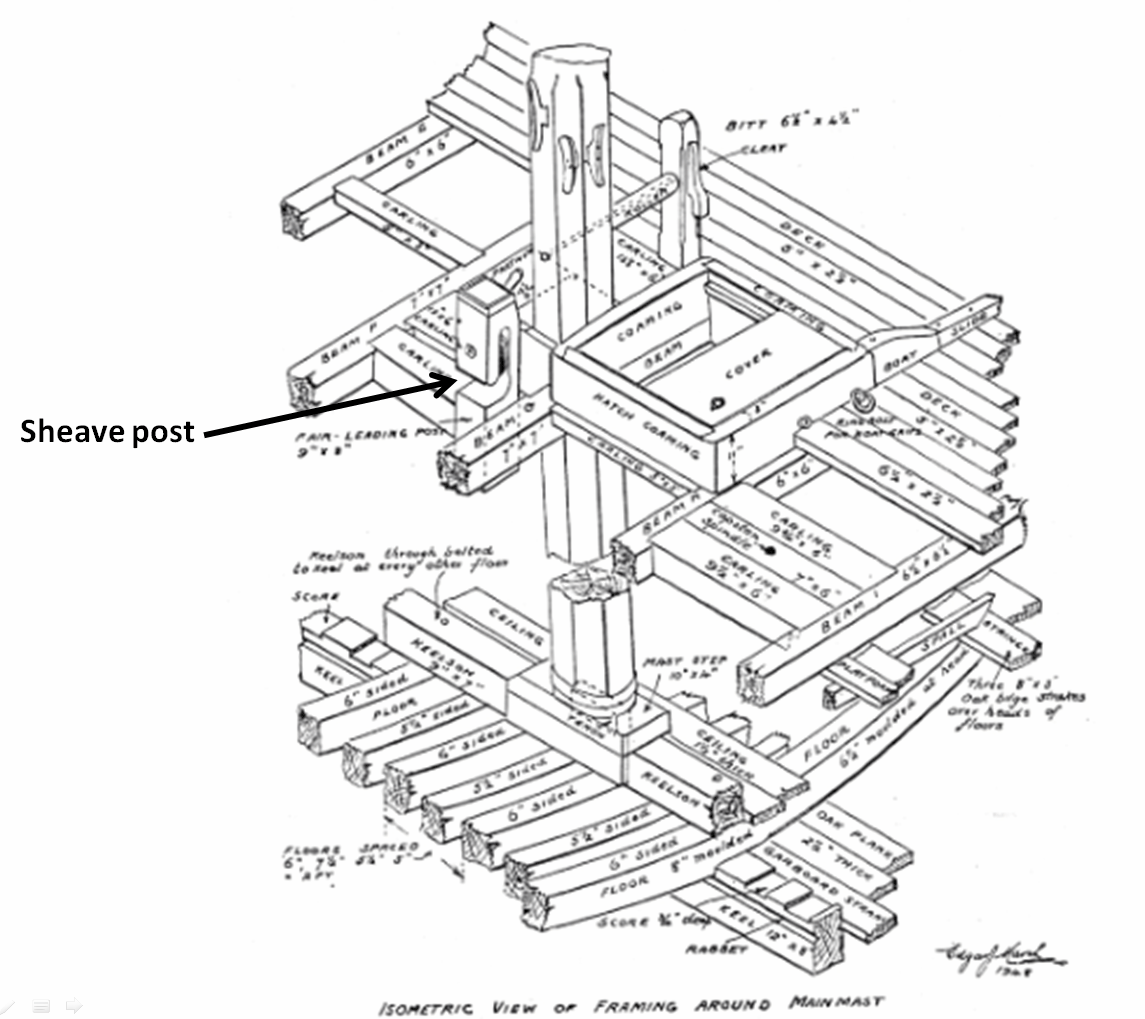
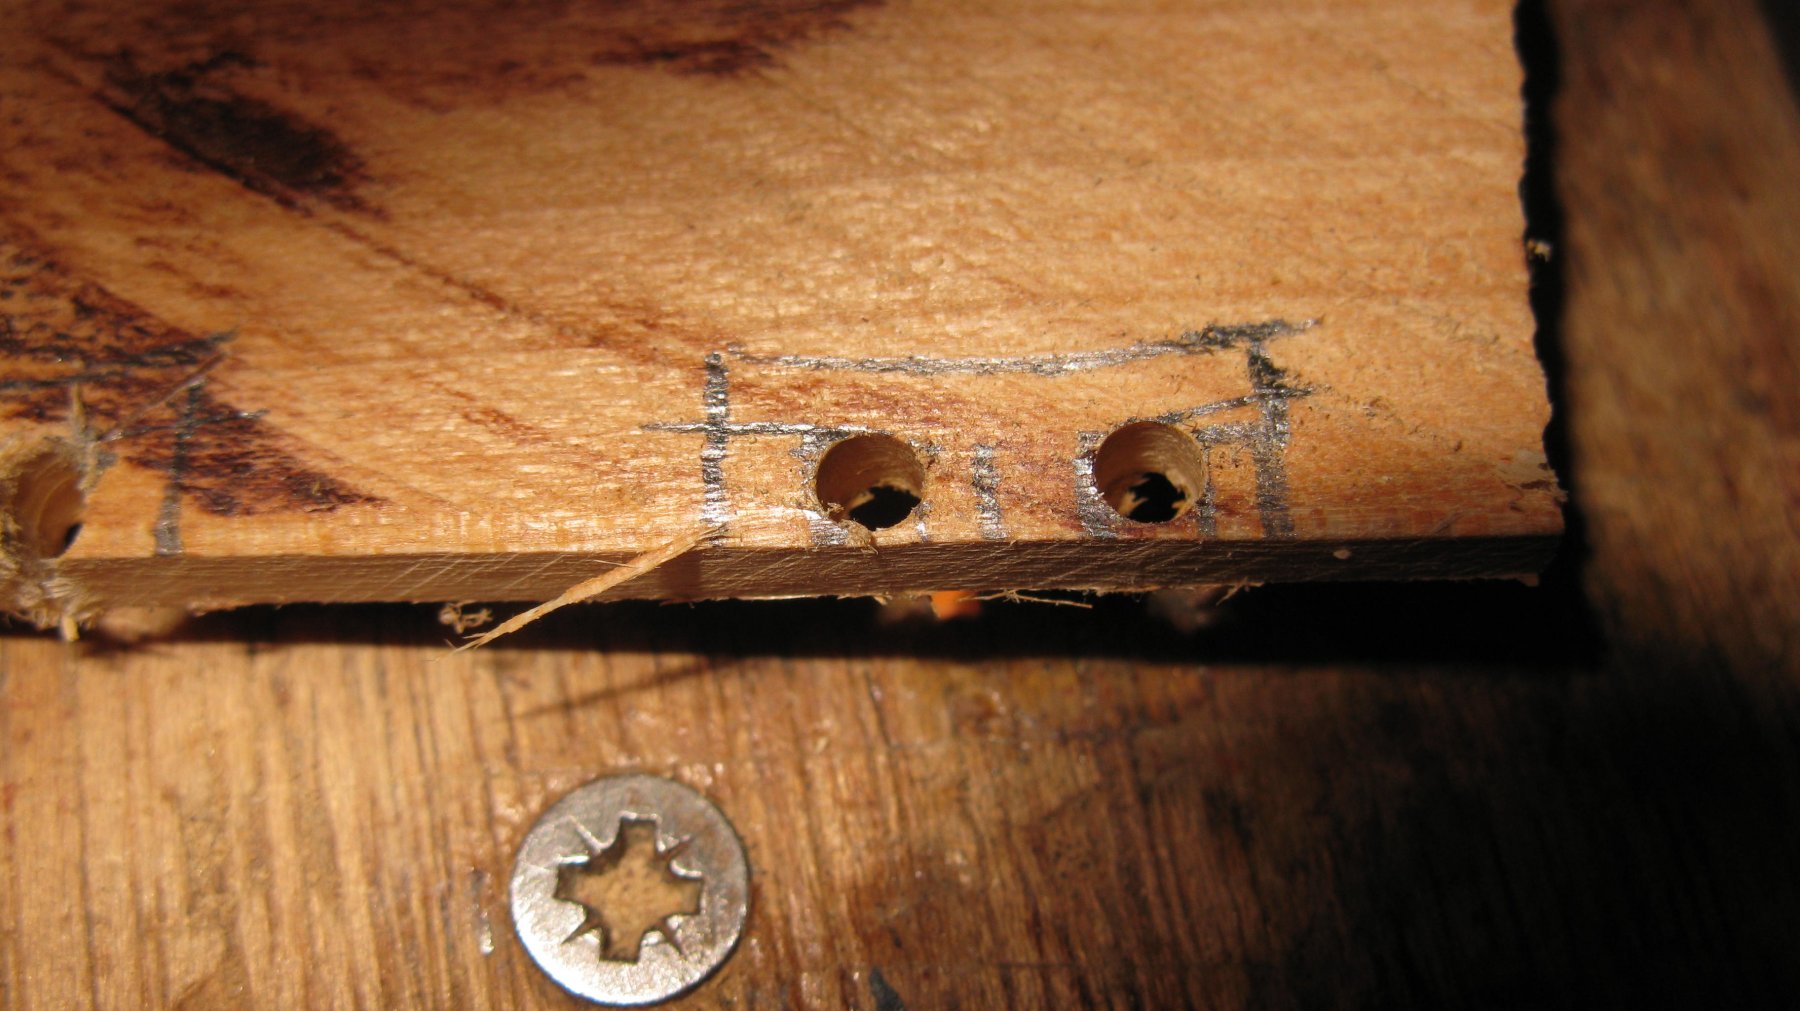
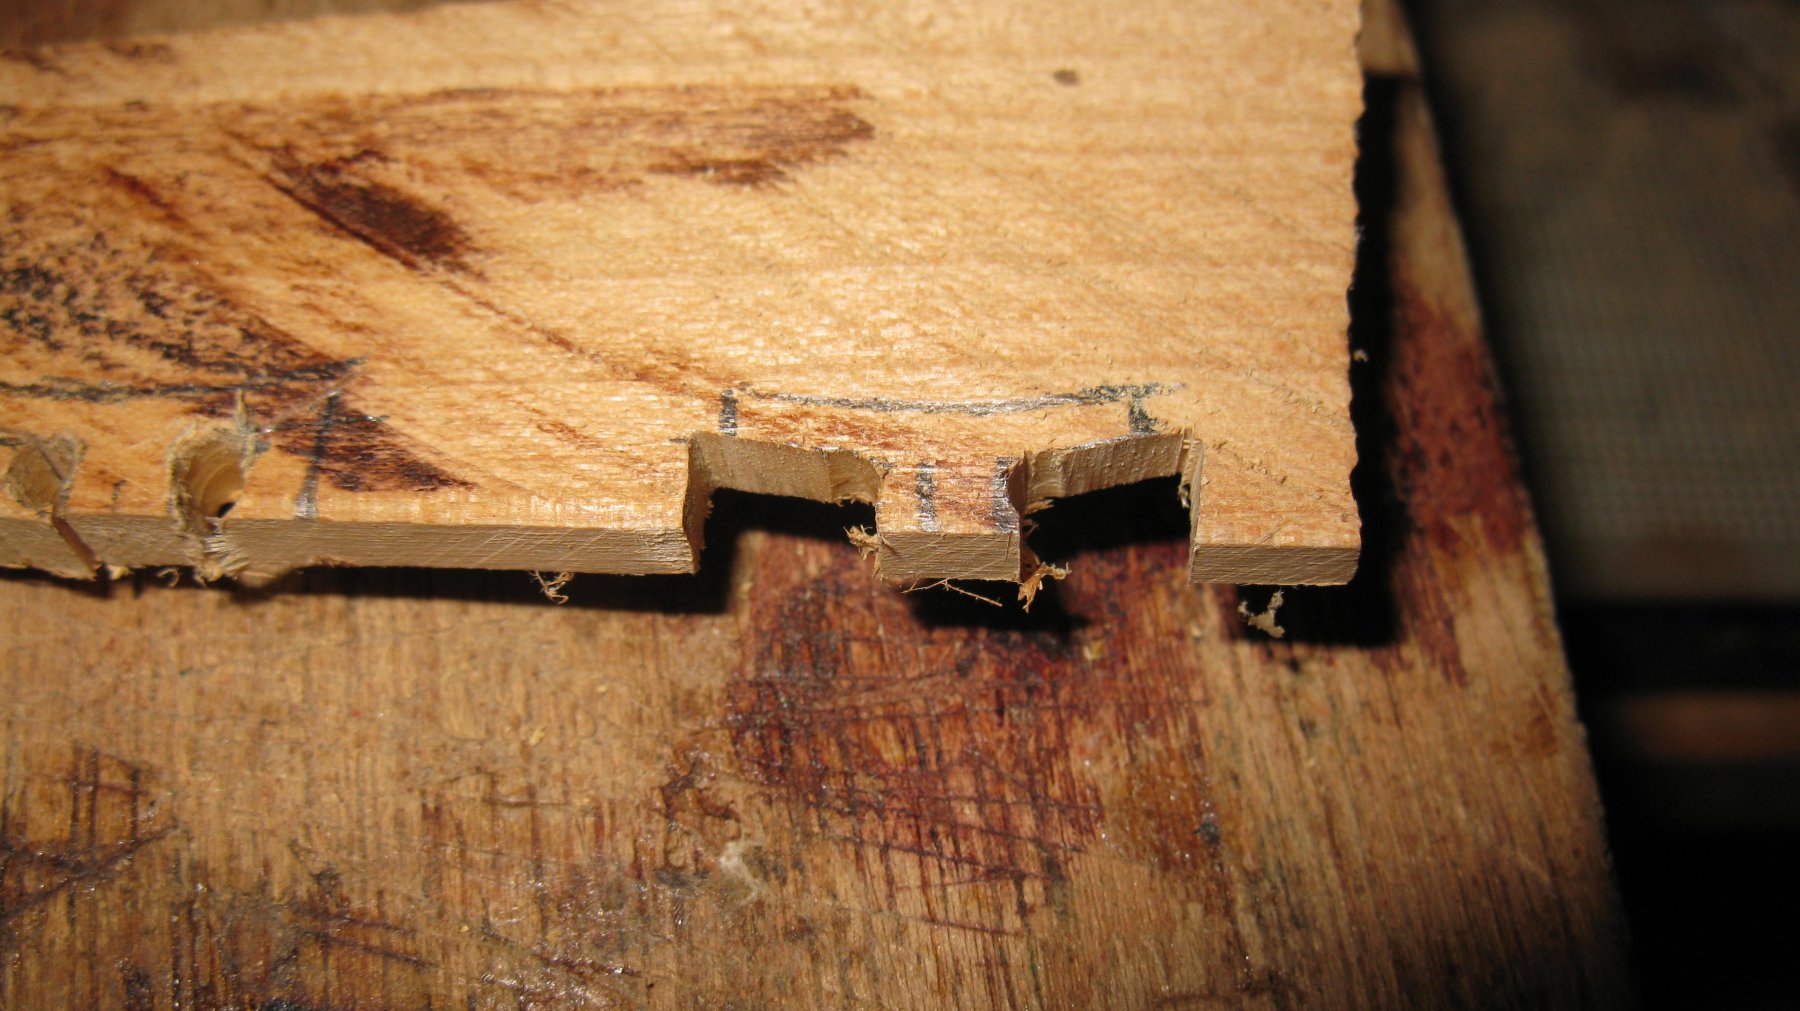
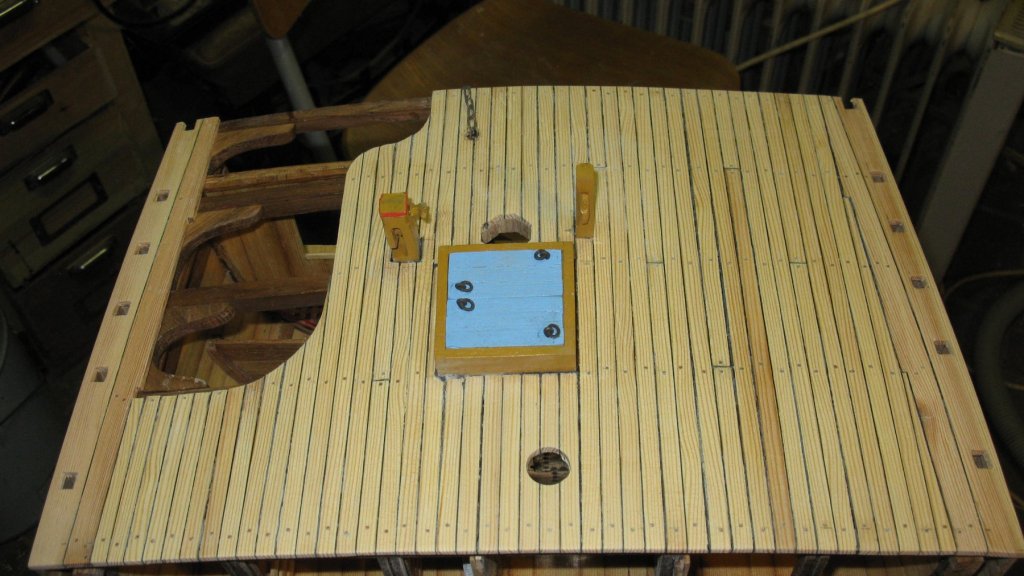
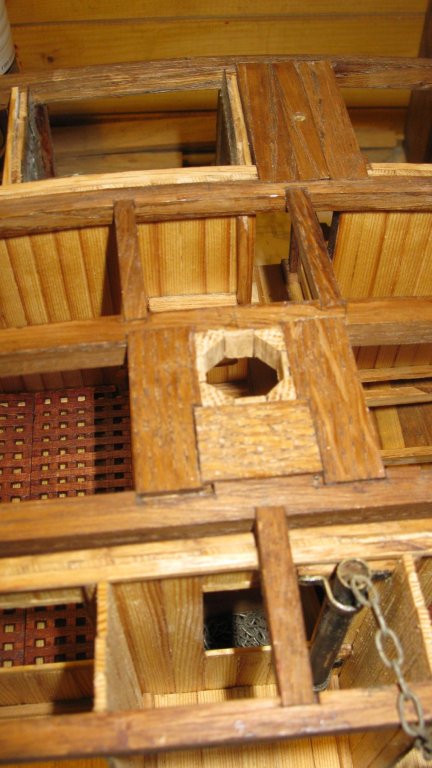
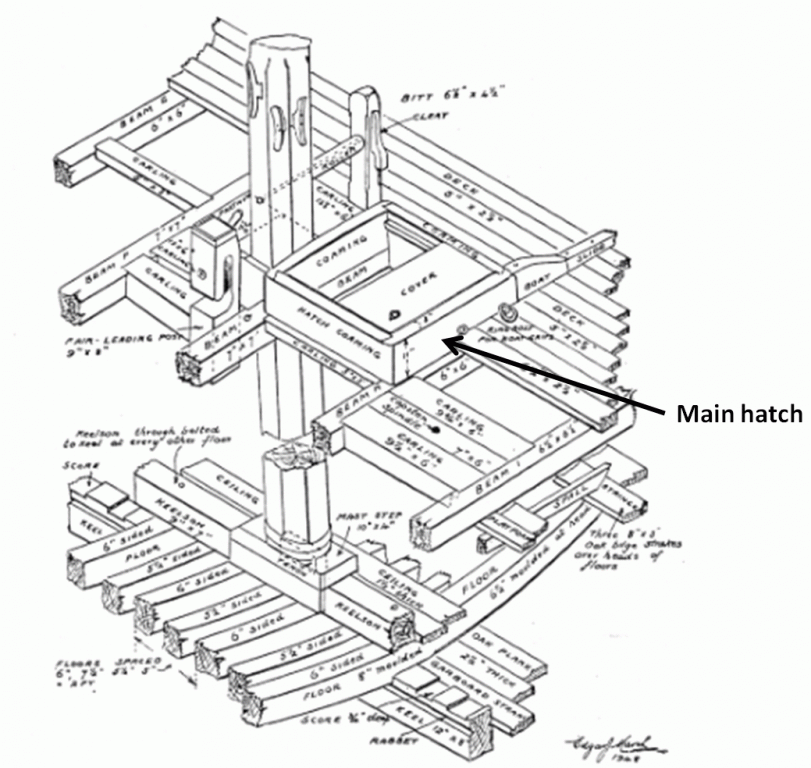
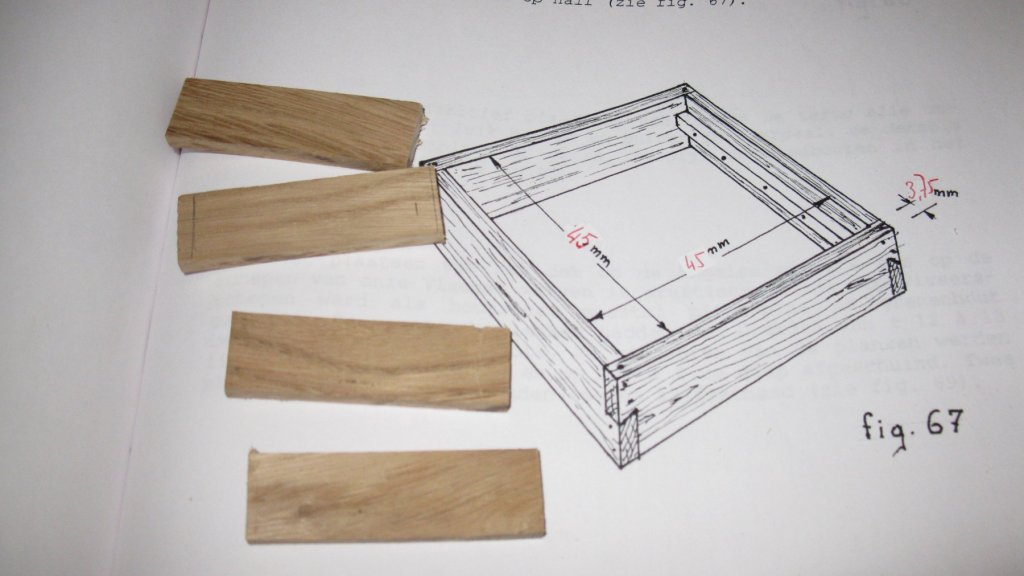
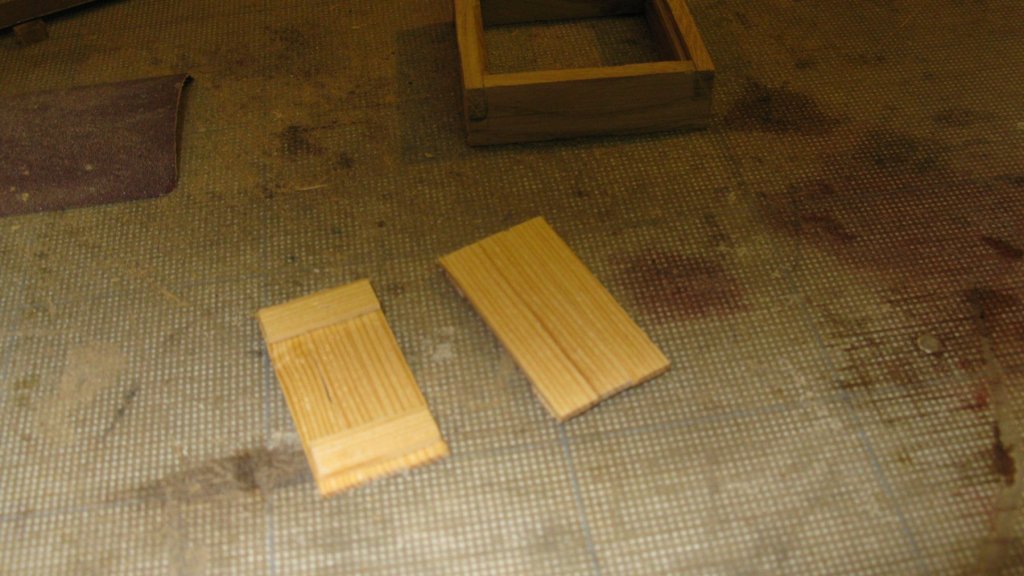
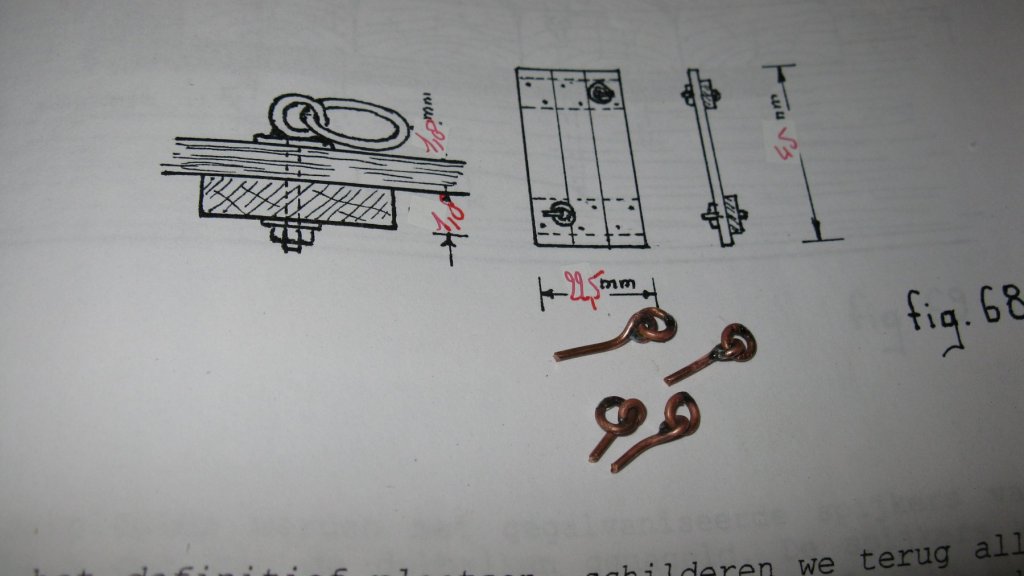
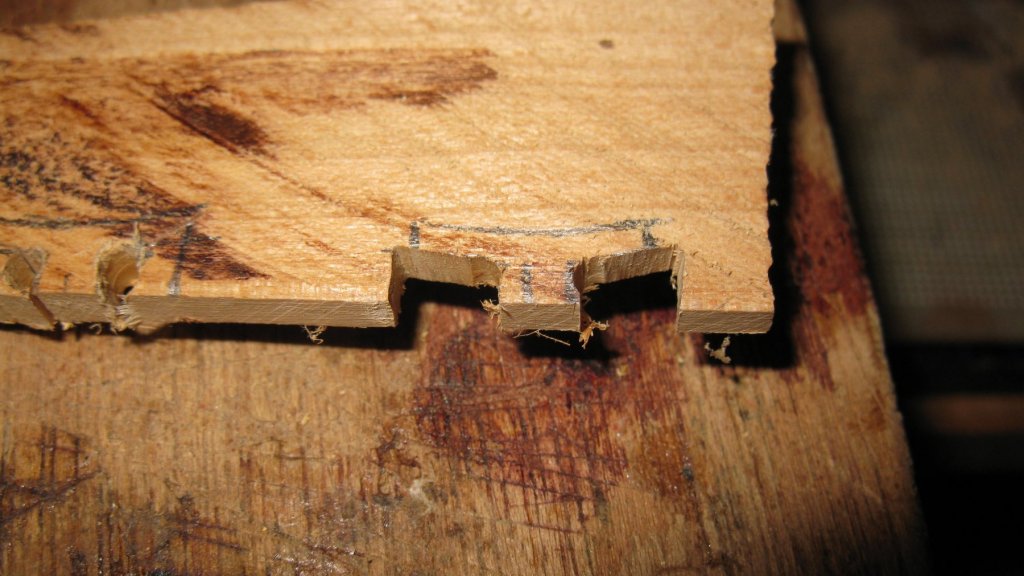
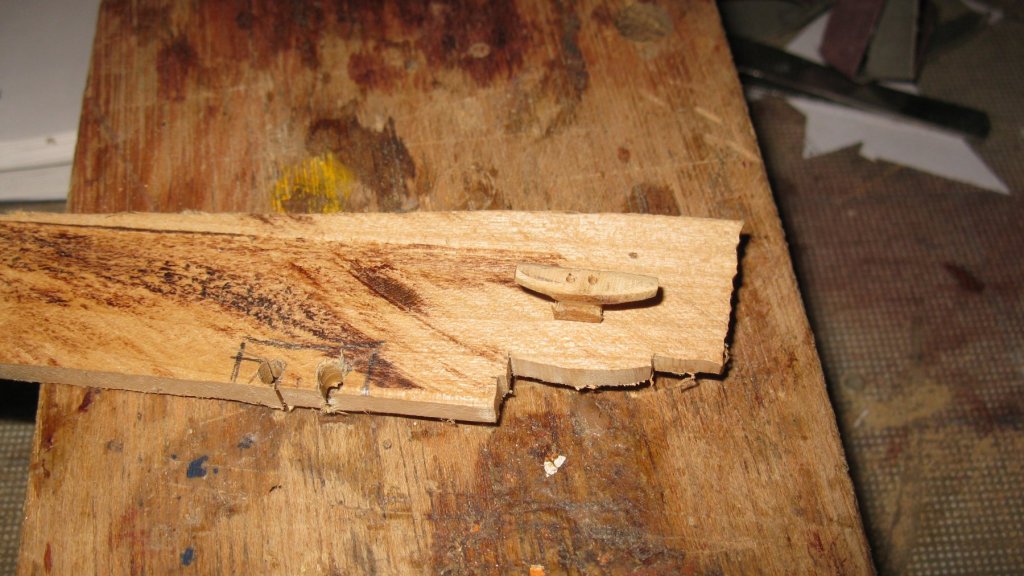
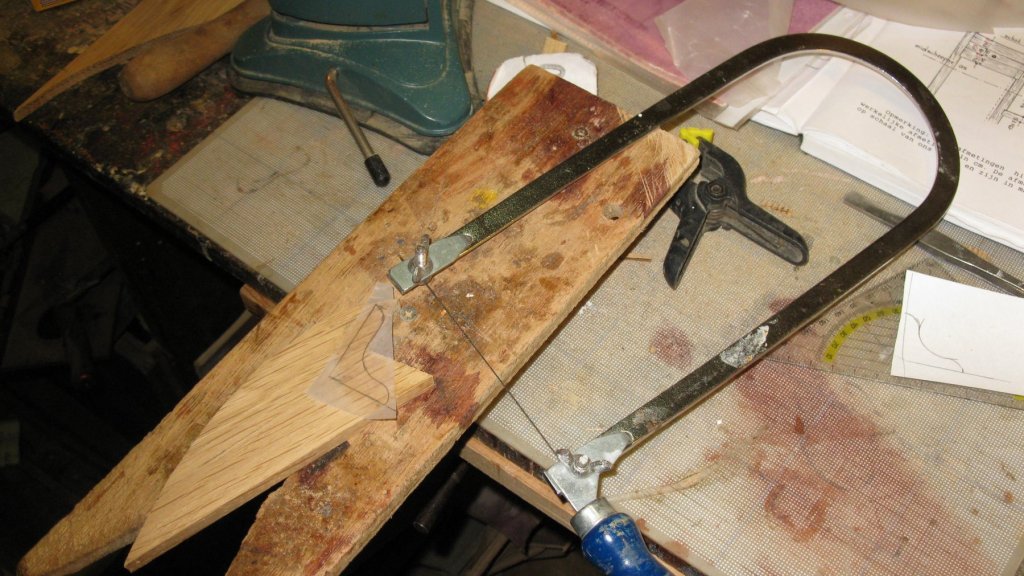
18.3. Preparing to lay the deck. Making the main hatch Just behind the main mast is the main hatch (Drawing: 'Sailing trawlers' Edgar J. March). The four hatch coamings. The coamings placed together with the dovetails sawn out. The hatch covers The hatch has to be painted in ocher and the covers in light blue. I paint also the fair leading post and the bit for the jib boom roller. I use acrylic paint from my wives paint box and varnish it when the paint is dry. Making the hatch rings


- 219 replies
-
- 7
-
-
- smack
- cross-section
- (and 2 more)
-
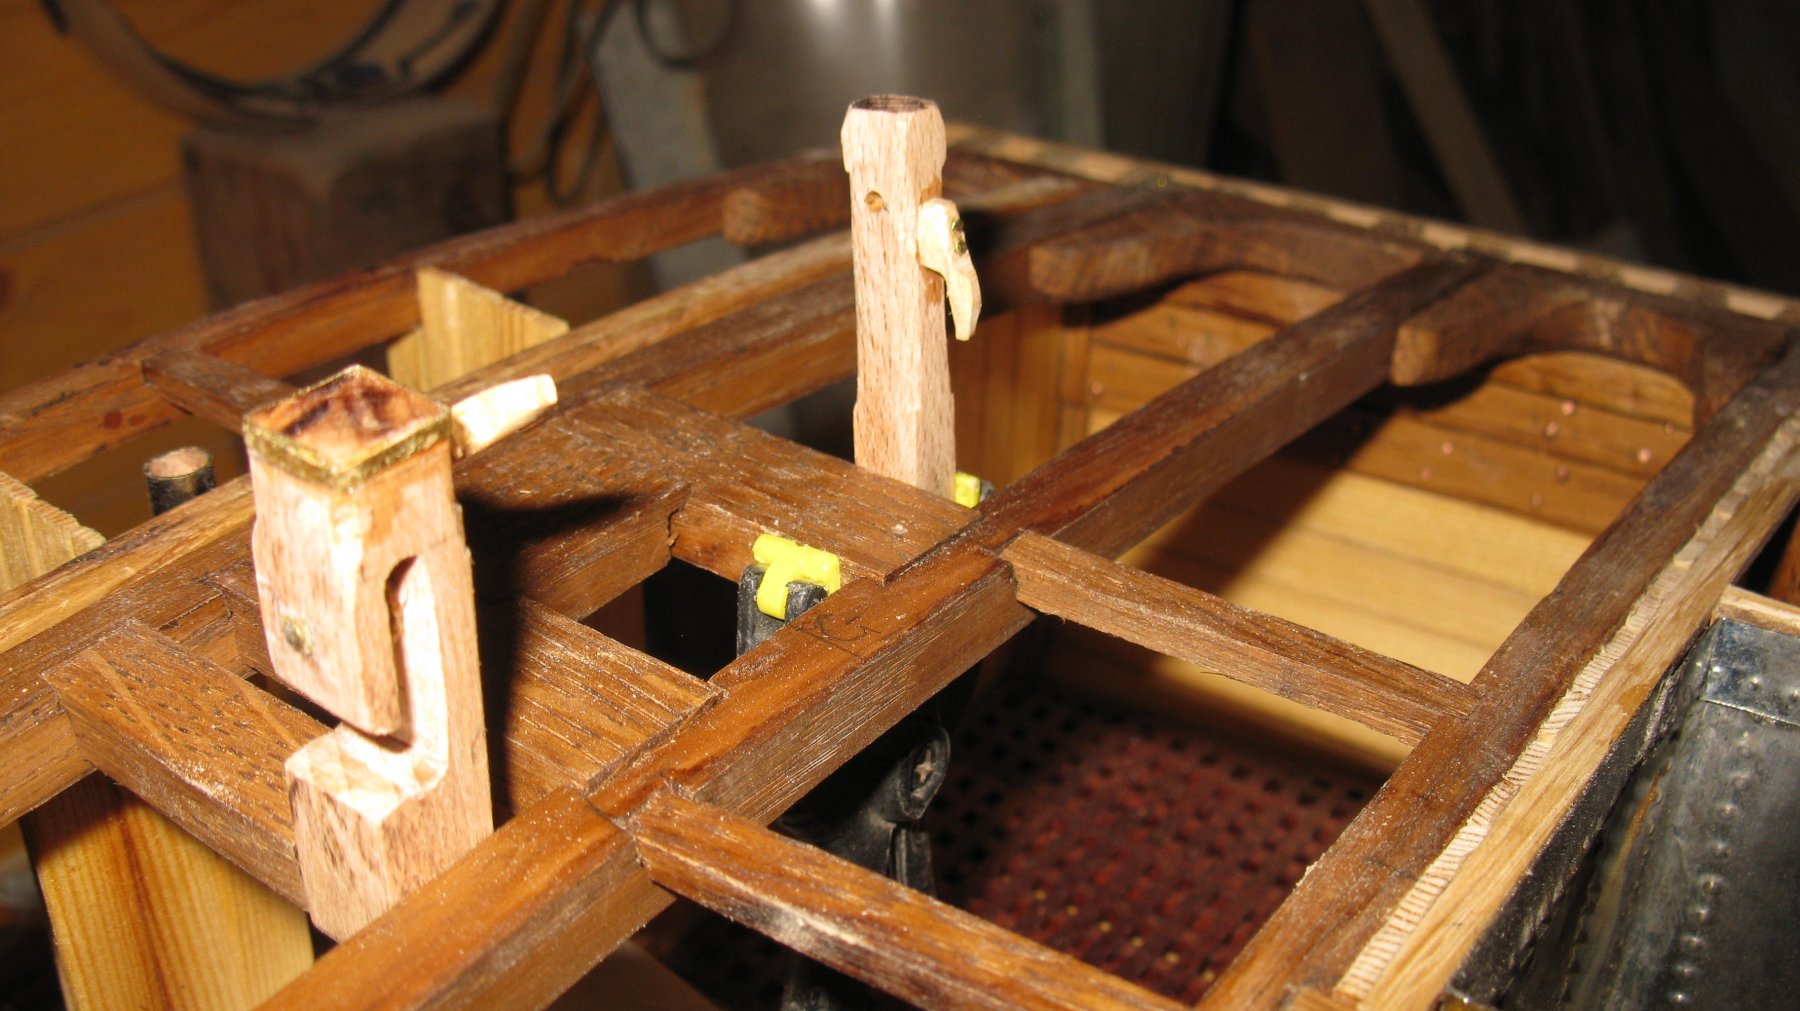
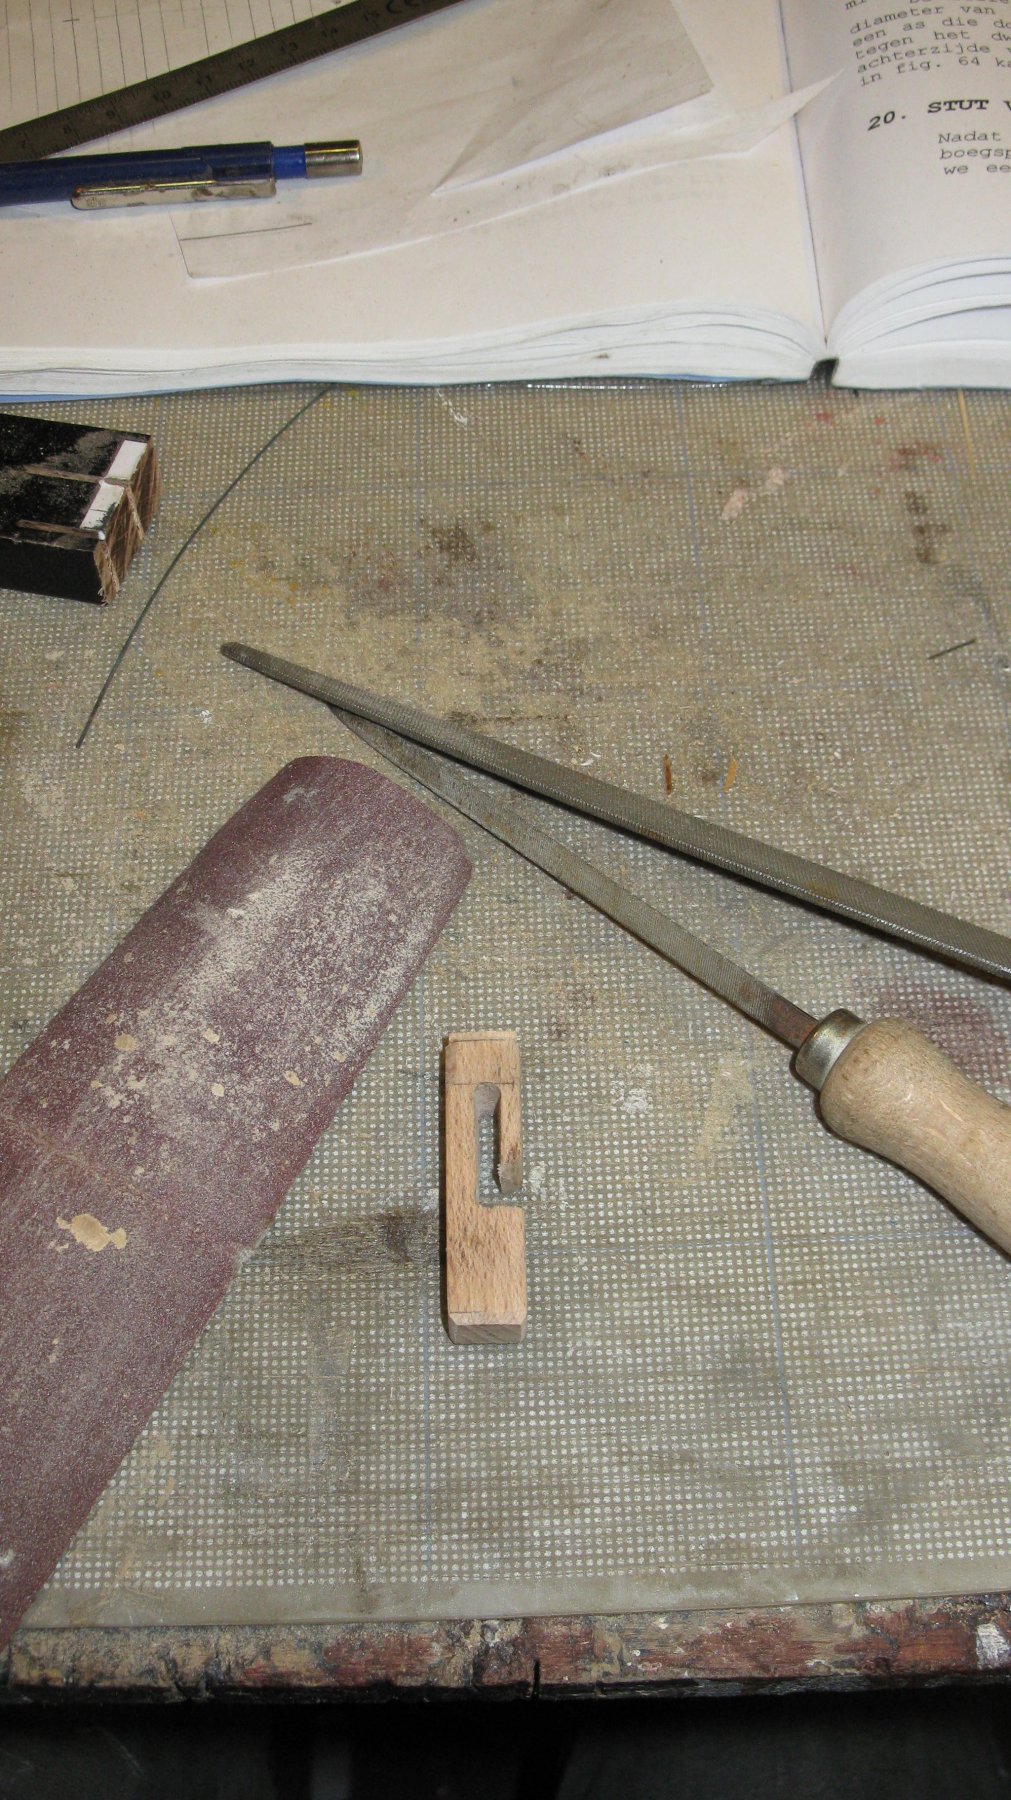
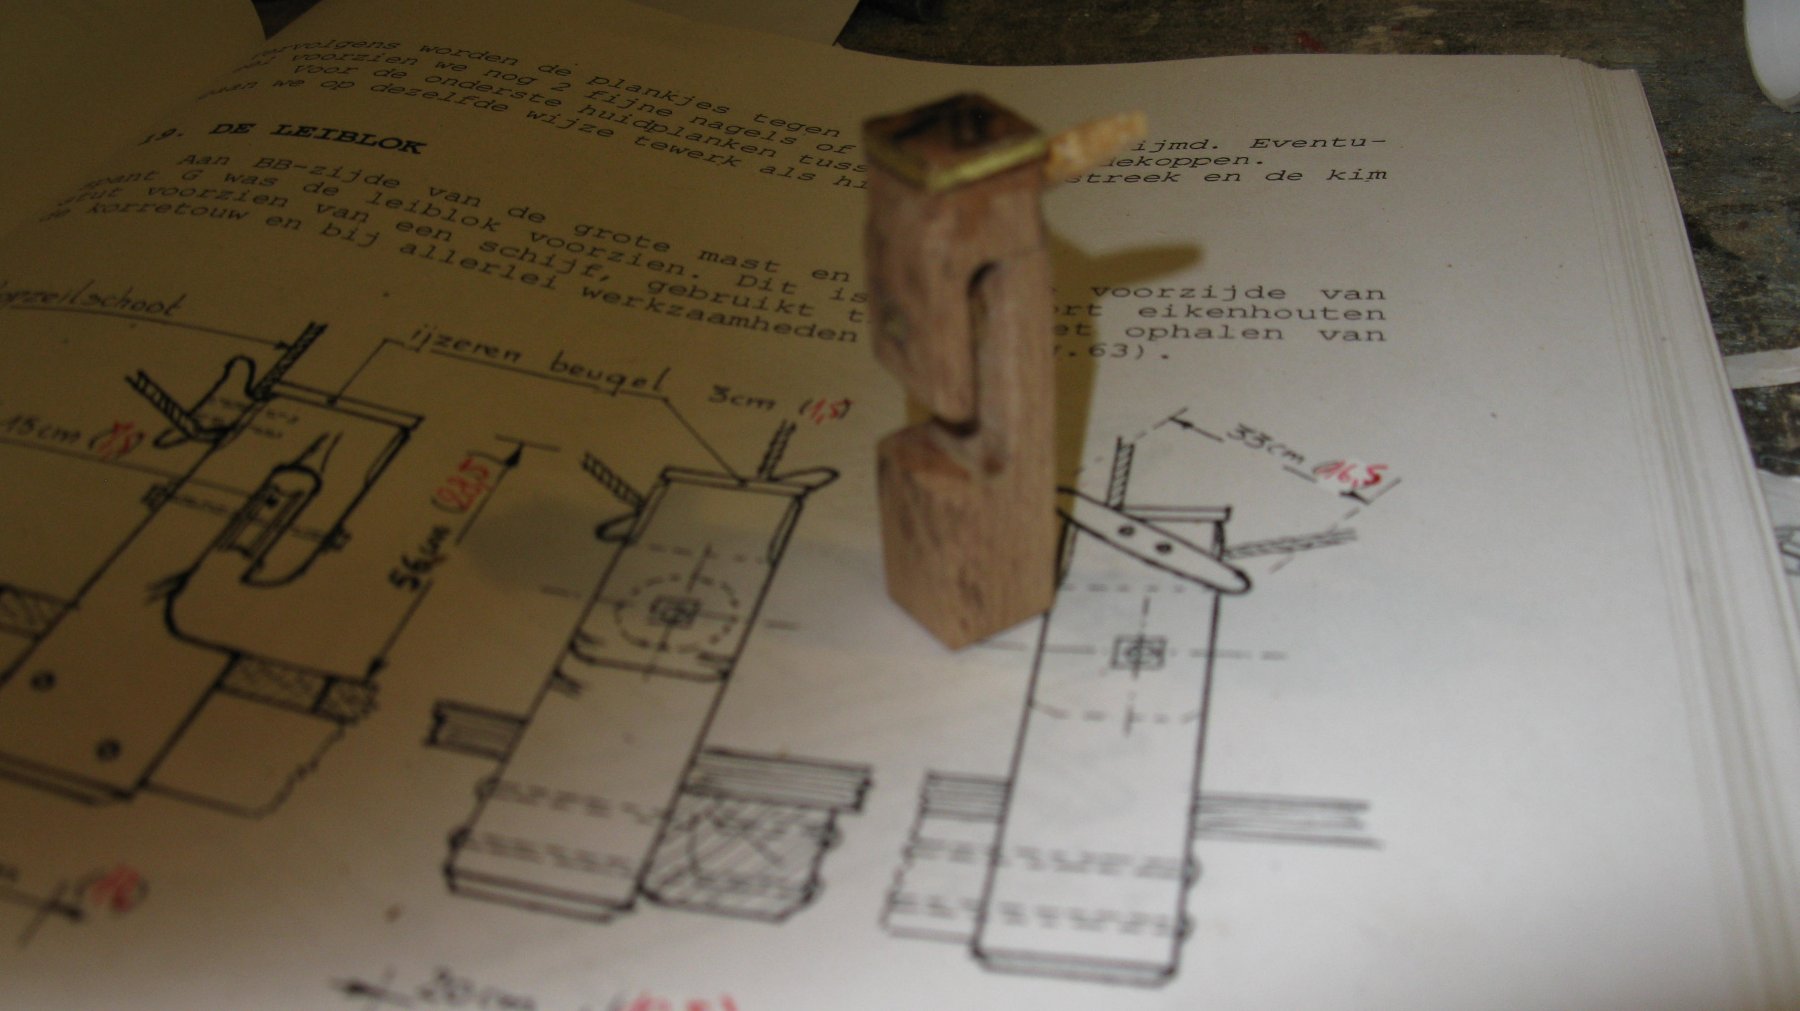
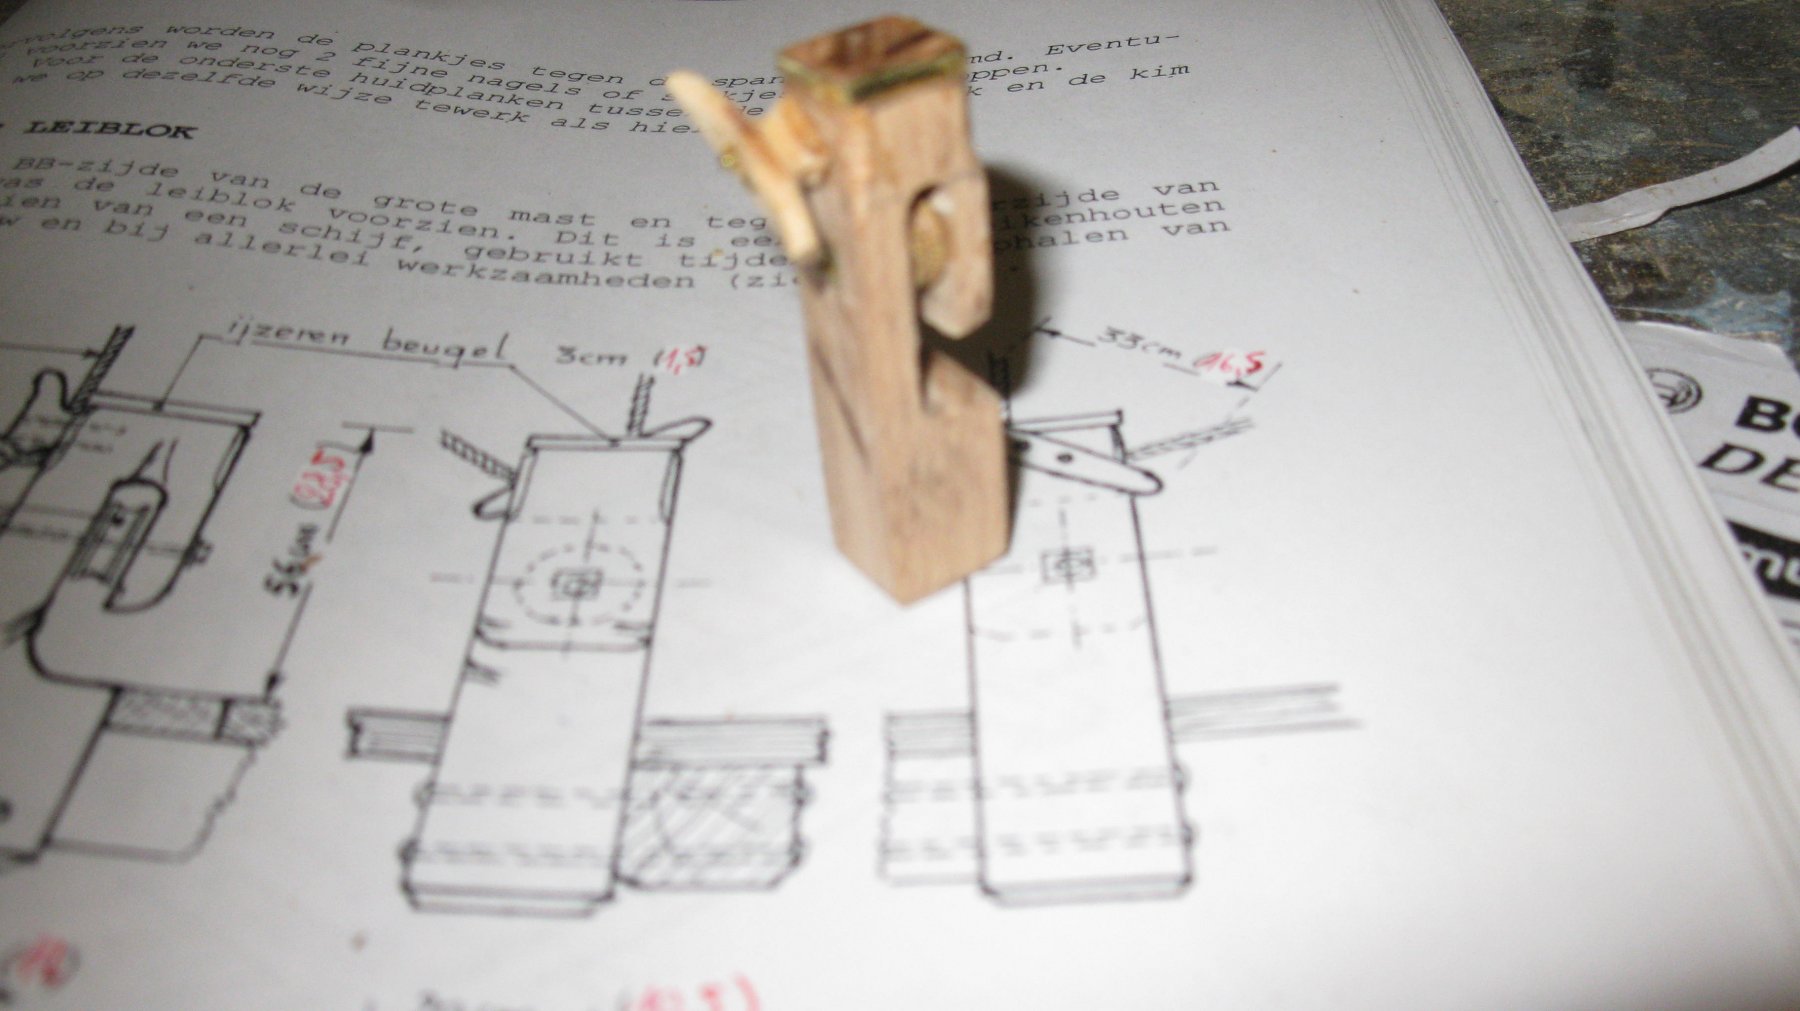
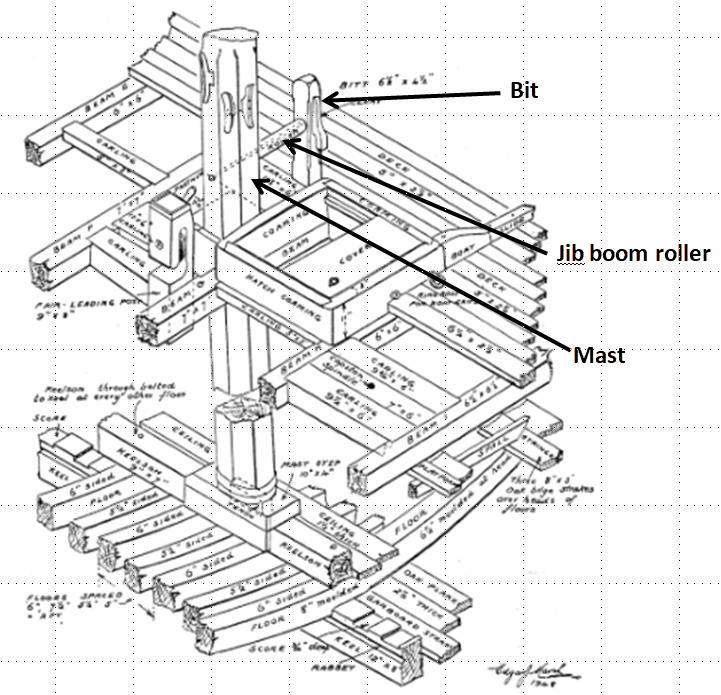
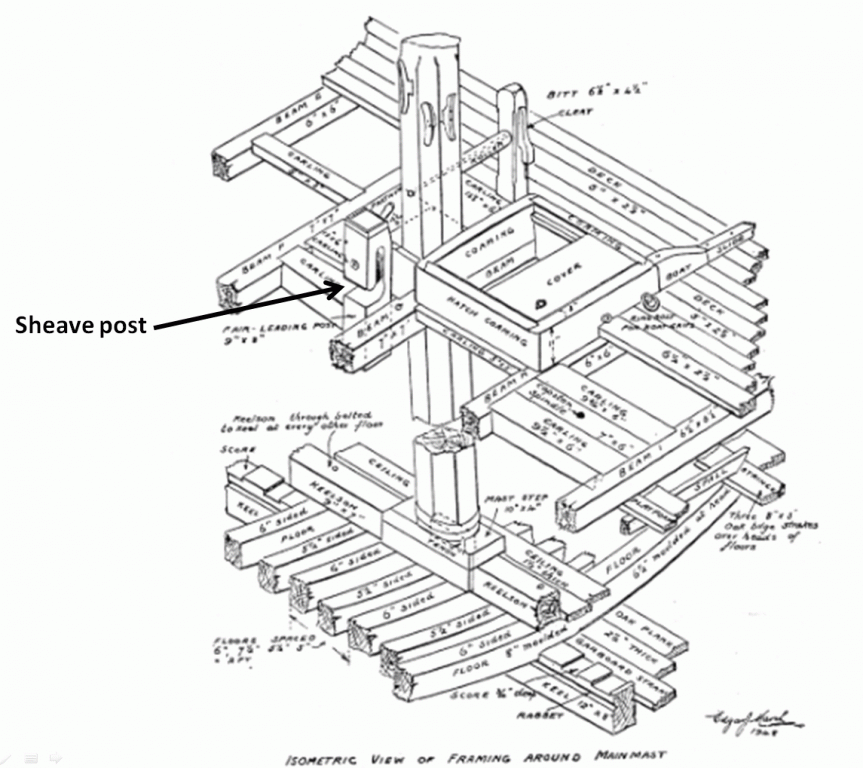
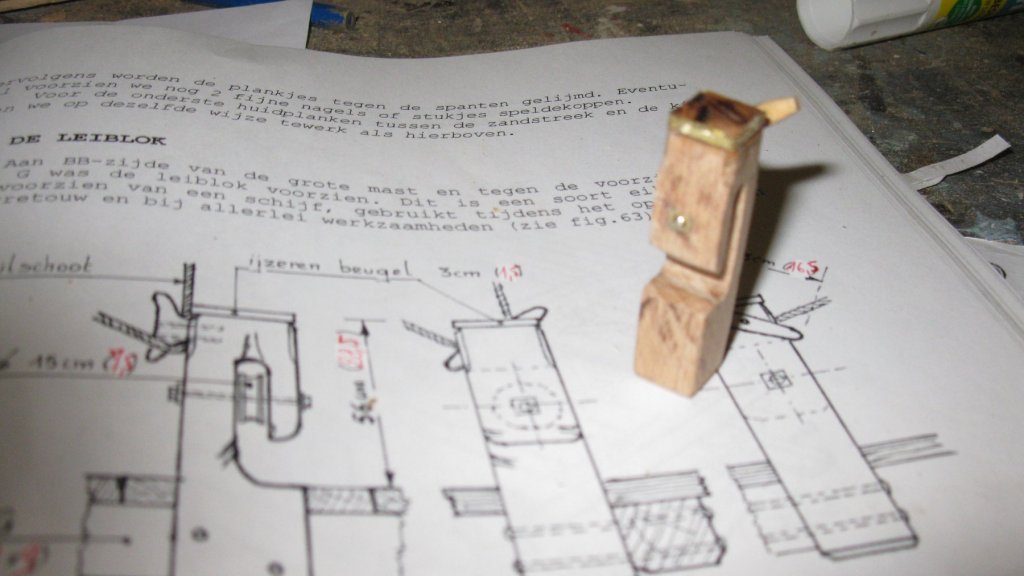
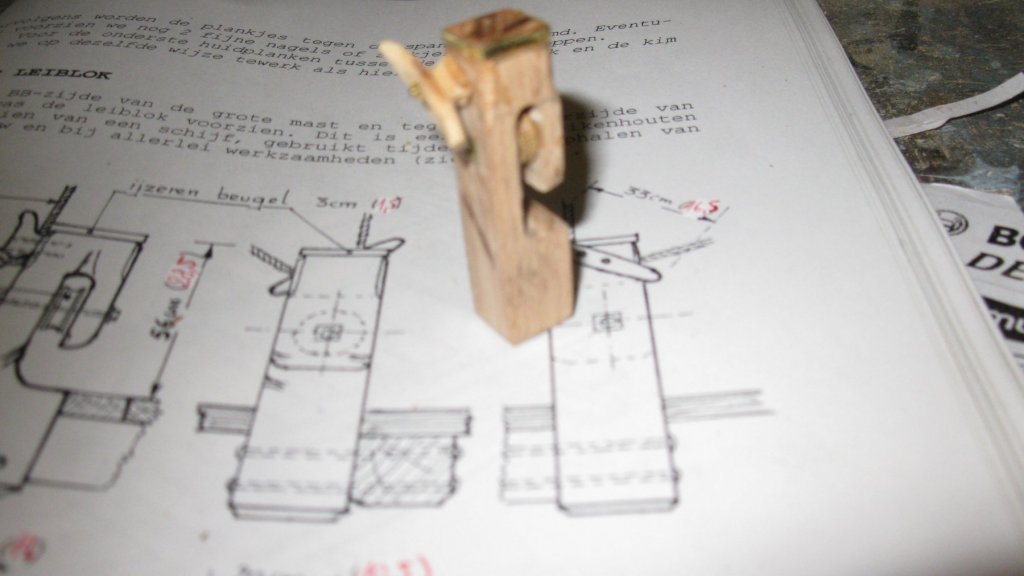
18.2. Preparing to lay the deck. Making a bit for the jib boom roller At the right side of the mast stands a bit with a cleat. Between the bit and the mast is a roller on which the jib boom is brought in (Drawing: 'Sailing trawlers' Edgar J. March). Making the bit. The fair leading post and the bit presented into their position. .

- 219 replies
-
- 7
-
-
- smack
- cross-section
- (and 2 more)
-
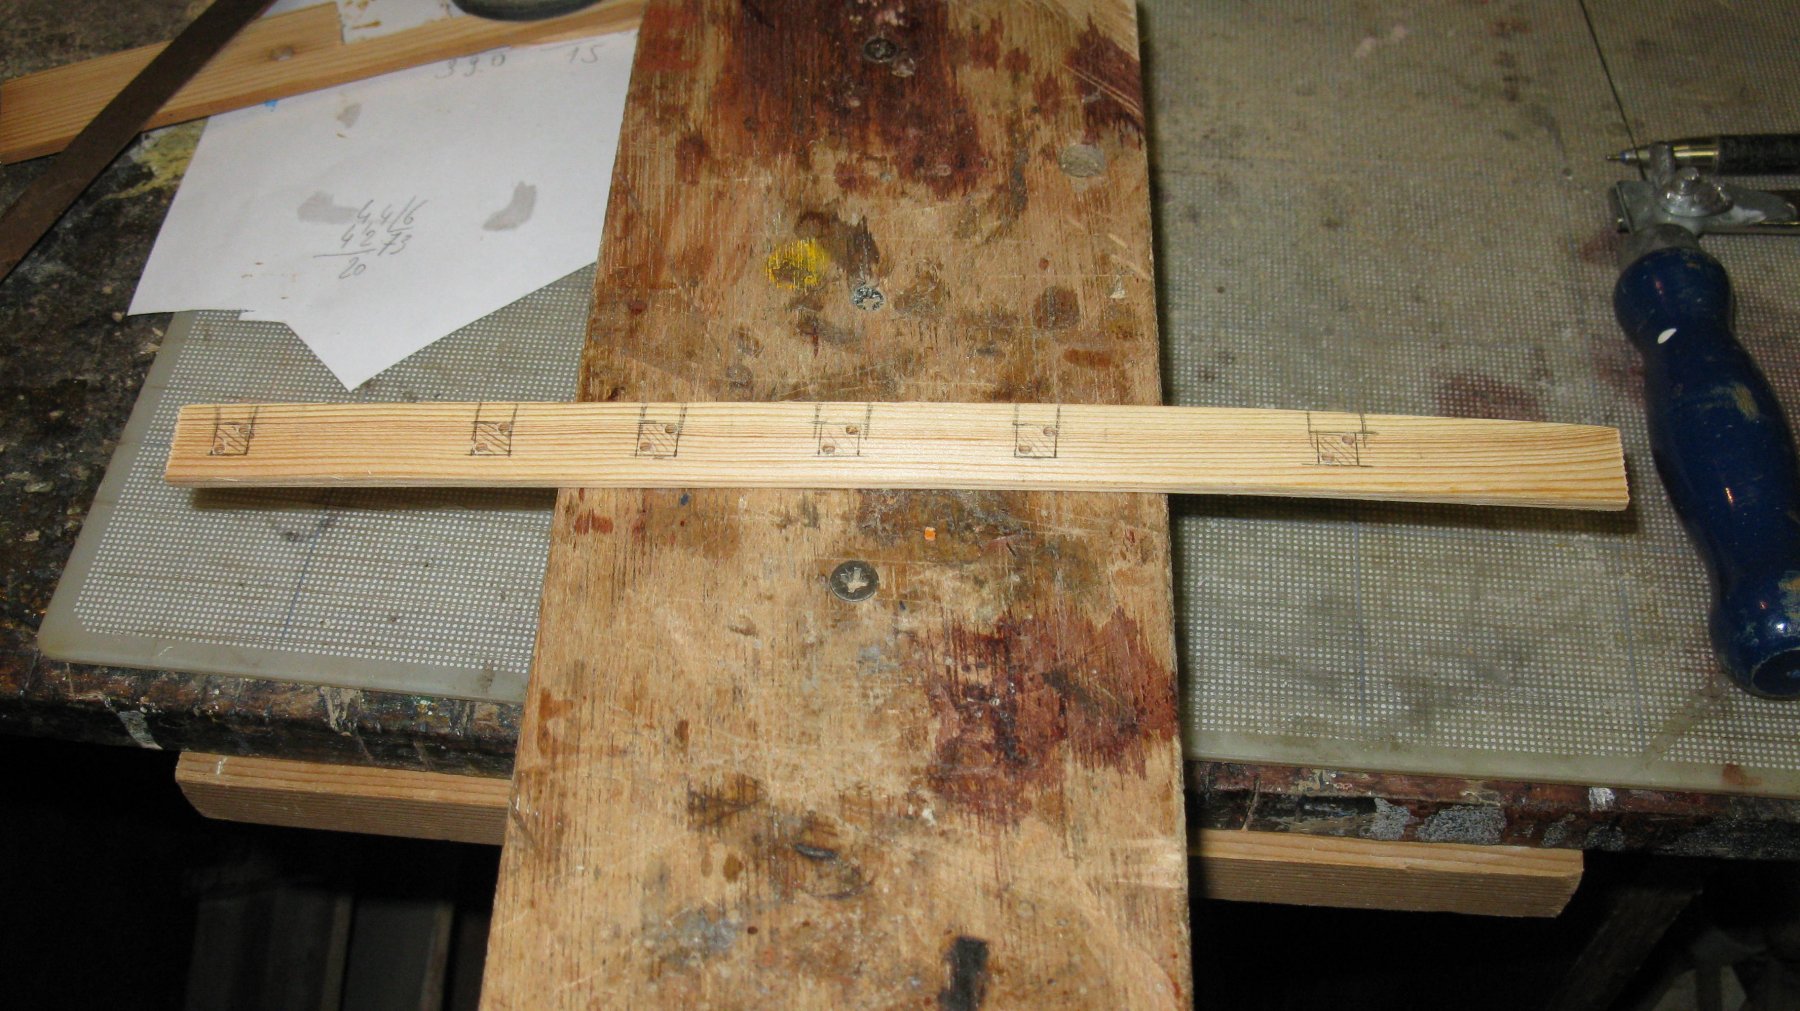
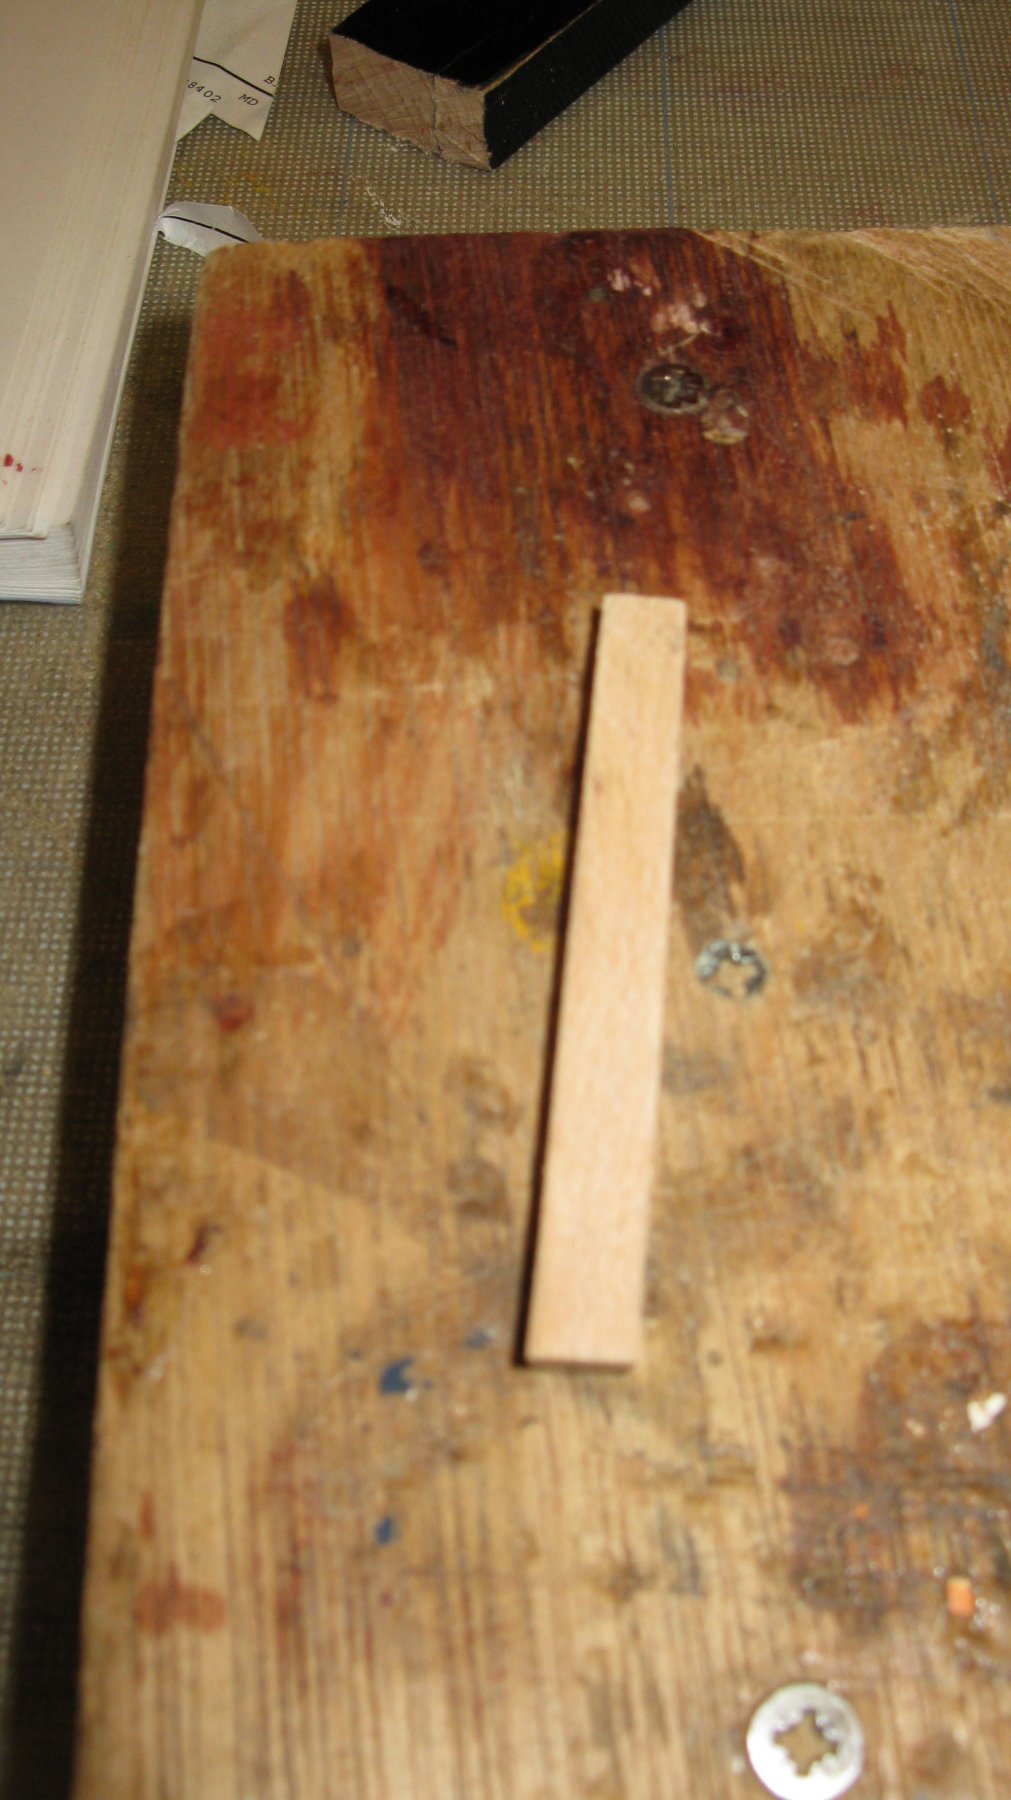
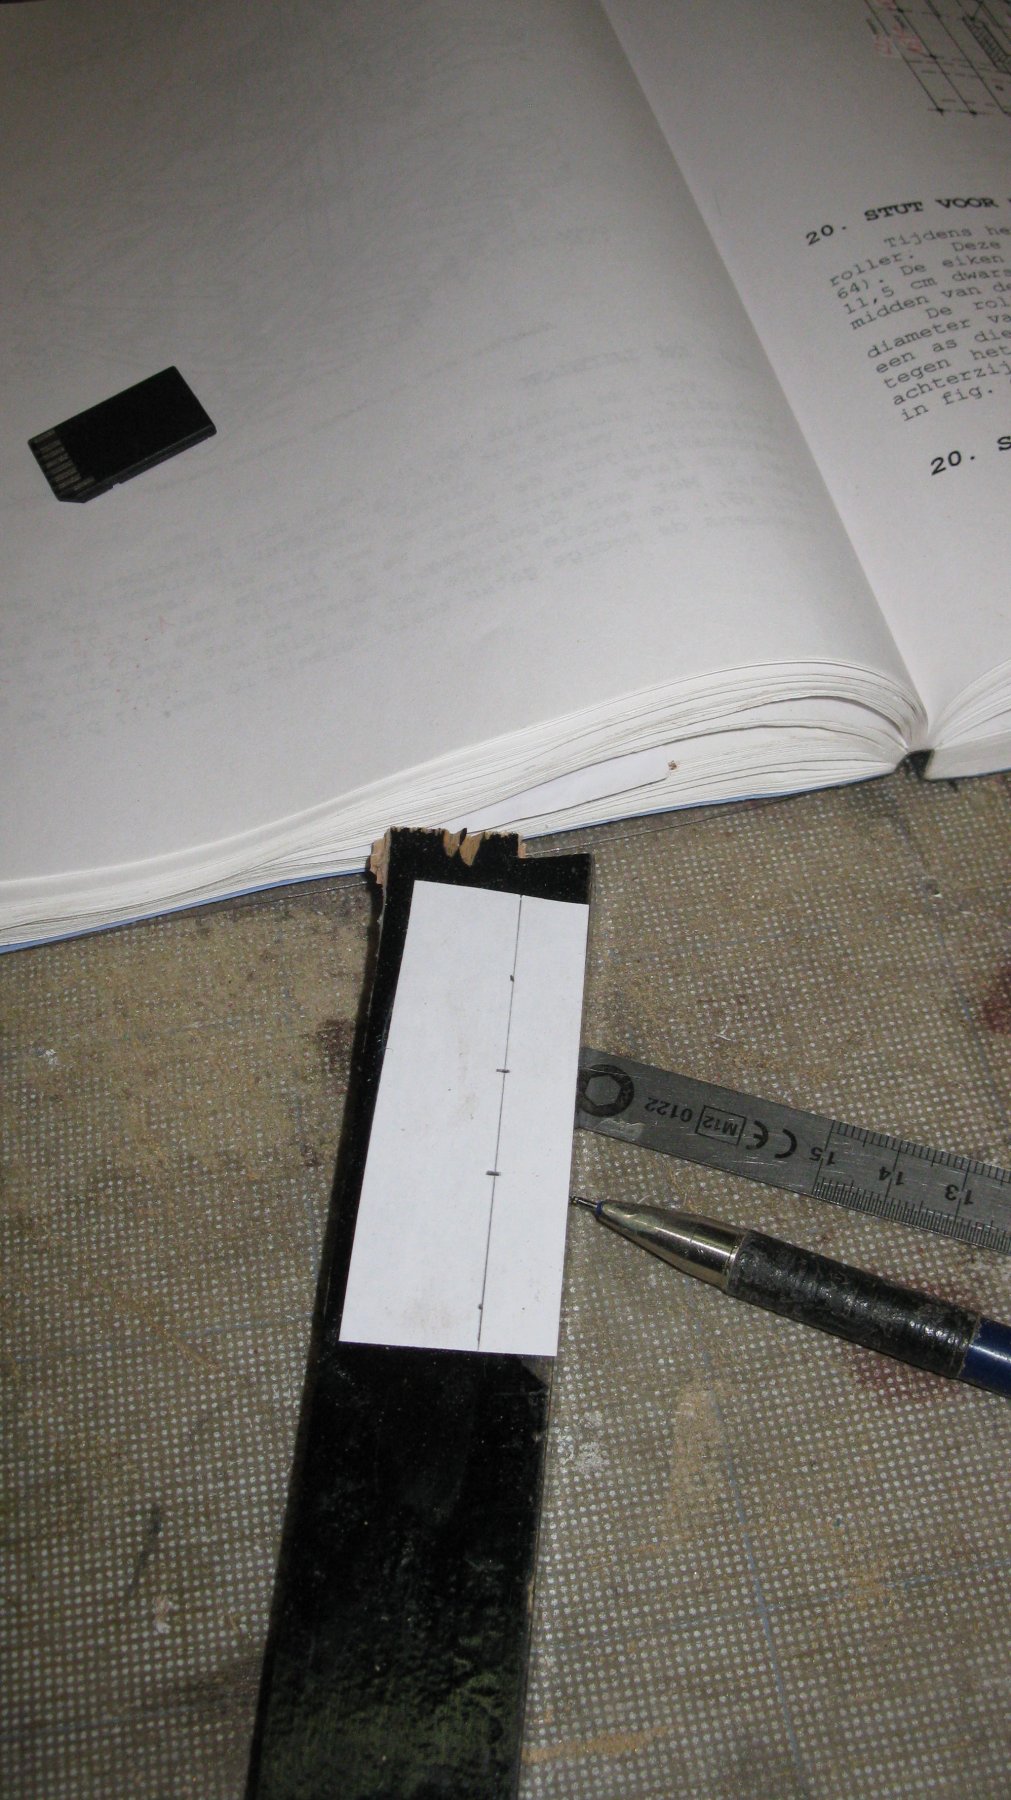
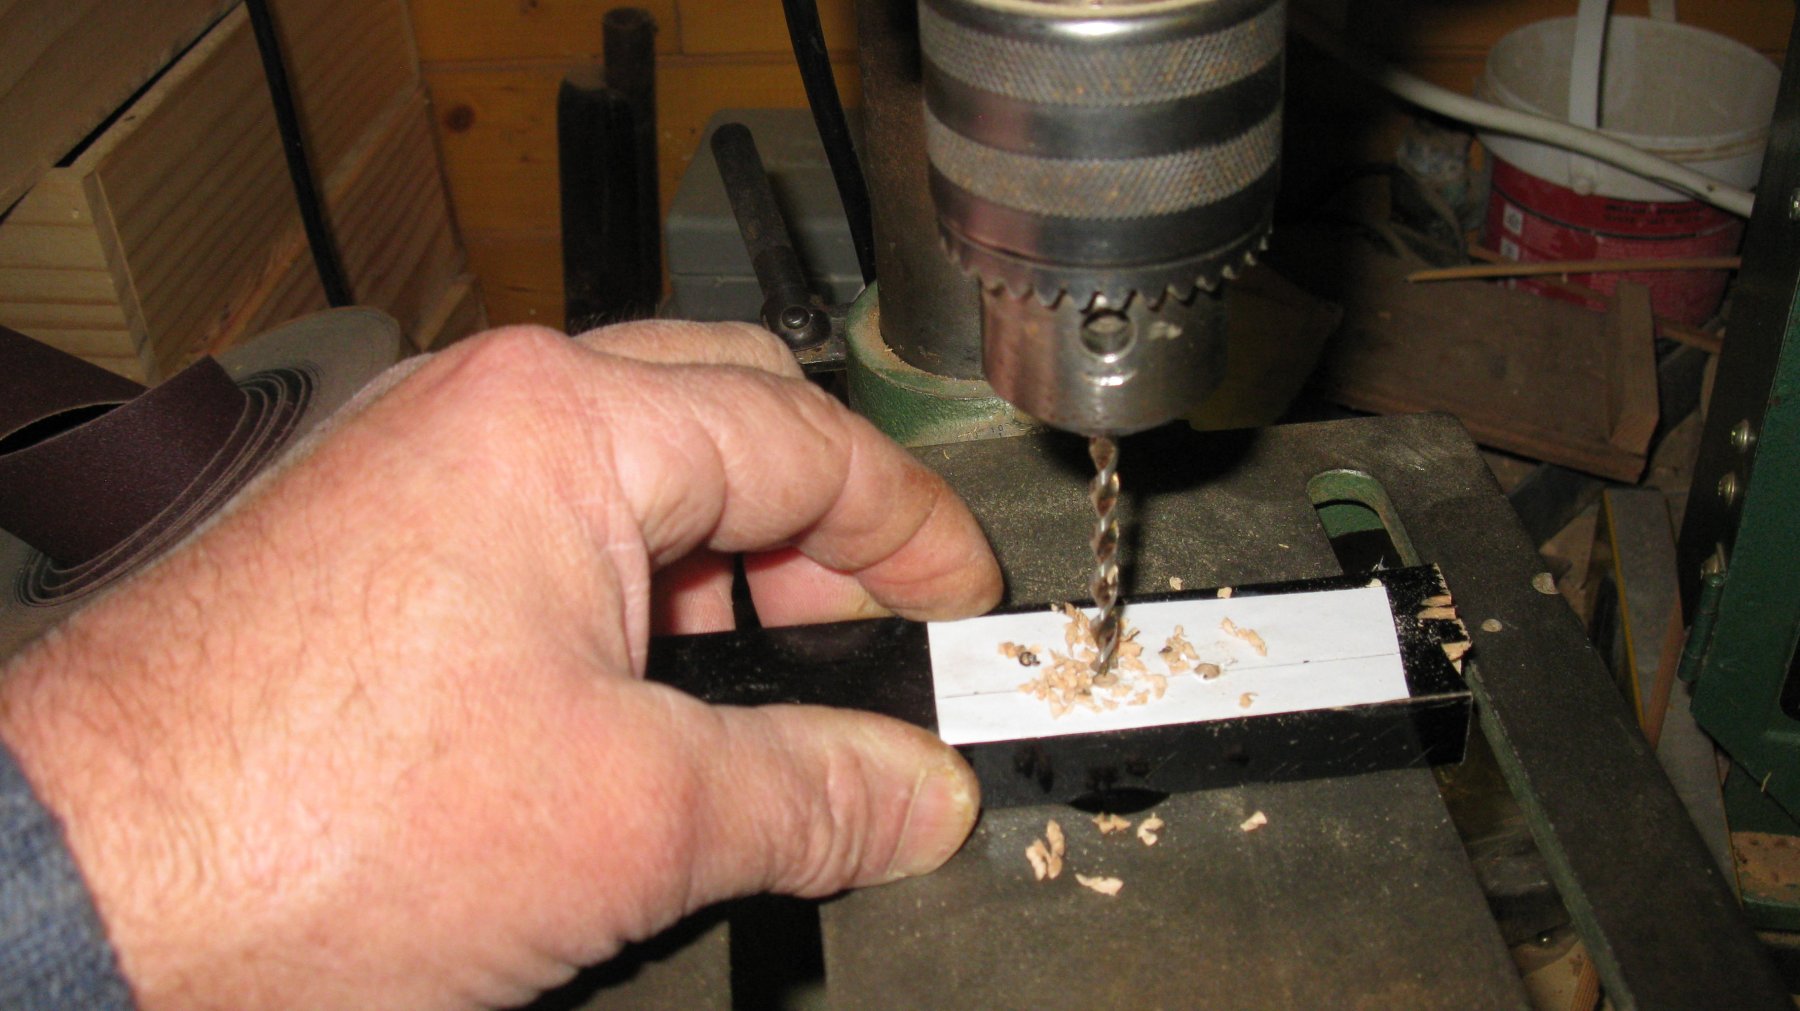
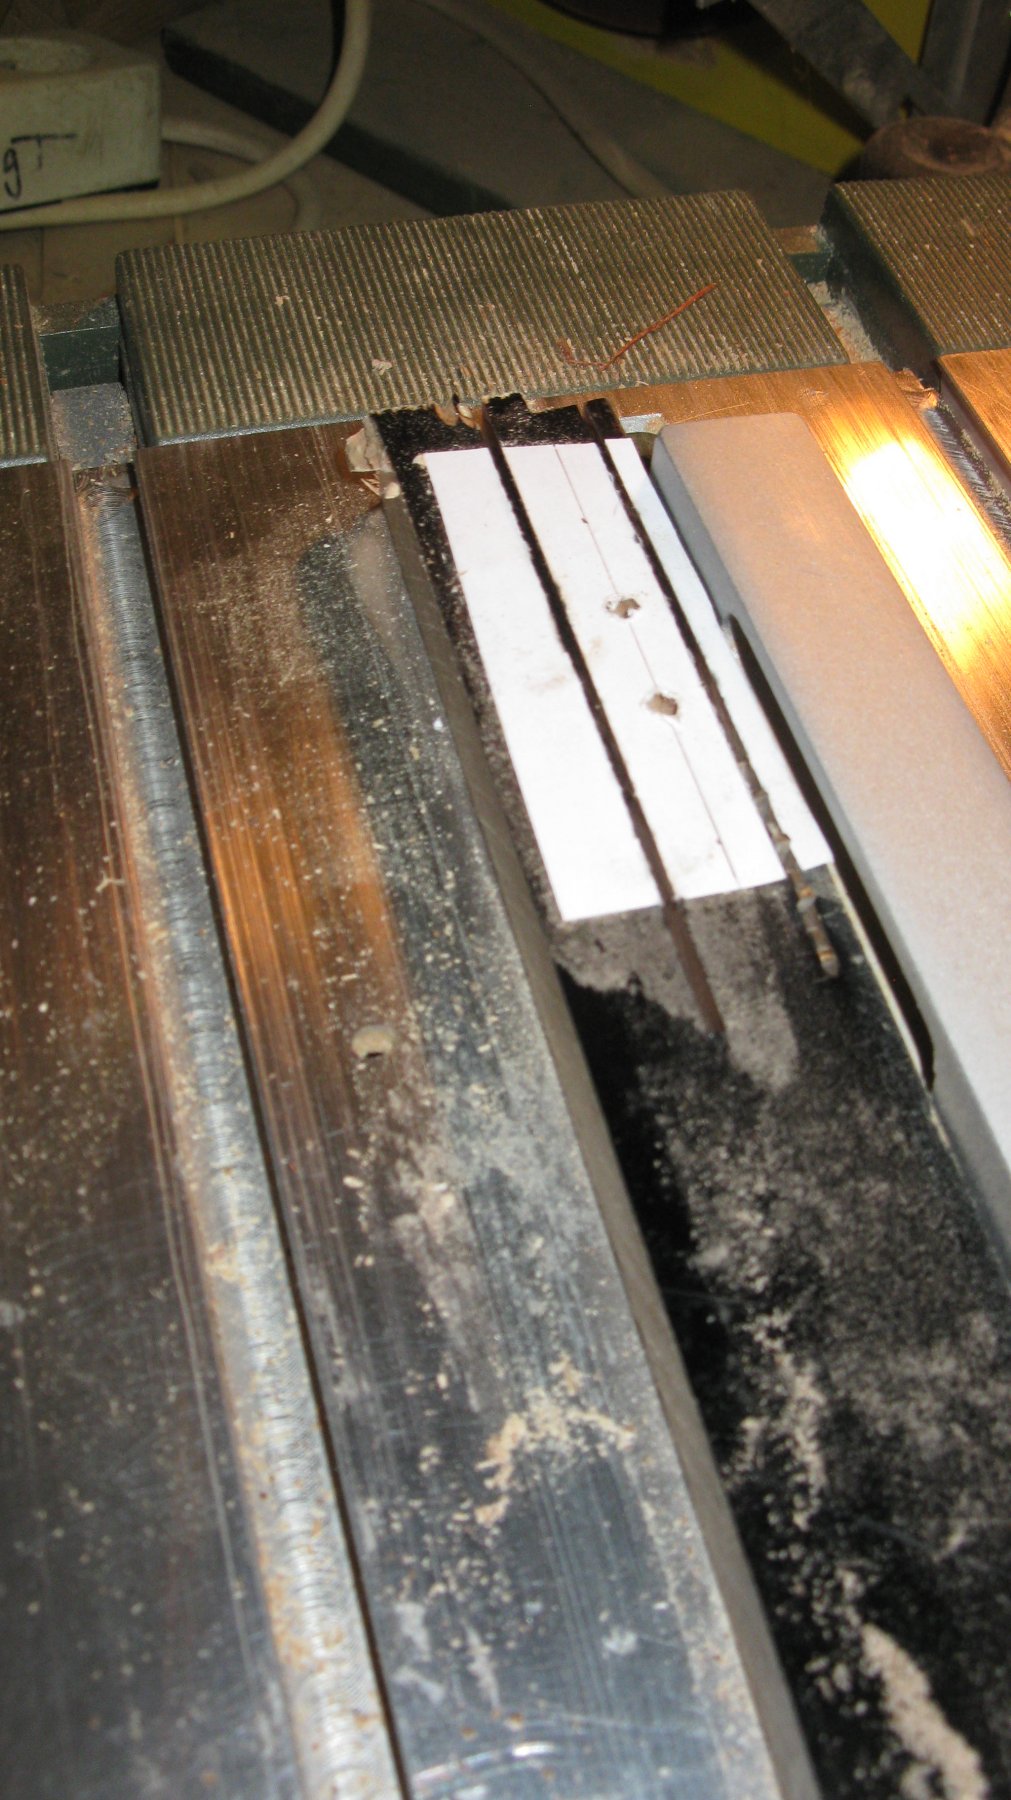
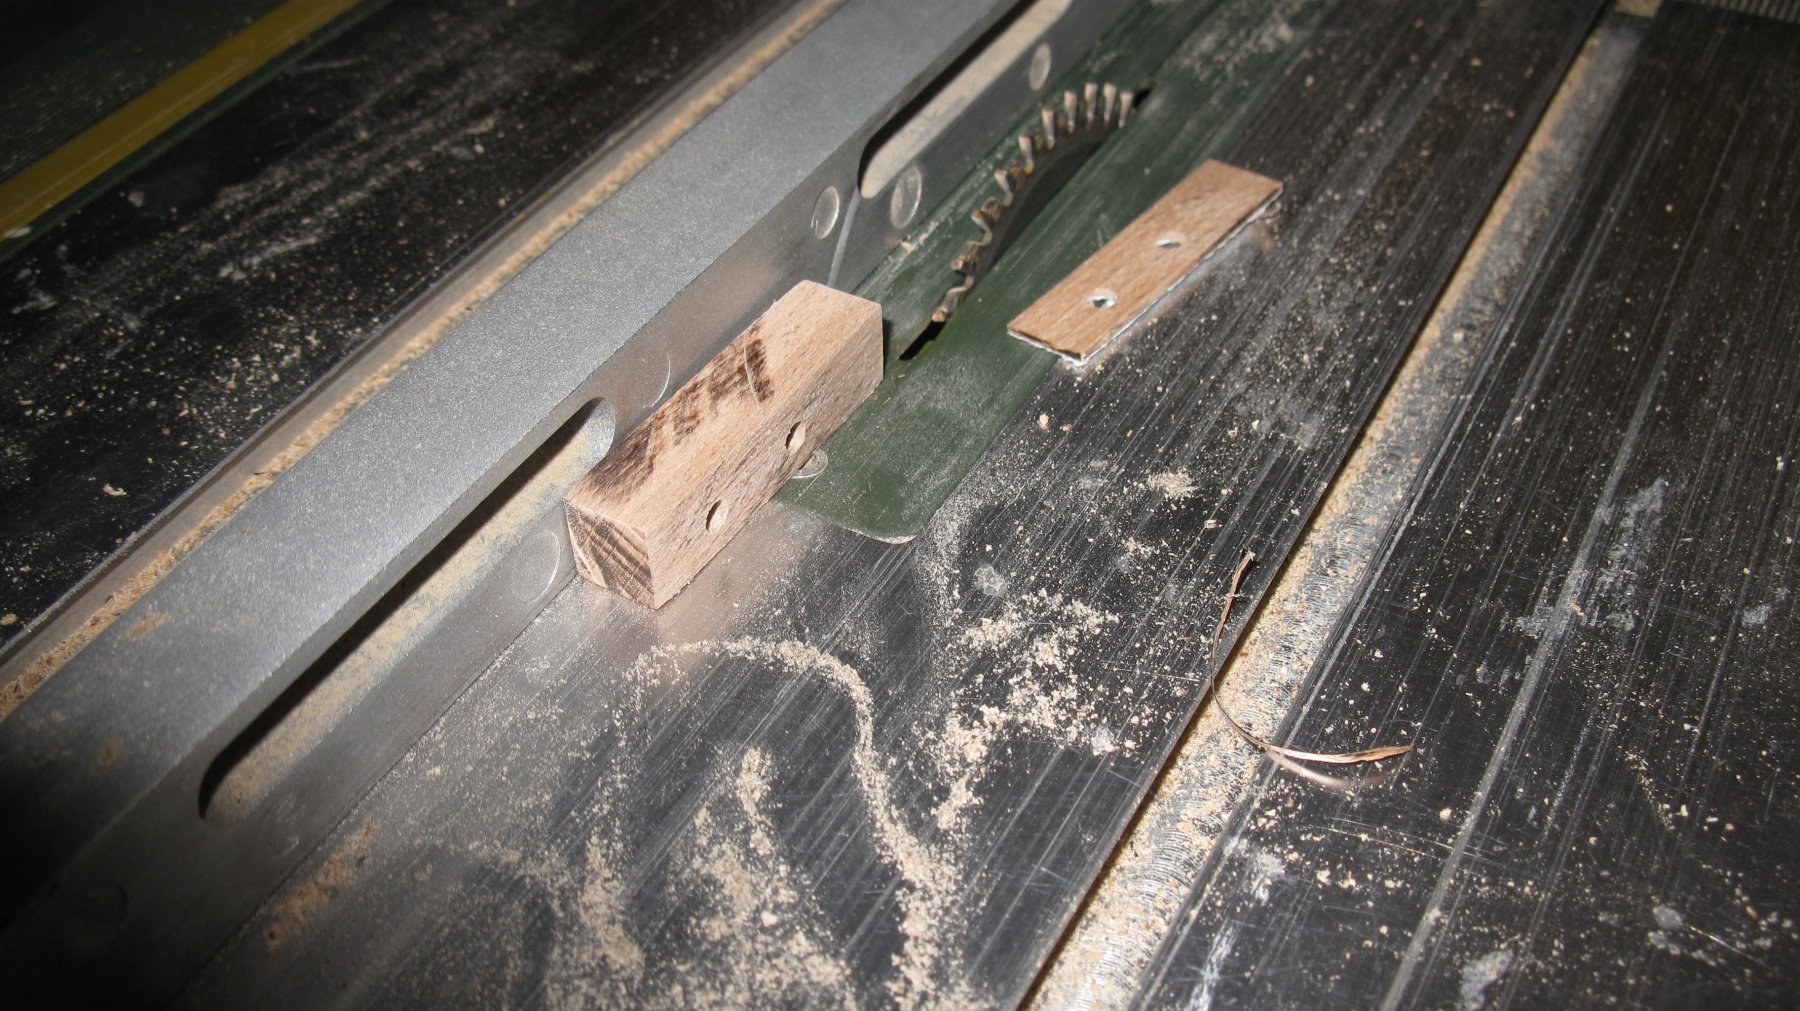
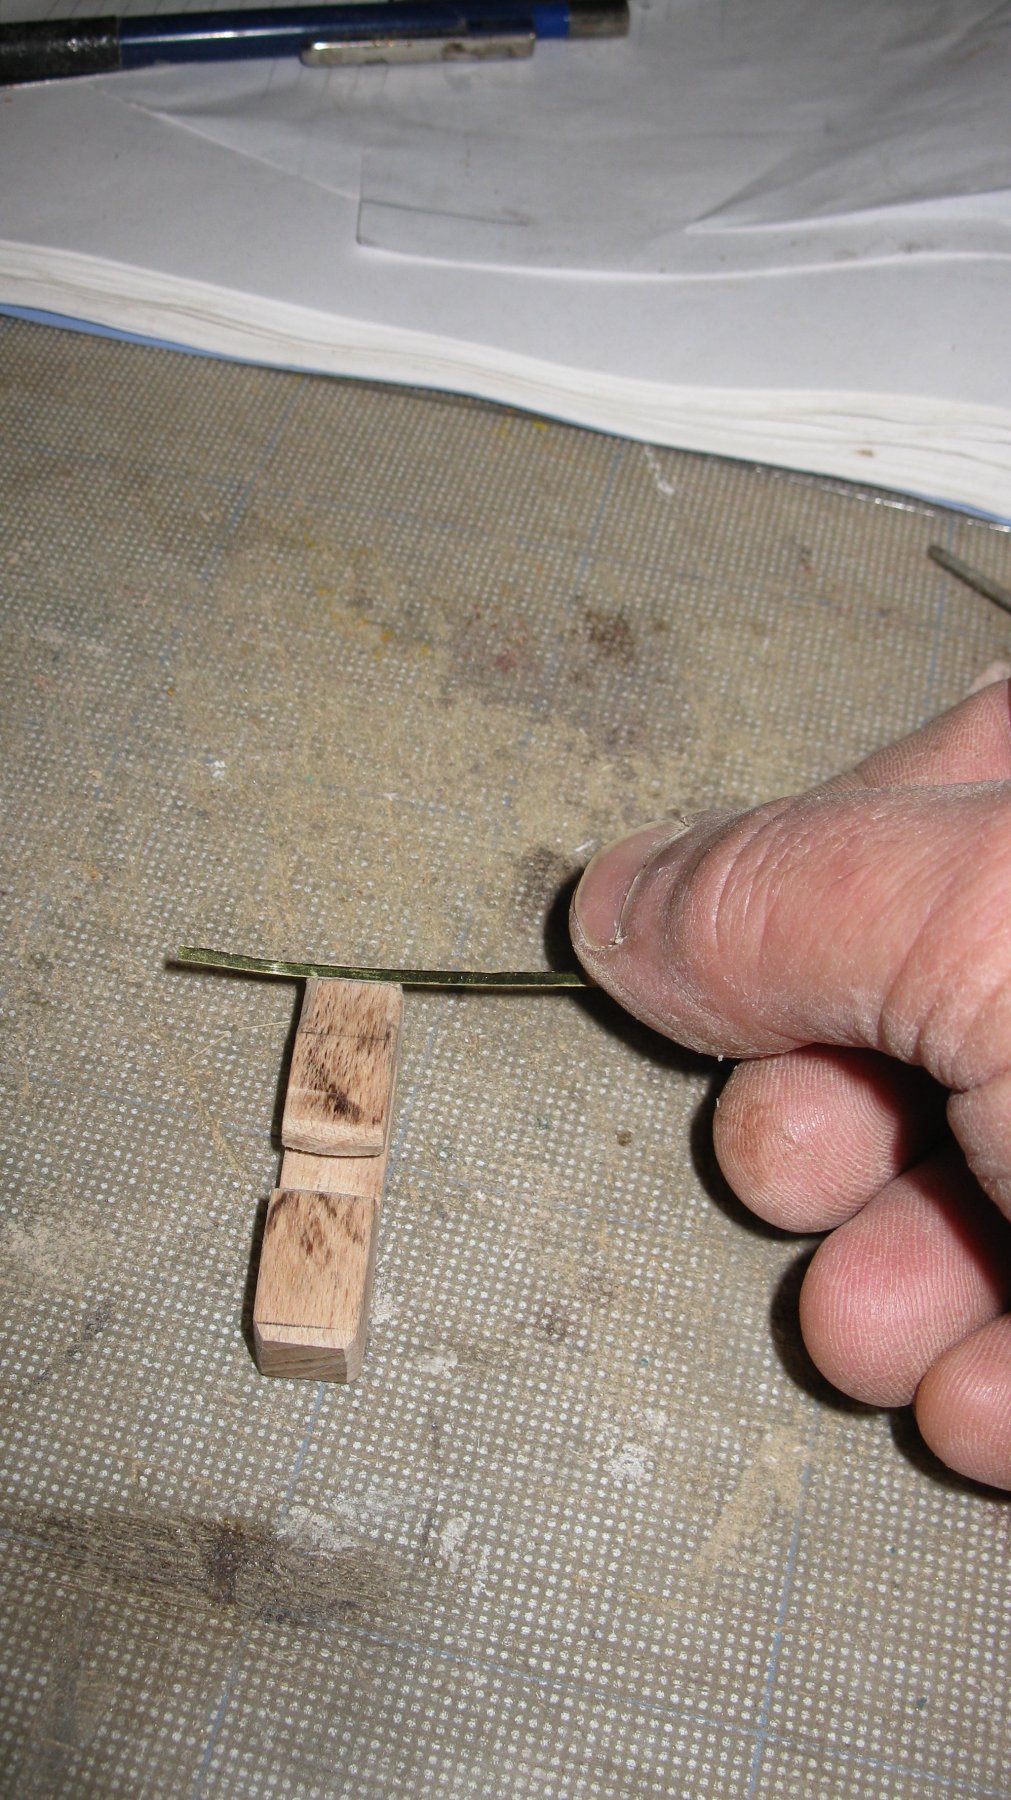
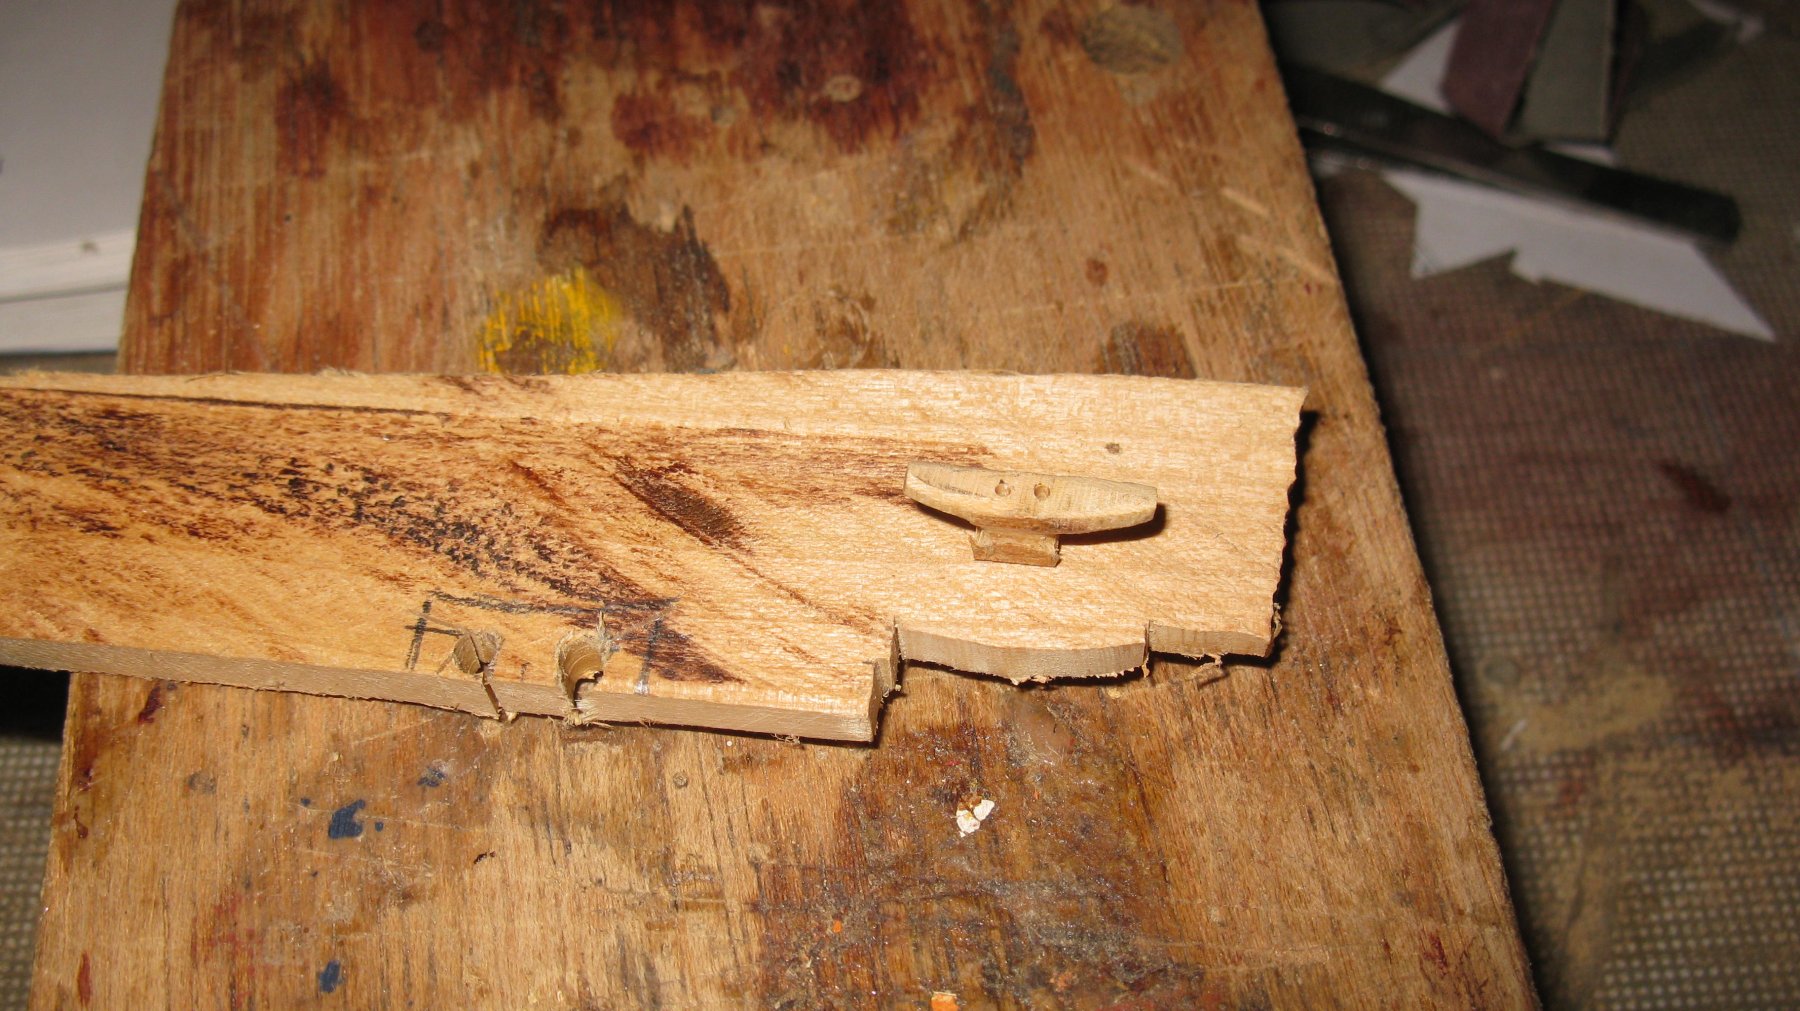
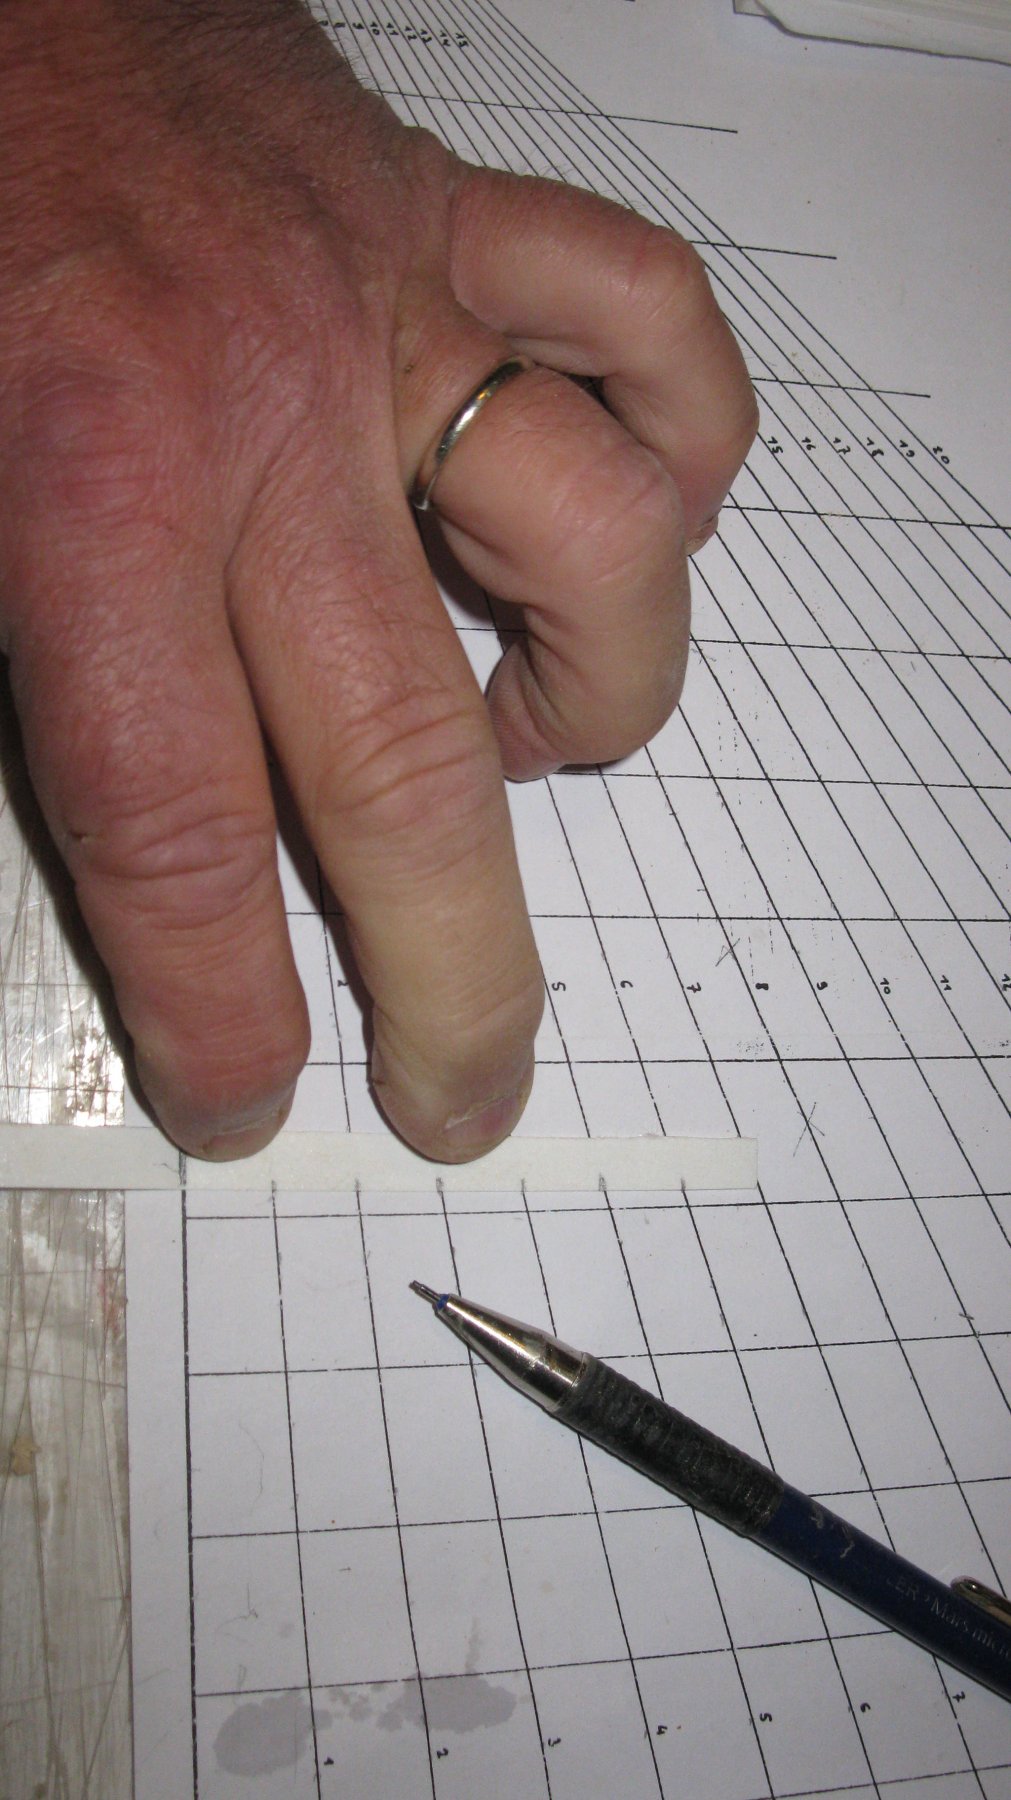
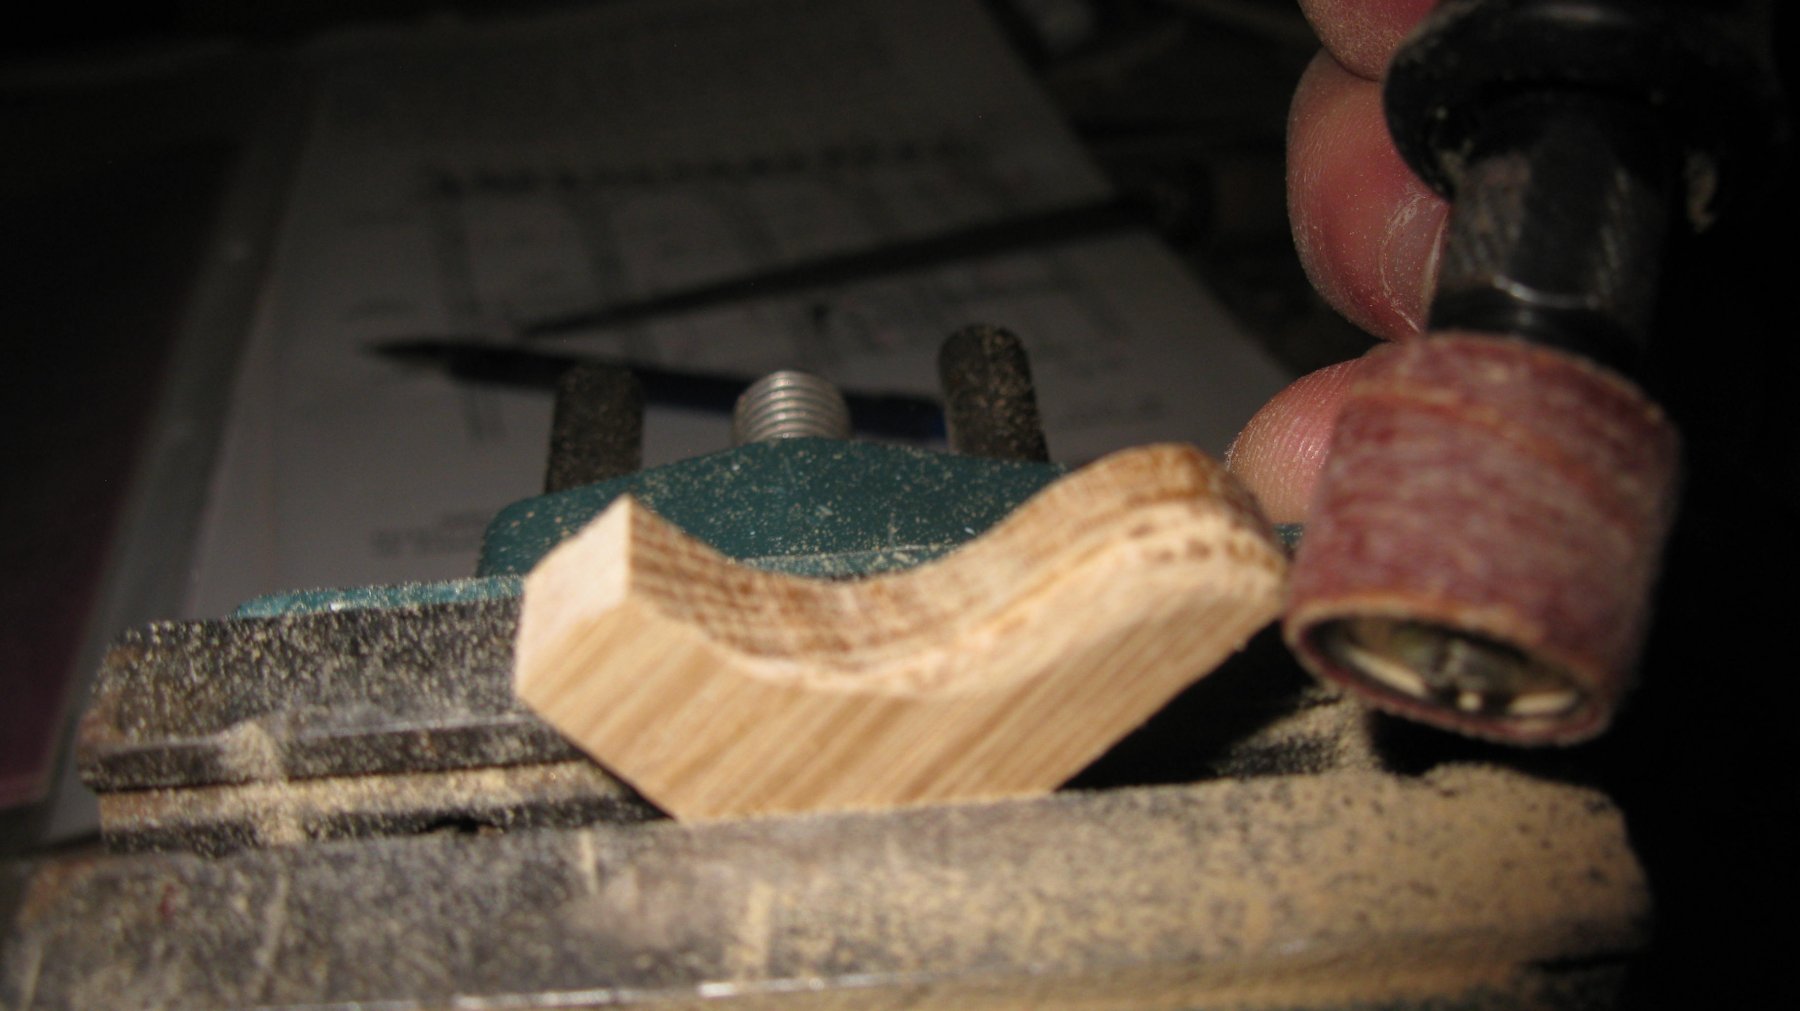
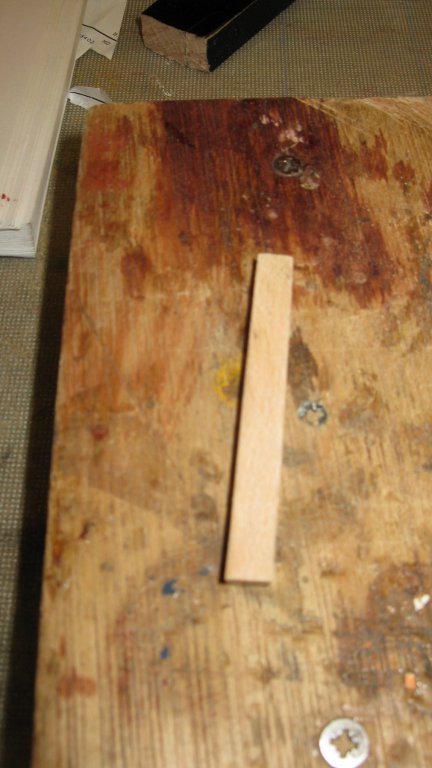
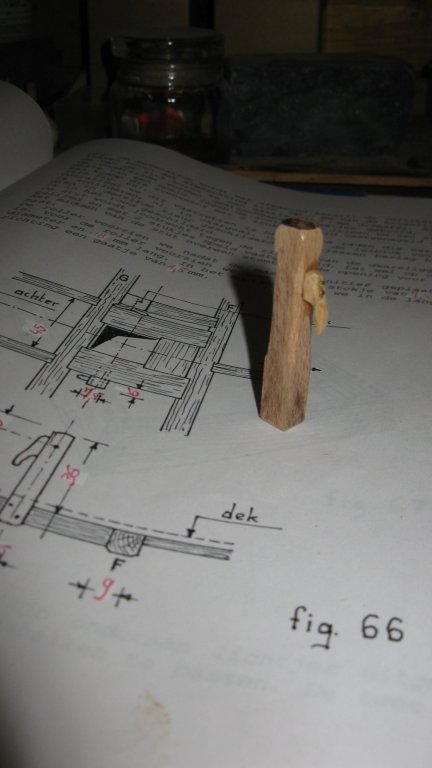
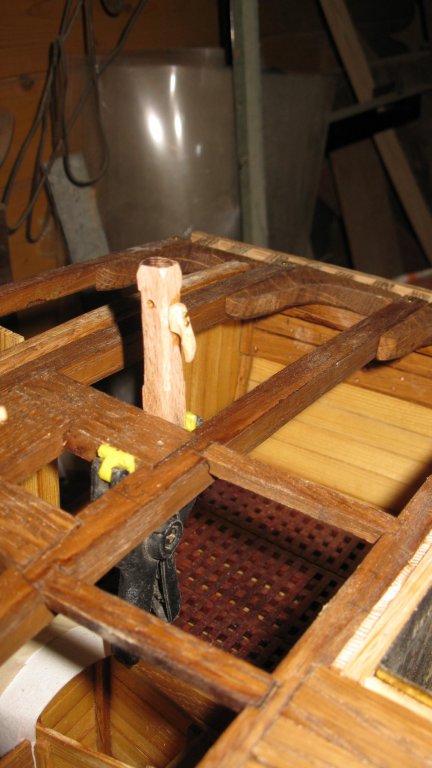
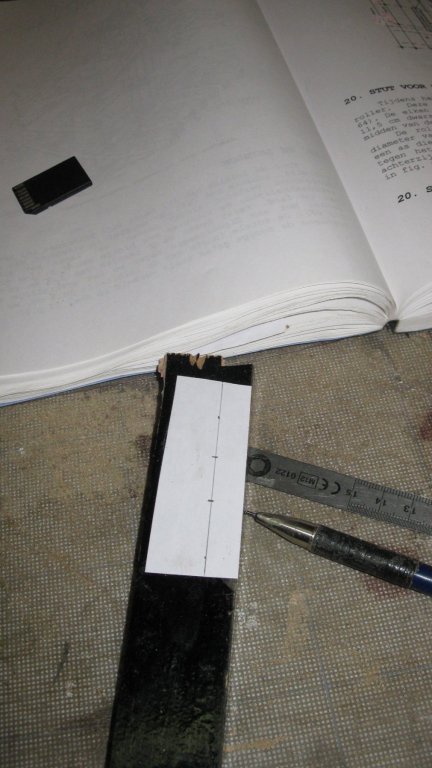
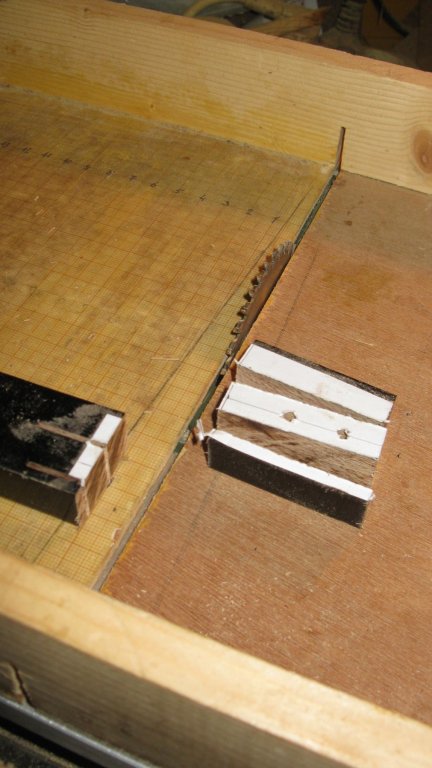
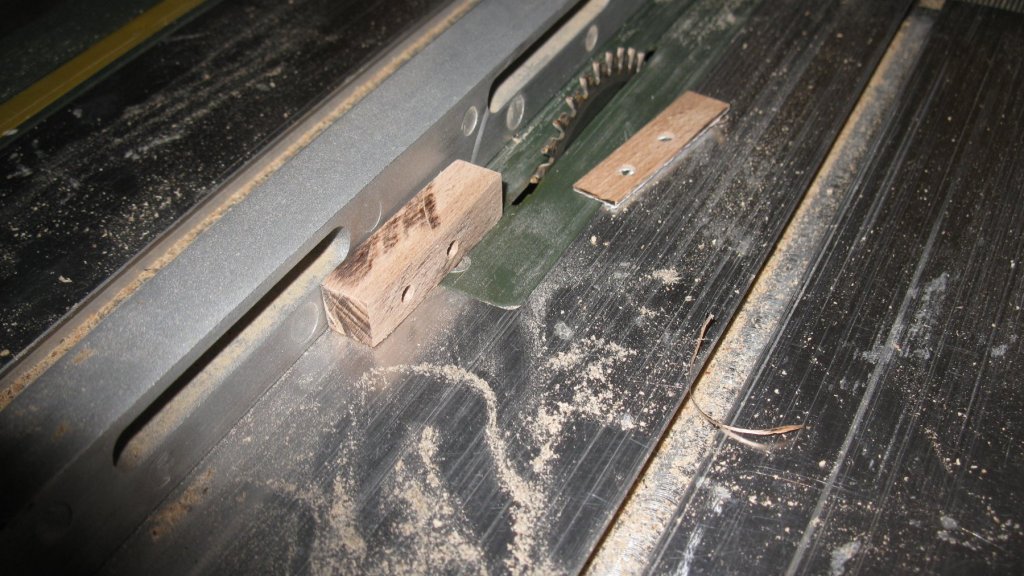
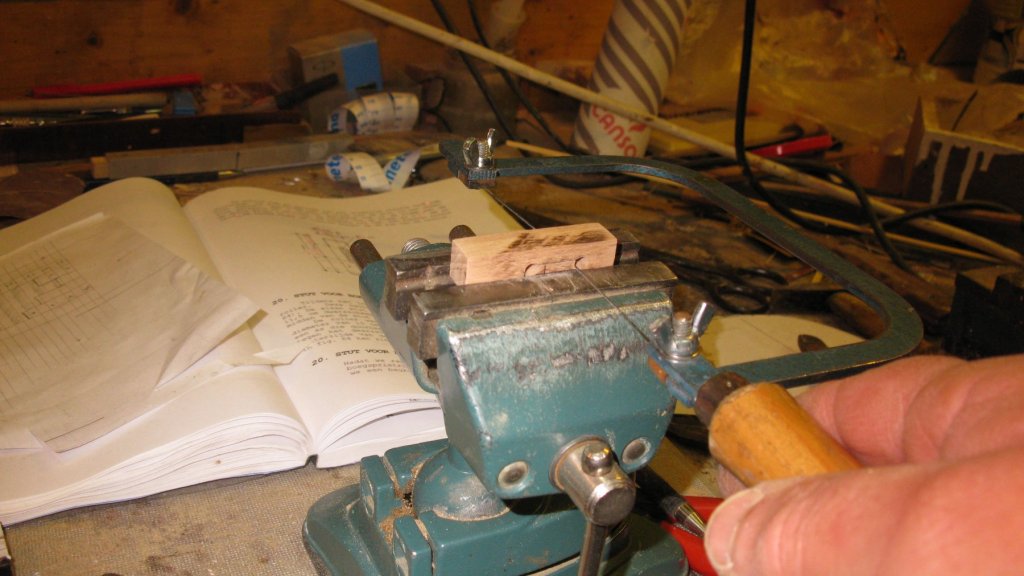
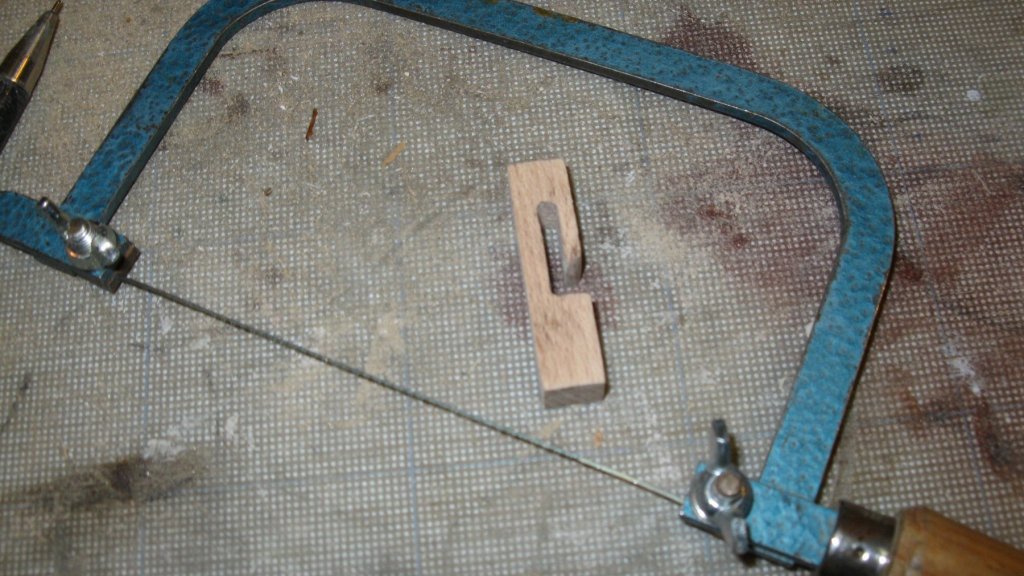
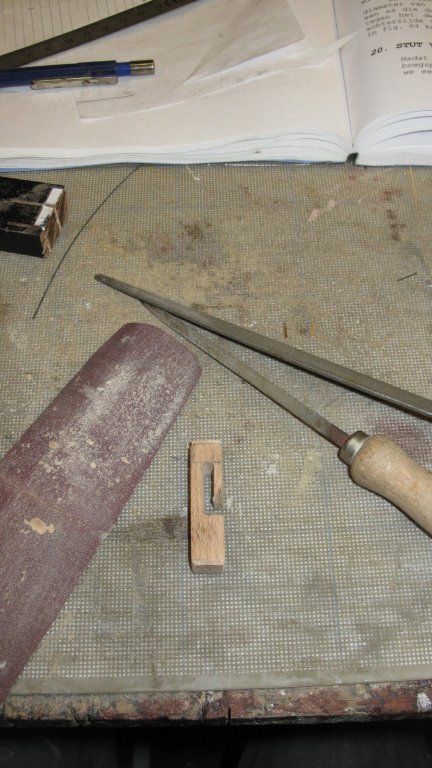
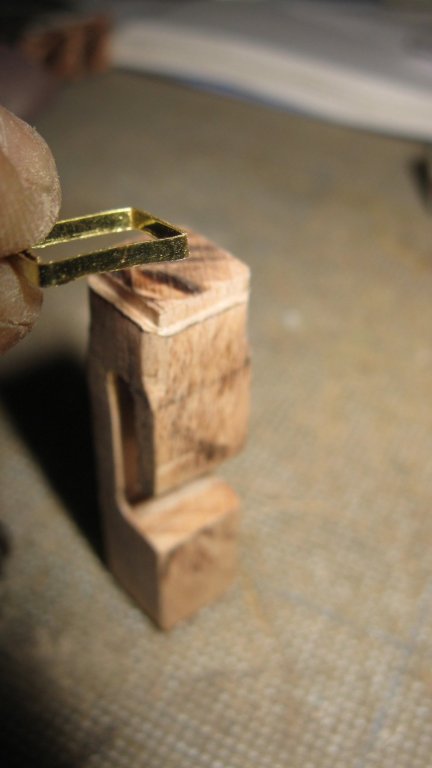
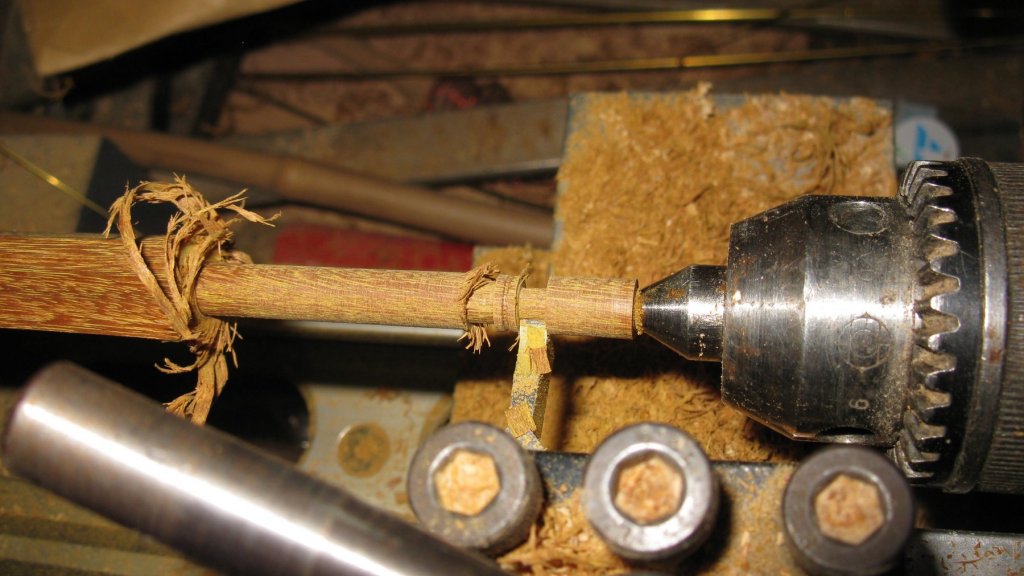
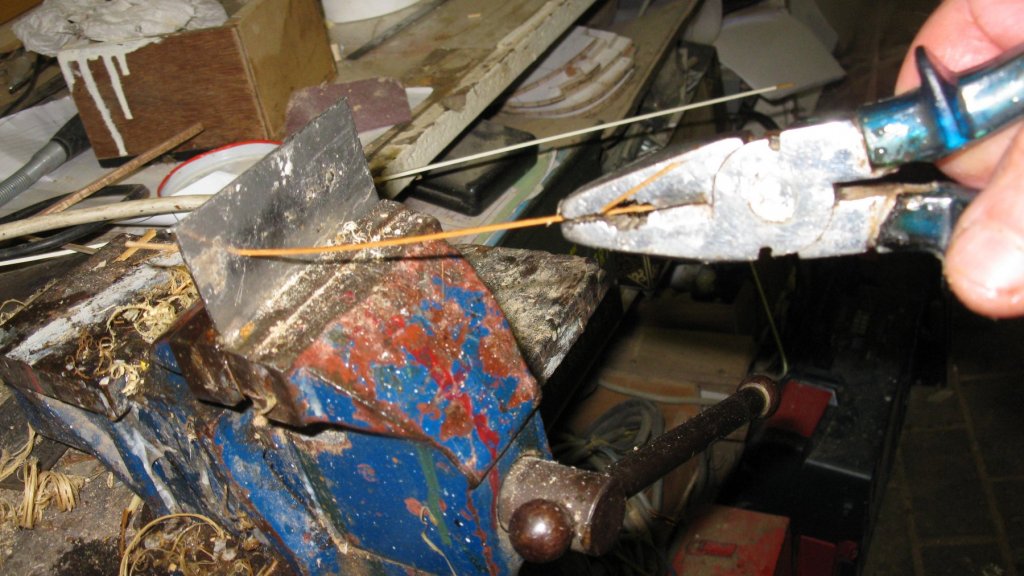
18.1. Preparing to lay the deck. Making a fair leading post Before laying the deck, some deck gear has to be made and to be placed. I start with a sheave post which will be standing left of the mast (Drawing: 'Sailing trawlers' Edgar J. March). Afterward the post will be painted so the practicum advises to use beech because it shows less grain then oak. I have a beach plank, but it is painted black. I saw al slice of it and glue a piece of paper on it because I can't draw with pencil on the black paint. I drill two holes for the recess of the sheave. Sawing out the post. Sawing the recess for the sheave. Shaping the post by filing it. The top of the sheave post is strengthened with a metal band. I cut a strip of a tin plate to make it. Turning the sheave with the lathe from a piece of hard wood. Making the cleat. The finished fair leading post. The fair leading post, presented into its position. Under the deck it is supported by a carling.


- 219 replies
-
- 11
-
-
- smack
- cross-section
- (and 2 more)
-
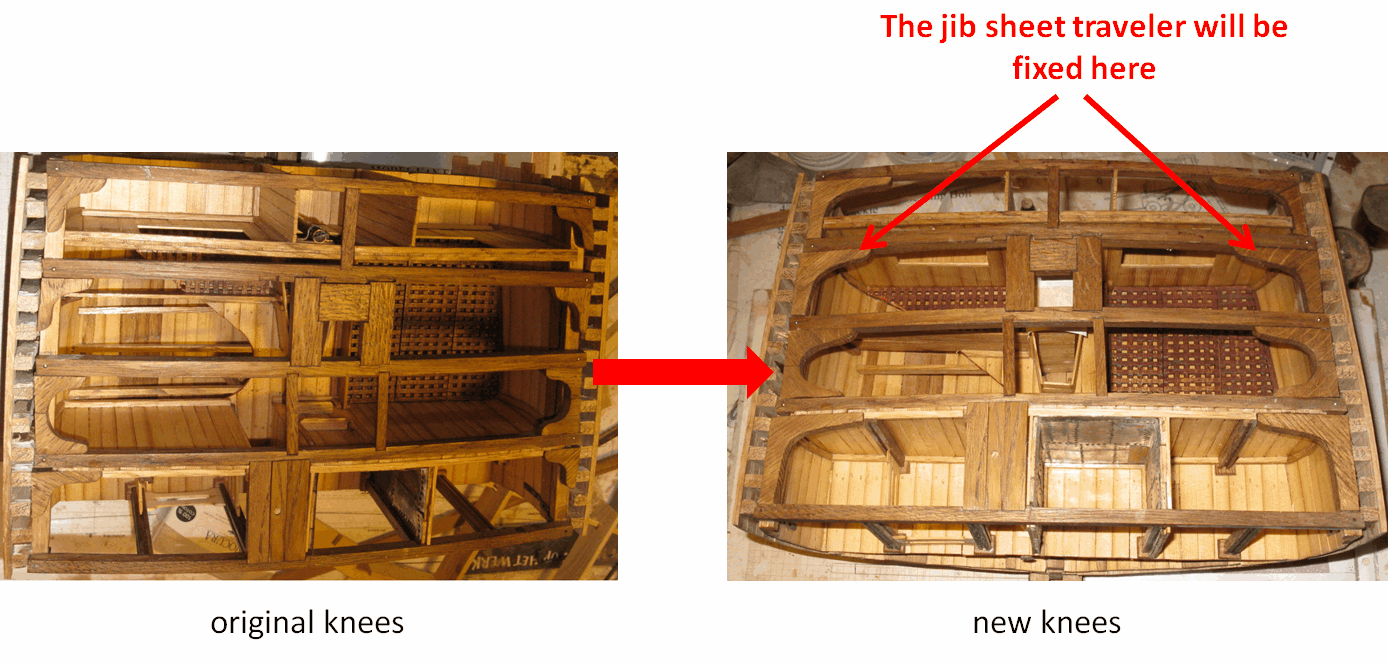
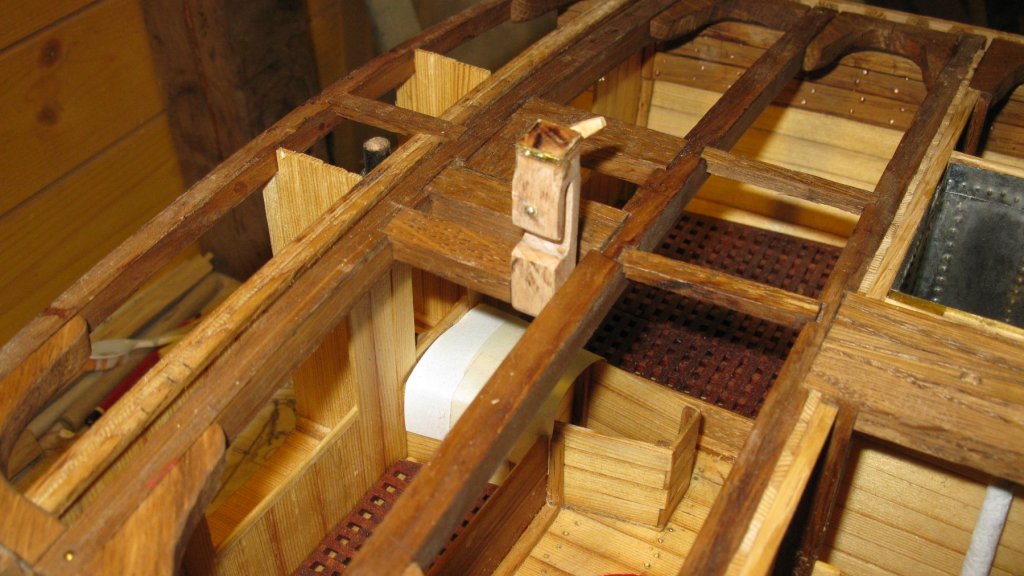
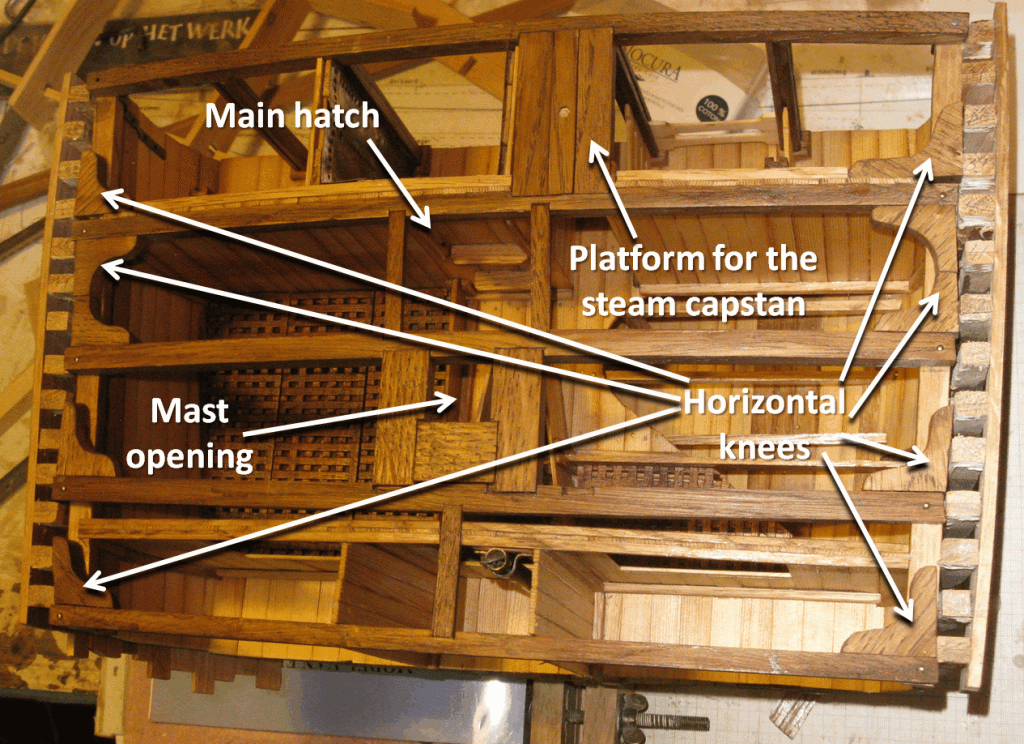
Part 18 Laying the deck Before starting to lay the deck, I read a bit further in the practicum and learned that the traveler for the jib sheet is at both sides mounted on the horizontal knees and not on the deck beam. That would not be possible with the knees like I made them, they are too small. Fortunately I discovered that before it is too late to replace the knees. I replaced my first knees by larger ones.

- 219 replies
-
- 7
-
-
- smack
- cross-section
- (and 2 more)
-
Thank you very much Pat, Patrick, Michael, Moab an Mark. @ Mark: If your question is; am I going to paint the hull? Yes, above the waterline it will get a tarred look and below I want to give it a copper paint tint.
- 219 replies
-
- 5
-
-
- smack
- cross-section
- (and 2 more)
-
HMS ROYAL KATHERINE 1664 by Doris - 1/55 - CARD
G.L. replied to DORIS's topic in - Build logs for subjects built 1501 - 1750
Doris, I fully agree with all the above comments. Thank you very much for showing this.- 1,035 replies
-
- 6
-
-
- royal katherine
- ship of the line
- (and 1 more)
-
Michael, You really have an eye for detail. If I am right 0.037" must be a bit less than 1mm. Incredible!
-
Thank you Carl, Because there are enough openings in the bulkheads to see the inside.
- 219 replies
-
- 2
-
-
- smack
- cross-section
- (and 2 more)
-
Thank you very much Aviaamator, but I do not understand a word of it.
- 219 replies
-
- 4
-
-
- smack
- cross-section
- (and 2 more)
-
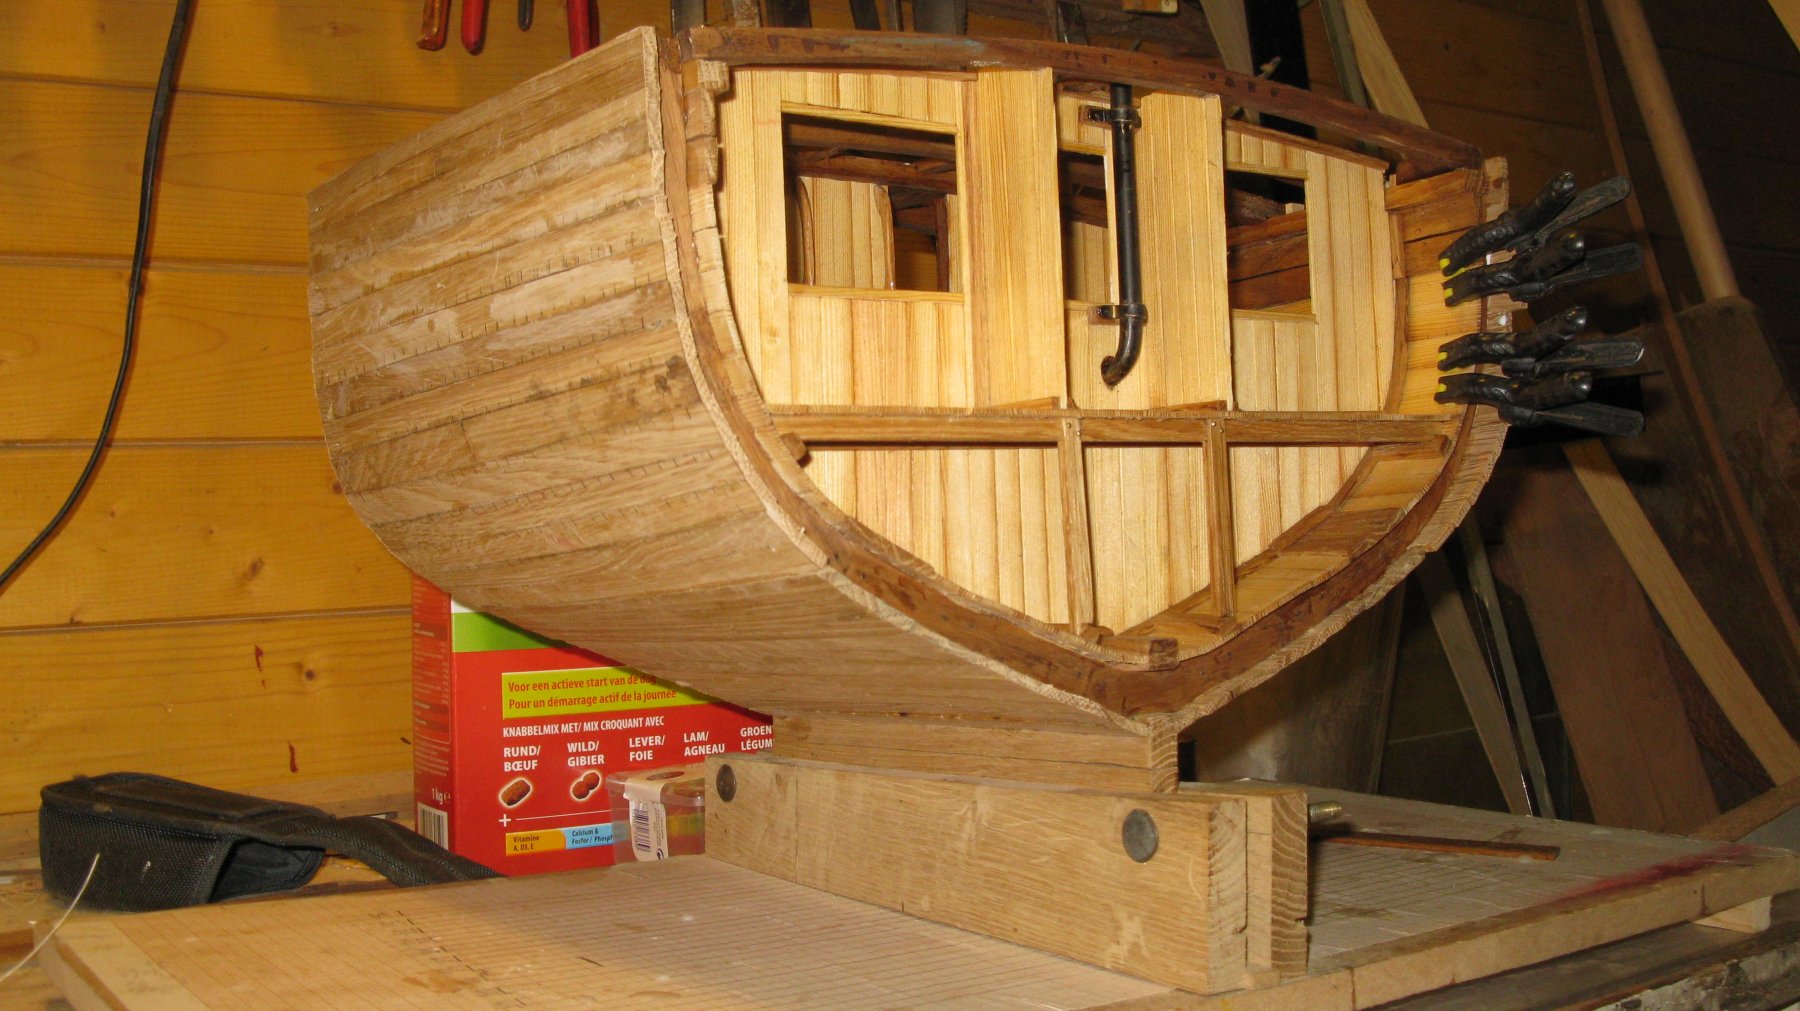
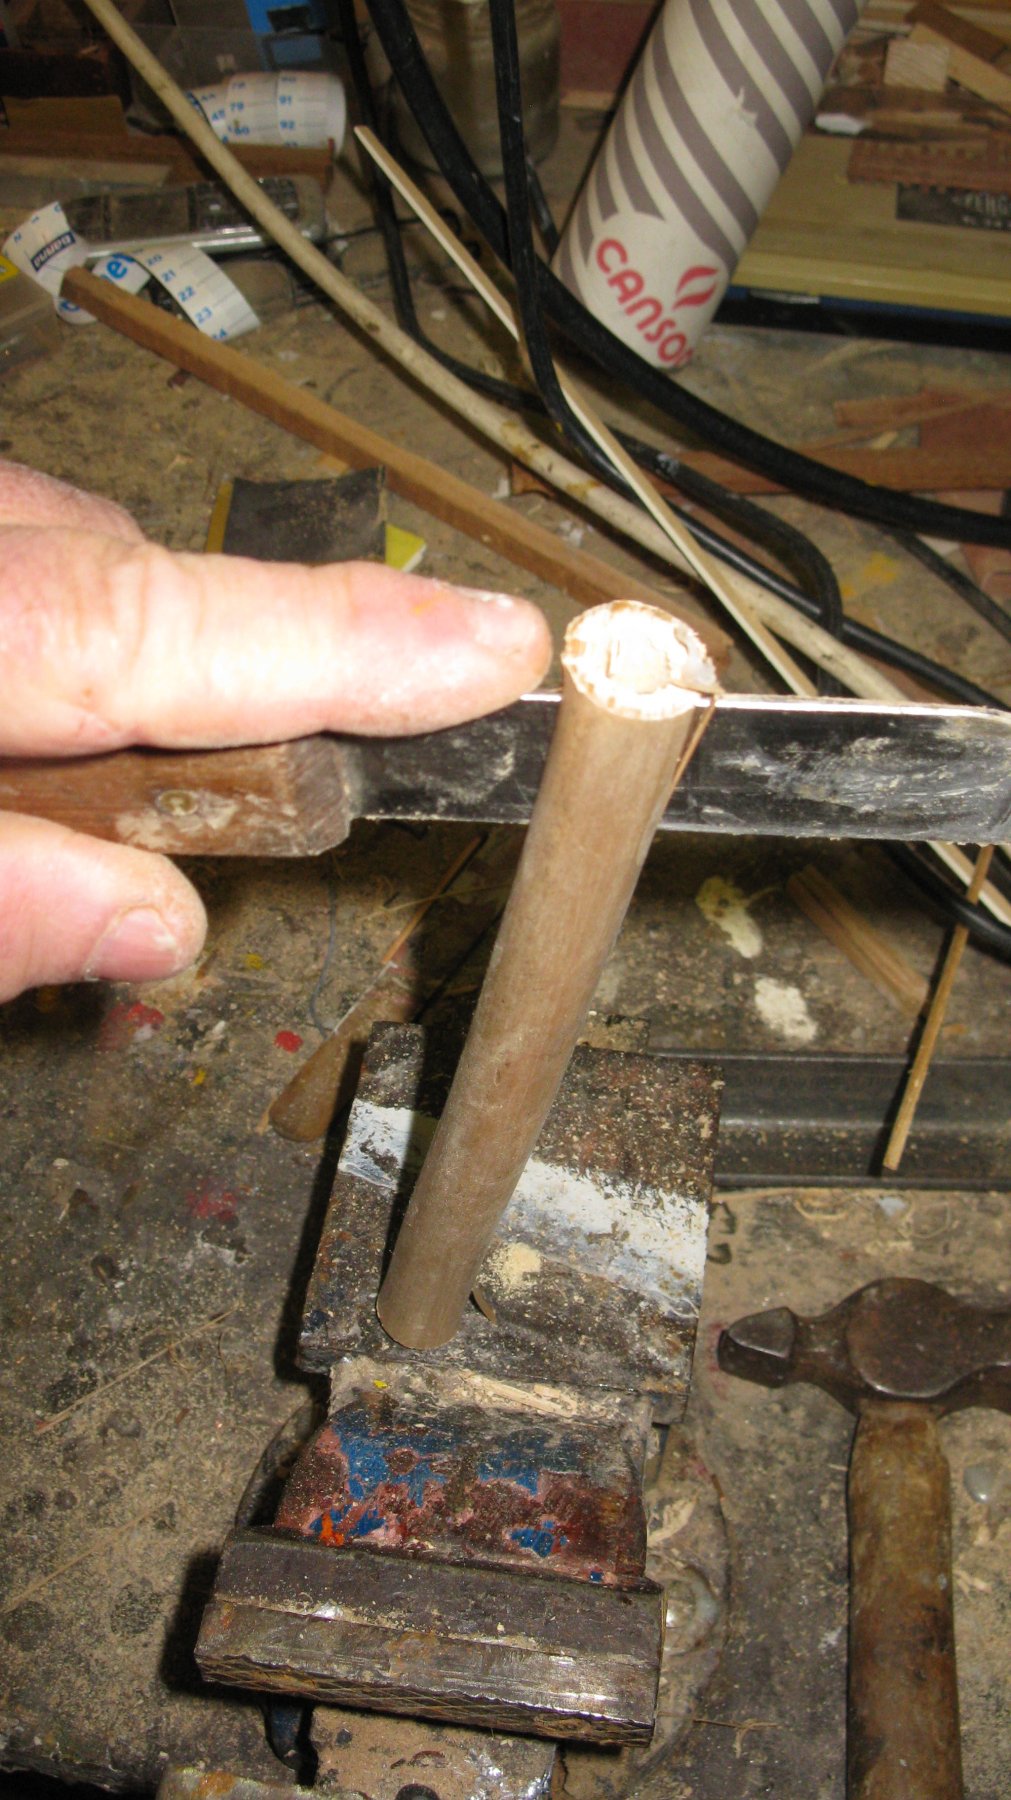
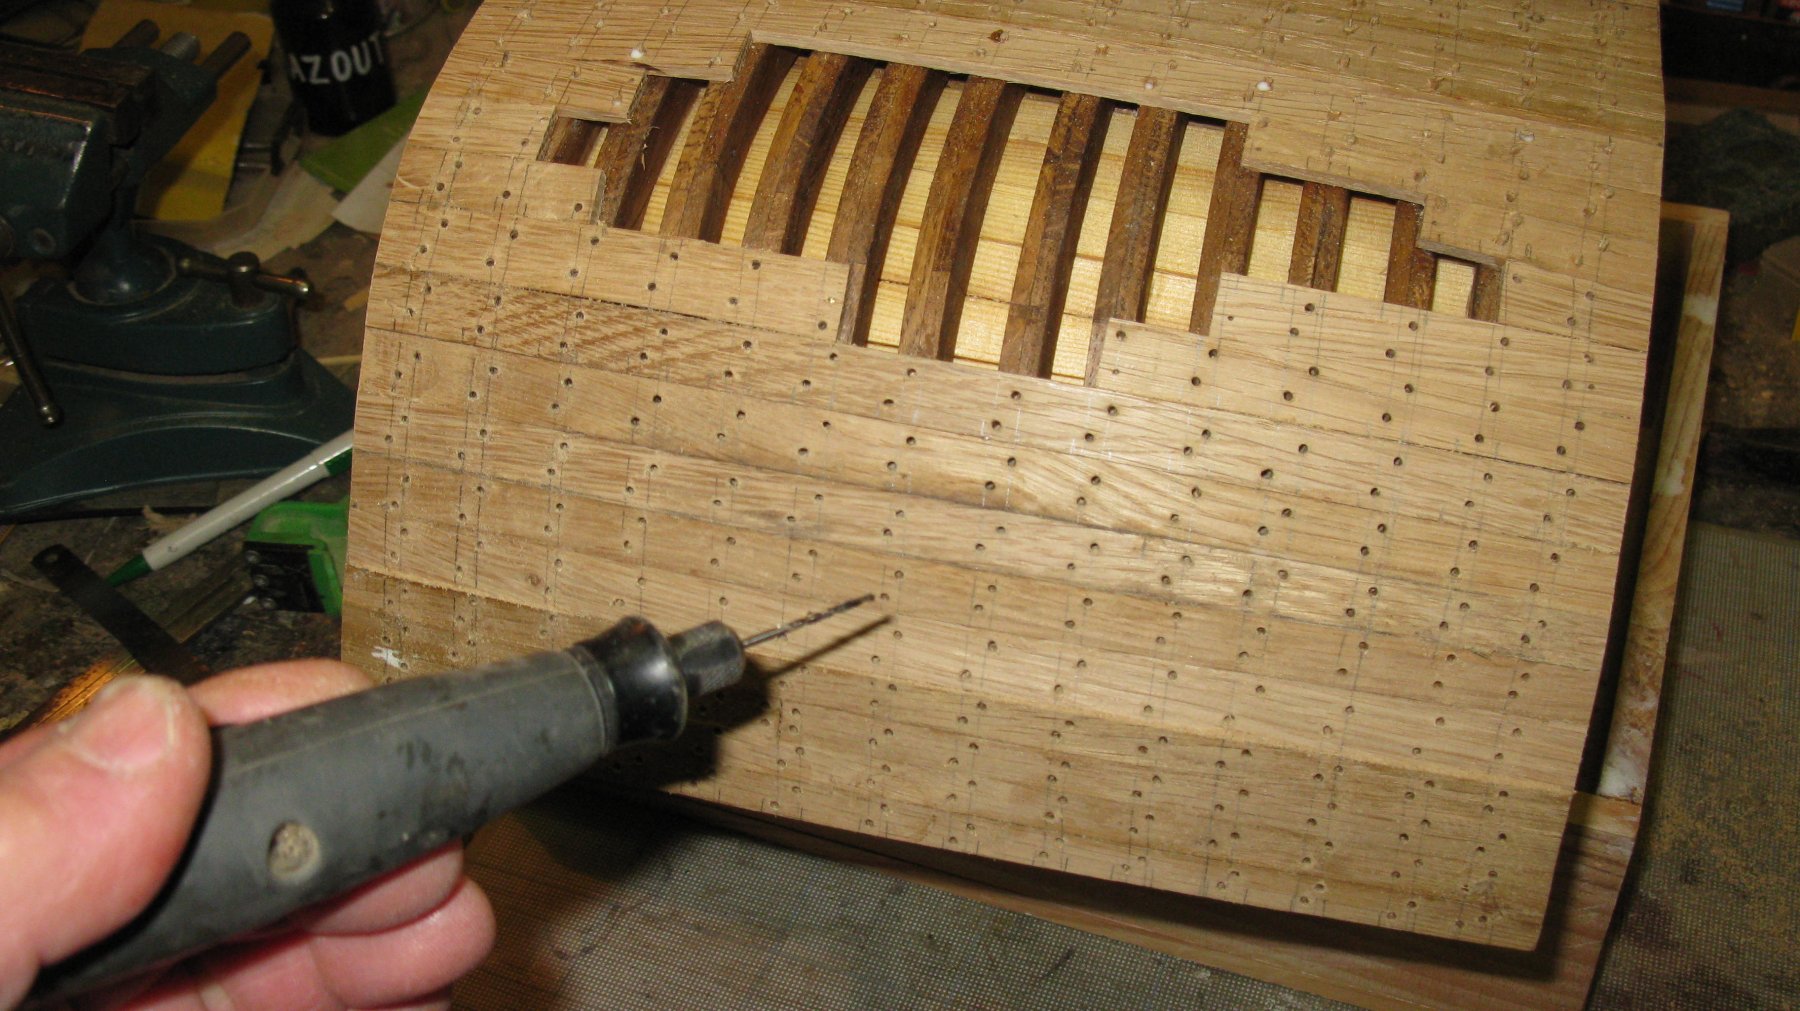
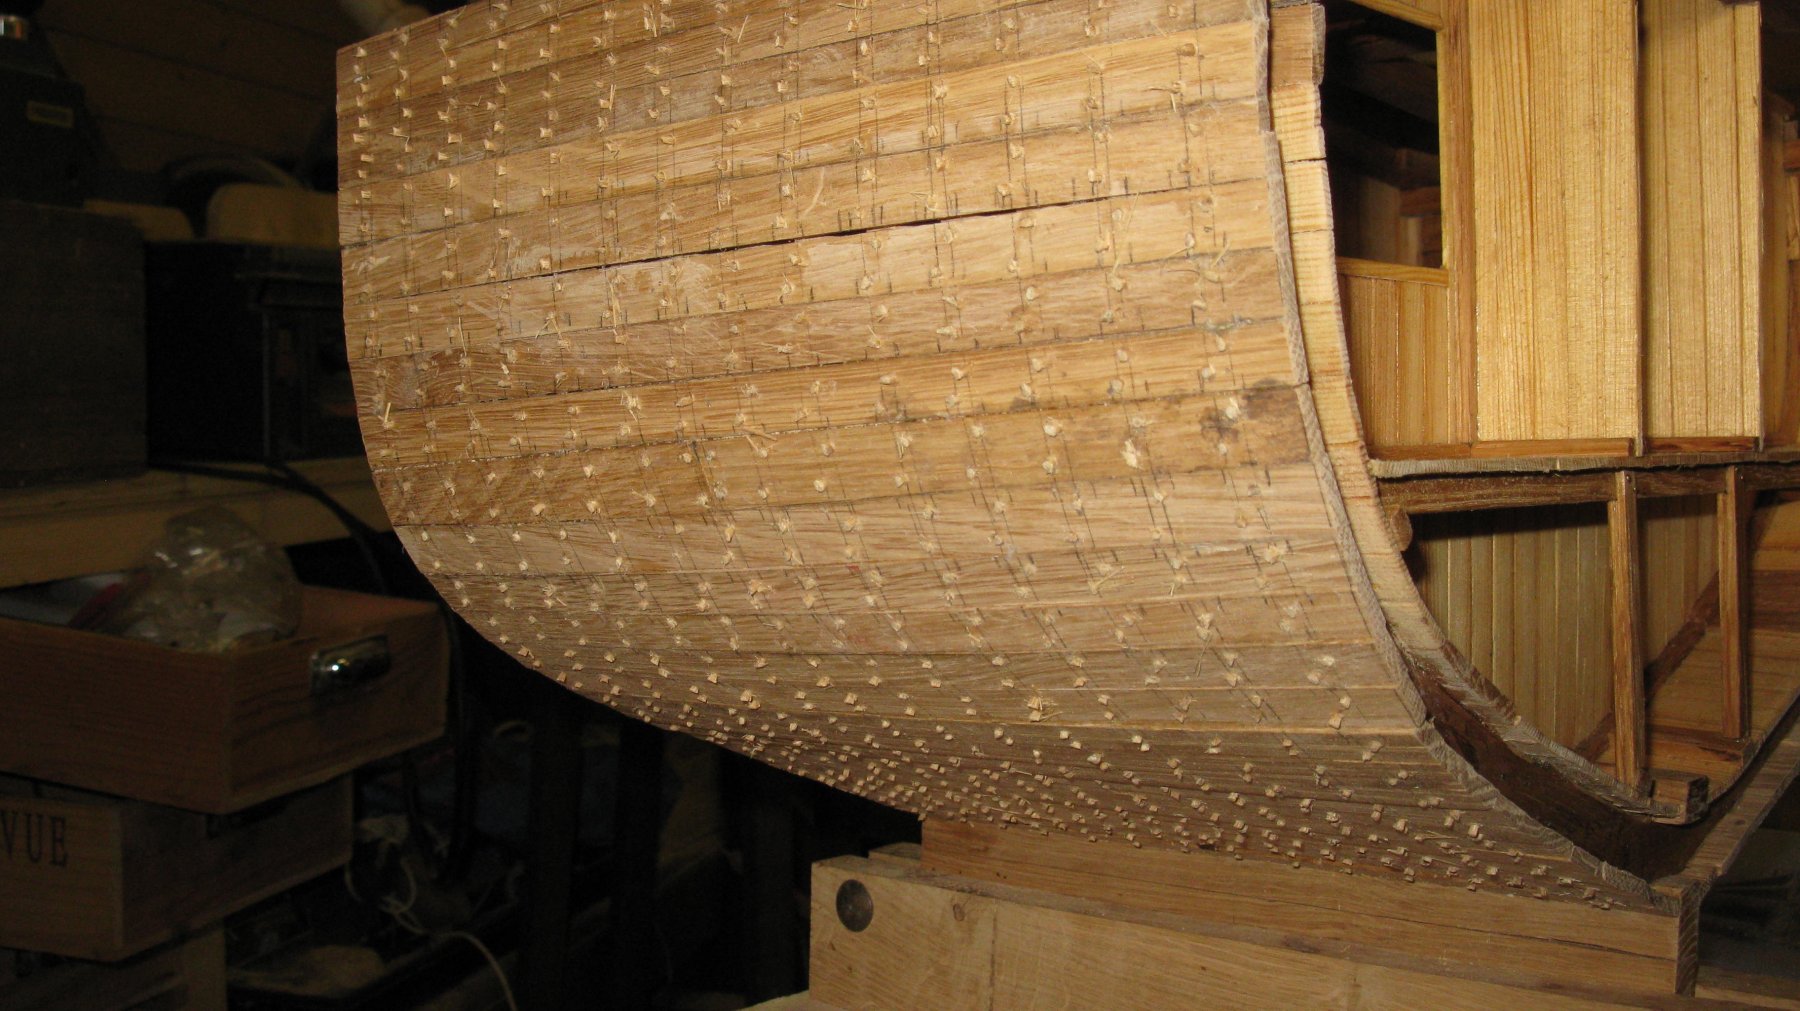
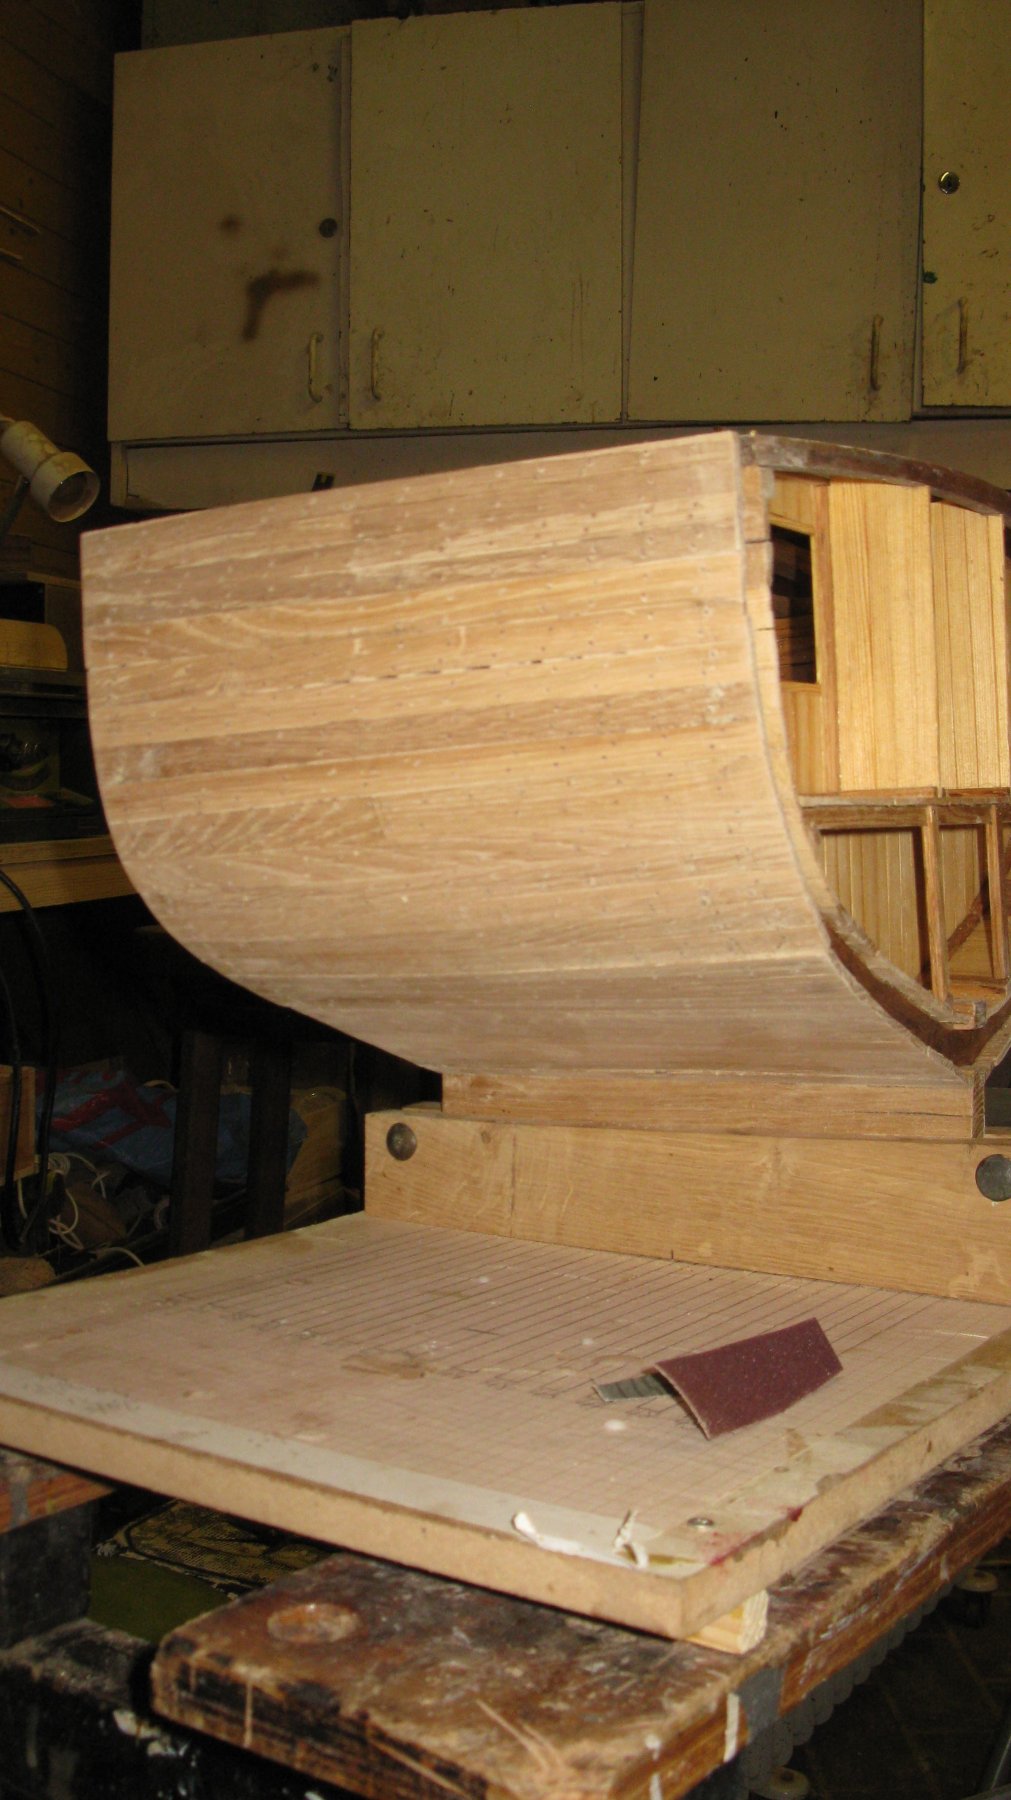
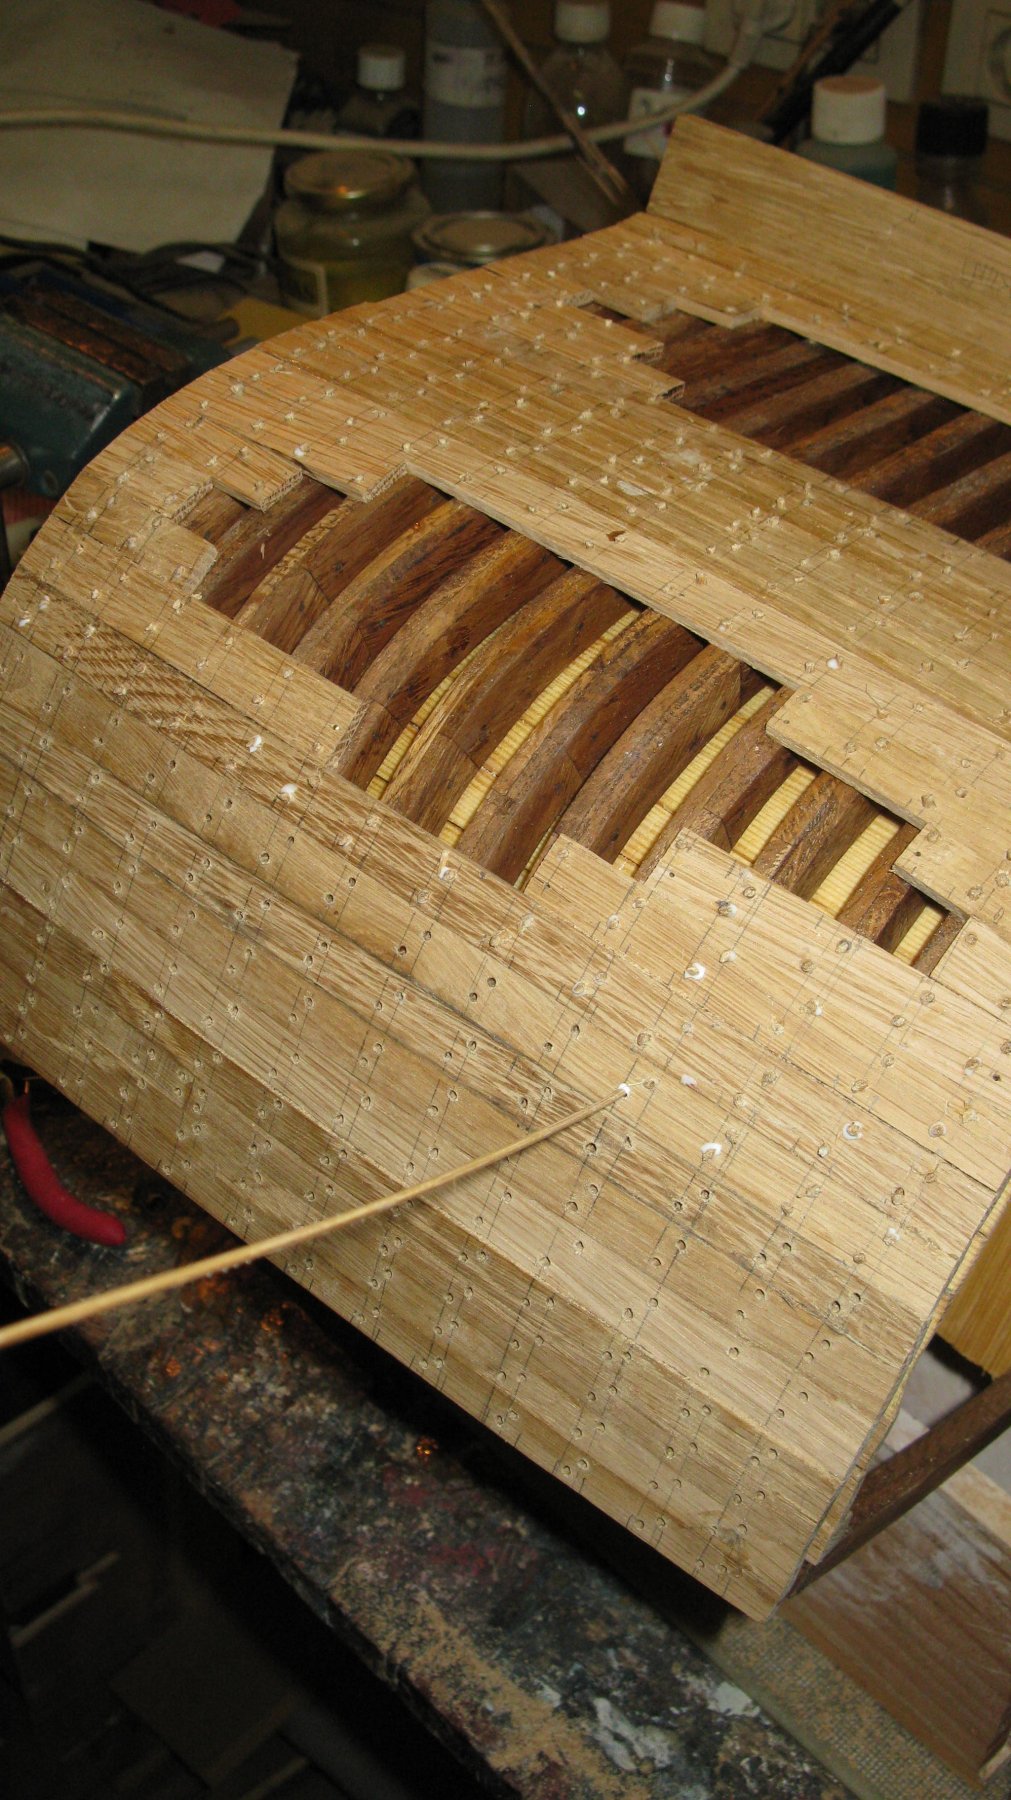
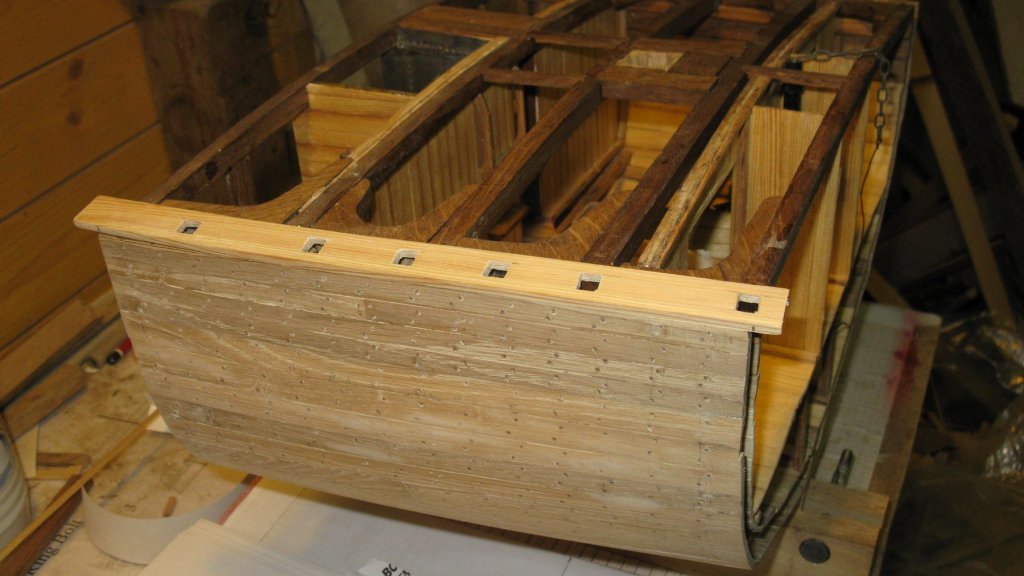
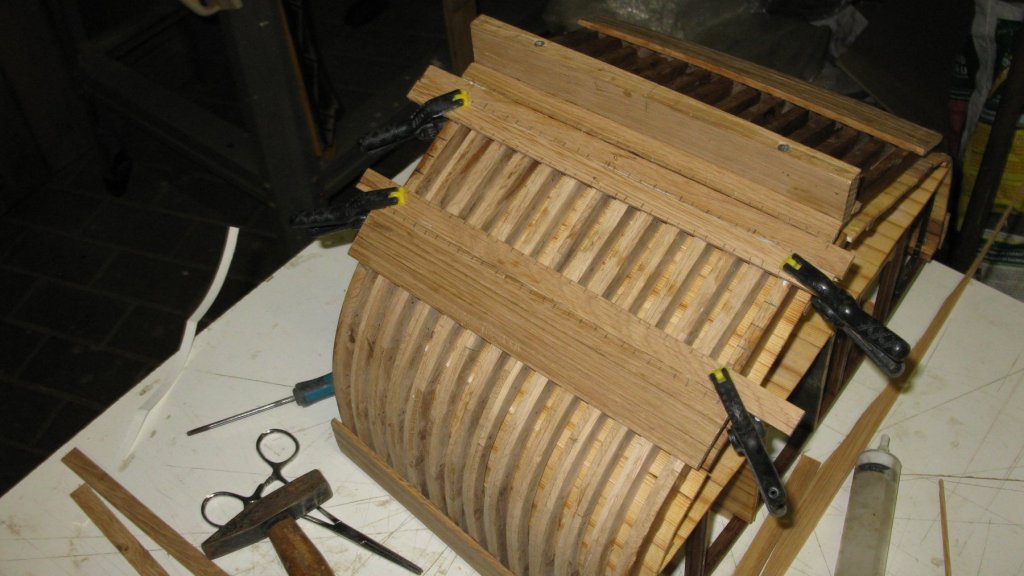
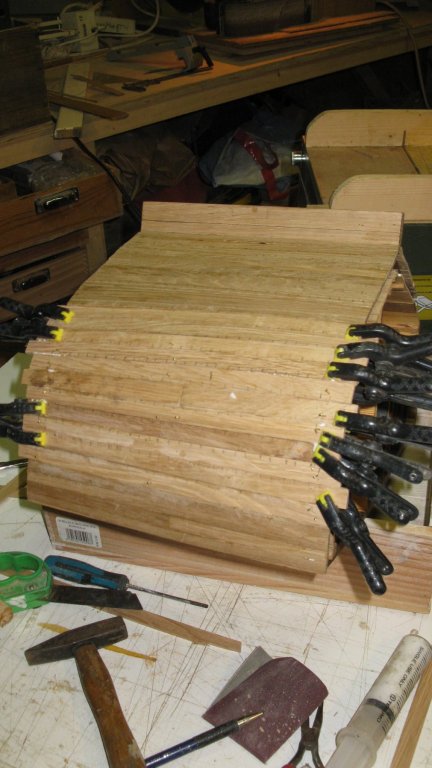
Part 17:The outside planking Time to plank the model at the outside. I make the division between the garboard strake and the stringers. There will be seven planks, so I measure the distance on the forward frame between the two with a strip of paper. I use a fan planking template to determine the seven plank widths on this frame... ... and mark the division on the frame. I do the same on the after frame and start to plank. I work from the sides to the middle and mark the position of the frames on each plank. That will help me later to determine the positions for the tree nails. First part completed. The whole starboard side planked I will leave open two holes in the planking of the port side to give sight on the frames. Outside planking completed. Before I can start to tree nail, I have to spend an afternoon splitting bamboo and pull the sticks through the draw plate to supplement my stock of tree nails. Drilling the nail holes and inserting the bamboo nails The nailed hull After sanding


- 219 replies
-
- 13
-
-
- smack
- cross-section
- (and 2 more)
-
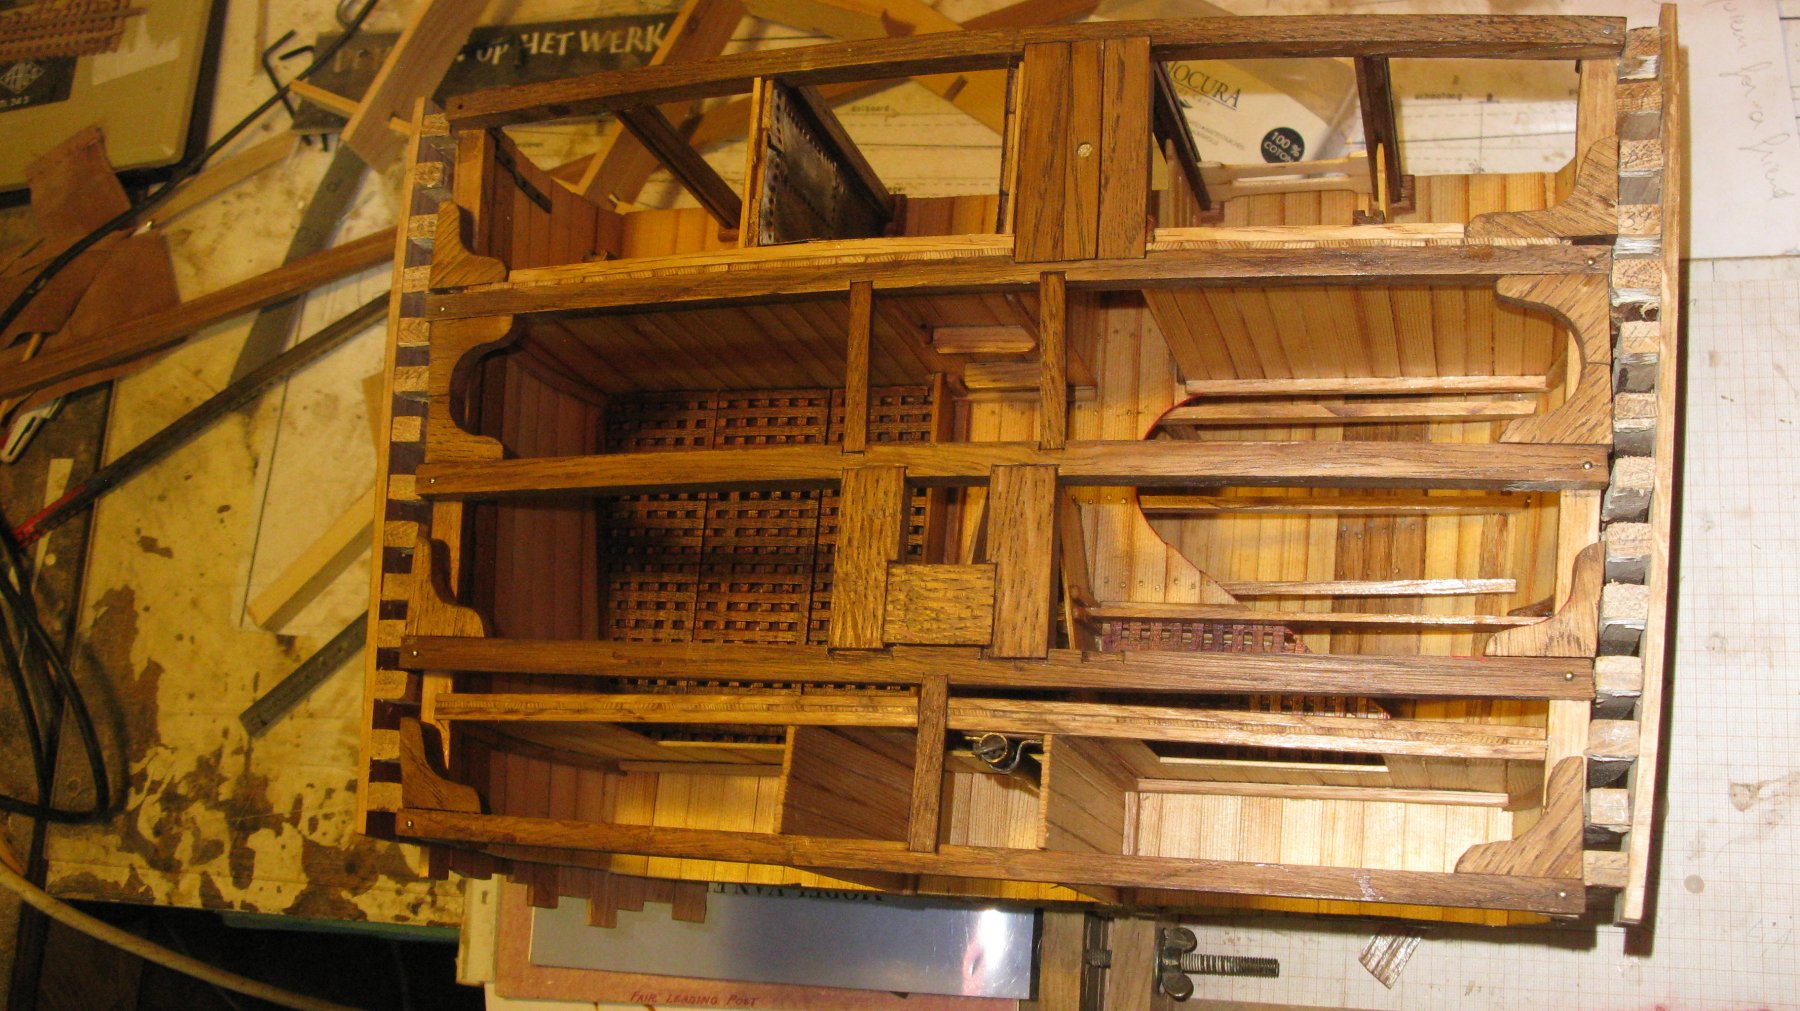
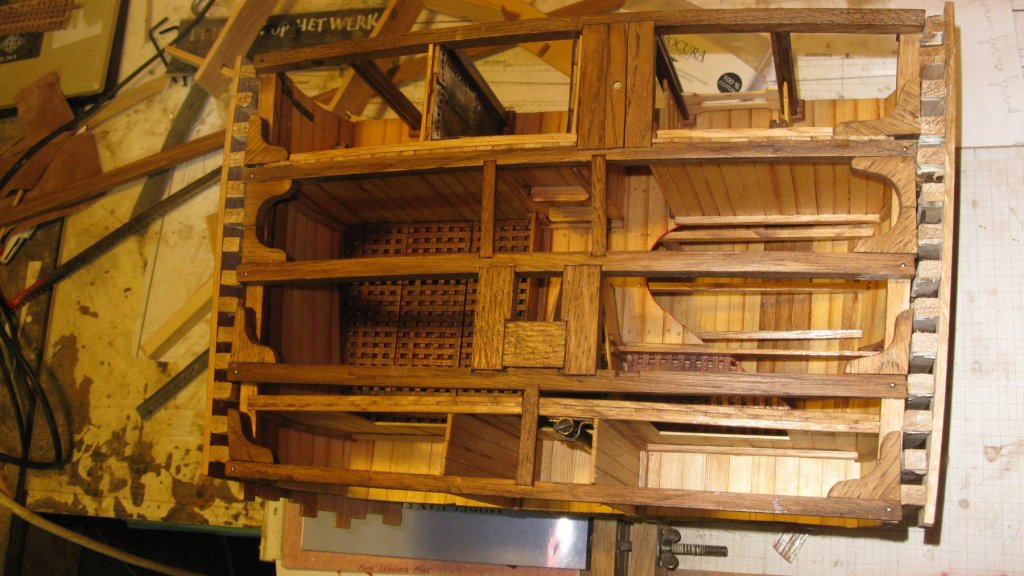
Part 16: Finishing the main deck structure The deck beams are prepared. The only remaining job is making the carlings and the horizontal knees. Sawing the knees with the fretsaw and finishing them with the Dremel. Knees and carlings placed. Some explanation

- 219 replies
-
- 13
-
-
- smack
- cross-section
- (and 2 more)
-
Thanks Carl, I didn't think about copper, but it would indeed better bend. Another lesson learned.
- 219 replies
-
- 2
-
-
- smack
- cross-section
- (and 2 more)