HOLIDAY DONATION DRIVE - SUPPORT MSW - DO YOUR PART TO KEEP THIS GREAT FORUM GOING! (Only 13 donations so far - C'mon guys!)
×


G.L.
-
Posts
1,553 -
Joined
-
Last visited
Content Type
Profiles
Forums
Gallery
Events
Everything posted by G.L.
-
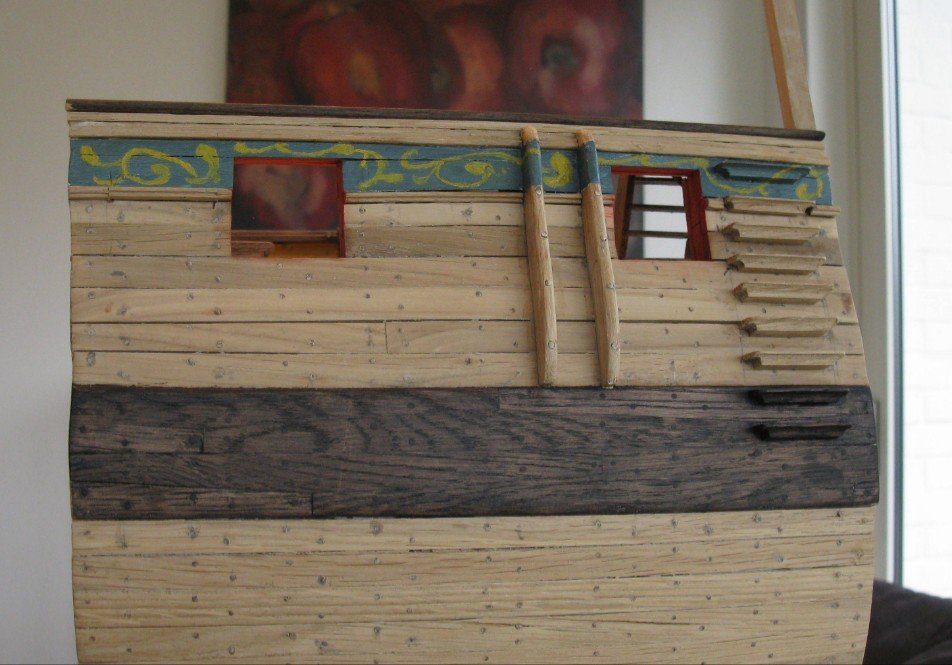
 Shadow and white spots added
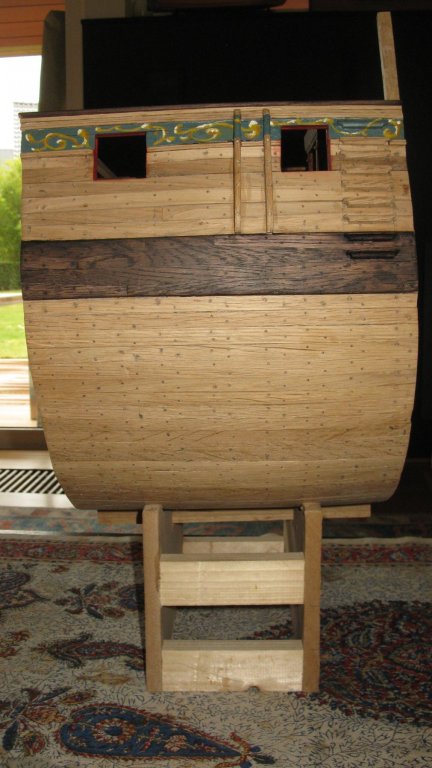

-
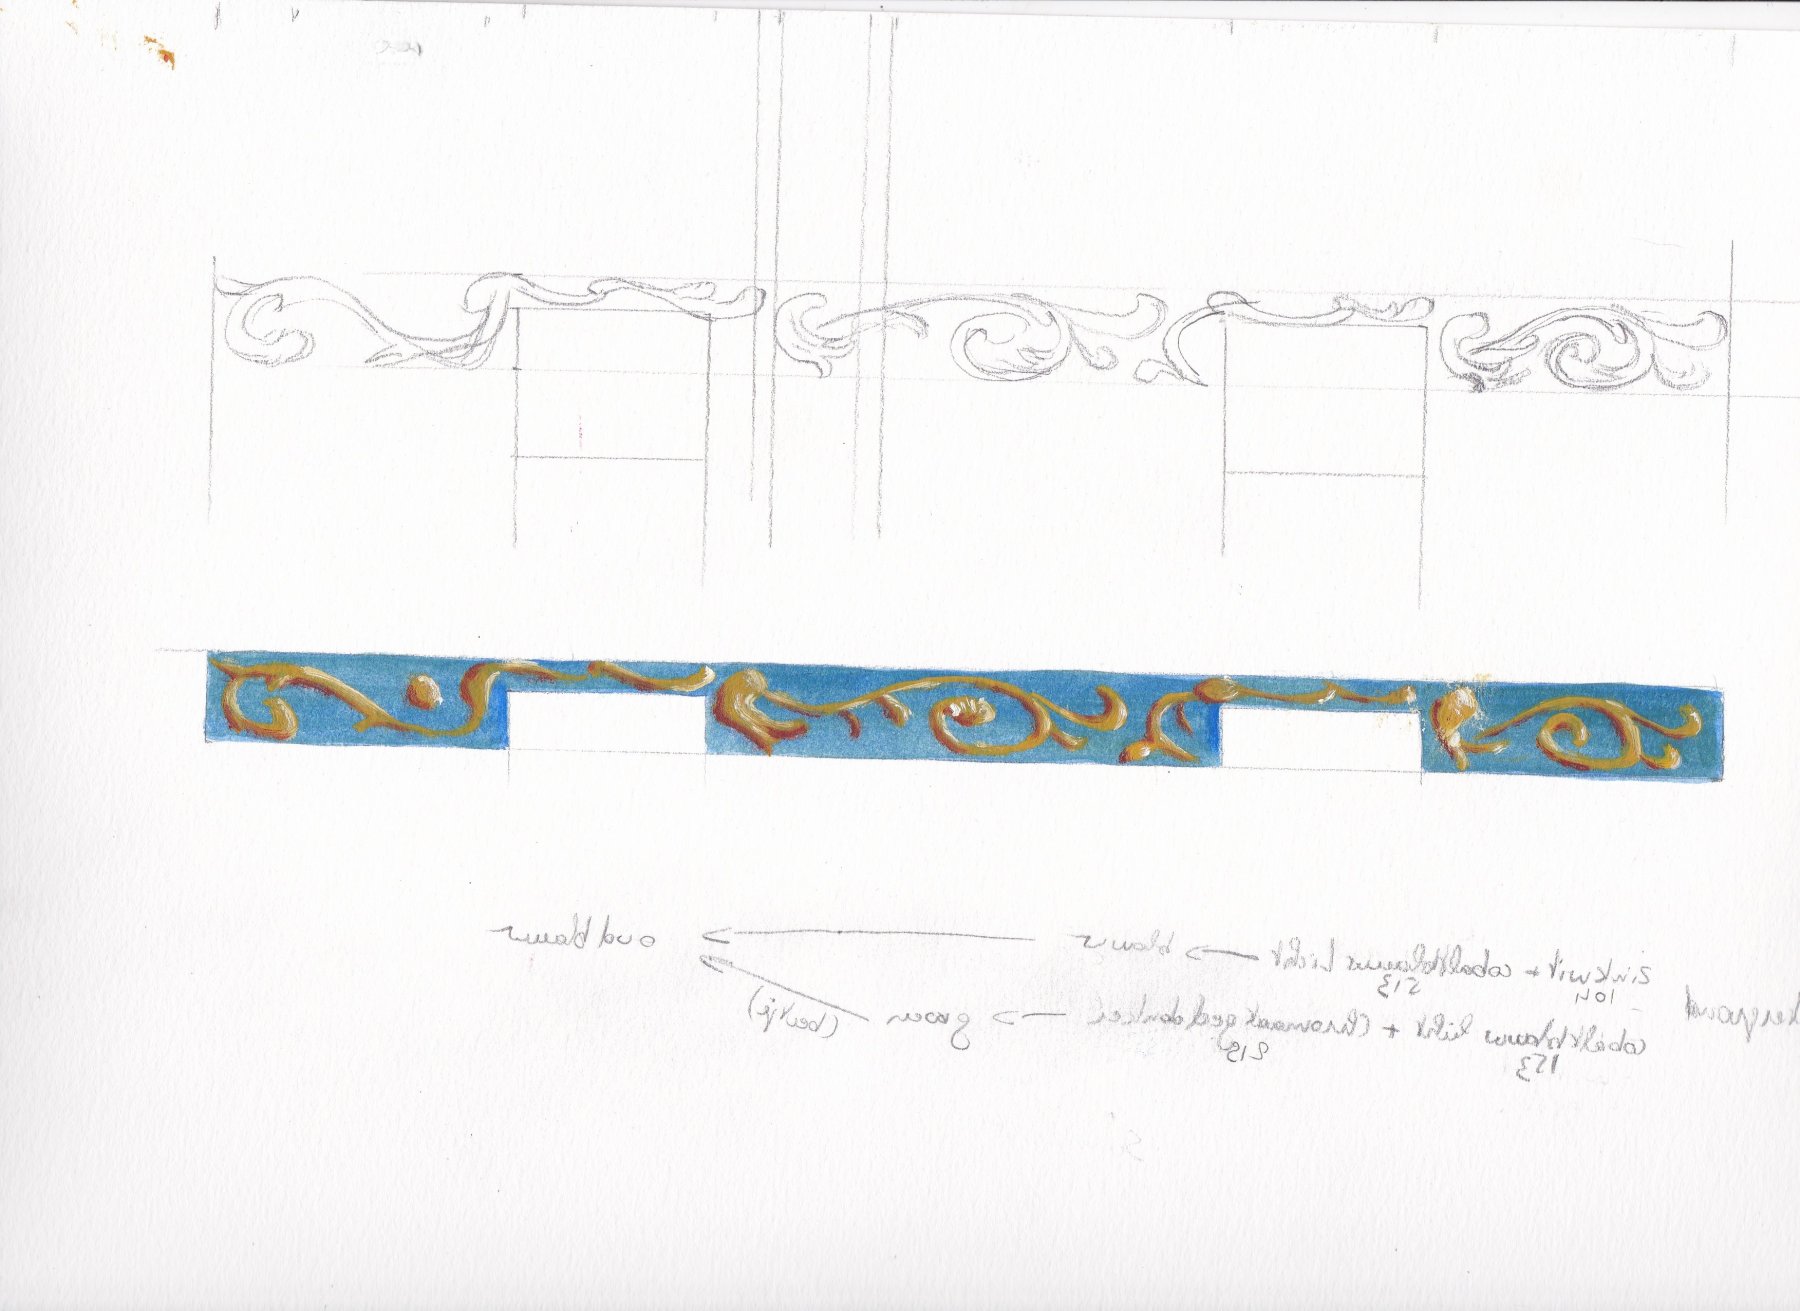
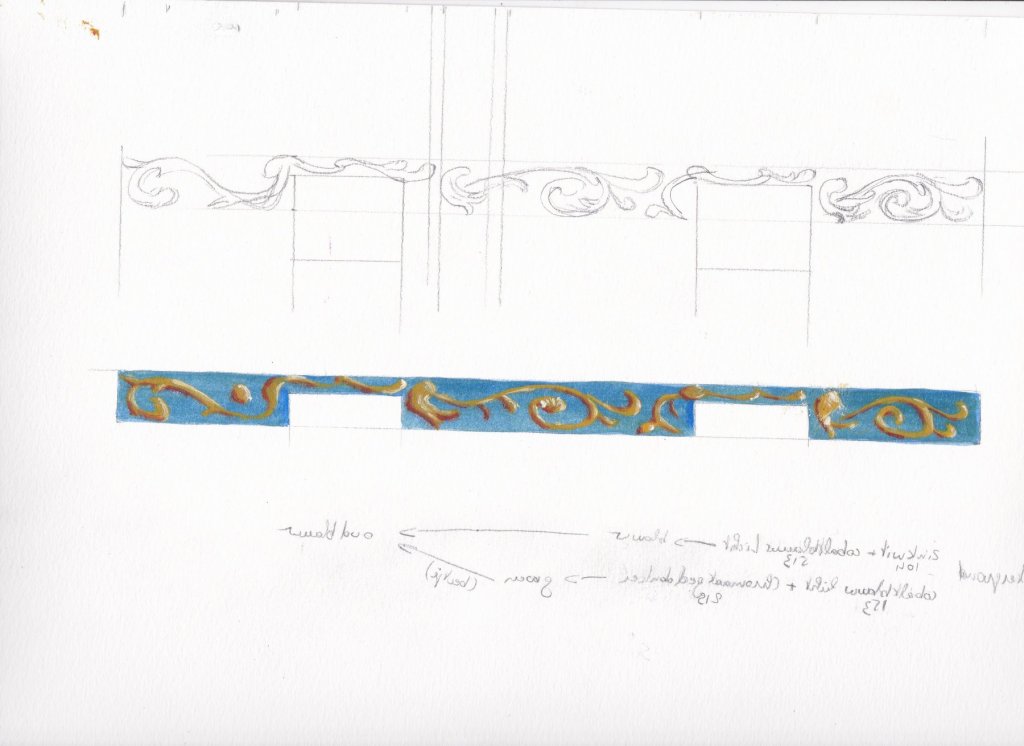
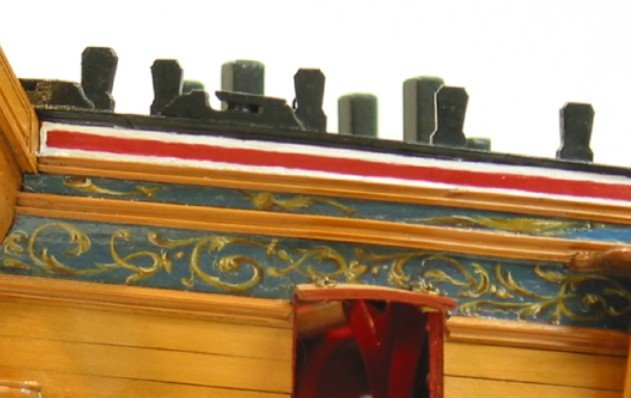
Now comes the most difficult part, the decorations. I am not an experienced painter. Painting the molding on a flat paper is not so difficult, but reproducing it on the model which has obstacles as fenders and ladder steps is a whole other story. With blood, sweat and tears and of course with yellow paint I can produce something that looks a bit like ornamental garlands. It still has to be finished with white light spots and darker yellow shadows. On the second picture you can see that the gaps between the planks were not yet filled when I was painting the moldings.
-
Congratulations, Derek. That was a smooth build. Your cross section looks very neat. Well done! I enjoyed very much your companionship in this group project. Disregarding some dormant projects, I believe that I am now the only active builder left on the Triton cross section forum (gives me a somewhat lonely feeling). Do you have already an idea for a following build? G.L.
-
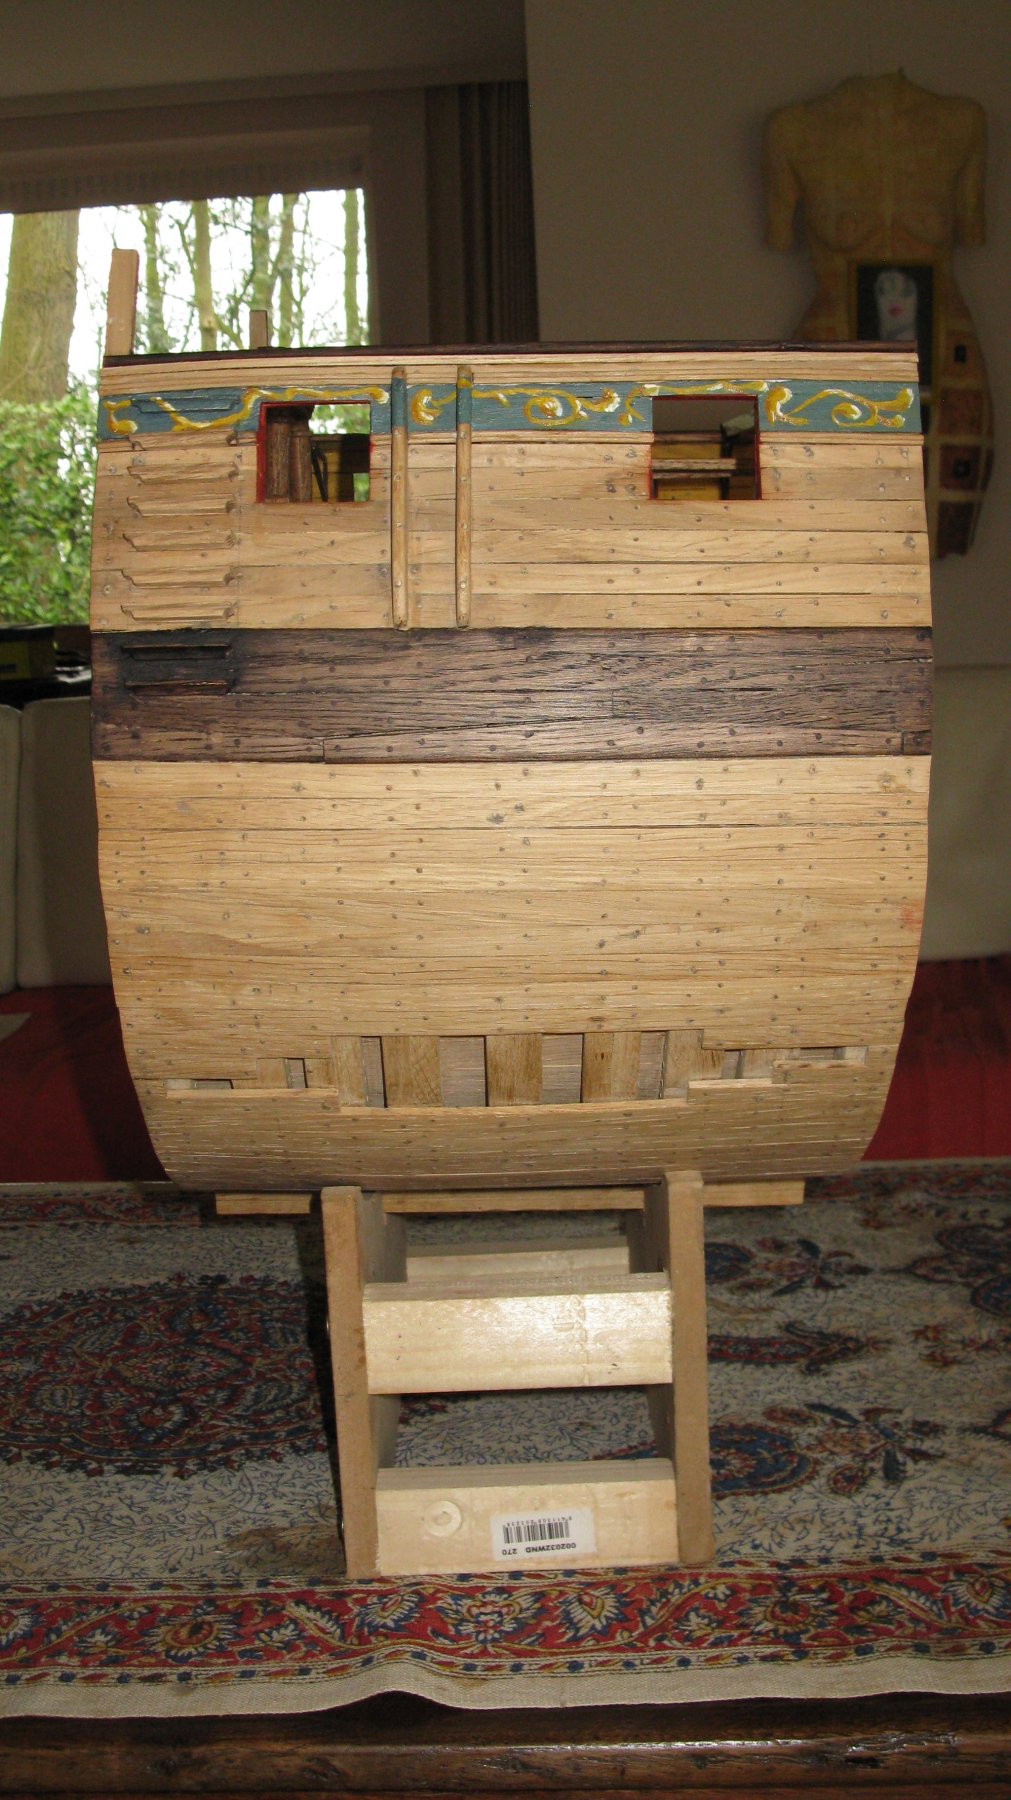
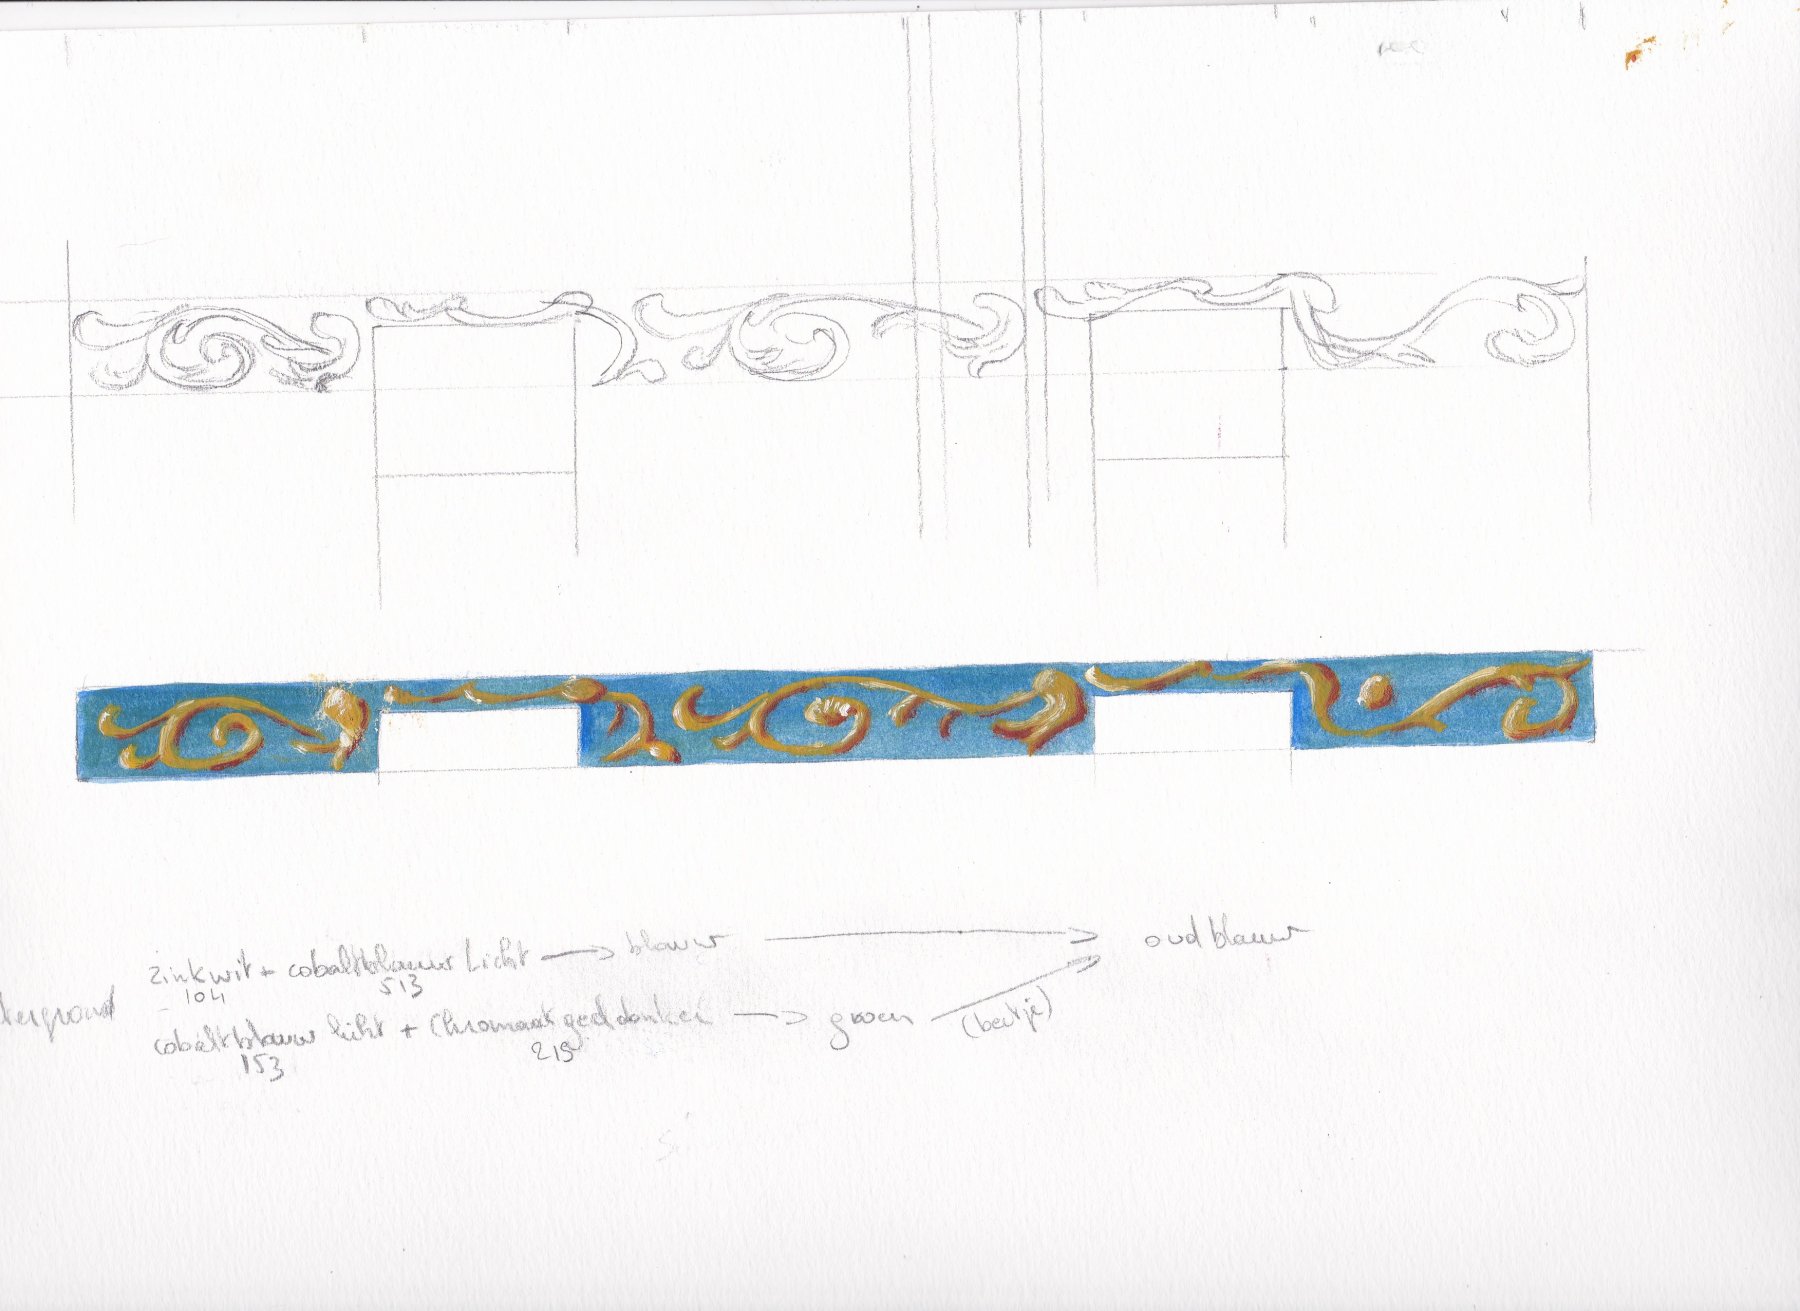
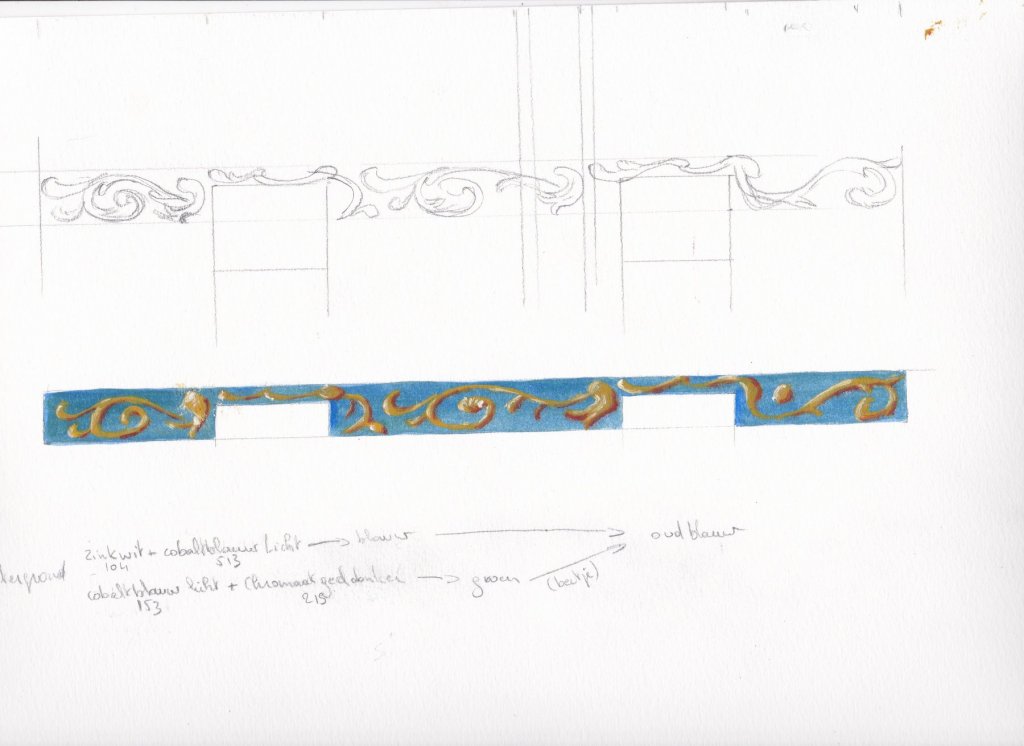
Thanks Derek and James, Over the white comes my blue of which I studiously notes the mixing ratios. Two layers are needed. It takes also some days for each layer to dry.

-
My wife, who knows a lot more about painting then I do, advises me to paint the molding in white first. The blue background will come out better, she says. Obediently as I am, I follow her advice.

-
I make first a design on paper. First in pencil to sketch a more simplified decoration than in the picture above. Then I paint in oil paint to find the correct colors. The blue background in particular needs some experimenting before it is acceptable. I scan my design and print it in mirror image to have a layout for both sides.
-
Above the gun ports, between the two trim mouldings I want to paint a decoration molding like it can be seen on some contemporary models.
-
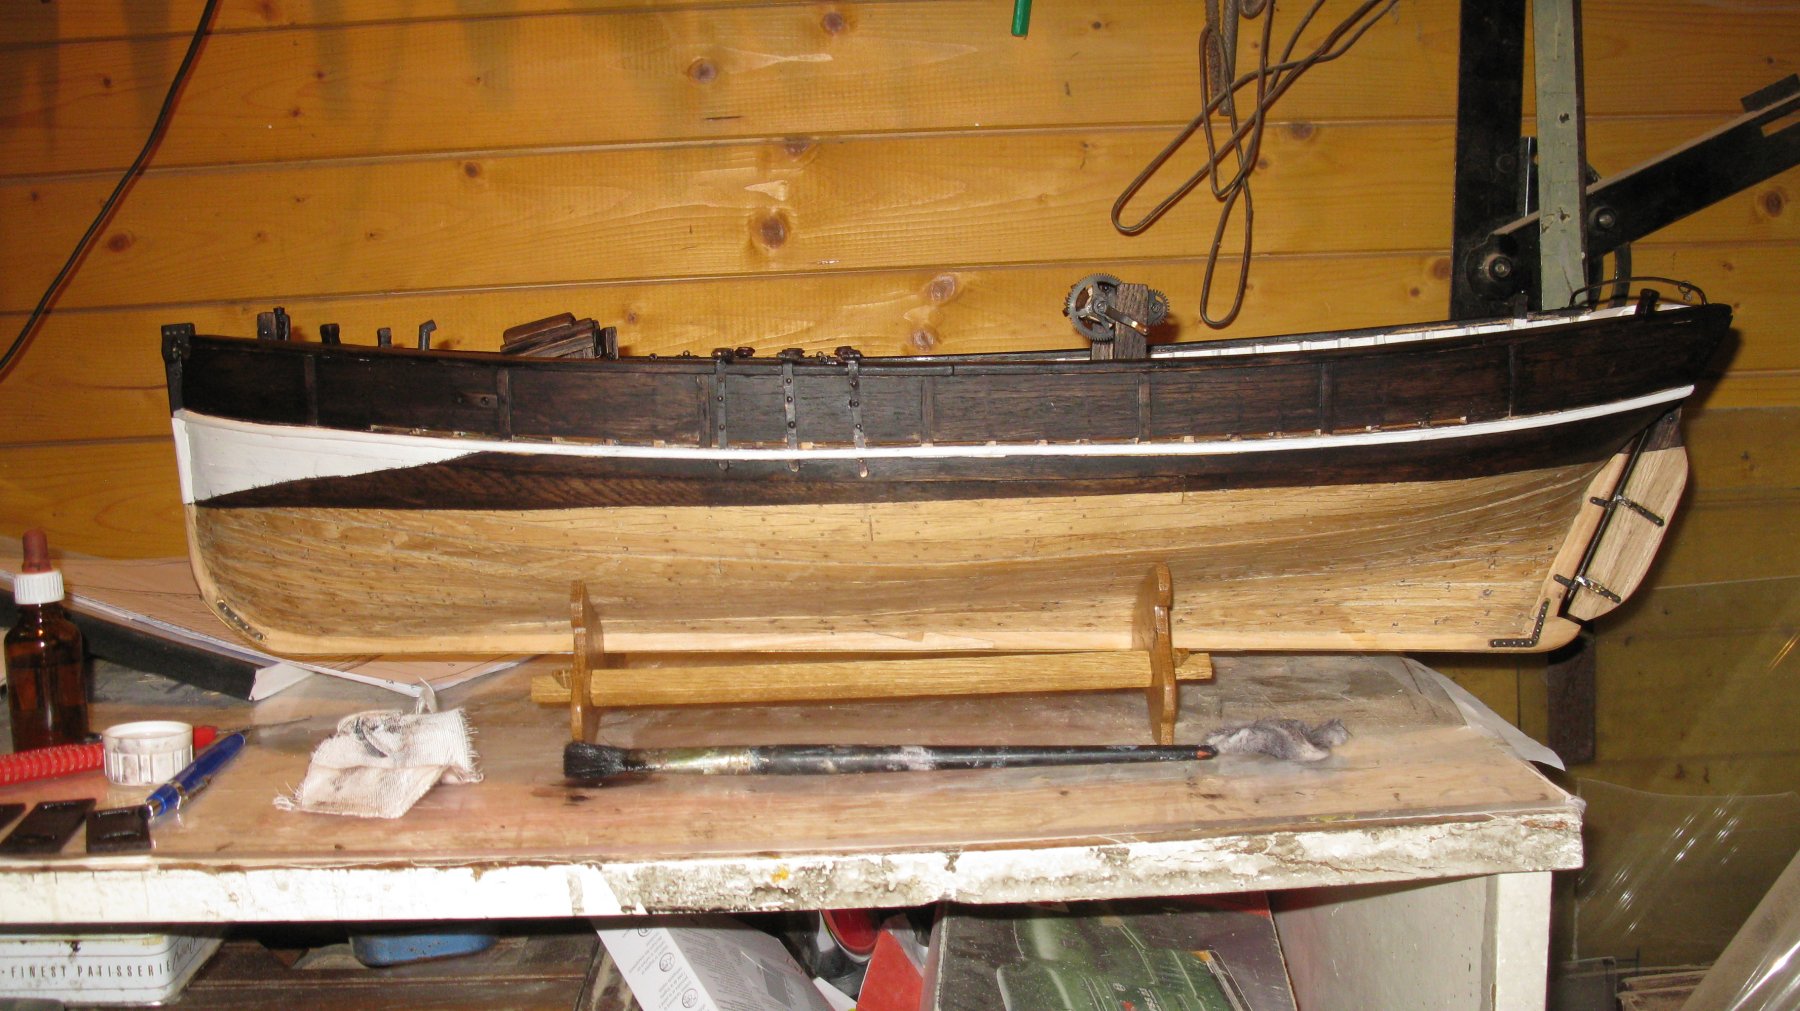
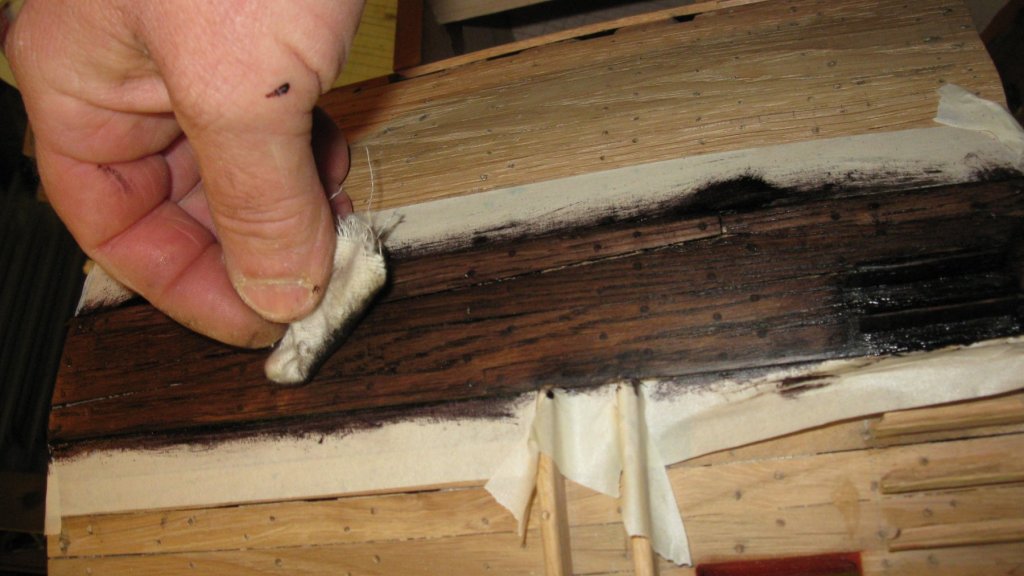
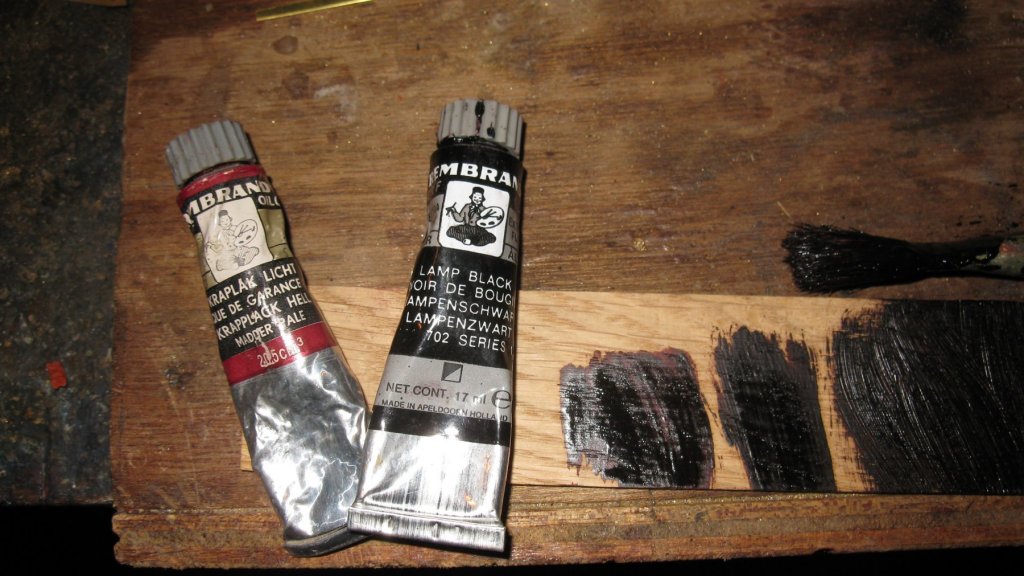
Thanks Chris! Time to give a bit color to my model. I make the wales dark, using the same method as for the inner bulwark. Now I am using a mixture of lamp black 2/3 and kraplack red 1/3. Again diluted with turpentine and rubbed up with a soft rag before it is fully dry.

-
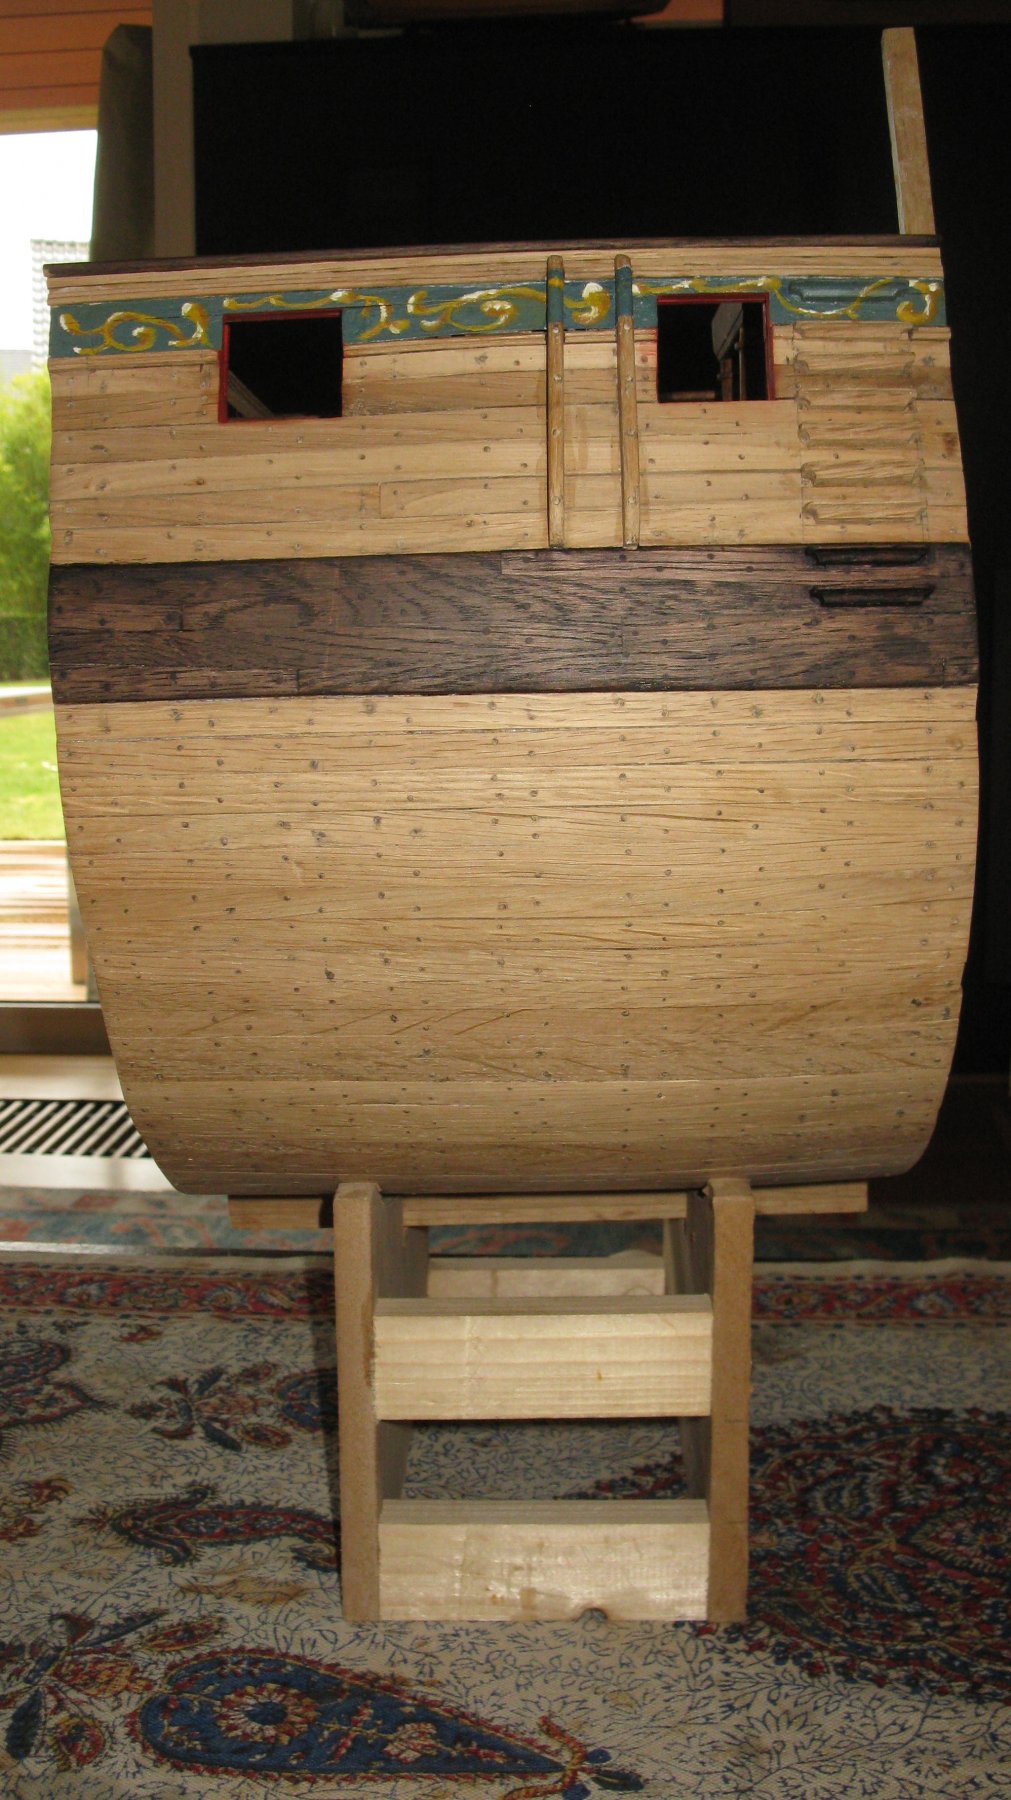
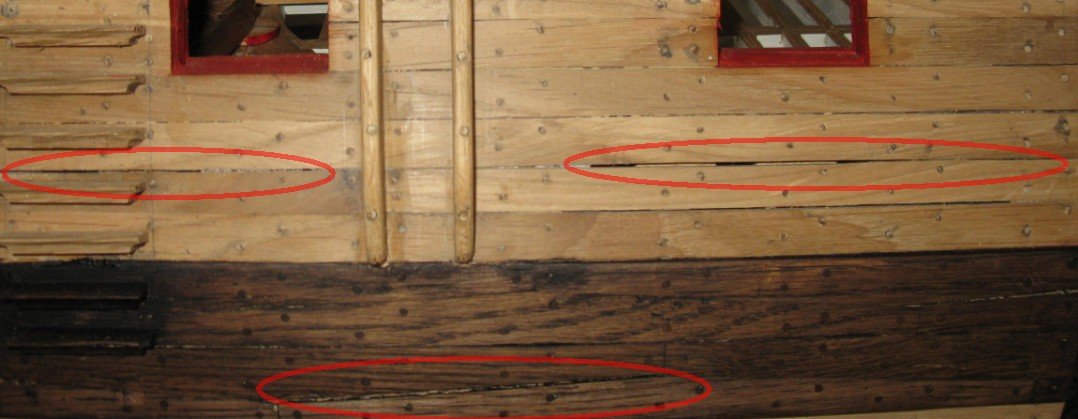
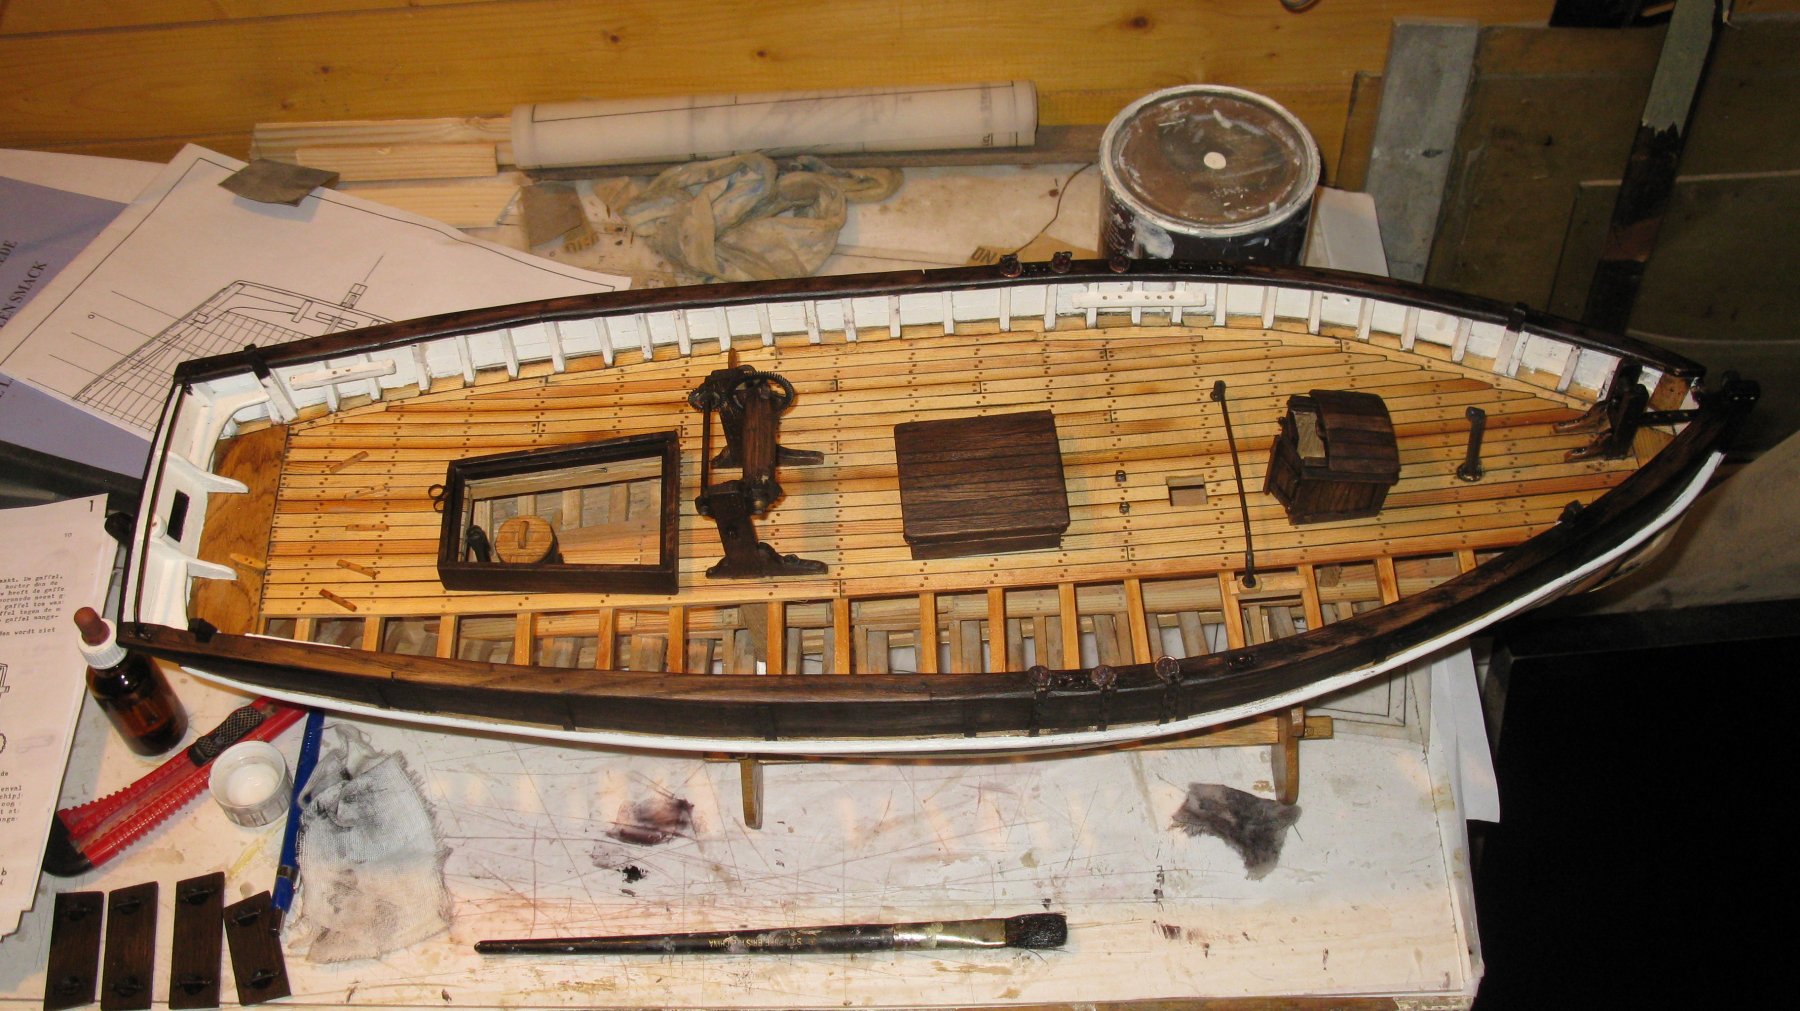
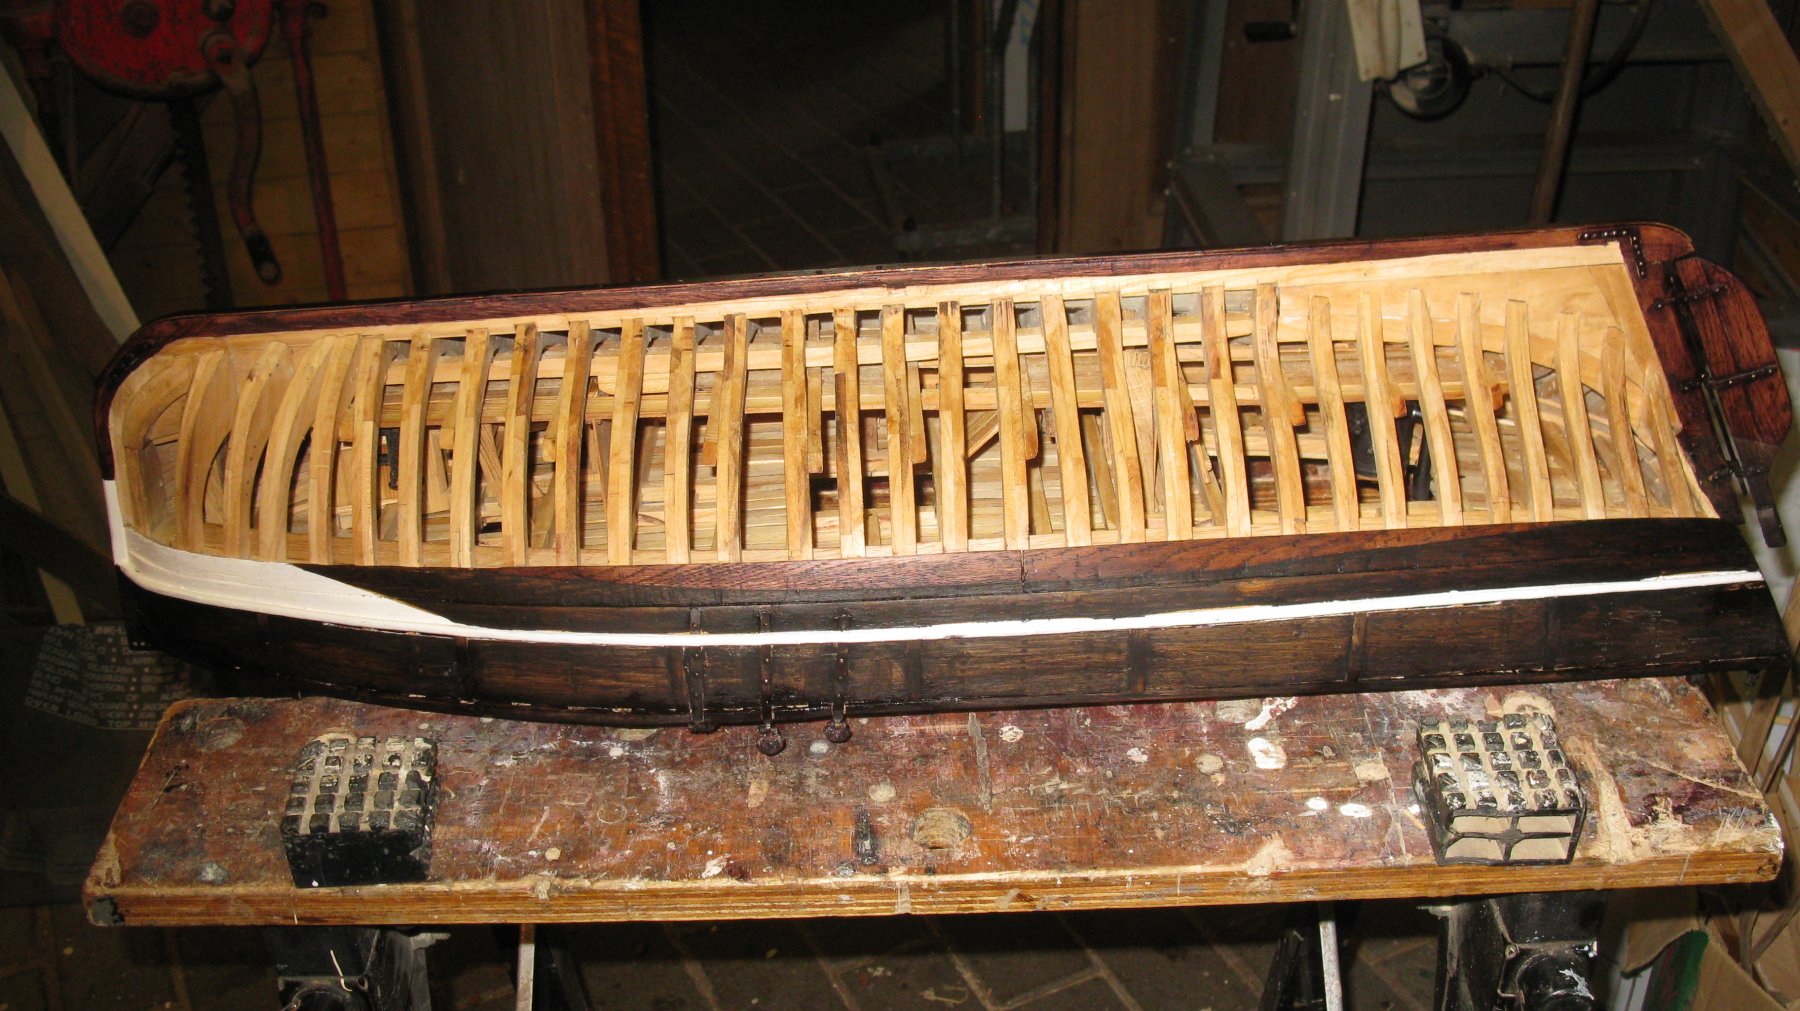
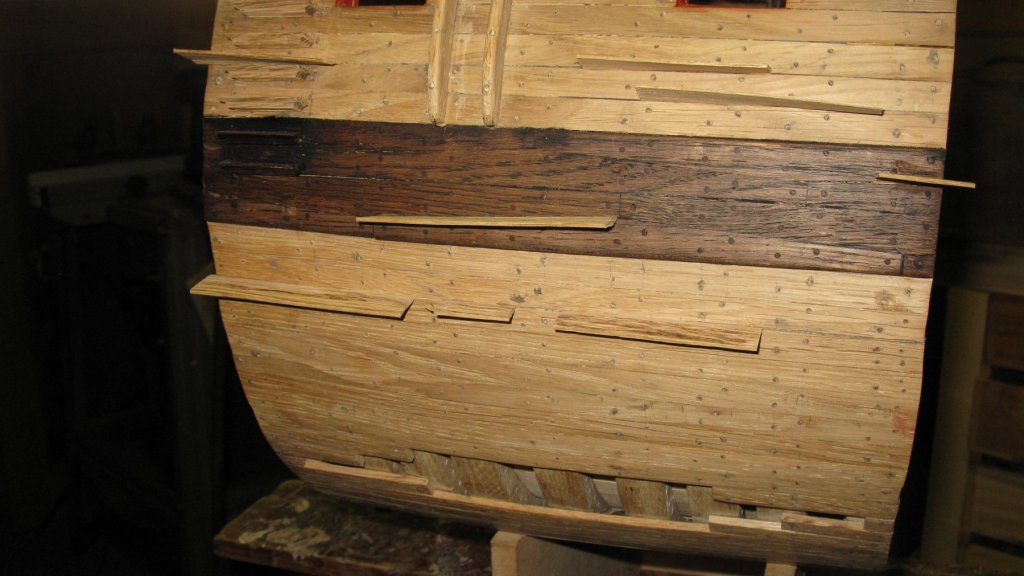
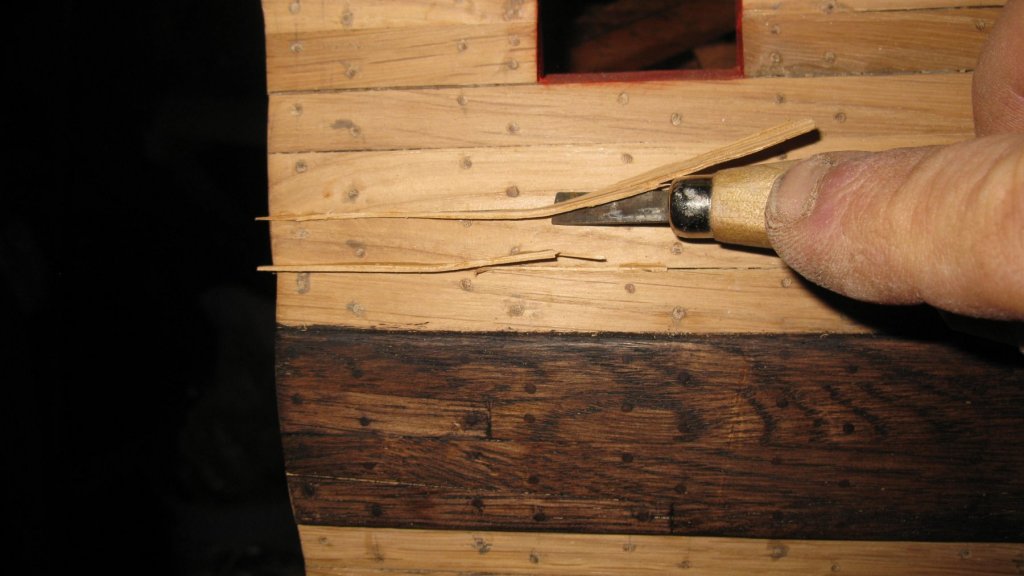
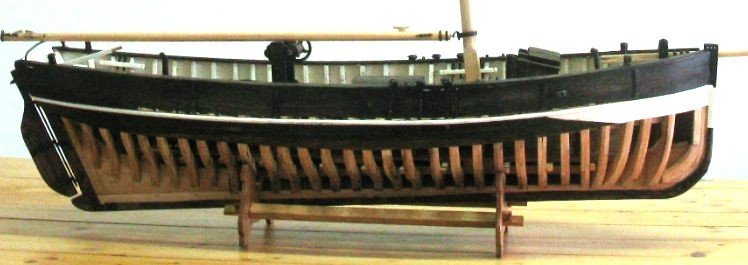
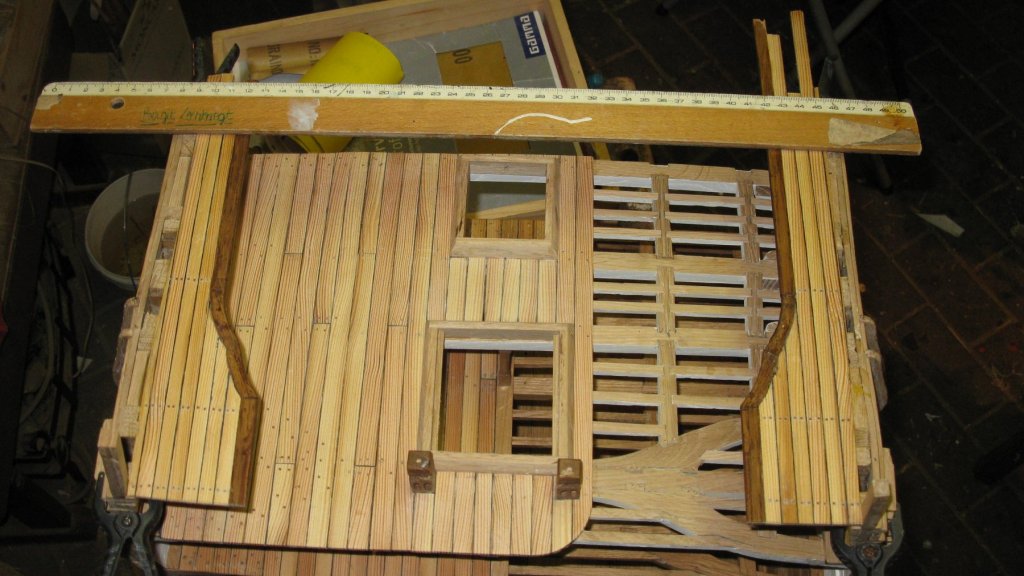
I thought about some solutions. Making a wood paste with sanding dust and varnish, etc... but I think it is better to fill the gaps with solid wood. So I make some thin planks in oak of which I sand a sharp side. I put some wood glue on the sharp side and knock it gently in the seams with a light hammer. When the glue is dry I cut the excess of the planks away with a sharp chisel and sand it flush with the hull. There are still some gaps, but trust on it that they will fill with sanding dust when sanding between the varnish layers.
-
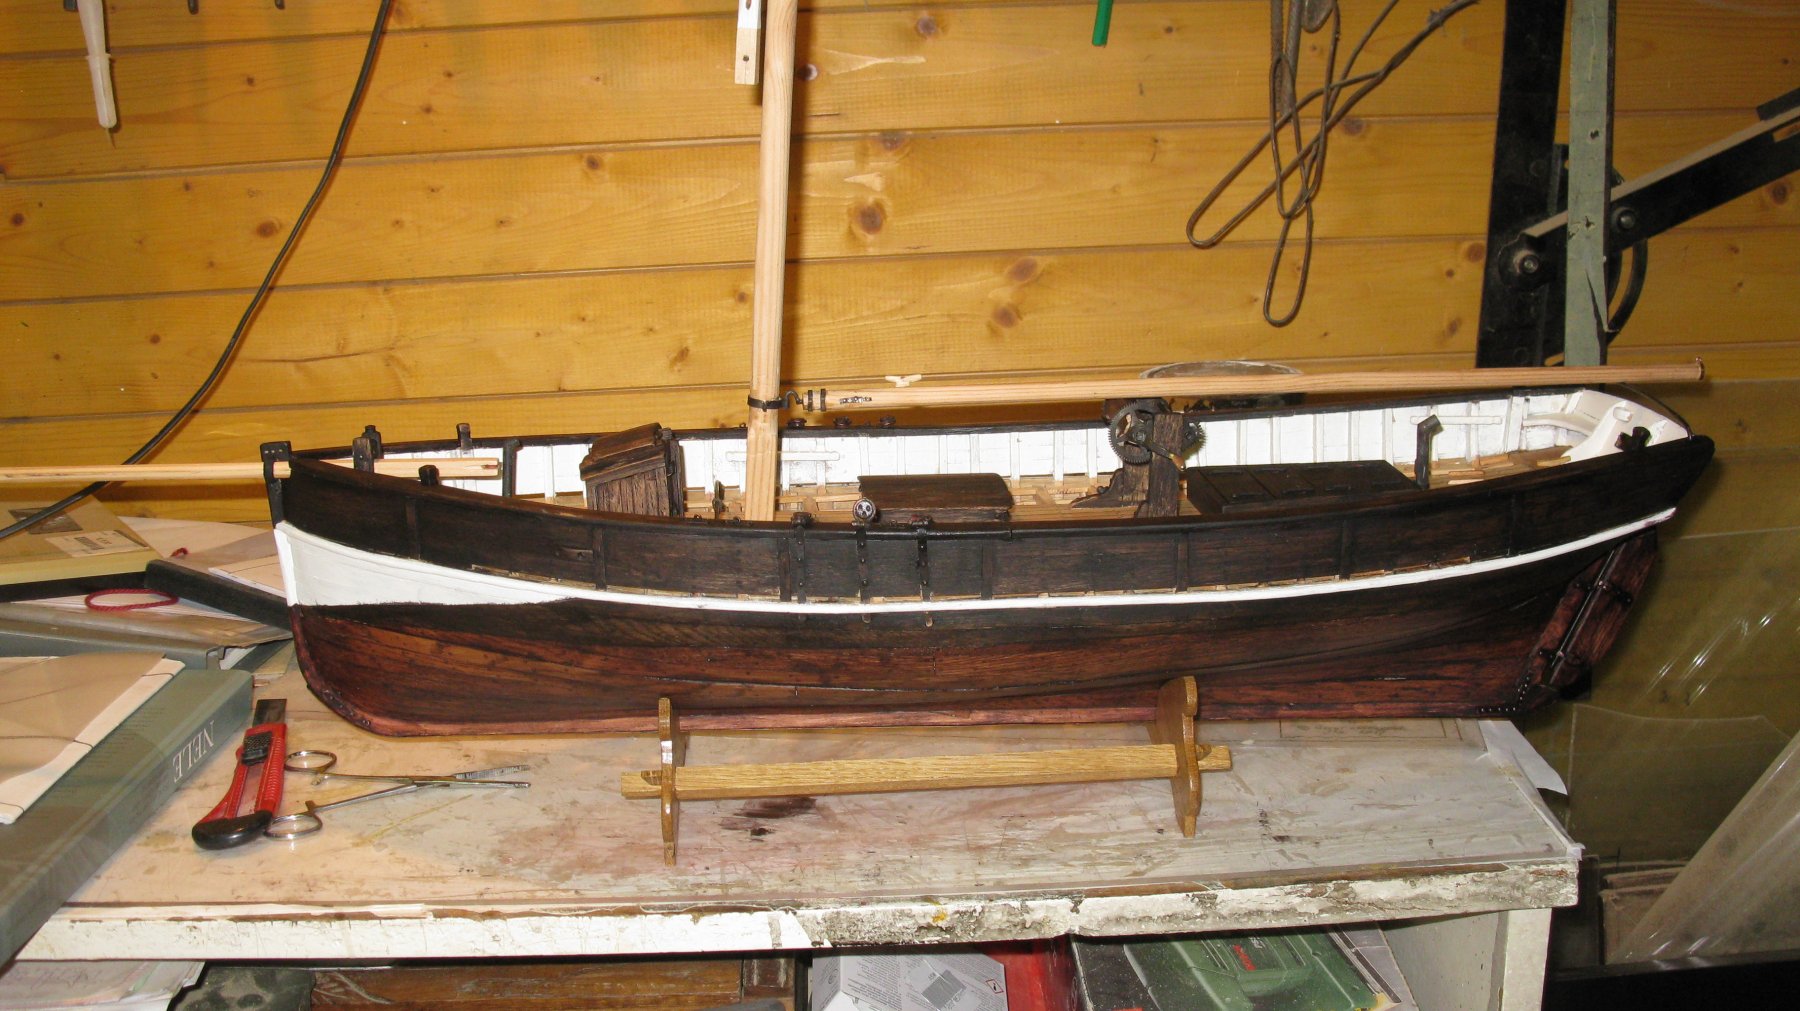
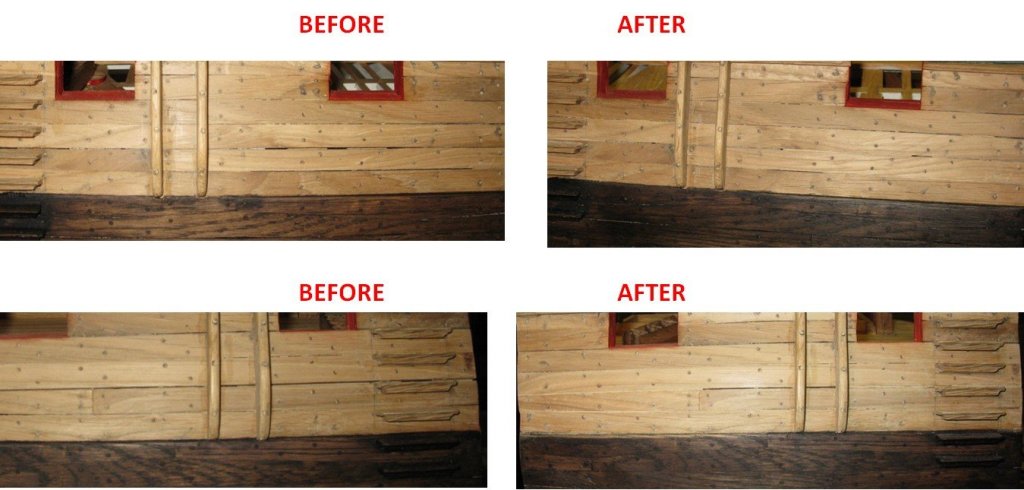
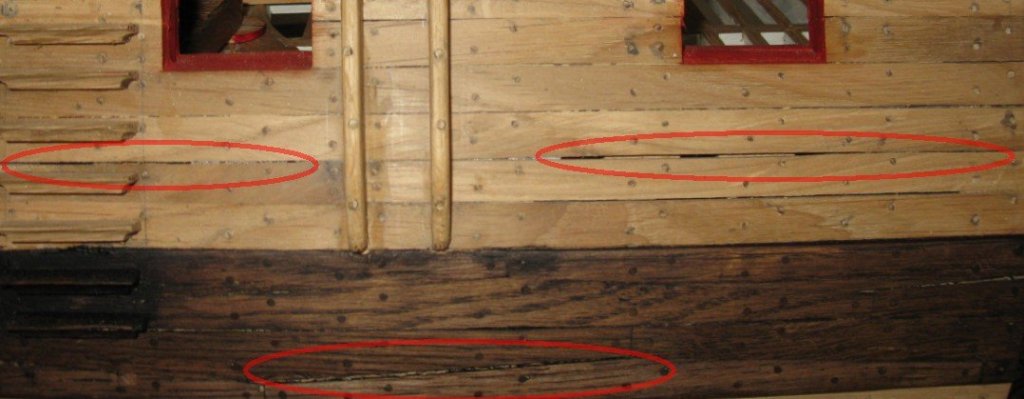
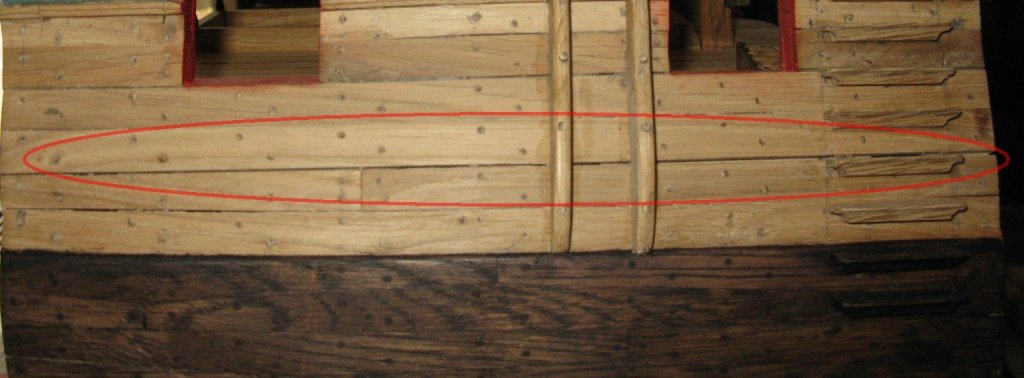
Thank you Christian. Yes she is looking good, except for one thing: Between some planks gaps are appearing. While planking, the planks fitted together nicely, but now here and there they opened from each other. I think that the reason is that my workshop is not heated and I planked during winter in a rather cold and sometimes a bit dank workshop. After planking I kept my cross section in house where it is warm and dry so .... Some seams are a bit too wide (the frames are visual between the planks) to leave it as it is.
-
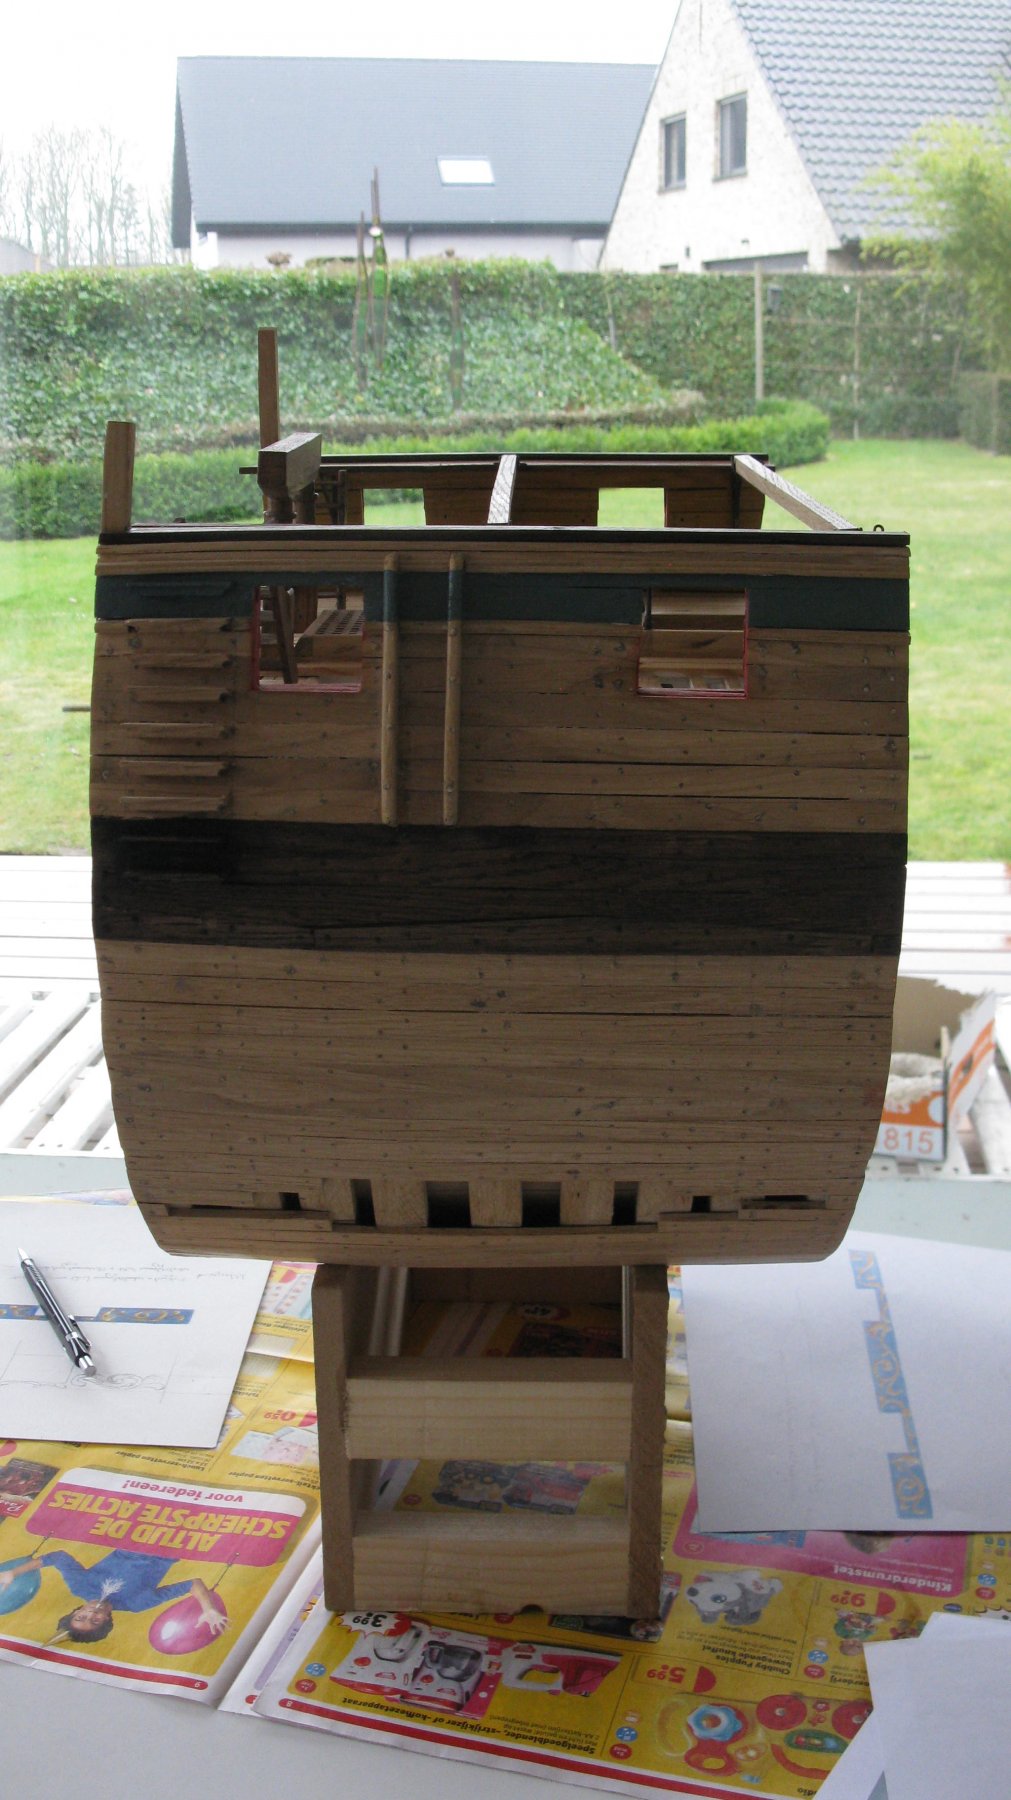
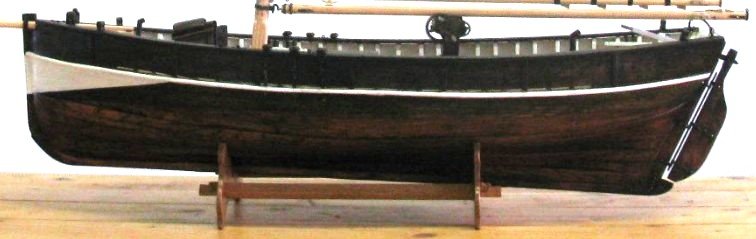
16.7 Coloring finished. The coating is finished with a matt lacquer of the kind painters use to lacquer oil paintings on canvas.
-
16.6 Painting the hull. As you can see, the underline of the white triangle is not sharply straight. The diluted paint penetrated below the masking tape. The white will have to be redone.


-
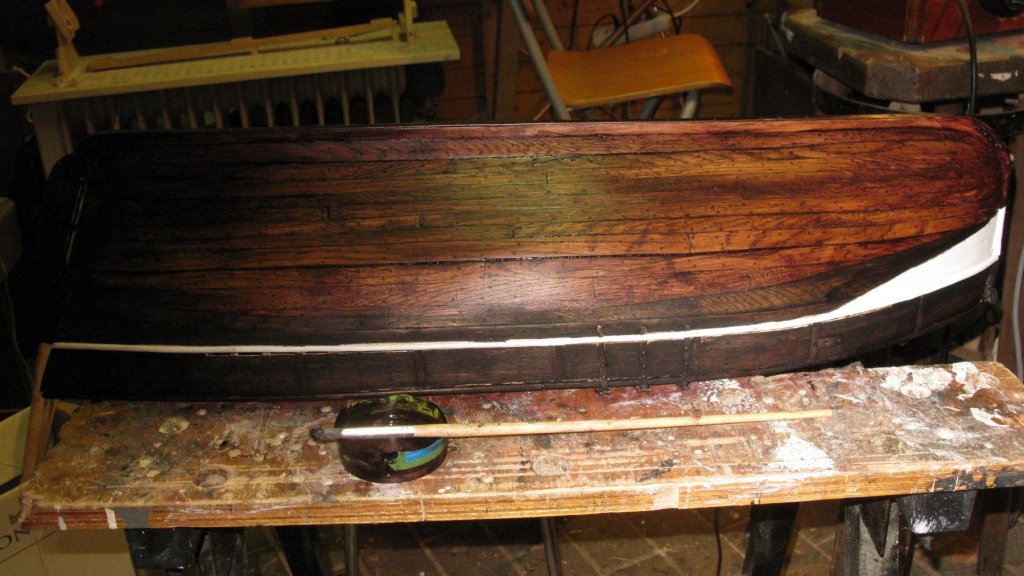
16.5 I have built my hull in oak, the wood that was used to build the real shrimpers. I would like to keep the grain of the wood visible through the paint. Therefore I use oil paint like painters use to paint on canvas. My wife is going to the art school, so I find everything that I need in her painting box. I use the paint strongly diluted with turpentine and to avoid that I have to wait several days before it is dry, I add some drips of siccative oil. In the 19th century most of the fishing boats in our region were black tarred, I want obtain a color which closes as much a possible a tarred hull. Therefore I mix lampblack with kraplack red. 1/3 red and 2/3 black above the waterline, 2/3 red and 1/3 black below the waterline. Before the paint dries completely, I rub it up with a soft cotton rag to spread the color equally over the surface.
-
Thank you, Keith.
-
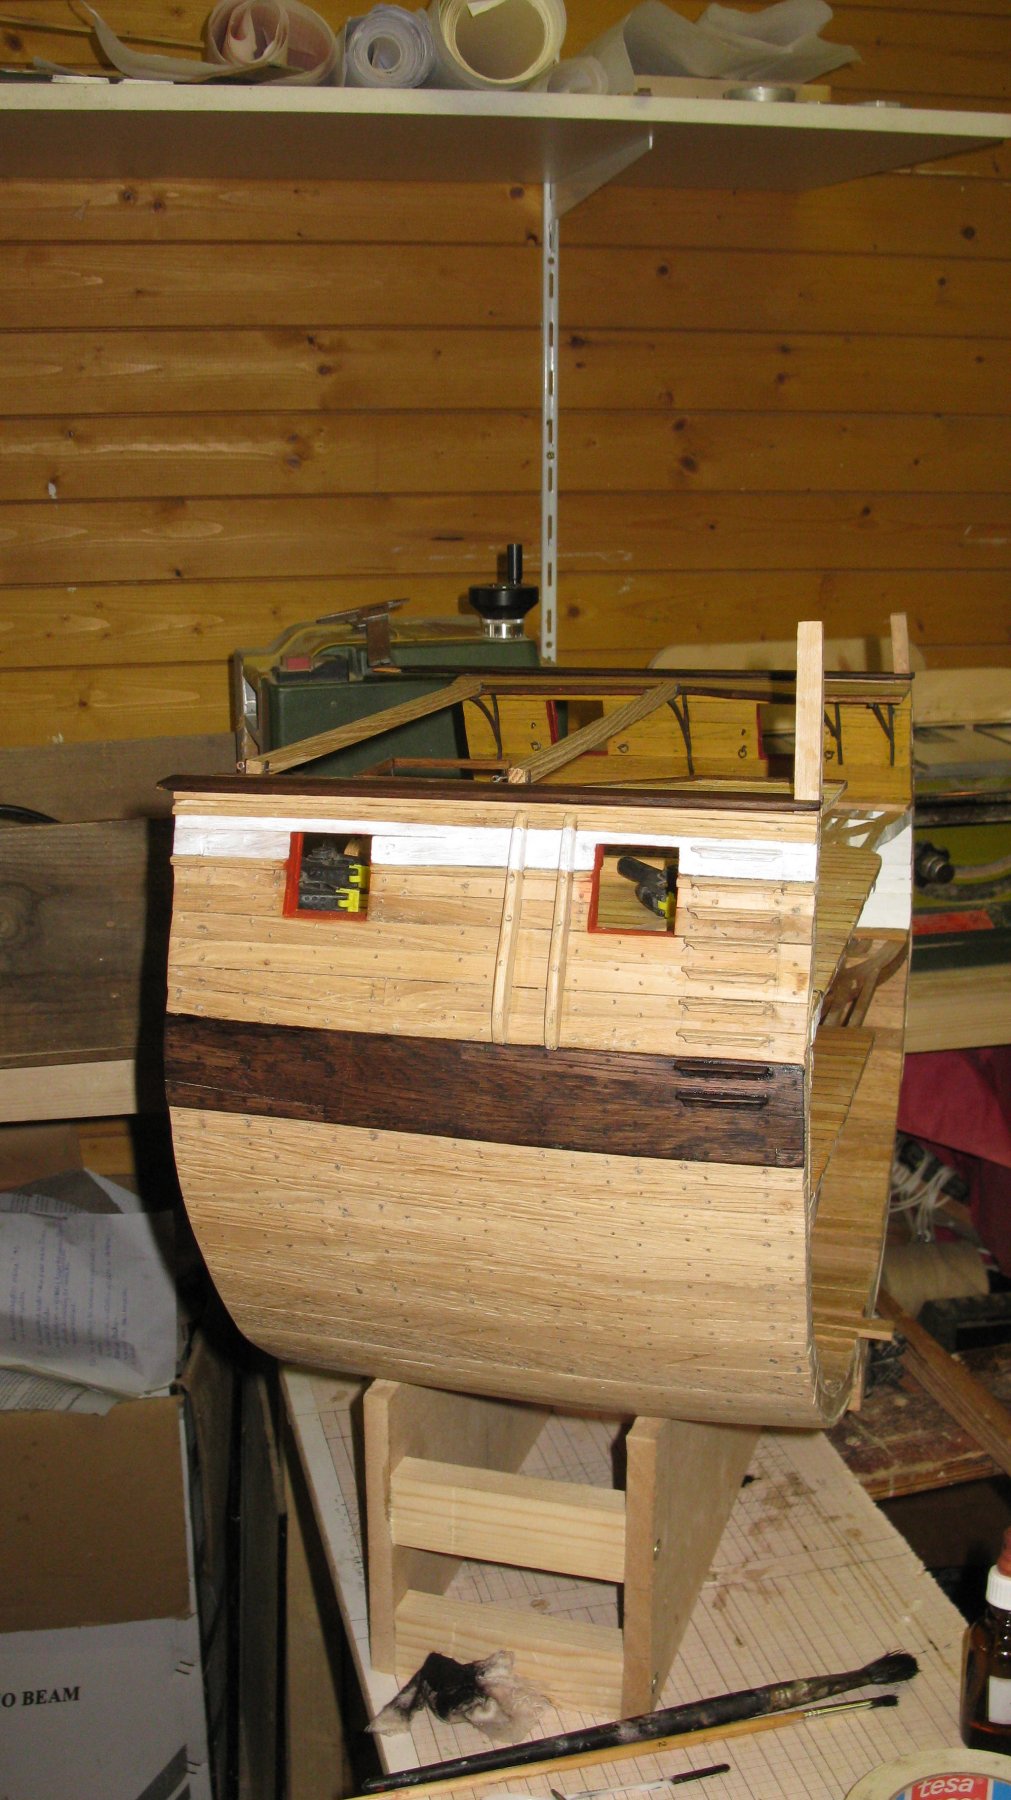
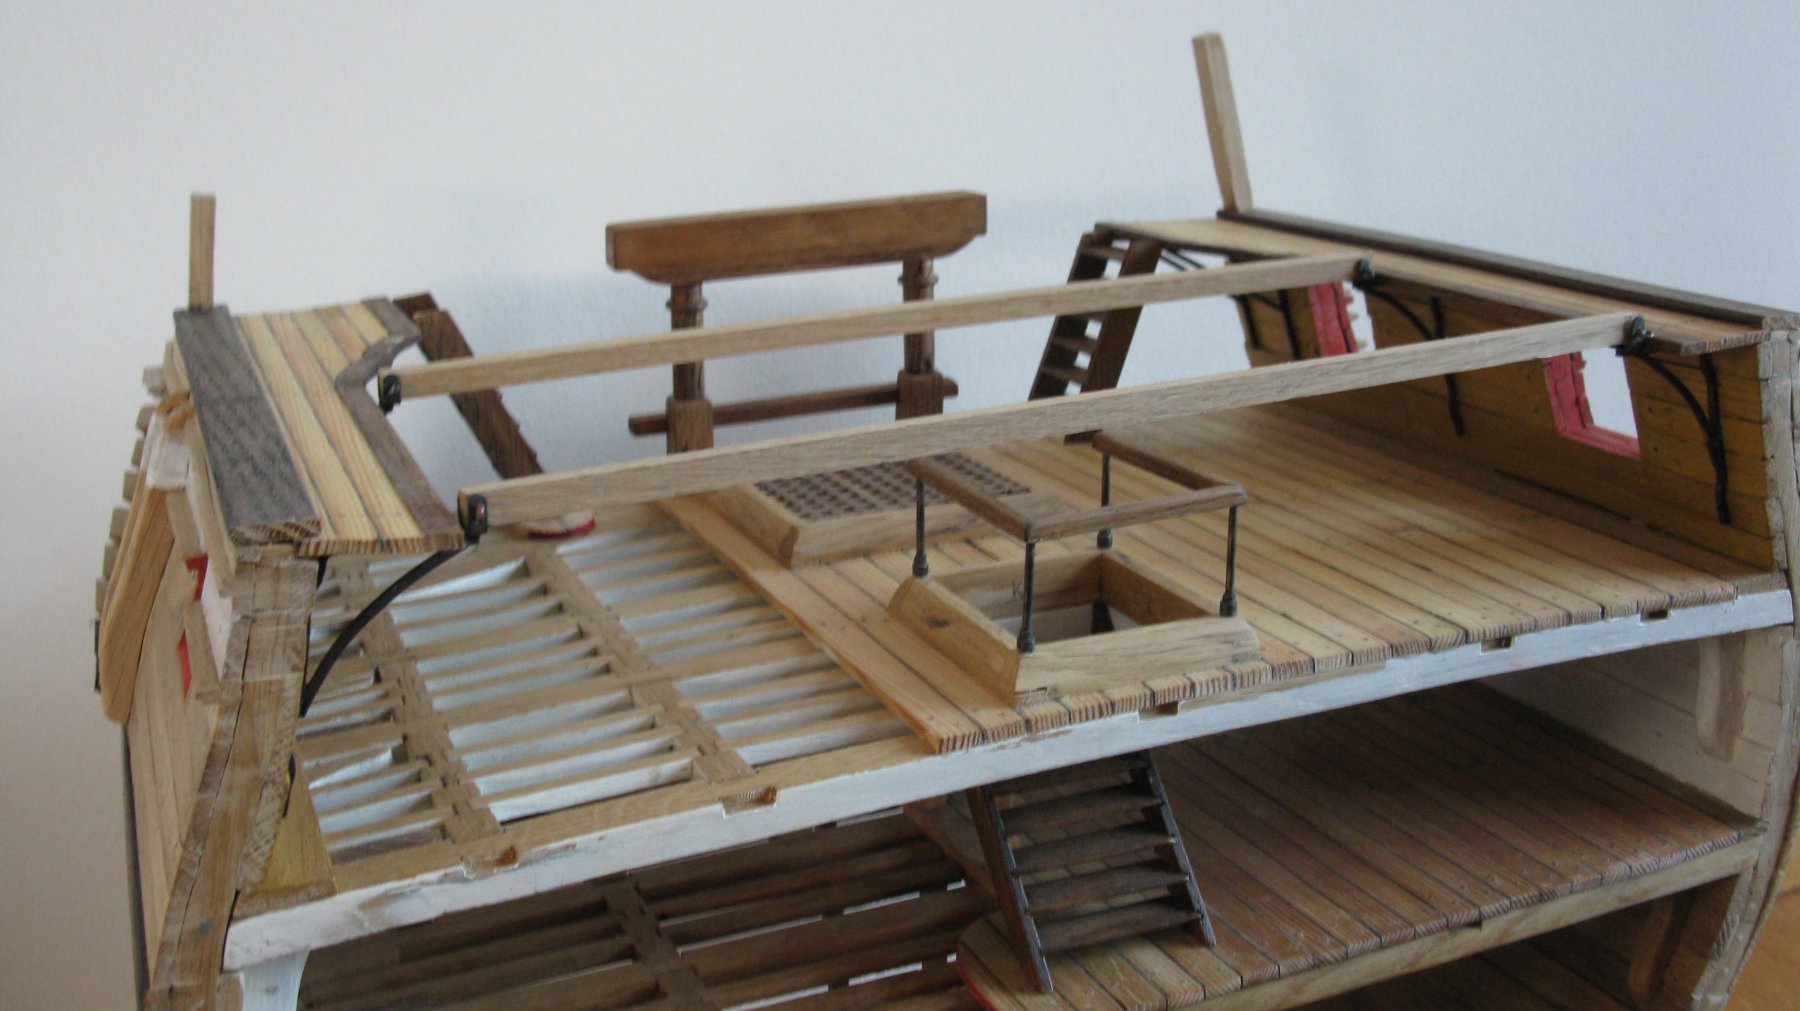
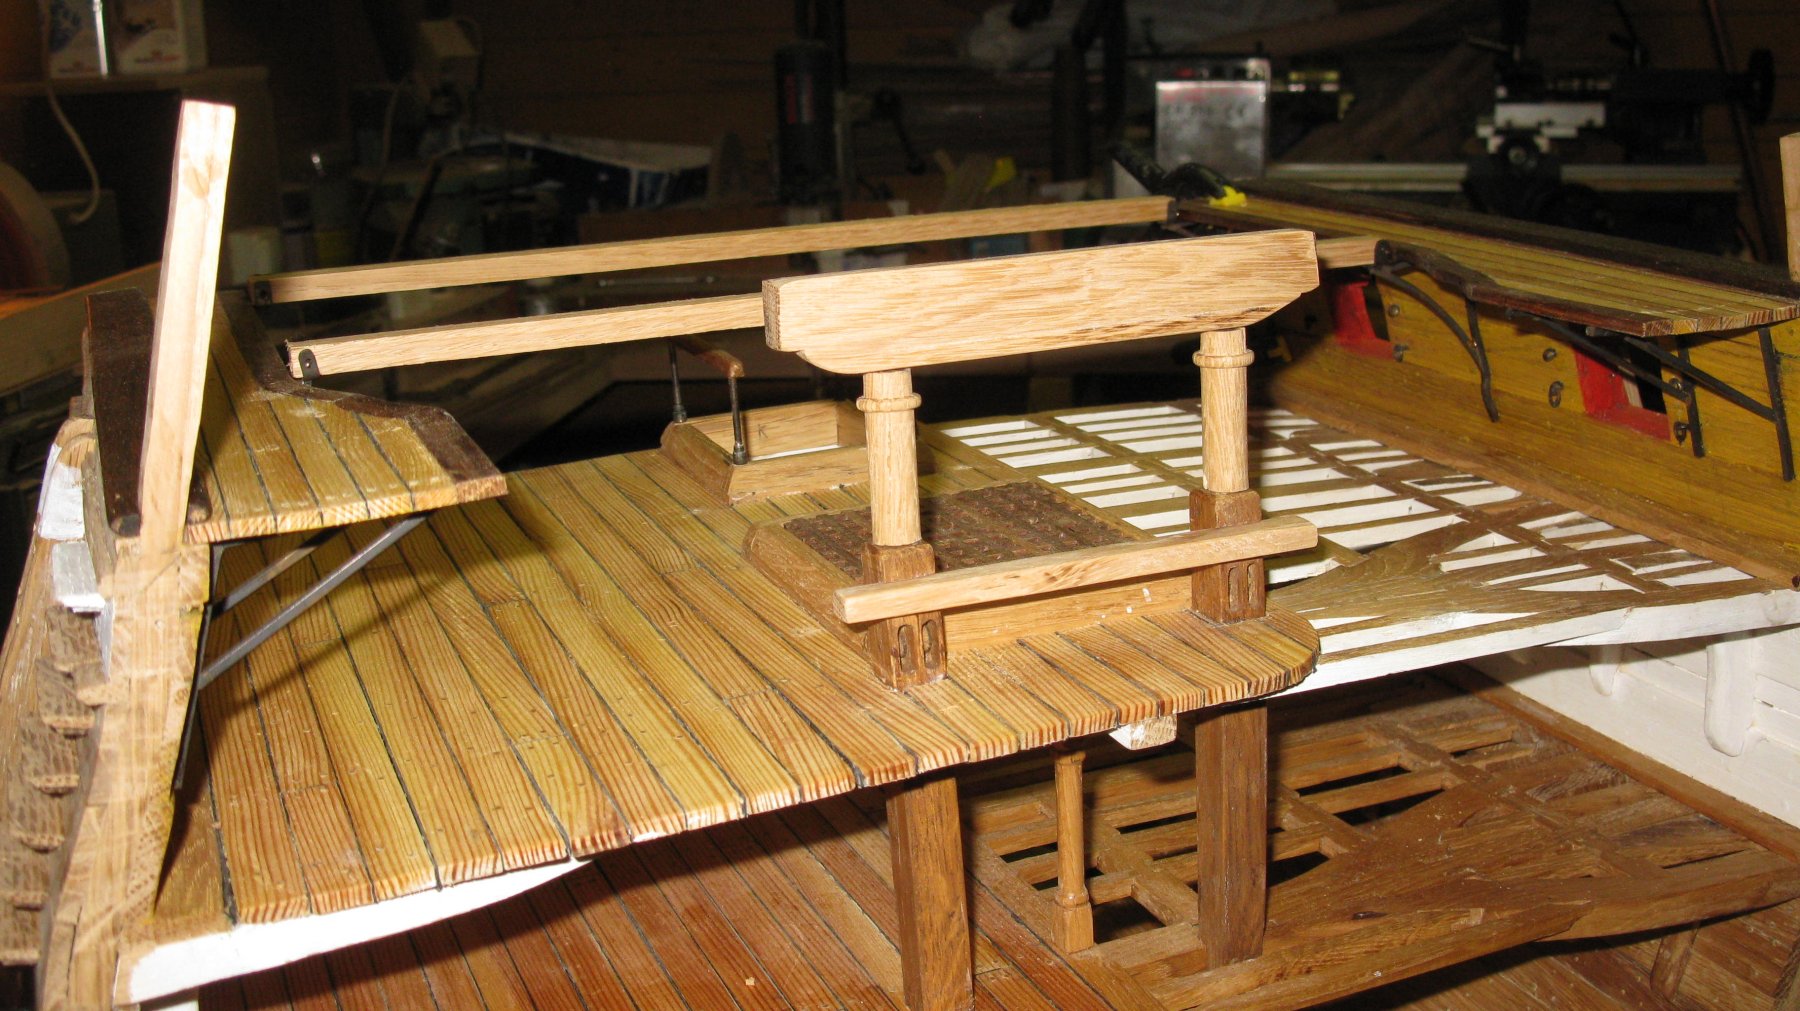
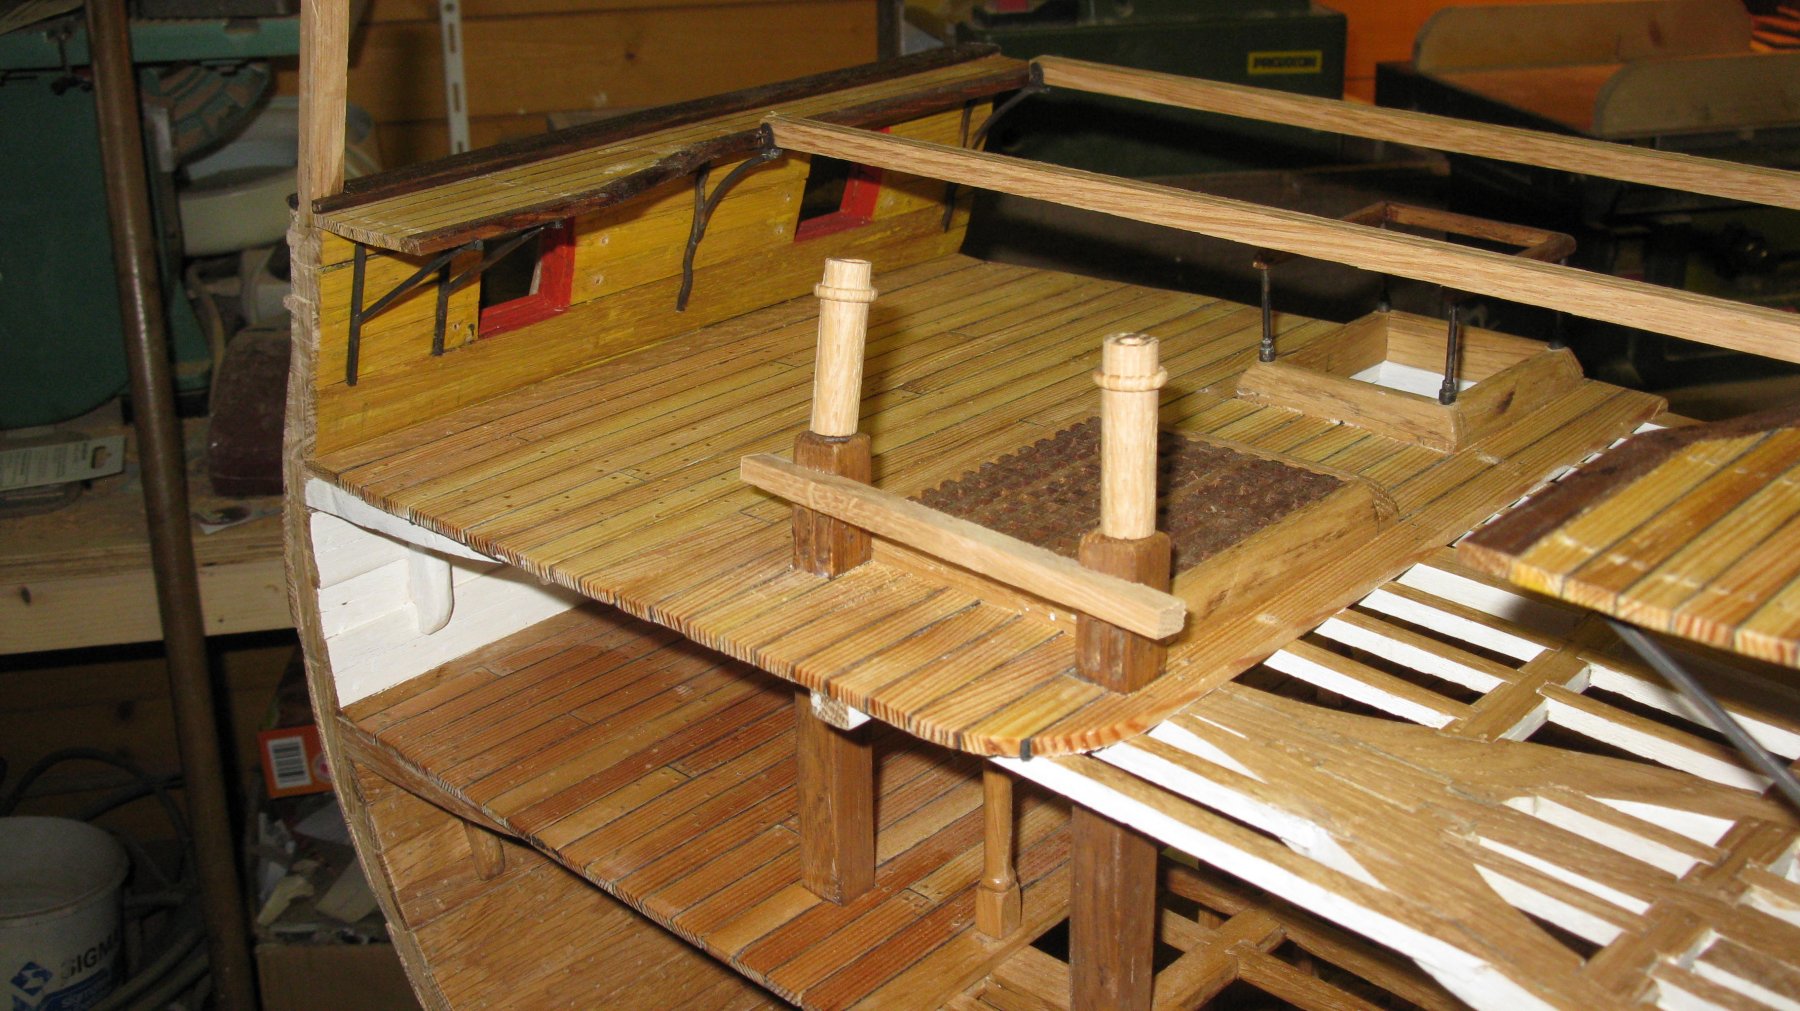
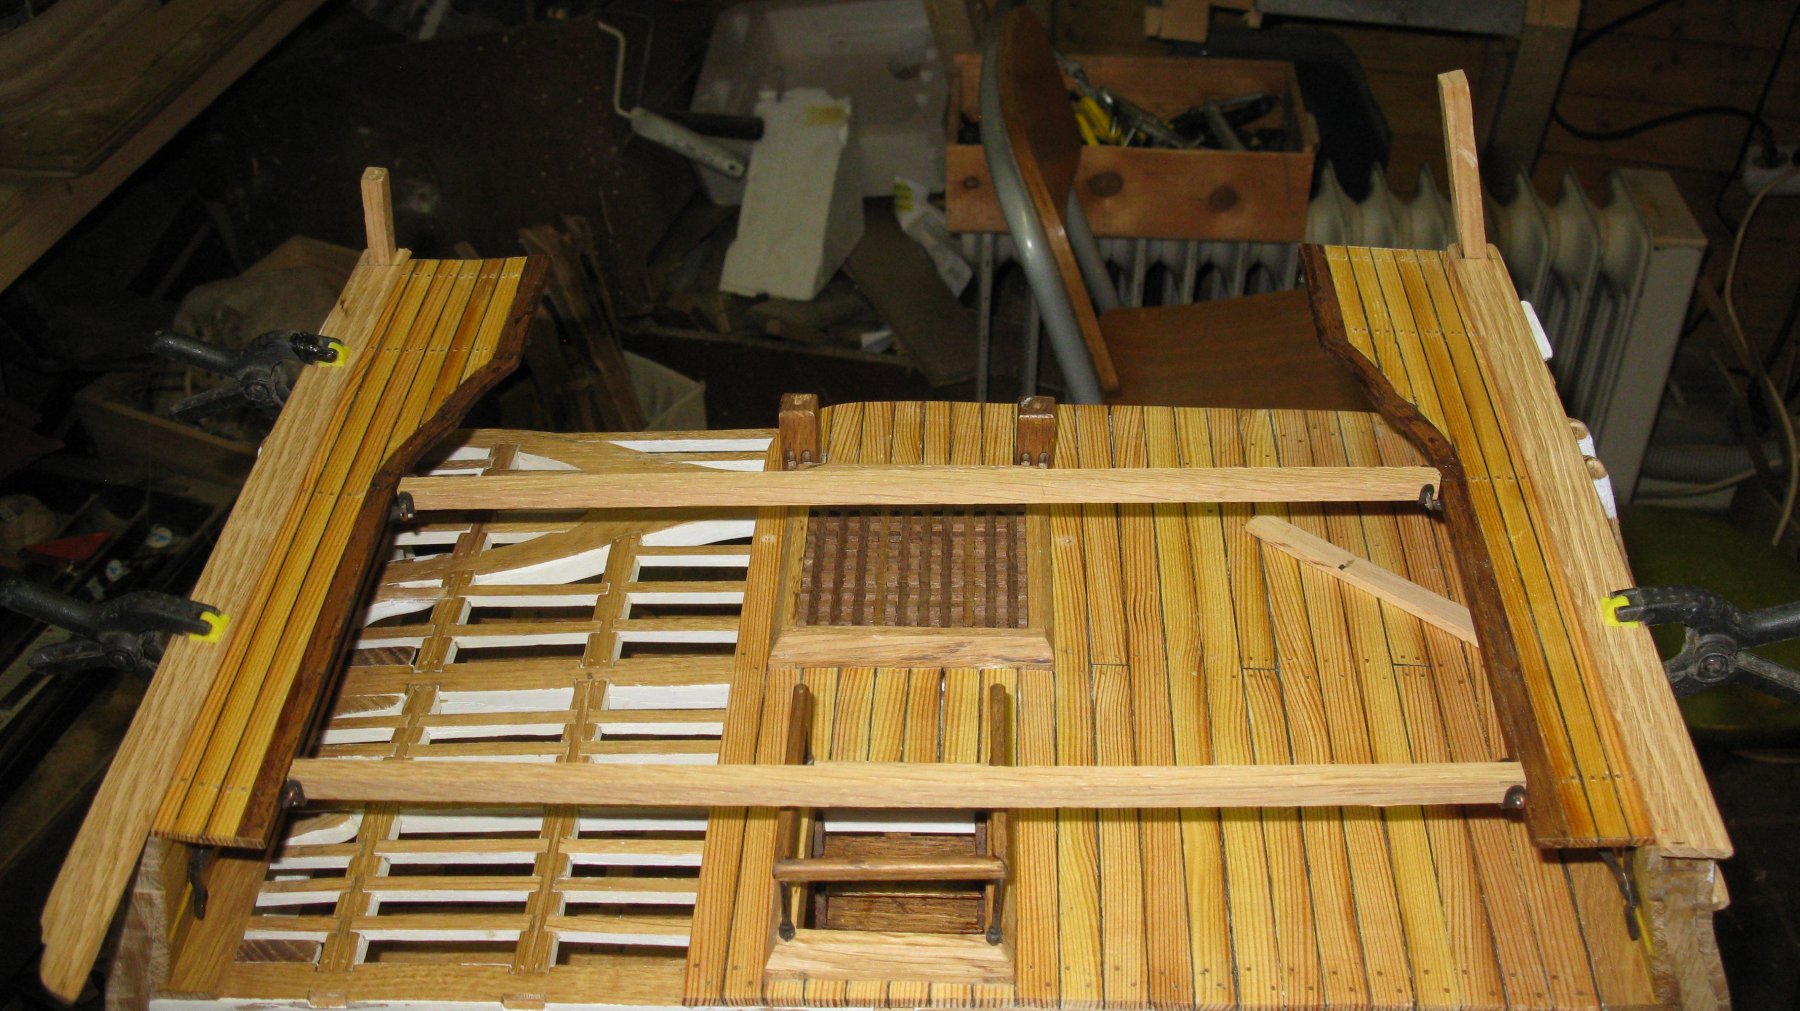
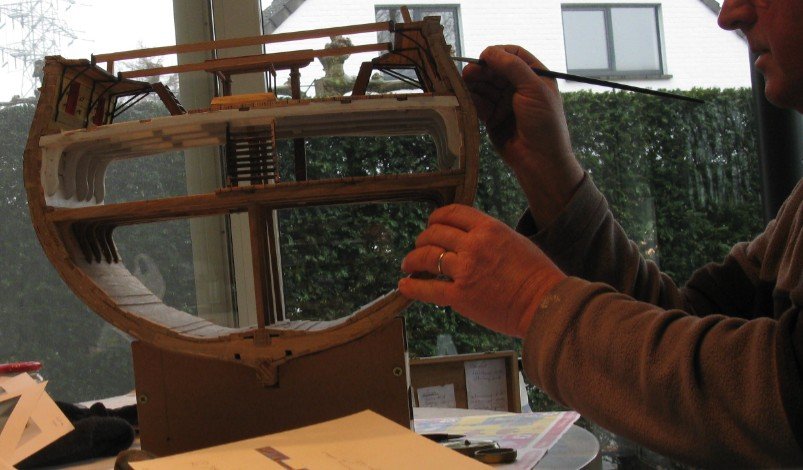
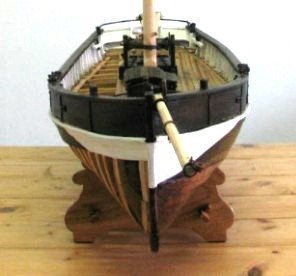
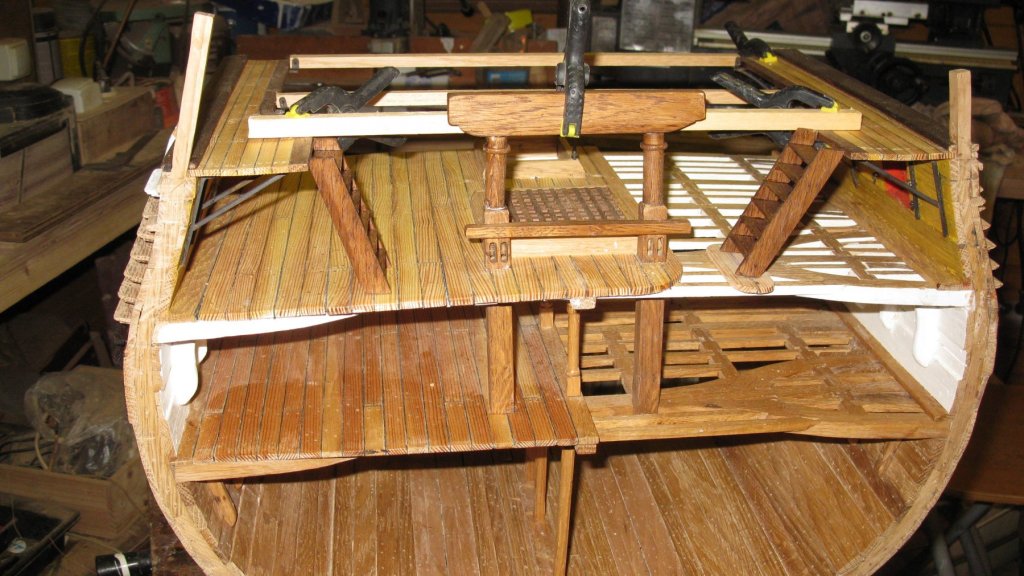
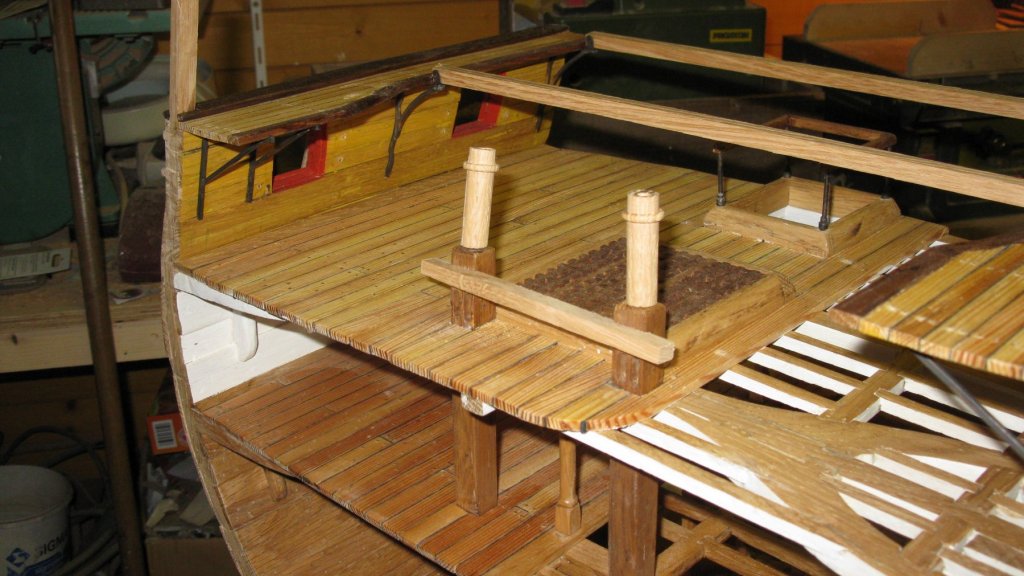
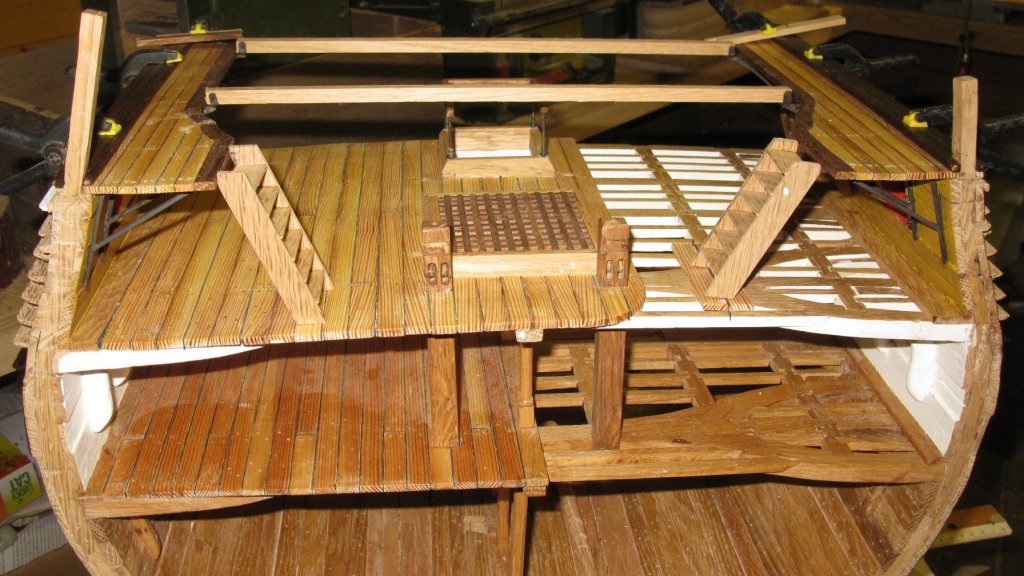
When the ladders and the top sail sheet bitts are stained dark, they are glued into position. A wooden stick laying over both gangways is giving support to the top sail sheet bitts until the glue is dry.

-
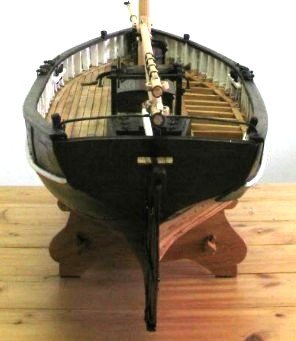
All the parts assembled.

-
The main top sail sheet bitts still have to be finished. The round parts are turned on the lathe.

-
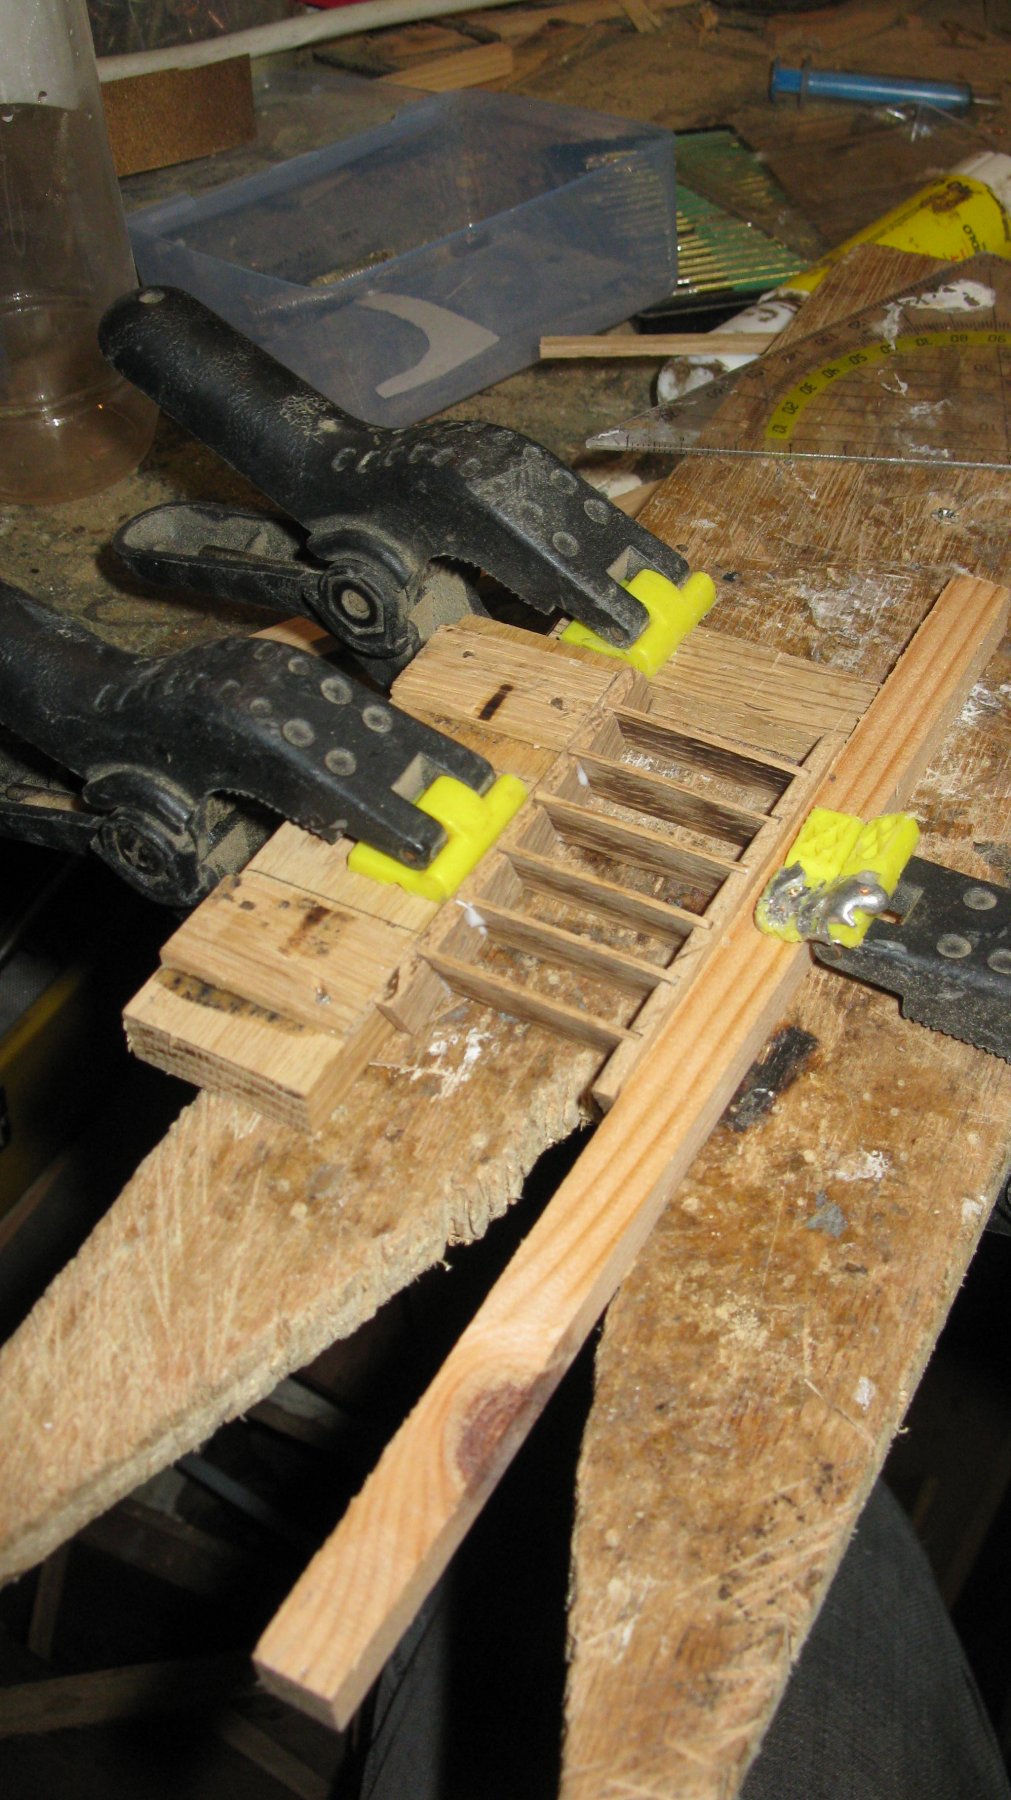
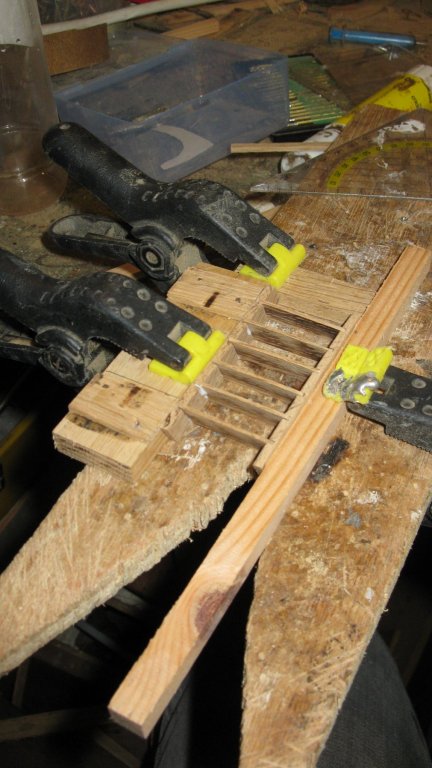
Now I can make the gangway ladders. The making process is as in my post of December 3.
-
The brackets and gangways in place

-
Yes Michael, at least my stairs will cause no broken legs and becks (on condition the sailors are not too drunk when they use it). G.L.
-
ancre La Salamandre by tadheus - 1:24
G.L. replied to tadheus's topic in - Build logs for subjects built 1751 - 1800
So much small details, Pawel! Tour mortars look ready to fire. Super job! G.L.