HOLIDAY DONATION DRIVE - SUPPORT MSW - DO YOUR PART TO KEEP THIS GREAT FORUM GOING! (Only 13 donations so far - C'mon guys!)
×


G.L.
-
Posts
1,553 -
Joined
-
Last visited
Content Type
Profiles
Forums
Gallery
Events
Everything posted by G.L.
-
 Congratulations on completing this wonderful project!
- 14 replies
-
- 1
-

-
- fra berlanga
- banana boat
- (and 2 more)
-
Patrick, The interior of your model has a very realistic look. Stylish colors! Leave some party sticks for the Christmas and New Year's Eve parties!
- 756 replies
-
- 4
-
-
- galleon
- golden hind
- (and 2 more)
-
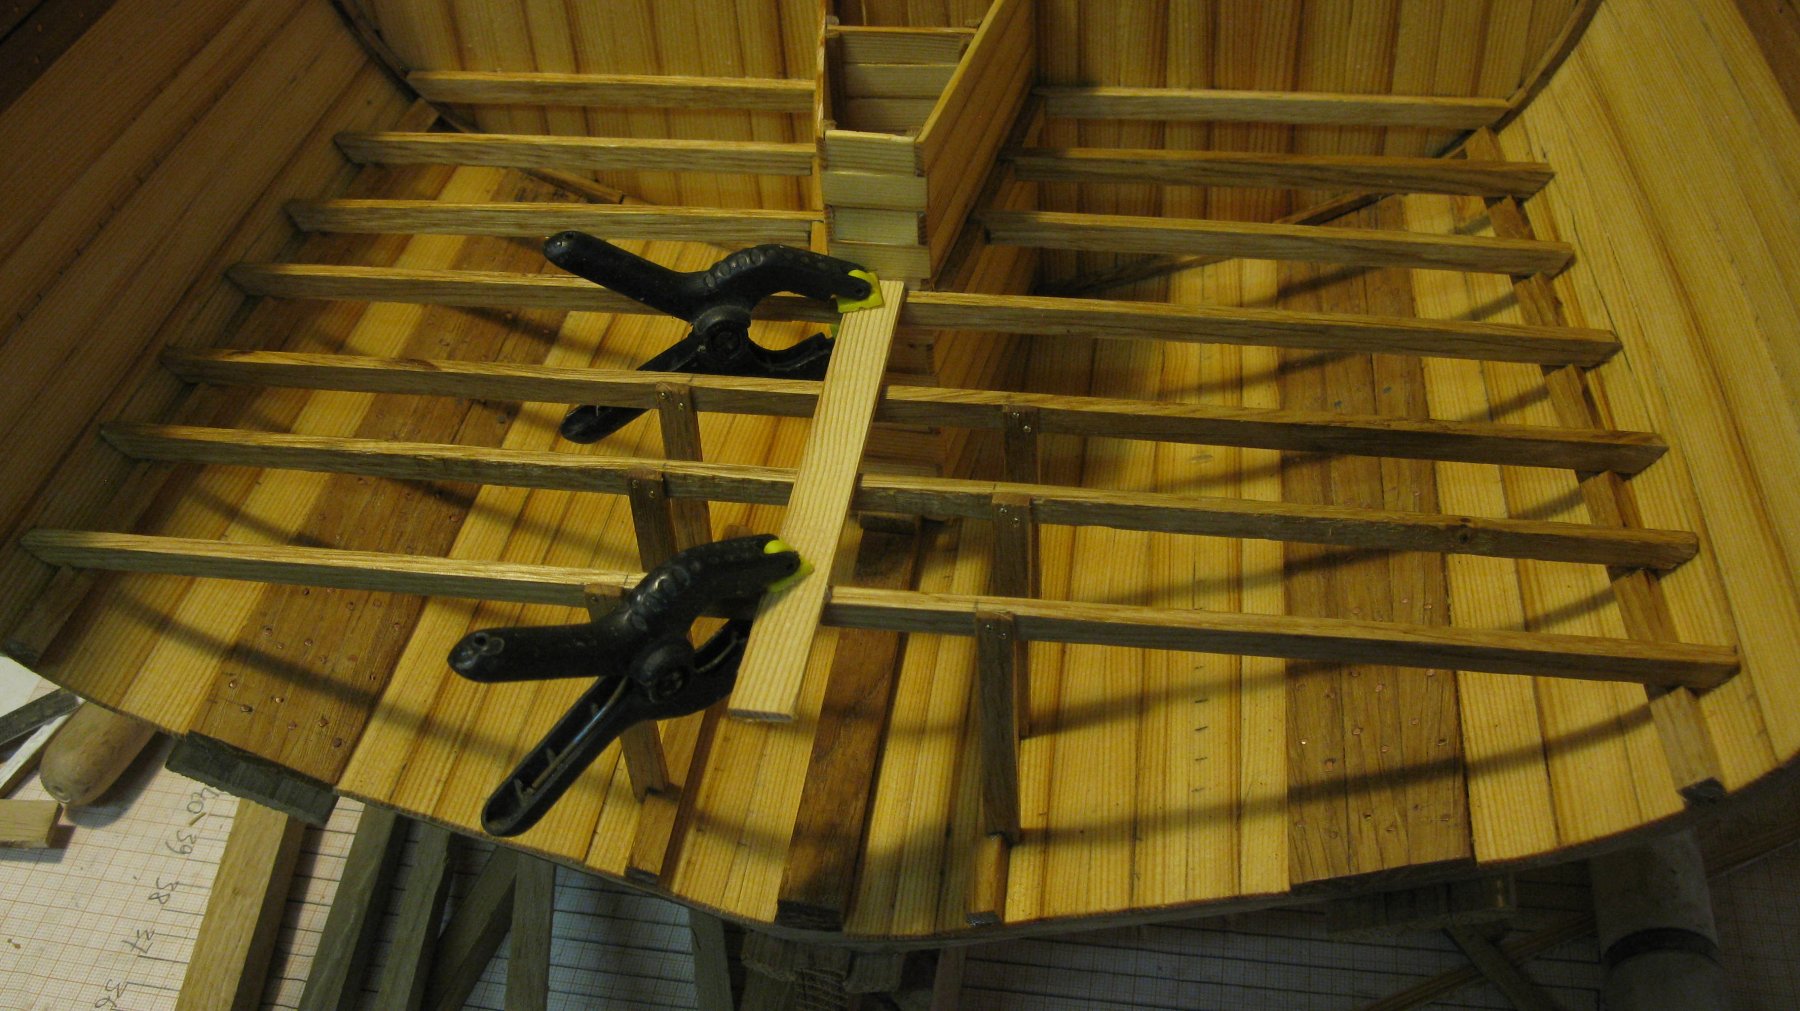
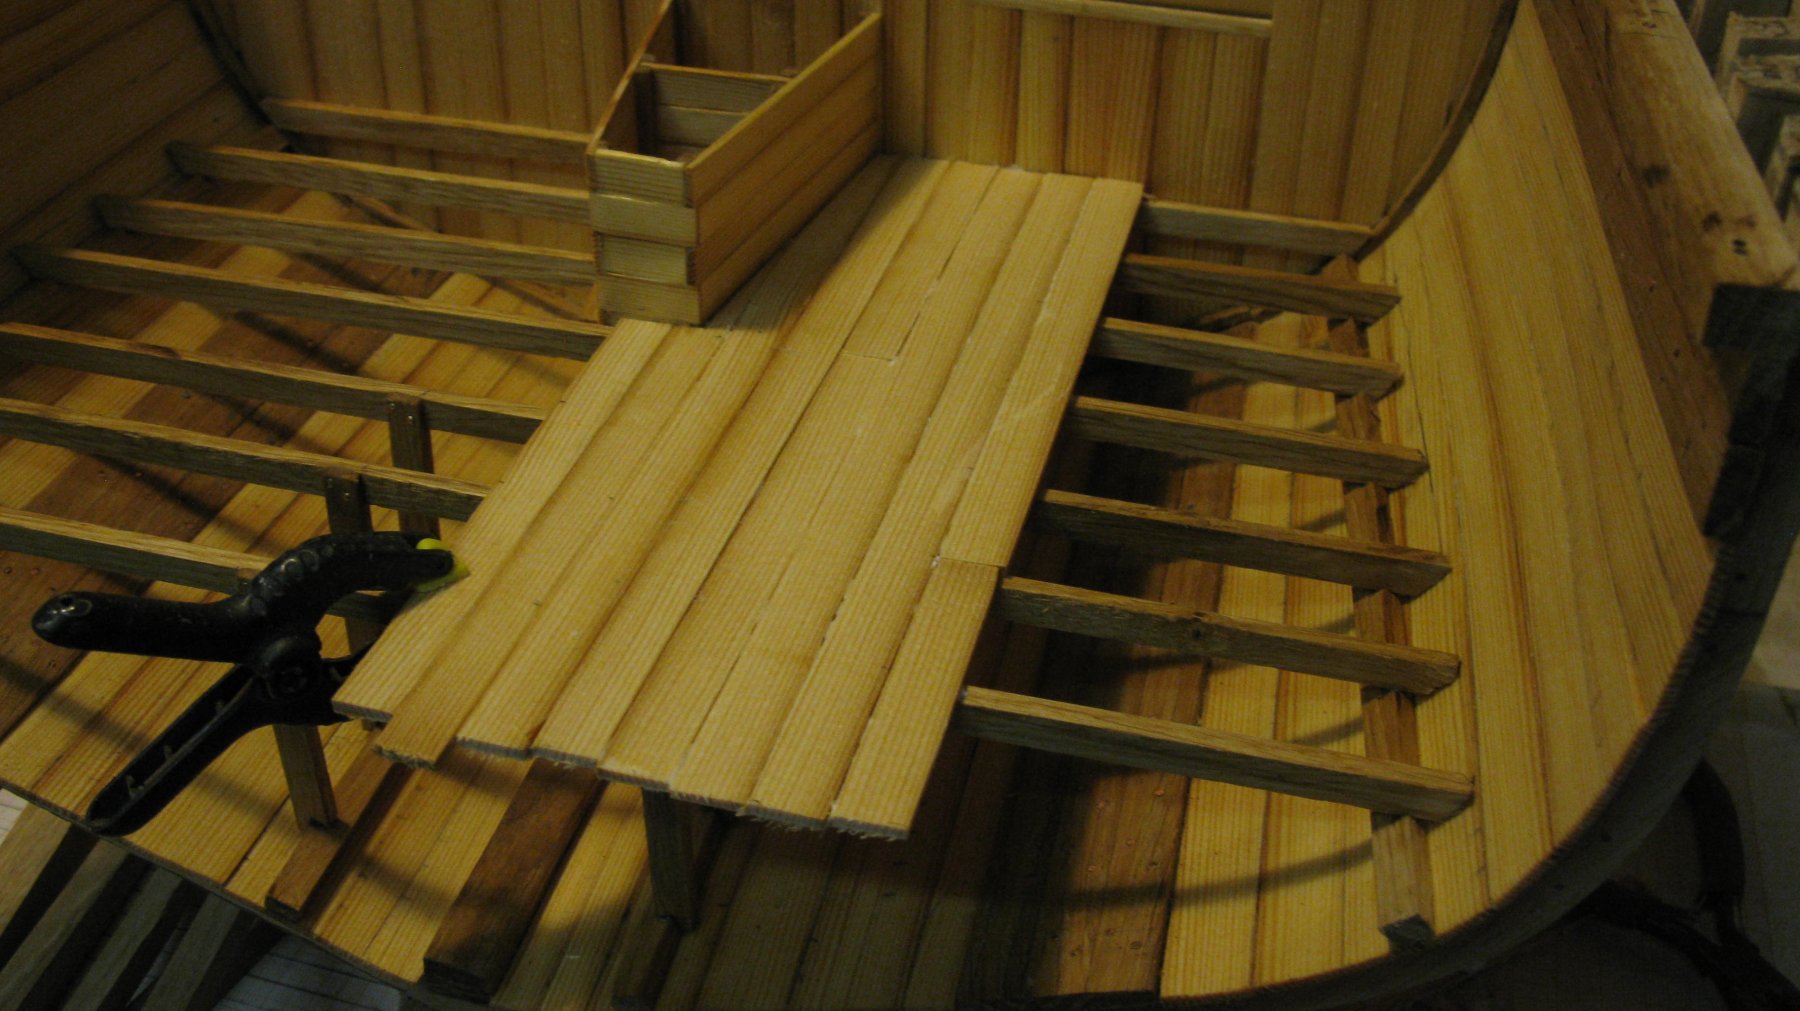
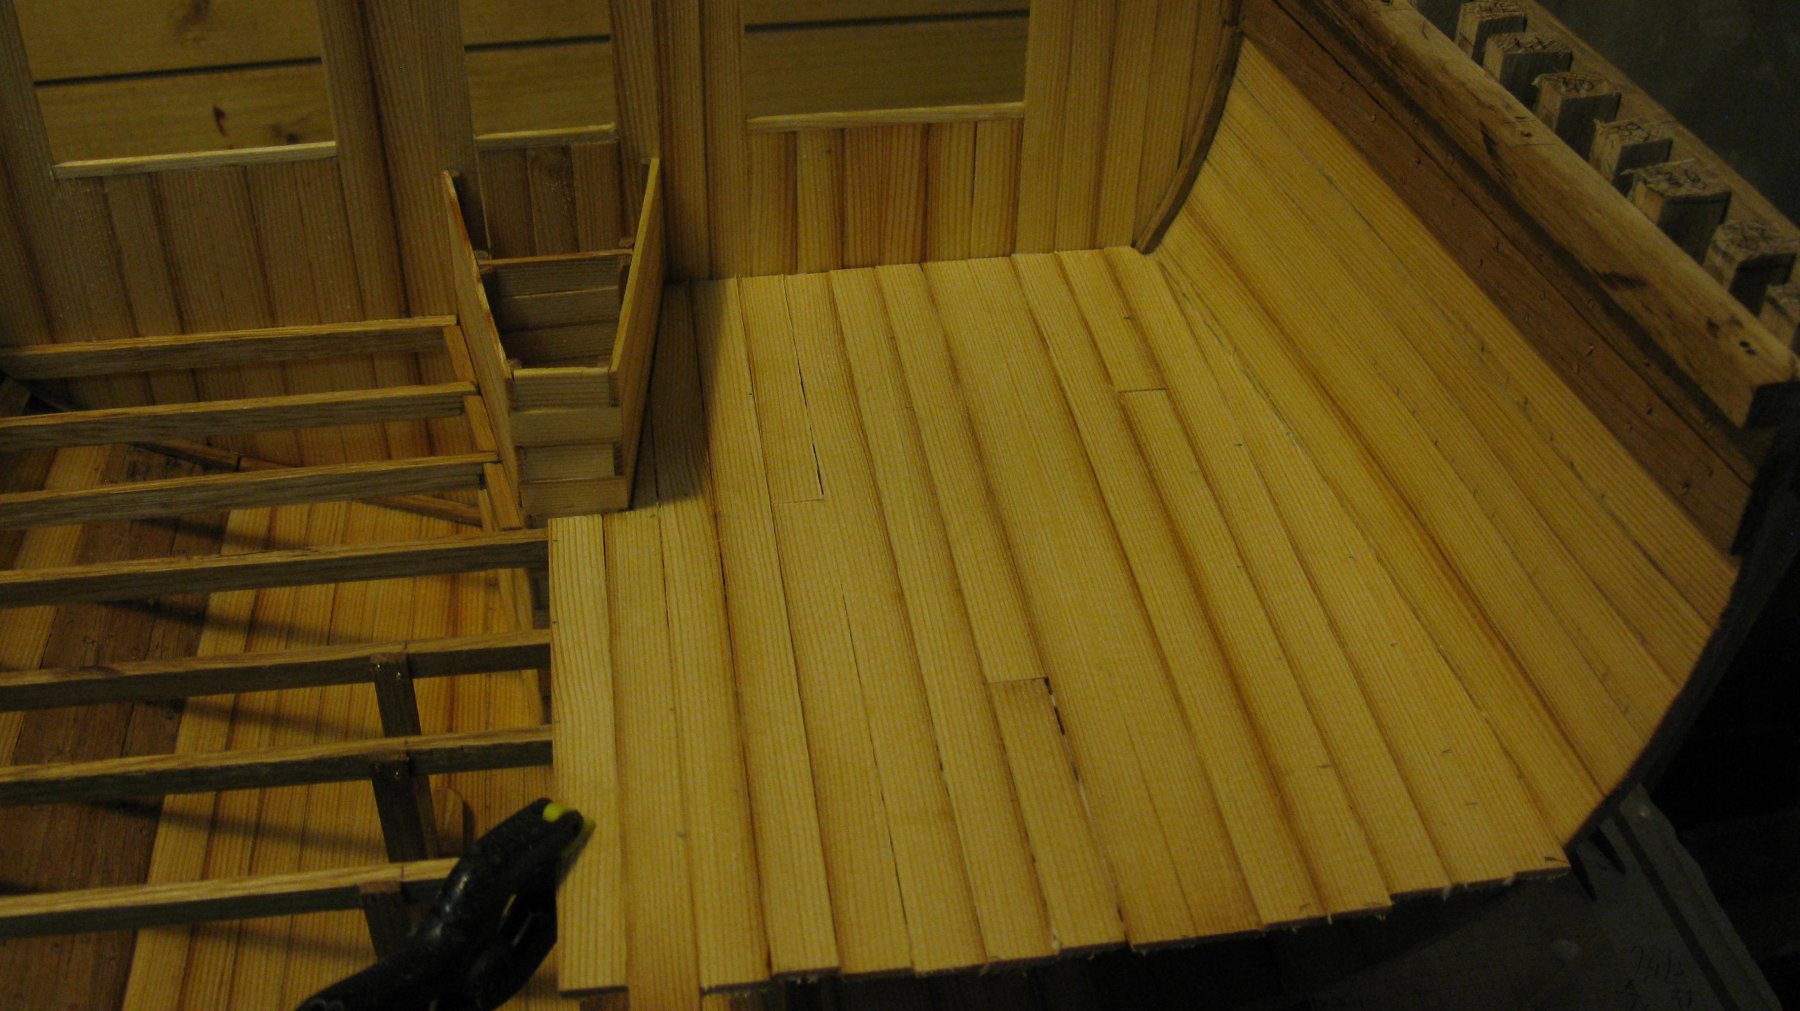
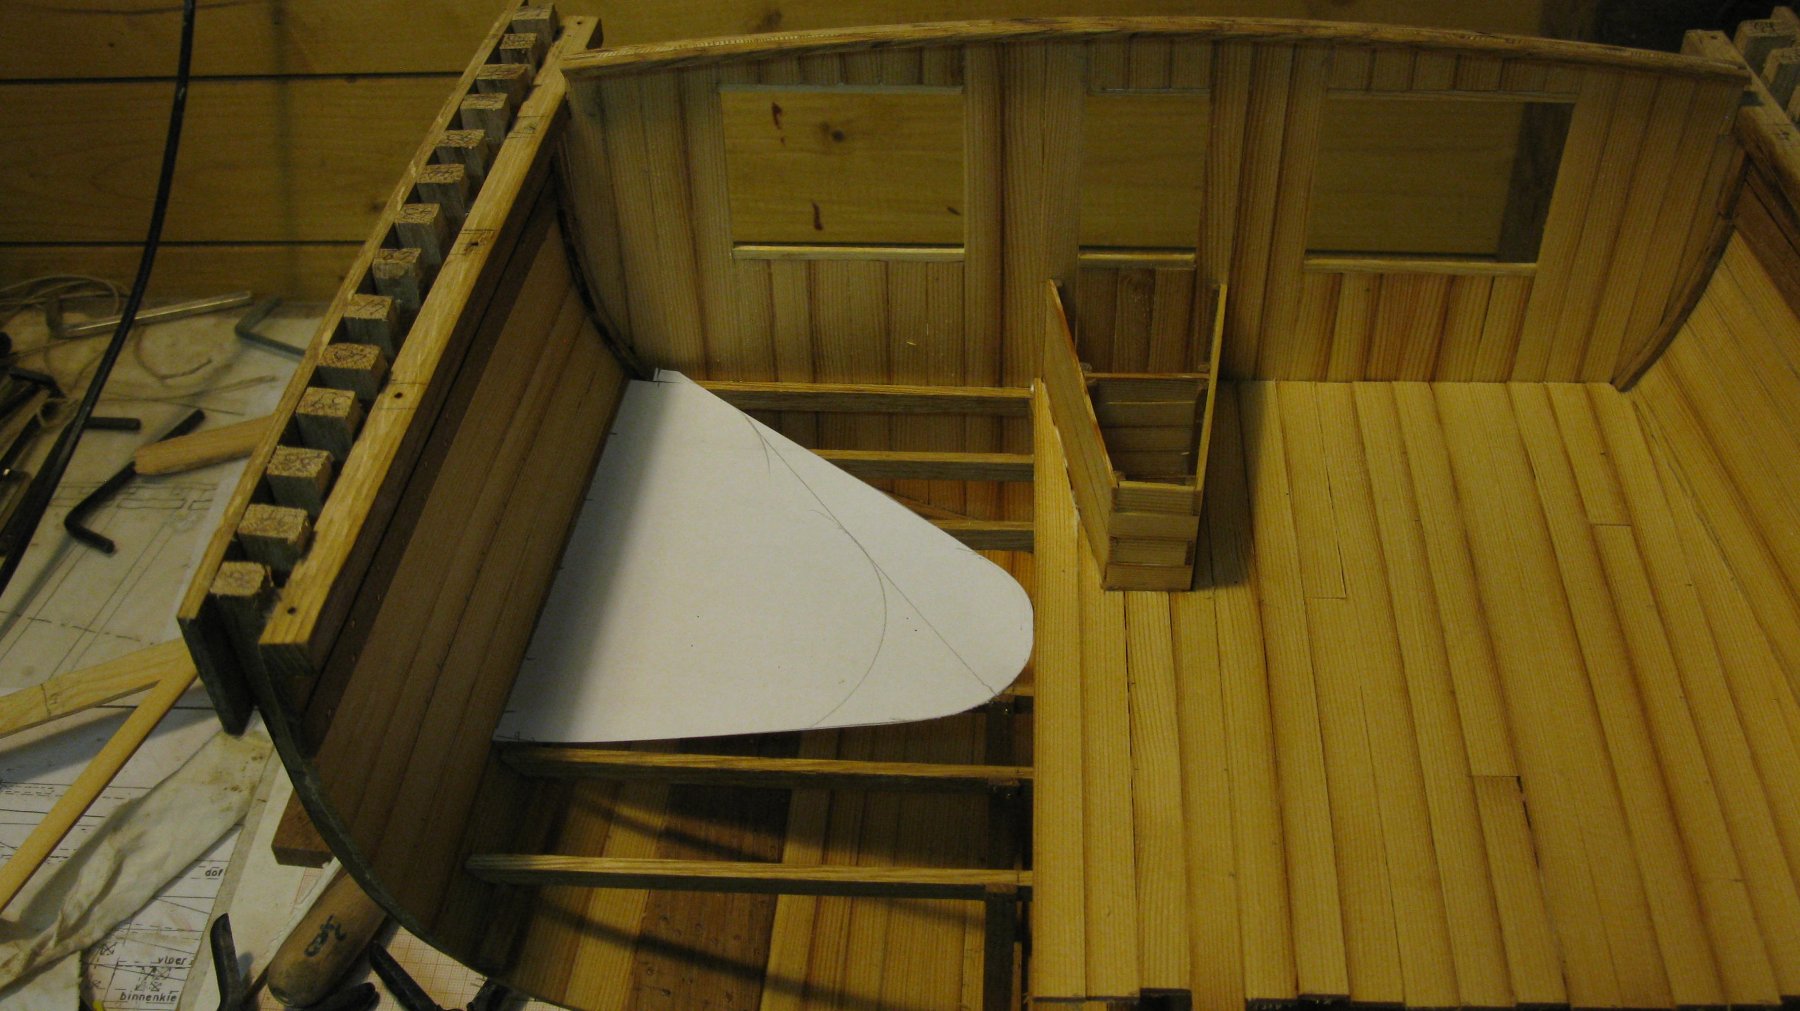
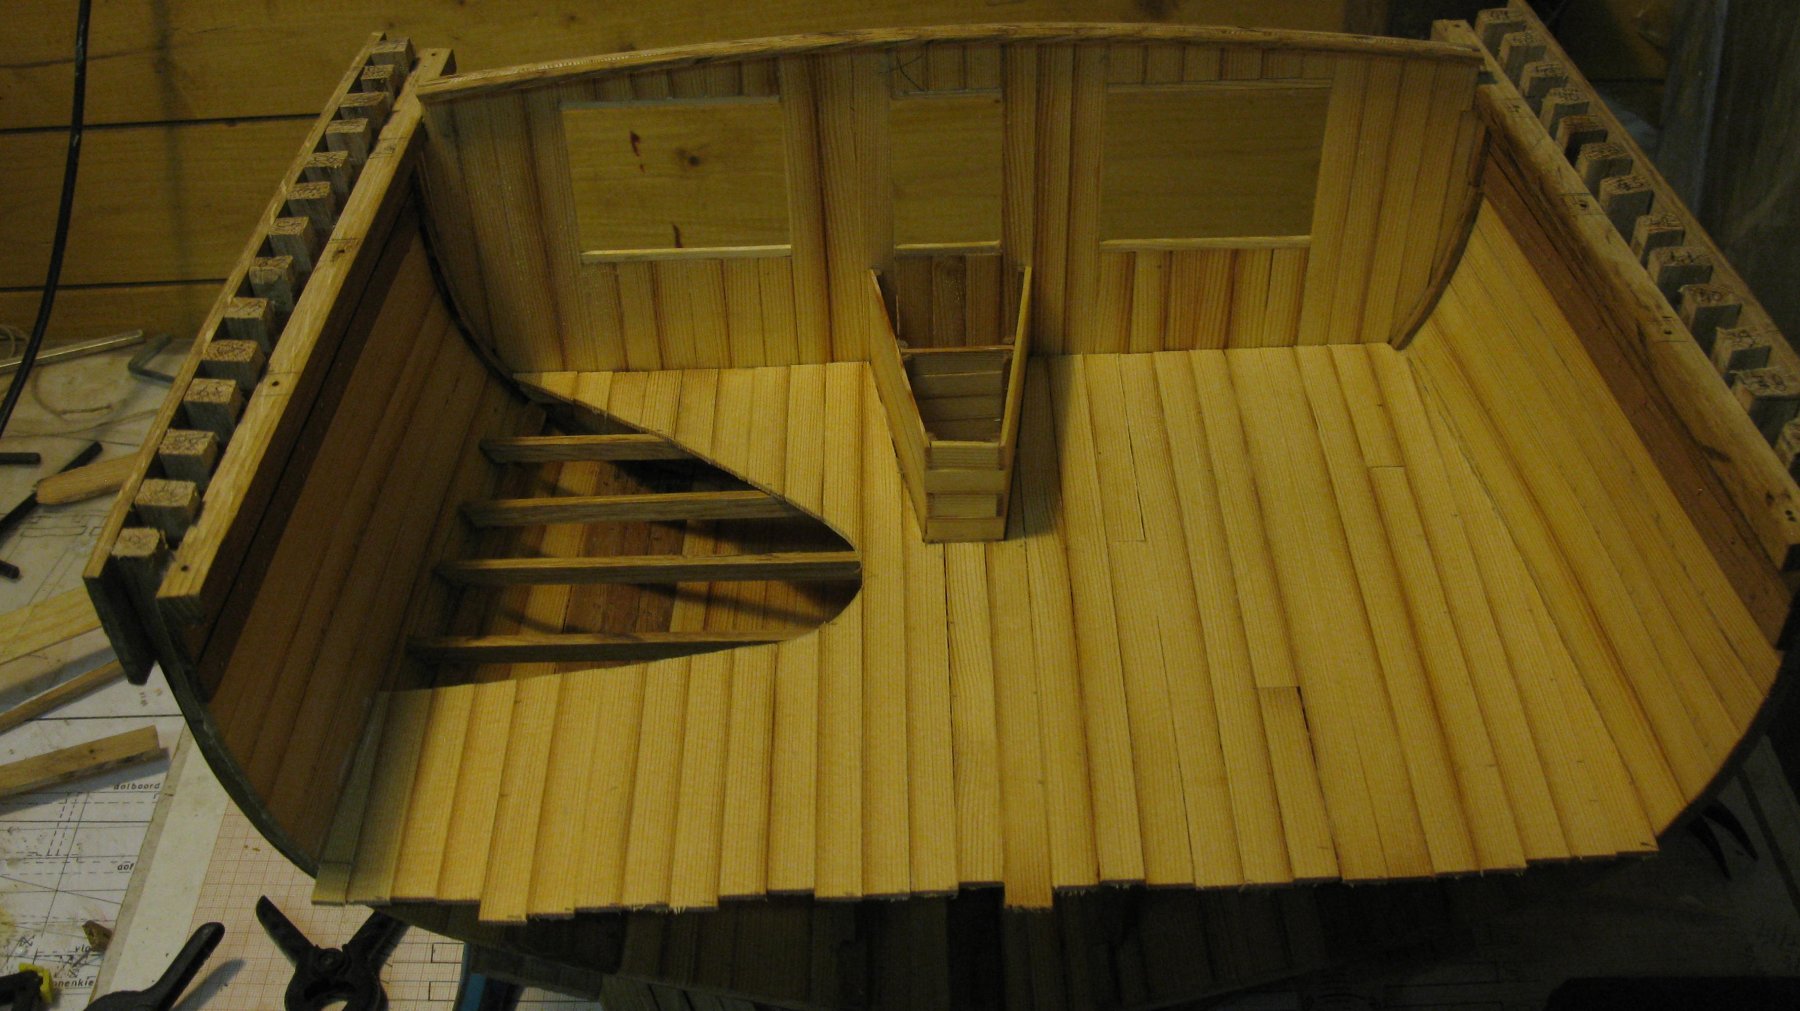
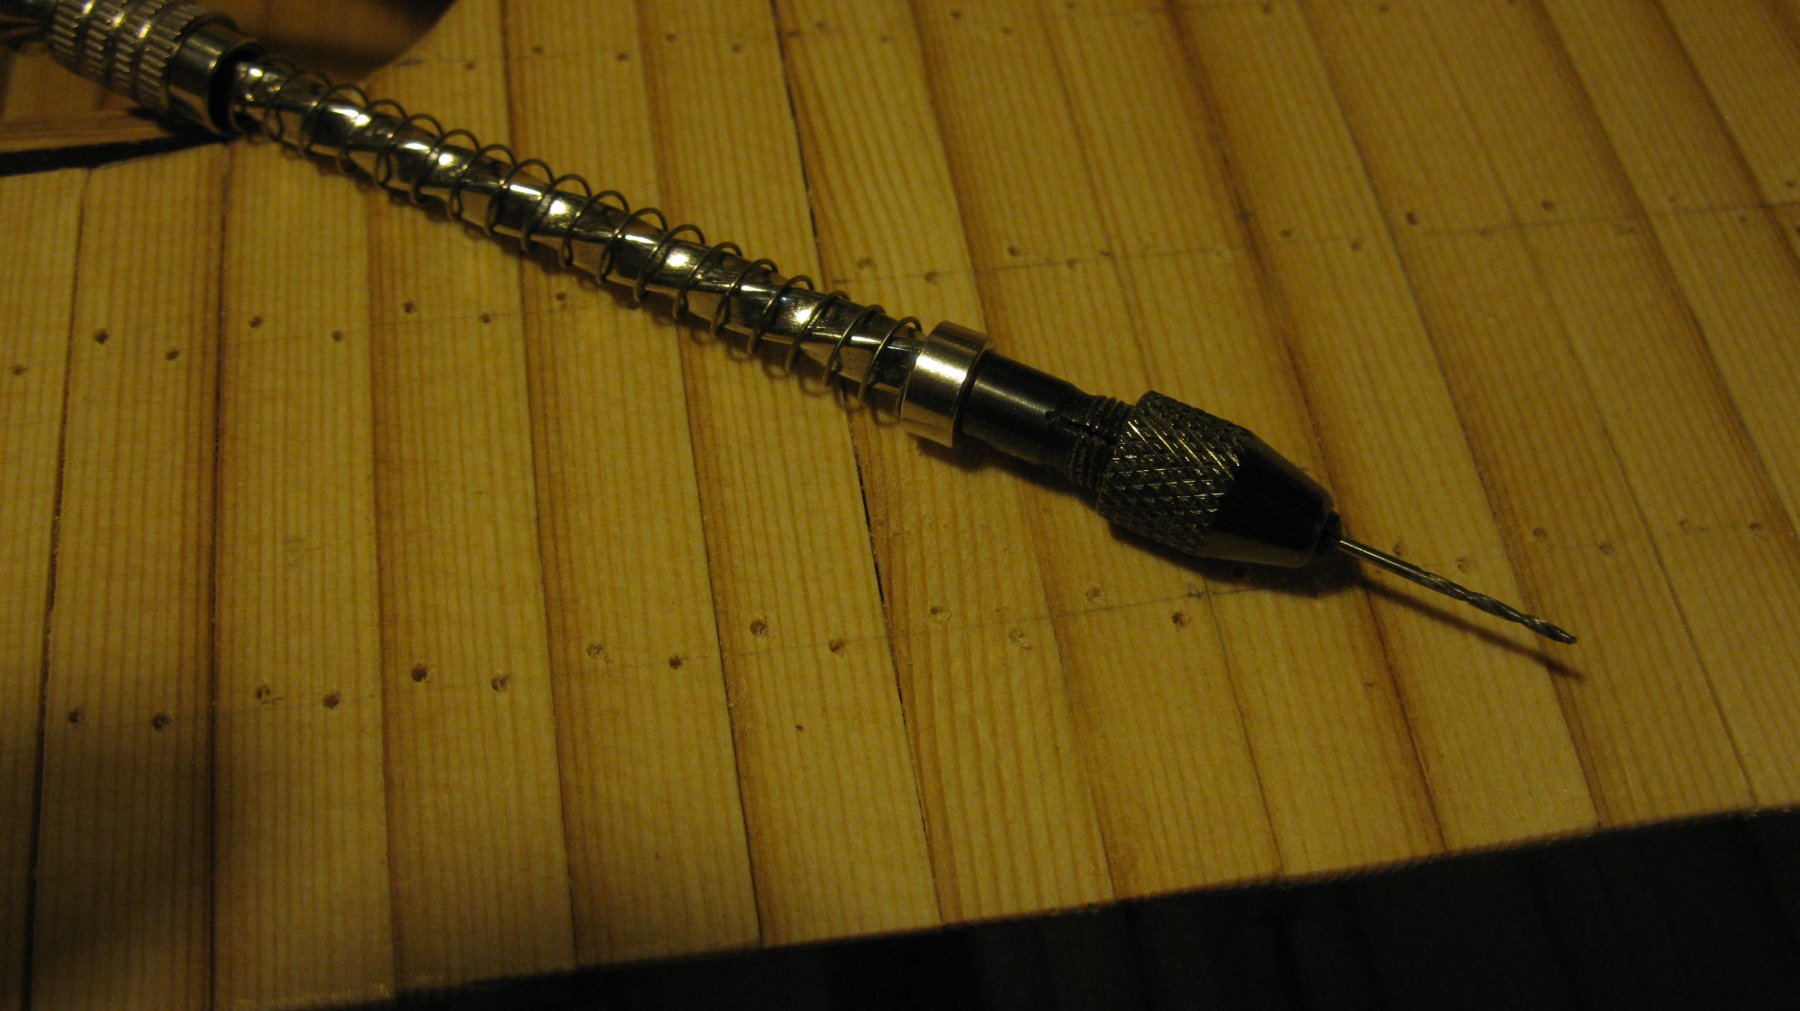
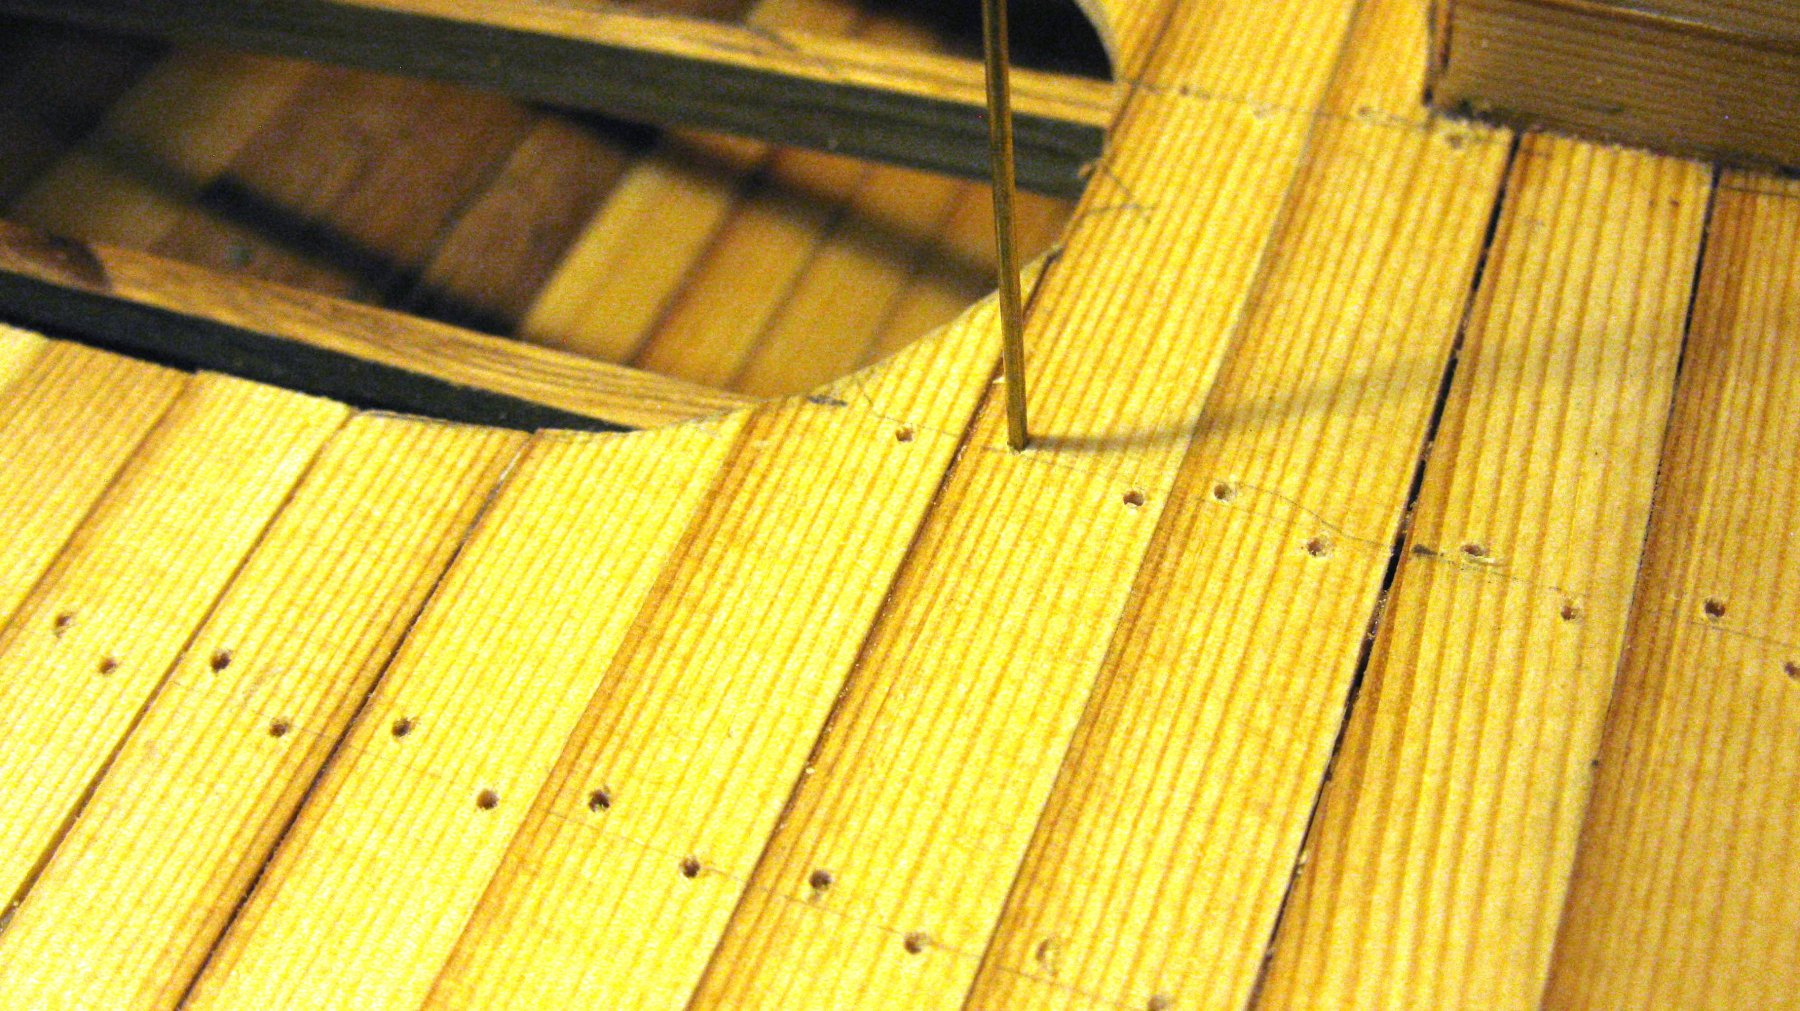
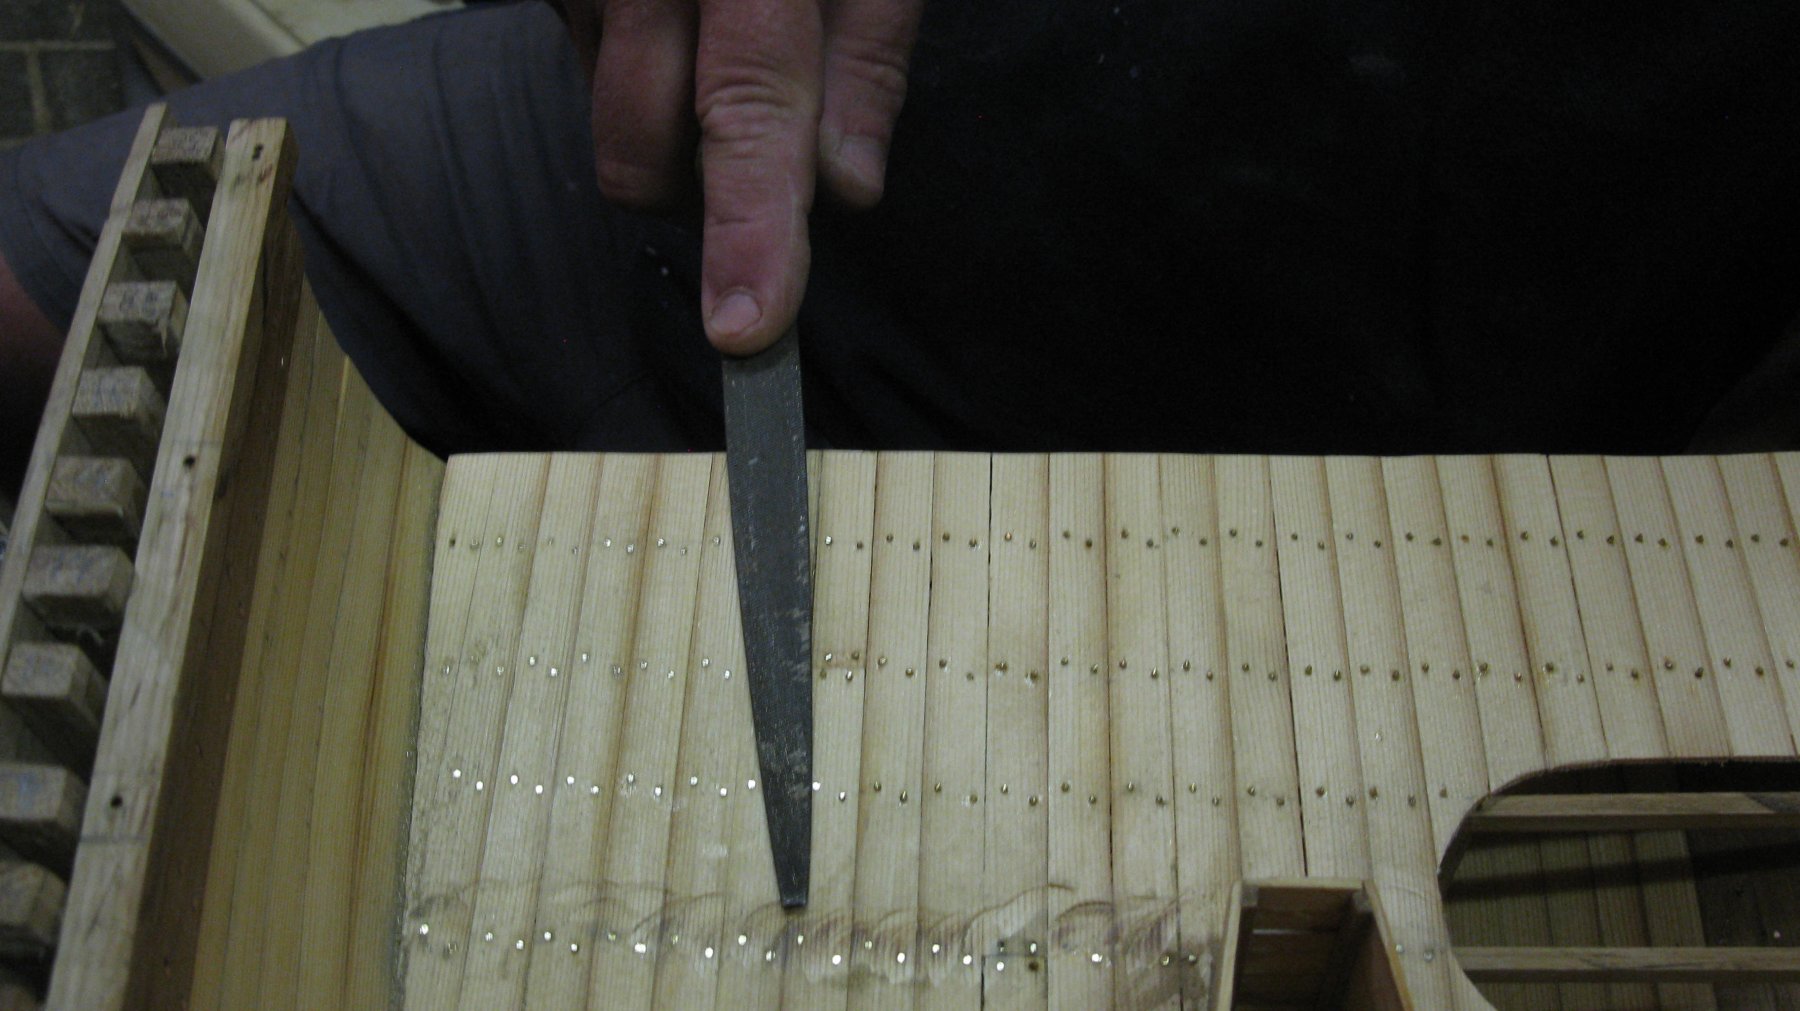
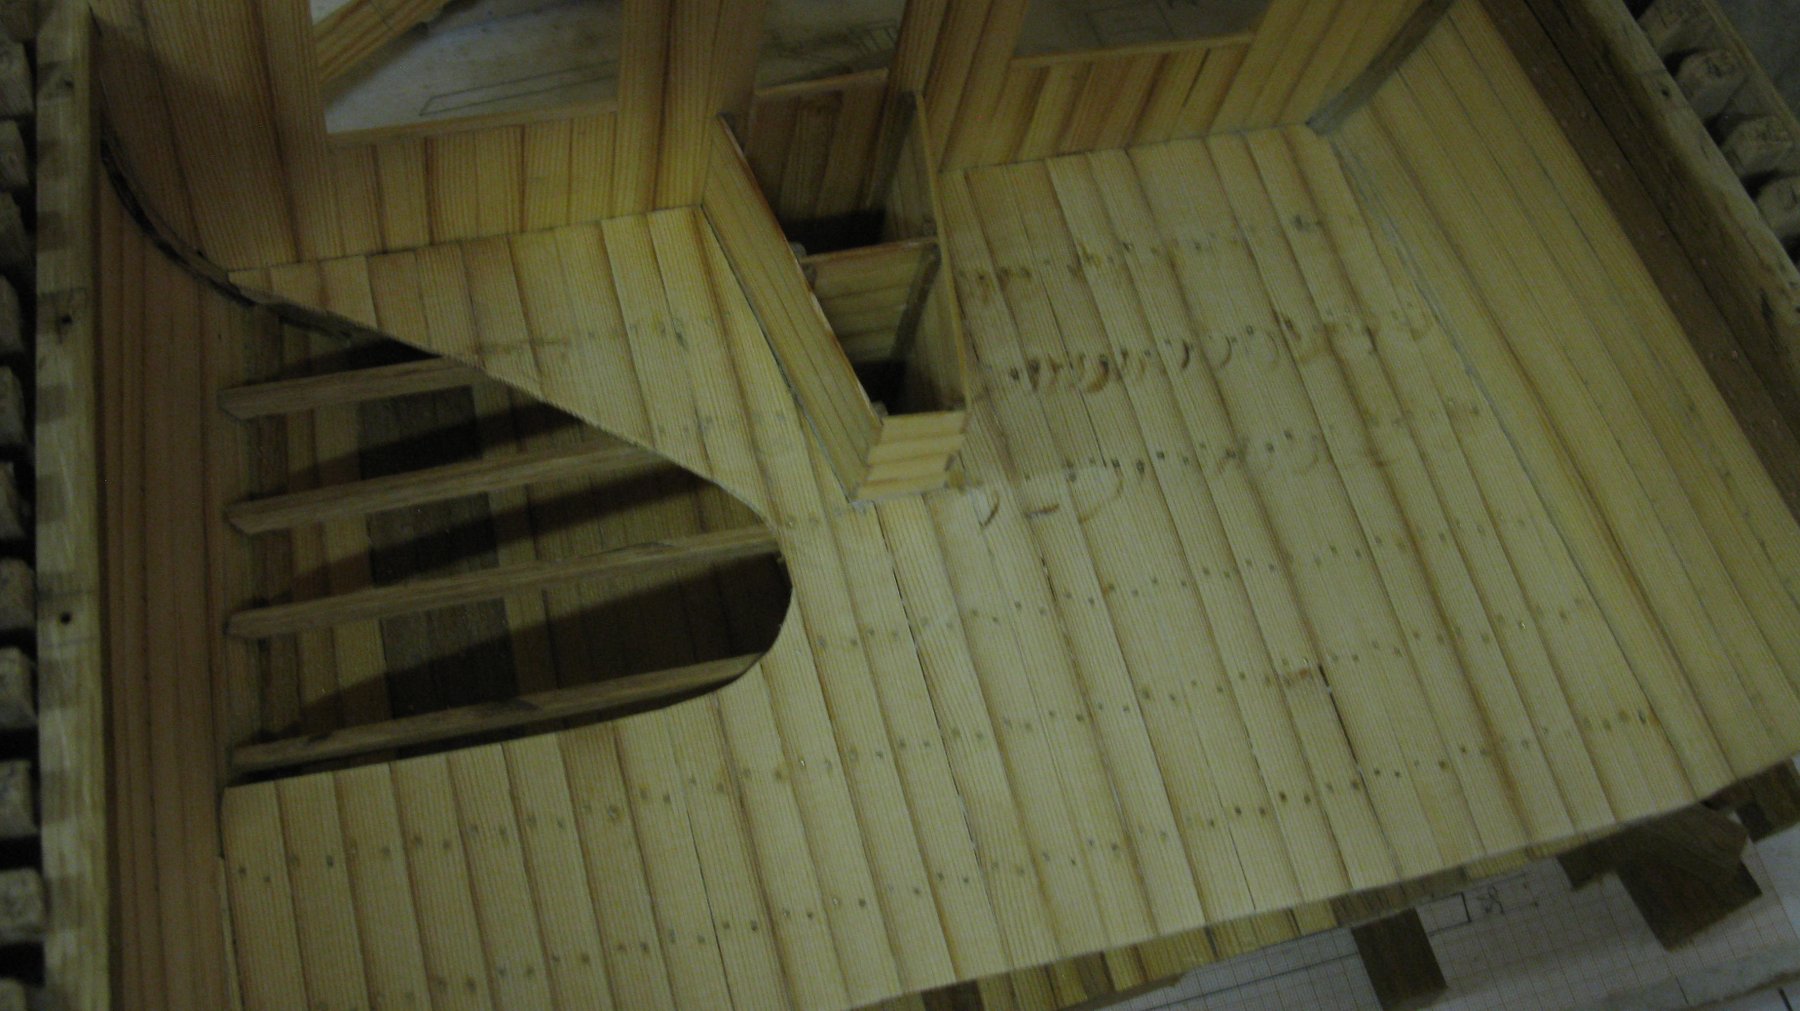
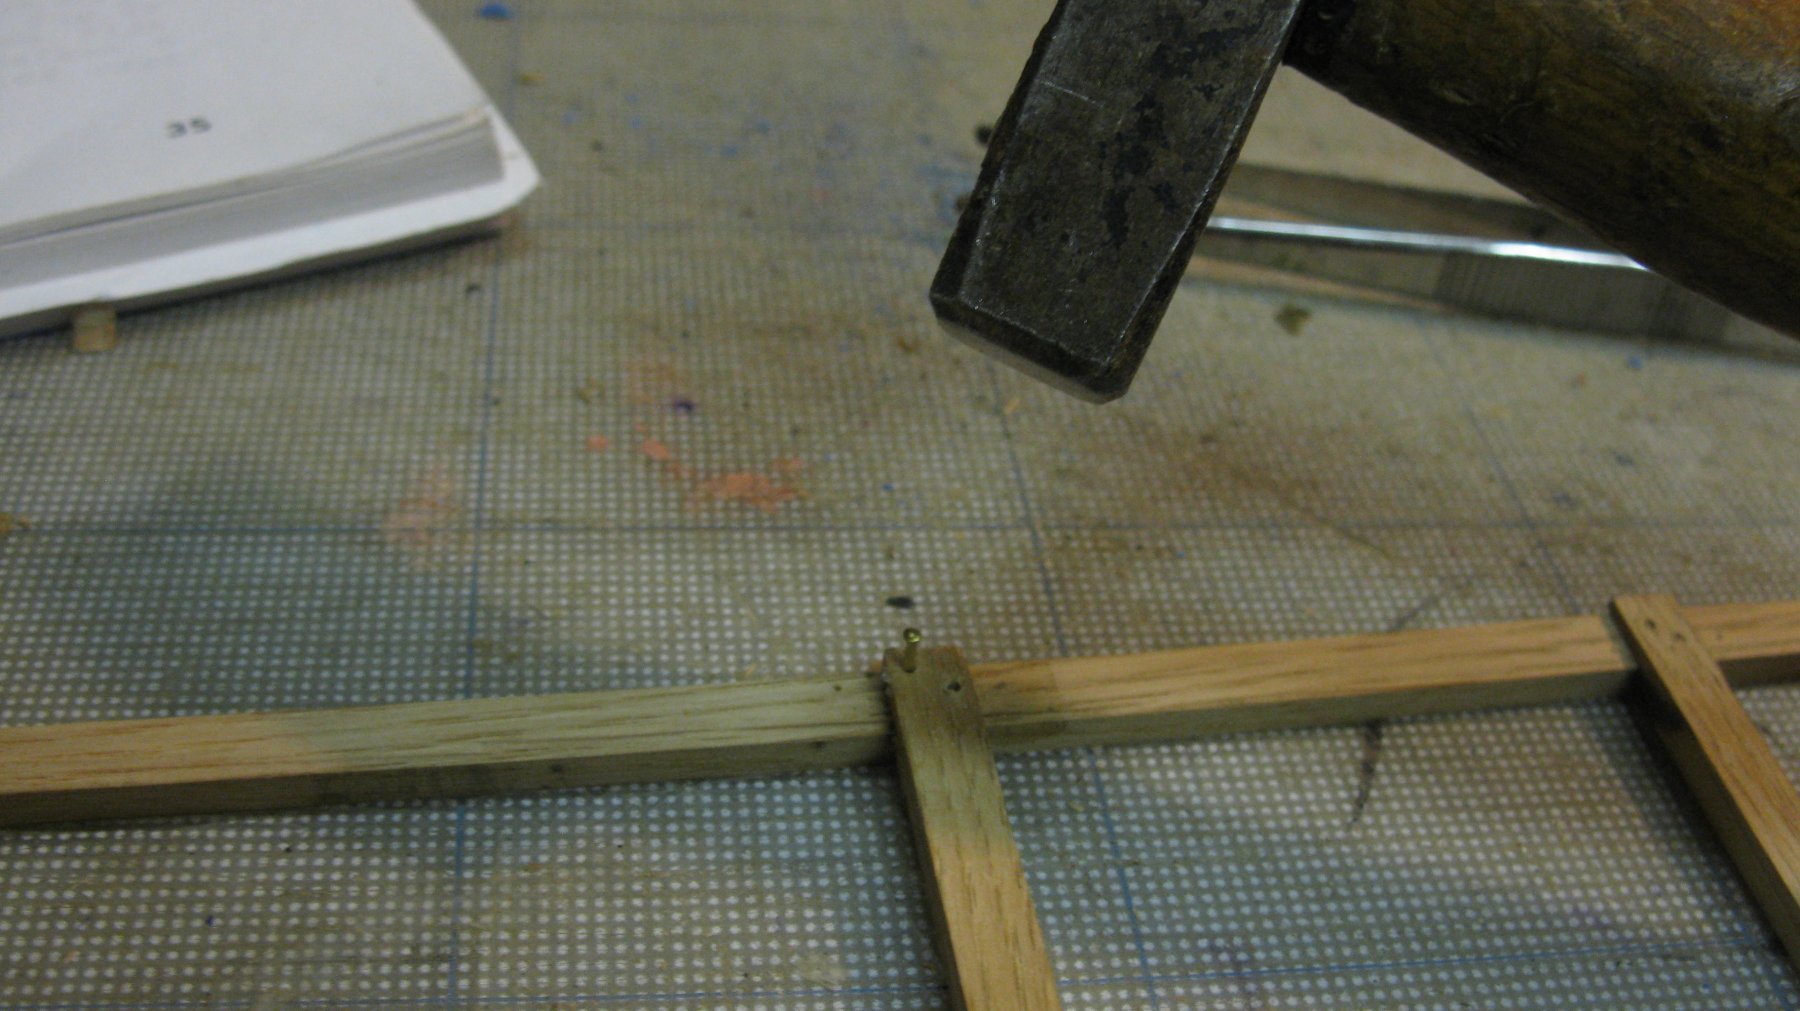
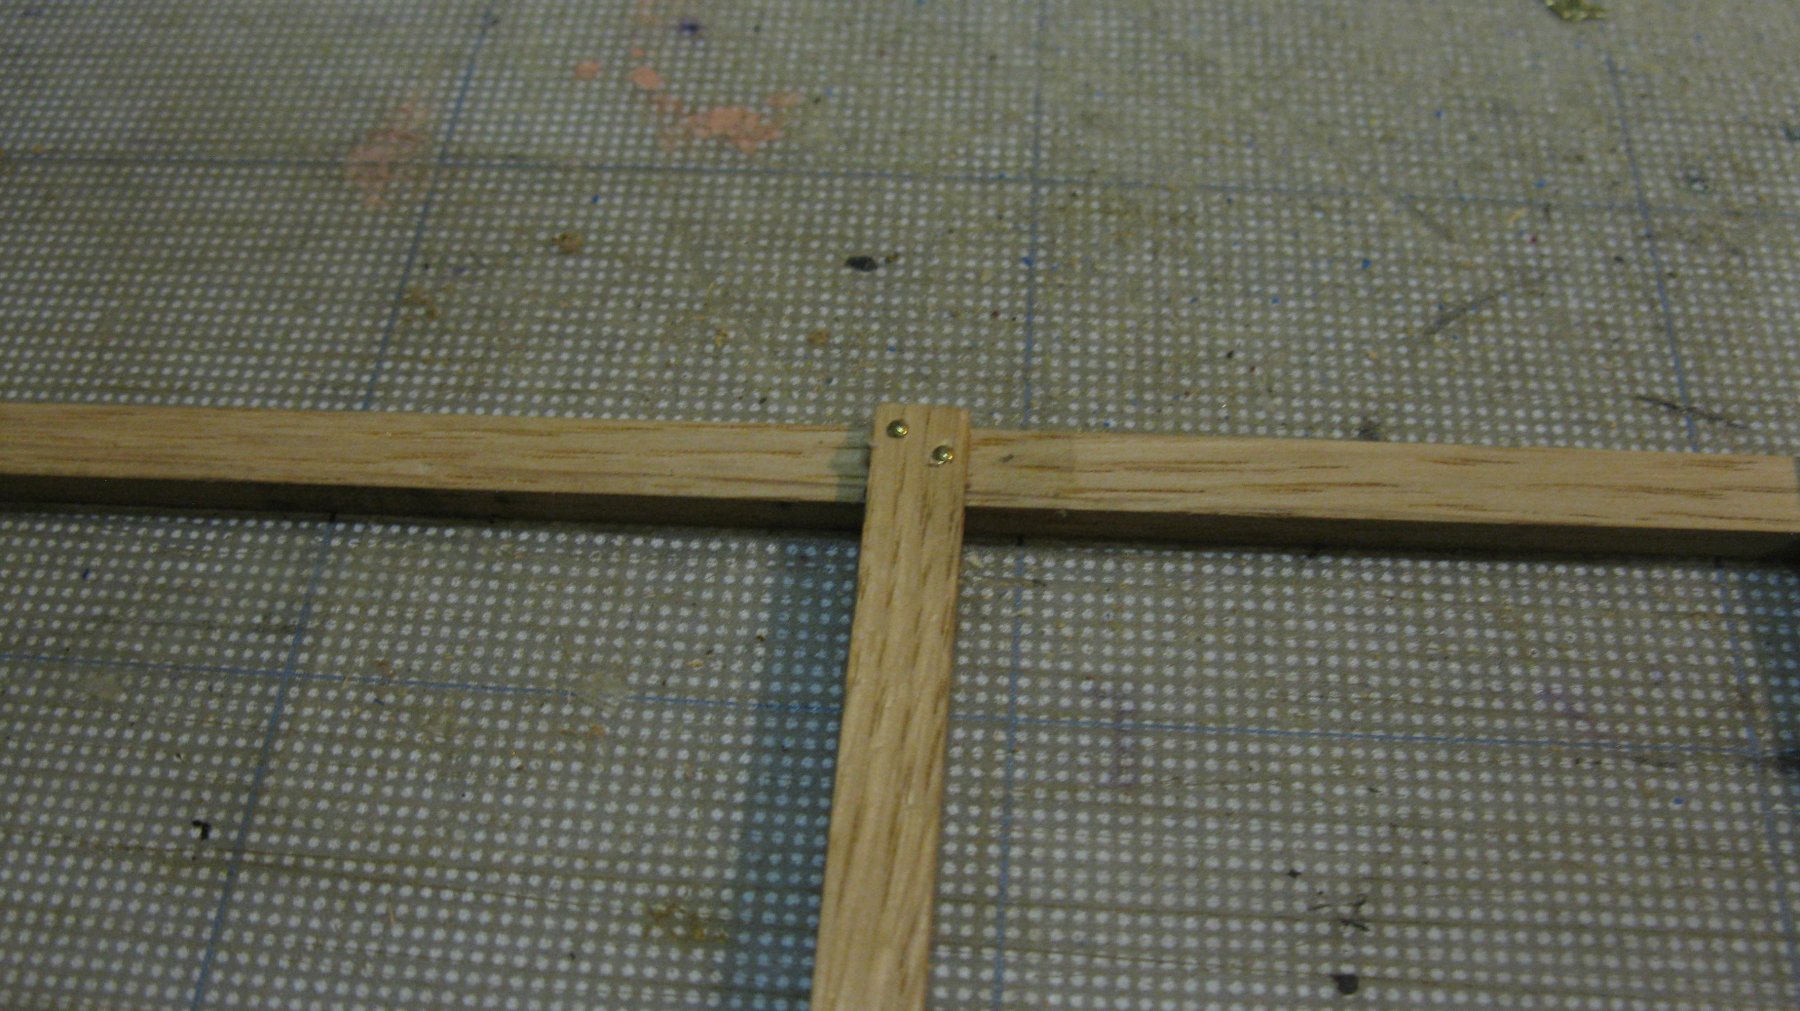
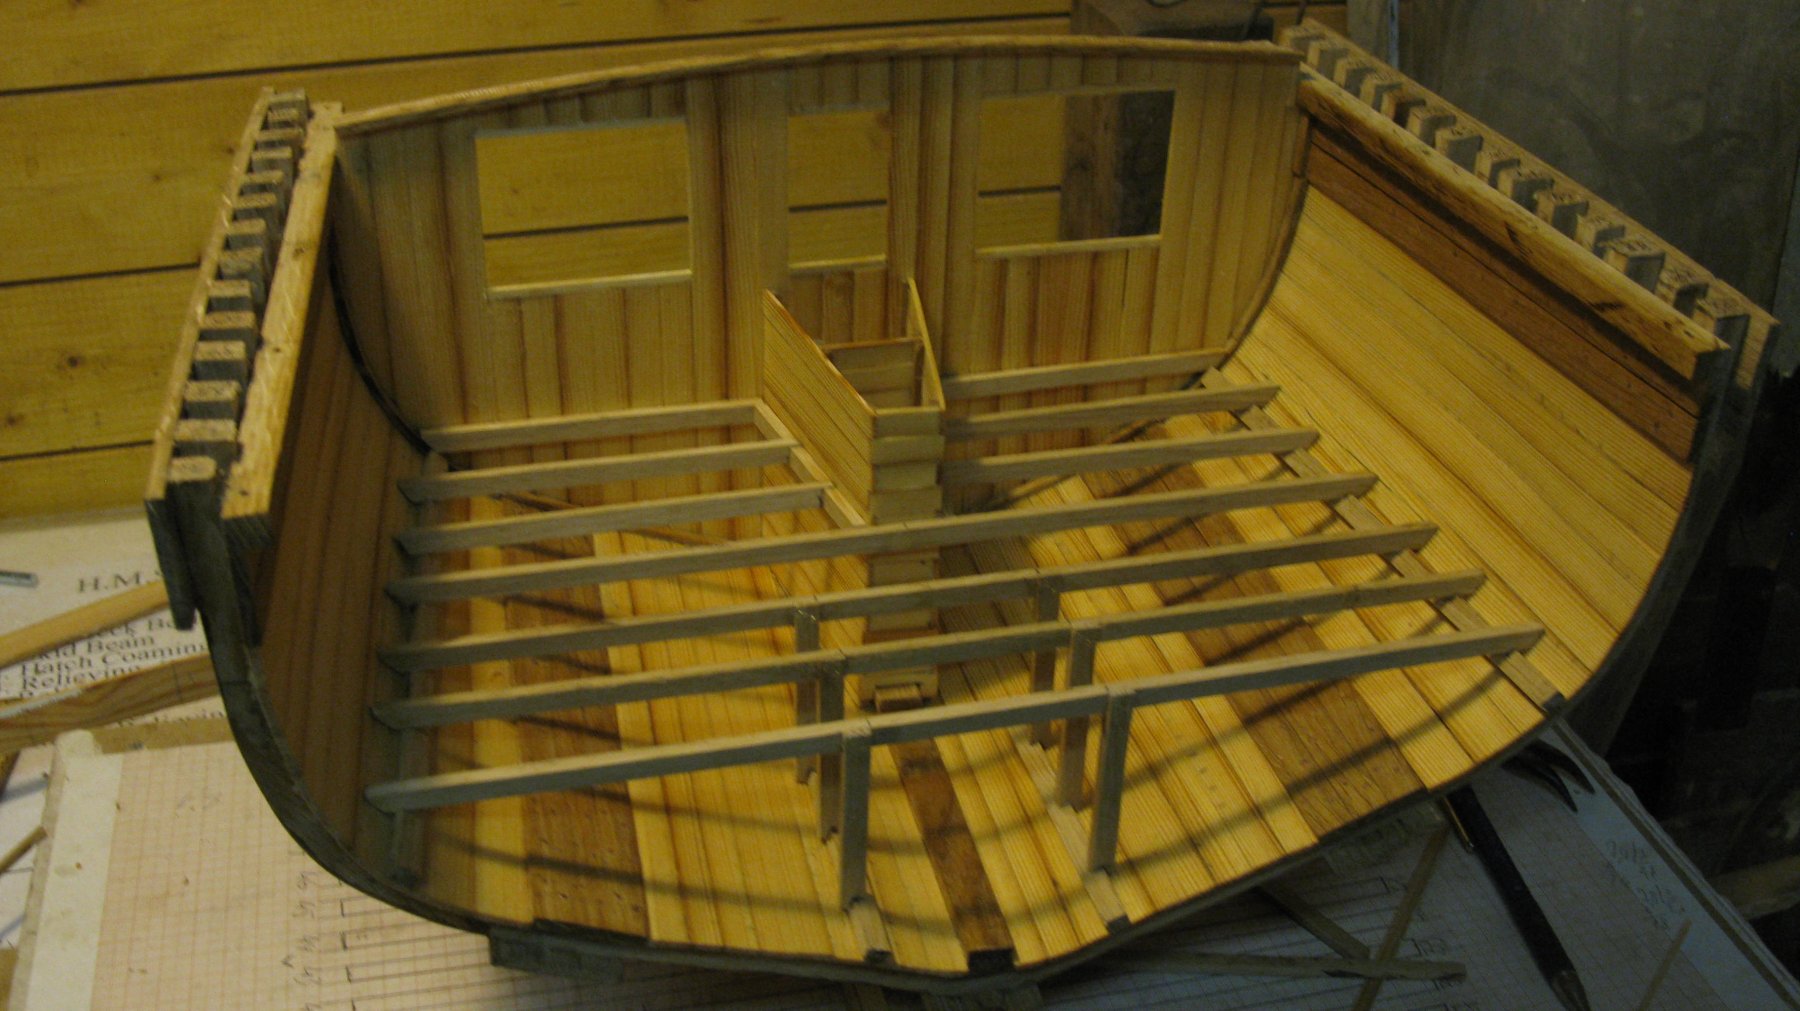
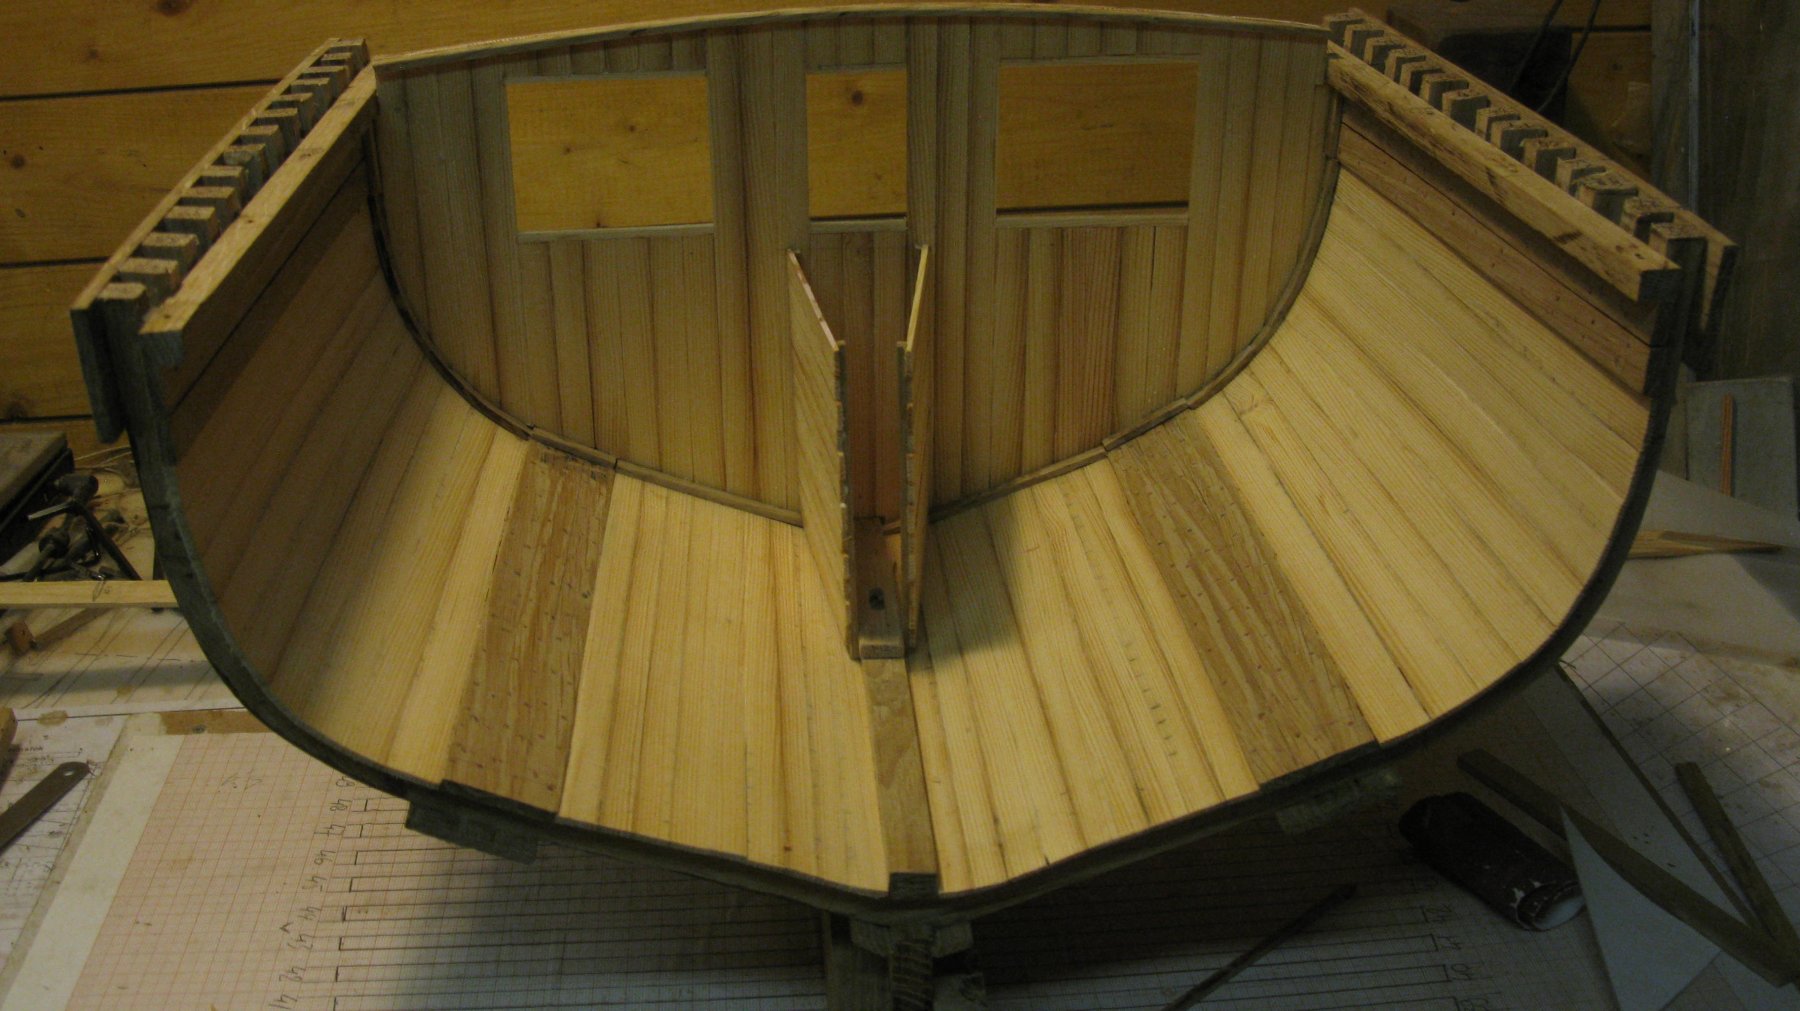
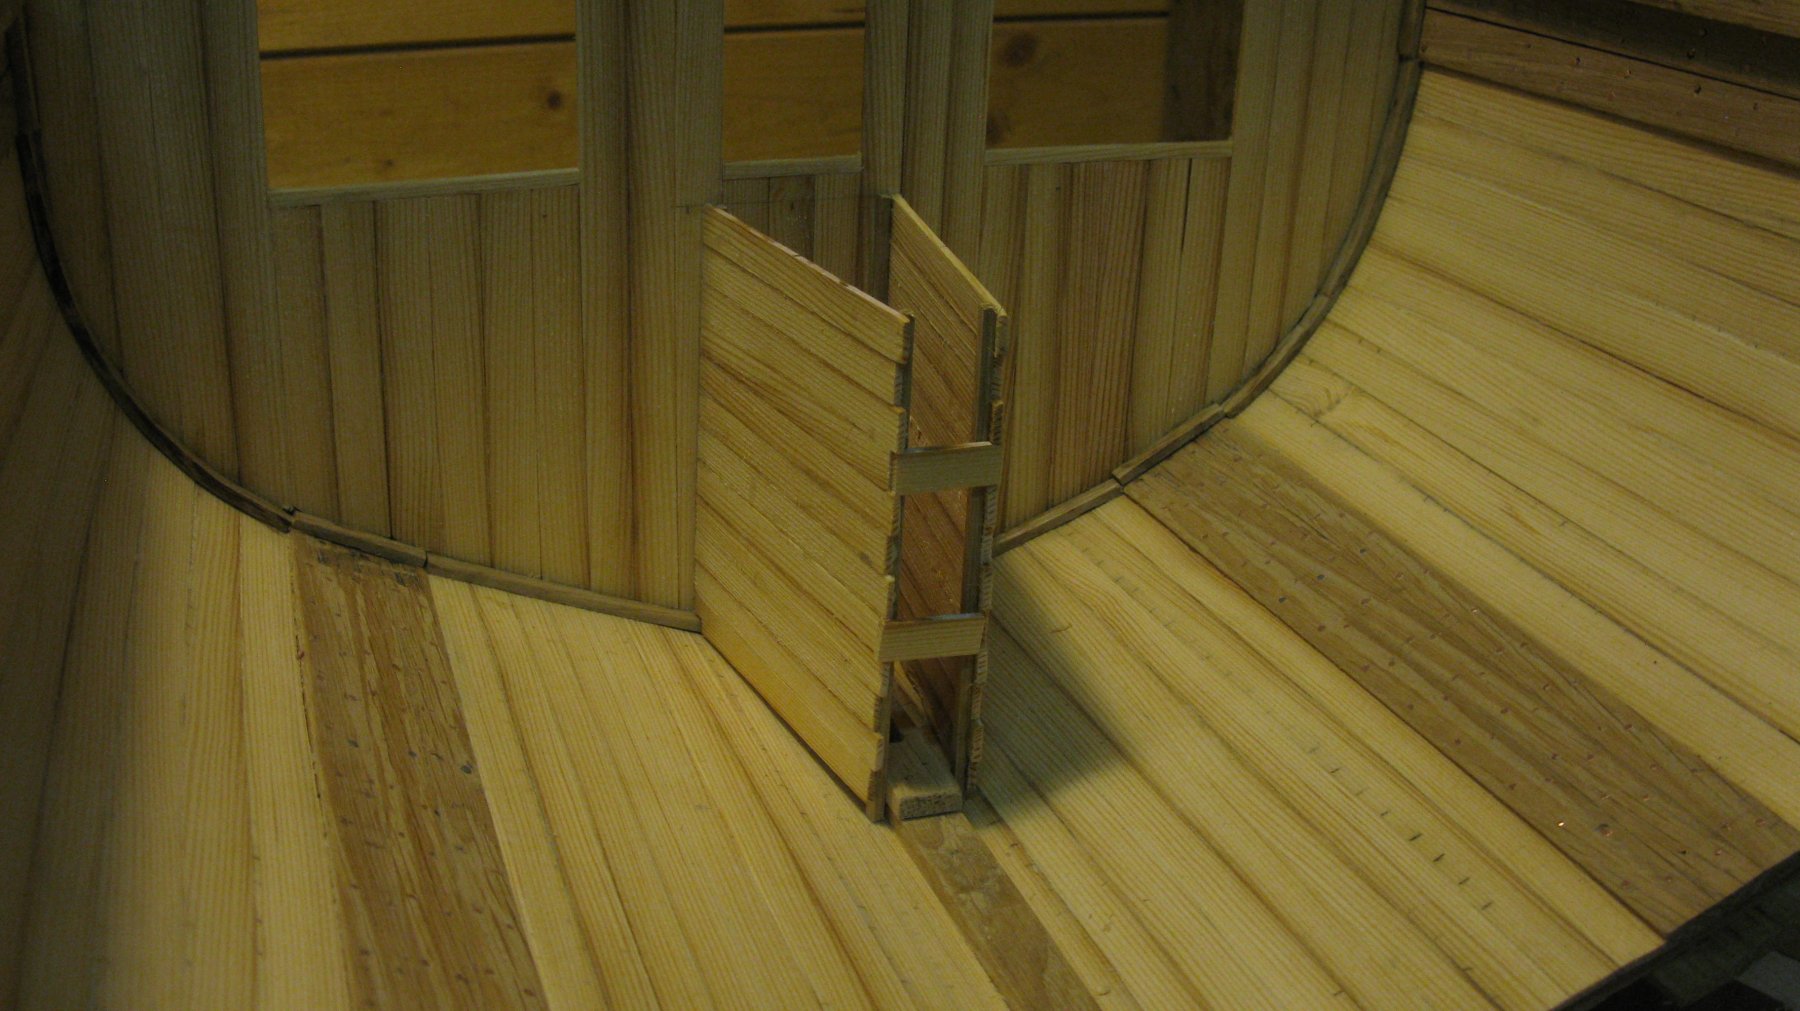
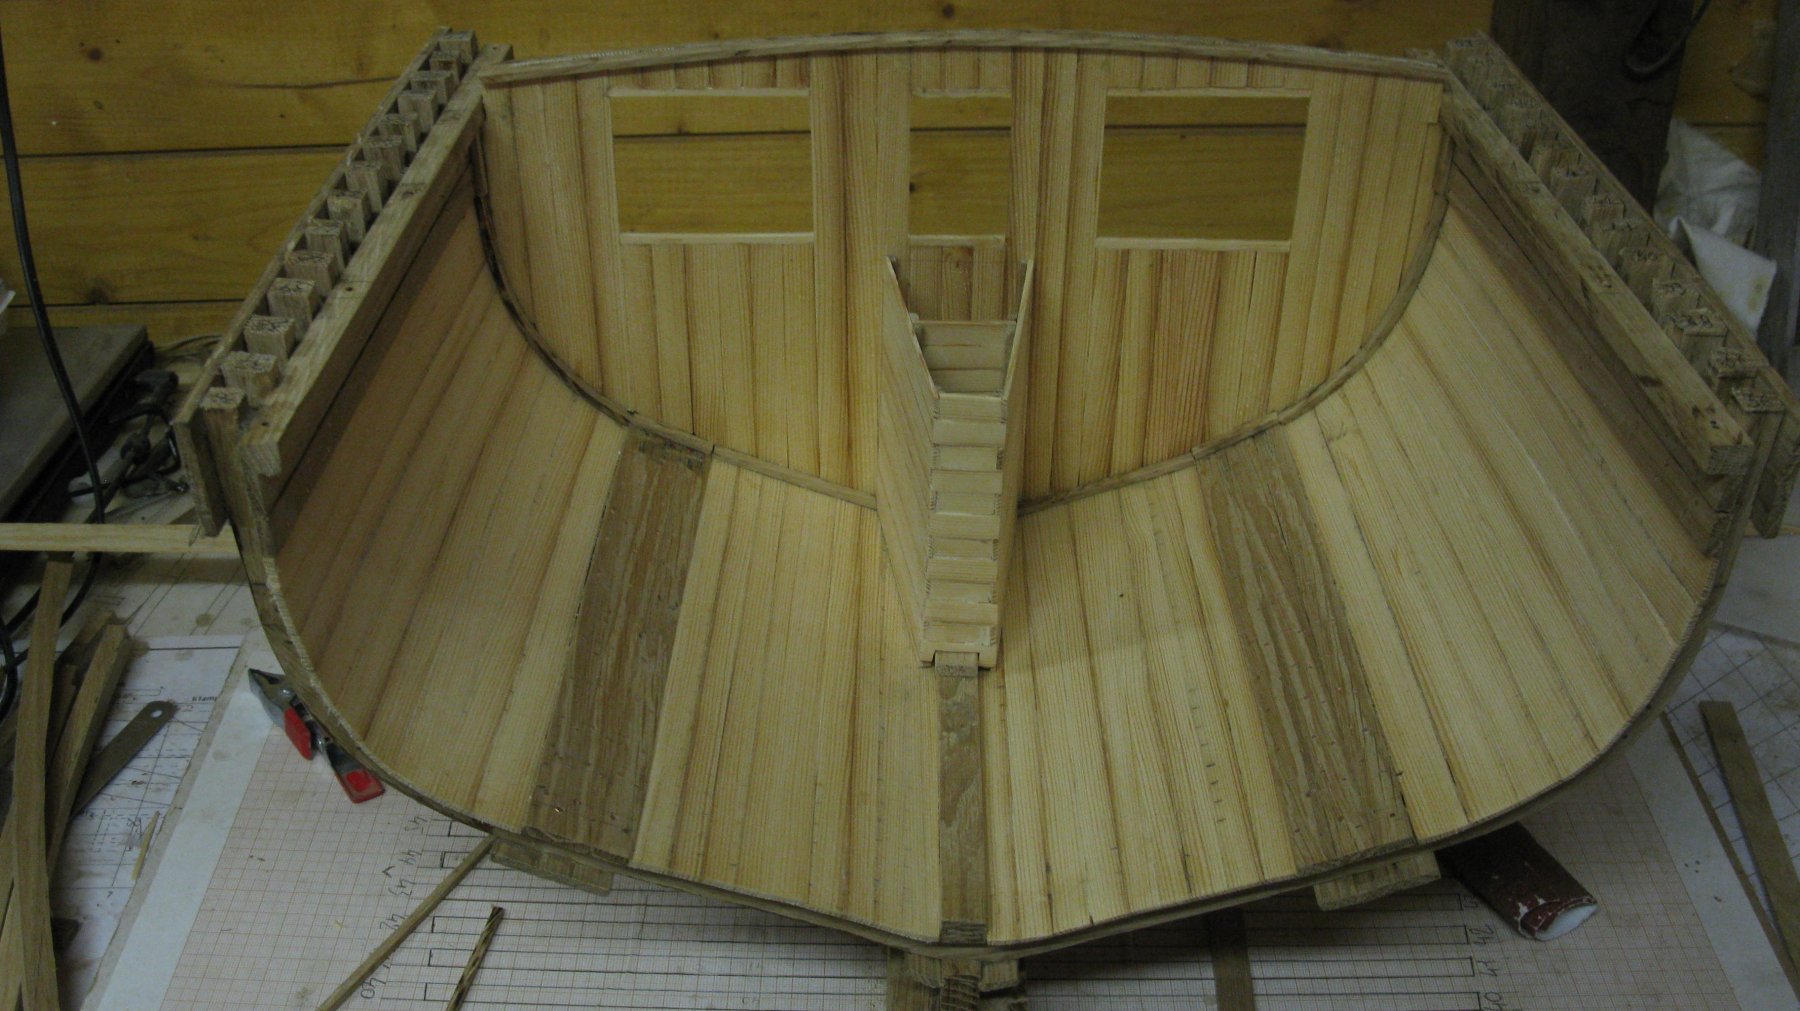
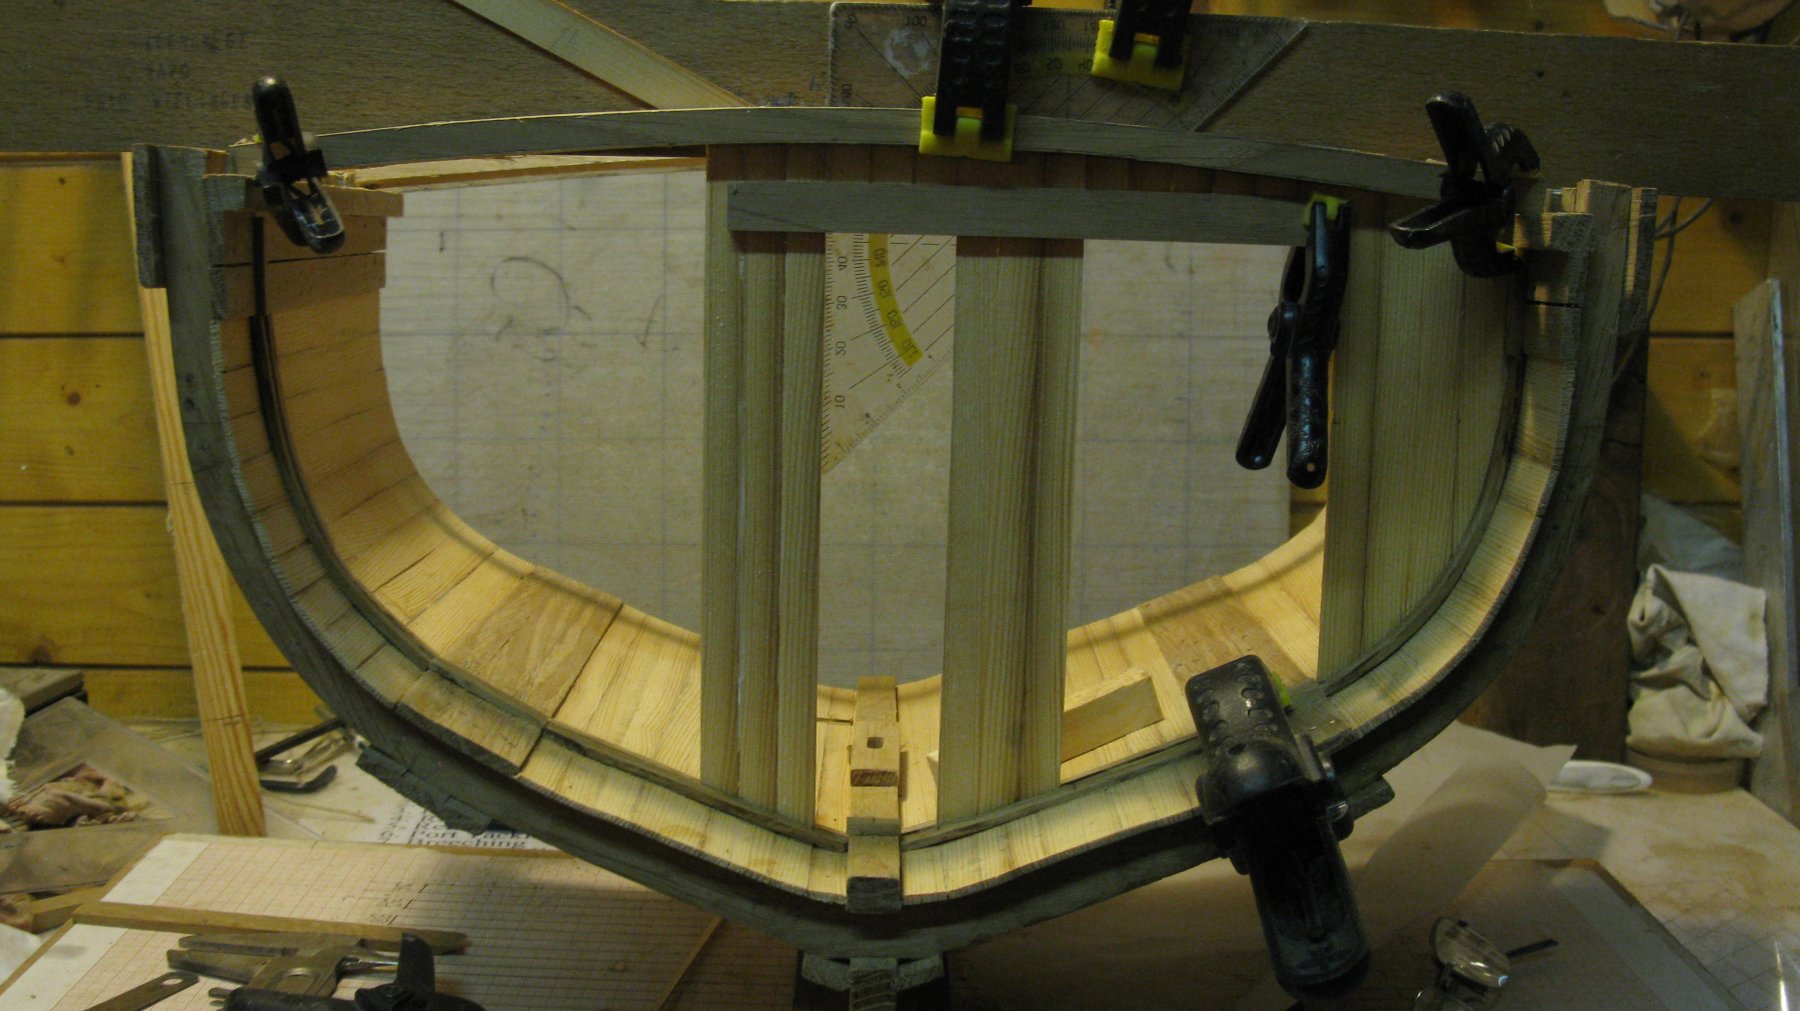
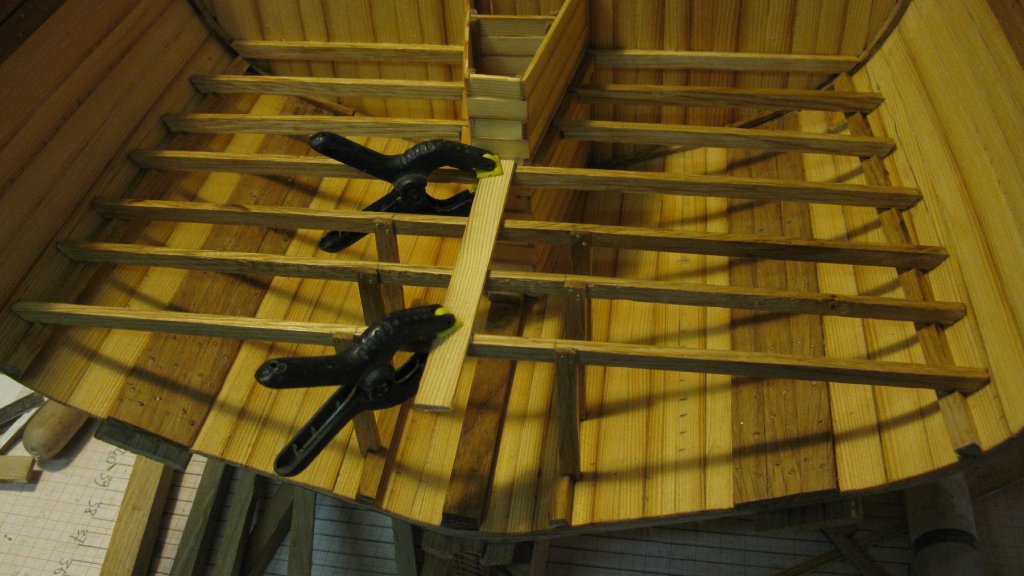
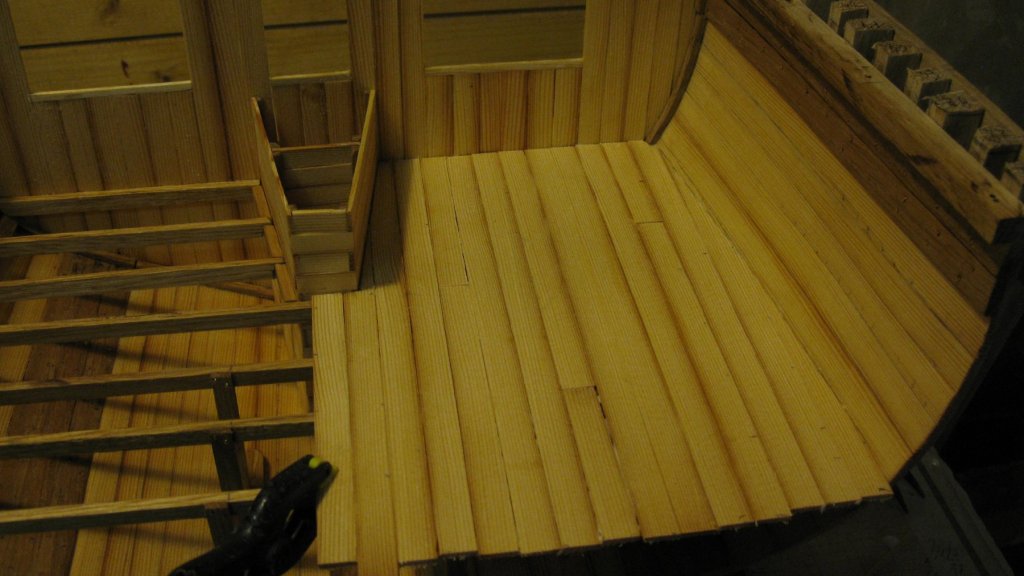
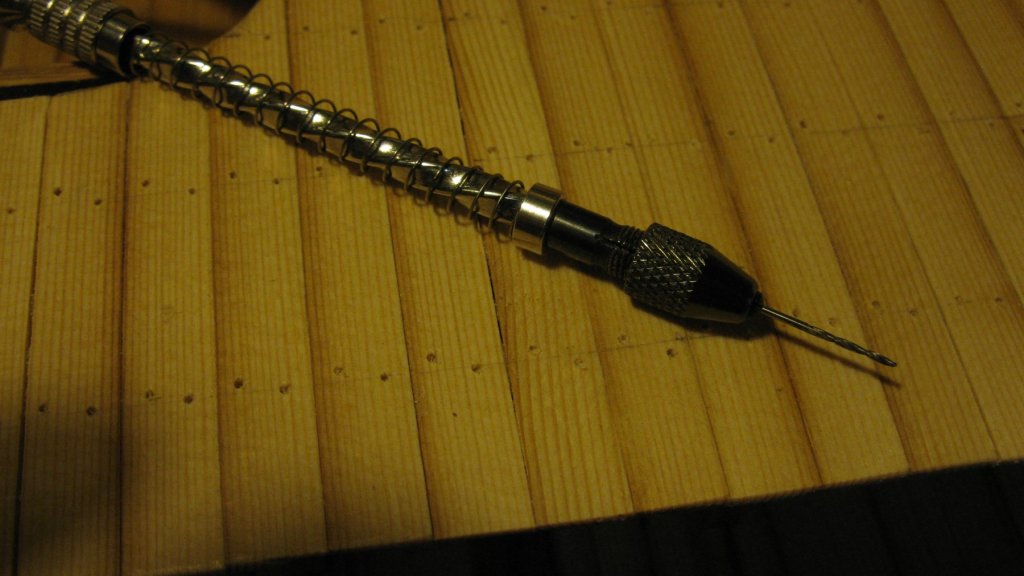
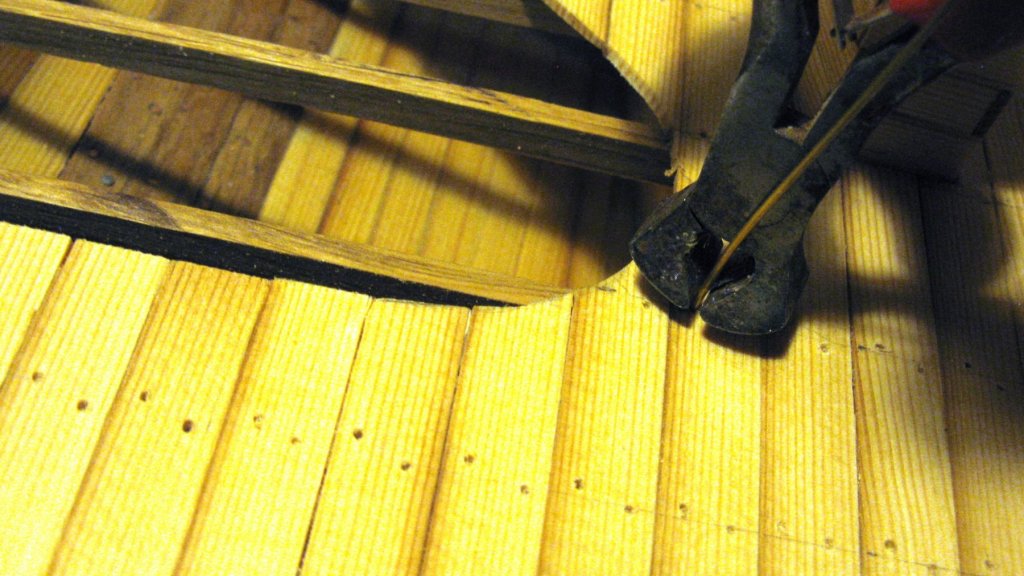
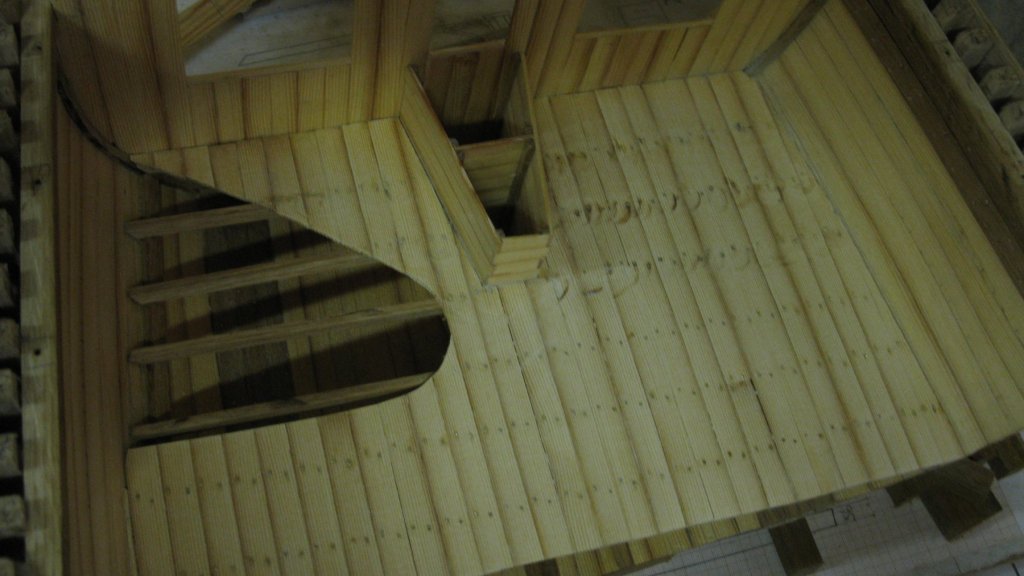
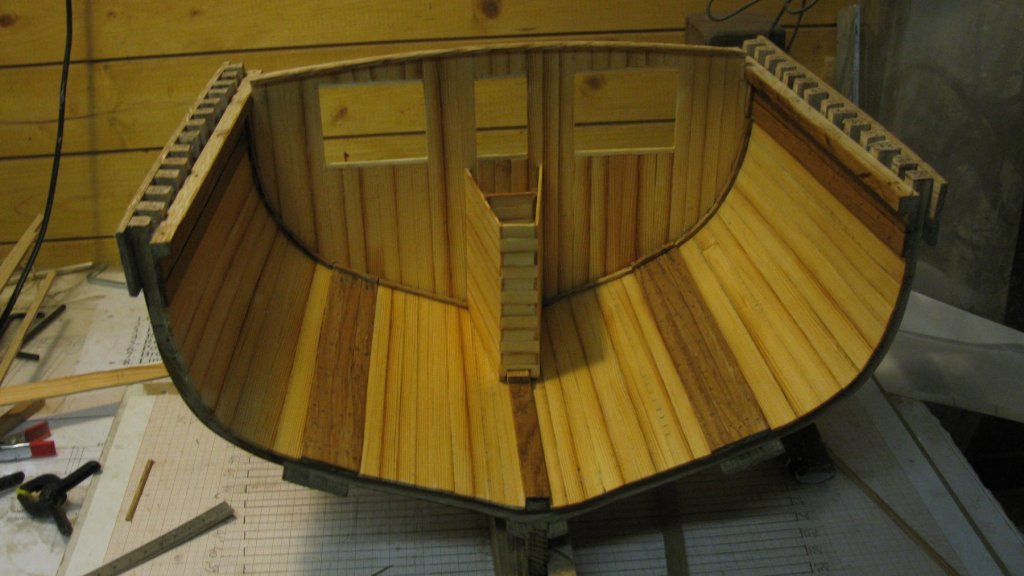
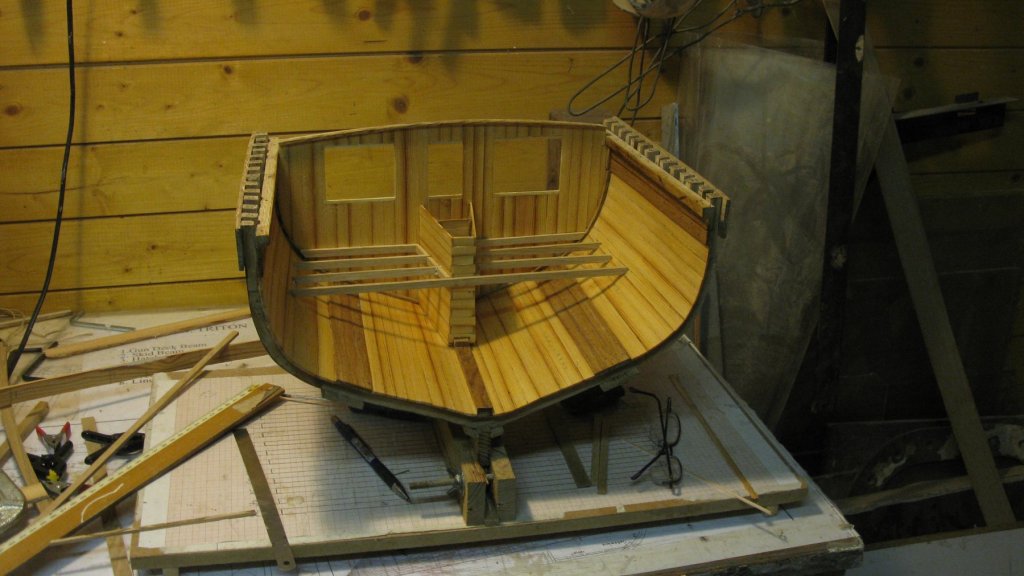
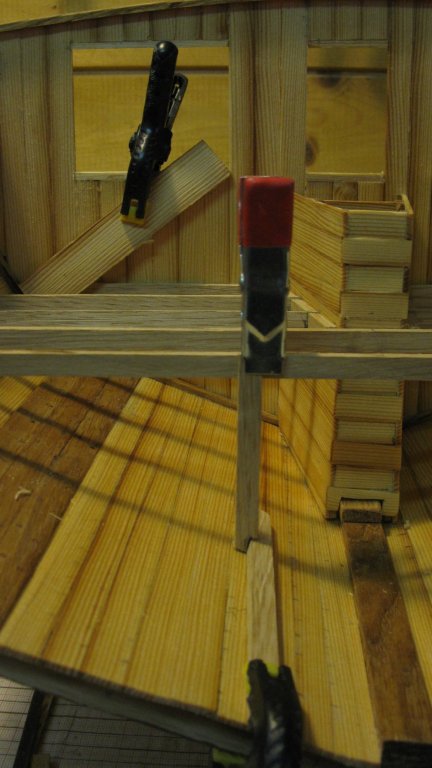
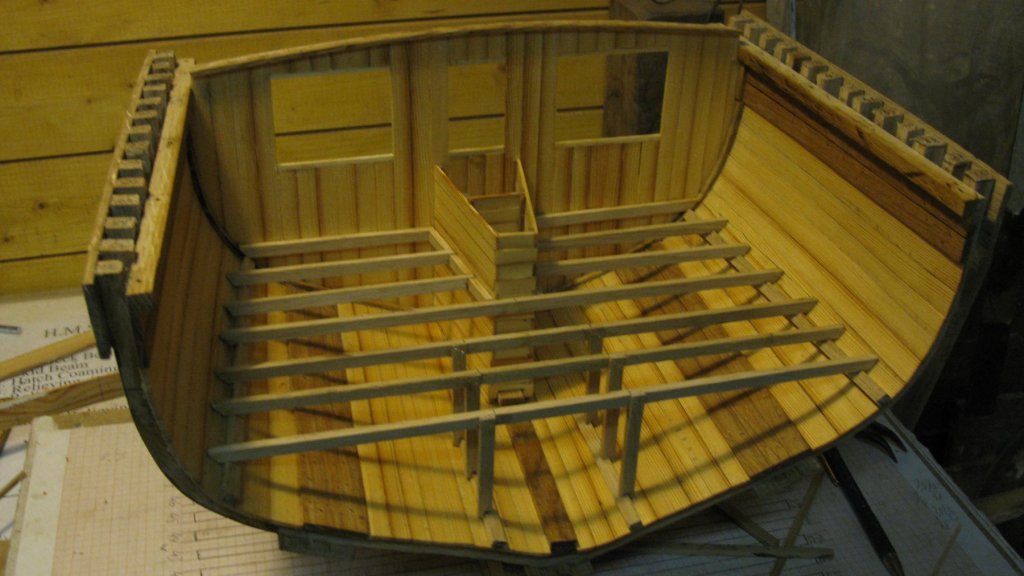
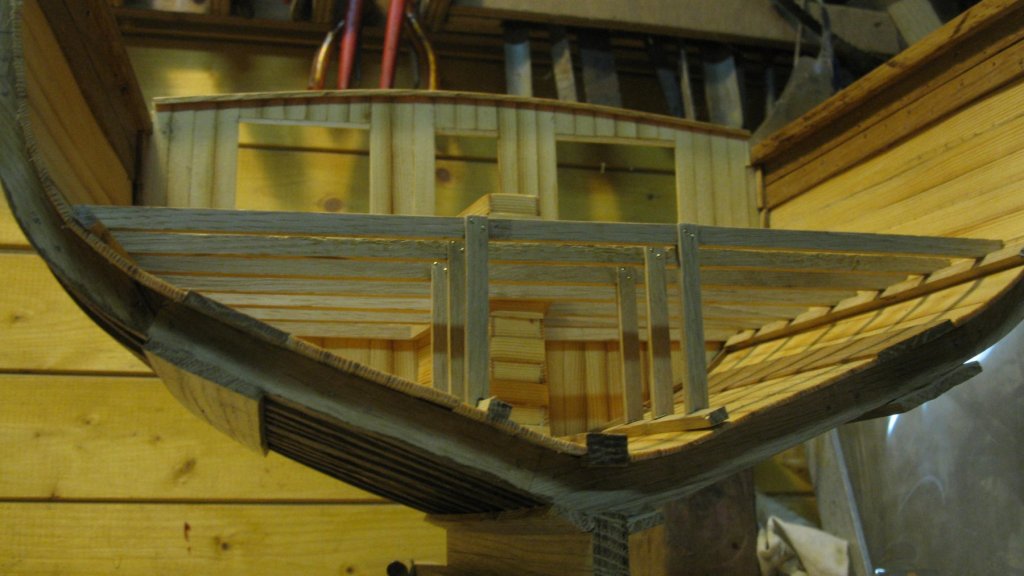
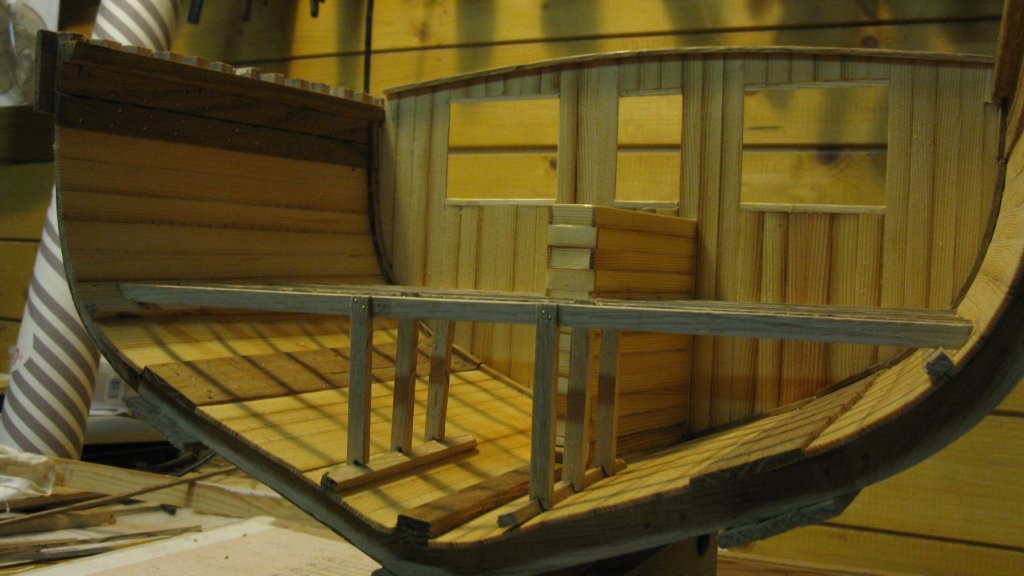
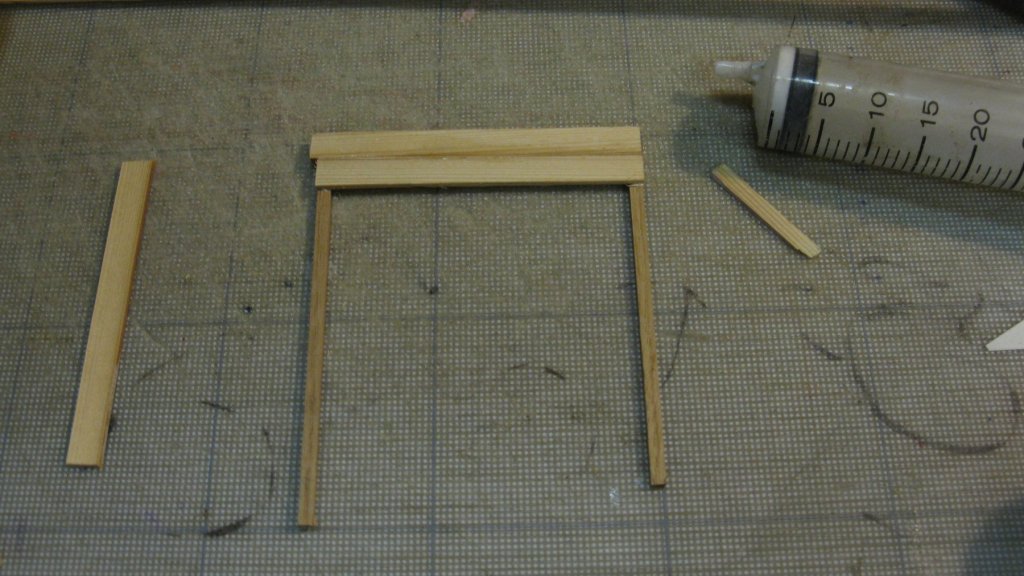
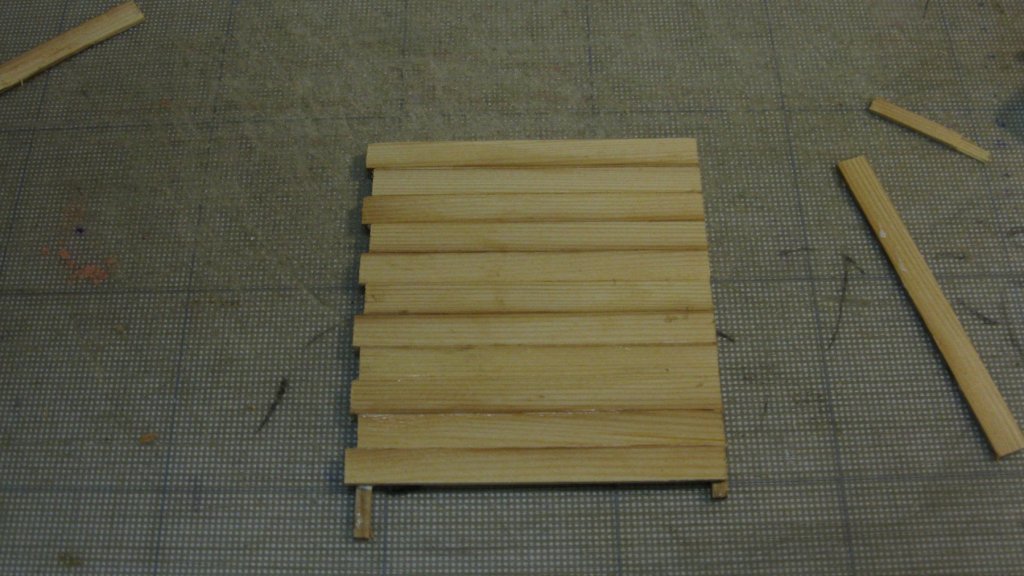
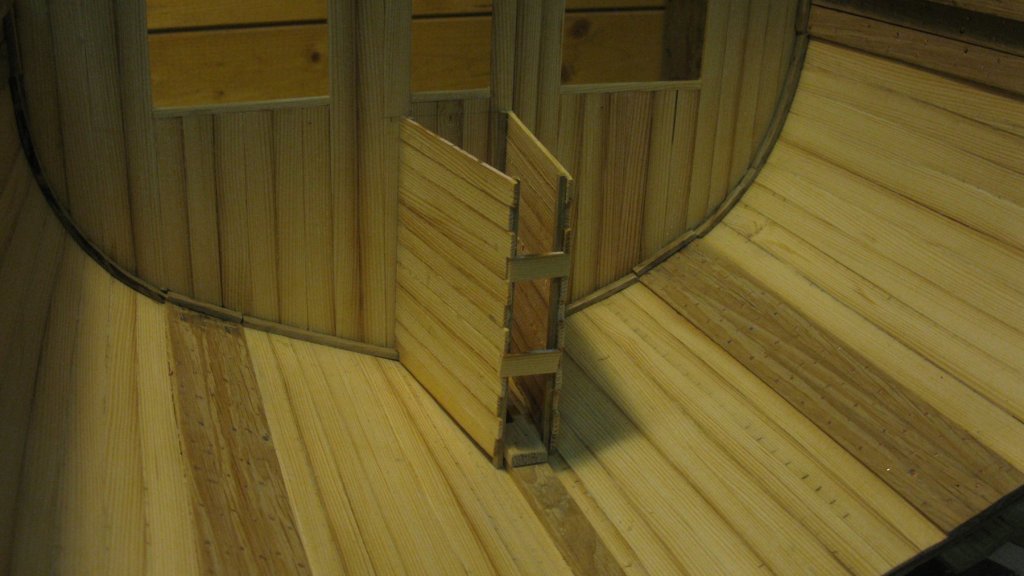
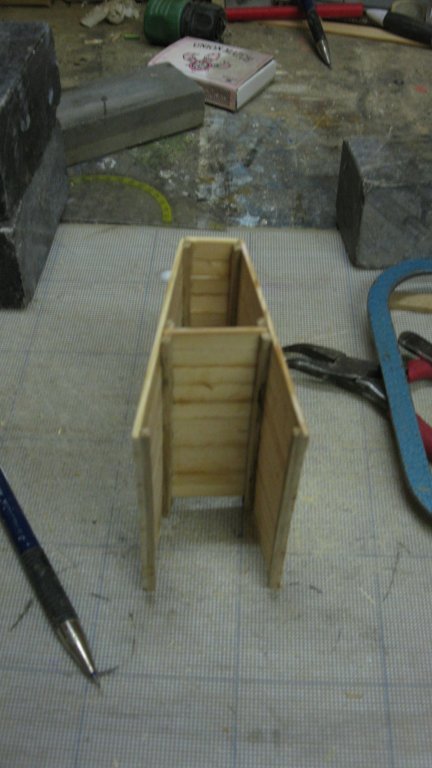
Now I start planking the lower deck. At port side I will leave a part of the lower deck uncovered to give inside view into the hold. I make a paper template of the planned opening. Afterward I reconverted the opening a bit with the closest side parallel with the deck beams. Like it is shown now, the opening would continue below the aft bulkhead. The lower deck with the original opening. The deck planks were nailed with iron nails. To imitate those I will use brass tree nails. Drilling the nail holes with a hand drill. In each hole I impact a brass rod with a drip of super glue and pinch it off just above the deck. Then I file the surface flat. Where I couldn't reach with the file, I used the Dremel. Bad idea: right of the chain box you see the marks of it. I hope to remove them as much as possible by sanding. The equipment store is divided in storages for the trawl warp and the rope fenders by removable baffles. To hold the baffles I place profile slats. With the baffles in place: Merry Christmas to you all!


- 219 replies
-
- 14
-
-
- smack
- cross-section
- (and 2 more)
-
I don't see any indication on the bottle that the linseed oil is boiled and I didn't boil it neither, so I guess it is plain.
- 219 replies
-
- 1
-
-
- smack
- cross-section
- (and 2 more)
-
Mark, It is distilled resin from pine trees. My wife uses the blend 2/3 linseed oil + 1/3 turpentine also in her oil paintings as a medium to make her colors transparant.
- 219 replies
-
- 1
-
-
- smack
- cross-section
- (and 2 more)
-
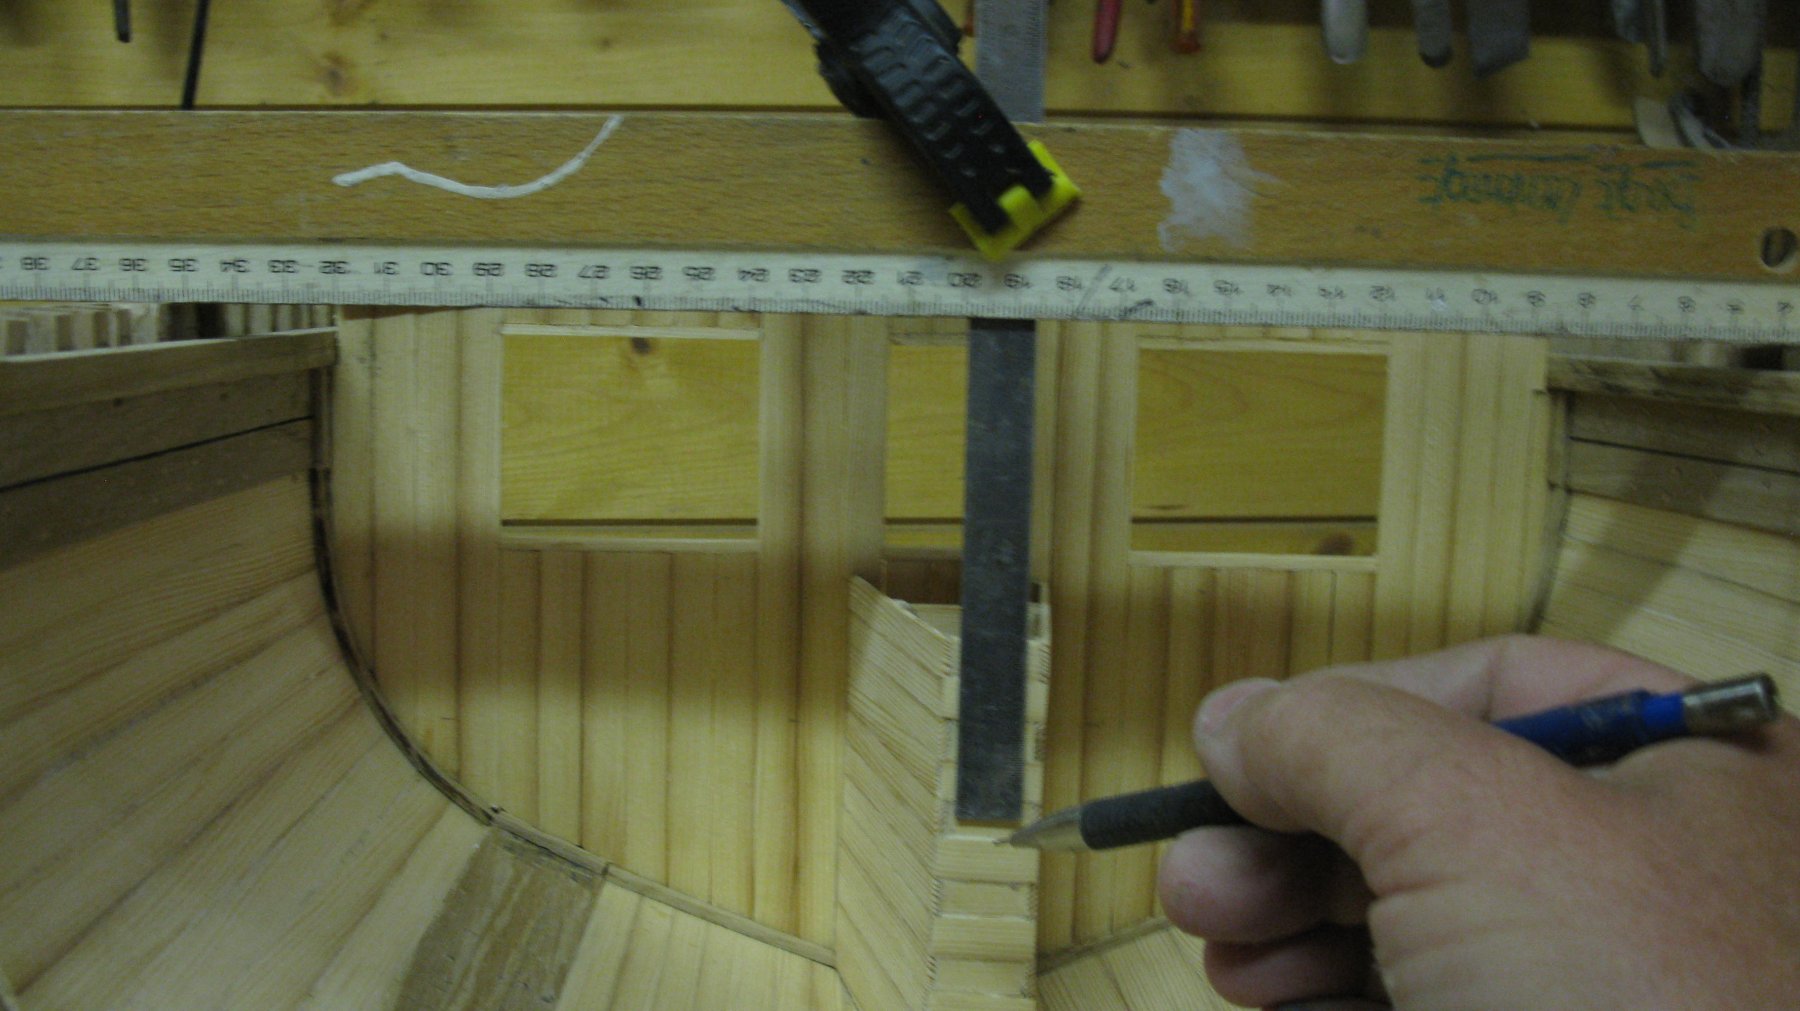
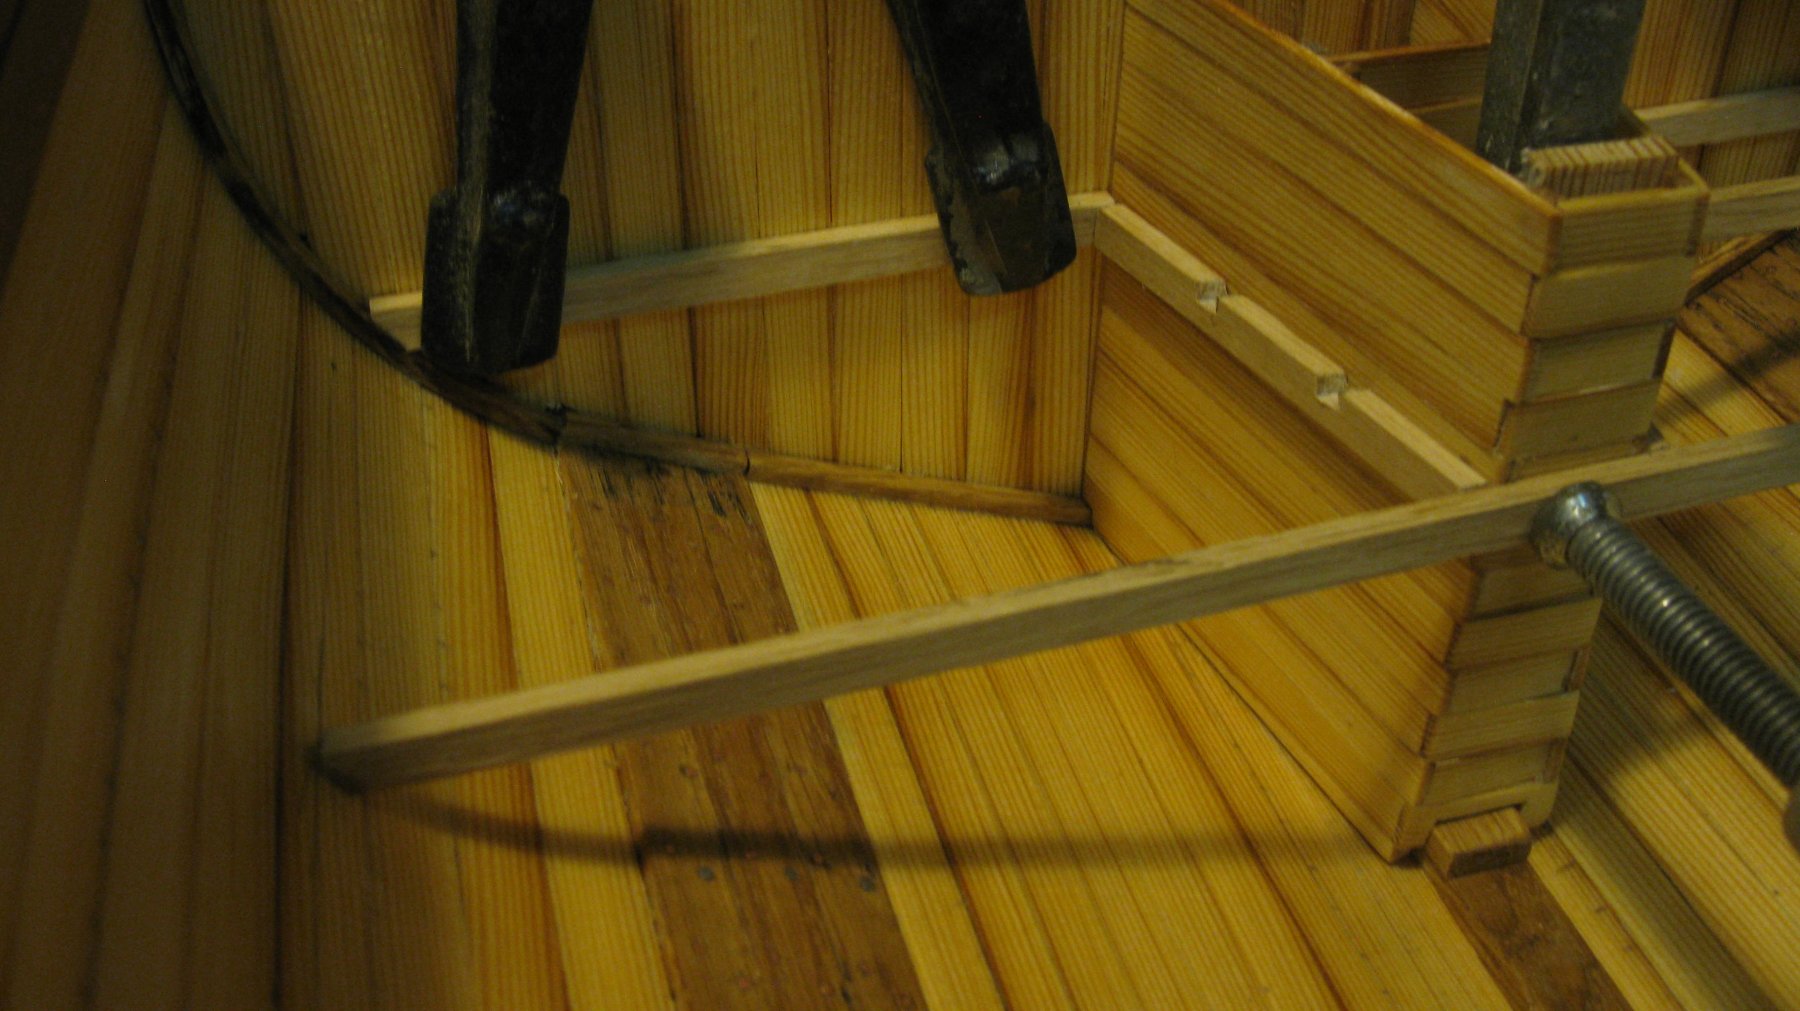
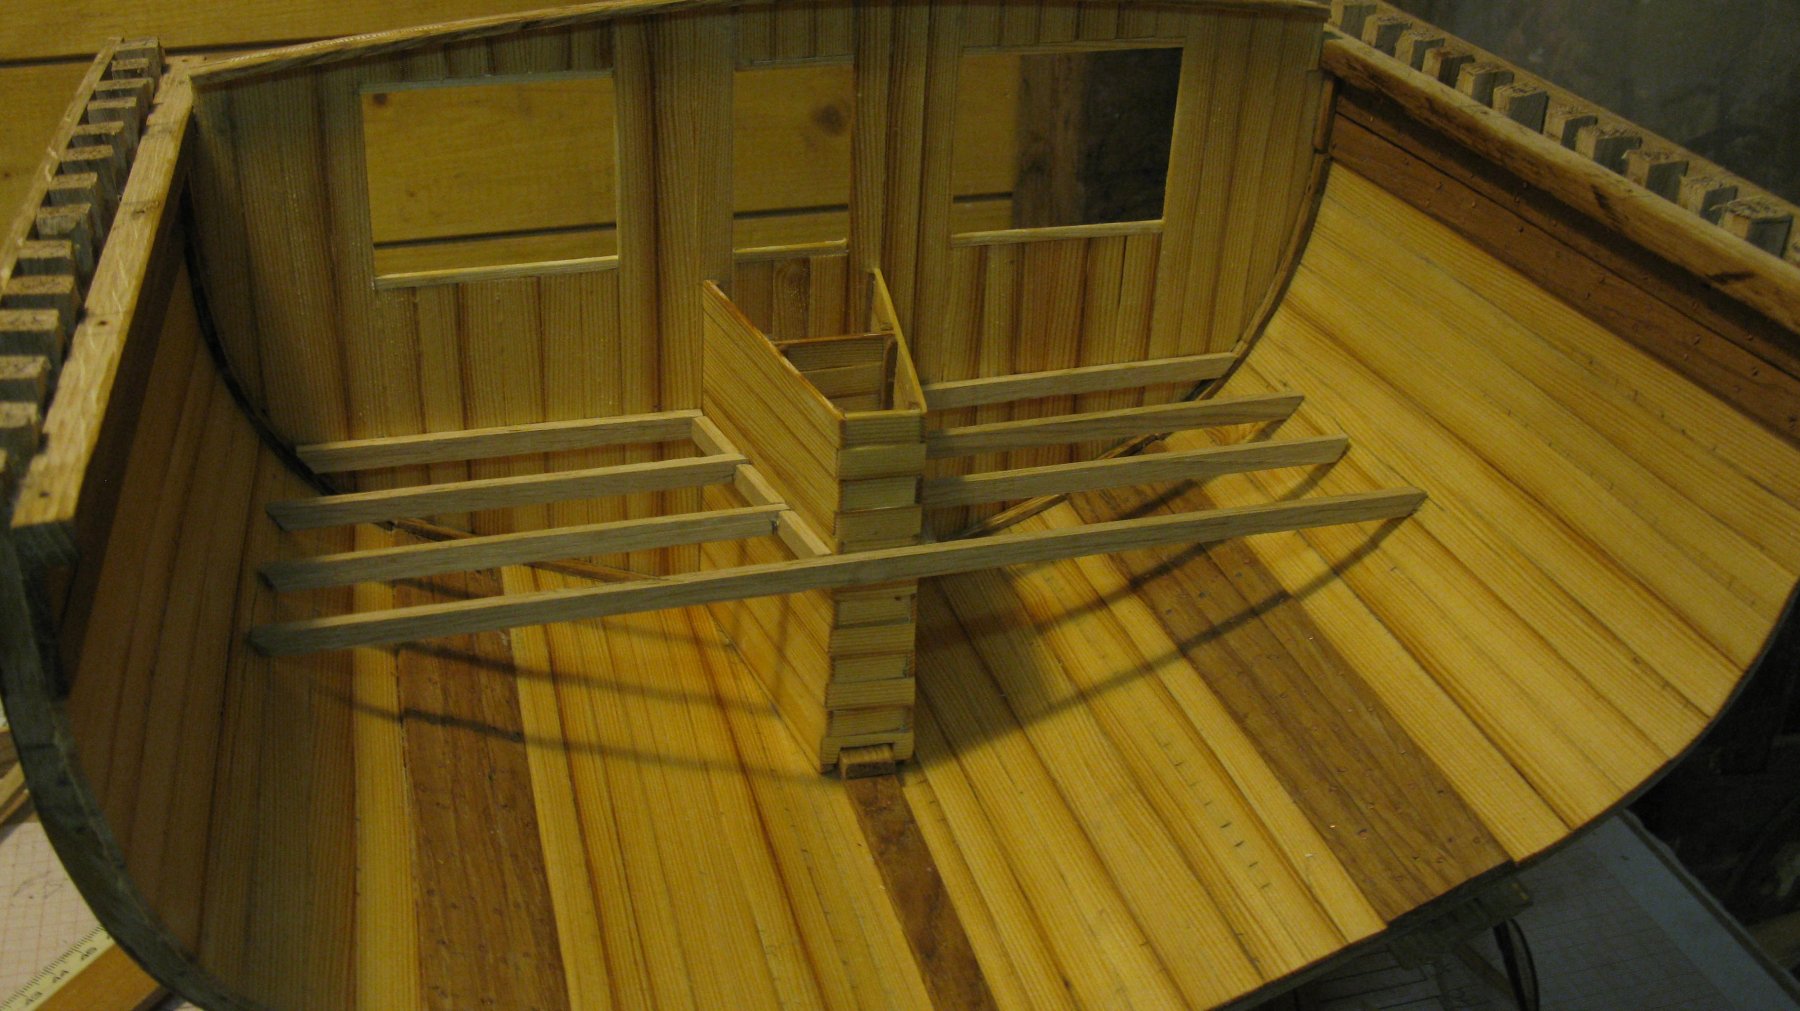
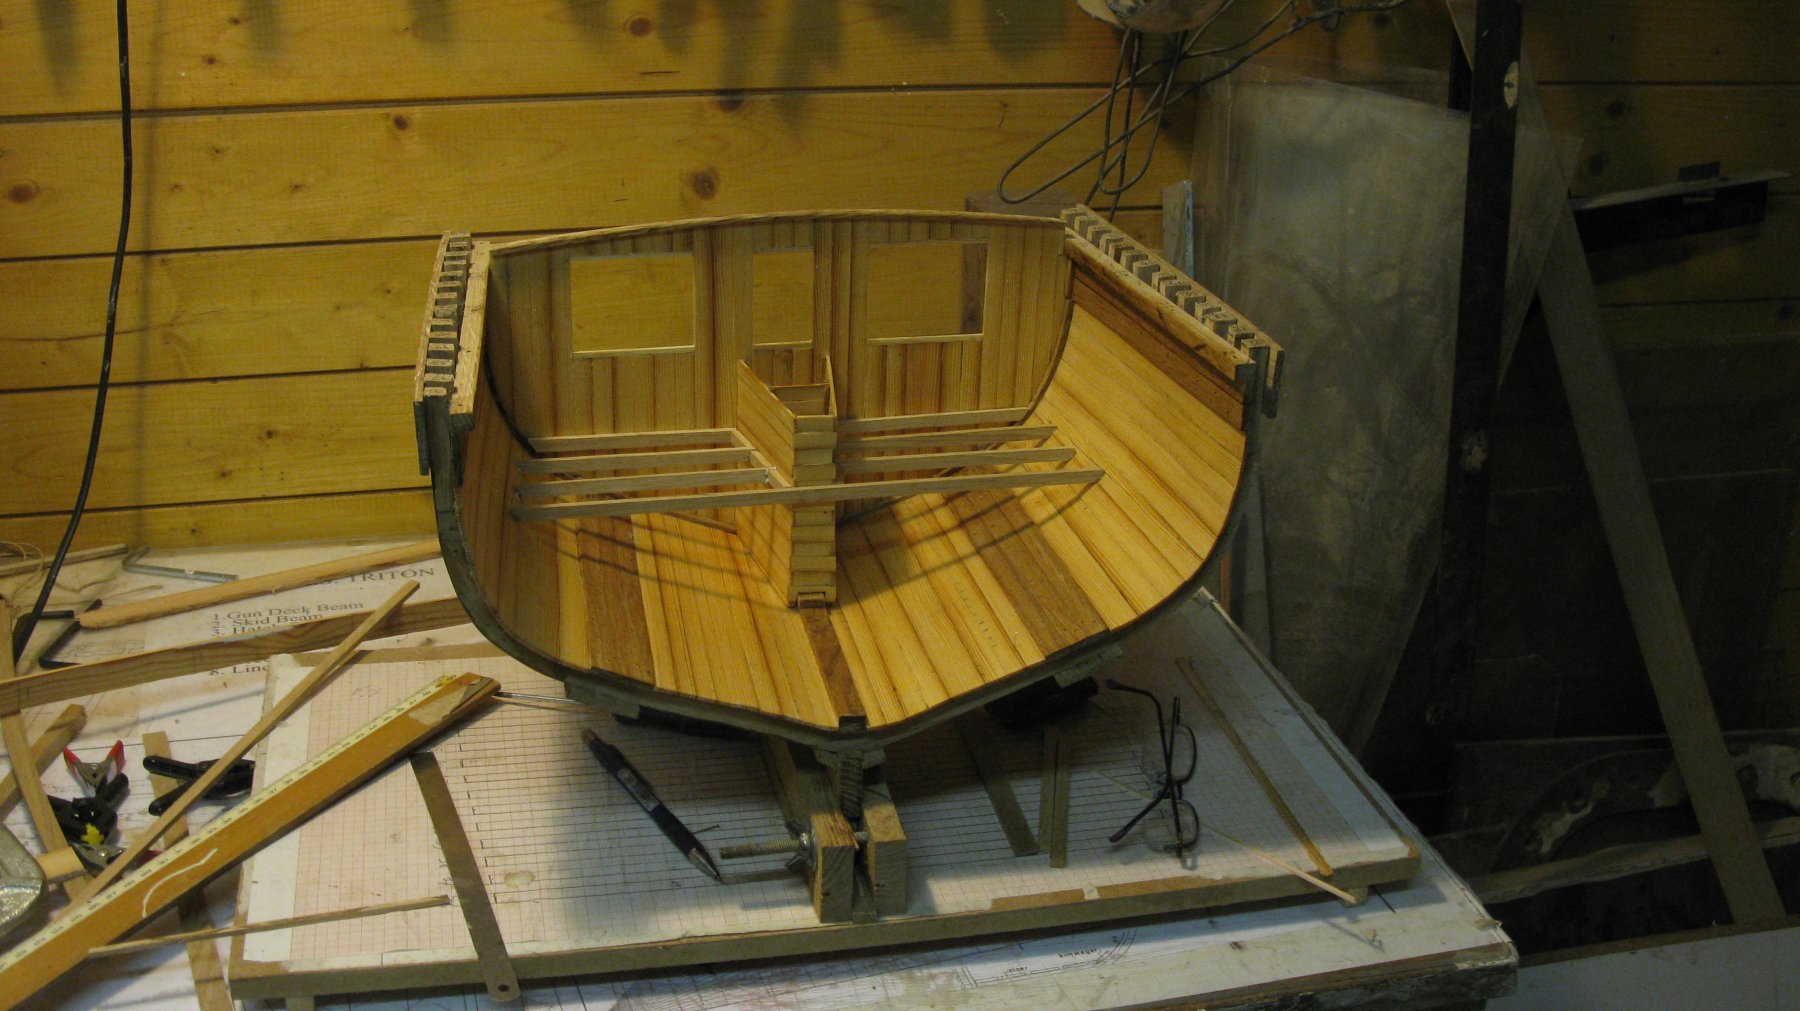
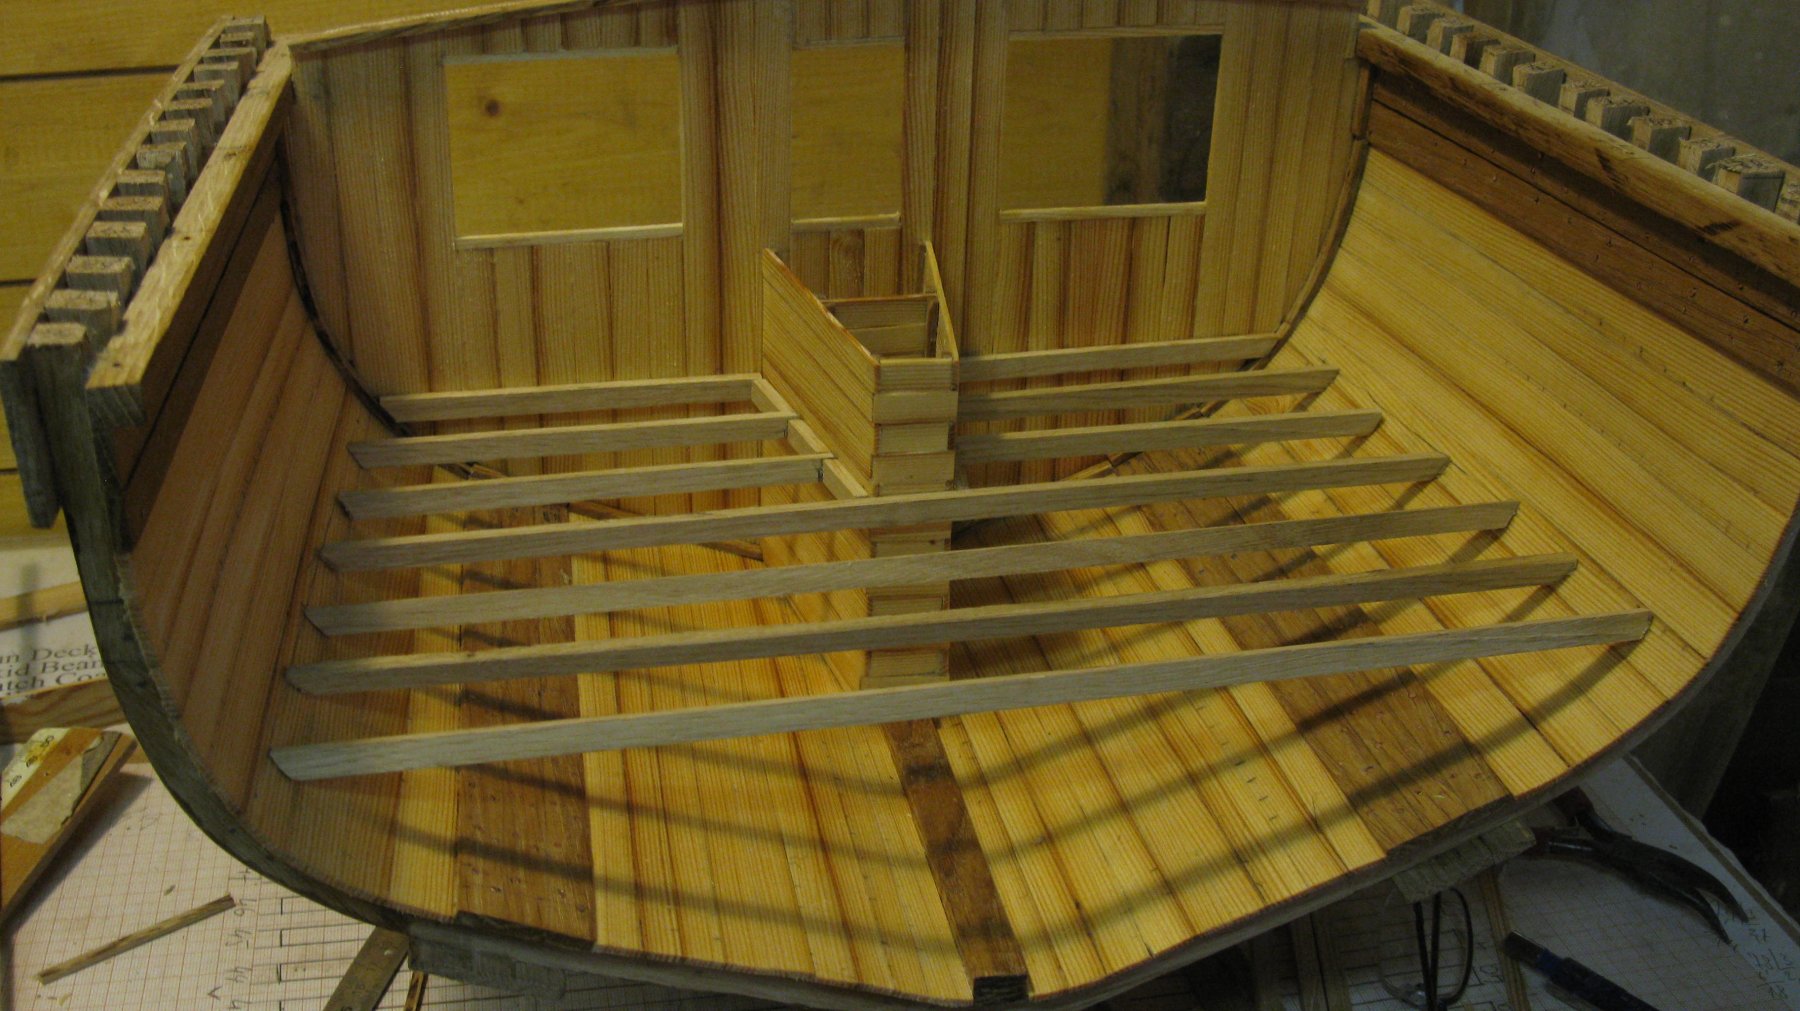
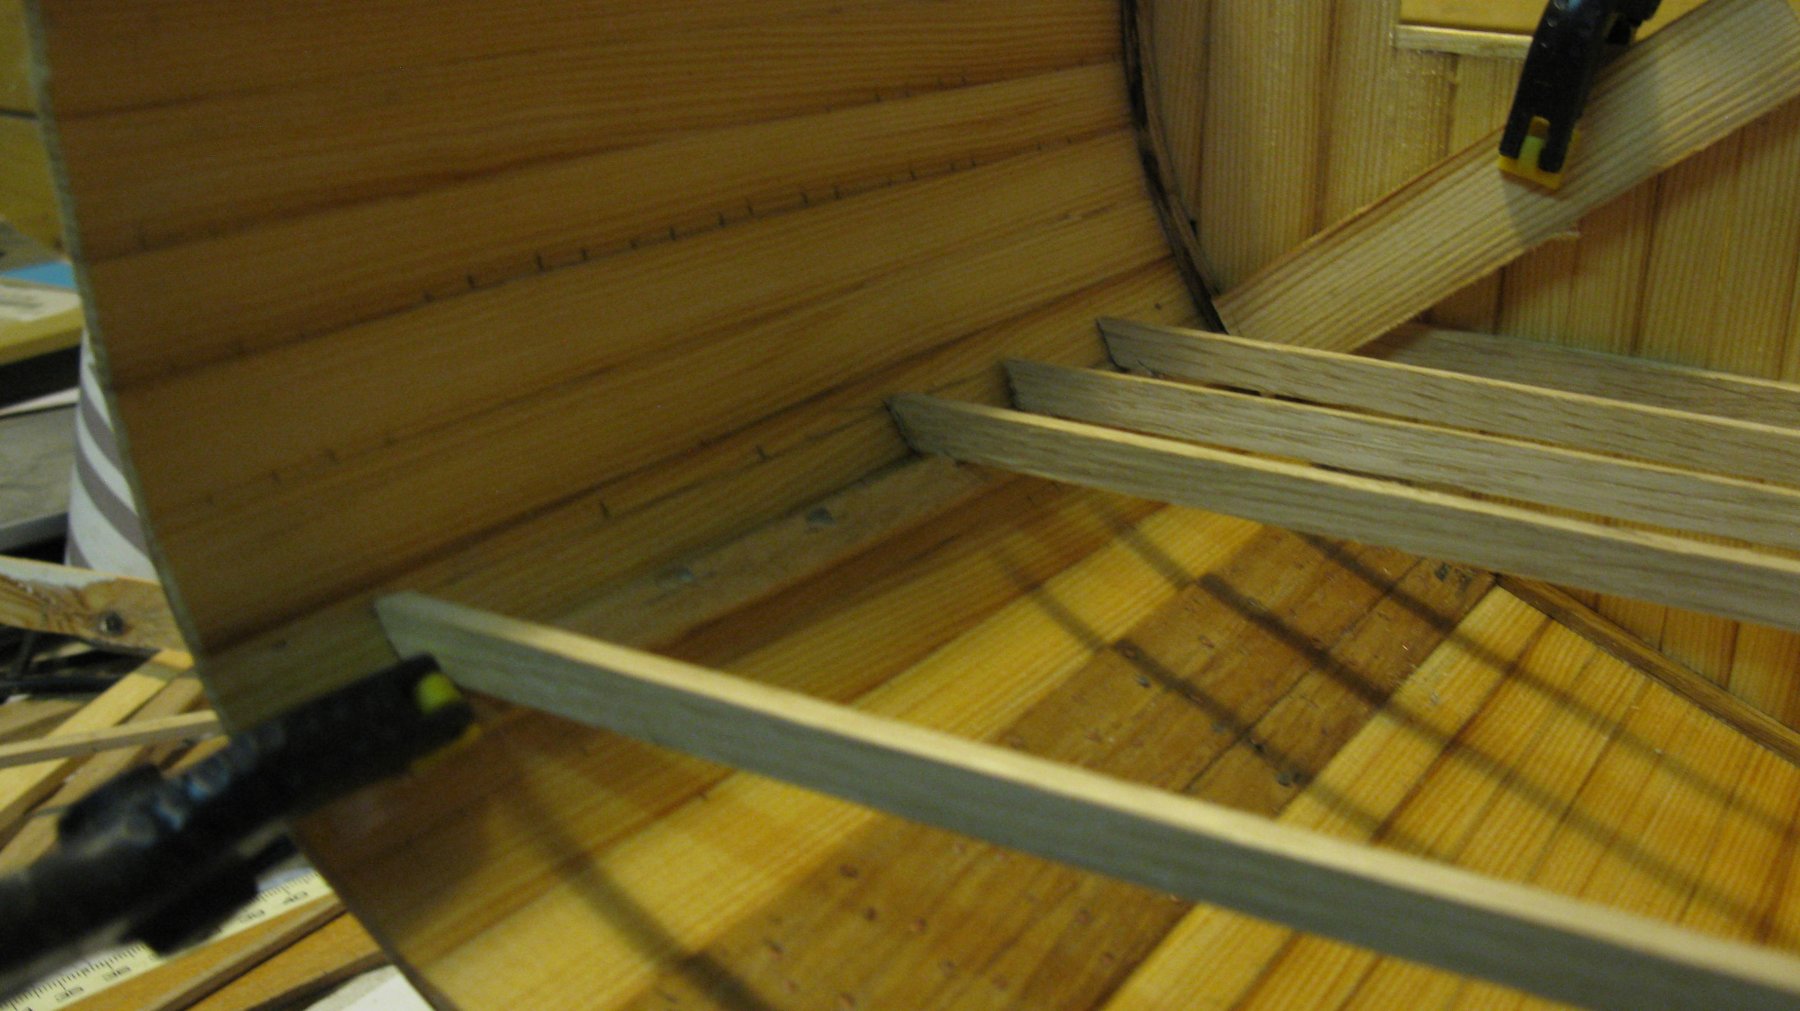
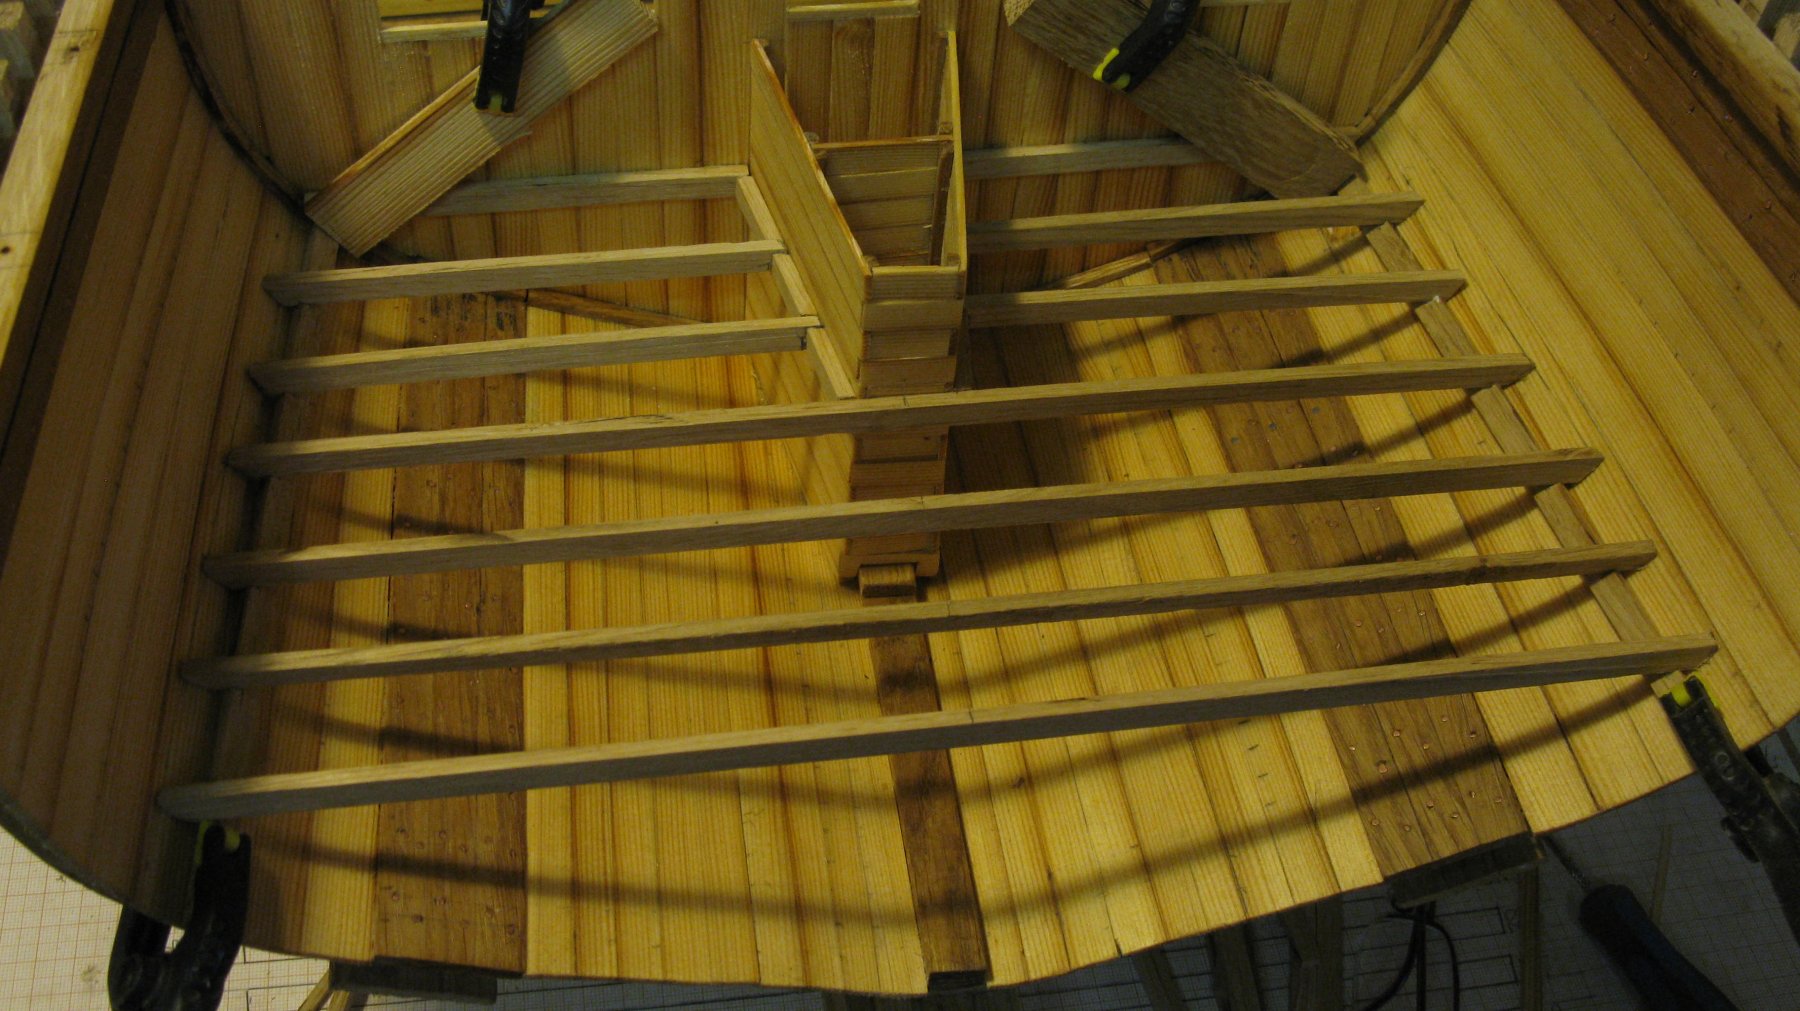
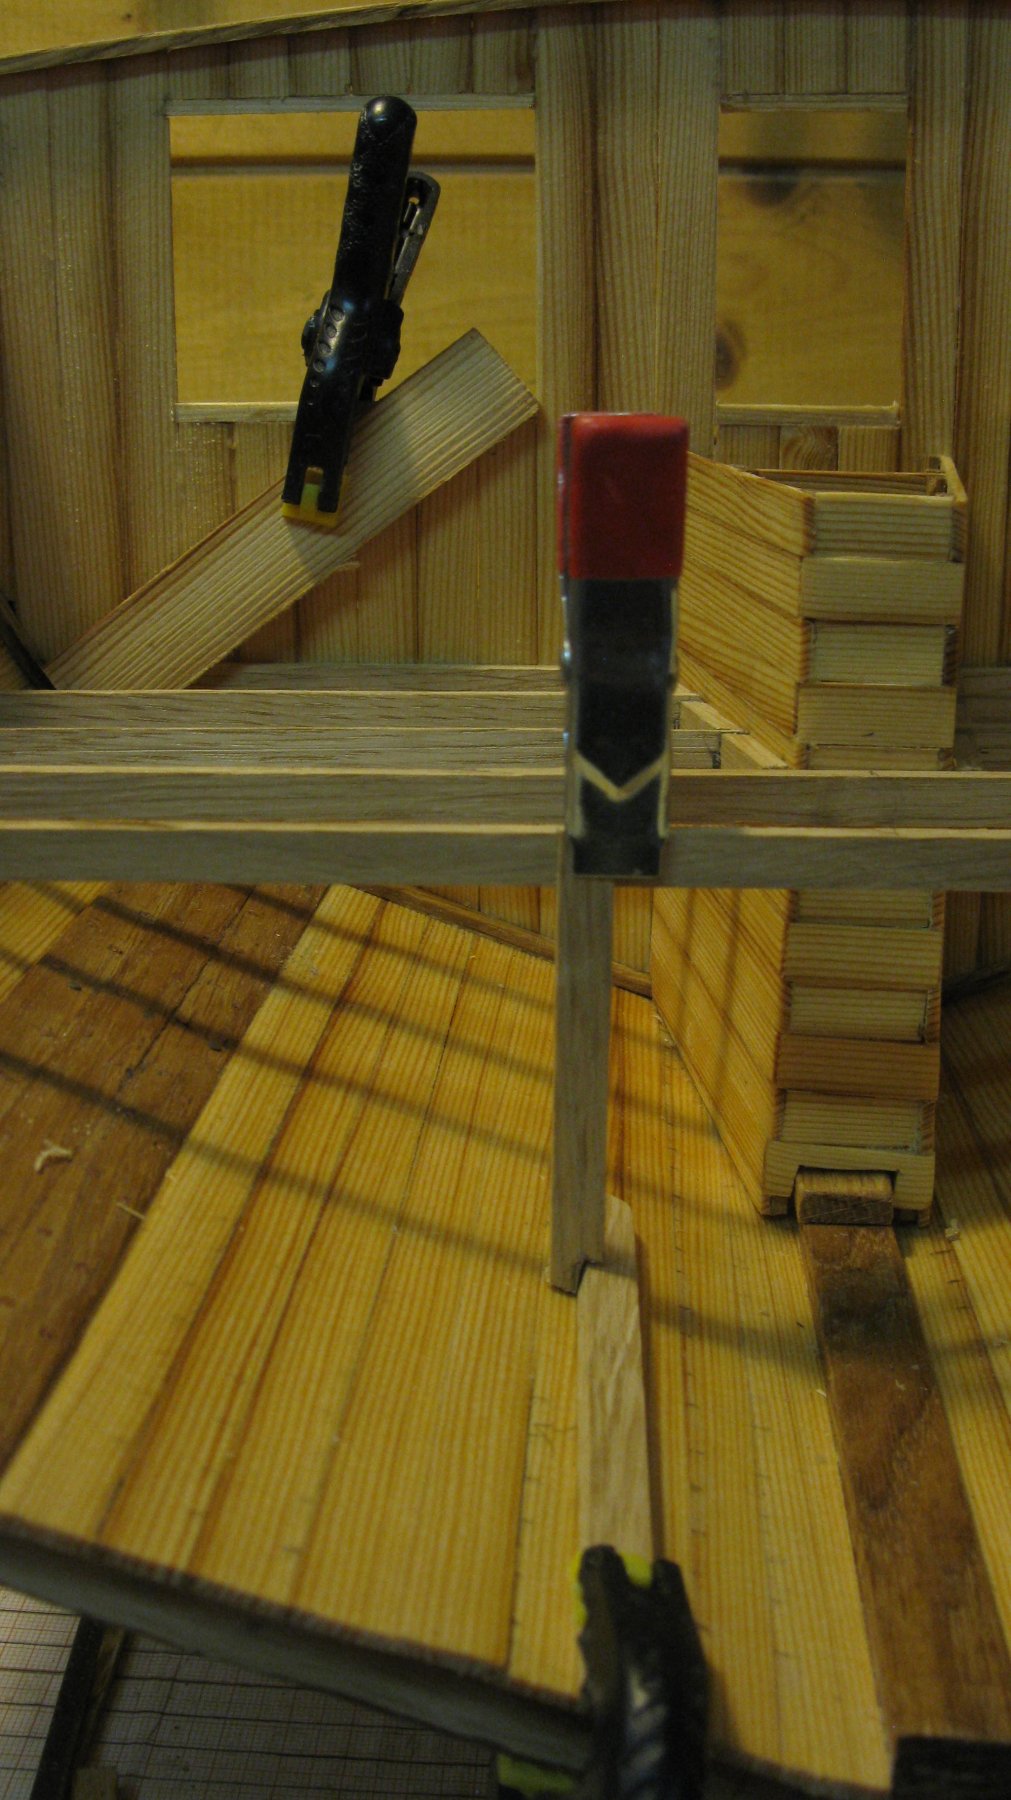
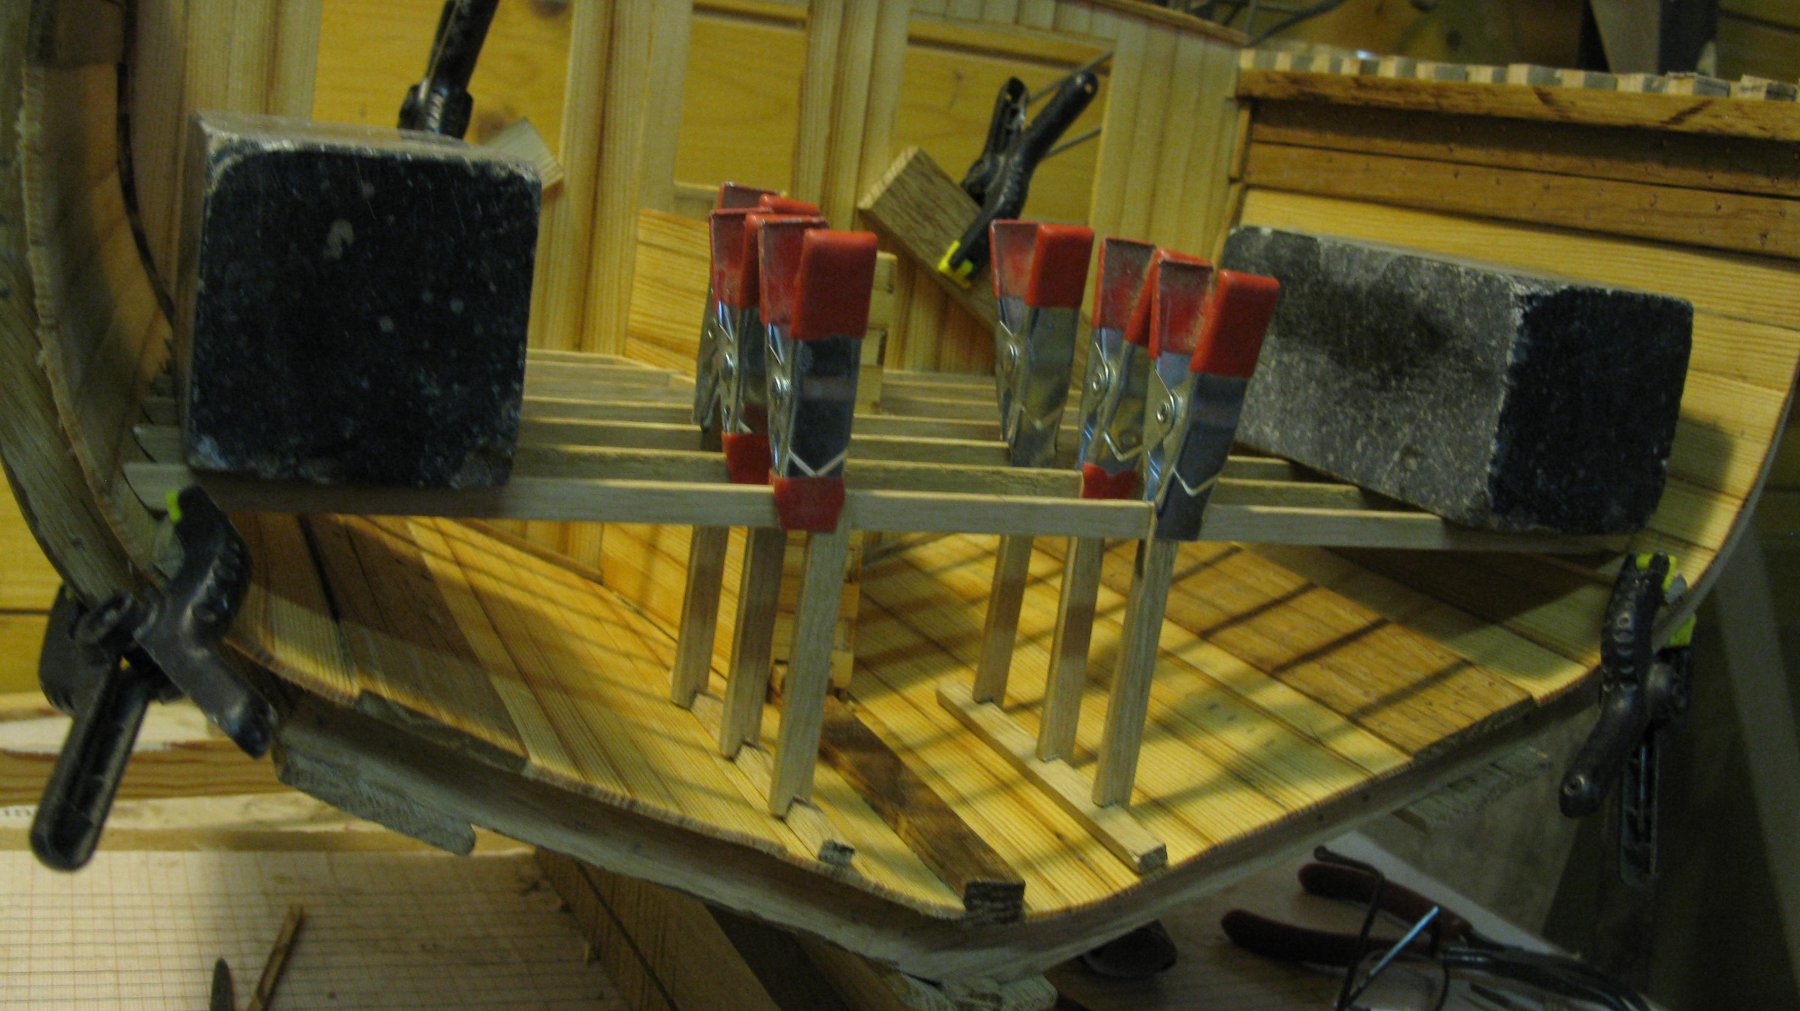
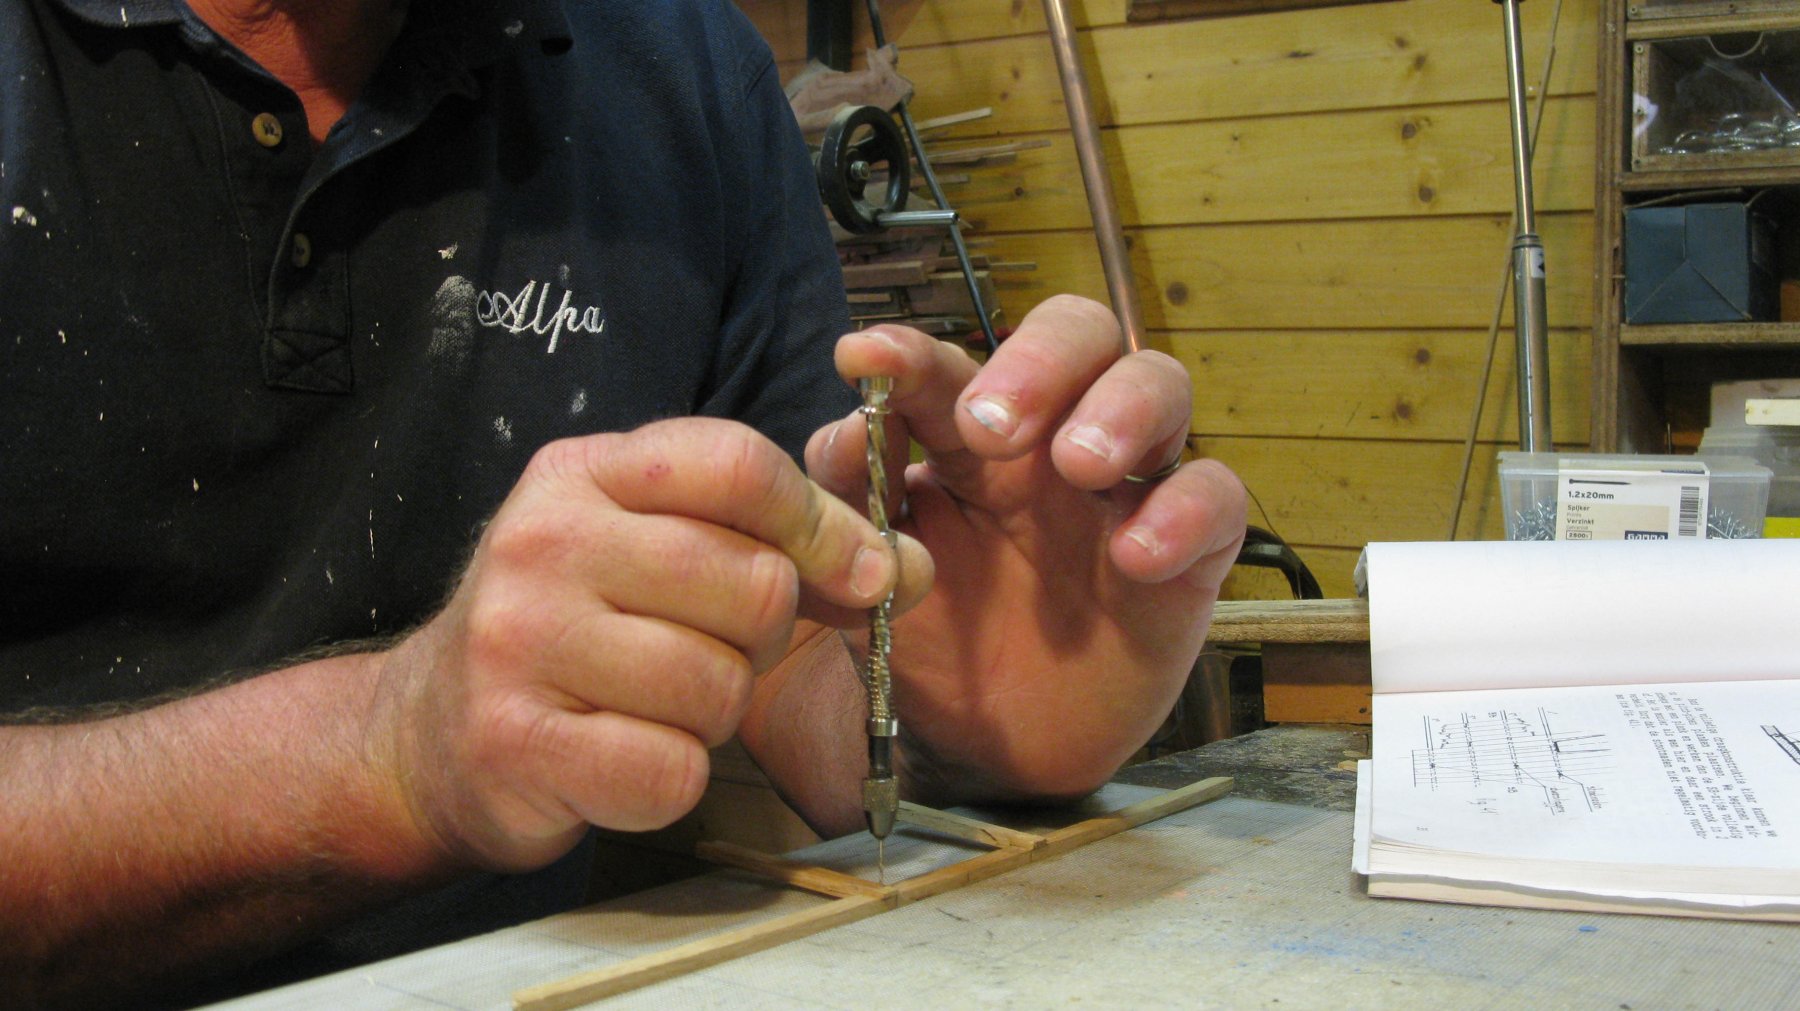
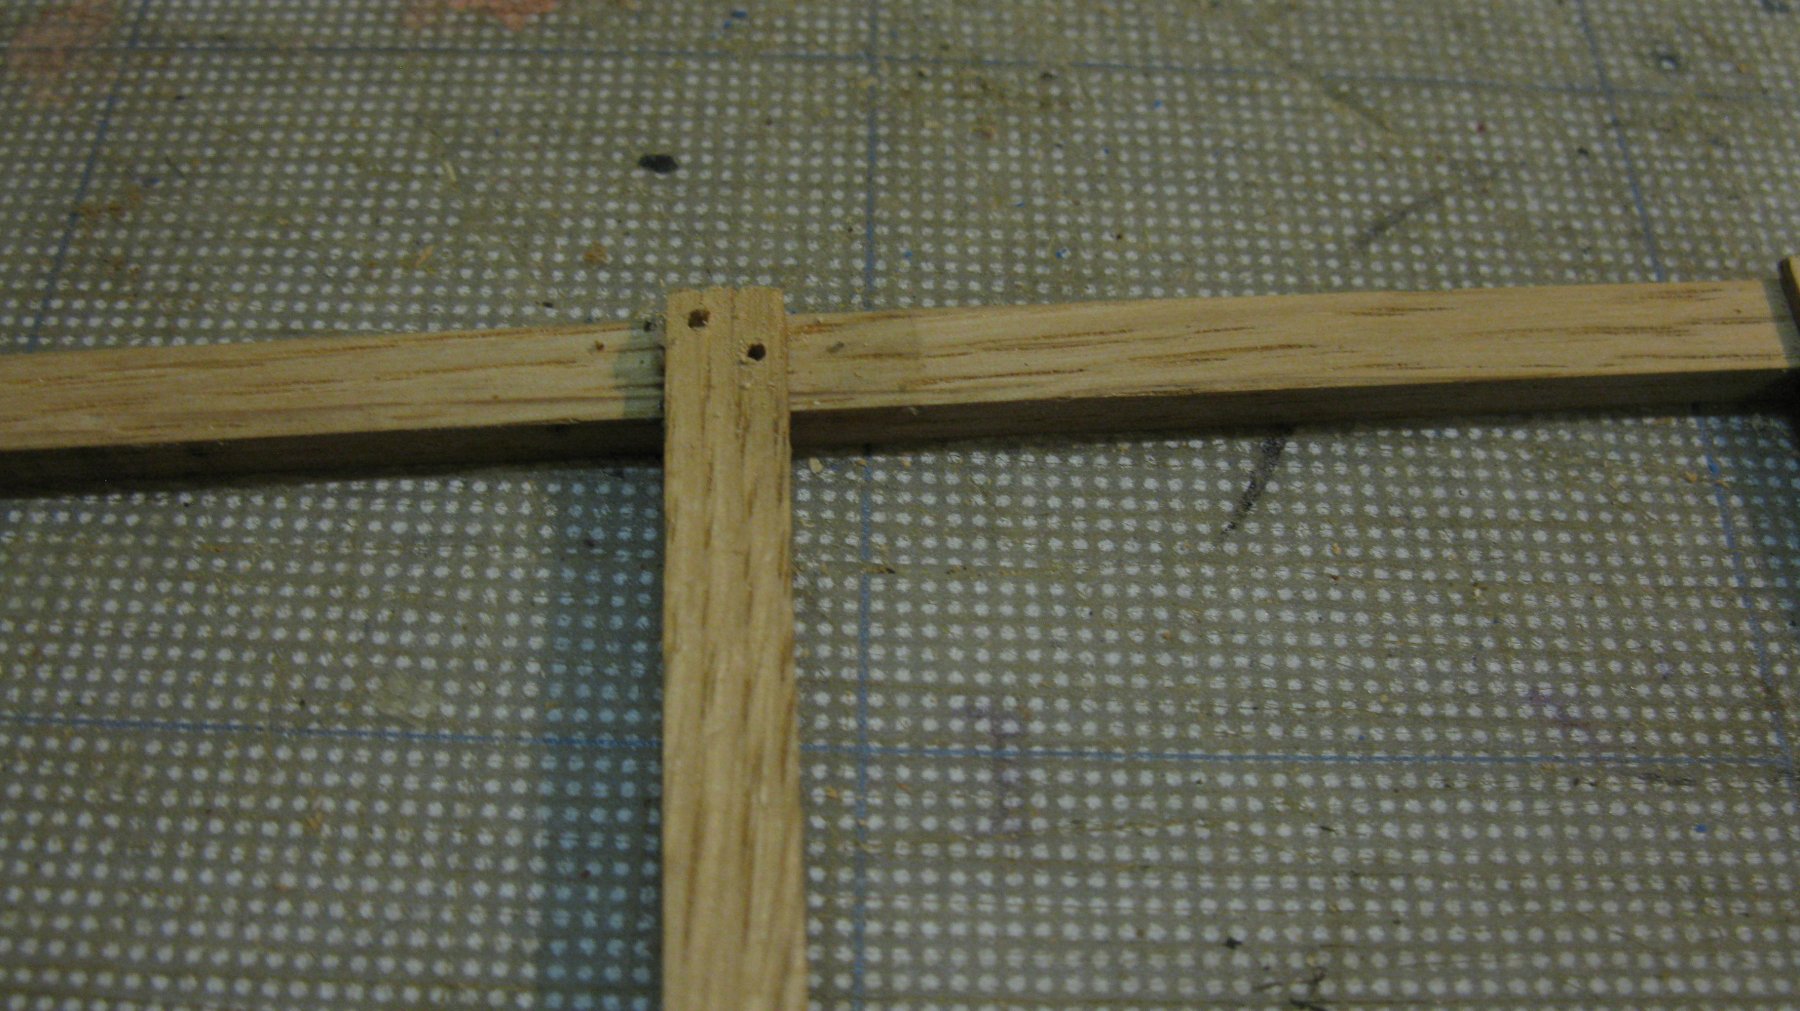
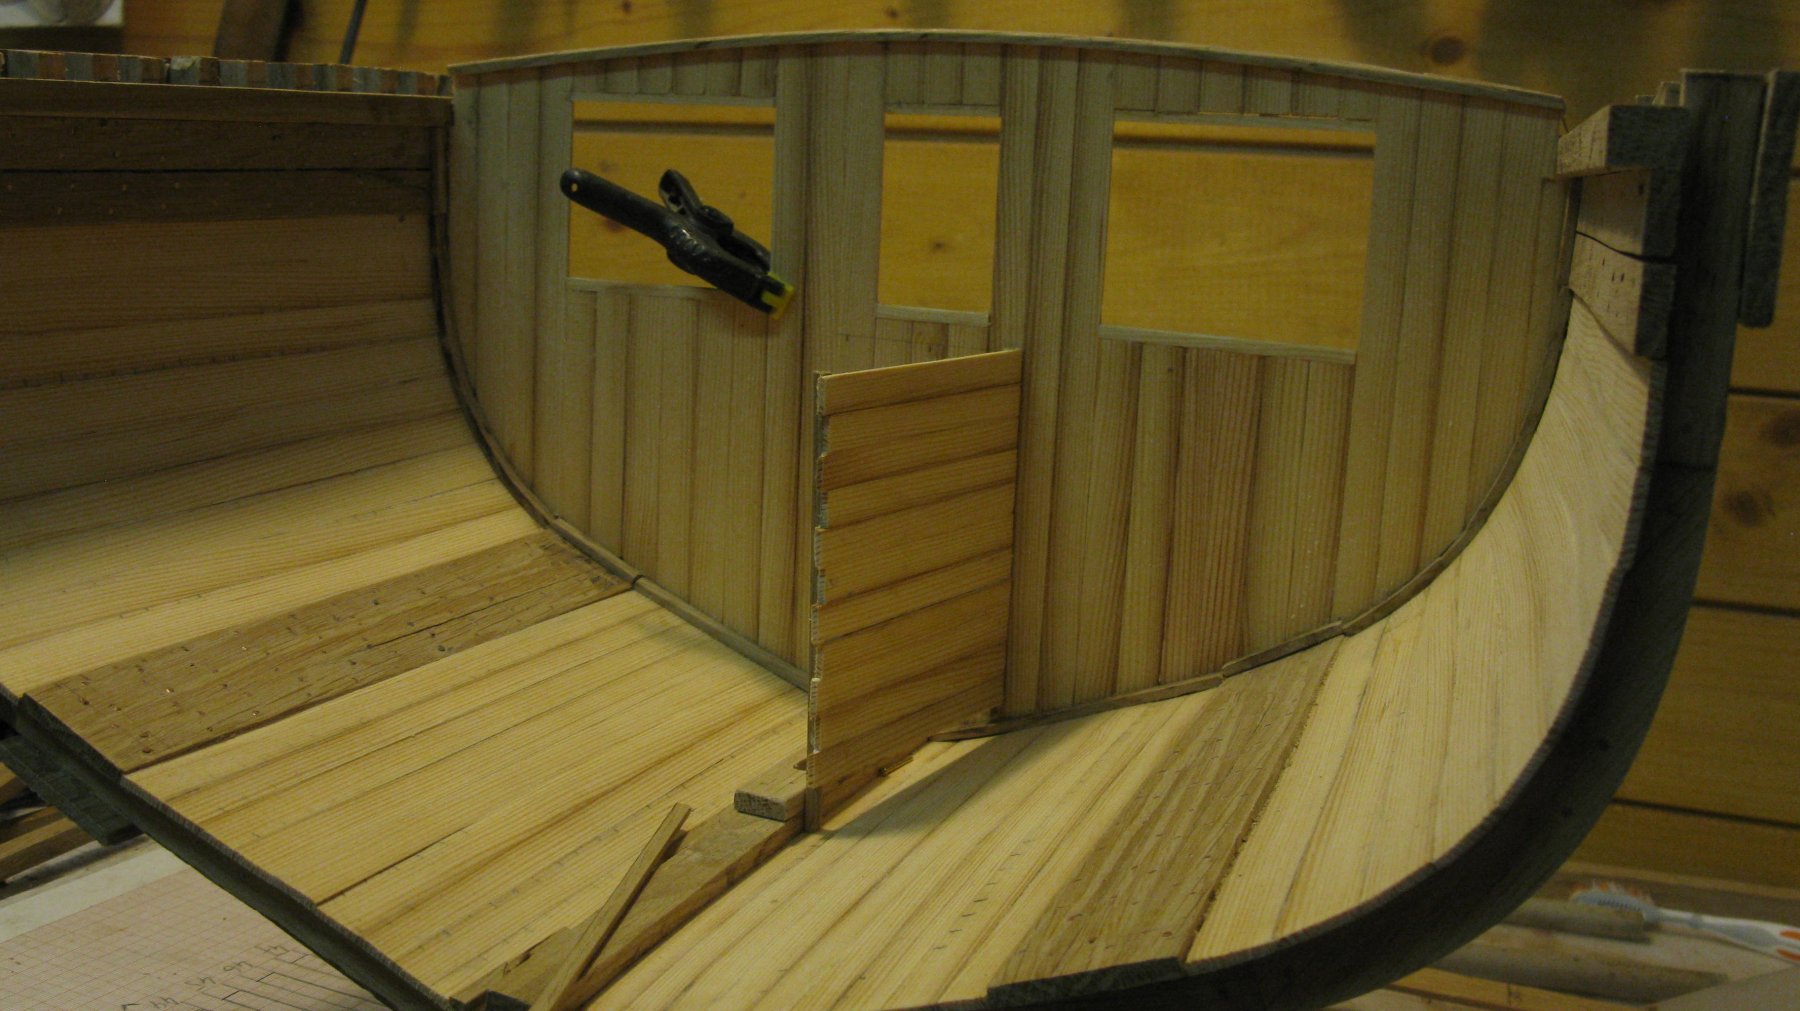
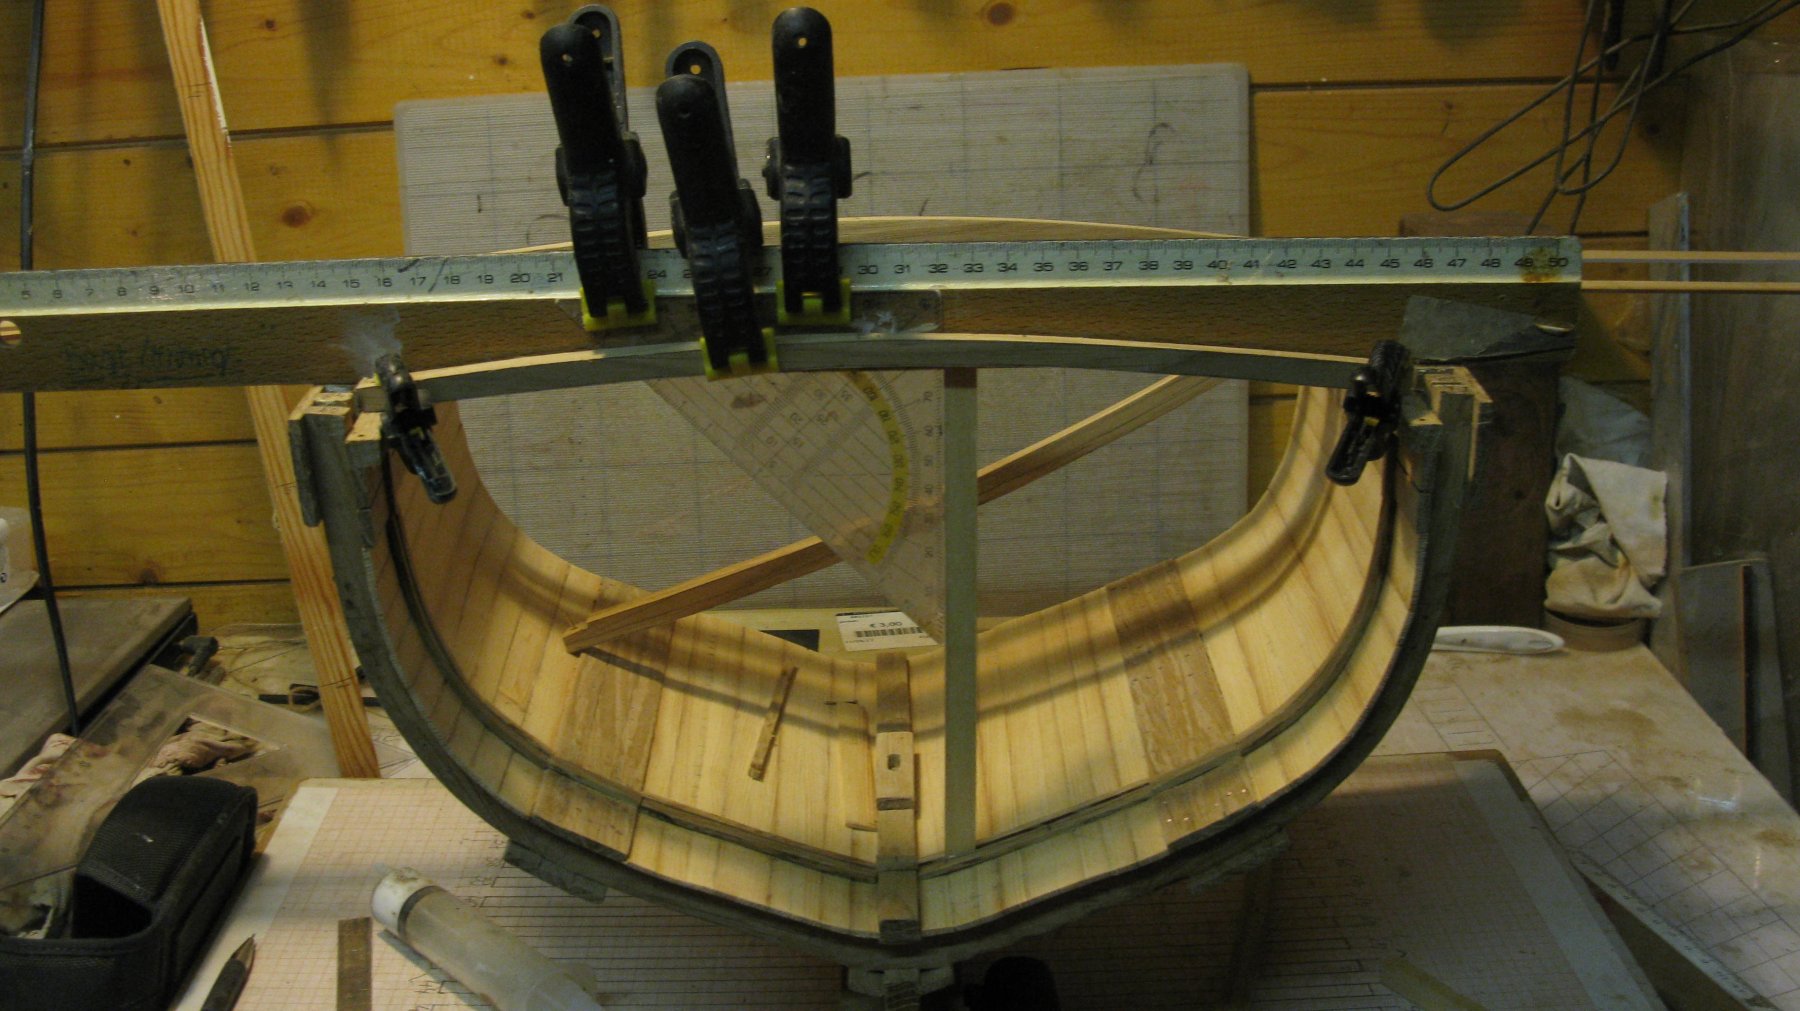
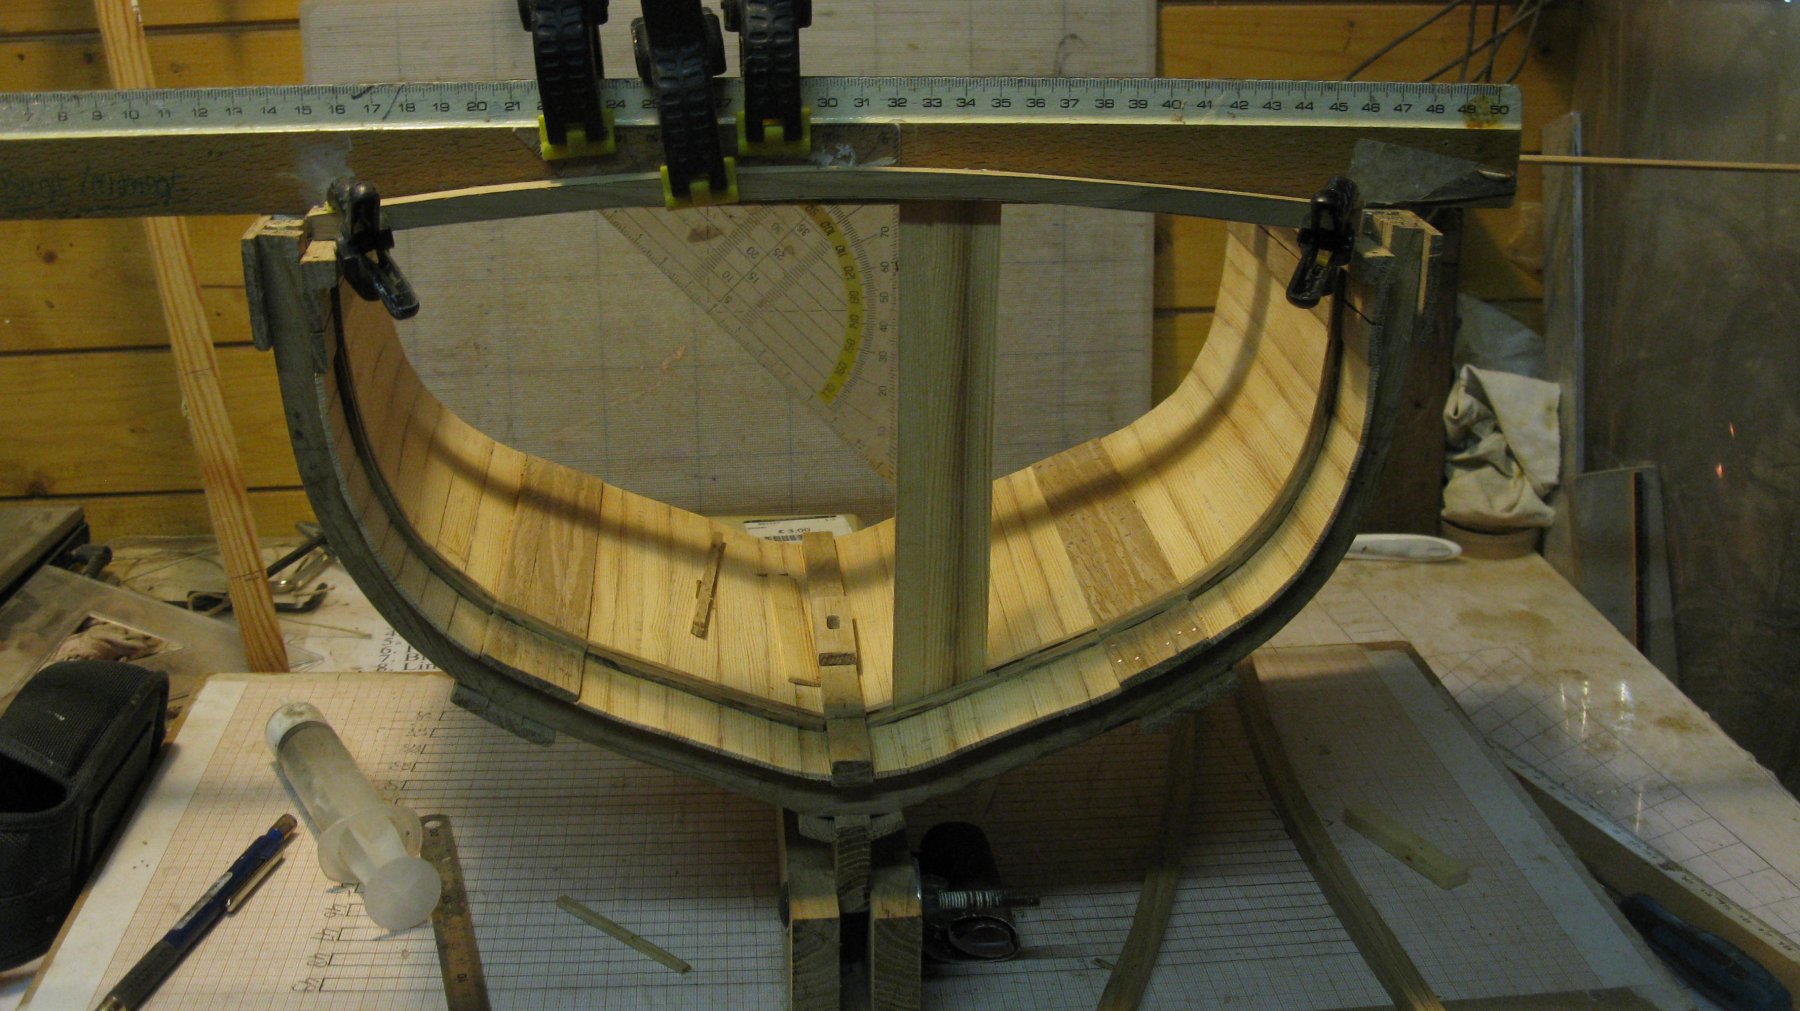
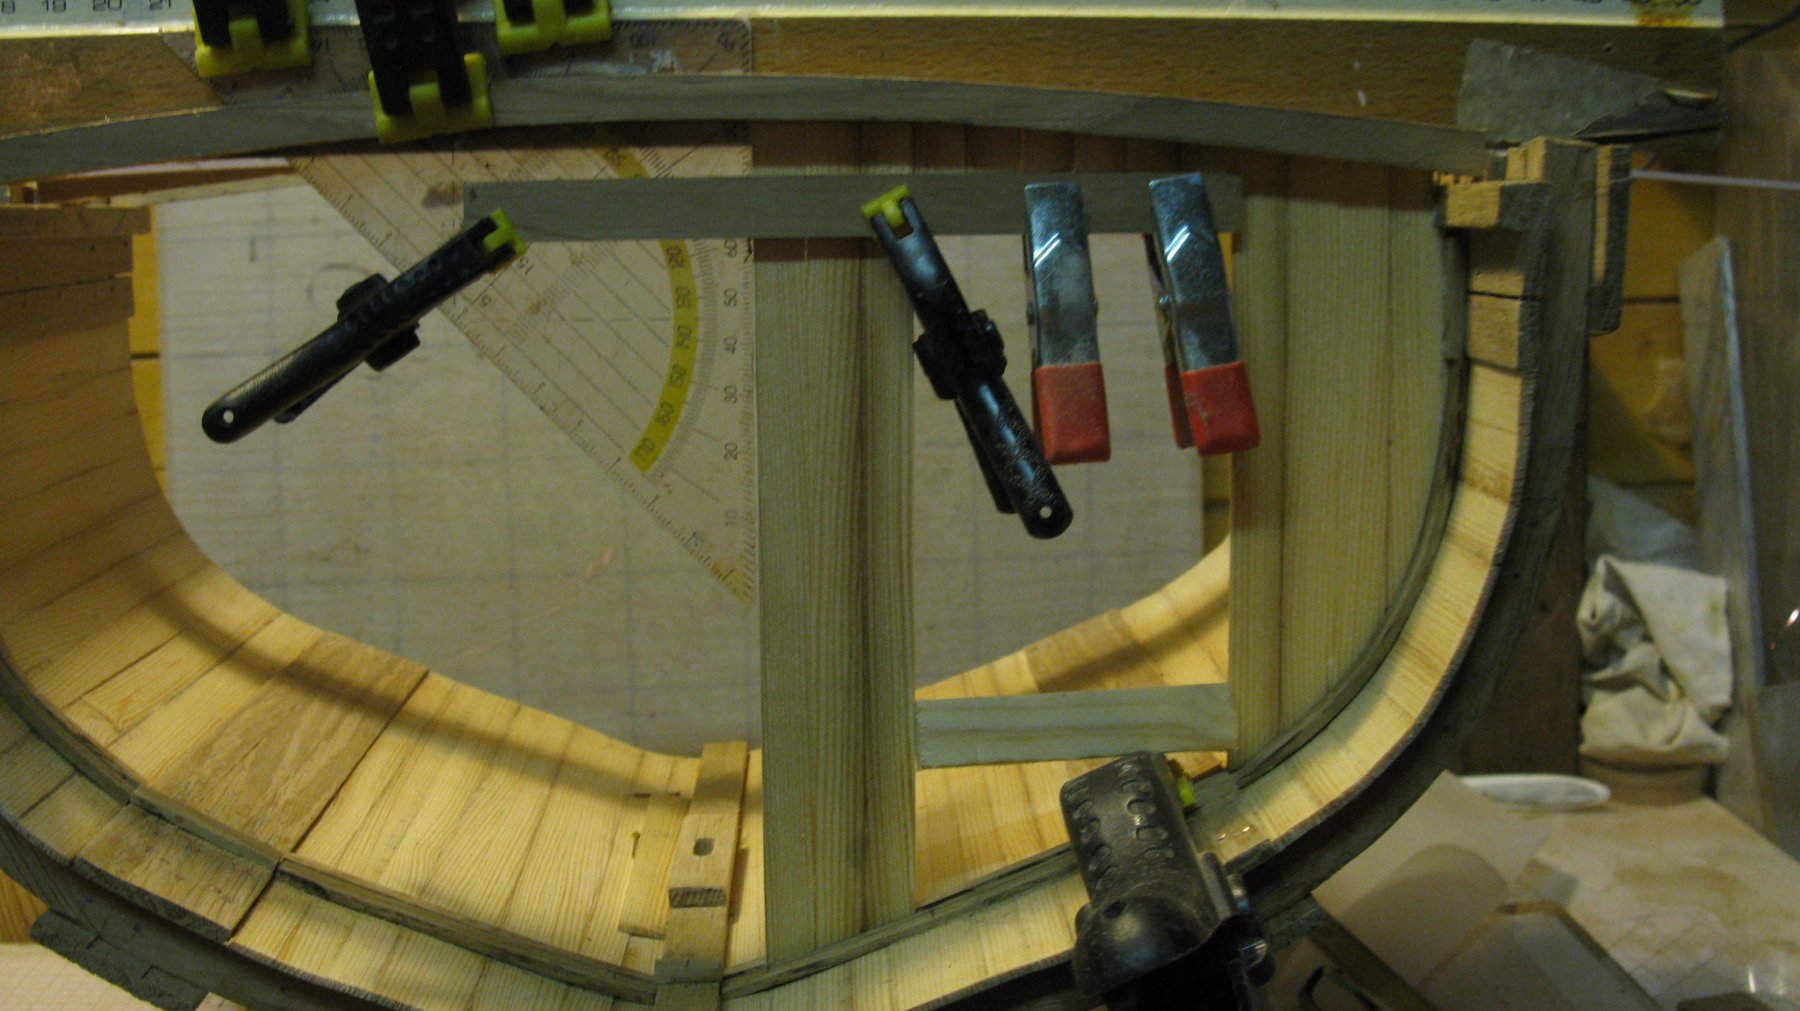
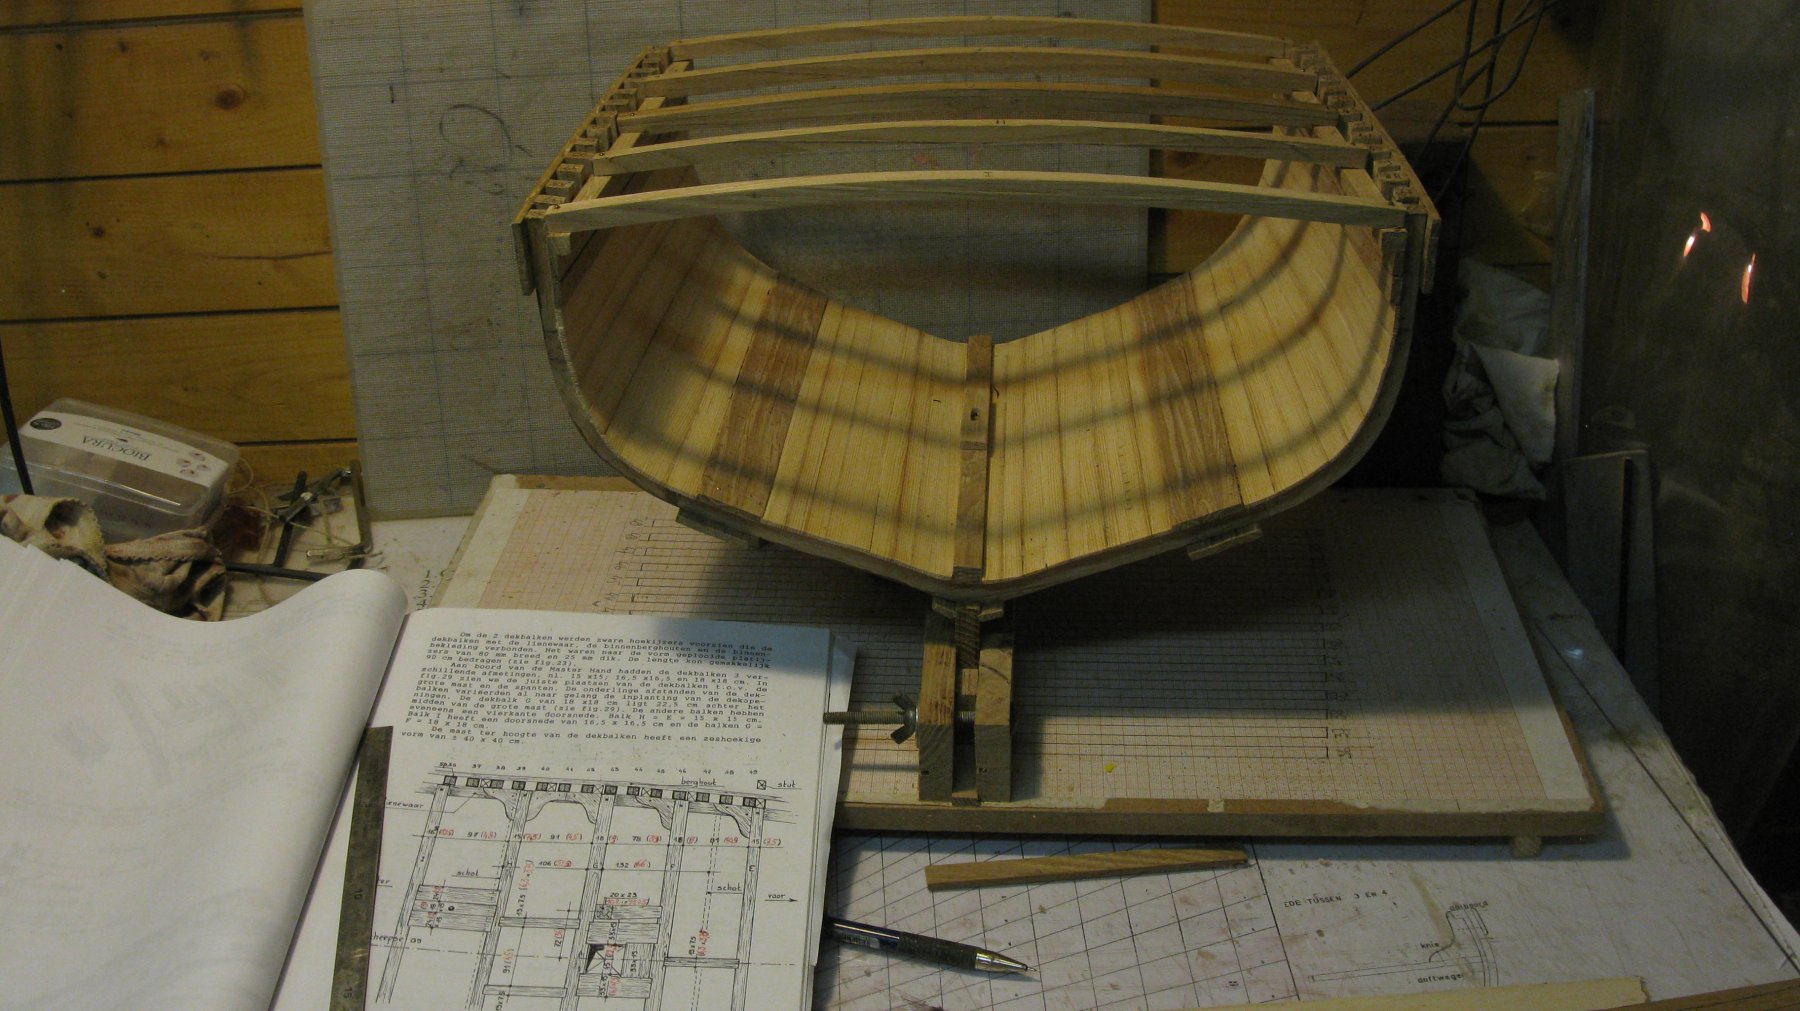
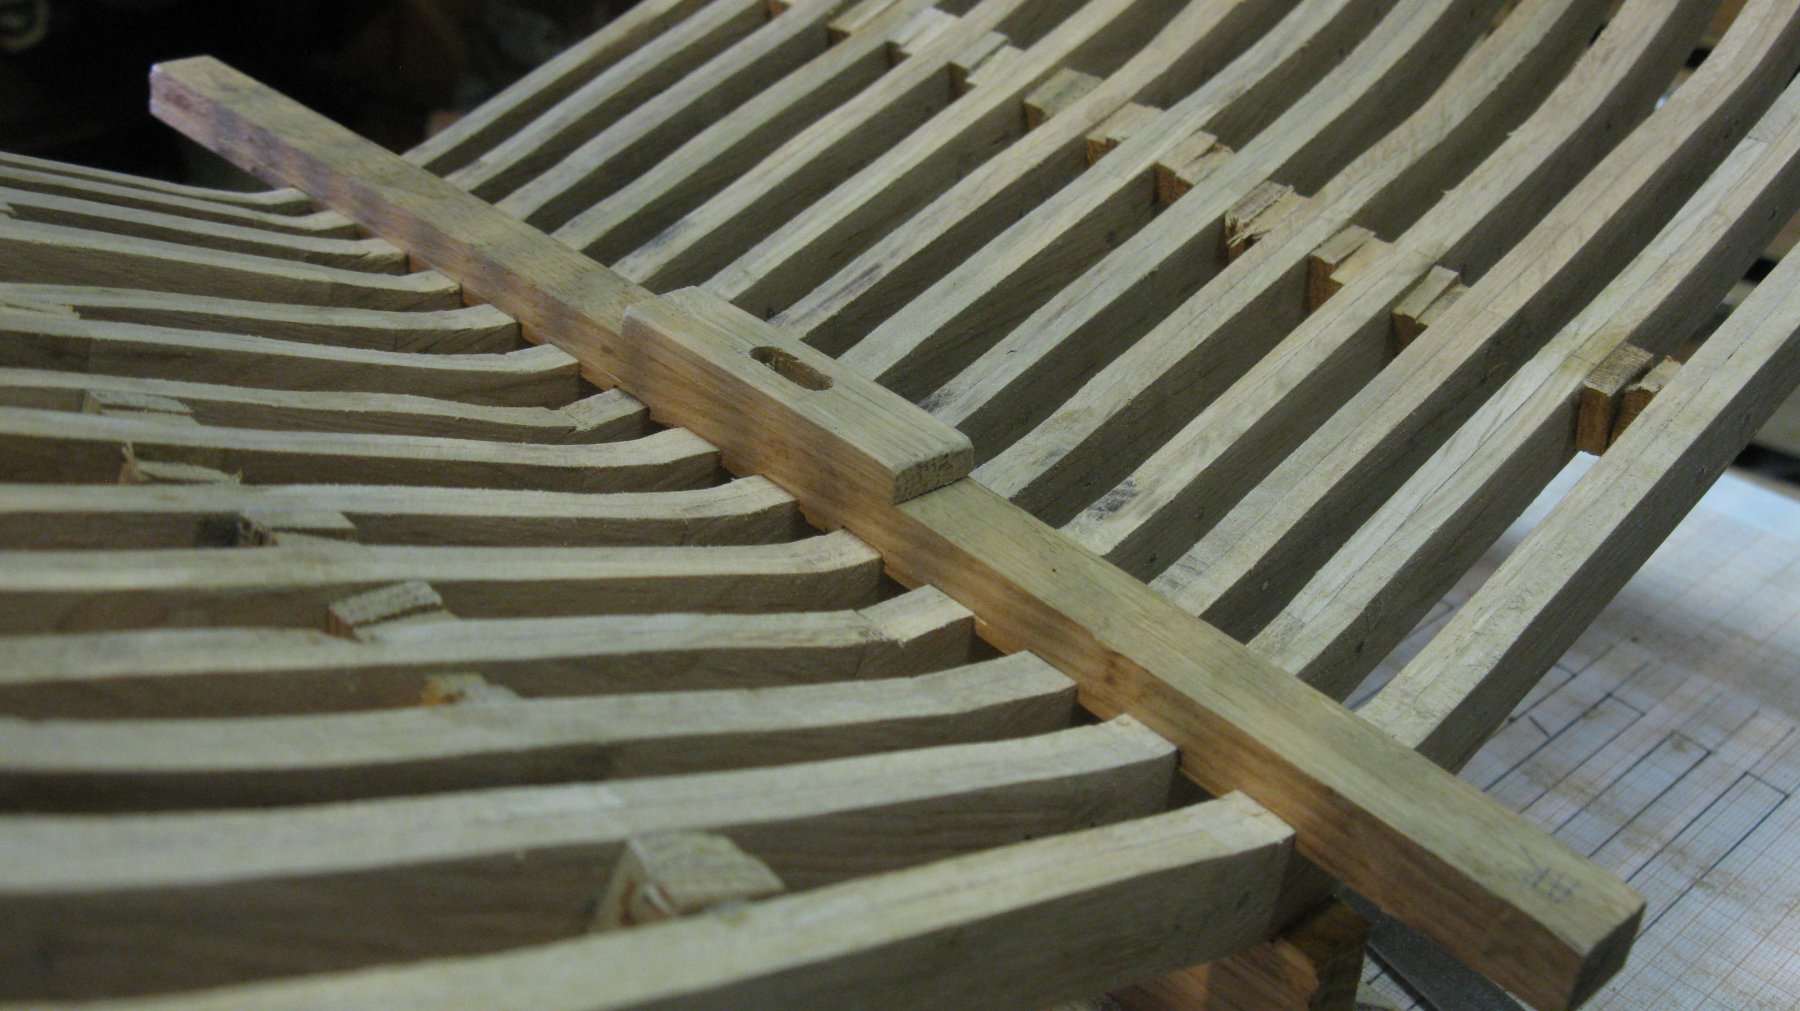
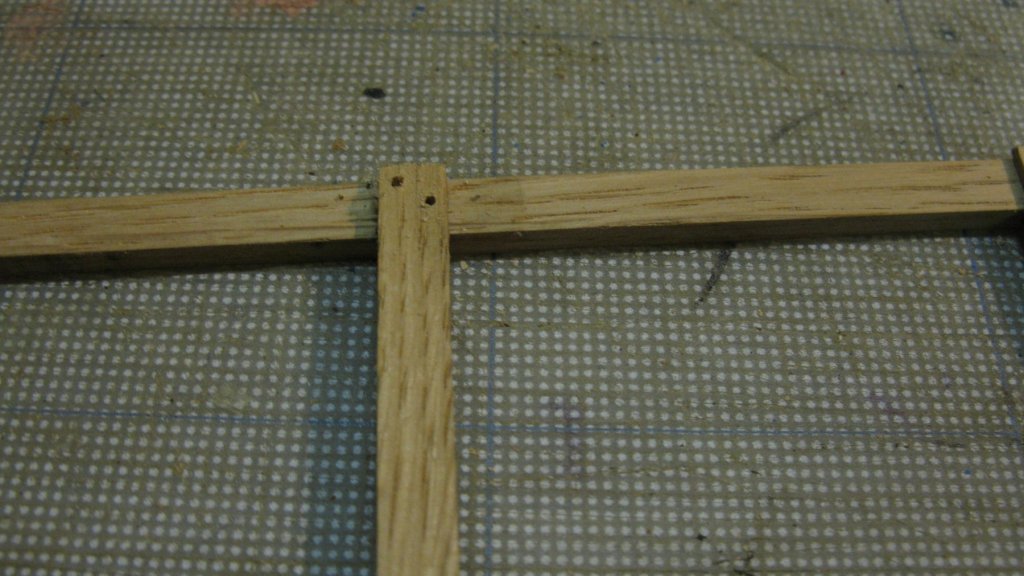
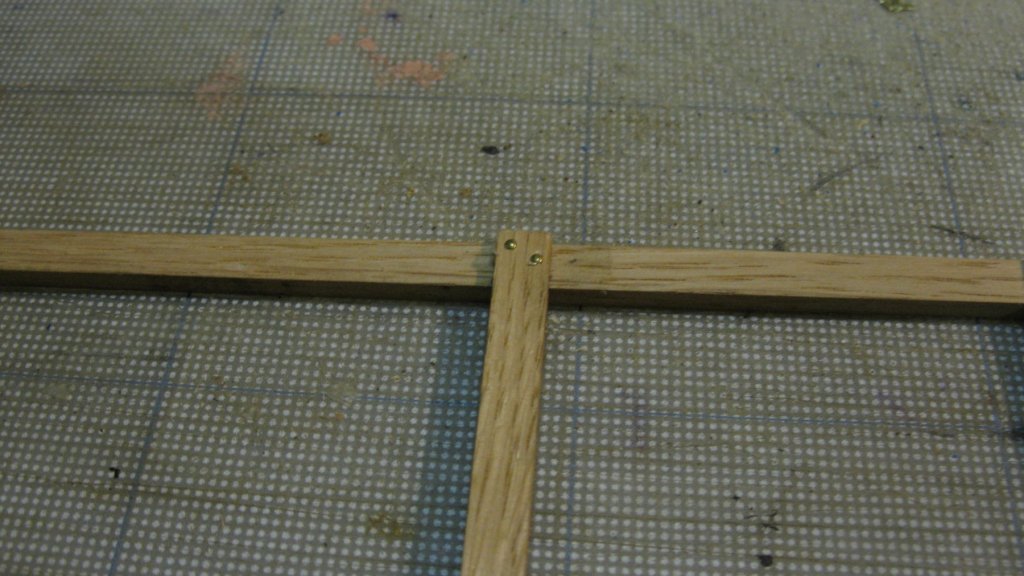
Part 13: The lower deck. The height of the equipment stores was 1.85 m. To determine the level of the lower deck, I lay a lath from wale to wale with a small perpendicular metal lath which stretches down to the right distance. With this simple tool I can mark the deck level where ever I want in the hull. With the lower deck laid, the space below will be hard to reach so before placing the lower deck beams I brush the interior with oil (2/3 linseed oil + 1/3 turpentine). Starting to lay the deck beams. Behind the chain box the beams extend over the width of the vessel. To avoid point load on the inner hull planks, the beams lay on a deck clamp at both sides. On the real smack the lower deck beams behind the chain box extend over about 4 meter so they need to be supported in the middle. This is done by two vertical buttresses each beam which stand also on a clamp at each side of the keelson. The deck beams with their buttresses are sawn to size and presented on the model. Some weights hold the beams in place. Everything is appropriate, the beams can be assembled and finished by drilling nail holes and nailing small brass nails in them. The deck beams in place.


- 219 replies
-
- 15
-
-
- smack
- cross-section
- (and 2 more)
-
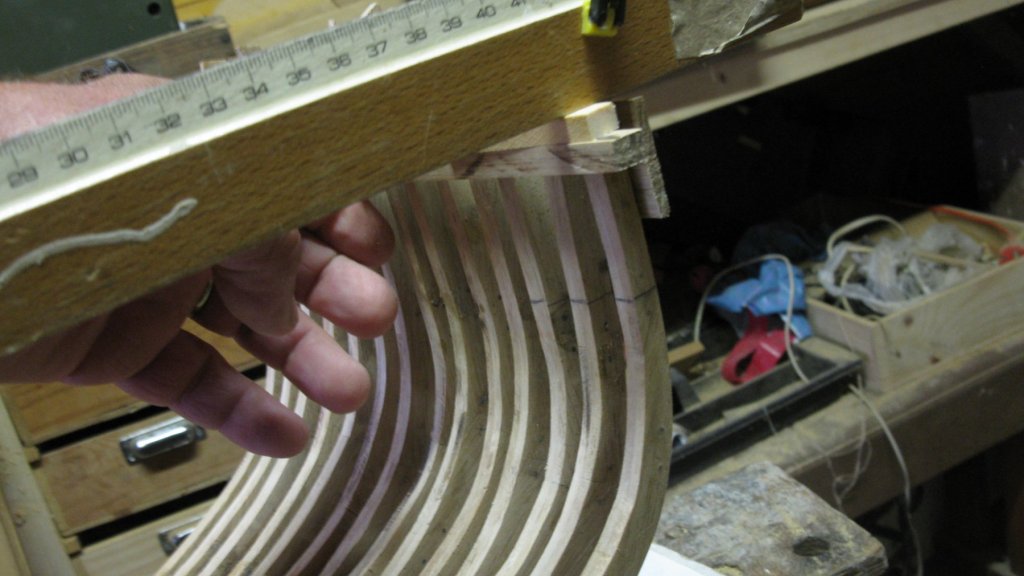
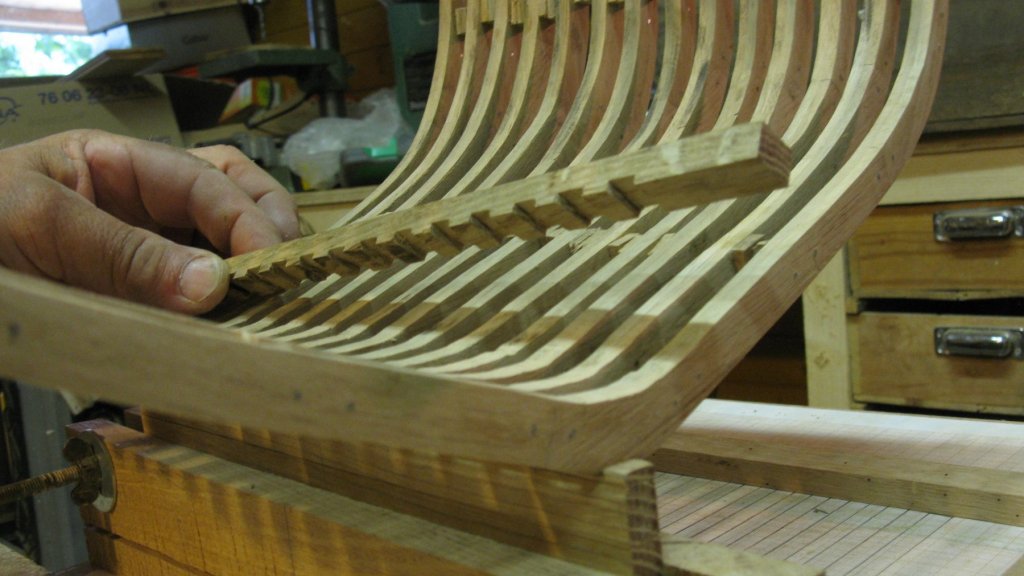
Looks nice. How do you bend the frames?
-
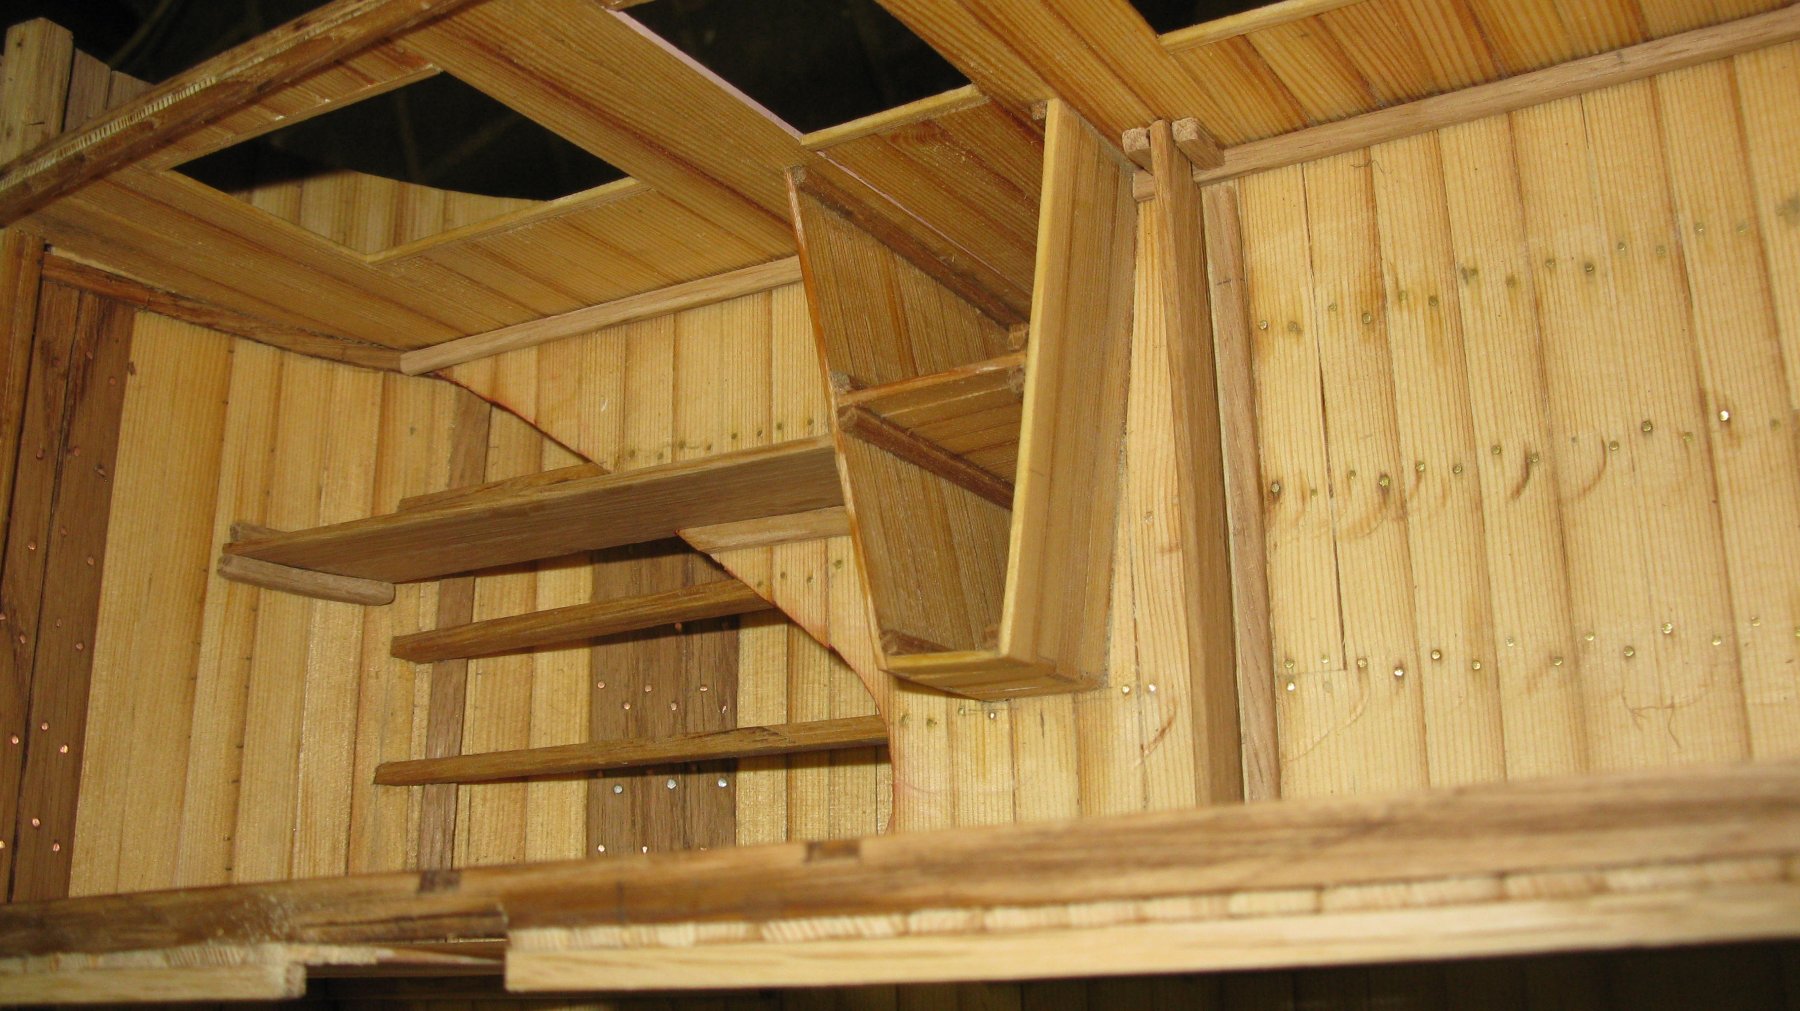
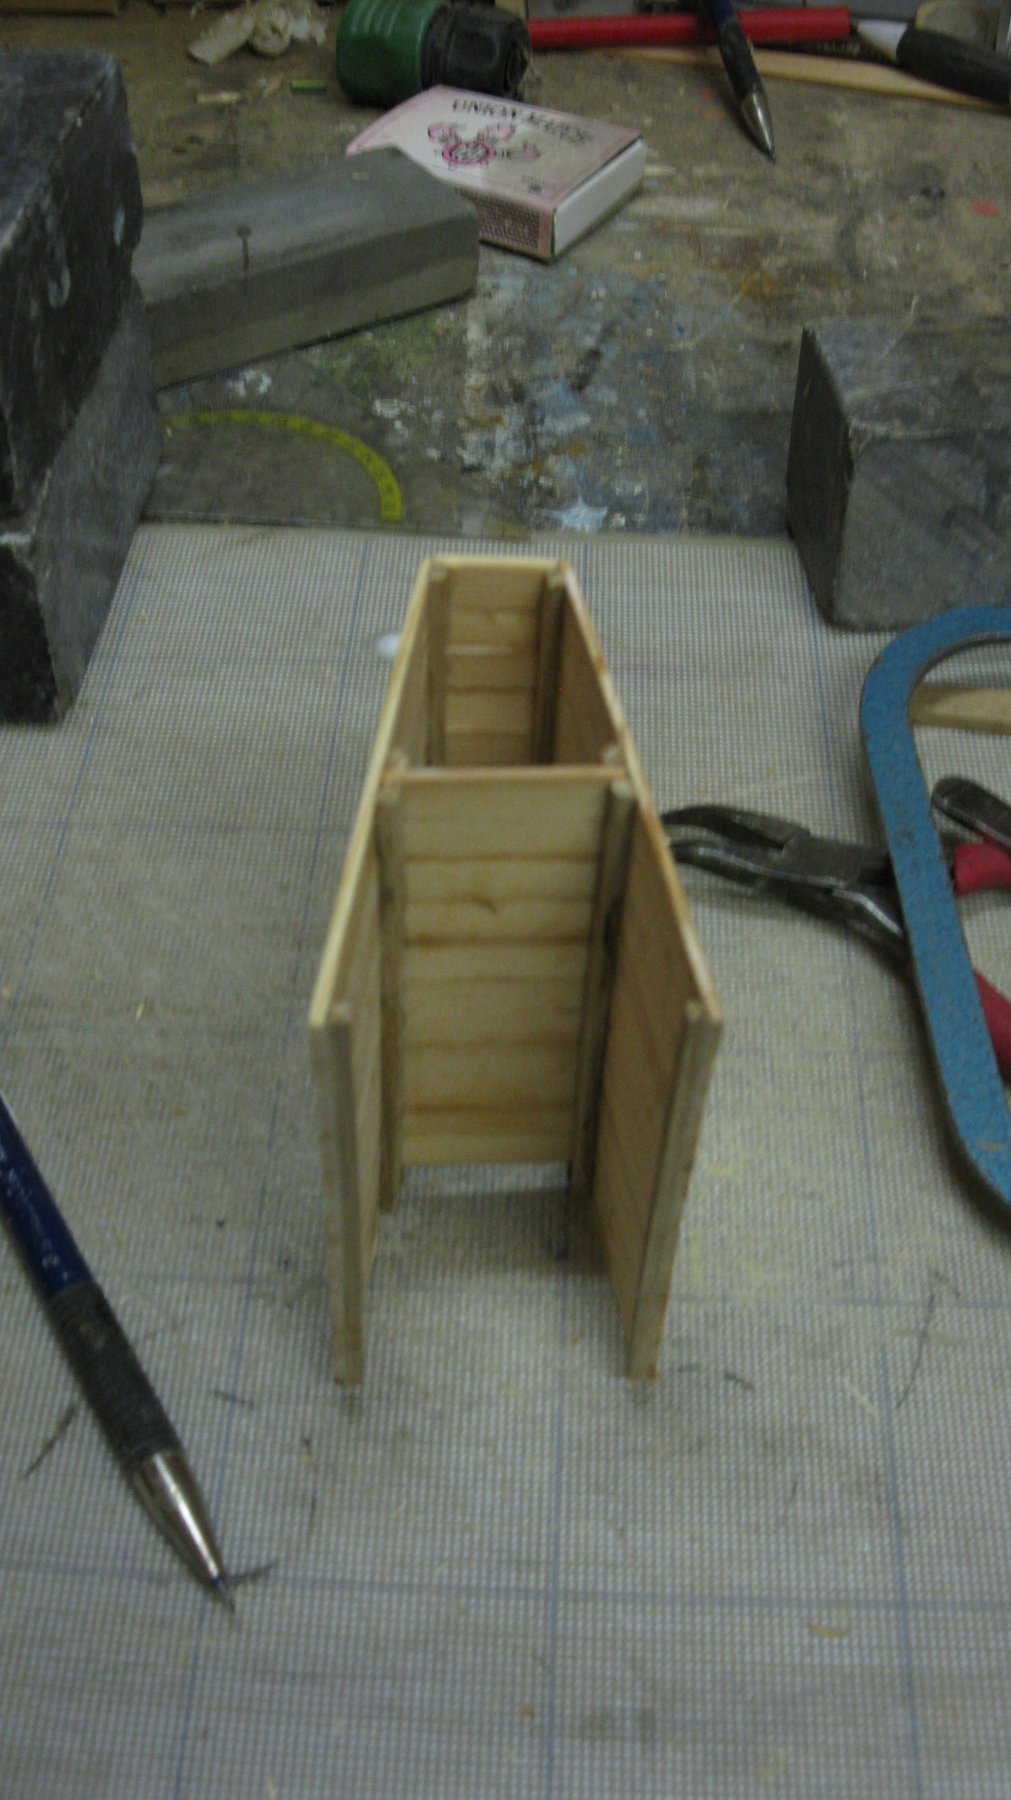
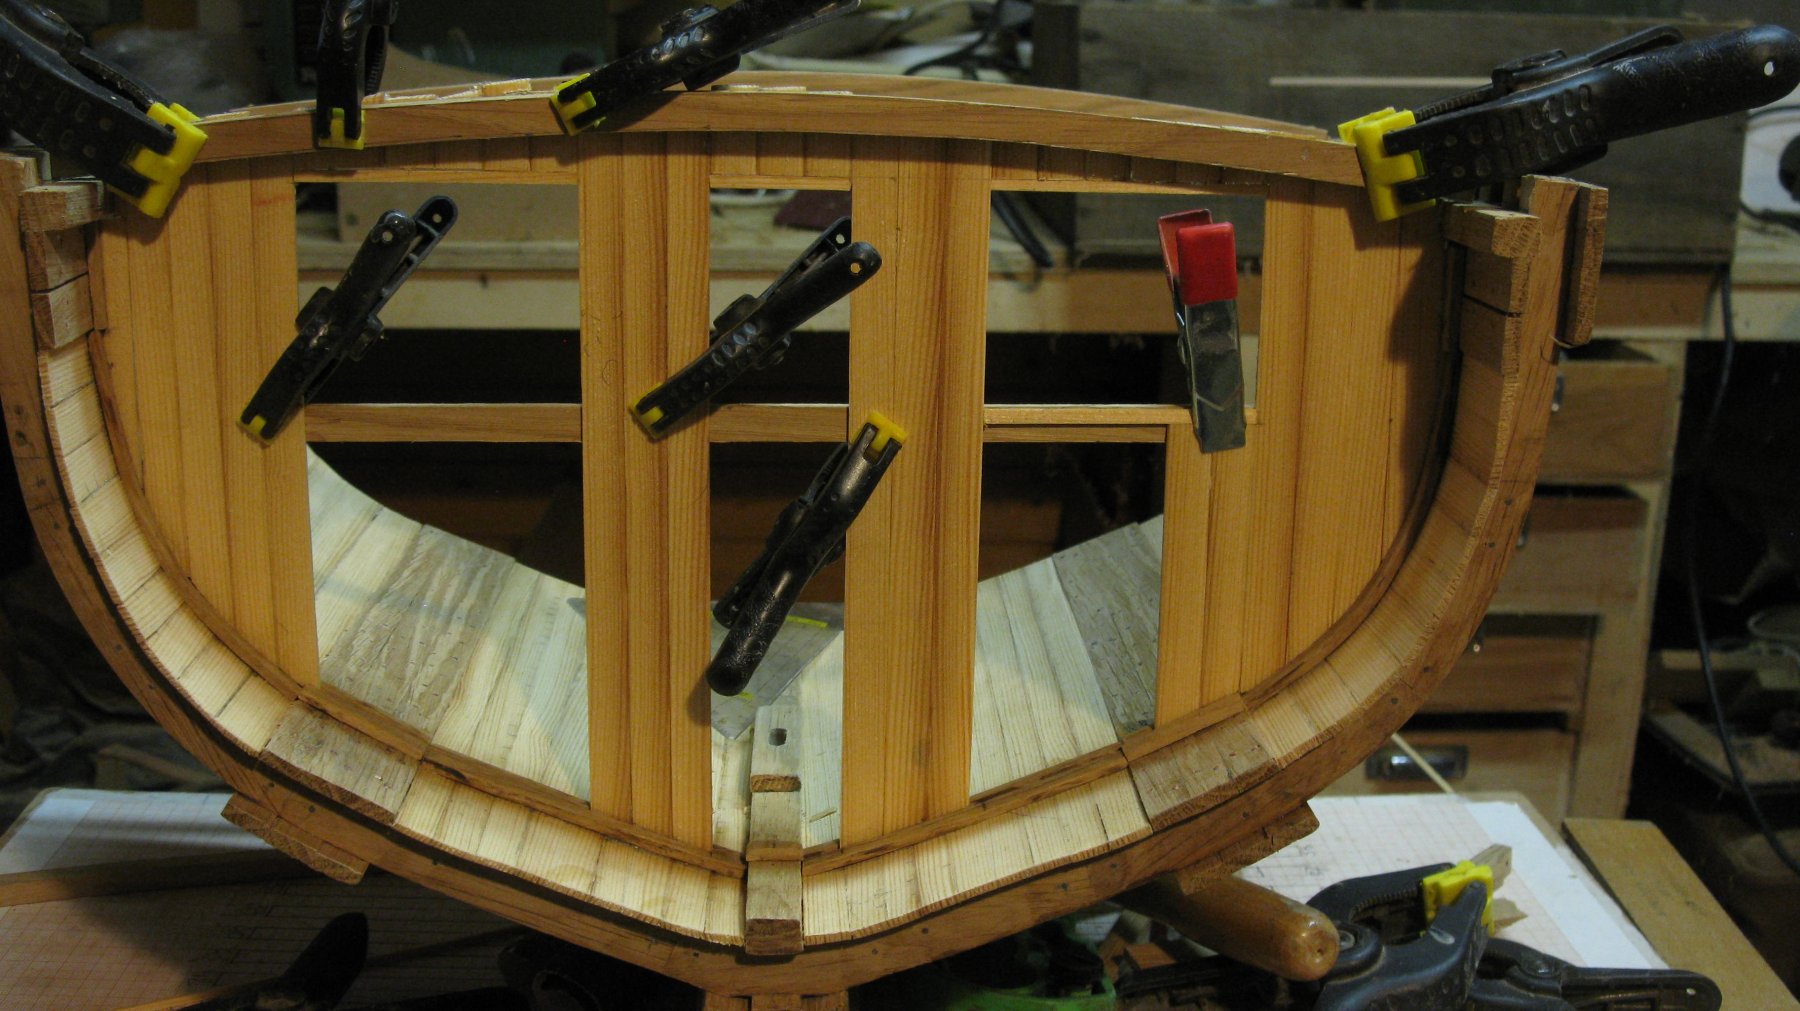
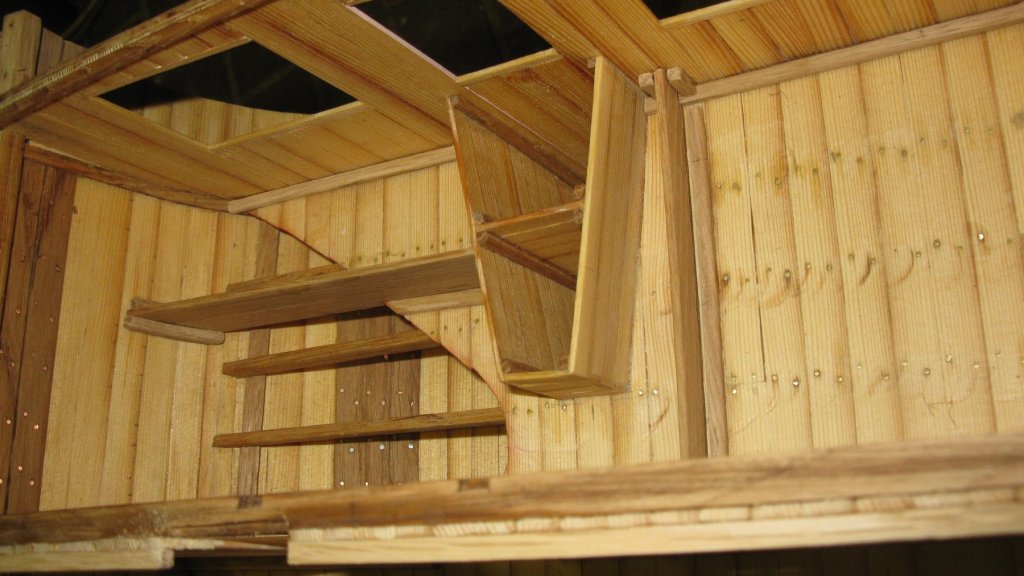
Part 12: The anchor chain box On the after side against the bulkhead stands a deep wooden box. The box is divided in two parts. The forward part is the anchor chain box the aft houses the mast step. I assemble the box outside the model. Now and then I place it in the model to check if everything fits. There is a partition in the middle of the box to separate the chain box from the mast step. The anchor chain box in place. G.L. Completed projects: HMS Triton cross section - FINISHED - Scale 1:24 Current projects: Oostends schipje (Ostend shrimper) - scale 1:20 Cross section Fishing Smack - Scale 1/20, POF, approx. 1920


- 219 replies
-
- 11
-
-
- smack
- cross-section
- (and 2 more)
-
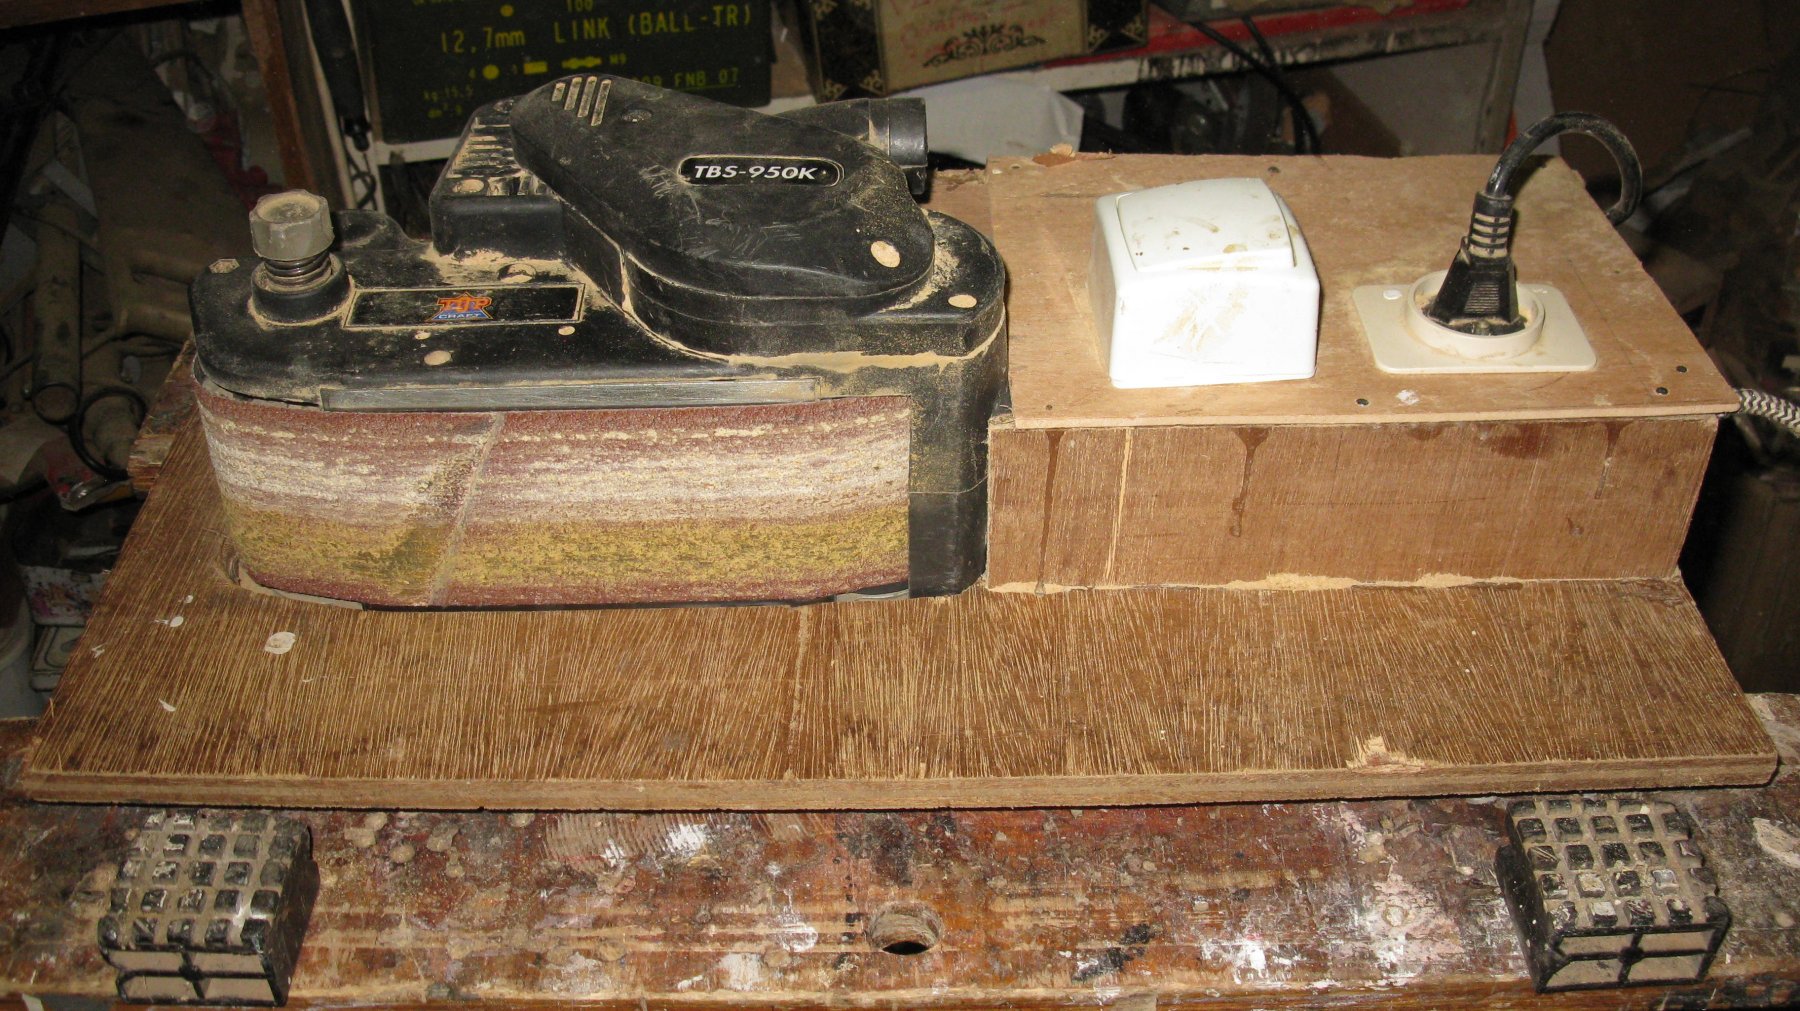
Thank you for the complements, Michael. Normally I am caching the good ideas by following your logs. The belt sander is a very useful tool, I use it very often. As you see so often that the sanding paper should be urgently replaced once again. The only disadvantage is that the sander makes a lot of noise. G.L.

- 219 replies
-
- 6
-
-
- smack
- cross-section
- (and 2 more)
-
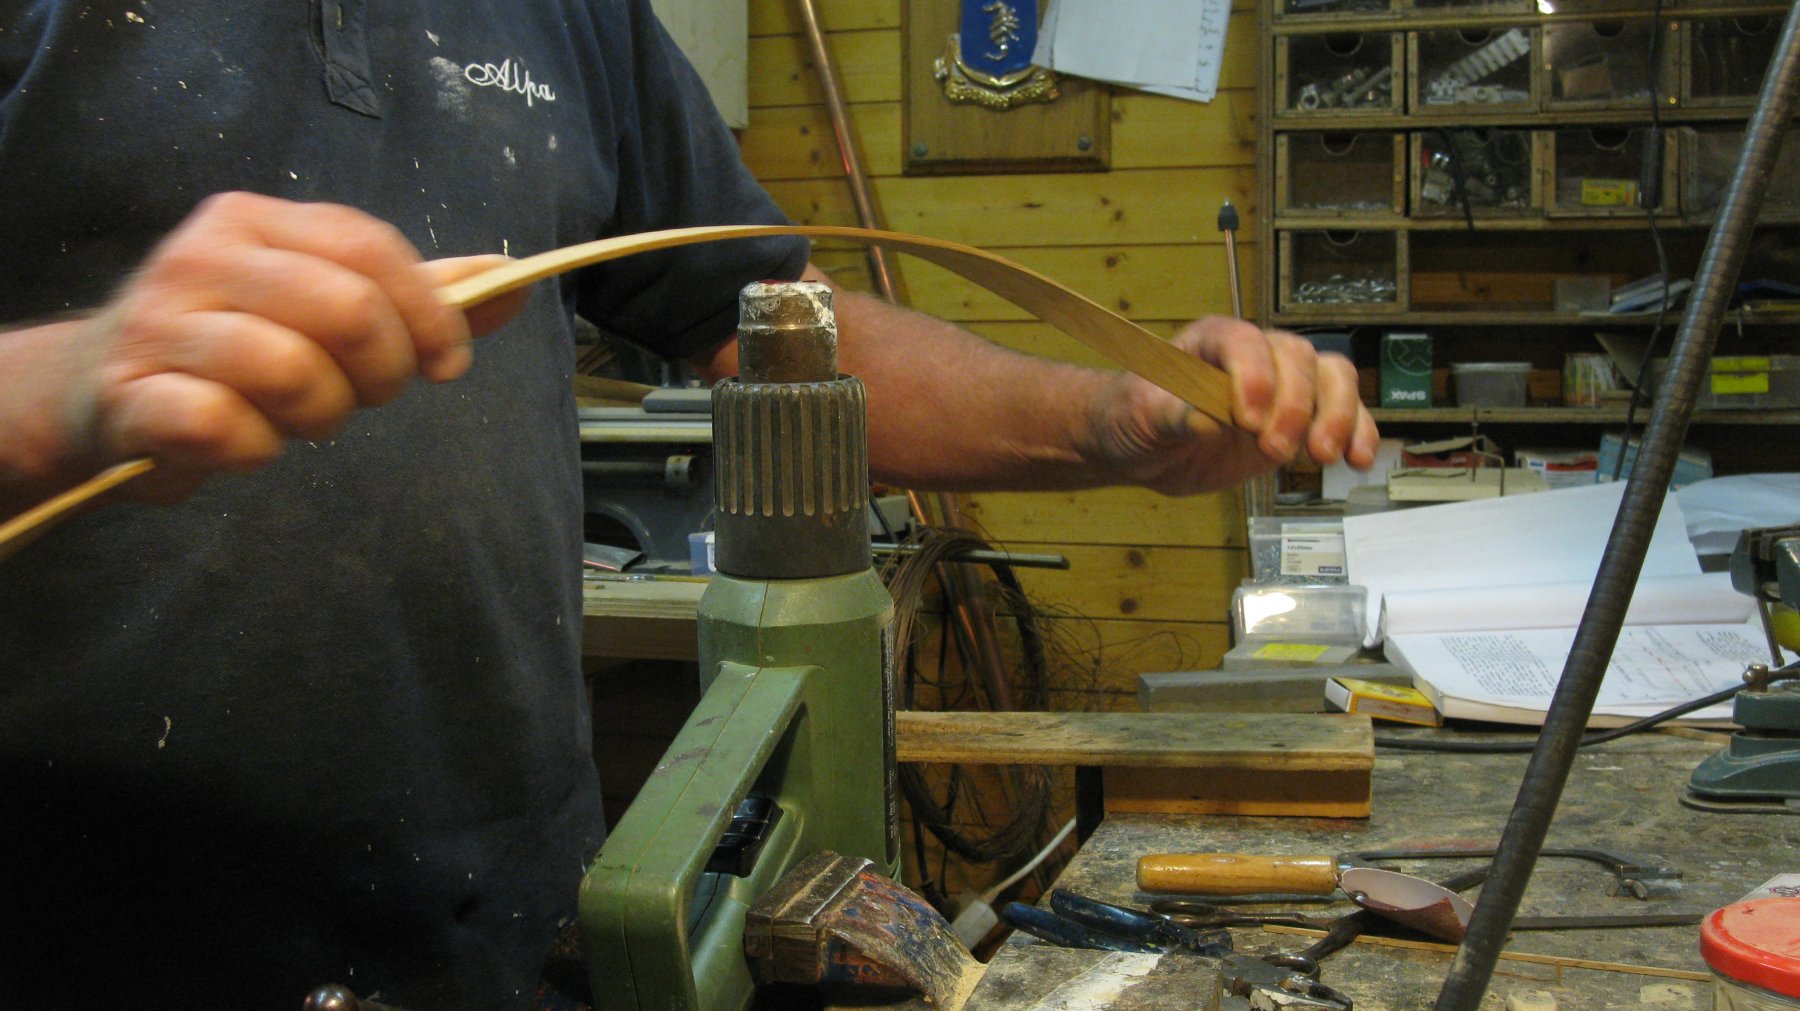
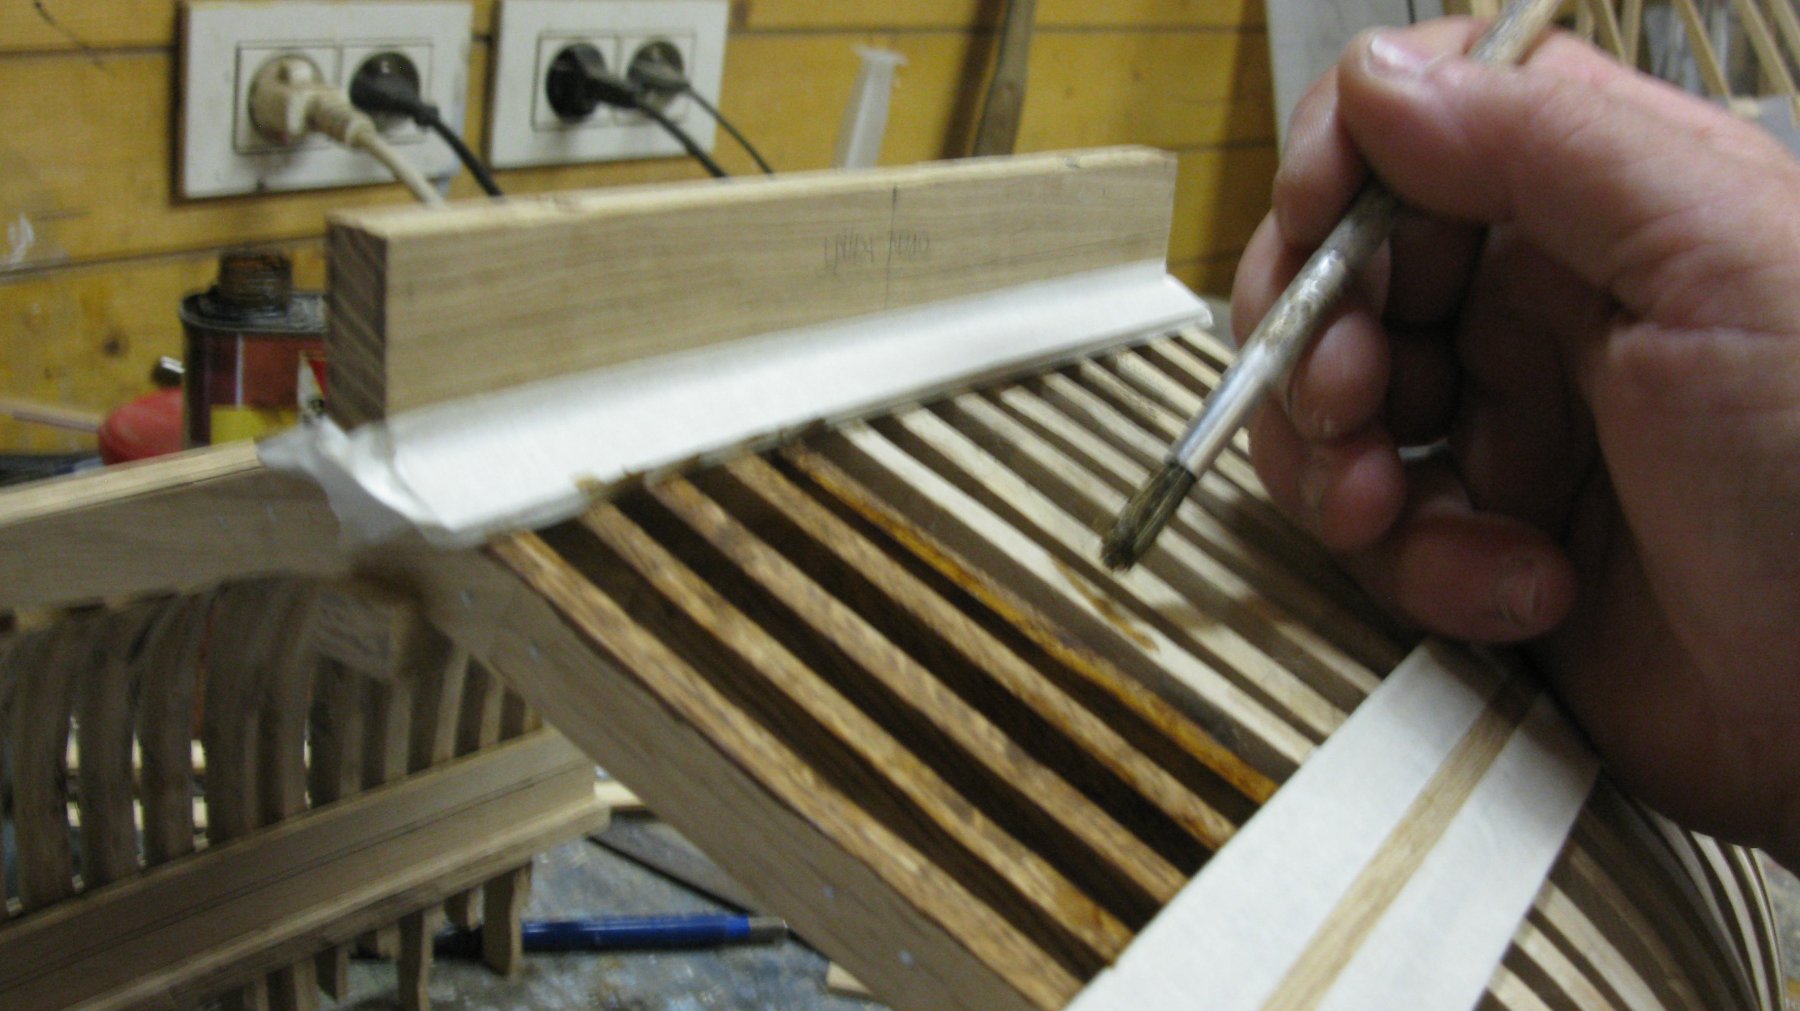
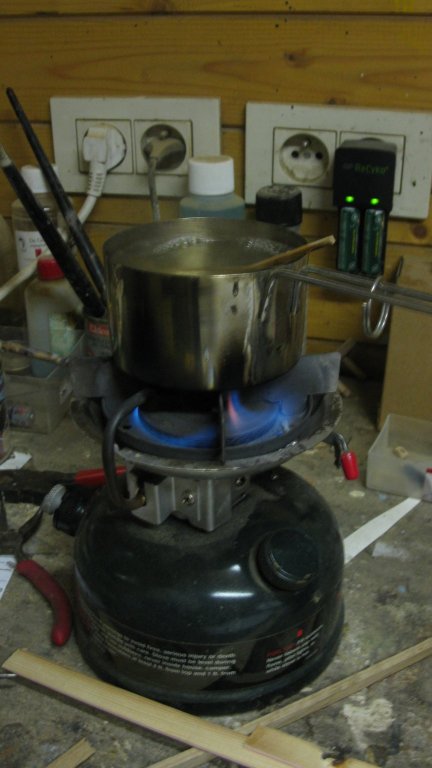
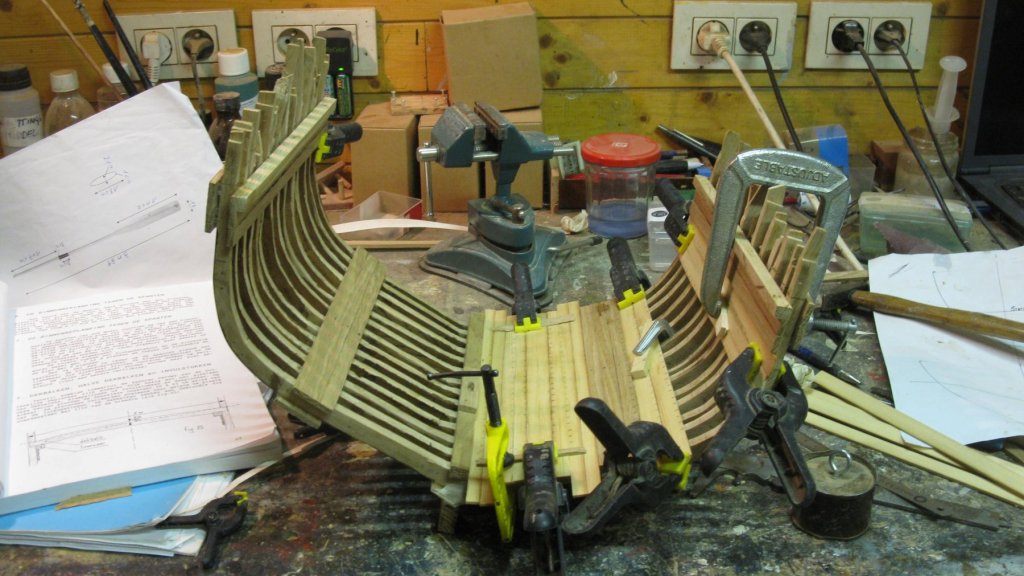
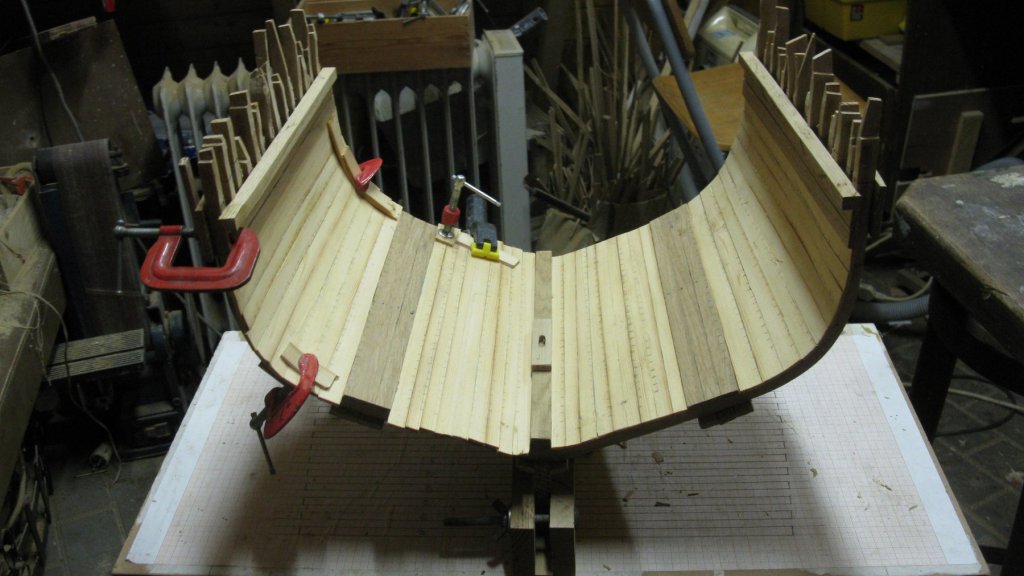
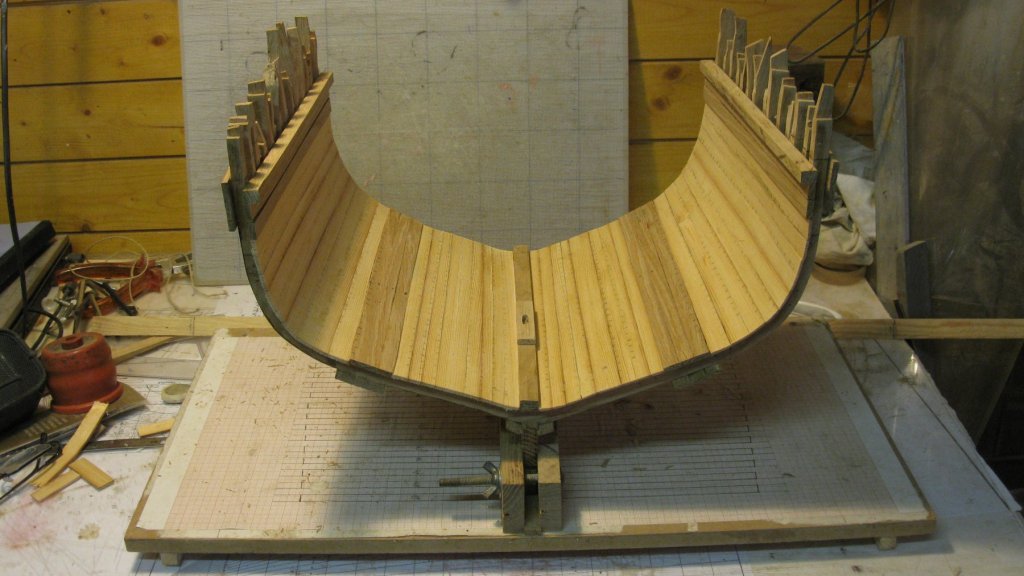
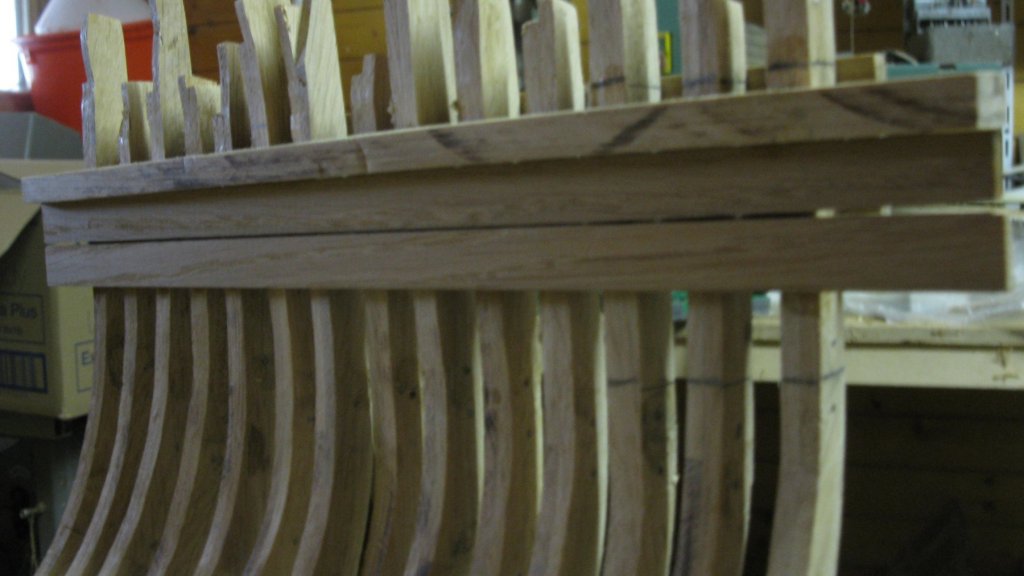
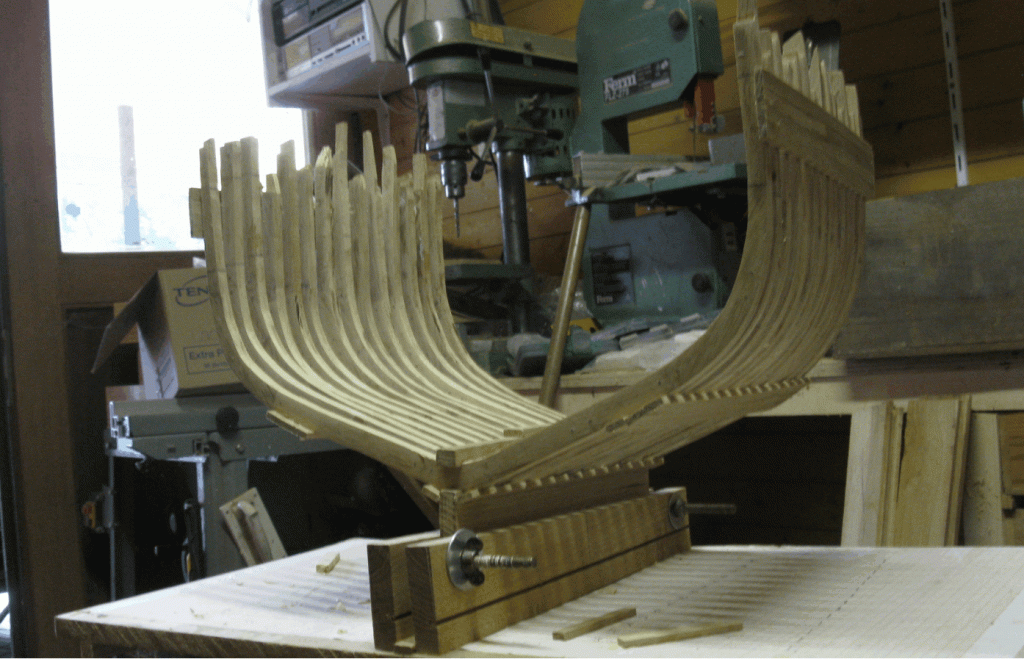
I used the boiling method only for small rods which fit in the cooking pot. When I have to bend larger planks to plank a hull, I use a paint stripper heat gun. On the picture below I have to plank a hull with 75 cm long and 3mm thick planks. I bend them dry above the heat of the paint stripper. If you are bending them carefully it takes only some moments before they keep the bended shape. G.L.

- 219 replies
-
- 6
-
-
- smack
- cross-section
- (and 2 more)
-
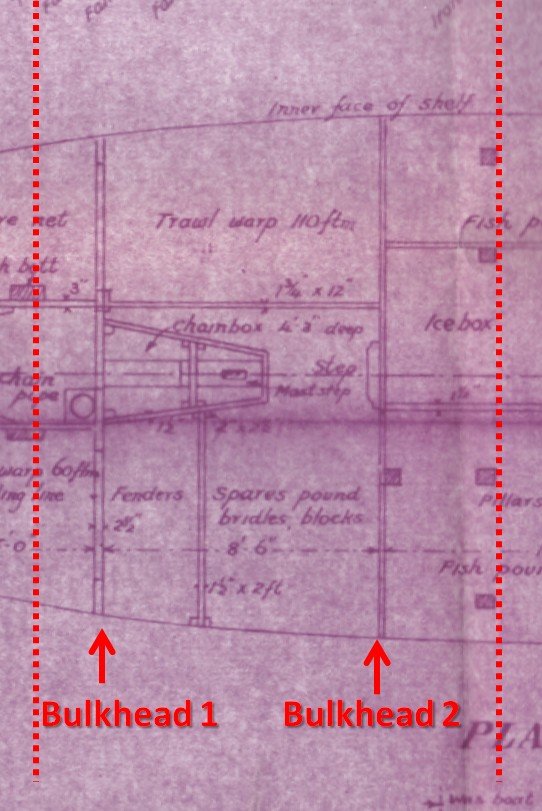
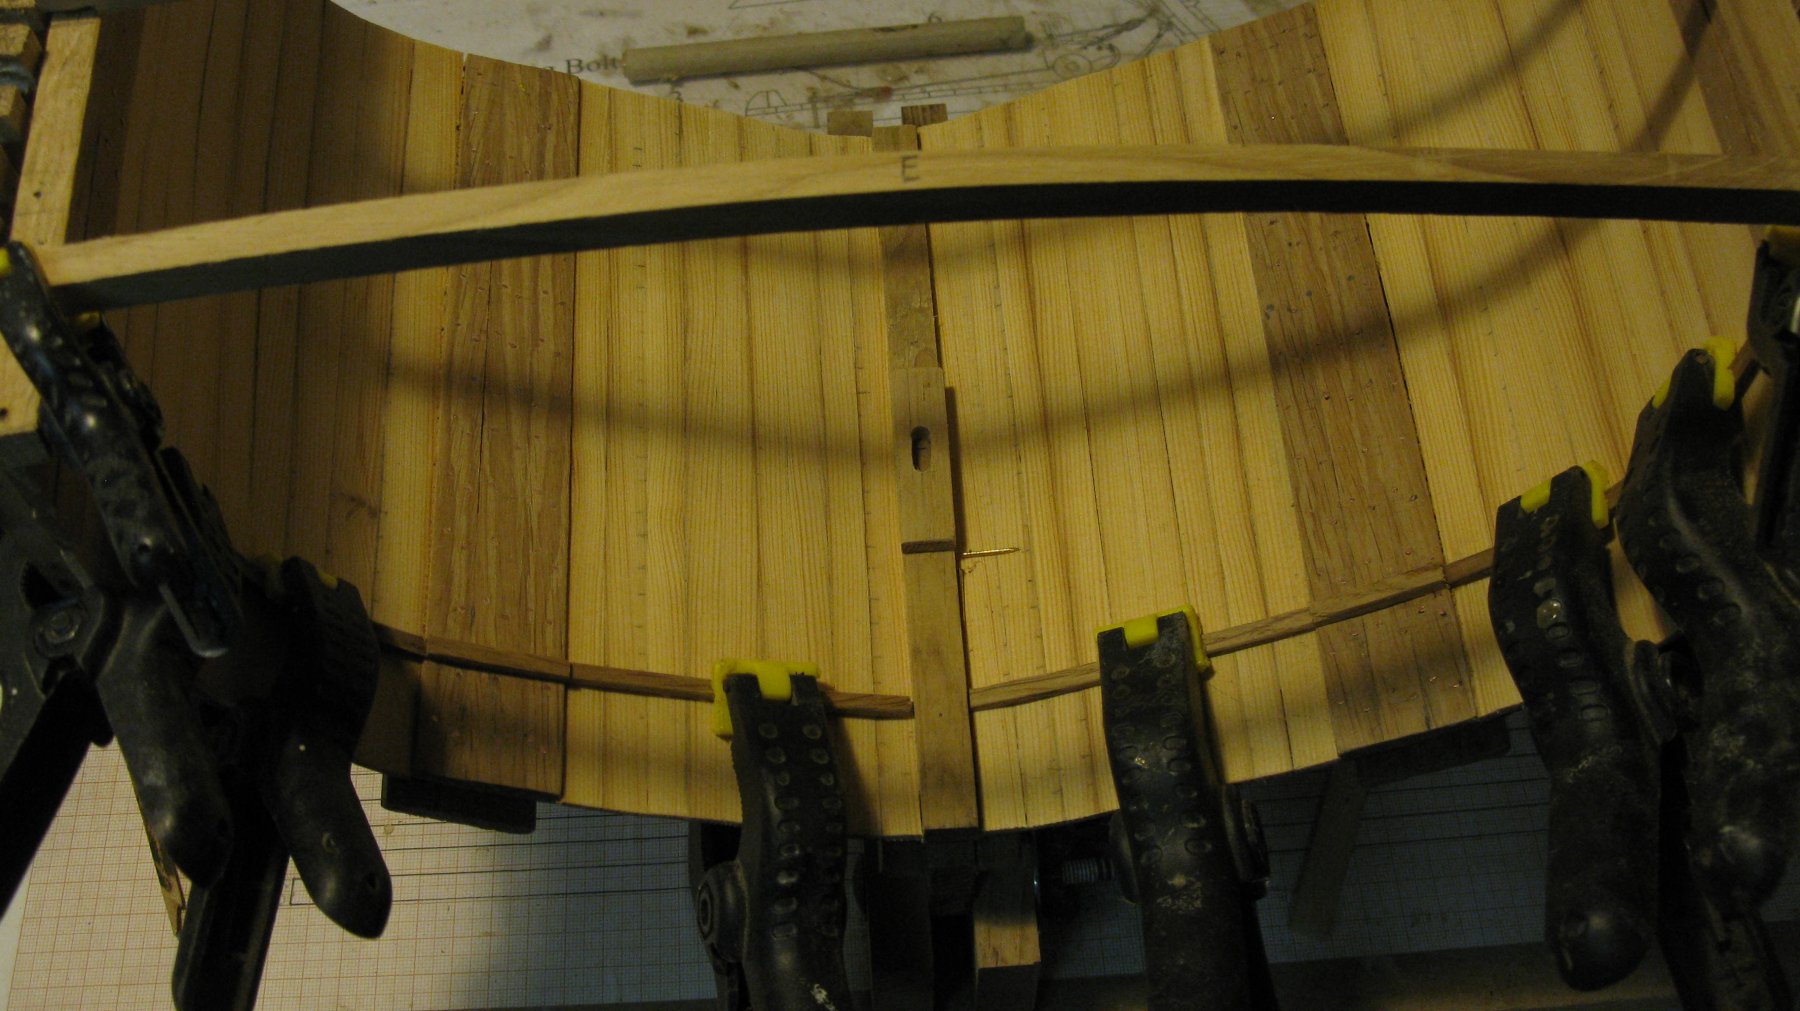
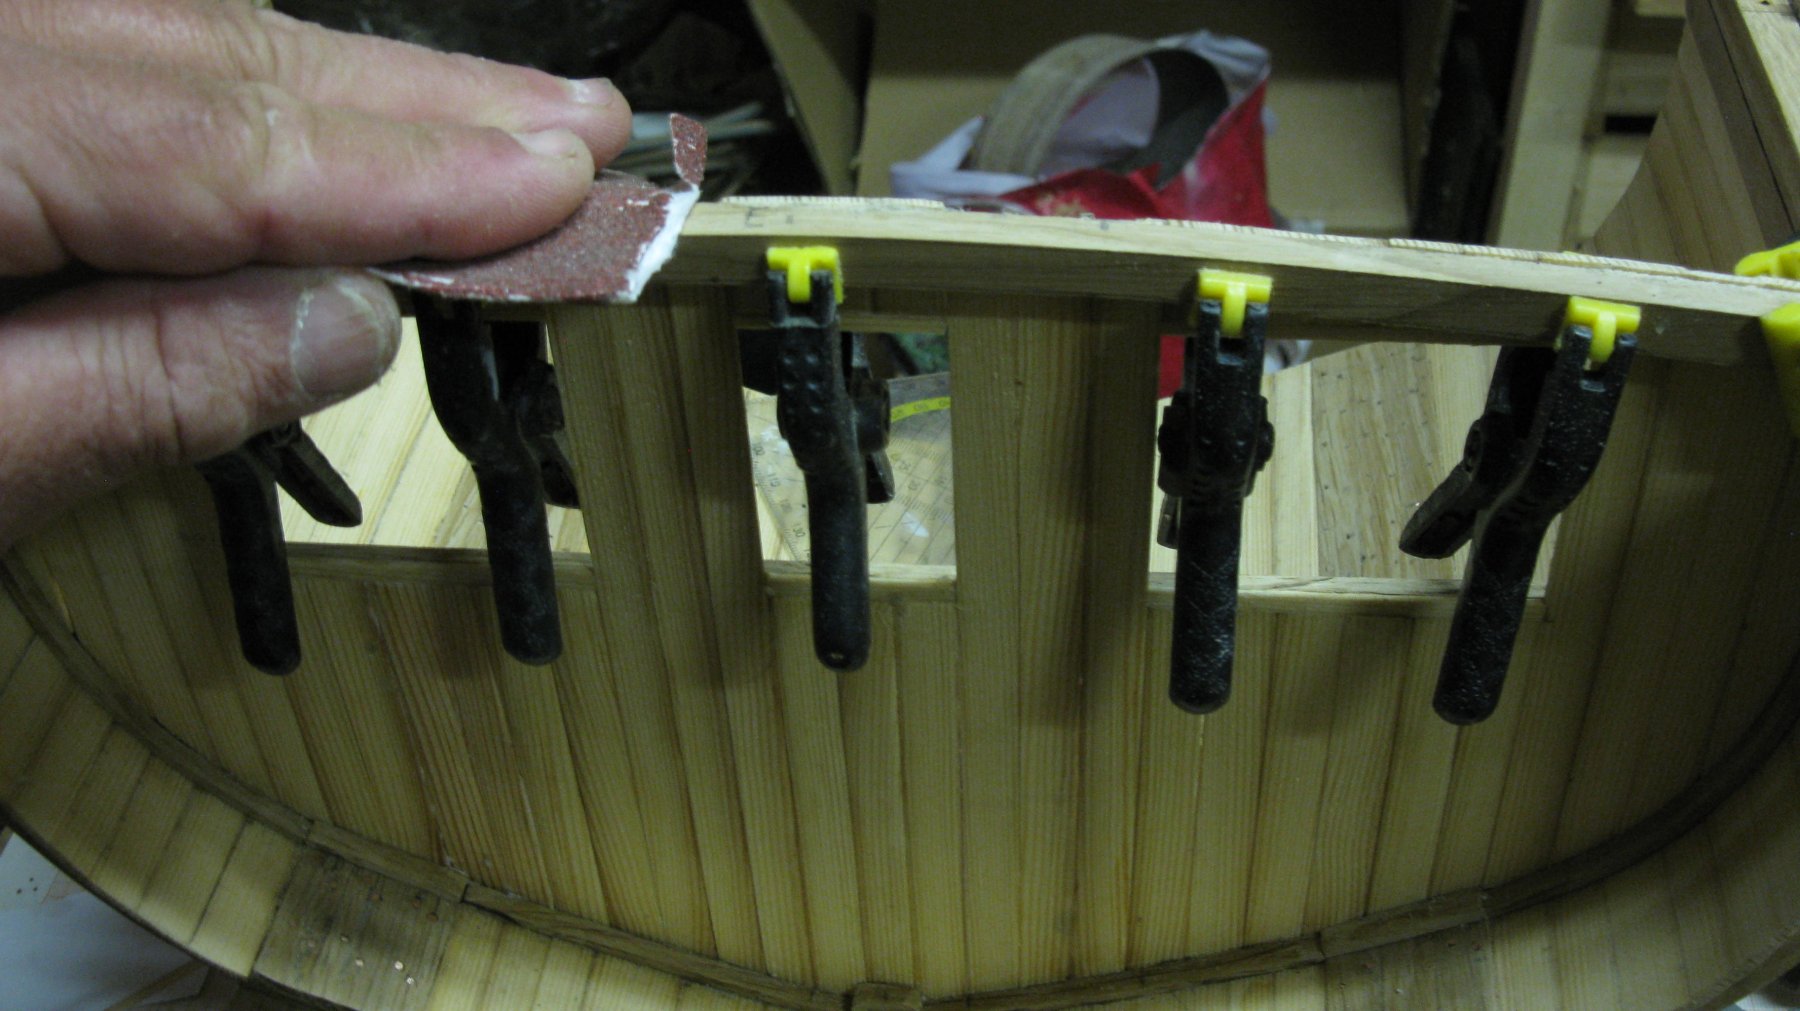
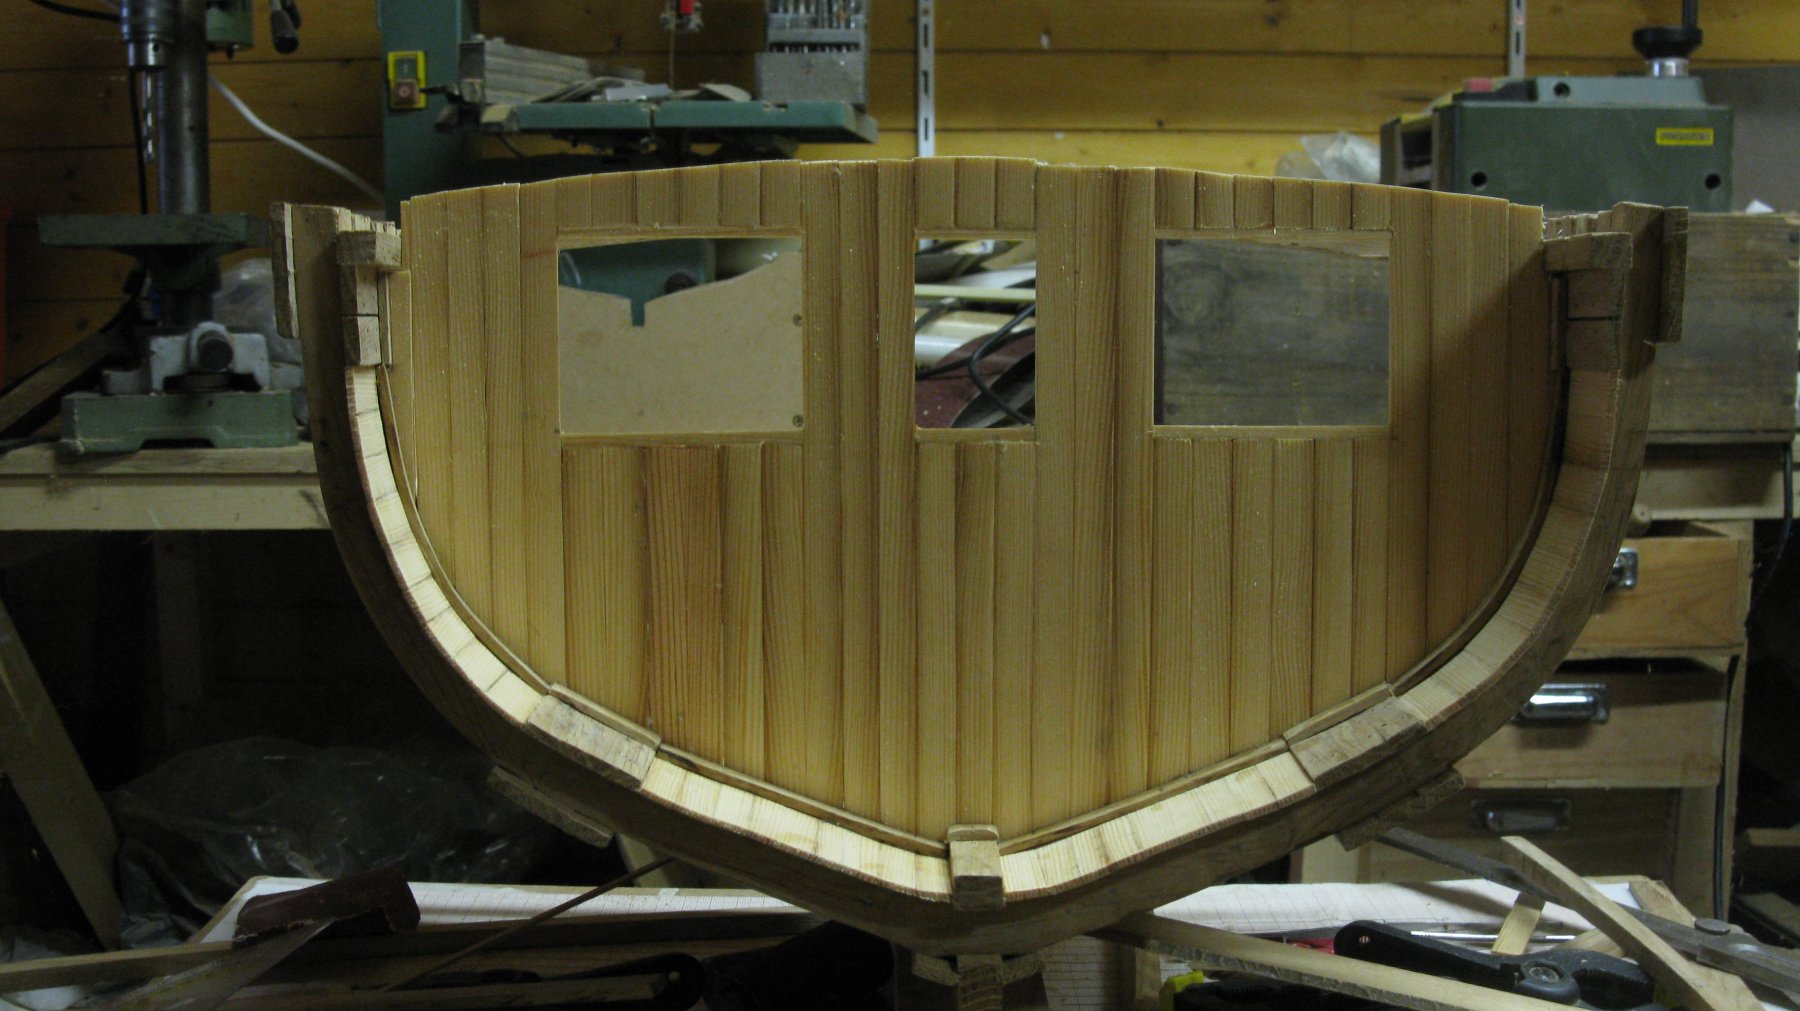
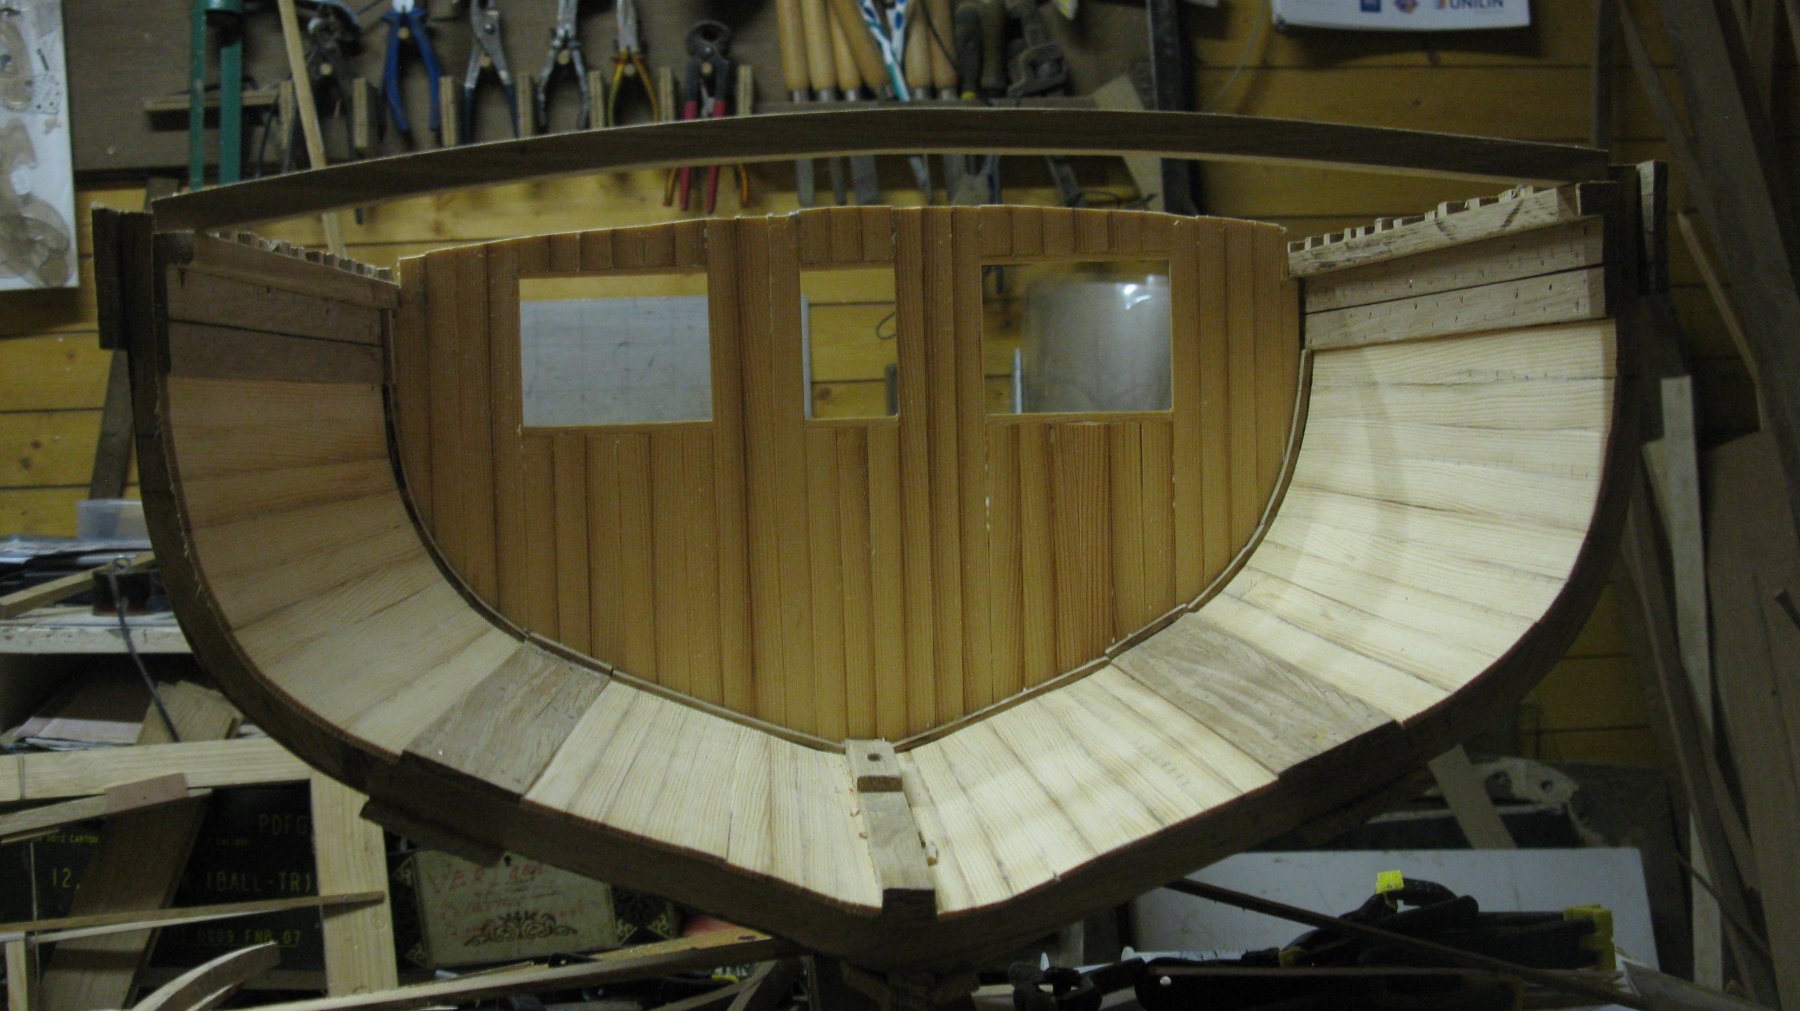
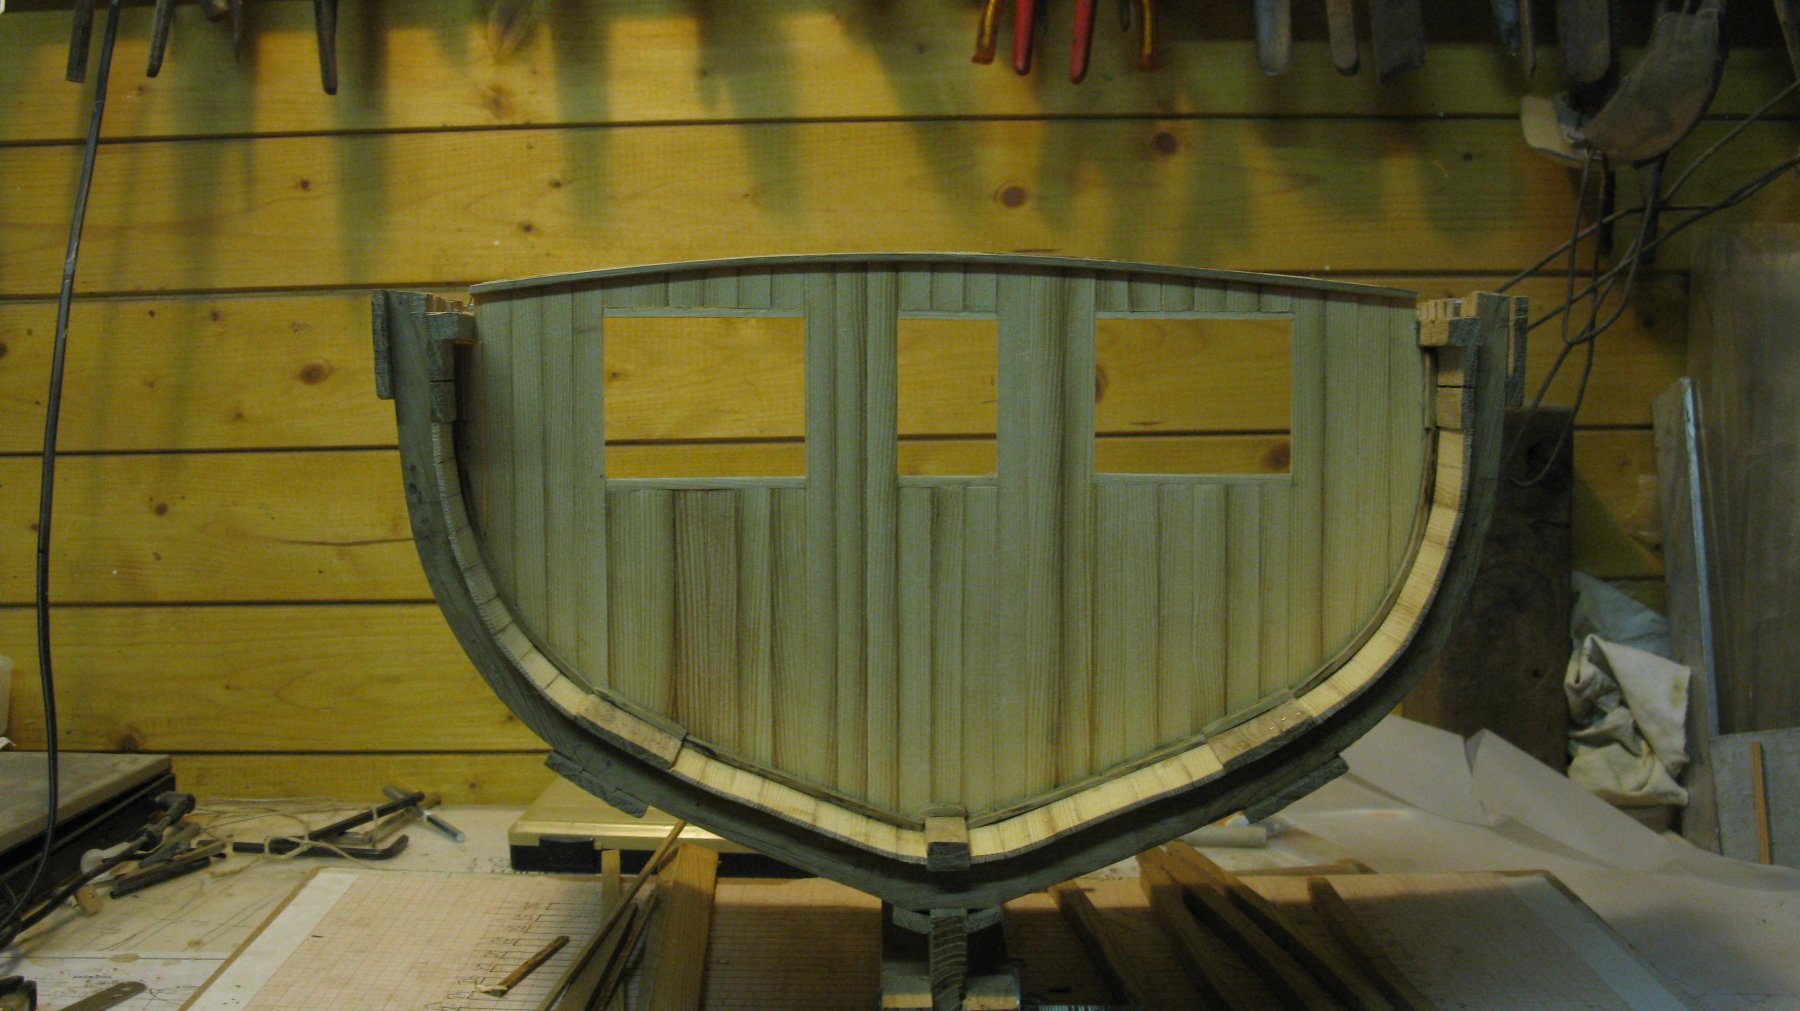
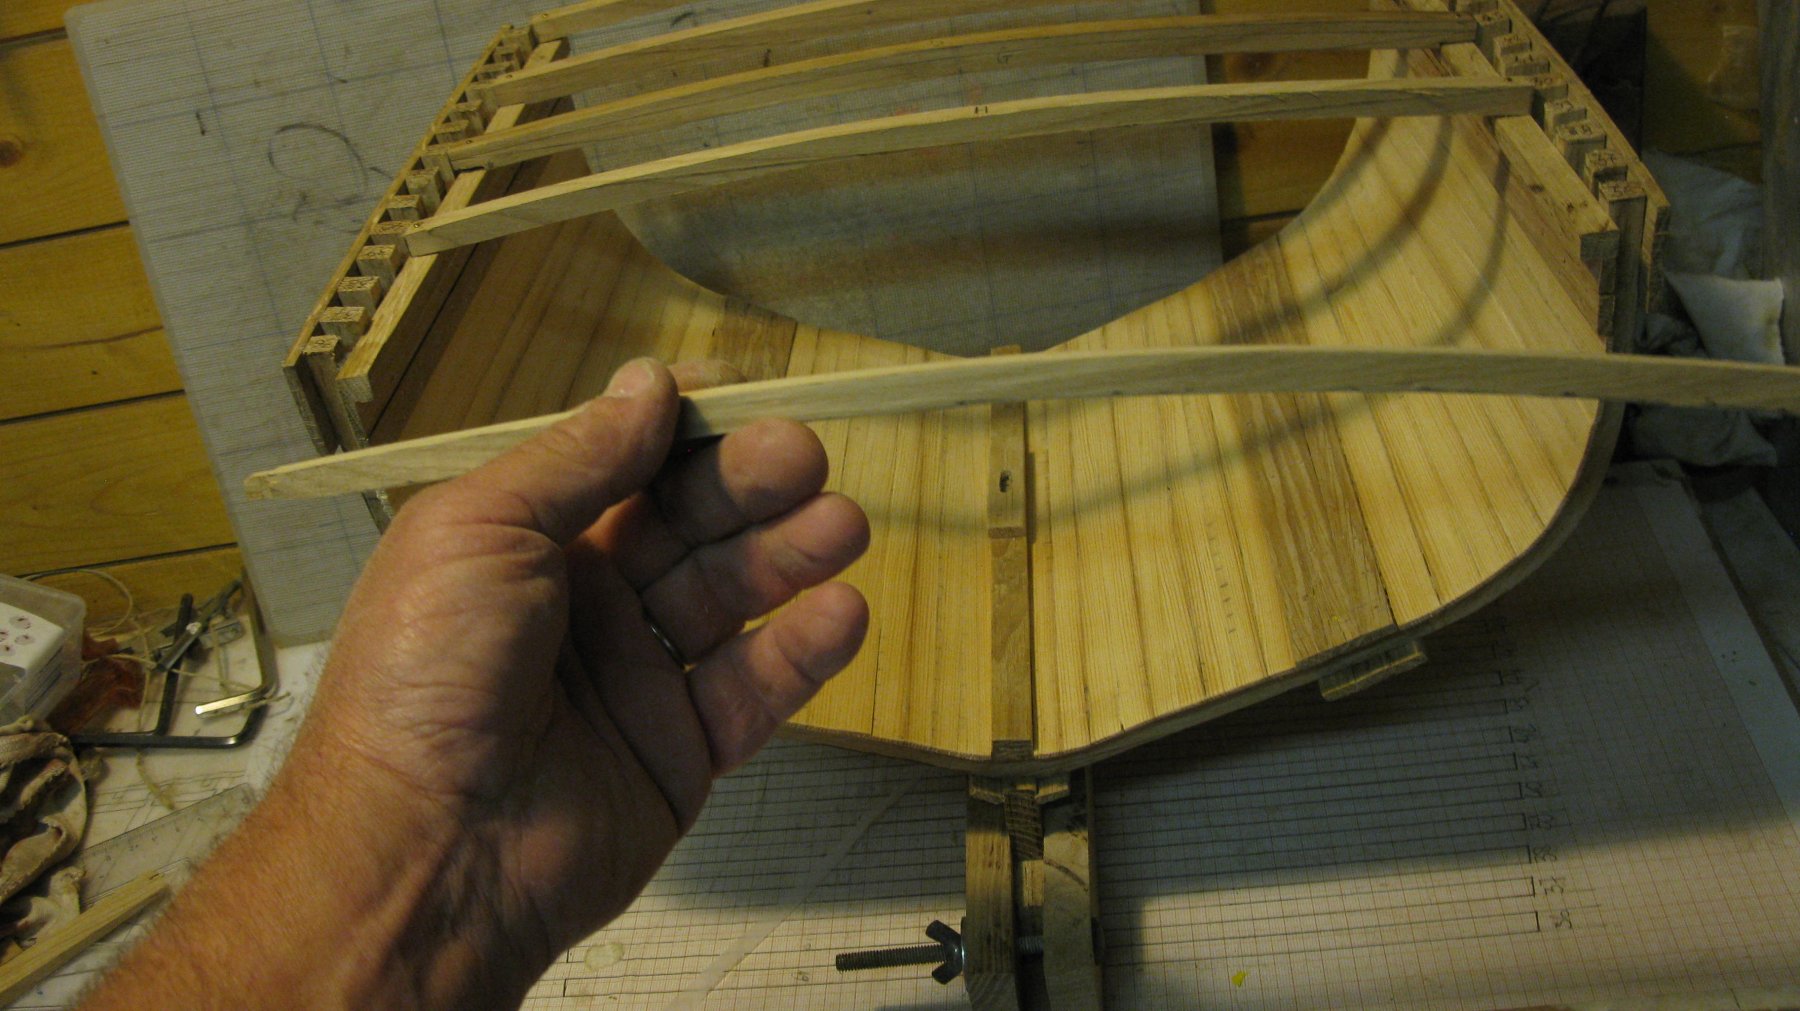
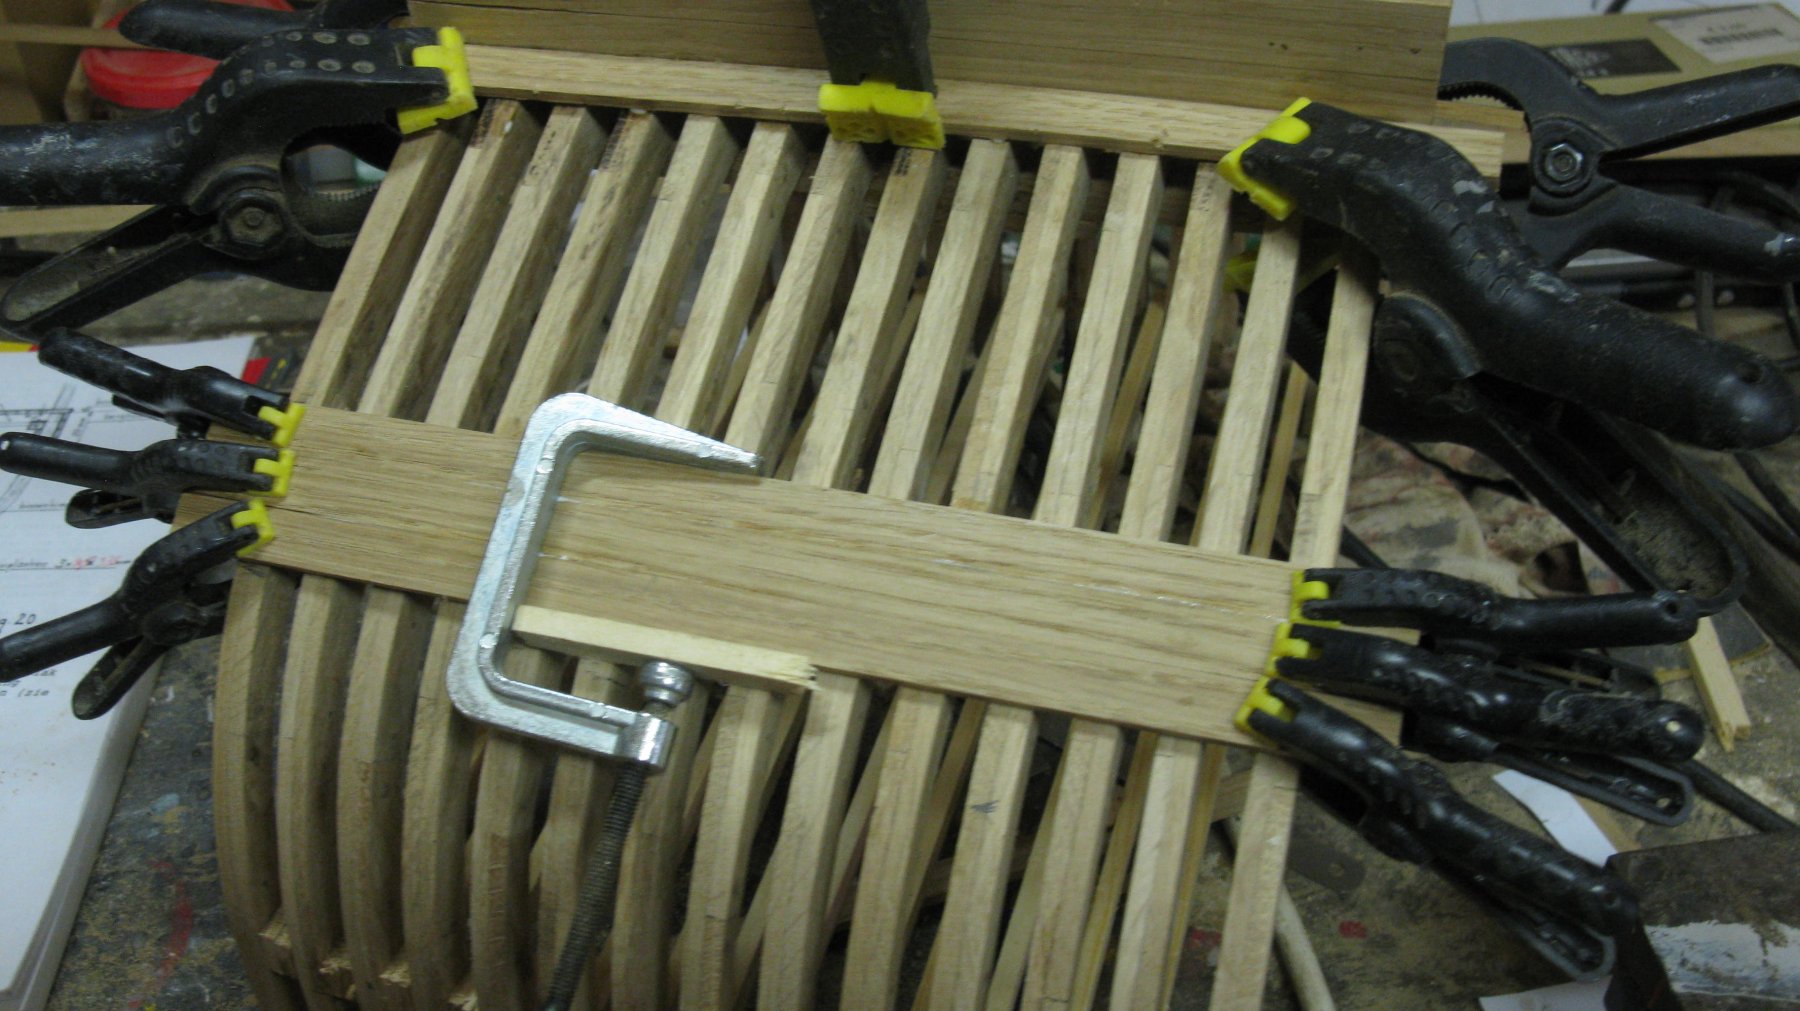
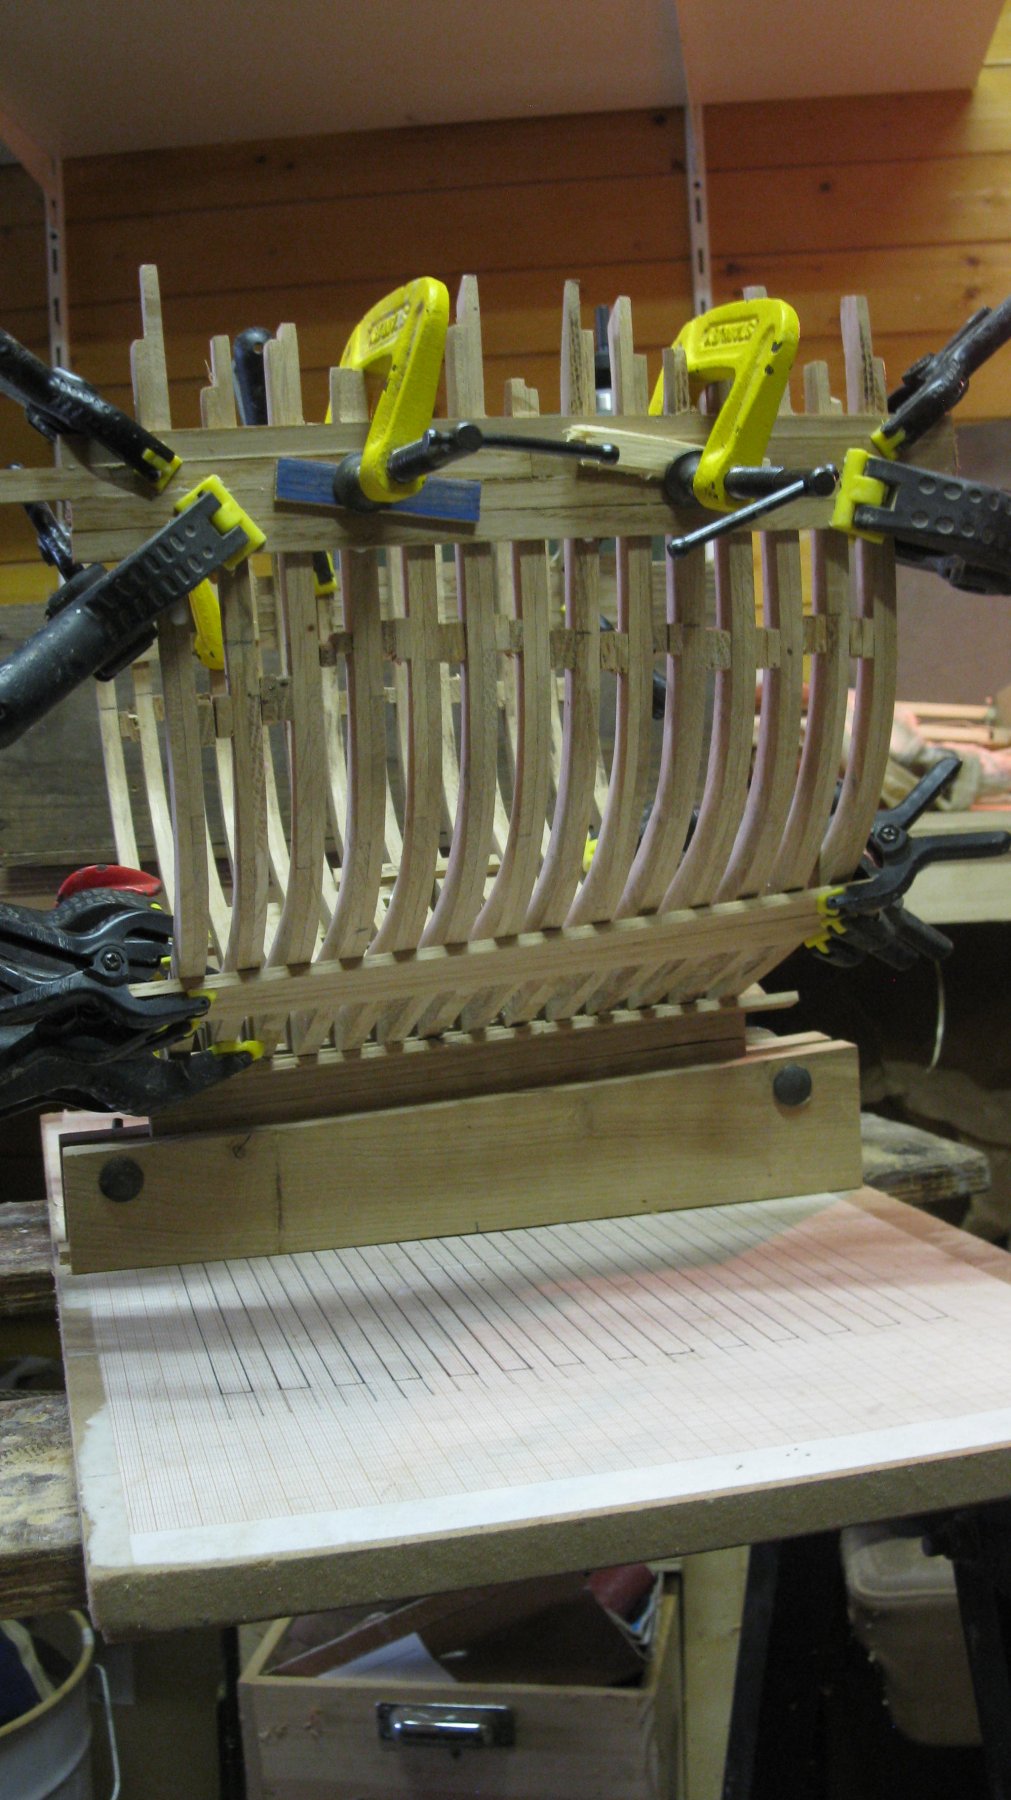
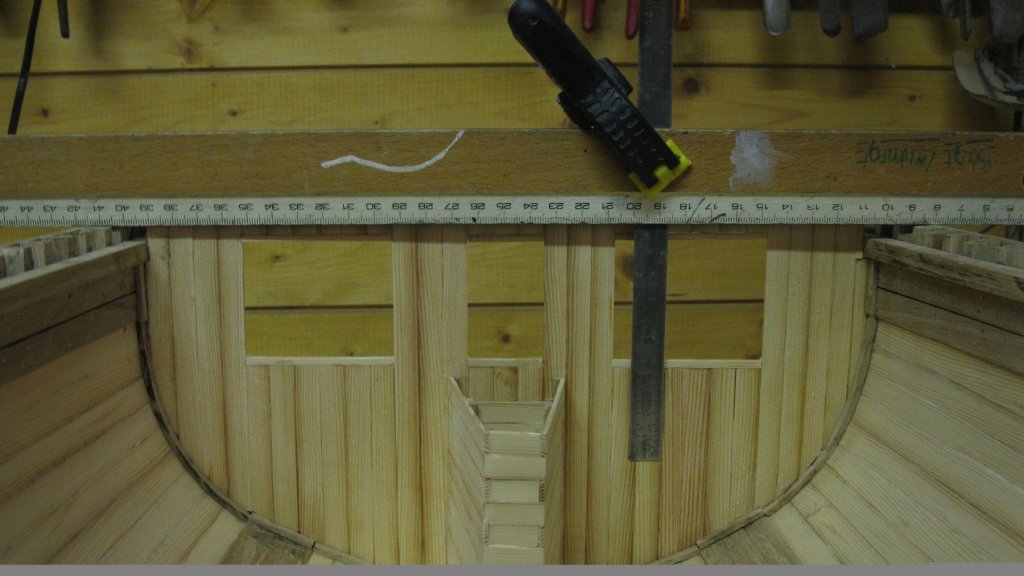
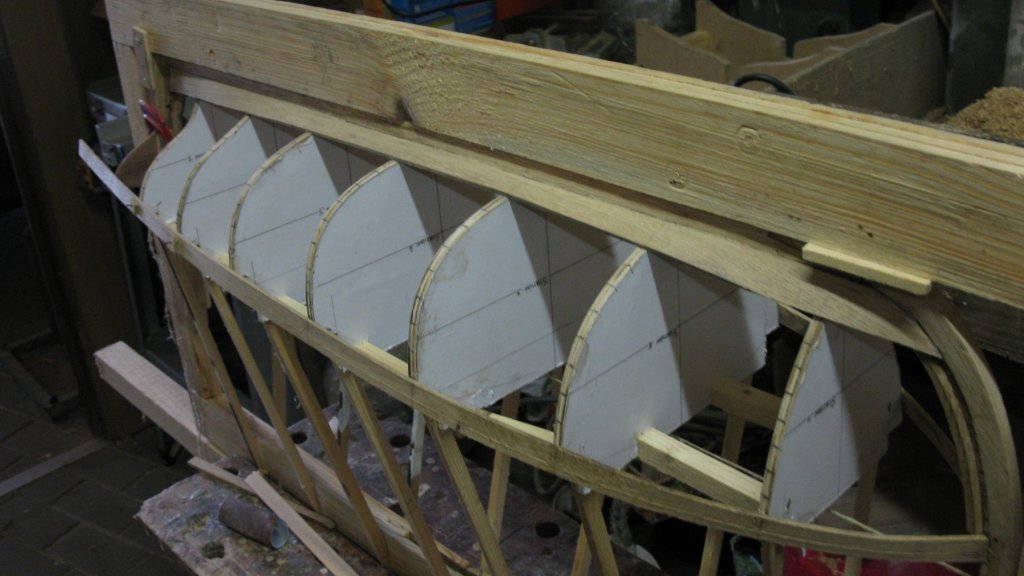
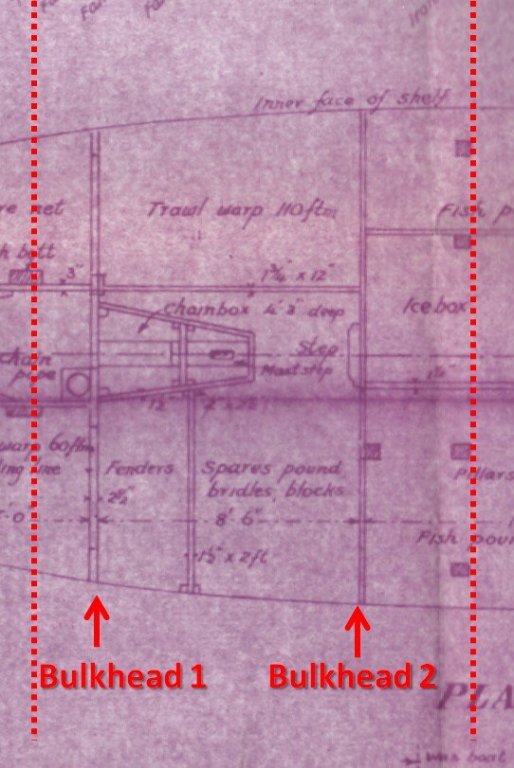
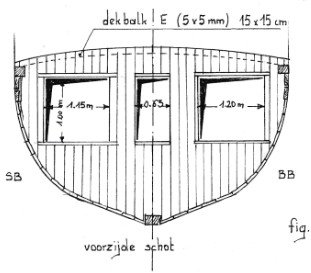
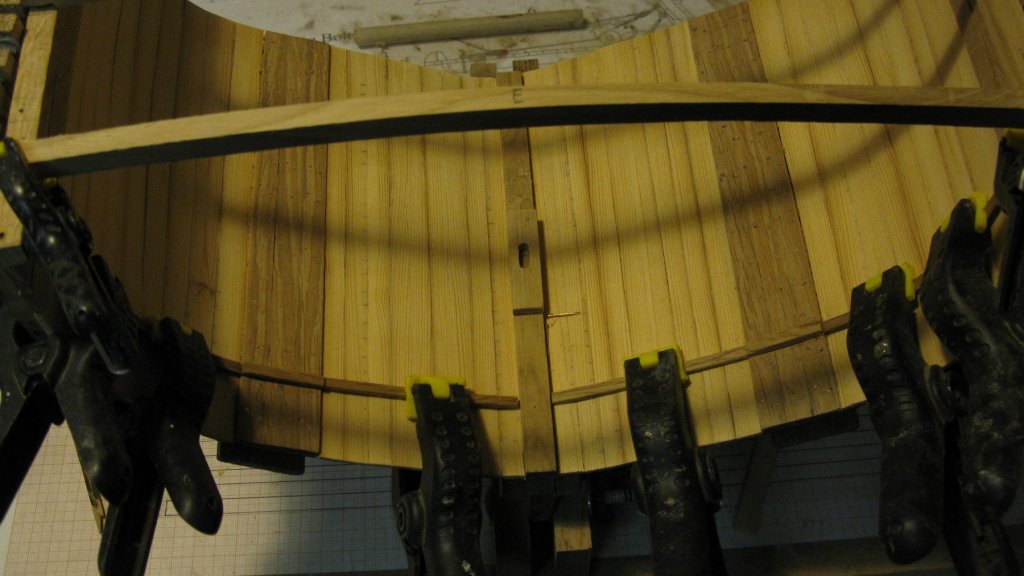
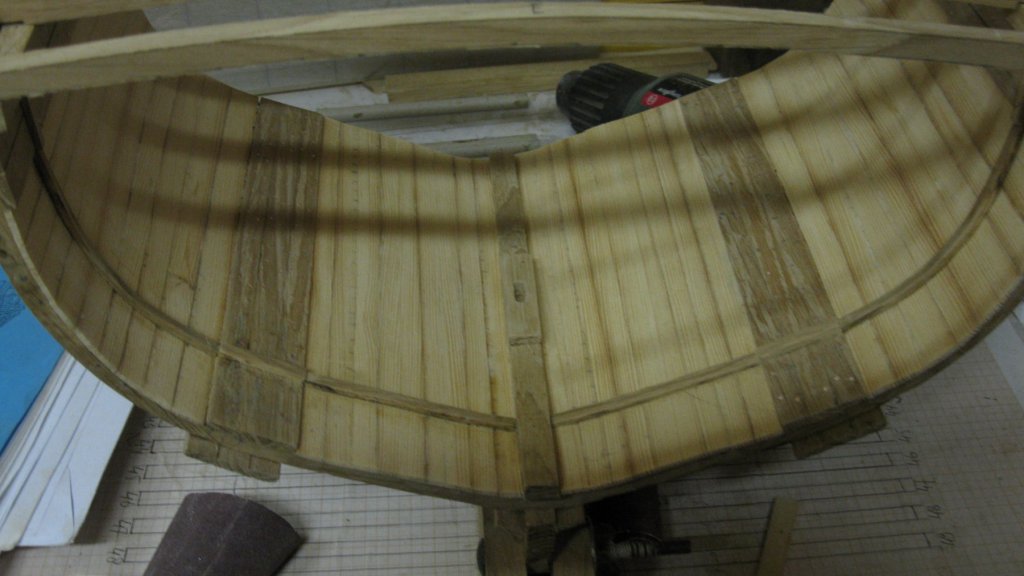
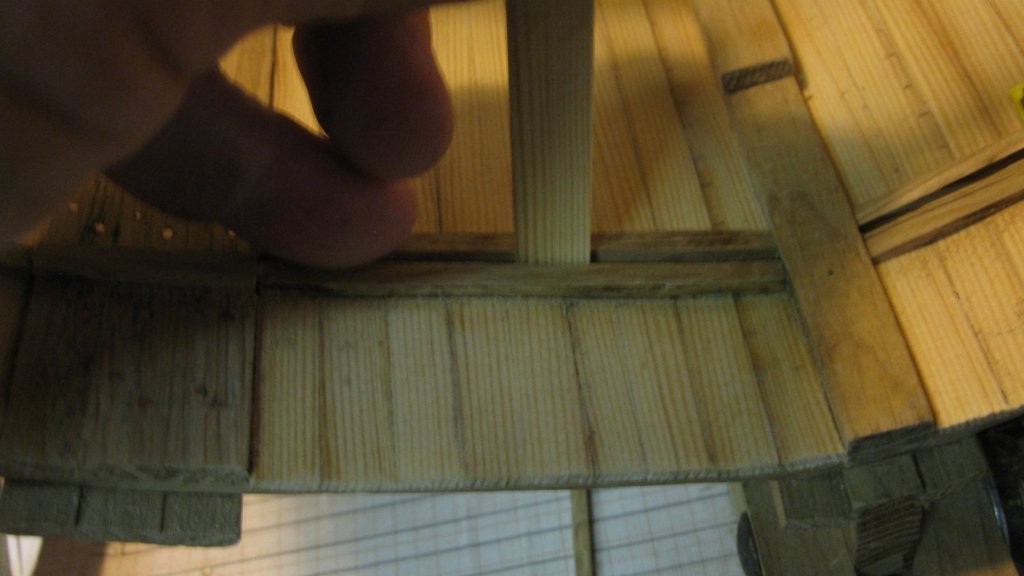
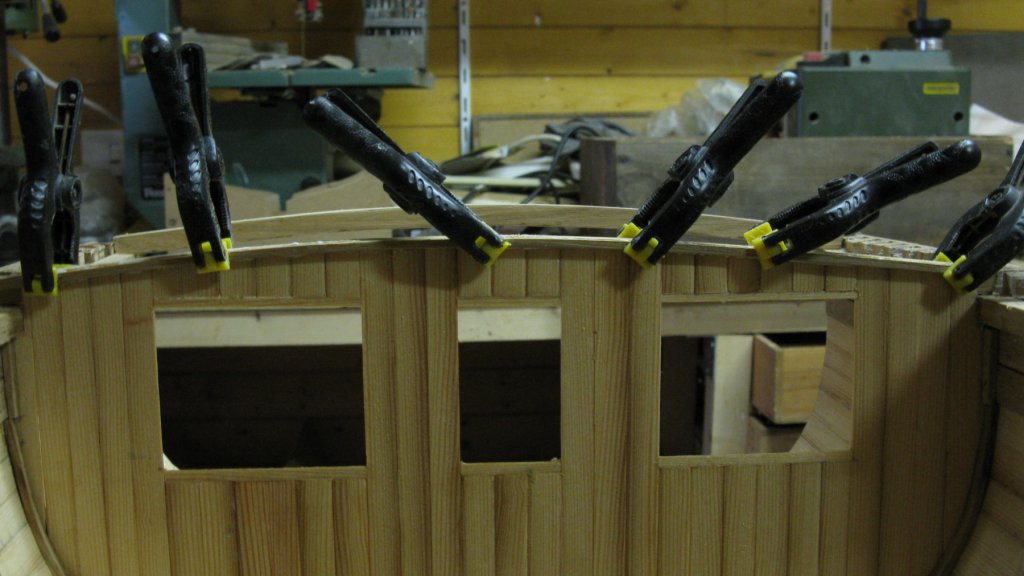
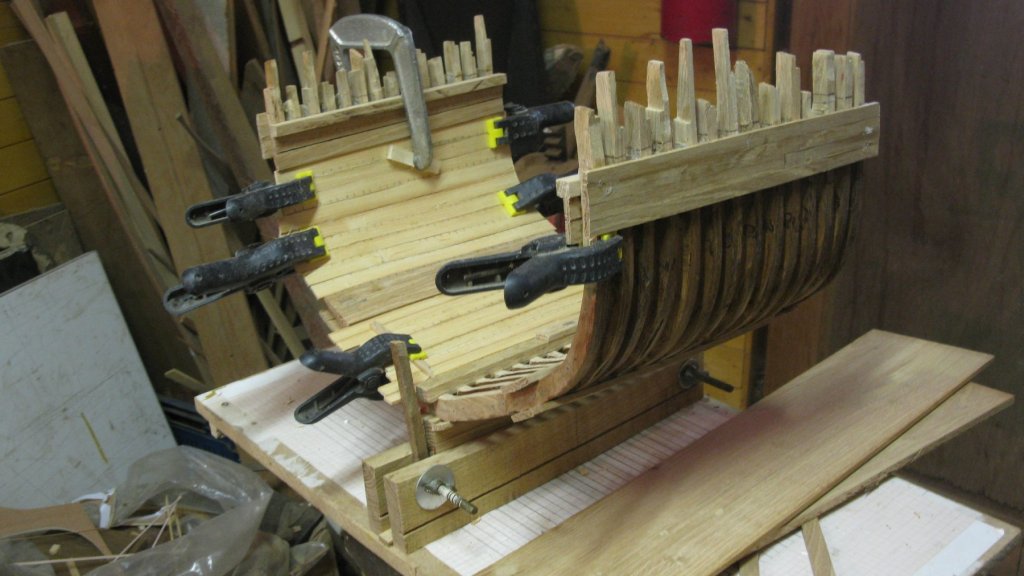
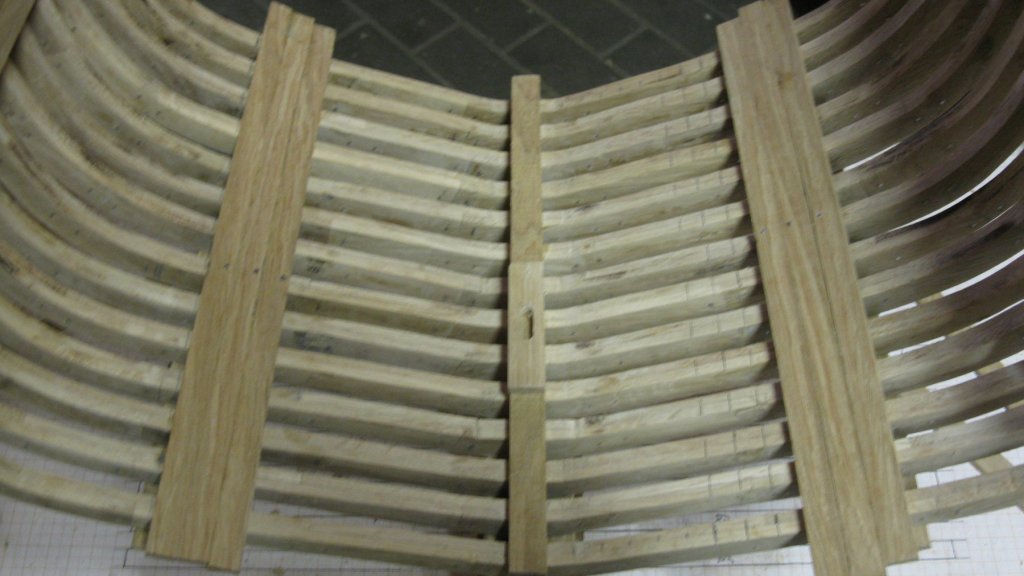
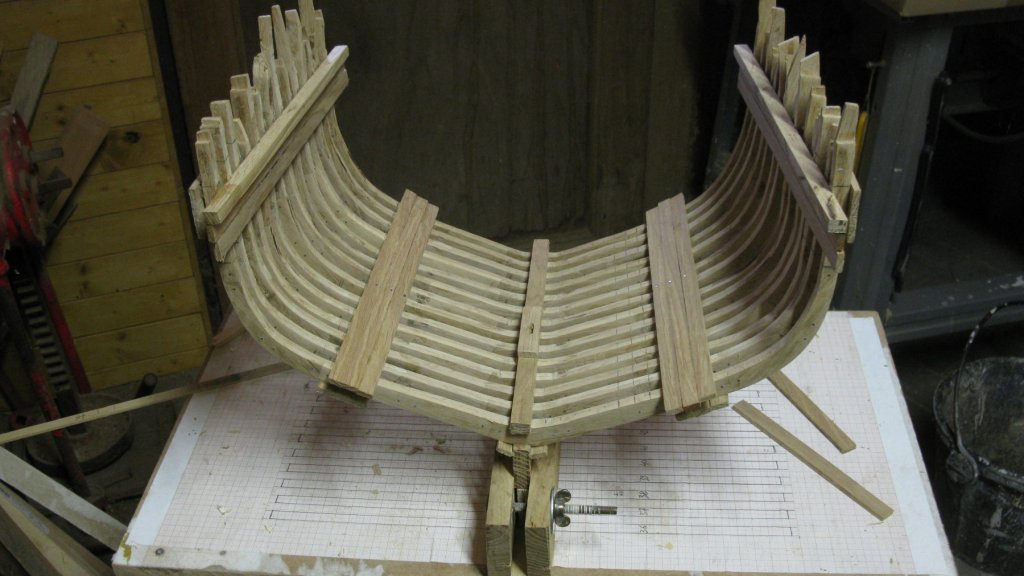
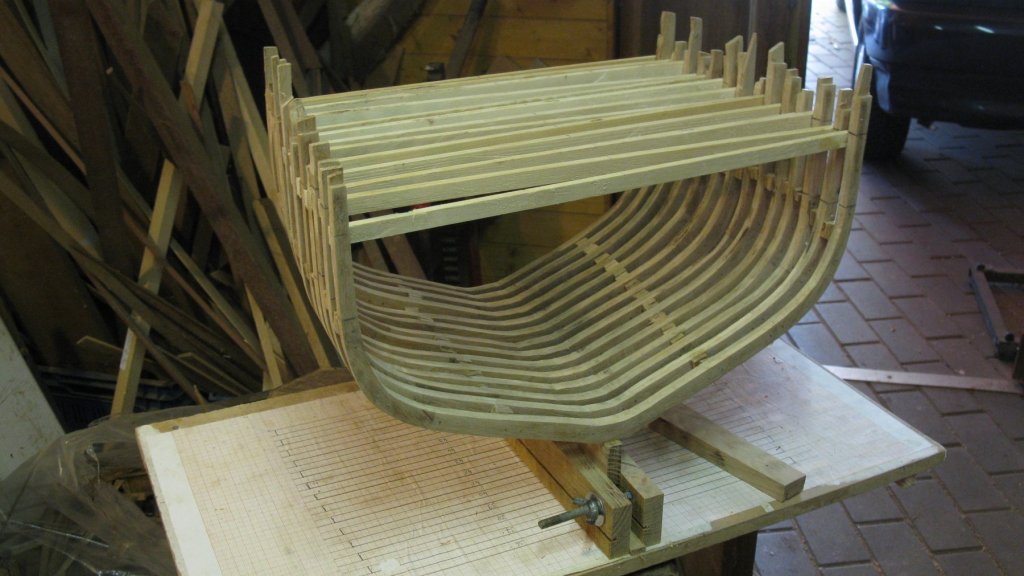
Welcome on board Moab! Here is the progress of last week: Part 11: Forward Bulkhead The cross section includes 2 bulkheads. The forward bulkhead stretches from the upper deck to the keelson. The aft bulkhead from the upper deck to the lower deck. Between the two bulkheads are equipment stores and the anchor chain box. Behind the aft bulkhead is the fish hold and an icebox. The bulkheads were built of pitch pine planks. I start with the forward bulkhead. In this bulkhead there are three openings. They are approx one meter high and give access to the forecastle. It does require a certain amount of agility to crawl through, so I believe they are more intended to pass material through it than as passageway for the crew. In rough weather when the for hatch is difficult to reach, they are a good alternative to reach the forecastle below deck. I start to lay the oak profile slats which will support the bulkhead. Laying the deck beam 'E' right above the bulkhead position enables me to determine the bulkheads top. The profile slats have to follow the hull curve. I plunge them during 5 to 10 minutes in boiling water; like this it is much easier to bend them without cracking them. The forward profile slats. I continue laying a second layer of slats to support the other side of the bulkhead with an interval equal to the thickness of the bulkhead planks. Starting to place the bulkhead planks. On the real vessels the planks fit in each other with tooth and groove. My planks are only 1.5 mm thick; I don't have sufficient joinery skills to make teeth and grooves in it so I will glue them against each other. I lay a lath over the wales and attach a triangle to it to make sure that my first plank is standing vertical. After that it is just a matter of sawing and gluing plank after plank The port side of the bulkhead is raised. The port passage is left open. The topside of the passage is placed. The horizontal plank is only temporally, it indicates the upper side of the opening. The small wooden bar at the bottom of the opening is a spacer. Continuing the planking to the starboard side. To fill up the open spaces below the passages, I attach again a temporal horizontal guide. When the glue is dry the planks which stick out above the deck beam are sanded equal. The bulkhead seen from forward Seen from aft. The bulkhead is finished on both sides with an oak profile slat on the top. As the slope of the bow is weak here, the slats do not need to be plunged in boiling water.


- 219 replies
-
- 18
-
-
- smack
- cross-section
- (and 2 more)
-
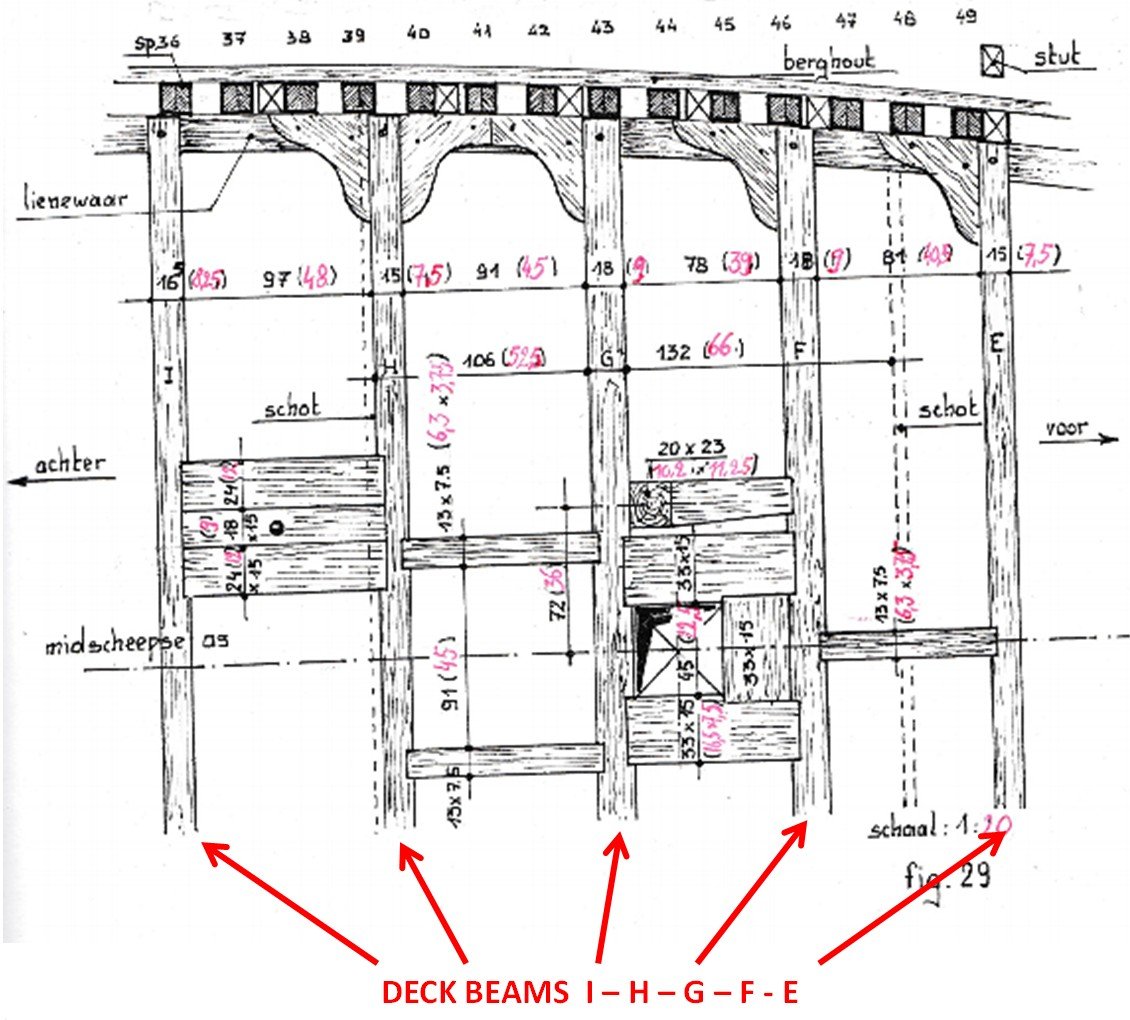
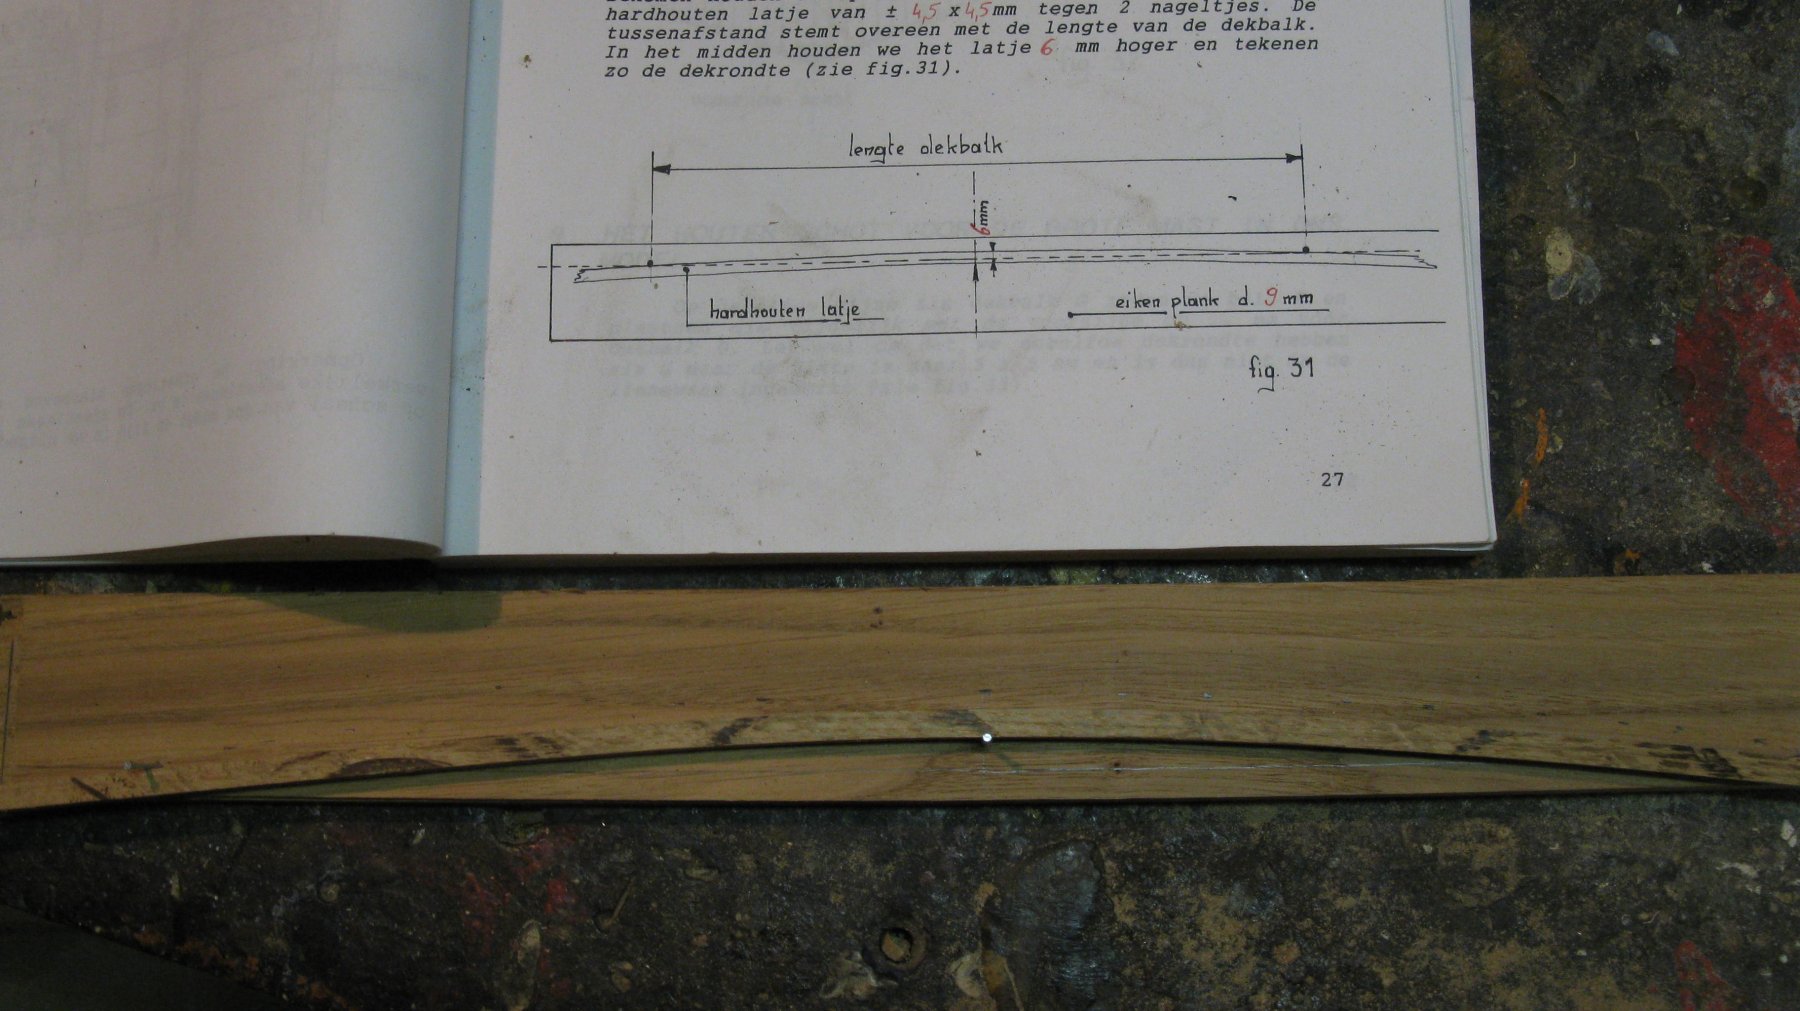
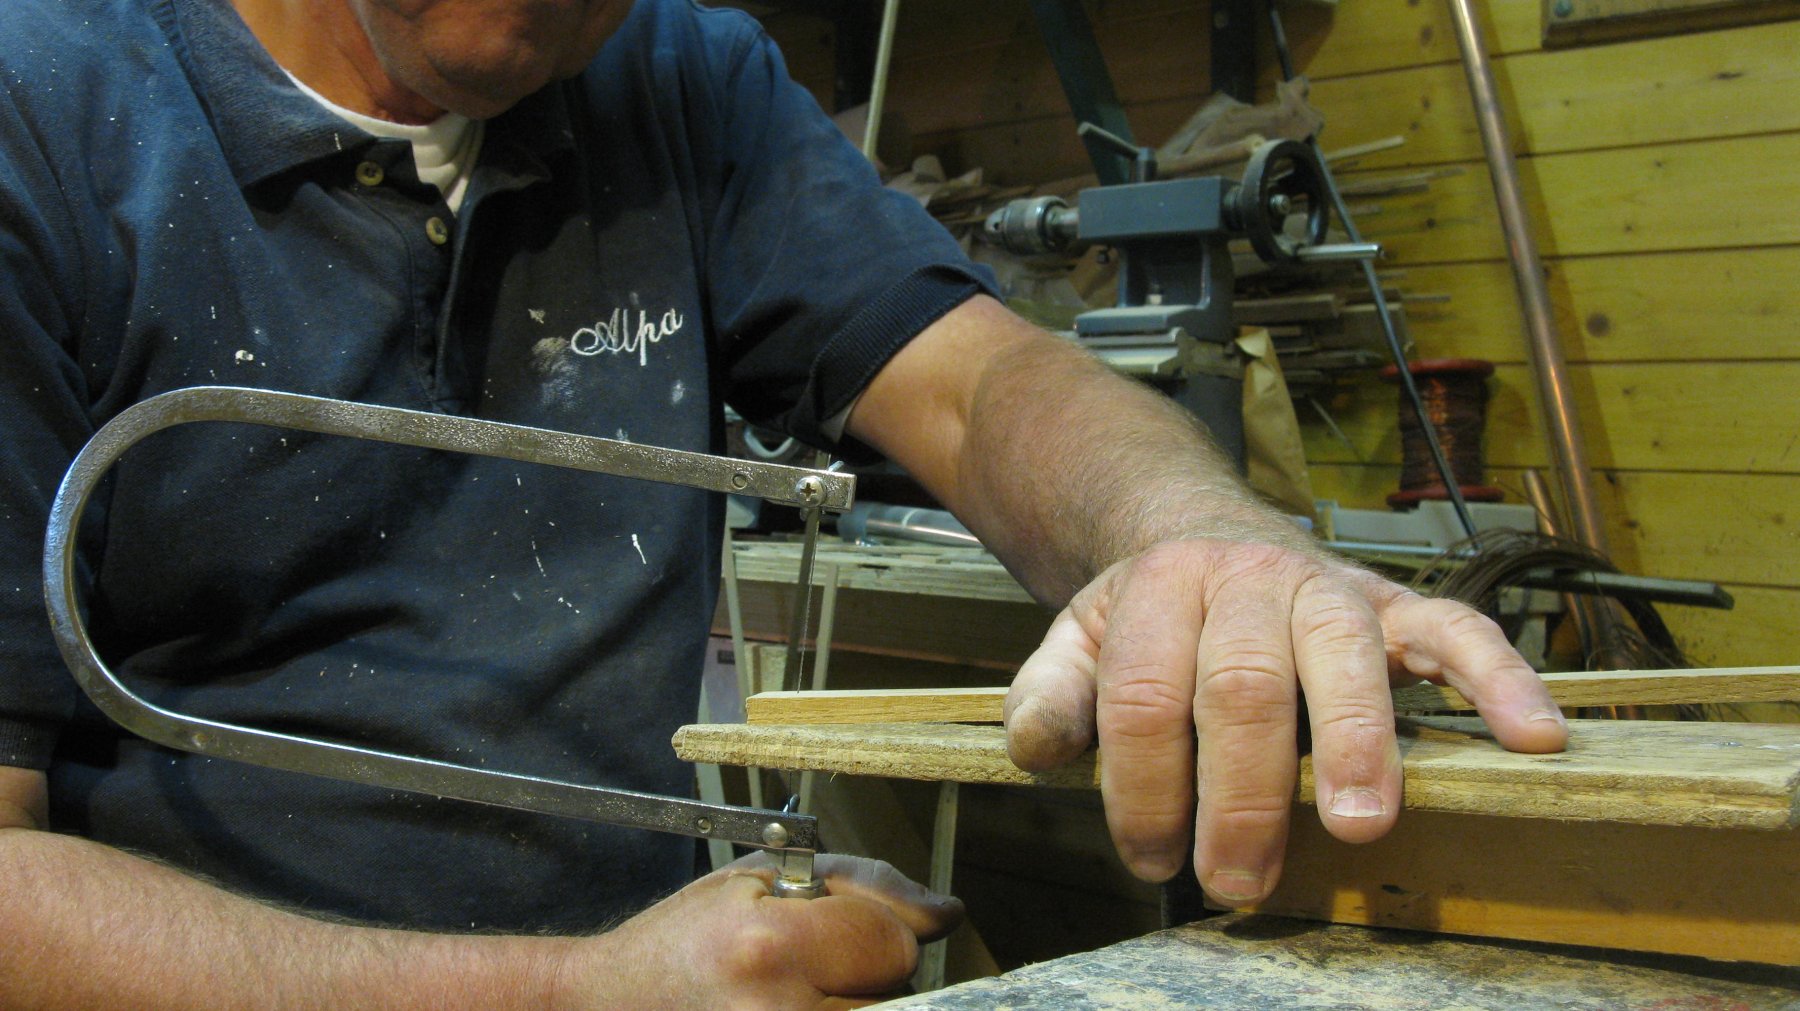
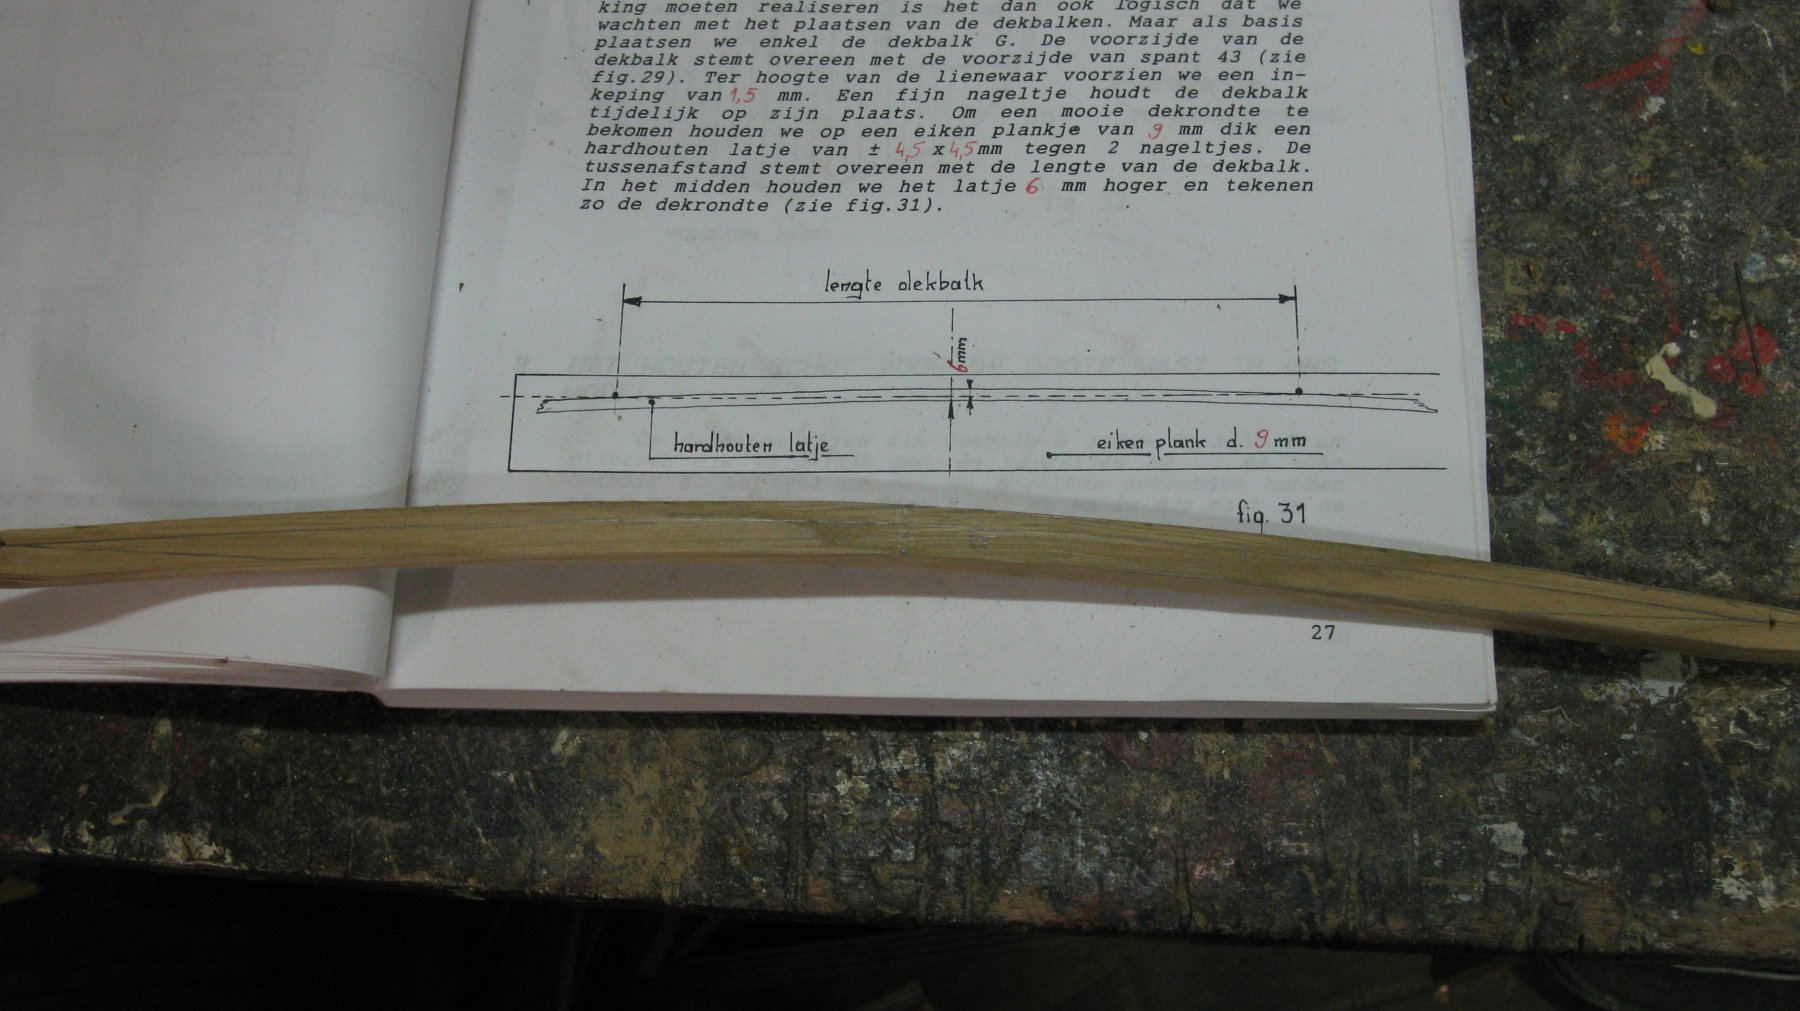
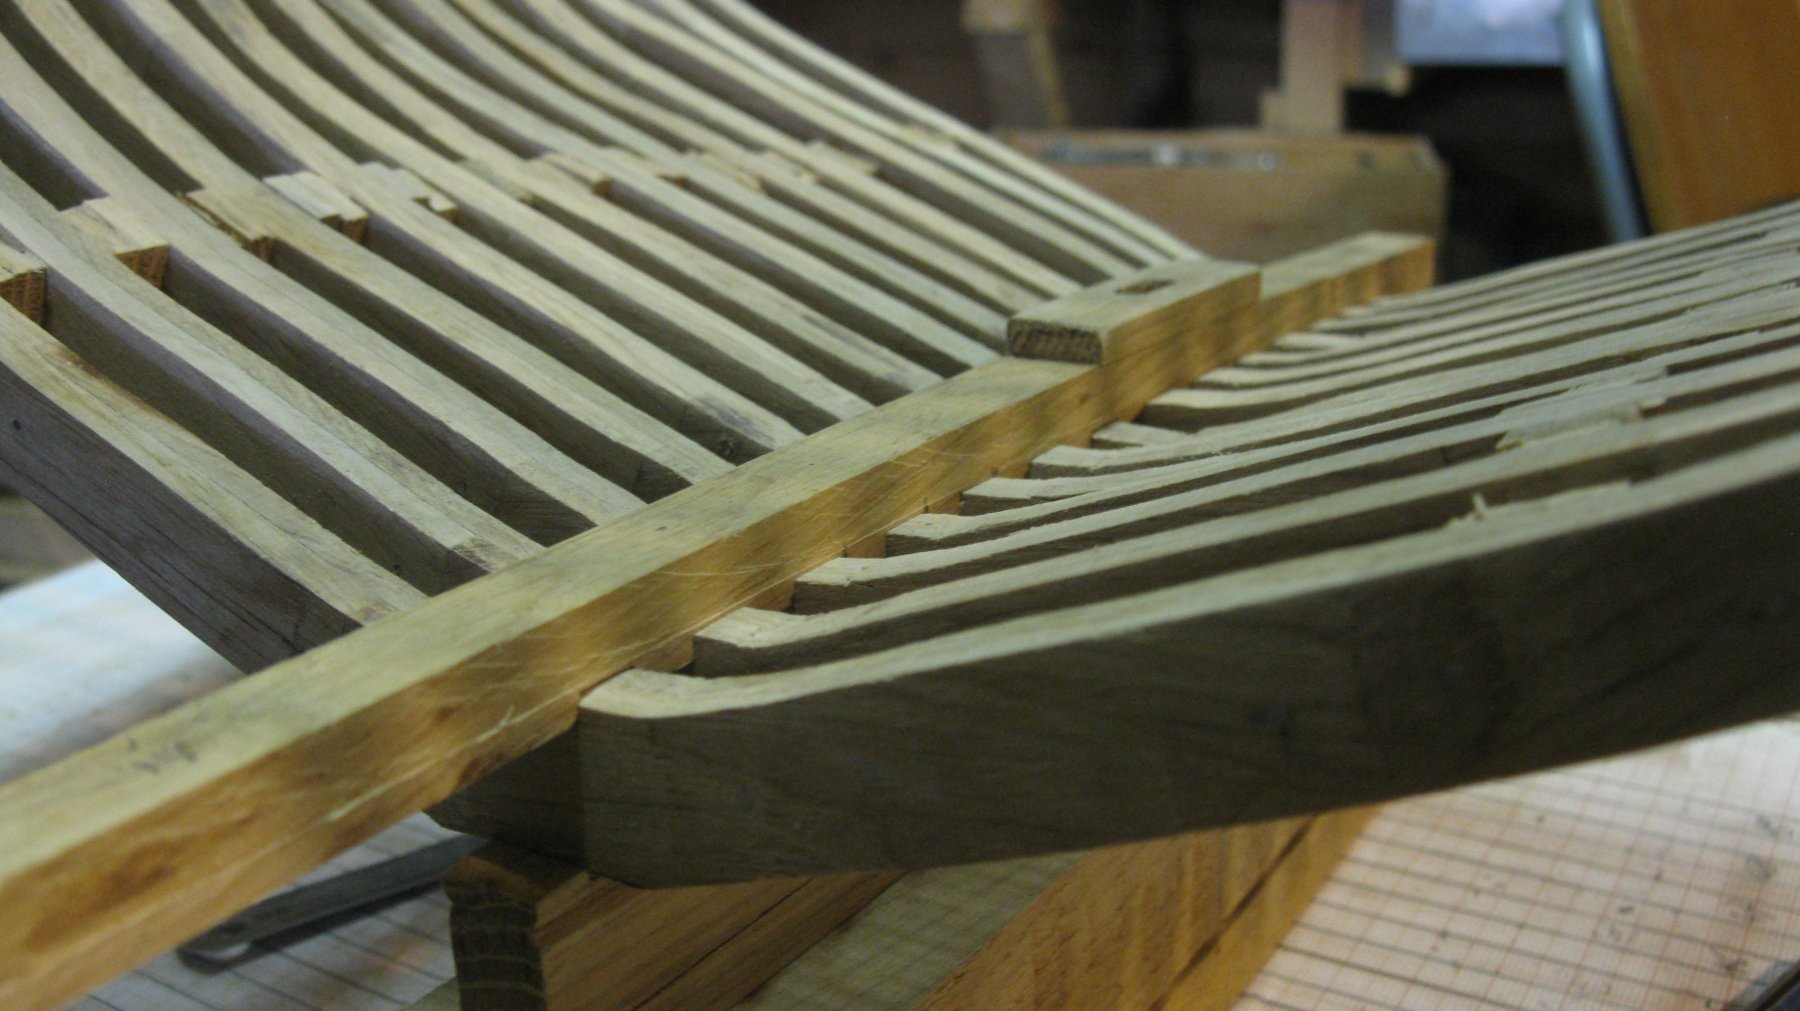
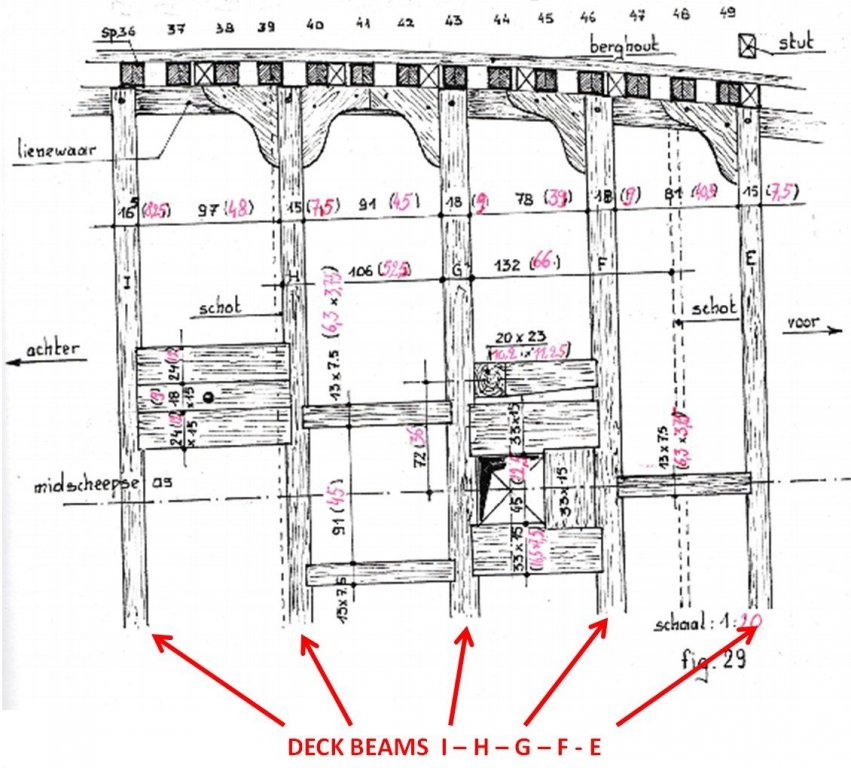
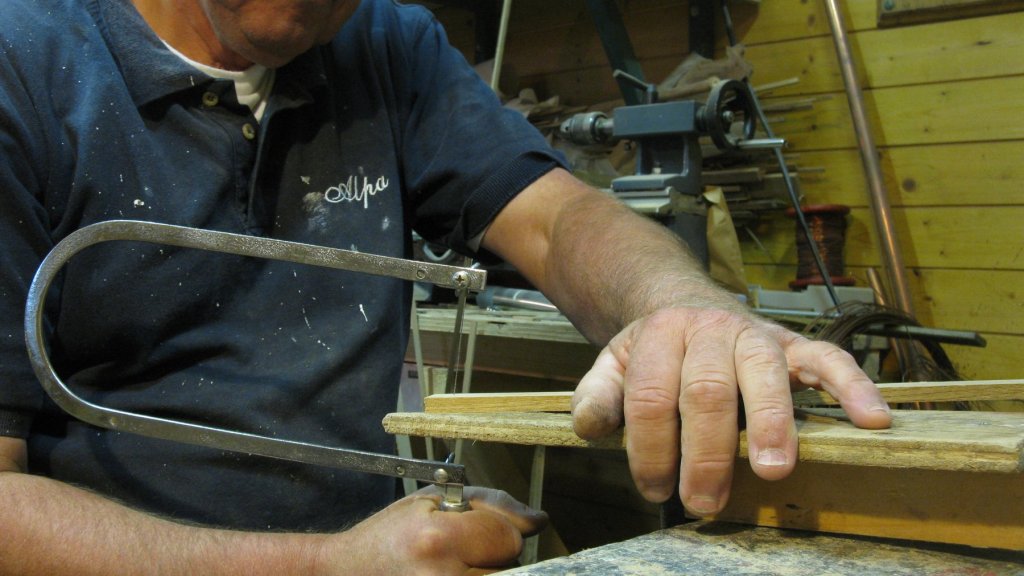
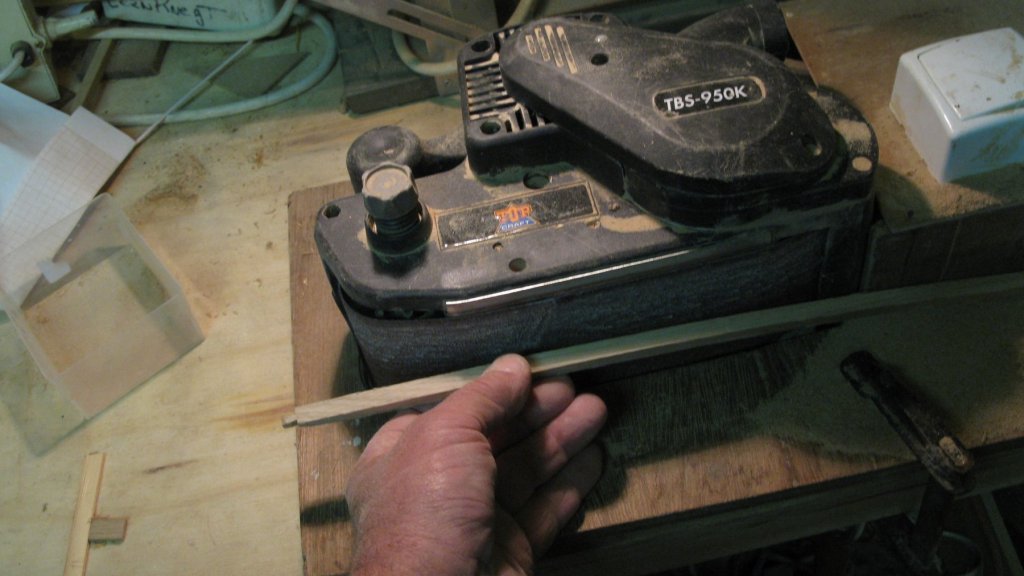
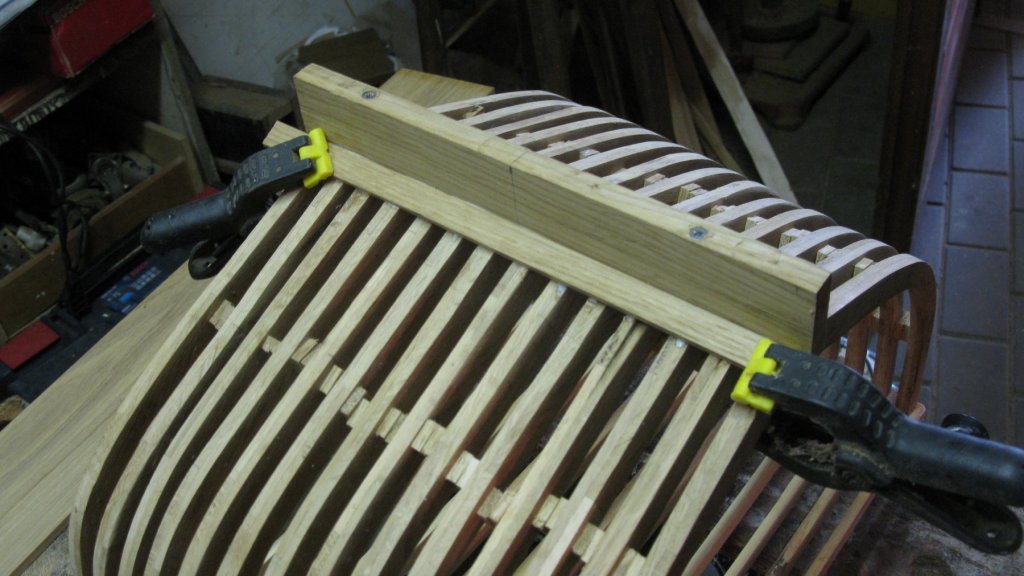
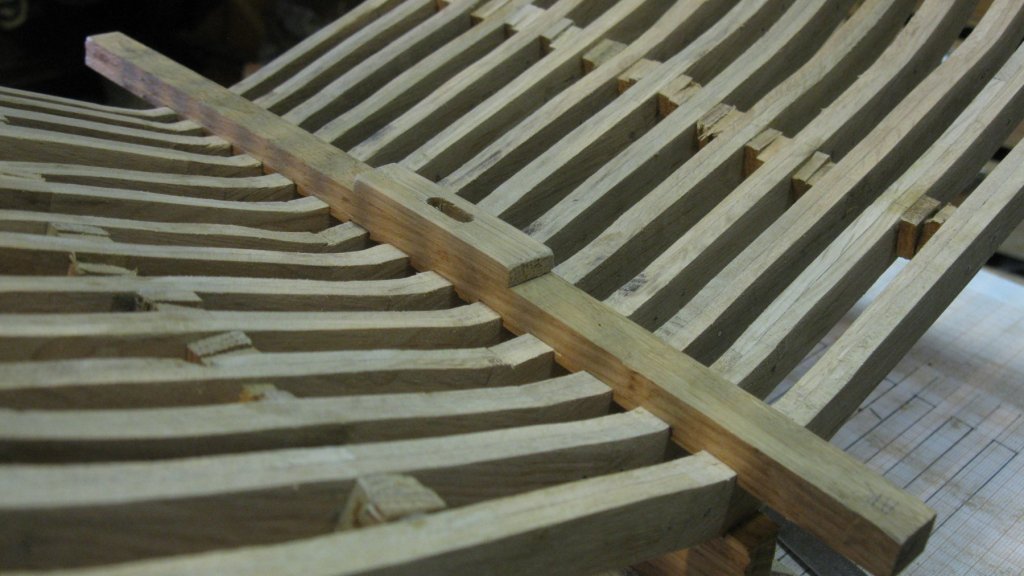
Part 10: Deck beams The cross section contains five deck beams of three different widths. The sizes on the image in black are the real dimensions in cm, those in red between brackets are the conversions to scale 1/20. I draw the round of the beam with the help of a small wooden bar, nailed in a bow on the plank of which I will saw the beam (as described in the practicum). The beams are sawed with the fretsaw and sanded in shape. I make the five deck beams one after the other. They are not yet fastened on the model because they have to be removed while making the interior. Meanwhile the excesses of the frames are removed. G.L. Completed projects: HMS Triton cross section - FINISHED - Scale 1:24 Current projects: Oostends schipje (Ostend shrimper) - scale 1:20 Cross section Fishing Smack - Scale 1/20, POF, approx. 1920


- 219 replies
-
- 14
-
-
- smack
- cross-section
- (and 2 more)
-
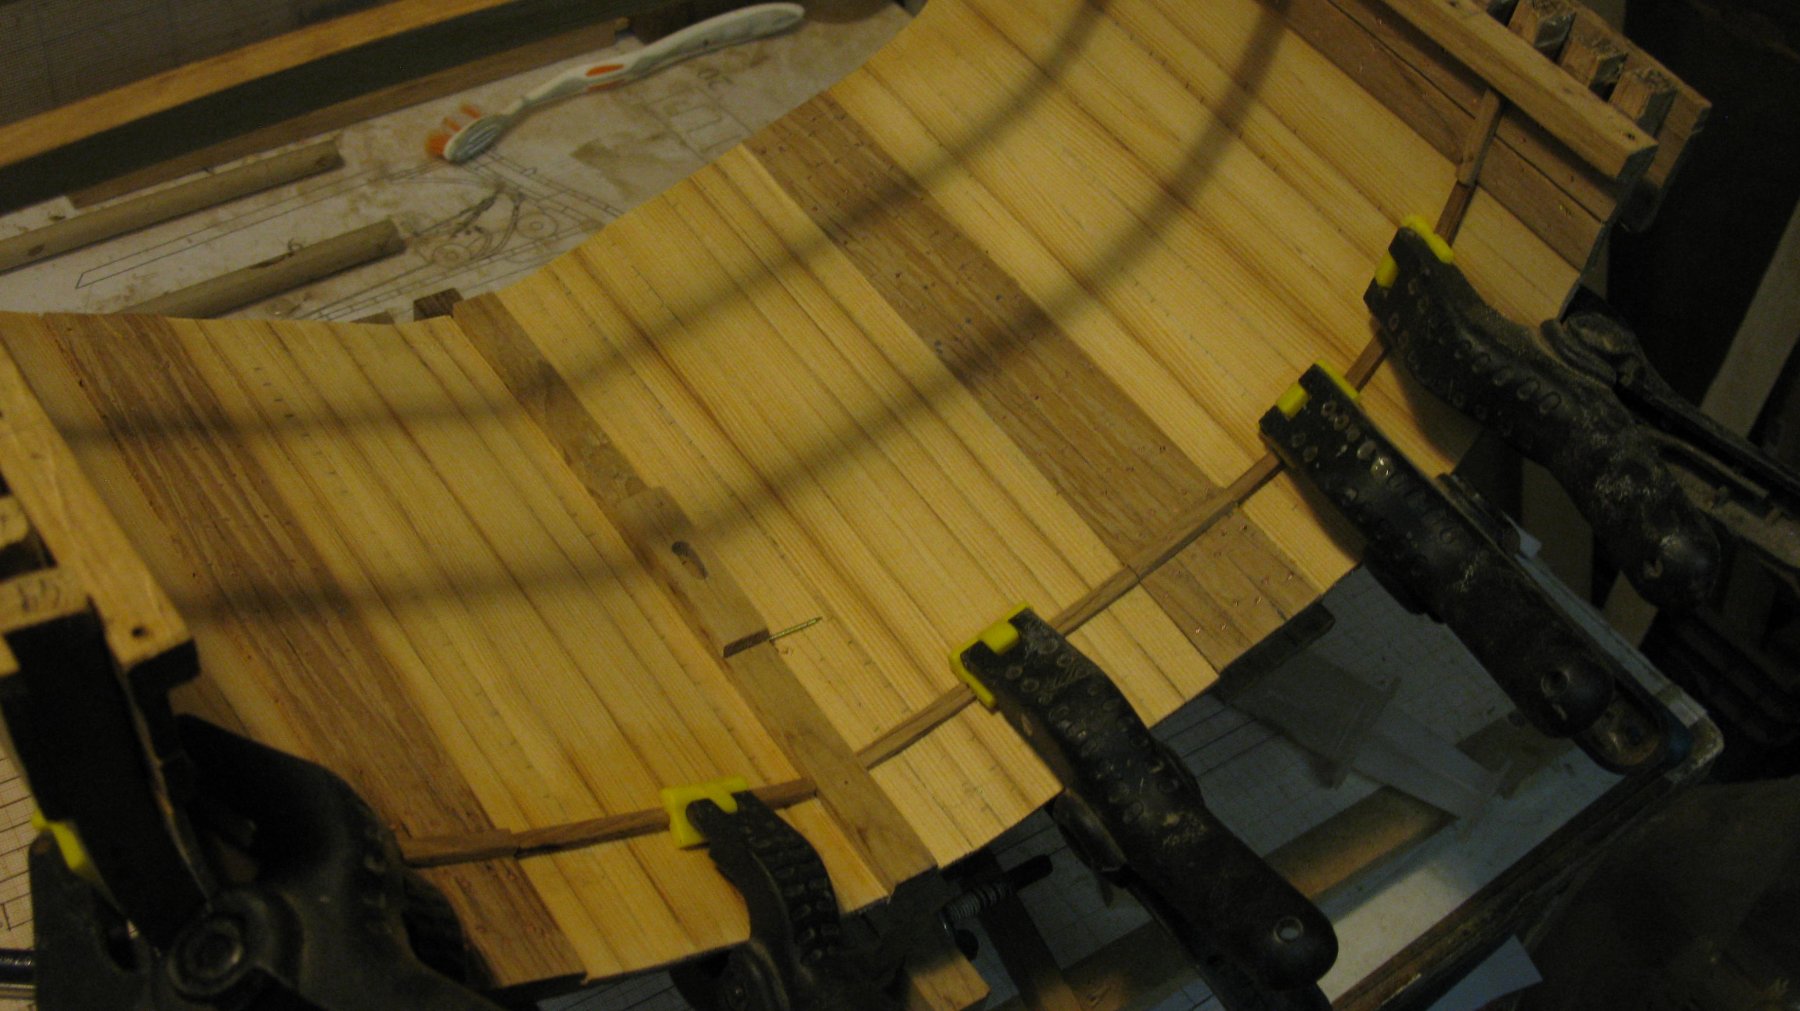
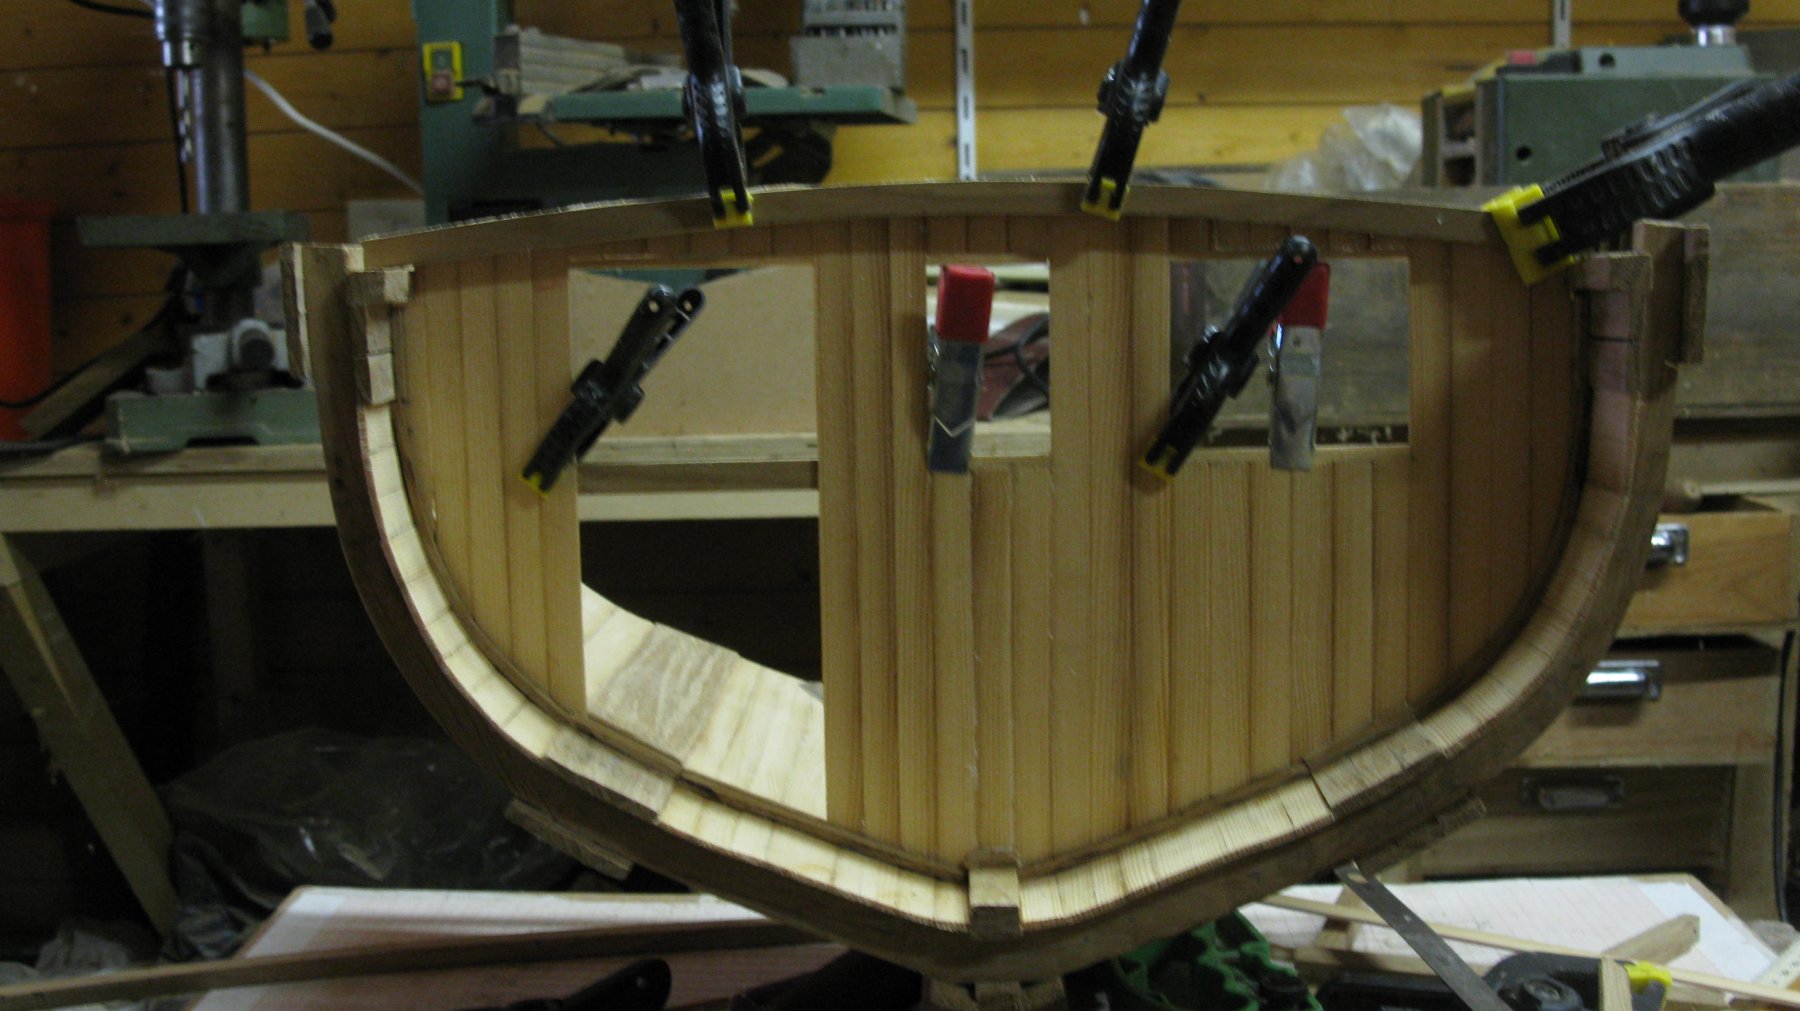
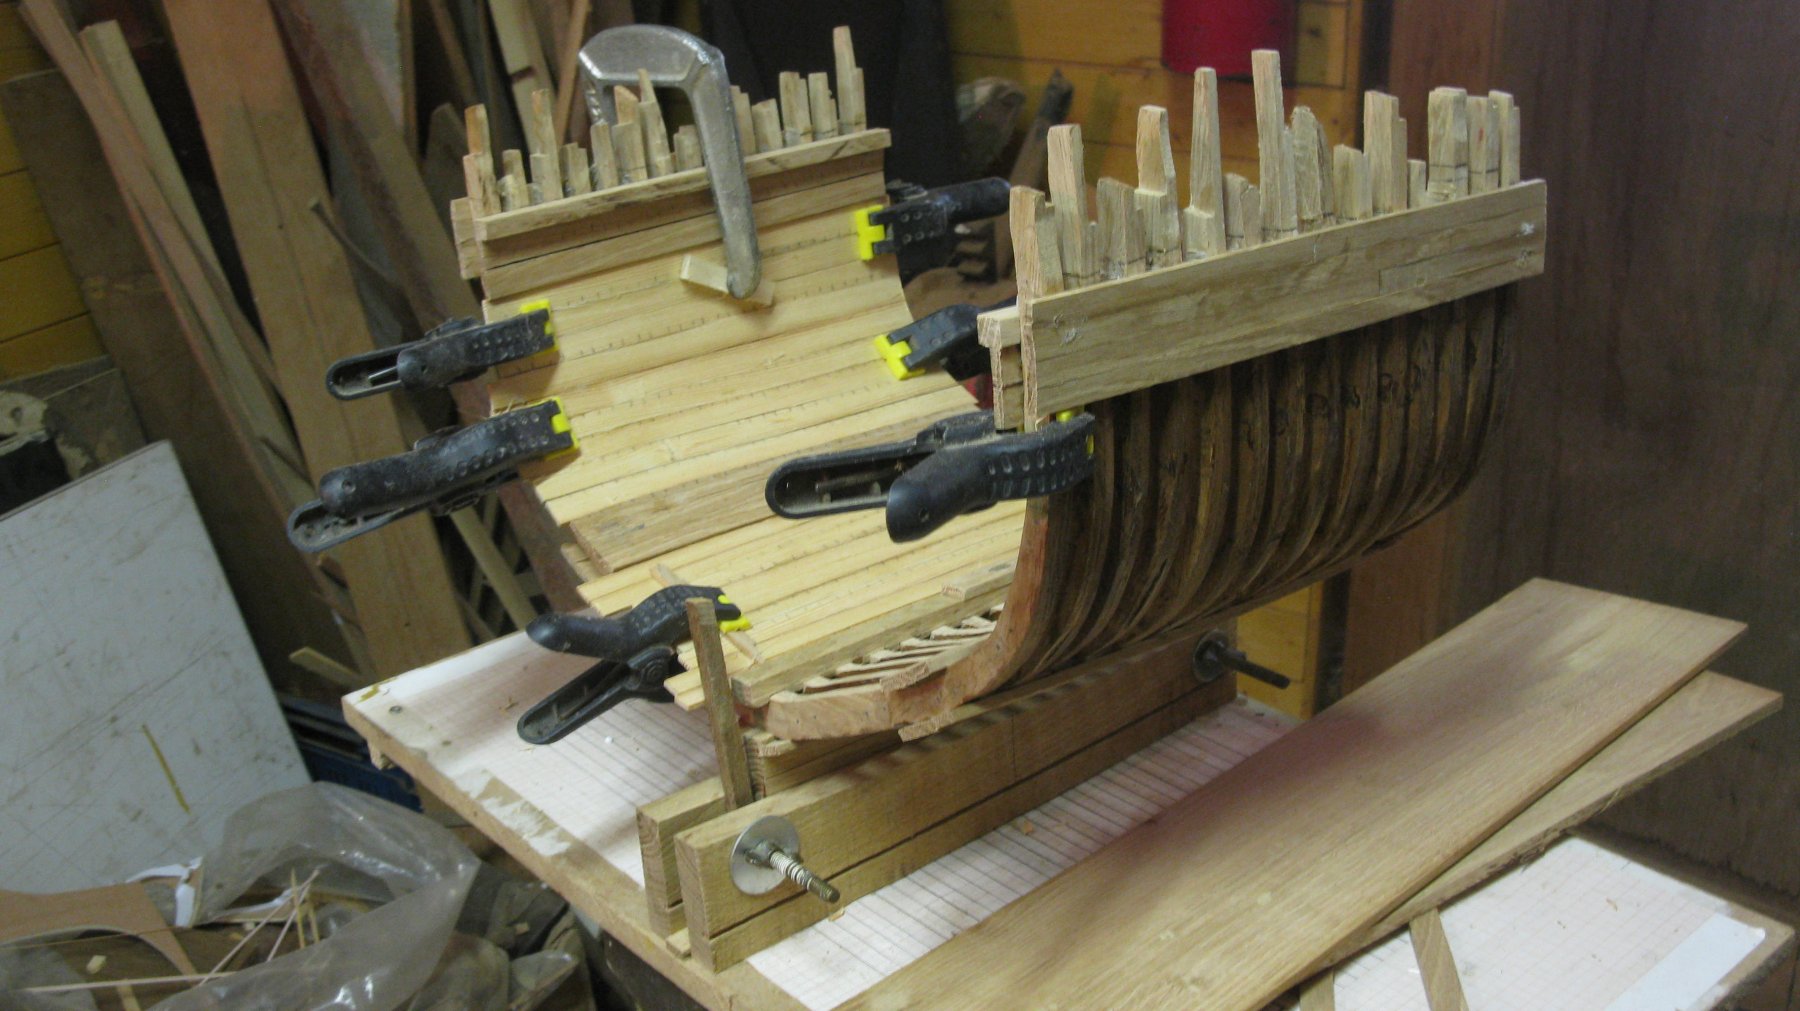
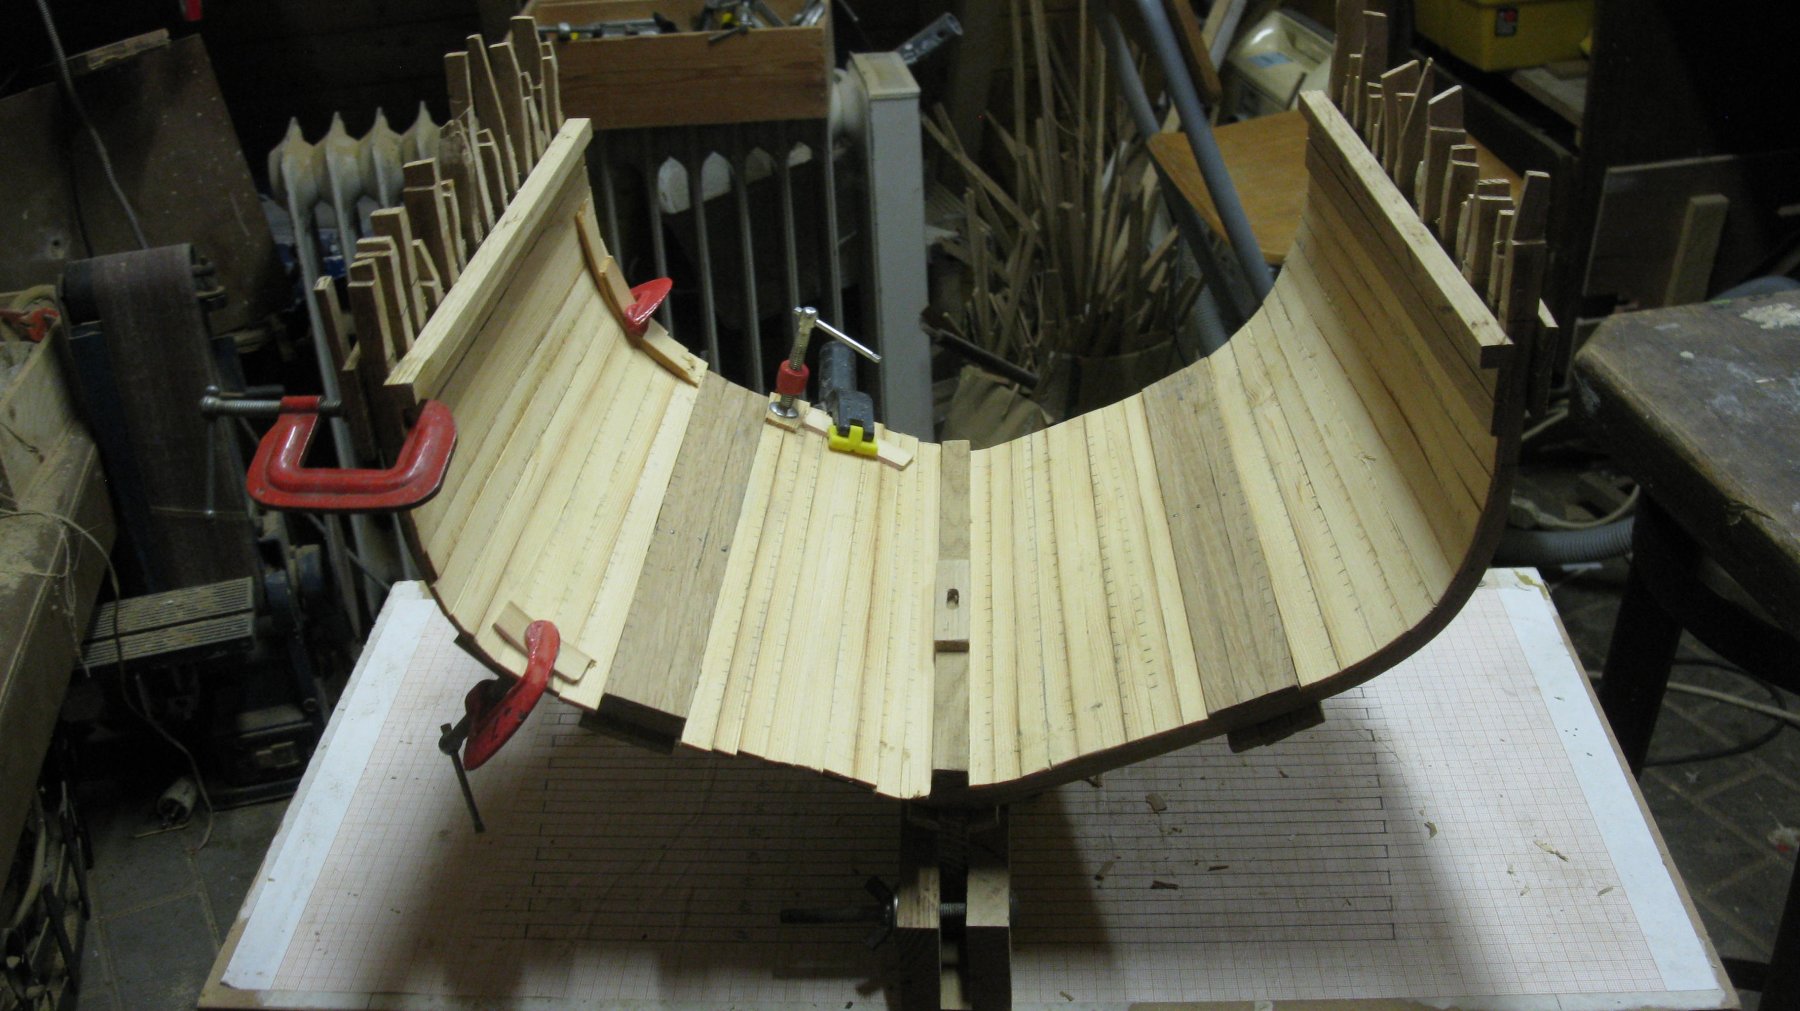
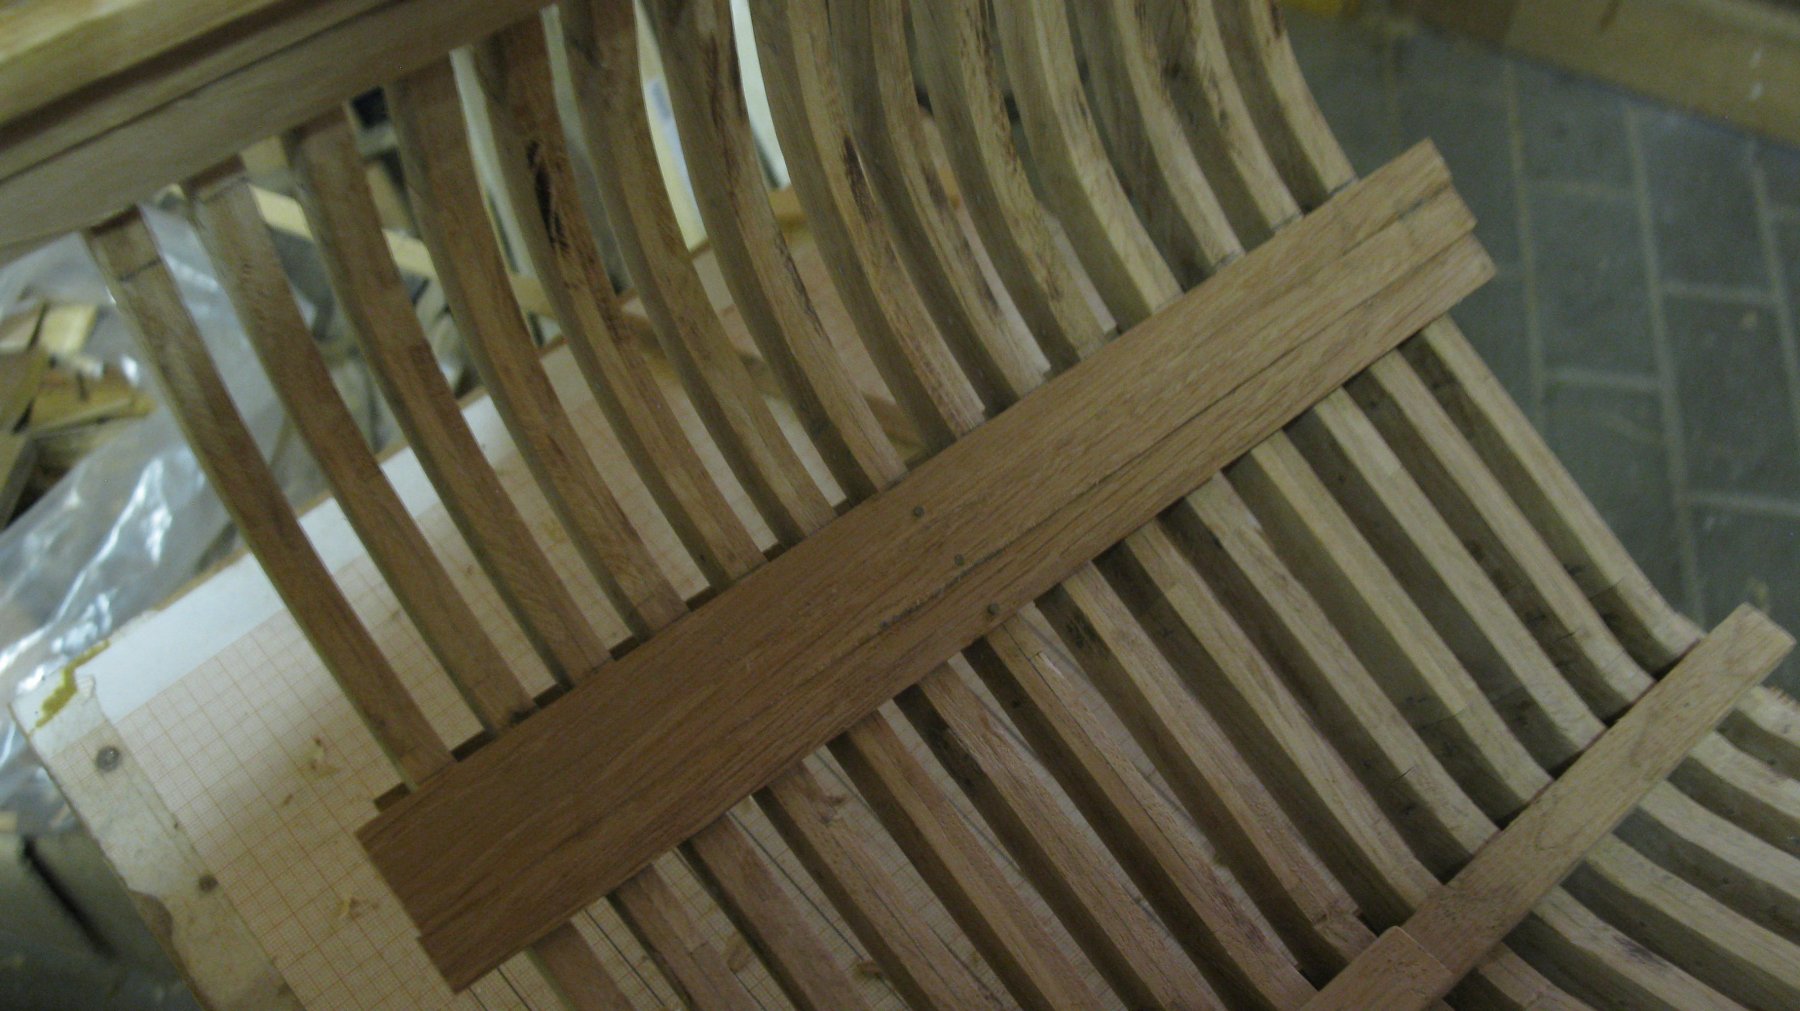
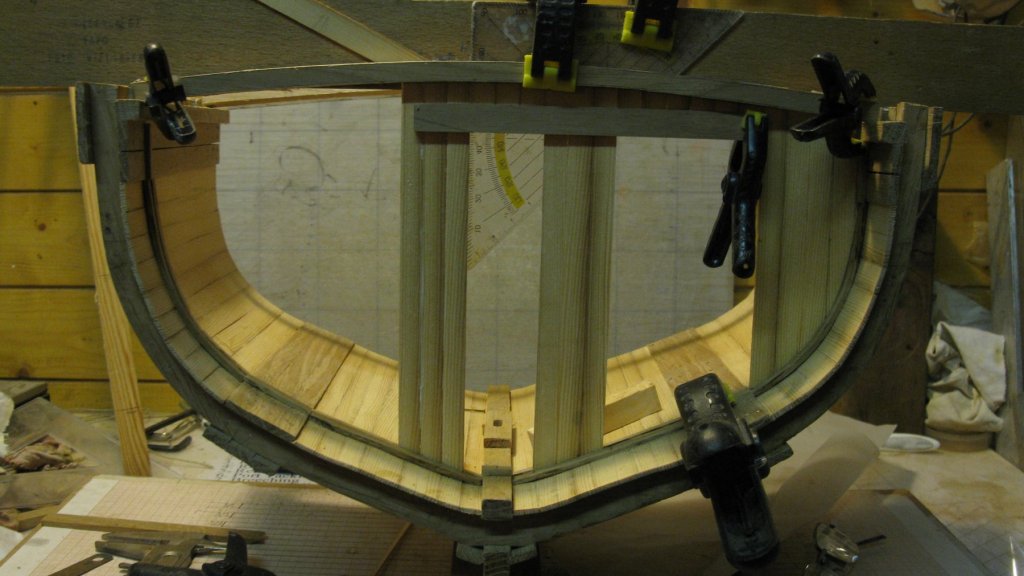
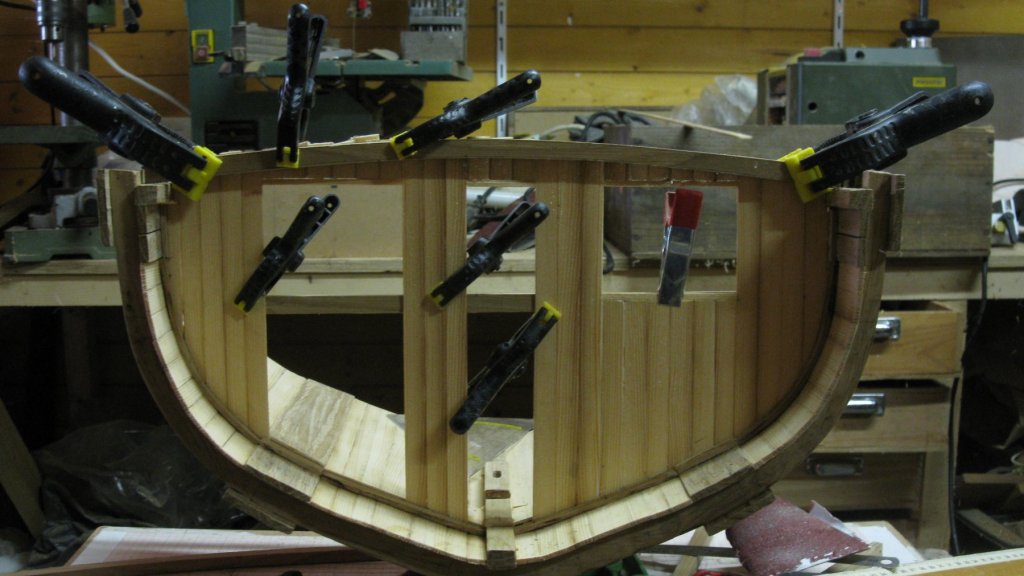
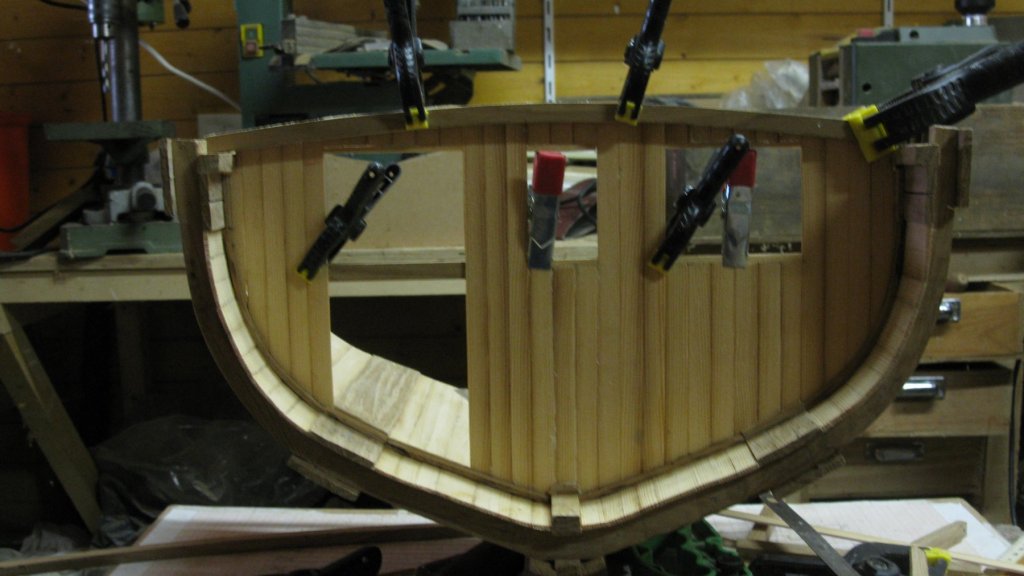
The remaining of the inner planking was done with pitch pine planks. As the hull narrows towards the bow, all planks have to be made individual. Each plank is a bit narrower at one side. The inner planking is completed G.L. Completed projects: HMS Triton cross section - FINISHED - Scale 1:24 Current projects: Oostends schipje (Ostend shrimper) - scale 1:20 Cross section Fishing Smack - Scale 1/20, POF, approx. 1920

- 219 replies
-
- 14
-
-
- smack
- cross-section
- (and 2 more)
-
That reminds me of the time when I was sailing on an old Agressive class wooden ocean minesweeper as a young officer. In rough sea when the bilges water was in motion, the smell of the bilge filled the entire ship. G.L. It is my aim to match your craftsmanship of the Golden Hind.
- 219 replies
-
- 2
-
-
- smack
- cross-section
- (and 2 more)
-
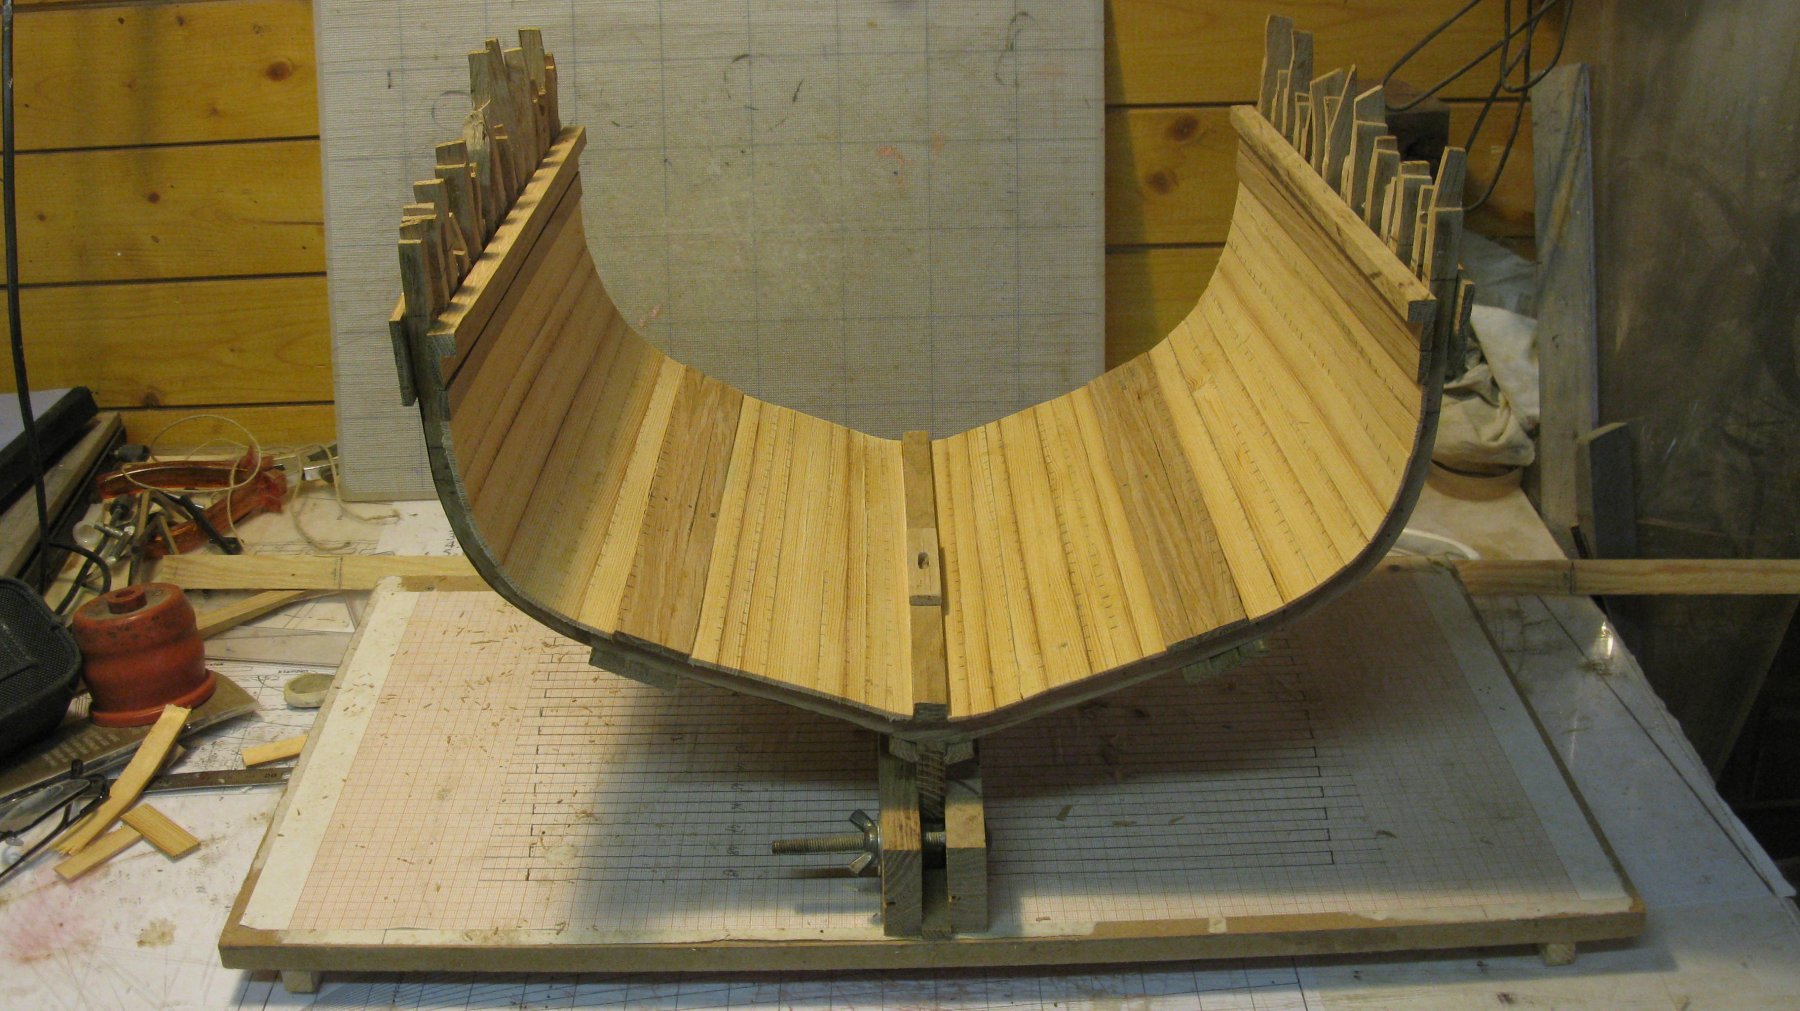
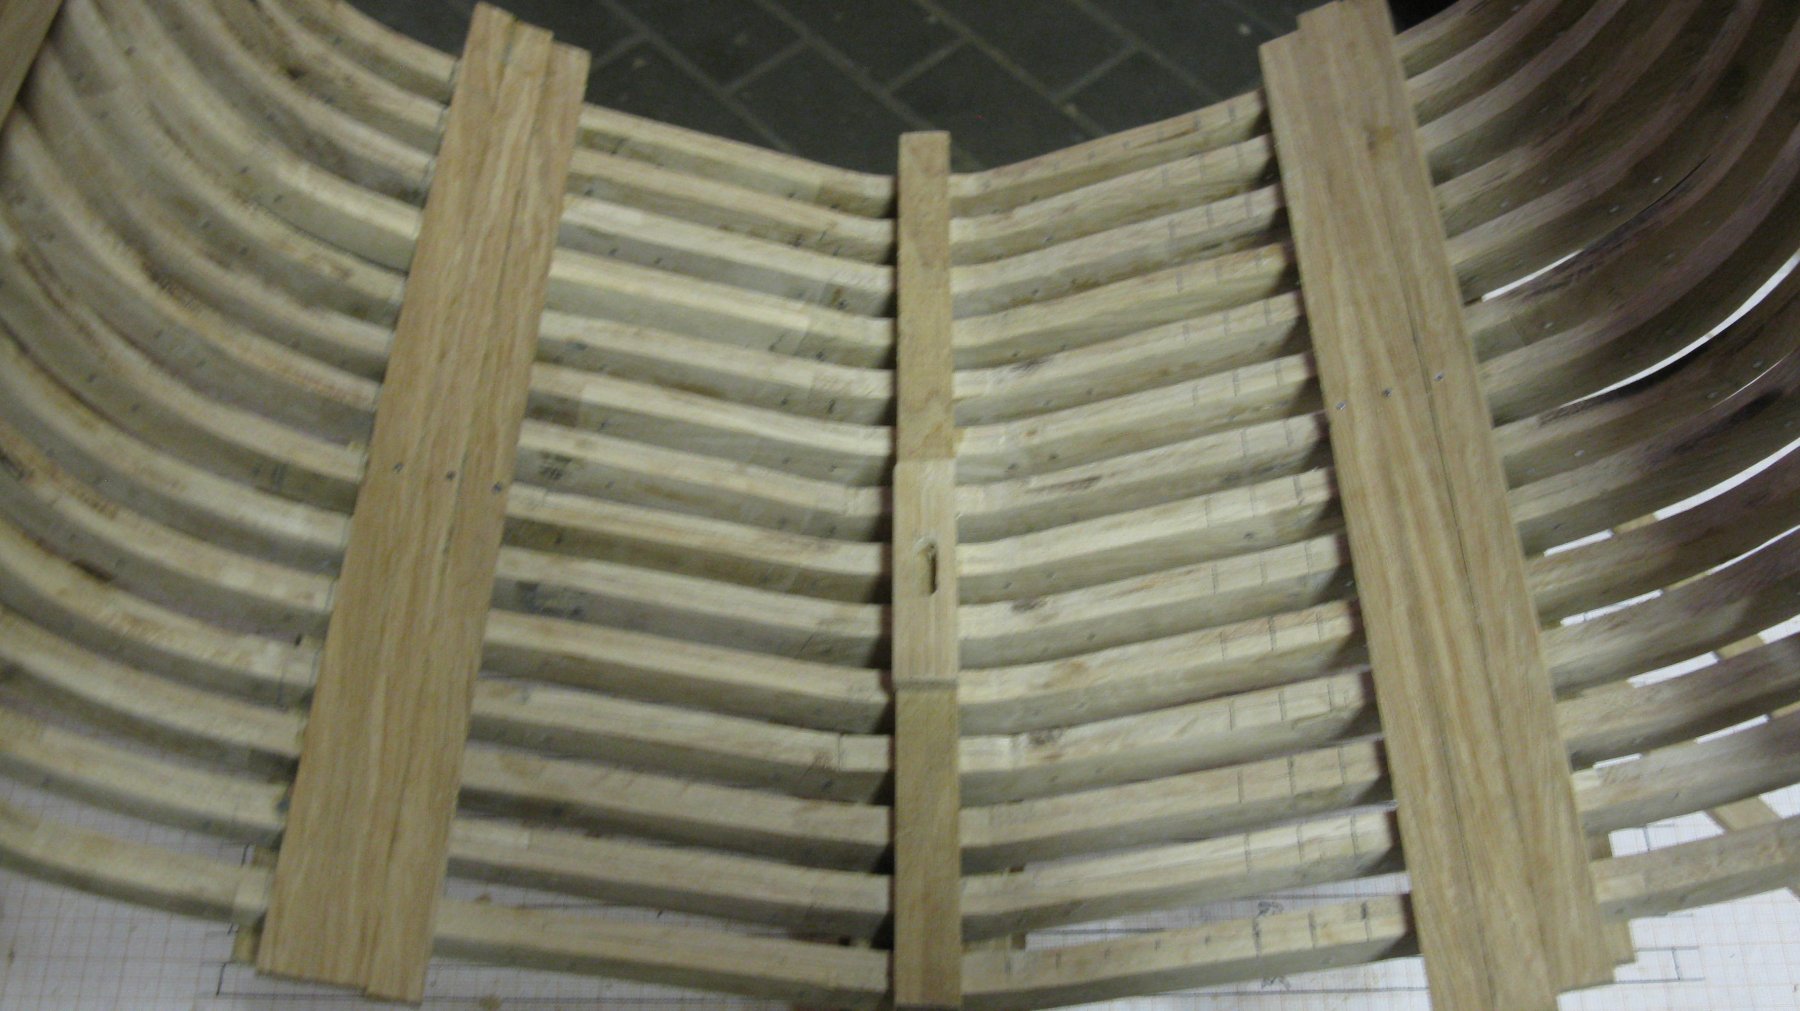
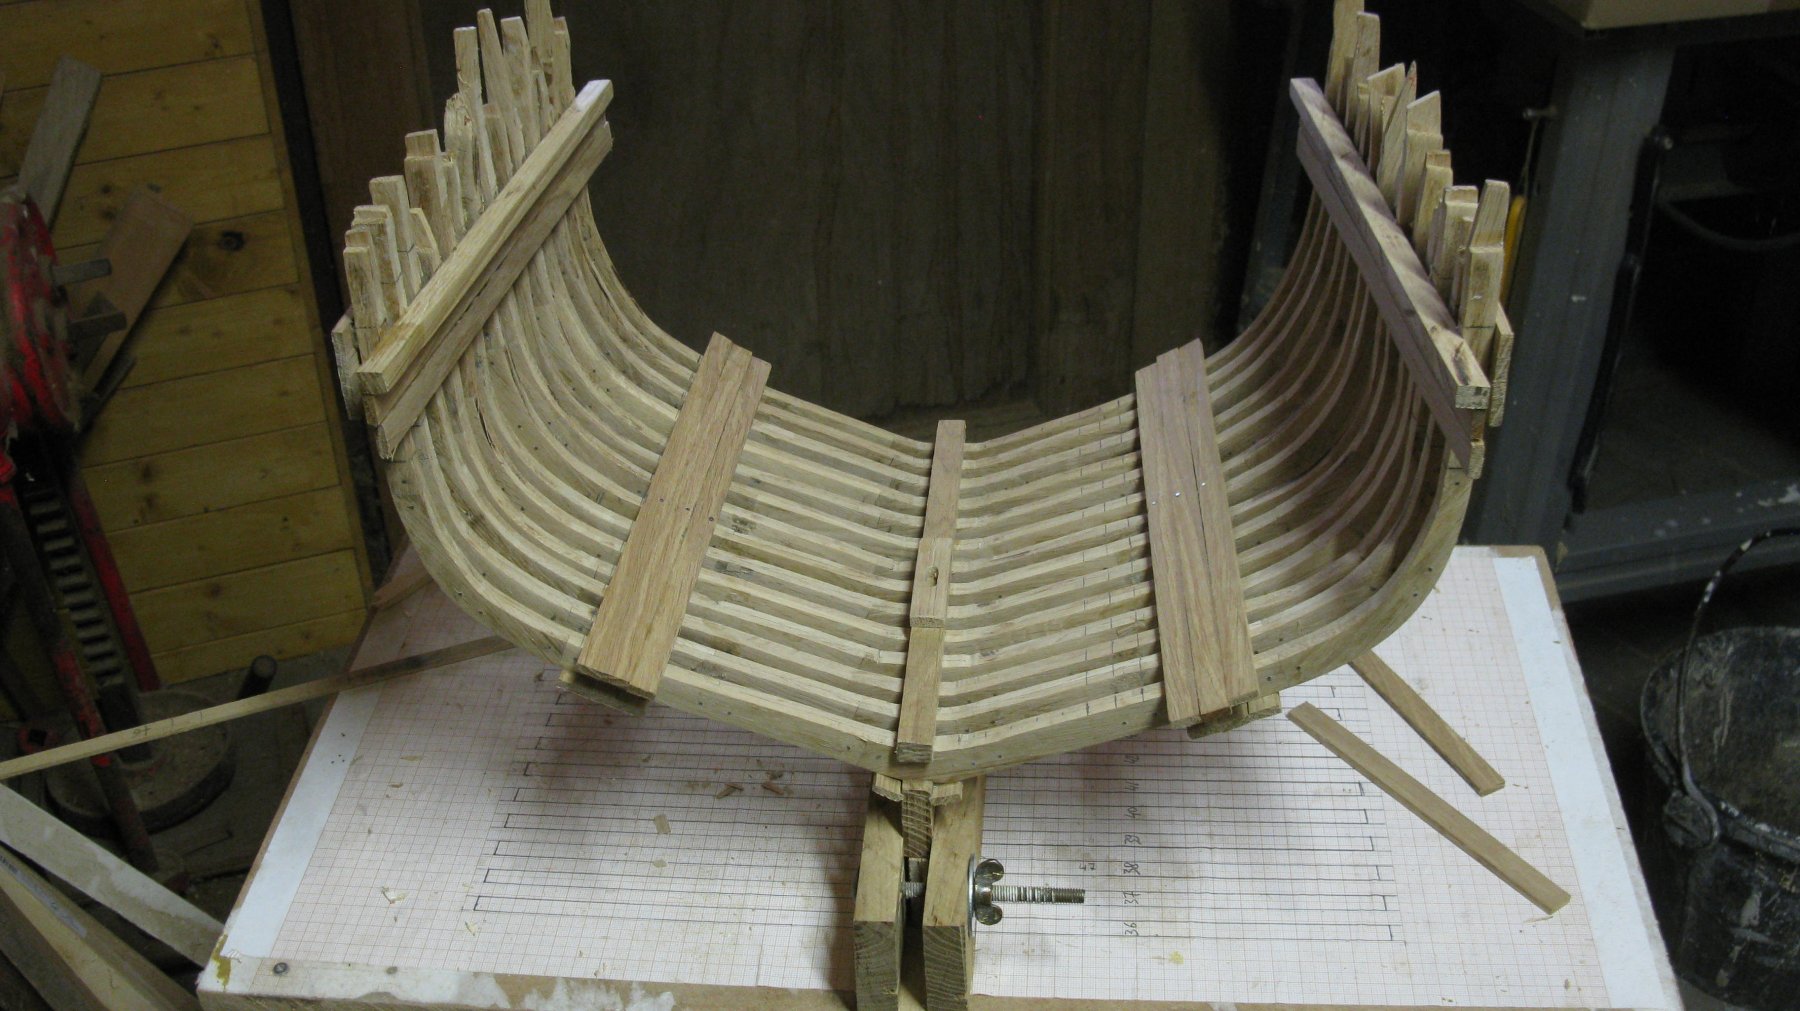
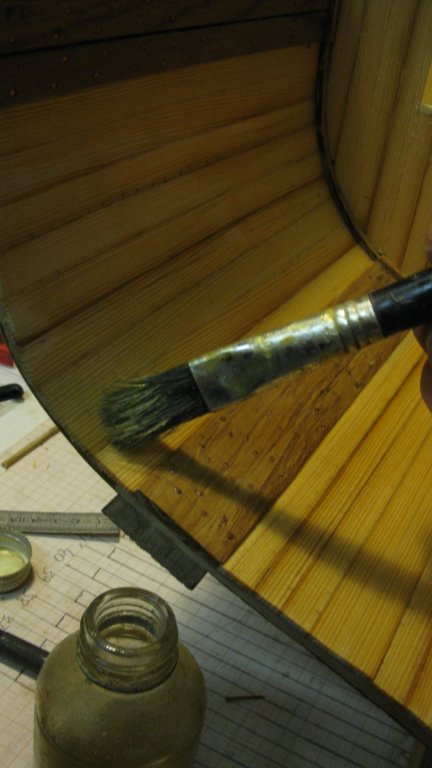
Part 9: Thick stuff inner planking and inner planking To determine the height of the deck beam clamps, I lay a lath on top of the wales from one side to the other. Below the lath I hold a 6,7 mm thick spacer and glue the clamp under it. Under the deck beam clamp come two inner wales. There is a narrow space between the two for ventilation. The inner thick stuff consists of three oak planks. The whole of the structural inner planking. I will leave out some of the hull planking at port side of the model to keep the frames visual, therefore it is now time to stain those frames dark. G.L. Completed projects: HMS Triton cross section - FINISHED - Scale 1:24 Current projects: Oostends schipje (Ostend shrimper) - scale 1:20 Cross section Fishing Smack - Scale 1/20, POF, approx. 1920


- 219 replies
-
- 11
-
-
- smack
- cross-section
- (and 2 more)
-
John and Michael, thanks for your encouraging words. Here some more progress: Part 8: Thick stuff outer planking Placing the garboard strake The thick stuff over floor heads The wales consist of four oak planks.

- 219 replies
-
- 7
-
-
- smack
- cross-section
- (and 2 more)
-
Hello Patrick, Glad you are back on the shipyard!! G.L.
- 756 replies
-
- 3
-
-
- galleon
- golden hind
- (and 2 more)
-
Thanks Michael, Patrick and the likers, Next item is the keelson: Part 6: The keelson The keelson is made of oak. The notches for the frames are made in the same way as I did for the keel. The keelson is glued in place. The mast step is also placed. G.L. Completed projects: HMS Triton cross section - FINISHED - Scale 1:24 Current projects: Oostends schipje (Ostend shrimper) - scale 1:20 Cross section Fishing Smack - Scale 1/20, POF, approx. 1920

- 219 replies
-
- 16
-
-
- smack
- cross-section
- (and 2 more)
-
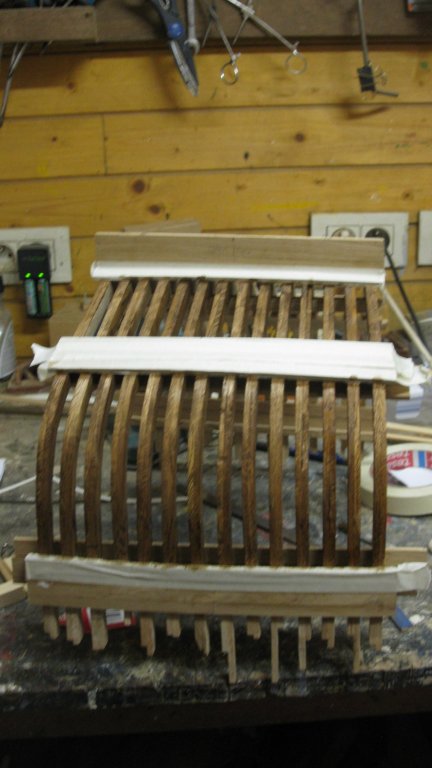
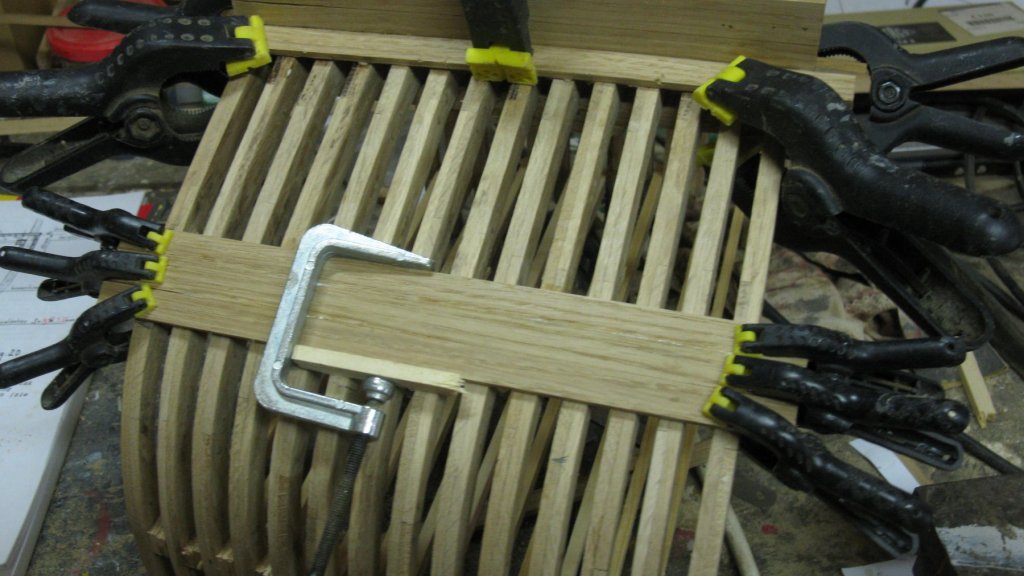
All 14 frames are placed on the keel. G.L. Completed projects: HMS Triton cross section - FINISHED - Scale 1:24 Current projects: Oostends schipje (Ostend shrimper) - scale 1:20 Cross section Fishing Smack - Scale 1/20, POF, approx. 1920
- 219 replies
-
- 13
-
-
- smack
- cross-section
- (and 2 more)
-
Can I borrow him to help me rigging my shrimper? G.L.