HOLIDAY DONATION DRIVE - SUPPORT MSW - DO YOUR PART TO KEEP THIS GREAT FORUM GOING! (Only 20 donations so far - C'mon guys!)
×


G.L.
-
Posts
1,553 -
Joined
-
Last visited
Content Type
Profiles
Forums
Gallery
Events
Everything posted by G.L.
-
 Michael, Since the children went their own way my wif and I have two cats and I think we would be very sad if one died. I feel so sorry for you.
 -
Nice work, Vaddoc. It is very interesting to follow the process.
-
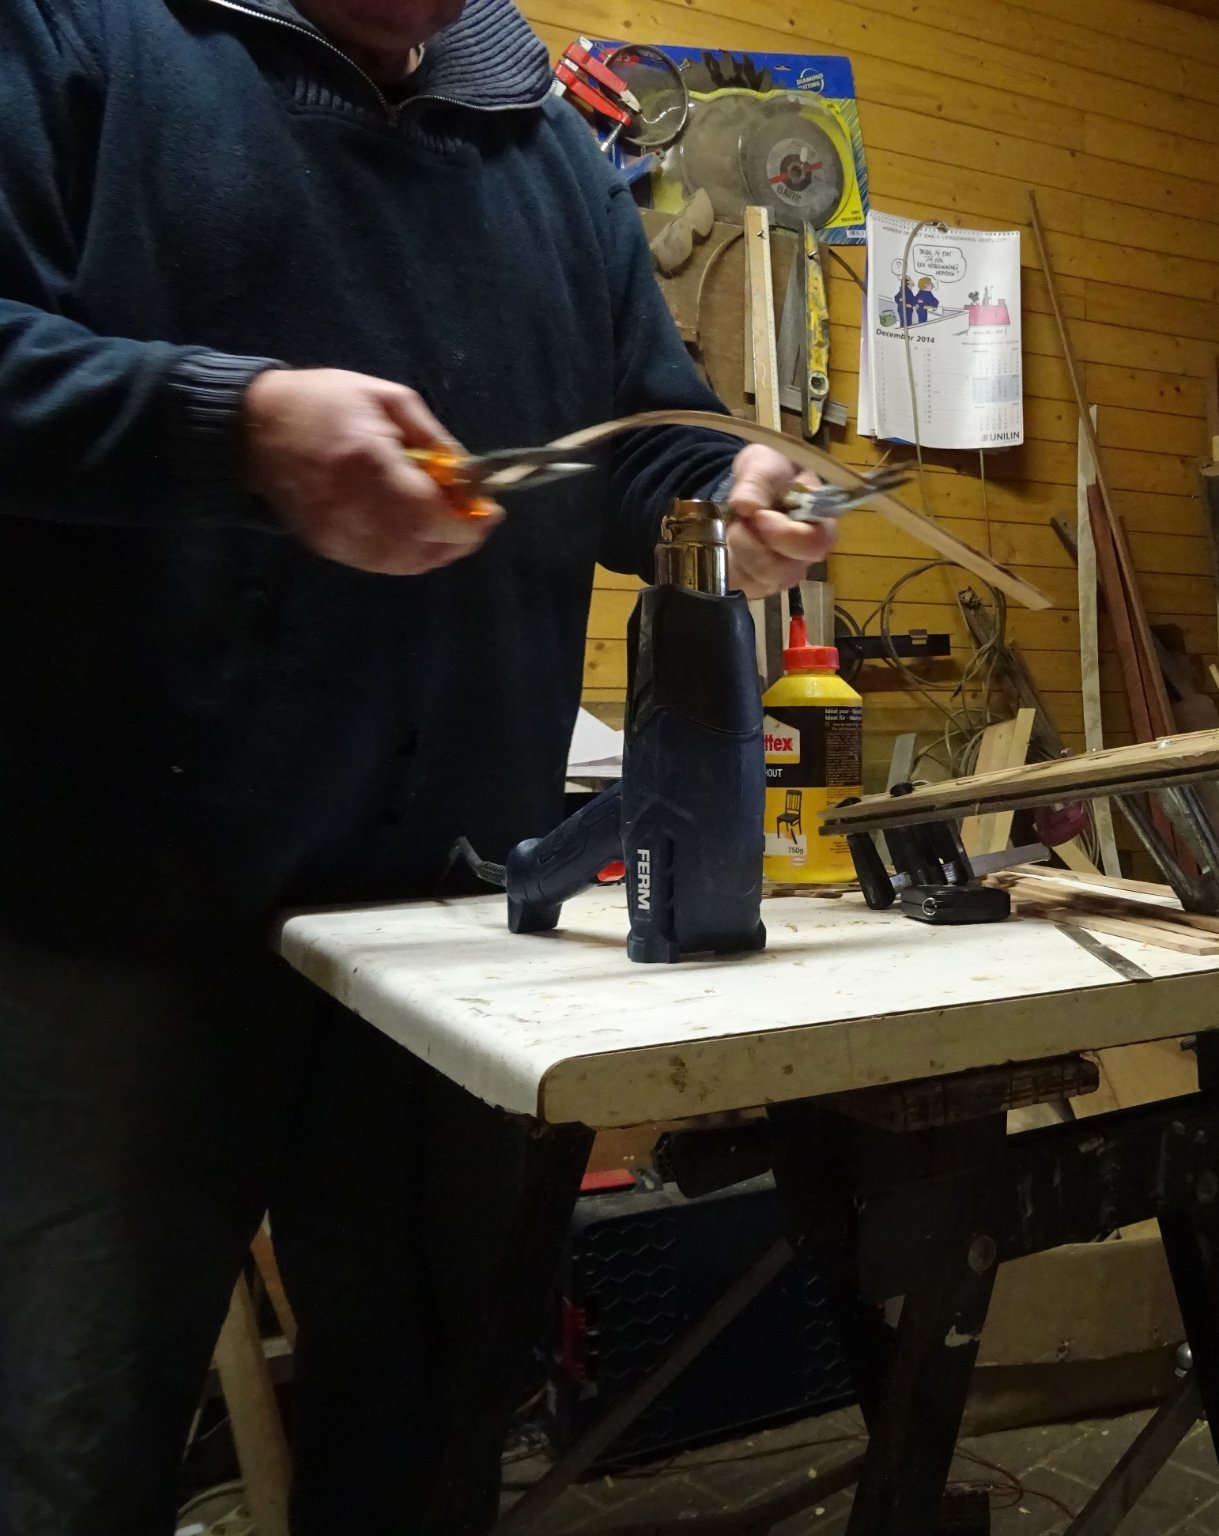
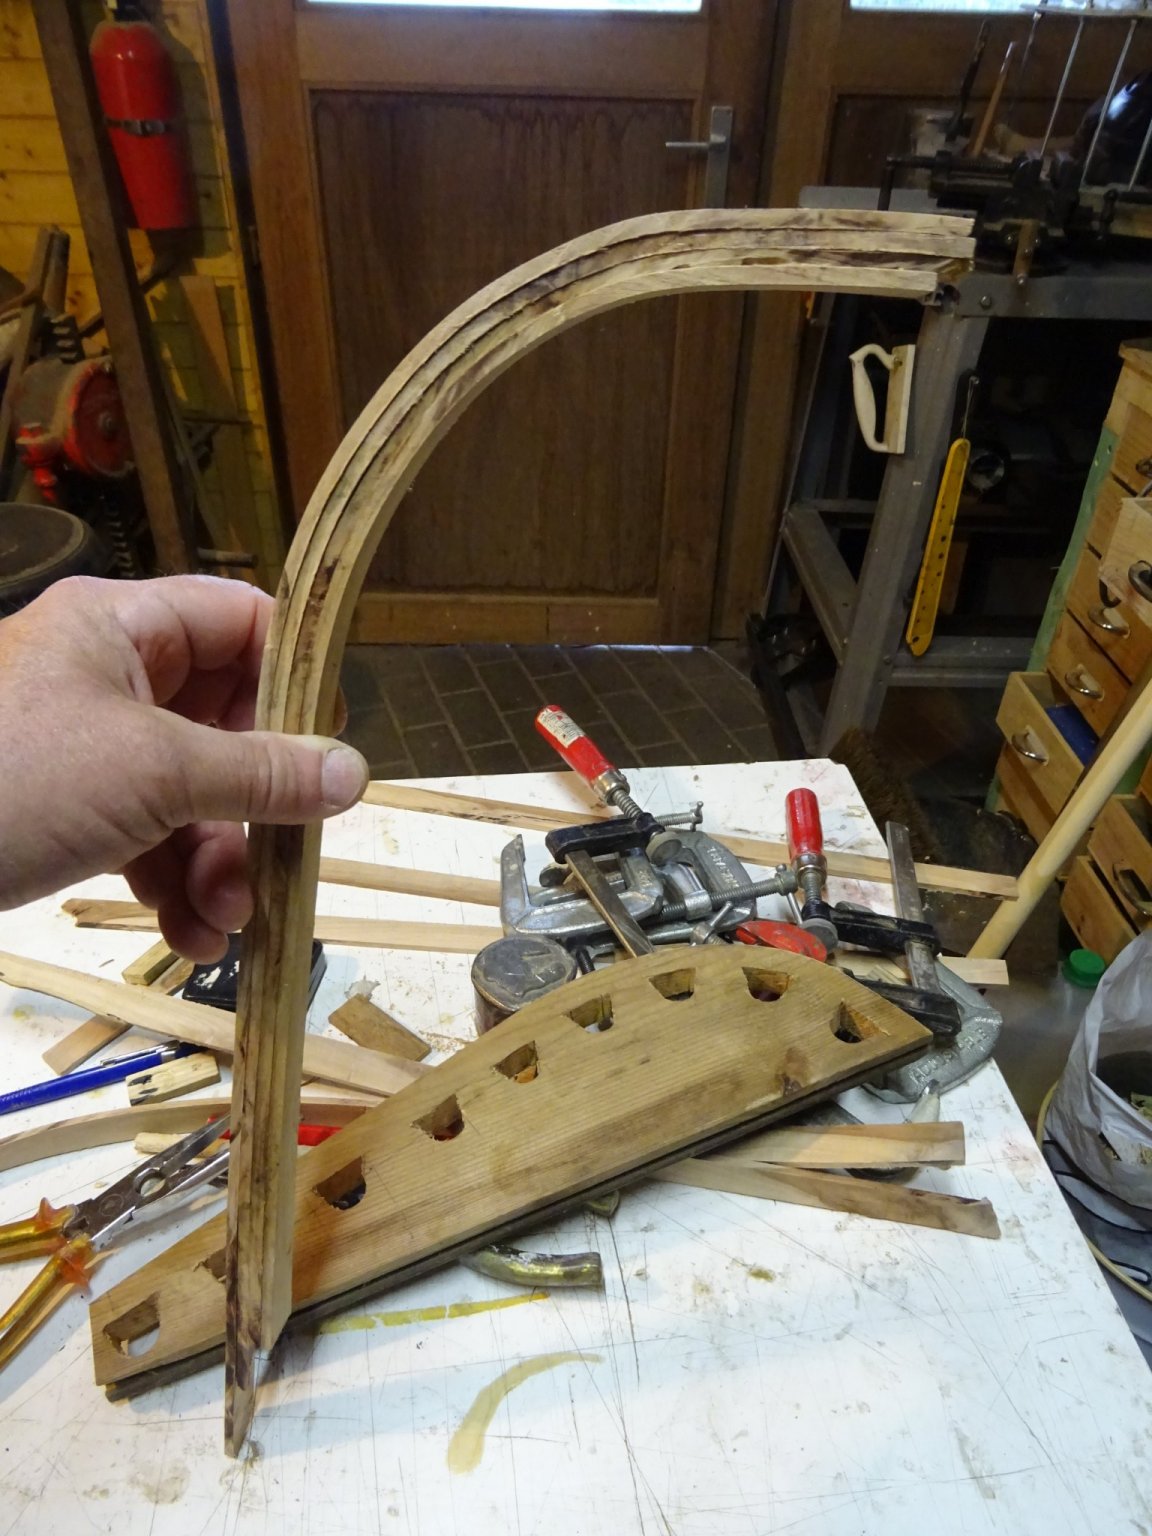
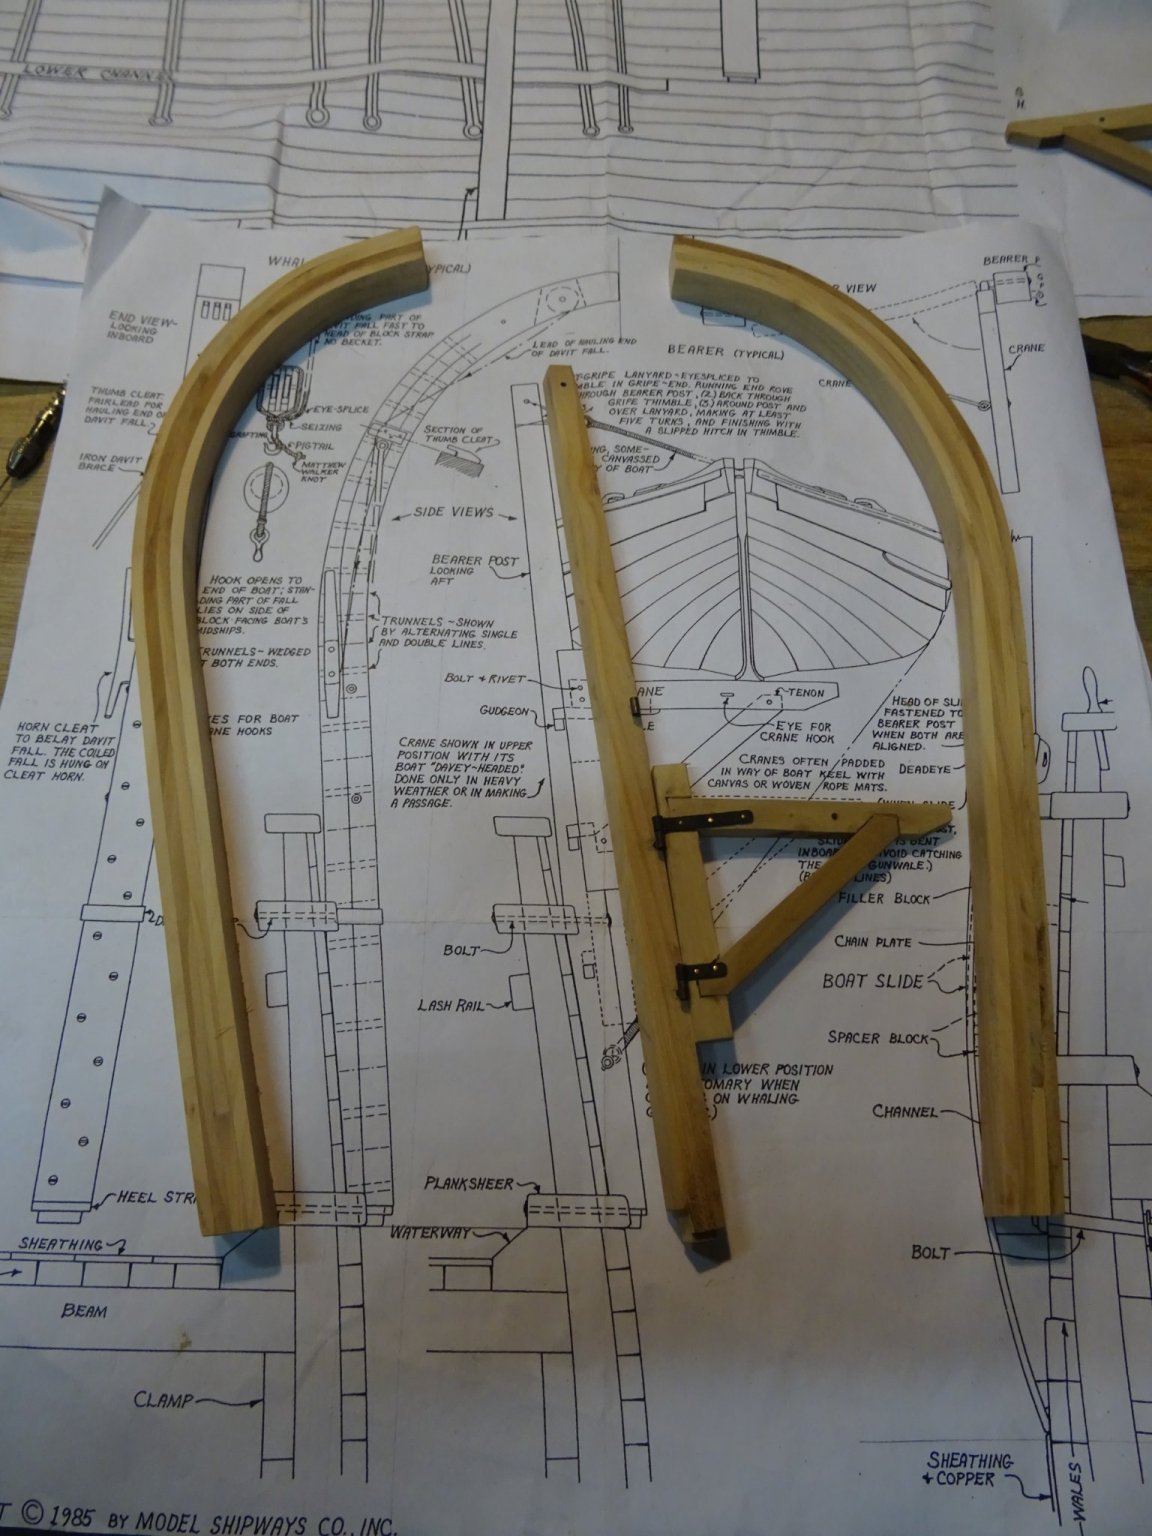
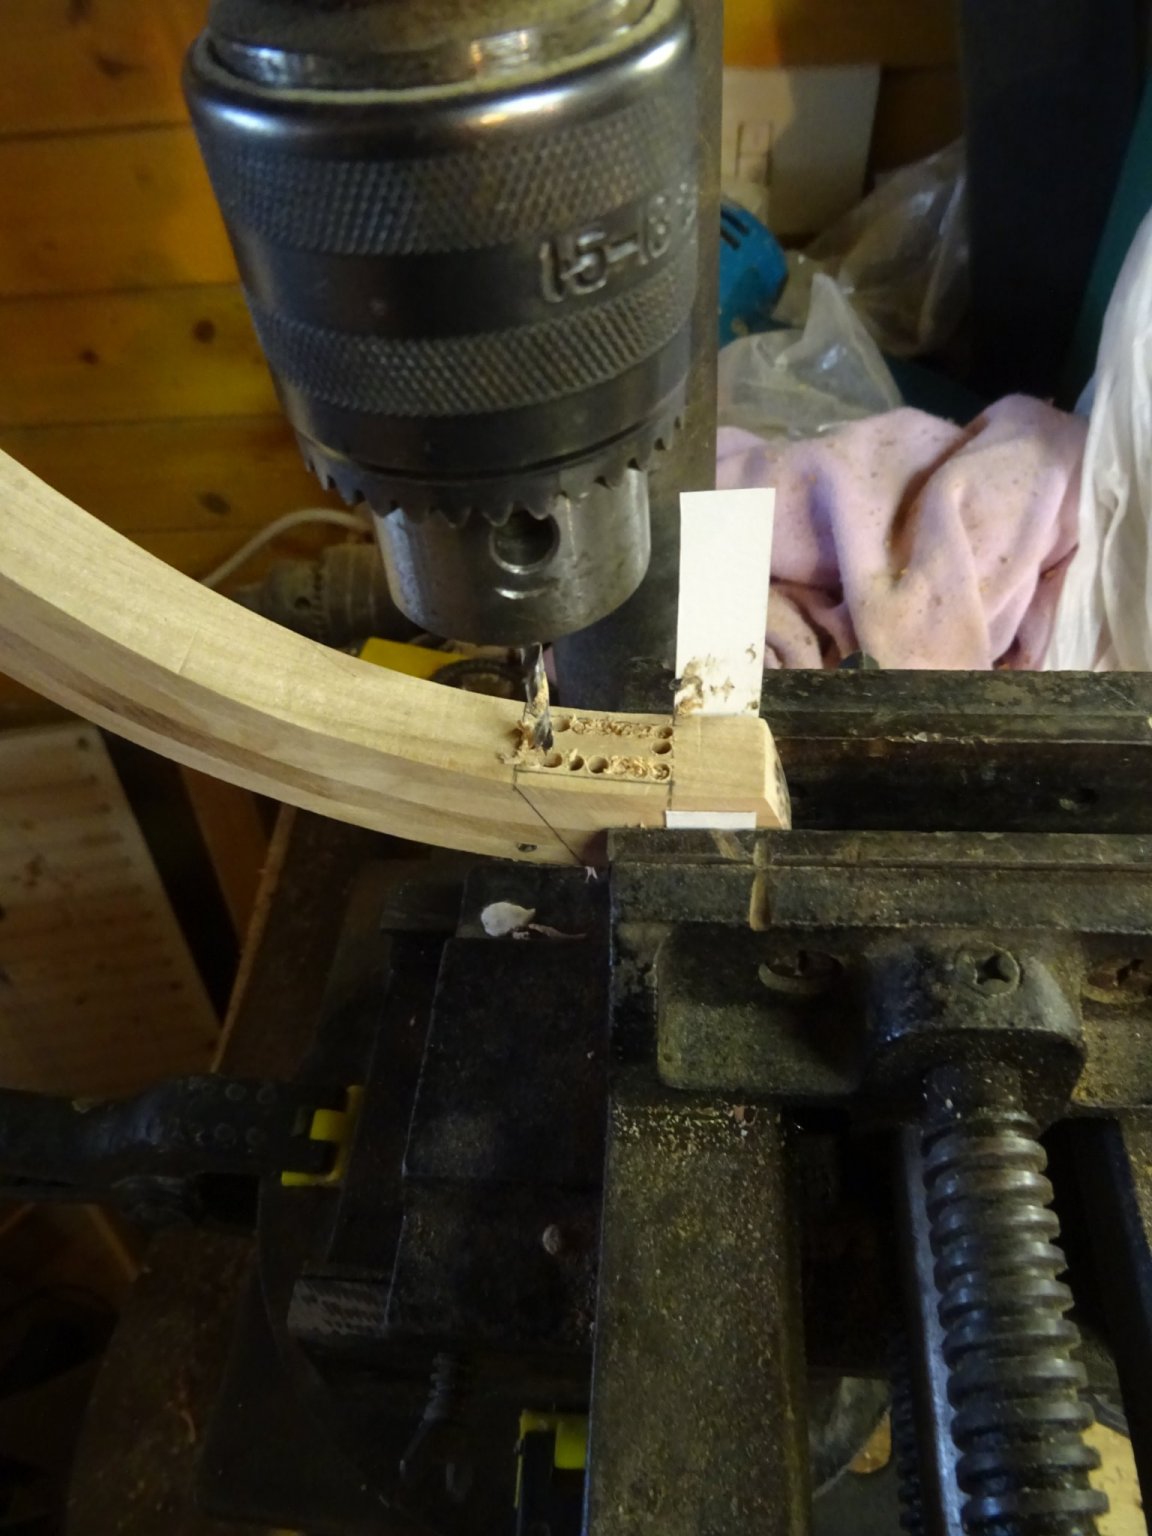
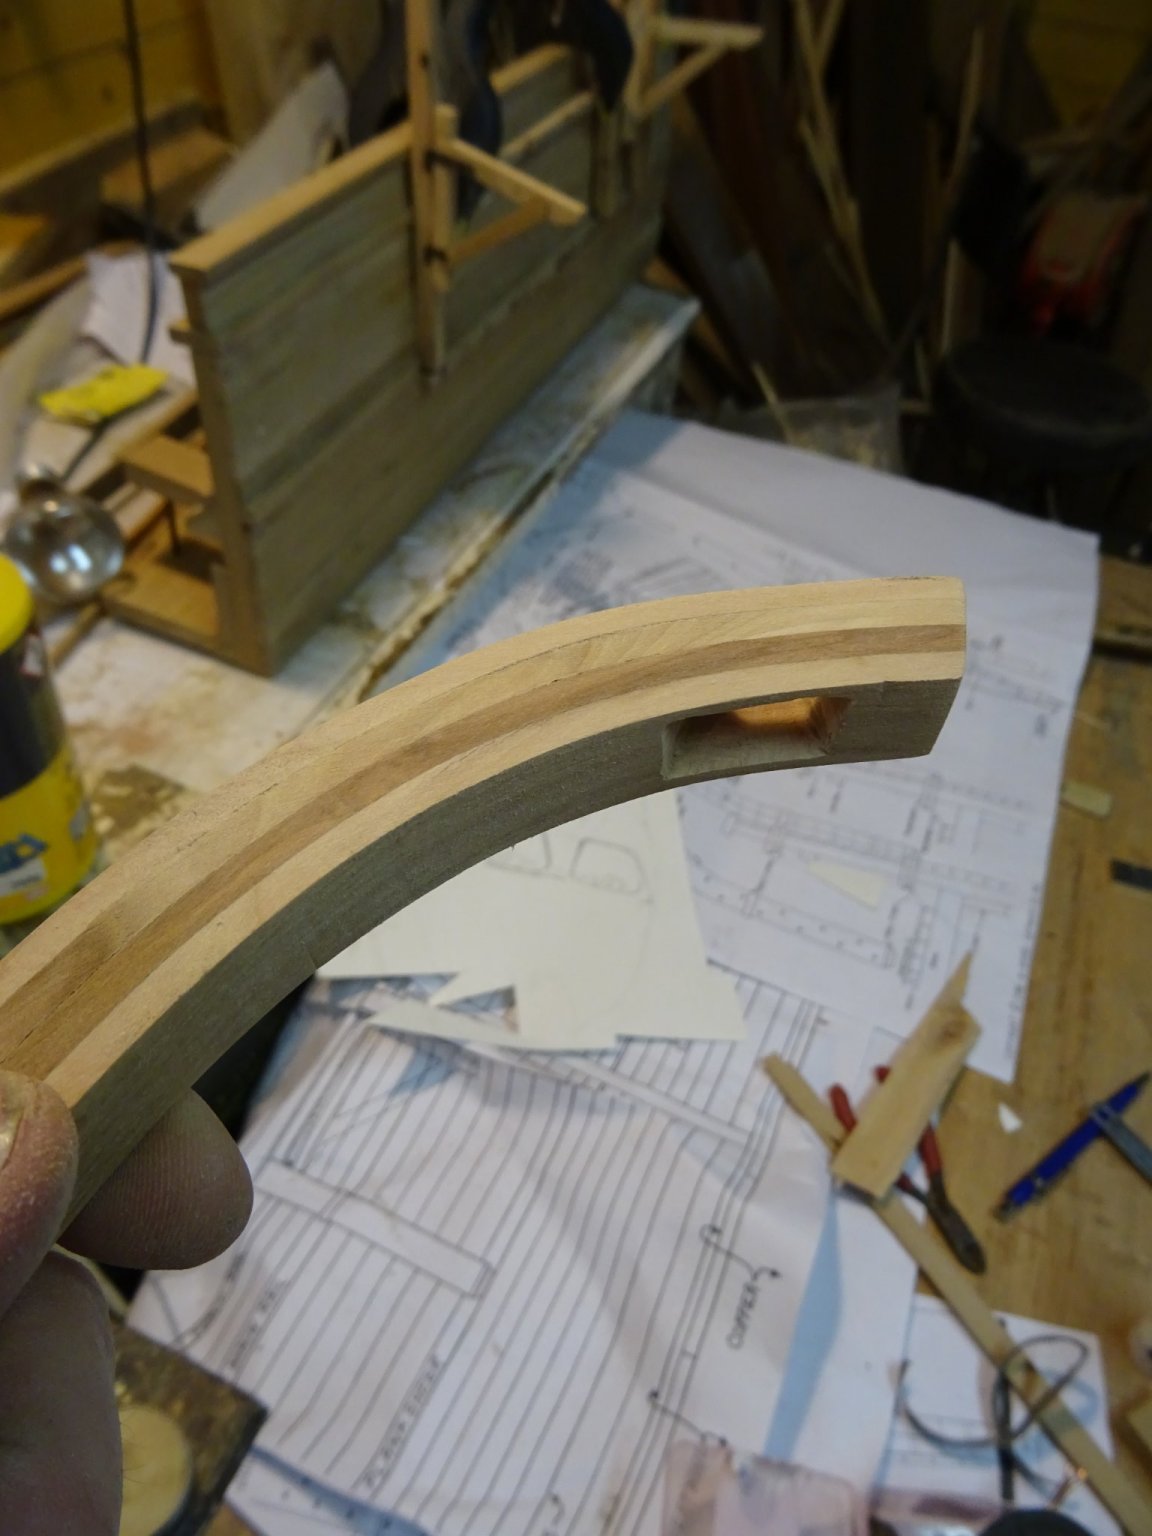
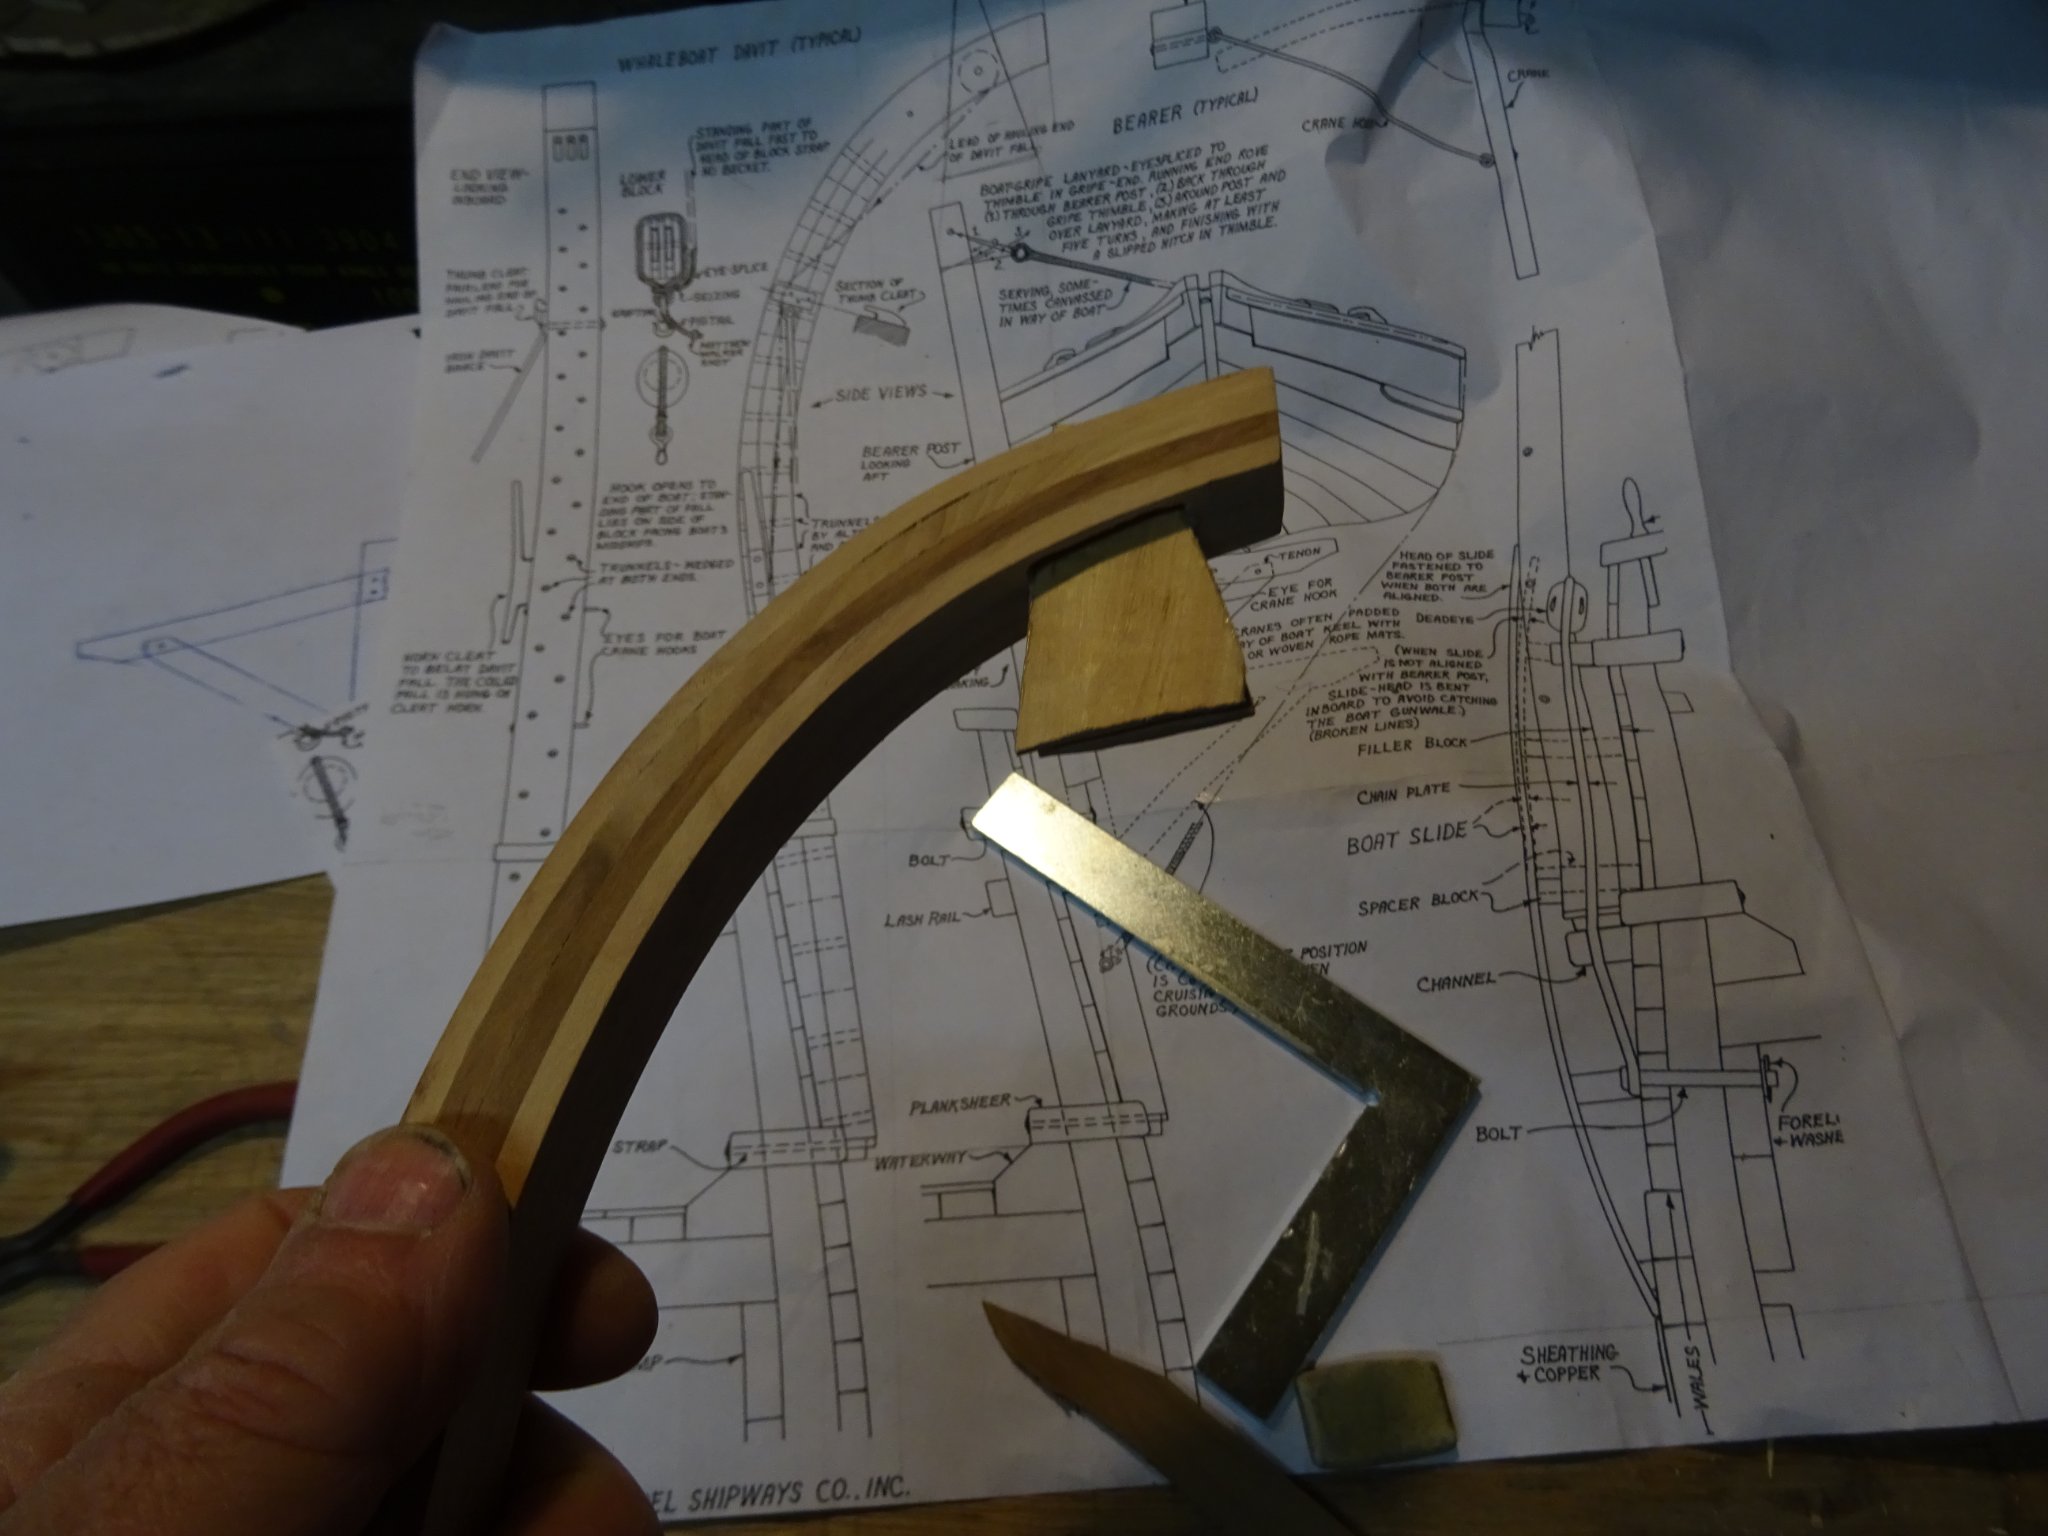
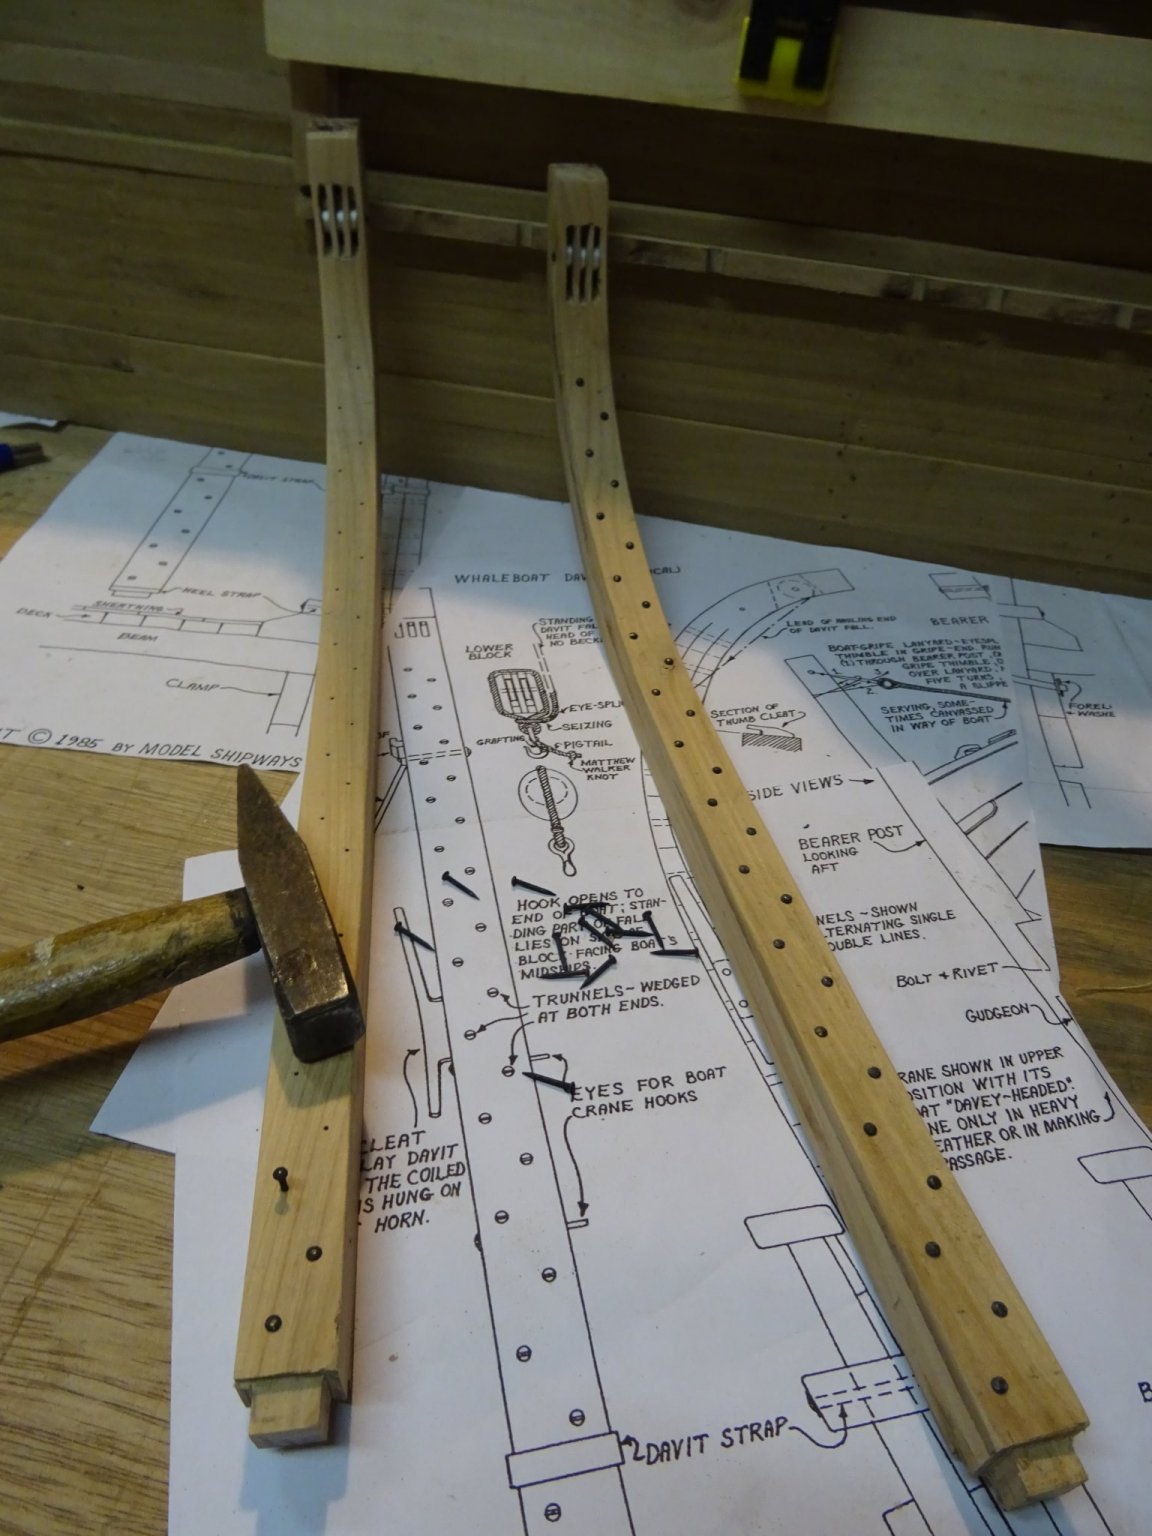
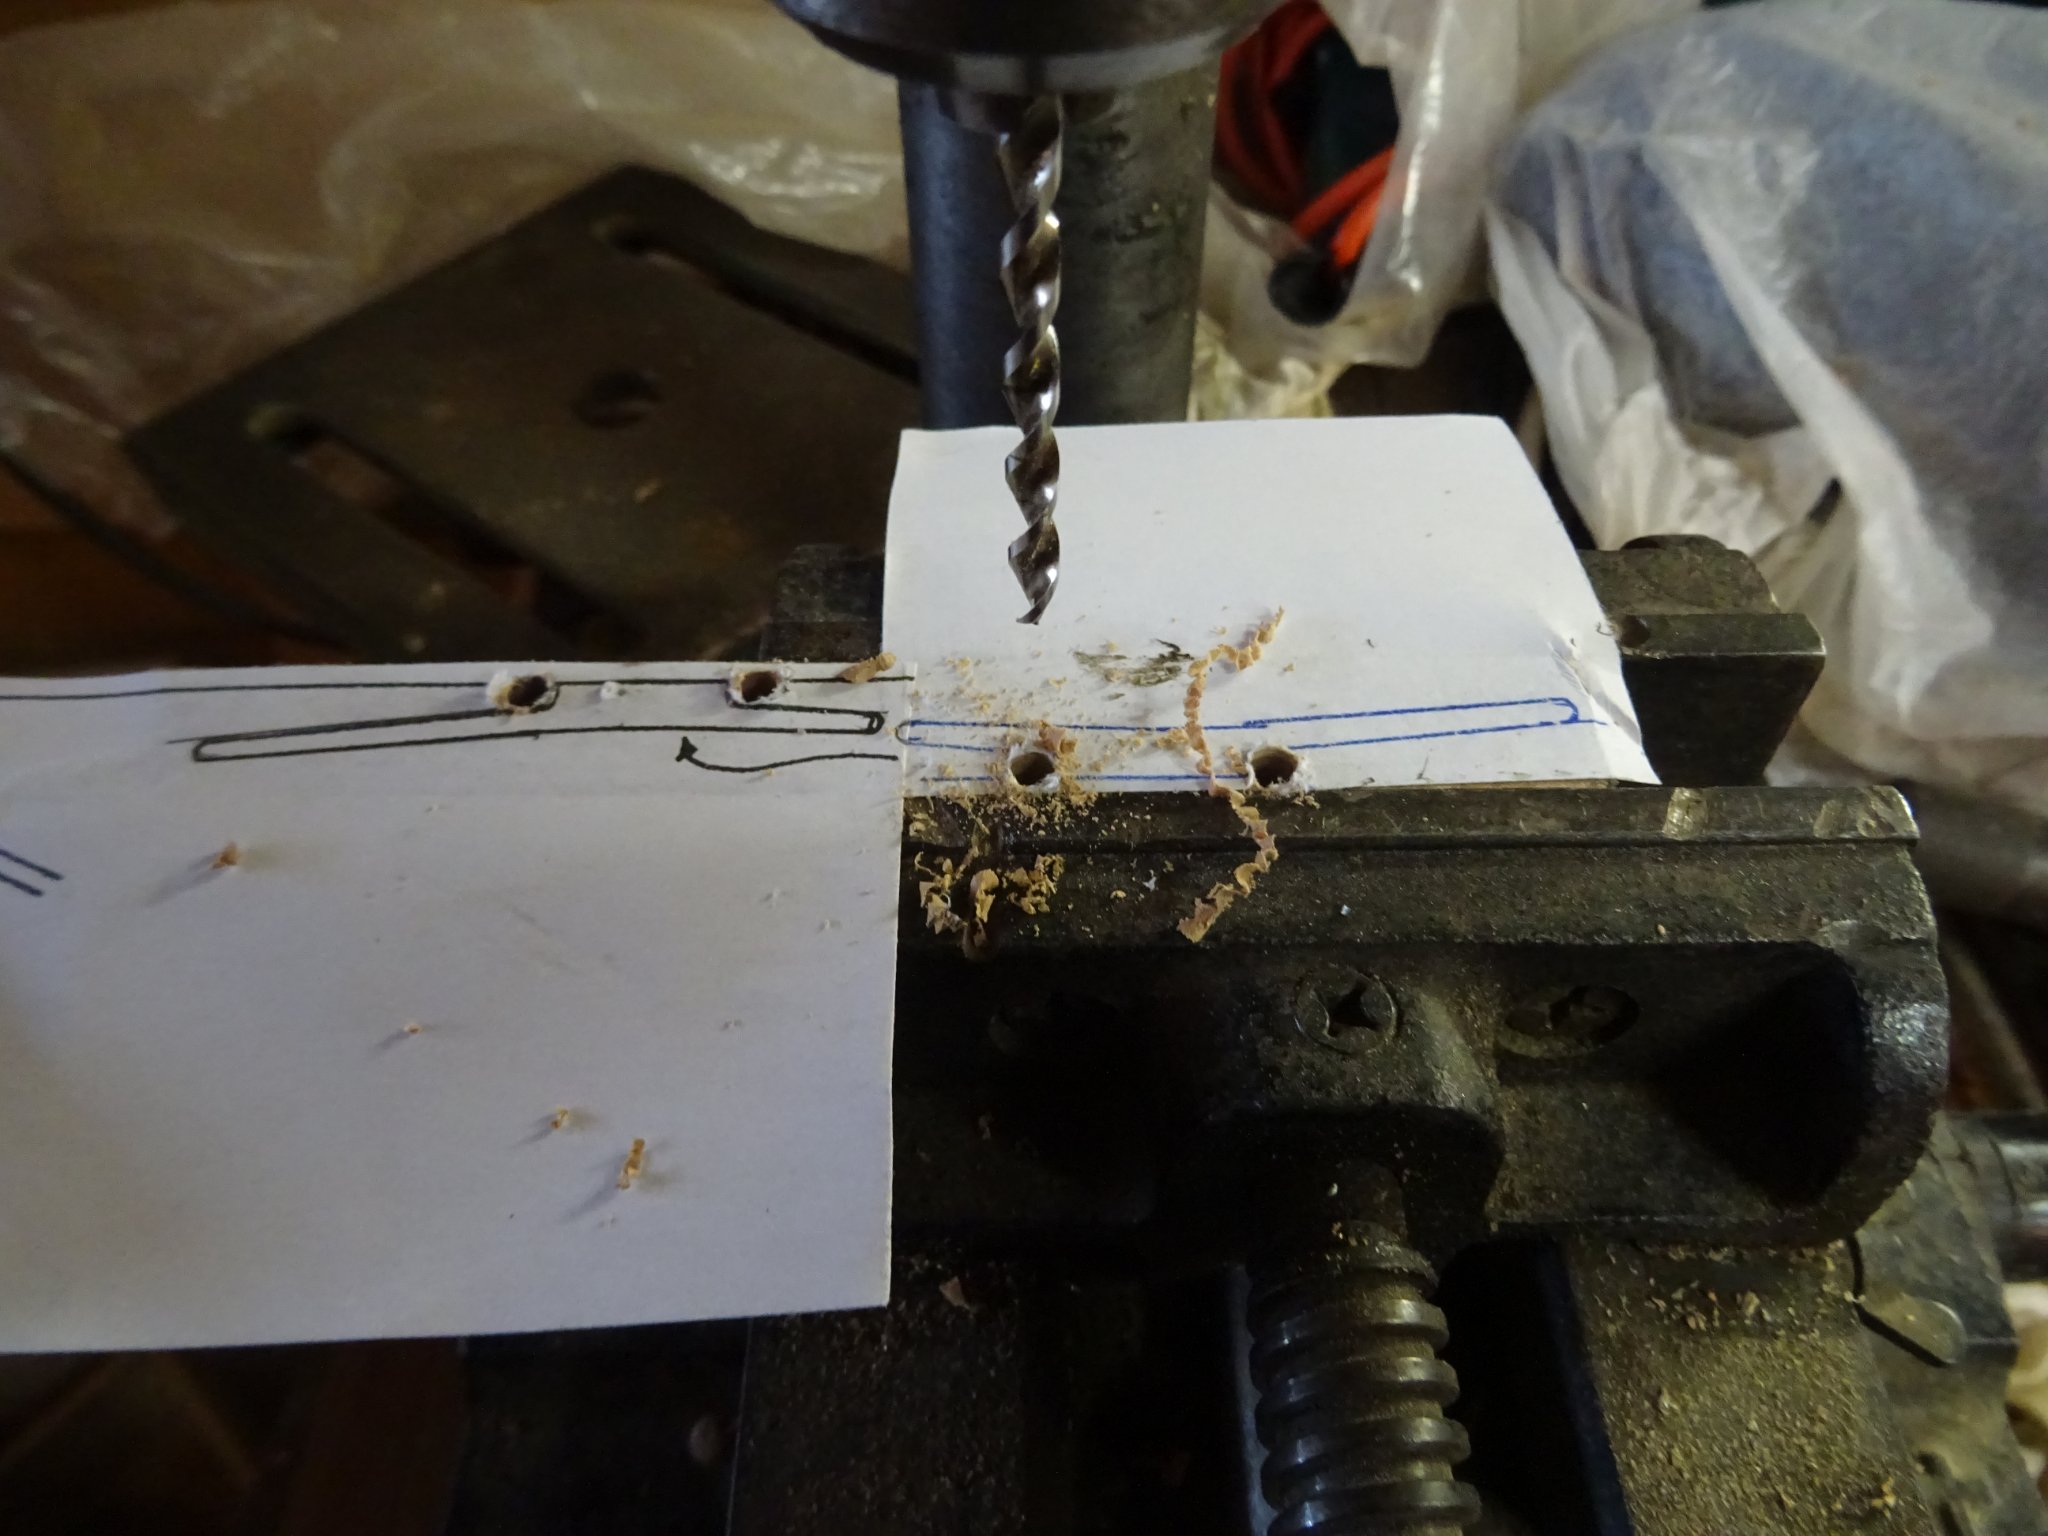
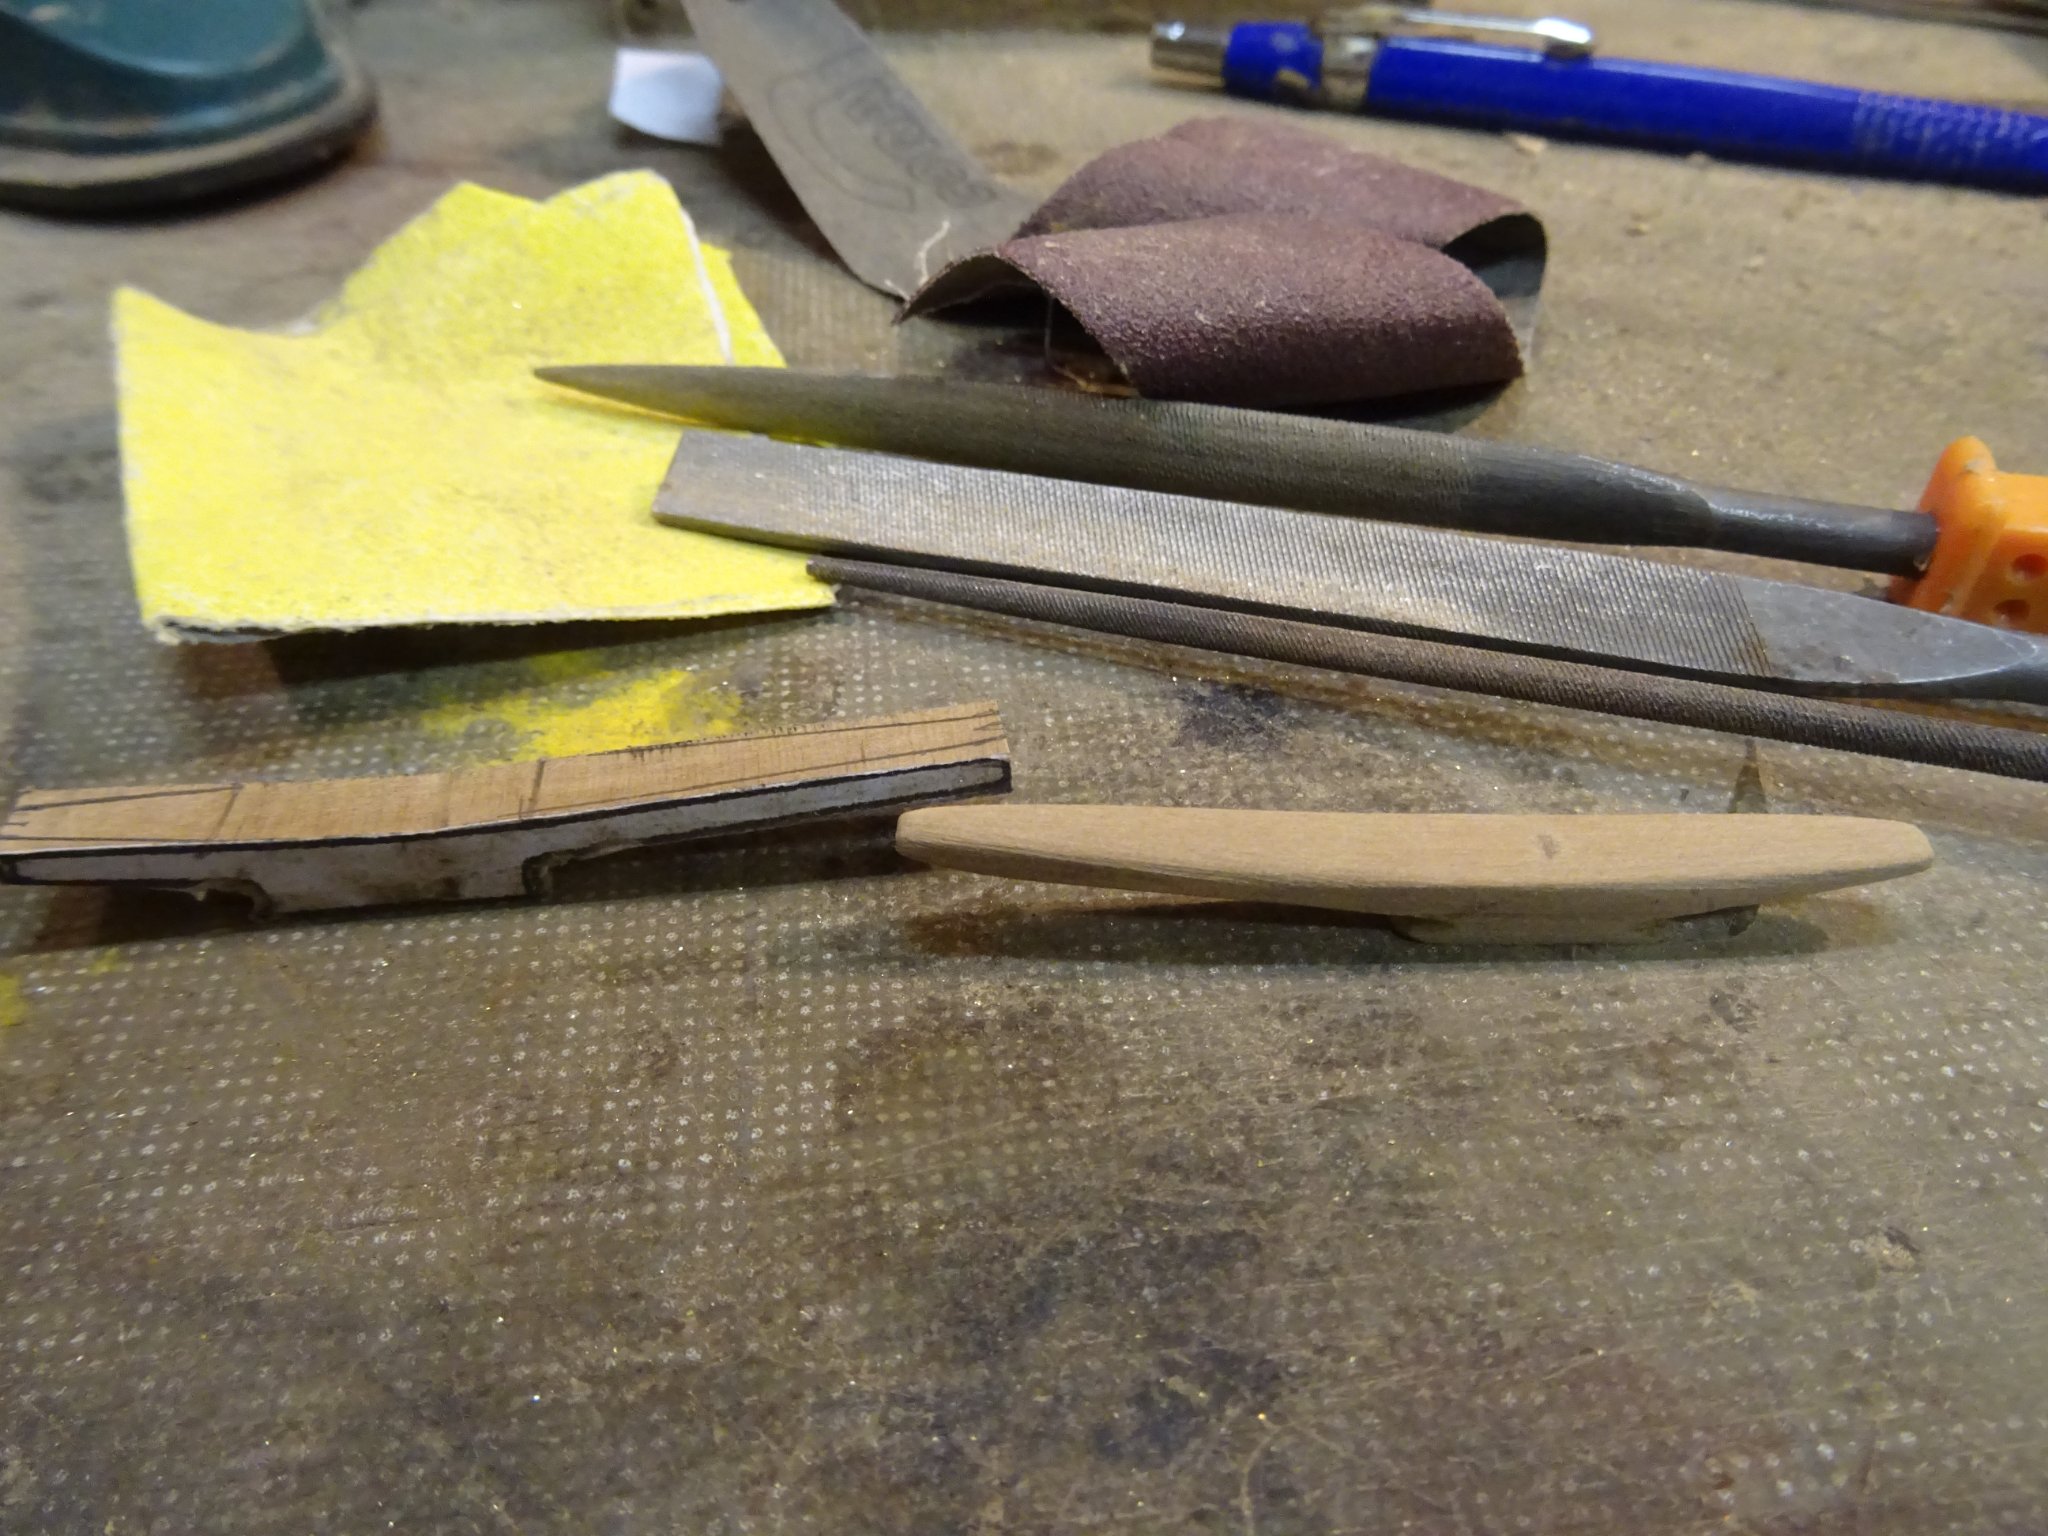
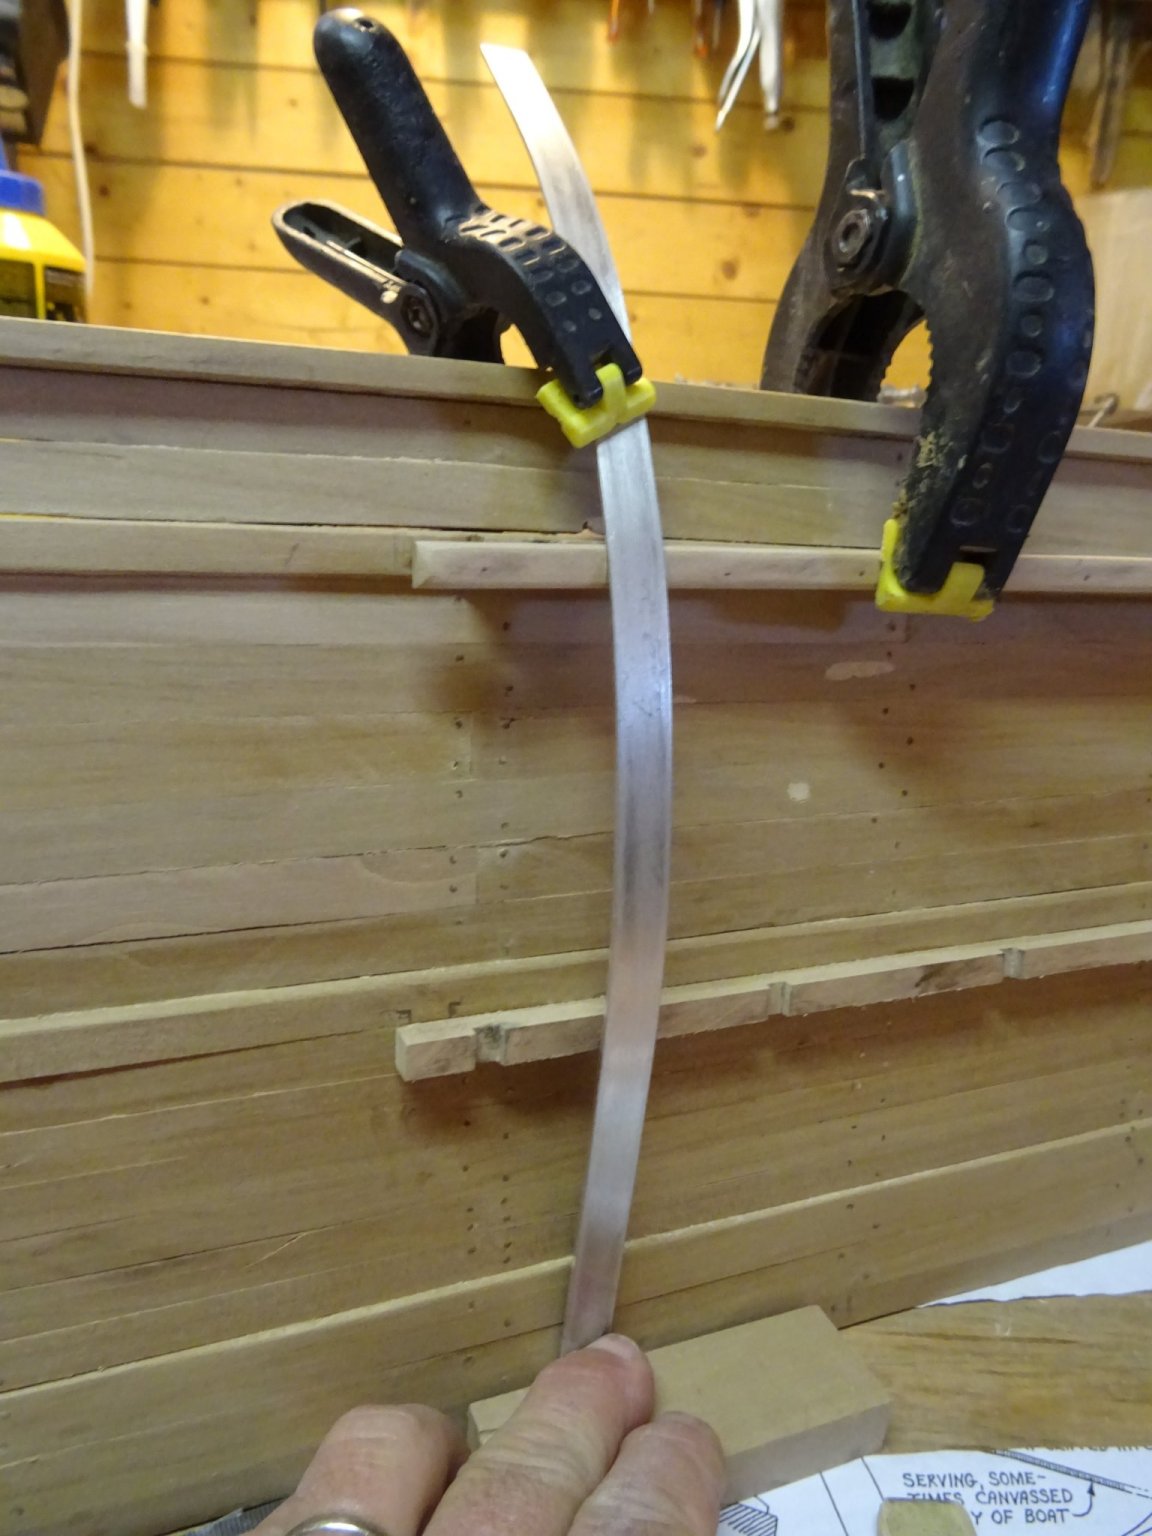
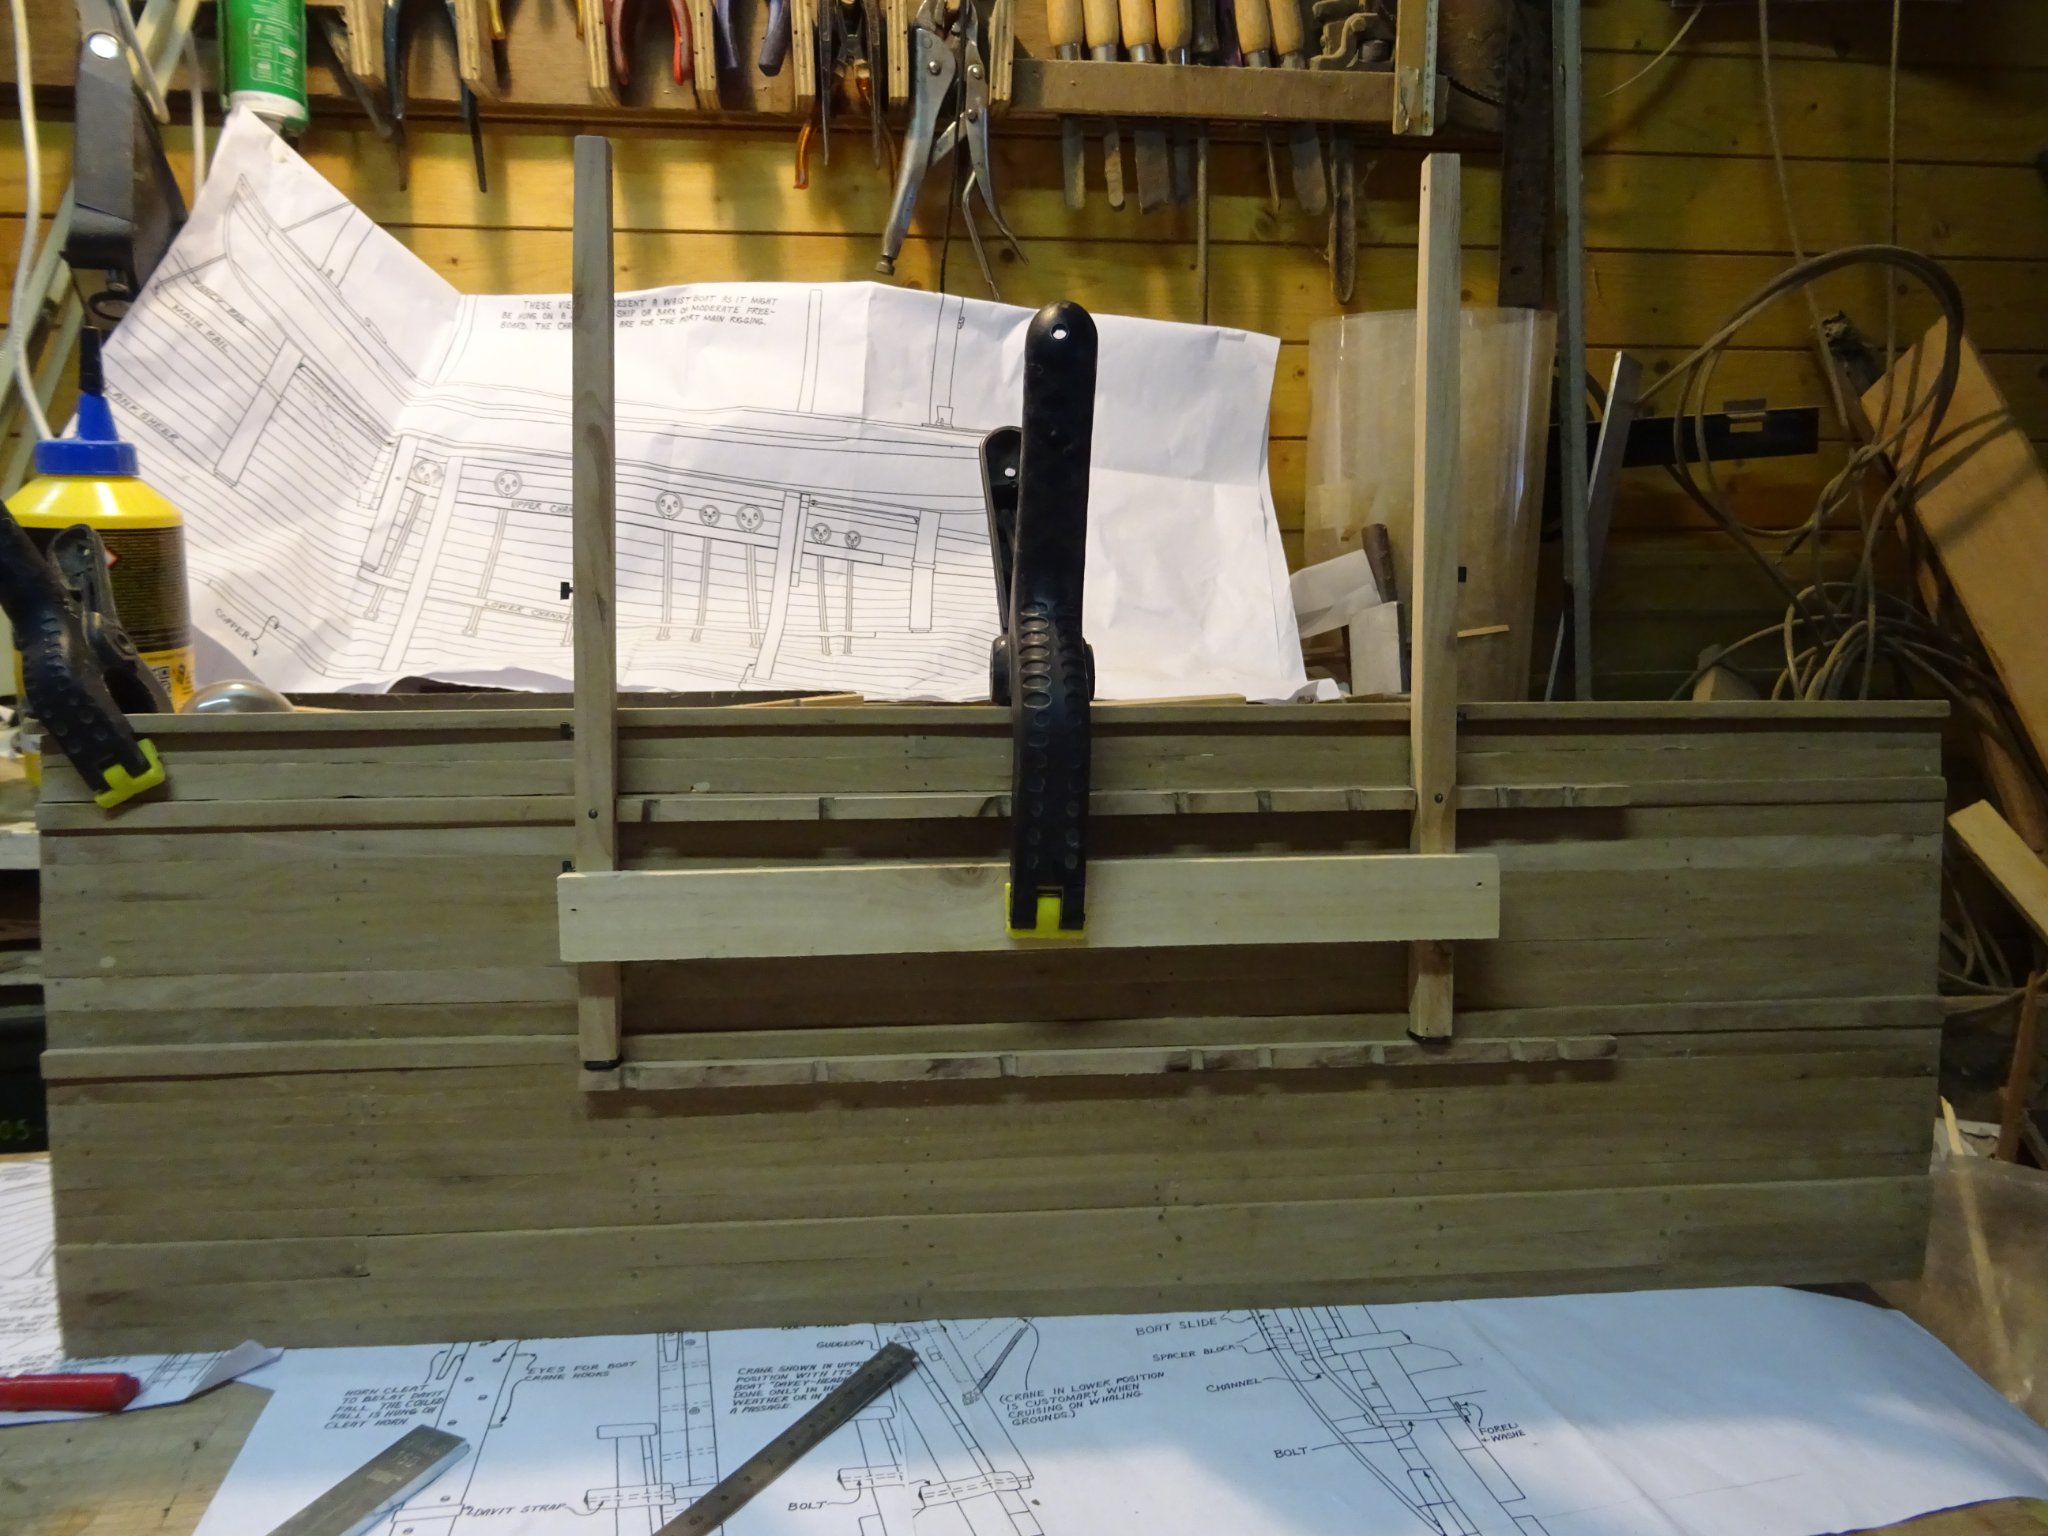
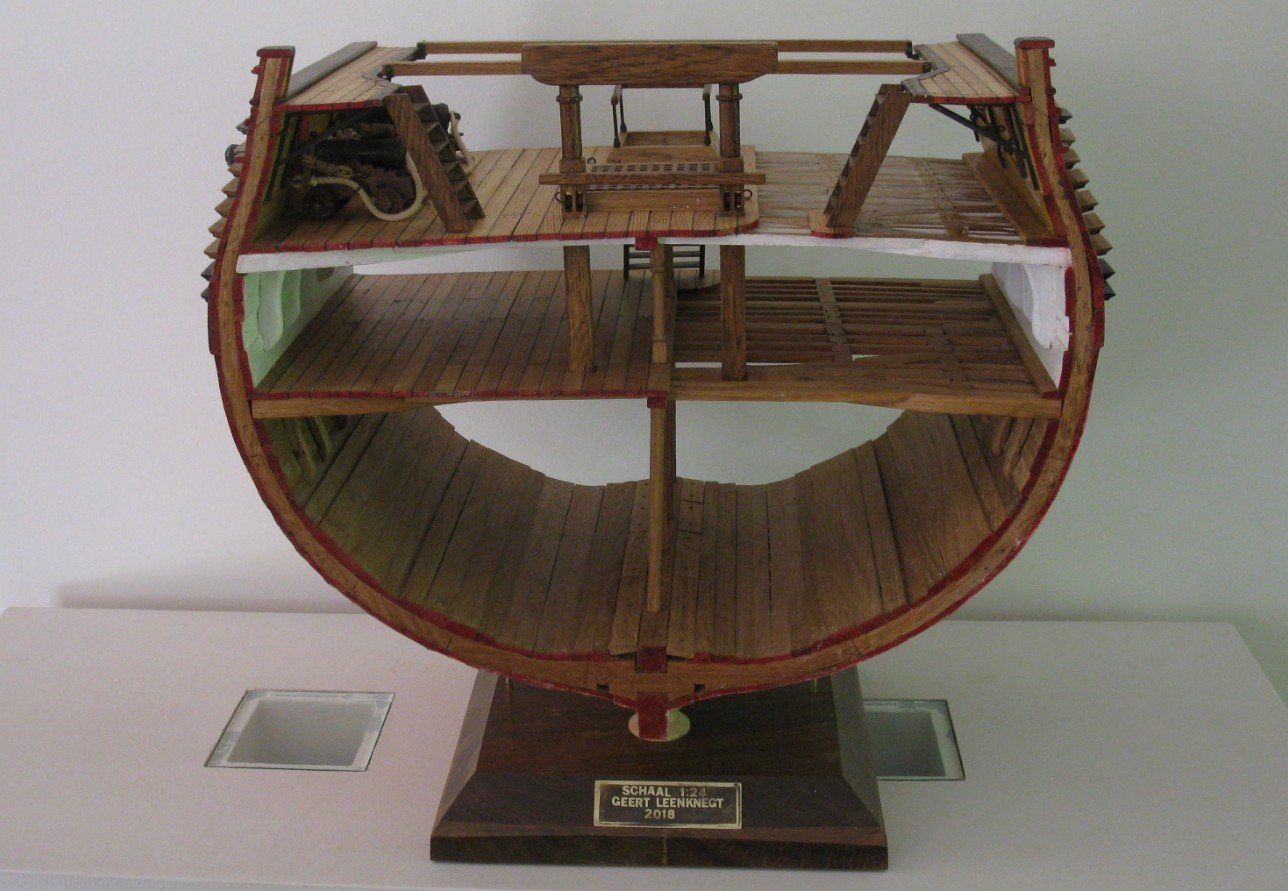
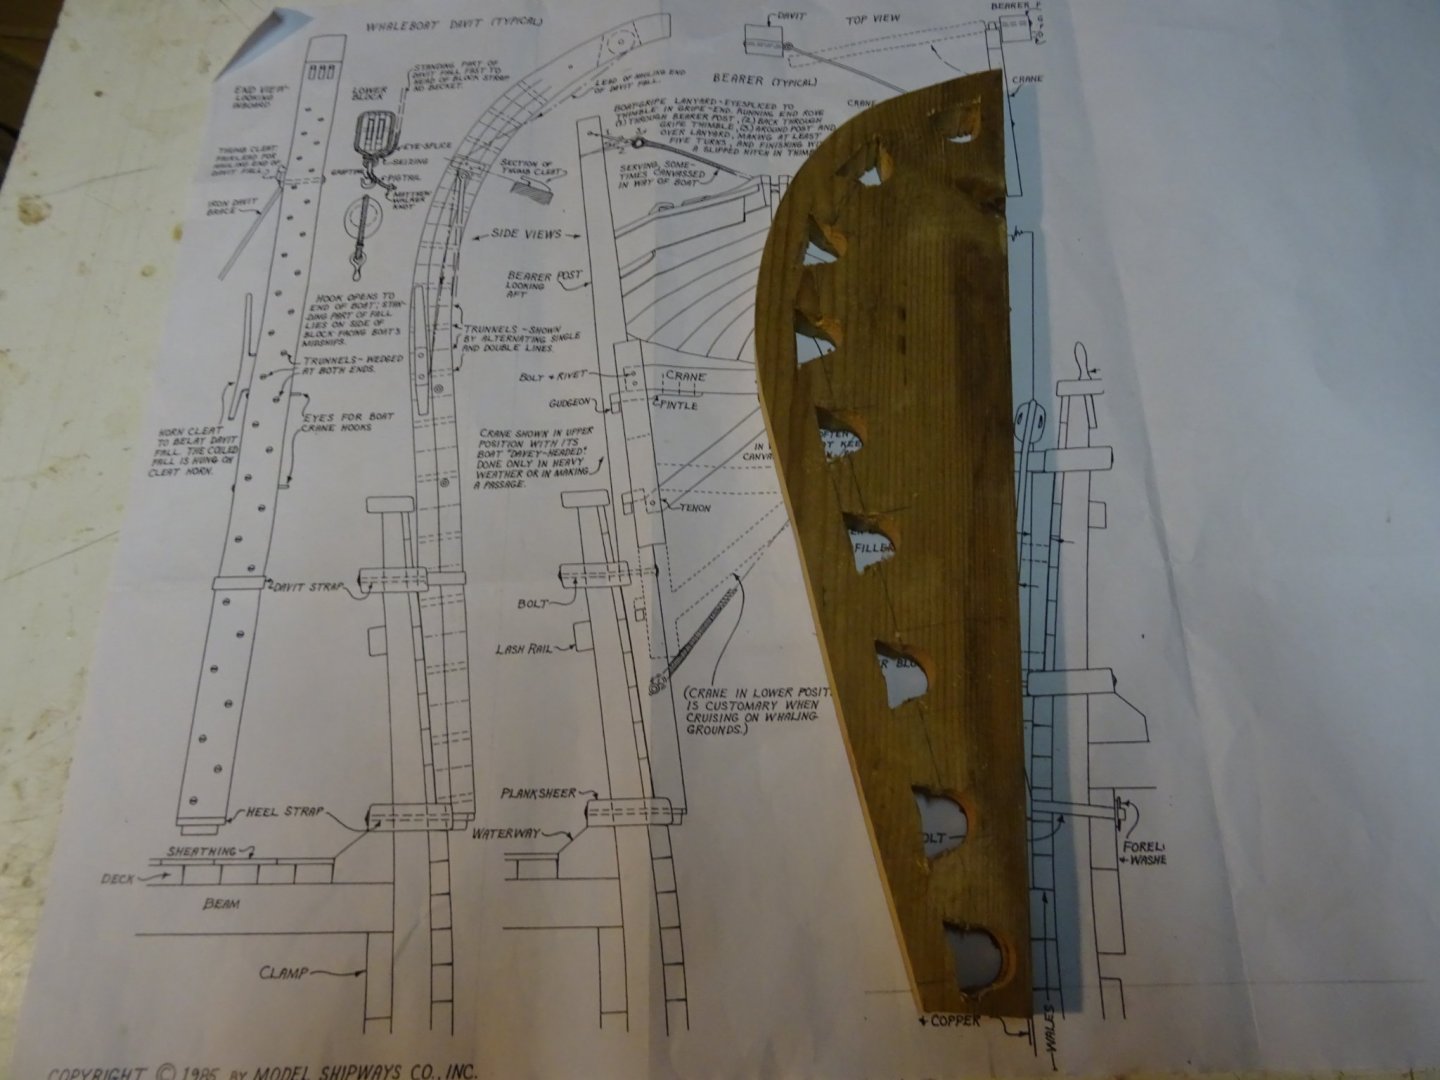
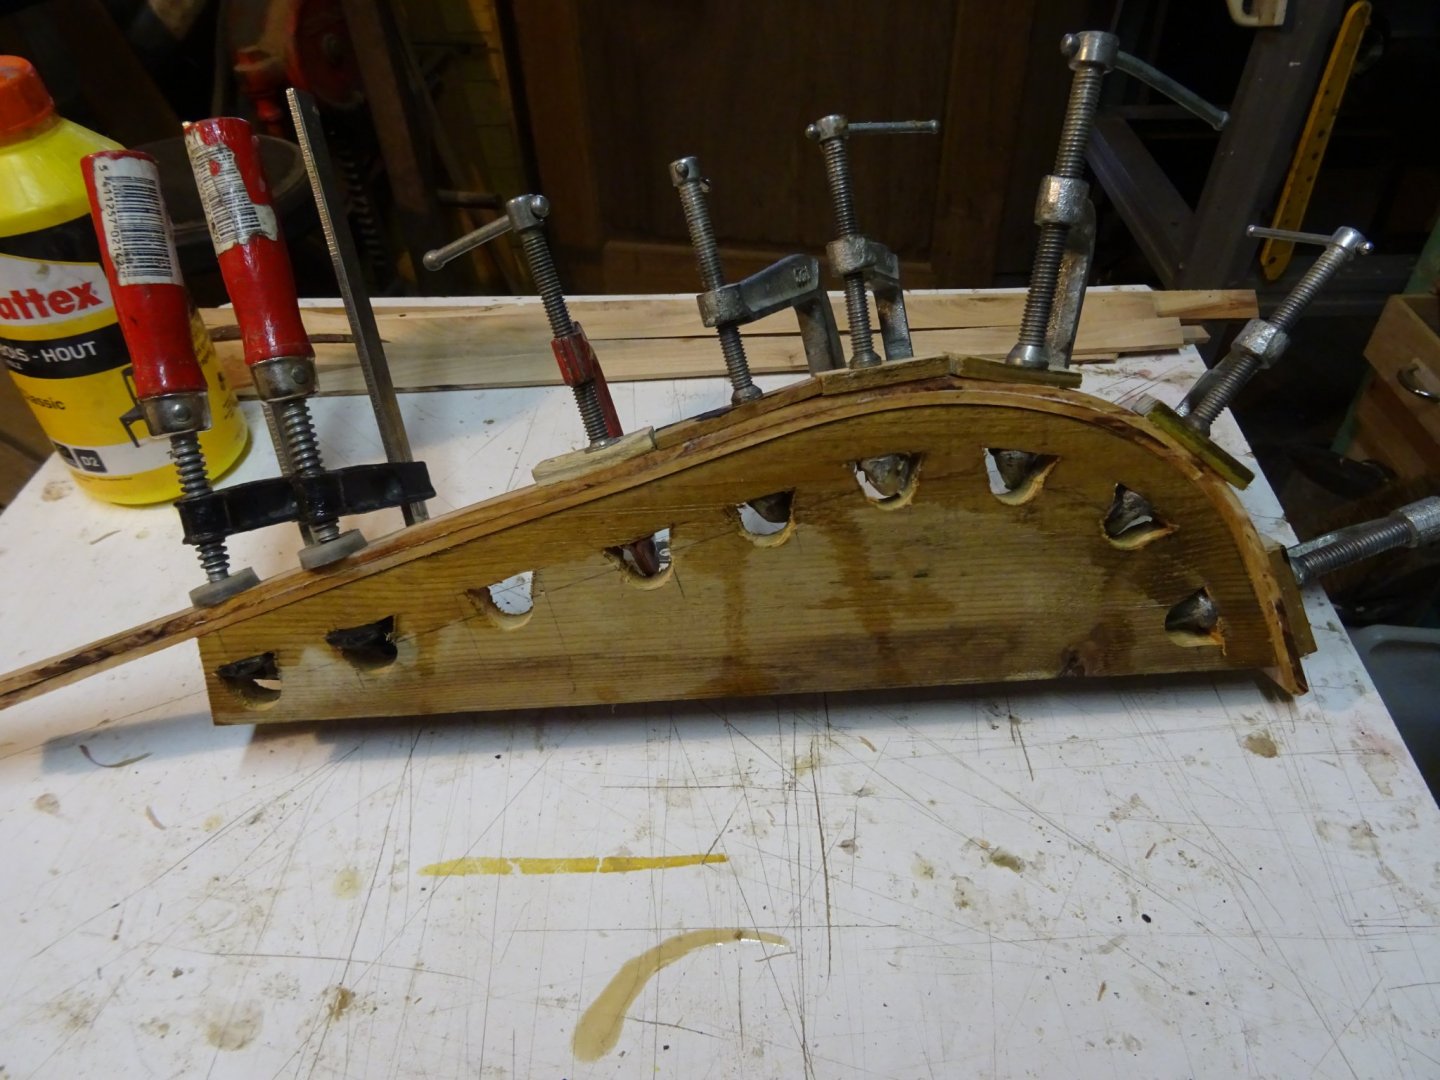
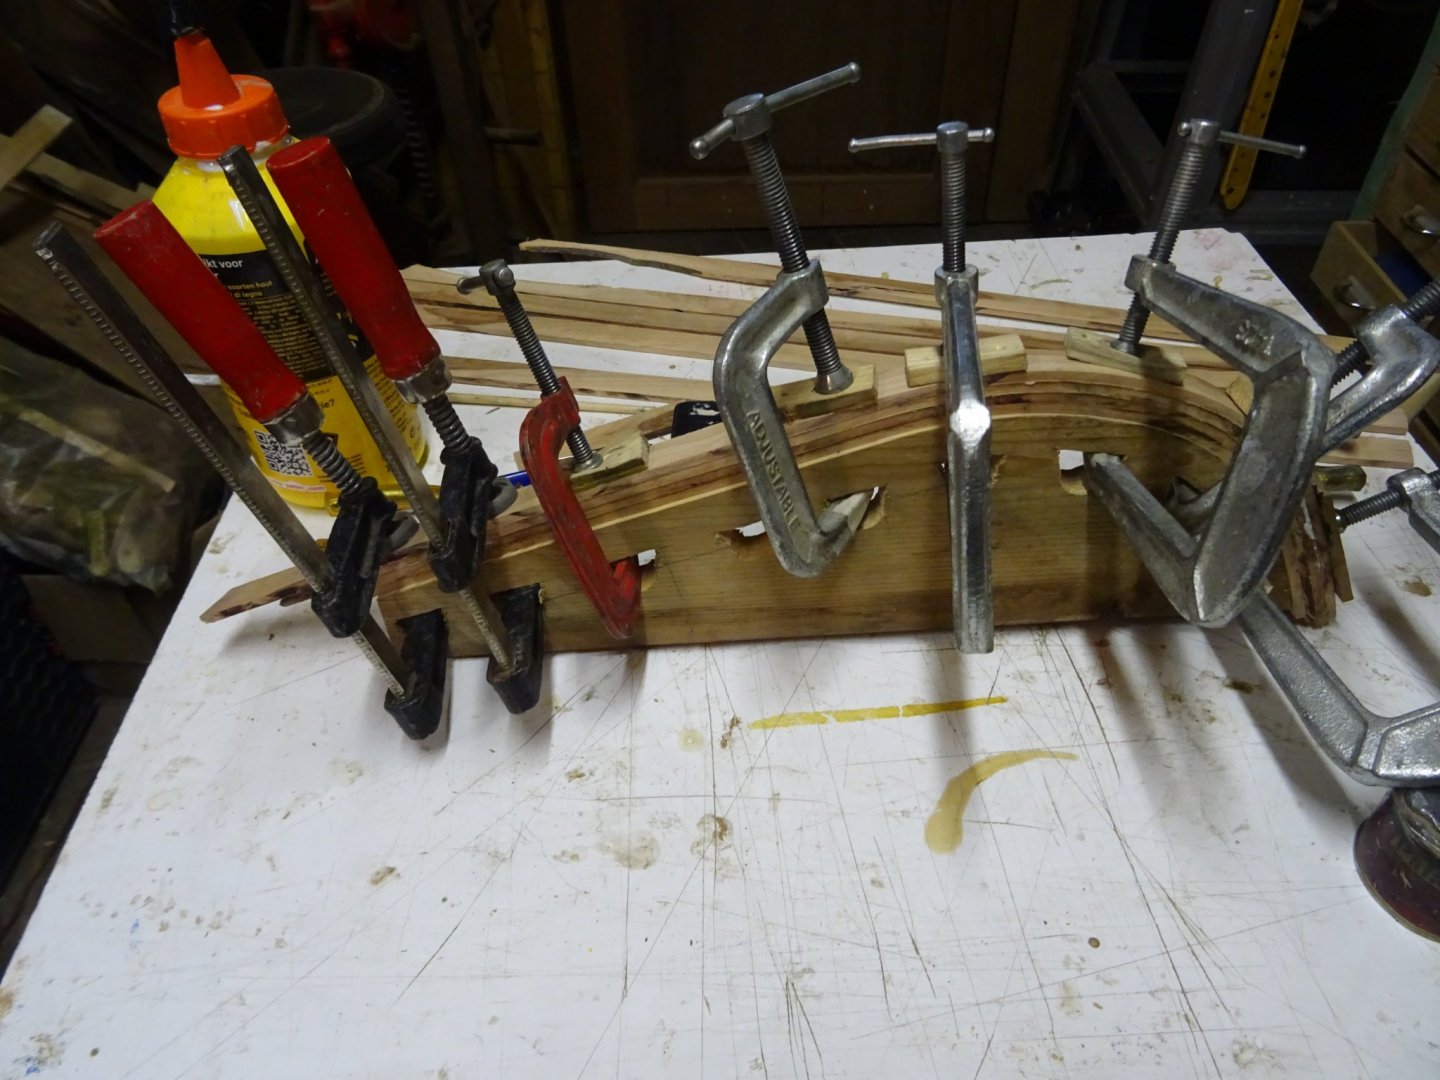
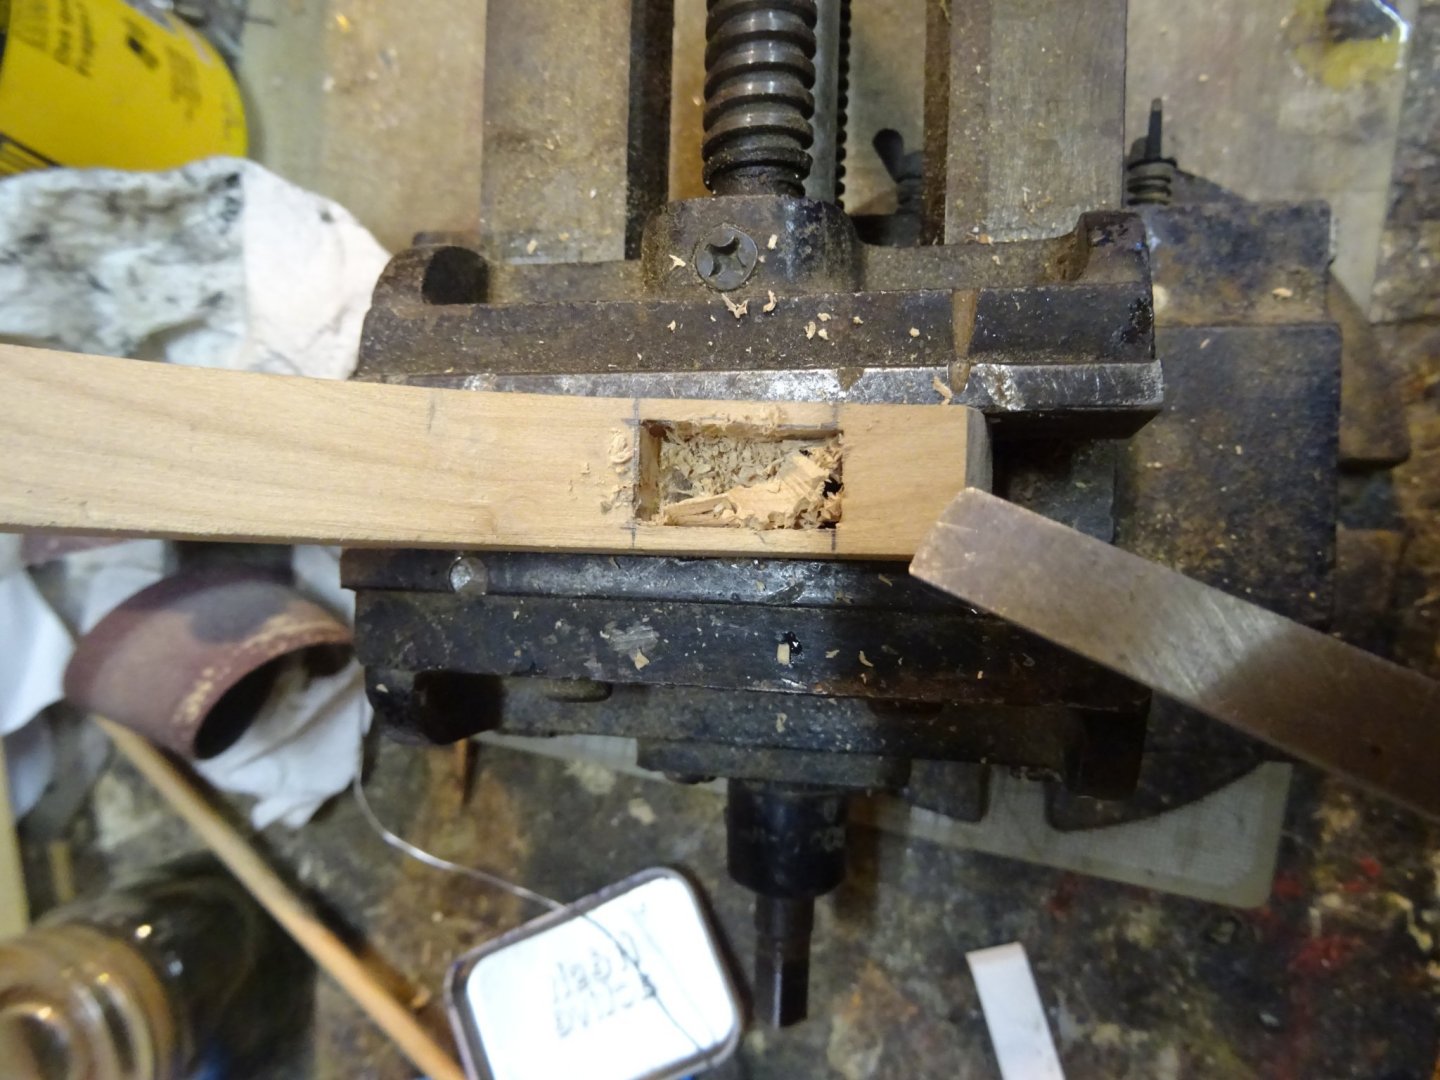
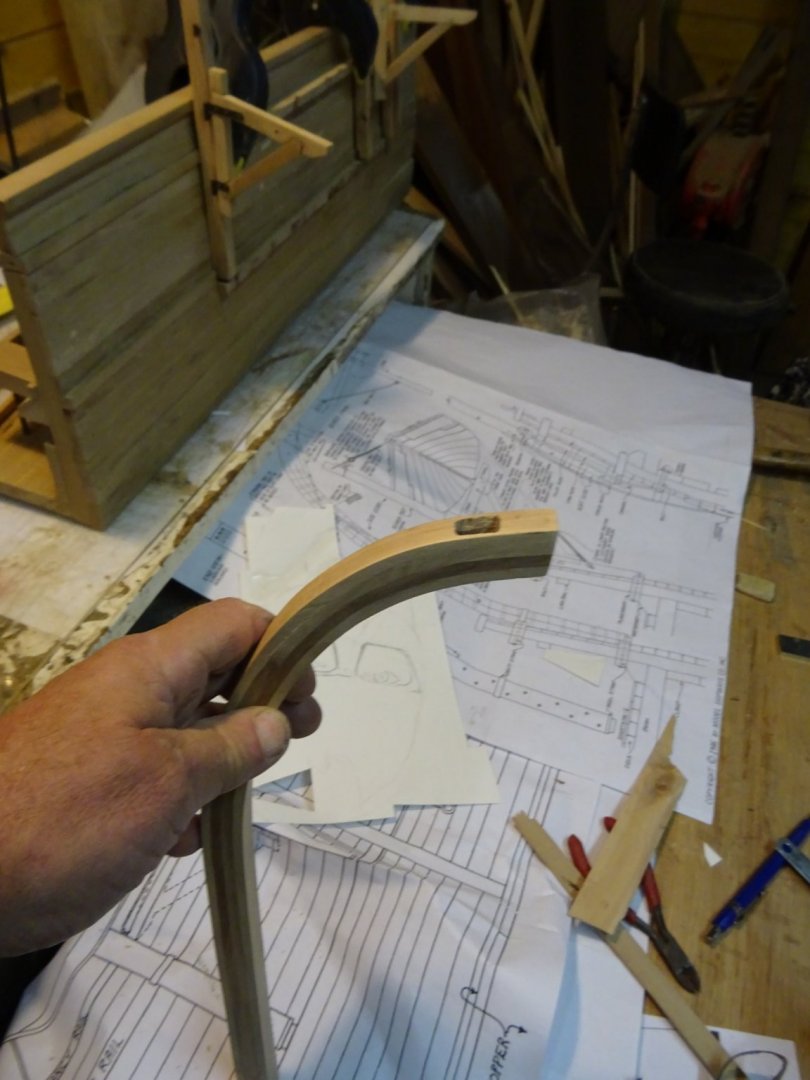
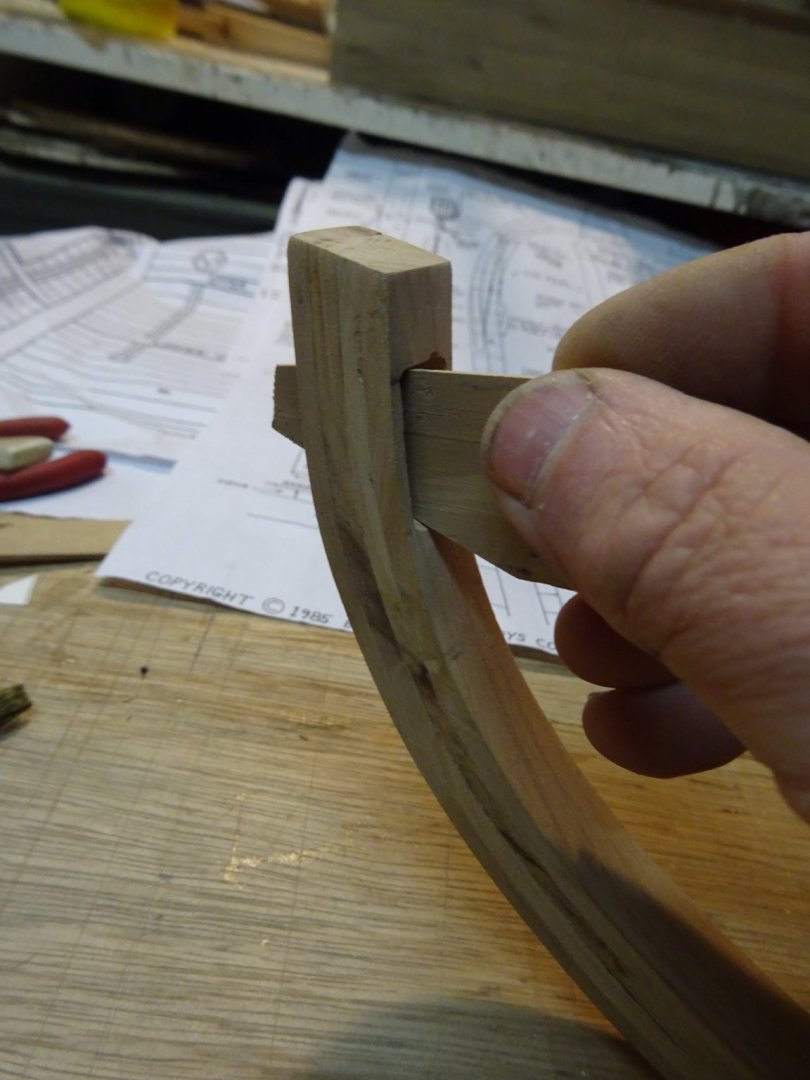
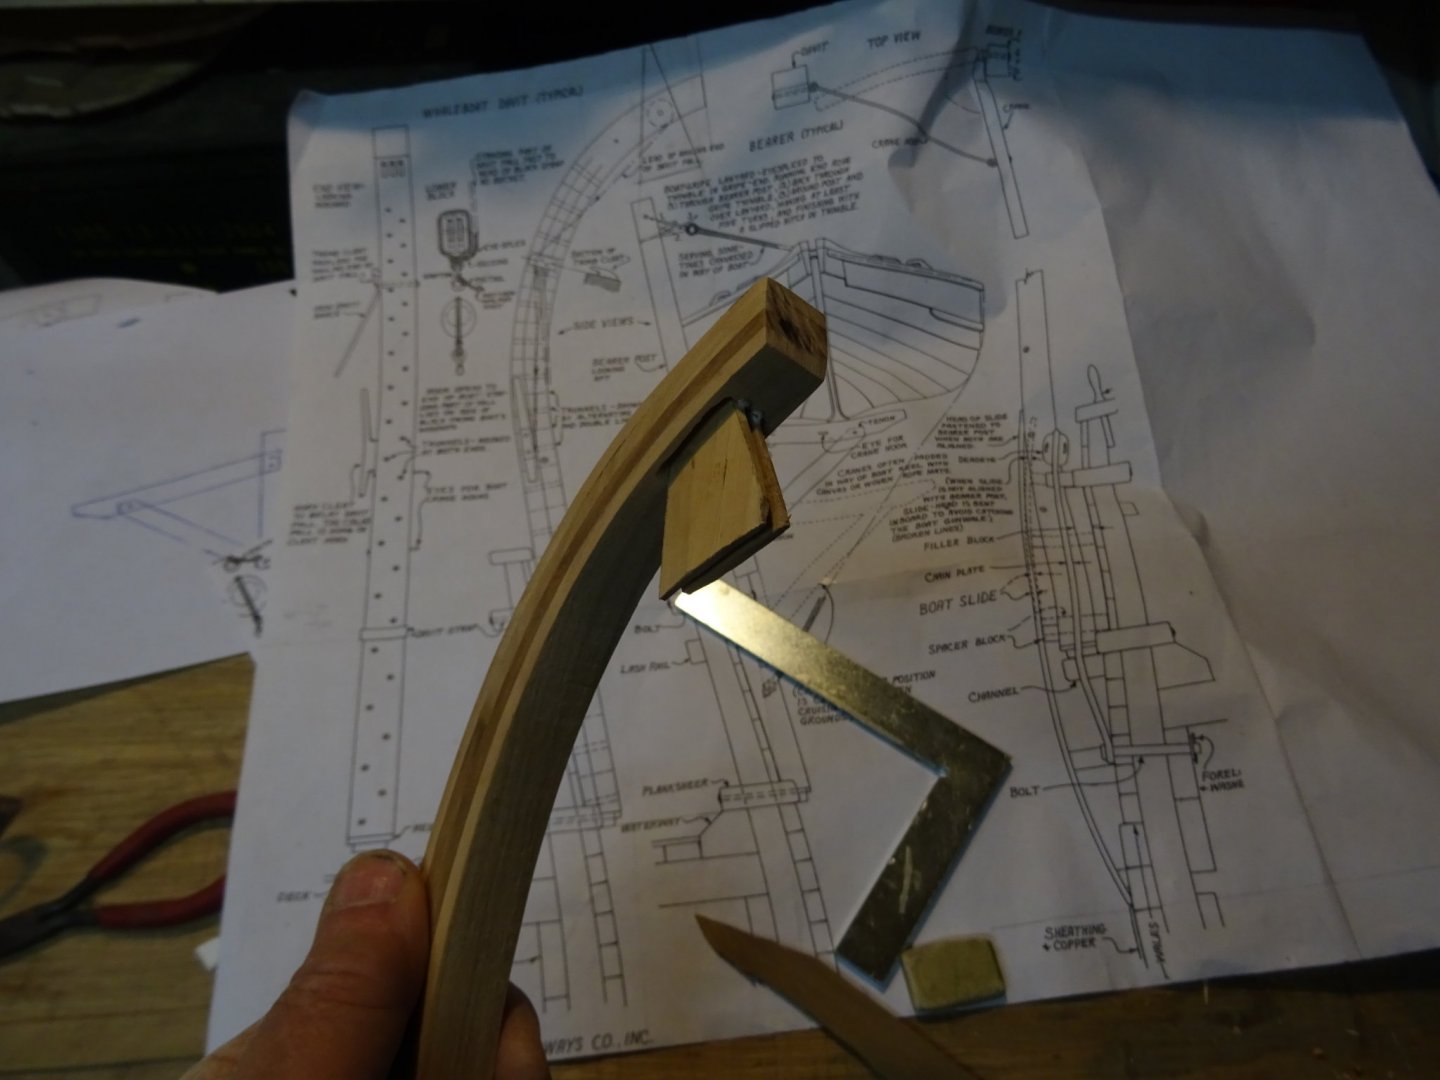
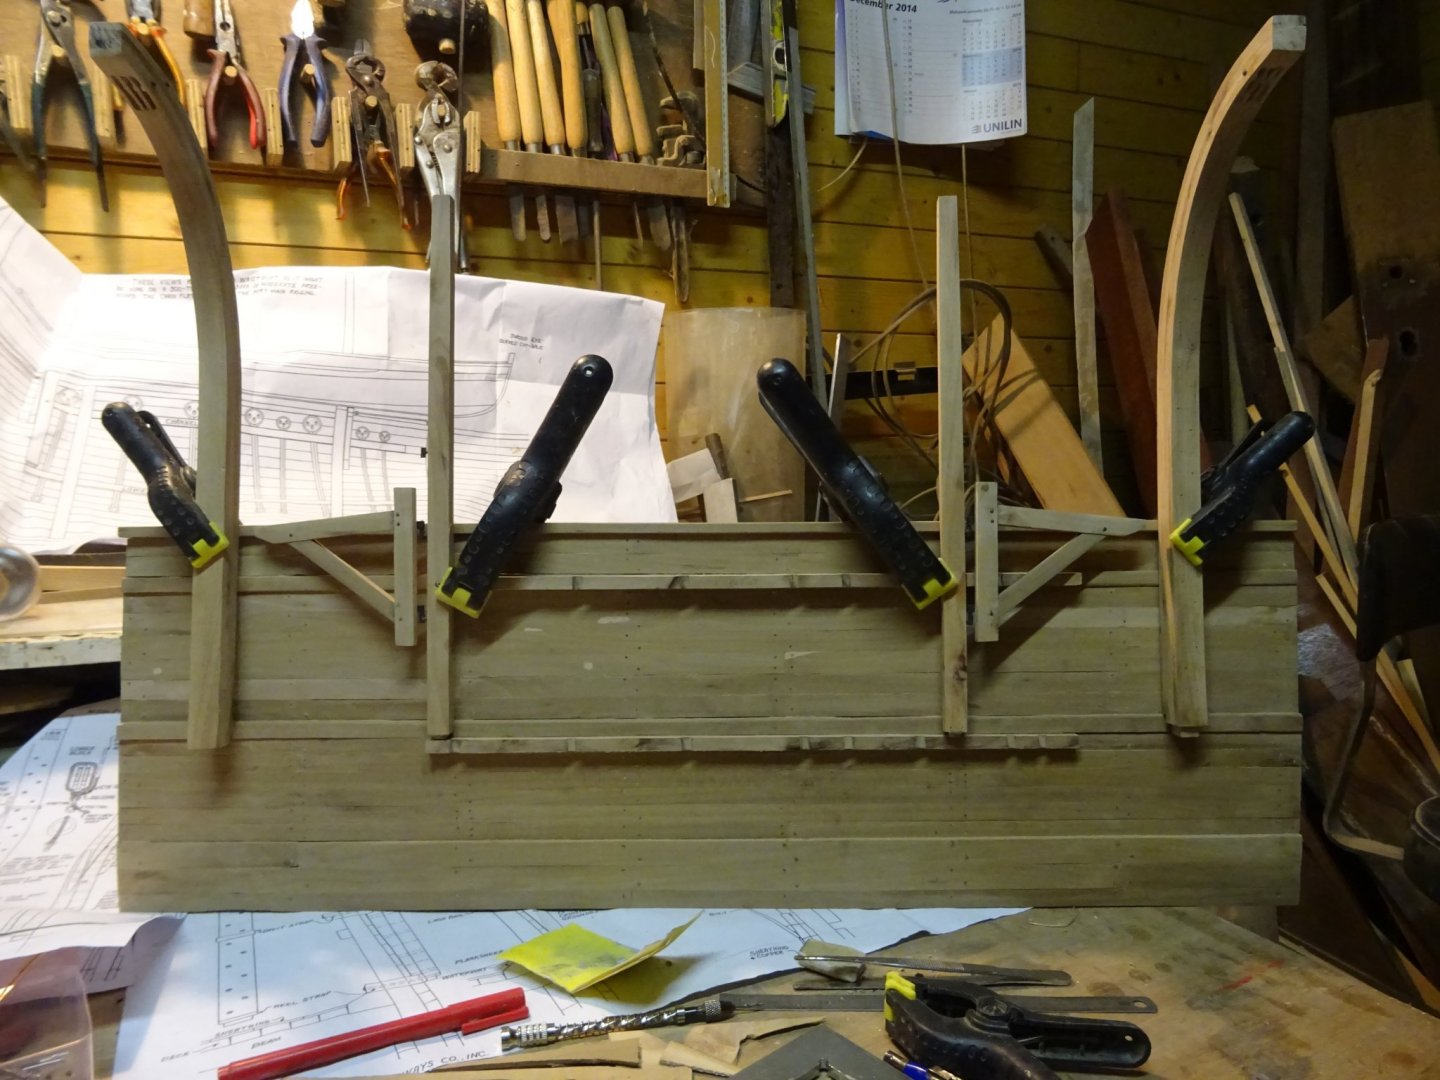
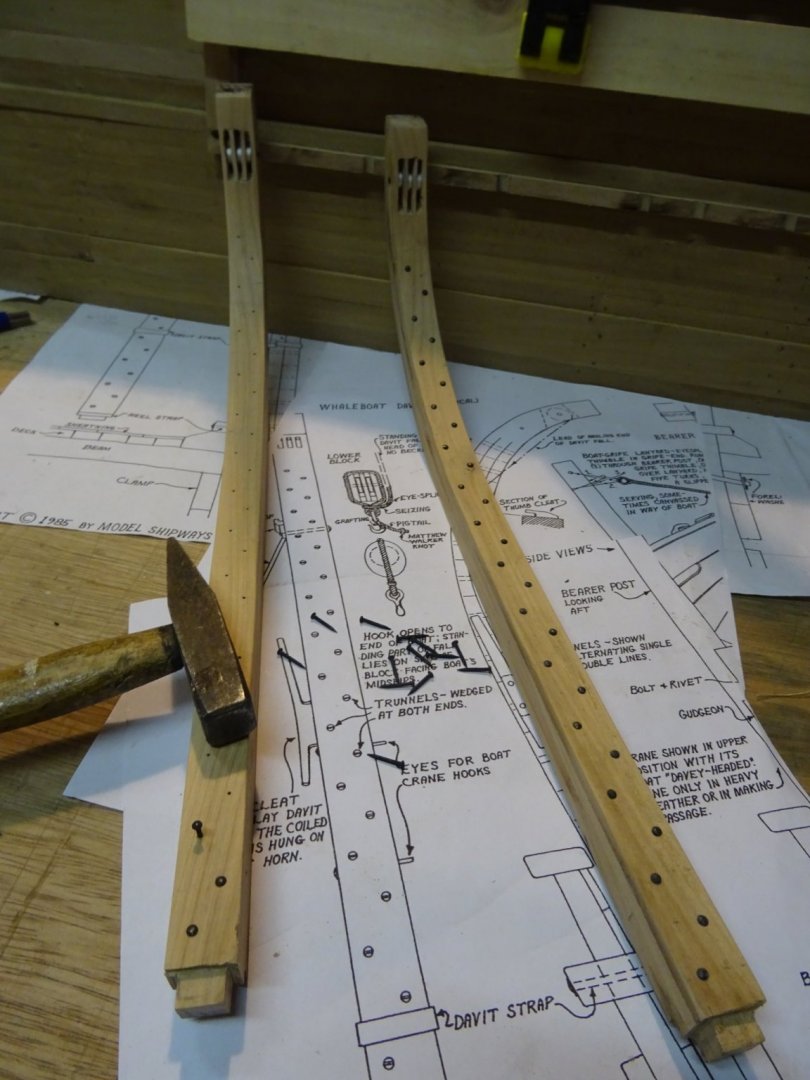
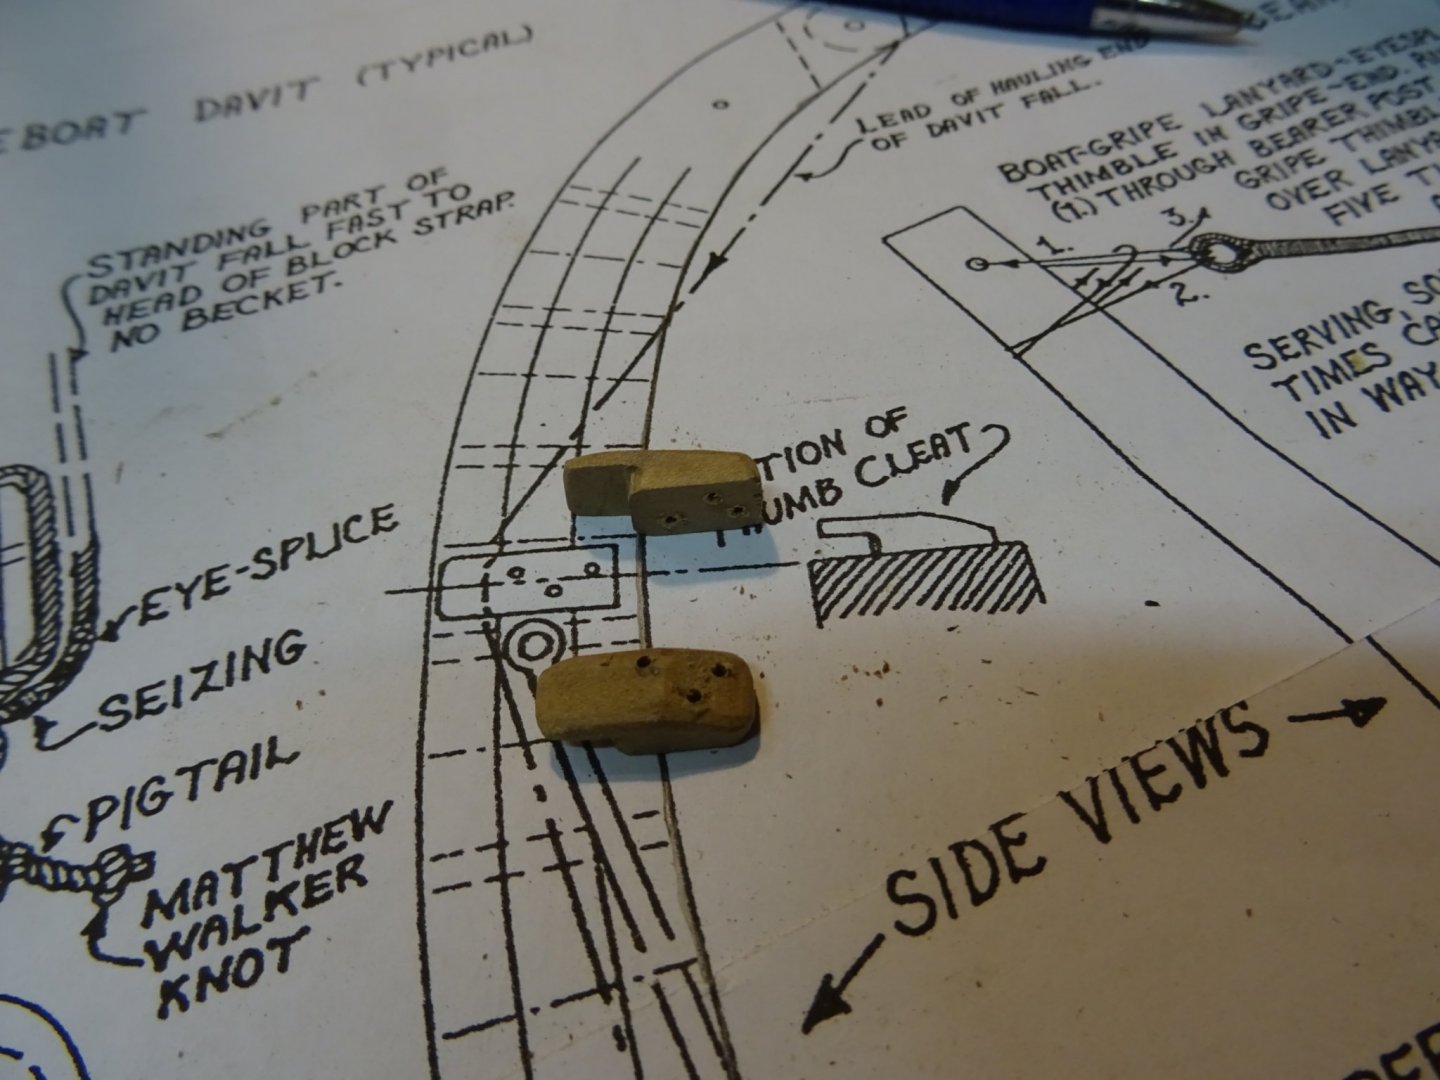
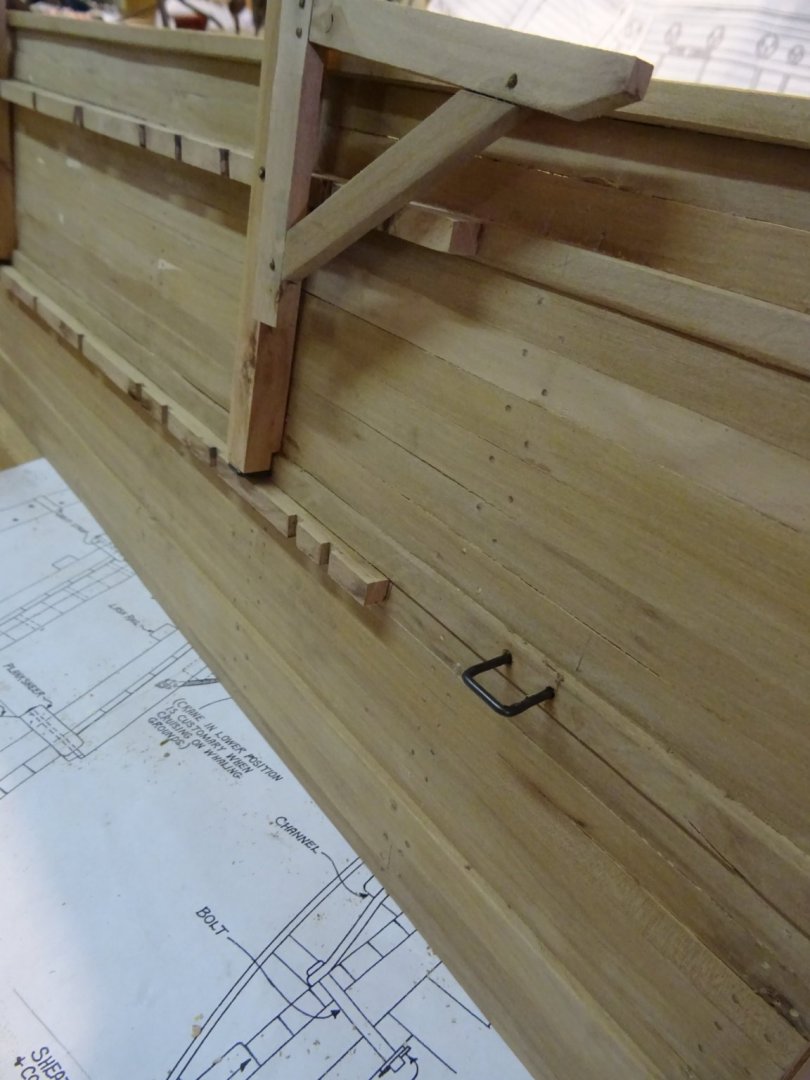
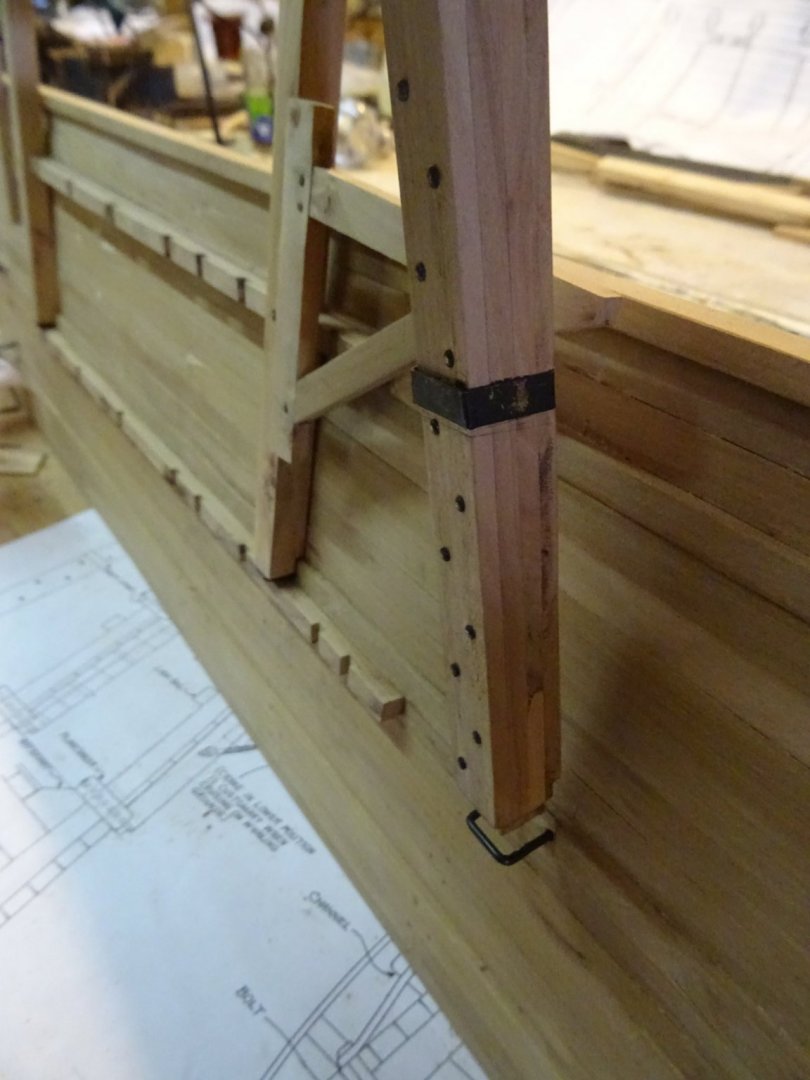
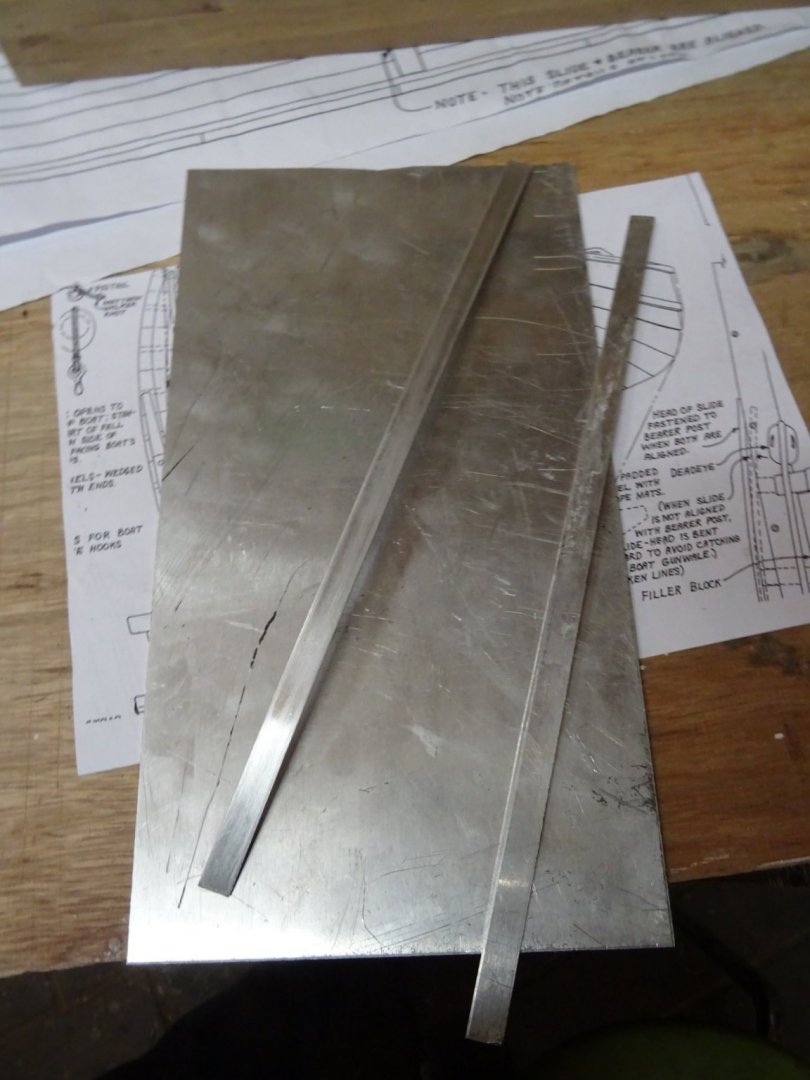
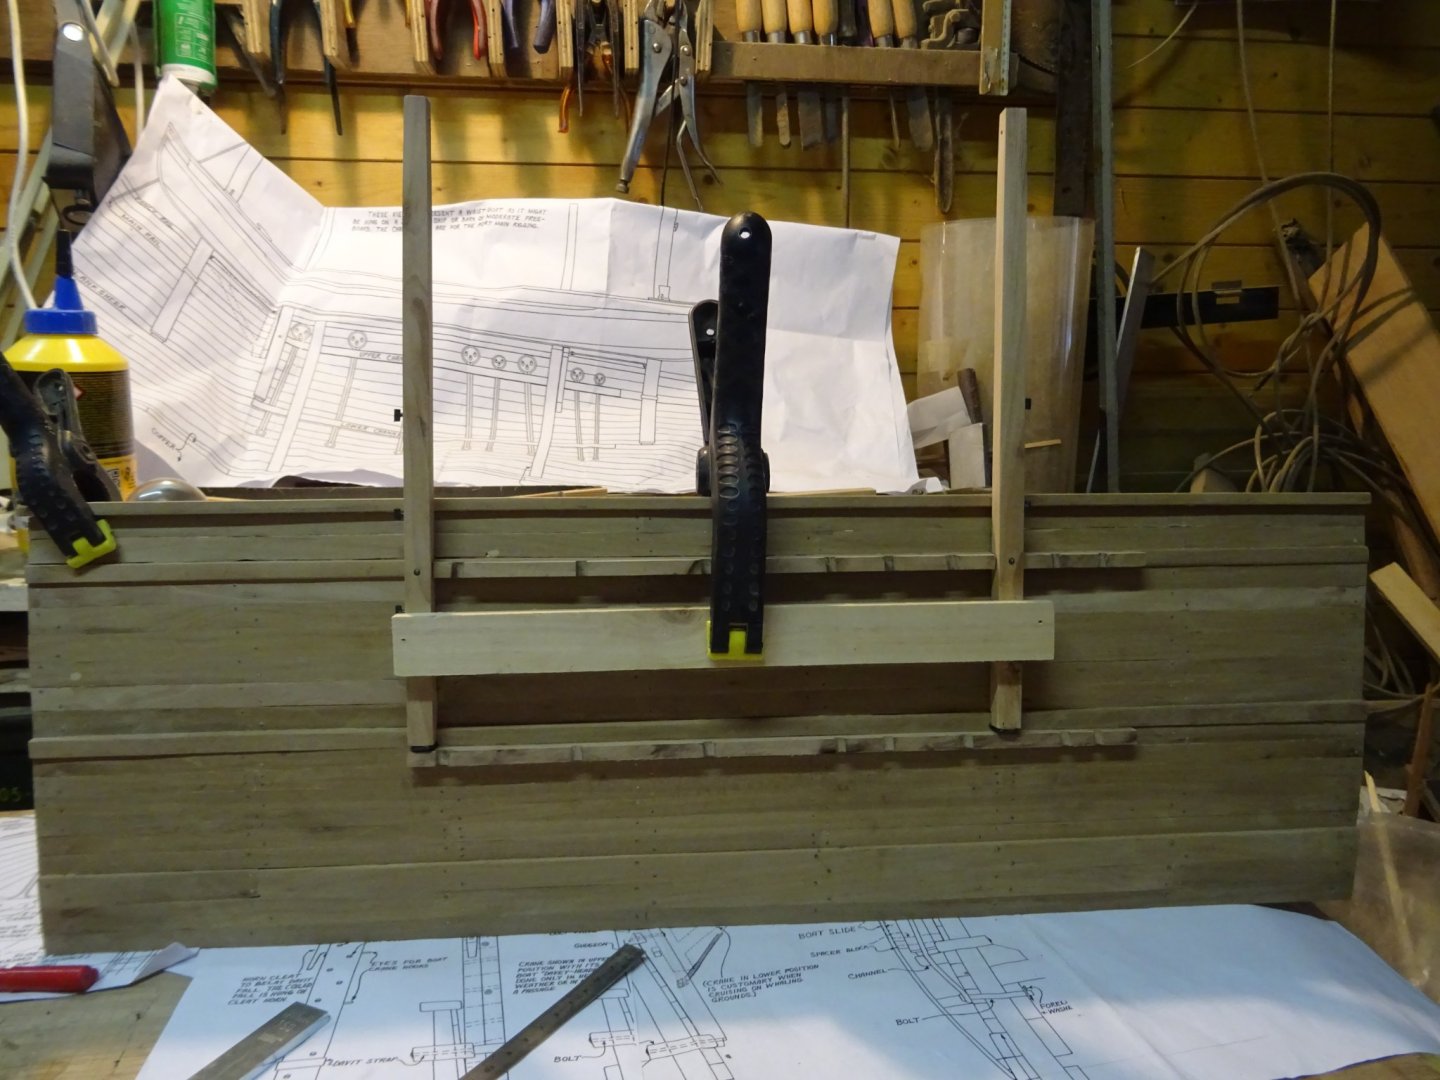
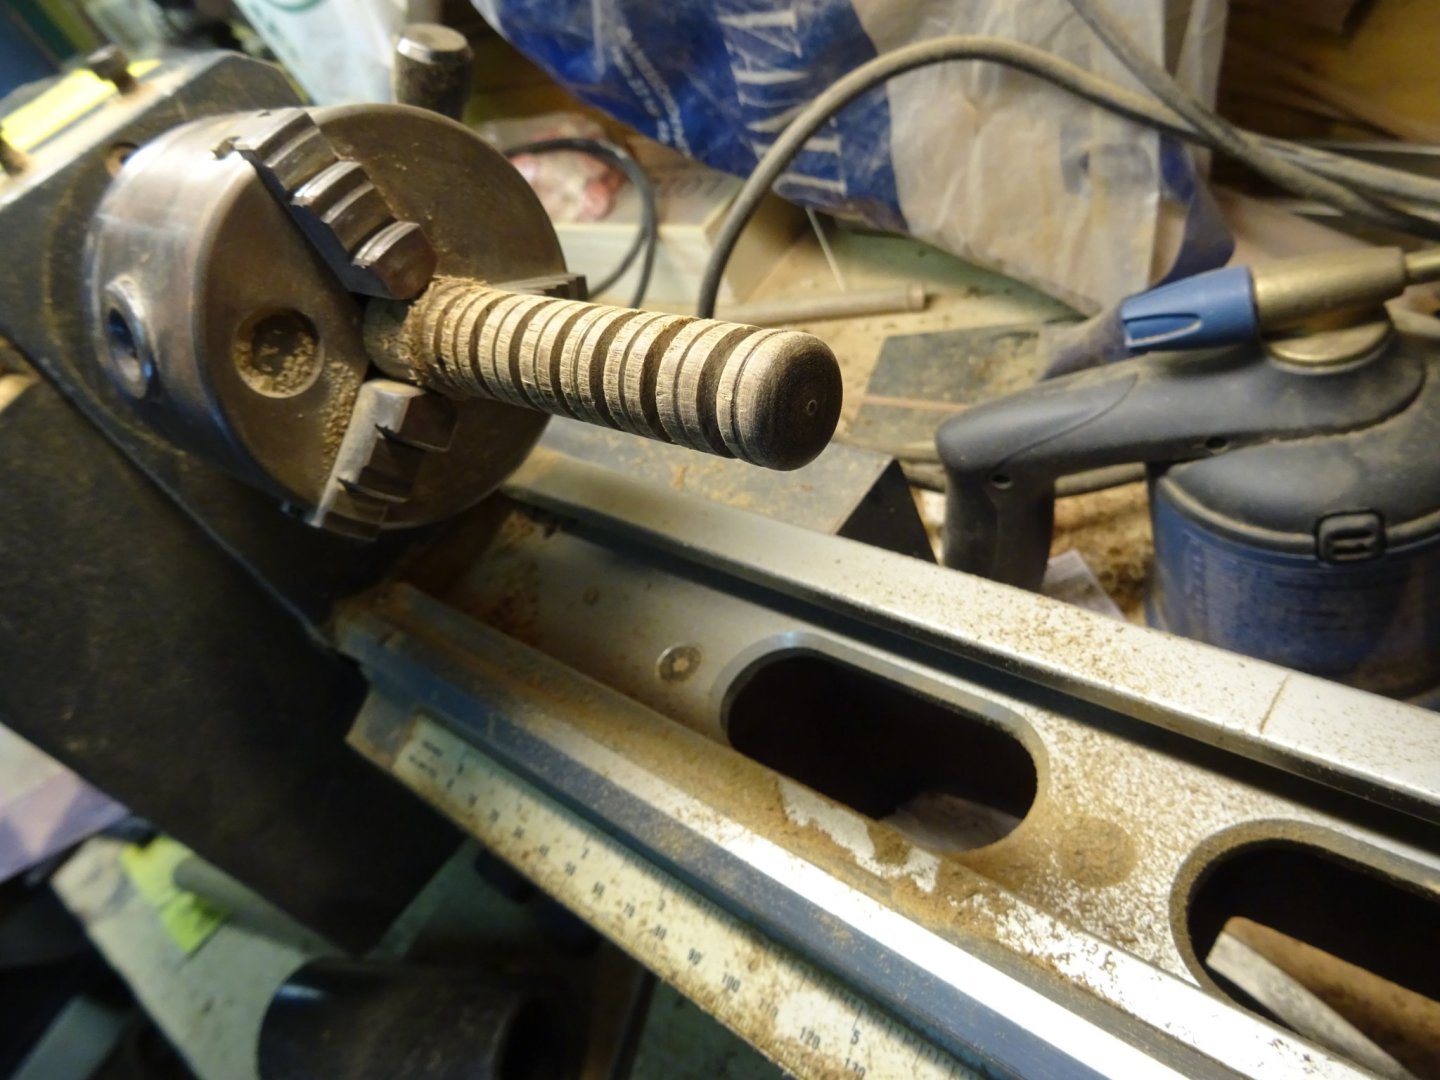
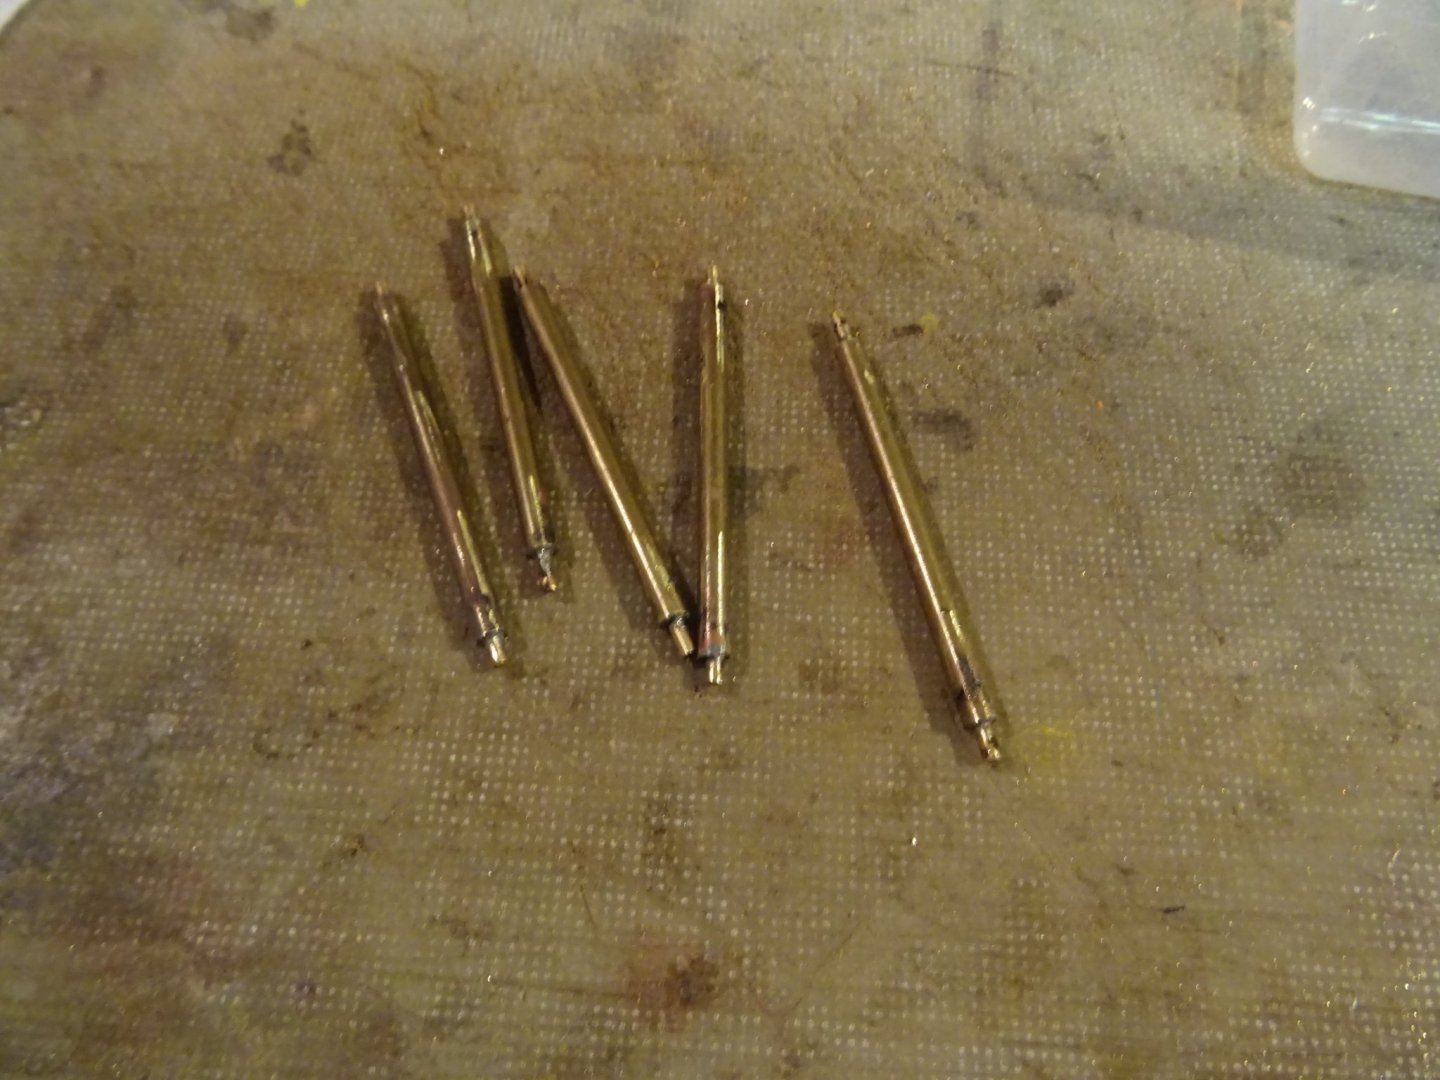
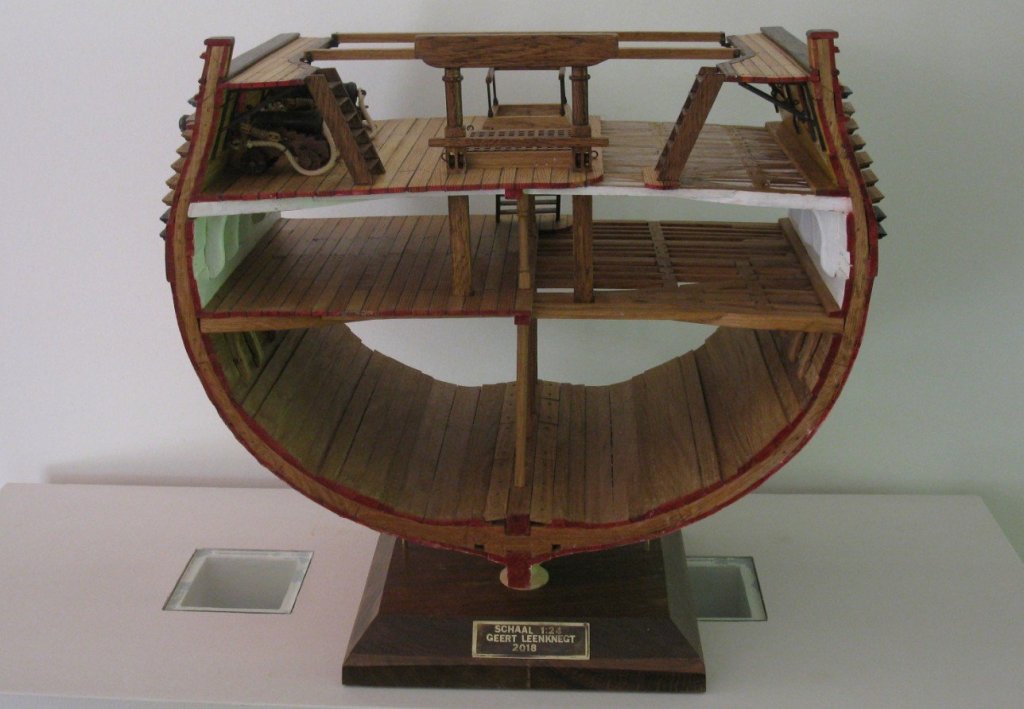
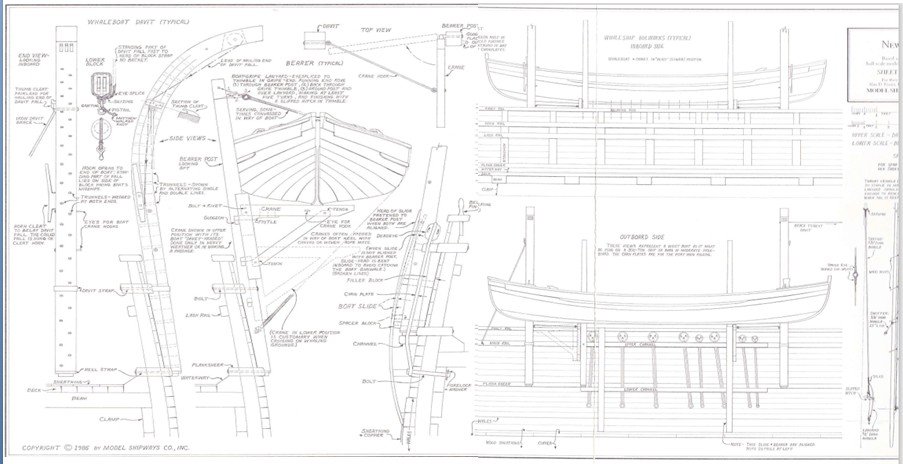
9.4. The davits and boat slide I laminate the two davits with four layers of 4mm thick pear planks. Therefore I saw a wooden laminating mold. To reduce the risk of cracking my planks (my pear stock is limited), I pre bend them above the heat of an air gun. Gluing the first pair of planks. When the glue is dry I add a plank up to the four needed. When I take them from the jig, they keep their curved shape. The two davits, cut to size and sanded and one of the cranes. I have neither the right tools nor the skills to make the three slots for the sheaves in both davits, so I try another approach. I will make one hole for the three slots and separate the slots with wooden wedges. I hope that the pictures make clear what I mean. Making the holes: The three slots are made by gluing two wedges in the hole at equal intervals. When the excesses of the wedges are sawn off and sanded the davits can be fitted. My slots are not perfect, but I can live with it. The davits are reinforced with bolts. I simulate the bolts by nailing brass nails in the davits. Some cleats have to be made for the davits. A small cleat above. And a horn cleat a bit lower. Making the horn cleat: The davits rest in brass heel straps just like the bearer posts. Between the bearer posts lay two curved metal gliders over the channels, the boat slides. They have to prevent the rub rail of the boat from interfering with the channels of the ship while hoisting or lowering. The strips are sawn from a piece of aluminum. It was done by my son, at his work they have better tools to cut metal than I have. Now I can finally glue the davits into place. At this stage I decide also to varnish the front of the model because once the boat slides and the chain plates are in place that will be more difficult. Thank you very much for reading this log, for your likes and for your encouraging comments. Till next week!


- 86 replies
-
- 6
-

-
- whaling
- clinker built
- (and 2 more)
-
Yes indeed. And it also takes a lot of wood. I think I'll have just enough pear to finish this. Thanks for your comment.
- 86 replies
-
- 1
-
-
- whaling
- clinker built
- (and 2 more)
-
Excellent work on that sloop, Jorge. But you also have the assistance of some charming helpers. Mine prefer the comfort of a warm living room above working in my cold workshop.

-
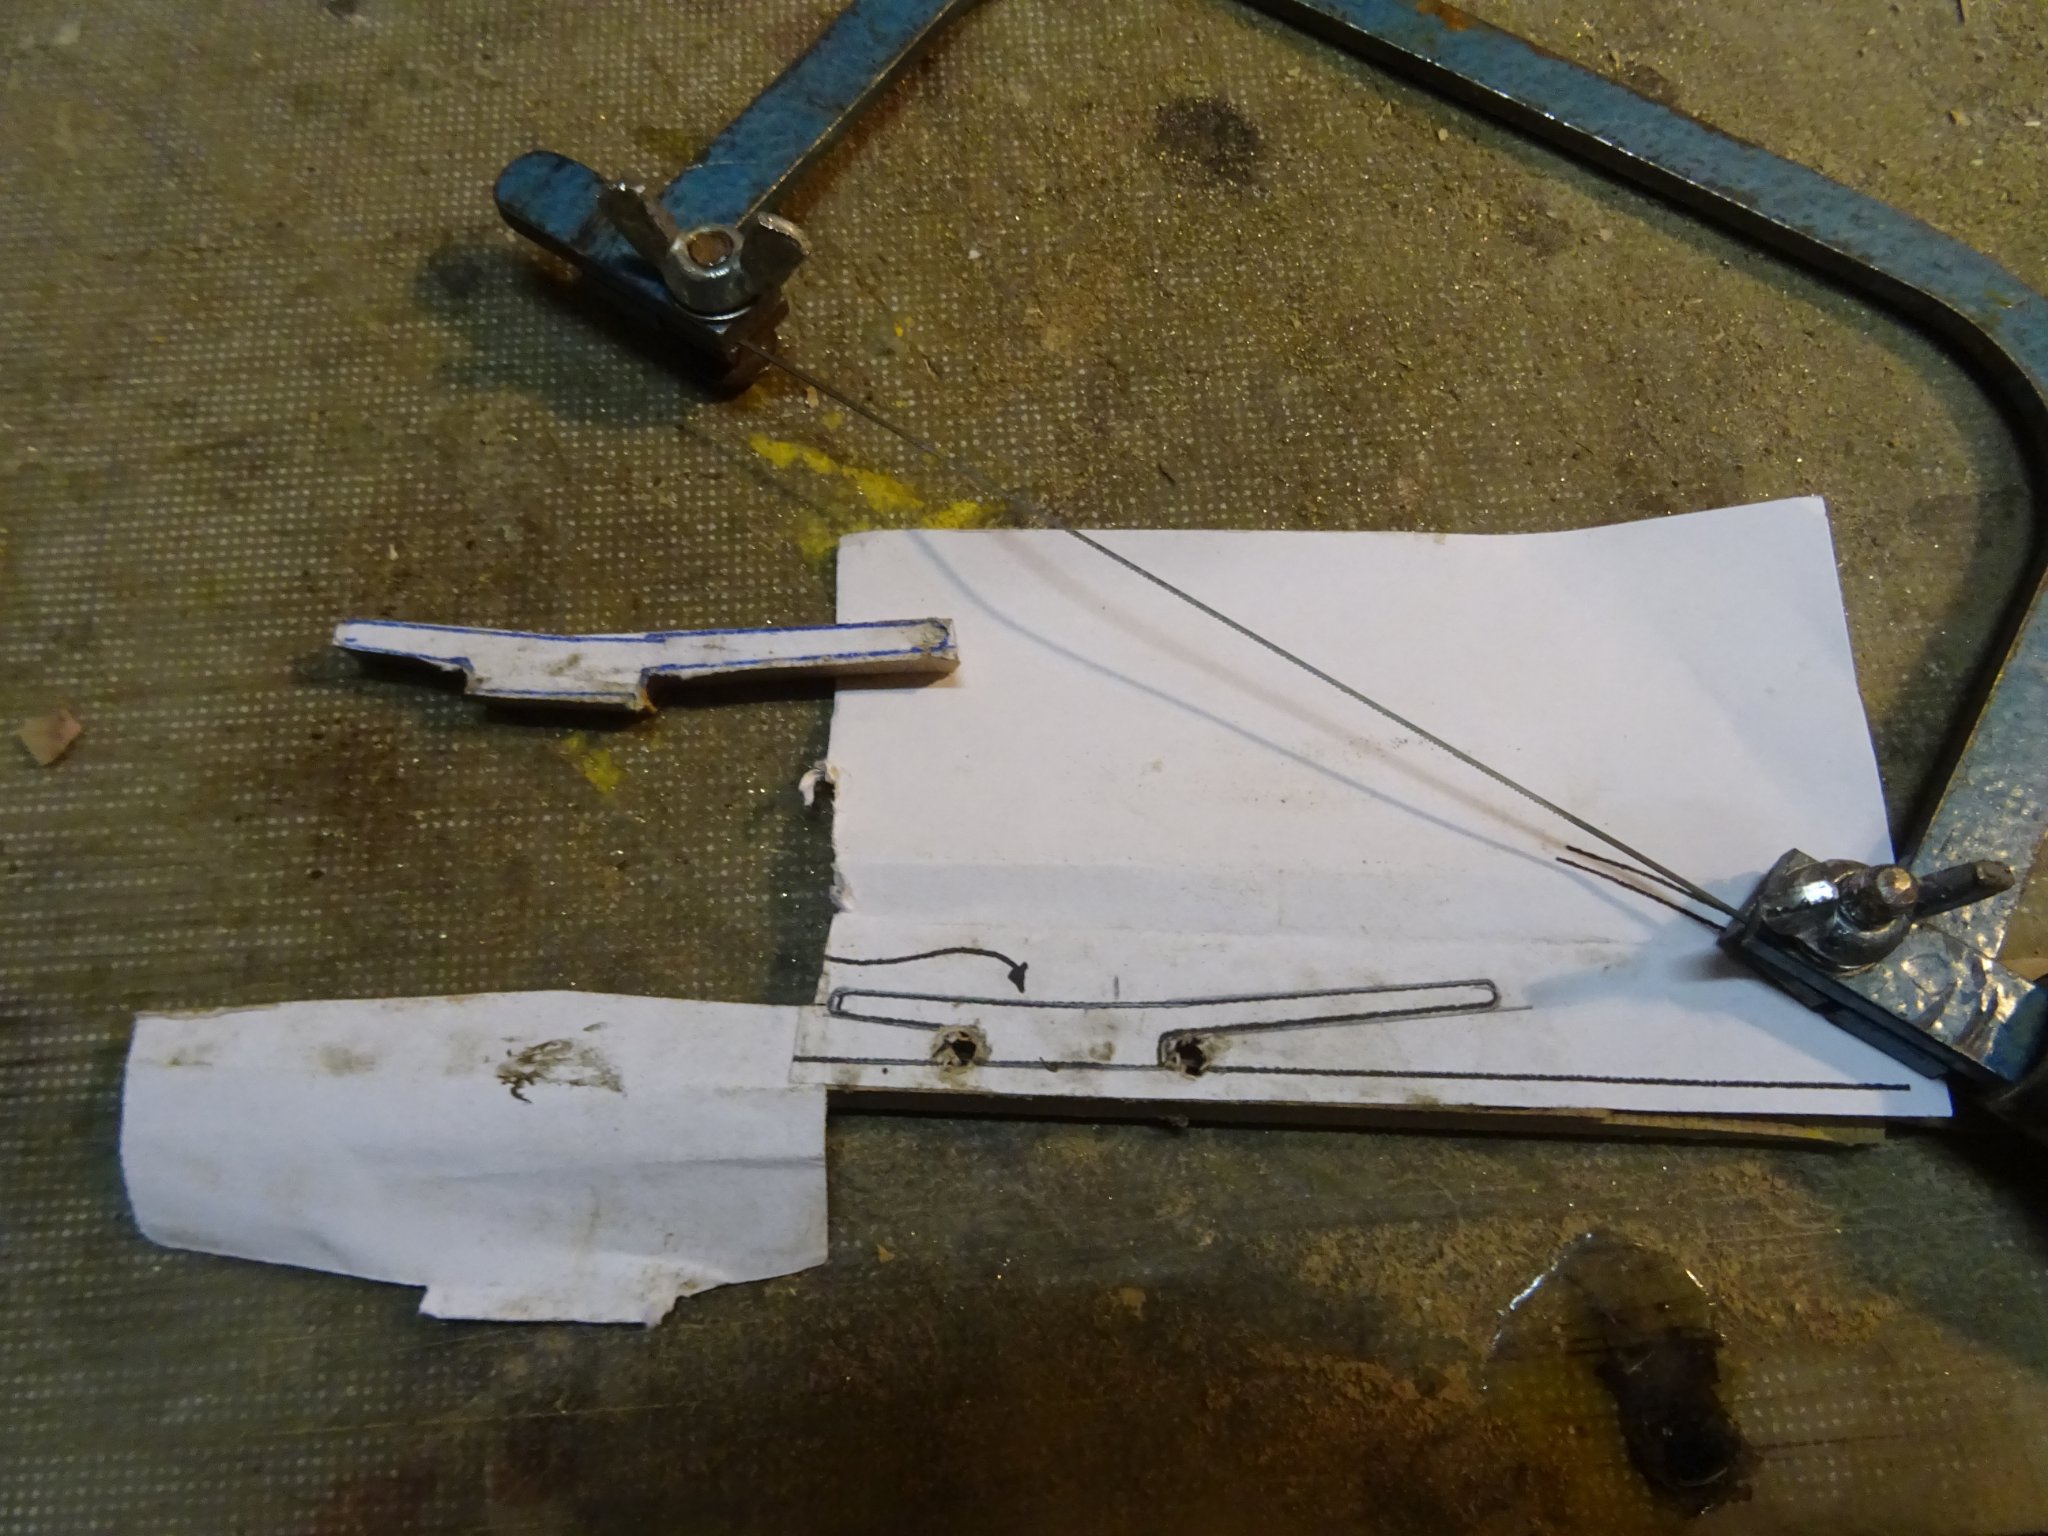
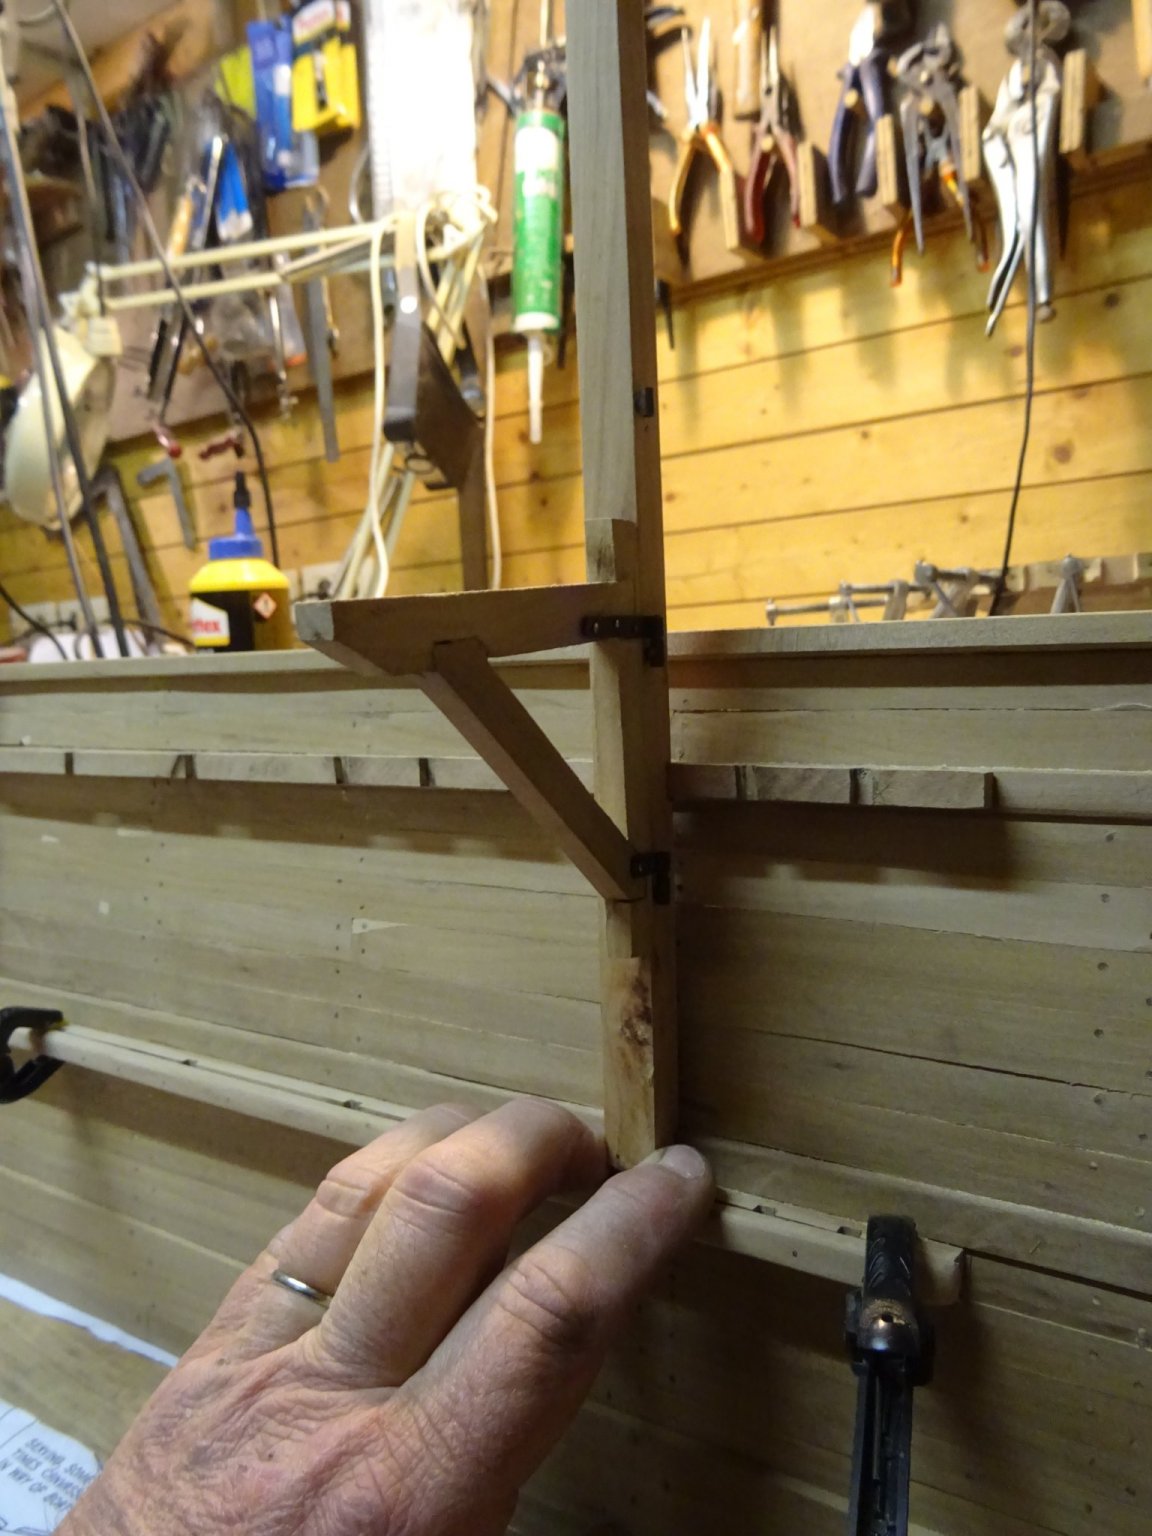
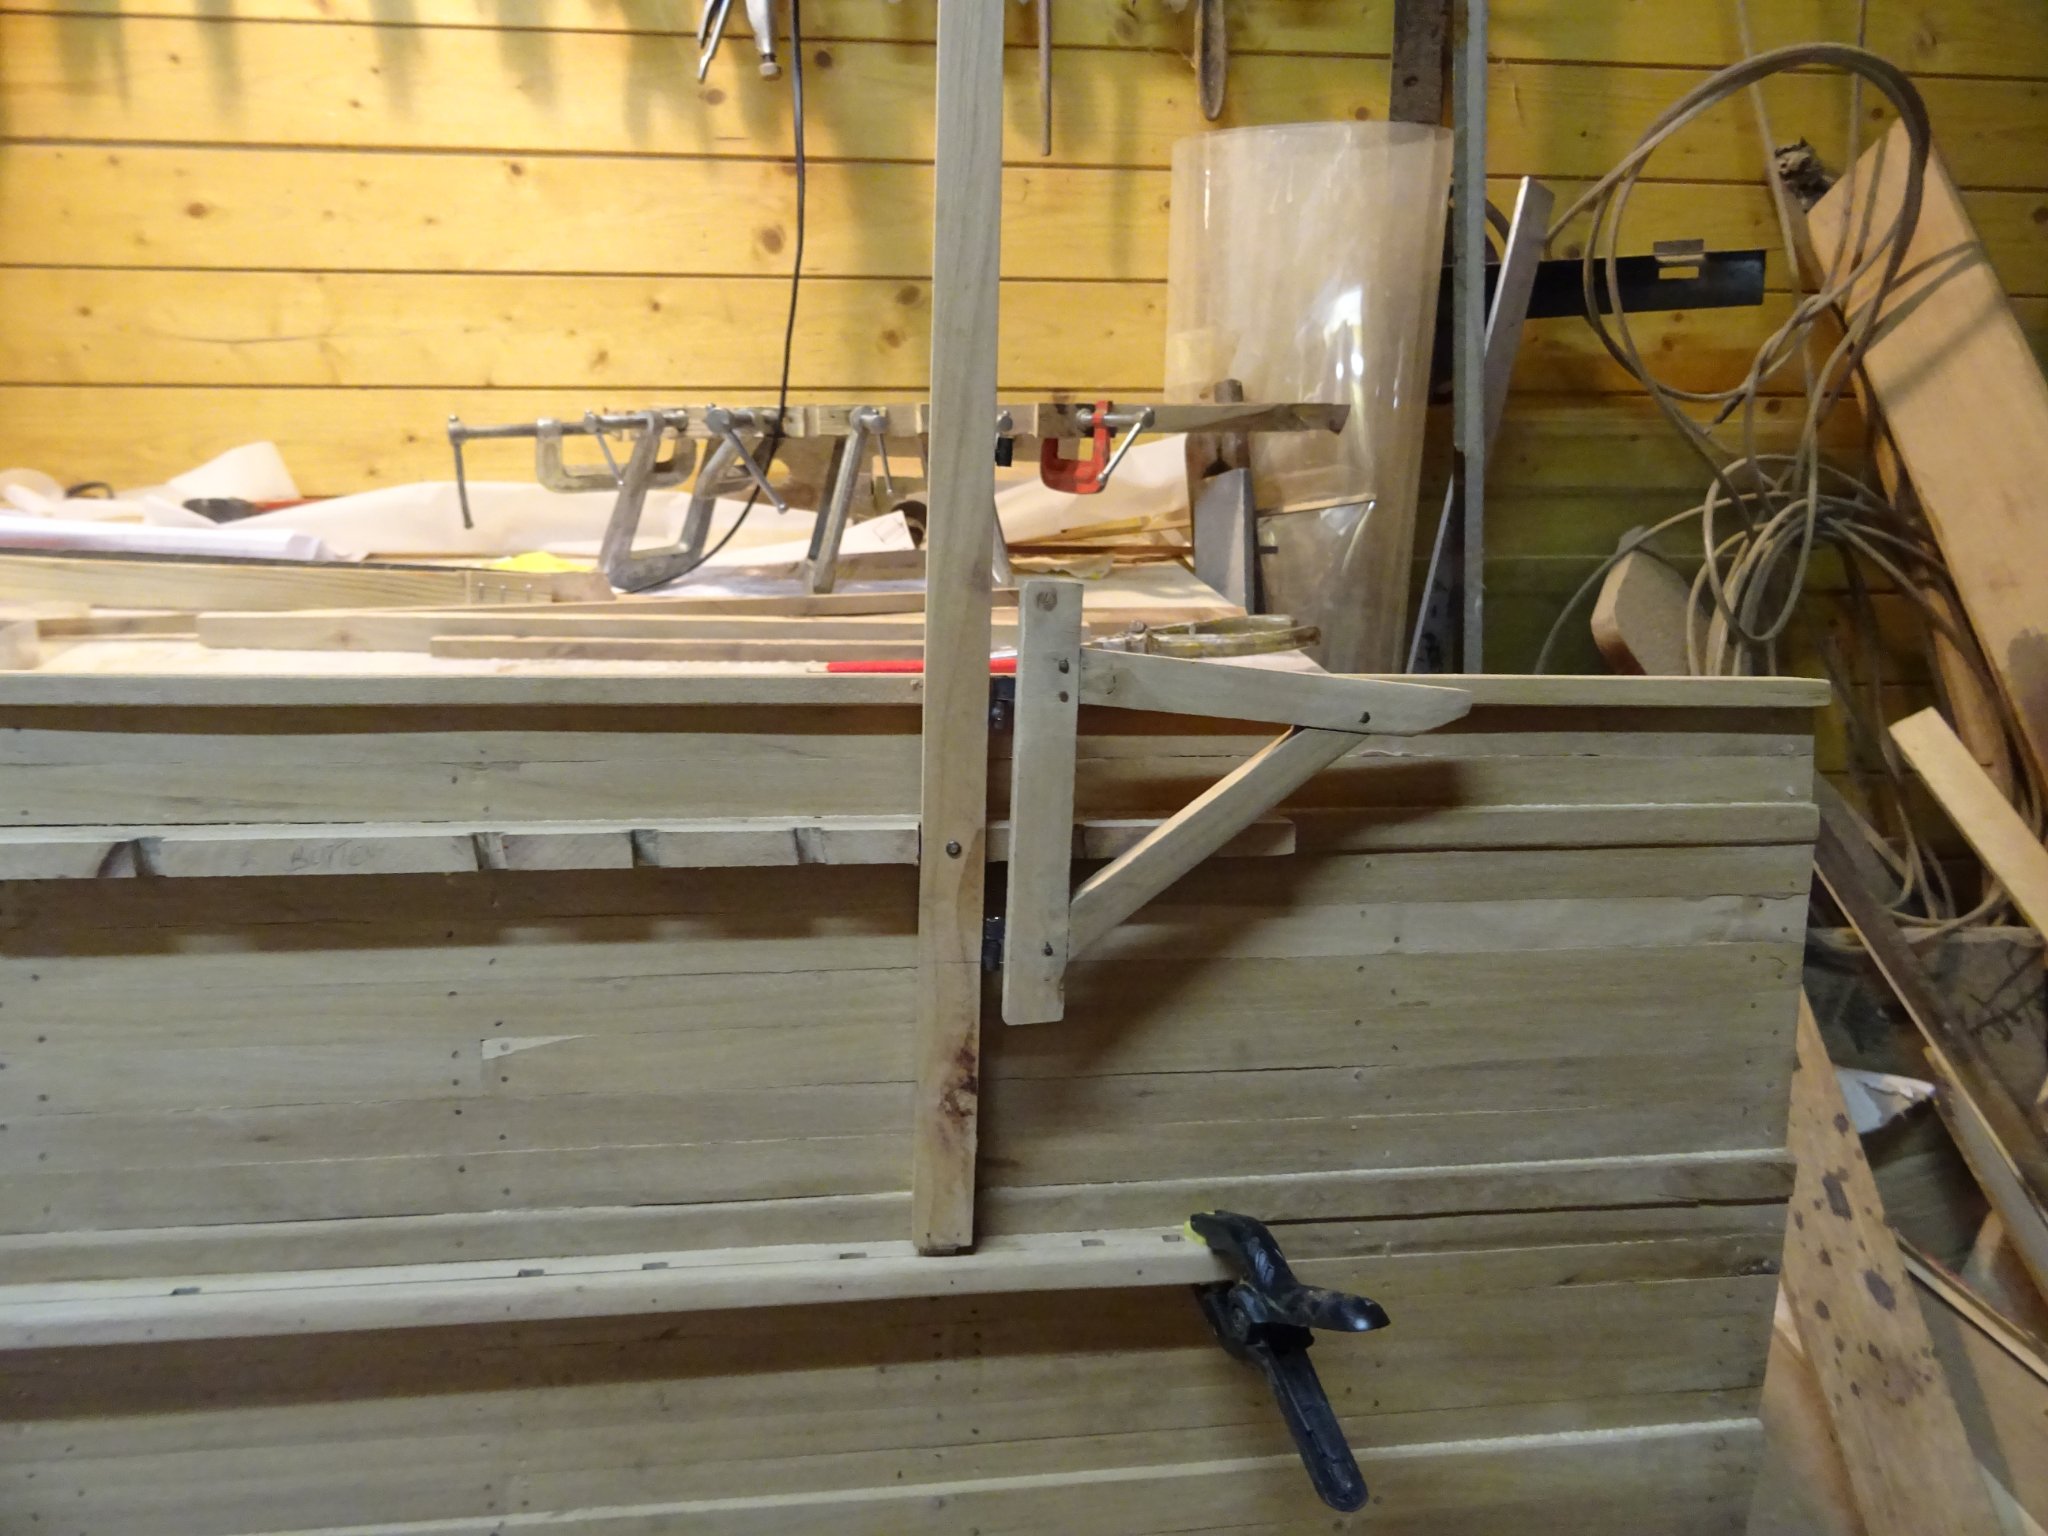
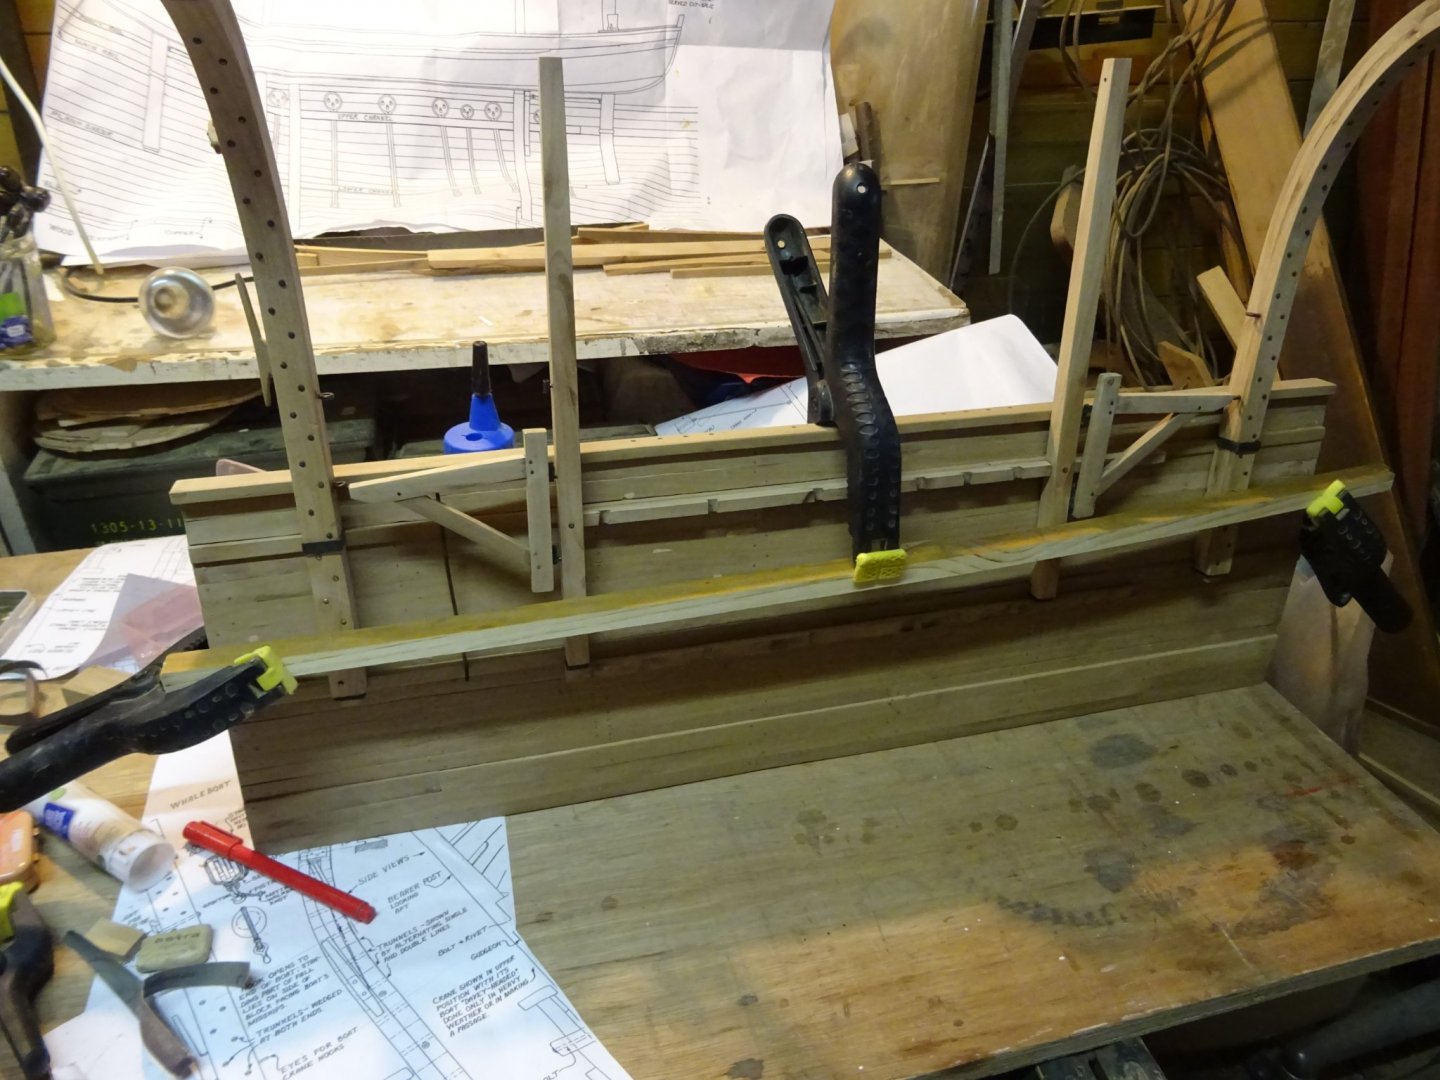
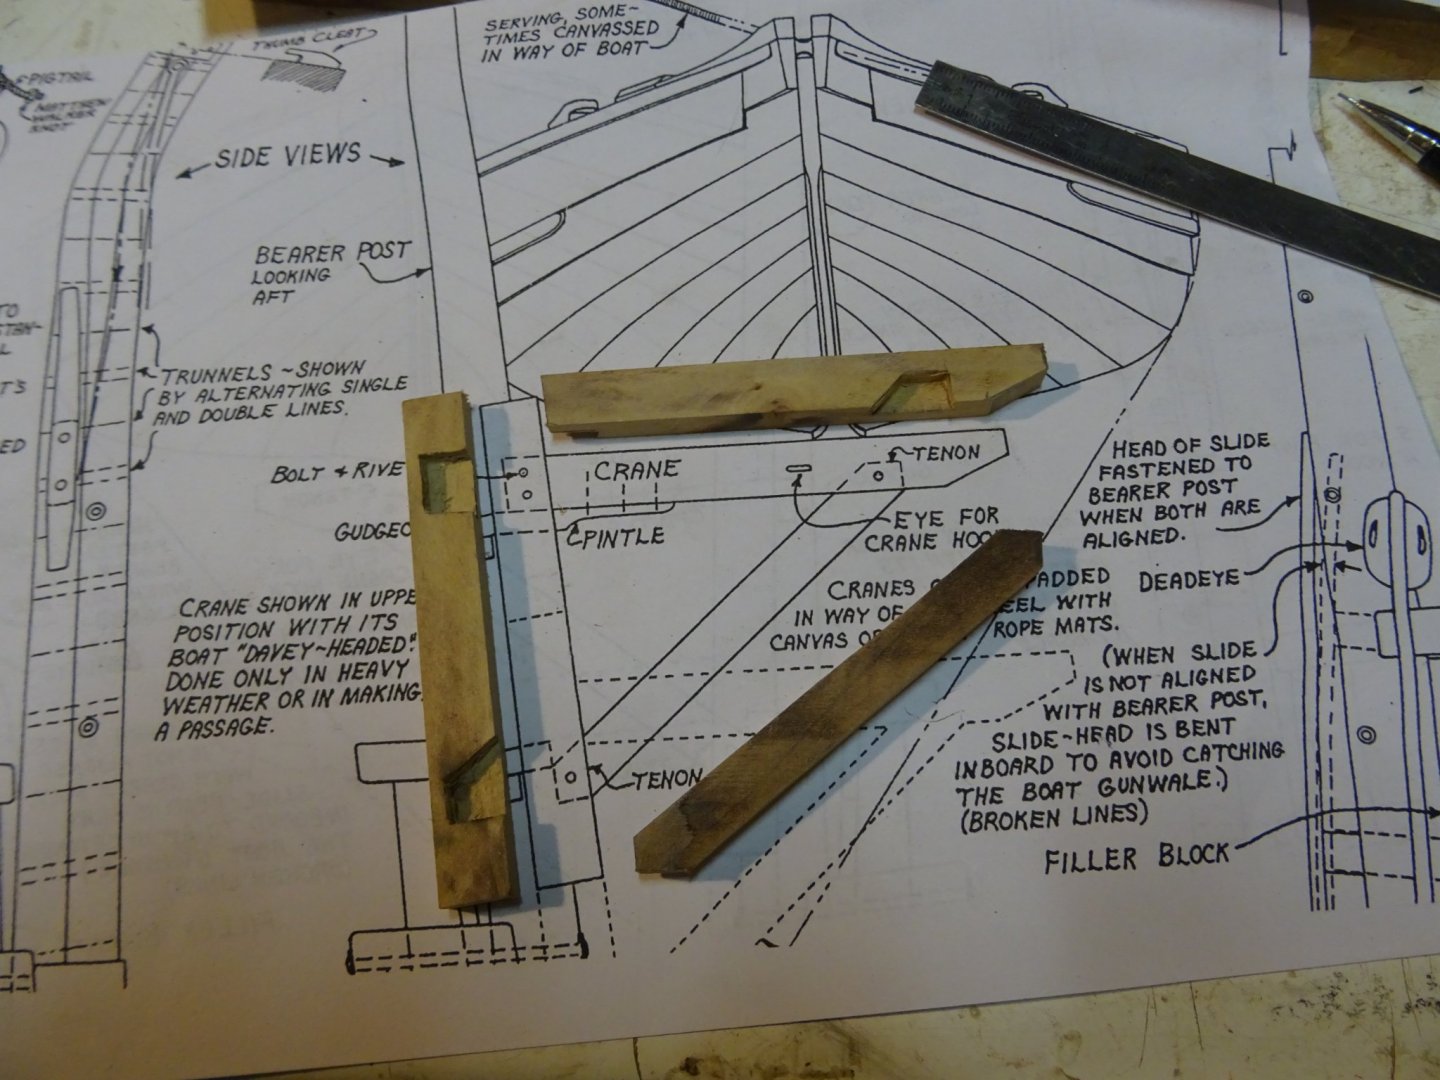
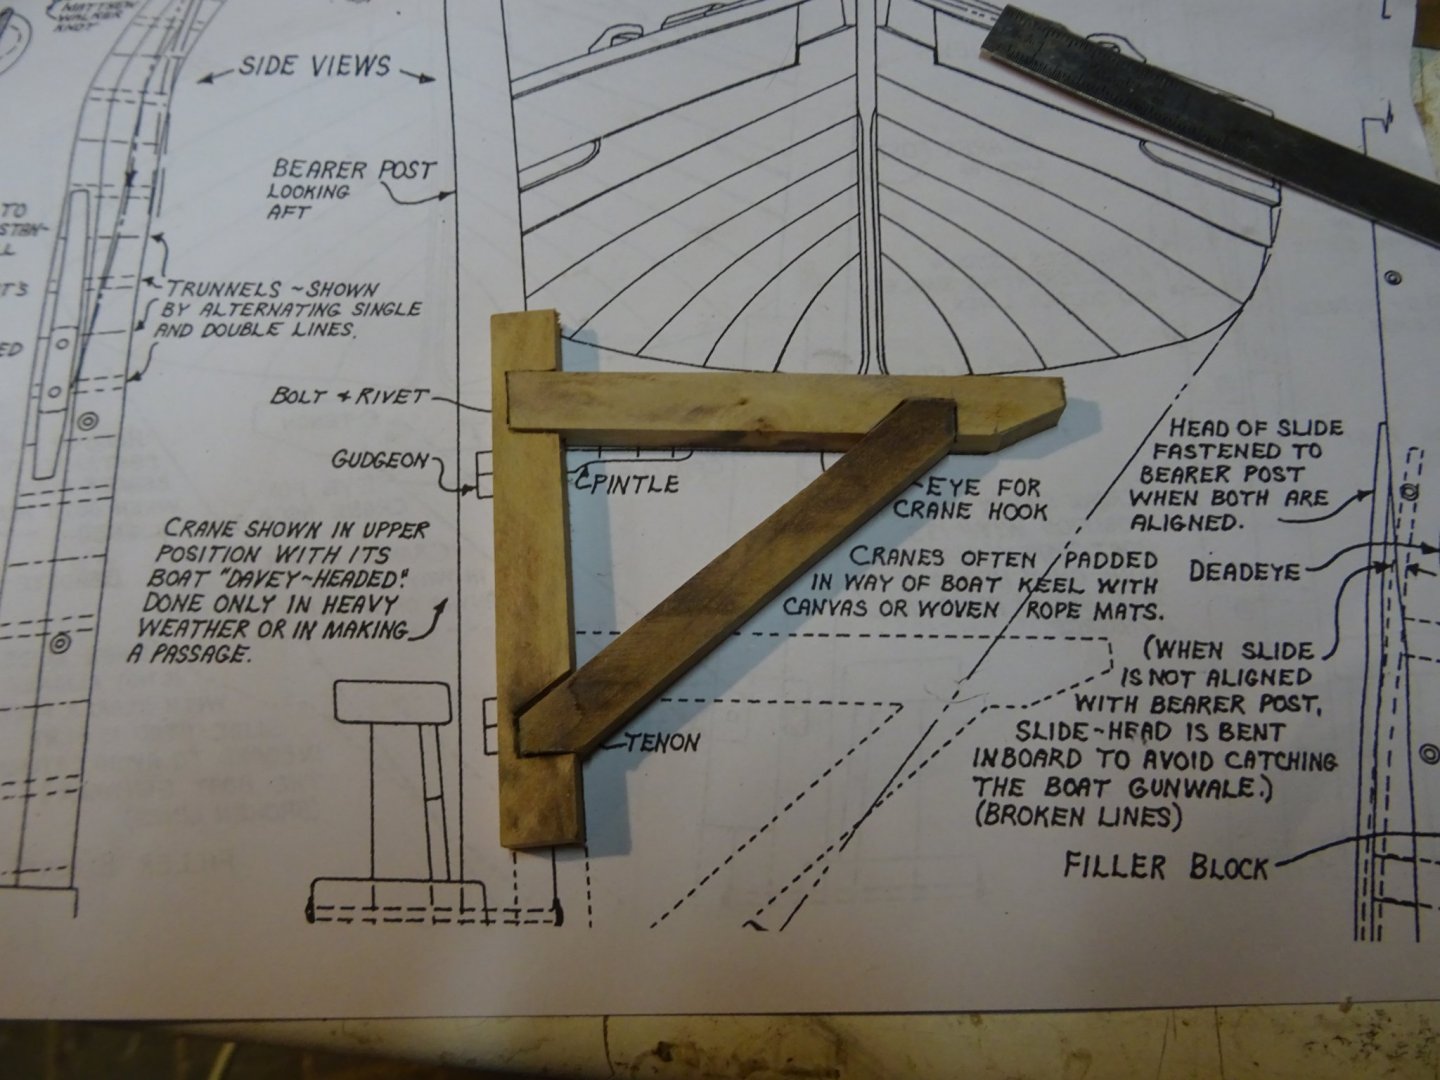
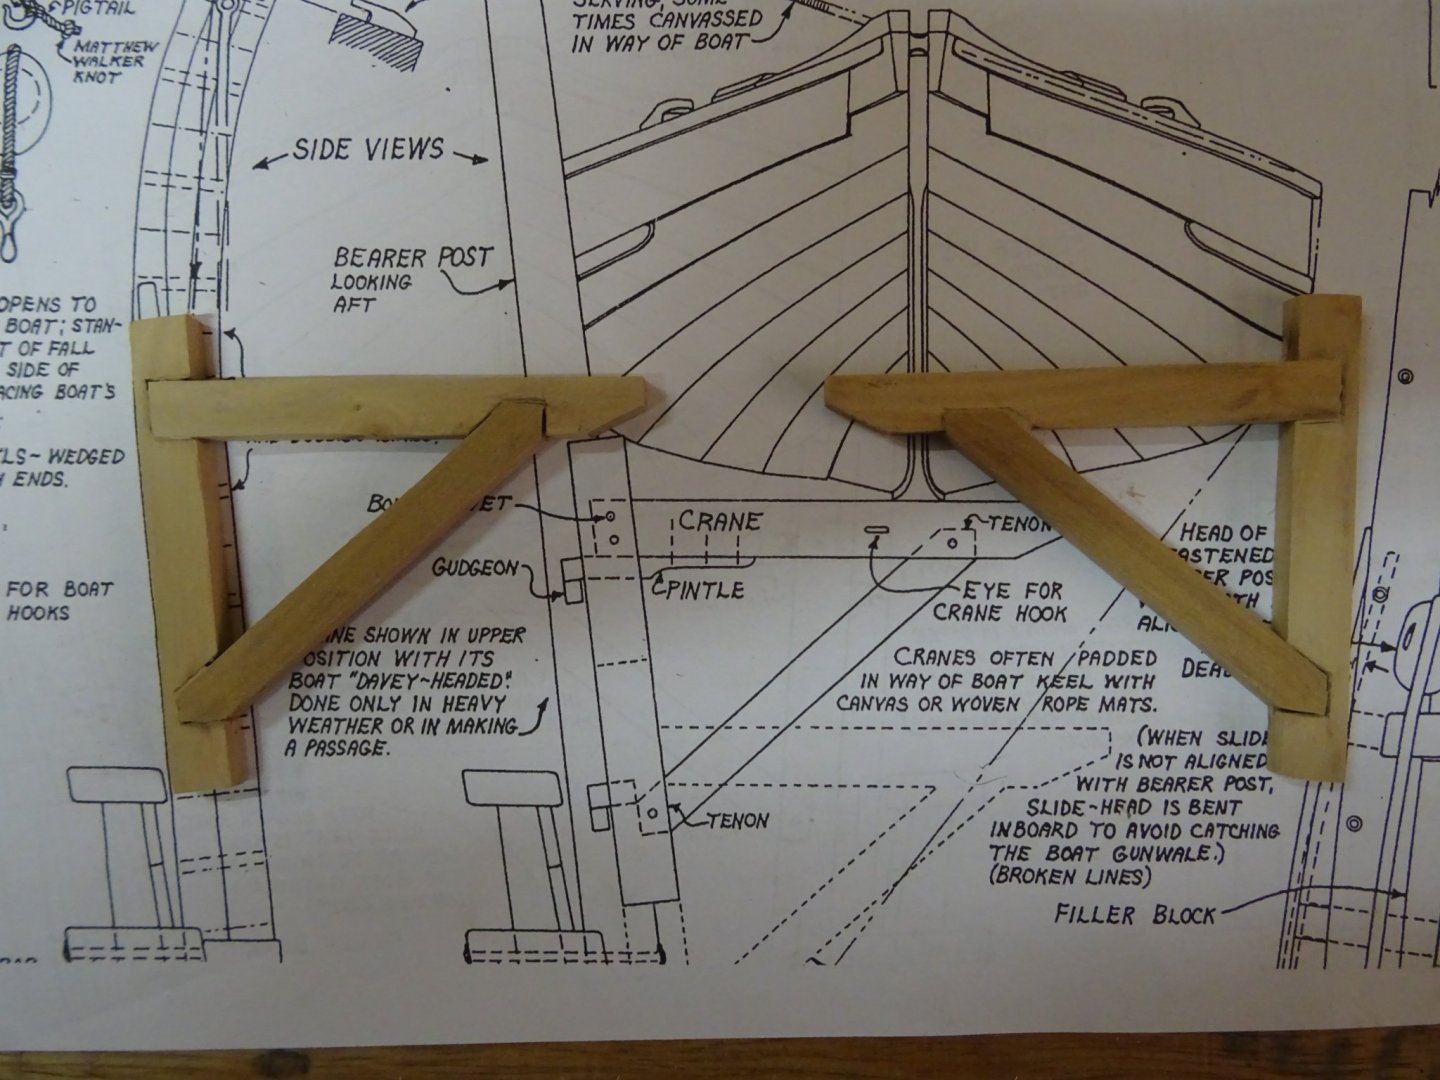
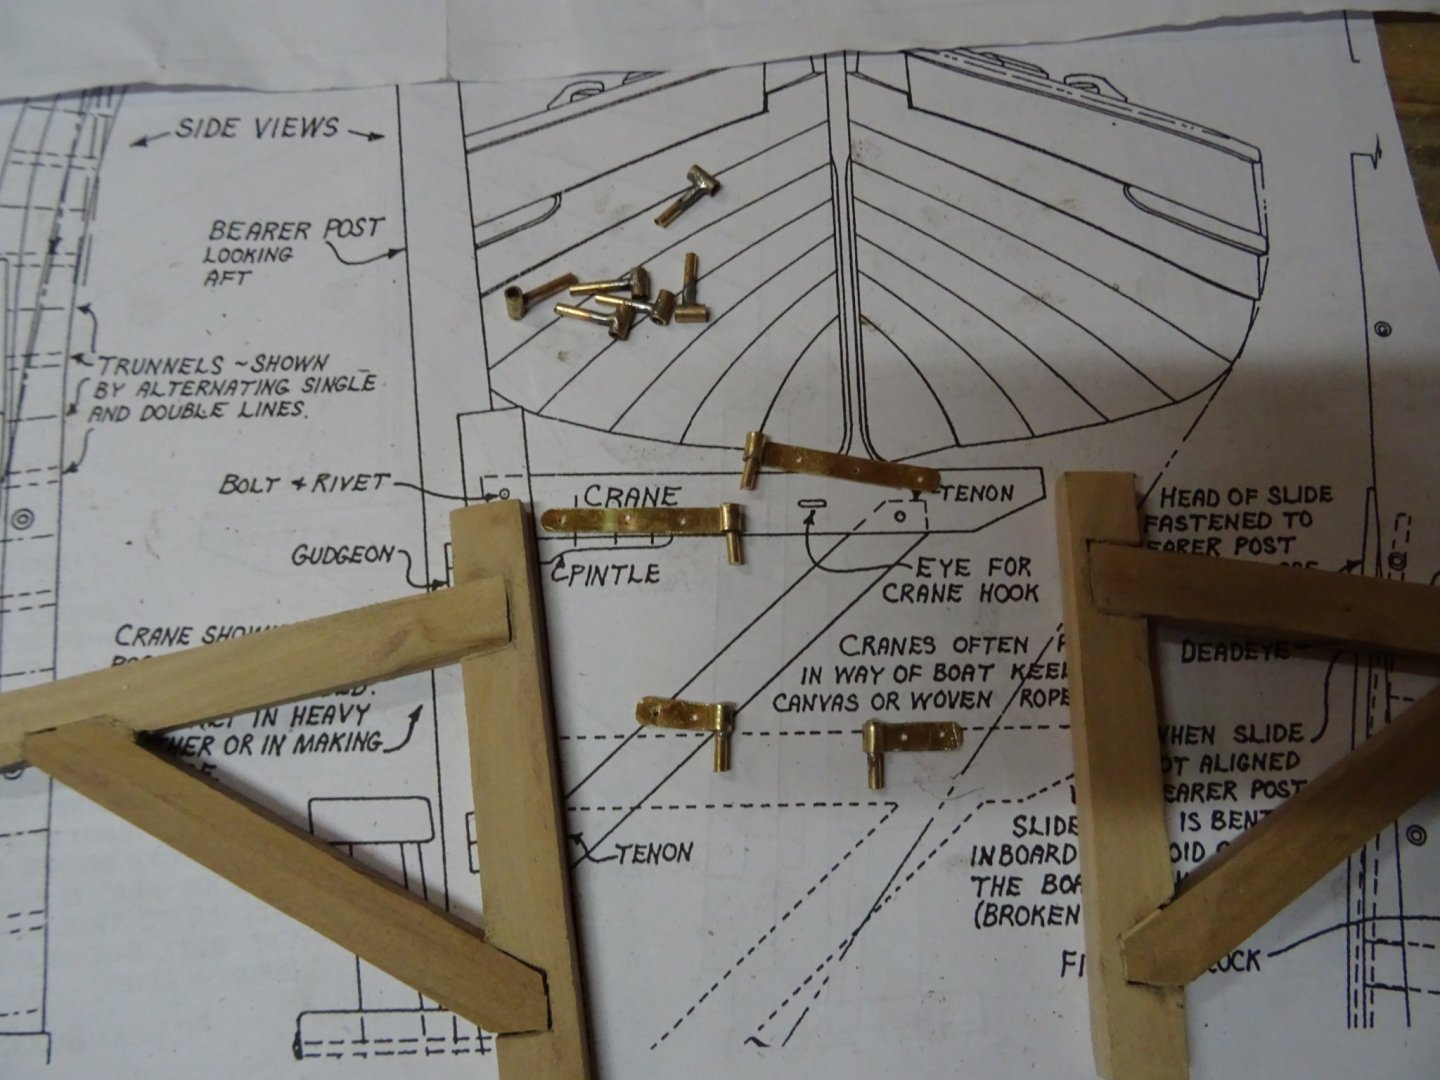
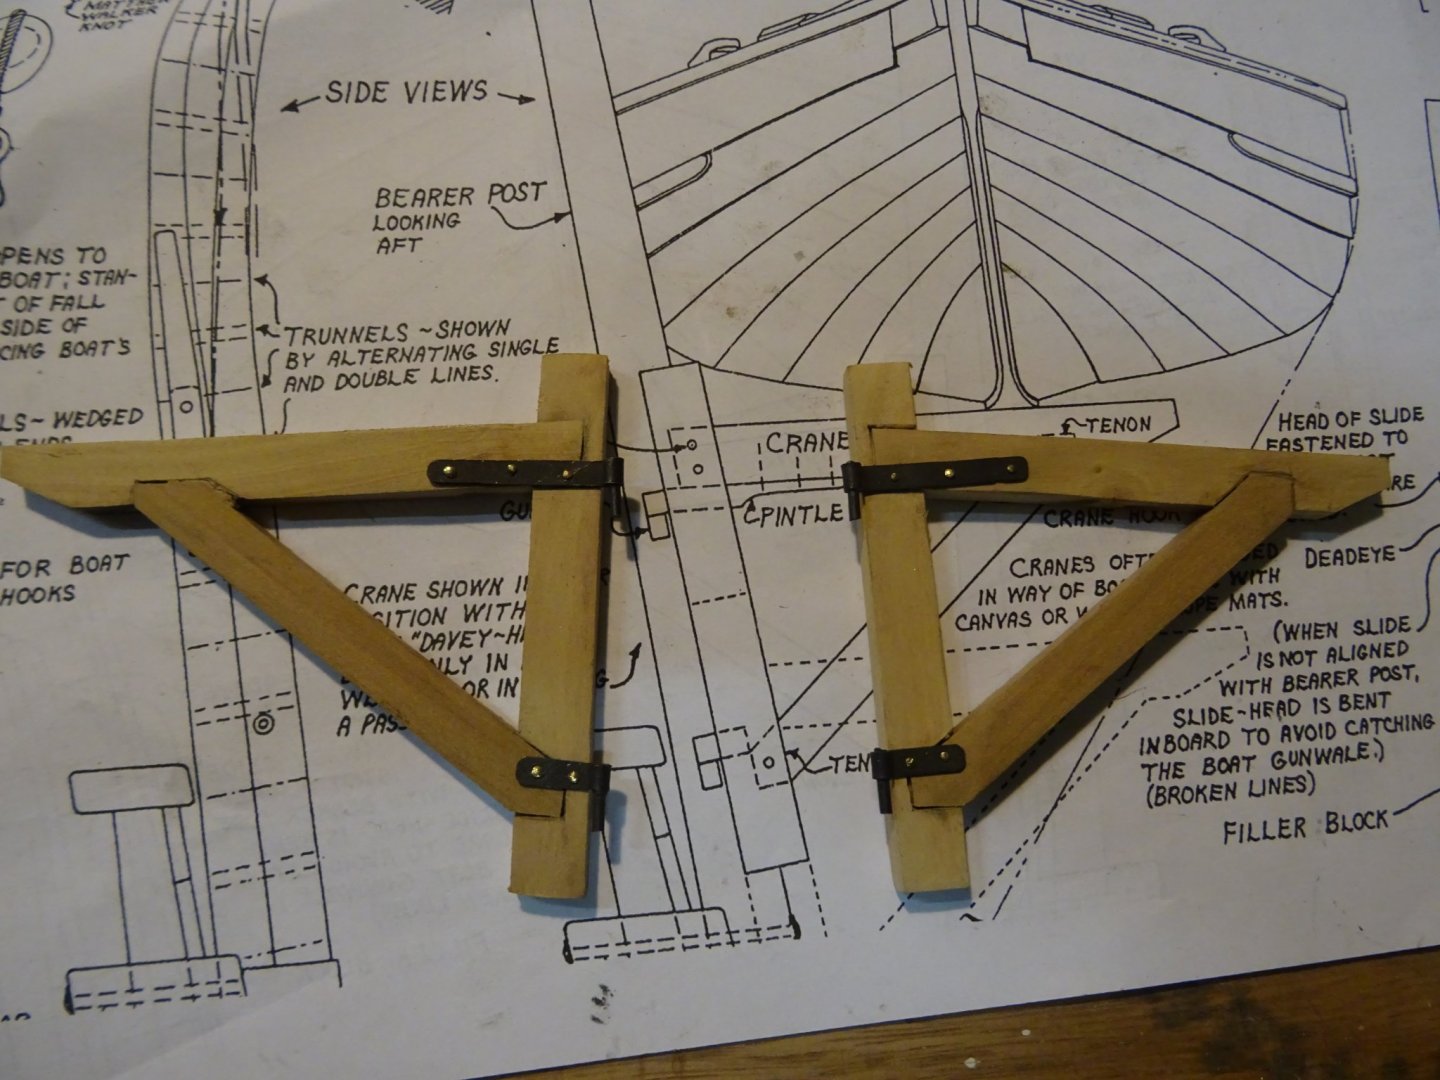
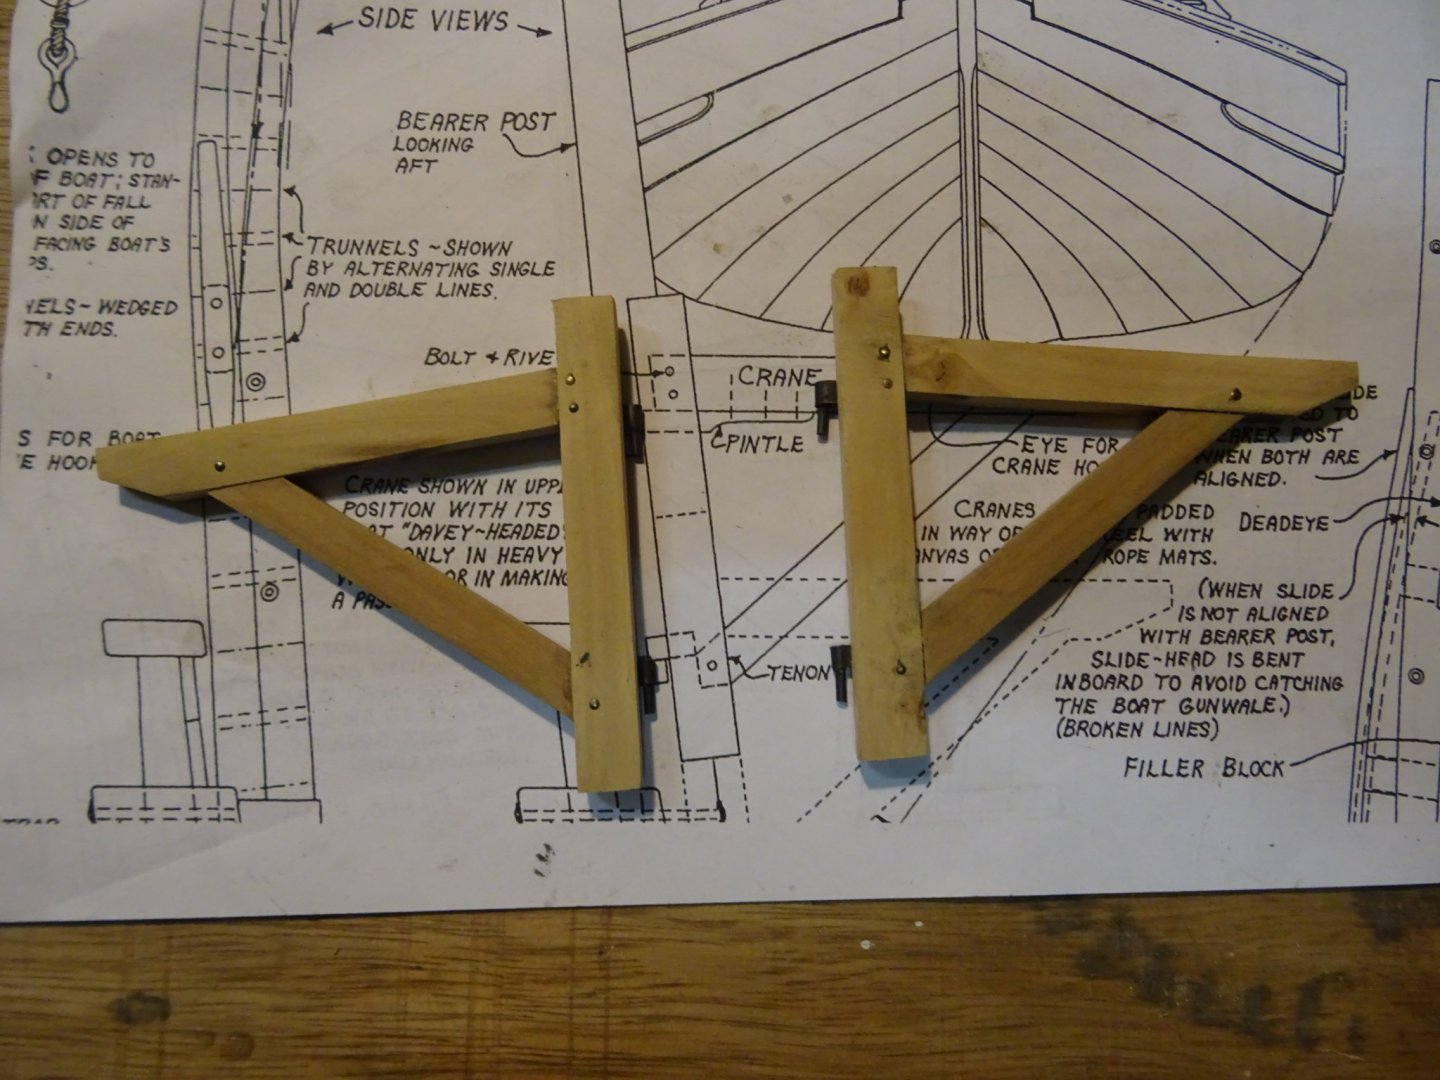
9.3 The bearer posts and the cranes Between the two davits stand two square bearer posts. They serve to support the cranes on which stands the boot while it is hoisted and hanging outboard in the davits. Fitting the bearer posts. Making the cranes: The cranes can swing in and out. Therefore they are placed in hinges. As you can see on the picture there are four pins and six gudgeons. Three gudgeons per crane allow to place the crane in a lower position in which the boat was rigged when cruising in whaling grounds. The crane can also be placed some half a meter higher during the passage to whaling grounds or in heavy seas. The crane swung out. The crane turned in to enable to hoist or to lower the boat. Placing the bearer posts definitively. Thank you very much for reading this log and for your likes. Till next week!


- 86 replies
-
- 4
-
-
- whaling
- clinker built
- (and 2 more)
-
This is a very interesting and educational post. I am very curious how you will transfer the shape of the strakes to the real planks. I am eager about the sequence of this thread.
-
Smooth lines, Vaddoc!
-
That's realy nice, Yankee D. Museum quality!
-
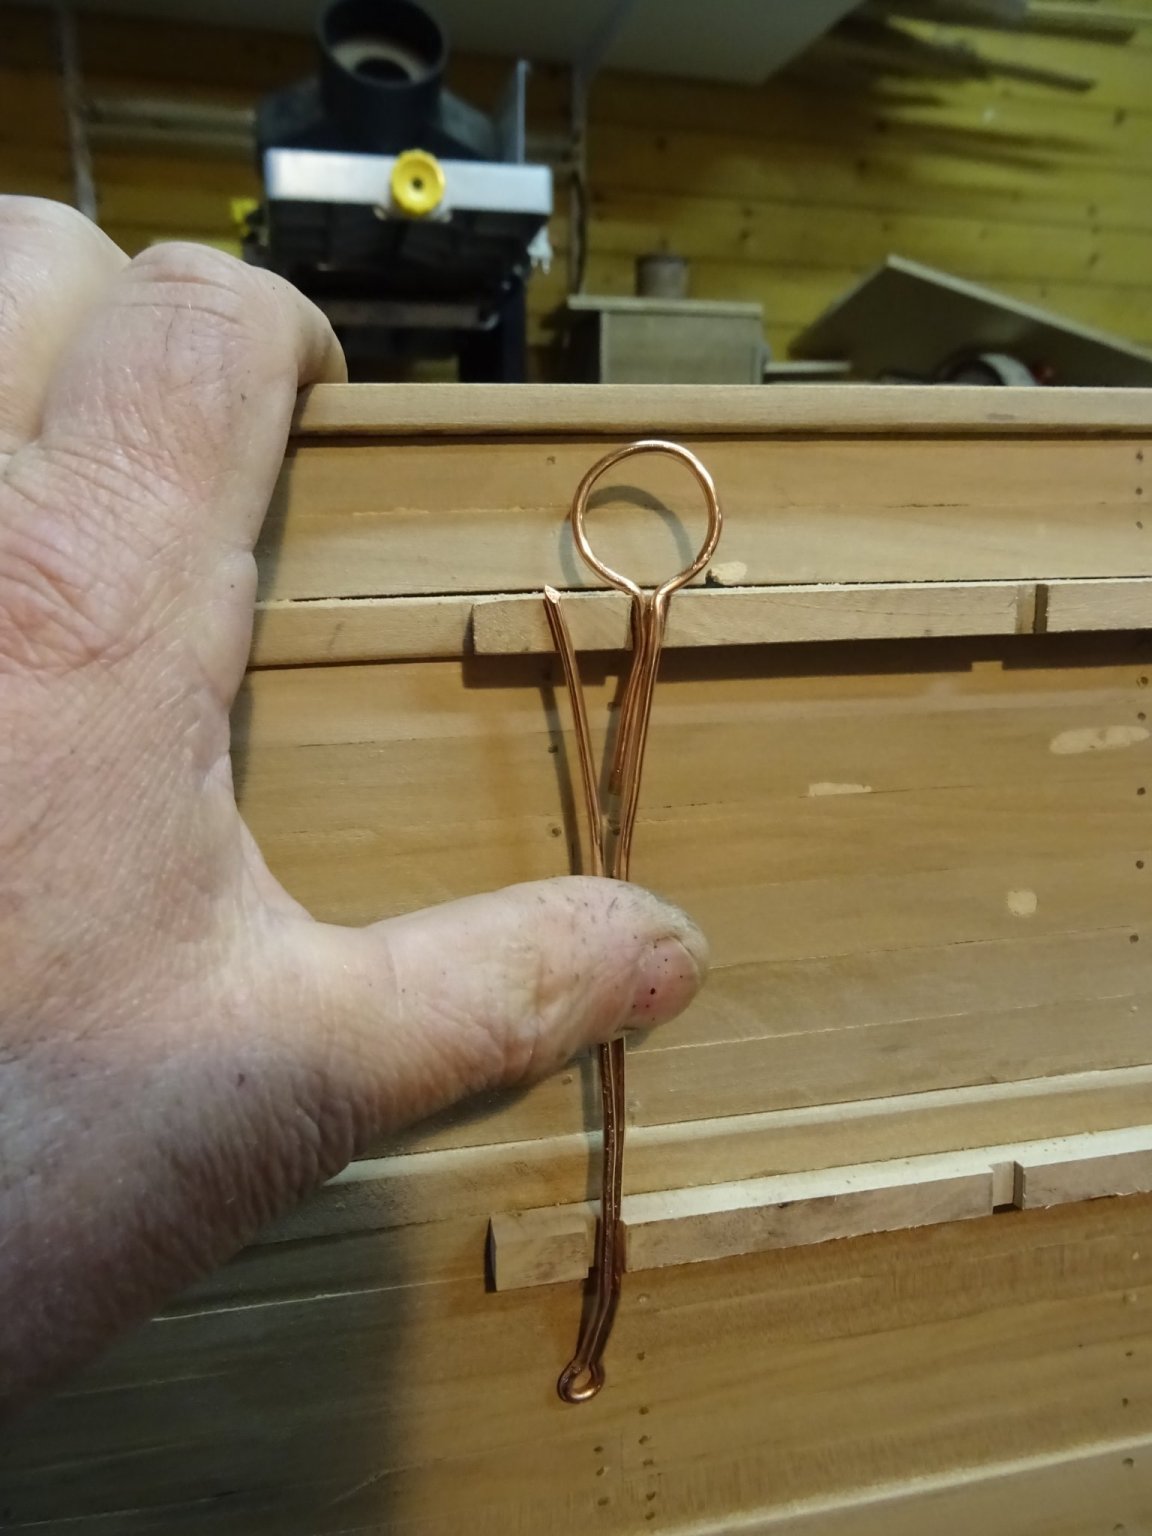
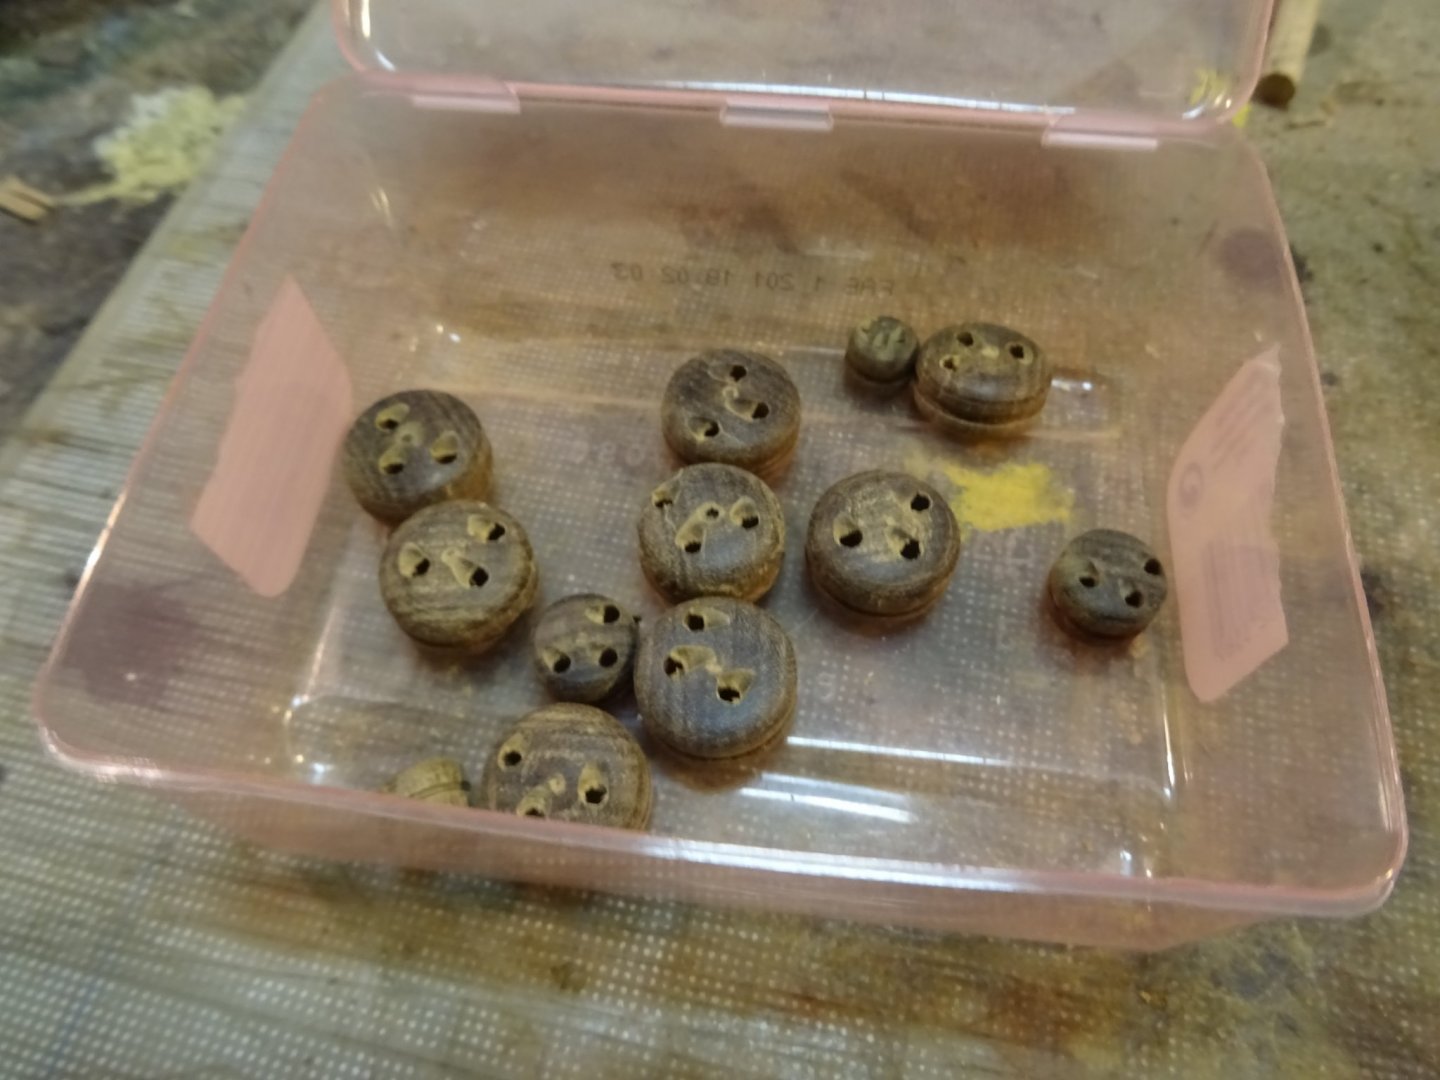
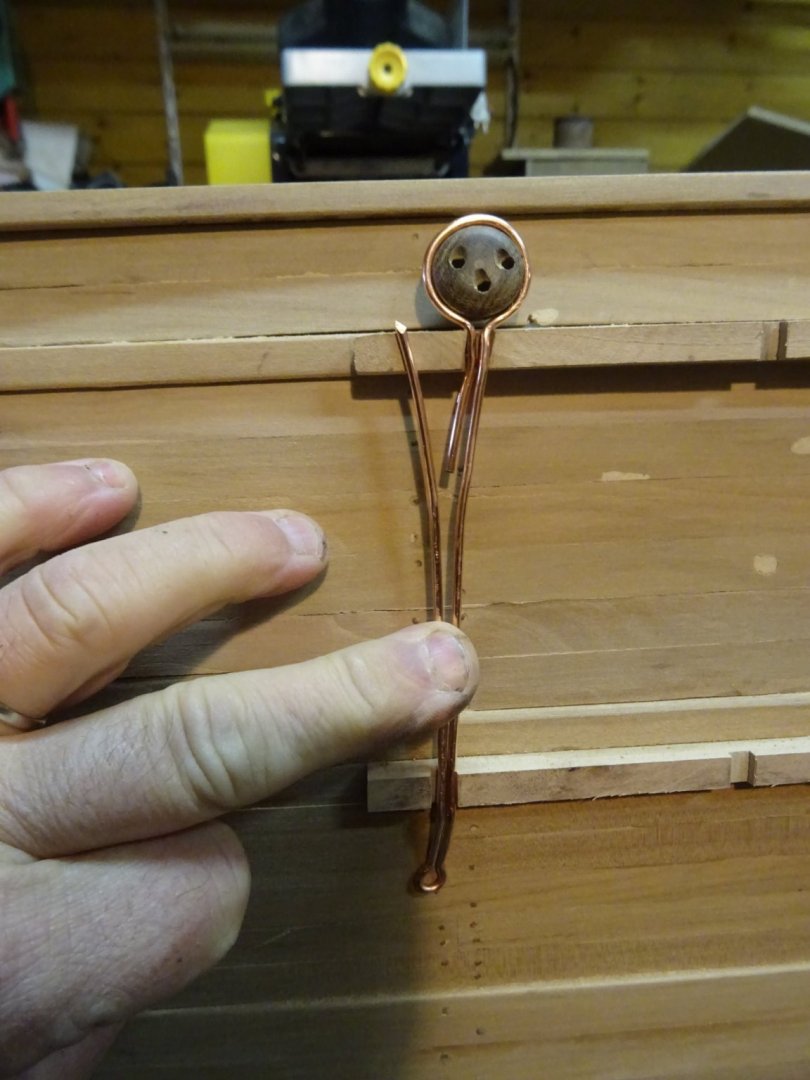
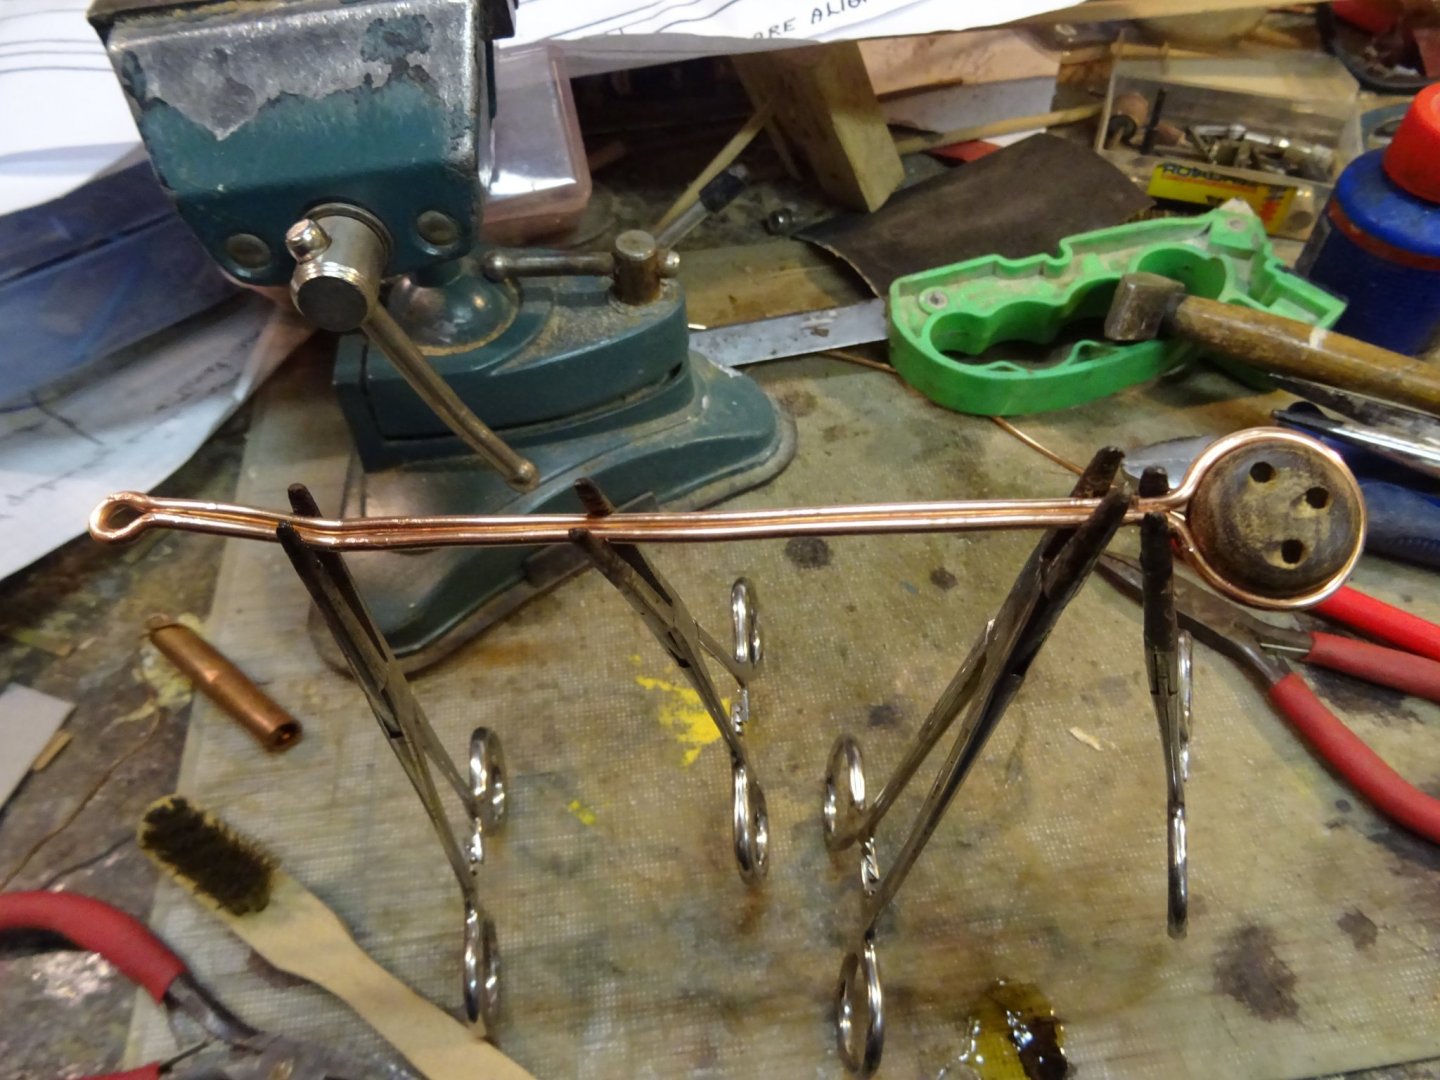
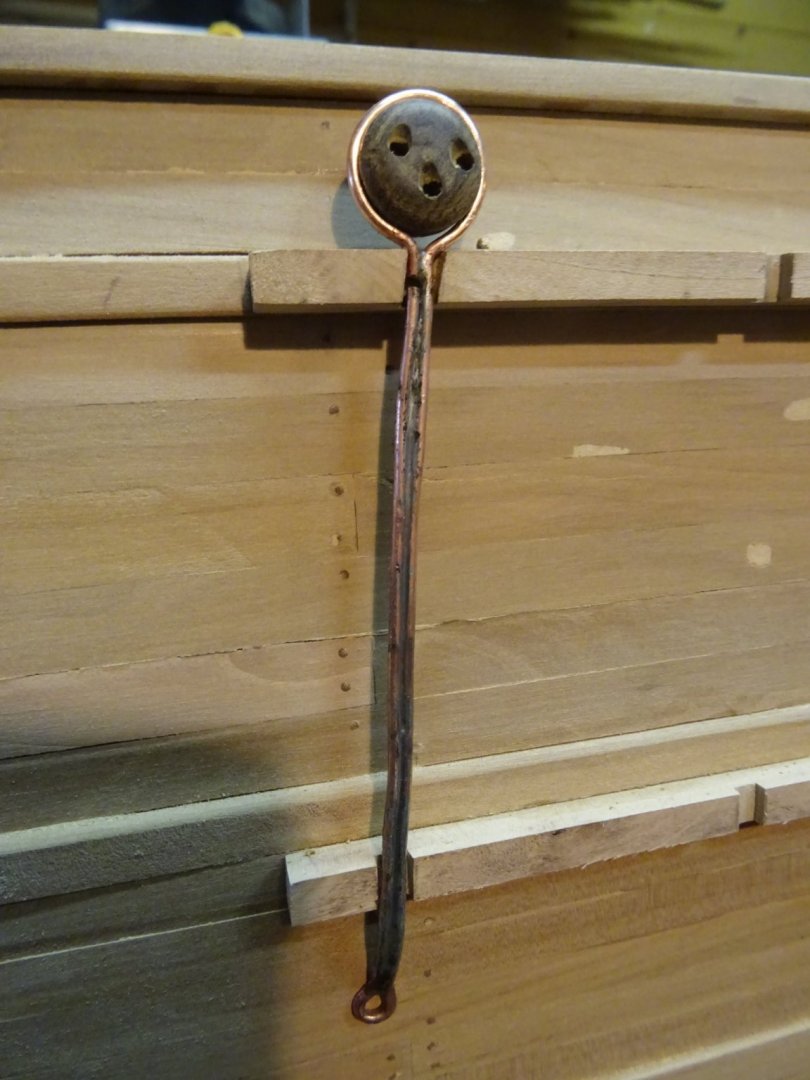
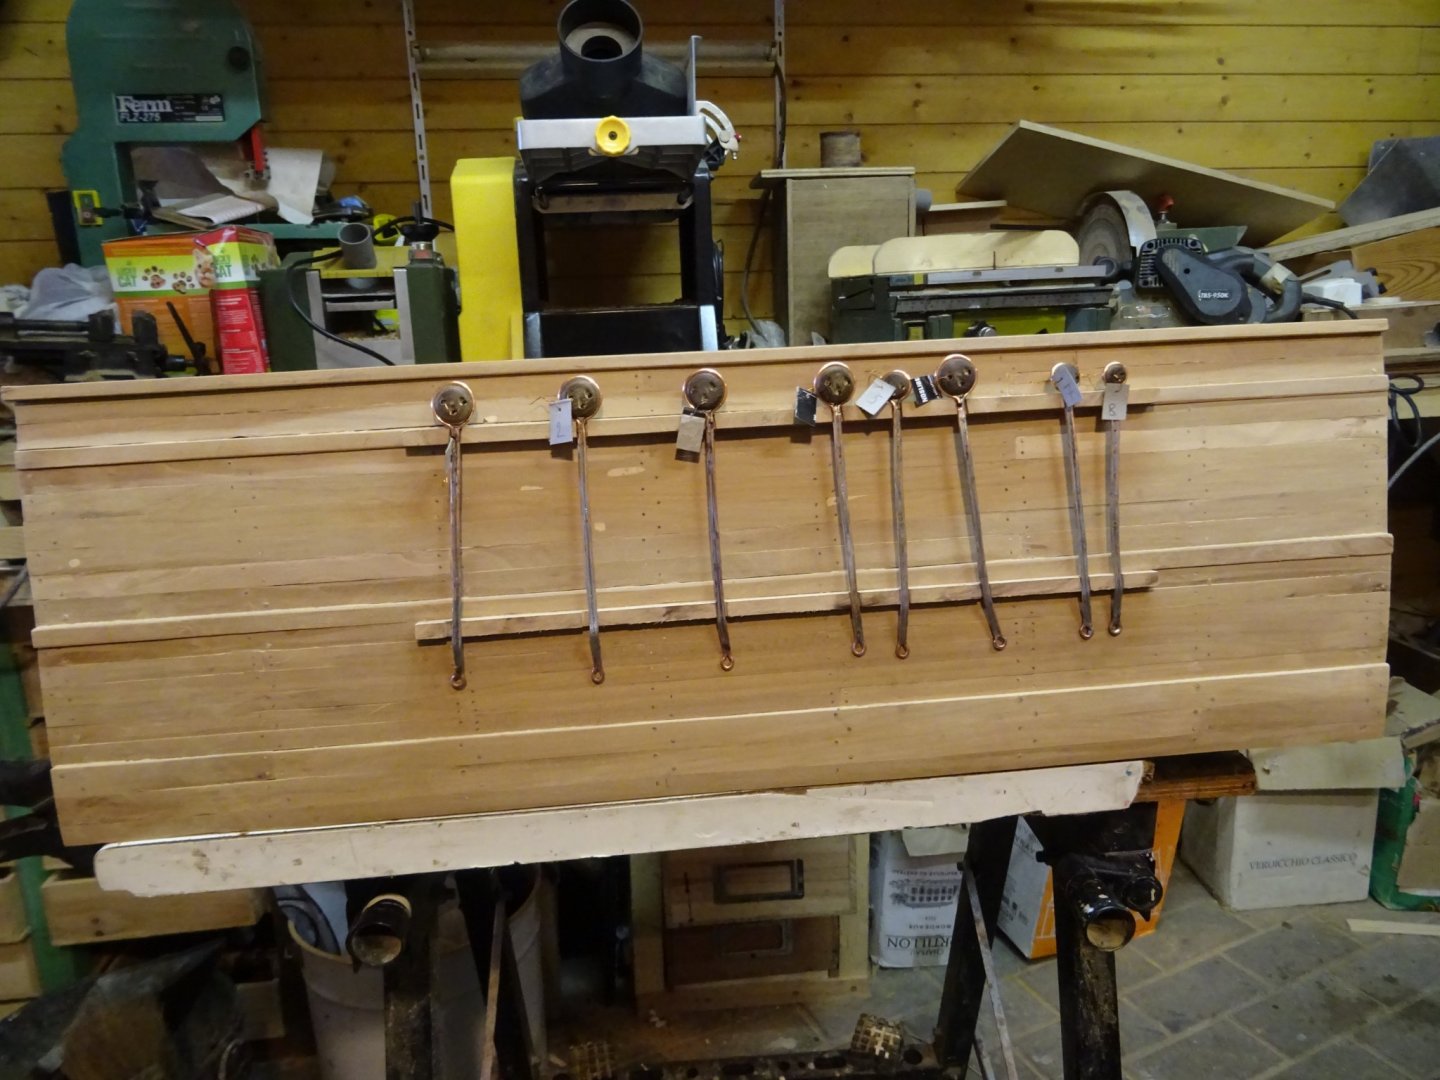
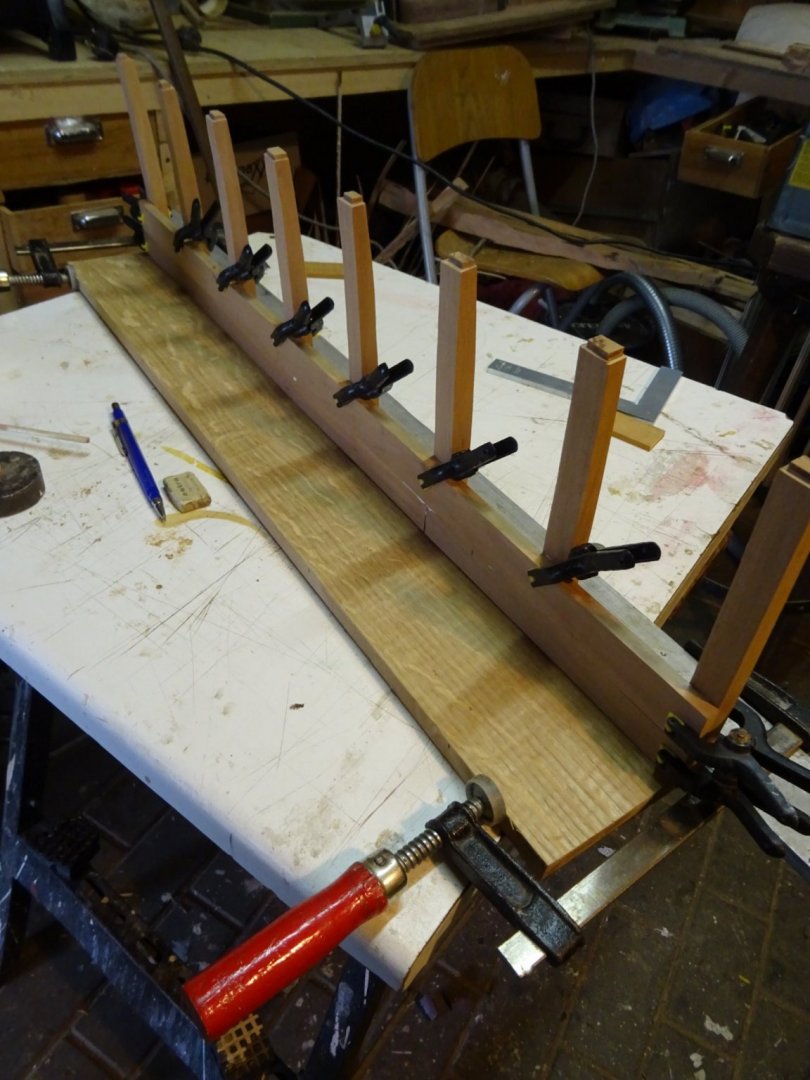
9.2 Dead eyes and chain plates Making the dead eyes. I need eight of them in three different sizes. I make some more of each size (you never know). Gluing the channels (in this case the upper channel). I make the chain plates of copper wire. Fitting the chain plates and the dead eyes. Soldering the chain plates. Fitting all the chain plates and dead eyes. I have labeled them because at this point they will be removed again to be blackened. I will place them definitively during a later stage of the build. Thank you very much for reading this log, for your likes and for your encouraging comments. Till next week!

- 86 replies
-
- 3
-
-
- whaling
- clinker built
- (and 2 more)
-
Tank you very much, Turangi. I am still in doubt whether this is really a Norwegian whale-boat or the interpretation of an American whale-boat as a model builder here in Europe had a long time ago.
- 86 replies
-
- 1
-
-
- whaling
- clinker built
- (and 2 more)
-
Very nice frames, Mark. And such a sharp cuts. What kind of machinery do you use to make such a clean notches?
-
Thank you, Hakan. The table saw is a Proxxon FET. I am very satisfied with it.
- 86 replies
-
- 2
-
-
- whaling
- clinker built
- (and 2 more)
-
It will be a big model at scale 1/24, Marc. A very interesting project. I signed in to follow your log. Wishing you success and a lot of modeling fun.
-
Nice work!
-
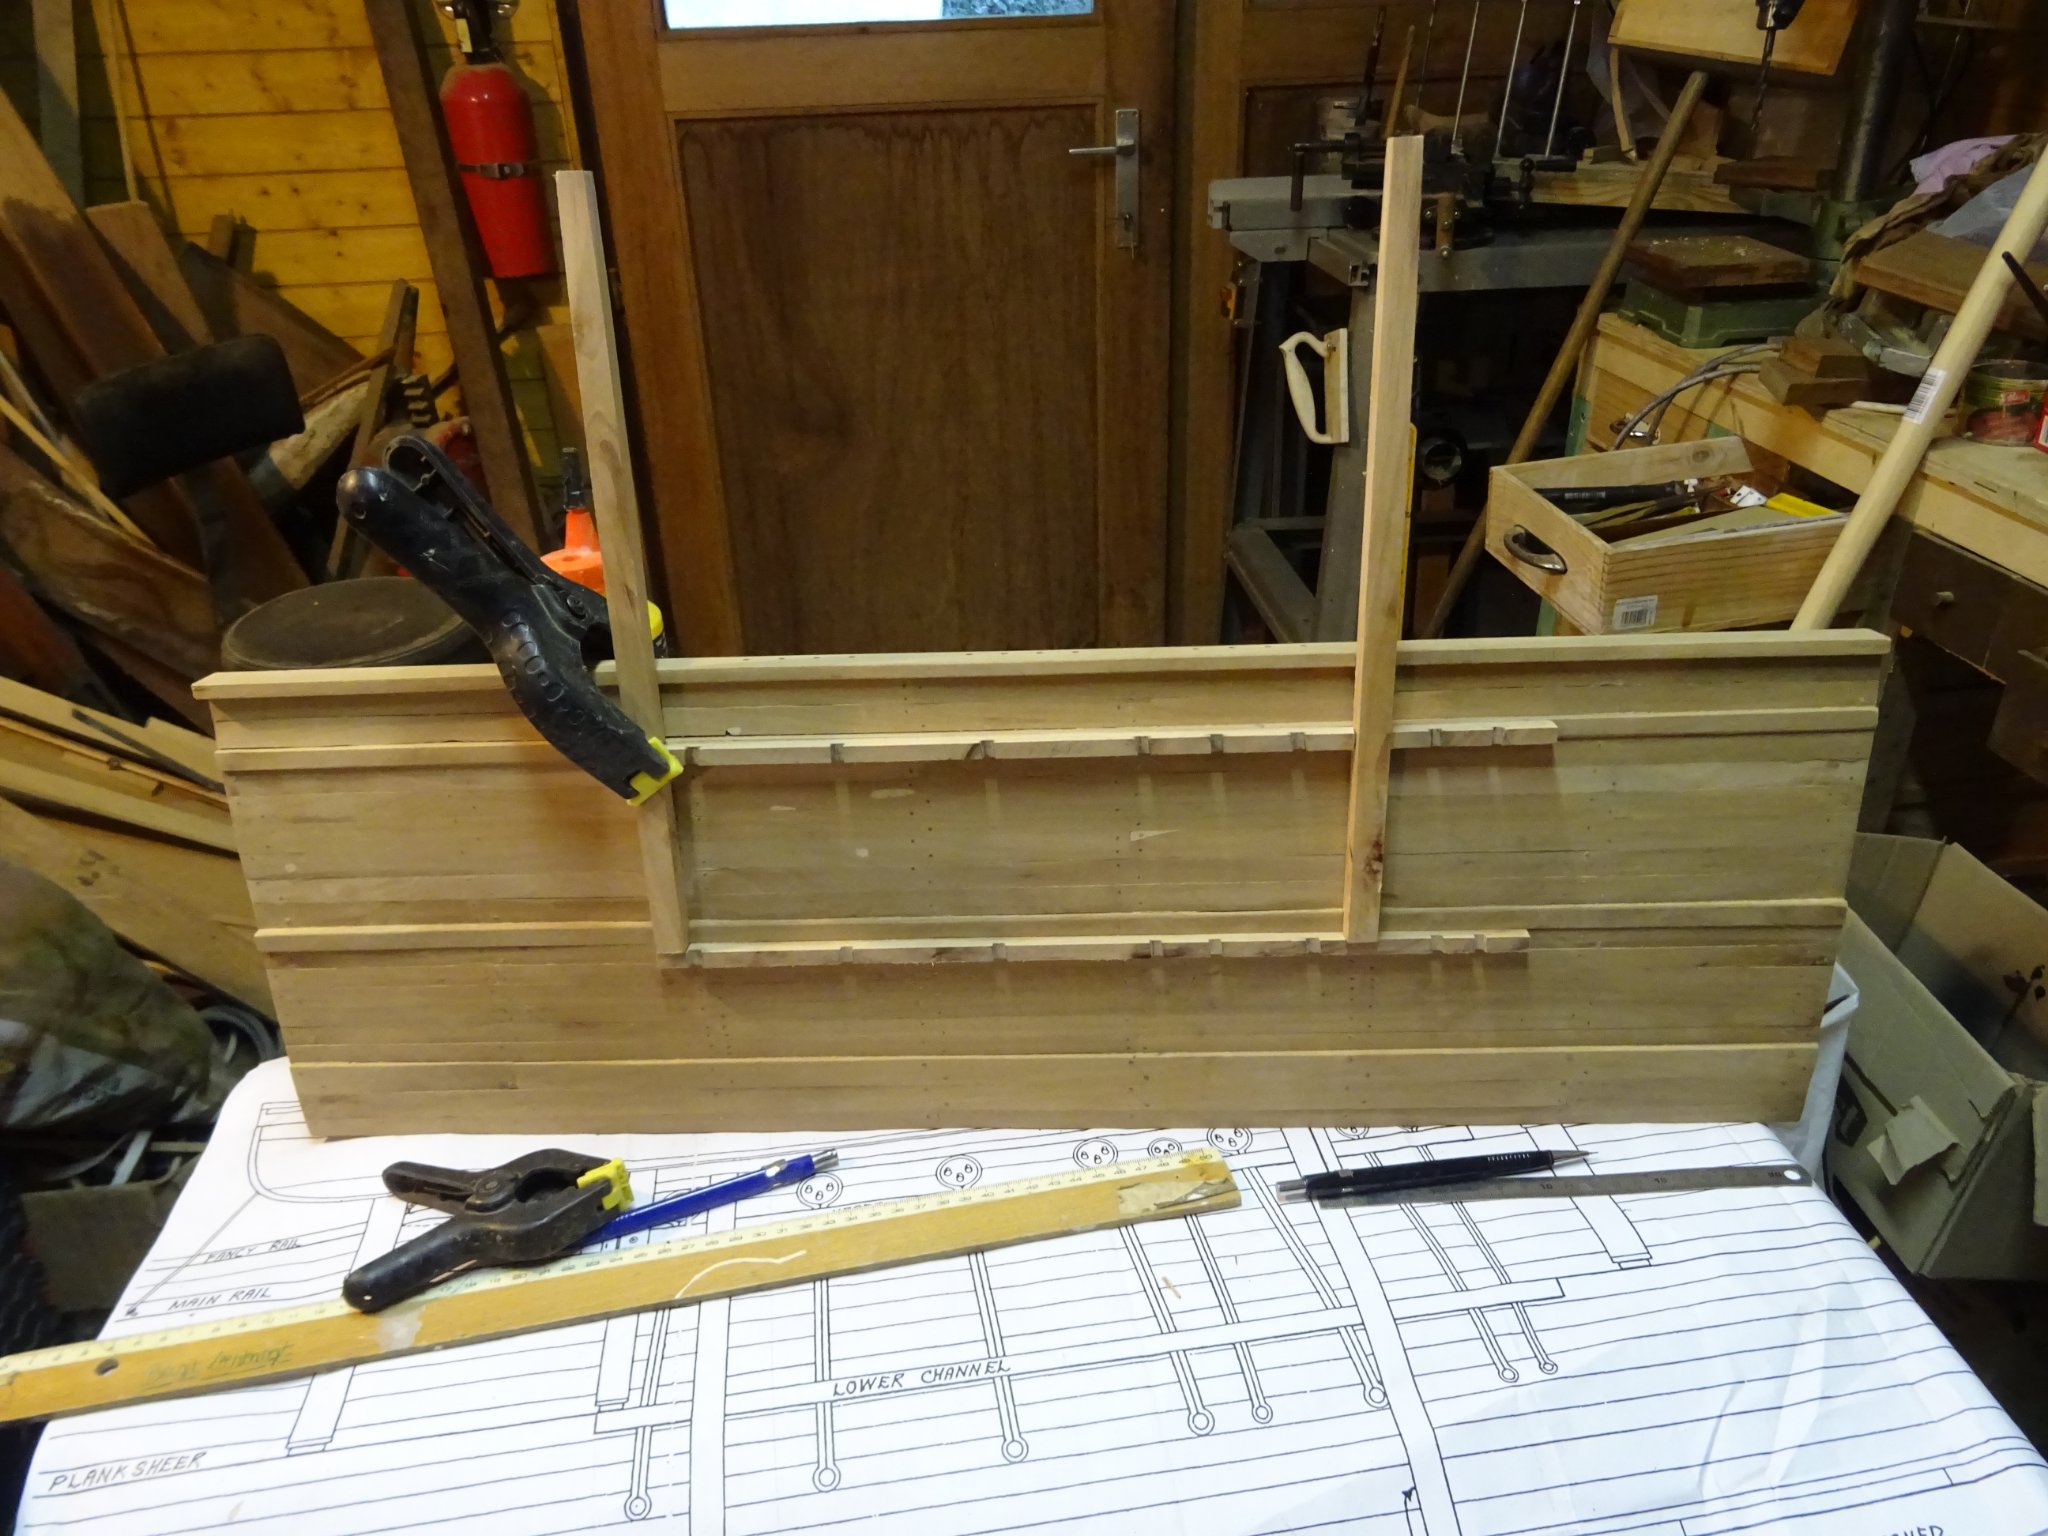
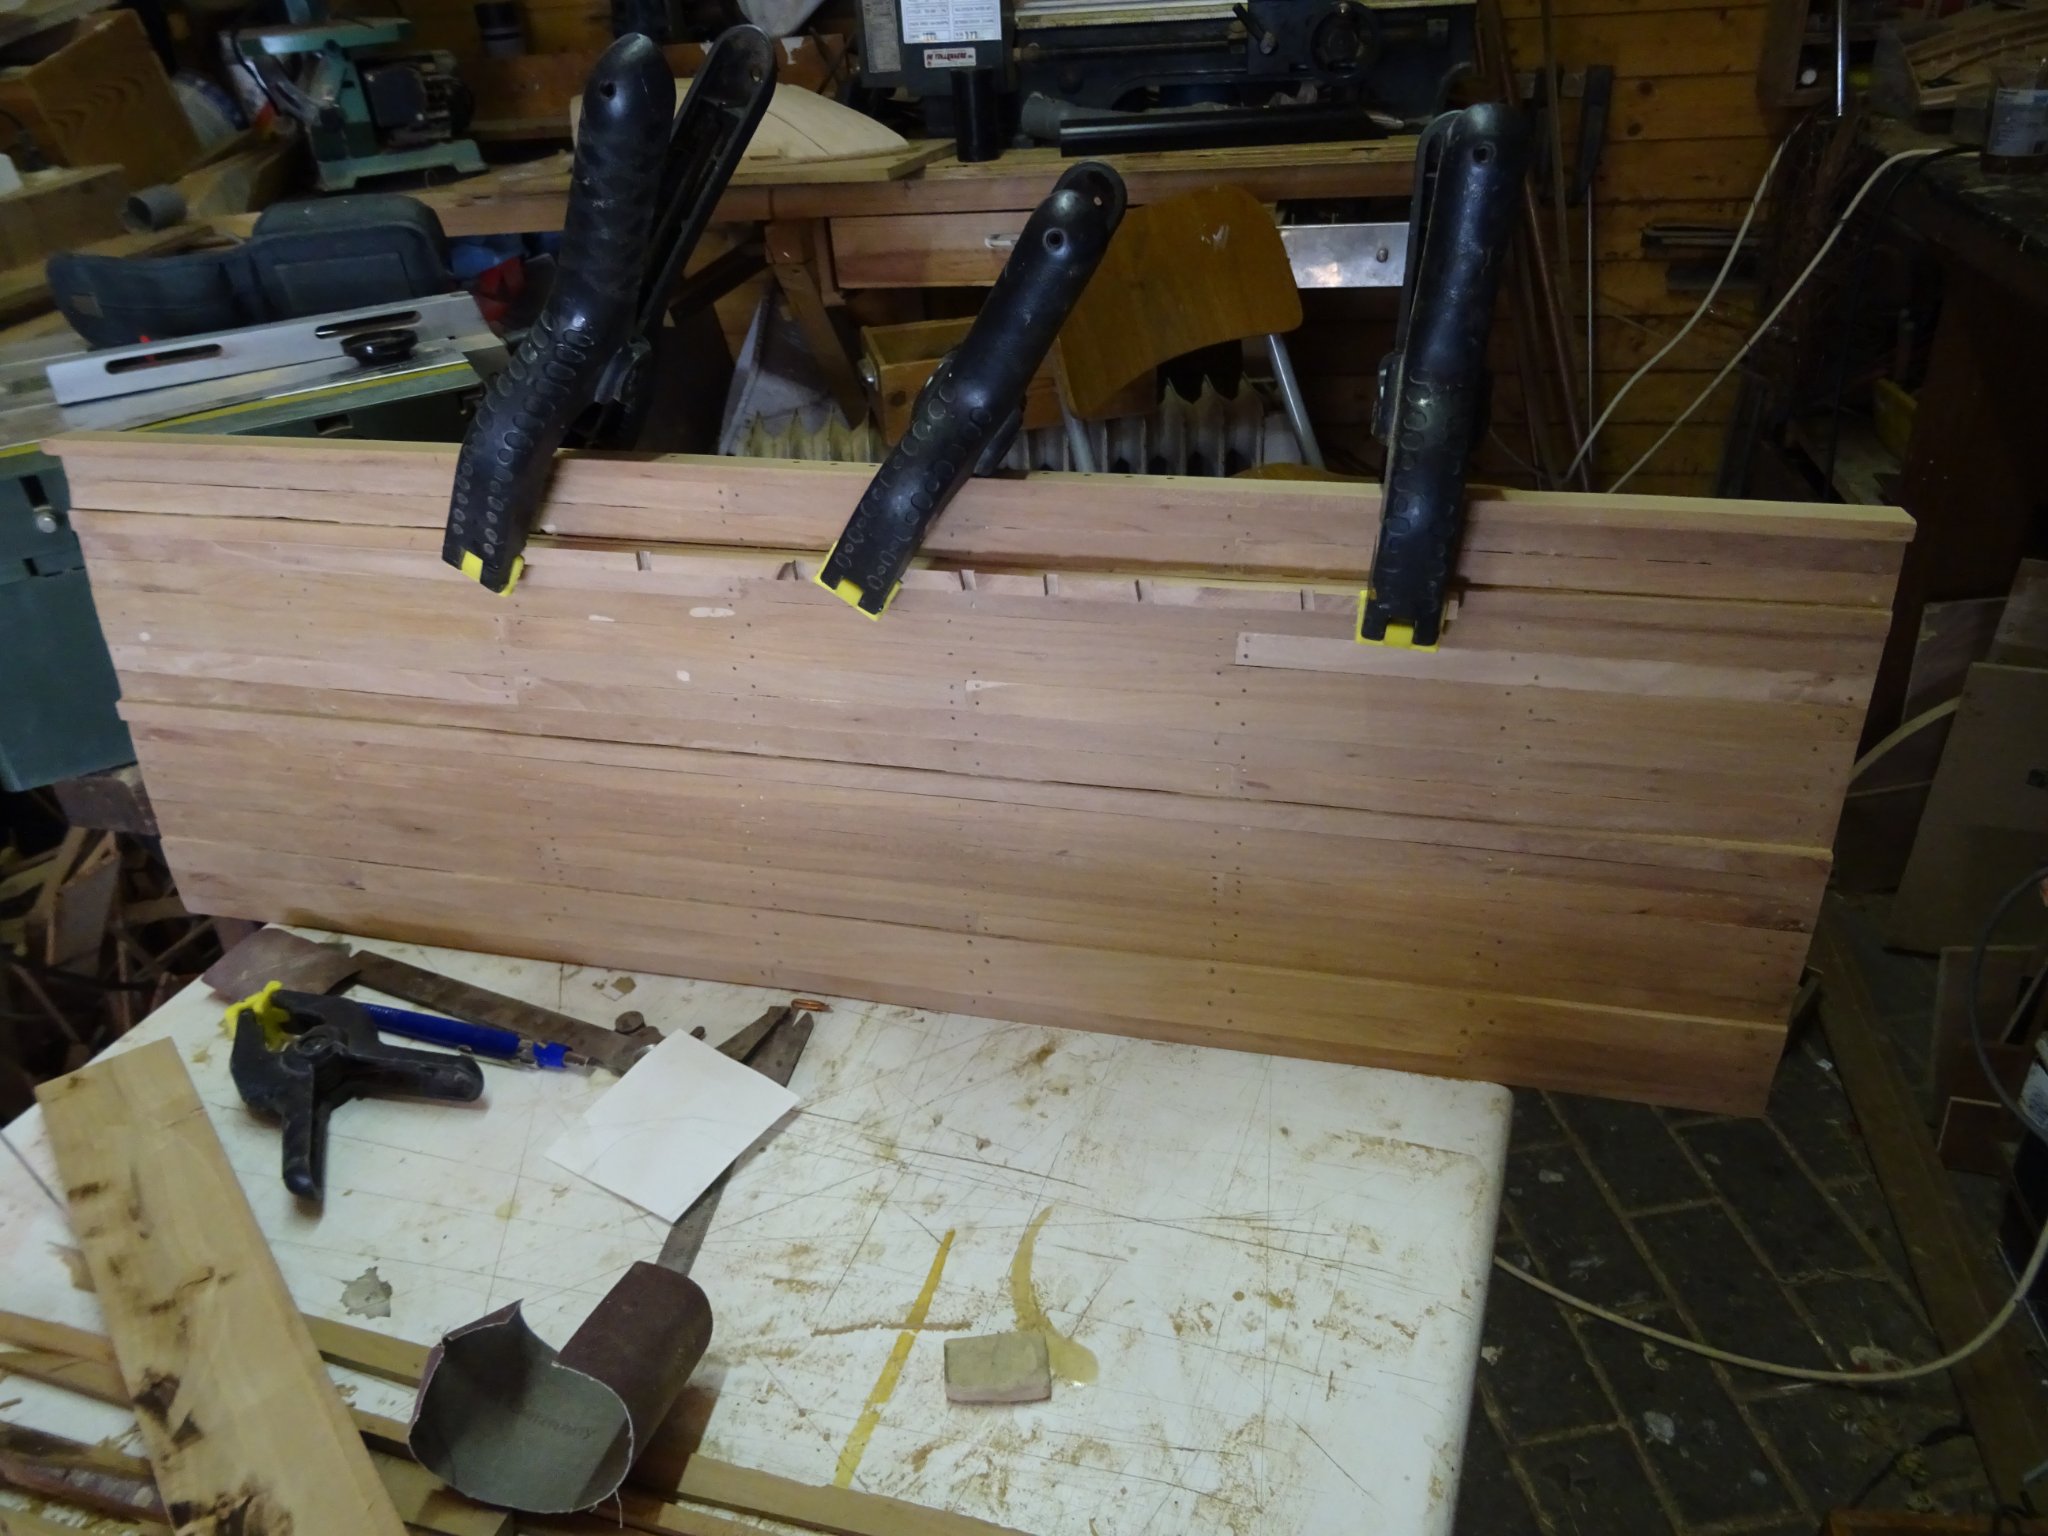
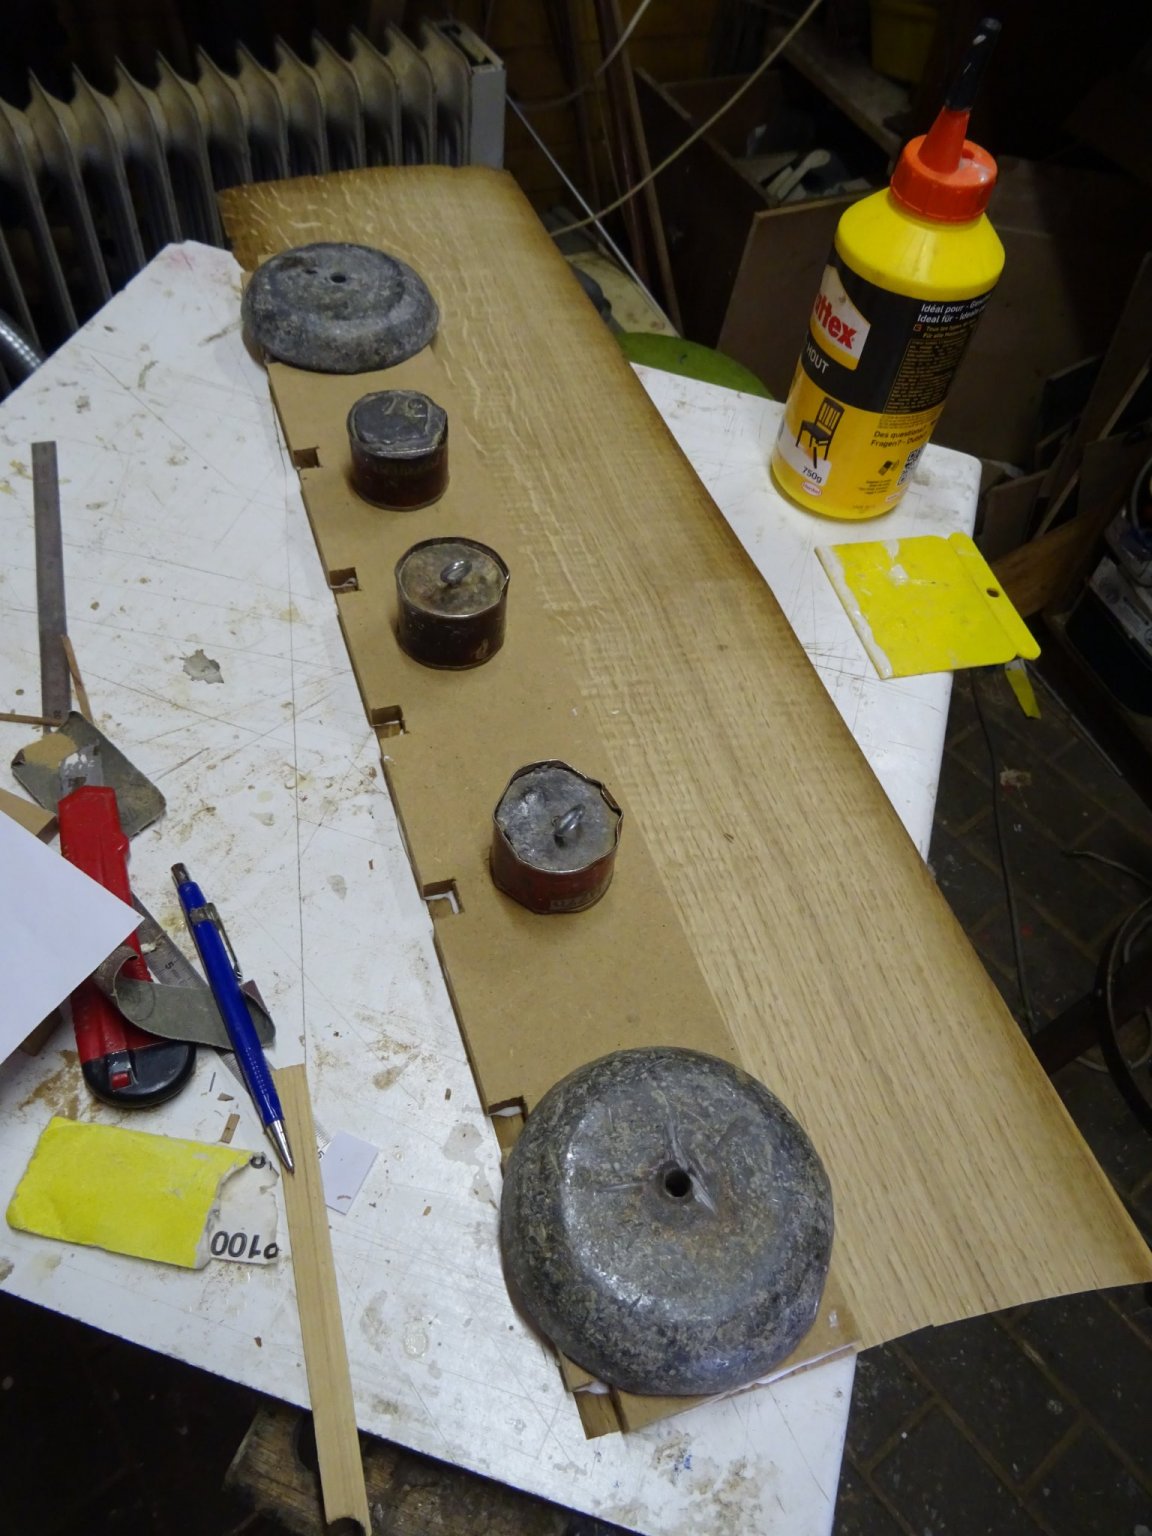
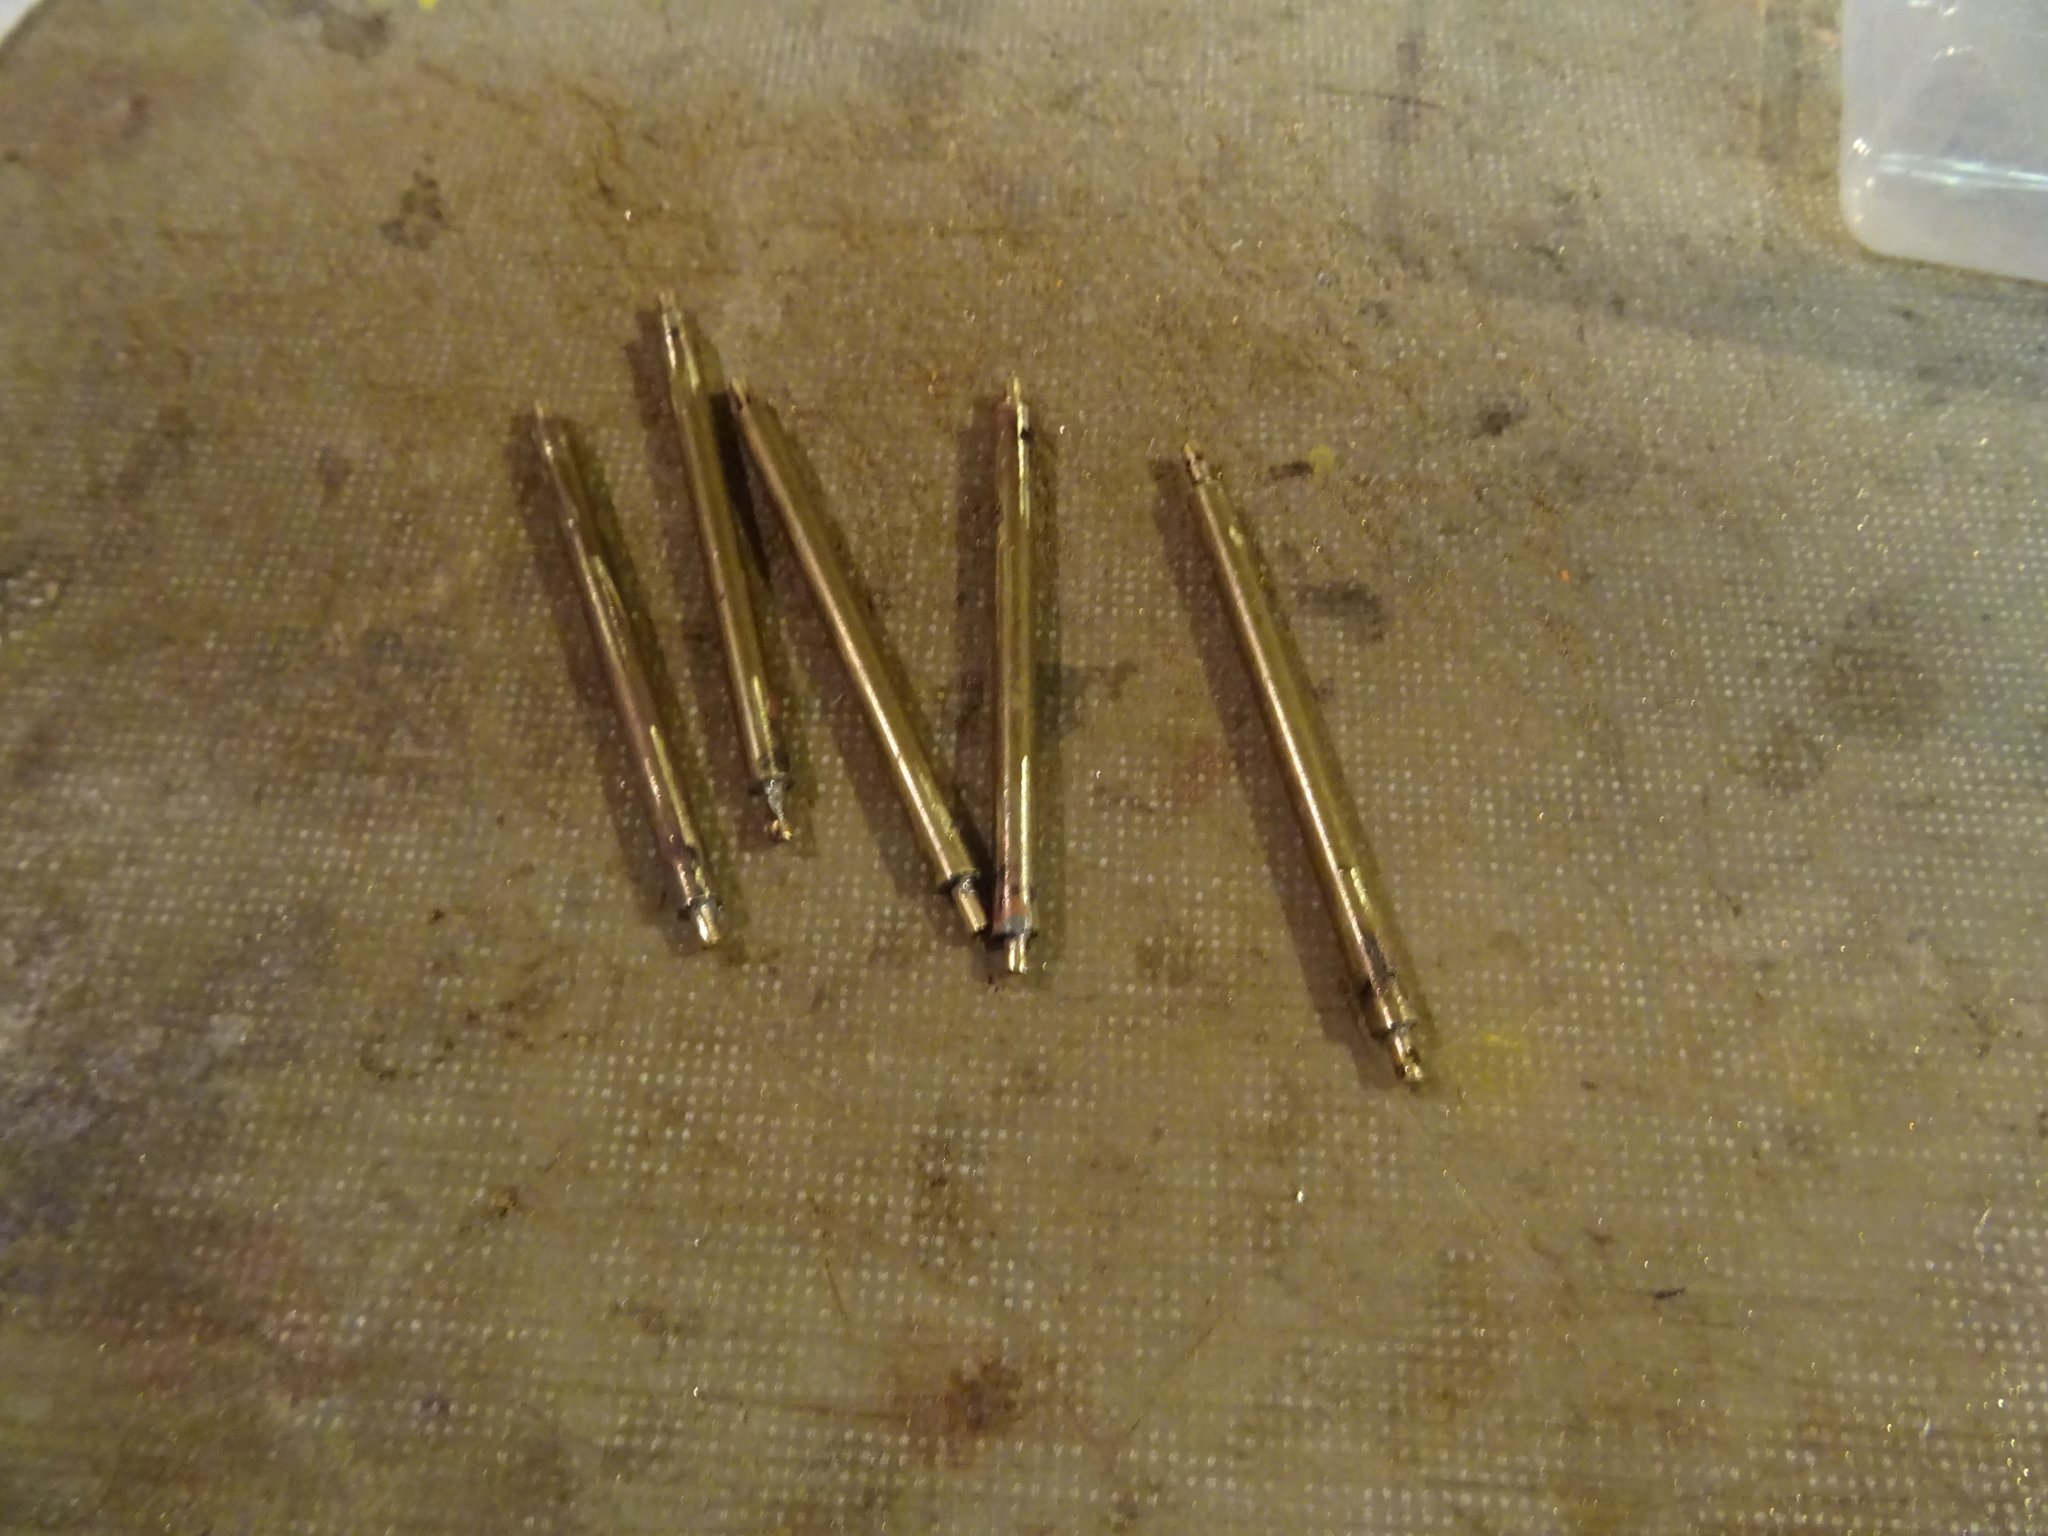
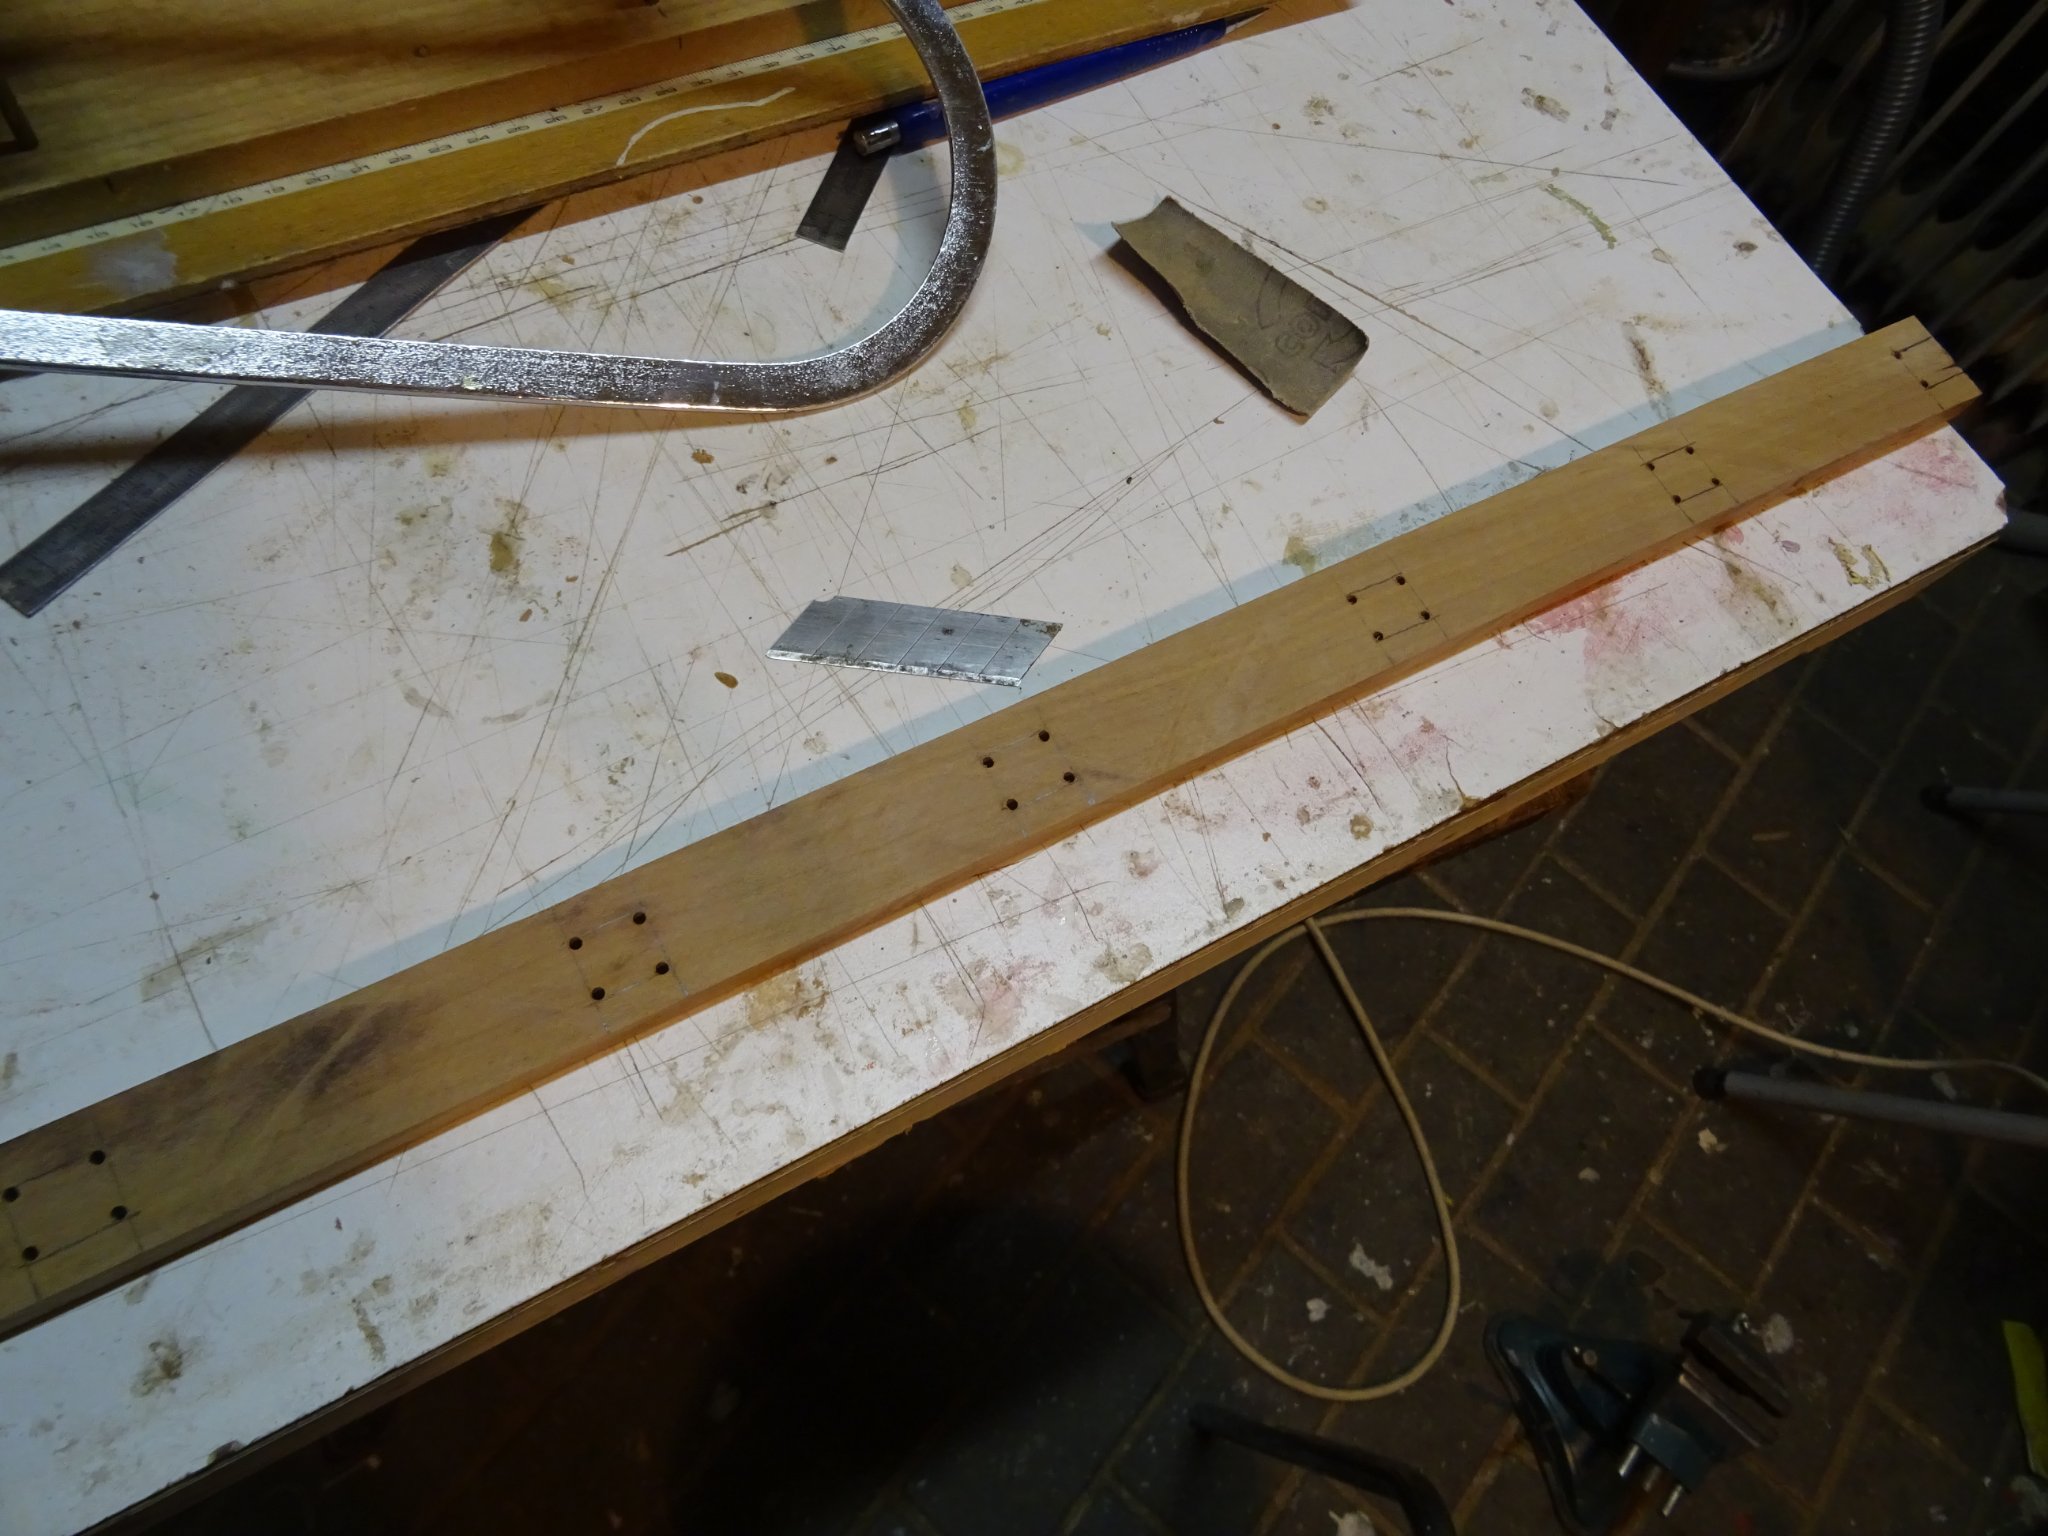
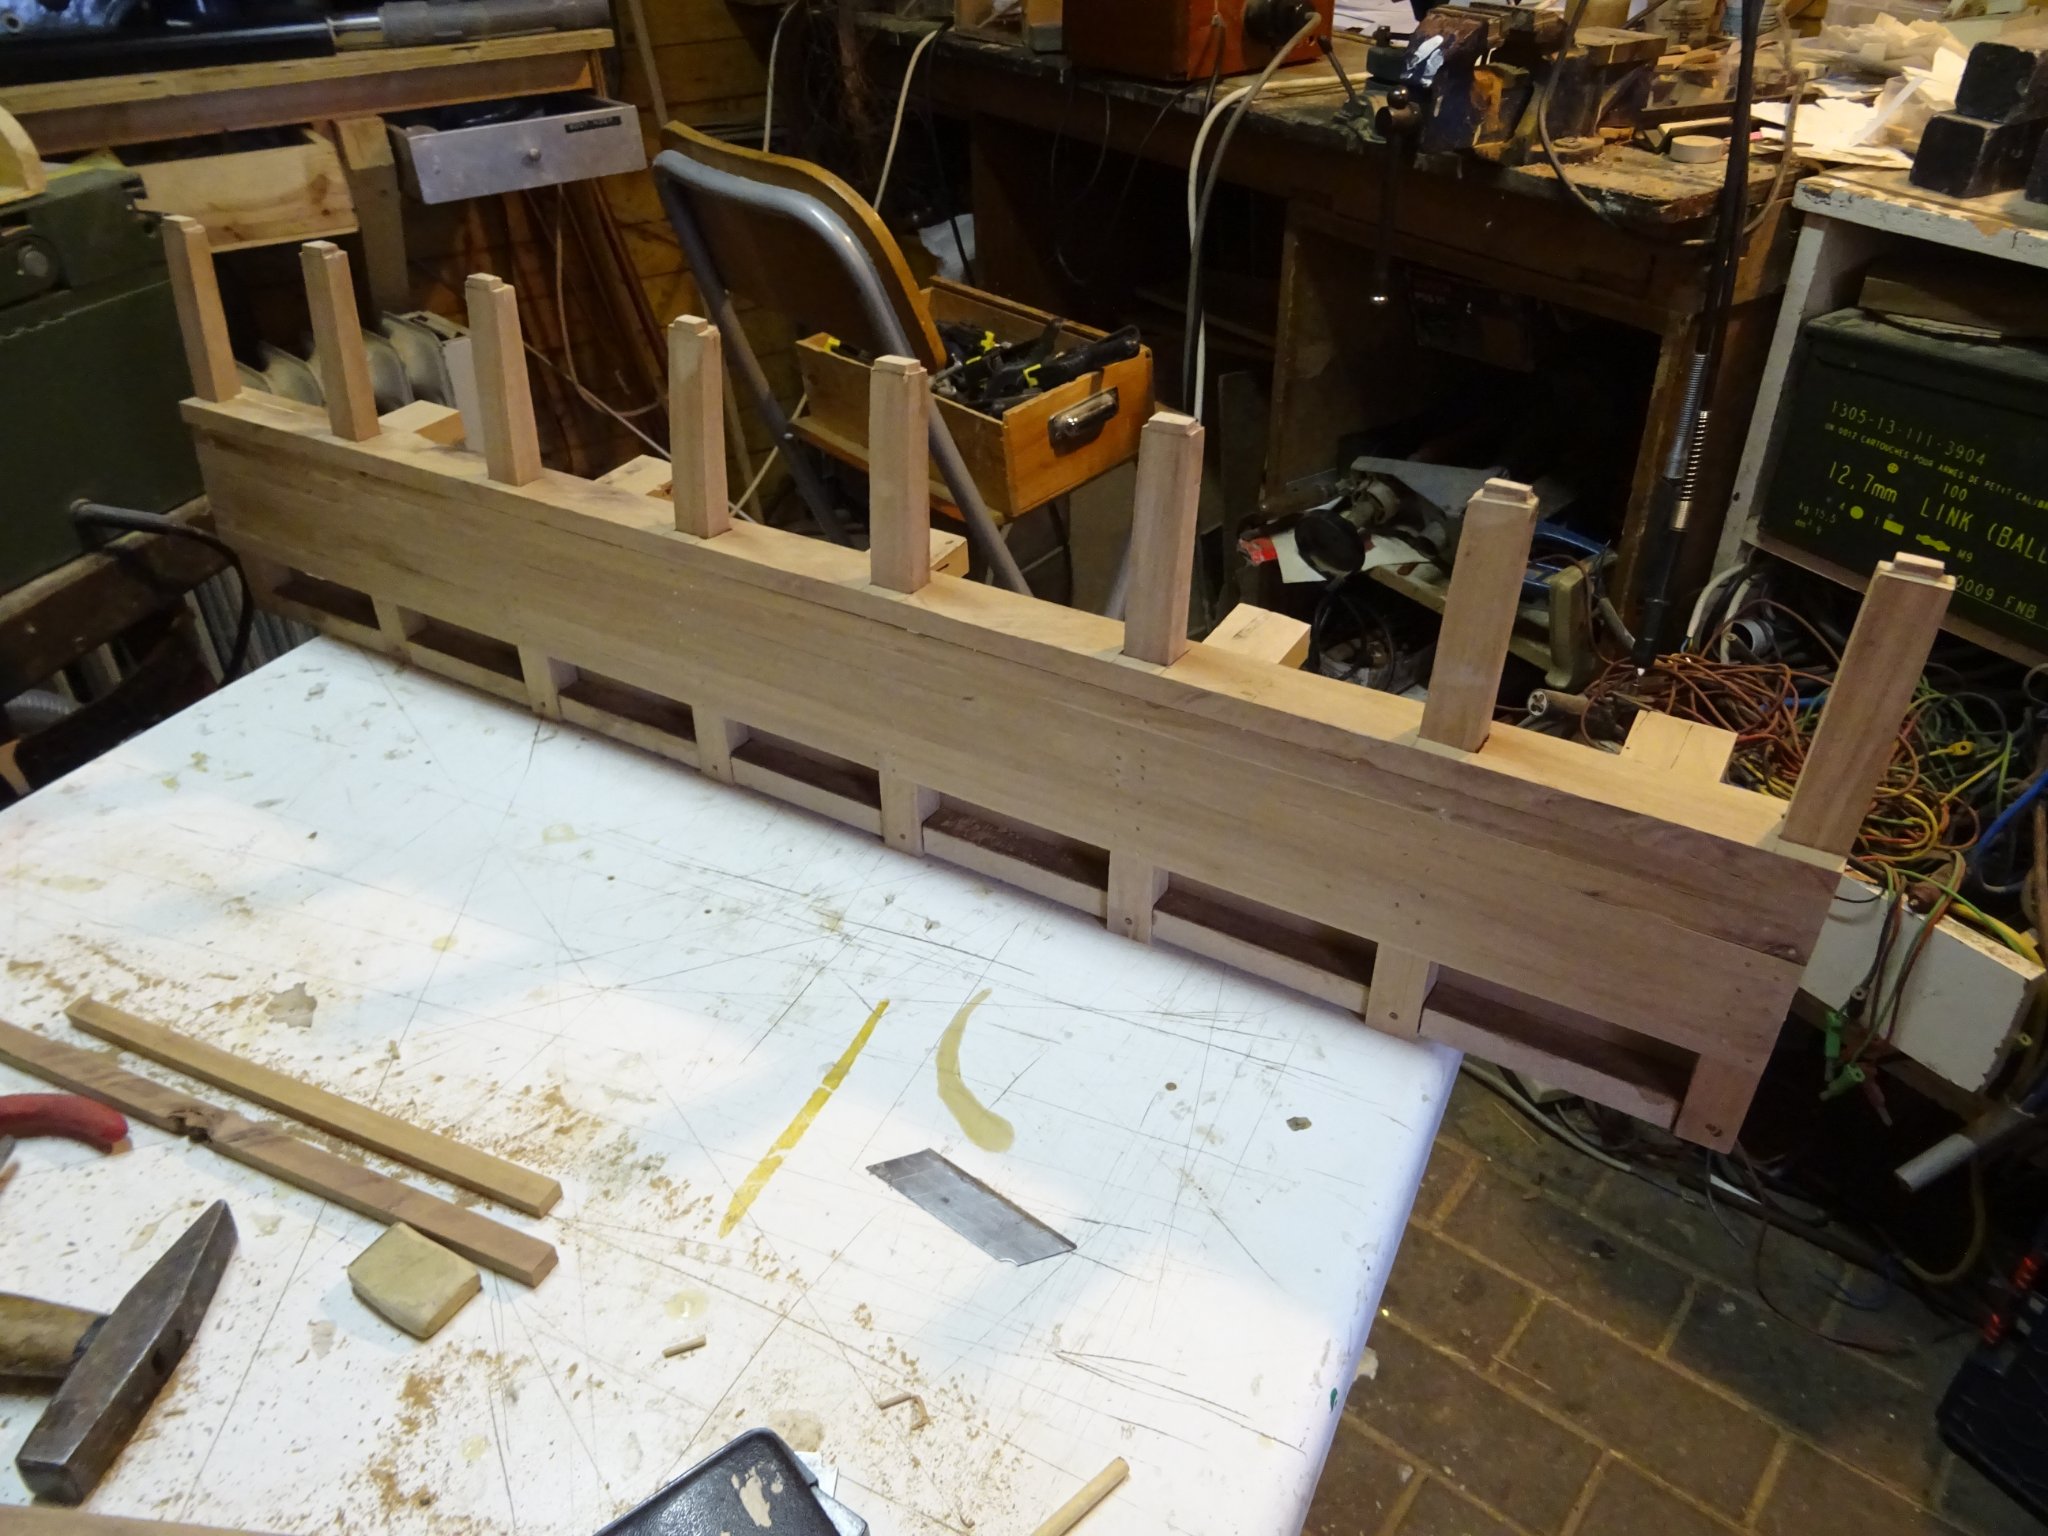
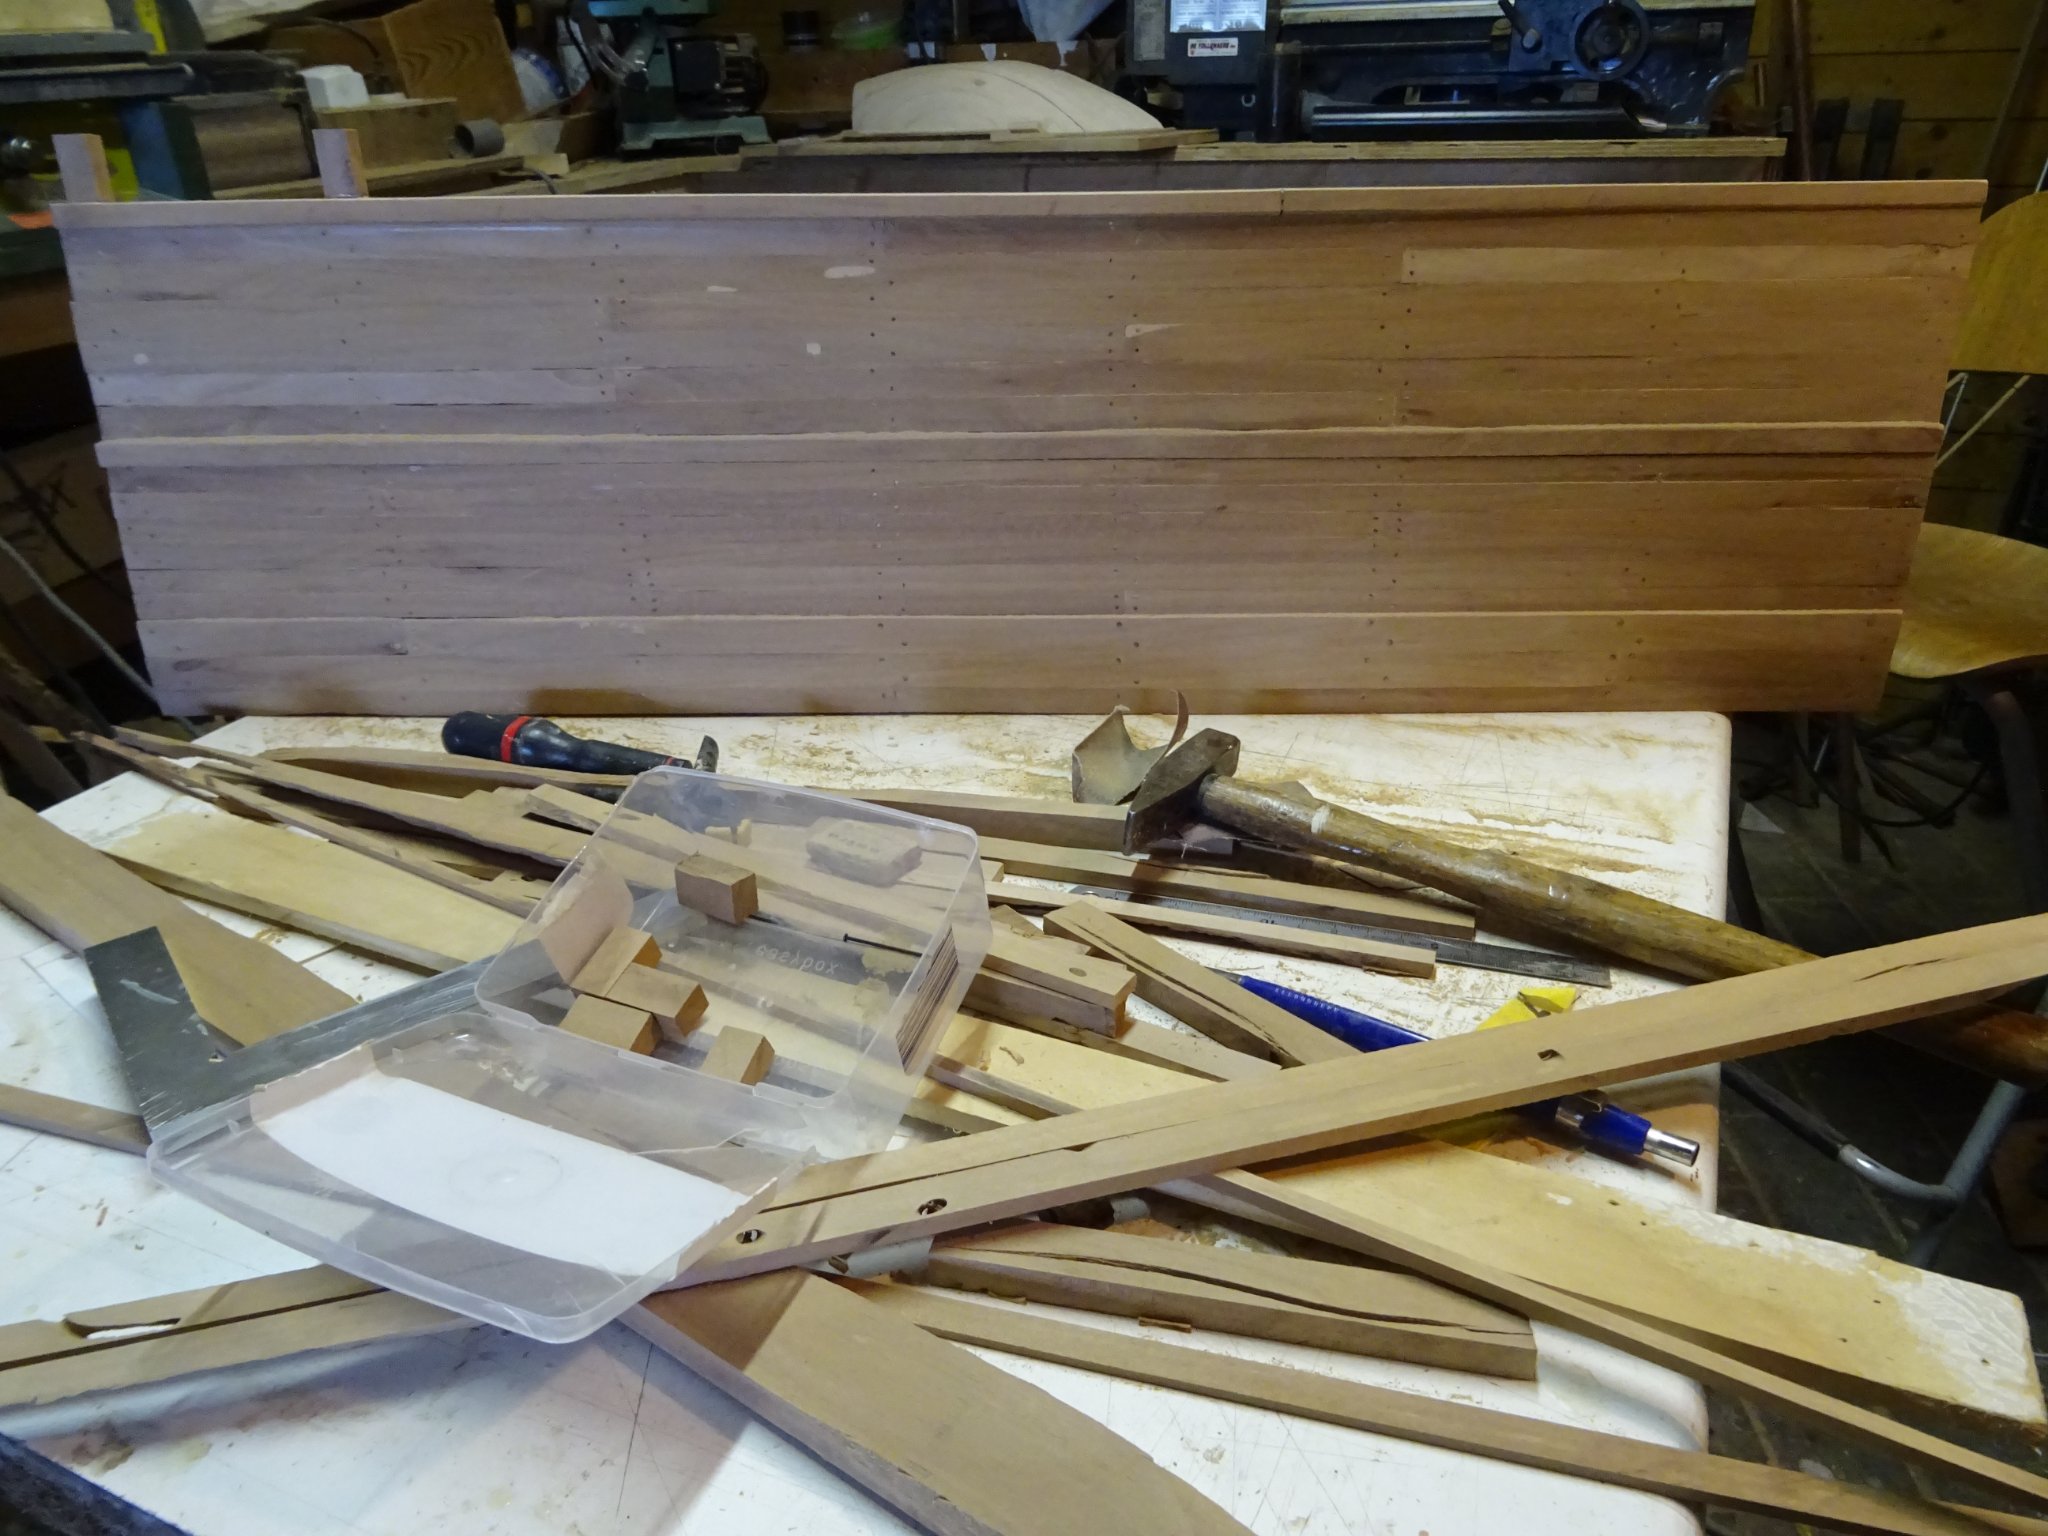
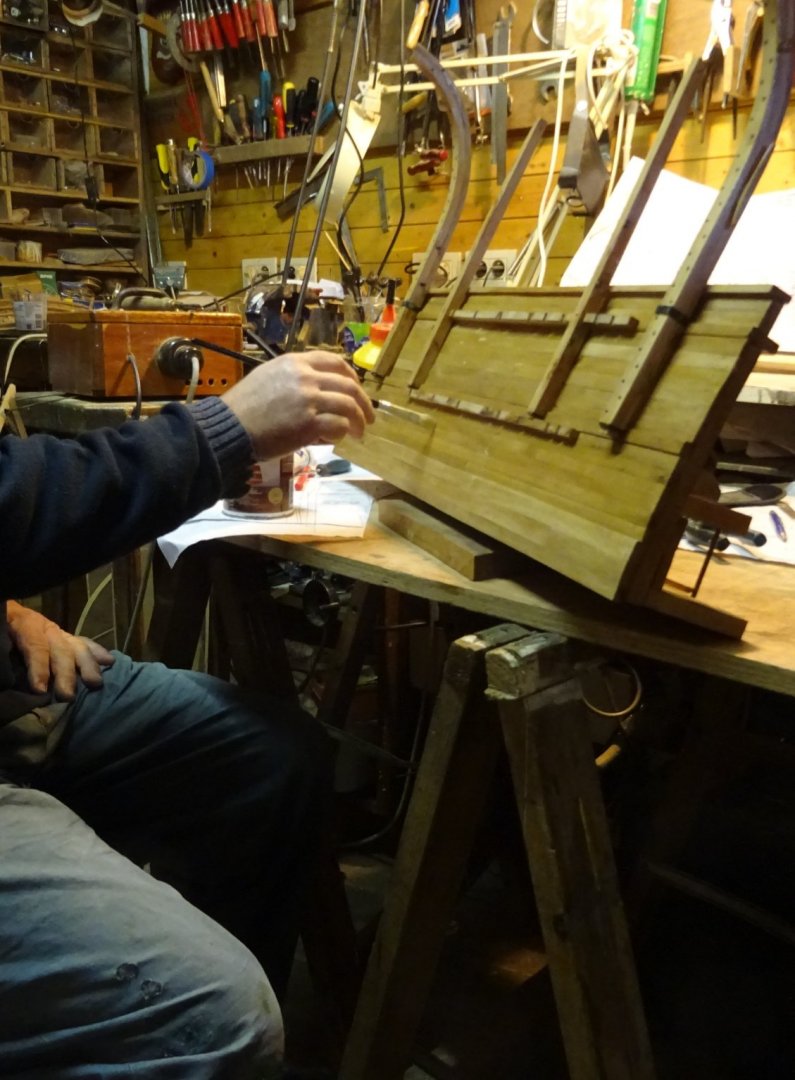
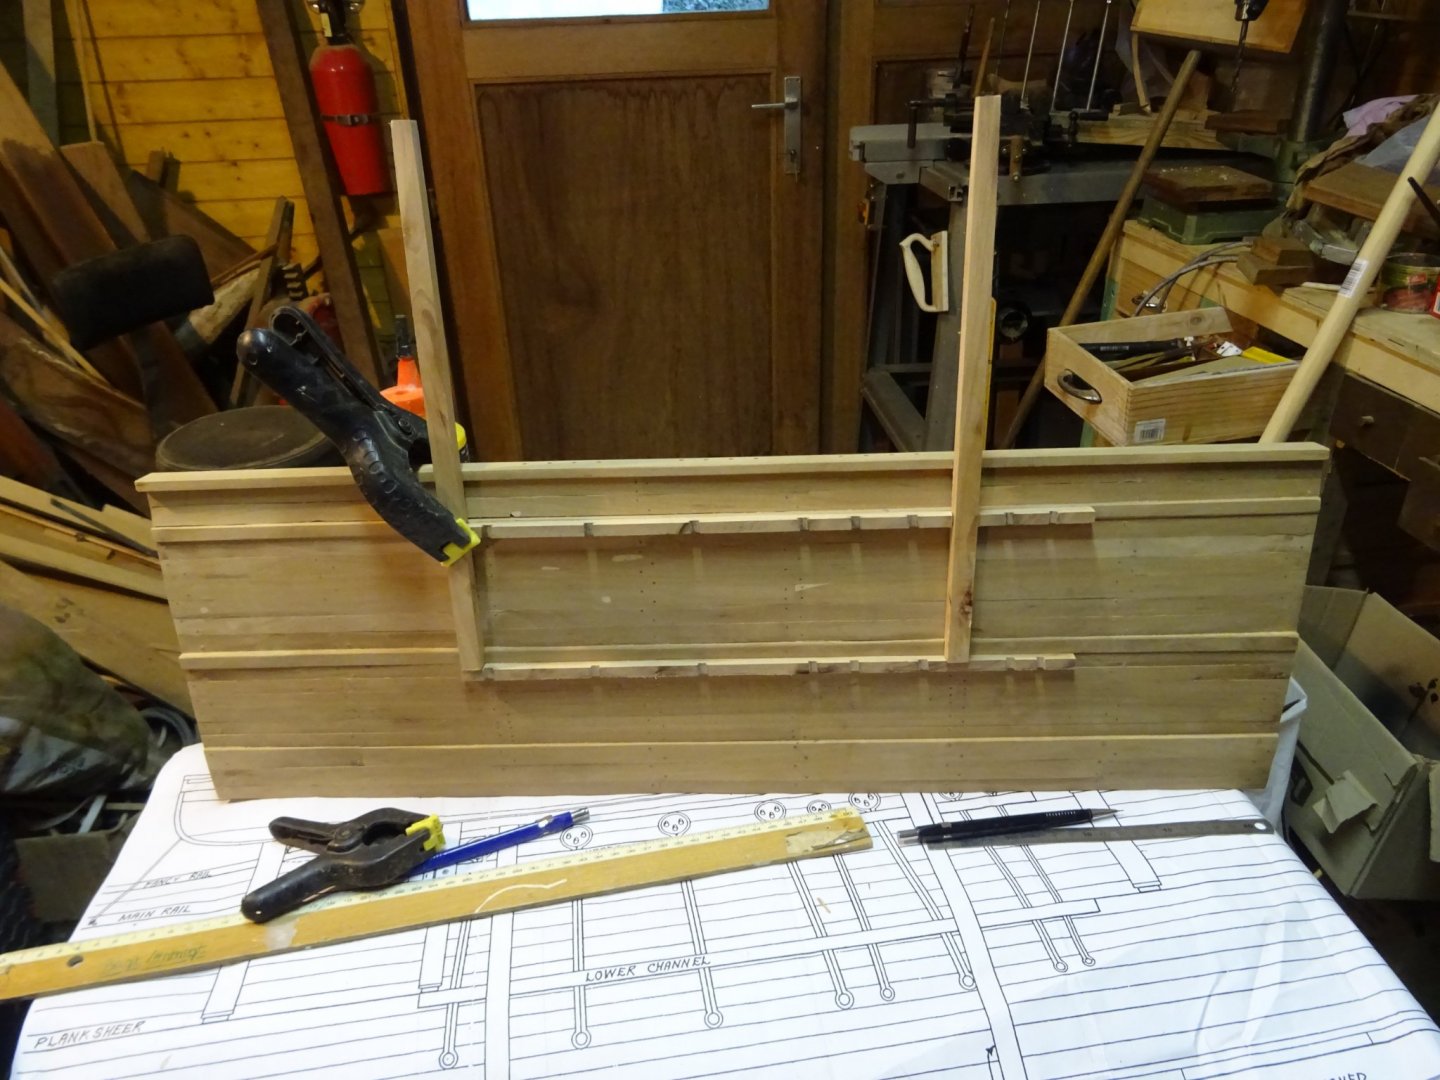
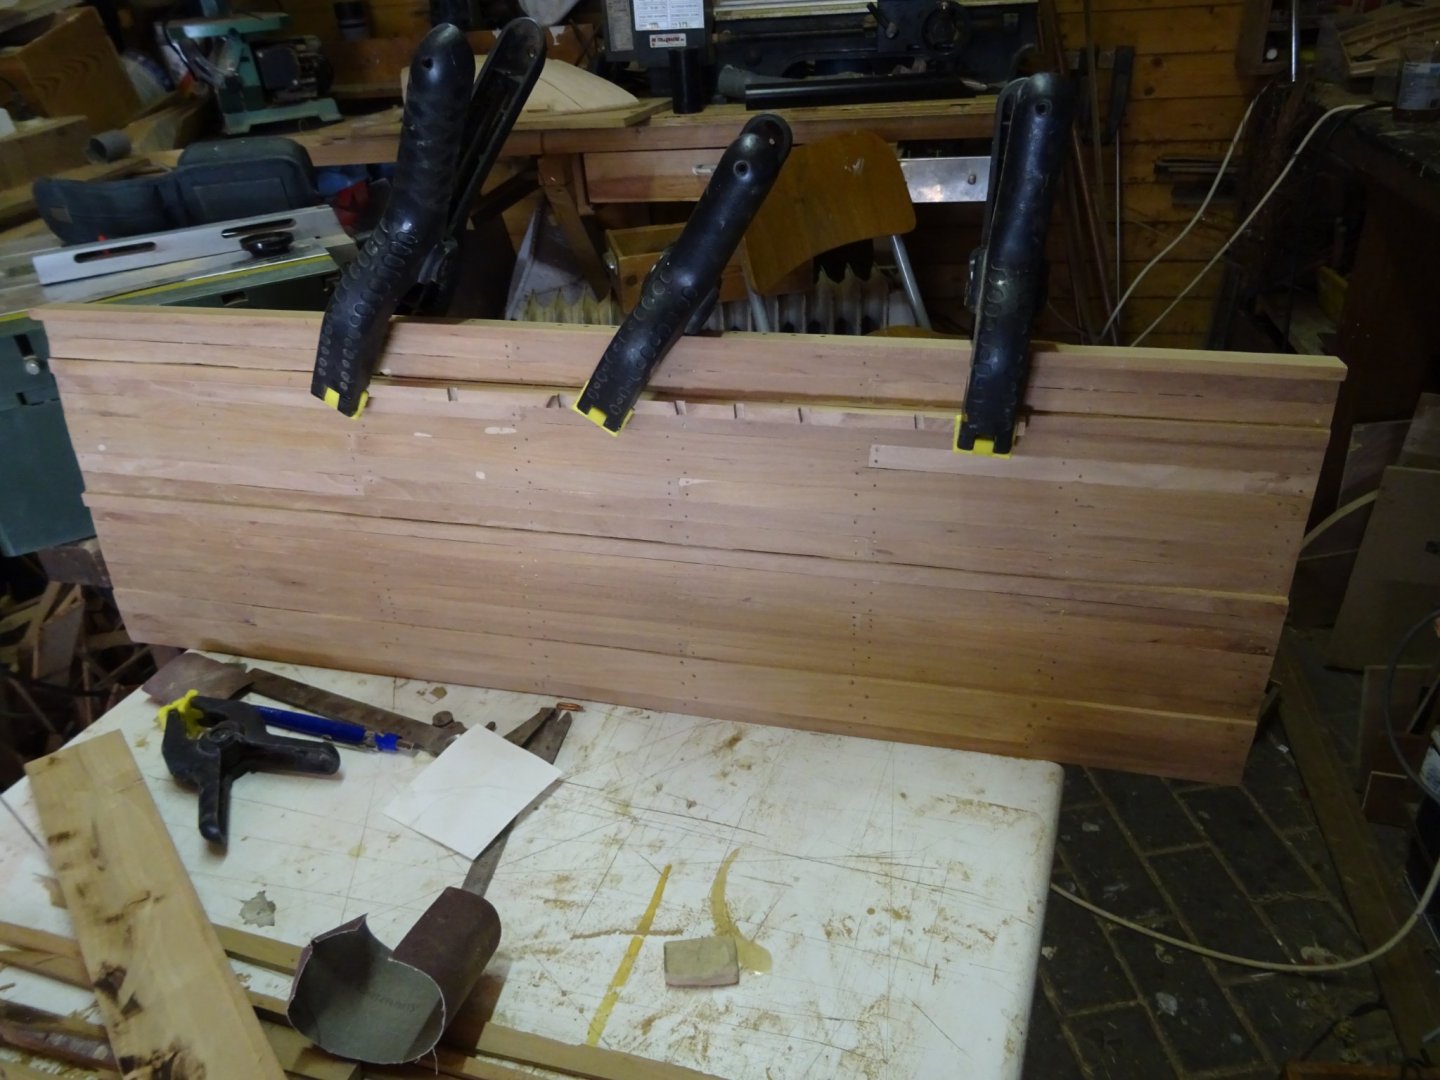
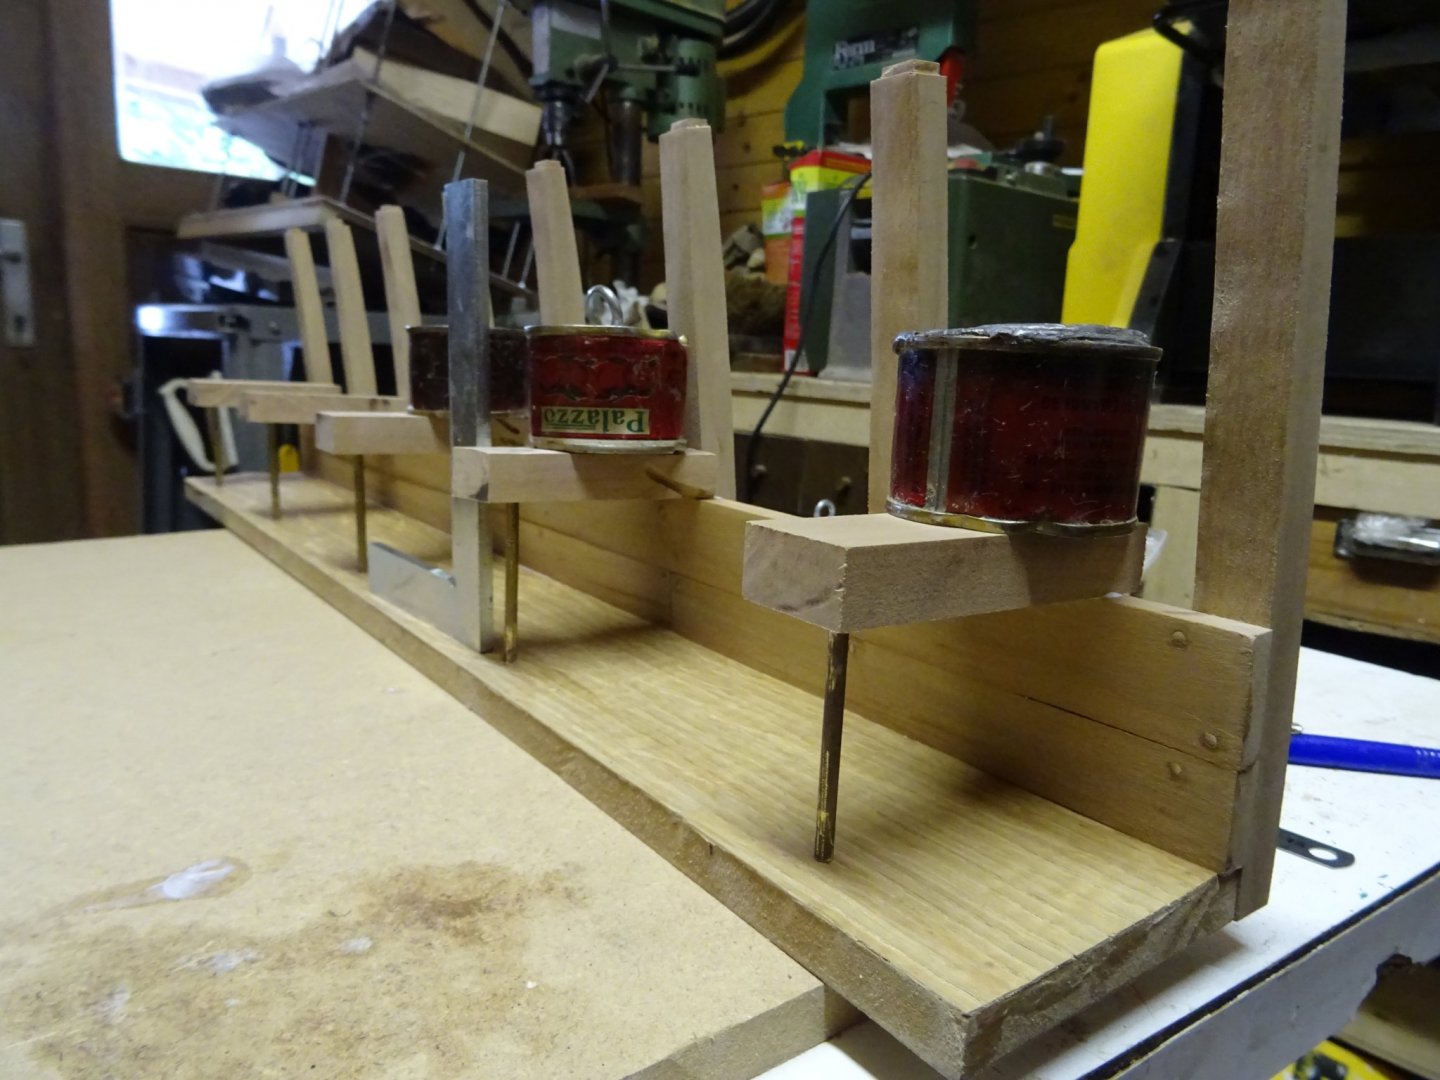
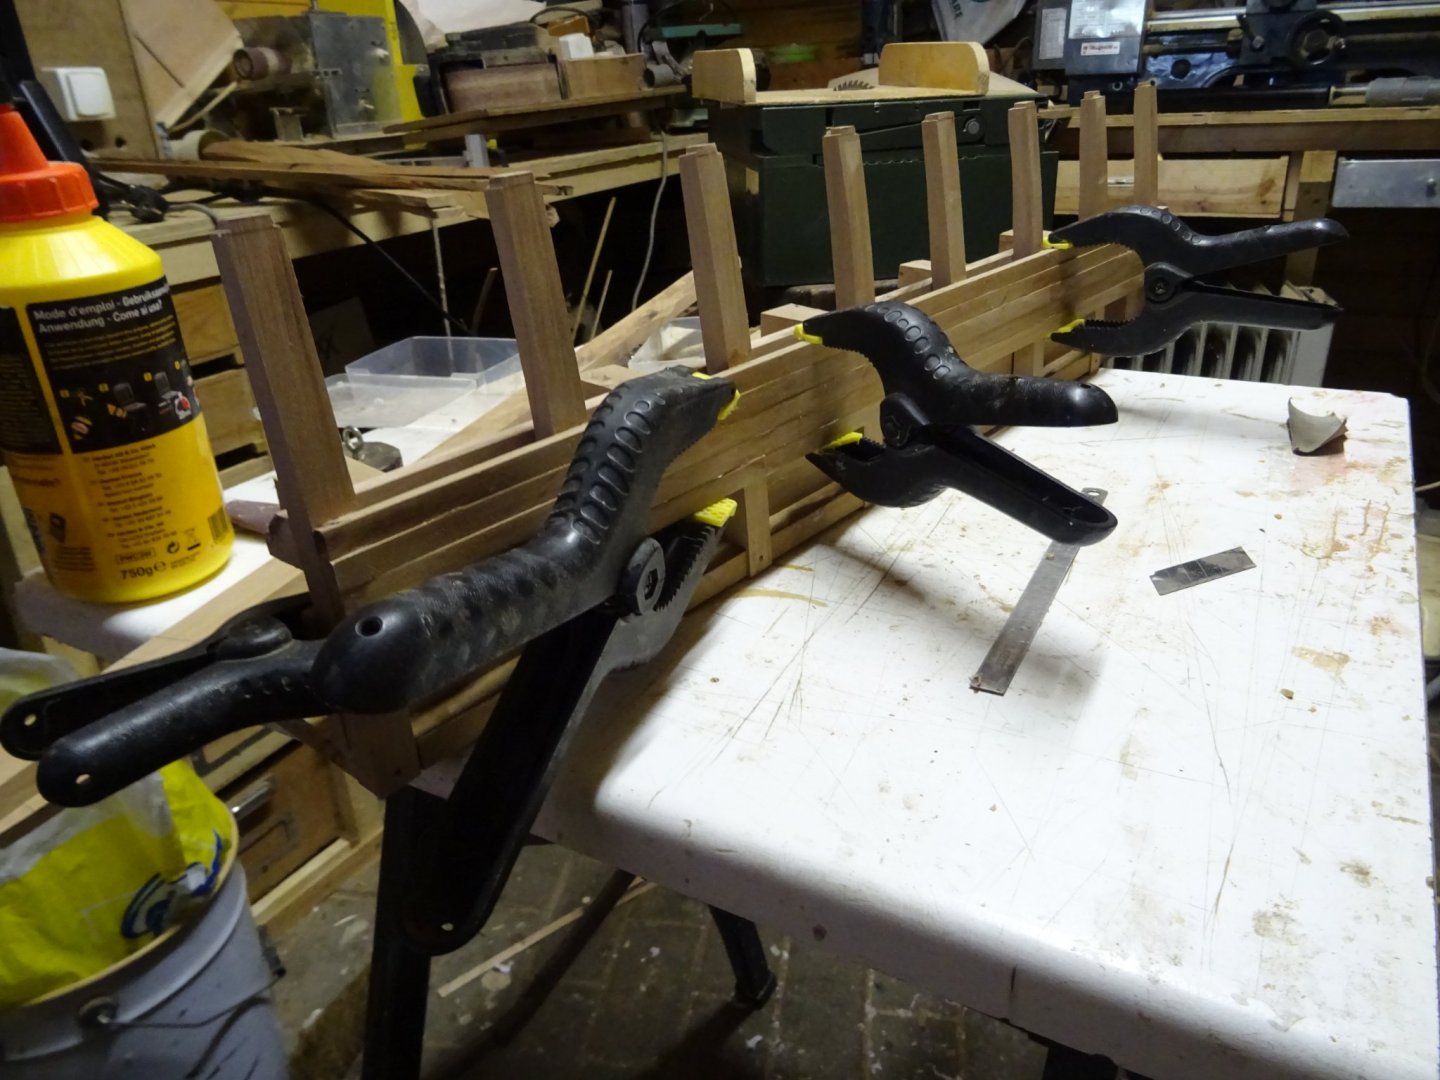
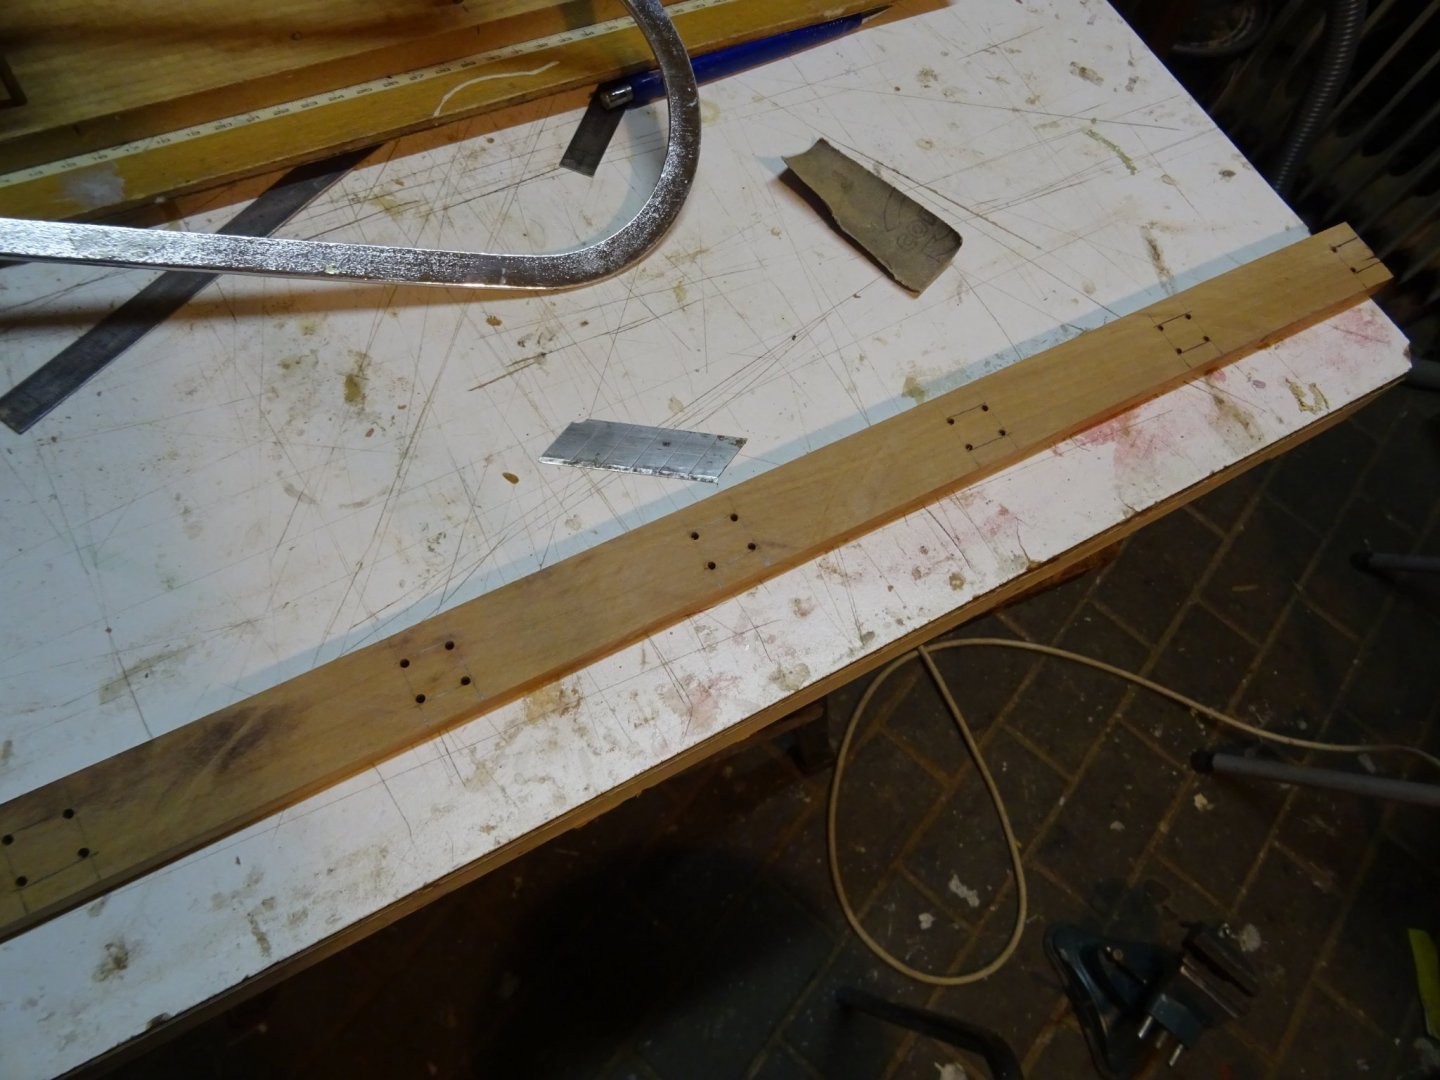
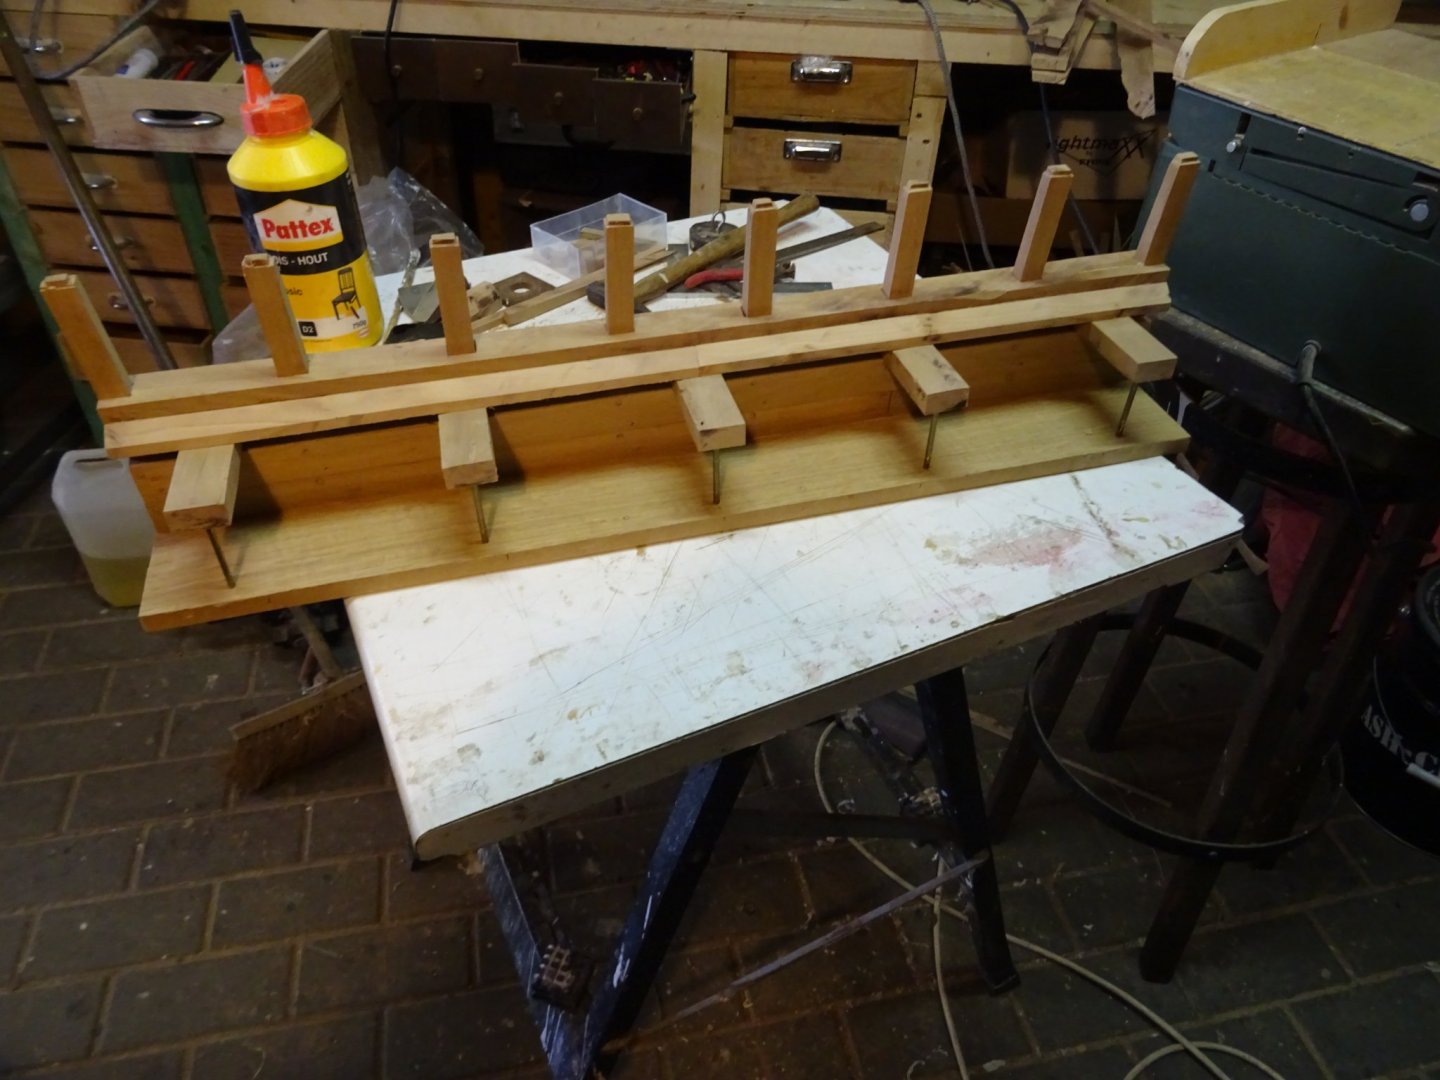
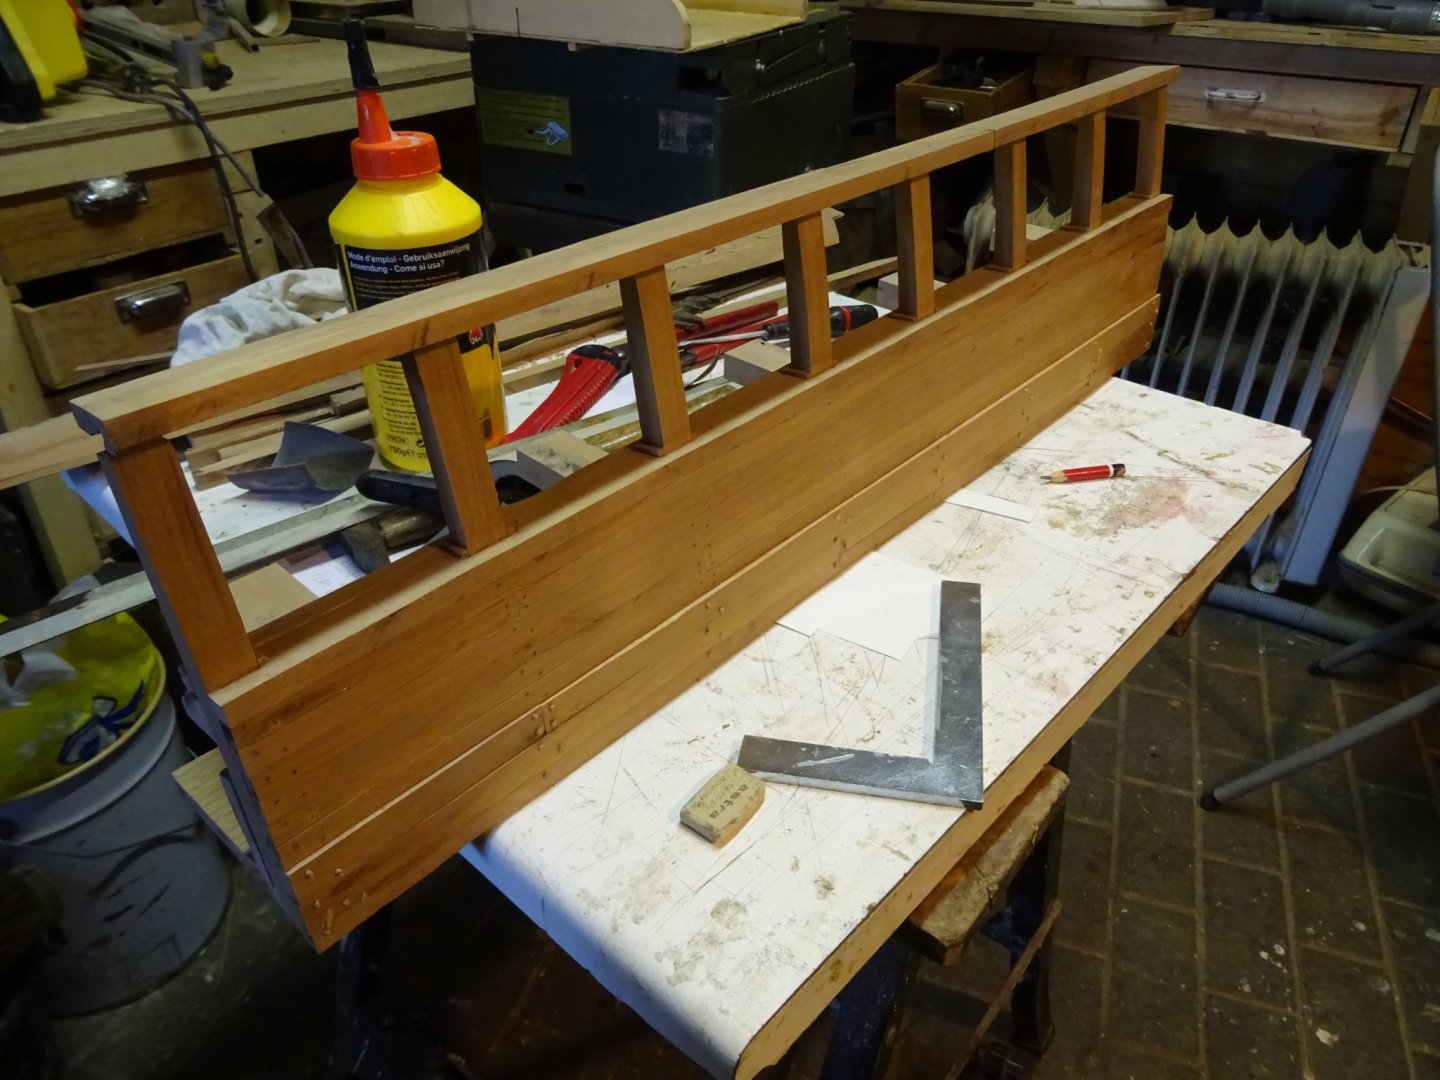
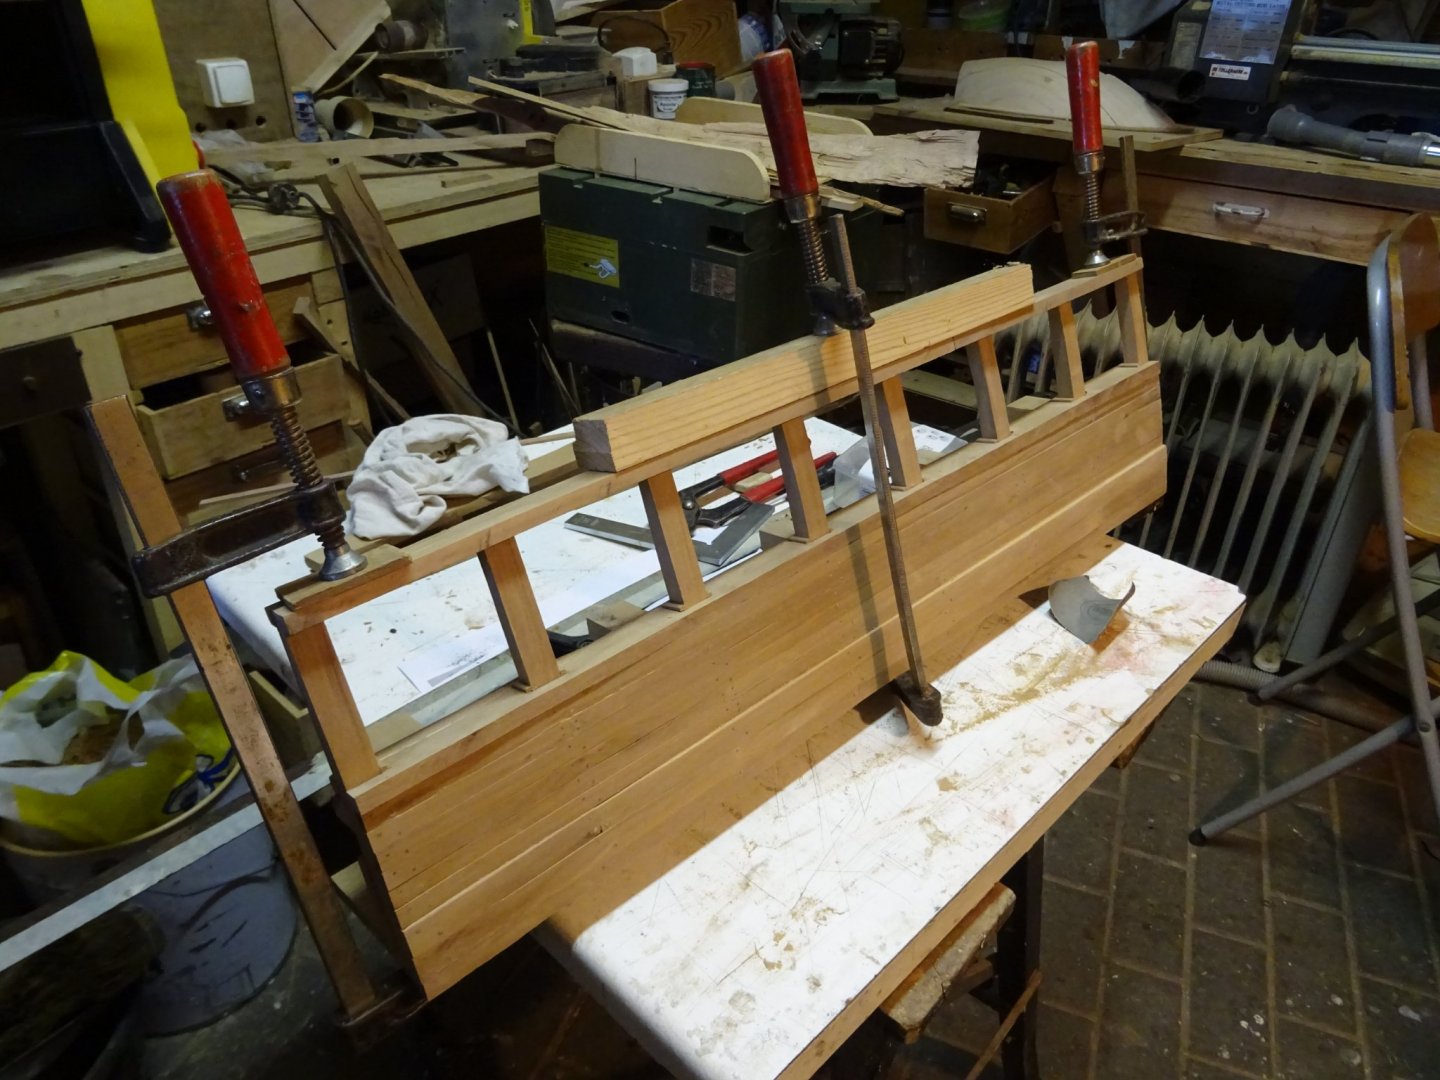
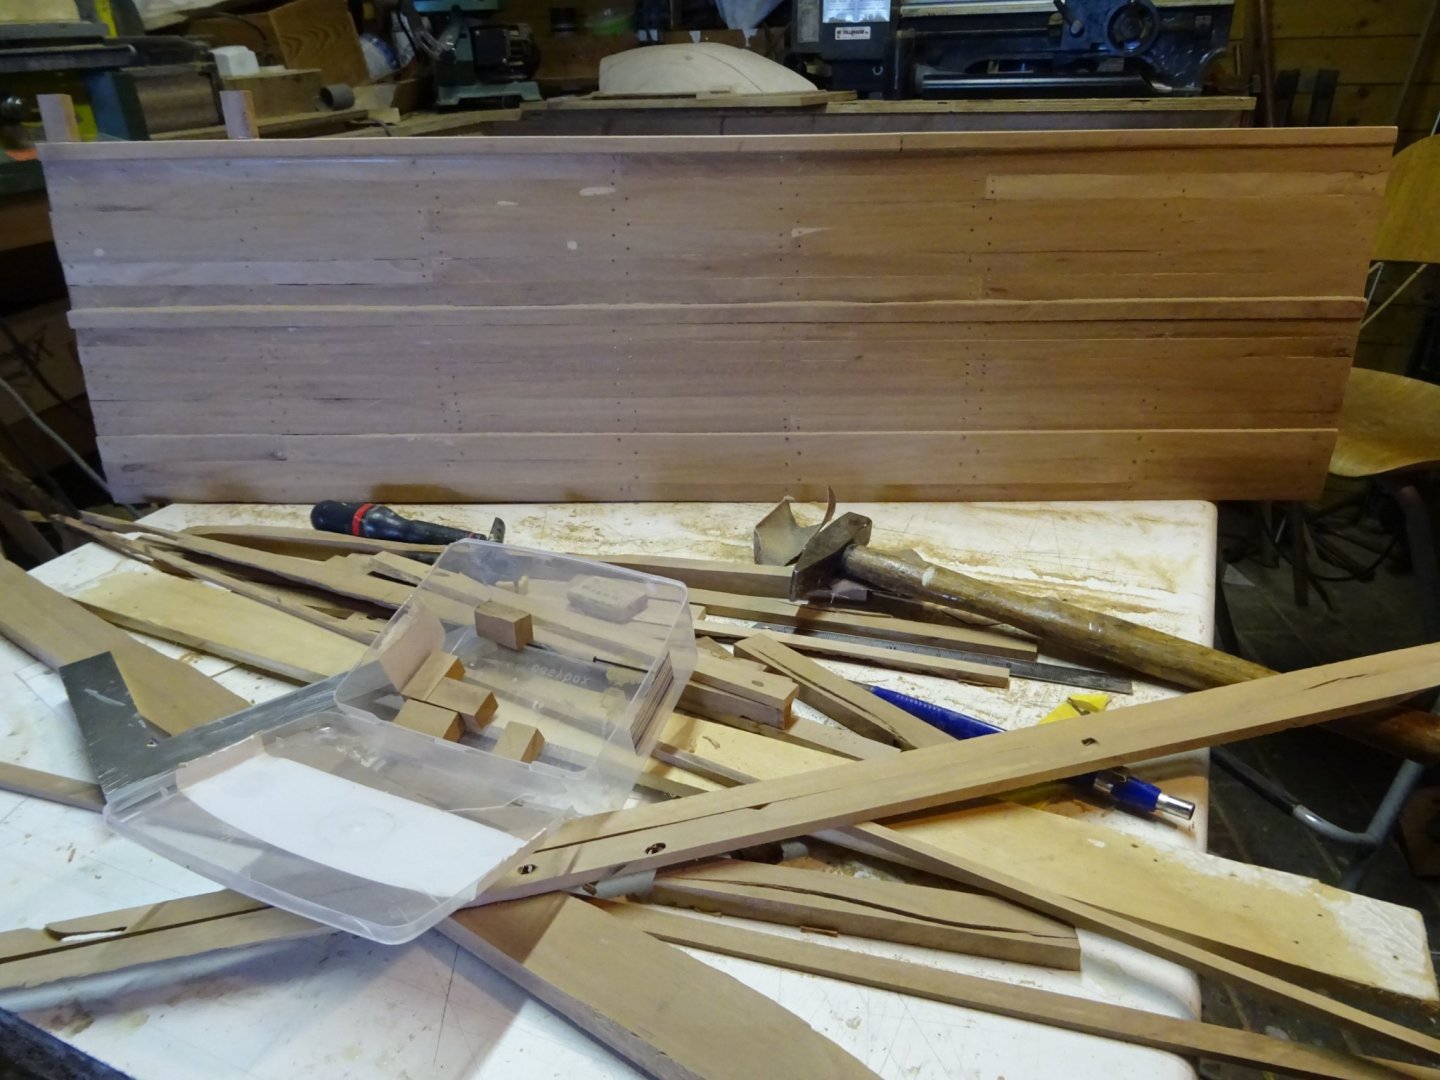
9.1 The base plate The base is a plate of MDF which I cover with oak veneer. The reason that I use oak veneer is simply because I have some. Here you see the plate upside down while gluing the veneer. I use some weights to give some pressure while the glue is drying. The base plate. In the front there are notches for the frames. The frames and deck clamps into place. On top of the beam clamps will come the deck beams. This davits model will be only a small section of the whaler so the deck beams will be cut off and hang in the air. For the stability of the model I will support each of them with a small brass pole. Making the poles. Gluing the deck beams into position. Putting some pressure on it with weights while the glue dries. On the deck beams comes the water way. Planking a part of the hull at the outside. The plank sheer has to come over the frames. Drilling holes on the corners of the openings for the frames before sawing them out with the fretsaw. The plank sheer is placed. A view of the outside. Fitting the main rail. In the meantime the wales have been placed and dowelled Gluing the main rail, The area between plank sheer and main rail is planked. On the right side at the top, two supports for the fancy rail are already placed. This was all fairly fast-moving work. Next week we will continue with more detailed work. Thank you very much for reading this log, for your likes and for your encouraging comments. Till next week!


- 86 replies
-
- 4
-
-
- whaling
- clinker built
- (and 2 more)
-
9. Davits and cranes I still have the feeling that something is missing in this project so I will not consider it as finished for the time being and continue to work on it. In the book 'Guide 'To build a whaleboat' by Erik Ronnberg you can find a detailed drawing of the davits and the cranes on a whaler. I decide to make davits and cranes as a display stand for my whale boat. It will be a somewhat didactic diorama-style display stand to remain in the style of previous models that I built (Shrimper model with an open side, Triton Cross section, Fishery smack cross section, Anatomy of a boat). The whale boat is made of cherry wood. To have some distinction I will make the display stand in pear. I have a small stock of it, hopefully I will have enough because at a scale 1/10 the davits and cranes will be quite big.
- 86 replies
-
- 3
-
-
- whaling
- clinker built
- (and 2 more)
-
Thank you very much, Marc. I would have preferred a little more certainty that it is a Norwegian whale-boat. Maybe a Norwegian reader can give more clarity on this. Thanks anyway for your reaction, Patrick.
- 86 replies
-
- 2
-
-
- whaling
- clinker built
- (and 2 more)