barryww
-
Posts
37 -
Joined
-
Last visited
Recent Profile Visitors
1,128 profile views


-
 J11 reacted to a post in a topic:
USS Cobia (SS 245) 1943 by barryww - Revell - PLASTIC - Scale 1:72 - 52" Gato Class Submarine Kit
J11 reacted to a post in a topic:
USS Cobia (SS 245) 1943 by barryww - Revell - PLASTIC - Scale 1:72 - 52" Gato Class Submarine Kit
-
Obormotov reacted to a post in a topic:
Chuck's planking videos...
-
popeye the sailor reacted to a post in a topic:
HMS Terror by Erebus and Terror - FINISHED - Scale 1:48 - POB - as fitted for polar service in 1845
-
Haliburton reacted to a post in a topic:
HMS Terror by Erebus and Terror - FINISHED - Scale 1:48 - POB - as fitted for polar service in 1845
-
druxey reacted to a post in a topic:
HMS Terror by Erebus and Terror - FINISHED - Scale 1:48 - POB - as fitted for polar service in 1845
-
Jack12477 reacted to a post in a topic:
HMS Terror by Erebus and Terror - FINISHED - Scale 1:48 - POB - as fitted for polar service in 1845
-
ccoyle reacted to a post in a topic:
HMS Terror by Erebus and Terror - FINISHED - Scale 1:48 - POB - as fitted for polar service in 1845
-
Erebus and Terror reacted to a post in a topic:
HMS Terror by Erebus and Terror - FINISHED - Scale 1:48 - POB - as fitted for polar service in 1845
-
Landlocked123 reacted to a post in a topic:
HMS Terror by Erebus and Terror - FINISHED - Scale 1:48 - POB - as fitted for polar service in 1845
-
mtaylor reacted to a post in a topic:
HMS Terror by Erebus and Terror - FINISHED - Scale 1:48 - POB - as fitted for polar service in 1845
-
 I bought the Occre kit from Ages of Sail today here in the States...should arrive next week. It is a retirement gift to myself and I plan to work on it beginning later this year. It appears to be a good buy. I have been fascinated by HMS Terror and HMS Erebus since doing a report on them back in junior high school in the early 70's. And now I have a kit on the way to my house. None of this would have been possible without you and your simply amazing work. Thank you so, so much. I'm sure I will get a lot of enjoyment from this.
- 346 replies
-
- 8
-
-
- terror
- polar exploration
- (and 2 more)
-
barryww reacted to a post in a topic:
HMS Terror by Erebus and Terror - FINISHED - Scale 1:48 - POB - as fitted for polar service in 1845
-
Thanks, that's a good enough recommendation for me.
-
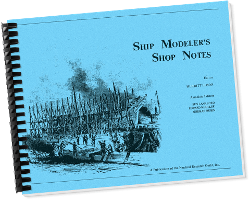
I see the NRG Ship Modeler’s Shop Notes for sale in the NRG store. Any of you have this? Do you recommend as a general MOP for model ship building or recommend something else? The picture seems to indicate it doesn't contain a lot of pages though, but I can't really tell for sure.
-
Such great craftmanship. Thank you for this practicum, the plans, all the mini-kits I've bought for this model, and teaching that patience is my guide.
- 1,048 replies
-
- 3
-
-
- cheerful
- Syren Ship Model Company
- (and 1 more)
-
Really takes the mystery out of how you do it. And the pictures speak for themselves as to the method. Thank you much for the article.
-
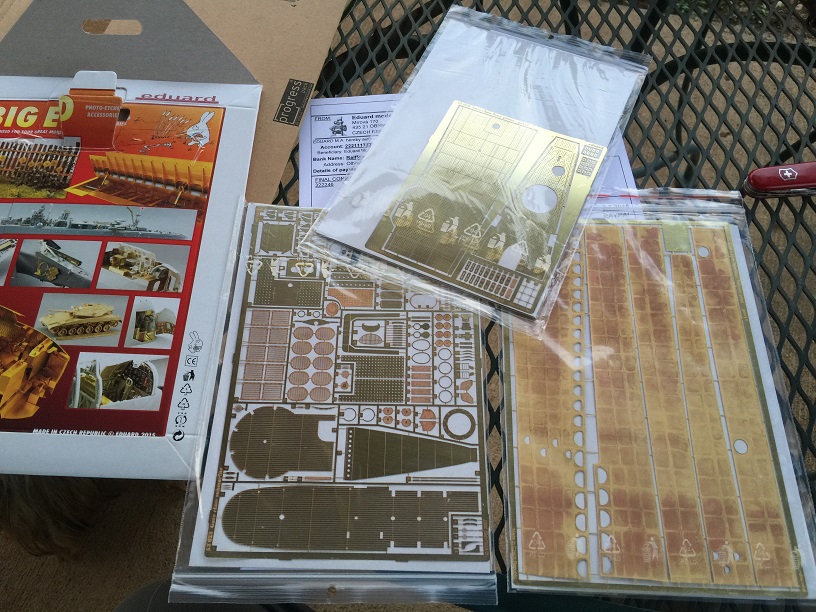
From the Czech Republic, here's some of the brass photo-etch sheets from Eduard that will add to or replace many of the plastic kit parts:
-
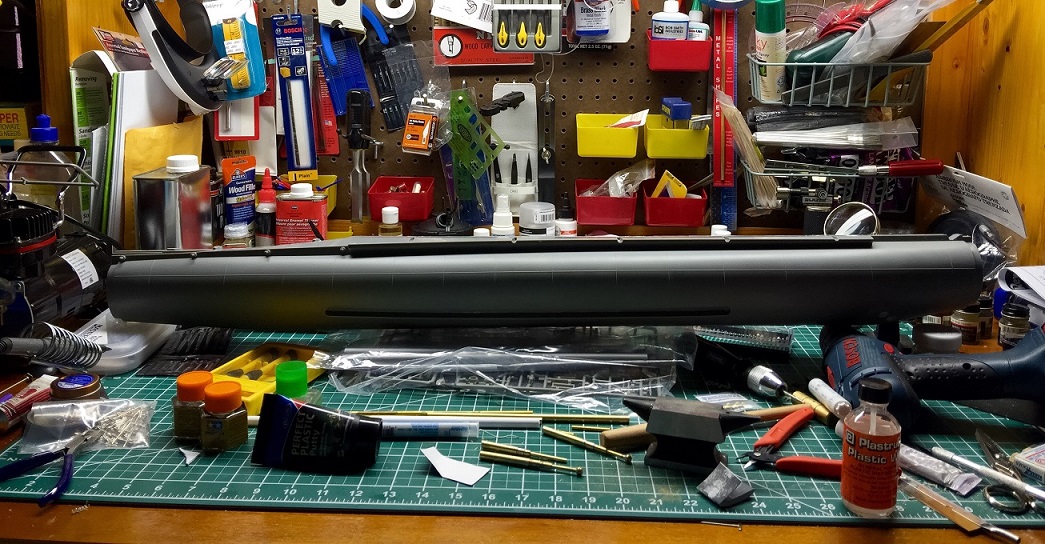
Glued hull halves together after attaching the bilge keels. This thing is big. There are still the bow and stern sections to be glued to this main hull section. I will need to clean up the hobby table so this thing will fit....never takes long to get into disarray does it? Will start on the bow section next, which will include some photo-etched parts to solder and fit.

-
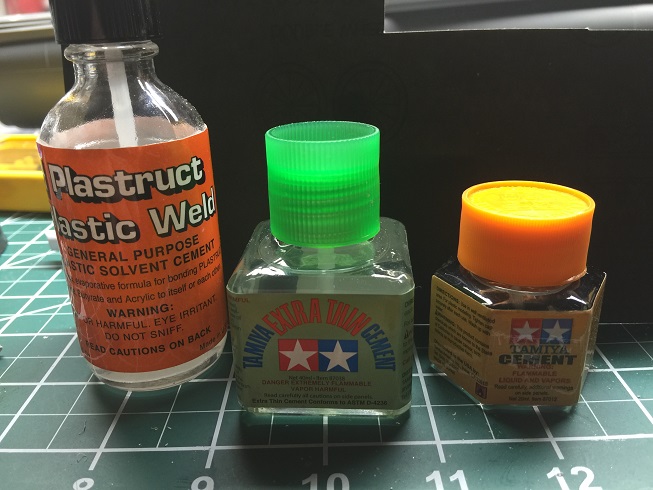
I have built plastic models most of my early life, but have been away from the hobby awhile. One thing that has changed are the glues available. No longer restricted to the familiar Testors cement in the tube, I really like Tamiya's Extra Thin cement that you apply after holding the parts together to be glued and allow capillary action to flow the glue along the seam. Good stuff!
-
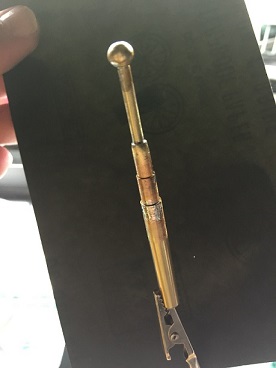
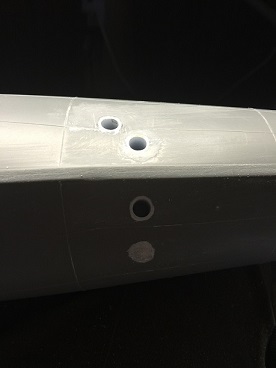
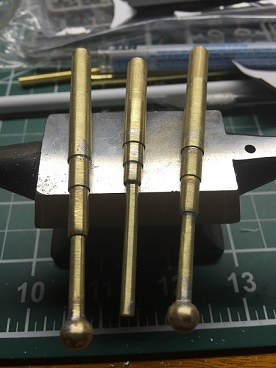
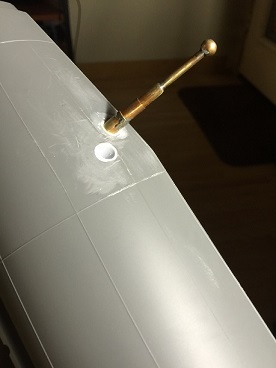
I wanted to model the sonar booms that lower from the bottom of the hull. These were not included in the kit, so I decided to fabricate them with various sizes of brass tubing. The recesses were made by gluing 1/4" I.D. plastic tubes into the hull after drilling holes first with electric drill. In the second picture, you can see where I had to patch a hole as I drilled one too many.
-
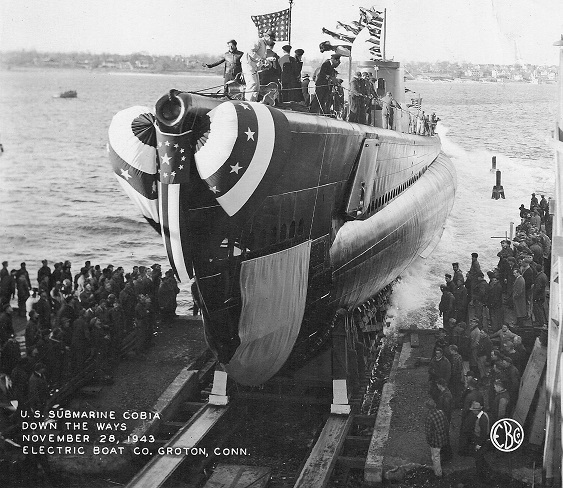
This build log will cover my building of the 1:72 Revell plastic kit of the Gato class submarine. The decals that come with the kit are for the USS Drum and USS Albacore. However, the fairwater, or conning tower, does not match either boat. But it does match that of the USS Cobia, which is what I will model here. Besides the kit itself which is 52 inches in length when completed, I have also purchased the complete "Big Ed" set of brass photo-etched parts for this kit from Eduard. Where I will display it I haven't decided yet, but it will be on the work bench for quite some time. Painting will mostly be done by airbrush, which I am quite the novice at using. But it should be fun to build. While not needing the skills to build like the wooden kits, I wanted to add this particular model to the log entries due mostly to the size of the model itself. (From Wikipedia:) The United States Navy Gato-class submarines were launched 1941–43 and were the first mass-production US submarine class of World War II. Together with their near-sisters the Balao and Tench classes, their design formed the majority of the United States Navy's World War II submarine fleet. Named after the first vessel of the class, USS Gato, the Gato class and its successors formed the core of the submarine service that was largely responsible for the destruction of the Japanese merchant marine and a large portion of the Imperial Japanese Navy in World War II. Gato's name comes from a species of small catshark. Like most other U.S. Navy submarines of the period, boats of the Gato class were given the names of marine creatures. USS Cobia (SS/AGSS-245) is a Gato-class submarine, formerly of the United States Navy, named for the cobia. Cobia (SS-245) was laid down on 17 March 1943 by Manitowoc Shipbuilding Company, Manitowoc, Wisconsin. She was launched on 28 November 1943 (sponsored by Mrs. C. W. Magruder), and commissioned on 29 March 1944, Lieutenant Commander Albert L. Becker in command. On 1 July 1970, the Navy struck Cobia from the Naval Register, and she was towed to Manitowoc, Wisconsin to serve as an international memorial to submariners. In 1986, Cobia was incorporated as a part of the Wisconsin Maritime Museum, declared a National Historic Landmark, and placed on the National Register of Historic Places. Cobia is permanently docked at the Manitowoc River's mouth at Lake Michigan.


-
Yep. They all look good to me. I think they look great in perfect pristine condition as they match the condition of the ship itself. If one was going to weather the ship, then something else would be in order. But I like it all as is.
- 1,048 replies
-
- 4
-
-
- cheerful
- Syren Ship Model Company
- (and 1 more)
-
barryww reacted to a post in a topic:
HM Cutter Cheerful 1806 by Chuck - FINISHED - 1:48 scale - kit prototype
-
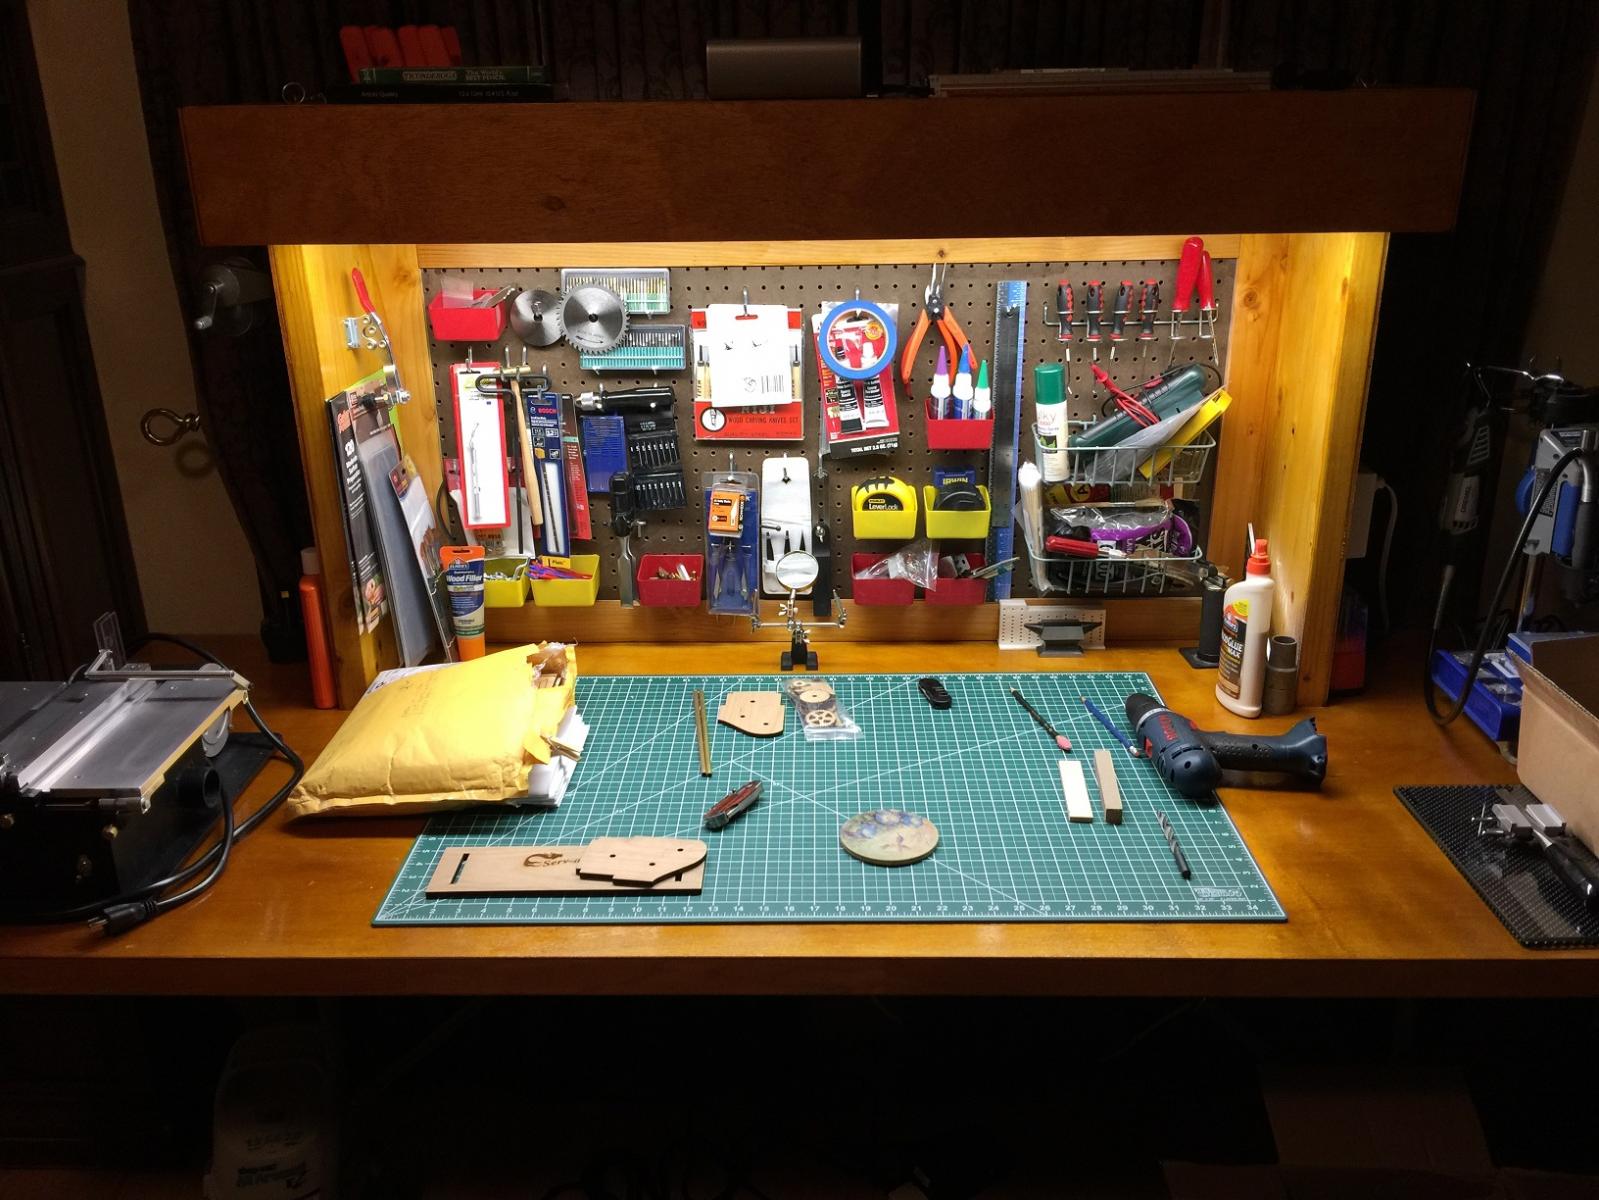
A small update. I needed to build a workspace for constructing the Cheerful, and over the past several weekends came up with this. A solid core door from Lowes completed the benchtop. I'll start posting my building photos this week of the Cheerful, but will be taking my time as I'm in no hurry. Feel free to comment or just follow along as I'm most interested in just creating a visual build log of my progress for myself. Critiques are more welcome than cudos, so use a critical eye as you watch, please, and thanks.

-
barryww reacted to a post in a topic:
Harbor Freight Mini Wood Planes
-
barryww reacted to a post in a topic:
Harbor Freight Mini Wood Planes
-
Harbor Freight Mini Wood Planes
barryww replied to grsjax's topic in Modeling tools and Workshop Equipment
I just ordered some of the Harbor Freight planes to try out. For the price, I haven't really lost anything if they don't past muster. I always use the Scary Sharp method for honing chisels using finer and finer grades of emery cloth. An easy cheap method for honing that gets me a really sharp blade. -
barryww reacted to a post in a topic:
Harbor Freight Mini Wood Planes
-
Great technique on the chainplates. I've learned a lot of building methods by just following along. Congrats on the milestone and I will be watching for your subsequent posts. Which reminds me that I need to order some of your deadeyes, blocks, and rope at some point. But I'll wait and see what you end up using. I'm not in any hurry.
- 1,048 replies
-
- 3
-
-
- cheerful
- Syren Ship Model Company
- (and 1 more)
-
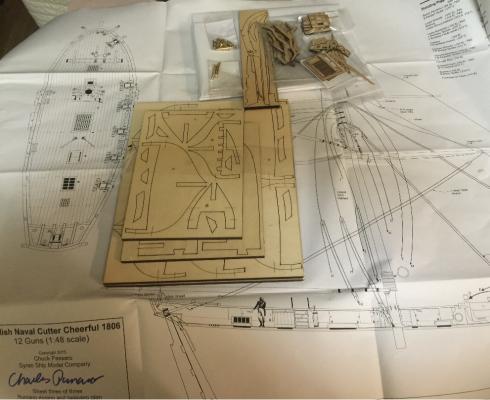
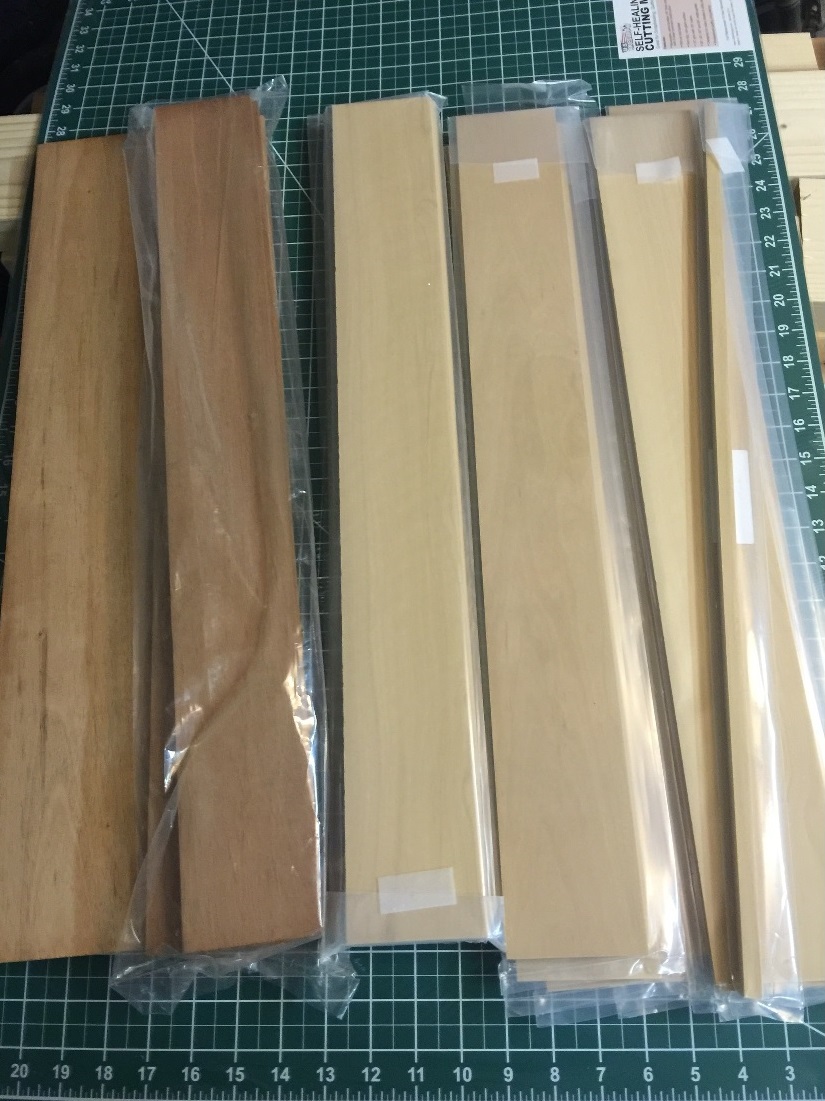
Just a small update. I'm presently working on a 6 ft hobby table as well as awaiting delivery of my Byrnes table saw, so no gluing has been done yet. But here are a couple pics: A pic of laser cut Cheerful parts from Chuck, plus another pic of some mahogany and boxwood sheets on top of a new large cutting mat. I also just bought locally a 3" x 3" x 24" castello boxwood piece of finished lumber for $17, so even though my Byrnes saw hasn't arrived, I'm already saving some dough, because I know what milled sheets cost. Wish they had more than one piece 'cause I would have bought every one they had. Heck of a deal!