


qwerty2008
-
Posts
552 -
Joined
-
Last visited
Content Type
Profiles
Forums
Gallery
Events
Posts posted by qwerty2008
-
-
-
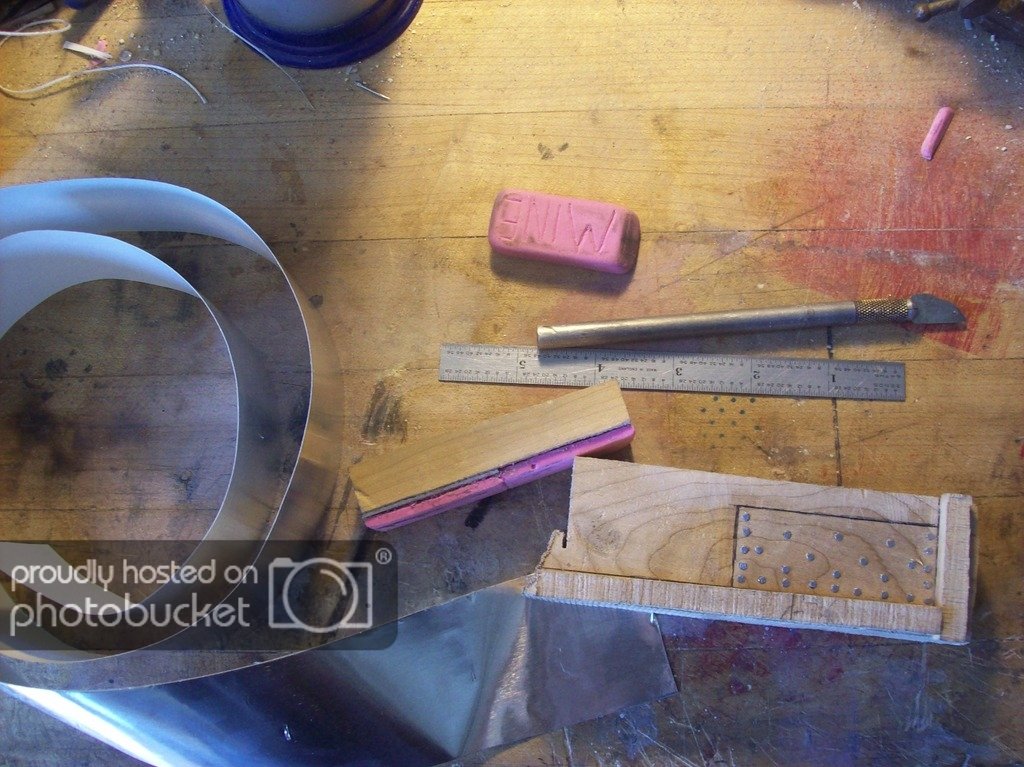
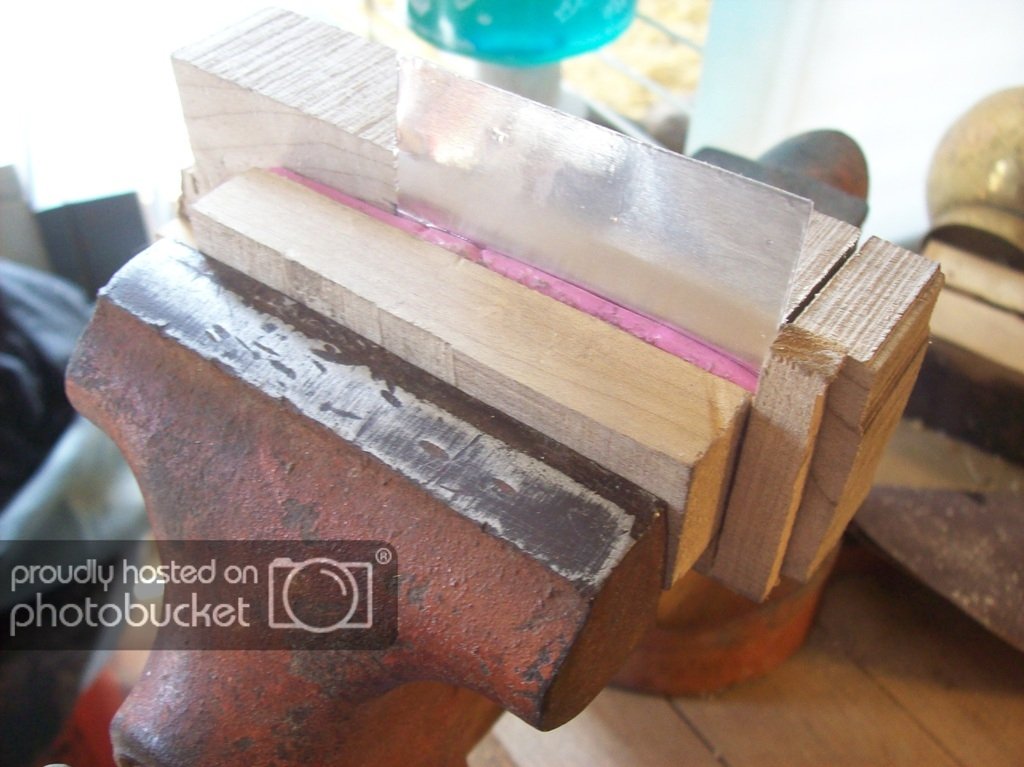
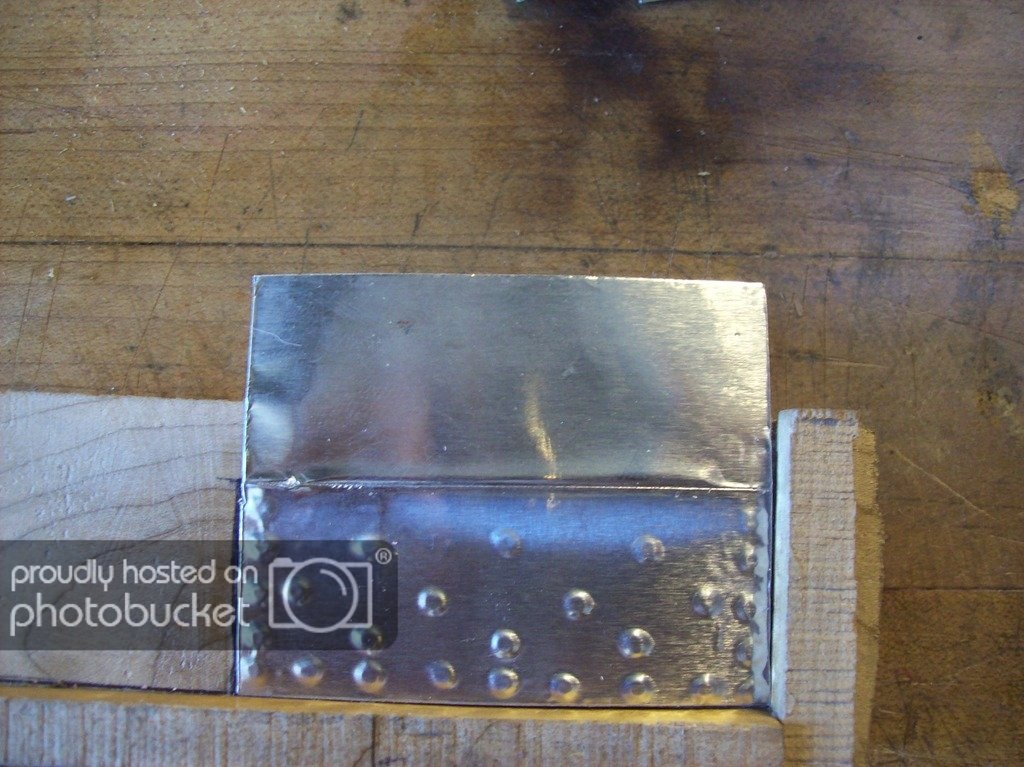
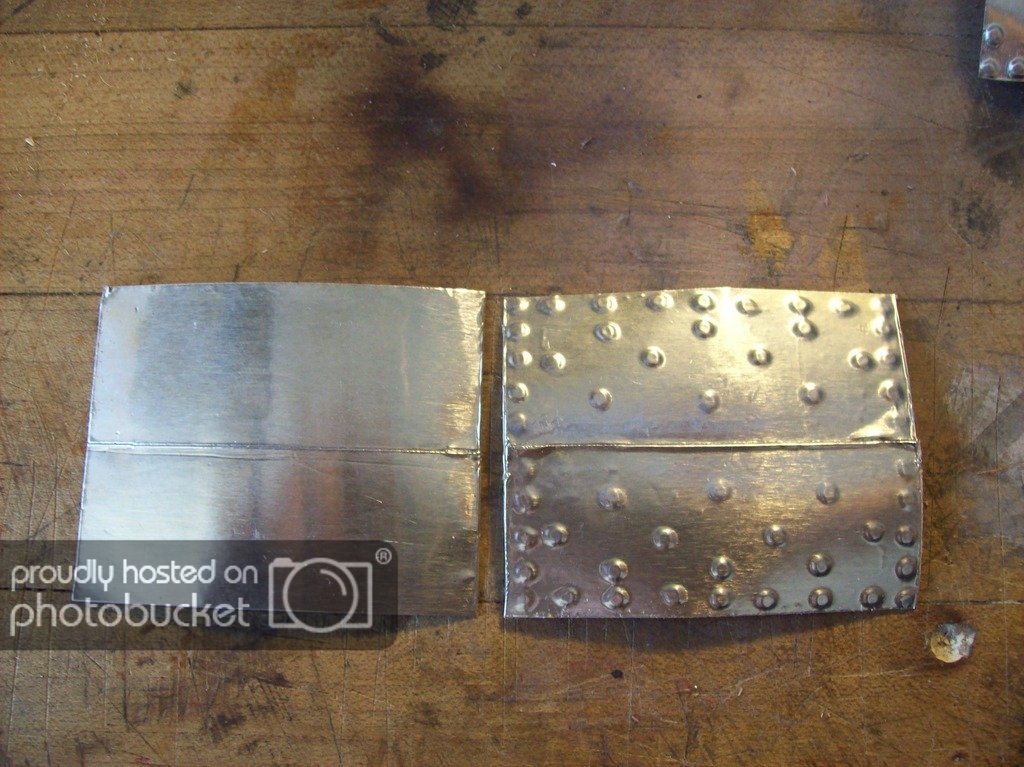
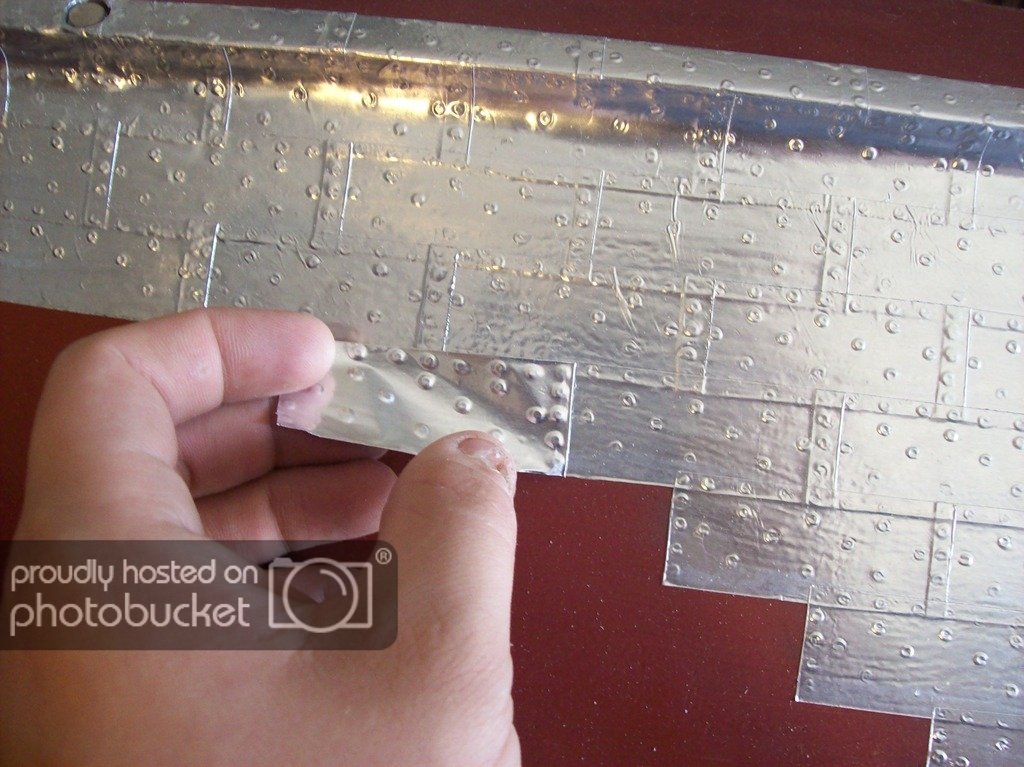
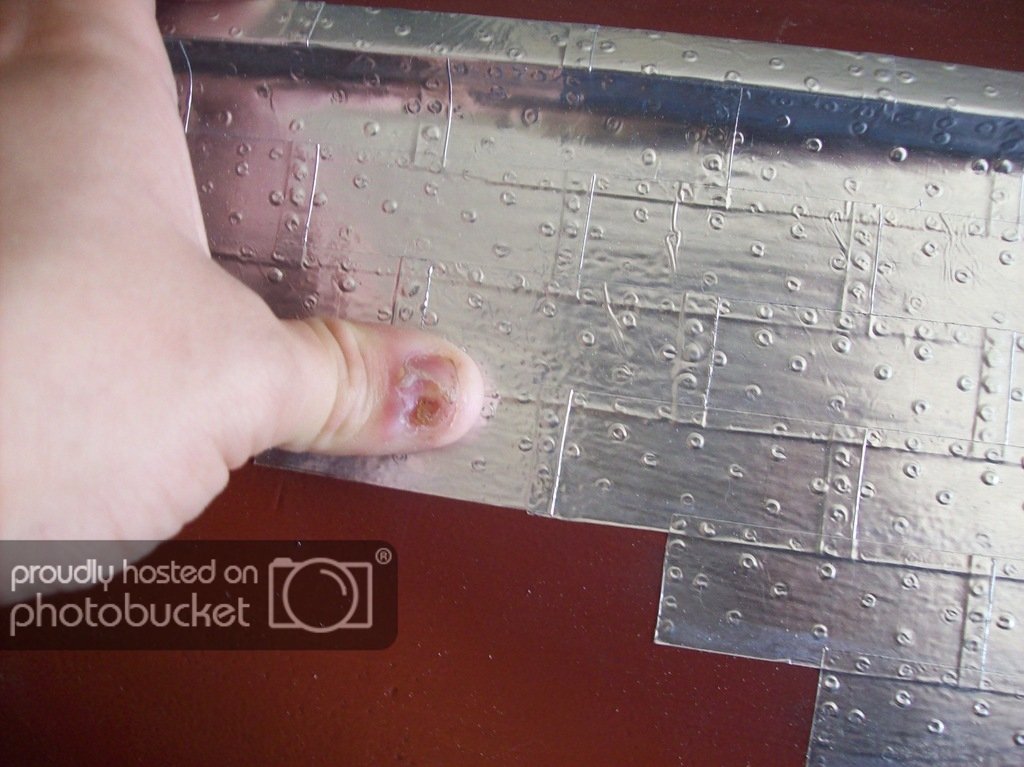
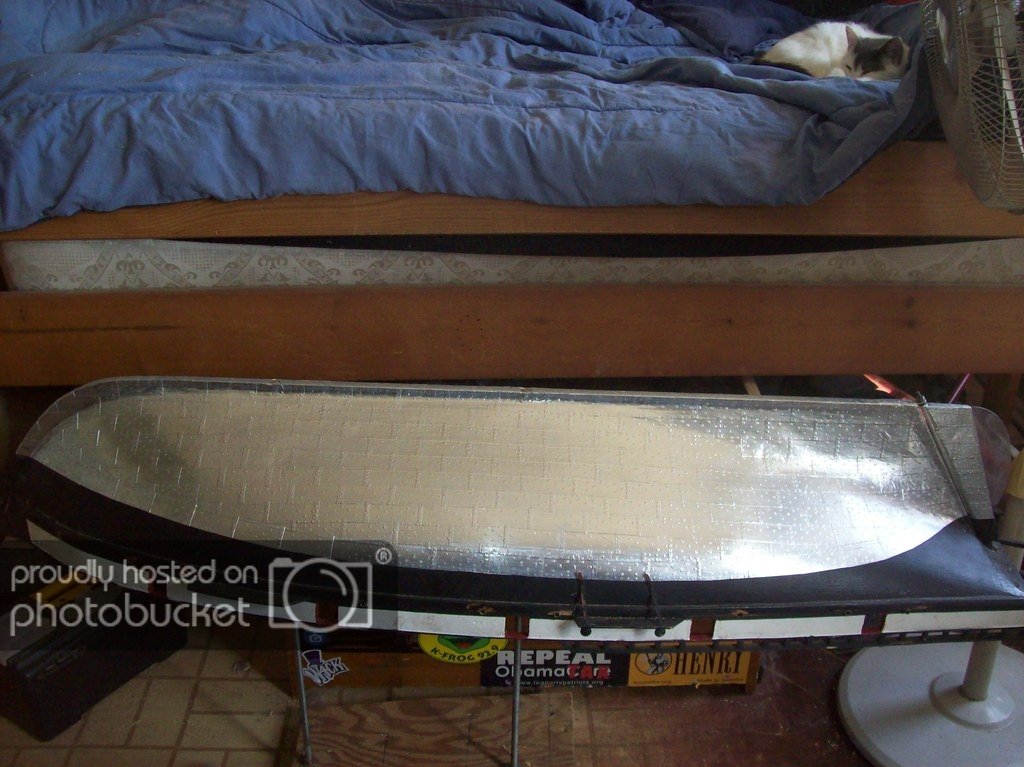
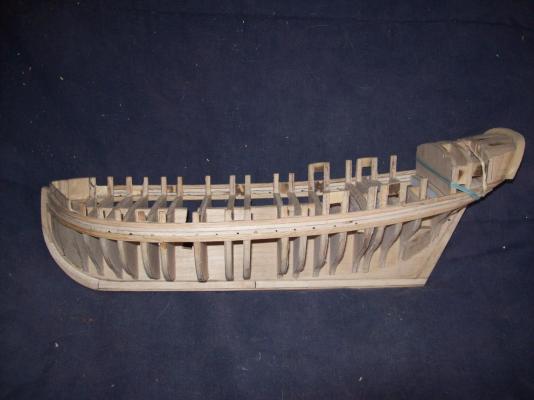
I haven't got much work done on the Byzantium the past couple of weeks due to working on the sloop Mediator. After planking half of the Mediator I am getting kinda tired of planking so I decided to switch back to the Byzantium and start coppering, well sorta. I made a plate press and started work making the plates last night, sofar I have made and installed over 200 plates completing the starboard side of the hull.
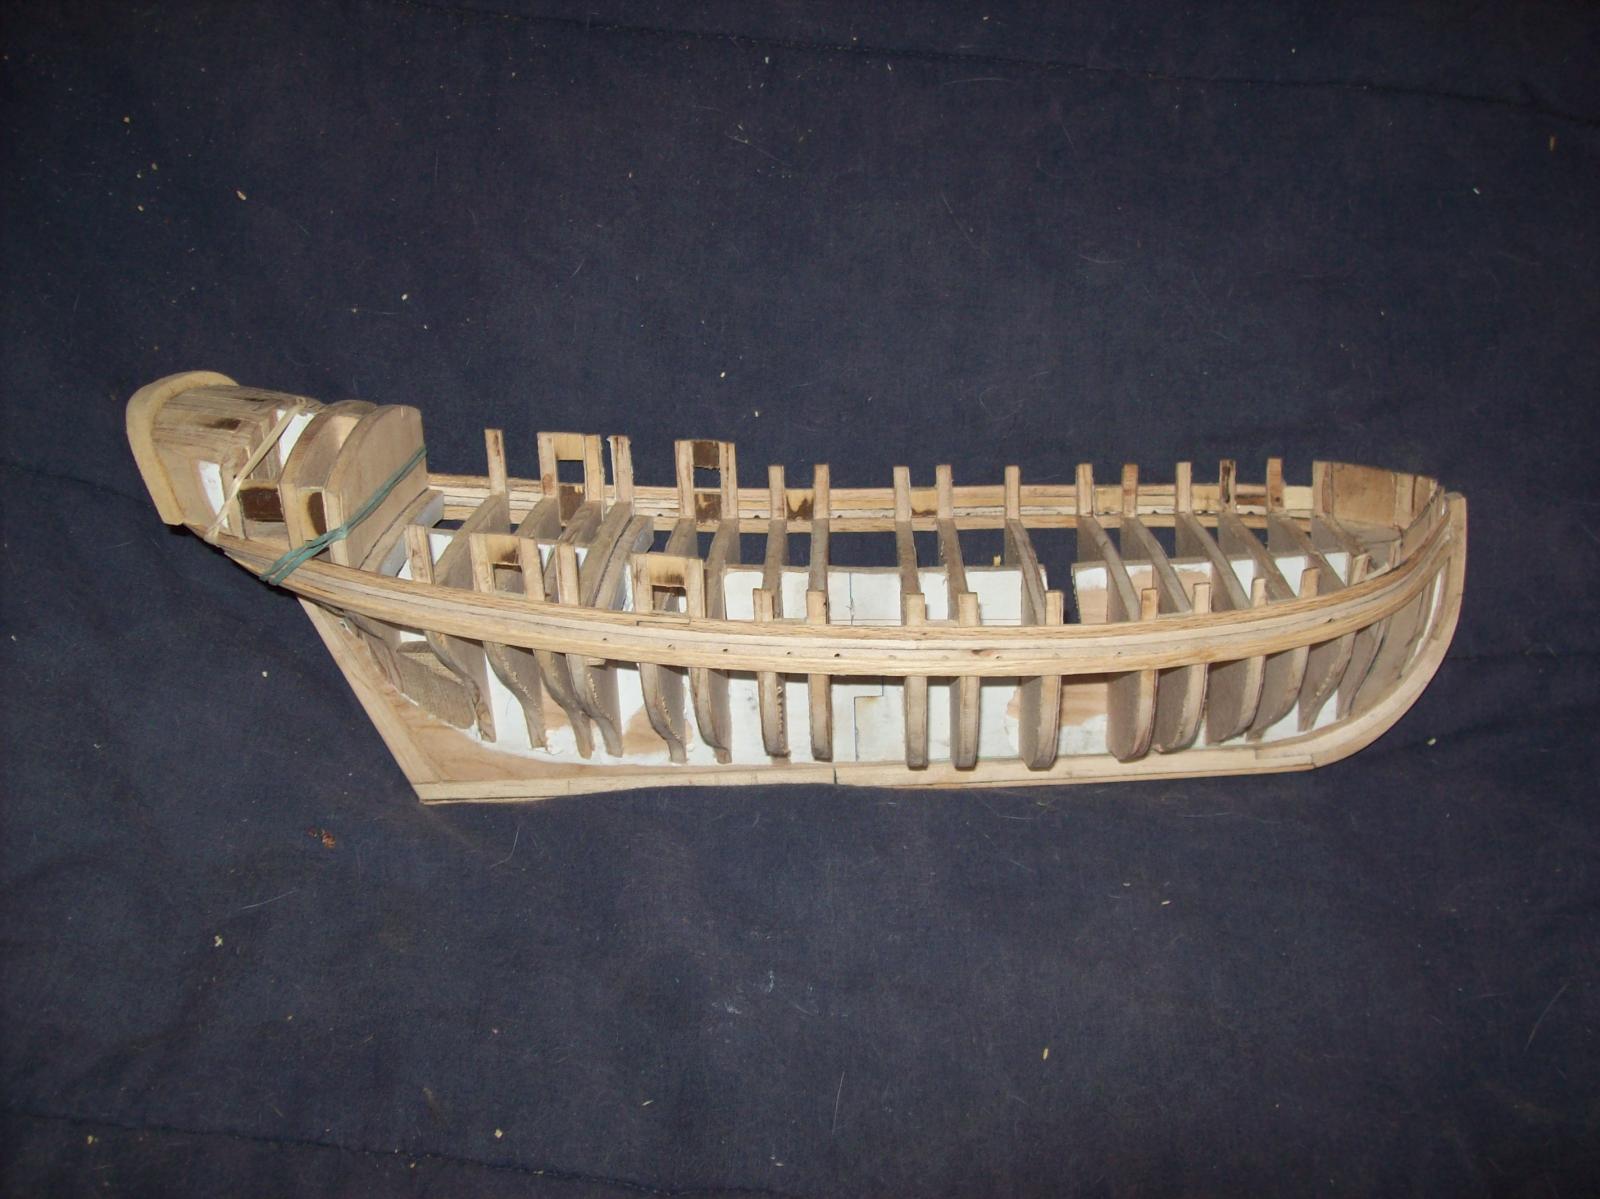
The progress as of this morning.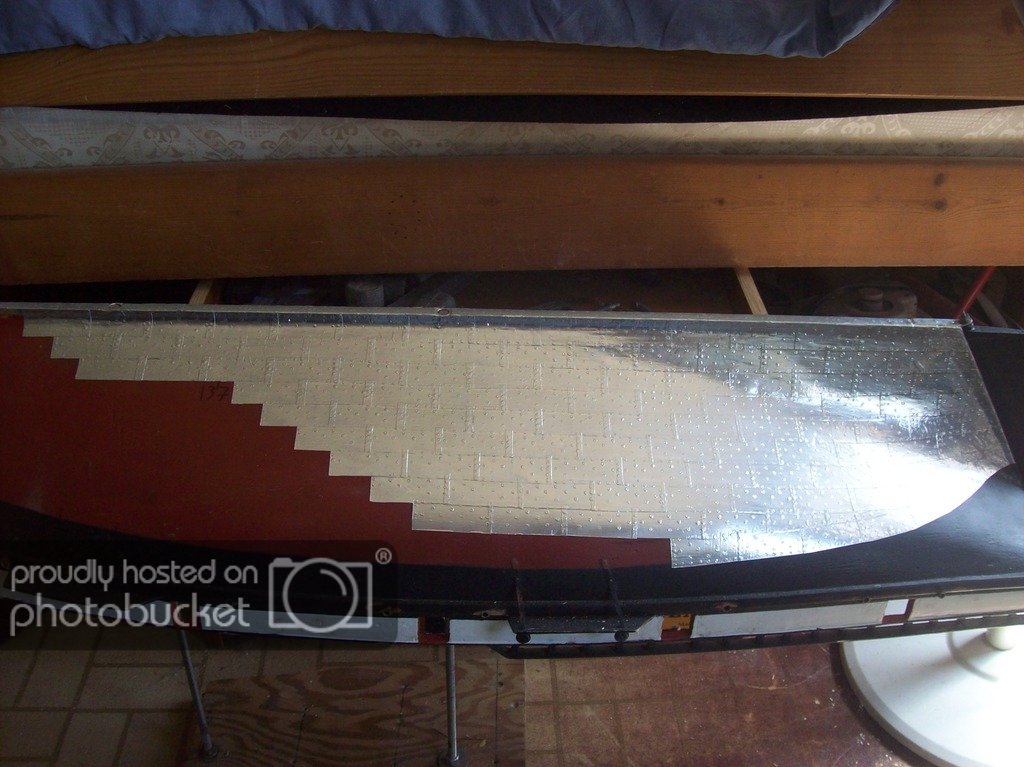
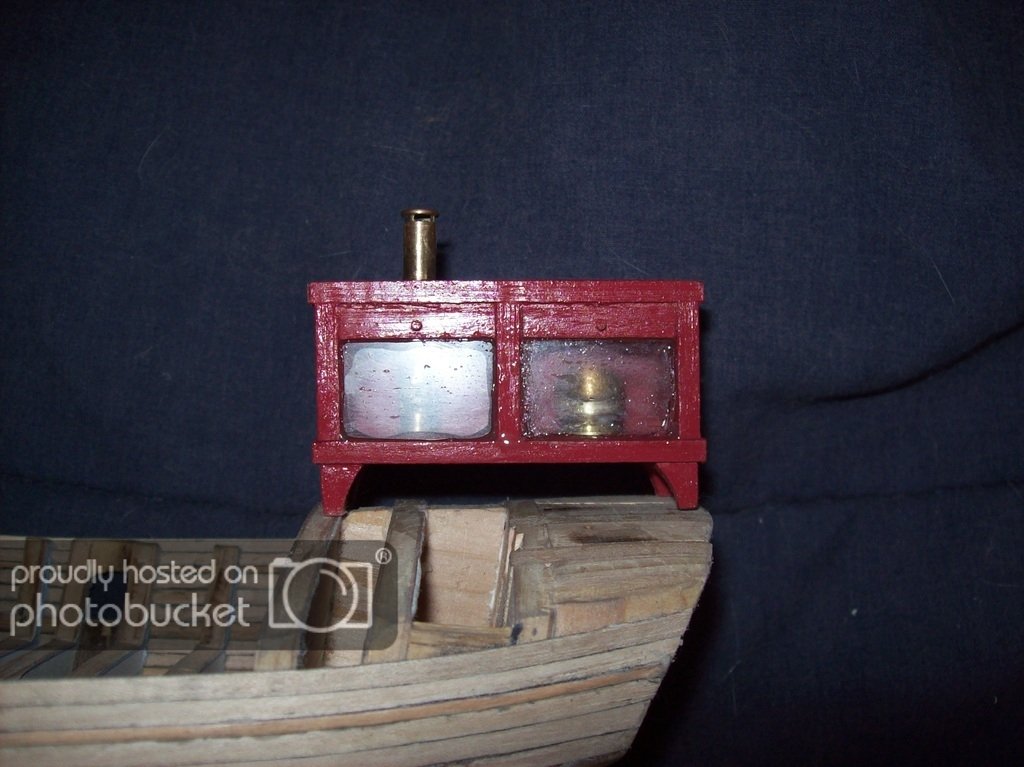
I also have painted the binnacle.
Lextin.
- IgorSky, Mfelinger, mikegerber and 3 others
-
 6
6
-
Håkan: Instead of soaking you could try using heat to bend the planks. I use a heat gun which is basically a glorified hairdryer except mine can actually set the wood on fire if left in front of it to long. I found that my oak planks turned to a rubber like consistency when heated making then very easy to bend.
Lextin.
- Omega1234, Wintergreen and mtaylor
-
3
-
Mark/Canute: I don't currently have anything to seal the wood except some clear coat which I would rather not use on this model as it would give a waxy appearance due to how thick it goes on. I am open to suggestions as to what product to get when the time comes?
Gaetan: the paint (spray paint sprayed into a jar) I used was solvent based but I do have a small can of water based paint that I can try as well.
Patrick: no the red on the board is Sharpie. though I don't remember ever putting the mark on the board all the actual blood spatter turned brown after a day or so.
I will hold off on painting the wales for now until I know for sure what the best method to do this is. I had originally planned to leave them natural (hence the use of a different wood then the planking) but I later realized that the model needed a little bit of contrasting color to make it stand out more, and to draw the eye away from any mistakes that I will inevitably make later on down the road.
PS. I have applied another coat of stain which darkened up the color a little and covered up the blotchyness along the waterline.
Lextin.
-
If your talking about what I thing you are then the solution is simple, pencil the edges of the planks, this will cause the joints between the planks to appear black as they were caulked and will even make the larger gaps appear black, I found this out when planking my own model today. Any gaps where air can pass thought I use wood filler such as plastic wood or homemade wood filler as described above by Mark but I add talc (baby powder) which improves the consistency making it better for sanding.
Lextin.
-
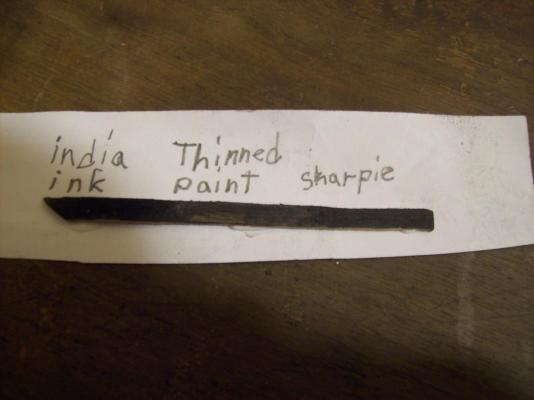
I decided to test some ideas for the wales so I took a scrap piece of oak and used india ink on a portion thinned paint on another and Sharpie marker on the last. Out of the the three I like the Sharpie the most but am afraid that it might rub off while handling the model.
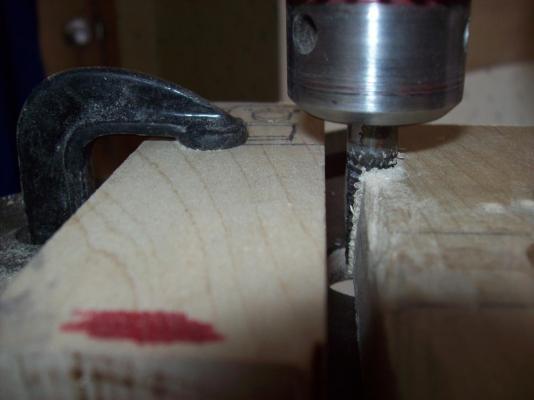
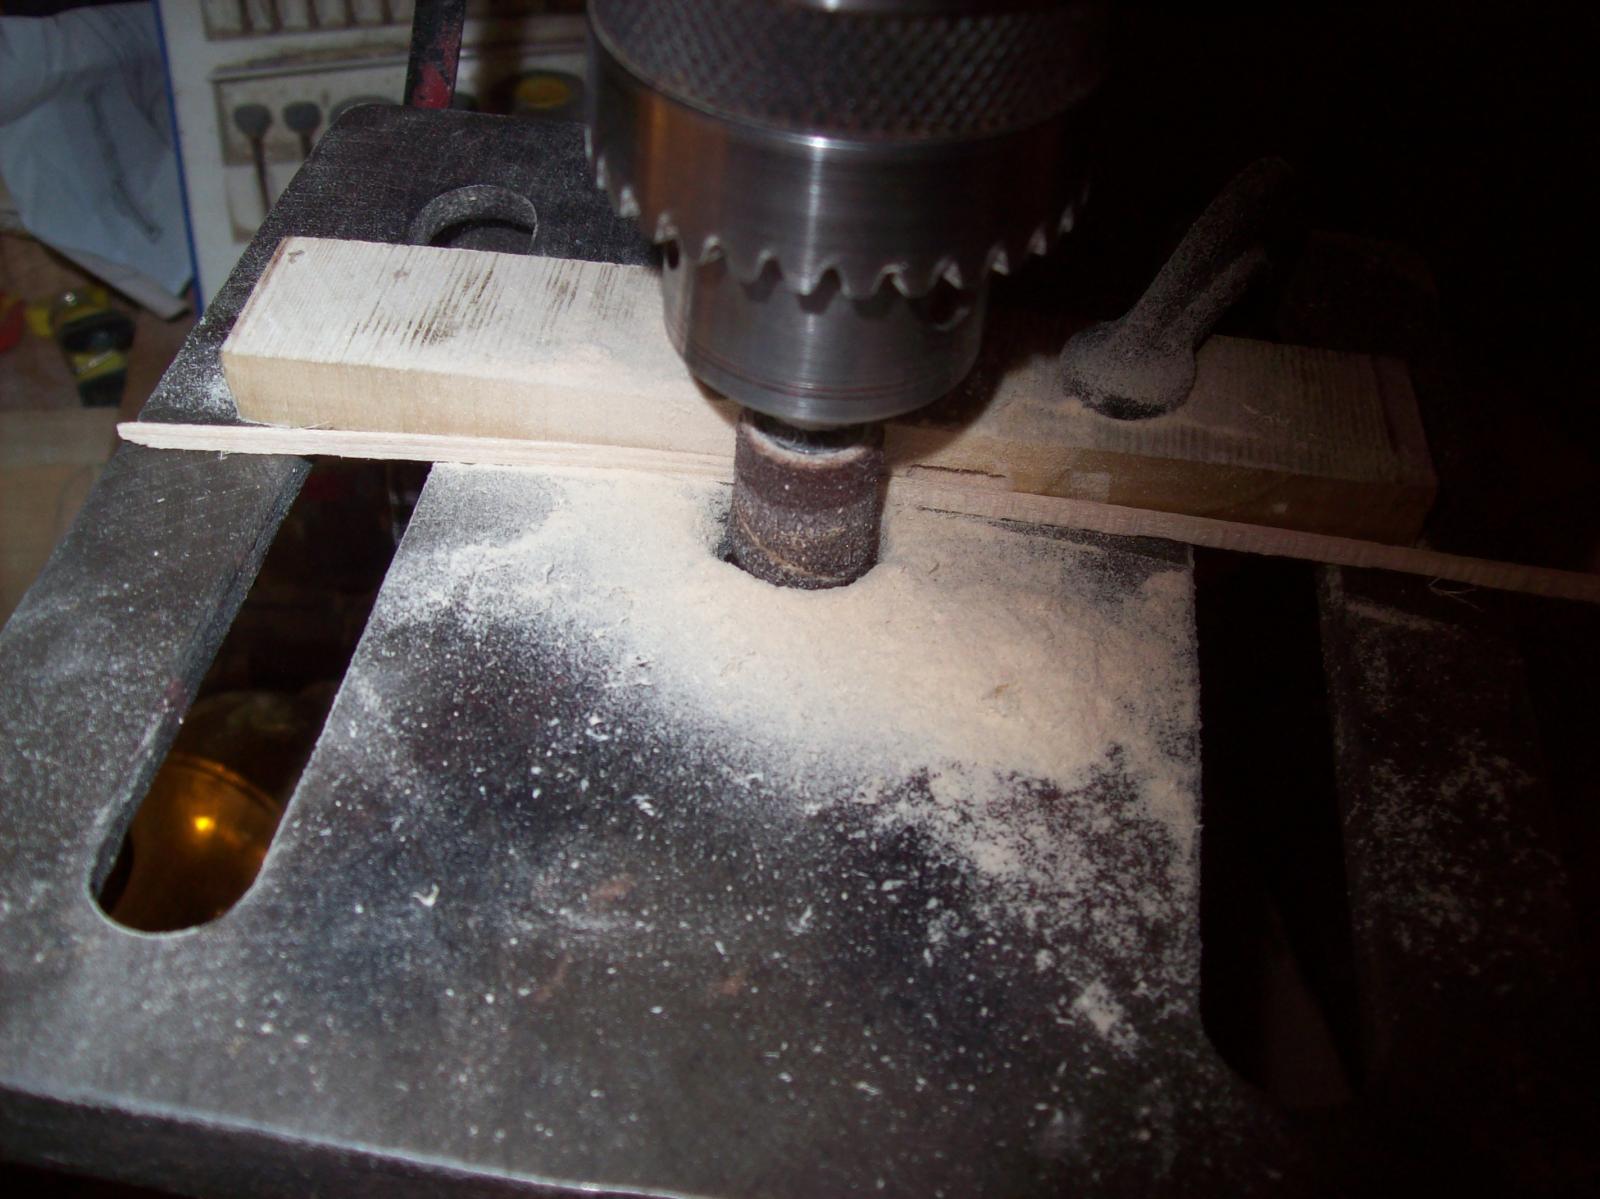
PS. Here is a picture of my new, safer rasping setup for the planks.
Lextin.
-
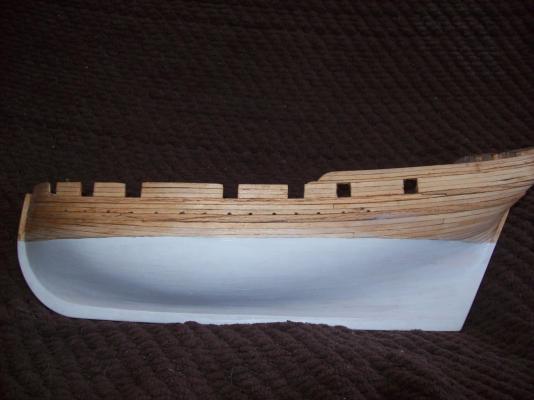
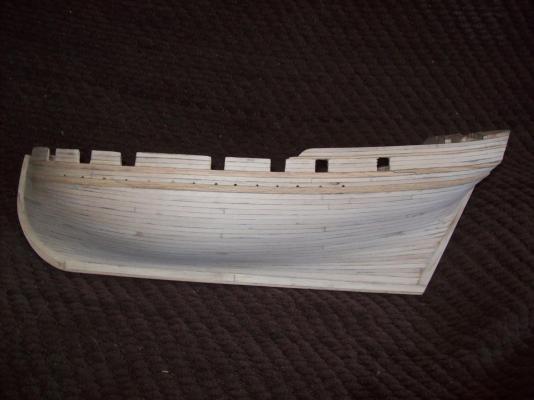
Port Side Paint: (37:00 hours)
When done with the planking I proceeded to stain the wood above the waterline and paint it white below the waterline. I still need to do some touching up on the color. Question: Should I paint the wales with thinned black paint or leave them natural? or even dye them with India ink?
Lextin.
-
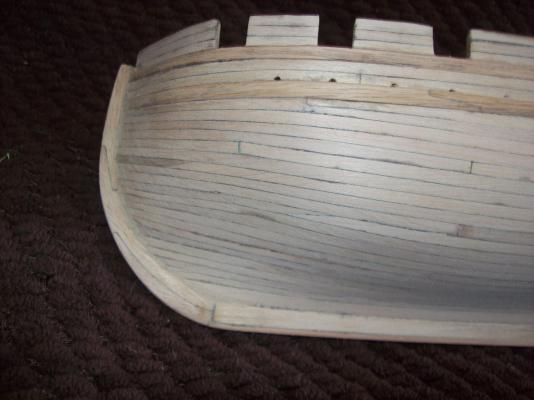
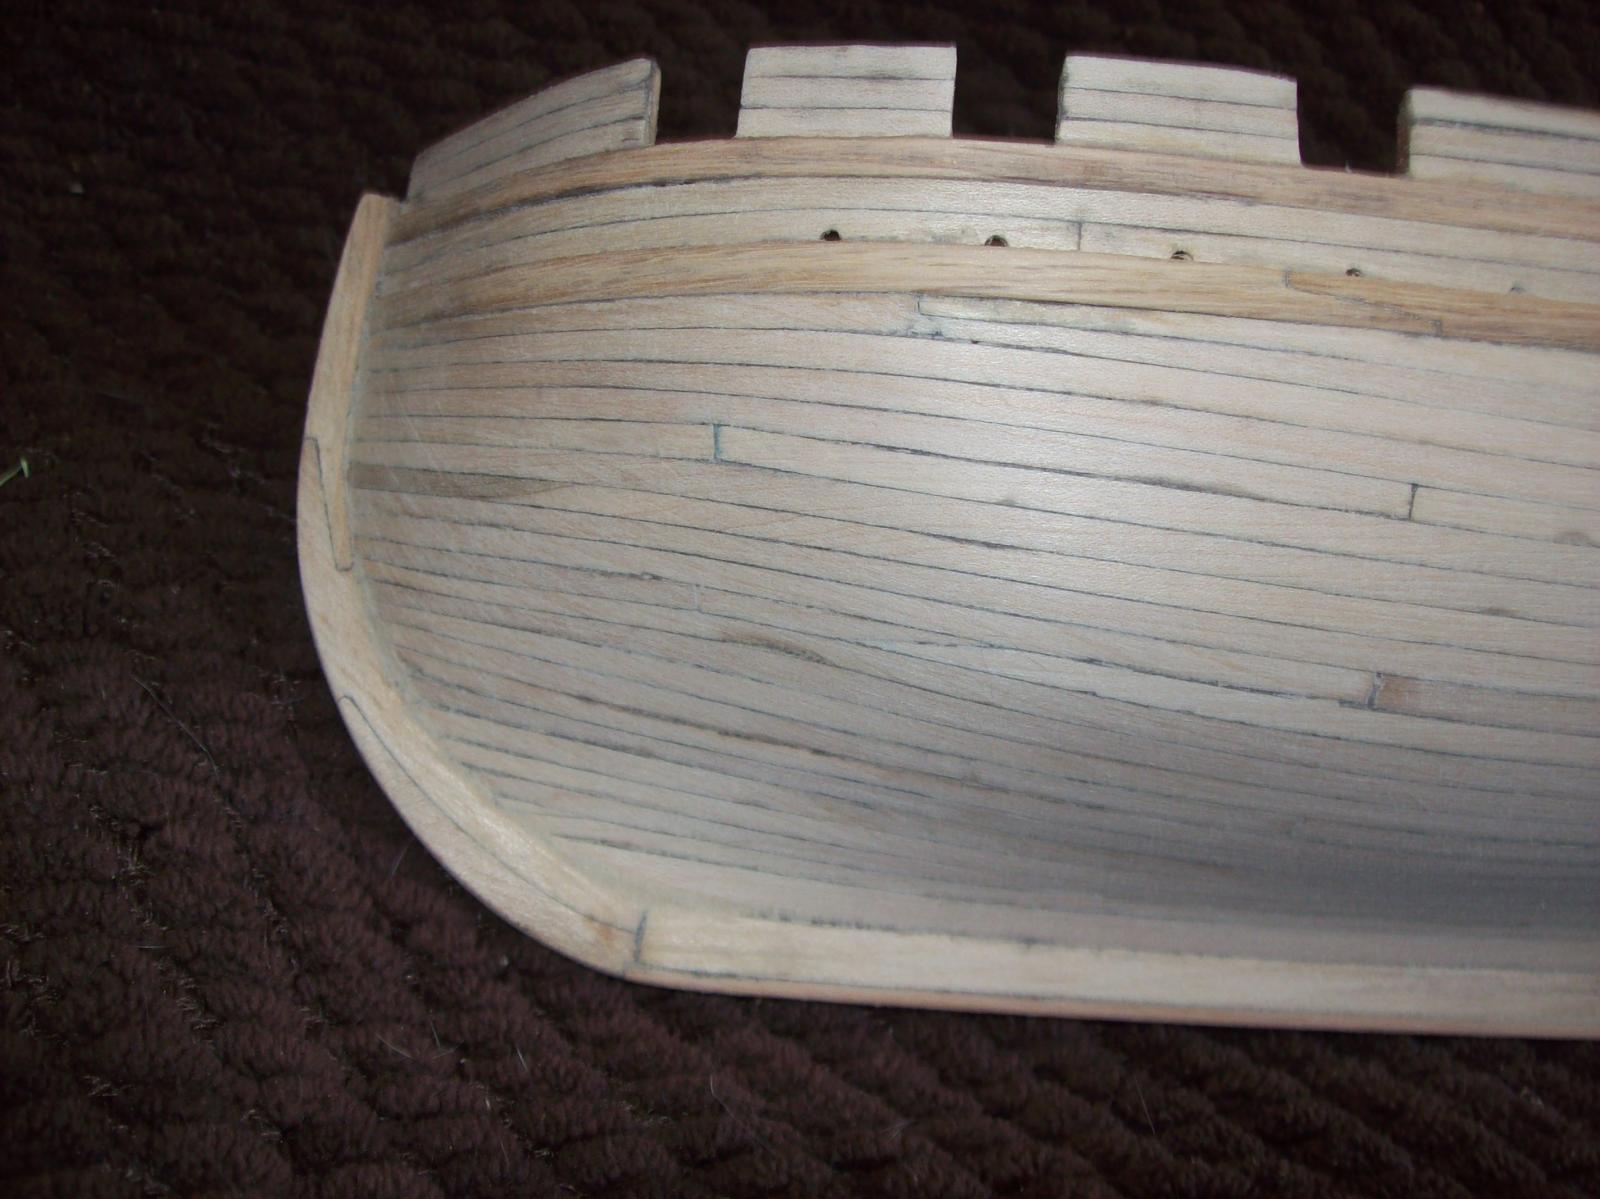
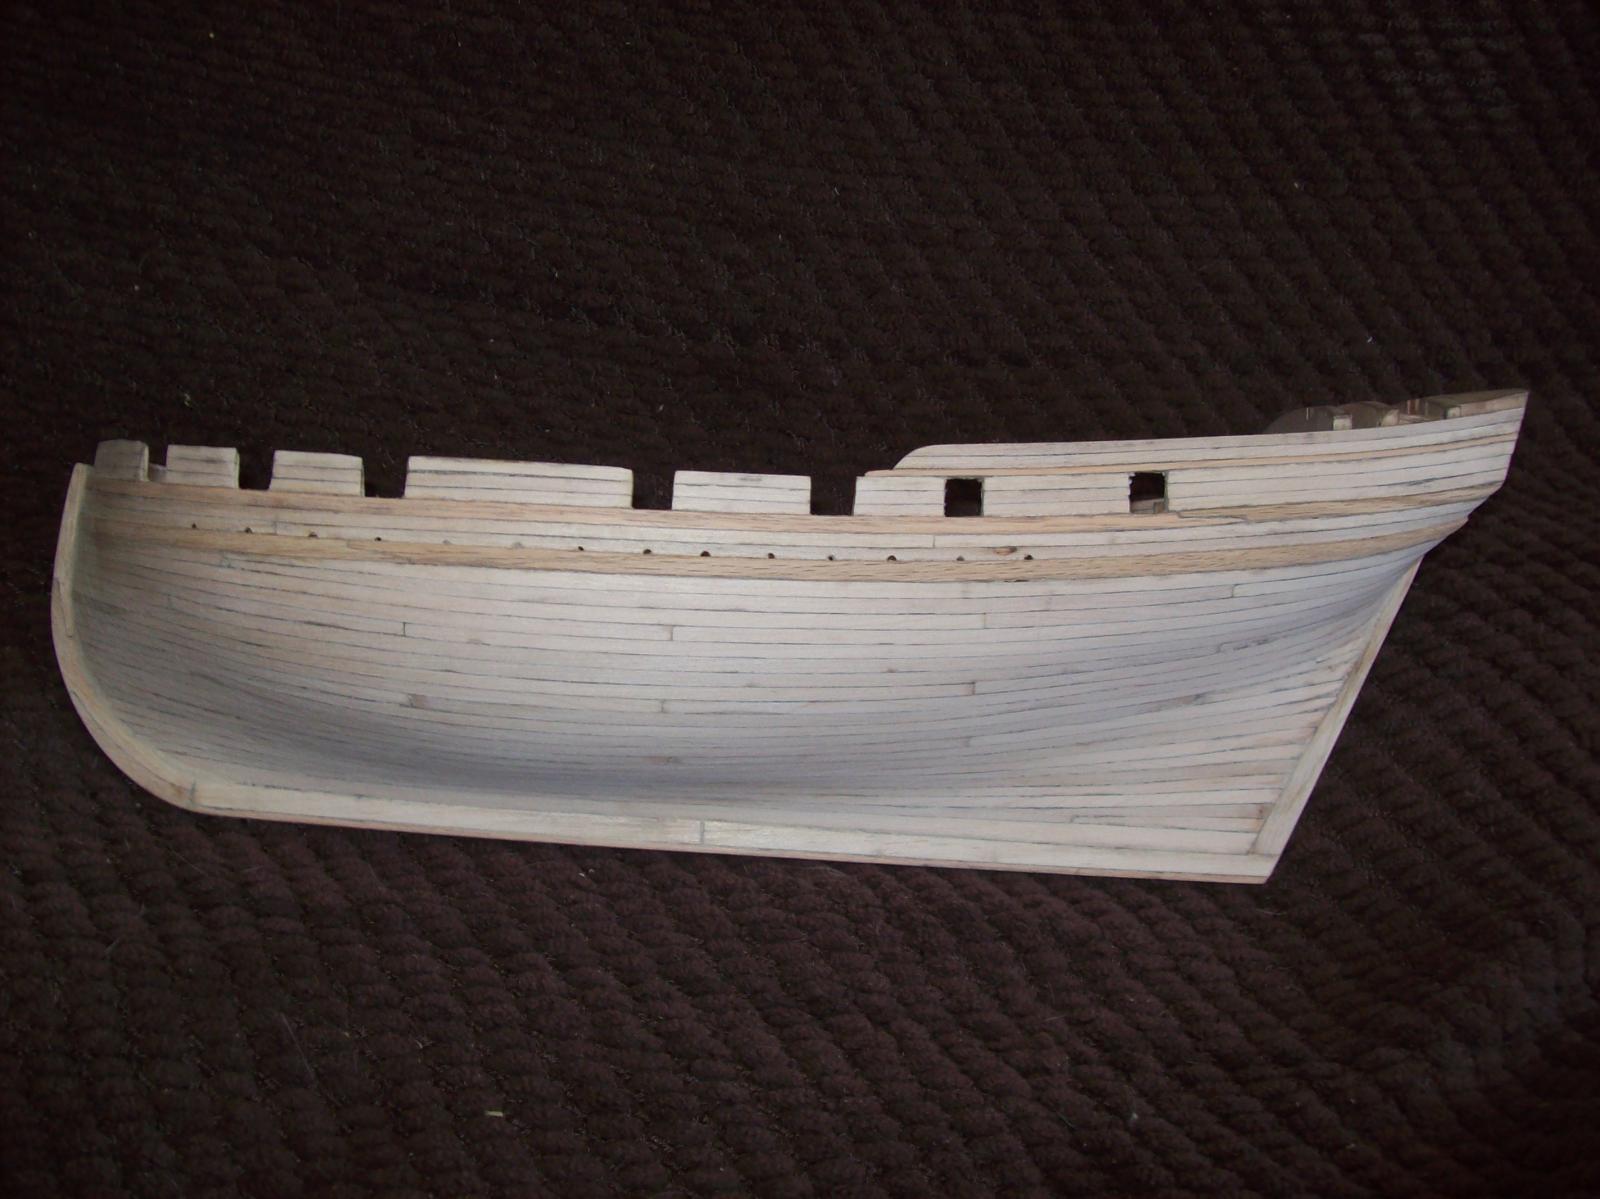
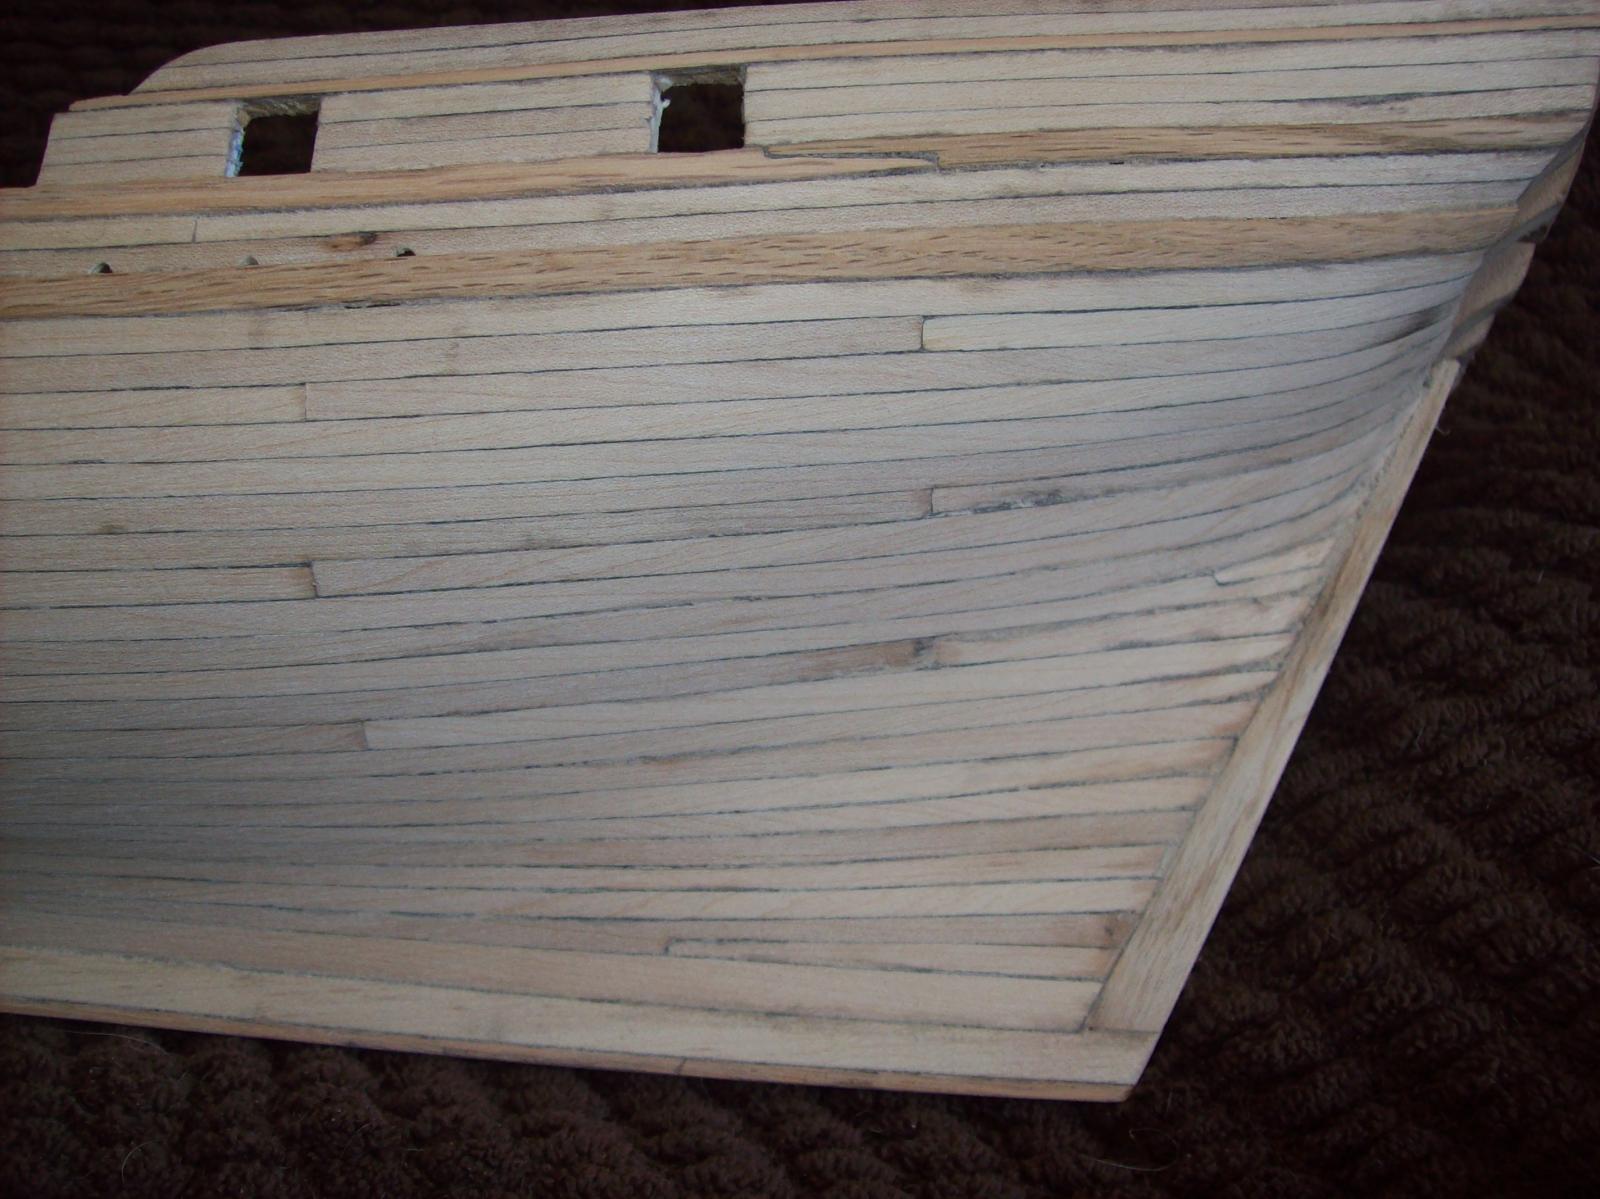
The Lower Planking Continued: (36:00 hours)
Last night I decided to get back to work and since then I have planked the rest of the port side. two stealers where required in the stern.
Lextin.
- egkb, SawdustDave, carlosgf and 2 others
-
5
-
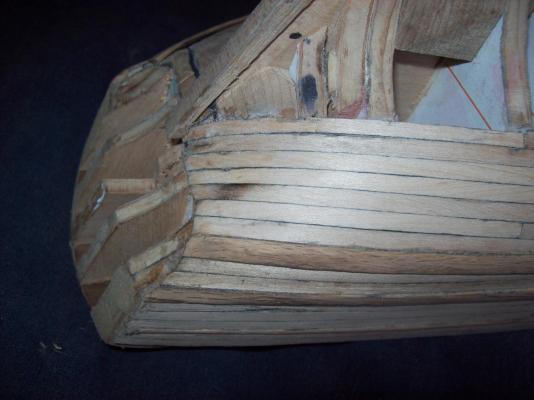
-
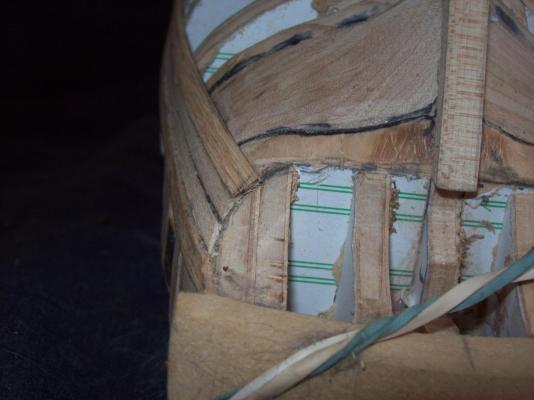
Here is a picture of what it looks like now, the arrow is pointing at the part that was ripped out from under the skin.

Lextin
-
She wont be coming along nicely at least not for the rest of today as I ripped my thumb nail off with a rotary rasp wile milling some more planks. My last sanding drum went kaput so I set up the rasp to thickness the blank for the next set of planks when my thumb got pulled between the rasp and the guide which was set at 1/8 inch. After it hapend I walked out to the living room to ask for a bandage when I passed out the first time, then after I stood back up I went down again when I came to it felt as if several days had passed since the incident. Basically I am trying to say that I wont be feeling up to working on the model anymore today.
Lextin.
-
Thanks Nils, Patrick, and everyone who pressed the like button .
Nils: Yes I will only be single planking the hull, the density of the bulkheads makes this fairly easy plus I got lucky when I made my planks as they are the perfect thickness to bend easily but not so easily that they show (unless of course you hold a lamp behind them as they are slightly translucent) the bulkheads.
Patrick: I surprised myself with that one and hopefully I can keep up the rate as I would like to finish the Mediator before collage starts this fall.
Lextin.
- Omega1234, Mirabell61 and mtaylor
-
3
-
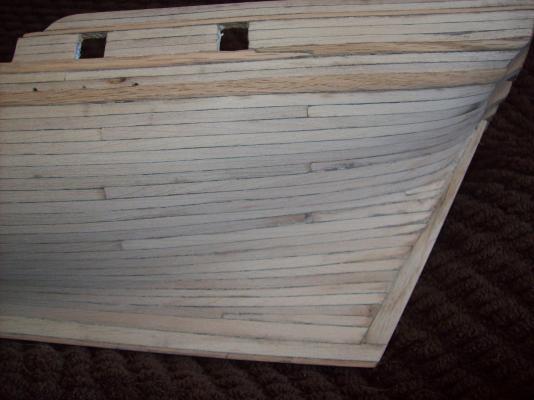
The Lower Planking: (30:00 hours)
I have started on the lower planking and am moving from the wale down. I am trying to use the least number of drop planks and stealers as per Chucks videos.

Lextin.
- Mirabell61, carlosgf, egkb and 4 others
-
7
-
-
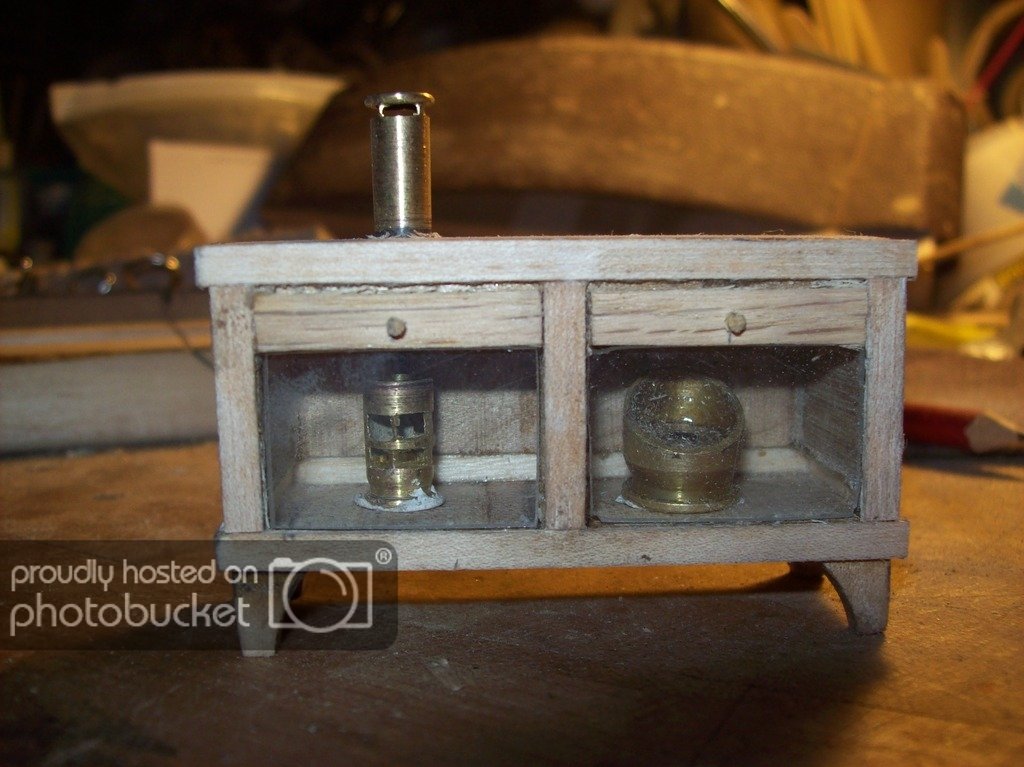
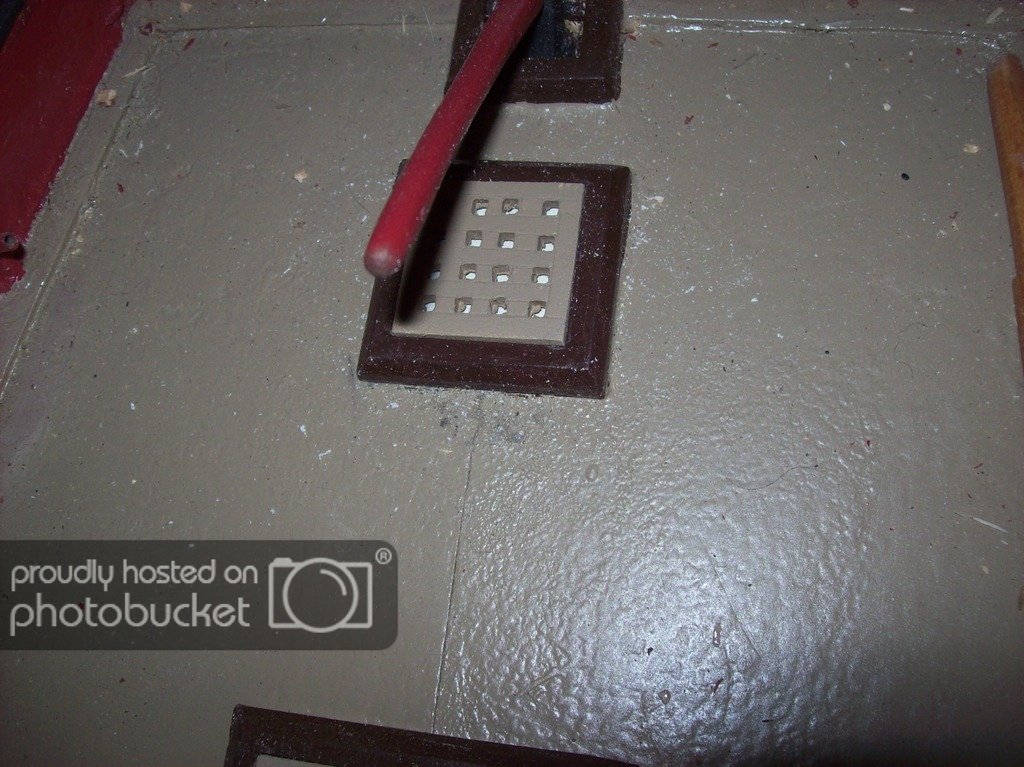
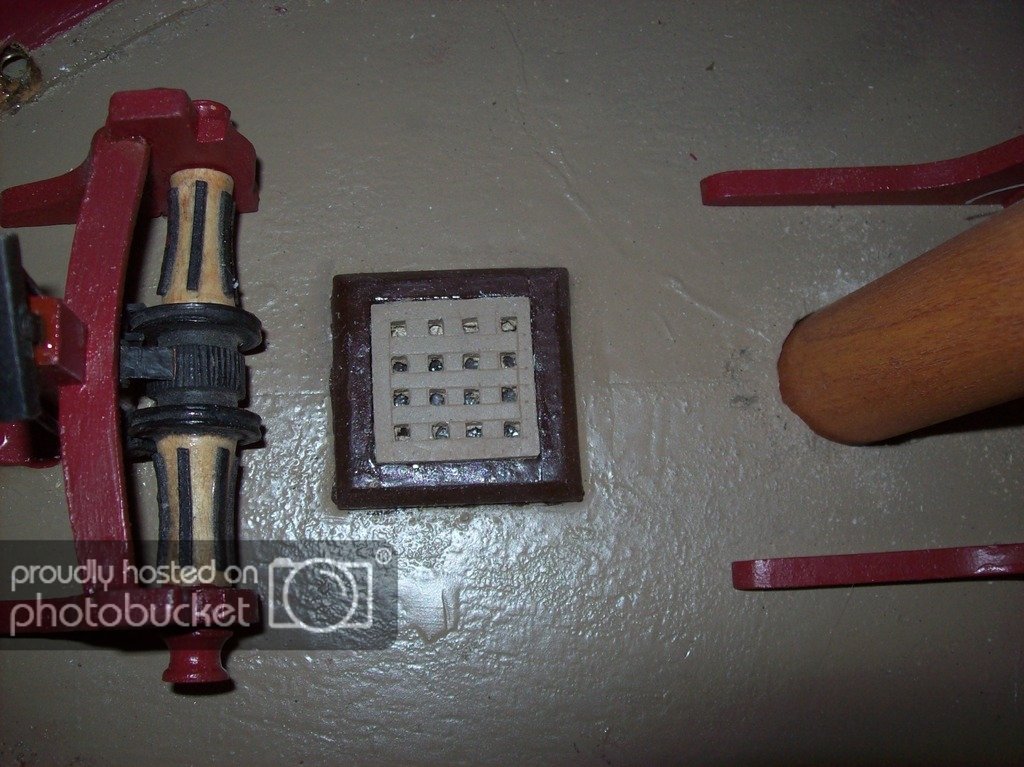
I have got back to work on the Byzantium and have made the rest of the gratings aswell as the binnacle. The pumps were made last week but forgot to post about them and this time I forgot to take pictures of them but you can see one in one of the other pictures. The compass was made from a .45 cal. shell and a .38 cal. shell, the lamp from a .25 cal. shell and the chimney from a .22 cal shell. I still need to paint the binnacle but other then that it is finished.
I have also changed the ladder hatch to only have one ladder and a grating over the other side.

Lextin.
-
-
-
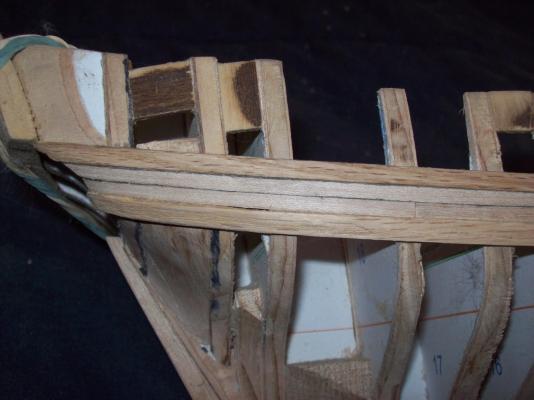
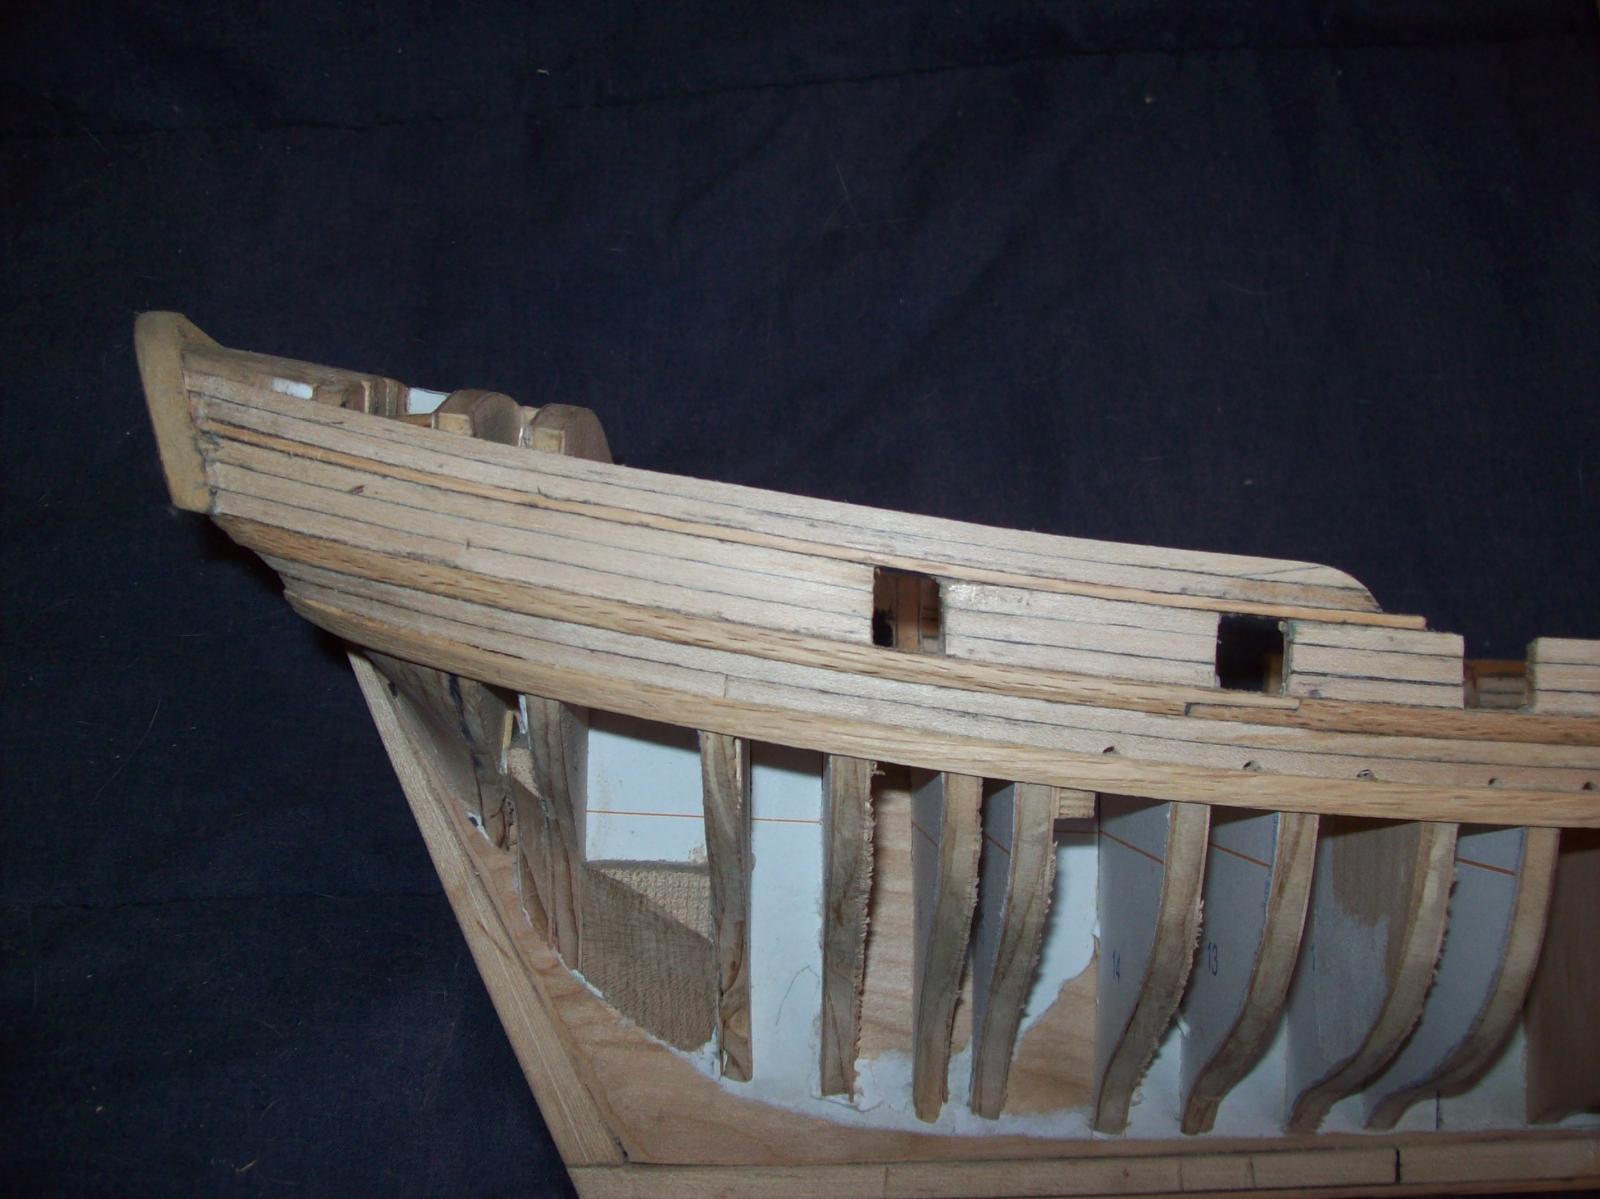
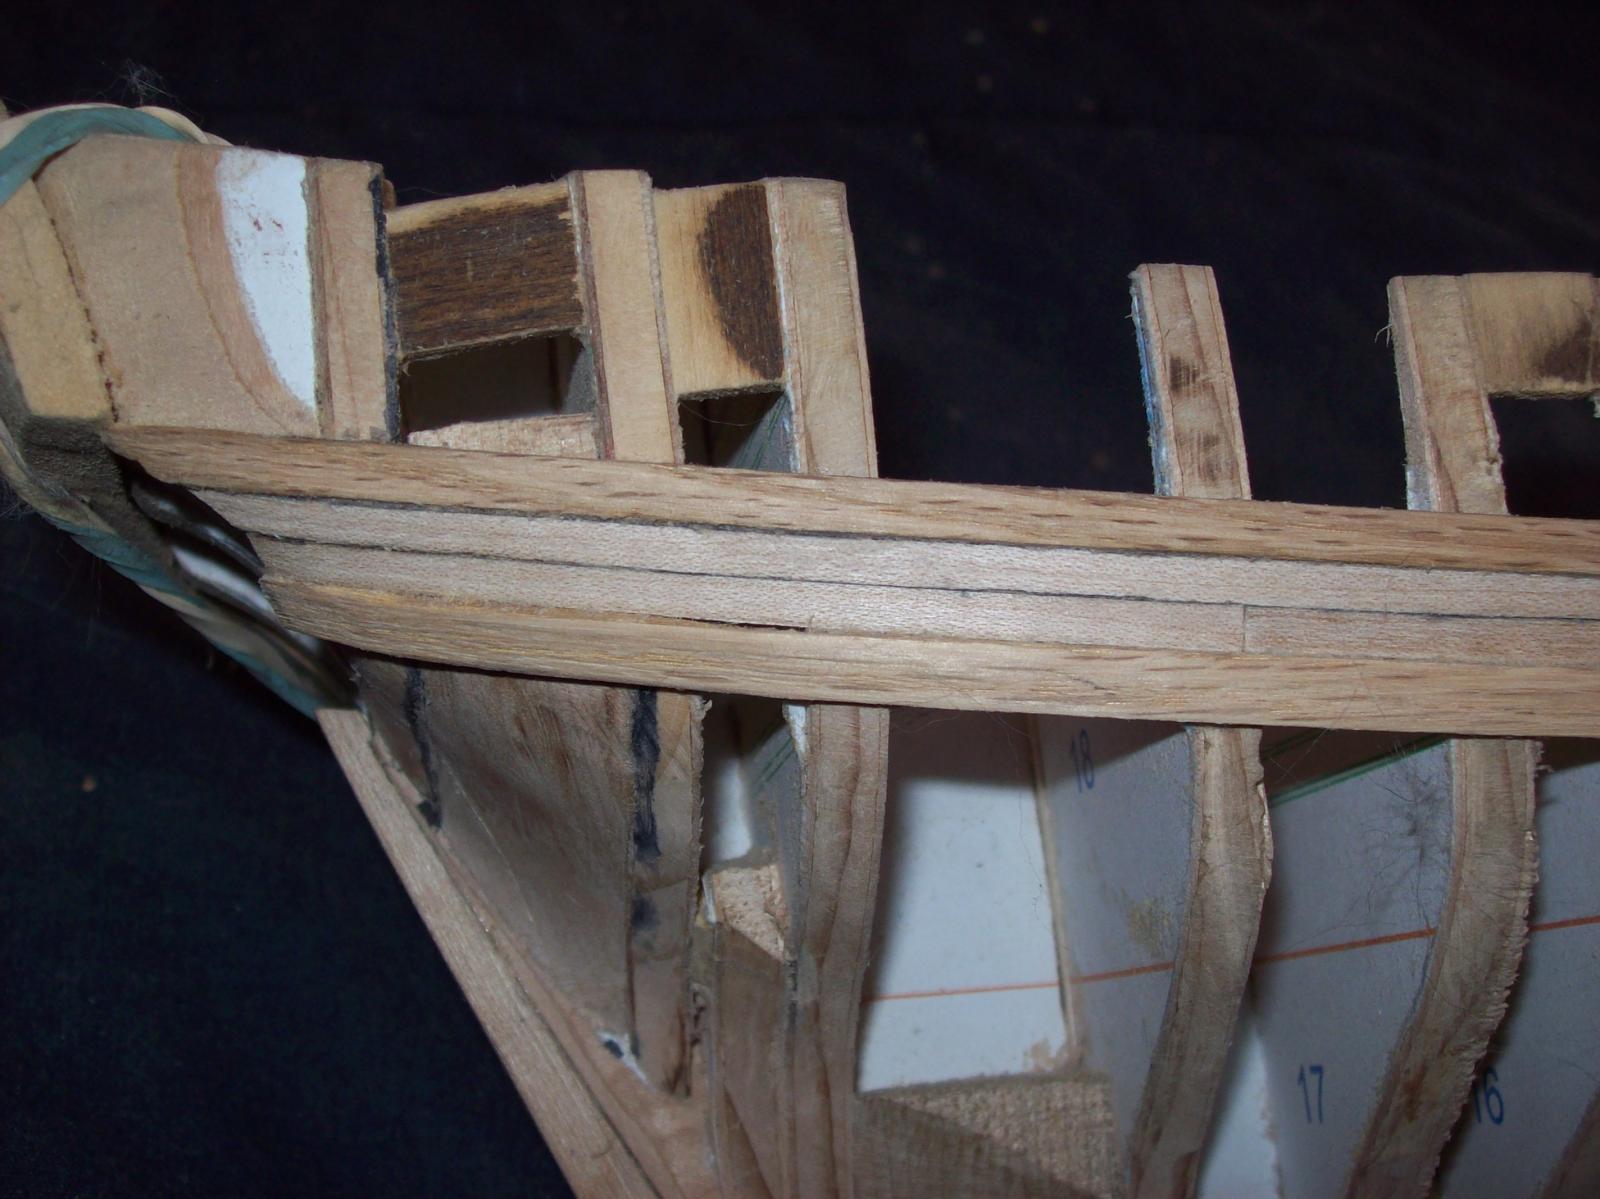
The lower wales (18:00 hours)
Today I made the lower wales, they were made in much the same way as the upper ones except that they where aligned against the planks above them. rather then by the gunports. I also fixed the port side upper wale because it was bugging me. The normal thickness planks are made from cherry which doesn't bend as well as the oak but because their so thin it don't really matter. The scuppers were made with a round file prier to installing the lower wale.
The first normal thickness plank.

My thickness sander.


Lextin.
-
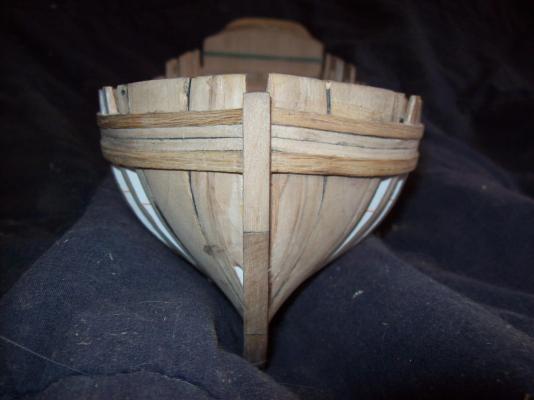
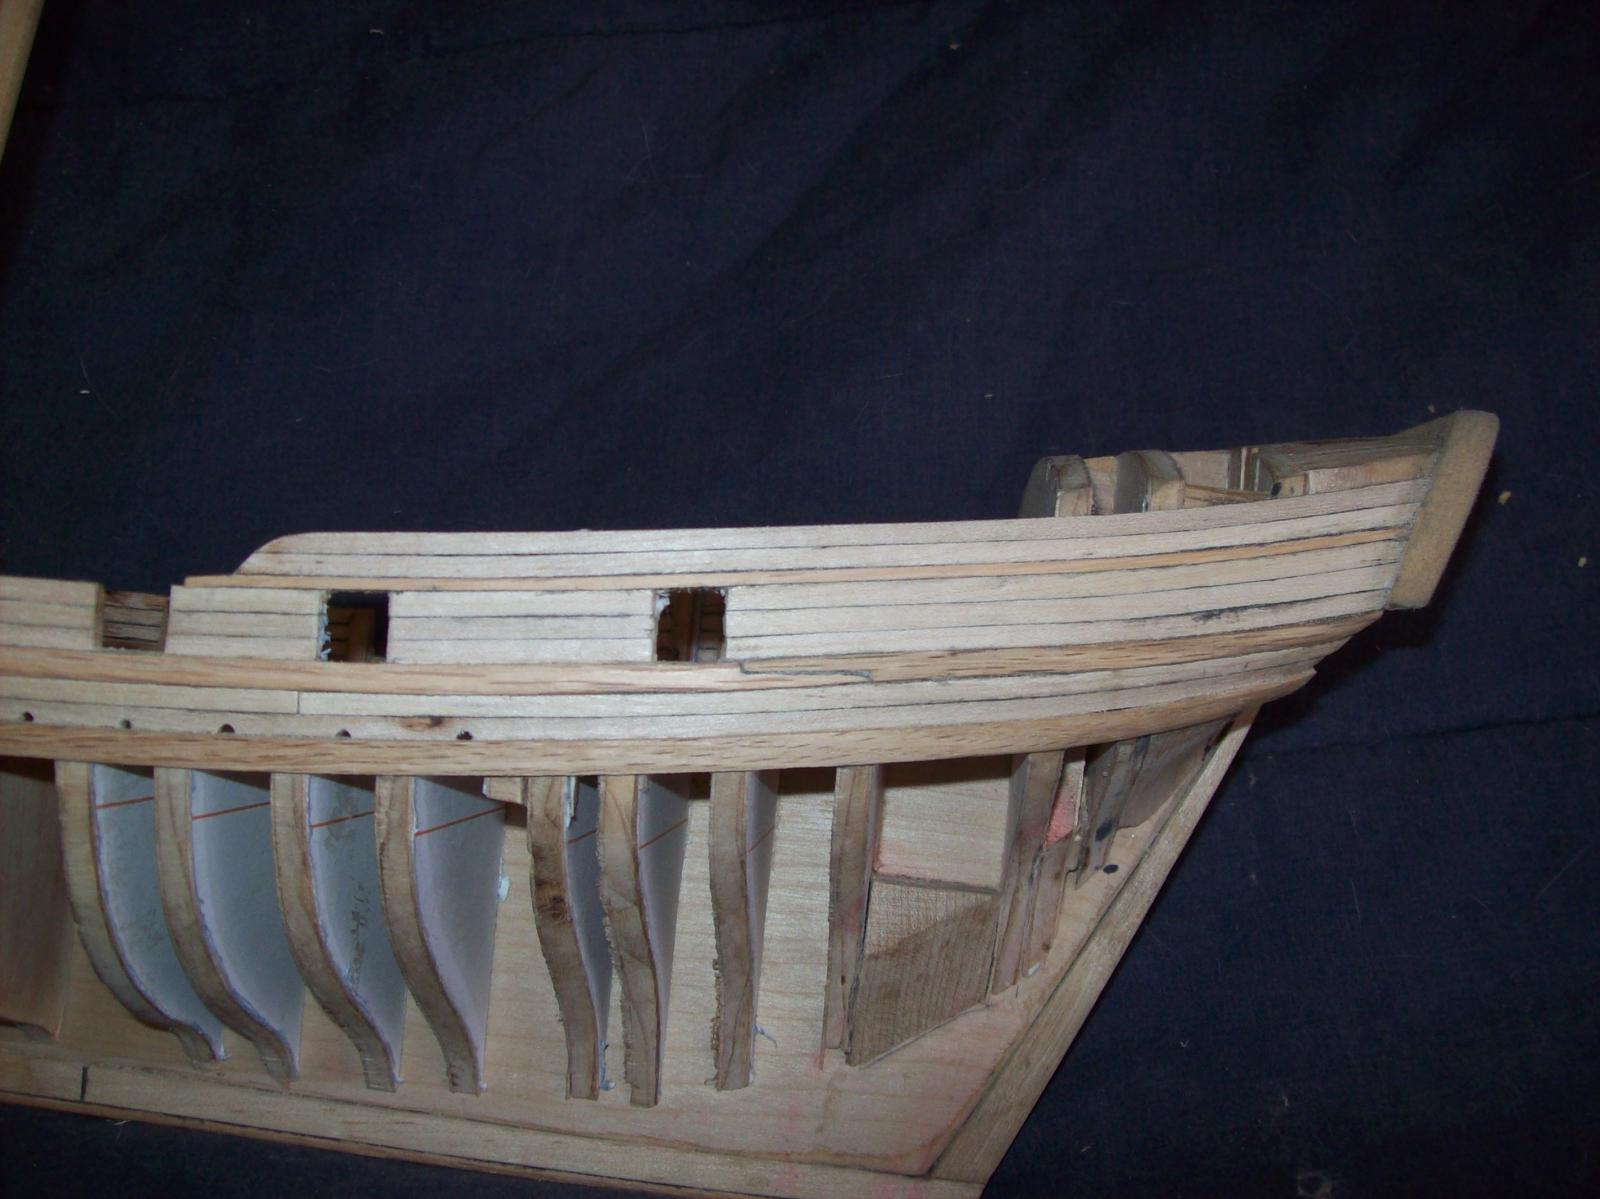
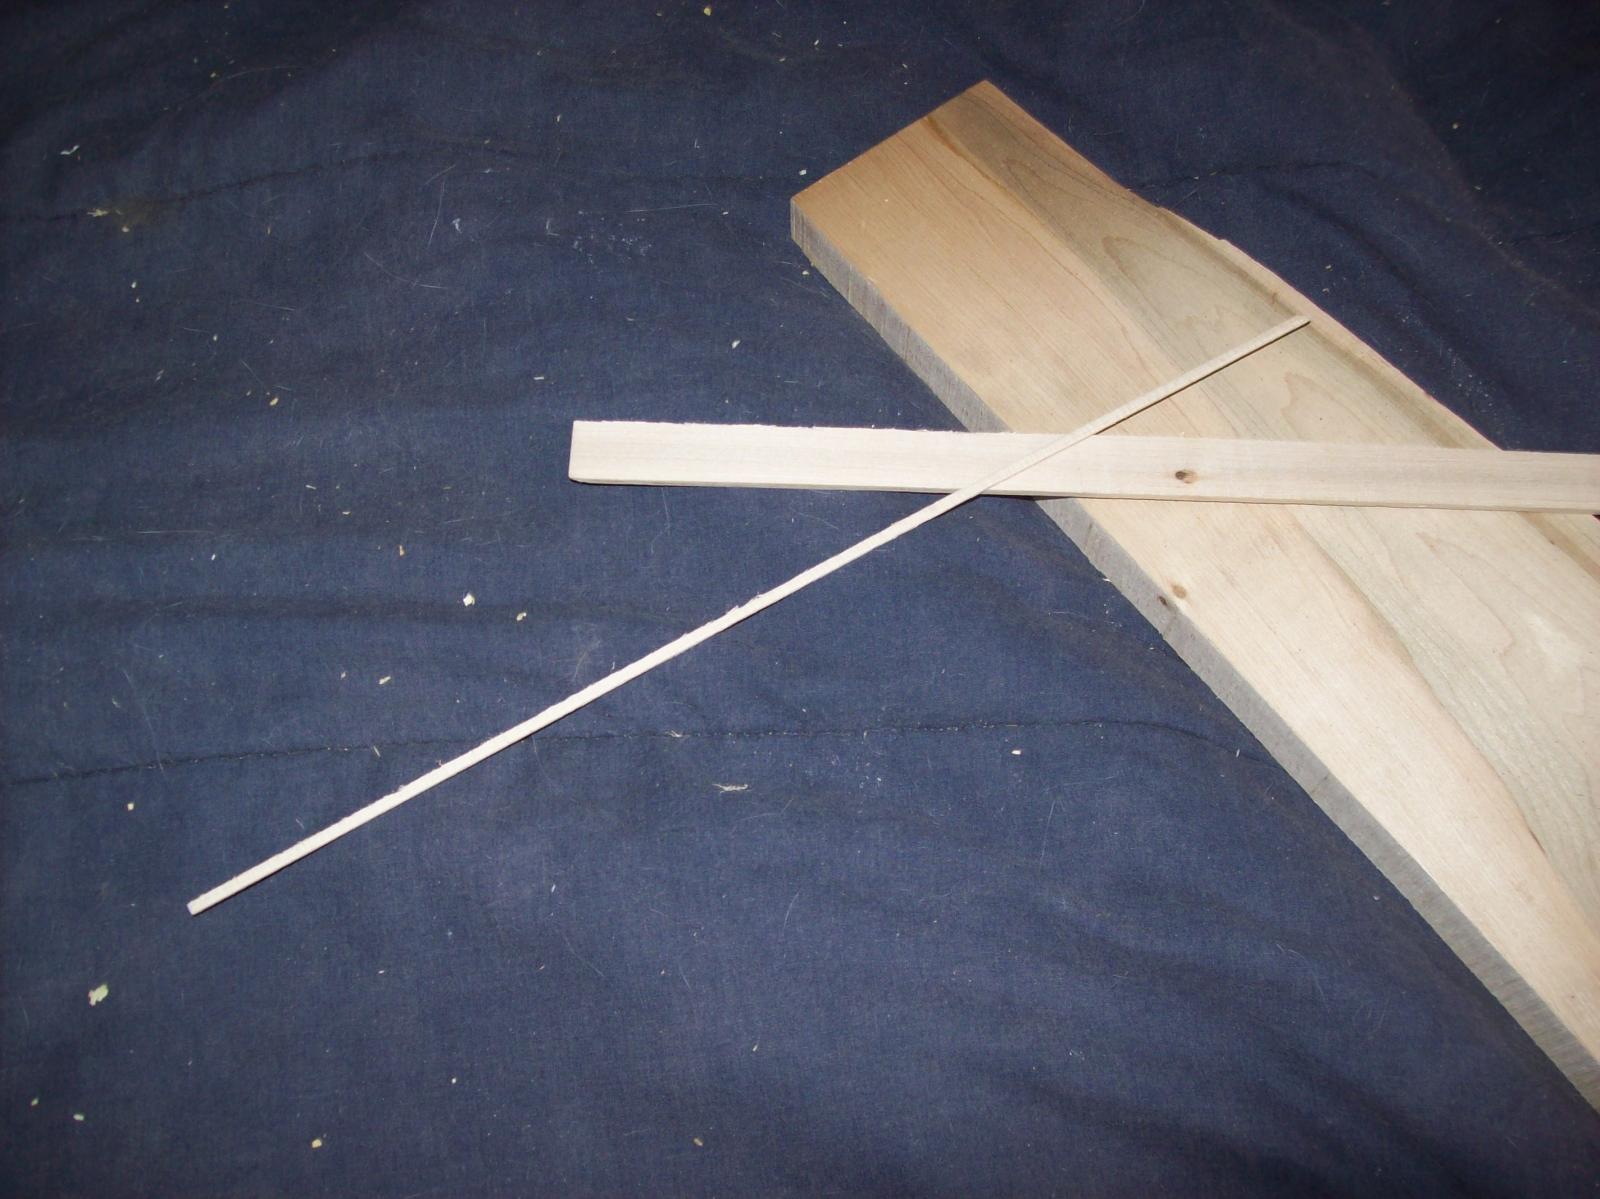
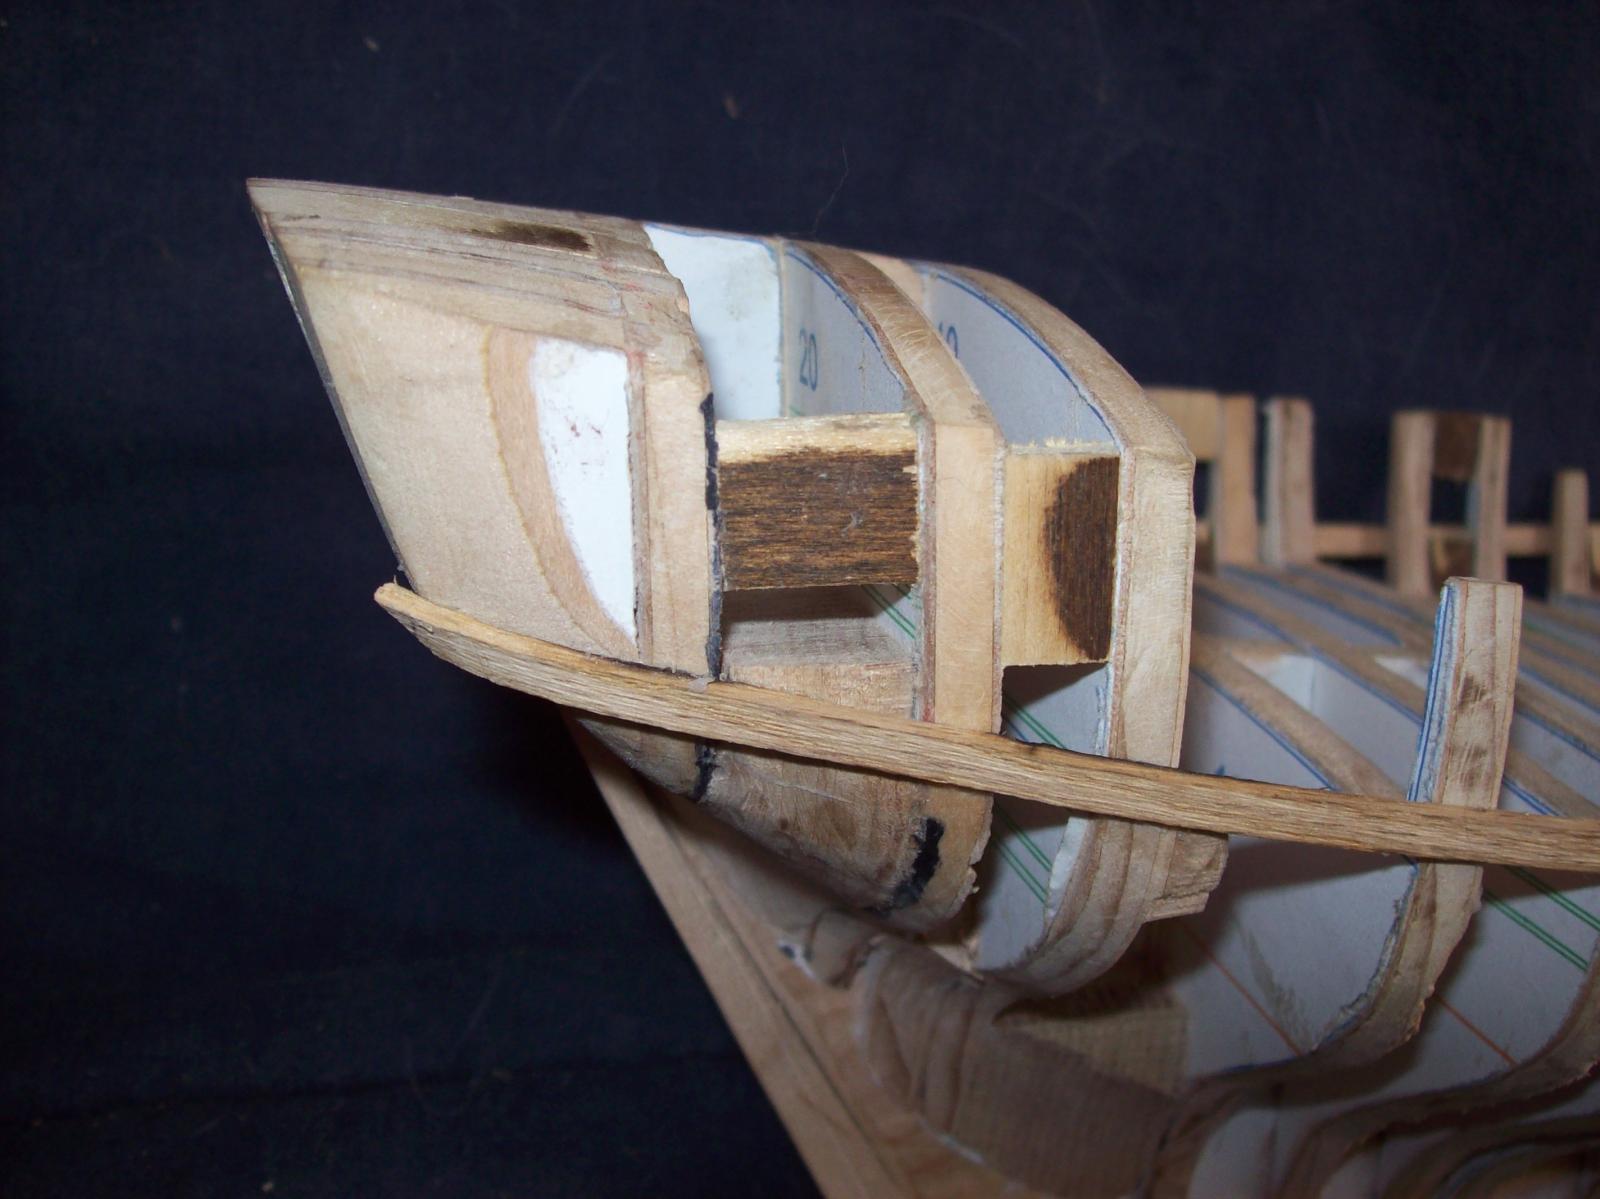
The upper wales: (13.00 hours)
The upper wales were made in order to set the lines for the rest of the planking. I made them by first milling the oak planks on the bandsaw and running them trough my improvised thickness sander to make them uniform thickness. The bends where made by heating the planks over a heat gun (this would make the wood flex as if it were rubber) and and bending with my fingers constantly checking the fit. Lastly they were glued in place with PVA and clamped to dry.
I could have done better on the port side but O-well that's in the past.


Lextin.
-
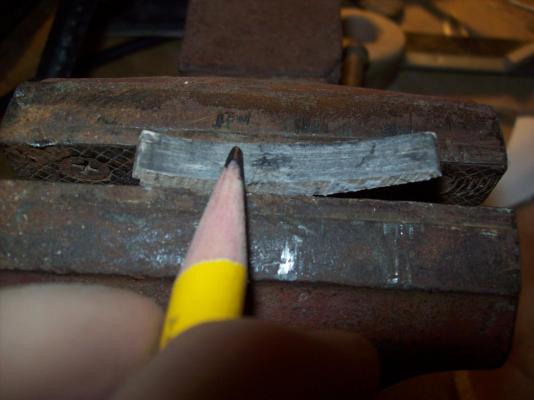
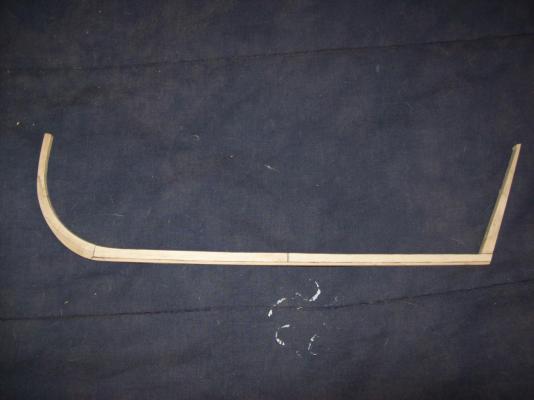
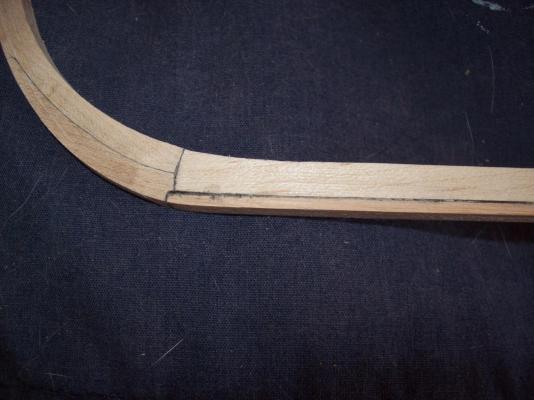
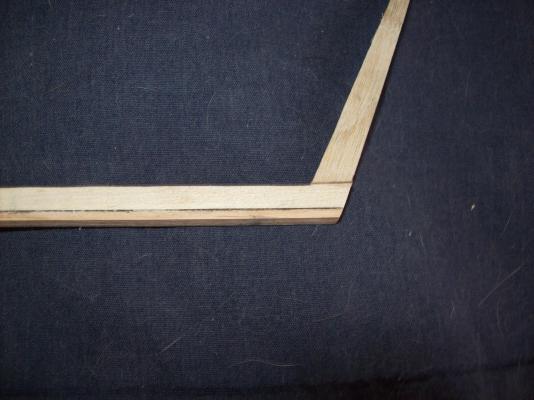
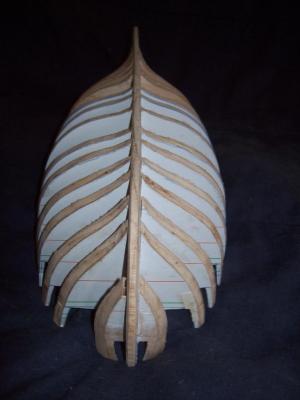
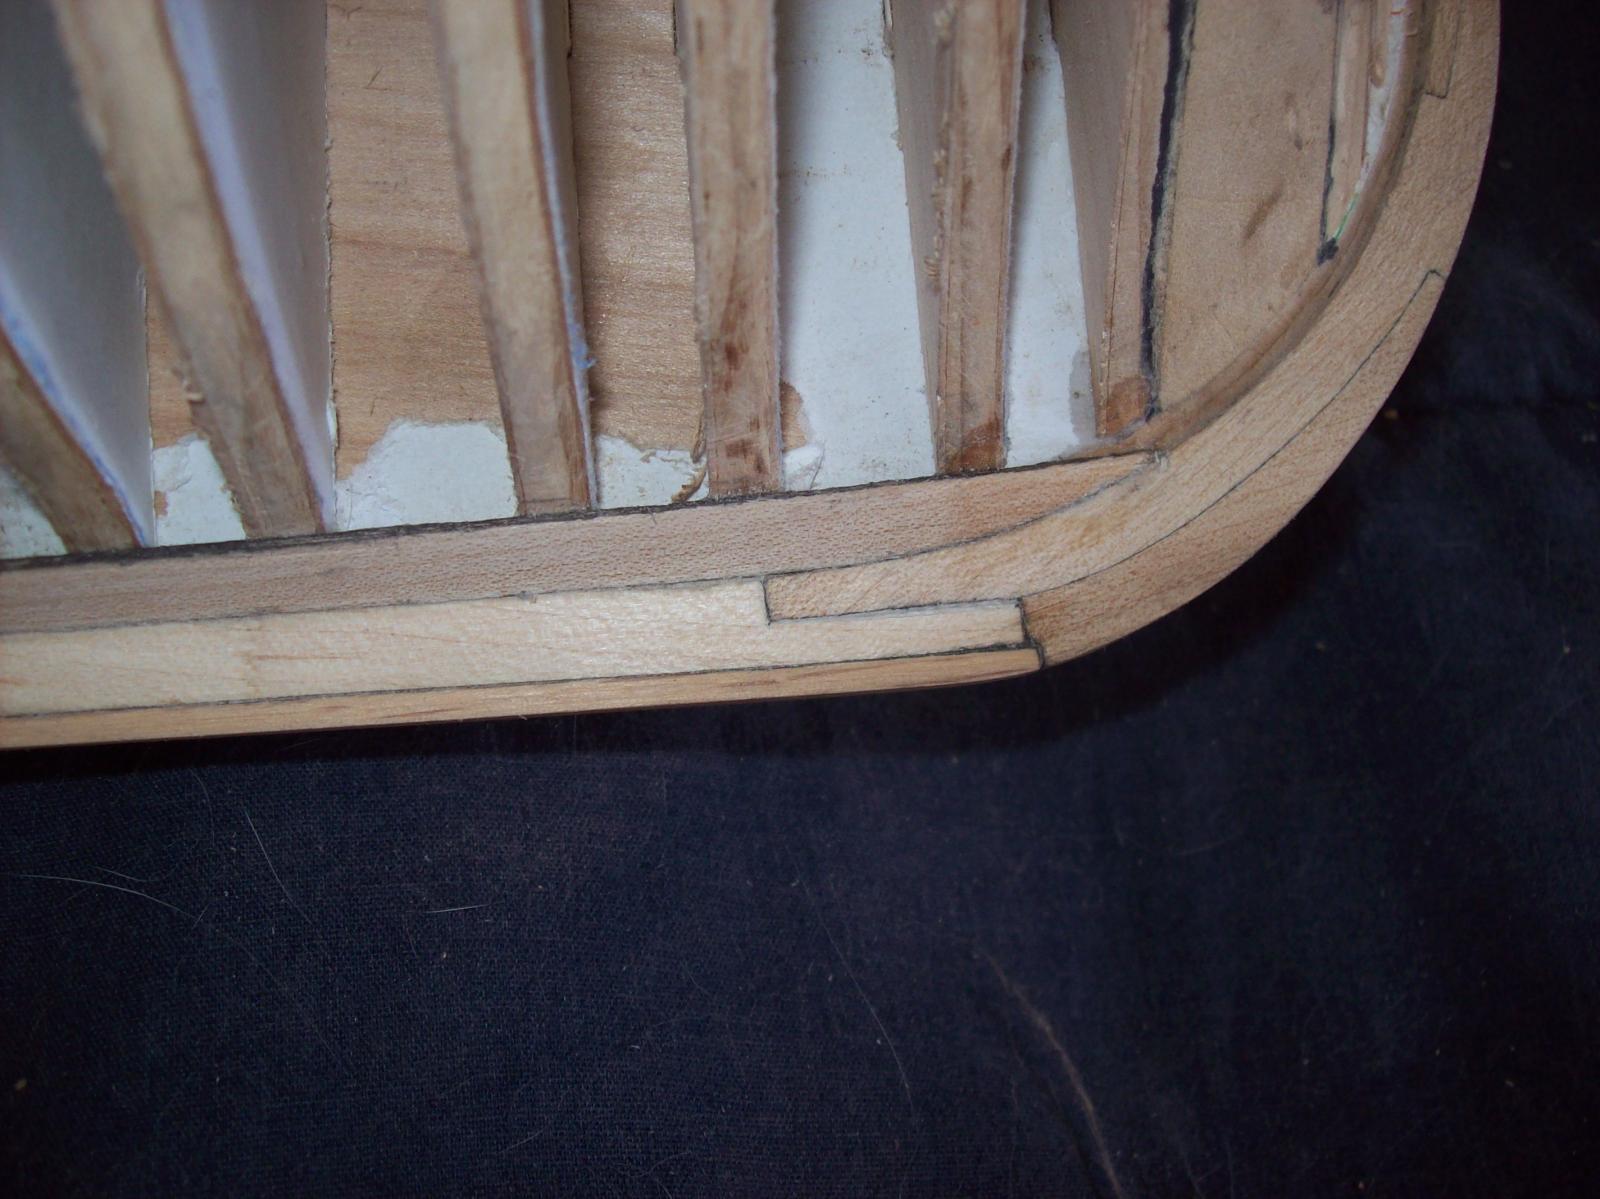
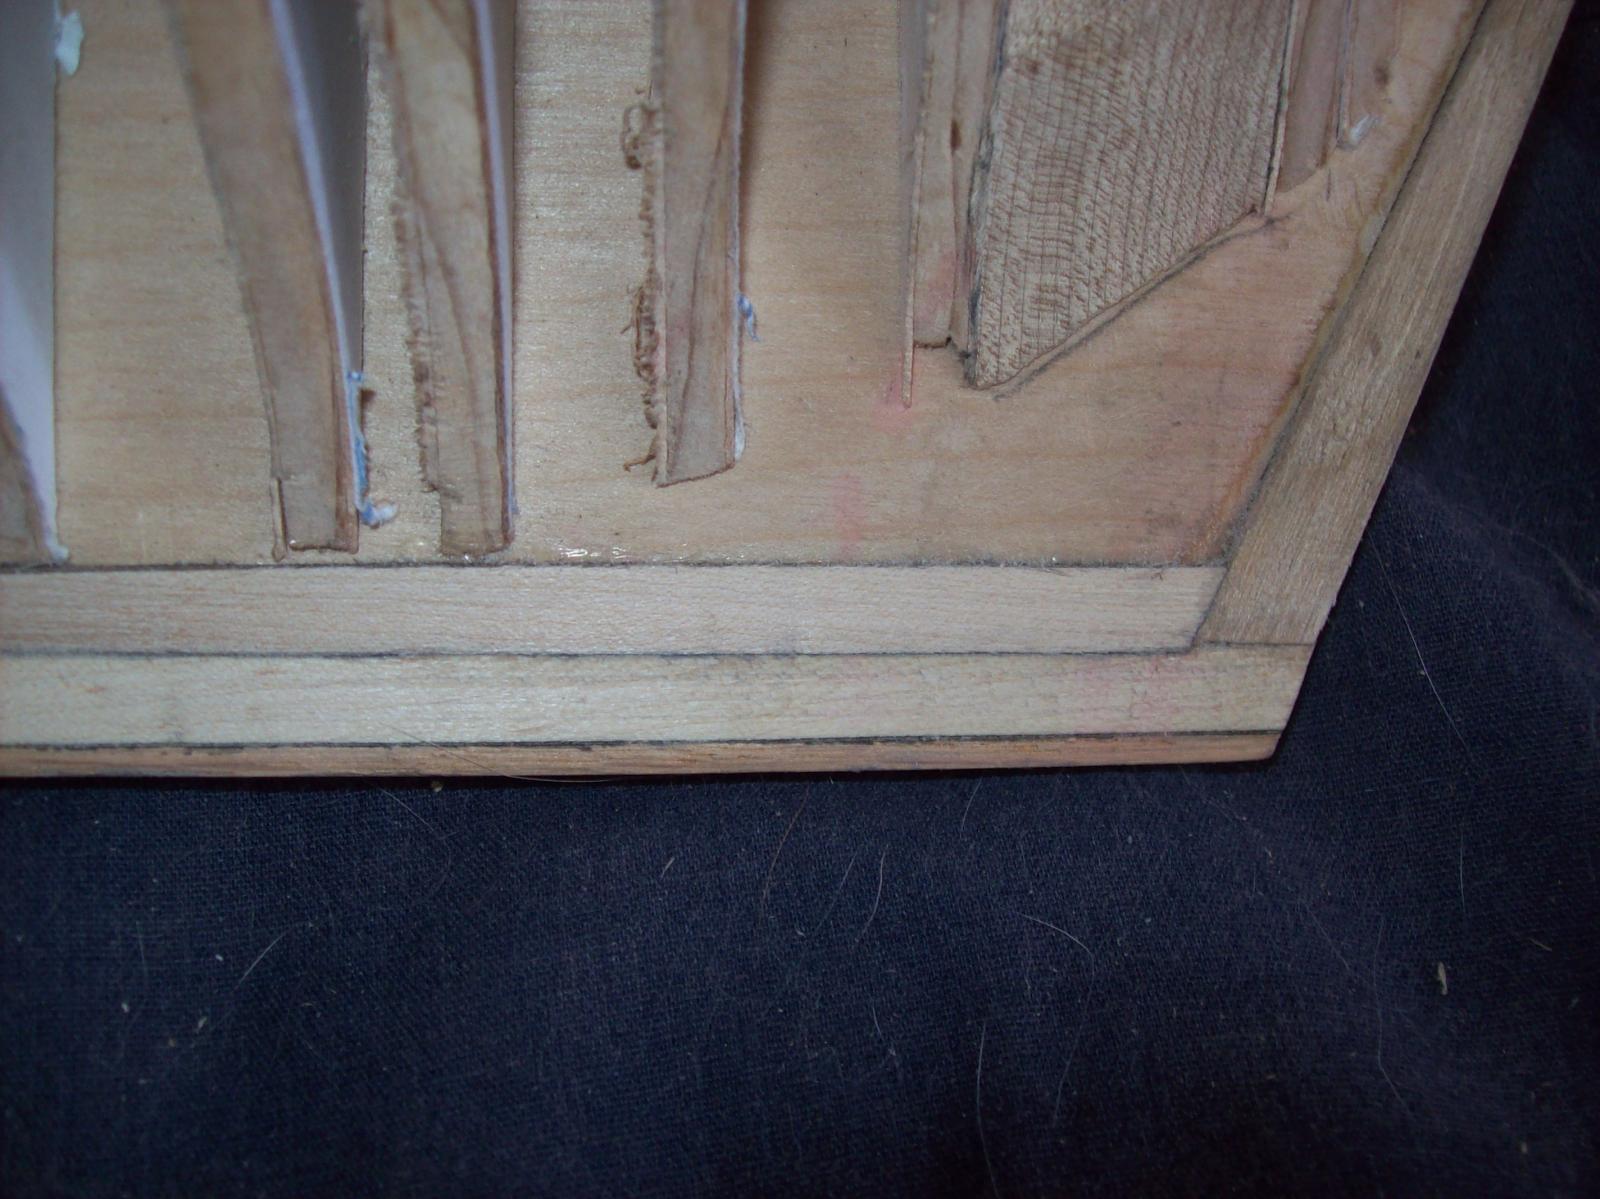
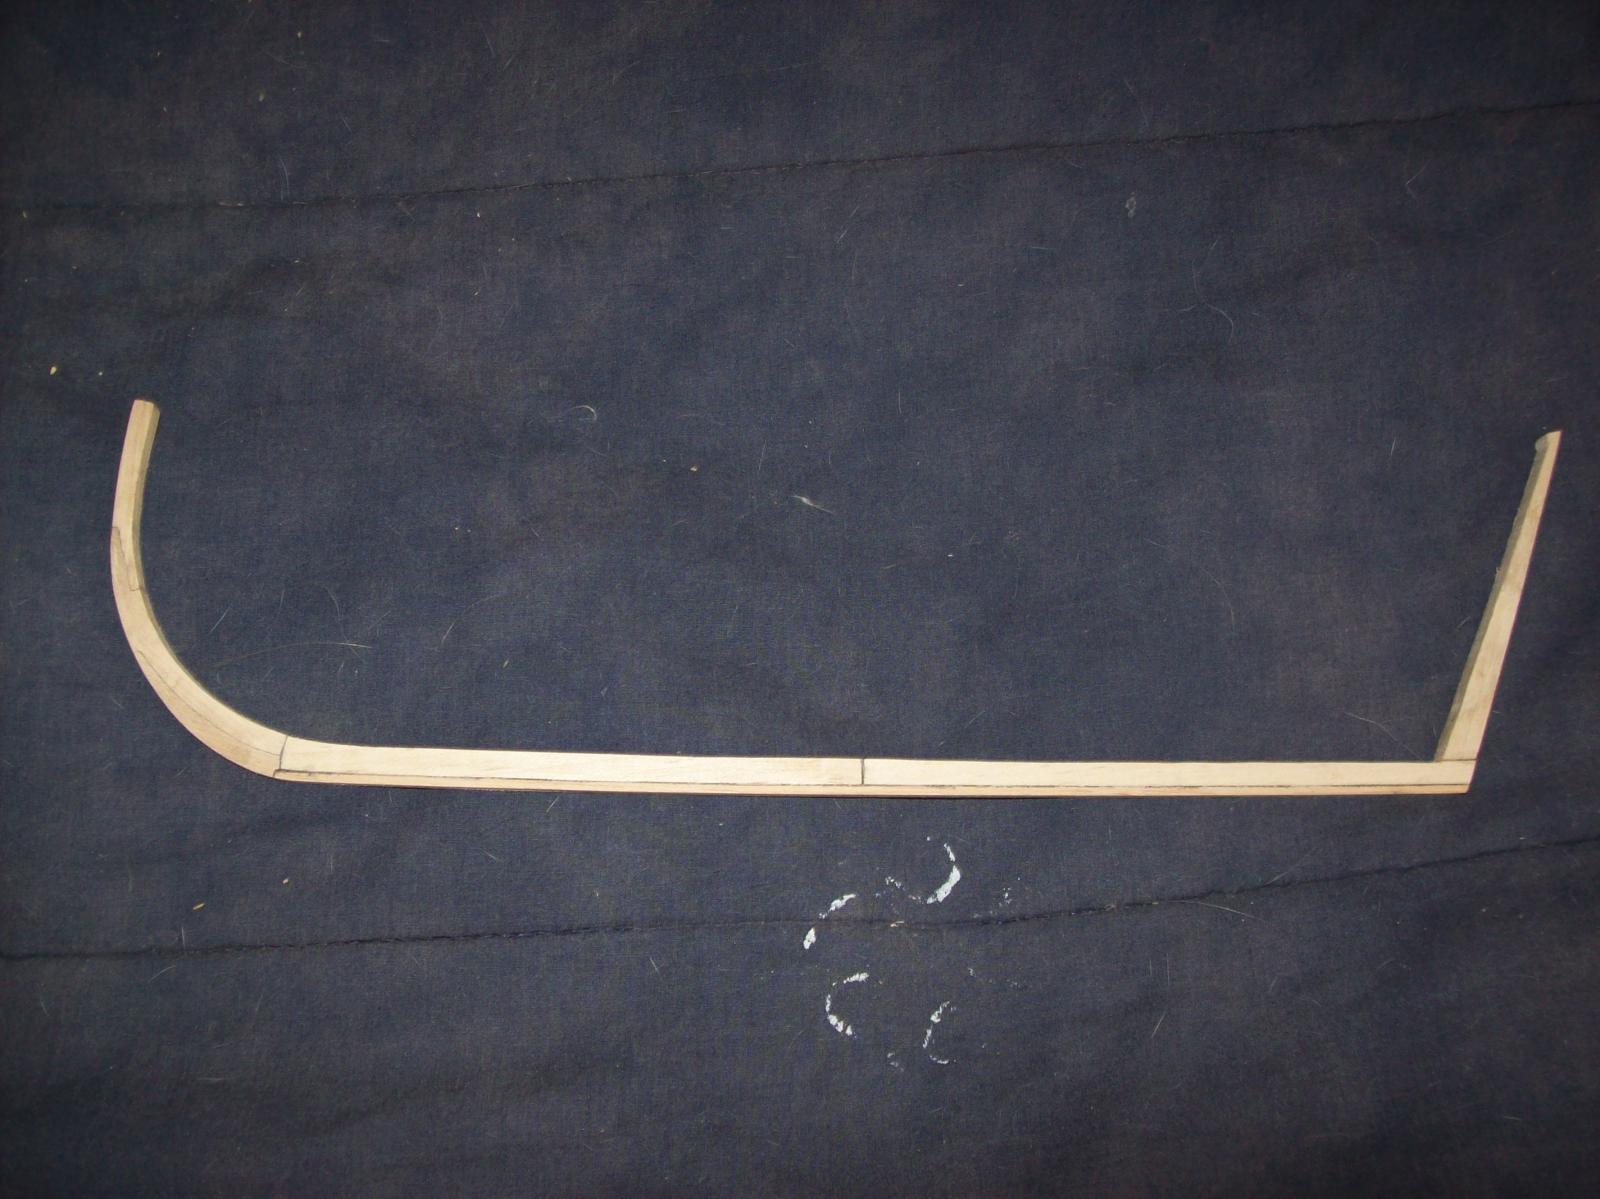
making the keel: (12:00 Hours)
The keel is done. I made the keel from cherry and the false keel from oak. Most the cutting was done on the bandsaw, I used the drum sander in the drillpress to sand the pieces right up to the lines then used a file to make the joints fit perfectly. I simulated calking by rubbing pencil on the inside of the joints prier to gluing. The entire keel was glued in place so that planking can commence.

Lextin.
- mtaylor, sonicmcdude, egkb and 4 others
-
7
-
-
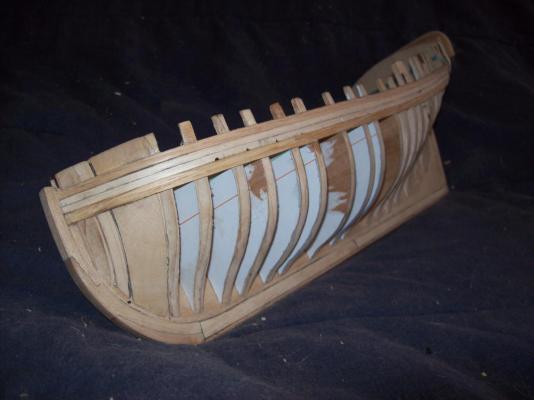
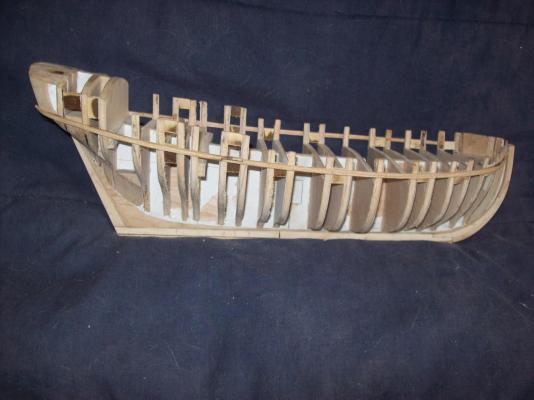
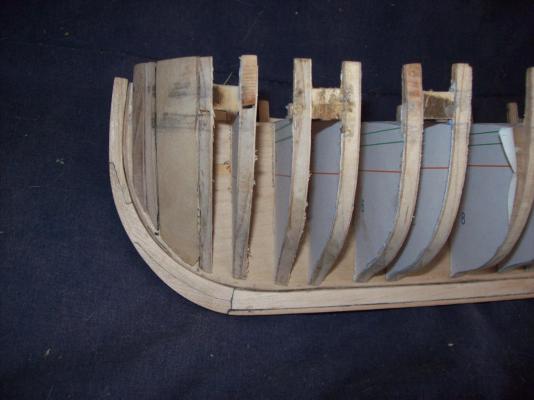
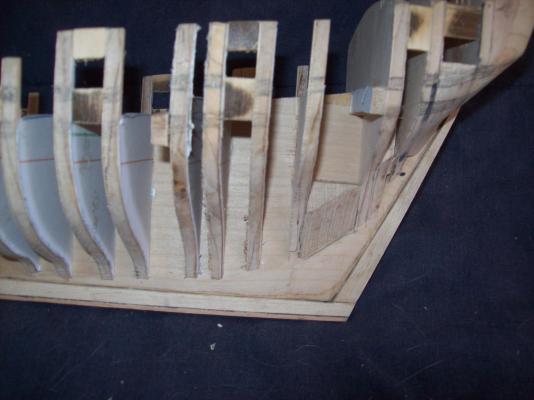
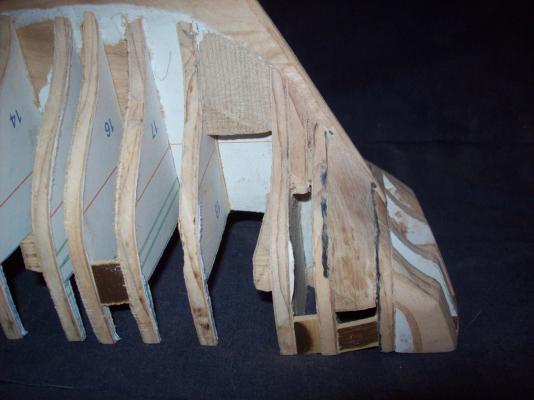
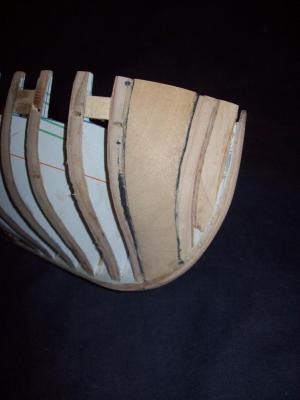
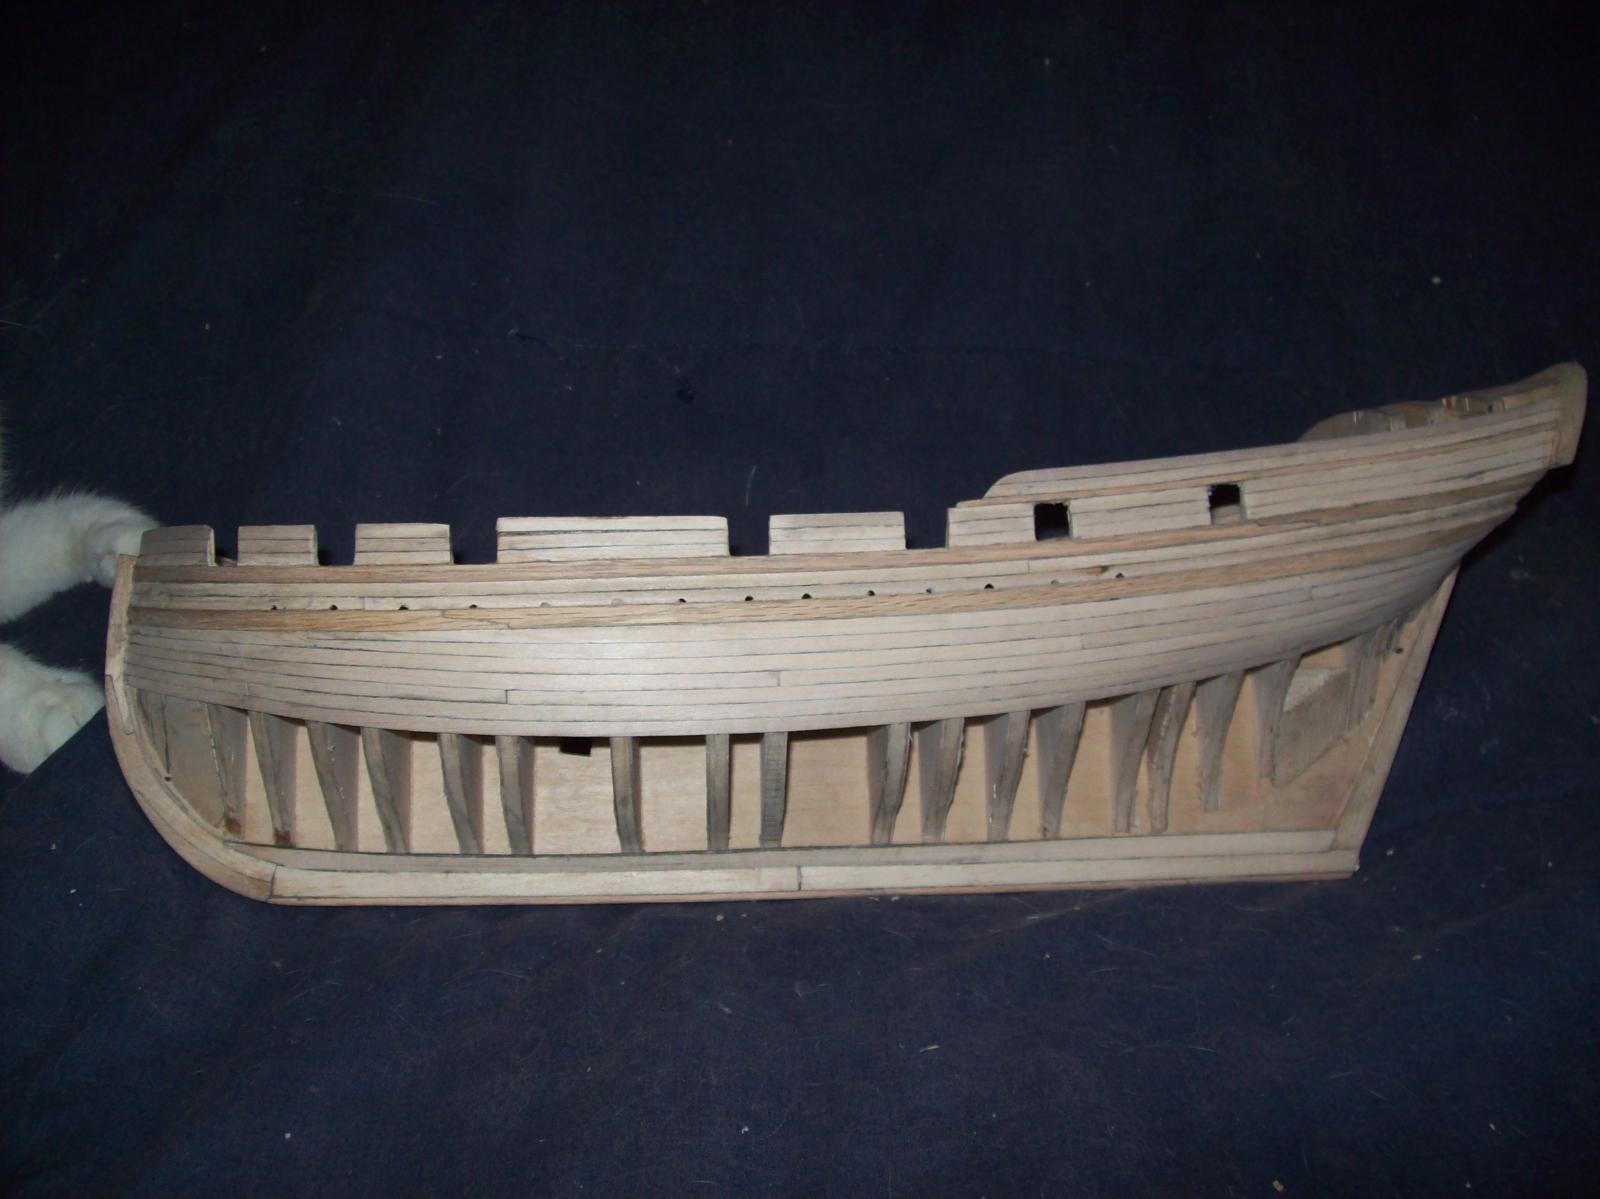
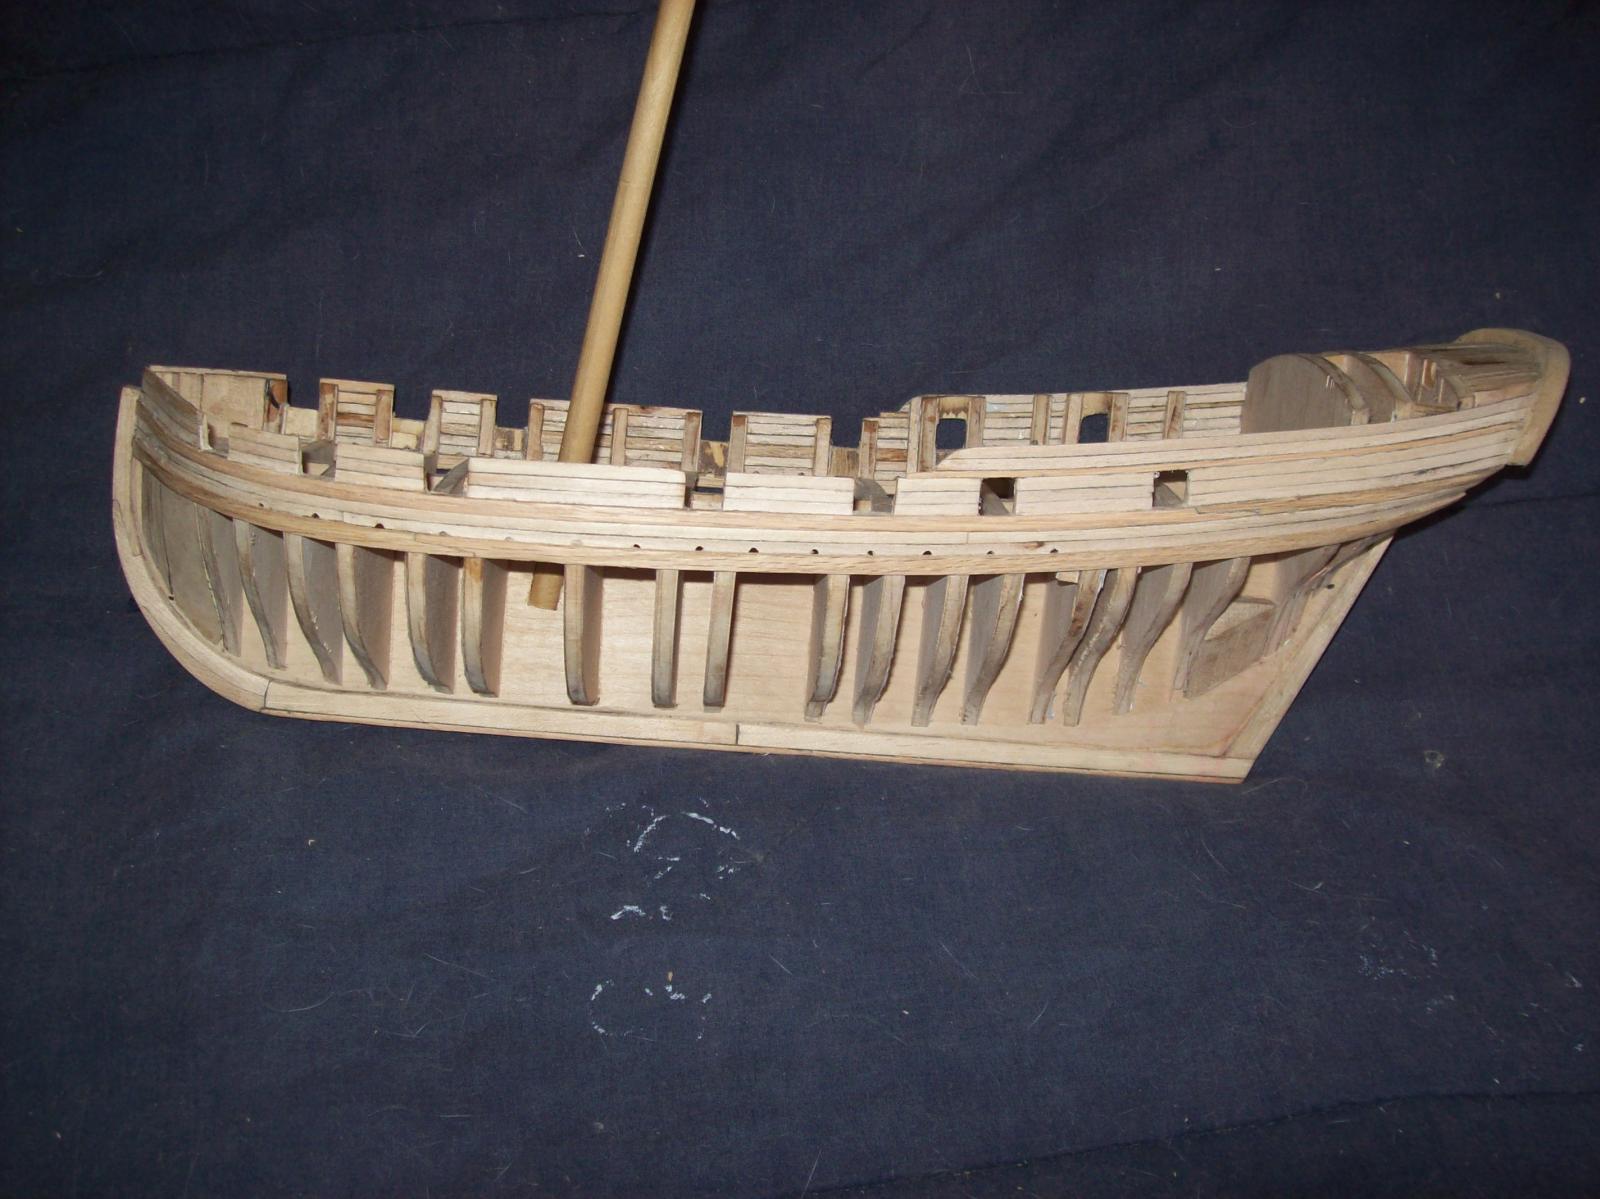
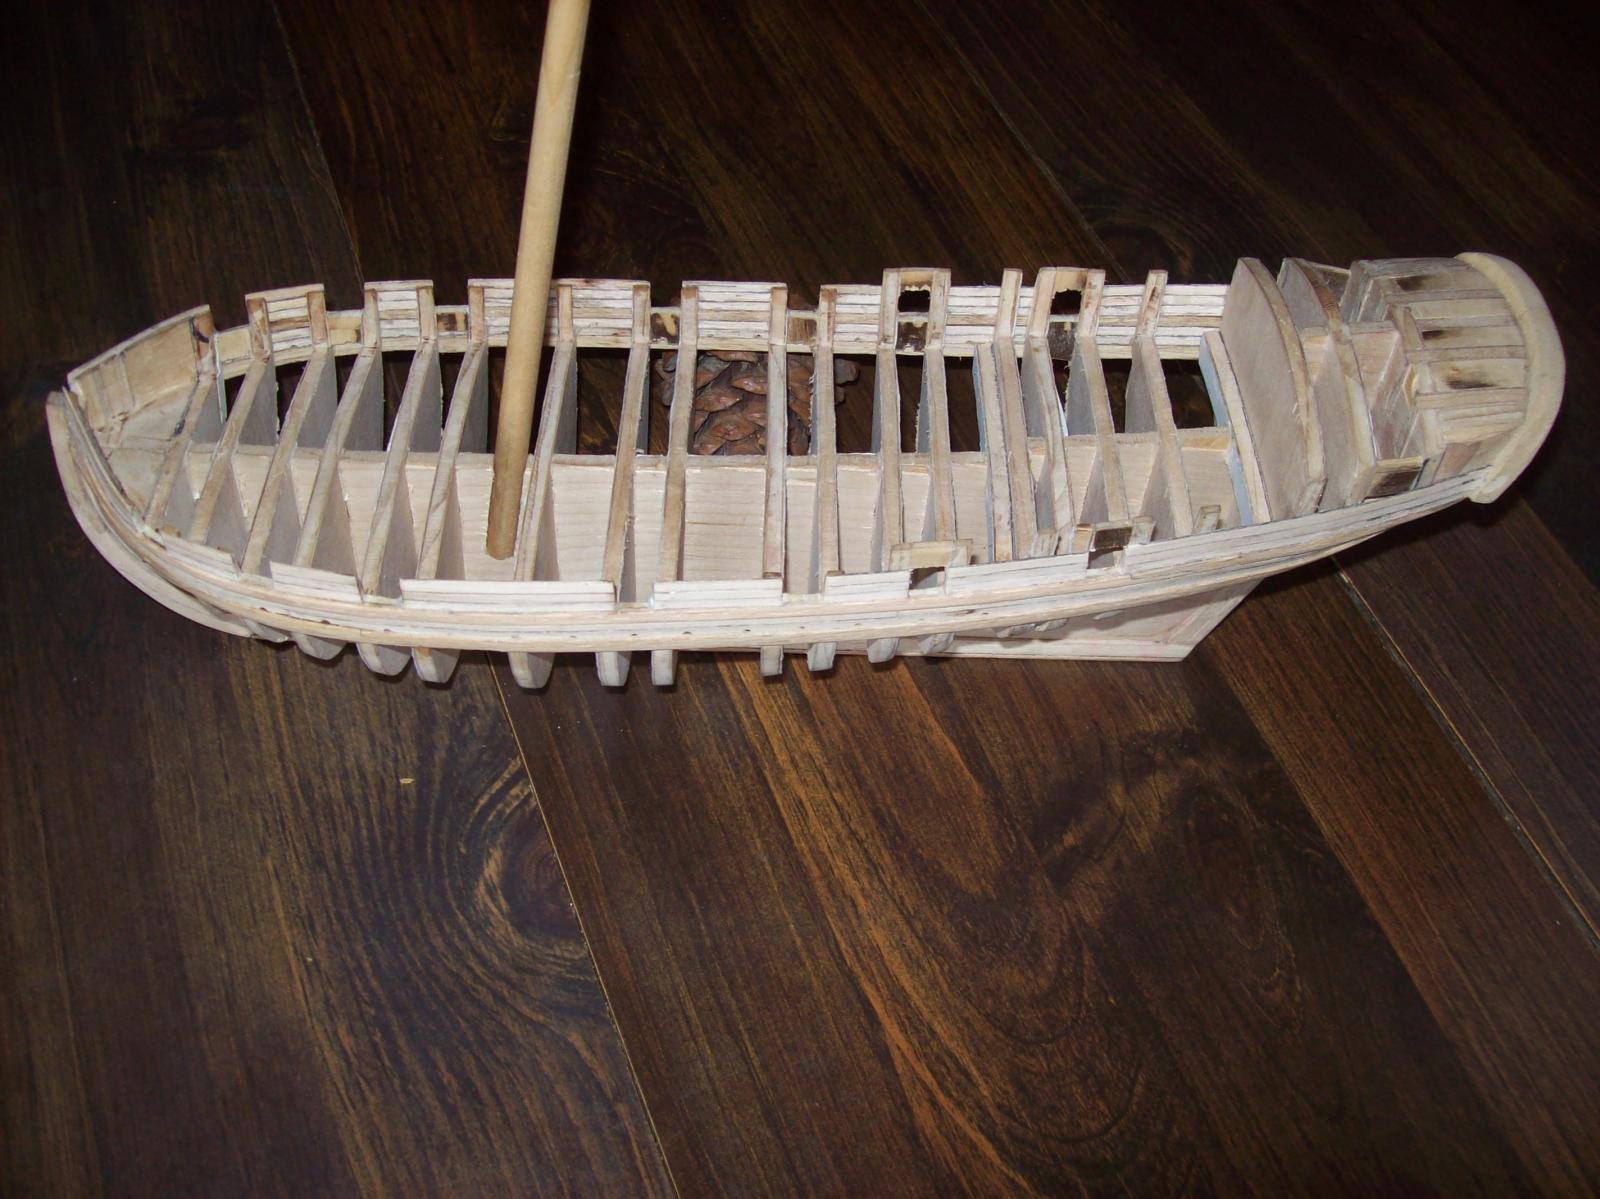
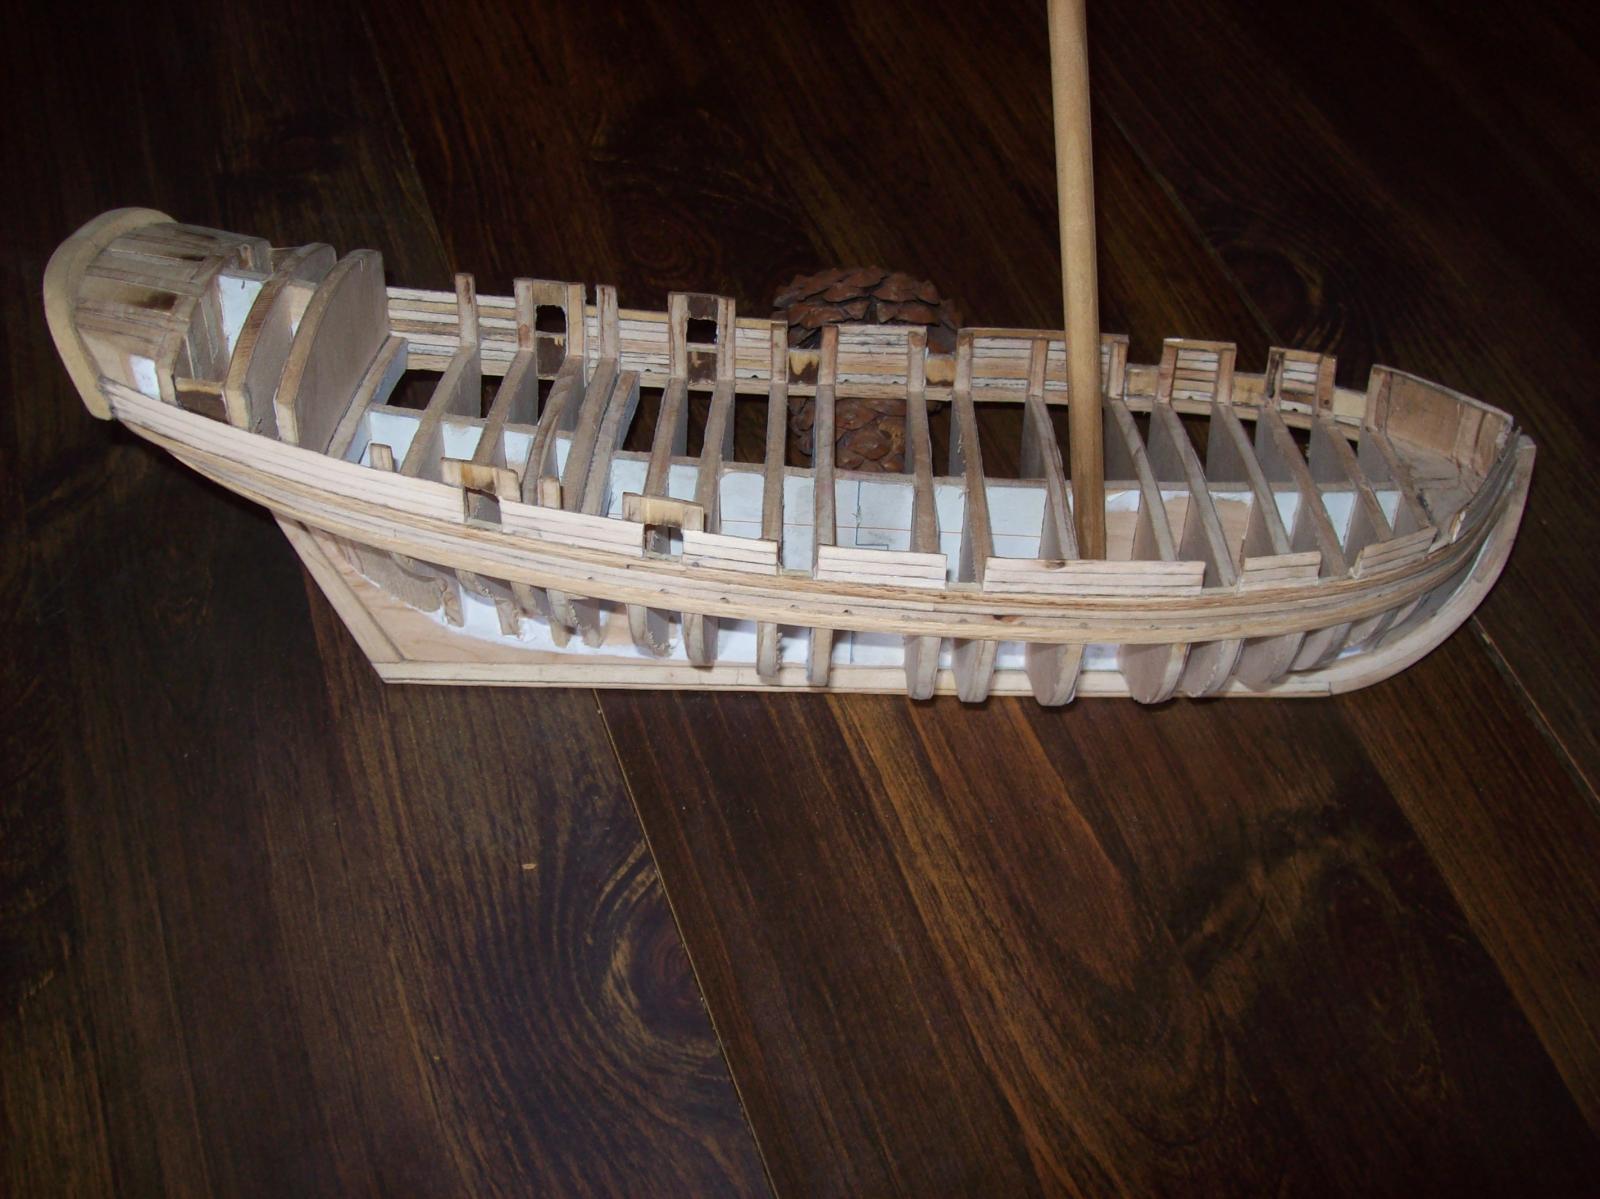
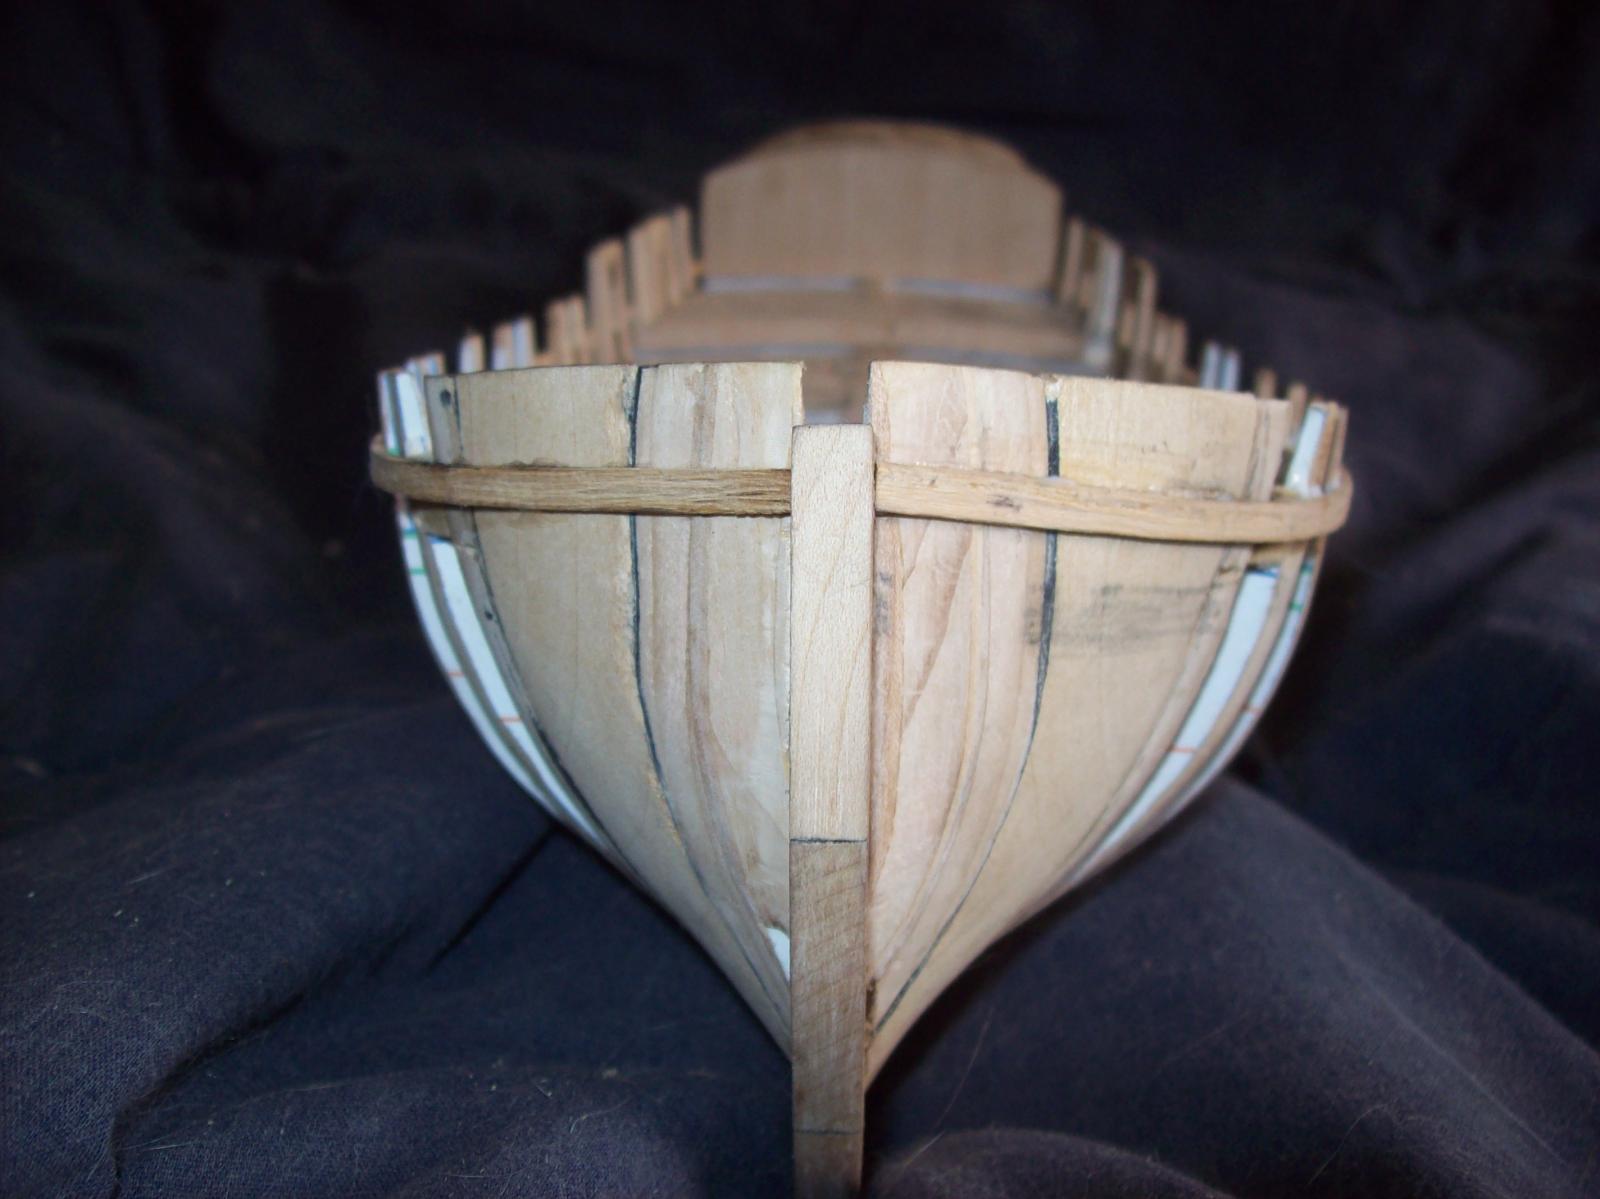
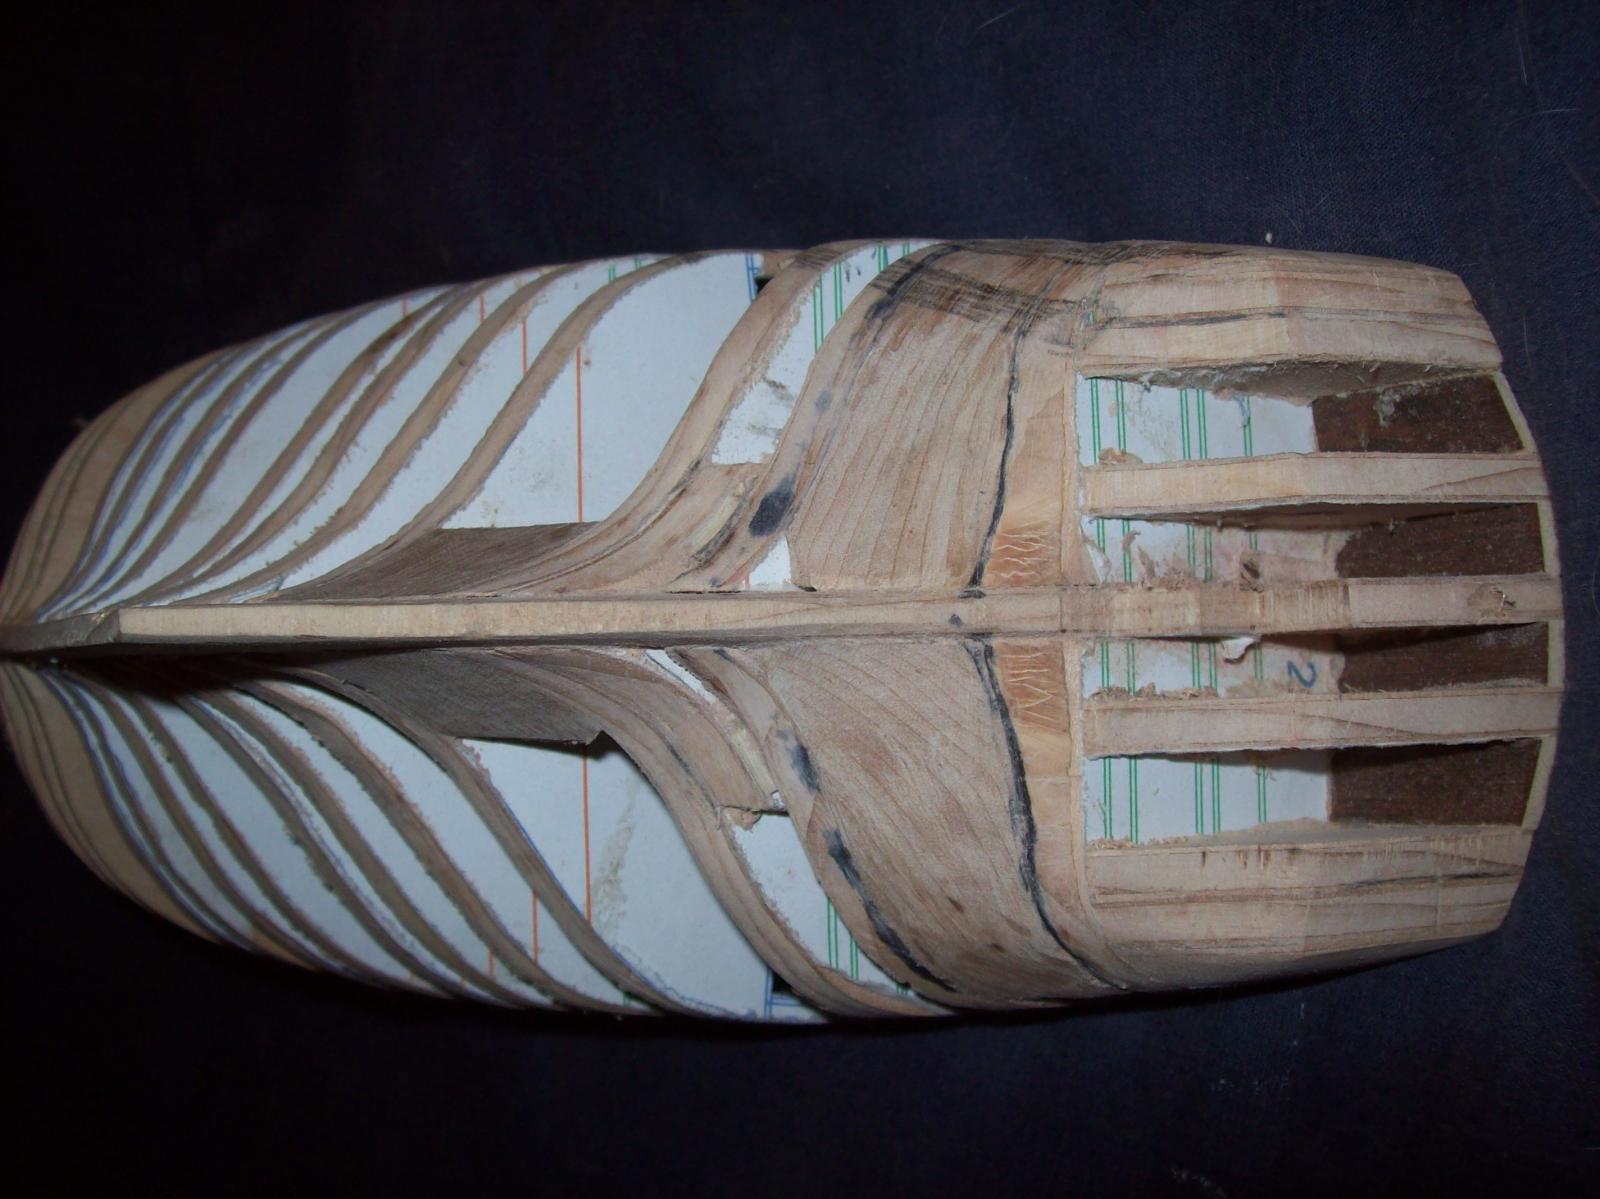
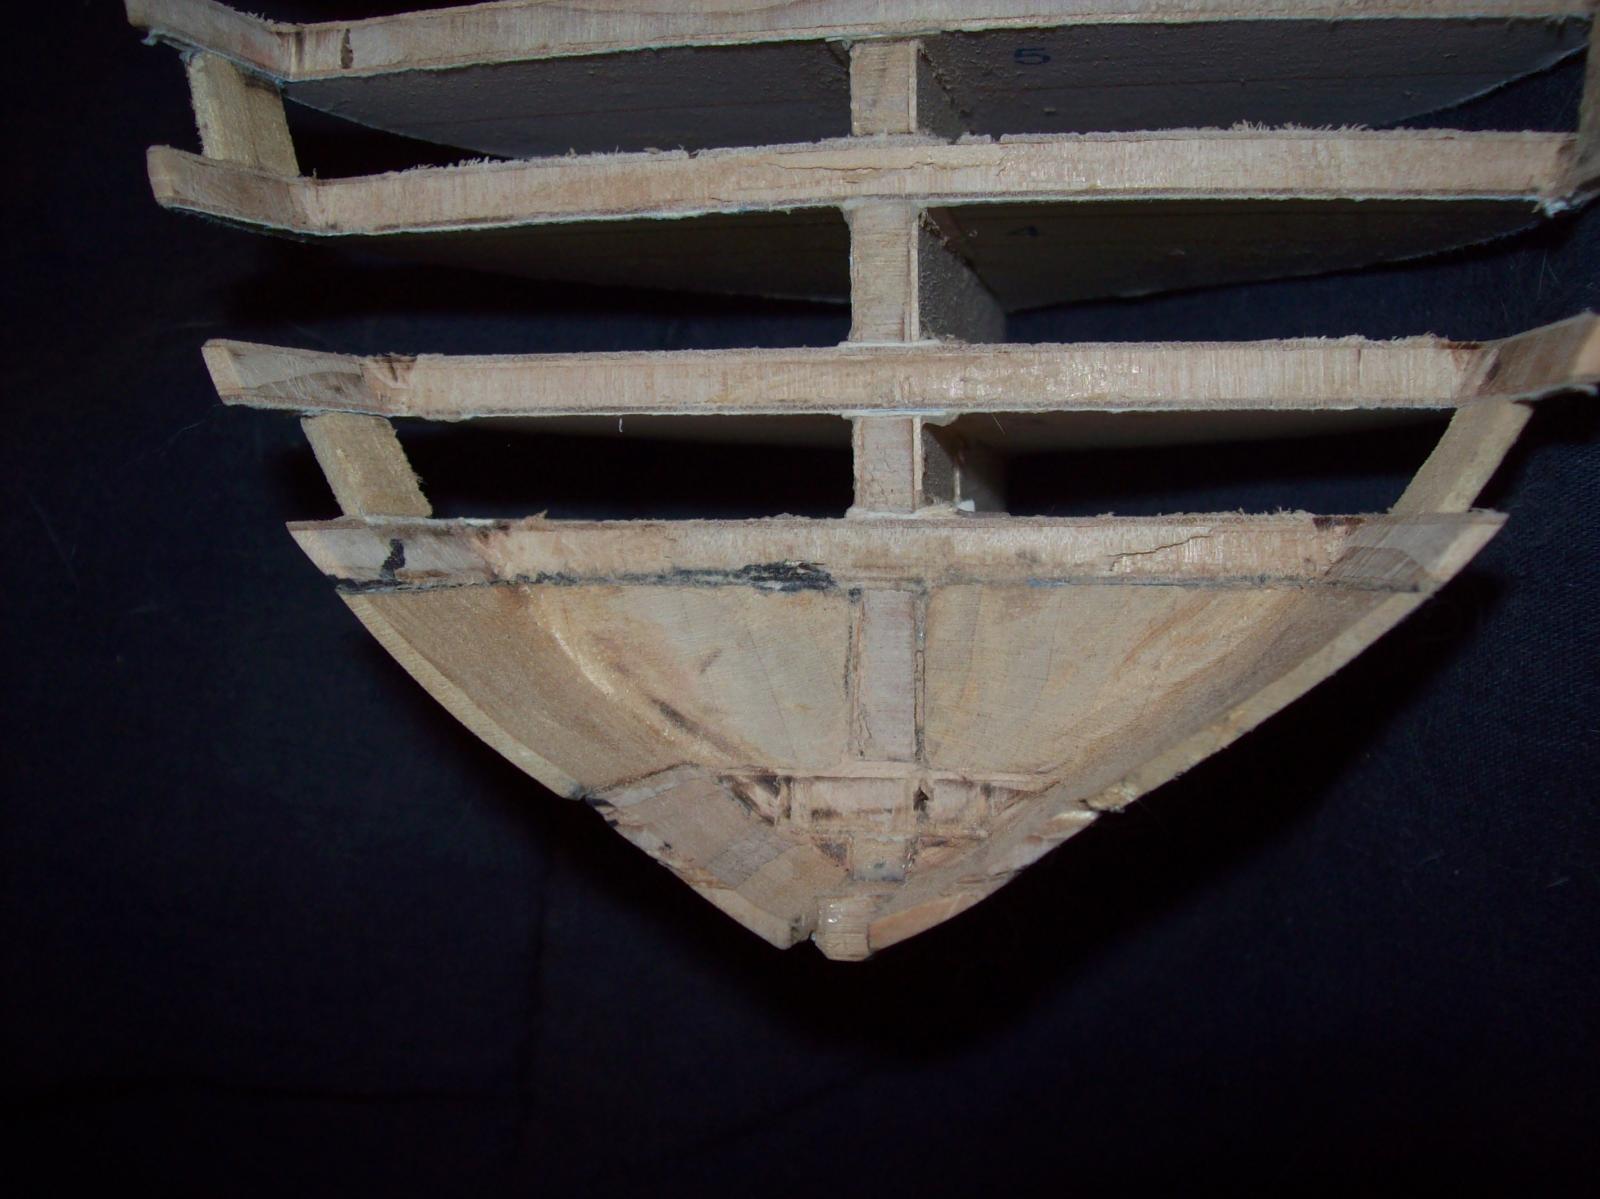
Filler Blocks: (8:00 hours)
I made the filler blocks for the bow and stern as well as the gunport sills. The sills where made by cutting a strip of wood to the with of the gunports and using the miter box to cut them square, then they where beveled to fit the openings and glued in place. The filler blocks where made by first marking the shape on a scrap piece of wood then cutting rasping and finally sanding them flush with the bulkheads. After everything was in place I went over the entire hull with a palm sander (Black and Decker Mouse) now I am down to the part where I just want to run my fingers along it feeling how smooth and even it is.


Lextin.
- sonicmcdude, IgorSky, egkb and 1 other
-
4
-
-
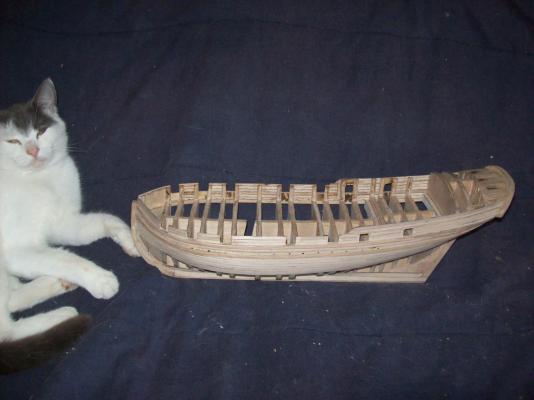
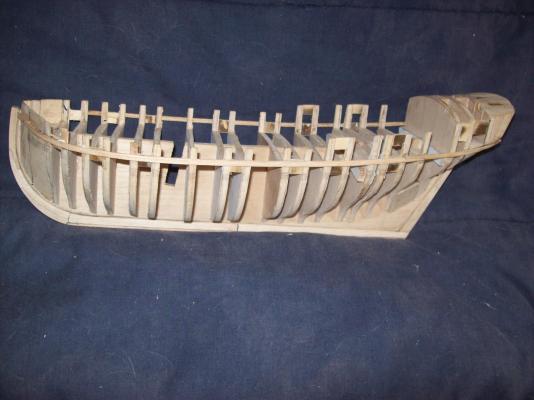
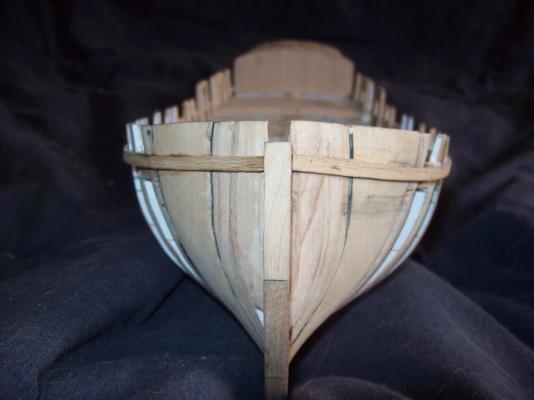
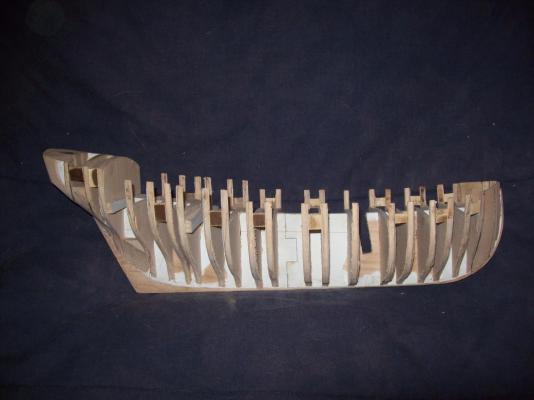
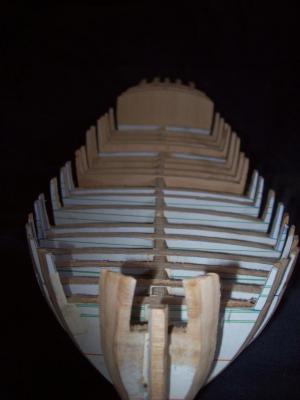
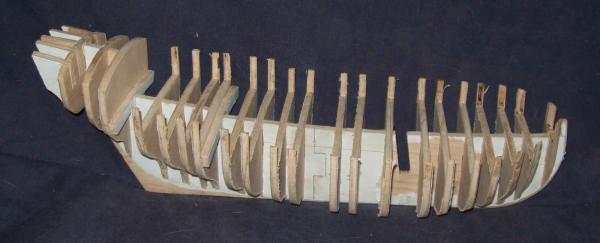
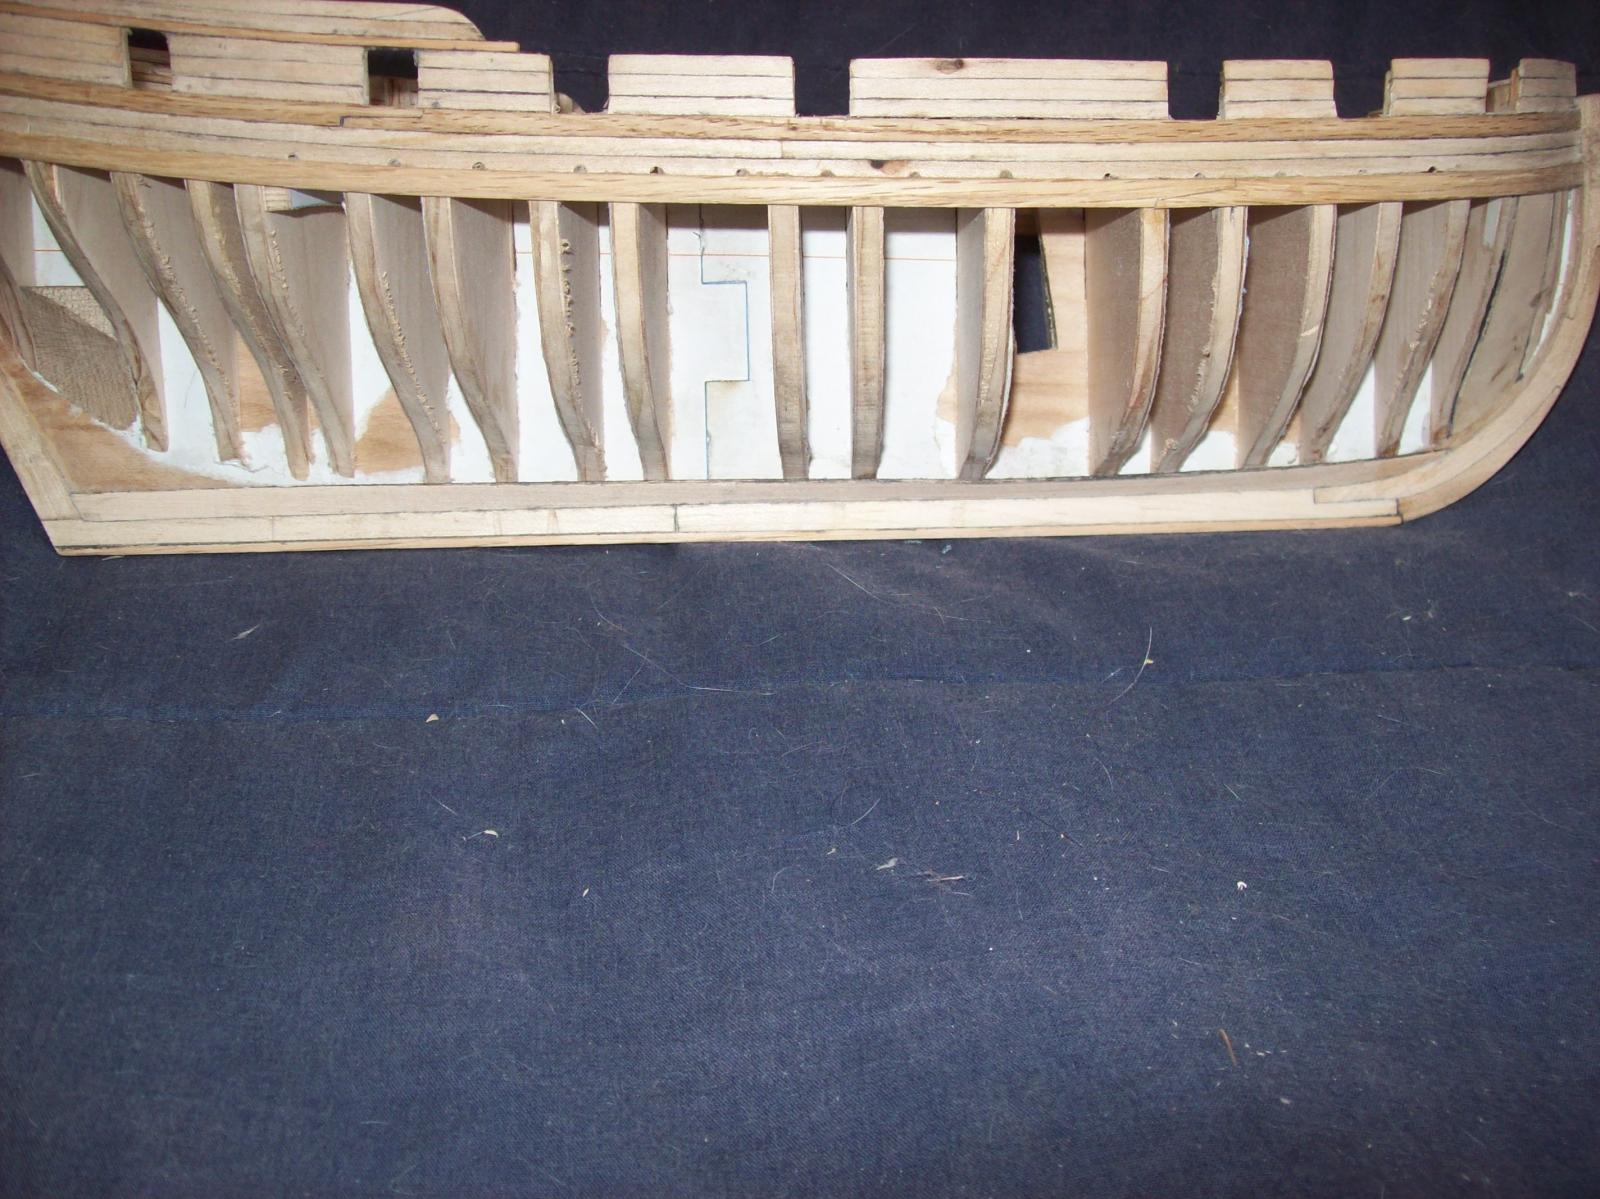
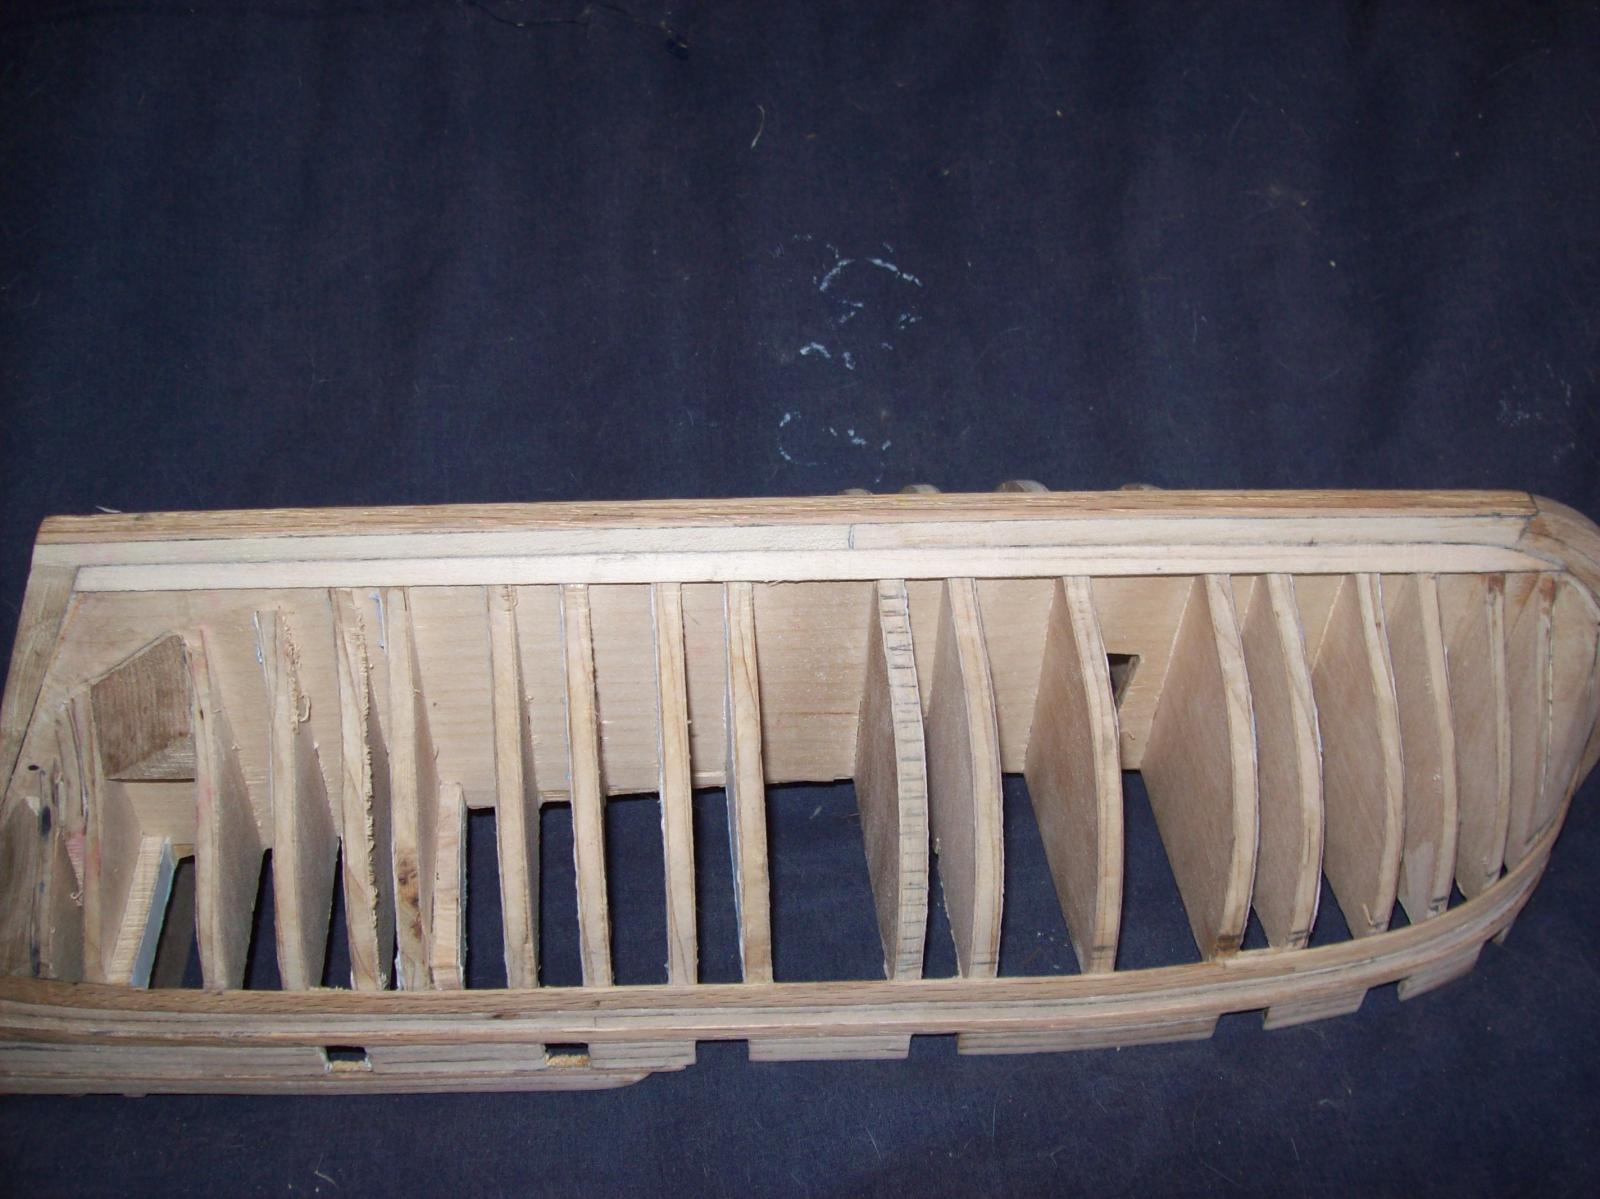
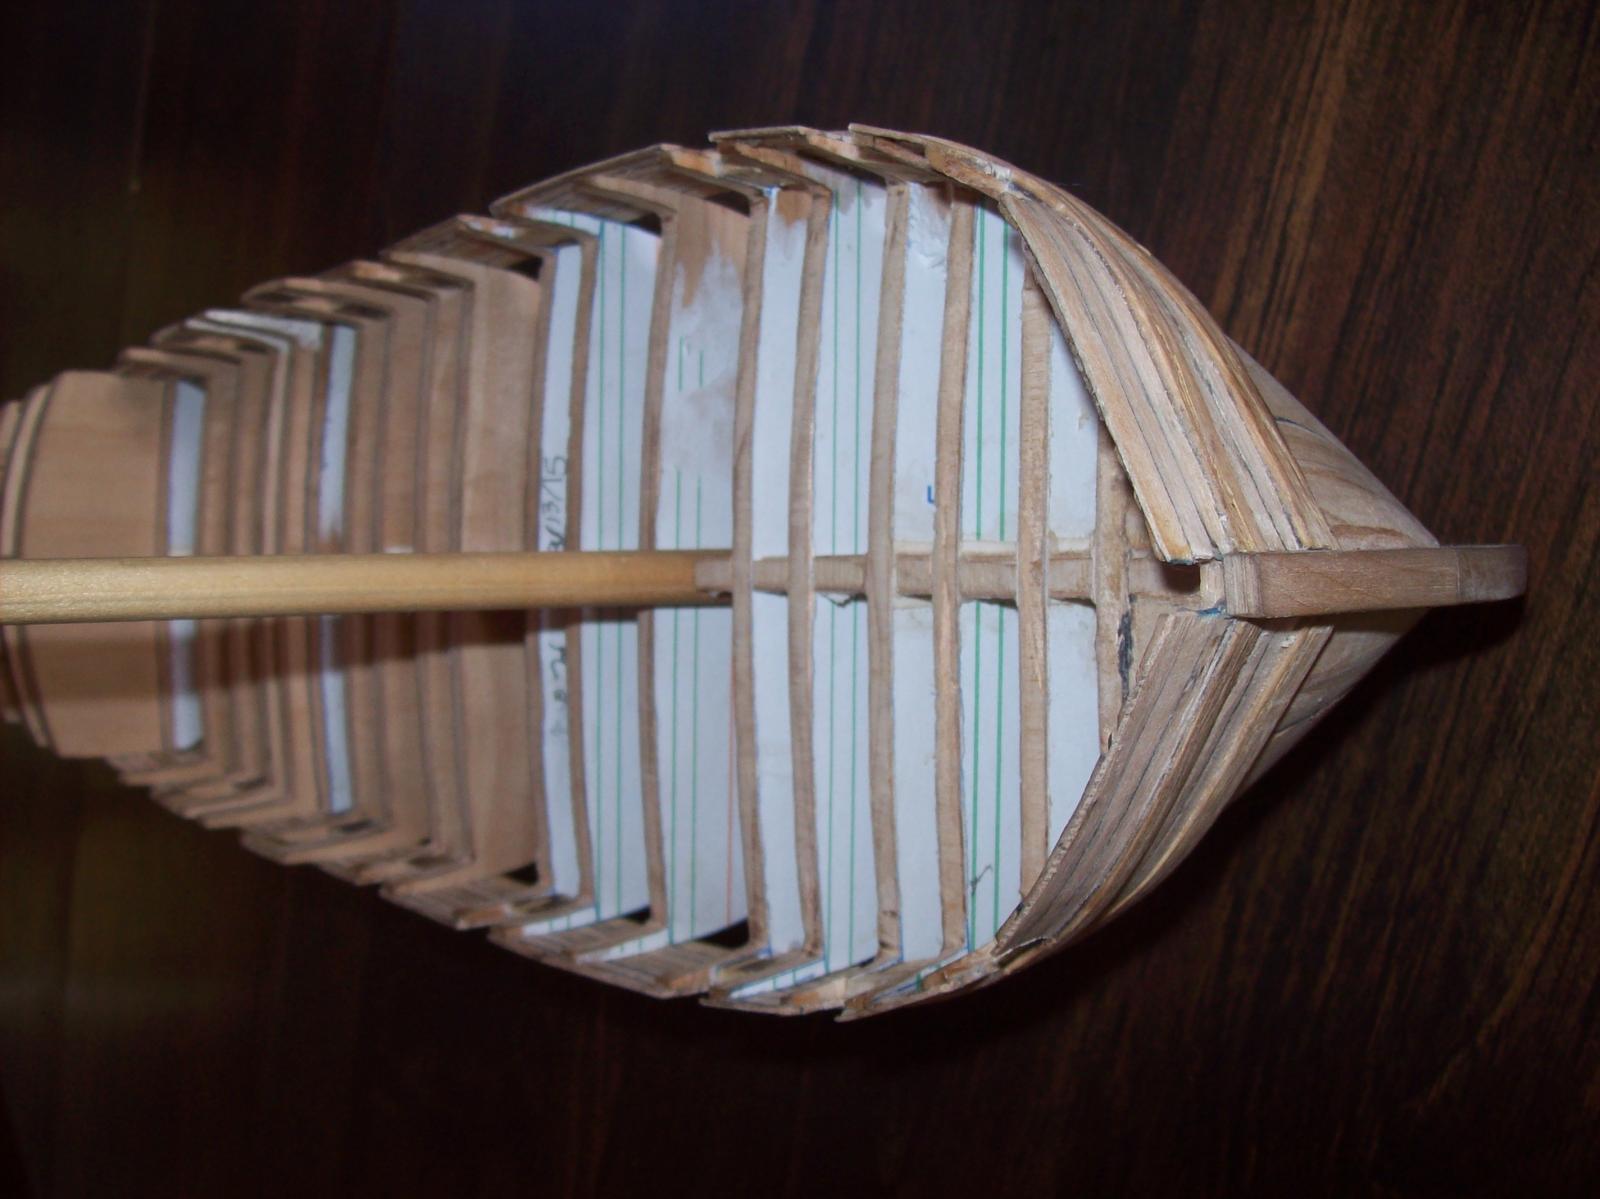
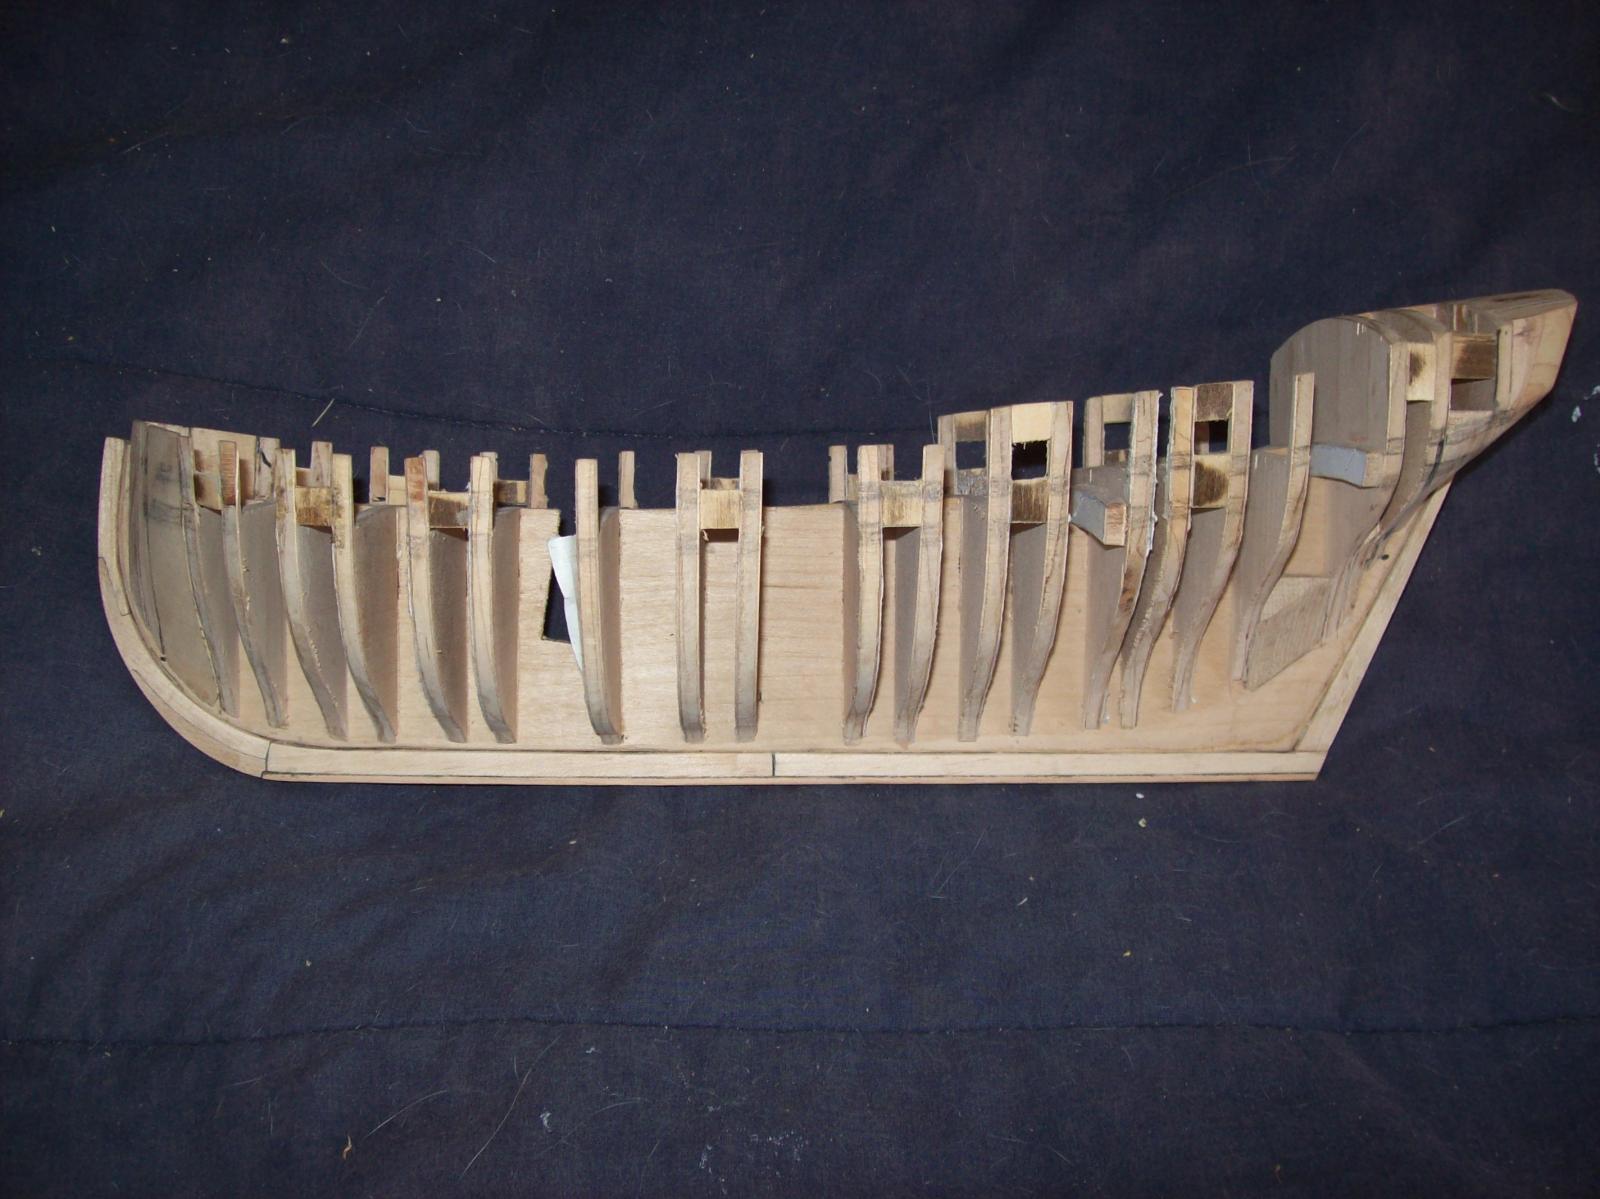
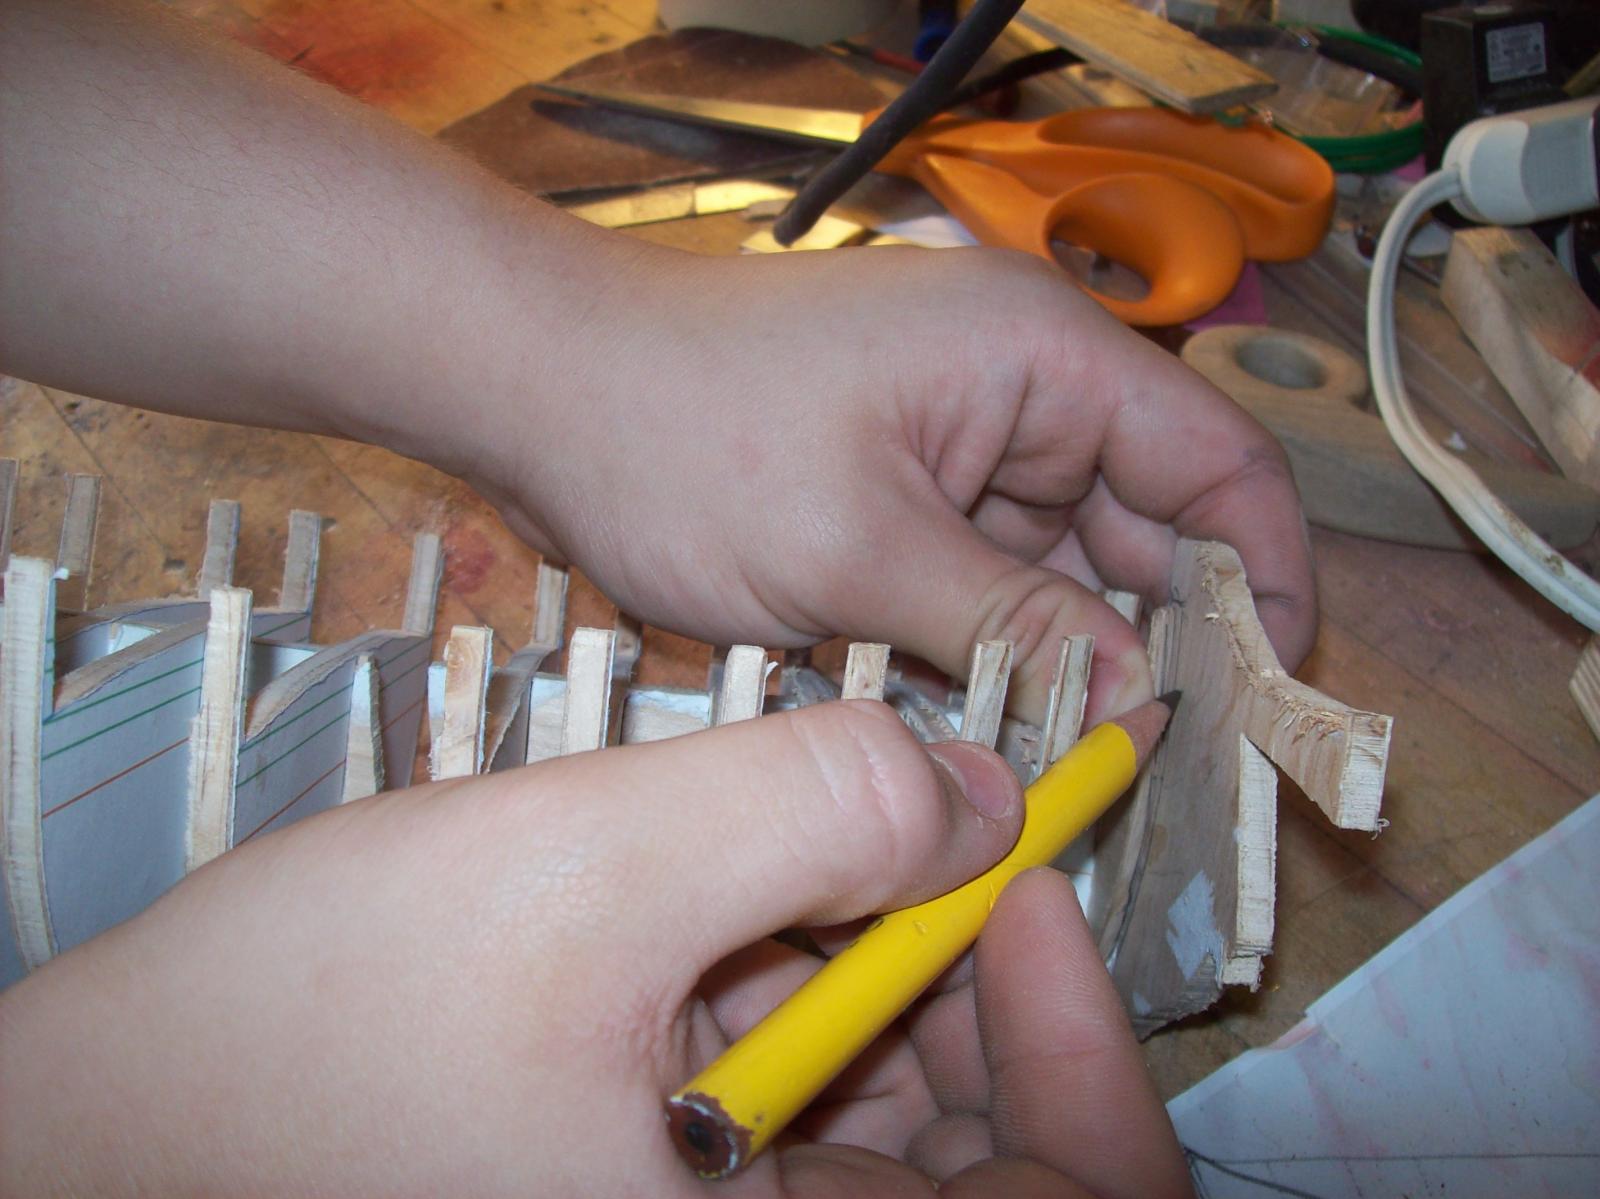
Fairing the Bulkheads: (4.00 hours)
The fairing was done with a sanding drum on my Dremel rotary tool and I just beveled the bulkheads using the lines on the plans as a guide then used a strip of heavy card to check fairness and was pleasantly surprised that it ran flat against all the bulkheads the first time acting as a testament to the quality of the plans. There are still a few spots that need touchups but that shouldn't take long.
Lextin.
- hexnut, sonicmcdude, mtaylor and 6 others
-
9


Stavanger by mikegerber - Scale 1:15 - RADIO - Colin Archer design
in - Build logs for subjects built 1901 - Present Day
Posted · Edited by qwerty2008
Reminds me of the time I almost lost my footy (inexpensive beginners model) Voyager. I was getting ready to bring her in when she slipped out of receiver range and took off strait into the wind towards the center of Lake Elsinore; luckily I was able to flag down a person on a SeaDoo to retrieve the tiny vessel.
Lextin.