


Chuck
-
Posts
9,711 -
Joined
-
Last visited
Content Type
Profiles
Forums
Gallery
Events
Everything posted by Chuck
-
 Thats great Chris. I wish you the best and let me know if I can help in any way. Chuck
 -
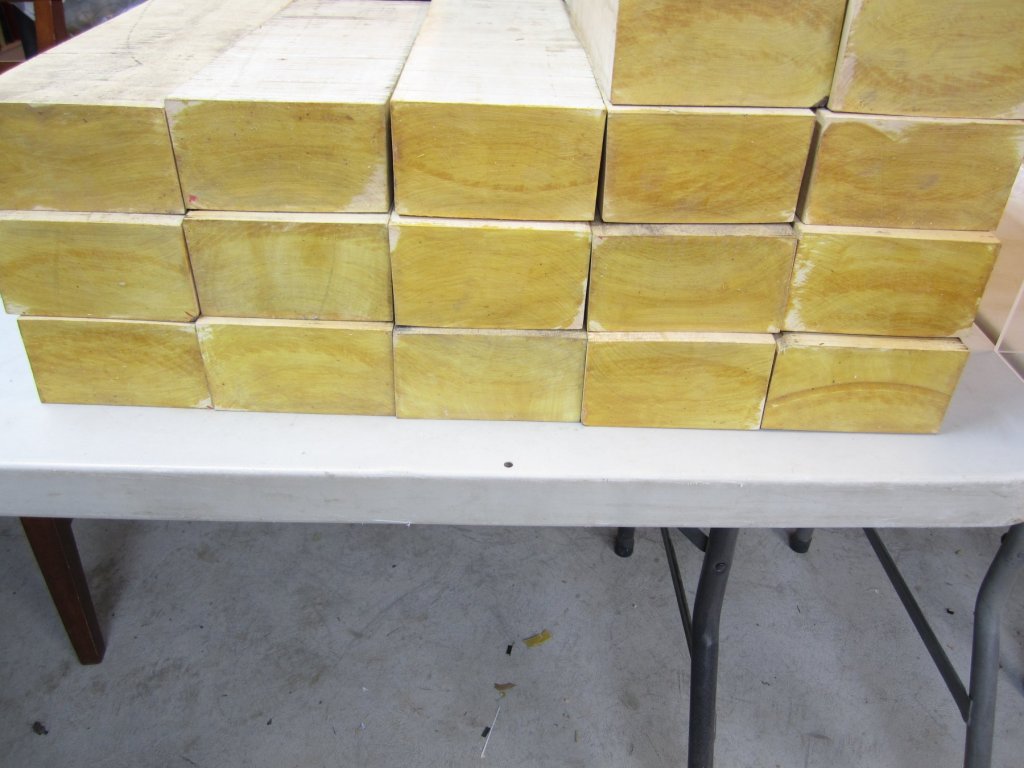
Chris, This is actually what I do. I go through a lot of wood as you will soon find out. The costs are extreme when you have to buy retail even if you are extended a discount. I buy the raw 8/4 or 12/4 lumber. I bought a top of the line bandsaw and drum sander. I will rip sheets myself or I have a guy that resaws them for me as needed. I pay him per sheet milled. There is a lot of waste, you will get boards that have knots and sap pockets that fall exactly where you have your laser cut parts positioned on a sheet. So these sheets are set aside and used to rip strips. To give you an idea of how many wood sheets, my kit of the longboat requires 26 sheets of laser cut part. Some large and some small. To make 10 kits at a time I have to order around 350 - 400 sheets of various thickness. This milling takes a few days to do. You just have to plan ahead and if you did it yourself or had a friend help you it could save thousands per year. I hand select my Cherry lumber, my Yellow cedar etc. But remember, you will never please everyone. Everyone wants something different and you will soon see how crazy the requests get. Boxwood order below... Cherry sheets that milled myself for my kits... Its worth considering. Just find a buddy you know who wants to help and you can probably rip enough for a batch of kits over one weekend.

- 906 replies
-
- 12
-

-
LOL.... Looking isnt going to help much Ben!!!! Seriously though, this is a tricky part of the project.
- 64 replies
-
- 2
-
-
- medway longboat
- Syren Ship Model Company
- (and 1 more)
-
Nice looking mast.......and Nice looking rope!!!
-
That really looks good....nice trick with the phone. I will certainly remember that one. 😊
- 32 replies
-
- 2
-
-
- medway longboat
- Syren Ship Model Company
- (and 1 more)
-
Syren Rope Rocket
Chuck replied to DelF's topic in Rope Making/Ropewalks's Commercial sources for ropewalk machines
I do the former....I can sense when the stretchiness is all but gone while adjusting the thread on the end. I dont test the middle of the span at all. The little difference you get with a wobble wont help or hurt. It's usually much more forgiving. My bet is on the third most common symptom for the line crinkling up on itself listed below. Its all a matter of testing and getting the feel for it. Rope making is something done by feel or the art of it. 1. one line is too slack... 2. One of the hooks is loose and swivelling. 3. You are twisting the individual strands too much causing them to bunch up on each other. They are all easy fixes. Its just a matter of practice and once you get your recipe down.......write it down for ever size rope you make. Then you will be all set. I am making rope today too!!! What a surprise. I am making one package or a 20' length of rope every 8 minutes. Although my pace tends to slow down a bit after a few hours. Chuck- 42 replies
-
- 5
-
-
- ropewalk
- rope rocket
- (and 1 more)
-
Nope.....once they are listed you can order. I cant take pre-orders. That just ends with somebody being mad at me. Its a first come first serve thing. Trust me .....I have gotten an ear-full, LOL. Chuck
-
Yes....I should have had another ten kits available this week but I had to stop and switch gears to make about 300 packages of rope. I am only about half way through. Having said that, I am still shooting for this weekend. I have all the laser cut parts completed for the ten kits....I just have to pack them up and add the other fiddly bits!!! Chuck
-
Syren Rope Rocket
Chuck replied to DelF's topic in Rope Making/Ropewalks's Commercial sources for ropewalk machines
That looks good. Just keep practicing and trying different ways. You will get in a groove with it. Make sure that the hooks arent loose either. Make sure they dont swivel and are locked in. This can affect your rope as well. But you are getting there....that rope looks very good indeed.- 42 replies
-
- 2
-
-
- ropewalk
- rope rocket
- (and 1 more)
-
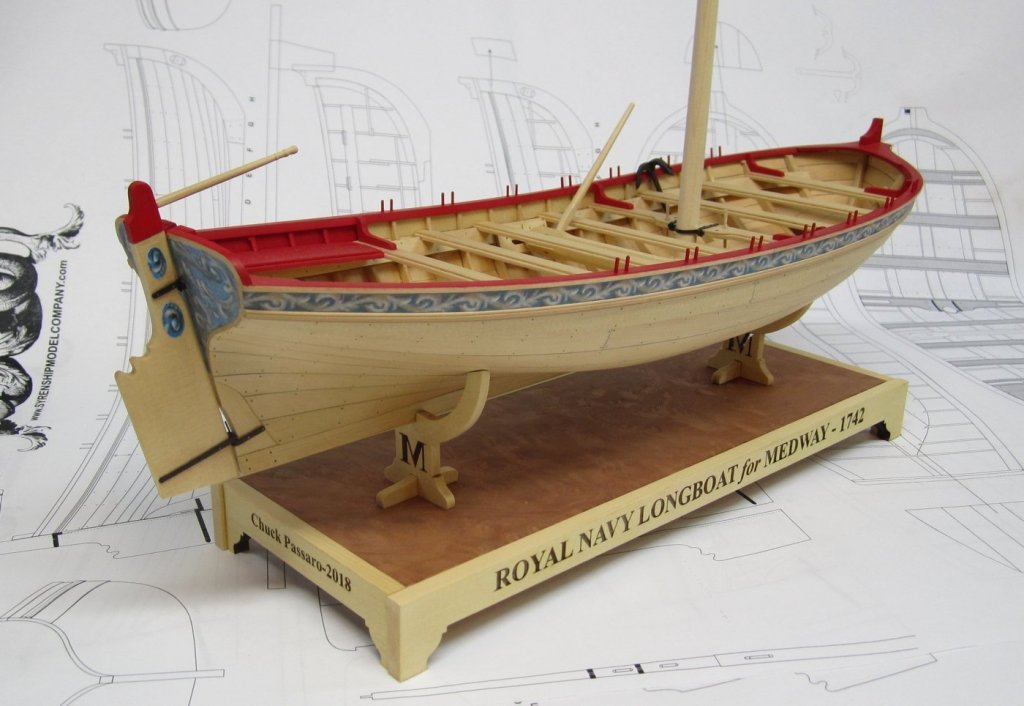
Custom Engraved bases are now available for the Longboat project. Click here for the page on the online store. https://www.syrenshipmodelcompany.com/medway-longboat-1742.php#!/Medway-Longboat-Custom-Engraved-Base/p/131063155/category=31834291 The Engraved base is a kit that you must build. You get all the parts needed to assemble the base including the burl veneer for the top and cradle pieces. We can custom engrave your name and date on the end pieces as shown in the photograph. Be specific and please realize that there is a space limitation for characters. So enter only your name and the date you want engraved. If you dont want your name added, please write "no custom engraving". Then you will only see the Longboat name on the front and back of the base. The veneer is glued to the top and the four sides are then glued to it. But to prevent the top from warping you must also glue the scrap veneer to the bottom of the board as well. This evens out the board so it doesnt cup badly. The scrap veneer is also included. The veneer is glued on with Titebond on both sides. Dont be skimpy with the glue. Spread it all over the 1/4" thick cherry board with no gaps which would cause bubbles to form in the veneer top. Spread out a thin coat over the entire board and then clamp the veneer to it. Do this on both sides at once and then clamp all three pieces between two thicker boards if you get my meaning. This presses everything nicely together so you wont get any bubbles. Then glue the two side pieces into position. Sand the ends flush with the front and back of the board. Lastly, add the longer engraved pieces along the front and back of the base. Easy as pie!!! An extra six dollars will be charged for shipping do the the size and shape of the base parts.
-
Nicely done Chris!! You are a quick builder. Beautiful work and there is no reason at all to be hesitant or nervous about showing the images.
-
Syren Rope Rocket
Chuck replied to DelF's topic in Rope Making/Ropewalks's Commercial sources for ropewalk machines
Oh almost forgot to mention. I just restocked these today....there are now six rope rockets in stock. I know several of you have been waiting patiently as they were out of stock for a couple of weeks. Sorry for the shameless plug!!!- 42 replies
-
- 5
-
-
- ropewalk
- rope rocket
- (and 1 more)
-
Beautiful work Ben.
-
Syren Rope Rocket
Chuck replied to DelF's topic in Rope Making/Ropewalks's Commercial sources for ropewalk machines
That look good. The bumps as you say are a result of having the lines not evenly tensioned. If you have one line looser than the others, that is the one that will bunch up on you as the others remain taught. AND...yes you are also correct in that if you move the headstock too quickly the lines will bunch up when they get twisted and sag. This is something you can manage with just a little practice. It becomes something you just get a feel for. I have made rope flawlessly in complete darkness during a blackout just based on knowing how the rope feels when its twisting. I use a simple triple knot on each hook. Again this is something that just gets easier with practice. I use a simple overhand knot first which remains loose, this allows me to adjust the tension in the line by feel as I pull on it. When I know it is the right amount of stretch, then I give it two more knots. Chuck- 42 replies
-
- 4
-
-
- ropewalk
- rope rocket
- (and 1 more)
-
Nicely done for your first time on the rope walk. The rope looks great.
-
Yes...That is all I am using. They will get darker after you apply some wipe on poly. I am running the pencil down only one edge of each seam. Chuck
-
That looks excellent!!! Really sharp and clean. I do hope you are enjoying this little project?
- 32 replies
-
- 1
-
-
- medway longboat
- Syren Ship Model Company
- (and 1 more)
-
Looks pretty darn good to me. This is not an easy hull to plank. You have done a very very good job of it!!!
-
That is looking great Rusty!!! Also ...just to let you guys know, I gave Rusty some new rope that I am testing. Rusty is using rope that I made using a new custom brand of thread that I had made which is ultra smooth with ZERO fuzz and lumps. You can see how defined the lay of the rope looks. I am moving closer and closer to switching over to this new stuff. It wont unravel at all just like my current offering. Great work Rusty...😊
- 152 replies
-
- 7
-
-
- medway longboat
- Syren Ship Model Company
- (and 1 more)
-
Availability of DMC Cabella Cotton for Rope Making
Chuck replied to tlevine's topic in Masting, rigging and sails
You can do it both ways.....but its easier to dye the rope afterwards. Look at videos where they show how folks dye yarn. They will tell you everything you need to know. -
The rope is already lightly waxed. No need to add anymore. Try working the rope without sealing the ends....the rope should not unravel. It may fray if you play/tease it enough. But if you just cut with a sharp blade you shouldnt have any issues. Although applying CA to the end of a line so you can cut it into a sharp point does help get it through the small holes in blocks.
- 49 replies
-
- 3
-
-
- constitution
- revell
- (and 1 more)


