DONATION DRIVE - SUPPORT MSW - DO YOUR PART TO KEEP THIS GREAT FORUM GOING!
×


Chuck
-
Posts
9,693 -
Joined
-
Last visited
Content Type
Profiles
Forums
Gallery
Events
Everything posted by Chuck
-

Queen Anne Barge by Beckmann - 1/24
Chuck replied to Beckmann's topic in - Kit build logs for subjects built from 1501 - 1750
I have no idea...could be a few things. My guess is the frames were not securely glued into the keel allowing for some movement. Or the base was warped from the beginning and and just not noticeable. There isnt much you can do about it at this point though. I am sure nobody will notice. Impossible to tell in the photos. Chuck -
Queen Anne Barge by Beckmann - 1/24
Chuck replied to Beckmann's topic in - Kit build logs for subjects built from 1501 - 1750
Really fine work. The guilded carvings look fantastic. -
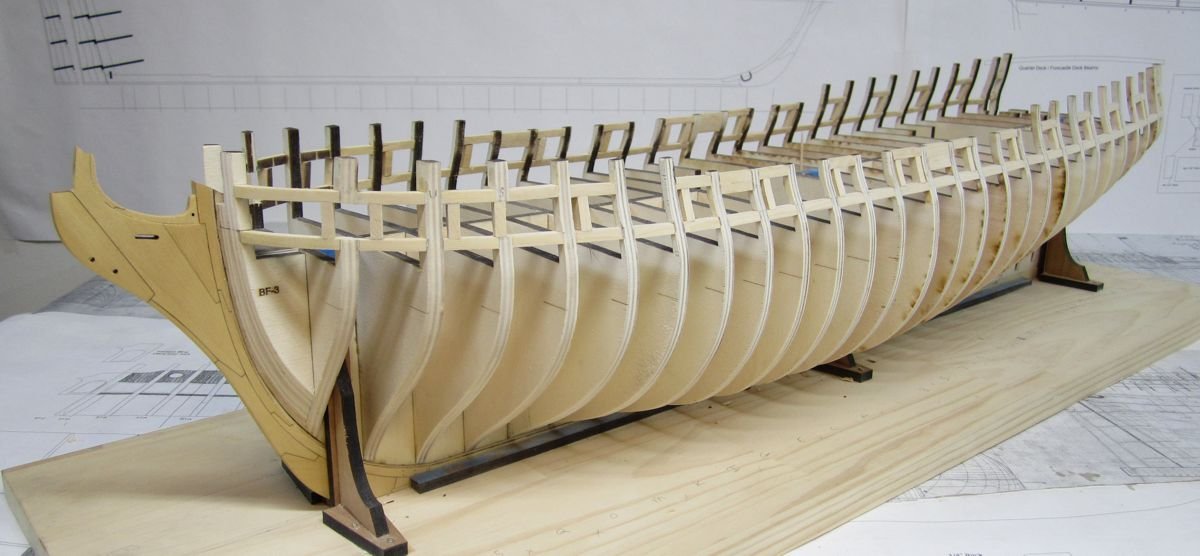
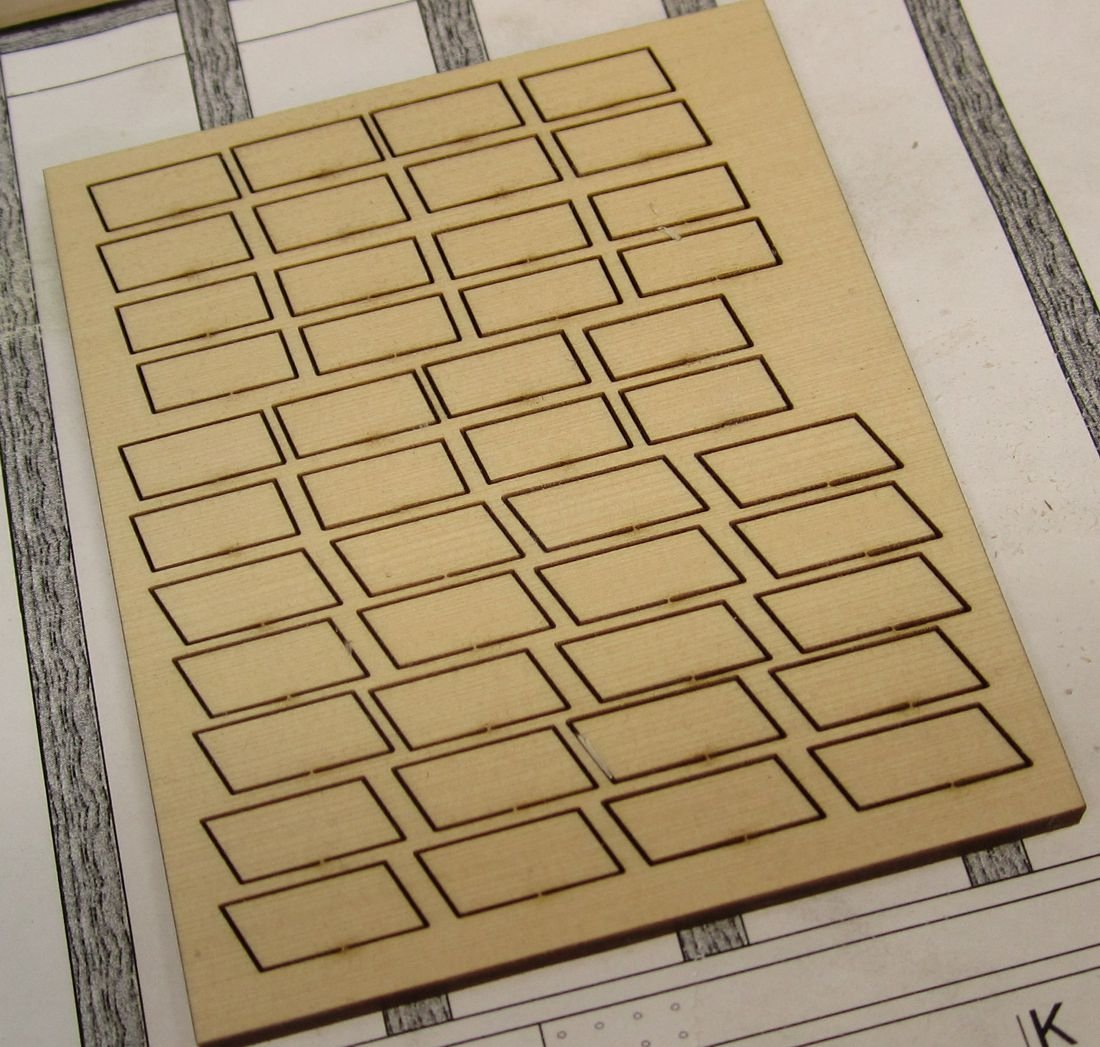
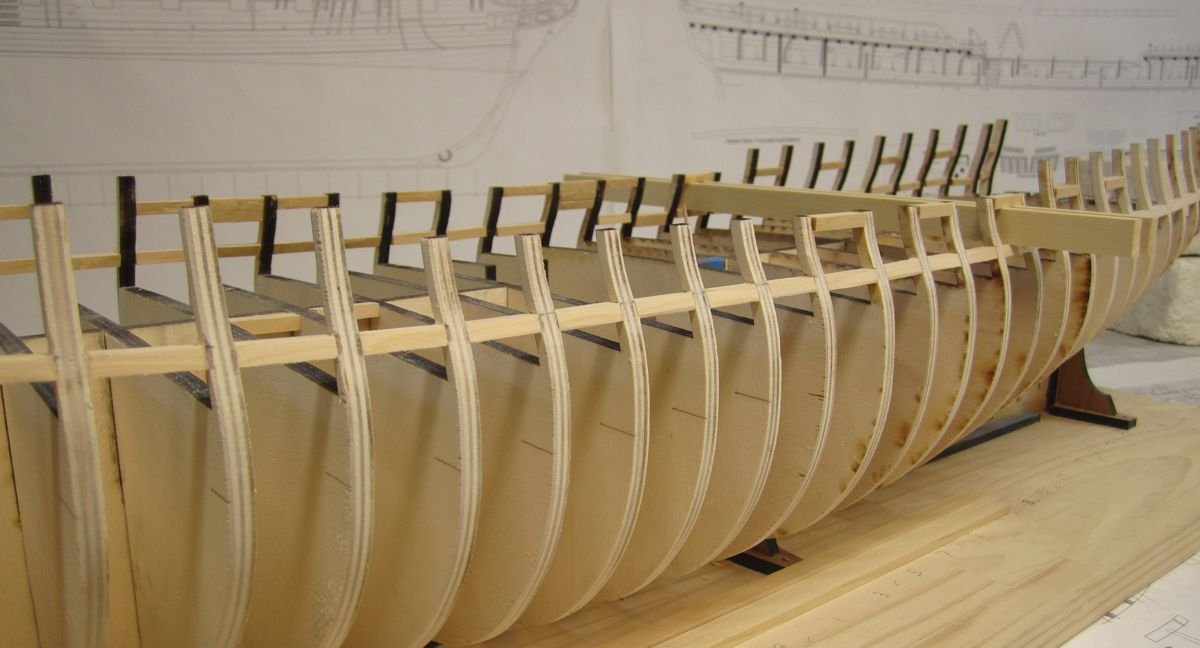
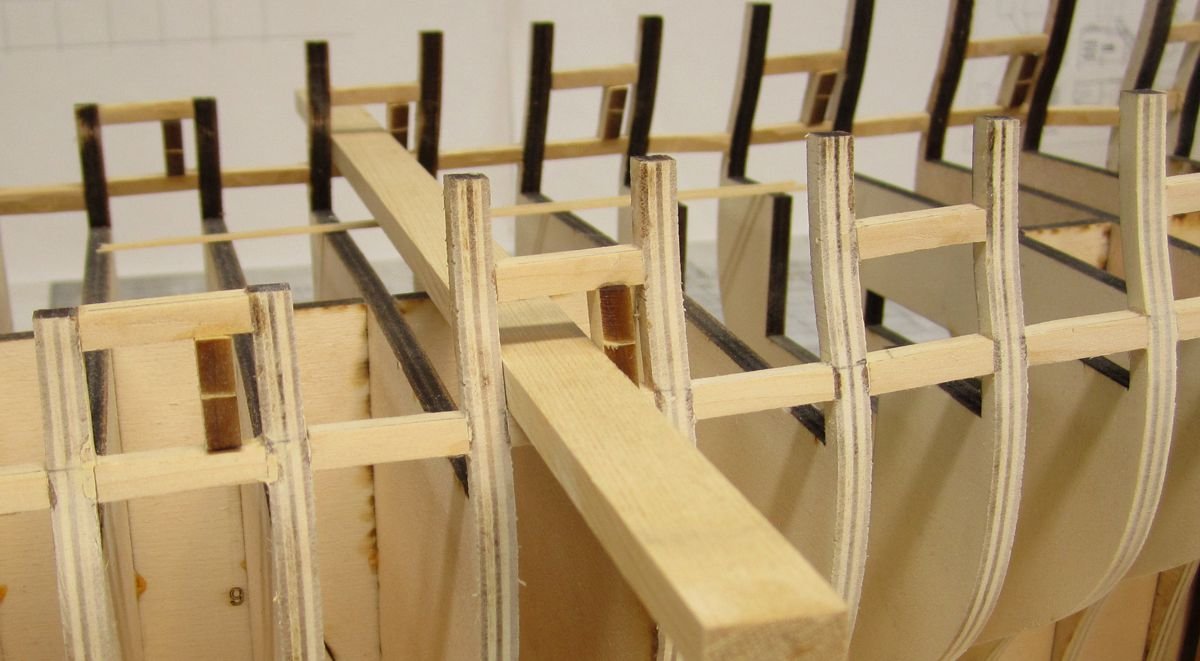
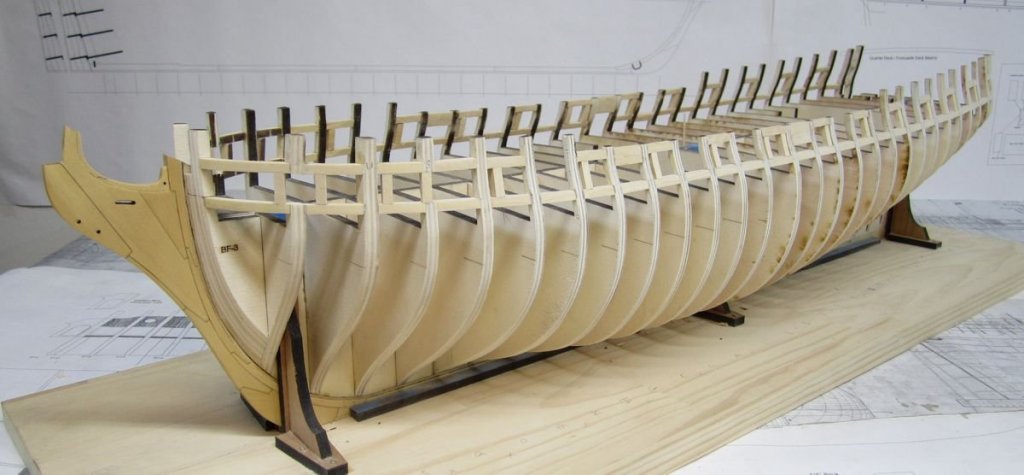
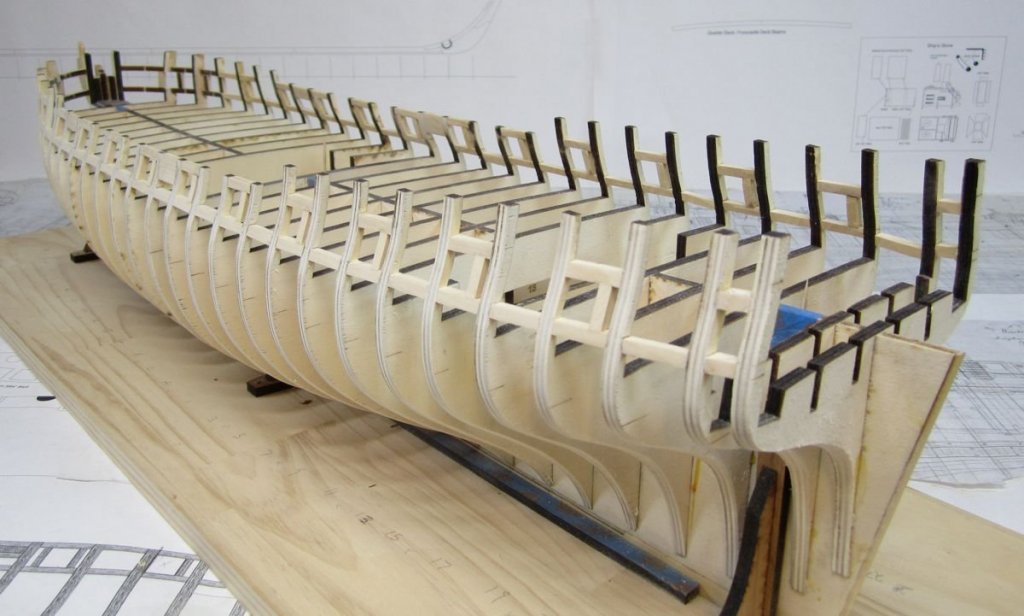
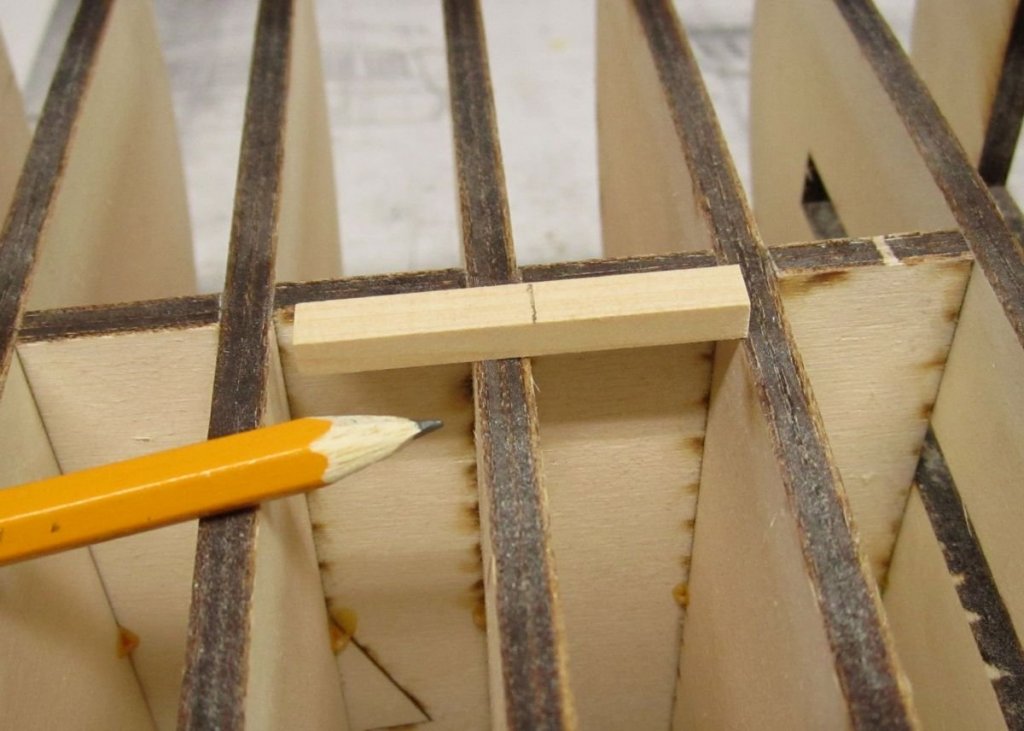
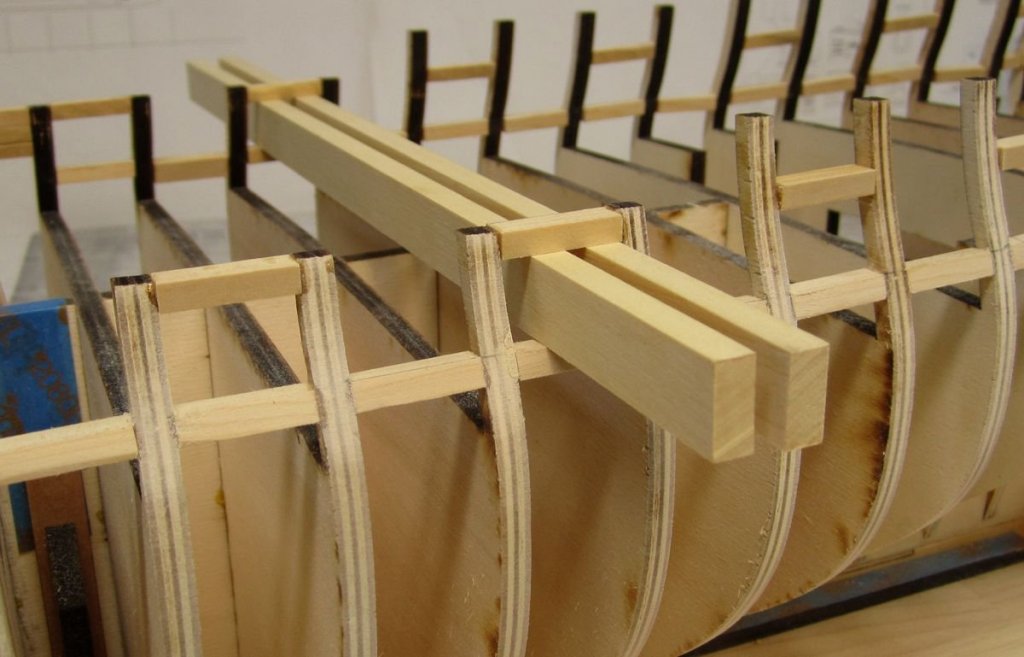
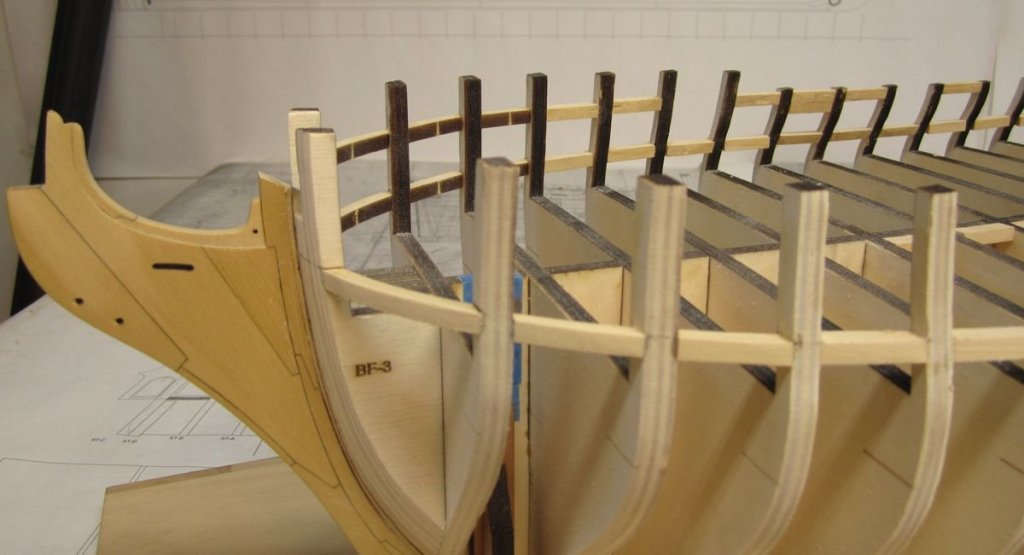
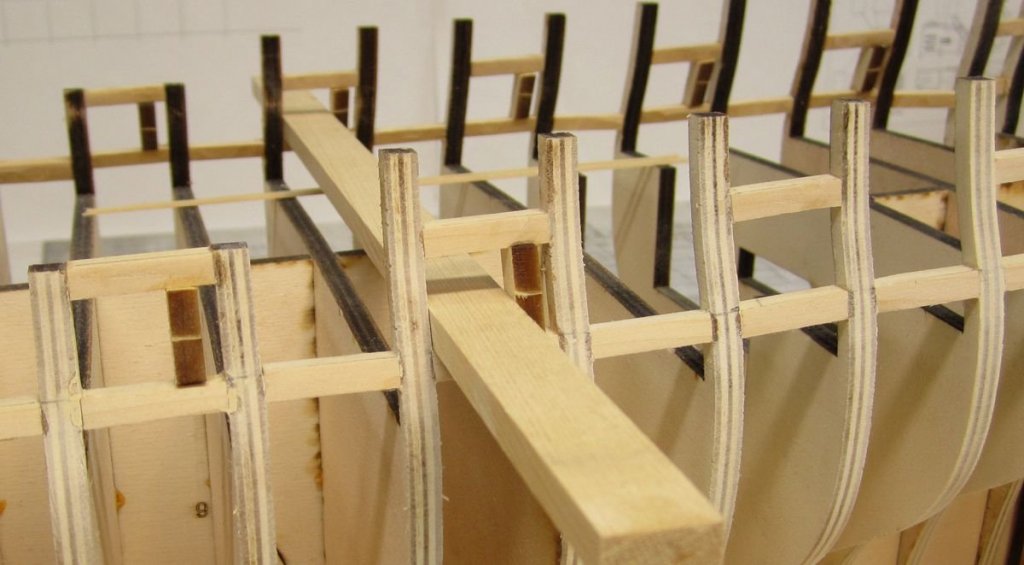
I have been making some steady progress on the framing. I just didnt want to bore you guys with this part of the project. Building the skeleton and framing is not that fun to look at. But here is the quick run down.... The bottom port sills were added first. Even though you really only need them where the gun ports are, I recommend that the bottom sills are placed between every bulkhead. It really makes everything solid. If you cut the sill to the correct length it also squares up teh bulkheads really good. Even the best attempts at squaring them to the false keel doesnt work. You might note that the three sections at the bow for the sills are laser cut. That makes it much easier. You may be tempted to measure the length off your model where the port sill is going to placed. This is the worst thing you can do. It is too easy to push the bulkhead one way or the other which of course forces the other side of the bulkhead in the opposite direction. This will really screw up your gun port placement. You could also measure off the plans....this is better but still not ideal. The best place to check the length between two bulkheads is on your model BUT....up against the false keel. This will give you the best results. If you do this for both sides everything will be really square and symmetrical. See below. Once done this was repeated for the upper sills or lintels. I used a spacer the correct height to place them all easily without measuring. I only did these where the actual ports were and a few other important locations. These are all shown on the plans. Then the port sides are added.....I have laser cut these. There are many shapes and angles to choose from. You still have to bevel the top and bottom where needed because they must be perfectly vertical.....just like the bulkheads. I used a spacer for these too so the ports were all the same width. This is what it looks like with all the port framing finished. Pretty boring stuff. I am about to start on the stern framing. I should be planking before very long. The outside was faired smooth. I wont bother with fairing the inboard side of the bulwarks yet. Its better to wait until after the hull is planked above the wales for that. Although I will probably rough chisel some heavy stuff away a little at time inboard when the mood strikes me.


- 1,784 replies
-
- 45
-

-
- winchelsea
- Syren Ship Model Company
- (and 1 more)
-
Looking real good so far. Well done. Happy you joined the group.
-
Jeff....you should just figure out what sheets you actually need since you have almost everything else. Then send me a PM. When I start making the next batch I will make just the sheets you need to start over like the frames and keel parts...😁
-
Not yet, When i make another batch i will announce. I just posted more rigging packages though. And i am making more of those too because they sold out in about an hour yesterday. The group will always remain open and its just a matter of teying to keep up with the demand.
-
Malco saw has some great stuff. I have used them before. And i have used Thurston but honesyly, over the last year or so I have been very unhappy with tThurston blades. The last two orders i got from thurston forced me to leave and try Malco. The Thurston blades were so dull I figured they were used and not resharpened properly. In contrast, the blades from Malco were razor sharp and cut even boxwood like butter. I am a convert and very very happy with Malco blades. Wish I had switched years ago.
- 18 replies
-
- 11
-
-
Soak the parts in 90% rubbing alcohol until the glue softens. It will take a while.
- 10 replies
-
- 1
-
-
- 18th century longboat
- model shipways
- (and 1 more)
-
Even though you can probably get there about 90 percent with CAD, Each plank still needs adjusting and tweaking for a really good fit. At least with me, i like to adjust each plank for real life issues the computer would never pick up like the kerf of the laser cutter or adding a little extra width to compensate for creep and bevel. In fact, all of my pre spiled planks for the longboat were done without a computer at all. I used the method described in my build log for it. They were spiled the old fashioned way. Then it was scanned and traced into a vector program. Then i tweaked each one as described above.
-
For those who have been waiting...I have posted ten more longboat kits in stock and ready for immediate shipment. The masting and rigging kits will soon follow in just a few days if everything works out. Chuck
-
No bowsprit ring would have been used at the stem. This was only used when the bowsprit was NOT well contained under the cap rail. Because the bowsprit is very secure between the frames and cap rail no ring would have been needed. I had it originally but removed it after this info came to light. Looks good!!!
- 574 replies
-
- 4
-
-
- cheerful
- Syren Ship Model Company
- (and 1 more)
-
Indeed.....everyone needs to set up an album for their photos. One album per subject and only include photos of completed models. No under construction pics as they should be posted in build logs. A description of the project is also important.....what kit...MFG or if scratch, based on what plans and built with what types of materials etc. Chuck
-
Beautiful work Ben. I wouldnt have expected anything less!!! Really looks good with exposed frames.
- 64 replies
-
- 2
-
-
- medway longboat
- Syren Ship Model Company
- (and 1 more)
-
Boy she does look pretty. You did an absolutely masterful job on the Cheerful project. I do hope you enjoyed building it!!! One of the best Cheerfuls I have seen and I have seen a whole lot of them.
- 51 replies
-
- 1
-
-
- cheerful
- Syren Ship Model Company
- (and 1 more)
-
Queen Anne Barge by Beckmann - 1/24
Chuck replied to Beckmann's topic in - Kit build logs for subjects built from 1501 - 1750
Yes that stuff...but the matte finish. -
Queen Anne Barge by Beckmann - 1/24
Chuck replied to Beckmann's topic in - Kit build logs for subjects built from 1501 - 1750
One thing you might want to try is a spray fixative. I will spray the entire model with a light spray of matte fixative or dull coat. This really evens out the red paint. You should give it a try on those extra pieces. I spray from about 18 inches away from the model and it really does wonders for the finish. -
No not yet. I havent had time to make the new rope yet. I am still using the cotton/linen stuff. I am hoping to have more rigging kits in about a week. I am stuck working on a few things on the house now. I have to knock off a few on the honey-do list or I will be out on the curb. If you know what I mean....😂
-
Nicely done!!! That is some fine work. Chuck
-
Good to see you back Bill.....any updates on the SOS?
- 382 replies
-
- 2
-
-
- sovereign of the seas
- carving
- (and 1 more)
-
Be sure to text me if you go for lunch and I will meet you there!!!
- 263 replies
-
- 1
-
-
- Medway Longboat
- Syren Ship Model Company
- (and 1 more)
-
Looking Good Ryland...... I am also looking forward to the show next month. It will be great to see you guys.
- 263 replies
-
- 1
-
-
- Medway Longboat
- Syren Ship Model Company
- (and 1 more)
-
Queen Anne Barge by Beckmann - 1/24
Chuck replied to Beckmann's topic in - Kit build logs for subjects built from 1501 - 1750
That is looking excellent!!! Its good to see someone taking such care with their paint work. Very nice progress.