Chuck
-
Posts
9,019 -
Joined
-
Last visited
Content Type
Profiles
Forums
Gallery
Events
Everything posted by Chuck
-
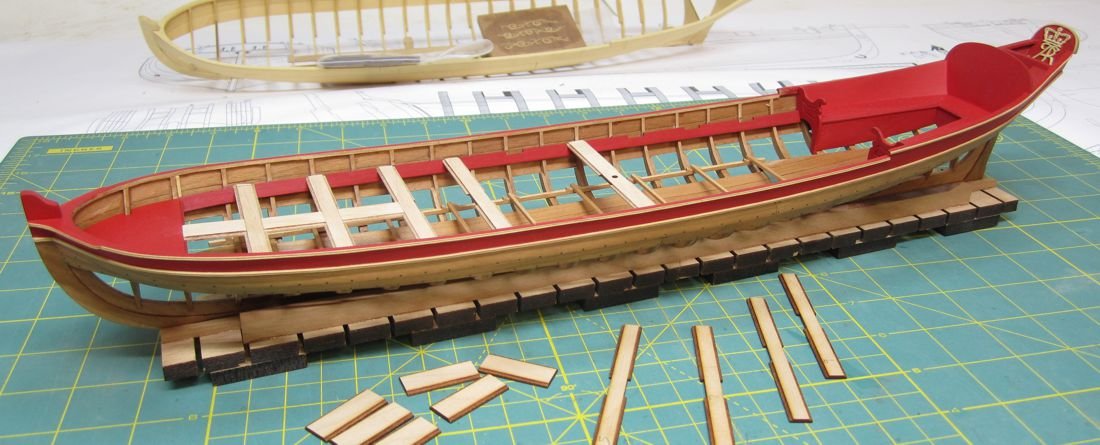
 All of the thwarts are now in place. But no glue yet. These are all just test fit. The tweaking is completed and all of the pieces seem to fit together with nice tight joints. I will glue them into place next and paint them. She is finally getting there.... Once these are done the only major construction left is the remaining inboard planking. After that its just the fancy bits and little detailing which makes it all come together. The paneling and carvings ect.
- 269 replies
-
- 27
-

-
- Queen Anne Barge
- Syren Ship Model Company
- (and 1 more)
-
Try www.WoodProjectSource.com Chuck
-
Thats pretty neat.....use the groups name in your title. I am sure there will be many interested.
-
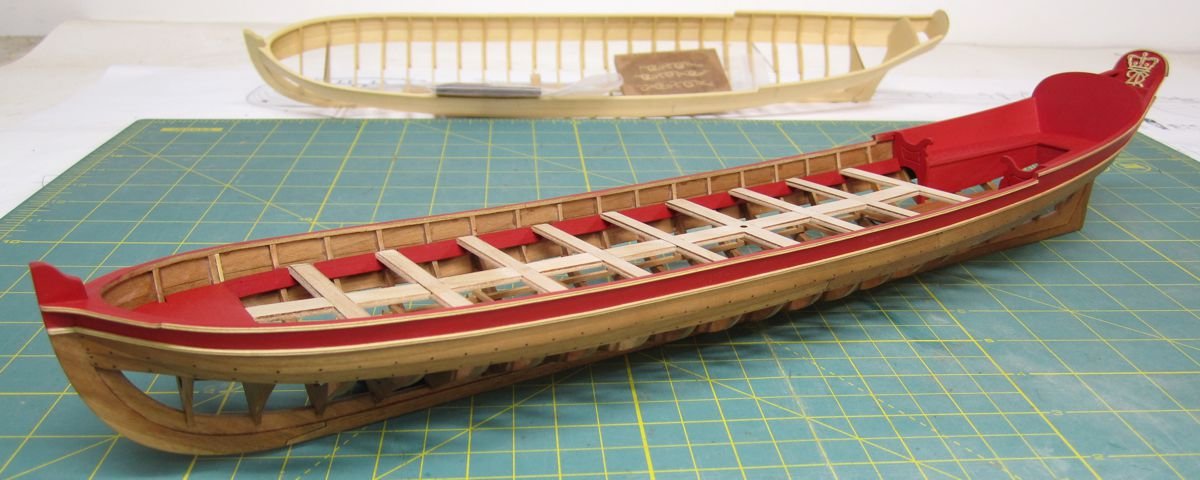
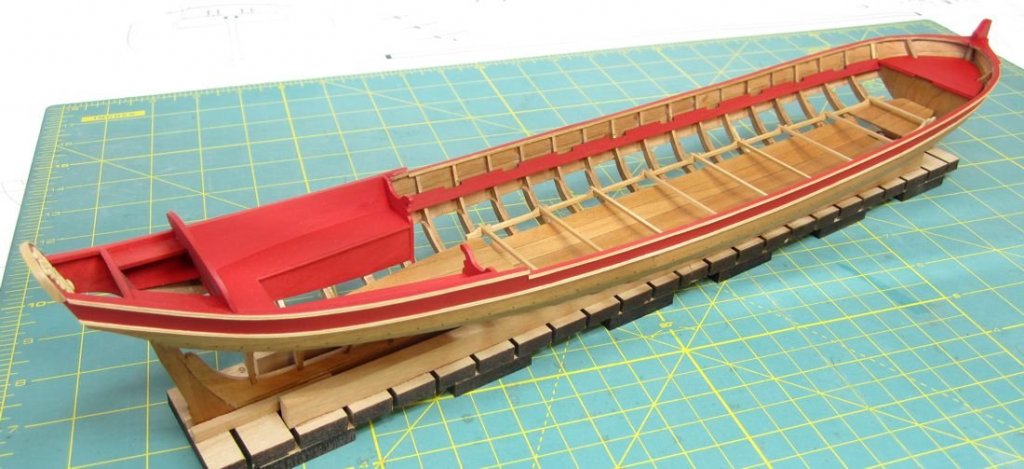
Just an update on the barge prototype. Work has continued since I got back from Annapolis. It was quite inspiring. Compare some of the images of the contemporary barge model. It was very helpful being able to examine it close up. The riser and stretcher timbers have been added. All are laser cut. Then the forward platform. I am now test fitting the thwarts in position. These are all just dry fit. No glue.....yet. The thwarts are all laser cut with etched trim. There are little notches laser cut on both sides to accept the center board between each thwart. I will dry fit them all together and then glue them in afterwards. I want to ensure a proper fit with thaat center board going straight down the center. Once I know that is OK I will glue them in and paint them. Or paint them first...I am not sure yet. Chuck

- 269 replies
-
- 38
-
-
- Queen Anne Barge
- Syren Ship Model Company
- (and 1 more)
-
Nicely done Russ. Planking is shaping up. The run of planks looks spot on.
- 420 replies
-
- 1
-
-
- shrimpboat
- lugger
- (and 2 more)
-
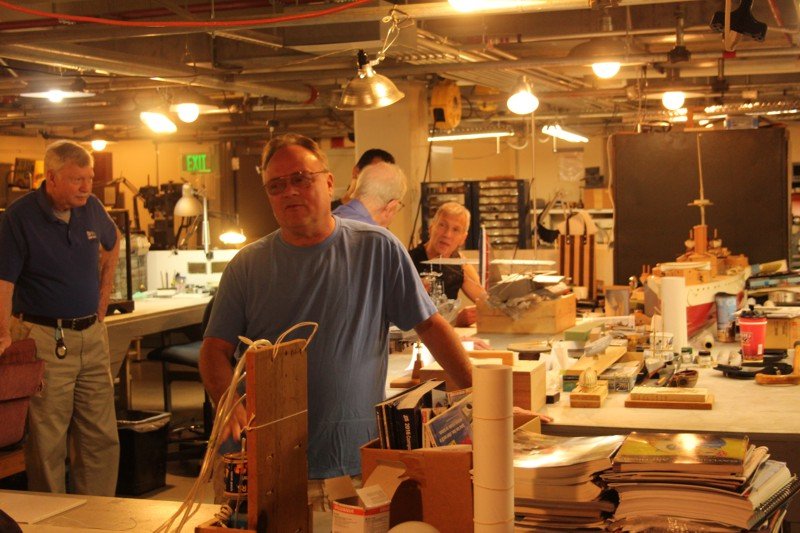
Thanks guys. Greg, Grant wasnt there that day but Don was. He spoke to our group for a while and we hung around the shop with the other guys who volunteer. He was off to Europe to visit the NMM that afternoon. Most everyone had been there many many times before but we took our time and some of the other guys accessed other buildings and models too. A very nice time had by all. Here is a view of the guys in the shop with ongoing restorations at the Academy. I believe that was a builders model of the Maine on the right. Chuck
- 269 replies
-
- 22
-
-
- Queen Anne Barge
- Syren Ship Model Company
- (and 1 more)
-
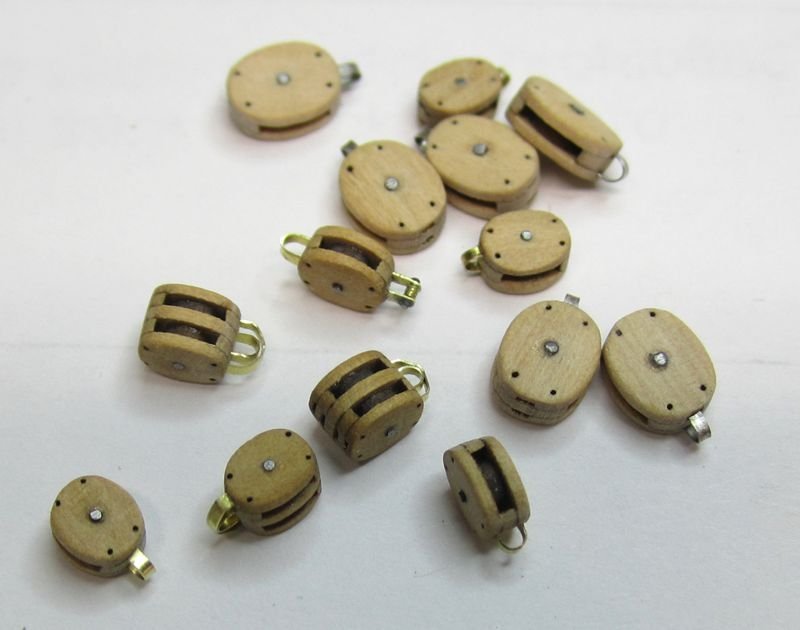
All you really have to do should you want a size I dont have listed is let me know before you order....I can always make the sizes you need. I just dont stock them because only a few people actually build that large and it doesnt pay to stock them as regular items. If you need them laser cut without the sheaves so you can replace them with with your own metal working sheaves that is also possible. I will just omit them. And by the way....for those that do need externally metal stropped blocks like cathead blocks for anchors, all you have to do is flip the orientation of the outside shells of each block. With a bit of creativity these will serve many purposes. I just cant stock them in every variation but hope that everyone can easily look at the parts and build them as they need them. These are easily turned into working blocks by removing the laser cut wooden simulated sheave before assembly and inserting a brass sheave in its place. Chuck
-
I just returned from a weekend in Annapolis at the Naval Academy. About 20 of our NJ club members went down and it was a wonderful time. Several of us brought our wives and girlfriends. We enjoyed lunch and dinner and a nice tour of the academy including its workshop where several models are being restored. Its always a pleasure to see my friends at Preble hall and they were spectacular hosts. I went down with one important goal besides enjoying the great company. I knew of a barge model that I wanted to photograph in detail from the same period as my Syren project. I am about to get back into the shop to work on my prototype. Here are some photos of that contemporary model. Note that it is NOT Clinker planked and it is completely planked. There are many other details of interest which will be pointed out as I continue my project. Here are some of the folks from our motley group ship modelers. A bunch of the other guys are missing from this photo, including my wife who was walking around the academy (probably shopping in town) at the time and in the museum. We are so fortunate to be such close friends and try to do this type of thing as often as possible. Where are we going next guys?!!!! You know many of these guys too. They are active MSW members. and some of the photos of the barge below....I have many more (thanks Mike) and will post them in an album and in the kit instructions. This model is circa 1705...Just beautiful!!!

- 269 replies
-
- 32
-
-
- Queen Anne Barge
- Syren Ship Model Company
- (and 1 more)
-
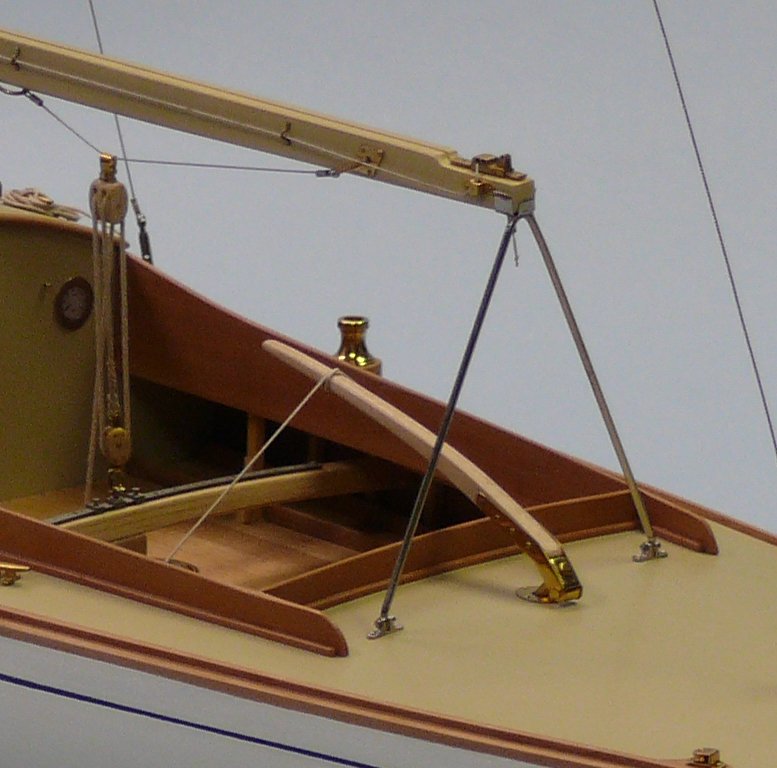
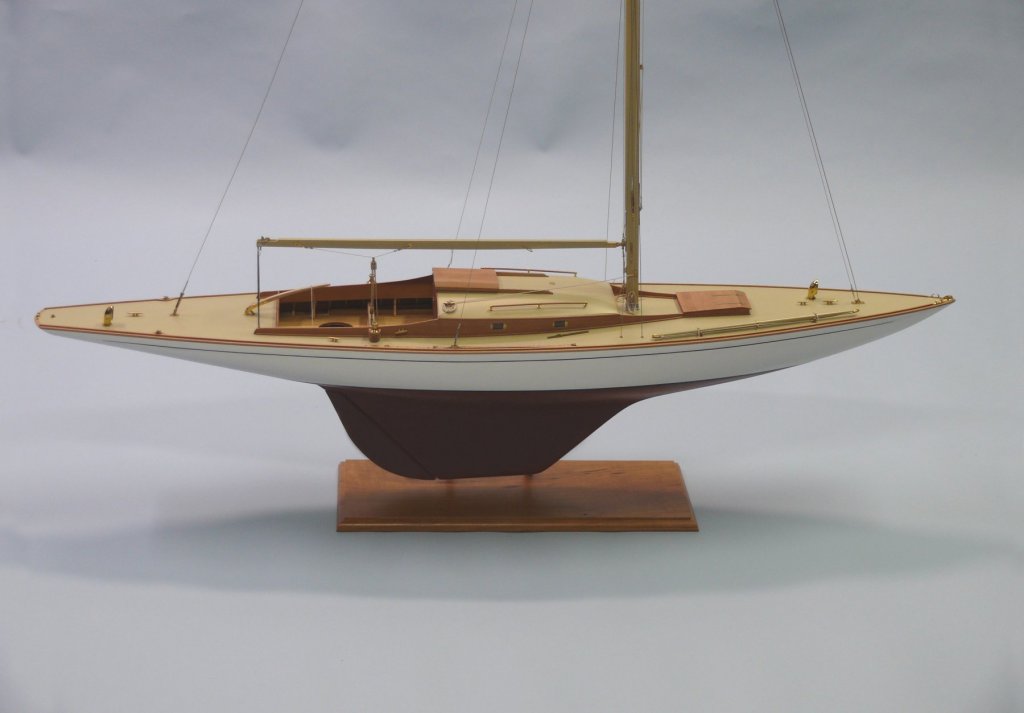
Here is an image of one of my blocks in use on an early yacht model. The model was built by Steve Wheeler. Its quite beautiful. Steve is a master craftsman with these models. It shouldnt be too difficult to make the number of blocks you would need. Its a far cry from the hundreds of blocks required on a typical "sticks and strings three master"
-
We sell plenty of internally strapped blocks at syren should you choose to go that route. Syrenshipmodelcompany.com Chuckj
-
Yes indeed....it is impossible to bend that severe a curve on the end of the strip. The curve was made closer to the middle and then the excess snipped off and discarded. If you achieve the proper curve you will need very little pressure if any to make the plank rest against the frames without any lifting. If it lifts at all your curve is incorrect. With such thin planking, you may not have to apply much heat to bend it the other way and also give it a bit of a twist. I have written a very detailed instruction for the barge here. http://modelshipworldforum.com/resources/Barge instructions.pdf on how I bent and twisted each strake. Maybe it will be of some help.
- 156 replies
-
- 9
-
-
- pinnace
- model shipways
- (and 1 more)
-
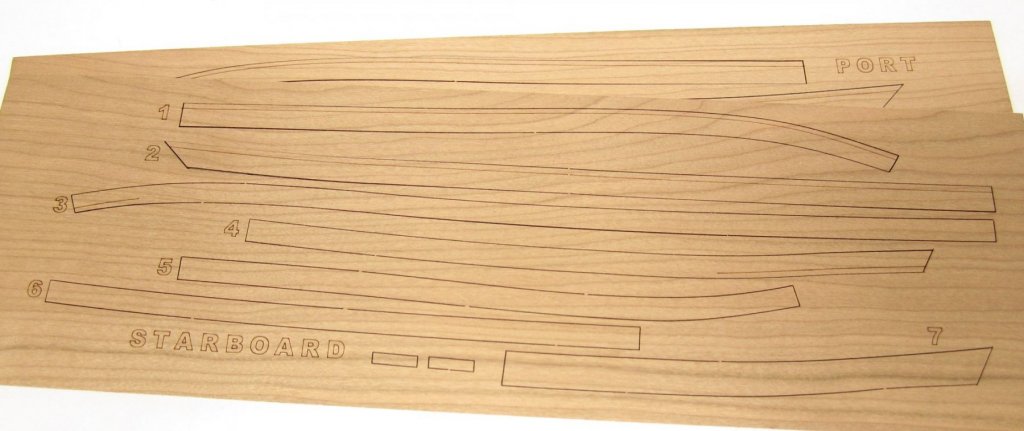
Planking these small boats is a challenge. Keep in mind that the curve on these planks was rather short and abrupt. I dont know if this helps but the shape for my latest barge is almost the same and these pre-spiled planks are a good comparison to the shapes you will need on the pinnace. Look closely at plank 1 and 3 and 5 which show the curved end for the bow quite well. Note how its an "s" shape overall. Because the curve needed is so tight at the bow being over only 2" or so it is probably easier to find and spile the shape and then cut from a sheet. You should give it a try on those strakes at the bow at least and for the first four down from the sheer. Keep in mind that this is a clinker hull but the shapes of the planks are the same. Chuck

- 156 replies
-
- 8
-
-
- pinnace
- model shipways
- (and 1 more)
-
Anyone can always contact me if the need some clarification.....and PDFs.
-
Now you know why I am doing my own kits and projects.....LOL I feel so bad about this guys, I hope you guys get it sorted out with Expo. Chuck
-
How hard can it be for these guys to print those templates correctly for the kit......seems like the easy part. Anyway.....hope these help. Remember to set your page scaling to NONE when printing them. And measure the scale bar for accuracy where each segment should be 3/16" wide. If these dont match your plans then they probably printed your plans incorrectly as well. Always measure the scale bar to find out. That is why it is there. These are the original files. Chuck colorcodedtemplate.pdf framingplan1.pdf framingplan2.pdf framingplan3.pdf framingplan4.pdf framingplan5.pdf framingplan6.pdf framingtemplate7.pdf sternframingsyren.pdf
-
Yes indeed...its on the list. I just have to catch up with making parts.....blocks....rope....inventory etc. Then I will start writing.
- 1,048 replies
-
- 9
-
-
- cheerful
- Syren Ship Model Company
- (and 1 more)
-
Thanks guys for the kind words and likes. Hopefully the next one wont take as long.
- 1,048 replies
-
- 5
-
-
- cheerful
- Syren Ship Model Company
- (and 1 more)
-
Thanks, They are laser cut mast hoops. They are place on the shaft of my Dremel and sanded so the the outside is round off as shown below. Chuck

- 1,048 replies
-
- 9
-
-
- cheerful
- Syren Ship Model Company
- (and 1 more)
-
Thank you all for likes and kind words.
- 1,048 replies
-
- 4
-
-
- cheerful
- Syren Ship Model Company
- (and 1 more)
-
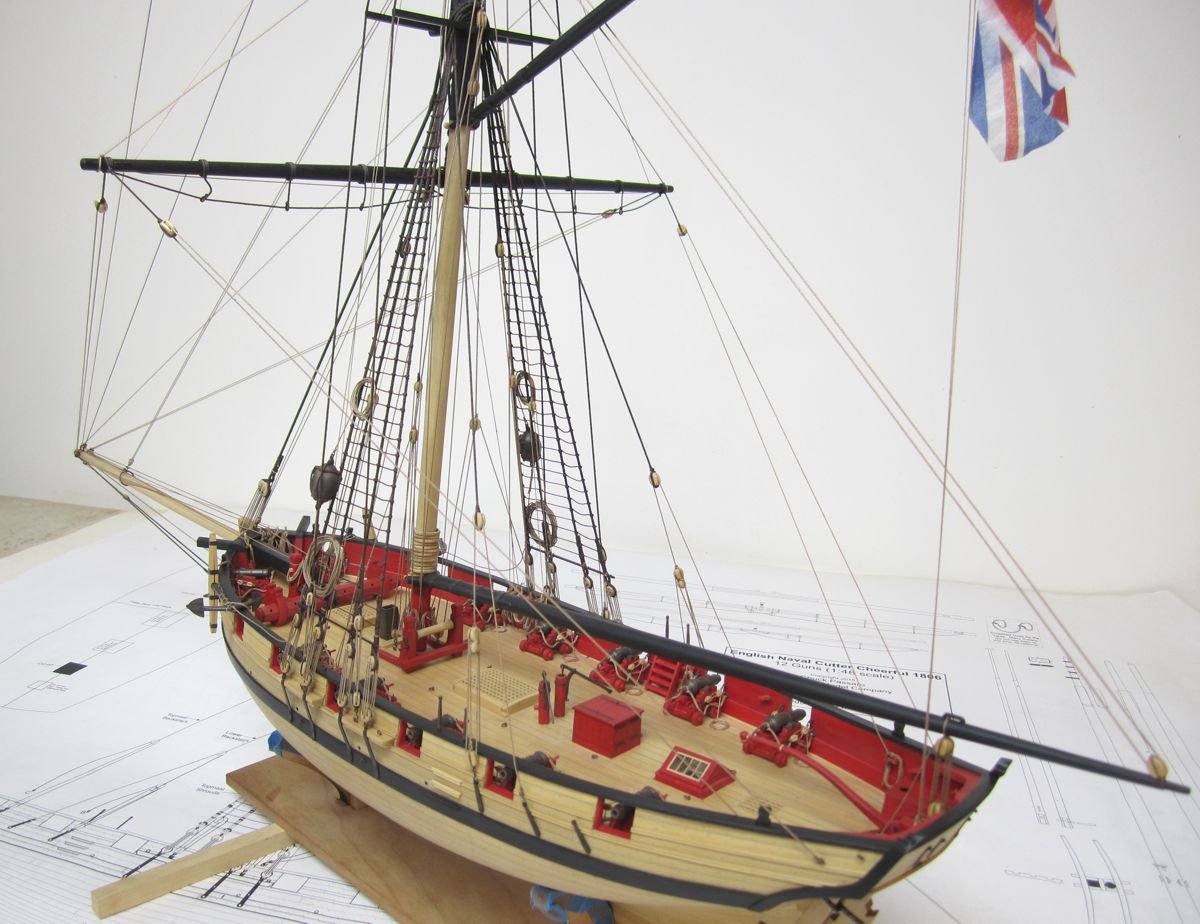
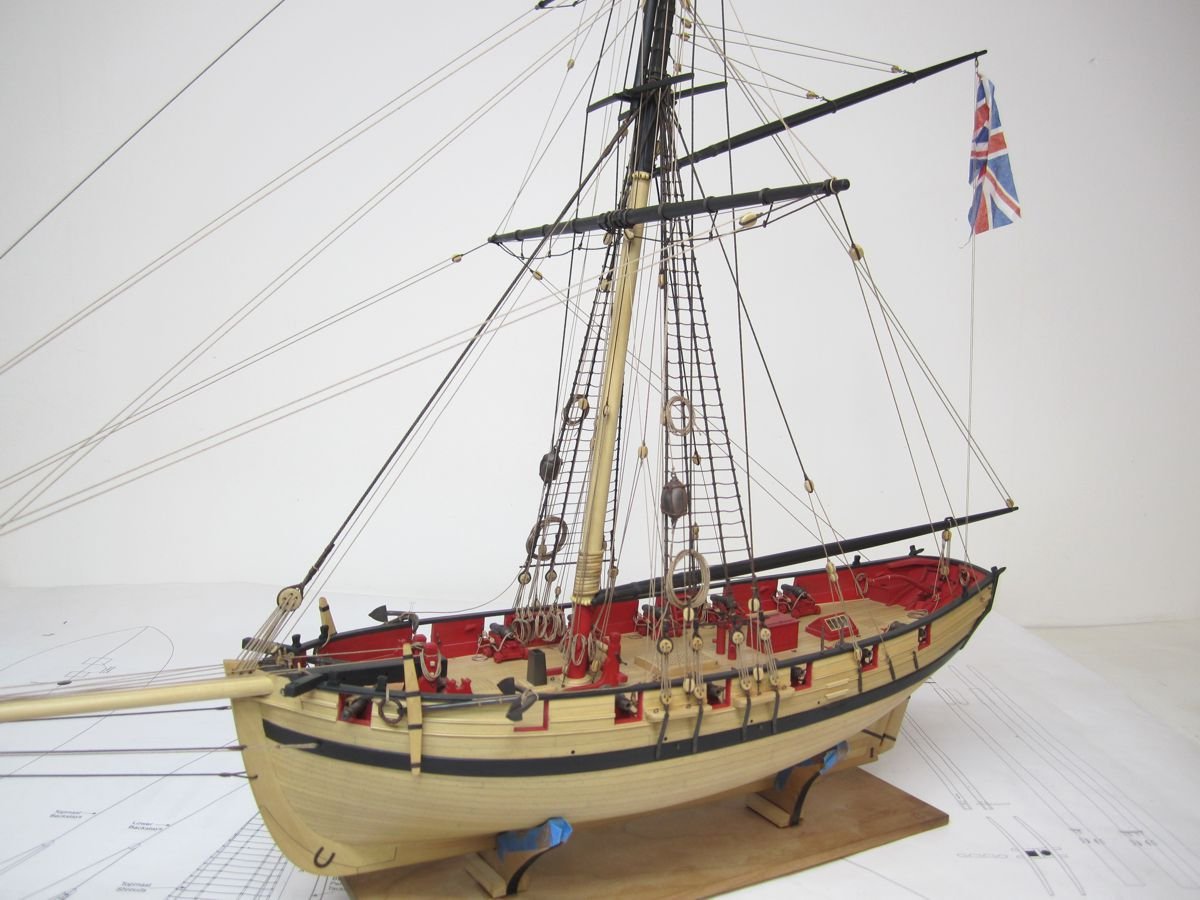
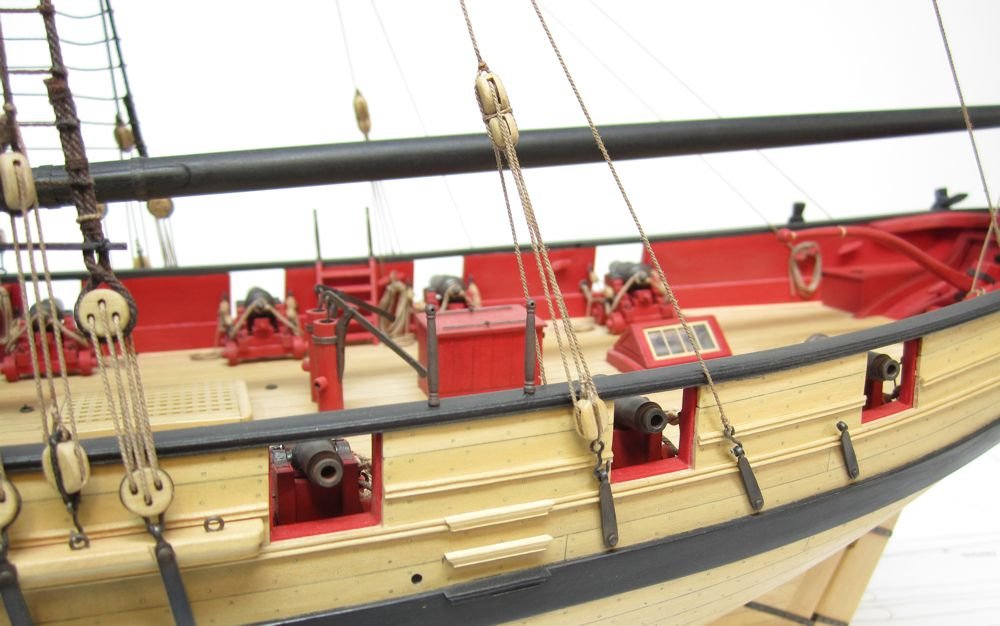
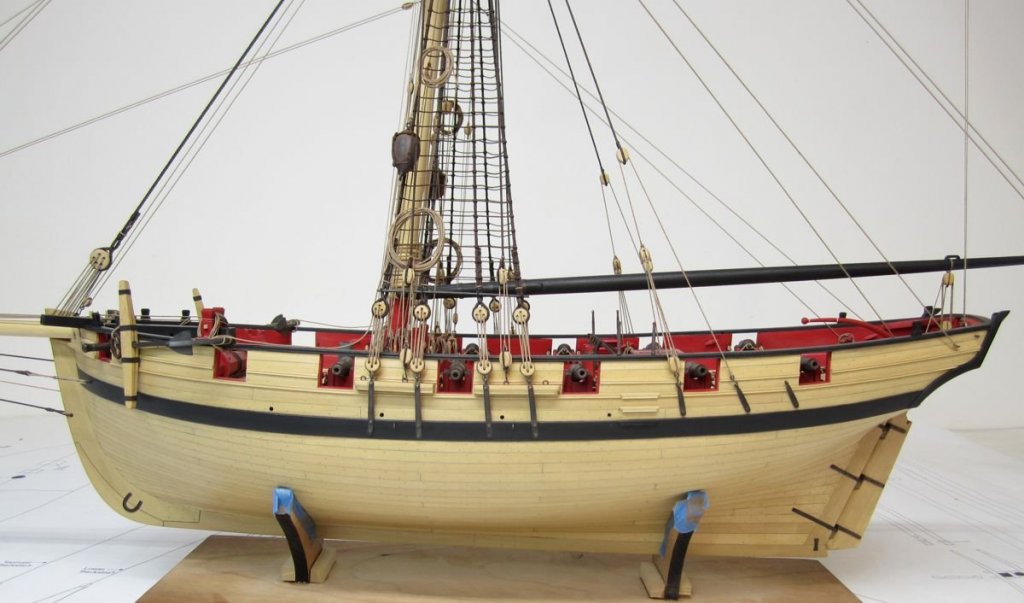
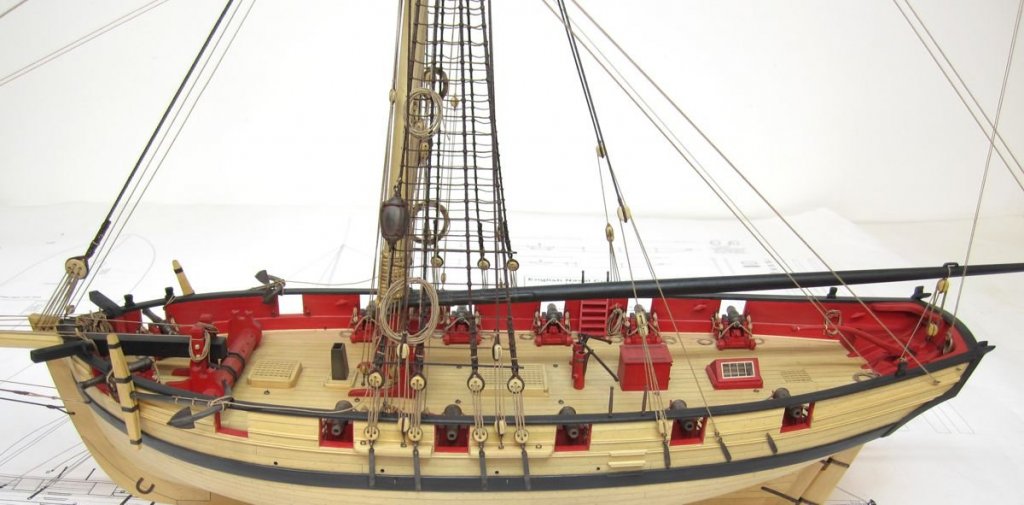
Thanks Dirk. Rigged the anchors today. Also made the entry way stanchions. These were made just like the belaying pins. They were turned in my dremmel. I started with a 1/16" strip. I drilled the hole forst while it was square and then turned the four stanchions. They were painted black and then made to look like metal. I wont add the rope from them because they always lay funny. They are not heavy enough to lay correctly and leaving them like this is much neater. They werent glued in yet when I took the photo below. And that about does it folks. After 3 years or so I have completed the Cheerful. I enjoyed myself a great deal and learned so much with this project. Here are some preliminary images of the completed model. Hopefully I will find time to make the base and case soon. But now its onto the barge.....


- 1,048 replies
-
- 51
-
-
- cheerful
- Syren Ship Model Company
- (and 1 more)
-
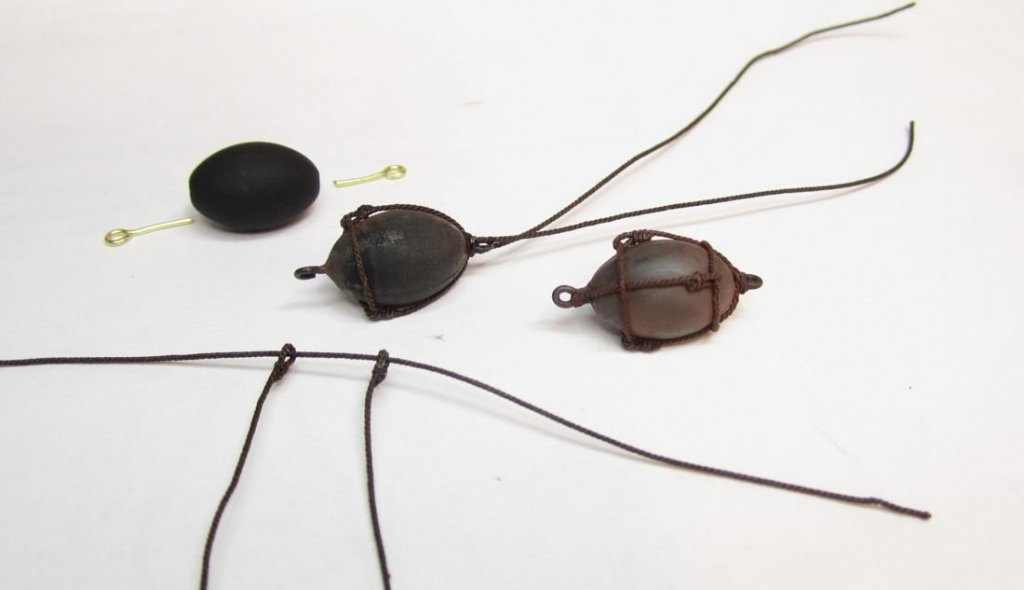
Having come home last night I wasnt much feeling like making blocks or rope. So instead I am spending the day in the workshop. To go along with the anchors I am making the nun buoys...or anchor buoys. These are an optional detail and are not always presented on contemporary models. But I thought it would make a detail. I sourced some special beads the appropriate size and shape. The buoys should be about 1/4 to 1/3 of the length of the anchor, original sources are sketchy. These buoys are 15mm long. The beads have a hole through them already but it was too large. So I filled it and then re-drilled for the eyebolts. This is not how a real anchor buoy is fashioned but I have simulated the details for years and think it does a nice job of it with the eyebolts. It makes rigging the buoys easier. The eyebolts are not glued in all the way. They are left about 1/32" from the buoy end so I can seize the loose ends of the rigging around them. First the eye bolts are added and the buoy is touched up and painted. Then I prepare two rope assemblies for each buoy. Each assembly contains two lengths of .025 brown rope with an eye formed on one end. Then they are slid onto another length of rope to complete the rope assembly. Two are needed for each buoy. One on each end. Normally the rope is served for these but I just wasnt feeling it so I used the rope as is. This rope is spliced around the buoy and the two loose ends brought down to the eyebolt. Here is where I seize them around the bases of the eyebolt and snipped off the loose ends. see the photo which shows the second buoy in this stage but I havent snipped off the excess rope yet after seizing the two loose ends. I repeat this process on the other side but note how the two loose ends will now be run under the first assembly first as they work their way towards the eyebolt on the other side. Its difficult to explain in writing but hopefully the photo does the trick. Then I touch up the black paint and apply some weathering powder. I dont want them to be solid black. Tomorrow I will rig them along with the anchors. You can see the completed buoy in front (right). The anchor mini-kits are now in stock and they do include the two buoys. So you get the parts for the anchors and the buoy material.
- 1,048 replies
-
- 27
-
-
- cheerful
- Syren Ship Model Company
- (and 1 more)
-
There are no fumes at all when laser cutting. It has very little strength when any pressure is applied to it so it cant be used for stuff on your model that needs this strength. Like chain plates or eye bolts and other things. It will tear quite readily when any stress is applied to thin pieces. It also breaks when you hard fold thin pieces. Its great for some parts and just plain not useable for others. Chuck
-
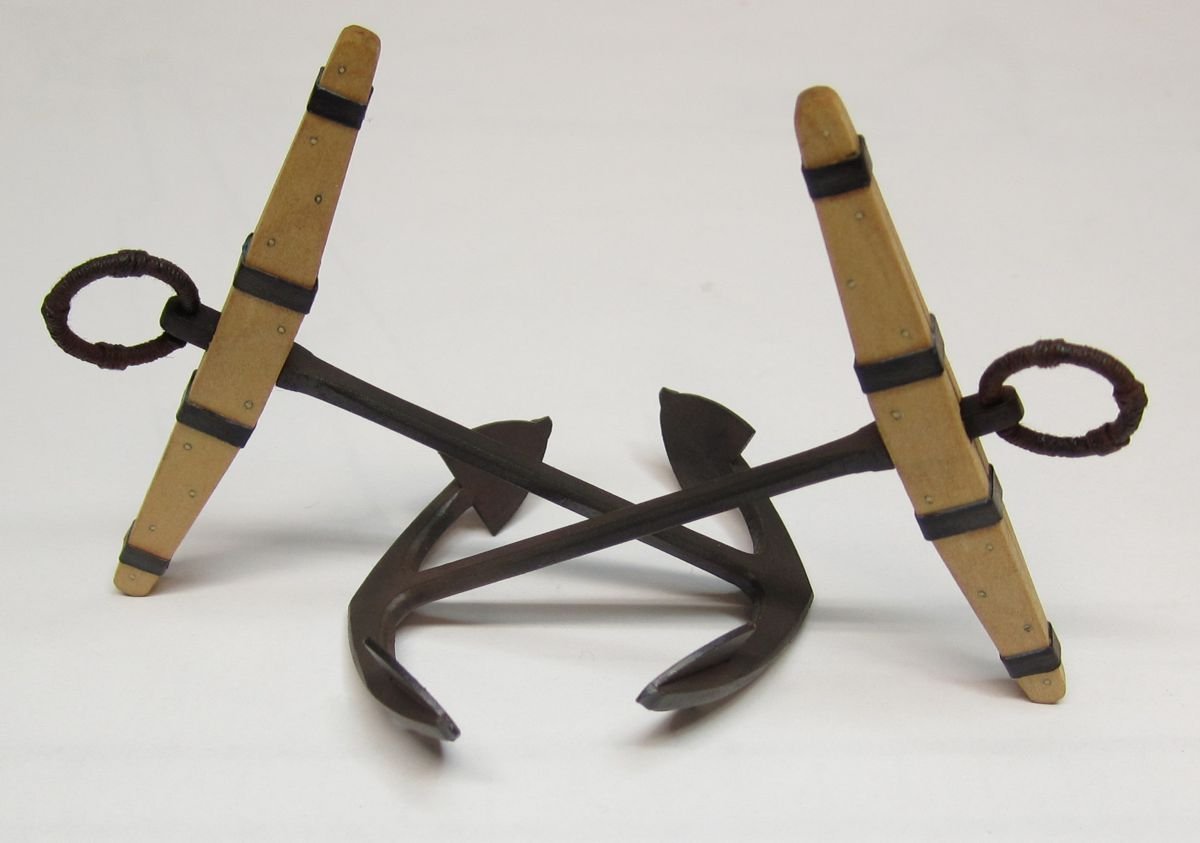
Forgot the picture.....the rings are done with their pudenning. Wrapped with .008 dark brown rope. Next will be the anchor buoys. Then to rig them. Chuck
- 1,048 replies
-
- 30
-
-
- cheerful
- Syren Ship Model Company
- (and 1 more)
-
I used Badger black air brush paint. But its nothing special. What really gives it a smooth appearance is when you brush on some grimy ash black or even some dark brown weathering powders. Then buff it off. That is what gives it the texture and tone and reflective quality you see. Chuck
- 1,048 replies
-
- 6
-
-
- cheerful
- Syren Ship Model Company
- (and 1 more)
-
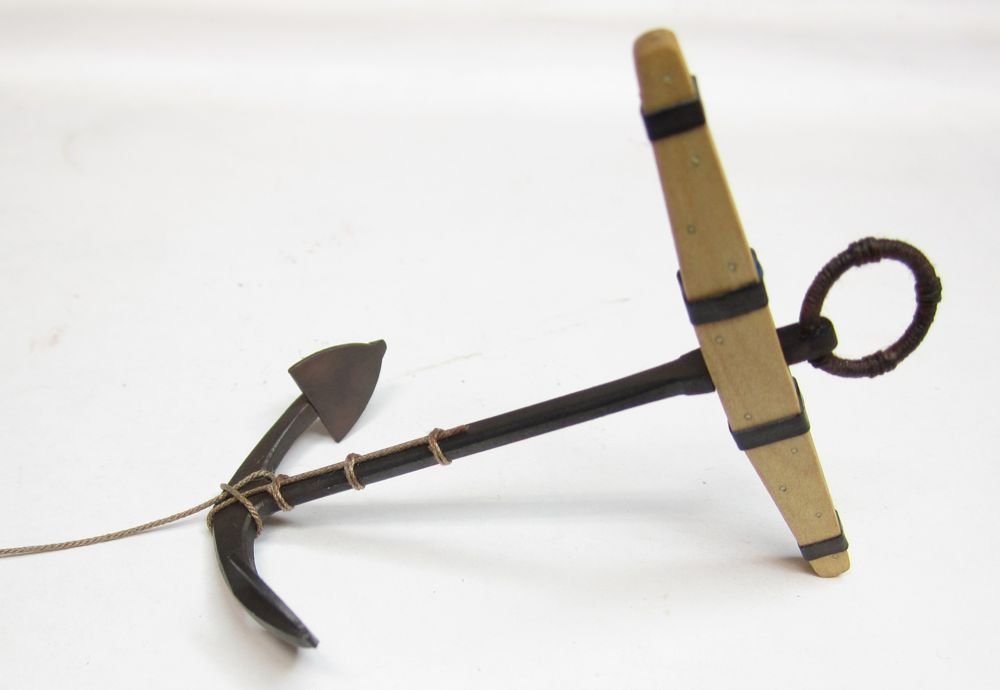
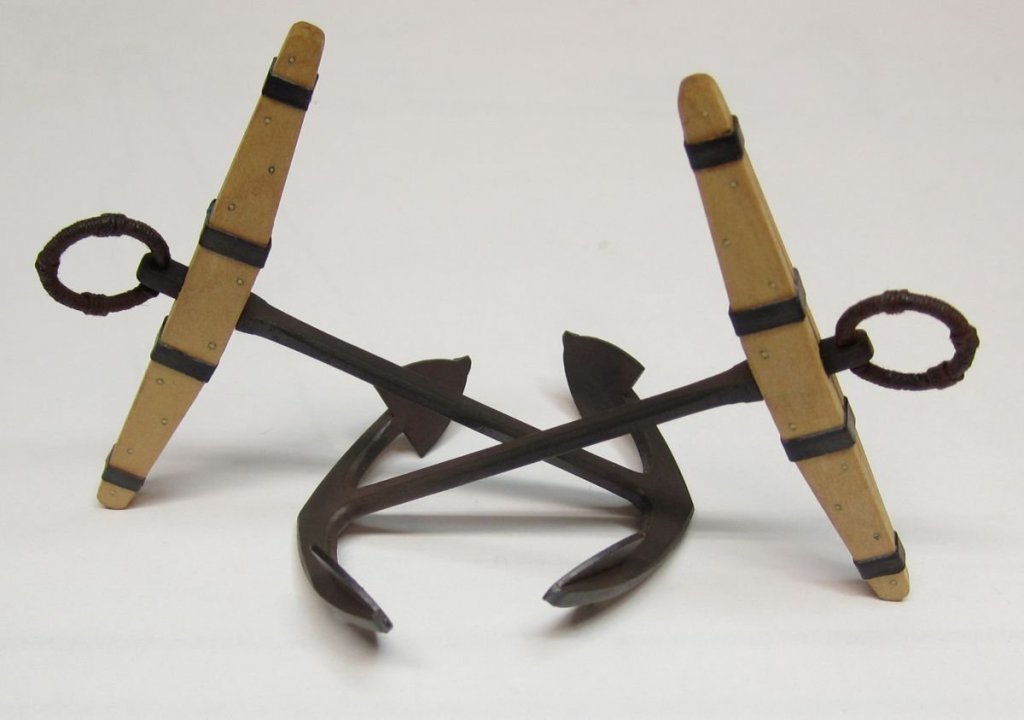
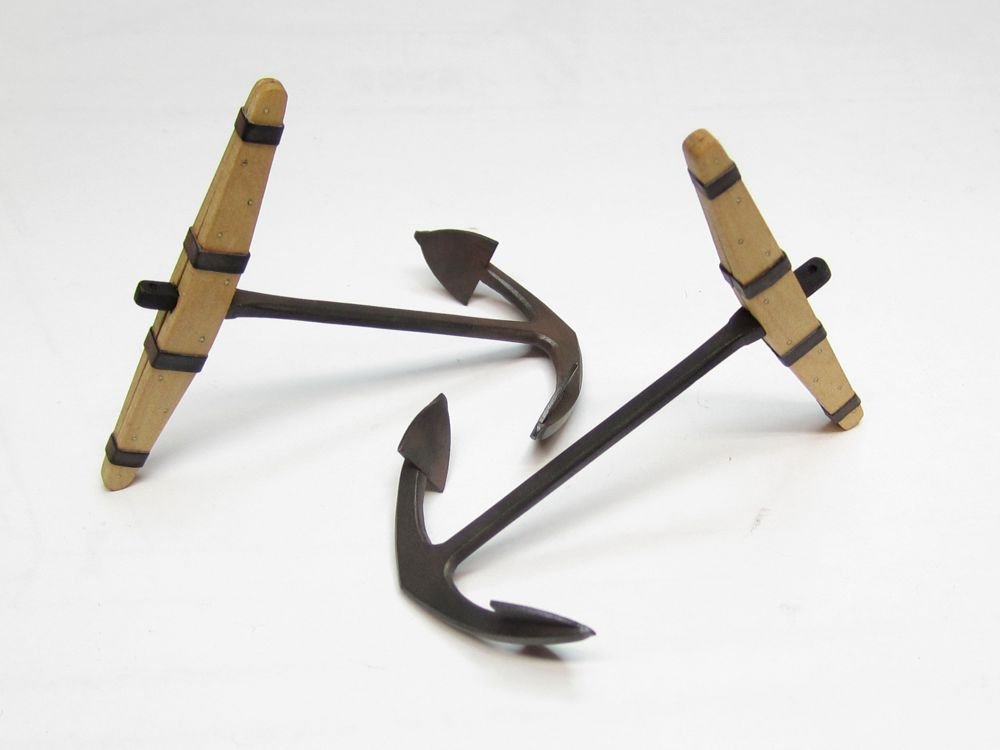
Keith These anchor kits should be out in a week or so. I have to finish them up for Cheerful first. As far as the Barge kit, That will sit waiting until I completely finish Cheerful now. I am just about done as you can see. Once completed I will resume work on the Barge. Here is what the anchors look like painted with the bands on the stock. Th e metal bands are just tape.....painters tape which is smooth....I lay a strip on my cutting board and paint it black. Then I cut the tape into strips the correct width. I wrap the tape around the stock two or three times. No more than that as it will look too clunky. I think its safe to say that unless someone picks up these anchors they would hardly know they were made from boxwood. They were painted black with an airbrush and then some weathering powders...both a rusty brown and a grimy black were added. That really does the trick and gives it a nice finish when buffed off lightly with a brush. The bands were added to the anchor stock only after it was positioned on the shank. This was because the stock opens up and putting the bands on ahead of time would have been problematic when the stock was closed. Next up is to make the ring for the anchors and do the puddening with rope. These anchors are 2 1/4" long or 58 mm. That measurement is without the ring. Chuck
- 1,048 replies
-
- 33
-
-
- cheerful
- Syren Ship Model Company
- (and 1 more)