Chuck
-
Posts
9,701 -
Joined
-
Last visited
Content Type
Profiles
Forums
Gallery
Events
Everything posted by Chuck
-
 Looks very good Mike. I wouldnt move it like the book. Think about what would happen over time if on the actual ship it was there. Small movement in the mast would cause that rope to shimmy back and forth and move around. The top edge of that strap although not razor sharp would slowly act as a knife weakening and tearing/cutting through the stay over time as the mast moved ever- so slowly back and forth..... Can you picture that? Chuck
- 452 replies
-
- 7
-

-
- cheerful
- Syren Ship Model Company
- (and 1 more)
-
I dont want to hijack the topic but... http://www.ebay.com/itm/Mazbot-7-034-Hole-Punch-Pliers-5-SIZE-Jewelry-Metal-Leather-HIGH-GRADE-HPP06-/280775730493 Ebay of course.
- 3,618 replies
-
- 7
-
-
- young america
- clipper
- (and 1 more)
-
If you dont mind spending $20 bucks for a tool you wont use that often.....This one works really well to make thimbles. Its a jewelry metal punch tool. Works great. The aluminum or brass tubes we use are very soft so only light squeeze pressure is needed.

- 3,618 replies
-
- 5
-
-
- young america
- clipper
- (and 1 more)
-
Fantastic news...look forward to seeing some progress. Chuck
- 39 replies
-
- 1
-
-
- cheerful
- Syren Ship Model Company
- (and 1 more)
-
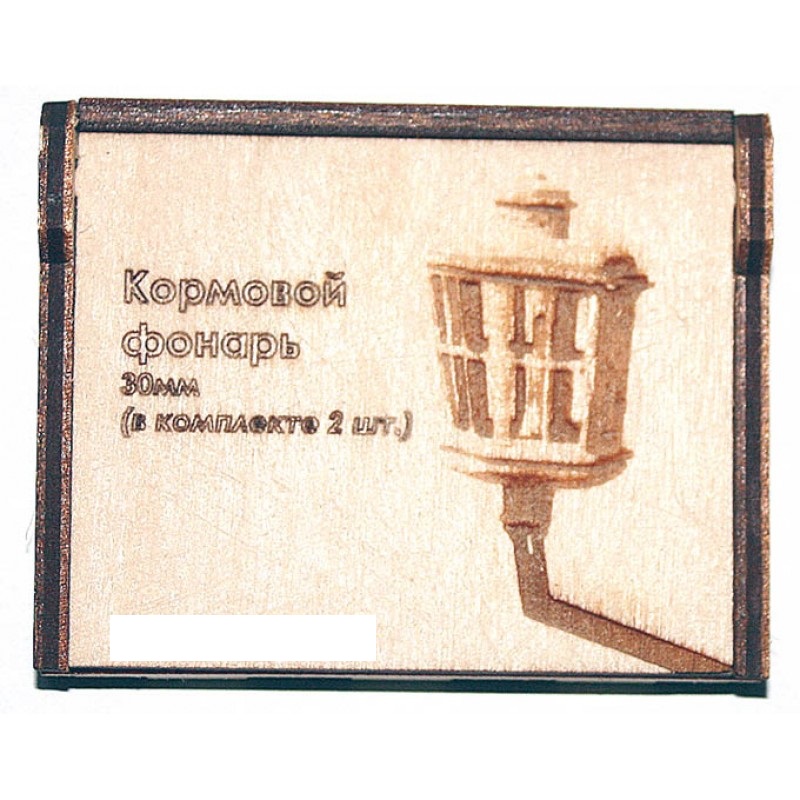
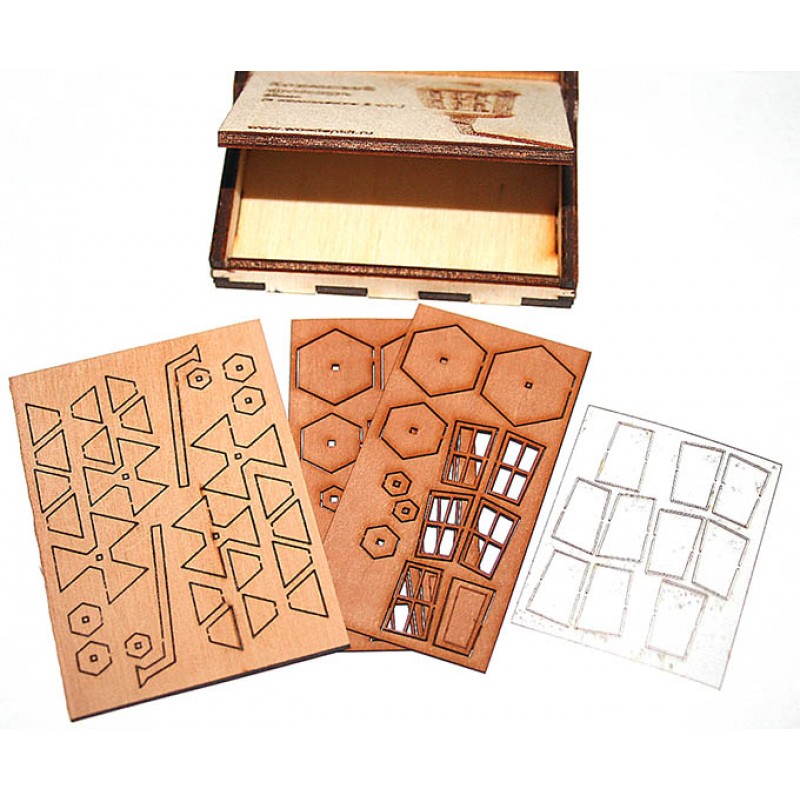
Yes I know but the damage is done already.....I was too trusting and very naive. Maybe I should partner with them as was mentioned in another thread by one of our members . That is why all future Syren parts and kits will no longer be sold with plans that include laser cut patterns. For example...my new barge kit wont have any templates of parts....on the plans. The plans will NOT be sold separately. Because the parts are all included and laser cut in the kit, it isnt really needed. I will use photographs of the parts in the instructions instead. Its a shame really that it has come to this. I have also removed the station lines from the body plan on the plan sheet so if they want to steal the barge design they will have to do some work to figure it out. If they are even capable. Live and learn. I also no longer sell to Russia or China. I do get orders but I simply cancel them. Its a real shame I tell ya. I am very close friends with two Russian model builders in the states. They have family back home and brought this site to my attention last year and apologized on behalf of good Russian folks who dont condone the practice. And they admit that the issue of piracy is as bad if not worse than in China. They also pointed me to another Russian site which includes a free download of my Cheerful plans, Syren Plans and Confederacy plans along with the practicum...which isnt even finished yet for Cheerful. You can also download many books from Seawatch page by page in RAR format. But those guys will end up with the nastiest of virus' on their computers after downloading anything. Really bad stuff actually and they advised me not even to try it as it gives the site owners access to their computers afterwards. So I do get a small bit of satisfaction in knowing that if anyone actually finds the site and downloads my plans they will have some serious problems......afterwards. Some people say I get too upset over this stuff and its just the way it is and although they say publicly they dont condone it....they are not all that disturbed by it. But I must tell you....its not a fortune lost but how much money have I lost because of folks like this.....and from those who are willing to use them? Its very serious for the industry. It makes me want to stop even trying and hang it up.....whats the point right? At least that is what runs through my mind from time to time. I could get a job at Home Depot and come home after a shift and make models just to relax like everyone else. Working 12 hours a day in the shop seven days a week to make a living as a ship modeler pays about the same thing.....it will be far less stress. Maybe some folks wouldnt take it so lightly or wouldnt buy from them if they were the ones trying to provide for their families by making a living at it. I do wish they would think about that when they hit the buy button.
- 14 replies
-
- 20
-
-
Yes indeed it is....that same scumbag company also pirated my lantern kits and other projects stolen from other MFGs....I removed the link. The Russians are just as bad as the Chinese. You would think with all of their master builders that they wouldnt have to steal other designs. But yes that company is bad news. They even use my assembly images taken from this site to help sell the lanterns. I made the unfortunate mistake of including the parts diagram in the downloadable instructions. Once again....You cant win!!! I have known about this company for some time now. When I first came across their site I had to laugh until I almost peed myself. Written in russian it says "Dont buy from a foreign supplier.....we manufacture all of OUR products in our own facility" If its out there they will find a way to steal it. They have also stolen and pirated Jeff Staudt's Batteau because the Model ship builder site hasnt used any protections.....not that this stops them. This company has already been added to the banned Kit makers list posted here. I guess I should be flattered right? Imitation the the greatest form of flattery or however that saying goes.... http://modelshipworld.com/index.php/topic/181-banned-kit-manufacturers-on-msw-pirated-kits-prohibited/ Here is a link to the real thing.......buy the original and NOT the pirated Commie fakes Chuck

- 14 replies
-
- 16
-
-
HM Cutter Cheerful 1806 by Erik W - 1:48 scale
Chuck replied to Erik W's topic in - Build logs for subjects built 1801 - 1850
That looks excellent.....well done. -
Thats a lot port lids....way more than are needed. Remember that not every port gets a lid. Only 7 per side. Chuck
- 2,191 replies
-
- 8
-
-
- confederacy
- Model Shipways
- (and 1 more)
-
How to deal with badly drawn plans?
Chuck replied to Redshirt's topic in CAD and 3D Modelling/Drafting Plans with Software
You cant use auto trace...its just not accurate. It also creates too many nodes in your lines. Unfortunately there are no shortcuts and these "quick-fix" auto functions are just a way to do the job quickly and rather sloppily. The only way you will be able to really do an accurate job is to import the image and trace over it while making corrections yourself. Then as Druxey said, use diagonals and waterlines to fair and correct your traced lines. It is a very time-consuming process but its the only way you will be sure its correct before you start making sawdust. I usually import an image and scale it to whatever the scale is I am working on...say 1:48. But others find it easier to make the drawing full size so they can use the real measurements from Steele or a builders contract. I use Corel Draw X8. It works great and once you become proficient with using the dozen or so tools and functions needed it goes well. You can use small tricks and methods to speed up the process. I have taught several people over the phone how to use CD and in person. I can usually get them to the point where they can work on their own with good results in just a few hours. But they must understand lofting and fairing and ship design before they start using the software or the lack of architectural knowledge usually does them in. Its easy enough to learn the software....much more difficult and time consuming to learn and understand how draft frames and proof out and fair your lines, along with adding all of those important details not shown on an original draft or simple plan original. In the image posted above for example, you can see the original draft I will begin drafting and tracing over. Also added to the workspace is an image of a similar contemporary model. This is also scaled up to the same size as the draft. Rather than flip back and forth to a photo on a different file or on paper, having the photo right above my work is an excellent and convenient reference. I can quickly examine the contemporary model for features not shown on the draft or incorporate and design my parts to mimic those on the model. For example, I can quickly use the model to design the joints between the stem and keel to closely mirror that models construction because its right above my workspace and not shown on the draft. I usually have many more draft copies and photos in my workspace than shown here but this is how I work up a set of plans....once at a pont to fair the frames or correct inaccuracies in the draft I can hide those images while I create my own half-breadth plan or whatever third view I need to prove out my lines. I use waterlines and diagonals to correct my frames while creating my own Half breadth view from the body plan and sheer plan I traced. Chuck
- 29 replies
-
- 16
-
-
Very nice....that is exactly how I will show the oars for my Royal Barge.....it looks great.
- 277 replies
-
- 2
-
-
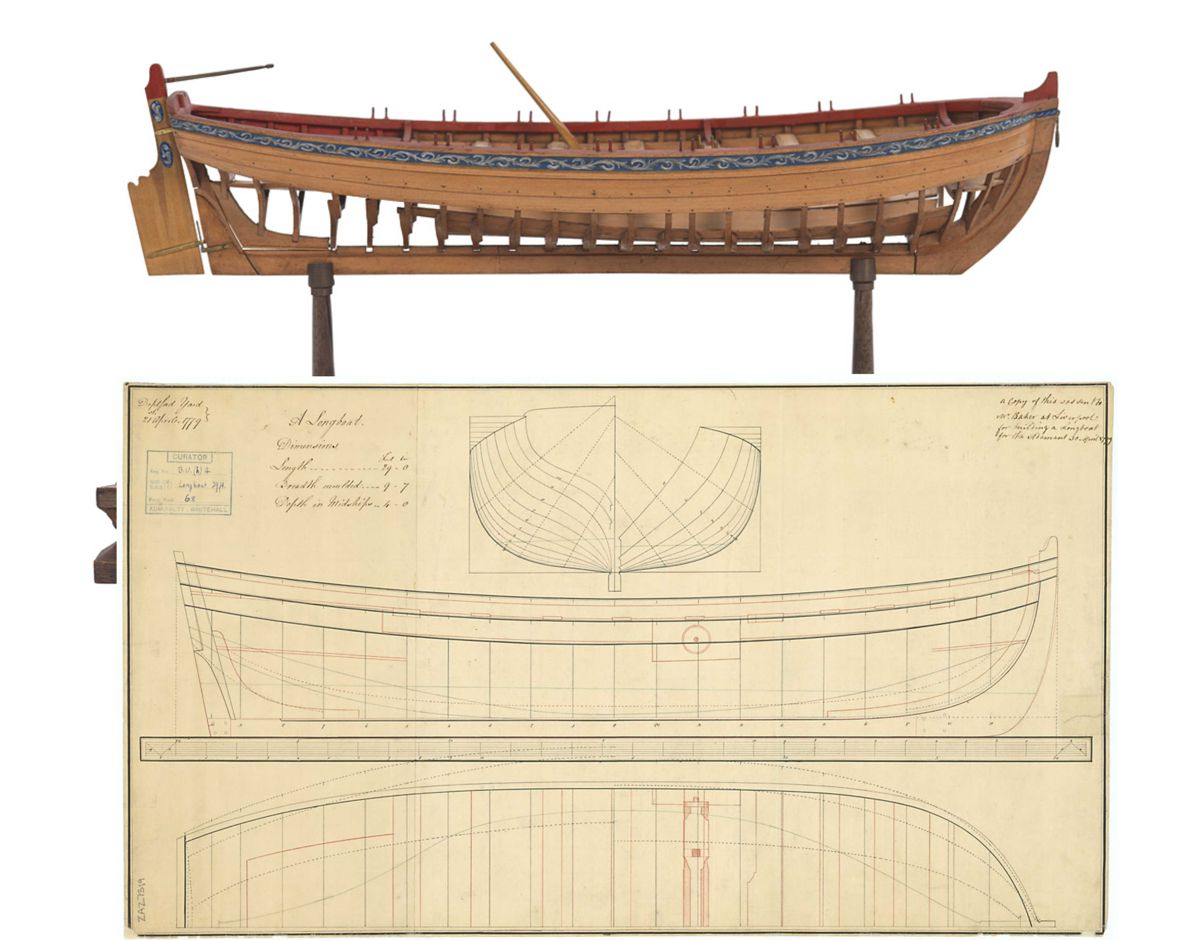
- model shipways
- 18th century longboat
- (and 1 more)
-
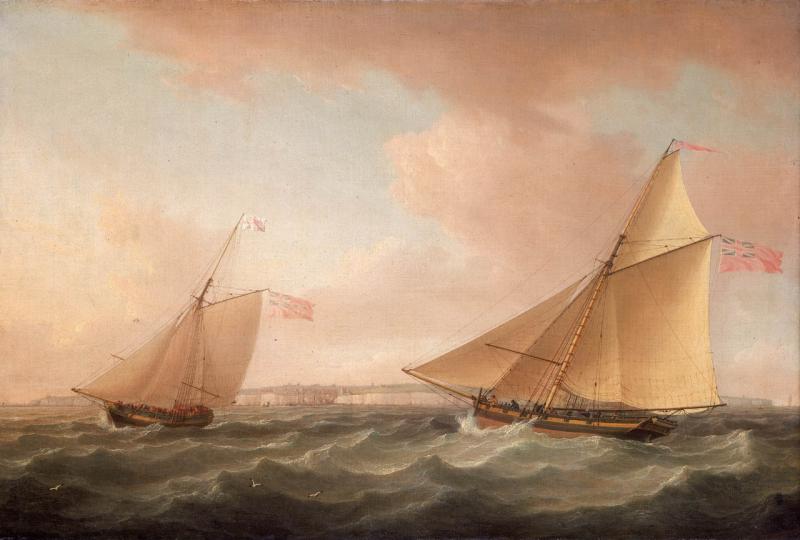
If not out at sea, the loose ends are belayed to a cleat which would be convenient. But if out at sea, the boom would need to swing freely so many contemporary models have the two loose ends belayed to the boom itself. This is also shown on many contemporary paintings as well like the ones shown.
-
HM Cutter Cheerful 1806 by Erik W - 1:48 scale
Chuck replied to Erik W's topic in - Build logs for subjects built 1801 - 1850
Really nice planking job....I think you found the sweet spot and wont have difficulty planking anything in the future. Well done!!! -
Thank You very much I basically use a lot of simple square knots. I try not to complicate things. Half the battle is using the right sized line. As soon as time allows I will try and put something together. Chuck
- 1,051 replies
-
- 6
-
-
- cheerful
- Syren Ship Model Company
- (and 1 more)
-
Here you go....if you can find an 8 1/2 x 11 sheet of self adhesive label paper I recommend using that. It makes things a lot easier. I know you only need one sheet but for future projects it worth the investment. You can buy self adhesive paper that is micro thin on ebay.....25 sheets per pack. longboatfreizes.pdf
- 162 replies
-
- 1
-
-
- 18th century longboat
- model shipways
- (and 1 more)
-
Nicely done Mike.....only a few more to go.
- 452 replies
-
- 5
-
-
- cheerful
- Syren Ship Model Company
- (and 1 more)
-
I am about to make the two yards for Cheerful and the center of each is eight sided. So I am going to start with a square stick and then turn it into an Octagon. I will round off the ends and taper them afterwards. I am using the 7/10/7 template to mark the stick so I can create the eight sided shape. When I was preparing my square stock I thought that everyone would probably benefit from the template I am using and created. It will save you time so you dont have to make one. Attached is a PDF template that is prepared with the correct ratios. I have been using it all along to make the masts and other spars. Its a very handy template to have. seventenseven.pdf Chuck
- 1,051 replies
-
- 16
-
-
- cheerful
- Syren Ship Model Company
- (and 1 more)
-
Beautifully done....it is refreshing to see some progress. I missed the updates.
-
Its really not a fair question. It depends on what you will be satisfied with in the end result. The old motto is true...."you get what you pay for". You can spend 5 bucks for a chisel or you can spend $150 for a better one. My guess is you will not be happy with the $5 chisel and will end up throwing it away. You can spend $30 for a bandsaw blade or $225. Etc. Etc.... You get what you pay for. This hobby is certainly not going to allow you to build models like this one below for $200 - $300. Its an expensive hobby once it grabs hold of you. It just depends on what you will be satisfied with in the end. Again its not really a fair question because some folks are willing to invest much money (if they can) and much time tobuild a model like this....but many are just as satisfied with a less ambitious result. If you are going to spend $1000 bucks on something that will take you maybe three years to complete I would say that is a very reasonable and inexpensive hobby. How many people spend just $335 dollars a year on a hobby for decent results. Especially if its something that will give you years of pleasure and enjoyment. I know guys that drop 100's every month bowling on a league......for me its just not worth it. I think that kind of money is better spent on ship modeling is.....so again....its not really a fair question. It more about how much do you really want it. You spend money on what you are passionate about and everyone is different.....I spent 200 dollars on a cheap saw once because I couldnt afford a good one. It was a terrible decision. Finally I saved enough to buy a Byrnes saw and it makes the hobby much more enjoyable. And that saw will last me a lifetime while the cheaper one was good for nothing out of the box.
- 39 replies
-
- 19
-
-
Its pretty straight forward....I am sure you could find either someone who has done that to this kit or even look at the NMM site. They have sailplans listed. But maybe someone who has done this already will share their templates. I never made any because it was not called for at the time when in development. see this topic http://modelshipworld.com/index.php/topic/13442-sail-design-for-18th-century-longboat/ Chuck
- 162 replies
-
- 1
-
-
- 18th century longboat
- model shipways
- (and 1 more)
-
Its really a VERY simple answer. Dont Use the Ancre plans at all. Dont use the Ancre drawings at all . You can learn a great deal from those books as a reference and source of inspiration but rather than replicate them and adding more to them....simply pick a 74 gun ship other than those from a plan by La Charpente....get the original drafts of a similar 74 and draft your model plans from them, using the knowledge you have gleaned from the Ancre books and other sources while avoiding any copying/duplication at all. Thus you will have created an original Kishmul set of plans that are entirely your own. Otherwise you would be really walking a thin line ....If you have the knowledge and skill to fill in the blanks that are missing from someone elses efforts....then certainly you would also have the chops to not use someone elses efforts as a starting point, and instead...simply flush out a whole new project from A thru Z ......rather than take A thru M from someone else and then supplement with your own N thru Z. Chuck
- 15 replies
-
- 10
-
-
Cruizer-class Brig-Sloops of the Royal Navy
Chuck replied to molasses's topic in Nautical/Naval History
A few more pictures in this article that are all about this model. Enjoy English Brig of War.pdf- 172 replies
-
- 10
-
-
Maybe...but as you can see by the photos it really isnt needed...they cleaned up real nice and look even better in person...