-
Posts
9,701 -
Joined
-
Last visited
Content Type
Profiles
Forums
Gallery
Events
Everything posted by Chuck
-

ancre Le Fleuron 1729 by rekon54 - 1:24
Chuck replied to rekon54's topic in - Build logs for subjects built 1501 - 1750
Absolutely beautiful work. Very inspiring!!! Looking forward to seeing more. Chuck -
I buy from them (Cherry) on a regular basis. Their cherry is quite good. They have limited thicknesses on their website but if you need something not shown send them an email with what you need and they will send you a PayPal invoice. Delivery is timely and milling is quite good. In fact, I just ordered several hundred dollars worth of Cherry to start mfg barge kits. Chuck
-
I usually use a satin finish wipe on poly after letting the stain dry for a day. But remember test it out on some scrap first. Prepare a planking sample. Prep sand the wood with 220 grit sandpaper and try the stain....it will be slightly darker. Then try some scrap planking with 320 sandpaper and apply the stain...it will appear lighter because you have left less "teeth" so-to-speak and with a smoother surface not as much stain will penetrate. With gel stain you apply and let sit for ten minutes and then wipe it off. Then allow 8-10 hours to dry if not over night. The next day lightly sand and apply the satin finish wipe on poly.
- 228 replies
-
- gunboat
- model shipways
-
(and 1 more)
Tagged with:
-
Gel stains have no shine at all. Its a pigment. It just colors the wood. Then you apply a protective finish over it which can be satin. Chuck
- 228 replies
-
- gunboat
- model shipways
-
(and 1 more)
Tagged with:
-
Lovely job on the exterior and interior planking. The basswood looks great. How do you plan to finish it. You could use a wipe on poly with no stain. Just to finish it. But if you want to apply a stain to give it color I recommend minwax gel stain. Its a great product and I have had good success with it. I prefer the honey maple color gel stain as it gives only a slight darkening to the basswood and leaves no blotches. Just test on some scrap planking first. Chuck
- 228 replies
-
- gunboat
- model shipways
-
(and 1 more)
Tagged with:
-
- 269 replies
-
- Queen Anne Barge
- Syren Ship Model Company
-
(and 1 more)
Tagged with:
-
What you need to realize is that the practicum was originally written for a classroom project and NOT for home use. Several new builders were working on the Phantom with my help and we met twice a week. We worked on the model together in a classroom environment. I was asked to also allow the MFG to place it on their site and I said it was OK. Folks thought it would be useful. The references to drawings in my guide were pointing to the actual instruction manual which came with the kit at the time...about 12 years ago. My guess is that the instructions have changed or at least the pagination. It is what it is. Still worth every penny....free. But if you have a question...dont be shy, ask your question in the appropriate forum or start a build log. Chuck
-
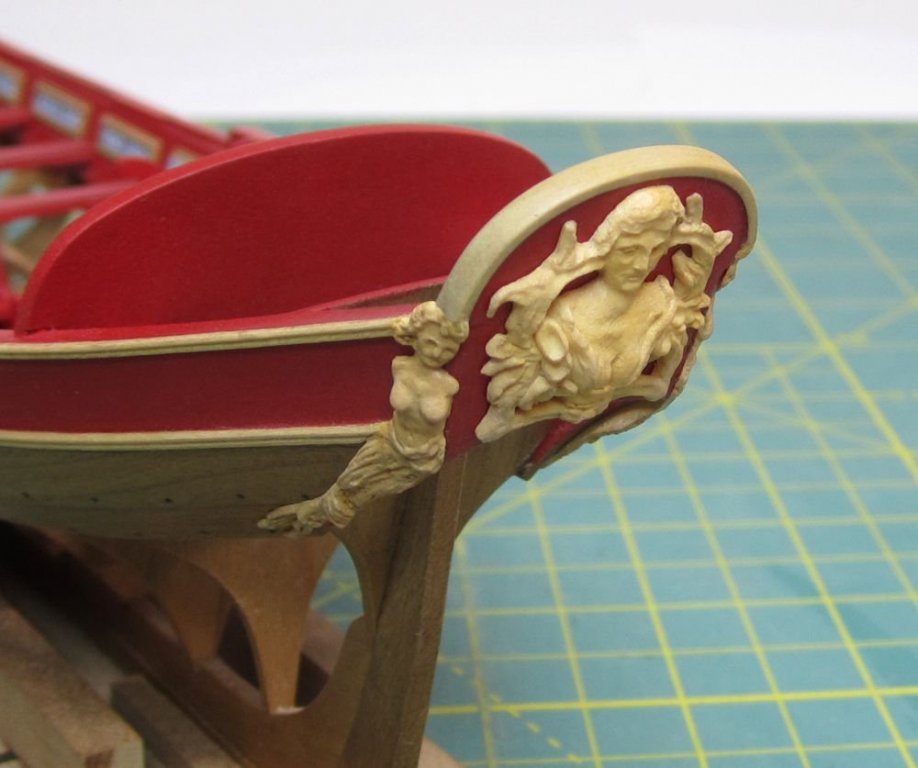
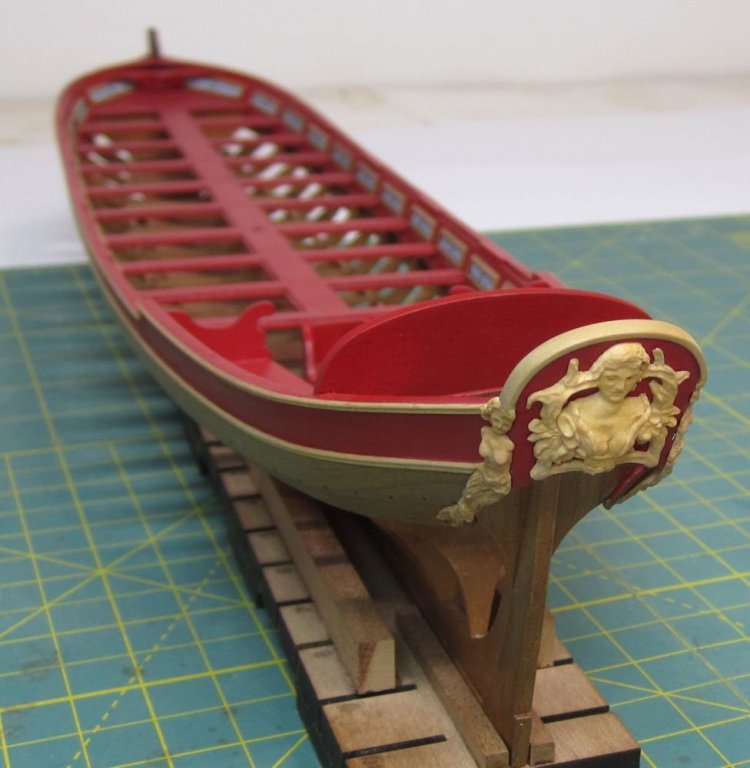
Thank you very much guys... Moving right along I added the syren figures at the stern. You can see how I dont have the acanthus leaves carved for the port side yet. Not enough time in teh day !!! I am gonna try and get the bust of queen Anne done next which goes on the outside of the tombstone transom. These two Syren figures were the smallest I have made to date. I could only merely suggest the details and hopefully your imagination will fill in the blanks. At least that is what I hear is supposed to happen. Almost forgot...these are once again resin castings. I will keep my sculpted originals as masters. Chuck
- 269 replies
-
- Queen Anne Barge
- Syren Ship Model Company
-
(and 1 more)
Tagged with:
-
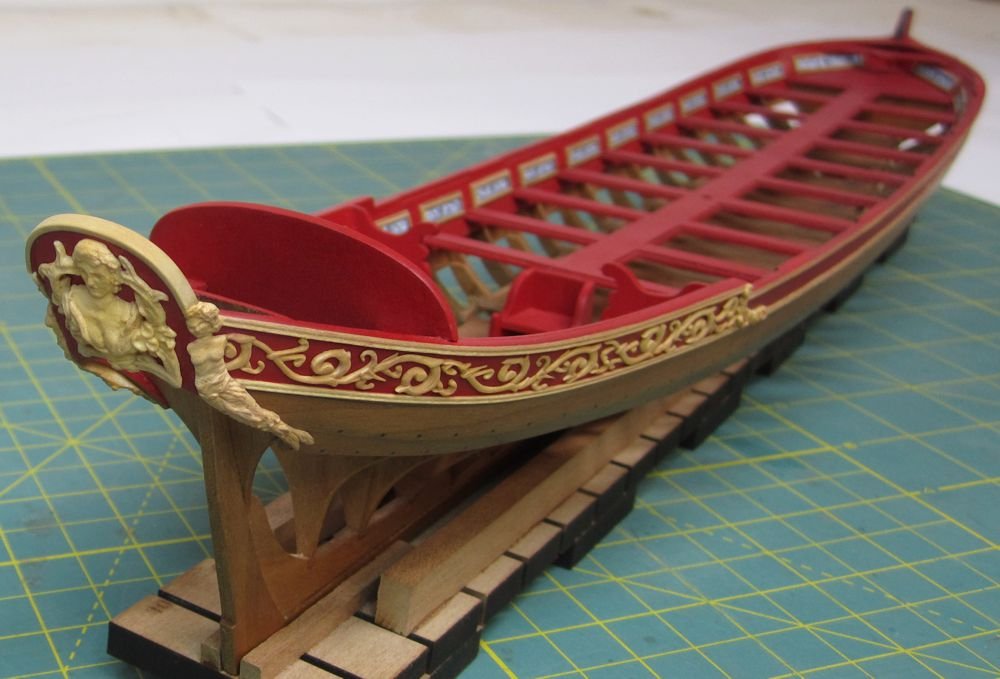
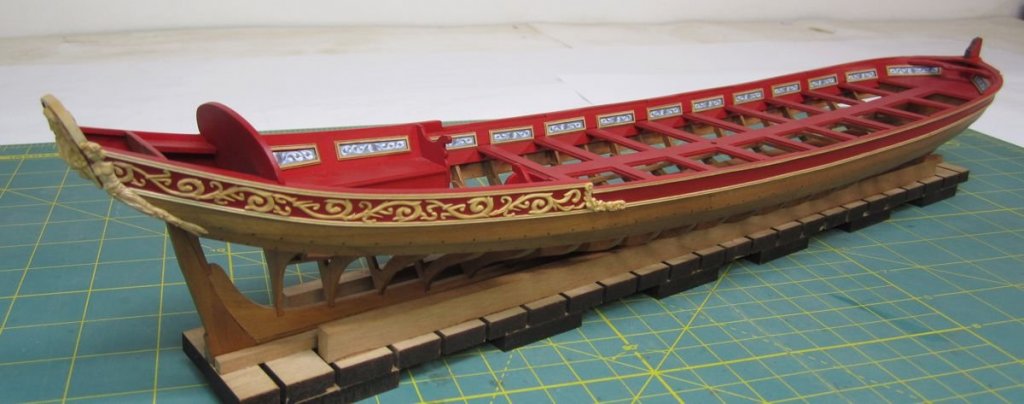
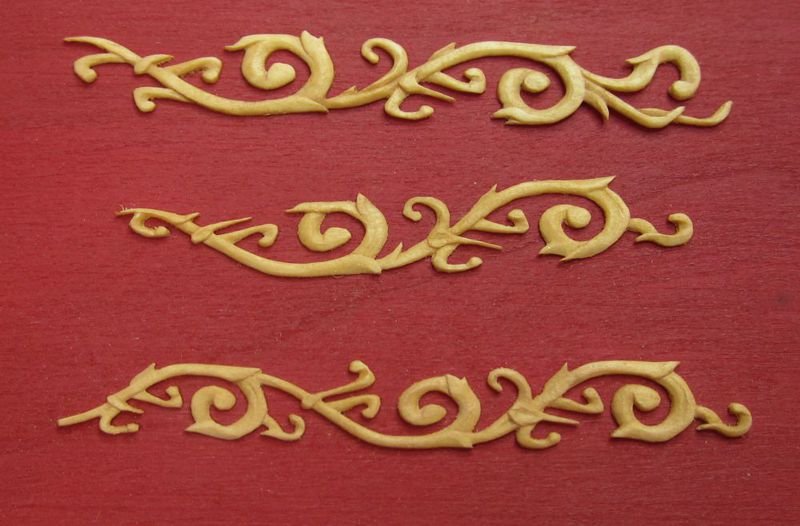
Slowly moving aft and getting more carvings completed. Actually I am concentrating on the sculpted parts now and I will finish the carvings once they are all completed. Rather than use my master boxwood carvings for the model, I am using resin castings instead. So all of the carving details you see below are resin. I will keep the original carvings as masters for when the molds wear out. Chuck
- 269 replies
-
- Queen Anne Barge
- Syren Ship Model Company
-
(and 1 more)
Tagged with:
-
Unlike brigs and frigates in other countries, you would not likely find any lanterns on American vessels. Not like you know from other English ships like Bounty or Victory. For example, If you were to look at any contemporary info.....paintings and models, you wont see any that show a lantern on Constitution or similar vessels. Its just not something you will see.
-
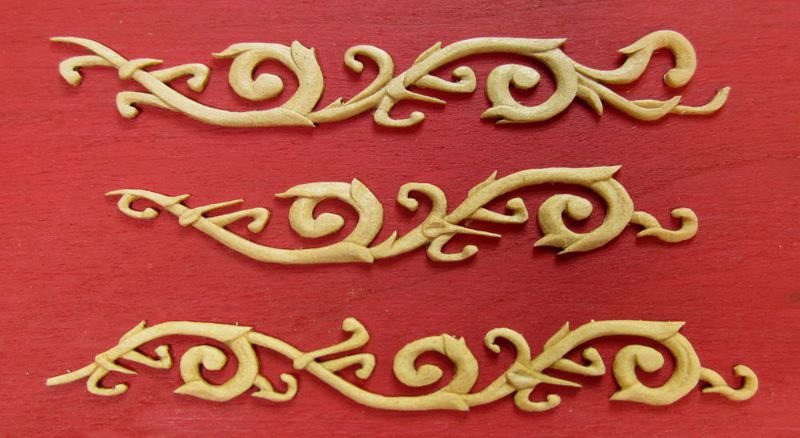
I continue to carve and sculpt the remaining decorations. This will take some time. I know you guys have seen these three carvings I did for the port side before. But while carving the new ones I have been pouring molds of the ones I already made and making resin castings. I will never paint a casting again. One of the photos shows the boxwood carved masters and another shows the resin castings colored with weathering powders as described earlier
- 269 replies
-
- Queen Anne Barge
- Syren Ship Model Company
-
(and 1 more)
Tagged with:
-
I got them at Micromark years ago. They were the earth tones set. There is no writing on each container so that is teh best I can do. Railroad guys use this set. Chuck
- 269 replies
-
- Queen Anne Barge
- Syren Ship Model Company
-
(and 1 more)
Tagged with:
-
Yes...the resin is already tan but very light. The weathering powders really finishes and its a darn close match and much cleaner than painting. Its also very quick.
- 269 replies
-
- Queen Anne Barge
- Syren Ship Model Company
-
(and 1 more)
Tagged with:
-
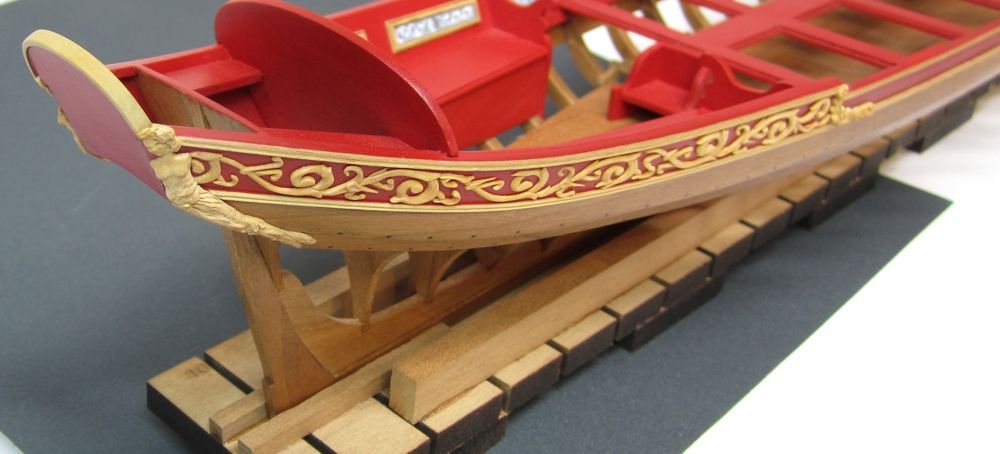
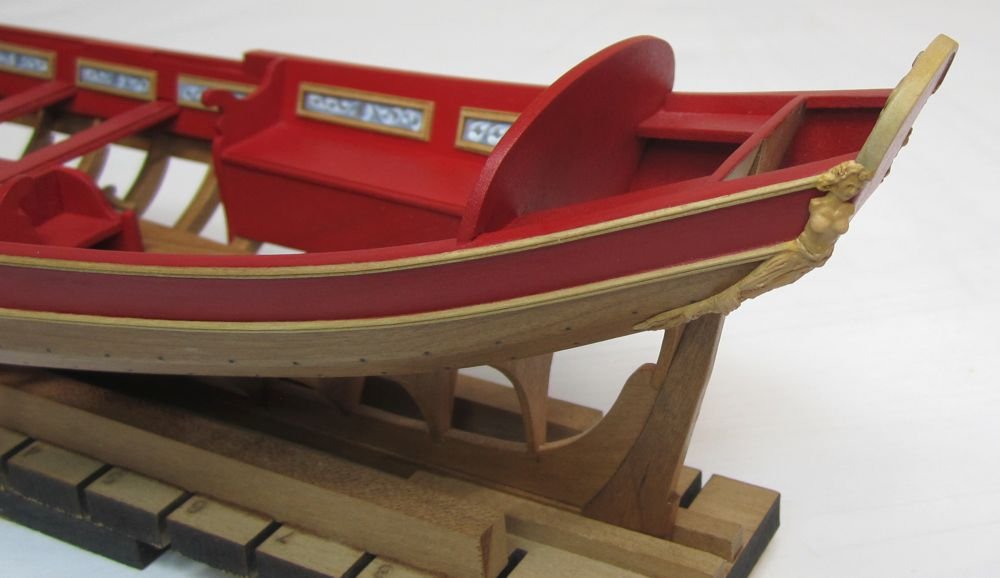
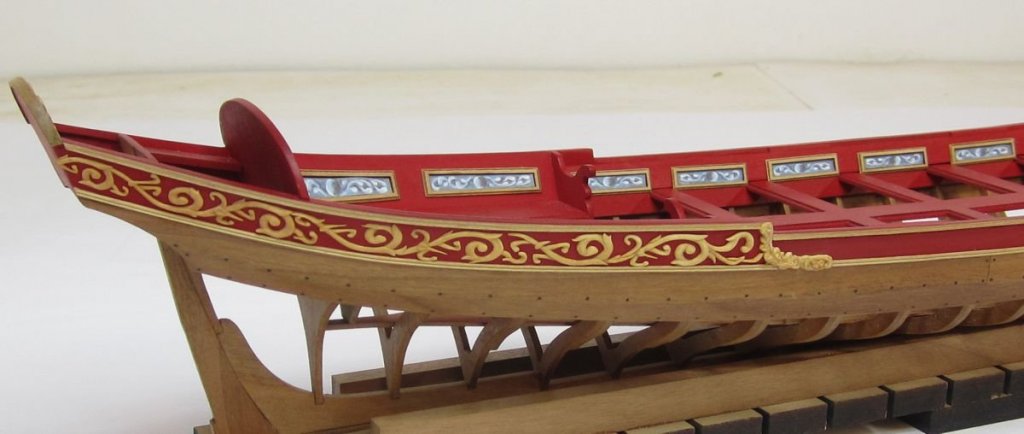
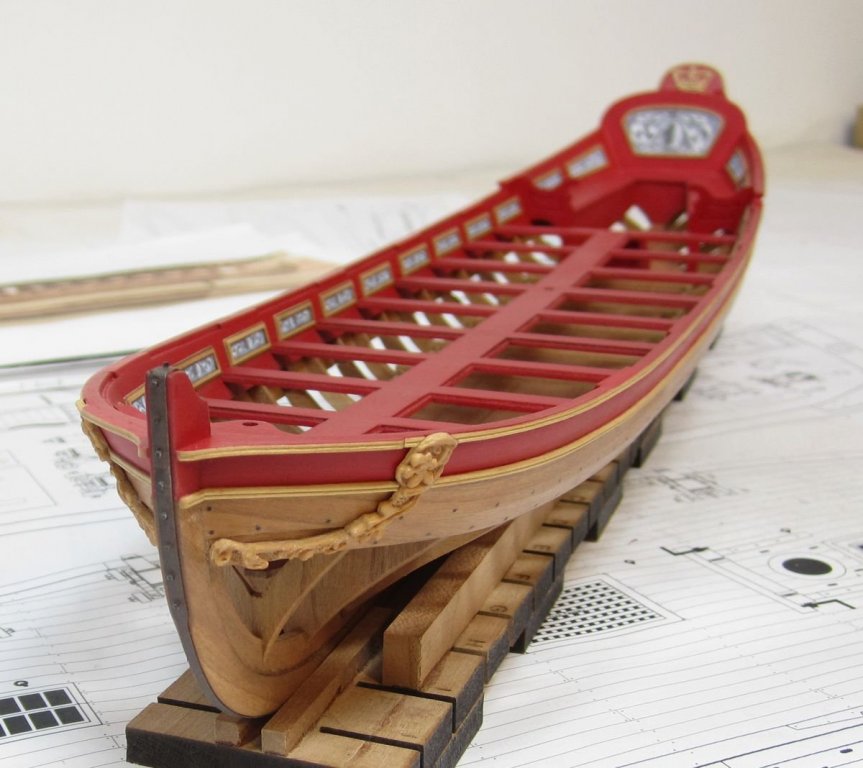
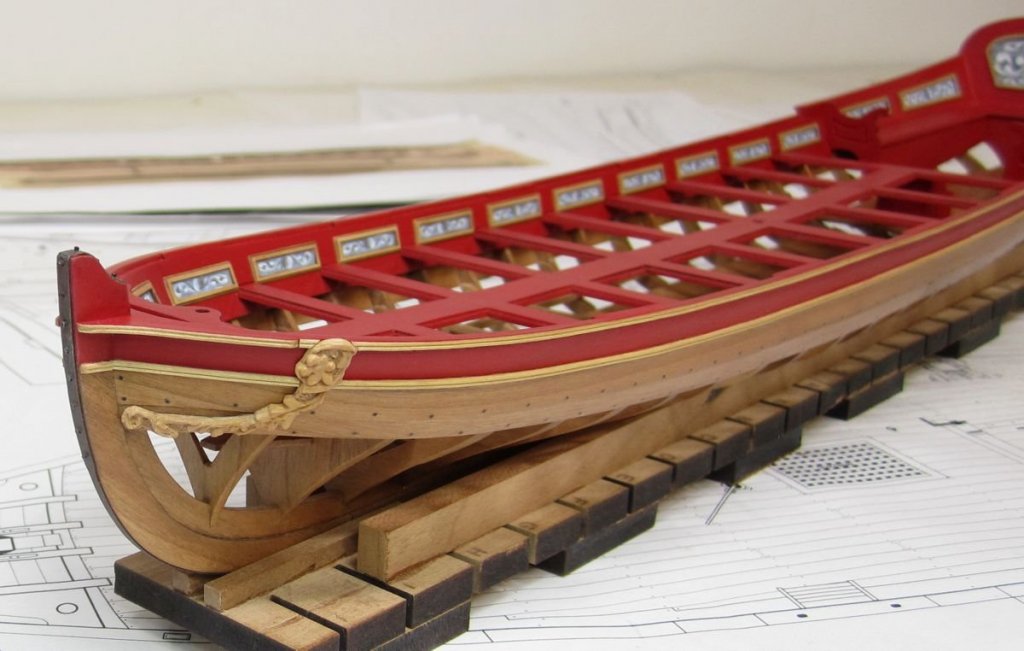
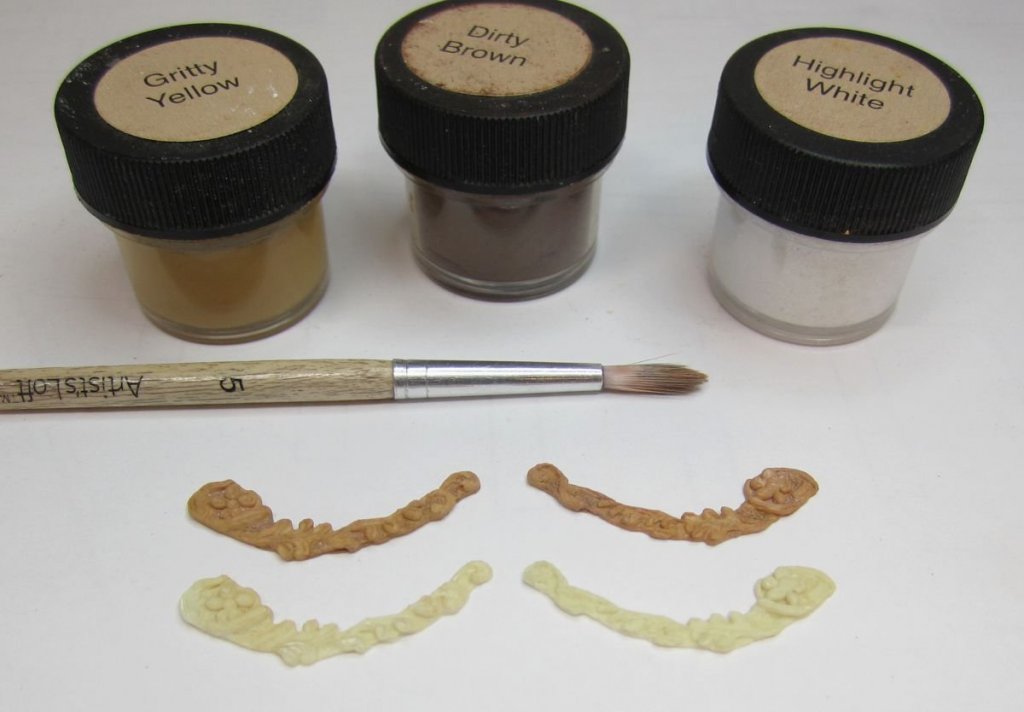
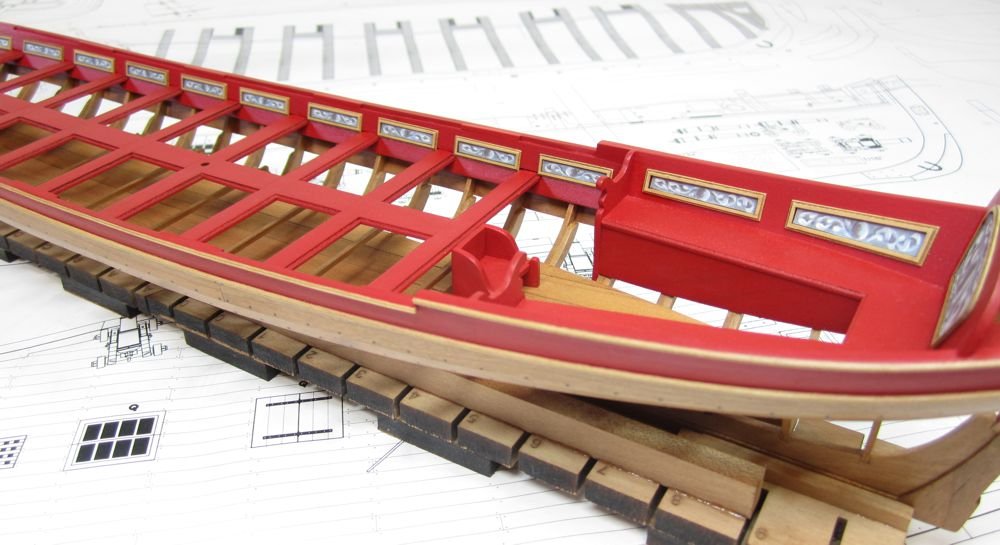
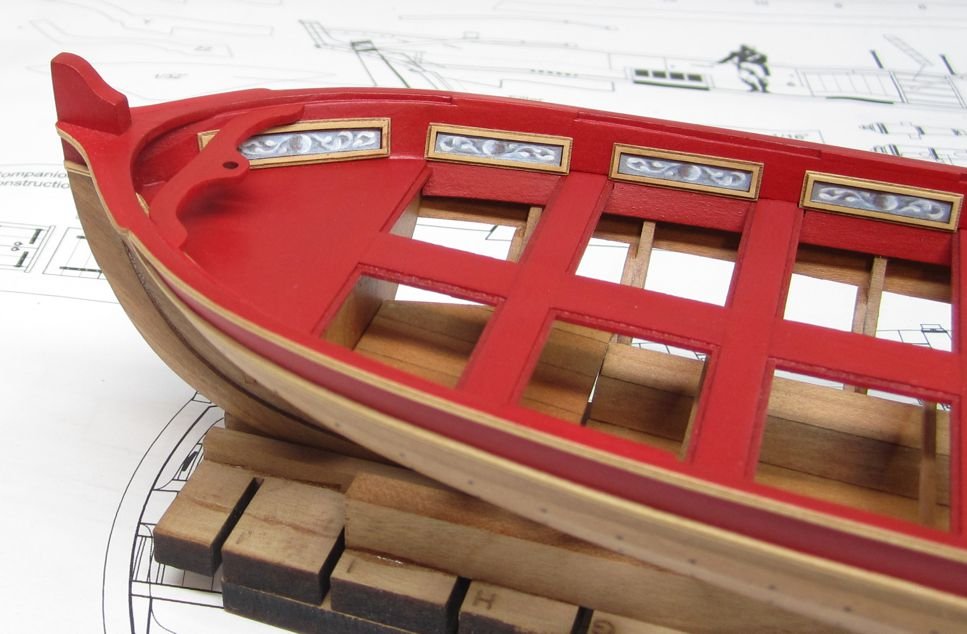
...Back to the barge. I completed the sculpting for the two bow pieces. Then I made a mold and some resin castings. Resin castings will come with the kit. In the photo below you can see two rows of resin castings. The bottom row is the raw resin casting. Rather than paint them as I typically do, trying to make them look like wood, I thought I would try something new. Rather than paint, I used weathering powders. I applied them directly to the resin castings with a brush. The three colors are shown. I continuously used differnt layers of the three colors and eventually it came out really well. The color matches wonderfully Its better than paint in my opinion as the powders dont build up and the detail remains crisp. You cant really chip or scratch the paint ruining your piece. Once done I sprayed with matte fixative. Below are the pictures showing the castings test fit on the model. I notched out the molding to accept them. You can also see the laser cut iron strap that runs on the forward face of the stem. It goes all the way under to the keel stopping just ahead of the scarf joint. There are holes pre-drilled along the top of the strip which were later filled with 22 gauge black wire. I pre-drilled the holes using the laser cut holes as a guide with a #71 bit. Then I stuck the wire into each hole with no glue. After snipping off the excess, they were filed down but allowed to stand proud. This creates the nice decorative detail you see on these barges. The strip was put on the stem in three sections. The top and aft side of the stem first as they were short pieces, then the long strip down the front. The seams are almost noticeable. You can get a tight fit between pieces and the laser board sands well. I think it simulates a piece of metal quite nicely.
- 269 replies
-
- Queen Anne Barge
- Syren Ship Model Company
-
(and 1 more)
Tagged with:
-
- 1,051 replies
-
- cheerful
- Syren Ship Model Company
-
(and 1 more)
Tagged with:
-

Swan class 3D model in progress
Chuck replied to dvm27's topic in CAD and 3D Modelling/Drafting Plans with Software
That is just wonderful. I cant wait to see more.- 141 replies
-
- pof swan series
- swan
-
(and 1 more)
Tagged with:
-
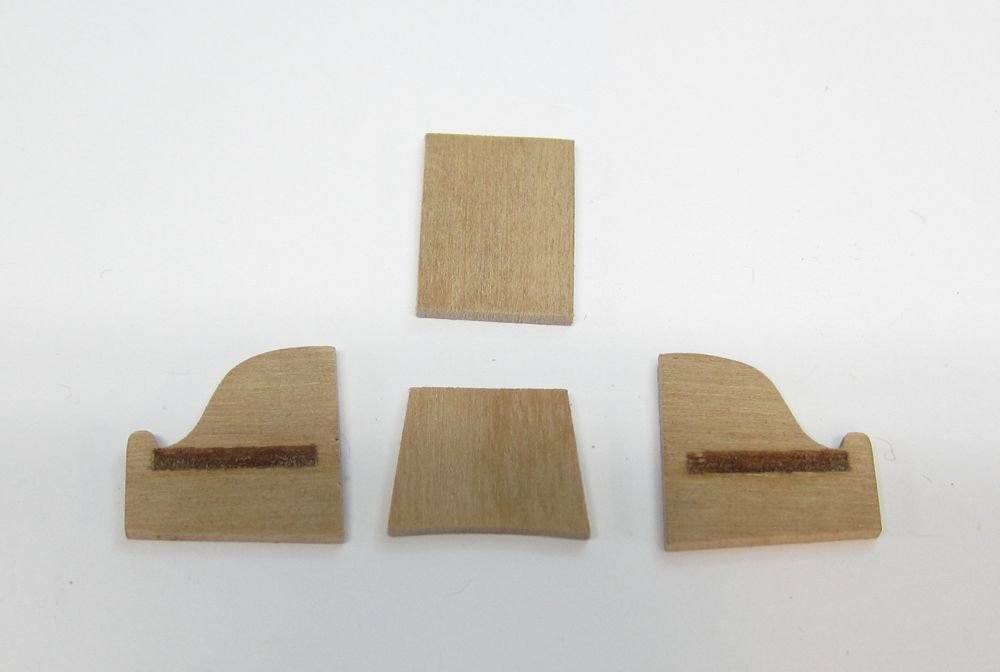
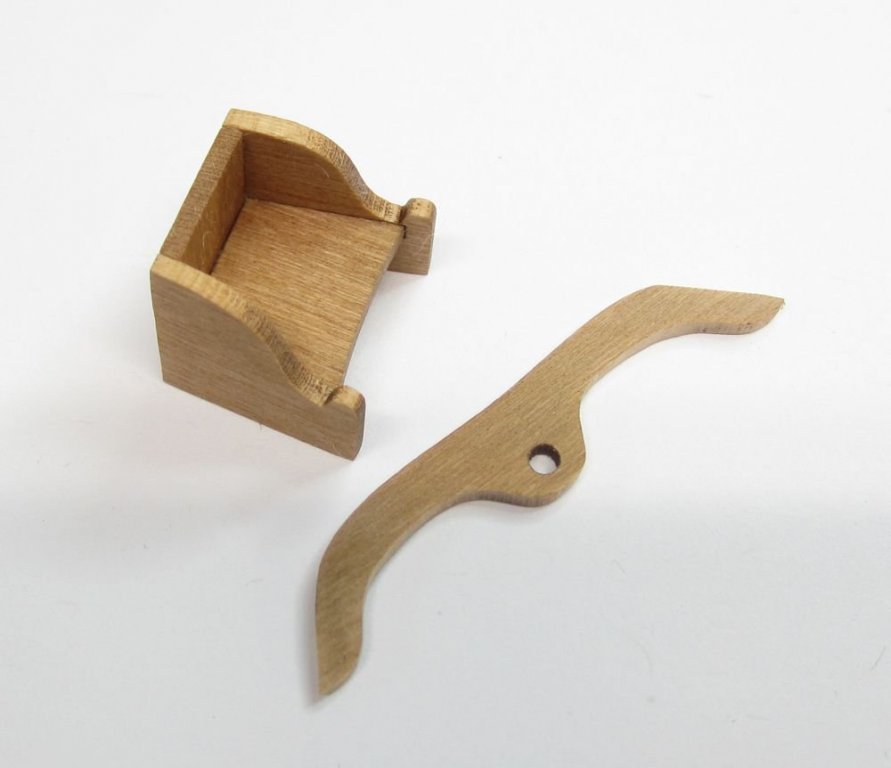
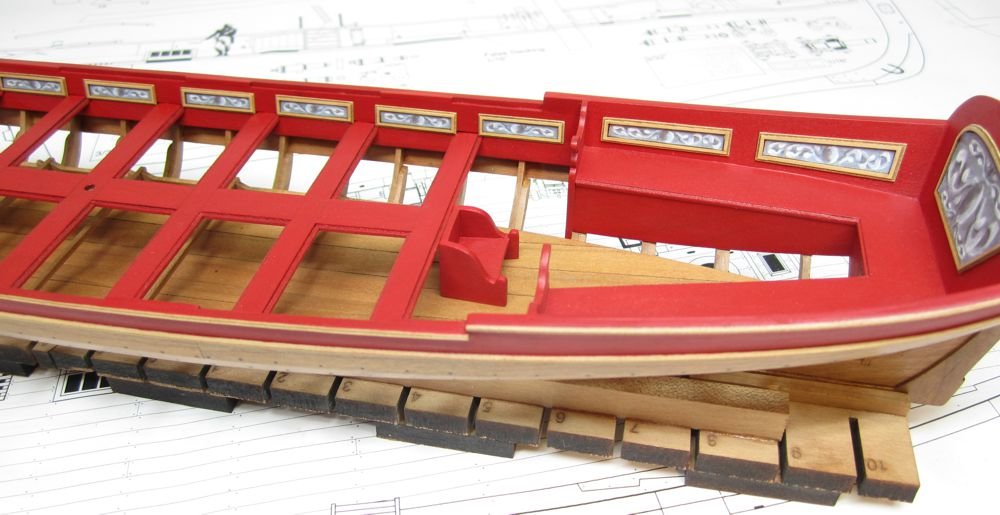
And just to let everyone know I am still working on models.....not just a hippie activist. Today the step was built. It has a laser etched slot to aid in its assembly. Then at the bow there is what I would call a "standard" of sorts. It has a hole in it to help secure the pole for the flag. Another will be drilled through the platform below it but I figured it would be damn near impossible to laser cut the hole on the platform and then line them up so the pole is straight. So I will be drilling with the bit running through the hole in the standard making sure that afterwards the pole will sit upward and straight. Except for a very few details inboard, the inboard part of the project is complete. NNow I will move outboard and begin to finish up the carvings. Then after that its the home stretch. Happy modeling everyone!!!!
- 269 replies
-
- Queen Anne Barge
- Syren Ship Model Company
-
(and 1 more)
Tagged with:
-

Is there a true POF kit in the market?
Chuck replied to Ulises Victoria's topic in Wood ship model kits
Not really any out there. Basically there is little demand but, in order to design them there needs to be hundreds if not thousands of hours of work. There are plenty of plans which have already been researched by renowned modelers and naval historians. They include the drawn frames and frame parts etc. But they never had the desire to go into the kit business. It would be very easy for a legit kit maker to reach out to these authors and pay them a royalty for their work. But it would push up the cost for the eventual kits which are already expensive. The Chinese, unlike the companies with ethics never reach out to these authors and that is why you see versions of Ancre Kits on the market from them but nowhere else. Just because there was never a kit doesnt mean the company can use the plans and research from an individual without paying them or even asking for permission. I couldnt afford to pay Ancre a royalty would love to produce a kit of their projects....or possibly one of AlexM's designs or even Admiralty models or even Harold Hahn's son. I would love to make a kit of EdT's clipper project. But its too expensive if you do it on the up and up and recognize the author's contribution and creation. What cost $1000 in China would cost $2500 made anywhere else. Those Hahn kits are verbatim copies of of the plans he created. I suspect you will see all of the aforementioned projects at some point available from China. That being said, I am hopeful Greg and David at Admiralty and Syren will reach some sort of agreement in the near future to produce an actual legitimate square rigged POF model kit. I will talk to them very soon about it. Speedwell look like a wonderful project. All they could say is no....it doesnt hurt to ask. -
Try vectorcut. http://www.vectorcut.com/letters.htm
-
Zoly, I wish you hadnt posted that. Shaking my head in disbelief. Within five minutes of your post, it was reported to the staff and I received a few PM's as well. you do know that book is copyright and the author is actually still alive and kicking. Many of our members know him personally. You should really buy that book to support him rather than download and steal PDF versions and also offer them to anyone who asks. It is my understanding that you have quite a collection of bootlegged Anatomy of the ship books, and others ..... often sharing and exchanging them through this site digitally. We cant allow such behavior at MSW. It is a violation of our rules and unethical no matter how you slice it. You have been a member for so long it baffles the mind how you could post that....still shaking my head in bewilderment. Chuck
About us
Modelshipworld - Advancing Ship Modeling through Research
SSL Secured
Your security is important for us so this Website is SSL-Secured
NRG Mailing Address
Nautical Research Guild
237 South Lincoln Street
Westmont IL, 60559-1917
Model Ship World ® and the MSW logo are Registered Trademarks, and belong to the Nautical Research Guild (United States Patent and Trademark Office: No. 6,929,264 & No. 6,929,274, registered Dec. 20, 2022)
Helpful Links
About the NRG
If you enjoy building ship models that are historically accurate as well as beautiful, then The Nautical Research Guild (NRG) is just right for you.
The Guild is a non-profit educational organization whose mission is to “Advance Ship Modeling Through Research”. We provide support to our members in their efforts to raise the quality of their model ships.
The Nautical Research Guild has published our world-renowned quarterly magazine, The Nautical Research Journal, since 1955. The pages of the Journal are full of articles by accomplished ship modelers who show you how they create those exquisite details on their models, and by maritime historians who show you the correct details to build. The Journal is available in both print and digital editions. Go to the NRG web site (www.thenrg.org) to download a complimentary digital copy of the Journal. The NRG also publishes plan sets, books and compilations of back issues of the Journal and the former Ships in Scale and Model Ship Builder magazines.


