Chuck
-
Posts
9,701 -
Joined
-
Last visited
Content Type
Profiles
Forums
Gallery
Events
Everything posted by Chuck
-

HM Cutter Cheerful 1806 by Erik W - 1:48 scale
Chuck replied to Erik W's topic in - Build logs for subjects built 1801 - 1850
Well done....the pint job looks good and so does the caulking seams. -
Barge instructions to date for those that are interested. Click here
- 269 replies
-
- 16
-

-
- Queen Anne Barge
- Syren Ship Model Company
- (and 1 more)
-
I like it a lot. Its a little light for my taste but not too bad. I am hoping it darkens a bit with age. The gluing was no problem. Both CA and carenters glue/titebond. No issues at all.
- 269 replies
-
- 5
-
-
- Queen Anne Barge
- Syren Ship Model Company
- (and 1 more)
-
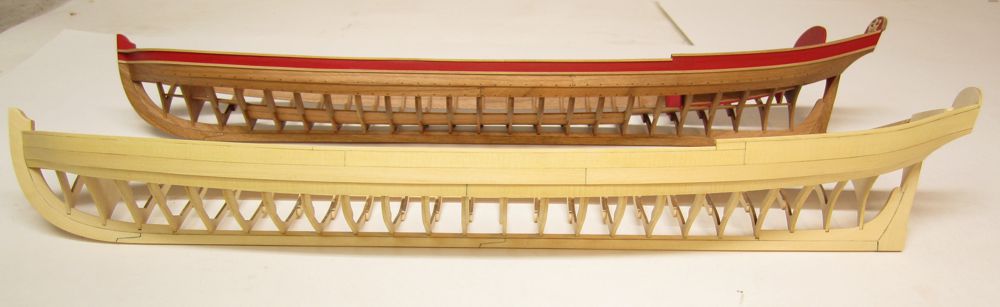
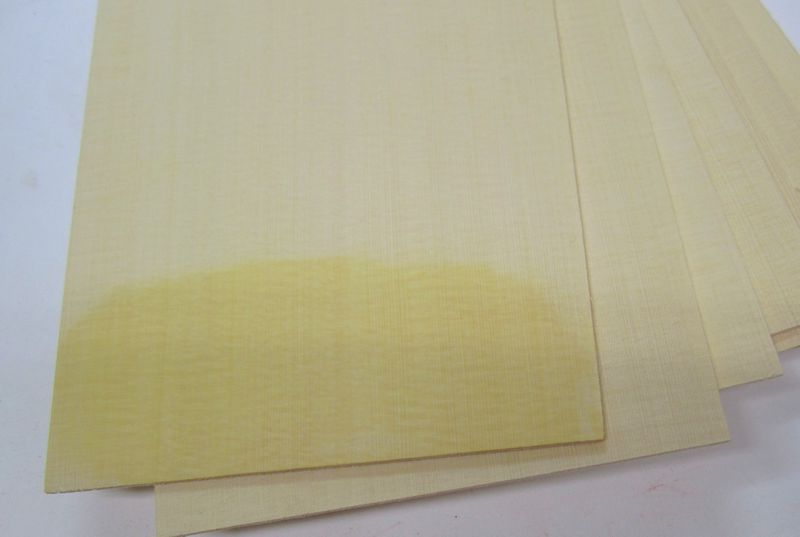
The Alaskan Yellow Cedar barge has been planked. Still lots to do on this one. I havent even faired the hull inboard yet. But before the molding and red paint is added I thought this would give you guys a nice idea of how the yellow cedar looks. I have just applied some wipe on poly. You can see the cherry version behind it. They are actually the exact same size but digital cameras do these funny things.... I would like to get the cedar version to the same point as the cherry version so I can progress with both simultaneously. All the cedar is wood project source Chuck

- 269 replies
-
- 21
-
-
- Queen Anne Barge
- Syren Ship Model Company
- (and 1 more)
-
I just finished laser cutting the Yellow cedar he dropped off yesterday. The Alaskan Yellow Cedar is such a wonderful wood to laser cut. The parts are for a second barge I am building which will be made entirely out of the yellow cedar. I hope to have pictures real soon but I am really enjoying working with it. If you are looking for a light golden/yellow wood that is easy to work with I do recommend you give the yellow cedar a try. The top board has some Wipe on Poly on the end. It makes teh color come out nicely. I should have the planking done this weekend so you guys could have a better look at teh stuff as part of a model. Chuck
- 31 replies
-
- 11
-
-
Maybe...but for right now this is all I have time to create.
-
Thank you very much.... See this topic for mounting........ http://modelshipworld.com/index.php/topic/14432-getting-startedmounting-your-carving-blanksand-removing-them-when-finished/
-
Thats the confederacy...
-
Absolutely......they dont even need to be thin walled. I have made thimbles and flared regular brass tubing that was 1/8 or 3/32" in diameter with no trouble at all. Brass is very soft. Just buy any K&S brass tube and you can do it with the right sizes blunt punch. See this http://modelshipworldforum.com/resources/Confed/Chapter12.pdf Read pages 3 and 4. Chuck
-
Buy larger brass tubing....
-
Insert some wire the same size as the I.D. of the tube. Then roll an xacto blade over it. See this video even though they didnt stick a wire into it.....thats the best way though.
- 1,051 replies
-
- 15
-
-
- cheerful
- Syren Ship Model Company
- (and 1 more)
-
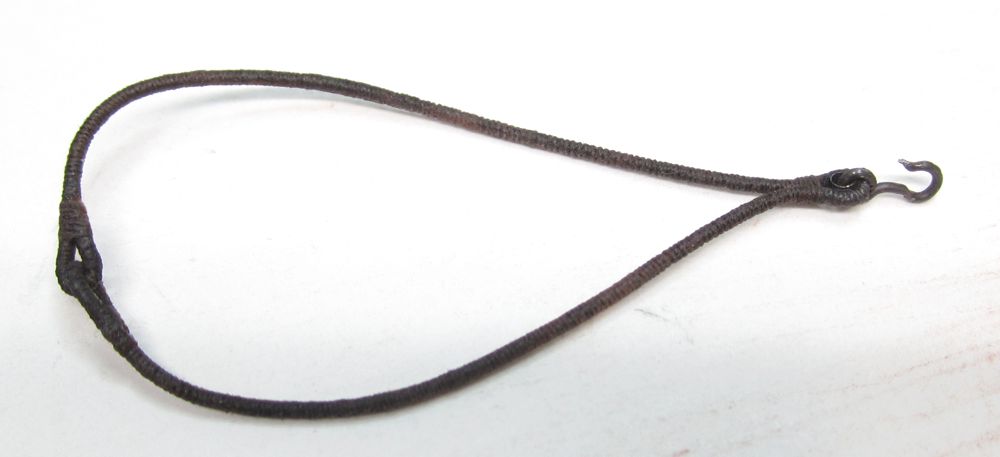
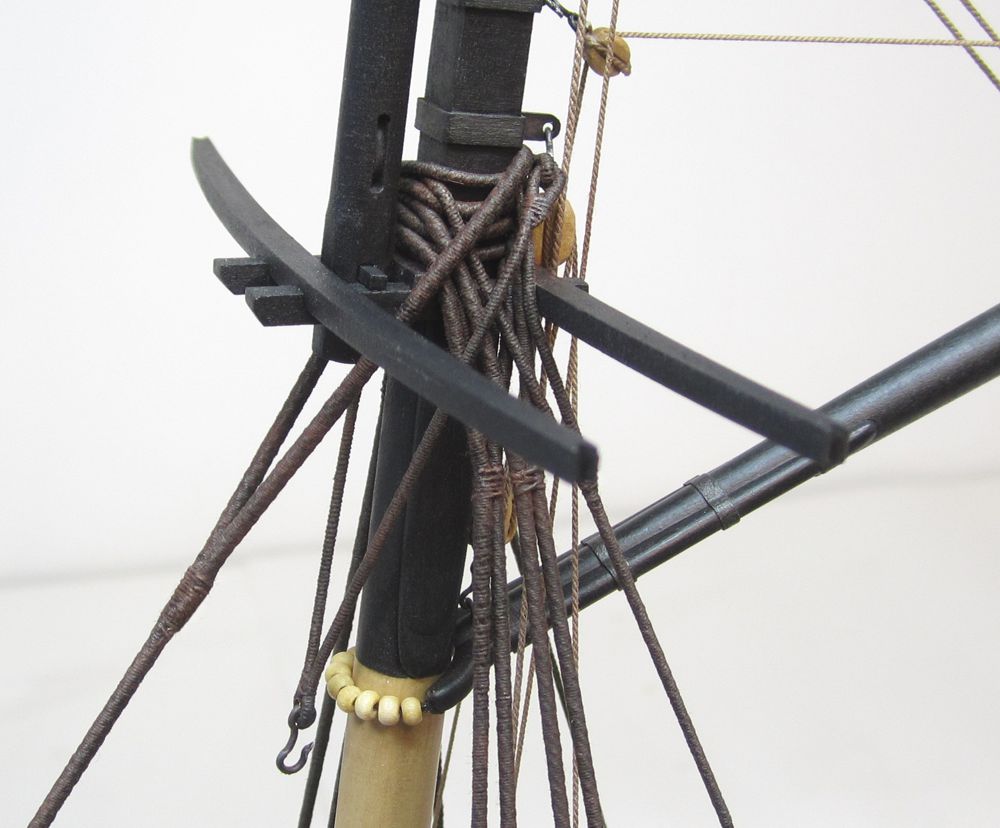
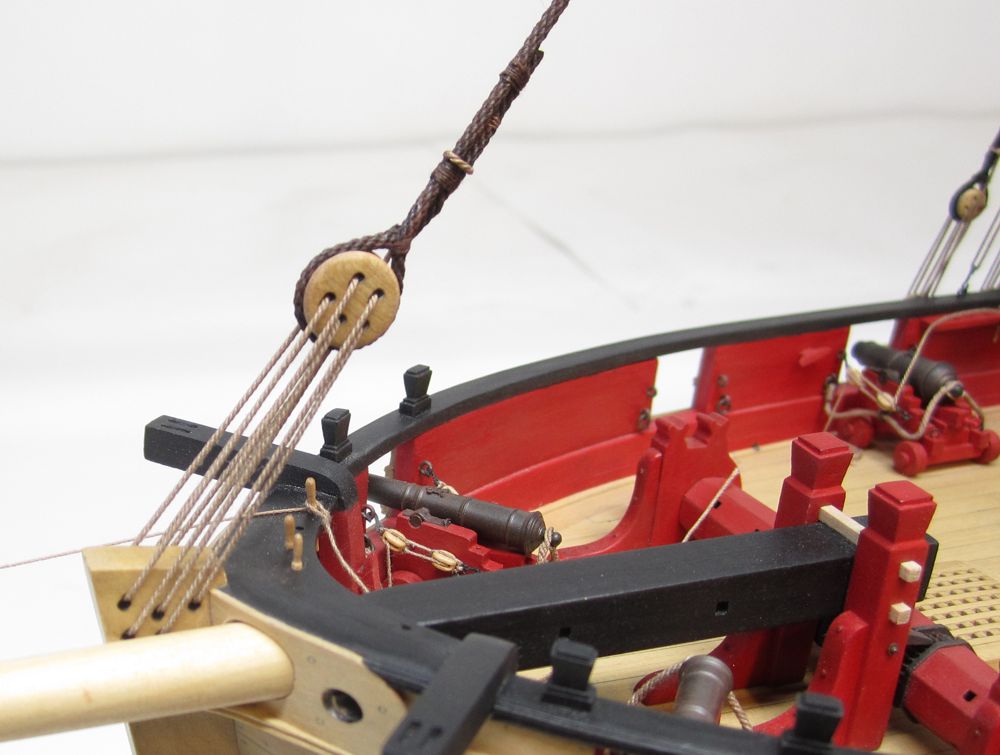
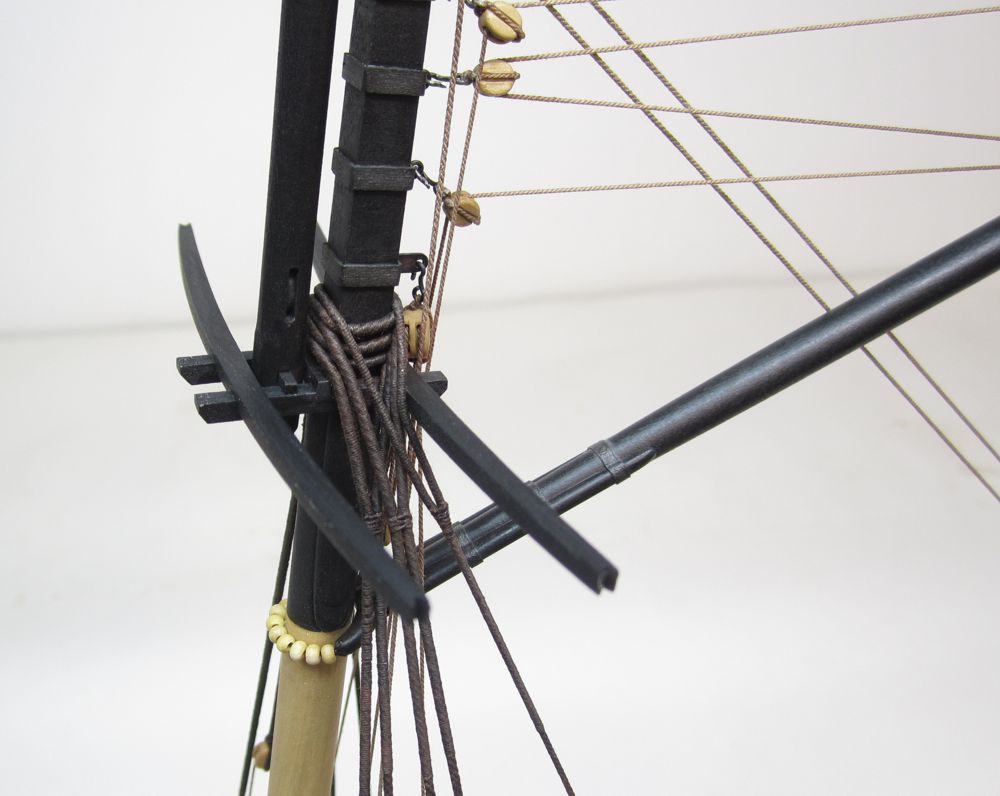
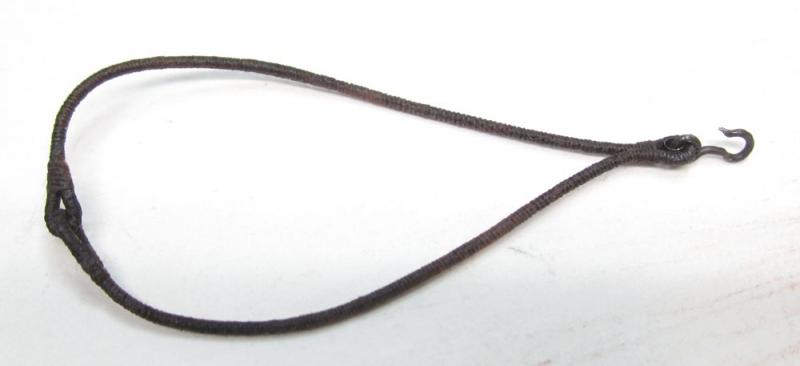
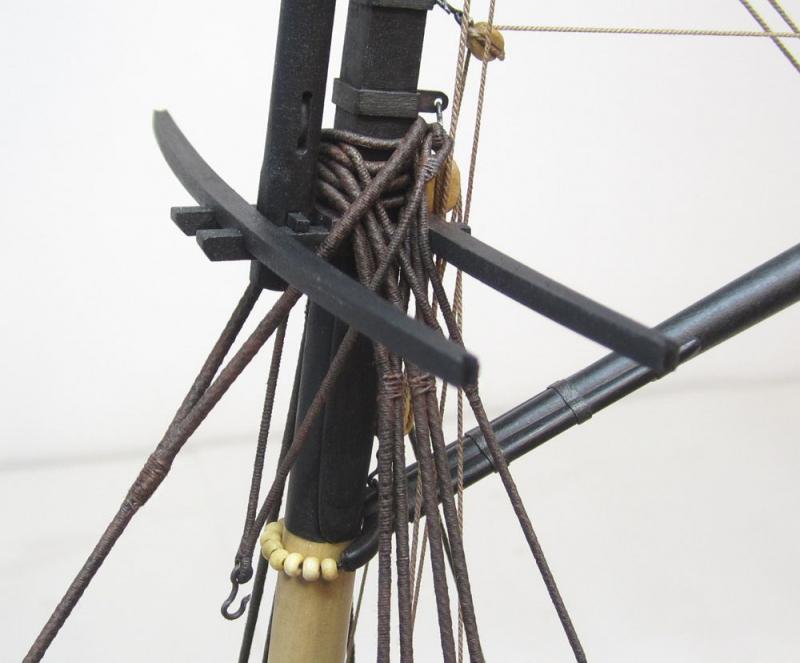
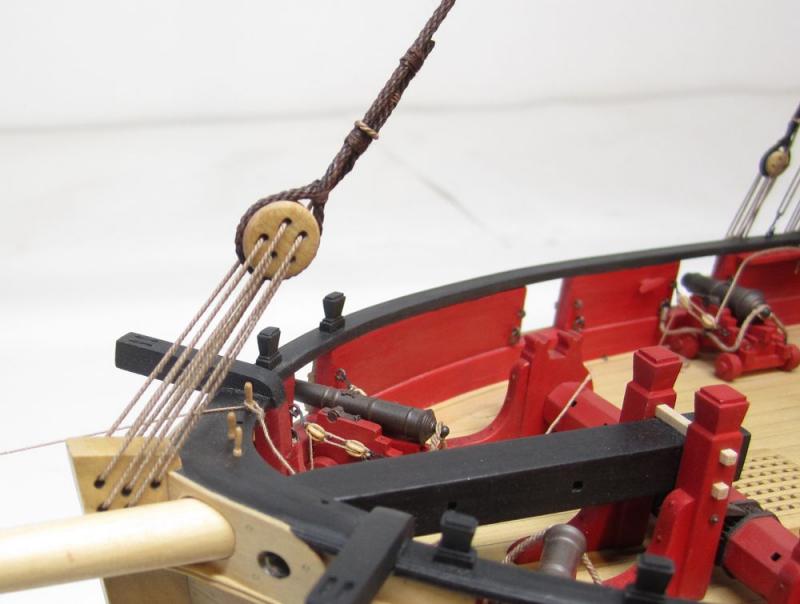
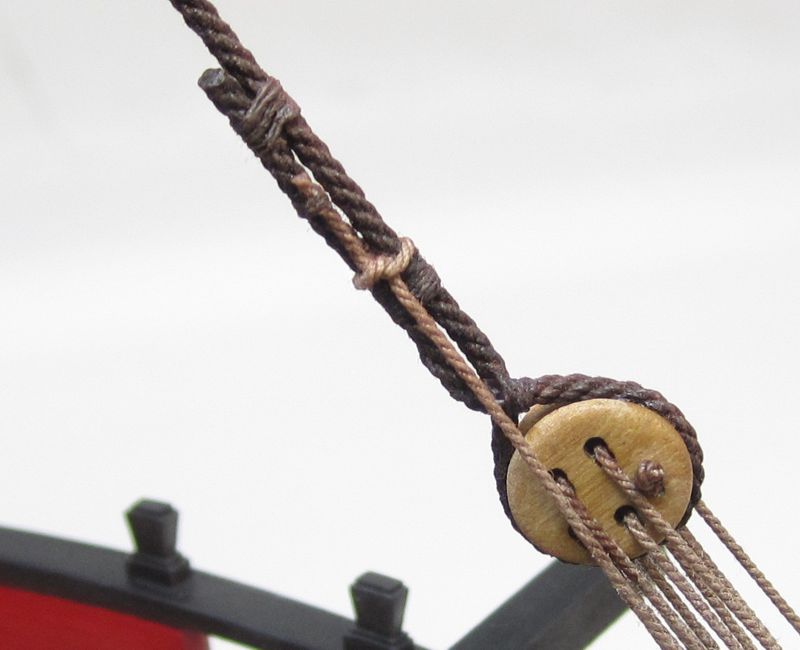
Thank you for the kind words guys. The lower backstays are completed so next up was to make the sling and then add the mainstay. The sling for the lower yard is served its entire length. I used .035 dark brown rope. It has a thimble seized to it with a hook made of 22 gauge wire and eyes formed on each loose end. After determining the length for the loose ends I formed the eyes and you can see how the eyes close up the sling by being inter-twined. I originally thought it would be easier to make the sling off the model. Which it was. BUT there were trade-offs. This meant that I had to unhook all of the blocks on the mast to get it in position. That wasnt too bad BUT afterwards I discovered that the sling wasnt long enough to get around the forward spreader. This was bad. I either had to cut the sling off and make another one...rigging it in place.....OR, try to carefully remove the forward spreader. I ended up removing the spreader without any damage. BUT I wouldnt recommend this to all the Cheerful builders out there. Best to rig it in place. The main stay was rigged from .054 dark brown rope. It was served around the masthead only down to about 1/2" below the splice. Thats right....a splice rather than a mouse. This was very common on cutters of the period and appears much more often on contemporary examples than the one or two found with a mouse. The other end of the stay had the 5-hole deadeye turned into it. The lanyard was rove through it as usual but the loose end was taken up around the stay once and then finally seized to the stay as shown. I used very fine fly-tie thread for this. It finished it off nicely. Now that the main stay is completed I can go back to all these loose ends at the belaying points and re-tension the lines. After that I will cut off the excess and add rope coils.... Next up....ratlines!!!!!
- 1,051 replies
-
- 55
-
-
- cheerful
- Syren Ship Model Company
- (and 1 more)
-
HM Cutter Cheerful 1806 by Erik W - 1:48 scale
Chuck replied to Erik W's topic in - Build logs for subjects built 1801 - 1850
Very nice....it looks wonderful. -
Erik That is correct. I use a simple knot appropriate for the job. It is very rare that I will need to use glue. At the very most I will use some diluted white glue on the knot or hitch afterwards. They key is not using rope that is too slippery and difficult to secure without slippage. For example, the nylon stuff that comes in many kits is too slippery and this would work. Many synthetic materials will be too slippery to simply use a clove hitch or granny knot to secure. They come undone on their own without much help. But its not a problem with the cotton/linen rope I am using. No slippage or undoing of knots at all. For the deadeye lanyards above the deadeye....this is one instance where I would apply a dot of watered down white glue. Not enough to be permanent but enough to lock the granny knot in position just in case. Its not under any tension if you can believe it because the deadeyes hold the rope pretty good once you have them all rigged in every hole. Again...a slippery rope material wouldnt behave like this however.
-
Looking good Rusty...It is great to have you making sawdust again. Chuck
- 310 replies
-
- 4
-
-
- cheerful
- Syren Ship Model Company
- (and 1 more)
-
That is something I would not recommend. Eventually they will get brittle and break. Its just not something you see on ship models and it would adversley effect the look and texture of the rope.
-
As a rule....I dont glue any of my lines to their final belaying point. They are made fast to their pins and cleats but because it is inevitable that you will need to re-tension the lines, this makes it very easy to do. There is no really good reason to glue the line permanently. It will stay in place just fine and makes fixing the lines or even replacing them much easier later on. I have restored models that are over 100 years old and they rarely glued the ropes to the belaying points back then. This meant it was as simple as pulling a belaying pin and re-doing it with proper tension. No need to cut anything. It was a pleasure compared to models which had the ropes glued and hard to work. I am currently rigging my model and have routinely adjusted the tension on many lines as it progresses. Once completed I will add rope coils over the pins with the smallest dot of white glue. They will be easy to remove if needed later. And the line can be adjusted as described.
-
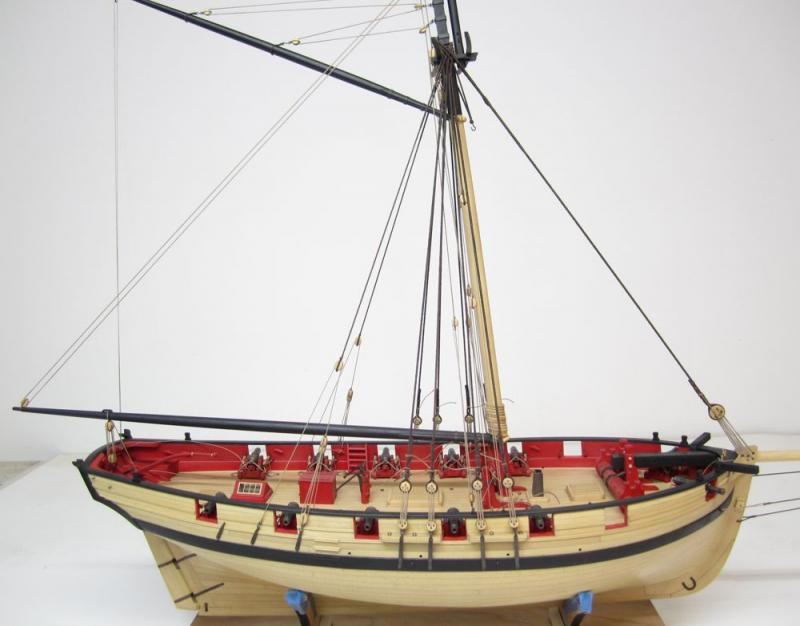
Shrouds are completed. I also added the lower backstay on the port side. The fiddle block is a min-kit from Syren (13/32"). You can see another one on top of the companionway which will be used for the other side. It is built up from three laser cut layers. Here is a shot of the growing shroud gang. The aft pair as well as the lower backstay are served only along the top that goes around the mast head. They are served down to a bit below the cheeks. Once that is finished it will be time for the sling for the lower yard and then the main stay.

- 1,051 replies
-
- 39
-
-
- cheerful
- Syren Ship Model Company
- (and 1 more)
-
No I like to pop in and look at as many builds as possible when time permits. I might not say much but I enjoy watching everyones progress. You are doing a fine job.
- 96 replies
-
- 9
-
-
- topsail schooner
- revenue cutter
- (and 3 more)
-
If you click on each size of my Syren blocks it will tell you which size rope is best for those sizes of blocks.
- 96 replies
-
- 7
-
-
- topsail schooner
- revenue cutter
- (and 3 more)
-
Looking good. Well done.
-
Thanks. Yes Druxey I have tried it that way but old habits die hard. I am just most comfortable doing it this way. Its not too bad but just a bit finicky. Luckily there are only eight to do. But I am happy with how they turned out. Chuck
- 1,051 replies
-
- 7
-
-
- cheerful
- Syren Ship Model Company
- (and 1 more)
-
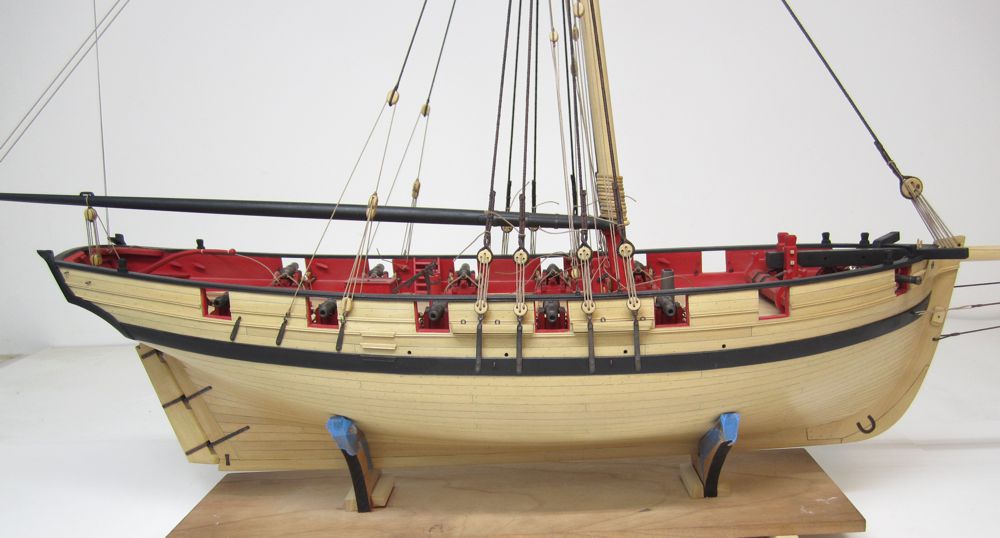
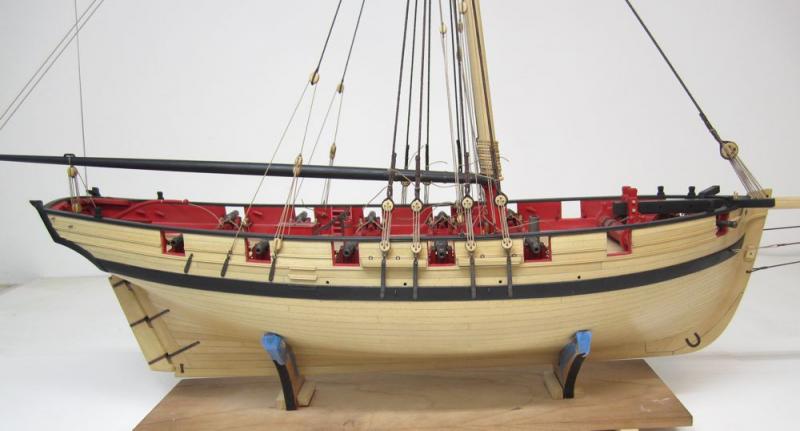
Thanks...I will say this this, its a joy working in 1/4" scale. You dont have to fight with such tiny parts and you get more detail. But you have to have the room to work and display it. Luckily this model is not that large since its just a cutter. I will have to find a good home for it once its done though...not much room to display the finished cased model.
- 1,051 replies
-
- 10
-
-
- cheerful
- Syren Ship Model Company
- (and 1 more)