Chuck
-
Posts
9,703 -
Joined
-
Last visited
Content Type
Profiles
Forums
Gallery
Events
Everything posted by Chuck
-
 There is a download in the other forum on signing up....it shows them the actual size.
 -
Thanks, I do know about those but never thought about using them on wood. I finished the third leaf design needed for the starboard side of the barge last night. I applied some Wipe-On-Poly and I am happy with how they look, so rather than continue noodling with these I am just going to press on. I have 5 more carving designs to get done for the model. Next I will mount these three on a piece of scrap wood so I can make a mold. I will pull a bunch of castings in resin for those who dont wish to carve them for their model. I just hope these masters dont get ruined in the process because I plan on adding them to the model shortly after. Chuck
- 45 replies
-
- 33
-

-
I am just using a #11 blade right out of the package. But I do know folks who make their own micro chisels in different shapes. That is above and beyond my abilities and time allotment for these so I am going to stick with whatever I can buy already made. Like Keith said...I think its just my technique and stroke and its something that will get better with learned experience. It would always be nice to find a trick or product that does the job....a silver bullet so-to-speak........ but I think its just a matter of learning the correct touch and the correct amount of pressure and angles while slicing. I dont want to over analyze my attempt because then you end up never finishing. So rather than fall prey to "analysis Paralysis" I am just going to keep going and apply a finish. There is always the next project and I will just find comfort that I will hopefully get better with more practice. I find myself slipping into the paralysis and must fight that....its a horrible thing.
- 45 replies
-
- 11
-
-
I think that would work for any area that the grain is going the right direction. But when the grain is exposed it usually tears the wood and makes it rough. It picks up the grain fibers. I would say that more than half of the surfaces on a design like this run with the grain in a less than optimal direction but yes I will give it a try in areas that wont get shredded. Thanks Chuck
-
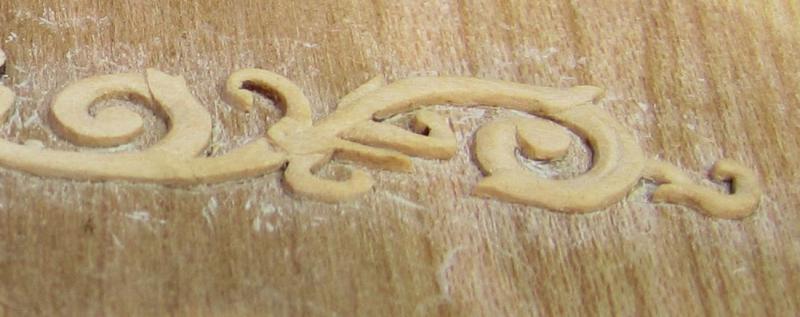
Lets get even closer.....This is what I see under magnification while carving.....you are so close to the details while carving it becomes hard not to obsess about the surface texture and I hope you can see the areas I would like to smooth out a bit but I am afraid to keep slicing and carving and wonder if there is another method. I think files would be too large and tough to use as I cant see getting any back and forth motion while its still mounted. Its fragile so attempting it after removal would most certainly break it...but who knows...it could just be my inexperience and that is how it should be done. Maybe I have to just get better with teh initial carving and that will just come with practice. Chuck
- 45 replies
-
- 16
-
-
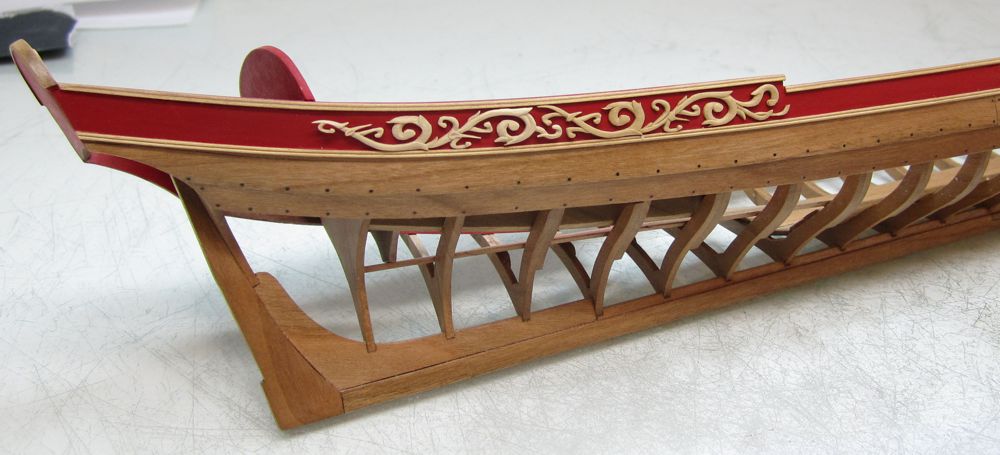
In this photo you can see two of three carvings placed on the model so you can see how they look when assembled...the third is still mounted on the carving base but you get the idea. I think I did apply Wipe-on-poly to that first one because it appears a bit darker. My question is this, In this photo you can see the surface quality of the pieces super close up. It looks a little rough to me in spots. I didnt scrape the surface at all while carving but you can still see some rough points and bits that werent completely removed in the corners and crannies.. I wonder if there is a way to sand pieces this tiny and fragile. I have tried folding a piece of 320 grit sandpaper and cutting it with a point on the end but its still tough to get into and address the rough areas. I Just cant get to them. Am I just looking at them too hard under magnification and close up macro photos???is it much to do about nothing or is there some method the more experienced carvers use to smooth out the surface to rid it of irregularities and tiny splits or wood hairs. I have seen the work of some master builders and carvers on ship models and they sometimes appear so crisp and smooth. It could have been that they were much larger but I doubt it. Maybe it looks just fine???? Buff it?? some sort of polishing or just apply some wipe on poly with a brush??? Feel free to jump in....these are the little gems I am hoping will get talked about as folks start their own logs. I am the first person in line for any and all tips. I also wonder how those builders of the contemporary models got their carvings so thin...look at the contemporary model I posted. Its the same scale. I thought our blanks at 1/32" thick were thin but I couldnt imagine going thinner??? It makes me admire them so much more. Chuck


- 45 replies
-
- 23
-
-
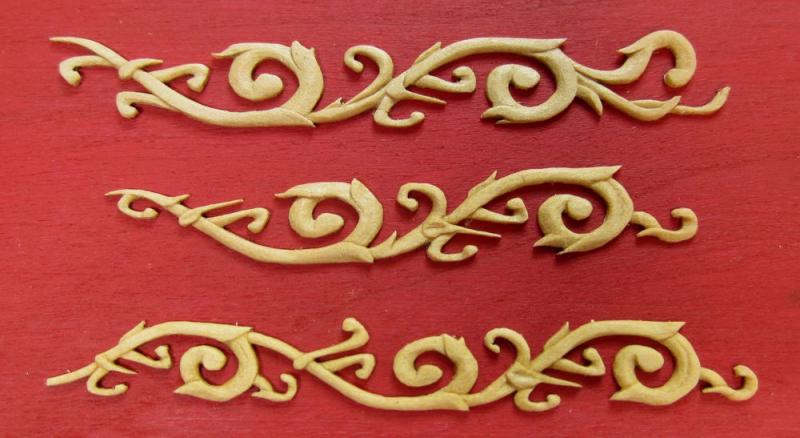
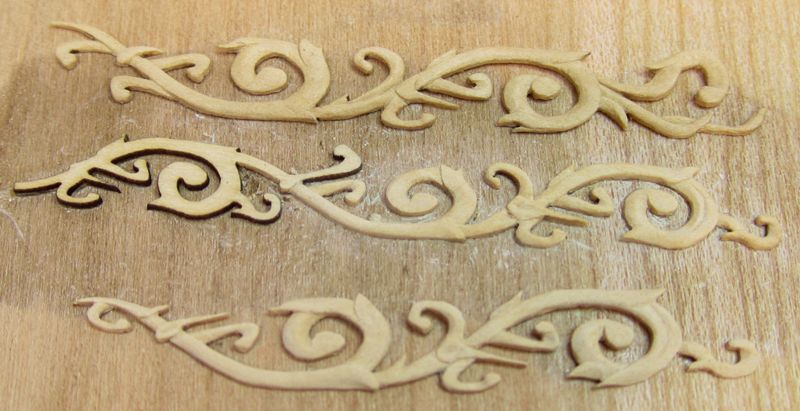
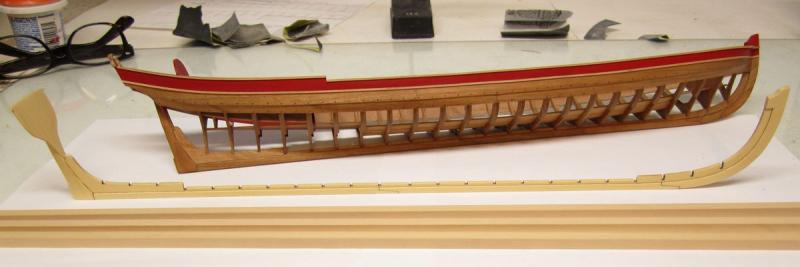
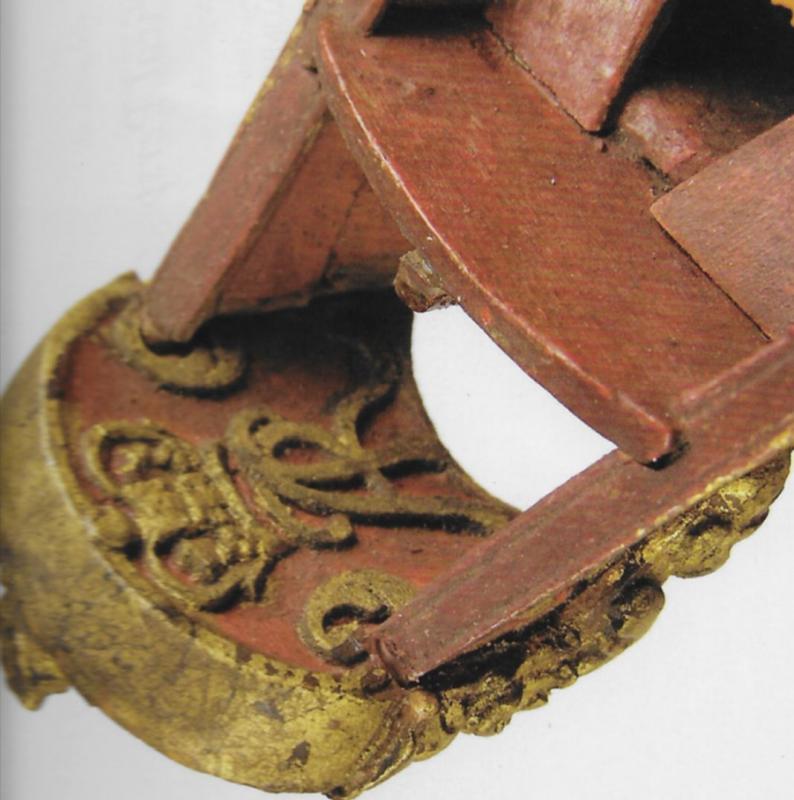
I am starting a project log so you guys can see how to start one as well. Just start a topic and name it properly. Maybe include what your method is.....#11 blades or rotary carving etc. I know that nobody likes being the first one to start so here it is to break the ice. I urge all you guys who bought the blank sets to do the same....lets get some ideas and conversations started. The photo below shows an extreme close up of my carving work to date. These three lengths of acanthus leaves are needed for one side of the barge. Once completed I need to carve another set for the port side. But those will be mounted upside down as they are a mirror image. I am almost done with this set....Just a little remains on the center example. I am using a #11 blade 98% of the time. The close up is pretty brutal.....warts and all you can see how the carving went. It looks much much better when viewed normally and no finish has been applied yet. I keep the other two that are finished close by as I work on this one because they must all look the same. I also included the contemporary barge model so you can see how these three pieces will become the continuous length of carving along the side of the barge aft. Its pretty typical of the acanthus leaf carving designs on any ship model. I figured its better done in three small lengths than one huge piece....just in case a one-time error that ruins the piece I am working on....the other two will still be fine and usable. Each one took me about six or seven hours to carve in a few one or two hour sessions. Chuck
- 45 replies
-
- 32
-
-
They are fine woods for carving in large scale but I wouldnt think it a good choice for the smaller carving we do. For many reasons. Its hard to get basswood to hold a hard edge when carving that tiny...it has a tendency to split and break as well. Just too fuzzy. In some cases on the design we will be carving pieces that have areas that are just 1/32" x 1/32" and this could fall in area where the grain runs in a less than optimal direction. So it would be tough to keep the integrity of the small pieces using any soft wood. I have carved some areas down to 1/64" x 1/64". Very fragile. If you have spent three hours carving a piece the last thing you want to happen is to get a break on a very thin area because the wood is too soft. Best to stick with woods that are much harder and stronger. I carved the crown cipher in cherry just to test it out...it was much more difficult to do and you had to be so much more careful and gentle with it. Even slightly dull blades will pull and split small areas of the design. And Cherry is much harder than Linden or Bass. It is possible but why not just use a harder wood to start with to make the process less problematic. Its fine for carving larger...but when you get these blanks you will understand how basswood or even Linden would just not work that well. Chuck
- 71 replies
-
- 10
-
-
No but I am sure that would work....I just had a bunch of bad cherry I needed to use up. I am sure any relatively hard base will do. About 3/16" thick or even 1/8" thick.
-
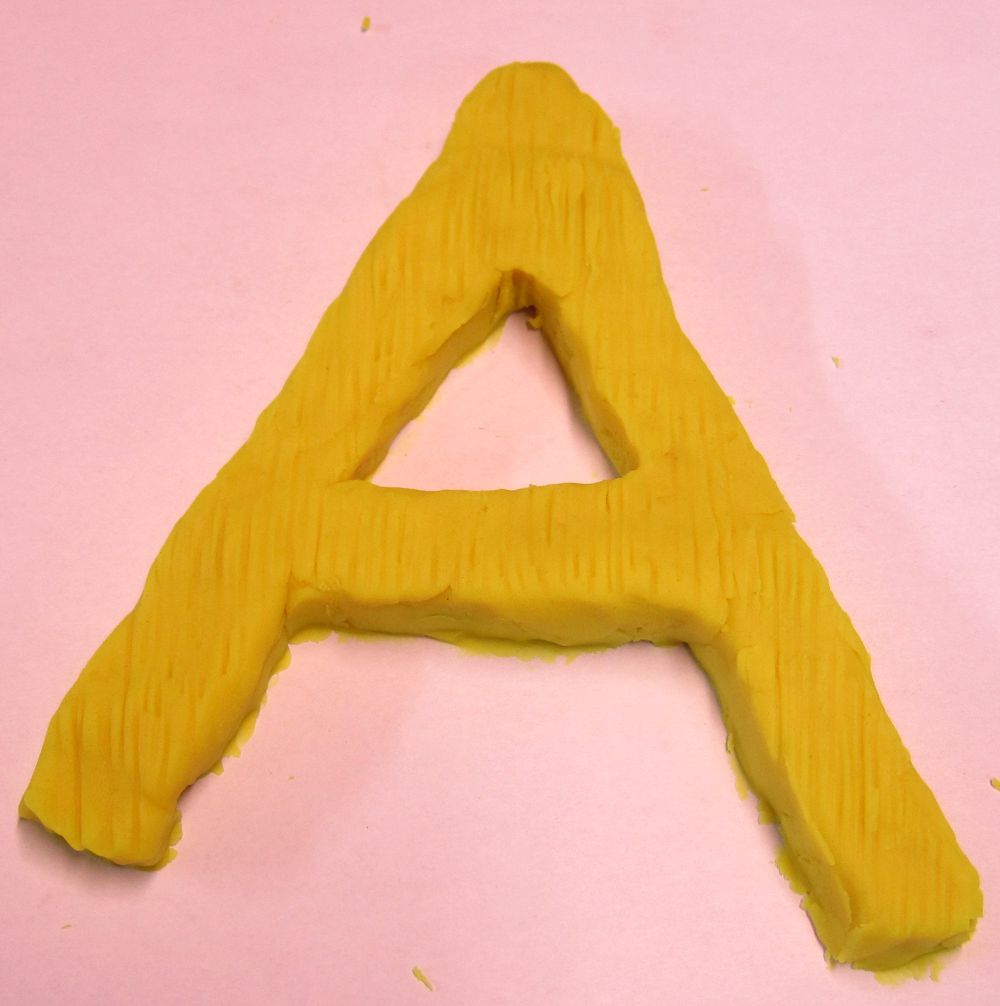
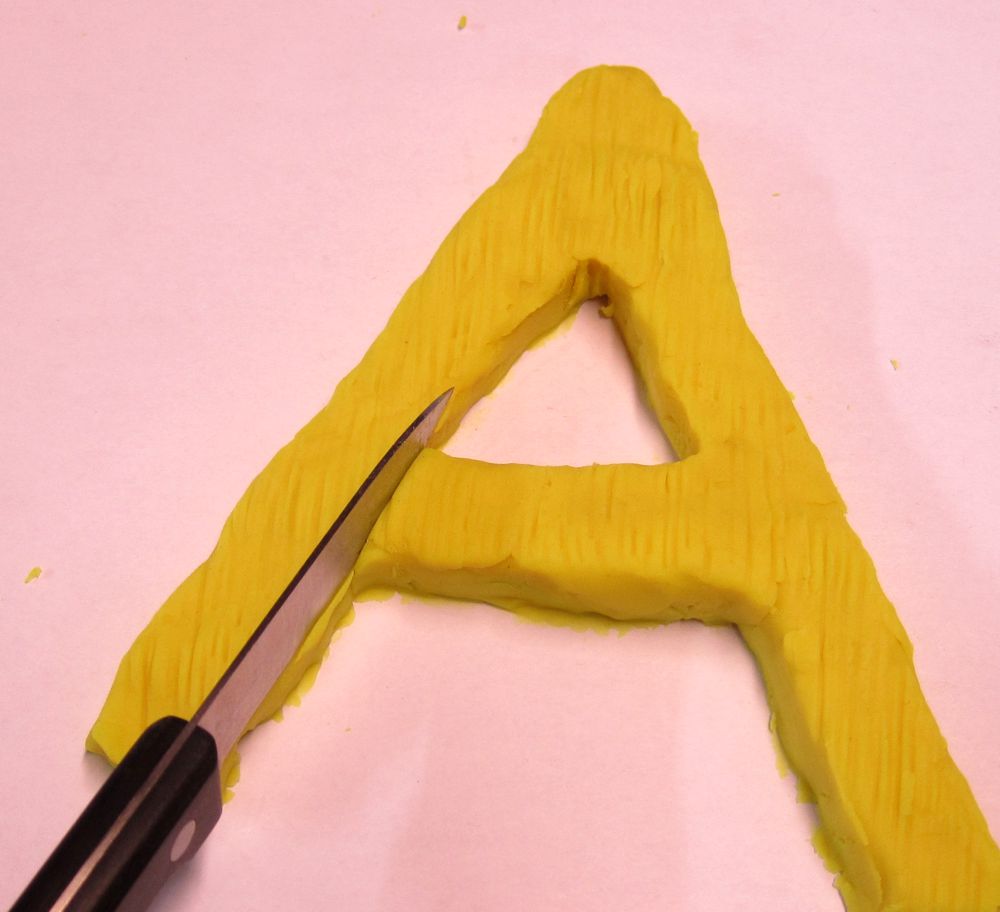
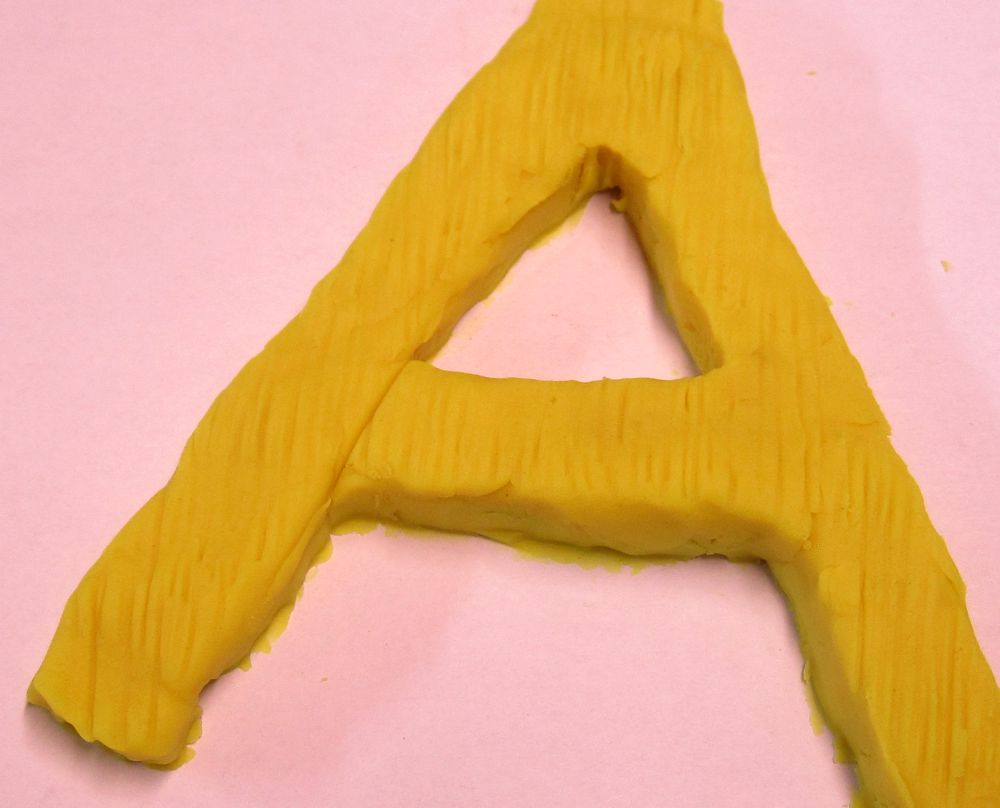
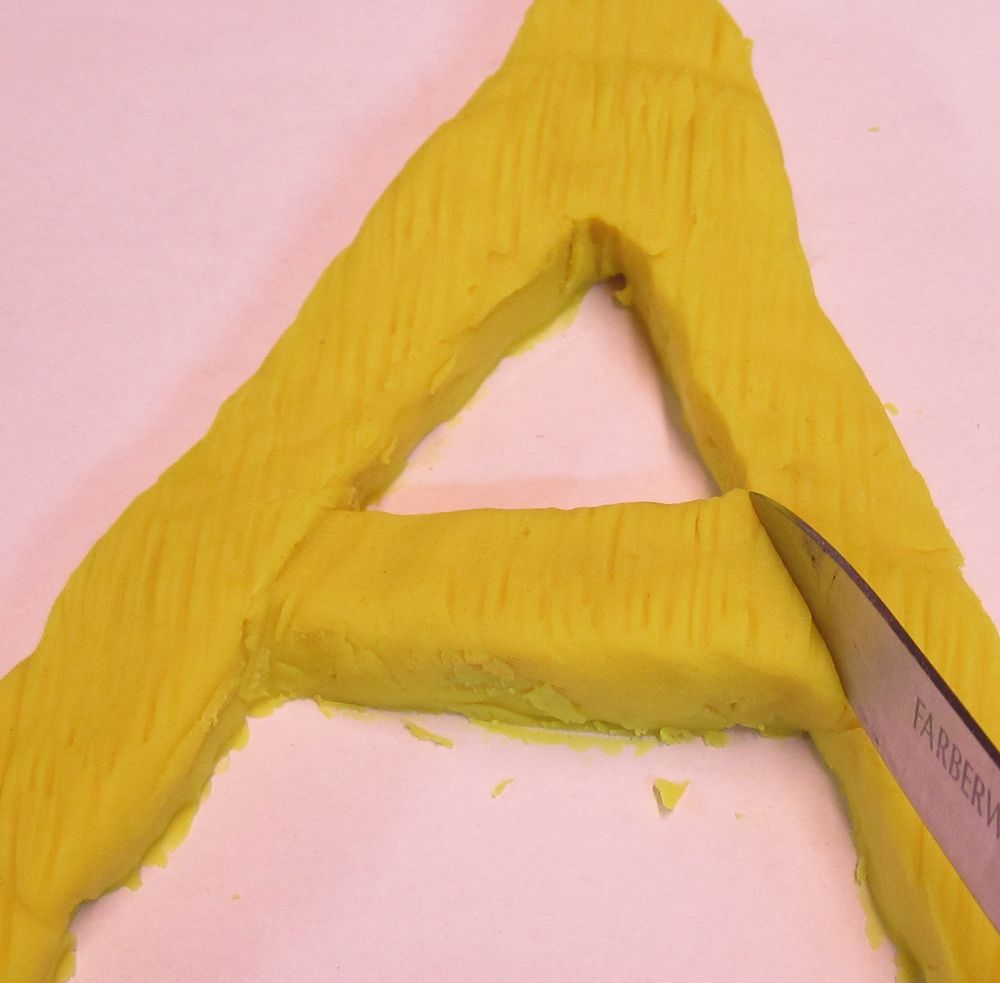
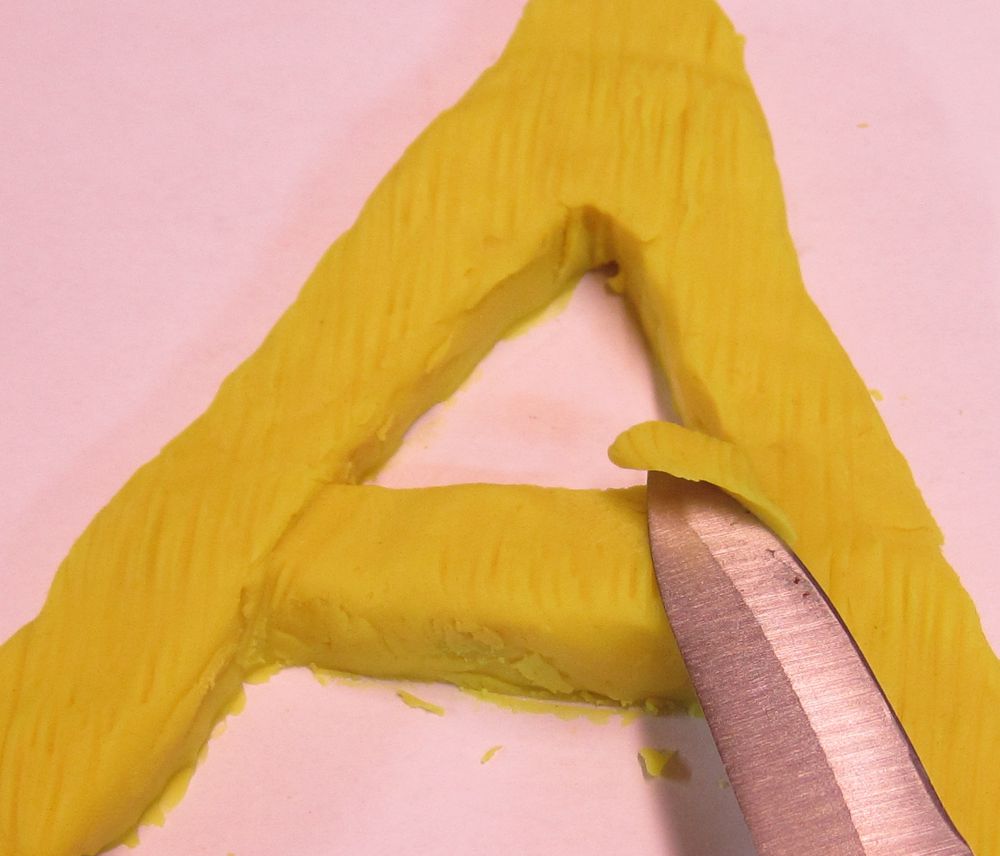
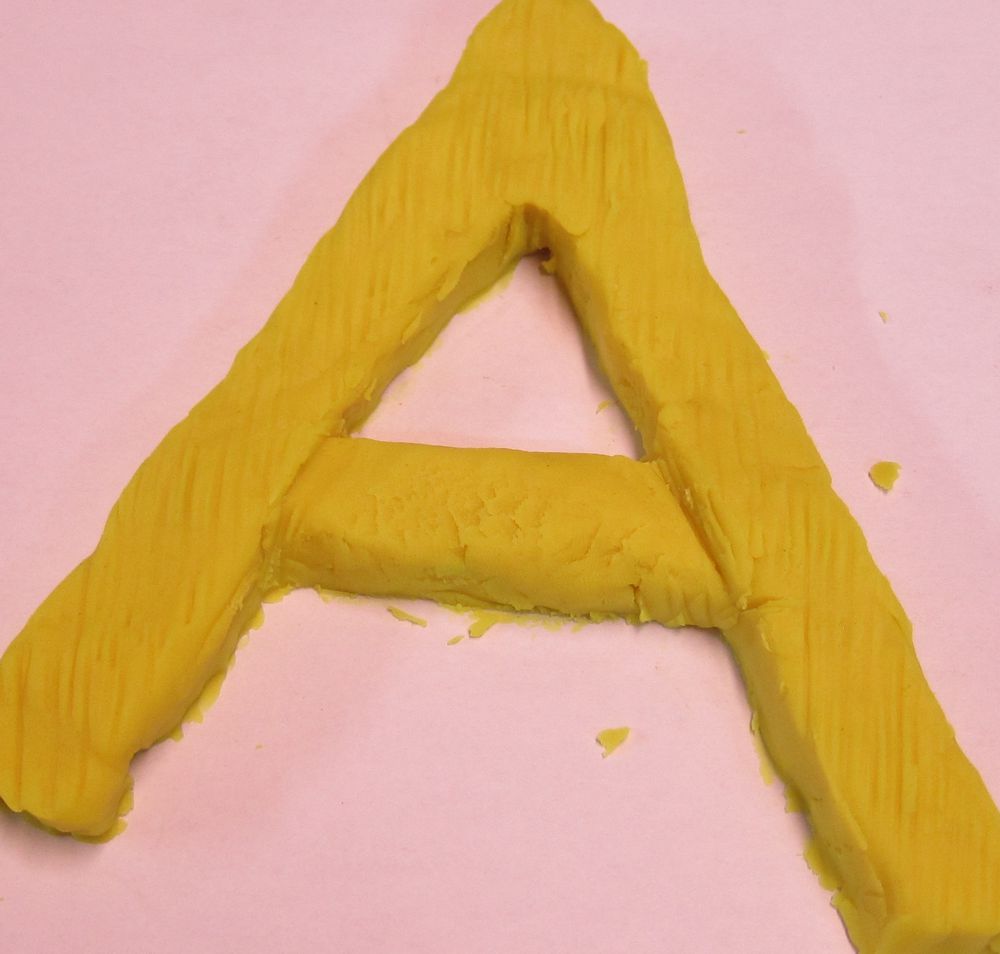
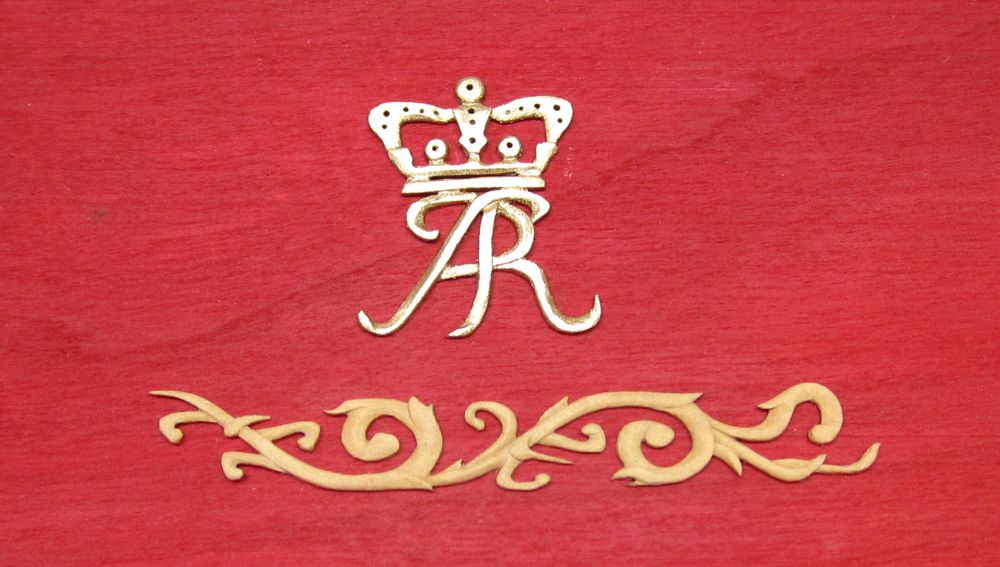
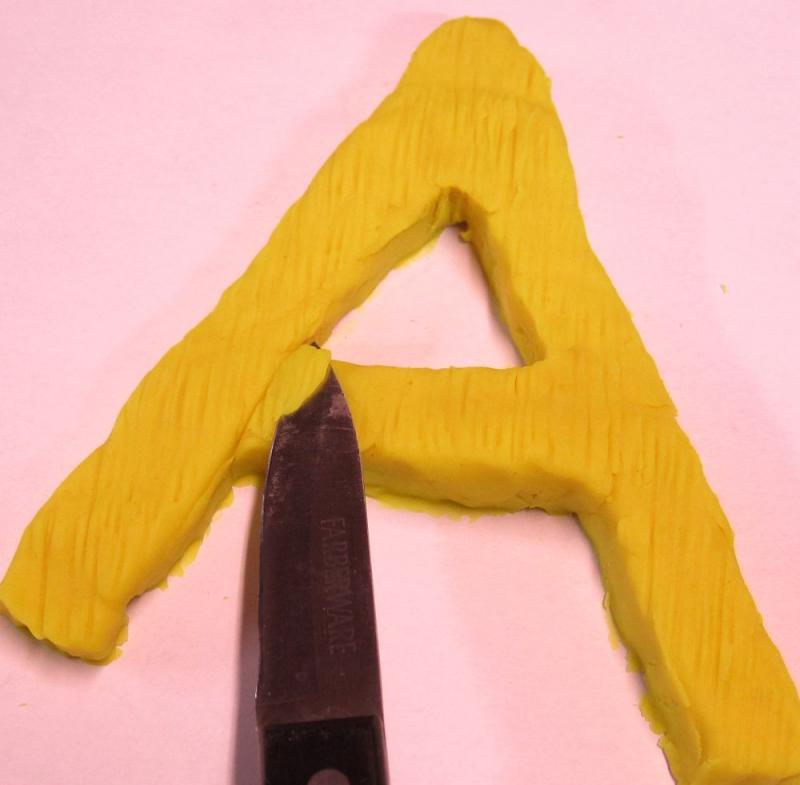
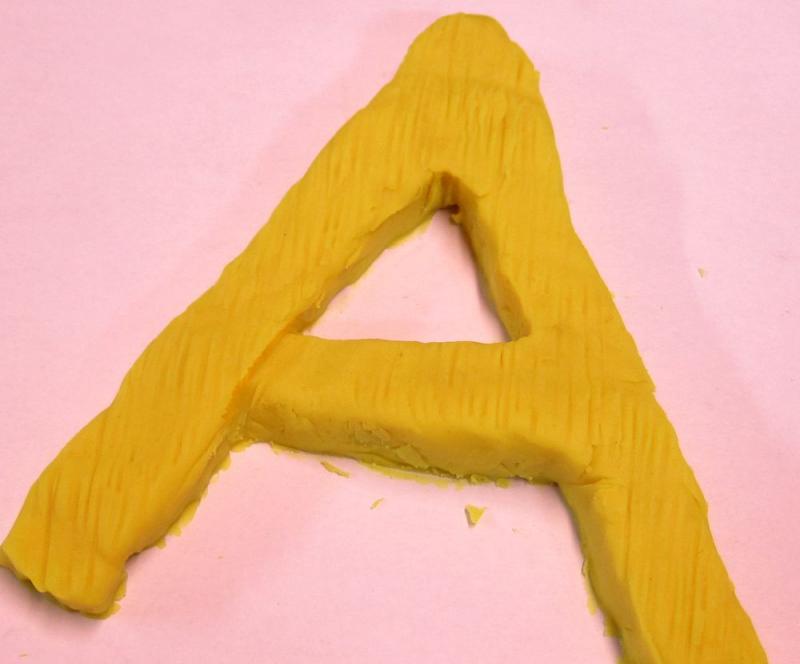
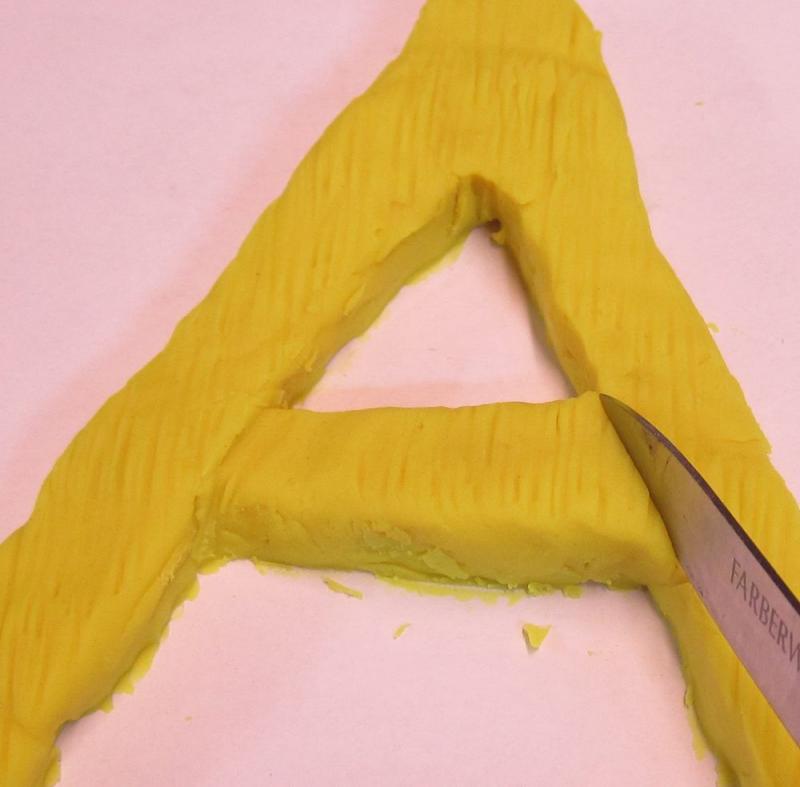
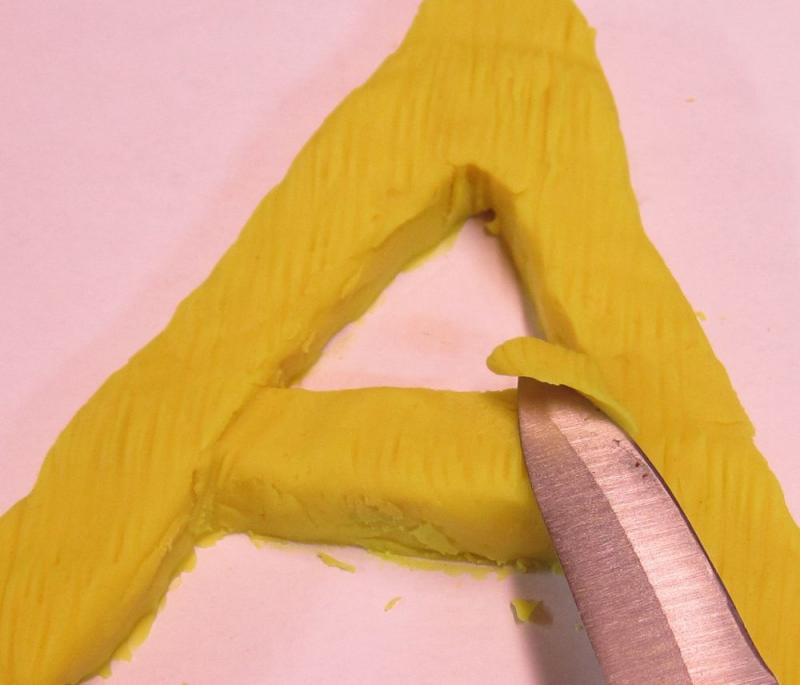
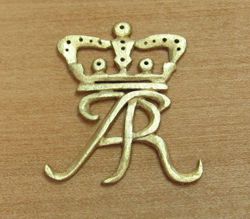
The stop cut is very important in relief carving. It is a two stroke cut that is used to create depth and relief. If you look at the crown design you can see the cross piece of the letters. I have indicated a stop cut on each side of the cross piece in red. To replicate this in my crude playdoh demo.....I have created the letter A. Note the wood grain added. The first stroke in a stop cut is to slice very carefully to the depth you want. In this case I am creating a cut straight down. Remember not to try and go too deep on the first try but rather make a series of stop cuts until you reach the desired depth and shape. So this first stroke if very shallow to only just begin creating depth. Heres what it looks like in playdoh The second stroke of a stop cut is to slice a very thin sliver off. Carve with your blade or chisel towards the stop cut. A small sliver should pop free creating depth. Repeat this process until you reach a depth and shape you want....yes I know it doesnt look great in playdoh but you get the idea. I am using a small kitchen knife to represent my micro chisel or #11 blade. Remember that the piece is just 1/32" thick so you will be taking it down at microscopic intervals as you repeat the two stroke stop cut many times on each side of the cross piece. Then start the process on the other side of the cross bar... Eventually you will have created some depth in the piece and then you could further shape it by rounding off the edges and cleaning it up.... again ...take a look at my first attempt and and how the cross piece of the letters looks after applying stop cuts to each side....then cleaning it up. I am sure more experienced carvers can do a much better job with it but this particular cut is used throughout relief carving for ship model carvings. You will use it a lot. As I did on my paper design...you can mark where you want your stop cuts in advance....they are shown in red on the drawing. You can see the other carving and probably pick out where I used the stop cut. I like to plan ahead and mark them out on my drawing. I like to pencil where all of the overlaps will be and depth is created. Its easy to lose track when you lose yourself in the carving process and seeing the pencil marks on the carving helps avoid a mistake where you will have to start over. see my pencil marks on the uncarved half of this piece. They show where I will use stop cuts.


- 7 replies
-
- 24
-
-
Thanks I am far from being in a position to show others, I am just starting out....but I hope others that have more experience will guide everyone, including me. Chuck
-
For our needs basswood is problematic...I did carve one of the crowns in cherry but using castello worked much better. I have not tried pear. I have tried Yellow cedar and that works beautifully. Carves like butter. No grain at all. Its a softer wood but very strong. Hold a clean crisp egde. I also tried Jelatung and Tupalo (I think thats how you spell it) Not good for our small carvings though. Way too soft. But Alaskan Yellow cedar has possibilities. I Loved it so much I actually started building another barge with it. Here is a sneak peek. In comparison with Cherry version. If you can get some its worth a try. The entire backbone is done in alaskan yellow cedar.
- 7 replies
-
- 18
-
-
Some criteria for starting a new group project
Chuck replied to Chuck's topic in Group Projects on Model Ship World
Through the NRG....I am mailing Kurt 20 sets tomorrow morning. He will add the line item to the NRG store. But as they run low on stock I will cut more and send them. Chuck -
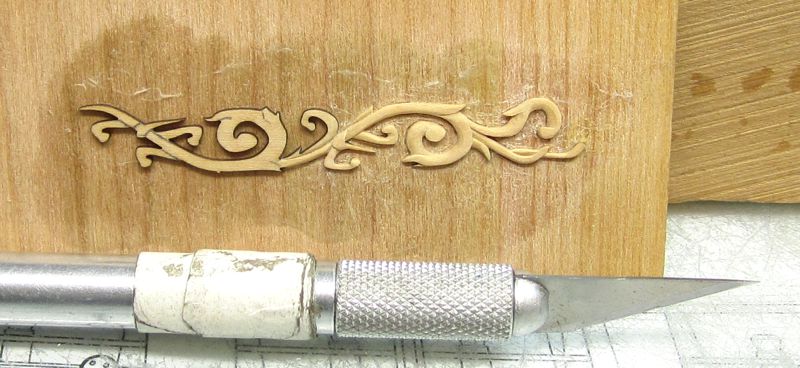
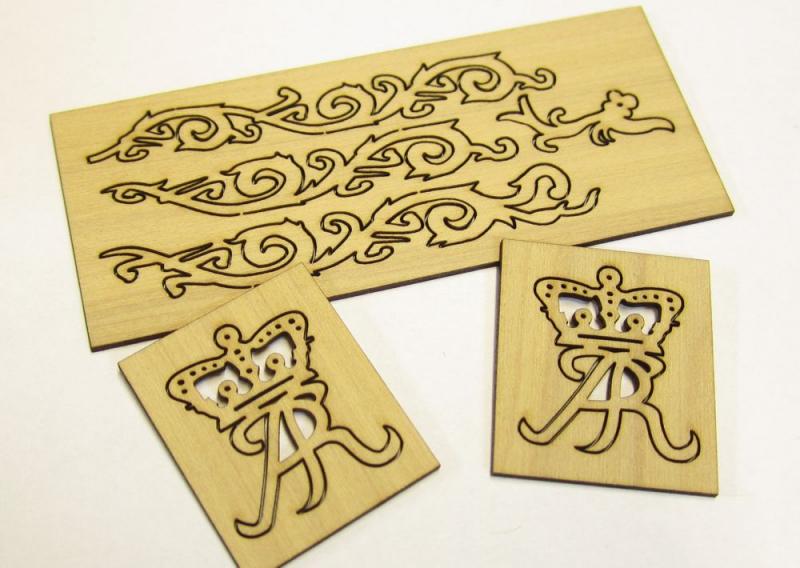
These two pieces were done with just #11 blades. No finish applied on the top one yet. They are about 1/4" wide and just a few inches long.....only 1/32" thick. I think a large chisel would obliterate them.

- 71 replies
-
- 18
-
-
The issue with chisels for me is the actual size and delicate nature of the parts we are carving. I just cant use the chisels with the same control as a #11 blade. A scalpel blade would be good also. Remember...these are tiny thin pieces of wood. Using a #11 blade you are just using the very tip. The last 1/32" portion of the very tip.....no more. Until you get a chance to try them all it would be hard for anyone to describe it. That was one of the benefits of getting everyone together at my shop so we could all try each others chisels and blades. Its the only way to tell. In fact, it wasnt until I tried a good quality chisel that I decided to buy them. They are expensive.
- 71 replies
-
- 10
-
-
I actually still use the #11 blades even though I have a whole set of chesels. They just get into the nooks better in my opinion. I am no authority on the subject though. I did use the "v" shaped groove chisel to make the veins in the leaves which was easier than making "chip cuts" with a #11 blade. So I guess it depends on what you are carving at the moment. And what you are more comfortable with.
-
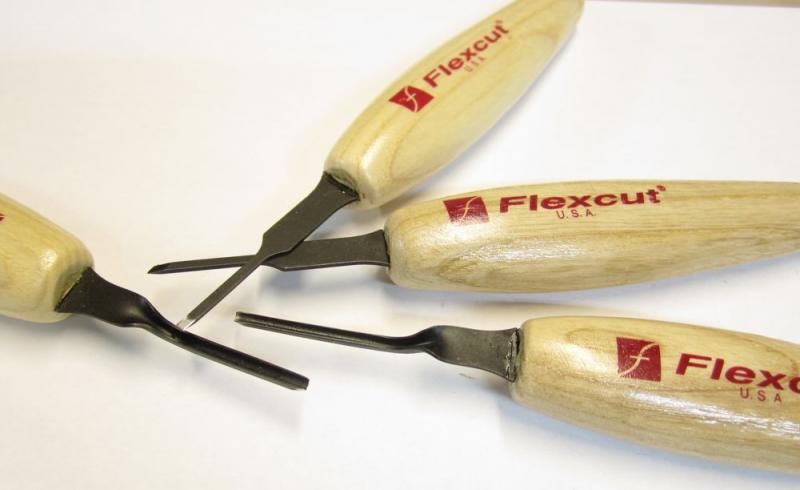
I havent used them much yet.....but flexcut has a special shaped "whatcha-ma-bob" to sharpen them. See below. http://www.flexcut.com/pw12-flexcut-slipstrop/ They also have a great how to video showing how to sharpen the chisels. Cant say much else because I barely used mine.....havent tried it yet. I mostly used a #11 blade. Chuck
-
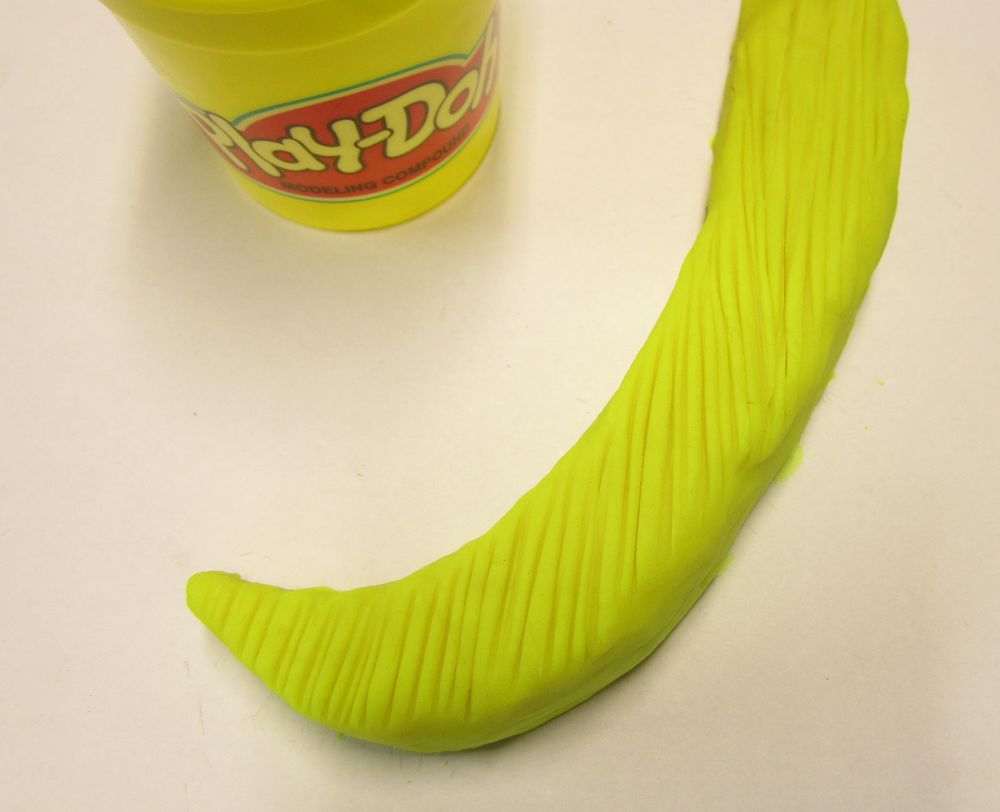
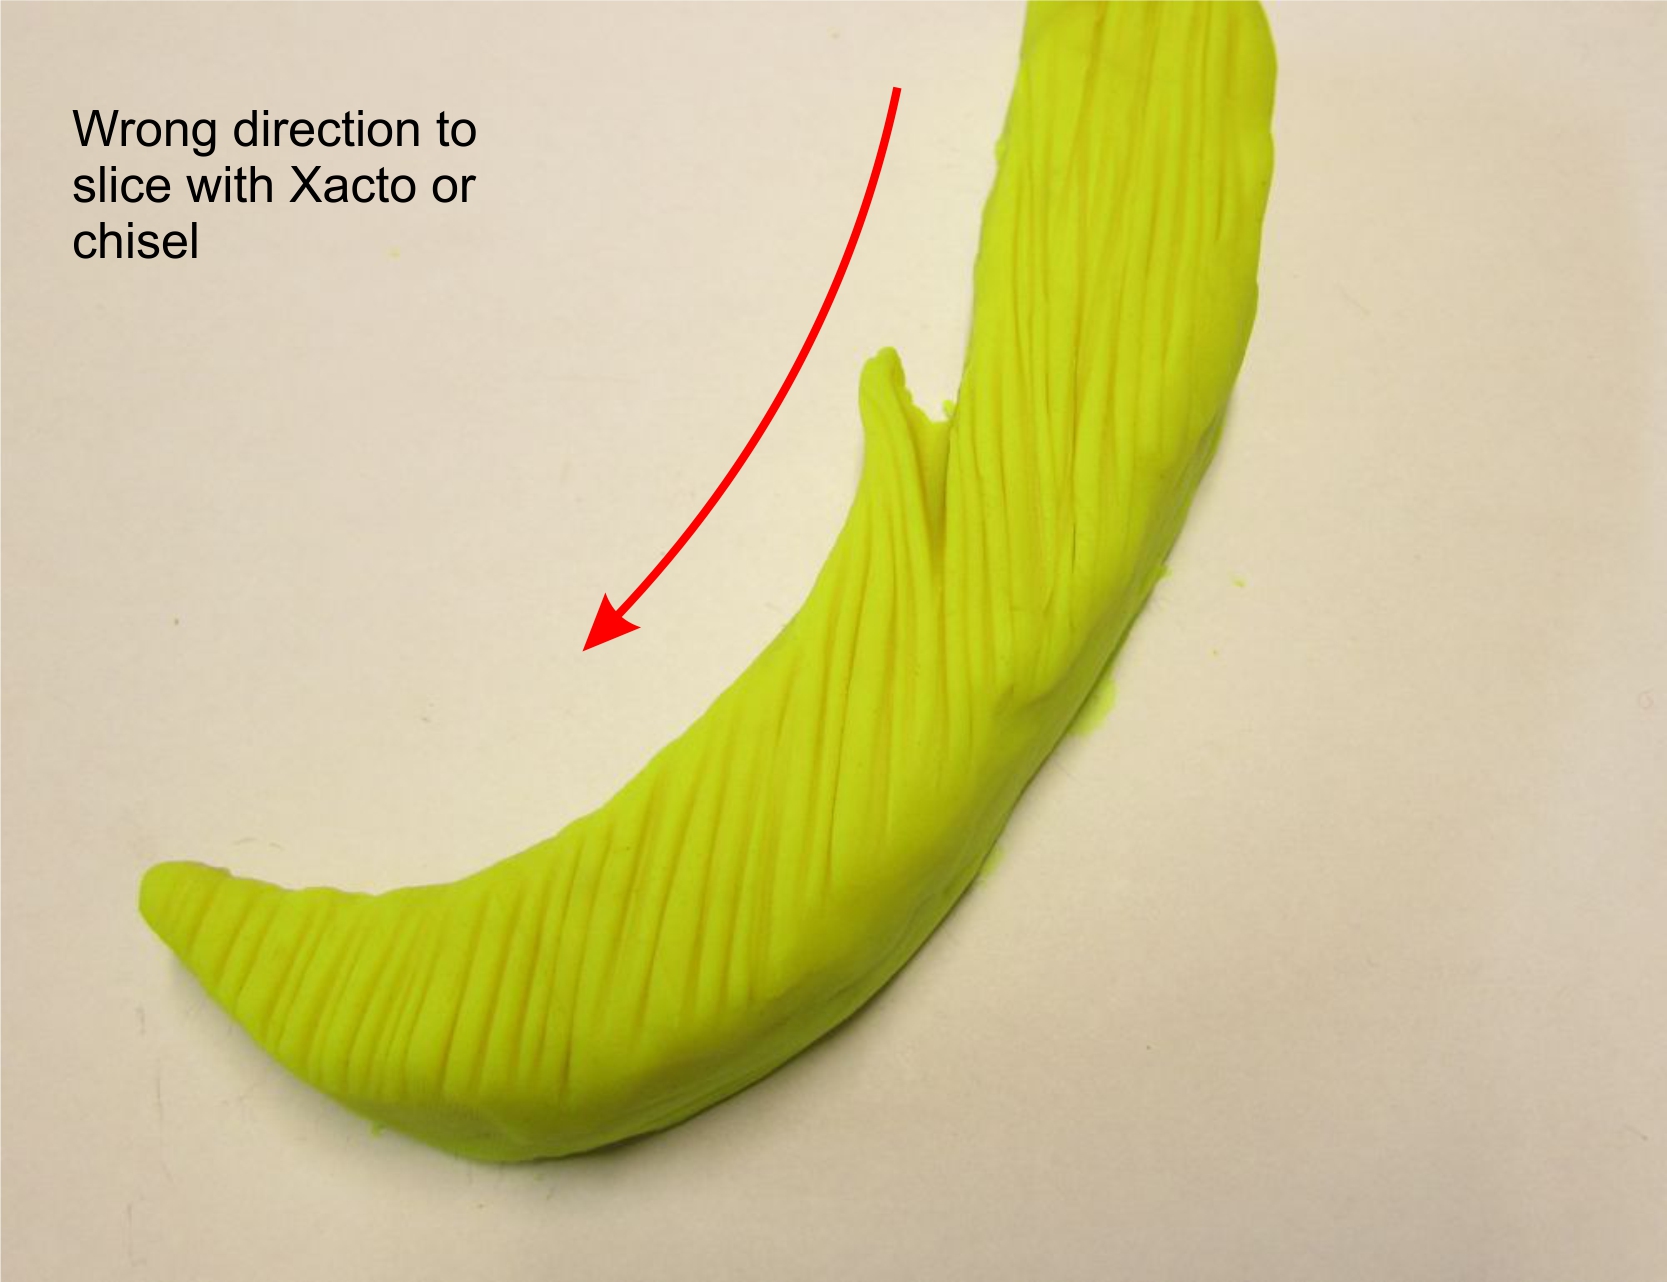
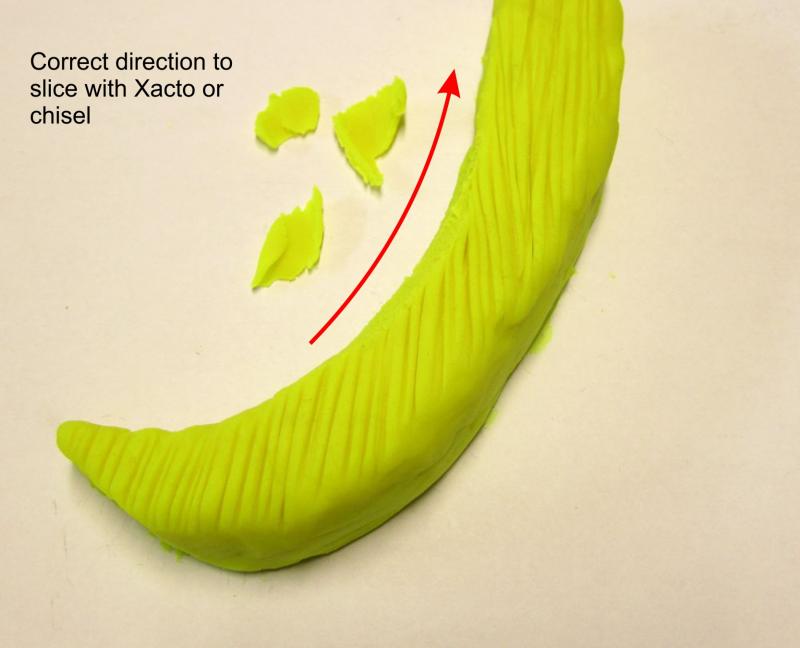
As I mentioned earlier...I am just a beginner with carving. But to get this group started, allow me the opportunity to describe the 4 basic cuts or techniques I used to carve the crown cipher and the other designs. This is what I covered with my local club before we undertook the actual carving. Because the pieces are so small, I used Playdoh to demonstrate the four cuts we were going to start with. It allowed us to demonstrate in larger scale so everyone could see it. Once I am done with cut one....please do reply and let me know if this method to describe the cuts translates well enough for the web. If you guys think this is a good method I will delete your replies and continue with the remaining three..... So let me begin. To start here is an exampled of the same cipher on a contemporary model. It very plainly carved. And its gilded. Here is my first try also gilded. When you download and print the design patterns here scaledecorationschart.pdf You will notice on the crown design below, that I added some lines and arrows....the short red lines indicate where we have stop cuts...to be explained later. The dark vertical lines show the wood grain. The arrows indicate suggested direction for slicing the laser char from the sides of your carving. Either with a # 11 blade or chisel. I used a #11 blade. I recommend you indicate the grain direction on the enlarged designs before you begin...and also draw in where you will place your stop cuts to establish depth....and arrows to indicate what direction you will slice and carve in. Its just good practice and a great exercise before the wood shavings start flying. As you can see I only did this for some of the cuts on the crown cipher......feel free to fill in the others on your design sheet before you begin. Note the left leg of the monogram. It has an arrow in green. This is used to demonstrate the importance in cut direction with your chisel or blade. The playdough piece below represents this same part of the crown cipher. Notice the grooves I added to represent the wood grain. When you are slicing with your chisel or blade....I watched everyone in my club group begin. It is logical that everyone would start with the design right side up.....and start with this leg of the design. The goal when starting is just to slice away the laser char from the sides of the piece. Most started slicing off small shavings in the direction shown below. I did this also. Its seems like the obvious way to do it. But guess what happened? The blade caught on the grain and either split the leg off entirely or creating a large chip along the grain direction which ruined the piece.....time to start again. Can you see how this would happen? Some also decided not to slice or chisel away the char as they were shaping the edges. They decided to scrape it off with the edge of the #11 blade. Not only did this make a horrible noise...I wouldnt recommend this approach. It leaves a dirty and rough surface that wont take a finish well. It just doesnt look good. Since we are trying to learn carving its best to try cutting or chiseling. Very tiny thin shavings....dont try to remove too much. This takes time to do. Its very delicate work. Instead Slice in the other direction as shown below. This may seem obvious to most but it is well worth mentioning. This completes the first type of basic cut used on these pieces. Its real beginner stuff but hopefully useful. Analyze your piece for the wood grain and its direction and pre-plan the direction of your cuts to avoid splitting and ruining your piece. You can do this ahead of time by drawing arrows on your printed design sheet. Let me know guys if this way of explaining the four basic cuts works....if it does....I will continue on with basic cut number two.....the stop cut. God I love the smell of playdoh!!!!!! Chuck


- 7 replies
-
- 24
-
-
Download the pdf here of the carving blank designs. It shows the designs actual size and also enlarged for clarity. The crown monogram is the easiest in my opinion and I recommend you start with that one. You will notice some red lines and arrows on the PDF.....They represent the wood grain and also a cheat sheet for deciding what direction you should slice in and where your stop cuts are located.... A more detailed explanation will follow and be placed in the pinned techniques......topic very soon!!! scaledecorationschart.pdf

- 12 replies
-
- 12
-
-
I carved my pieces using only a #11 blade. I also tried a few micro chisels from Flexcut. They worked really well. I only really used the "v" shaped one. The important thing is to keep them very sharp.....as soon as the #11 blades got a little dull I threw it away and got a new one. I havent done any rotary carving because I dont like the look of the pieces after using the bits. Too rounded for my tastes but only probably because I dont know how to do it correctly. I also like the feel of the blade vs. the rotary tool. But guys, please discuss your tools and approaches here and hopefully we will have a few that will try rotary carving. Chuck
- 71 replies
-
- 14
-
-
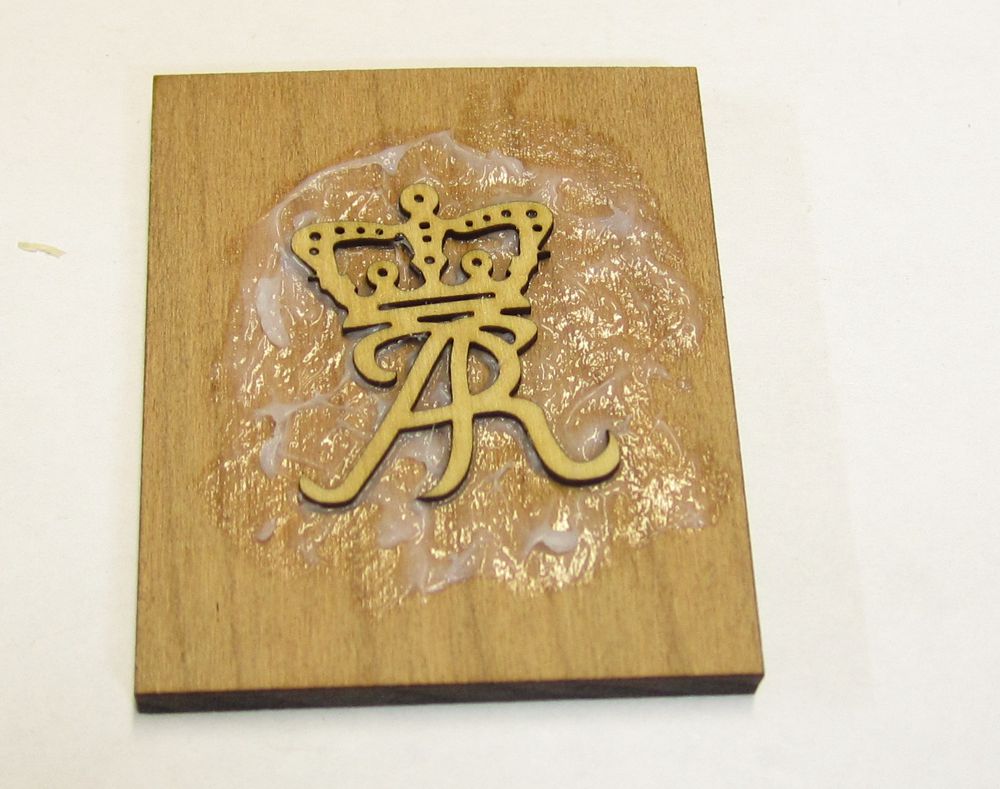
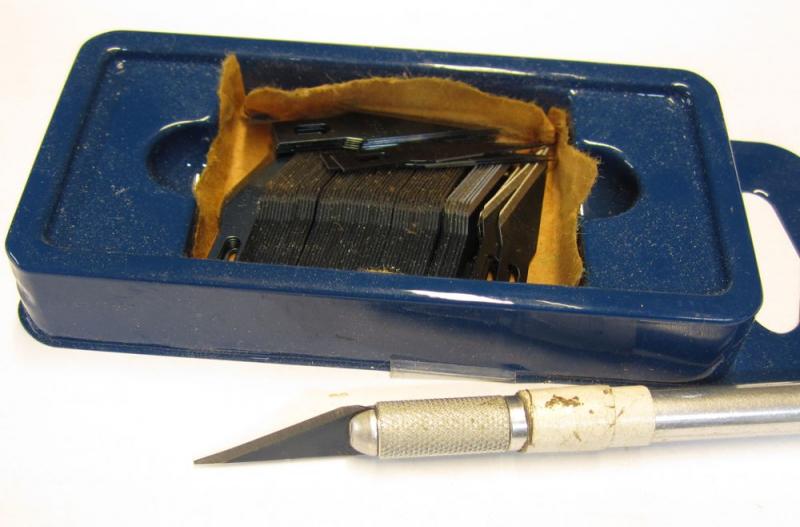
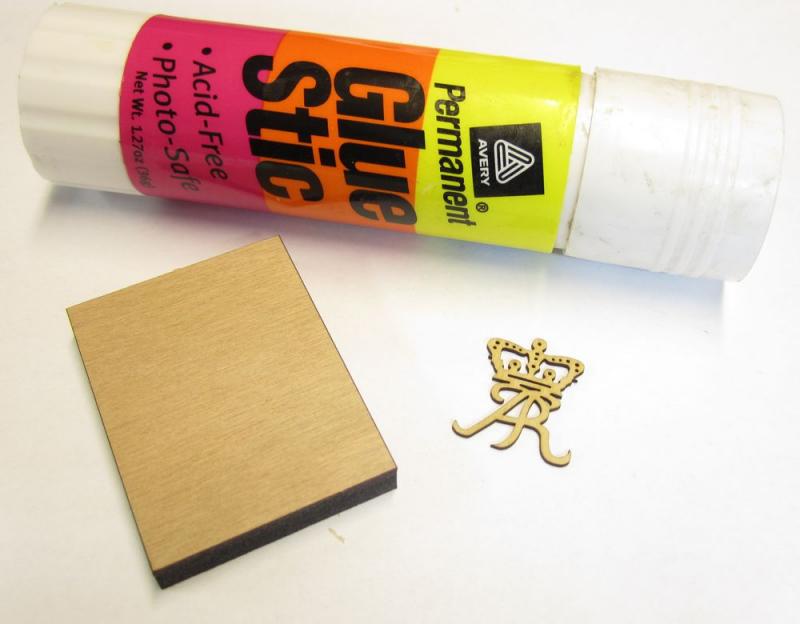
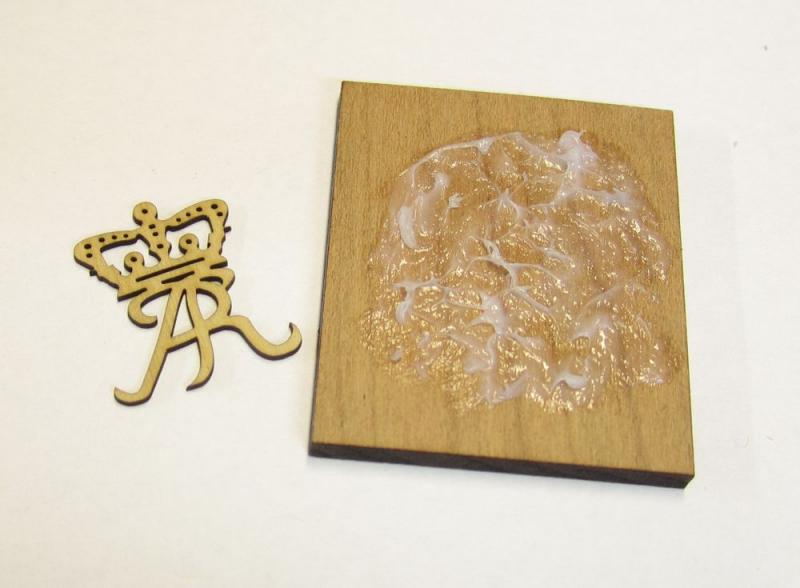
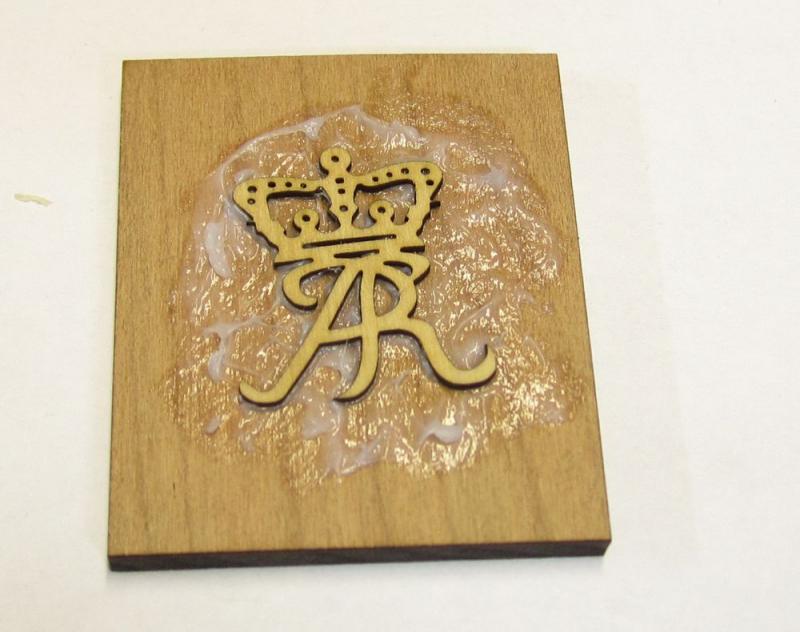
I am far from being an expert at carving in wood. This was my first attempt and it seemed to work really well. I am sure some of you will have alternative methods for mounting your carving blanks. The Queen's cipher is probably the easiest of the designs to start with so I recommend starting with those. To mount the blank, I used a thicker 1/8" or 3/16" thick piece of scrap wood (not included with the blanks). Its cherry and is hard enough to take a beating. I would imagine softer woods are not the best to use and probably should be avoided. The base was cut just a little larger than the piece being carved. It was glued on with a childs glue stick. This glue is easy to remove and cures permanent and strong....but will easily be treated with rubbing alcohol when the time comes to remove it. Dont be shy with how much you use. You want this piece secure. These are fragile pieces at 1/32" thick. Take special care with the areas that would be prone to breaking like the bottom tails for the letters. The glue will dry hard but also flatter. If some squished out its not a problem because you can easily scrape it away while carving. Because the designs are so thin it will have a tendency to curl when wet with glue. To solve this problem I sandwiched it with another small scrap piece and clamped it to dry. I let it dry overnight before starting to carve it. To remove the piece after you are done...I literally just filled a small plastic container with 90% rubbing alcohol and dropped it in. I let it fully submerge in a 1" deep bath for about 3 hours. It actually fell right off the base without any trouble. Feel free to share other ways here or in your logs when you start one. I would NOT recommend trying to carve these blanks without mounting them to a base. They will just break apart in the first 2 seconds. Chuck

- 10 replies
-
- 18
-
-
Please feel free to post any books, publications or articles you may have read and recommend. If you read something that you will think can help others learn about carving or miniature carving please place it here.
-
This group area was set up to allow folks to experiment with relief carving as a group. Share ideas, techniques and advice. Laser cut carving blanks have been made available for those of you interested in using them. If everyone uses the same design it will be easier to share ideas and comment about them as a group. But it is not a requirement. Feel free to join in with the group if you would rather carve a different pattern and design. I would ask however that you refrain from using more advanced subjects like figureheads and fully "in-the-round" subjects as it is beyond the scope of this group at this time. To purchase a set of carving blanks CLICK HERE You will notice a few "pinned topics" at the top of this group area. These pinned topics were set up as an area for all to discuss those related subjects. If you have a question or comment related to them please post within those topics so everyone can easily find them later. Other than those pinned topics, we ask that you only create a mini-carving log of your own. Please title it similar to the example listed below. "Chuck's carving log" or maybe "Chucks first attempt at carving" It will work just like any other build log. This forum should not have any topics in it other than the properly named "carving logs" and pinned topics. Should you want to ask a question or post something, make sure it is posted in either a log or one of the instructional topics in the tabs above. Dont start a new topic. If for whatever reason you guys feel there is a need for a new instructional topic because your discussion doesnt relate to the ones already there....just start another one in the "tutorials and discussions" tab. You know the drill....this basically works like all of the other group project areas. See the other tabs above in this group area that have all the tutorials and instructions!!!! Feel free to ask any questions about this group here. All questions and comments are appreciated and very helpful.

- 12 replies
-
- 14
-
-
Carving instructions in the Barge chapter instructions are here. But also follow along n this topic. Shallopinstpartthree.pdf
-
If you have questions, comments or recommendations for carving tools and wood choices please post them here. The carving blanks for this project are only available in boxwood to start...but with enough interest...maybe we will try some others. Feel free to elaborate here.