
Supplies of the Ship Modeler's Handbook are running out. Get your copy NOW before they are gone! Click on photo to order.
×


Chuck
-
Posts
9,449 -
Joined
-
Last visited
Reputation Activity
-

 Chuck got a reaction from FrankWouts in Sloop Speedwell 1752 by Chuck - Ketch Rigged Sloop - POF - prototype build
Thank You...
With the catheads completed I could finish some inboard details at the bow in preparation for fitting the bulwarks with the pissdale and other stuff.
In this photo you can see the the waterway was added around the perimeter of the fcastle deck. It was done exactly like the other decks.
Then I I added the final breast hook at the bow. This was done just like the others on the deck below it. It was laser cut in two pieces. I made sure to bevel the inside edge so I got a tight fit against the bulwarks and stem. I added nine bolts that stood proud using 30lb black fishing line. Then it was painted red.
Lastly, I added the thin an delicate molding strip on the inboard bulwarks. If this is made too heavy it would just look bad. So I made sure it was very thin and not too wide. Its a nice feature on the model actually. You guys wont have to worry about scraping the fancy profile into a strip of wood. I laser cut these for you with the profile. But I didnt use wood. I laser cut them from very thin syre-nite acrylic. This stuff is awesome really. It is very, very flexible. And we will need it to be, which is why I chose to use it. It bends so nicely without breaking. We will need that flexibility when it has to go around the top edge of the pissdales which are up next. I would just recommend that you round off the top edge to make it look like a nice fancy molding strip. Just be careful and use a fine 400 grit sandpaper. Its beige to match the wood color but I could have actually laser cut them in red. But for those of you who want to go natural without paint I am using the stuff that looks like boxwood. The same stuff I used for the stern lights etc. So you must paint it red before you glue it on the hull.
It runs from the aft side of the cat tail and along the sheer in the waist. It continues all the way back to the poop bulkhead.
You really must try and keep a nice run with this molding. It should be a graceful run from bow to stern without any dips or waviness. Follow the run of your inboard planking. the top of the molding is flush with the top of the cap rail along the waist.
-
Chuck got a reaction from FrankWouts in Sloop Speedwell 1752 by Chuck - Ketch Rigged Sloop - POF - prototype build
Catheads...
I usually hold off on making the catheads, but it just makes sense to get them done now. It will make it easier to finish off the inboard bulwarks which will be next up. With the catheads all done I can get the waterways in on the f'castle deck along with the pissdale and other details.
All the pieces are laser cut for the catheads. Below. I have cleaned all the char off of these pieces and they are ready to assemble.
The sides with the carved panels were glued on first. First the outside cover to establish the raised panel look and then the inboard piece. These are 1/64" thick and are sanded down even thinner afterwards.
Then the carved front piece and sheaves were added. These are a hair larger than needed so you can sand them all nice and flush.
Then the cathead was glue to the cat tail...no worries about the seam because that will be completely covered.
Using the templates that we used to establish the hawse holes, the position for the catheads were marked outboard. Then the bulwarks were notched out carefully. I used a razor saw. The notch was made narrower than needed and not as deep as ultimately needed. Once the basic notch was cut out, I used a good file to slowly open it up to its final size and shape.
You will also notice I painted the inboard cat tail red in advance. I painted up to the seam line. Note the chamfered edges inboard.
When test fit and in the final position, the inboard side of the cat tail is flush with the top of the cap rail. But the angle of the cathead rises and so it will be above the cap rail height on the outboard side. You can see this in the picture. This is what you are shooting for. The cat tail is also left longer on the inboard side so you can shorten it accordingly. It should sit flat on the deck. You will soon see some inboard pics.
Above the cathead there is a cat block. Usually this is an open cat block but on the contemporary model it is closed. So I will follow suit. This is laser cut and 3/16" wide. ...but is currently a straight cat block. You need to sand a slight curve into this when viewed from above. It needs to conform to the rounded shape of the cap rail when viewed from above. See the plans. This is easy enough to do. It is a very slight curve.
Then a sheave is added and a slot is created on the bottom. This slot will accommodate the top of the cathead. It will sit right on top of it and thus this slot must be angled to match the upward slope of the cathead. Again this is not hard to do. I just used a small flat file. But yes you can carve it with a chisel also. The catblock was painted black.
A final pic of the catheads in position and the cat blocks too. There is still a bunch of paint touch up to get done.
Now as you know there are many ways to build and position these. For example, if you wanted to, you can add the inboard cat tail separately without gluing them together first. Maybe that will be easier for some. Cut it to length and paint it red. Glue it to the inboard bulwarks and partially in the notch. Then add the cathead by placing it into the notch up against the cat tail.
Its up to you. I just thought it might be easier this way to make them look like one piece if they were glued together first. But its not the only way to do it. And remember, the seam between the two parts will be completely covered by the cat block. So it doesnt have to be perfect.
-

 Chuck got a reaction from Dave_E in HMS Indefatigable 1794 (prototype) by James H - Vanguard Models - 1:64 - FINISHED
Really fantastic finish. Well worth the time and effort. That is a large model.
-
 Chuck got a reaction from Ryland Craze in HMS Indefatigable 1794 (prototype) by James H - Vanguard Models - 1:64 - FINISHED
Really fantastic finish. Well worth the time and effort. That is a large model.
-
 Chuck got a reaction from GrandpaPhil in Sloop Speedwell 1752 by Chuck - Ketch Rigged Sloop - POF - prototype build
Catheads...
I usually hold off on making the catheads, but it just makes sense to get them done now. It will make it easier to finish off the inboard bulwarks which will be next up. With the catheads all done I can get the waterways in on the f'castle deck along with the pissdale and other details.
All the pieces are laser cut for the catheads. Below. I have cleaned all the char off of these pieces and they are ready to assemble.
The sides with the carved panels were glued on first. First the outside cover to establish the raised panel look and then the inboard piece. These are 1/64" thick and are sanded down even thinner afterwards.
Then the carved front piece and sheaves were added. These are a hair larger than needed so you can sand them all nice and flush.
Then the cathead was glue to the cat tail...no worries about the seam because that will be completely covered.
Using the templates that we used to establish the hawse holes, the position for the catheads were marked outboard. Then the bulwarks were notched out carefully. I used a razor saw. The notch was made narrower than needed and not as deep as ultimately needed. Once the basic notch was cut out, I used a good file to slowly open it up to its final size and shape.
You will also notice I painted the inboard cat tail red in advance. I painted up to the seam line. Note the chamfered edges inboard.
When test fit and in the final position, the inboard side of the cat tail is flush with the top of the cap rail. But the angle of the cathead rises and so it will be above the cap rail height on the outboard side. You can see this in the picture. This is what you are shooting for. The cat tail is also left longer on the inboard side so you can shorten it accordingly. It should sit flat on the deck. You will soon see some inboard pics.
Above the cathead there is a cat block. Usually this is an open cat block but on the contemporary model it is closed. So I will follow suit. This is laser cut and 3/16" wide. ...but is currently a straight cat block. You need to sand a slight curve into this when viewed from above. It needs to conform to the rounded shape of the cap rail when viewed from above. See the plans. This is easy enough to do. It is a very slight curve.
Then a sheave is added and a slot is created on the bottom. This slot will accommodate the top of the cathead. It will sit right on top of it and thus this slot must be angled to match the upward slope of the cathead. Again this is not hard to do. I just used a small flat file. But yes you can carve it with a chisel also. The catblock was painted black.
A final pic of the catheads in position and the cat blocks too. There is still a bunch of paint touch up to get done.
Now as you know there are many ways to build and position these. For example, if you wanted to, you can add the inboard cat tail separately without gluing them together first. Maybe that will be easier for some. Cut it to length and paint it red. Glue it to the inboard bulwarks and partially in the notch. Then add the cathead by placing it into the notch up against the cat tail.
Its up to you. I just thought it might be easier this way to make them look like one piece if they were glued together first. But its not the only way to do it. And remember, the seam between the two parts will be completely covered by the cat block. So it doesnt have to be perfect.
-
 Chuck got a reaction from Hubac's Historian in Sloop Speedwell 1752 by Chuck - Ketch Rigged Sloop - POF - prototype build
Catheads...
I usually hold off on making the catheads, but it just makes sense to get them done now. It will make it easier to finish off the inboard bulwarks which will be next up. With the catheads all done I can get the waterways in on the f'castle deck along with the pissdale and other details.
All the pieces are laser cut for the catheads. Below. I have cleaned all the char off of these pieces and they are ready to assemble.
The sides with the carved panels were glued on first. First the outside cover to establish the raised panel look and then the inboard piece. These are 1/64" thick and are sanded down even thinner afterwards.
Then the carved front piece and sheaves were added. These are a hair larger than needed so you can sand them all nice and flush.
Then the cathead was glue to the cat tail...no worries about the seam because that will be completely covered.
Using the templates that we used to establish the hawse holes, the position for the catheads were marked outboard. Then the bulwarks were notched out carefully. I used a razor saw. The notch was made narrower than needed and not as deep as ultimately needed. Once the basic notch was cut out, I used a good file to slowly open it up to its final size and shape.
You will also notice I painted the inboard cat tail red in advance. I painted up to the seam line. Note the chamfered edges inboard.
When test fit and in the final position, the inboard side of the cat tail is flush with the top of the cap rail. But the angle of the cathead rises and so it will be above the cap rail height on the outboard side. You can see this in the picture. This is what you are shooting for. The cat tail is also left longer on the inboard side so you can shorten it accordingly. It should sit flat on the deck. You will soon see some inboard pics.
Above the cathead there is a cat block. Usually this is an open cat block but on the contemporary model it is closed. So I will follow suit. This is laser cut and 3/16" wide. ...but is currently a straight cat block. You need to sand a slight curve into this when viewed from above. It needs to conform to the rounded shape of the cap rail when viewed from above. See the plans. This is easy enough to do. It is a very slight curve.
Then a sheave is added and a slot is created on the bottom. This slot will accommodate the top of the cathead. It will sit right on top of it and thus this slot must be angled to match the upward slope of the cathead. Again this is not hard to do. I just used a small flat file. But yes you can carve it with a chisel also. The catblock was painted black.
A final pic of the catheads in position and the cat blocks too. There is still a bunch of paint touch up to get done.
Now as you know there are many ways to build and position these. For example, if you wanted to, you can add the inboard cat tail separately without gluing them together first. Maybe that will be easier for some. Cut it to length and paint it red. Glue it to the inboard bulwarks and partially in the notch. Then add the cathead by placing it into the notch up against the cat tail.
Its up to you. I just thought it might be easier this way to make them look like one piece if they were glued together first. But its not the only way to do it. And remember, the seam between the two parts will be completely covered by the cat block. So it doesnt have to be perfect.
-
 Chuck reacted to JeffT in Sloop Speedwell 1752 by JeffT - Syren Ship Model Company - 1:32 scale - POF Sloop
I'm a little behind on this. I've had a couple medical procedures to deal with over the last two weeks so I haven't been able to do much. I'll be back on it soon.
-
 Chuck got a reaction from scrubbyj427 in Sloop Speedwell 1752 by Chuck - Ketch Rigged Sloop - POF - prototype build
Catheads...
I usually hold off on making the catheads, but it just makes sense to get them done now. It will make it easier to finish off the inboard bulwarks which will be next up. With the catheads all done I can get the waterways in on the f'castle deck along with the pissdale and other details.
All the pieces are laser cut for the catheads. Below. I have cleaned all the char off of these pieces and they are ready to assemble.
The sides with the carved panels were glued on first. First the outside cover to establish the raised panel look and then the inboard piece. These are 1/64" thick and are sanded down even thinner afterwards.
Then the carved front piece and sheaves were added. These are a hair larger than needed so you can sand them all nice and flush.
Then the cathead was glue to the cat tail...no worries about the seam because that will be completely covered.
Using the templates that we used to establish the hawse holes, the position for the catheads were marked outboard. Then the bulwarks were notched out carefully. I used a razor saw. The notch was made narrower than needed and not as deep as ultimately needed. Once the basic notch was cut out, I used a good file to slowly open it up to its final size and shape.
You will also notice I painted the inboard cat tail red in advance. I painted up to the seam line. Note the chamfered edges inboard.
When test fit and in the final position, the inboard side of the cat tail is flush with the top of the cap rail. But the angle of the cathead rises and so it will be above the cap rail height on the outboard side. You can see this in the picture. This is what you are shooting for. The cat tail is also left longer on the inboard side so you can shorten it accordingly. It should sit flat on the deck. You will soon see some inboard pics.
Above the cathead there is a cat block. Usually this is an open cat block but on the contemporary model it is closed. So I will follow suit. This is laser cut and 3/16" wide. ...but is currently a straight cat block. You need to sand a slight curve into this when viewed from above. It needs to conform to the rounded shape of the cap rail when viewed from above. See the plans. This is easy enough to do. It is a very slight curve.
Then a sheave is added and a slot is created on the bottom. This slot will accommodate the top of the cathead. It will sit right on top of it and thus this slot must be angled to match the upward slope of the cathead. Again this is not hard to do. I just used a small flat file. But yes you can carve it with a chisel also. The catblock was painted black.
A final pic of the catheads in position and the cat blocks too. There is still a bunch of paint touch up to get done.
Now as you know there are many ways to build and position these. For example, if you wanted to, you can add the inboard cat tail separately without gluing them together first. Maybe that will be easier for some. Cut it to length and paint it red. Glue it to the inboard bulwarks and partially in the notch. Then add the cathead by placing it into the notch up against the cat tail.
Its up to you. I just thought it might be easier this way to make them look like one piece if they were glued together first. But its not the only way to do it. And remember, the seam between the two parts will be completely covered by the cat block. So it doesnt have to be perfect.
-
 Chuck got a reaction from mtaylor in HMS Indefatigable 1794 (prototype) by James H - Vanguard Models - 1:64 - FINISHED
Really fantastic finish. Well worth the time and effort. That is a large model.
-
 Chuck got a reaction from DB789 in HMS Indefatigable 1794 (prototype) by James H - Vanguard Models - 1:64 - FINISHED
Really fantastic finish. Well worth the time and effort. That is a large model.
-
Chuck reacted to James H in HMS Indefatigable 1794 (prototype) by James H - Vanguard Models - 1:64 - FINISHED
Well folks, this is it.
After 2yrs and 2 months, a period of ill health due to long covid, and also a break to build Grecian, here is my completed HMS Indefatigable. The rigging on this is intense but The last rig sheet went quickly. Hope you like her.
-
 Chuck got a reaction from archjofo in Sloop Speedwell 1752 by Chuck - Ketch Rigged Sloop - POF - prototype build
Catheads...
I usually hold off on making the catheads, but it just makes sense to get them done now. It will make it easier to finish off the inboard bulwarks which will be next up. With the catheads all done I can get the waterways in on the f'castle deck along with the pissdale and other details.
All the pieces are laser cut for the catheads. Below. I have cleaned all the char off of these pieces and they are ready to assemble.
The sides with the carved panels were glued on first. First the outside cover to establish the raised panel look and then the inboard piece. These are 1/64" thick and are sanded down even thinner afterwards.
Then the carved front piece and sheaves were added. These are a hair larger than needed so you can sand them all nice and flush.
Then the cathead was glue to the cat tail...no worries about the seam because that will be completely covered.
Using the templates that we used to establish the hawse holes, the position for the catheads were marked outboard. Then the bulwarks were notched out carefully. I used a razor saw. The notch was made narrower than needed and not as deep as ultimately needed. Once the basic notch was cut out, I used a good file to slowly open it up to its final size and shape.
You will also notice I painted the inboard cat tail red in advance. I painted up to the seam line. Note the chamfered edges inboard.
When test fit and in the final position, the inboard side of the cat tail is flush with the top of the cap rail. But the angle of the cathead rises and so it will be above the cap rail height on the outboard side. You can see this in the picture. This is what you are shooting for. The cat tail is also left longer on the inboard side so you can shorten it accordingly. It should sit flat on the deck. You will soon see some inboard pics.
Above the cathead there is a cat block. Usually this is an open cat block but on the contemporary model it is closed. So I will follow suit. This is laser cut and 3/16" wide. ...but is currently a straight cat block. You need to sand a slight curve into this when viewed from above. It needs to conform to the rounded shape of the cap rail when viewed from above. See the plans. This is easy enough to do. It is a very slight curve.
Then a sheave is added and a slot is created on the bottom. This slot will accommodate the top of the cathead. It will sit right on top of it and thus this slot must be angled to match the upward slope of the cathead. Again this is not hard to do. I just used a small flat file. But yes you can carve it with a chisel also. The catblock was painted black.
A final pic of the catheads in position and the cat blocks too. There is still a bunch of paint touch up to get done.
Now as you know there are many ways to build and position these. For example, if you wanted to, you can add the inboard cat tail separately without gluing them together first. Maybe that will be easier for some. Cut it to length and paint it red. Glue it to the inboard bulwarks and partially in the notch. Then add the cathead by placing it into the notch up against the cat tail.
Its up to you. I just thought it might be easier this way to make them look like one piece if they were glued together first. But its not the only way to do it. And remember, the seam between the two parts will be completely covered by the cat block. So it doesnt have to be perfect.
-
Chuck got a reaction from FrankWouts in Sloop Speedwell 1752 by Chuck - Ketch Rigged Sloop - POF - prototype build
The hawse holes can be complex but if you spend a lot of time preparing and measuring it will go smoothly. Before I begin describing my process here is a look at the contemporary model. You can see many close up details here.
I started by preparing some new templates. They are very much like the other templates but I wanted to add some other reference lines to help me more with aligning the hawse holes. So these are the ones you want to use when you get this stage.
You will note a few things in that photo. First you will see the dashed vertical lines I added that extend up to the cap rail. These will allow you to mark the locations of the hawse holes on top of the cap rail. To do this I cut some painters tape to the width of the hawse holes and placed it on the cap rail using the template as a guide. The tape runs parallel to the keel across the cap rail.
You will also notice how I cut the hawse holes from the template so I could use it as a stencil after taping it to the hull. I also cut an opening to mark the location of the hawse hoods or naval hoods. These are the plates that sit over the planking. The template sits on top of the wales as before. The forward edge sits against the stem.
I of course cut away the molding strip on the hull before I taped the template in position. I dont want to forget to mention that. Then I traced the hawse holes onto the hull.
On the inboard side of the hull, I prepared another template specifically for the hawse holes. Note the dashed lines again that extend to the cap rail. This template was lined up with the tape I placed across the cap rail. This will be the path I plan to drill through the hull for the hawse holes. This was a lot of measuring and planning to come up with these templates but it all worked out well. Just trace the hawse holes on the inboard side as well. Note how the template is sitting on the deck which establishes the correct height...I hope.
I didnt take any pictures right after drilling the hawse holes. I cant believe I forgot to do it. But let me explain the process. I drilled them out using progressively larger drill bits. I drilled from both sides. I drilled half way through from the front and then switched to inboard. I drilled half way through until the holes met in the middle and the first small hole was clear and through. Then I switched to a slightly larger drill bit and repeated the process. I increased them until the hawse holes were almost full size and then I switched to a round file to clean them up and enlarge them further.
THE ENTIRE time while drilling from the outboard side I used the blue tape on the top of the cap rail to guide the drill bit at the same angle. Following the keel. The hawse holes are almost level in height inboard and outboard with only a slight upward angle needed as you drill from the outboard side. A very slight angle. Not to worry if its not exact because when you dill from the inboard side to meet the outside hole it should all meet up decently.
I touched up the red paint inboard and used a soft pencil to darken the insides of the hawse holes black...to represent lead or tin I suppose.
Next up was to add the Hawse hoods or Naval hoods on the outboard side. These are made in two layers. They are laser cut and on the outermost end is a laser etched detail. This small etched detail wouldnt be difficult to carve with a sharp chisel. But I just assume etch it onto the ends. This means you must clean up the laser char from this "stepped" detail. I used a small flat needle file. It doesnt have to be perfectly clean either. Just do the best you can. Mine isnt perfect by any means and this little bt of char will actually accentuate the carved detail. Look at the photo of the contemporary model to see it on the original. The parts on the left are not yet cleaned.
The two layers are glued together carefully. The circles for the hawse holes are registered together. But a little tip....while gluing the two layers you can actually pre bend the hoods so they will stay bent and curved once the glue dries. Its hard to see this in the photo but the one on the right is curved to almost match the hull curvature exactly. This will make it so much easier to glue onto the hull.
Here you can see the two layered assembly glued onto the hull. Please note that after gluing the two layers together the inside edge against the stem must be beveled. I also cut these pieces a but longer (not by much) so you can line them up with your hawse holes drilled through the hull. Just carefully bevel the edge a little at time until as you are test fitting it on the model it the hawse holes line up. The holes themselves are also slightly smaller on this so you will have even more wiggle room to enlarge them after this is glued on the model. I think they look pretty good and look quite a bit like the contemporary model.
Lastly...the bolster. This piece is slightly thicker and not long enough to bend easily. So I laser cut it on even thicker boxwood stock. Its easier to sand the curve into the back side rather than bend it to fit on the hull. Once the bolster sits nicely on the hull and the curve matches, you can sand the outside to match. This will leave the overall thickness at about 3/64". Maybe slightly more.
Round off the top edges and sides but dont touch the hawse hole cut-aways just yet. This will be done after you glue the bolsters on the model. You will notice the oddball shape of the hawse hole cut-aways. They dont look like half circles. This is on purpose. Remember the hawse holes are drilled through parallel to the keel. So these weird shaped half holes are shaped like l=this so you can file them to the proper shape. Use a round file to open them up to match the angle of your hawse holes through the bulwarks. I hope that makes sense. When initially gluing the bolster on the hull, line up the iboard side to match the profile of your hawse holes. Just like in the photo. Then use your file to shape them.
They will or should be opened up to look like this. The holes were touched up and blackened with a soft pencil.
-
 Chuck got a reaction from marsalv in Sloop Speedwell 1752 by Chuck - Ketch Rigged Sloop - POF - prototype build
To scupper or not to scupper.
Most contemporary models do not show the scuppers. In fact the contemporary model of Speedwell doesnt show the scuppers. I didnt add the scuppers on my Winnie build which was typical. But I am going to show them on my speedwell. Nothing fancy. These arent too crazy to do. Not like the hawse holes will be. But you do have to be careful. You need to carefully measure them inboard and outboard so they look like they line up. You can actually use the deck planking templates because I have marked the inboard locations for all of the scuppers.
When I drill my scuppers I dont even try to drill them all the way through. That adds unnecessary difficulty. I drill shallow holes only about 1/16" deep or slightly more. Inboard, I start with a small pilot hole with a small drill bit. Then in this case, I used a #47 drill bit afterwards to make them larger. Finally I used a round file to smooth out the hole’s insides. I lightly sanded the inboard bulwarks over the scuppers with some 400 grit sandpaper to smooth out any fraying. This will require some paint touch-up later when they are all done. The scupper holes were made flush with the deck level or just a hair above.
I prefer to use a soft pencil to darken the inside of the holes. I made sure to cover the entire inside surface of the scuppers including the back of the hole. Then I touch up the red bulwark paint. On this model I drilled the scuppers before I added the waterway. I just wanted to try something new. It worked out really well for me. No chipping or fraying of the water way at all. You can do it whichever way is more comfortable for you.
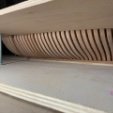
The picture below shows the holes drilled and darkened with the pencil. They are nice and dark. I touched up the red paint as well on the bulwarks afterwards. You can see the waterway strip also prepared in advance and ready to be glued into position.
The waterway is a 3/64" x 3/64" strip of cedar. I sanded one of the four corners of the strip down its entire length. I used an Emory board or sanding stick. Basically I made it triangular in profile. Then I held it in position so I could mark the positions for the scuppers along its length. I really tried to get these exactly where they should be located. I used a round mini file to make the half round openings along the length of the waterway where the scuppers were marked out. Once in position this really looked good. I used the same soft pencil to darken the round notches I made along the waterway as well. Below you can see how the scuppers inboard turned out. I made the waterway in two pieces for the gun deck rather than use one long strip that spanned across the whole length.
I also prepared the waterway for the poop deck, port and starboard. This was easy...no scuppers, LOL. Just make the strip triangular. Dont worry about trying to make it concave or anything fancy.
Here is a photo.
Finally to the outboard side. No difference here really. I used those outboard templates we used way back when....remember those. If you have to shift the template fore and aft a bit to line them up with the inboard scuppers you made on the opposite side of the deck/hull its no big deal. But this template will give you a really good start and can be rested atop the wales.
I drilled with a small drill bit first and again made the holes larger using the #47 bit. I cleaned them up a bit and darkened them with a soft pencil. Once again...no need to drill all the way through and hope you meet the same scupper hole you drilled on the inboard side. Fake it ...till you make it .....I always say. I drilled part way through once again. Make sure you really darken them inside the holes nicely and completely.
Dont add the waterway on the fcastle deck yet. I think it best to drill the hawse holes first. I will be doing that next me thinks.
-
Chuck got a reaction from marsalv in HMS Portland 1770 by scrubbyj427 - 1:48 - 4th rate 50-gun ship
Beautiful....simply beautiful.
-
 Chuck got a reaction from Trussben in Sloop Speedwell 1752 by Chuck - Ketch Rigged Sloop - POF - prototype build
Catheads...
I usually hold off on making the catheads, but it just makes sense to get them done now. It will make it easier to finish off the inboard bulwarks which will be next up. With the catheads all done I can get the waterways in on the f'castle deck along with the pissdale and other details.
All the pieces are laser cut for the catheads. Below. I have cleaned all the char off of these pieces and they are ready to assemble.
The sides with the carved panels were glued on first. First the outside cover to establish the raised panel look and then the inboard piece. These are 1/64" thick and are sanded down even thinner afterwards.
Then the carved front piece and sheaves were added. These are a hair larger than needed so you can sand them all nice and flush.
Then the cathead was glue to the cat tail...no worries about the seam because that will be completely covered.
Using the templates that we used to establish the hawse holes, the position for the catheads were marked outboard. Then the bulwarks were notched out carefully. I used a razor saw. The notch was made narrower than needed and not as deep as ultimately needed. Once the basic notch was cut out, I used a good file to slowly open it up to its final size and shape.
You will also notice I painted the inboard cat tail red in advance. I painted up to the seam line. Note the chamfered edges inboard.
When test fit and in the final position, the inboard side of the cat tail is flush with the top of the cap rail. But the angle of the cathead rises and so it will be above the cap rail height on the outboard side. You can see this in the picture. This is what you are shooting for. The cat tail is also left longer on the inboard side so you can shorten it accordingly. It should sit flat on the deck. You will soon see some inboard pics.
Above the cathead there is a cat block. Usually this is an open cat block but on the contemporary model it is closed. So I will follow suit. This is laser cut and 3/16" wide. ...but is currently a straight cat block. You need to sand a slight curve into this when viewed from above. It needs to conform to the rounded shape of the cap rail when viewed from above. See the plans. This is easy enough to do. It is a very slight curve.
Then a sheave is added and a slot is created on the bottom. This slot will accommodate the top of the cathead. It will sit right on top of it and thus this slot must be angled to match the upward slope of the cathead. Again this is not hard to do. I just used a small flat file. But yes you can carve it with a chisel also. The catblock was painted black.
A final pic of the catheads in position and the cat blocks too. There is still a bunch of paint touch up to get done.
Now as you know there are many ways to build and position these. For example, if you wanted to, you can add the inboard cat tail separately without gluing them together first. Maybe that will be easier for some. Cut it to length and paint it red. Glue it to the inboard bulwarks and partially in the notch. Then add the cathead by placing it into the notch up against the cat tail.
Its up to you. I just thought it might be easier this way to make them look like one piece if they were glued together first. But its not the only way to do it. And remember, the seam between the two parts will be completely covered by the cat block. So it doesnt have to be perfect.
-
Chuck got a reaction from Hubac's Historian in Sloop Speedwell 1752 by Chuck - Ketch Rigged Sloop - POF - prototype build
The hawse holes can be complex but if you spend a lot of time preparing and measuring it will go smoothly. Before I begin describing my process here is a look at the contemporary model. You can see many close up details here.
I started by preparing some new templates. They are very much like the other templates but I wanted to add some other reference lines to help me more with aligning the hawse holes. So these are the ones you want to use when you get this stage.
You will note a few things in that photo. First you will see the dashed vertical lines I added that extend up to the cap rail. These will allow you to mark the locations of the hawse holes on top of the cap rail. To do this I cut some painters tape to the width of the hawse holes and placed it on the cap rail using the template as a guide. The tape runs parallel to the keel across the cap rail.
You will also notice how I cut the hawse holes from the template so I could use it as a stencil after taping it to the hull. I also cut an opening to mark the location of the hawse hoods or naval hoods. These are the plates that sit over the planking. The template sits on top of the wales as before. The forward edge sits against the stem.
I of course cut away the molding strip on the hull before I taped the template in position. I dont want to forget to mention that. Then I traced the hawse holes onto the hull.
On the inboard side of the hull, I prepared another template specifically for the hawse holes. Note the dashed lines again that extend to the cap rail. This template was lined up with the tape I placed across the cap rail. This will be the path I plan to drill through the hull for the hawse holes. This was a lot of measuring and planning to come up with these templates but it all worked out well. Just trace the hawse holes on the inboard side as well. Note how the template is sitting on the deck which establishes the correct height...I hope.
I didnt take any pictures right after drilling the hawse holes. I cant believe I forgot to do it. But let me explain the process. I drilled them out using progressively larger drill bits. I drilled from both sides. I drilled half way through from the front and then switched to inboard. I drilled half way through until the holes met in the middle and the first small hole was clear and through. Then I switched to a slightly larger drill bit and repeated the process. I increased them until the hawse holes were almost full size and then I switched to a round file to clean them up and enlarge them further.
THE ENTIRE time while drilling from the outboard side I used the blue tape on the top of the cap rail to guide the drill bit at the same angle. Following the keel. The hawse holes are almost level in height inboard and outboard with only a slight upward angle needed as you drill from the outboard side. A very slight angle. Not to worry if its not exact because when you dill from the inboard side to meet the outside hole it should all meet up decently.
I touched up the red paint inboard and used a soft pencil to darken the insides of the hawse holes black...to represent lead or tin I suppose.
Next up was to add the Hawse hoods or Naval hoods on the outboard side. These are made in two layers. They are laser cut and on the outermost end is a laser etched detail. This small etched detail wouldnt be difficult to carve with a sharp chisel. But I just assume etch it onto the ends. This means you must clean up the laser char from this "stepped" detail. I used a small flat needle file. It doesnt have to be perfectly clean either. Just do the best you can. Mine isnt perfect by any means and this little bt of char will actually accentuate the carved detail. Look at the photo of the contemporary model to see it on the original. The parts on the left are not yet cleaned.
The two layers are glued together carefully. The circles for the hawse holes are registered together. But a little tip....while gluing the two layers you can actually pre bend the hoods so they will stay bent and curved once the glue dries. Its hard to see this in the photo but the one on the right is curved to almost match the hull curvature exactly. This will make it so much easier to glue onto the hull.
Here you can see the two layered assembly glued onto the hull. Please note that after gluing the two layers together the inside edge against the stem must be beveled. I also cut these pieces a but longer (not by much) so you can line them up with your hawse holes drilled through the hull. Just carefully bevel the edge a little at time until as you are test fitting it on the model it the hawse holes line up. The holes themselves are also slightly smaller on this so you will have even more wiggle room to enlarge them after this is glued on the model. I think they look pretty good and look quite a bit like the contemporary model.
Lastly...the bolster. This piece is slightly thicker and not long enough to bend easily. So I laser cut it on even thicker boxwood stock. Its easier to sand the curve into the back side rather than bend it to fit on the hull. Once the bolster sits nicely on the hull and the curve matches, you can sand the outside to match. This will leave the overall thickness at about 3/64". Maybe slightly more.
Round off the top edges and sides but dont touch the hawse hole cut-aways just yet. This will be done after you glue the bolsters on the model. You will notice the oddball shape of the hawse hole cut-aways. They dont look like half circles. This is on purpose. Remember the hawse holes are drilled through parallel to the keel. So these weird shaped half holes are shaped like l=this so you can file them to the proper shape. Use a round file to open them up to match the angle of your hawse holes through the bulwarks. I hope that makes sense. When initially gluing the bolster on the hull, line up the iboard side to match the profile of your hawse holes. Just like in the photo. Then use your file to shape them.
They will or should be opened up to look like this. The holes were touched up and blackened with a soft pencil.
-
 Chuck got a reaction from ccoyle in Sloop Speedwell 1752 by Chuck - Ketch Rigged Sloop - POF - prototype build
Catheads...
I usually hold off on making the catheads, but it just makes sense to get them done now. It will make it easier to finish off the inboard bulwarks which will be next up. With the catheads all done I can get the waterways in on the f'castle deck along with the pissdale and other details.
All the pieces are laser cut for the catheads. Below. I have cleaned all the char off of these pieces and they are ready to assemble.
The sides with the carved panels were glued on first. First the outside cover to establish the raised panel look and then the inboard piece. These are 1/64" thick and are sanded down even thinner afterwards.
Then the carved front piece and sheaves were added. These are a hair larger than needed so you can sand them all nice and flush.
Then the cathead was glue to the cat tail...no worries about the seam because that will be completely covered.
Using the templates that we used to establish the hawse holes, the position for the catheads were marked outboard. Then the bulwarks were notched out carefully. I used a razor saw. The notch was made narrower than needed and not as deep as ultimately needed. Once the basic notch was cut out, I used a good file to slowly open it up to its final size and shape.
You will also notice I painted the inboard cat tail red in advance. I painted up to the seam line. Note the chamfered edges inboard.
When test fit and in the final position, the inboard side of the cat tail is flush with the top of the cap rail. But the angle of the cathead rises and so it will be above the cap rail height on the outboard side. You can see this in the picture. This is what you are shooting for. The cat tail is also left longer on the inboard side so you can shorten it accordingly. It should sit flat on the deck. You will soon see some inboard pics.
Above the cathead there is a cat block. Usually this is an open cat block but on the contemporary model it is closed. So I will follow suit. This is laser cut and 3/16" wide. ...but is currently a straight cat block. You need to sand a slight curve into this when viewed from above. It needs to conform to the rounded shape of the cap rail when viewed from above. See the plans. This is easy enough to do. It is a very slight curve.
Then a sheave is added and a slot is created on the bottom. This slot will accommodate the top of the cathead. It will sit right on top of it and thus this slot must be angled to match the upward slope of the cathead. Again this is not hard to do. I just used a small flat file. But yes you can carve it with a chisel also. The catblock was painted black.
A final pic of the catheads in position and the cat blocks too. There is still a bunch of paint touch up to get done.
Now as you know there are many ways to build and position these. For example, if you wanted to, you can add the inboard cat tail separately without gluing them together first. Maybe that will be easier for some. Cut it to length and paint it red. Glue it to the inboard bulwarks and partially in the notch. Then add the cathead by placing it into the notch up against the cat tail.
Its up to you. I just thought it might be easier this way to make them look like one piece if they were glued together first. But its not the only way to do it. And remember, the seam between the two parts will be completely covered by the cat block. So it doesnt have to be perfect.
-
 Chuck got a reaction from Knocklouder in Sloop Speedwell 1752 by Chuck - Ketch Rigged Sloop - POF - prototype build
Catheads...
I usually hold off on making the catheads, but it just makes sense to get them done now. It will make it easier to finish off the inboard bulwarks which will be next up. With the catheads all done I can get the waterways in on the f'castle deck along with the pissdale and other details.
All the pieces are laser cut for the catheads. Below. I have cleaned all the char off of these pieces and they are ready to assemble.
The sides with the carved panels were glued on first. First the outside cover to establish the raised panel look and then the inboard piece. These are 1/64" thick and are sanded down even thinner afterwards.
Then the carved front piece and sheaves were added. These are a hair larger than needed so you can sand them all nice and flush.
Then the cathead was glue to the cat tail...no worries about the seam because that will be completely covered.
Using the templates that we used to establish the hawse holes, the position for the catheads were marked outboard. Then the bulwarks were notched out carefully. I used a razor saw. The notch was made narrower than needed and not as deep as ultimately needed. Once the basic notch was cut out, I used a good file to slowly open it up to its final size and shape.
You will also notice I painted the inboard cat tail red in advance. I painted up to the seam line. Note the chamfered edges inboard.
When test fit and in the final position, the inboard side of the cat tail is flush with the top of the cap rail. But the angle of the cathead rises and so it will be above the cap rail height on the outboard side. You can see this in the picture. This is what you are shooting for. The cat tail is also left longer on the inboard side so you can shorten it accordingly. It should sit flat on the deck. You will soon see some inboard pics.
Above the cathead there is a cat block. Usually this is an open cat block but on the contemporary model it is closed. So I will follow suit. This is laser cut and 3/16" wide. ...but is currently a straight cat block. You need to sand a slight curve into this when viewed from above. It needs to conform to the rounded shape of the cap rail when viewed from above. See the plans. This is easy enough to do. It is a very slight curve.
Then a sheave is added and a slot is created on the bottom. This slot will accommodate the top of the cathead. It will sit right on top of it and thus this slot must be angled to match the upward slope of the cathead. Again this is not hard to do. I just used a small flat file. But yes you can carve it with a chisel also. The catblock was painted black.
A final pic of the catheads in position and the cat blocks too. There is still a bunch of paint touch up to get done.
Now as you know there are many ways to build and position these. For example, if you wanted to, you can add the inboard cat tail separately without gluing them together first. Maybe that will be easier for some. Cut it to length and paint it red. Glue it to the inboard bulwarks and partially in the notch. Then add the cathead by placing it into the notch up against the cat tail.
Its up to you. I just thought it might be easier this way to make them look like one piece if they were glued together first. But its not the only way to do it. And remember, the seam between the two parts will be completely covered by the cat block. So it doesnt have to be perfect.
-
 Chuck got a reaction from yvesvidal in Sloop Speedwell 1752 by Chuck - Ketch Rigged Sloop - POF - prototype build
Catheads...
I usually hold off on making the catheads, but it just makes sense to get them done now. It will make it easier to finish off the inboard bulwarks which will be next up. With the catheads all done I can get the waterways in on the f'castle deck along with the pissdale and other details.
All the pieces are laser cut for the catheads. Below. I have cleaned all the char off of these pieces and they are ready to assemble.
The sides with the carved panels were glued on first. First the outside cover to establish the raised panel look and then the inboard piece. These are 1/64" thick and are sanded down even thinner afterwards.
Then the carved front piece and sheaves were added. These are a hair larger than needed so you can sand them all nice and flush.
Then the cathead was glue to the cat tail...no worries about the seam because that will be completely covered.
Using the templates that we used to establish the hawse holes, the position for the catheads were marked outboard. Then the bulwarks were notched out carefully. I used a razor saw. The notch was made narrower than needed and not as deep as ultimately needed. Once the basic notch was cut out, I used a good file to slowly open it up to its final size and shape.
You will also notice I painted the inboard cat tail red in advance. I painted up to the seam line. Note the chamfered edges inboard.
When test fit and in the final position, the inboard side of the cat tail is flush with the top of the cap rail. But the angle of the cathead rises and so it will be above the cap rail height on the outboard side. You can see this in the picture. This is what you are shooting for. The cat tail is also left longer on the inboard side so you can shorten it accordingly. It should sit flat on the deck. You will soon see some inboard pics.
Above the cathead there is a cat block. Usually this is an open cat block but on the contemporary model it is closed. So I will follow suit. This is laser cut and 3/16" wide. ...but is currently a straight cat block. You need to sand a slight curve into this when viewed from above. It needs to conform to the rounded shape of the cap rail when viewed from above. See the plans. This is easy enough to do. It is a very slight curve.
Then a sheave is added and a slot is created on the bottom. This slot will accommodate the top of the cathead. It will sit right on top of it and thus this slot must be angled to match the upward slope of the cathead. Again this is not hard to do. I just used a small flat file. But yes you can carve it with a chisel also. The catblock was painted black.
A final pic of the catheads in position and the cat blocks too. There is still a bunch of paint touch up to get done.
Now as you know there are many ways to build and position these. For example, if you wanted to, you can add the inboard cat tail separately without gluing them together first. Maybe that will be easier for some. Cut it to length and paint it red. Glue it to the inboard bulwarks and partially in the notch. Then add the cathead by placing it into the notch up against the cat tail.
Its up to you. I just thought it might be easier this way to make them look like one piece if they were glued together first. But its not the only way to do it. And remember, the seam between the two parts will be completely covered by the cat block. So it doesnt have to be perfect.
-
 Chuck got a reaction from PaddyO in US Brig Syren by Nirvana - Model Shipways
How hard can it be for these guys to print those templates correctly for the kit......seems like the easy part. Anyway.....hope these help. Remember to set your page scaling to NONE when printing them. And measure the scale bar for accuracy where each segment should be 3/16" wide. If these dont match your plans then they probably printed your plans incorrectly as well. Always measure the scale bar to find out. That is why it is there. These are the original files.
Chuck
colorcodedtemplate.pdf
framingplan1.pdf
framingplan2.pdf
framingplan3.pdf
framingplan4.pdf
framingplan5.pdf
framingplan6.pdf
framingtemplate7.pdf
sternframingsyren.pdf
-
 Chuck got a reaction from Archi in Sloop Speedwell 1752 by Chuck - Ketch Rigged Sloop - POF - prototype build
Catheads...
I usually hold off on making the catheads, but it just makes sense to get them done now. It will make it easier to finish off the inboard bulwarks which will be next up. With the catheads all done I can get the waterways in on the f'castle deck along with the pissdale and other details.
All the pieces are laser cut for the catheads. Below. I have cleaned all the char off of these pieces and they are ready to assemble.
The sides with the carved panels were glued on first. First the outside cover to establish the raised panel look and then the inboard piece. These are 1/64" thick and are sanded down even thinner afterwards.
Then the carved front piece and sheaves were added. These are a hair larger than needed so you can sand them all nice and flush.
Then the cathead was glue to the cat tail...no worries about the seam because that will be completely covered.
Using the templates that we used to establish the hawse holes, the position for the catheads were marked outboard. Then the bulwarks were notched out carefully. I used a razor saw. The notch was made narrower than needed and not as deep as ultimately needed. Once the basic notch was cut out, I used a good file to slowly open it up to its final size and shape.
You will also notice I painted the inboard cat tail red in advance. I painted up to the seam line. Note the chamfered edges inboard.
When test fit and in the final position, the inboard side of the cat tail is flush with the top of the cap rail. But the angle of the cathead rises and so it will be above the cap rail height on the outboard side. You can see this in the picture. This is what you are shooting for. The cat tail is also left longer on the inboard side so you can shorten it accordingly. It should sit flat on the deck. You will soon see some inboard pics.
Above the cathead there is a cat block. Usually this is an open cat block but on the contemporary model it is closed. So I will follow suit. This is laser cut and 3/16" wide. ...but is currently a straight cat block. You need to sand a slight curve into this when viewed from above. It needs to conform to the rounded shape of the cap rail when viewed from above. See the plans. This is easy enough to do. It is a very slight curve.
Then a sheave is added and a slot is created on the bottom. This slot will accommodate the top of the cathead. It will sit right on top of it and thus this slot must be angled to match the upward slope of the cathead. Again this is not hard to do. I just used a small flat file. But yes you can carve it with a chisel also. The catblock was painted black.
A final pic of the catheads in position and the cat blocks too. There is still a bunch of paint touch up to get done.
Now as you know there are many ways to build and position these. For example, if you wanted to, you can add the inboard cat tail separately without gluing them together first. Maybe that will be easier for some. Cut it to length and paint it red. Glue it to the inboard bulwarks and partially in the notch. Then add the cathead by placing it into the notch up against the cat tail.
Its up to you. I just thought it might be easier this way to make them look like one piece if they were glued together first. But its not the only way to do it. And remember, the seam between the two parts will be completely covered by the cat block. So it doesnt have to be perfect.
-
 Chuck got a reaction from JeffT in Sloop Speedwell 1752 by Chuck - Ketch Rigged Sloop - POF - prototype build
Catheads...
I usually hold off on making the catheads, but it just makes sense to get them done now. It will make it easier to finish off the inboard bulwarks which will be next up. With the catheads all done I can get the waterways in on the f'castle deck along with the pissdale and other details.
All the pieces are laser cut for the catheads. Below. I have cleaned all the char off of these pieces and they are ready to assemble.
The sides with the carved panels were glued on first. First the outside cover to establish the raised panel look and then the inboard piece. These are 1/64" thick and are sanded down even thinner afterwards.
Then the carved front piece and sheaves were added. These are a hair larger than needed so you can sand them all nice and flush.
Then the cathead was glue to the cat tail...no worries about the seam because that will be completely covered.
Using the templates that we used to establish the hawse holes, the position for the catheads were marked outboard. Then the bulwarks were notched out carefully. I used a razor saw. The notch was made narrower than needed and not as deep as ultimately needed. Once the basic notch was cut out, I used a good file to slowly open it up to its final size and shape.
You will also notice I painted the inboard cat tail red in advance. I painted up to the seam line. Note the chamfered edges inboard.
When test fit and in the final position, the inboard side of the cat tail is flush with the top of the cap rail. But the angle of the cathead rises and so it will be above the cap rail height on the outboard side. You can see this in the picture. This is what you are shooting for. The cat tail is also left longer on the inboard side so you can shorten it accordingly. It should sit flat on the deck. You will soon see some inboard pics.
Above the cathead there is a cat block. Usually this is an open cat block but on the contemporary model it is closed. So I will follow suit. This is laser cut and 3/16" wide. ...but is currently a straight cat block. You need to sand a slight curve into this when viewed from above. It needs to conform to the rounded shape of the cap rail when viewed from above. See the plans. This is easy enough to do. It is a very slight curve.
Then a sheave is added and a slot is created on the bottom. This slot will accommodate the top of the cathead. It will sit right on top of it and thus this slot must be angled to match the upward slope of the cathead. Again this is not hard to do. I just used a small flat file. But yes you can carve it with a chisel also. The catblock was painted black.
A final pic of the catheads in position and the cat blocks too. There is still a bunch of paint touch up to get done.
Now as you know there are many ways to build and position these. For example, if you wanted to, you can add the inboard cat tail separately without gluing them together first. Maybe that will be easier for some. Cut it to length and paint it red. Glue it to the inboard bulwarks and partially in the notch. Then add the cathead by placing it into the notch up against the cat tail.
Its up to you. I just thought it might be easier this way to make them look like one piece if they were glued together first. But its not the only way to do it. And remember, the seam between the two parts will be completely covered by the cat block. So it doesnt have to be perfect.
-
Chuck got a reaction from marsalv in Sloop Speedwell 1752 by Chuck - Ketch Rigged Sloop - POF - prototype build
Catheads...
I usually hold off on making the catheads, but it just makes sense to get them done now. It will make it easier to finish off the inboard bulwarks which will be next up. With the catheads all done I can get the waterways in on the f'castle deck along with the pissdale and other details.
All the pieces are laser cut for the catheads. Below. I have cleaned all the char off of these pieces and they are ready to assemble.
The sides with the carved panels were glued on first. First the outside cover to establish the raised panel look and then the inboard piece. These are 1/64" thick and are sanded down even thinner afterwards.
Then the carved front piece and sheaves were added. These are a hair larger than needed so you can sand them all nice and flush.
Then the cathead was glue to the cat tail...no worries about the seam because that will be completely covered.
Using the templates that we used to establish the hawse holes, the position for the catheads were marked outboard. Then the bulwarks were notched out carefully. I used a razor saw. The notch was made narrower than needed and not as deep as ultimately needed. Once the basic notch was cut out, I used a good file to slowly open it up to its final size and shape.
You will also notice I painted the inboard cat tail red in advance. I painted up to the seam line. Note the chamfered edges inboard.
When test fit and in the final position, the inboard side of the cat tail is flush with the top of the cap rail. But the angle of the cathead rises and so it will be above the cap rail height on the outboard side. You can see this in the picture. This is what you are shooting for. The cat tail is also left longer on the inboard side so you can shorten it accordingly. It should sit flat on the deck. You will soon see some inboard pics.
Above the cathead there is a cat block. Usually this is an open cat block but on the contemporary model it is closed. So I will follow suit. This is laser cut and 3/16" wide. ...but is currently a straight cat block. You need to sand a slight curve into this when viewed from above. It needs to conform to the rounded shape of the cap rail when viewed from above. See the plans. This is easy enough to do. It is a very slight curve.
Then a sheave is added and a slot is created on the bottom. This slot will accommodate the top of the cathead. It will sit right on top of it and thus this slot must be angled to match the upward slope of the cathead. Again this is not hard to do. I just used a small flat file. But yes you can carve it with a chisel also. The catblock was painted black.
A final pic of the catheads in position and the cat blocks too. There is still a bunch of paint touch up to get done.
Now as you know there are many ways to build and position these. For example, if you wanted to, you can add the inboard cat tail separately without gluing them together first. Maybe that will be easier for some. Cut it to length and paint it red. Glue it to the inboard bulwarks and partially in the notch. Then add the cathead by placing it into the notch up against the cat tail.
Its up to you. I just thought it might be easier this way to make them look like one piece if they were glued together first. But its not the only way to do it. And remember, the seam between the two parts will be completely covered by the cat block. So it doesnt have to be perfect.
-
 Chuck got a reaction from Tobias in Sloop Speedwell 1752 by Chuck - Ketch Rigged Sloop - POF - prototype build
Catheads...
I usually hold off on making the catheads, but it just makes sense to get them done now. It will make it easier to finish off the inboard bulwarks which will be next up. With the catheads all done I can get the waterways in on the f'castle deck along with the pissdale and other details.
All the pieces are laser cut for the catheads. Below. I have cleaned all the char off of these pieces and they are ready to assemble.
The sides with the carved panels were glued on first. First the outside cover to establish the raised panel look and then the inboard piece. These are 1/64" thick and are sanded down even thinner afterwards.
Then the carved front piece and sheaves were added. These are a hair larger than needed so you can sand them all nice and flush.
Then the cathead was glue to the cat tail...no worries about the seam because that will be completely covered.
Using the templates that we used to establish the hawse holes, the position for the catheads were marked outboard. Then the bulwarks were notched out carefully. I used a razor saw. The notch was made narrower than needed and not as deep as ultimately needed. Once the basic notch was cut out, I used a good file to slowly open it up to its final size and shape.
You will also notice I painted the inboard cat tail red in advance. I painted up to the seam line. Note the chamfered edges inboard.
When test fit and in the final position, the inboard side of the cat tail is flush with the top of the cap rail. But the angle of the cathead rises and so it will be above the cap rail height on the outboard side. You can see this in the picture. This is what you are shooting for. The cat tail is also left longer on the inboard side so you can shorten it accordingly. It should sit flat on the deck. You will soon see some inboard pics.
Above the cathead there is a cat block. Usually this is an open cat block but on the contemporary model it is closed. So I will follow suit. This is laser cut and 3/16" wide. ...but is currently a straight cat block. You need to sand a slight curve into this when viewed from above. It needs to conform to the rounded shape of the cap rail when viewed from above. See the plans. This is easy enough to do. It is a very slight curve.
Then a sheave is added and a slot is created on the bottom. This slot will accommodate the top of the cathead. It will sit right on top of it and thus this slot must be angled to match the upward slope of the cathead. Again this is not hard to do. I just used a small flat file. But yes you can carve it with a chisel also. The catblock was painted black.
A final pic of the catheads in position and the cat blocks too. There is still a bunch of paint touch up to get done.
Now as you know there are many ways to build and position these. For example, if you wanted to, you can add the inboard cat tail separately without gluing them together first. Maybe that will be easier for some. Cut it to length and paint it red. Glue it to the inboard bulwarks and partially in the notch. Then add the cathead by placing it into the notch up against the cat tail.
Its up to you. I just thought it might be easier this way to make them look like one piece if they were glued together first. But its not the only way to do it. And remember, the seam between the two parts will be completely covered by the cat block. So it doesnt have to be perfect.