michael mott
-
Posts
5,200 -
Joined
-
Last visited
Content Type
Profiles
Forums
Gallery
Events
Everything posted by michael mott
-
 Looks great GL The diagram of the parts on the deck was very helpful. Michael
- 219 replies
-
- 1
-

-
- smack
- cross-section
- (and 2 more)
-
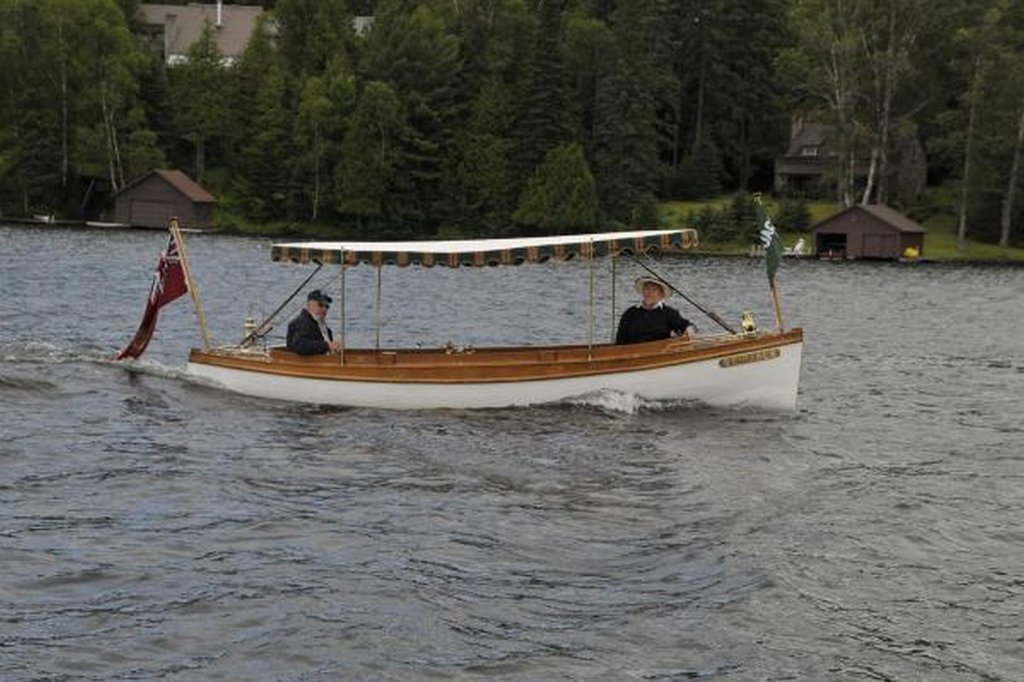
I wish! Thank you for you kindness. Kurt yes Skipjack has a canopy Now that I am satisfied with the shape of the lines I can add the canopy to the drawings. As a diversion Judy and I just watched the movie "Infinity" about the genius who proved "partition" in mathematics. A beautiful movie. Michael

-
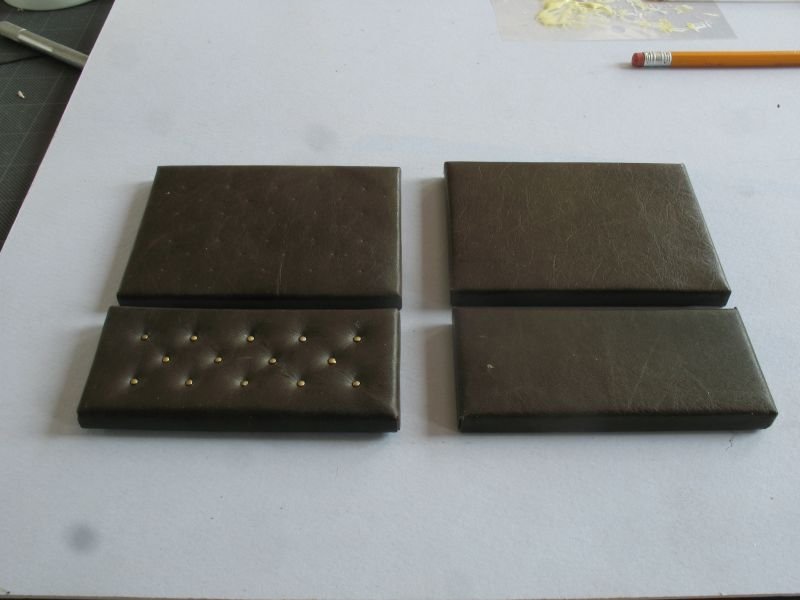
Hi Druxey, they don't need to made of leather, in the same way that the carved decoration on a period ship doesn't need to carved in Boxwood. I could make them out of clay the same way that Doris uses it. I know that I can make them out of leather in the same way that I made this seat out of leather. It is something that I want to do. Michael
-
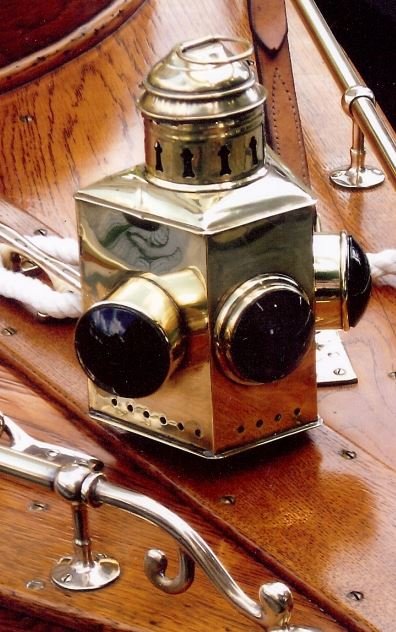
Yes, I agree with that! Dan, glad you mentioned that the funnels were weights because at first I was wondering. Michael
- 238 replies
-
- 6
-
-
- leviathan
- troop ship
- (and 2 more)
-
Ed the amount of rigging on your model is simply amazing, I don't think I am careful enough to be able to get that many lines assembled without a major disaster. You must have spent many hours planning the sequence, and that can only happen by knowing what all the lines are for and where they need to belay. michael
- 3,618 replies
-
- 7
-
-
- young america
- clipper
- (and 1 more)
-
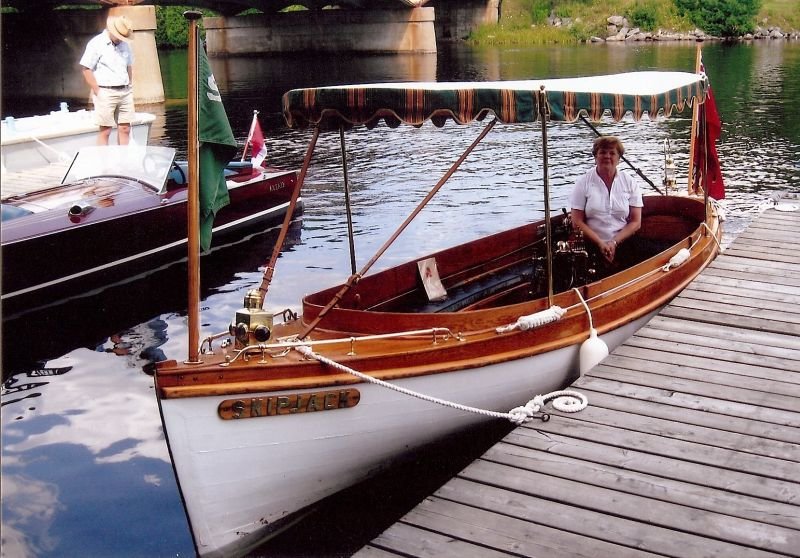
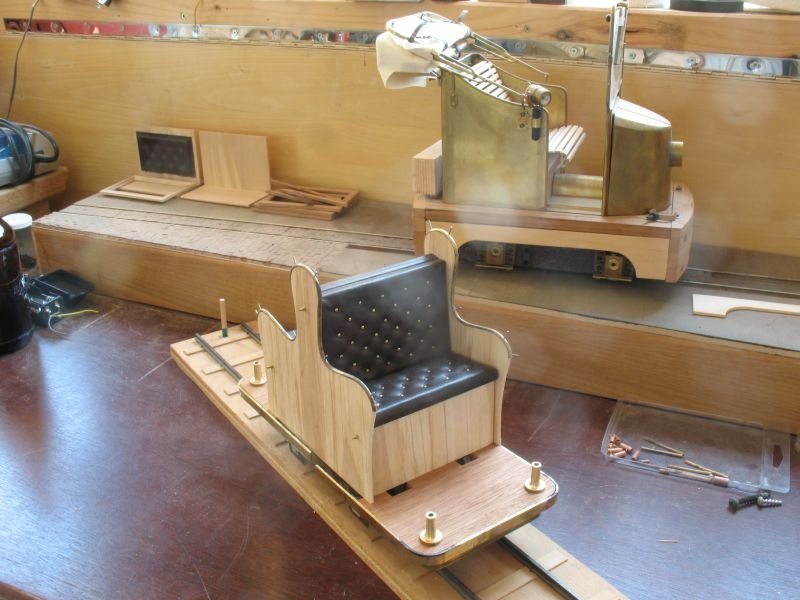
Kurt I do have the dimensions of this one. Druxey, thanks it really took a long time to realize the condition that was causing the trouble fitting the floors. Keith, yes a bronze frame with hardwood sleeved handles will make a nice feature there are two of them there is one on the starboard side at the sern as well You can also see why I need to be able to make the tufted cushions in leather. Michael
-
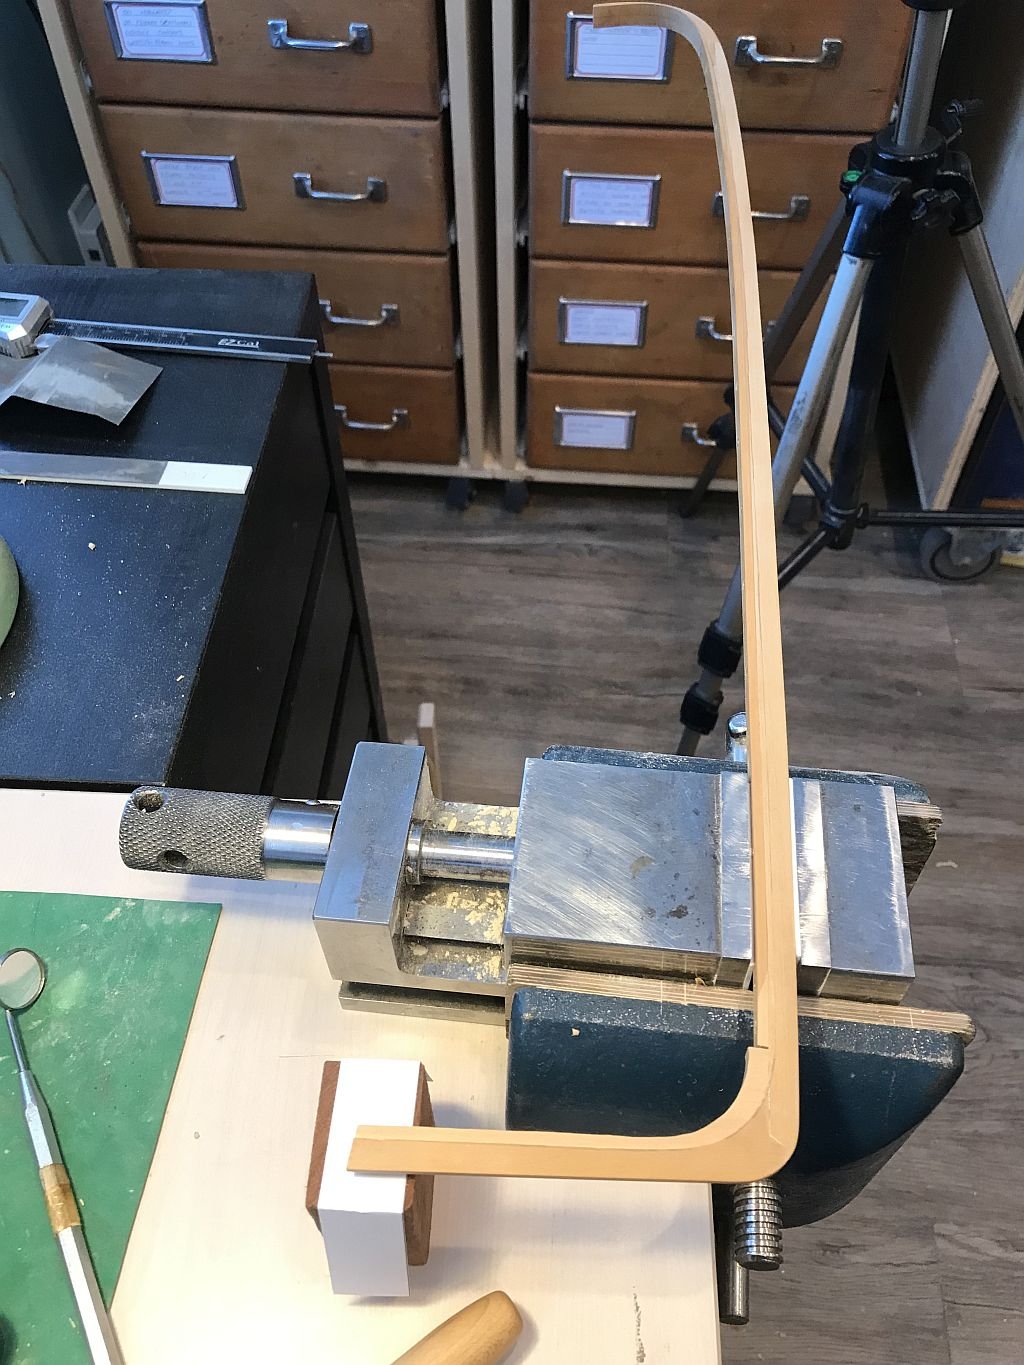
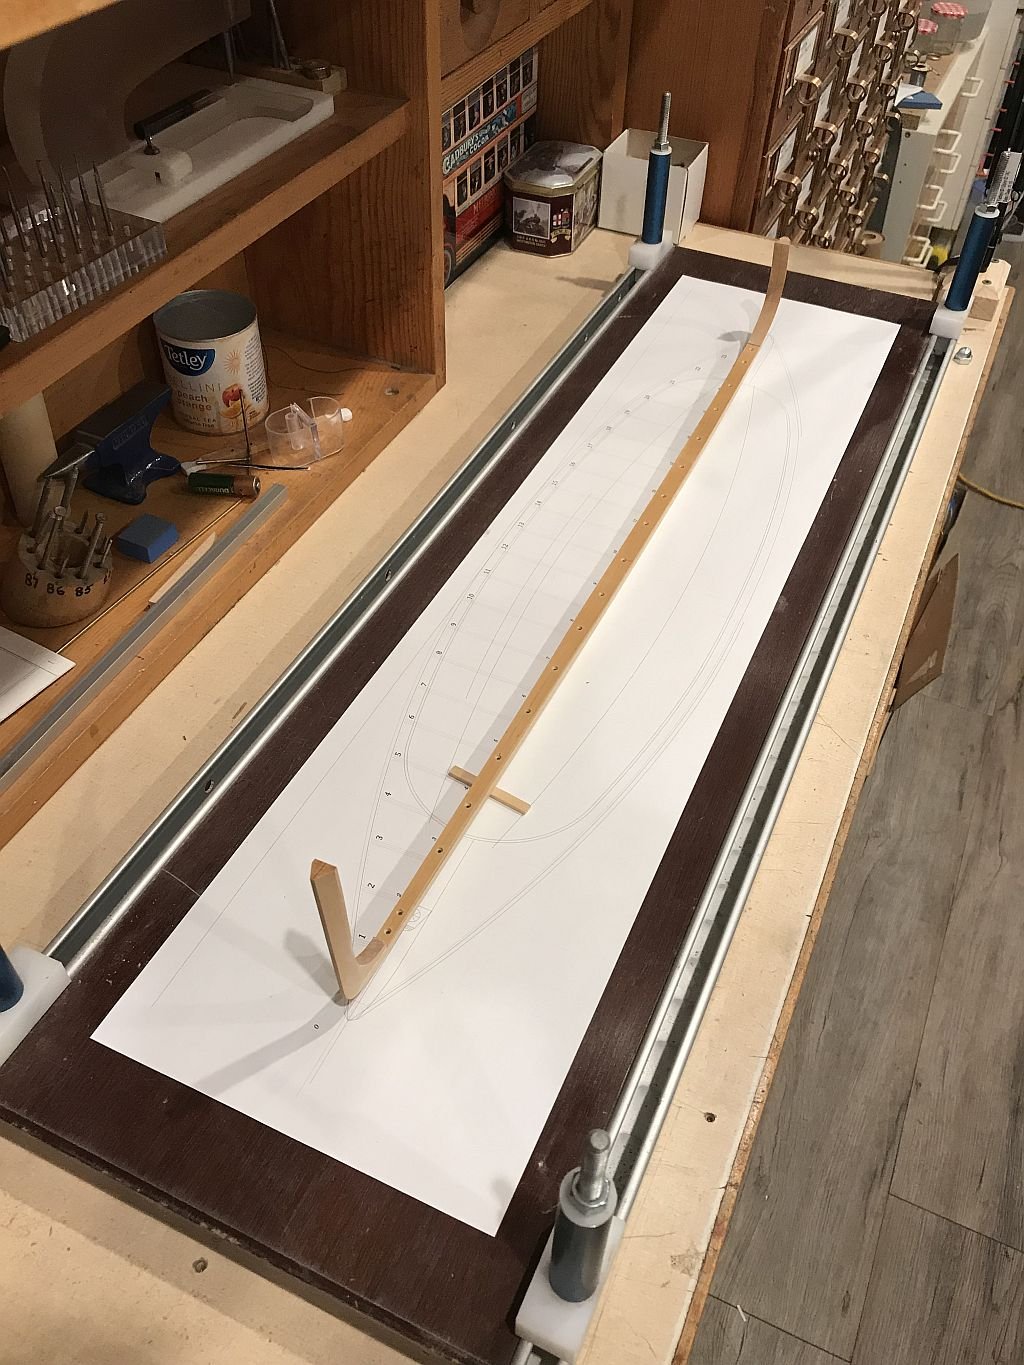
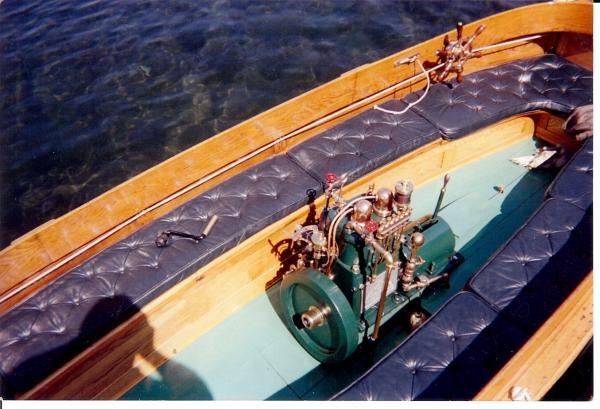
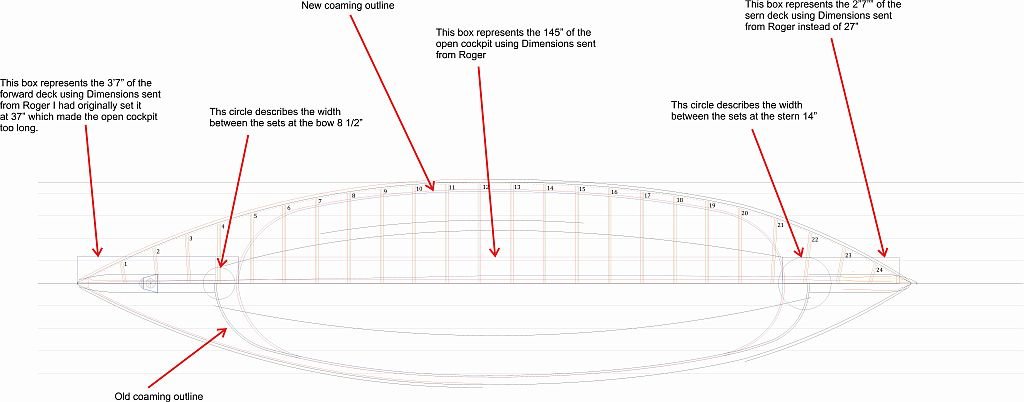
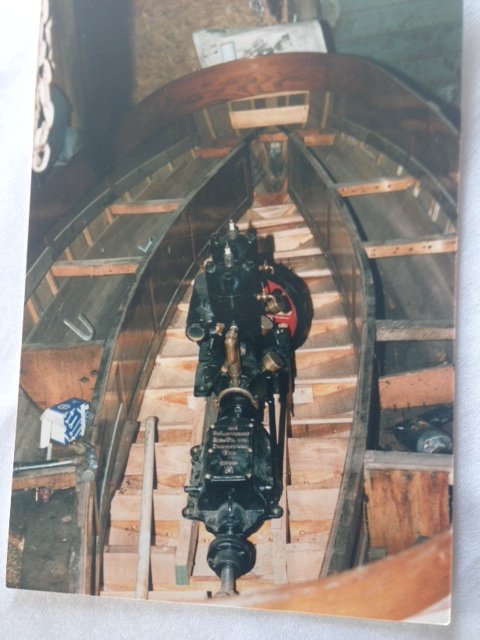
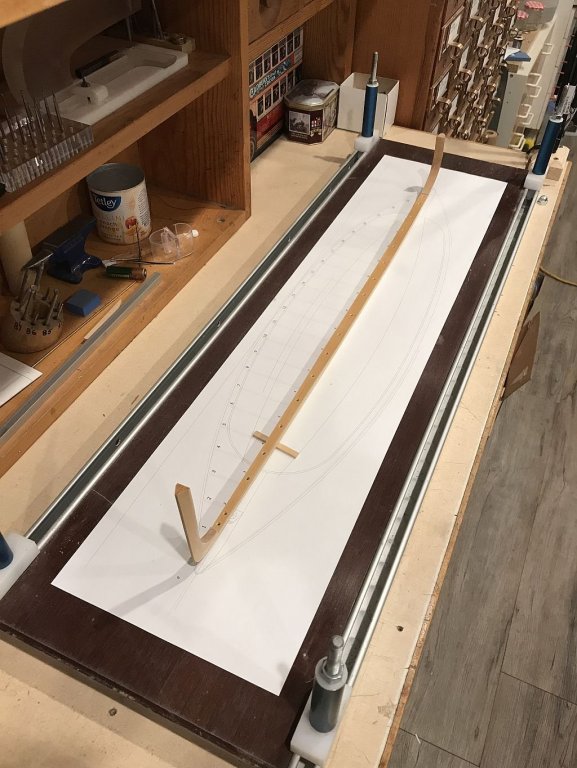
Continuing with trying to make the interior dimensions fit properly in all three views following the numbers that roger sent a few years back I have finally got them to match but it entailed rotating the whole sheer line 1 degree using the tip of the bow as the center of rotation. By doing this the floors begin to fit properly into the profile view of the ribs. one of the things that kept tripping me up was the line of the seats is flat and not curved to follow the sheer as I had originally drawn it. I will need to add a short section to the stern post, this will then cause all the interior dimensions to fit. The red lines are the new positions of the coaming opening length and the raised sheer line at the stern. It actually gives the elevation a better proportion in my opinion. and this also fit with rotating the engine to match the photos which aligned it up with the prop-shaft better. I can see why some people like to freelance, it is much more challenging working to build a representation of an existing boat where there are no drawings in existence that I have been able to find to date. It has certainly been very helpful to have the Roger be able to measure things for me like these in the next picture B bow 8 1/2" mid-ship 26" stern 14" C bow 11" mid-ship 11 1/2" Note 74" from bow end moving toward stern the floor steps up 2 1/2" becoming 9" to the seat. Stern 7" E bow 7 1/2" mid-ship 5" stern 10" F bow 9" mid-ship 12 1/2" stern 121/2" D is an air whistle. Michael


-
Wow! what is interesting mark is in looking at the last picture, it reminds me of those images that one sees occasionally where the image can be seen in one of two ways either a positive shape or a negative one. and the barrel appears to be raised up from the surrounding surface because of the lighting. A beautiful surface indeed. Michael
-
Some very interesting things to think about as I prepare to work on my skipjack hull. I like that you used wood to fill with. Michael
-
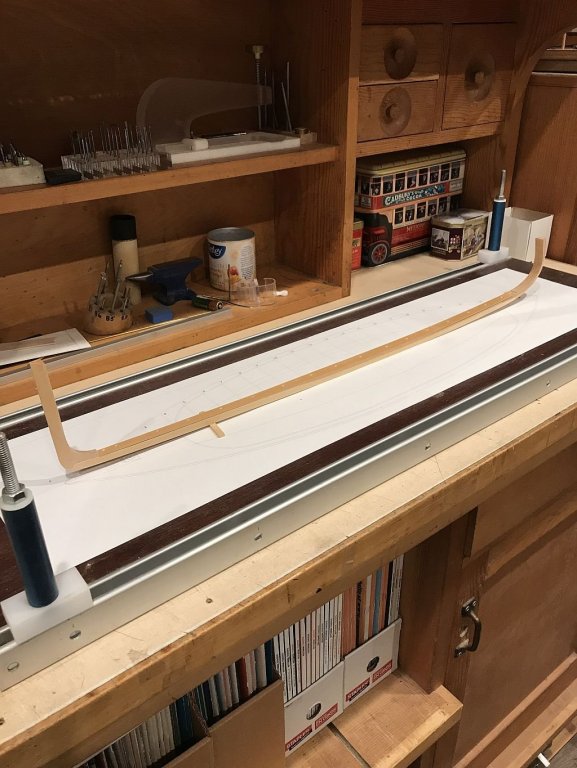
I had posted an update to this build yesterday in the Bristol Cutter log by mistake I deleted it and am re-posting the content here where it belongs. I have re-attached the top plate to the keel and begun carving the recess for the planks in the stem and keel. there are 11 planks. Michael
-
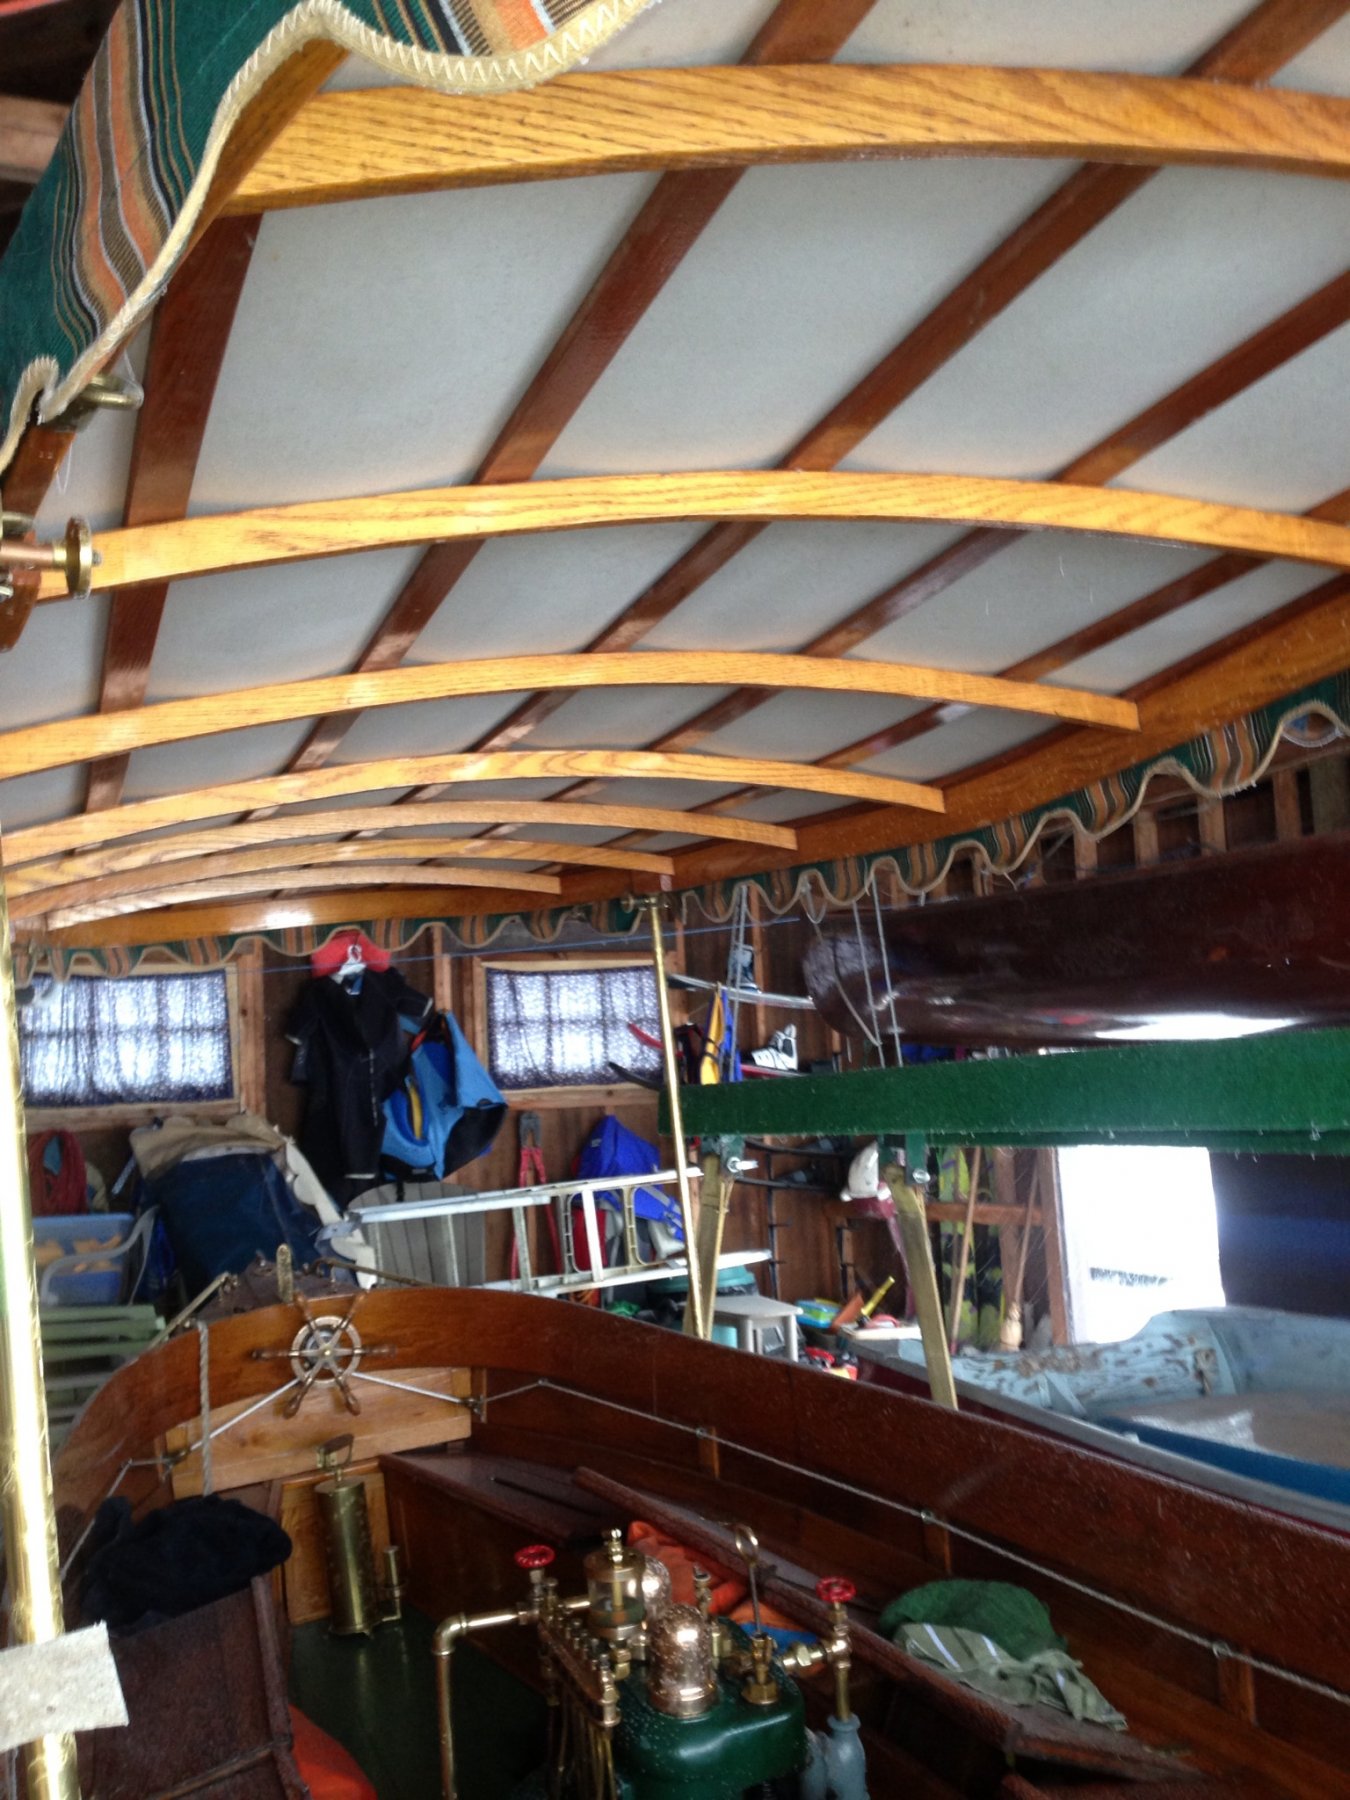
This drawing shows the difference in the plan of the cockpit. The reason for needing to make these changes is because I am going to fit the floor timbers to the keel before doing the planking. I will be able fair them to match the bulkhead stations and to get the engine mountings sorted out without any obstructions. once that is done then I will add the stringers to the bulkhead then match the frames to the stingers then beginning at the garboard plank it with 3/64th yellow cedar. removing the stringers as I continue the planking up to the sheer strake.There are 11 planks. This shot of the floors during the earlier restoration gives me a clear indication of what the interior framing looked like. So before anyone points out that the floor timbers are sitting on top of the ceiling boards, I know! I just spotted that. I'm thinking about it, and I am reshaping the bottom of the hull on drawings to better reflect, the photograph. Two steps forward and one step back....and I am having fun. Plotting the floor boards onto the profiles gave me my first clue that the bottom was not quite right. Michael
-
Thank you for the information Bob that does make a great deal of sense... Yeah I don't want to go over the edge just yet. The sample you showed is lovely. Michael
-
I am more interested in the Coffee ad to the immediate top left. LOL
-
It really does look like a lovely hull shape, nice work translating the drawings into the form. michael
-
Thanks for the likes and compliments. In examining the keel, stem and stern, I noticed a rather nasty kink has developed since I made it a few years ago. So I removed the centre section between the stem and stern, and replaced it today. I noticed it when I was about to finish the rebate transition from the keel to the stem. Michael
-
Nicely done Mark, I'm sure that you wont have any trouble with these. Michael
-
I had a look and though that the members of this forum would enjoy this set of answers. over to you Andy. Michael
-
Nah he was working under a serious deadline and had broken his coke bottle glasses and was working without them...it was all a bit blurry. Patrick, the photos of all the interior detail in the group pictures shows how amazing this model is, your attention to the tiny details has really brought the odd vessel to life. well done indeed! Michael
-
Ooooh That looks painful Maury, Do you have to replace the whole garboard or can you just remove a portion of it? Michael
-
Carl there is some truth to that. It was a way to revisit the whole project. Steve yes I looked at quite a few on the internet and a lot of them were pretty sad looking. I have never seen that commercial Greg but then I don't watch much TV I have no time left in the day for it. Hmmm..... for me, I could probably do something a little smaller, but this is crude compared to a ladies Swiss watch, now those guys who make those could do something that would be astonishing! Some of the model railway stuff is quite remarkable too, and a friend of mine Dave who's name I won't mention does those amazing tiny steel models that are photo etched, that you almost need a microscope to put together, and who just started a Bluenose model. Thanks for all the visits and for the fine compliments and encouragements I do appreciate them. Michael
-
I like this way of preparing the hull Kieth it will make the planking so much easier, I have the blueprints full size for an 8 foot model of Shamrock V when I get around to it I am going to go this route. There is a lumber yard close by that has some large blocks of balsa. And I agree with Druxey the form looks beautiful. Michael
-
Eric My condolences to you regarding the loss of your friend, these events take a while to process, sharing your thoughts can help ease the pain. Michael
- 599 replies
-
- 8
-
-
- sidewheeler
- arabia
- (and 4 more)