HOLIDAY DONATION DRIVE - SUPPORT MSW - DO YOUR PART TO KEEP THIS GREAT FORUM GOING! (Only 20 donations so far - C'mon guys!)
×


gak1965
-
Posts
720 -
Joined
-
Last visited
Content Type
Profiles
Forums
Gallery
Events
Everything posted by gak1965
-
 Good to know. It seems to be working so far...
 -
Wow. I would have expected the wheel to be inside somewhere (like the Monitor) rather than out in the open. I imagine that it would be an, ah, uncomfortable place during combat.
- 45 replies
-
- 6
-

-

-
- Tijger
- Paper Shipwright
- (and 2 more)
-
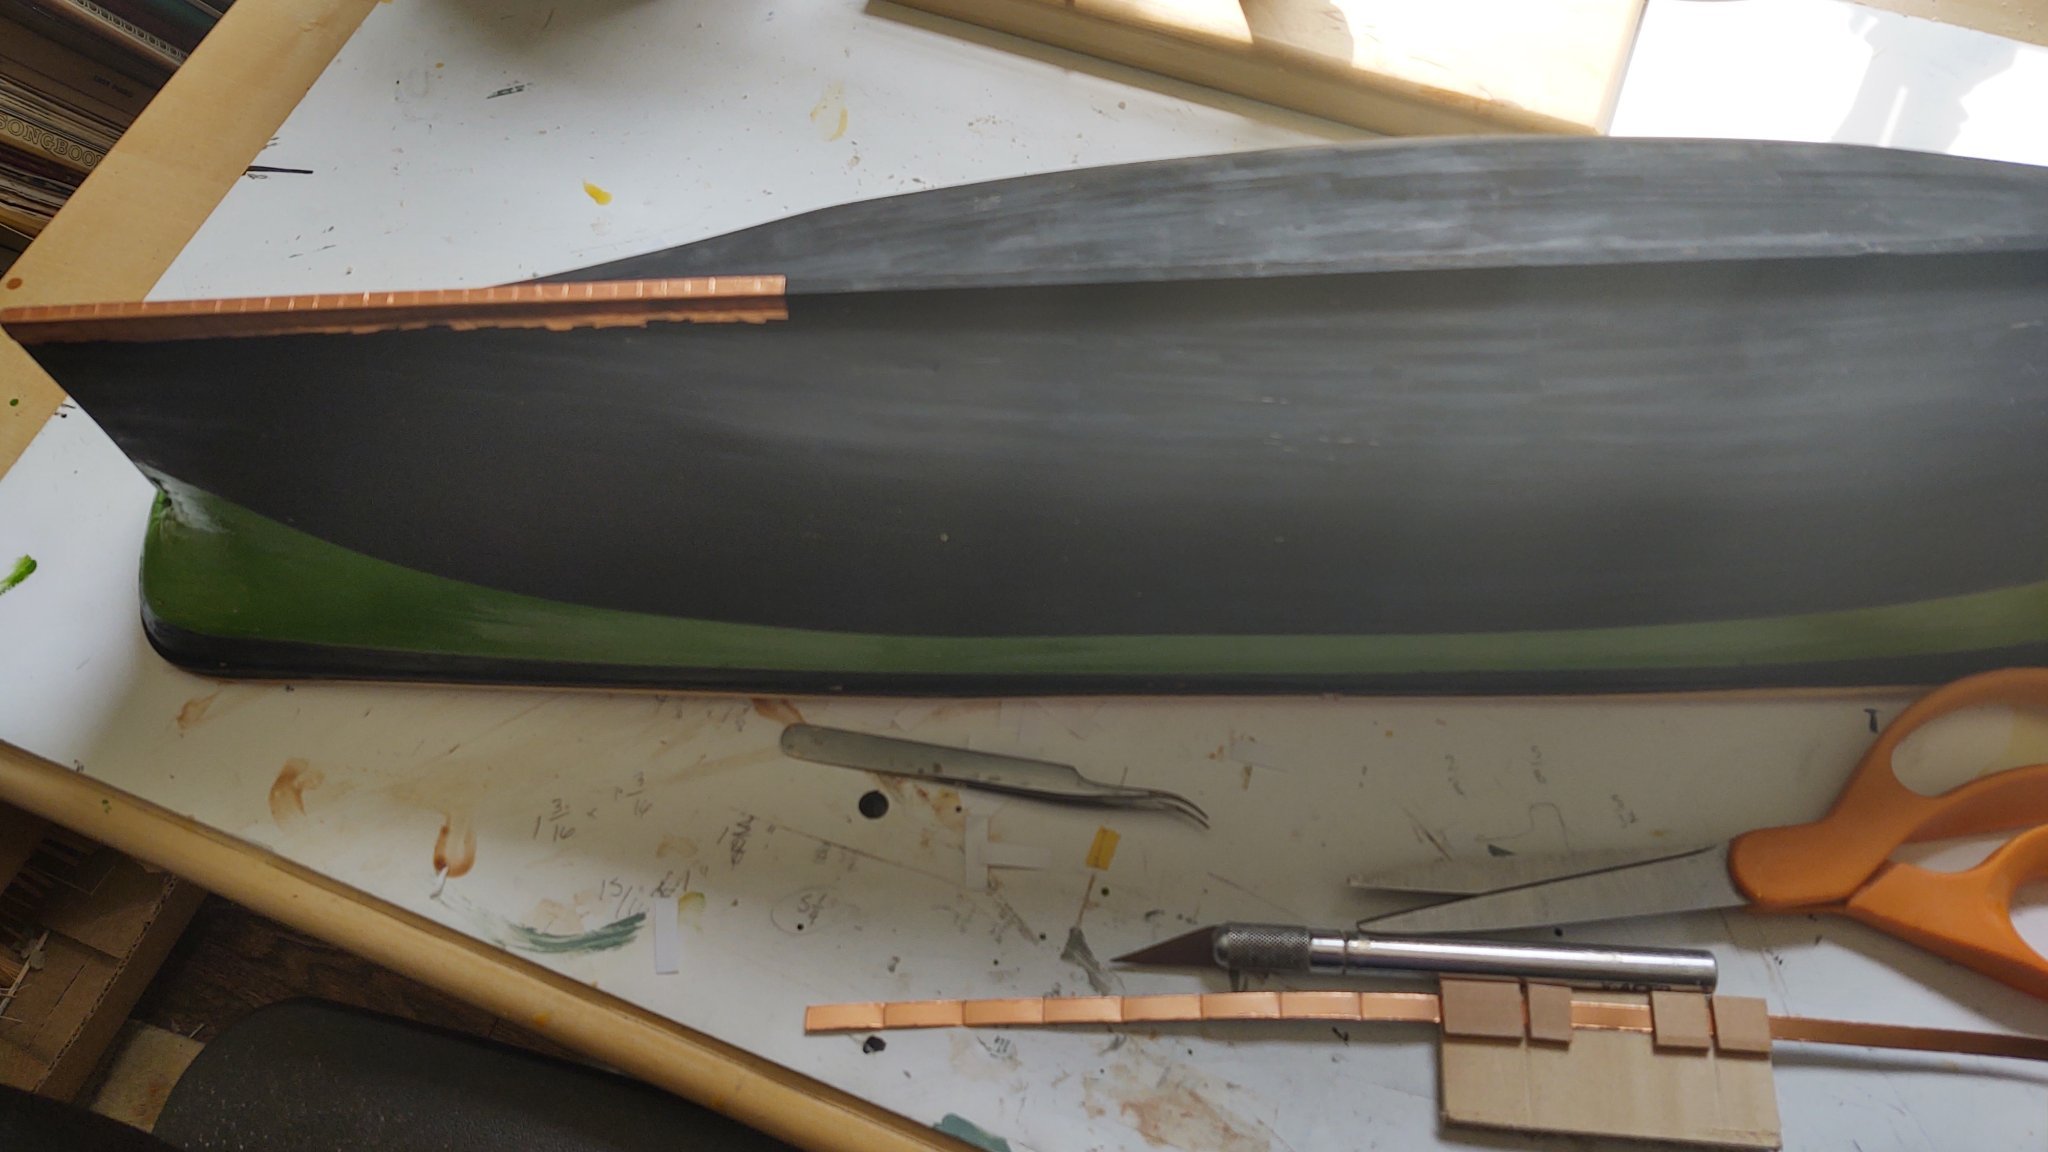
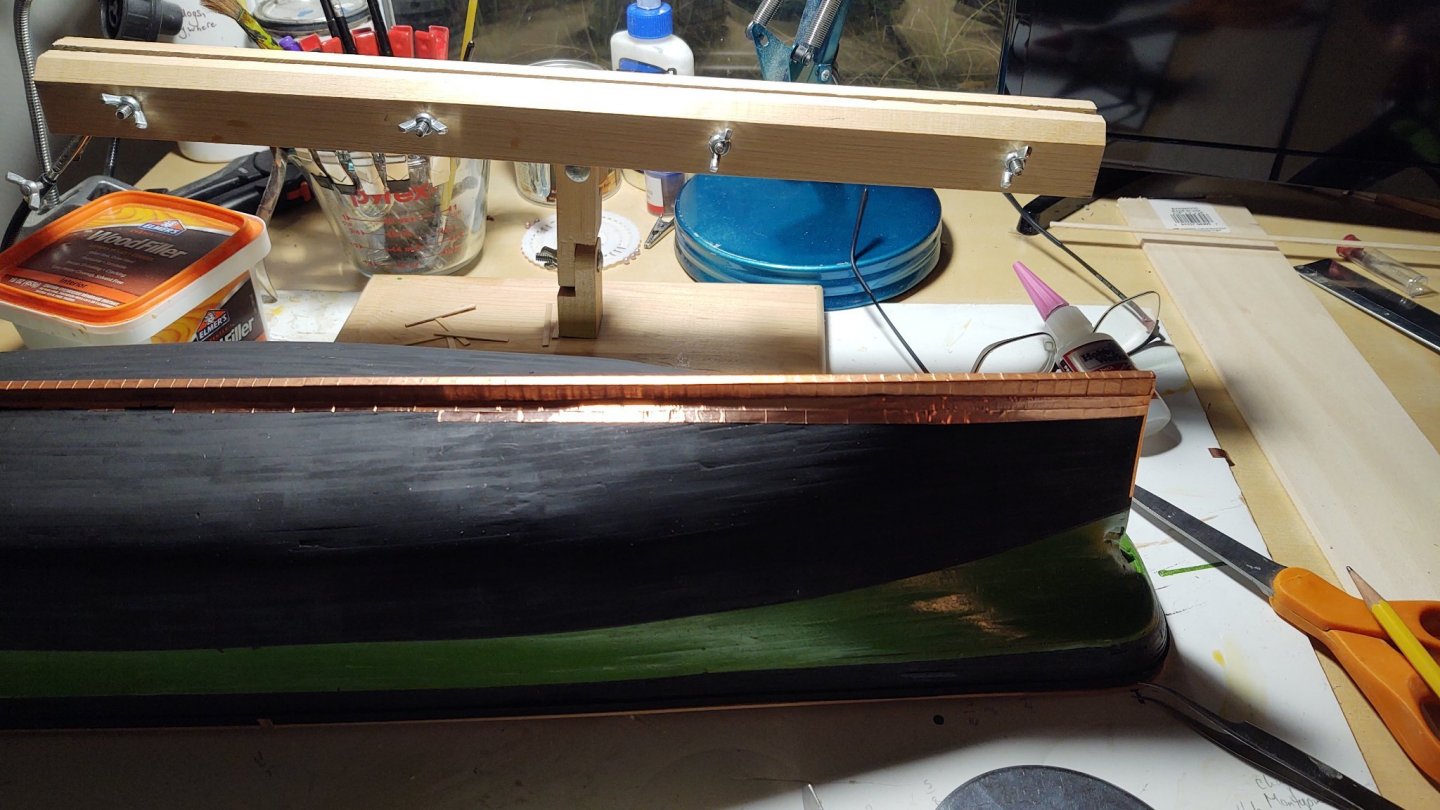
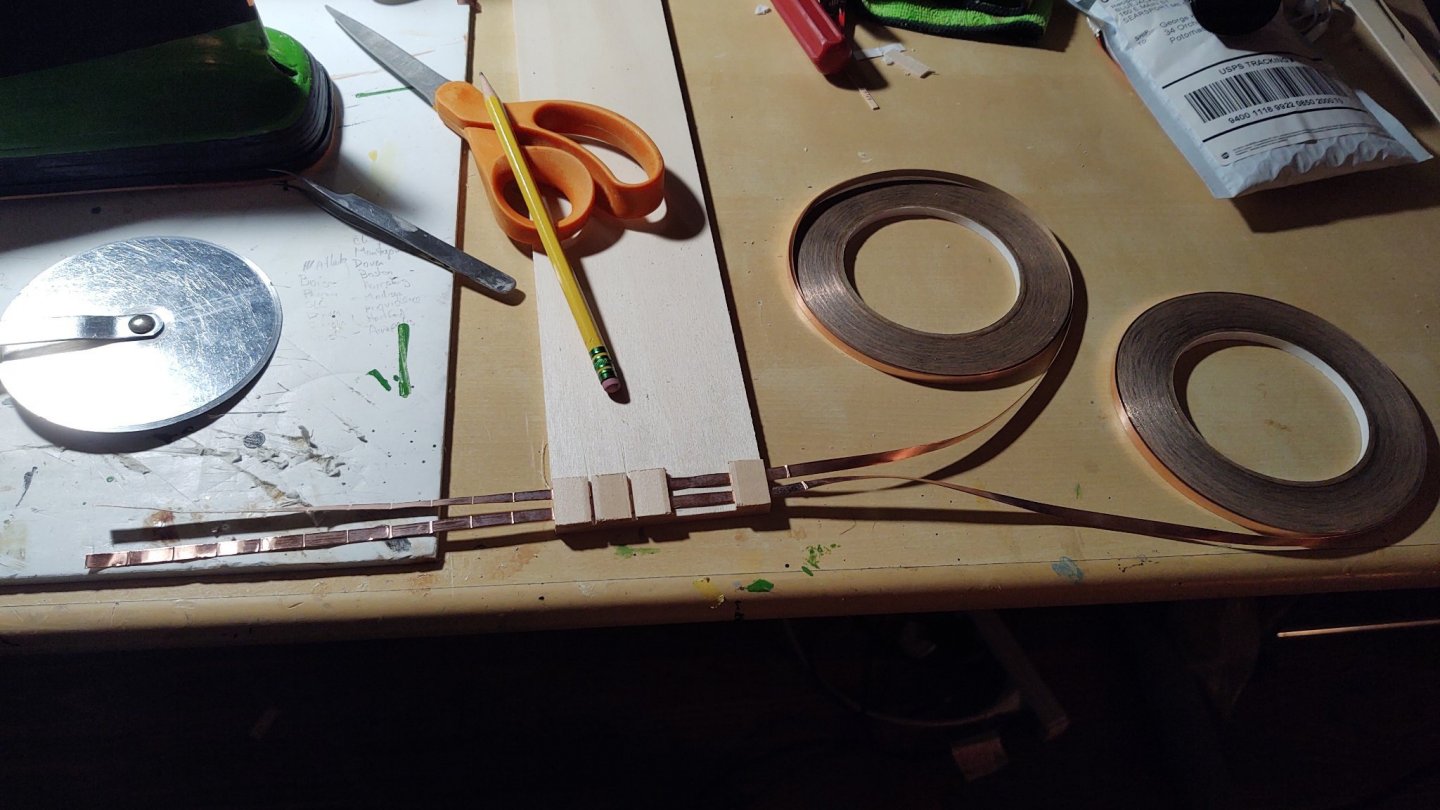
Very brief progress update. I decided to use the 1/4 inch copper tape to cover the keel. The picture below shows the jig I made to mark the plates for cutting. The individual plates are 9/32 long, are scored with a pizza cutter. The individual plates were cut out and applied in 1/4 inch segments to the keel as below. I allowed the plates to flow onto the hull since they would be covered up by the regular plates later. Once that was complete, I made another jig that feeds two 3/16 rolls of copper tape and has two guides for the pizza cutter so that I can make 4 plates at a time, pull it through, make two more plates, etc. as seen below. The 'plates' are 3/16 by 1/2, or at 1:96 they are 18 by 48 inches. That makes them a little taller than the 14 by 48 inch plates that are called for in the plans, but I question my ability to manipulate anything smaller. Finally I cut 6 plate segments and start laying out the regular plate segments, starting at the stern and aligning against the keel. The picture below shows two incomplete rows on the starboard side, but you get the basic idea. I am using the self-adhesive, rather than using Rob's method of gluing the paper backed tape. It seems to be working okay, although I definitely get more 'scrunching' than Rob's method produces. Once I get a little further, I'll mark the gore line with Tamiya tape so that I know where to stop. I expect that this is going to take a while, but it's more about perseverance at this point - kinda like making ratlines. As you can see, I've gone for the simple look, with the plate divisions marked by using the pizza cutter on the visible, rather than the paper backing side. This produces plate separators that are lowered rather than raised, and is a bit less obvious, but still definitely there. I am also going to suggest that the imperfections in the plate laying are giving it the surface interest that is usually formed as a result of the nailing. In any case, that is my story and I'm sticking with it. Thanks for looking in! George K


- 602 replies
-
- 6
-
-
- Flying Fish
- Model Shipways
- (and 2 more)
-
Looking great. None of the three MSW kits I've done or am working on provide many castings. I think the boundary condition for providing a casting is "can't be readily made with hand tools". That's fine with me, and it seems to be a distinction with some other manufacturers. George K
-
Did you make the capstan or is it a commercial product?
-
Looks great. I was wondering how to eventually replicate the pre cut planksheer that MS makes when I start Discovery, and I think that your method is the answer
-
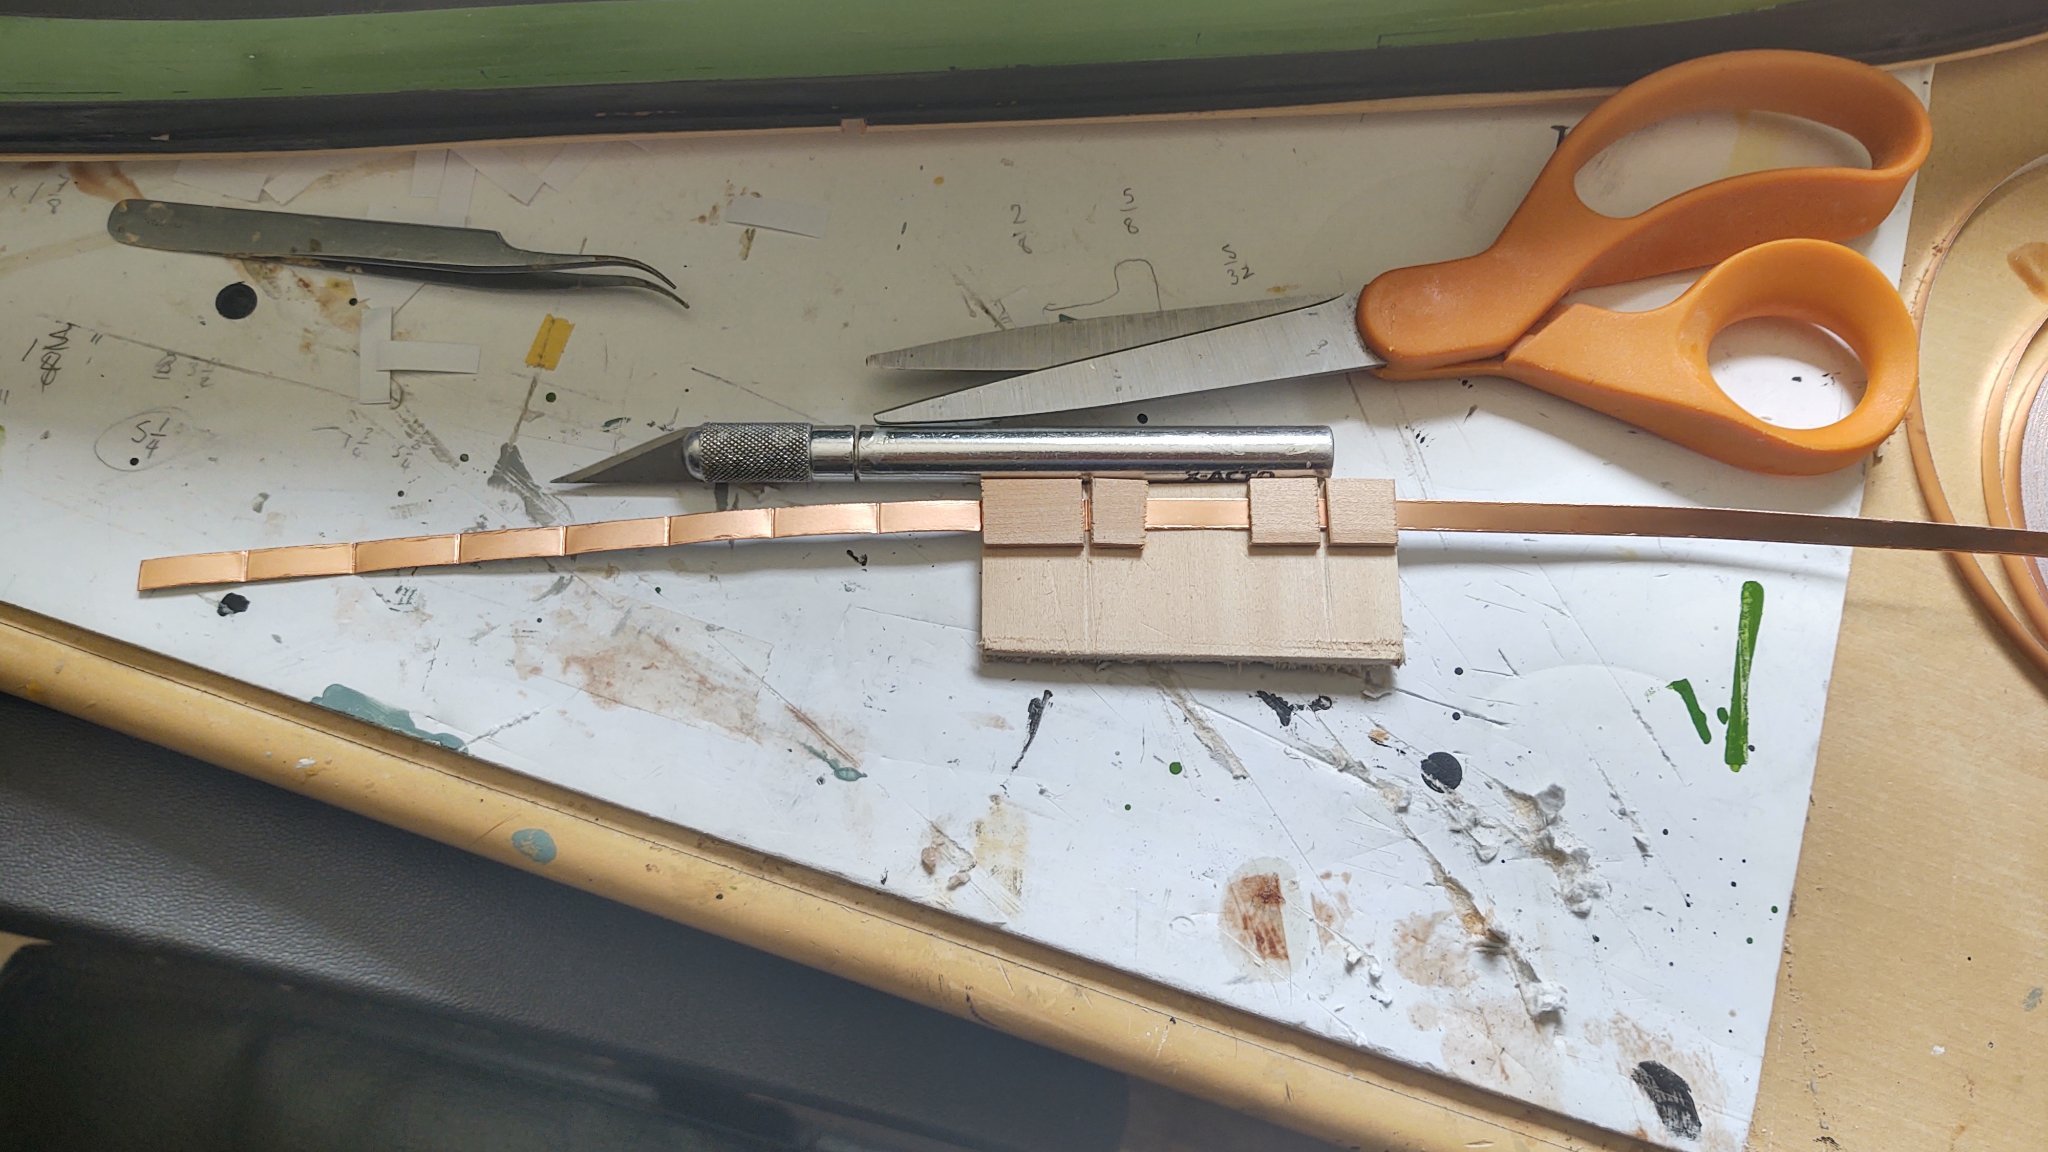
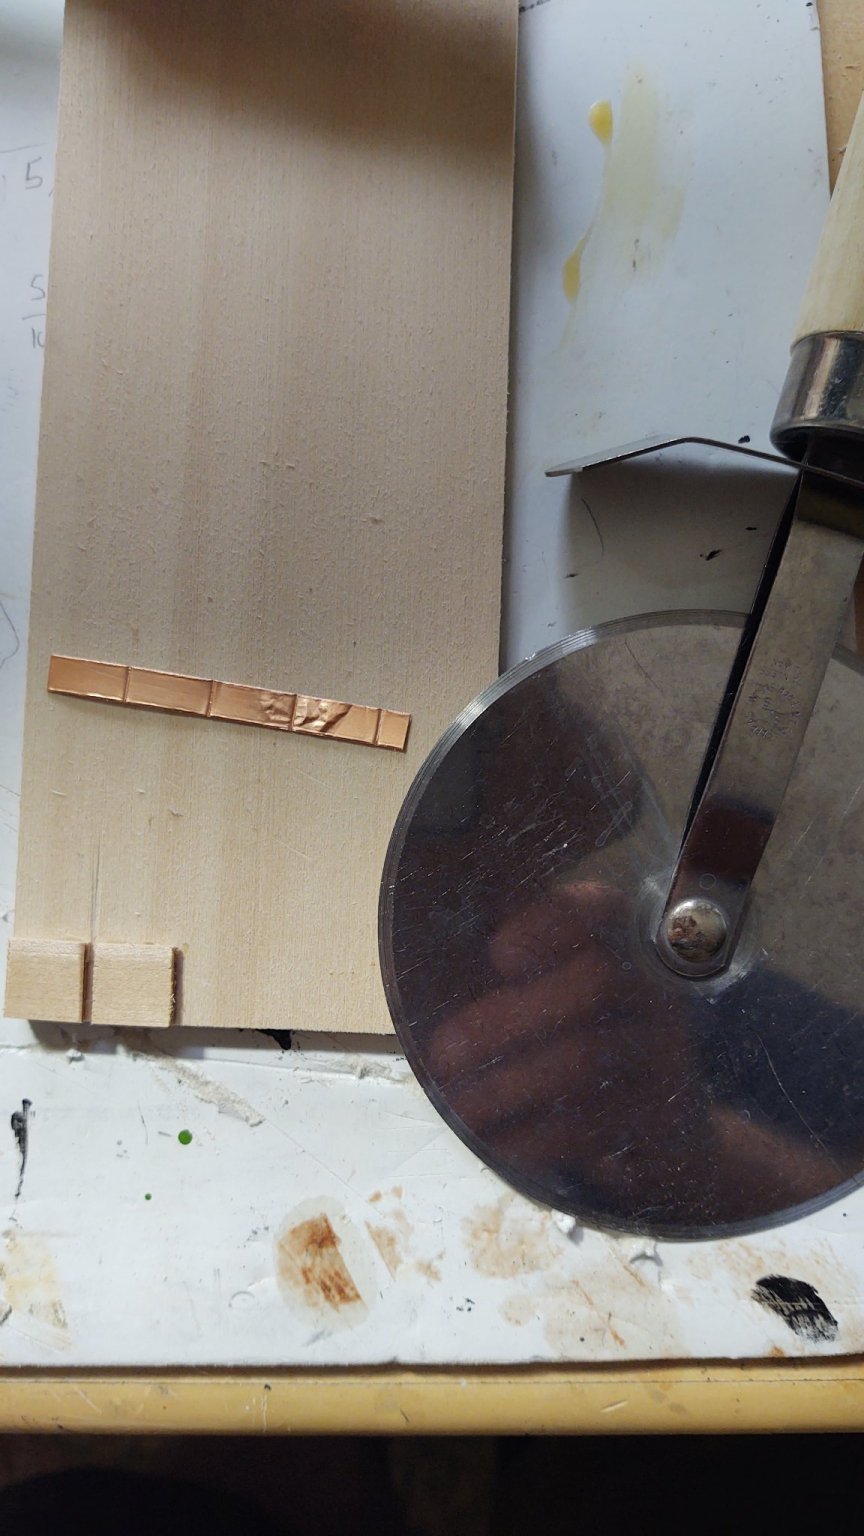
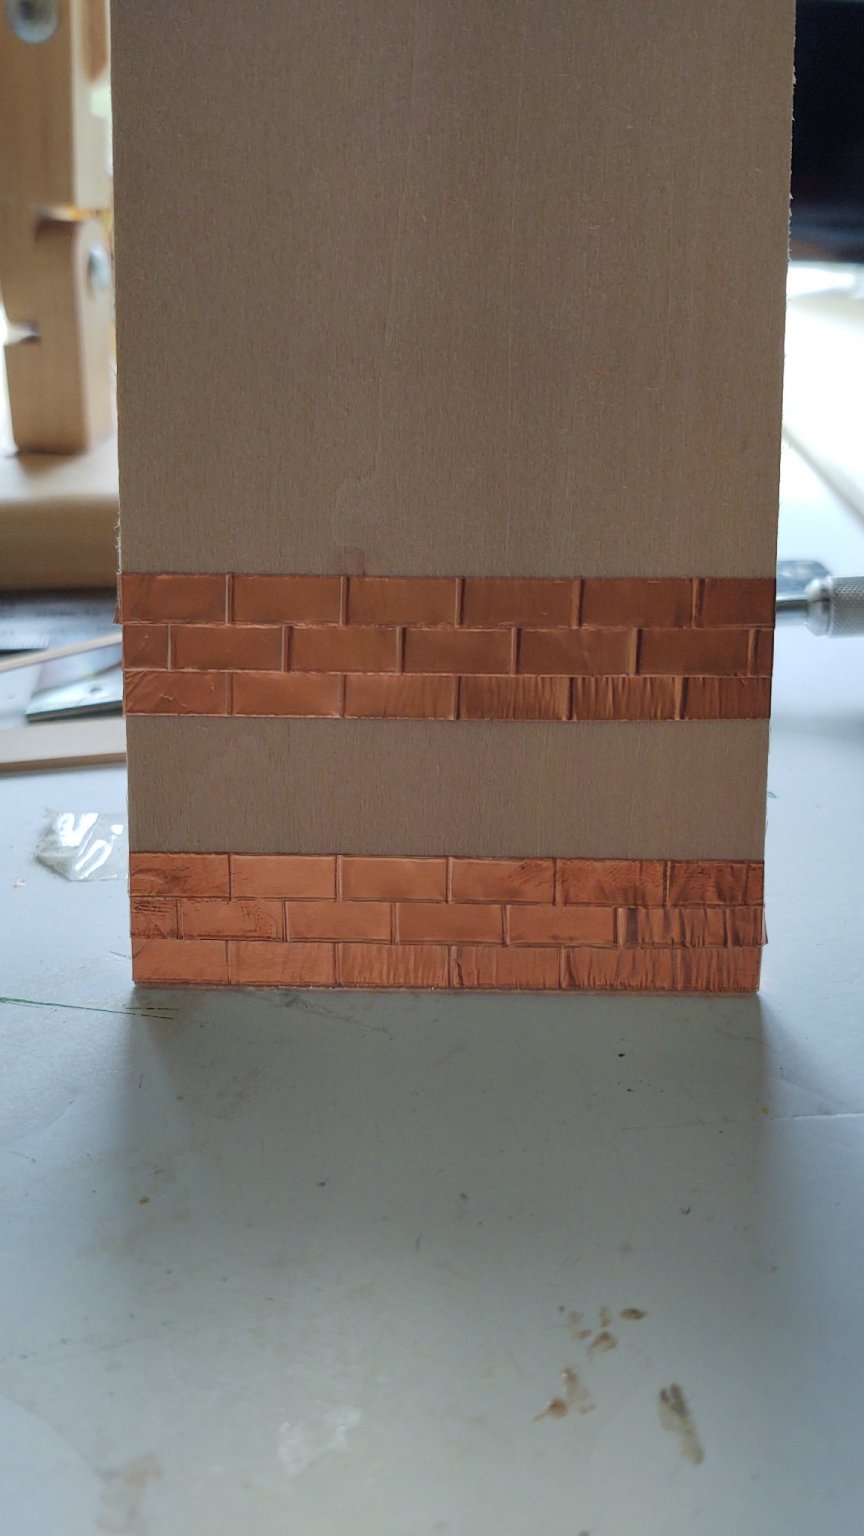
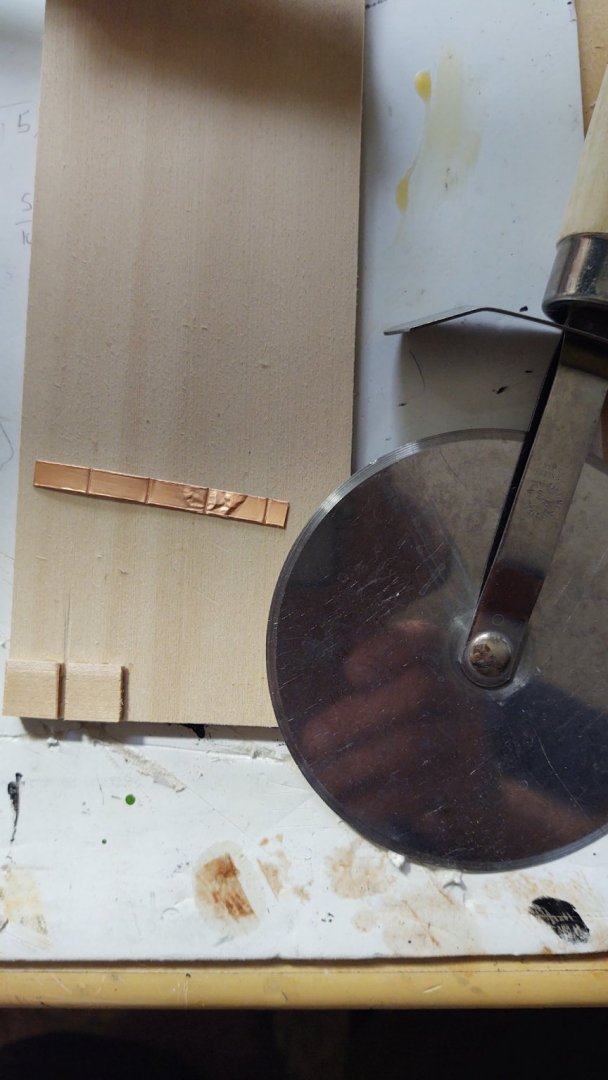
Well, broke down and started working on the copper. Ultimately decided to go with the unadorned look given the scale. These are the tests with some 1/4 inch copper that isn't going onto the ship. The plates were made in my extremely high tech plate making apparatus, made from a bit of wood scrap and a pizza cutter. I used that to score the tape, which is then cut out into 6 plate sections. A sample section from a bit of damaged tape also shown. These plates at scale are 24" by 48", correct length, incorrect height. As you will see, the tape itself seems to have a bit of a raised edge, which I think can usefully serve as approximating a line of nails which would be about 0.4 mm wide at scale. I put together a couple of experiments below, the top rows were scored on the back, yielding a raised edge between the plates, and the bottom set were scored on the top of the plate. Both produce a pleasing effect, but I think that I will go with the variant with embossed from above as the plates seem more "separate" to me. I started from the bottom, and got better at applying the six plate segments as I progressed, so the top set is a lot cleaner looking (and the top row of the lower sections is better looking than the bottom two rows). The key is to hold the end of the strip down and peel off the paper backing without letting it curl up. Although I am going to use 3/16 tape on the ship, I may use some of the 1/4 to copper the keel, as it will fully cover it and allow cleaner overlaps than the 3/16 segments will (and it will allow me to get some value from the kit tape). As always, thanks for looking in. George K.

- 602 replies
-
- 5
-
-
- Flying Fish
- Model Shipways
- (and 2 more)
-
Thanks for the vote of confidence! It's been years since I've been out to Hyannis but next time I do, I'll have to stop by. In a similar vein, you may be aware of Chesapeake Mill in England (https://en.m.wikipedia.org/wiki/Chesapeake_Mill) that was partially constructed with timbers from HMS Chesapeake, formerly USS Chesapeake.
- 602 replies
-
- 1
-
-
- Flying Fish
- Model Shipways
- (and 2 more)
-
At the risk of getting philosophical, I tend to subscribe to the latter view. I personally lack the skill to weather effectively, and suspect I may not be alone. I also suspect that there is an axis of artist vs. engineer. I lean engineer and love the look of just commissioned/fitted out. But I'm still going to try to change the copper to new Muntz on my Flying Fish. Doing some experiments with different color paints to get the right shade. Regards, George K
- 3,560 replies
-
- 2
-
-
- clipper
- hull model
- (and 2 more)
-
Are you planning on putting in a gore line or just run it continuously?
-
The planking work is very nice. Are you planning to paint or go for a bare wood second planking with some kind of attractive veneer? It will look great either way, just curious. George K
-
Looking great so far! I would glue them in place personally. Otherwise I imagine when you are rigging the shrouds you are going to pull some of them out, or a year from now they are going to start popping loose. When you have a chain plate that is nailed to the hull and/or that flares beneath the chains the glue isn't a big deal, but in this case, I think you'll regret skipping it. Standard disclaimer. Regards, George K
-
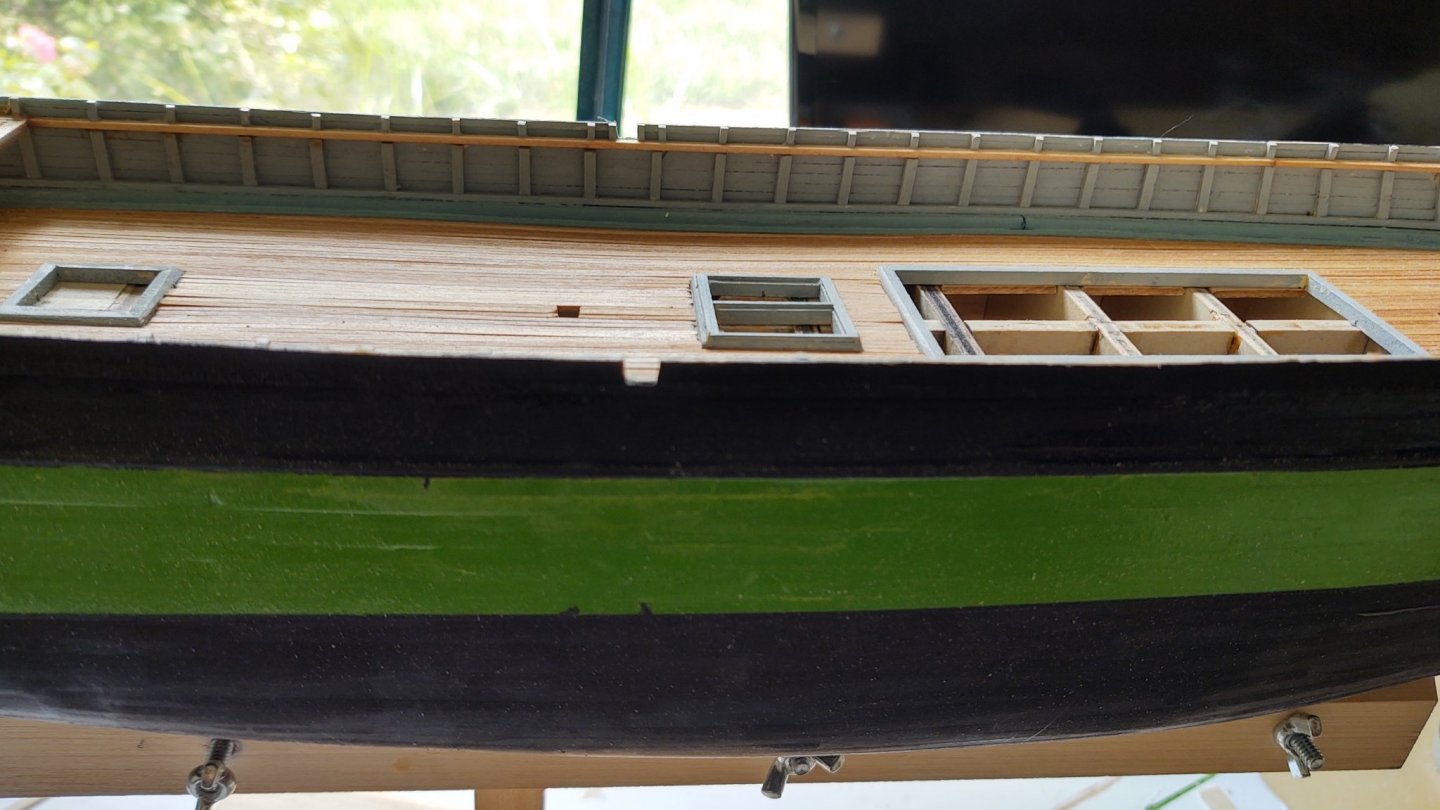
Thank you all for the compliments. I've added the topgallant rail. I added in a couple of extra ribs by where the entry ports sit to stabilize the bulwarks, and then cut open the entry ports. I then added the side boards on the entry ports and added started putting the topgallant rail on. The aft section was carved out of a section from a 1/16 by 4 by 24 inch basswood, the rest were made directly from 1/16 by 1/8 basswood strips, The section from the stern to the entry ports required no pre-bending, but I soaked and pre-bent the sections from the entry ports to the forecastle and the sections over the forecastle. After they dried, I stained and attached them in place. Some photos below: Incidentally, the piece of wood behind the aft most coaming is one of the side boards that I dropped, and could not find and had to remake. After taking these pictures and noticing it, I removed it. Next, one more coaming for the after deckhouse on the main deck and then it is time to start putting on copper/muntz plates. Thanks again for looking in. George K.


- 602 replies
-
- 2
-
-
- Flying Fish
- Model Shipways
- (and 2 more)
-
Looking great, particularly how smooth the planks are going on. Looks like your fairing was basically perfect! Looking forward to the next installment! George K
-
Thanks!
-
A very brief update. I've completed the poop deck, and added the doubler for the capstan on forecastle. Next up, the coamings for the extension of the after deckhouse and the vents. The deckhouse extension coamings are the only ones that are sitting on the deck, rather than having the decks butt up against them. I didn't want to have to deal with maintaining the camber of the deck given where the coamings would be sitting on the bulkheads, but I think that I could have probably done it in retrospect. Something for the next build I suppose. A couple of pics, and as always, thanks for looking in. George


- 602 replies
-
- 6
-
-
- Flying Fish
- Model Shipways
- (and 2 more)
-
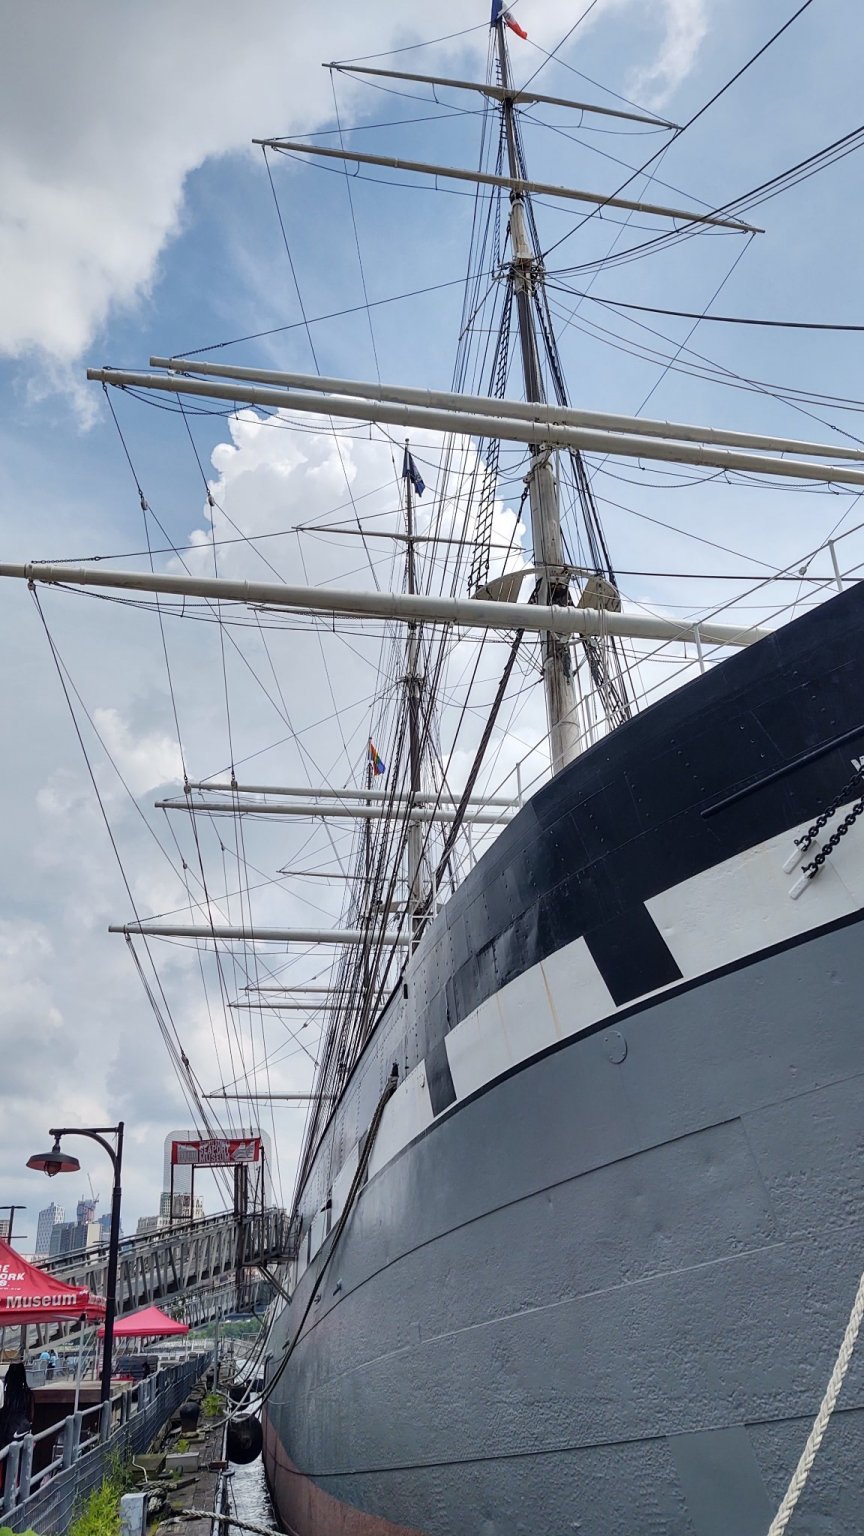
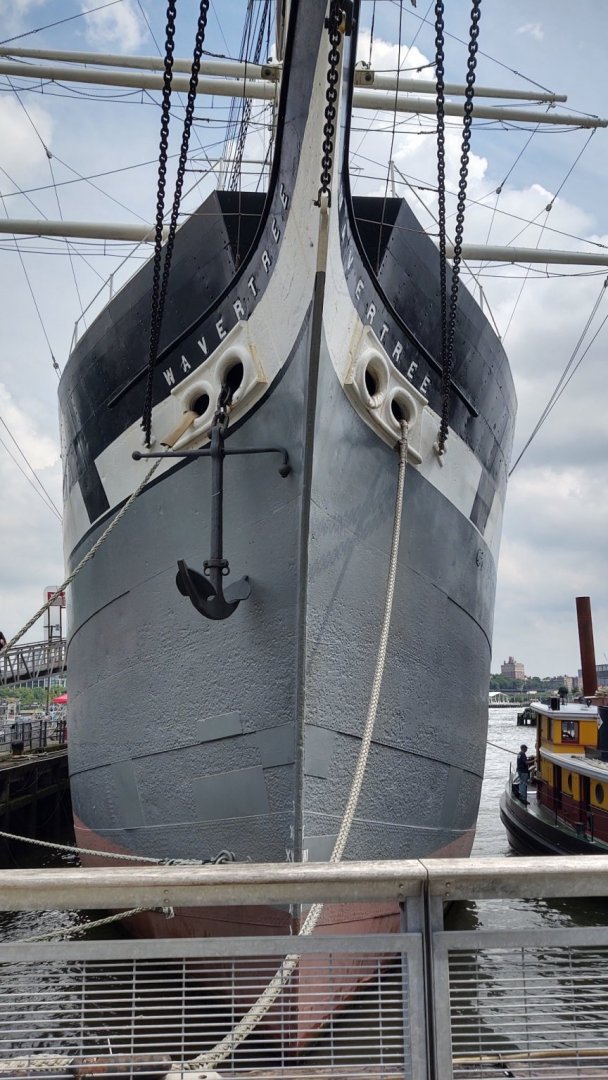
Oh, and a palate cleanser. I was in New York City to race the NYC triathlon over the weekend. Here are two photos of Wavertree that I took while I was there. Built 1885 in Southampton and, according to Wikipedia, one of the last ships built out of wrought iron. Love those clipper bows. George K ,

- 602 replies
-
- 1
-
-
- Flying Fish
- Model Shipways
- (and 2 more)
-
Good to know. What paint did you use? And did you use the regular VentureTape or some other brand? I'm already thinking of replacing the 1/4 inch foil in the kit (which implies a plate that is 24 inches tall) with either 3/16 which scales out to 18 inches, or 5/32 foil (15 inches). You can go as low as 1/8 (12 scale inches) but that seems really difficult to work with. My recollection looking at one of your previous builds suggests that 14 inches tall is pretty "standard" for a plate. I also haven't decided exactly what to do about the 'nails'. Walking under the Cutty Sark, the nails did not present as obvious as they tend to in models. I tend to agree with the argument that you previous made that at 1:96 almost any visible nail is way out of scale (although attractive). Even a one inch nailhead (bigger than they actually are, I'm pretty sure) would be about 0.26 mm. I liked your idea for using the screen to create the 'plates' but would need to find something else to replicate it. Apparently the brass tape doesn't solder as well as the copper, so there wasn't much demand for it in the stained glass world. I was hoping that I might be able to get some old stock from a place here where my younger daughter learned to do SG, but they don't appear to have any. The only place online I can still see a listing for it shows it as out of stock. Regardless, I need to make up my mind soon. I've almost finished planking the poop, once that is done, it's time to drill and install the vents, put the topgallant rail in place and deal with the coppering/muntz(?)ing.
-
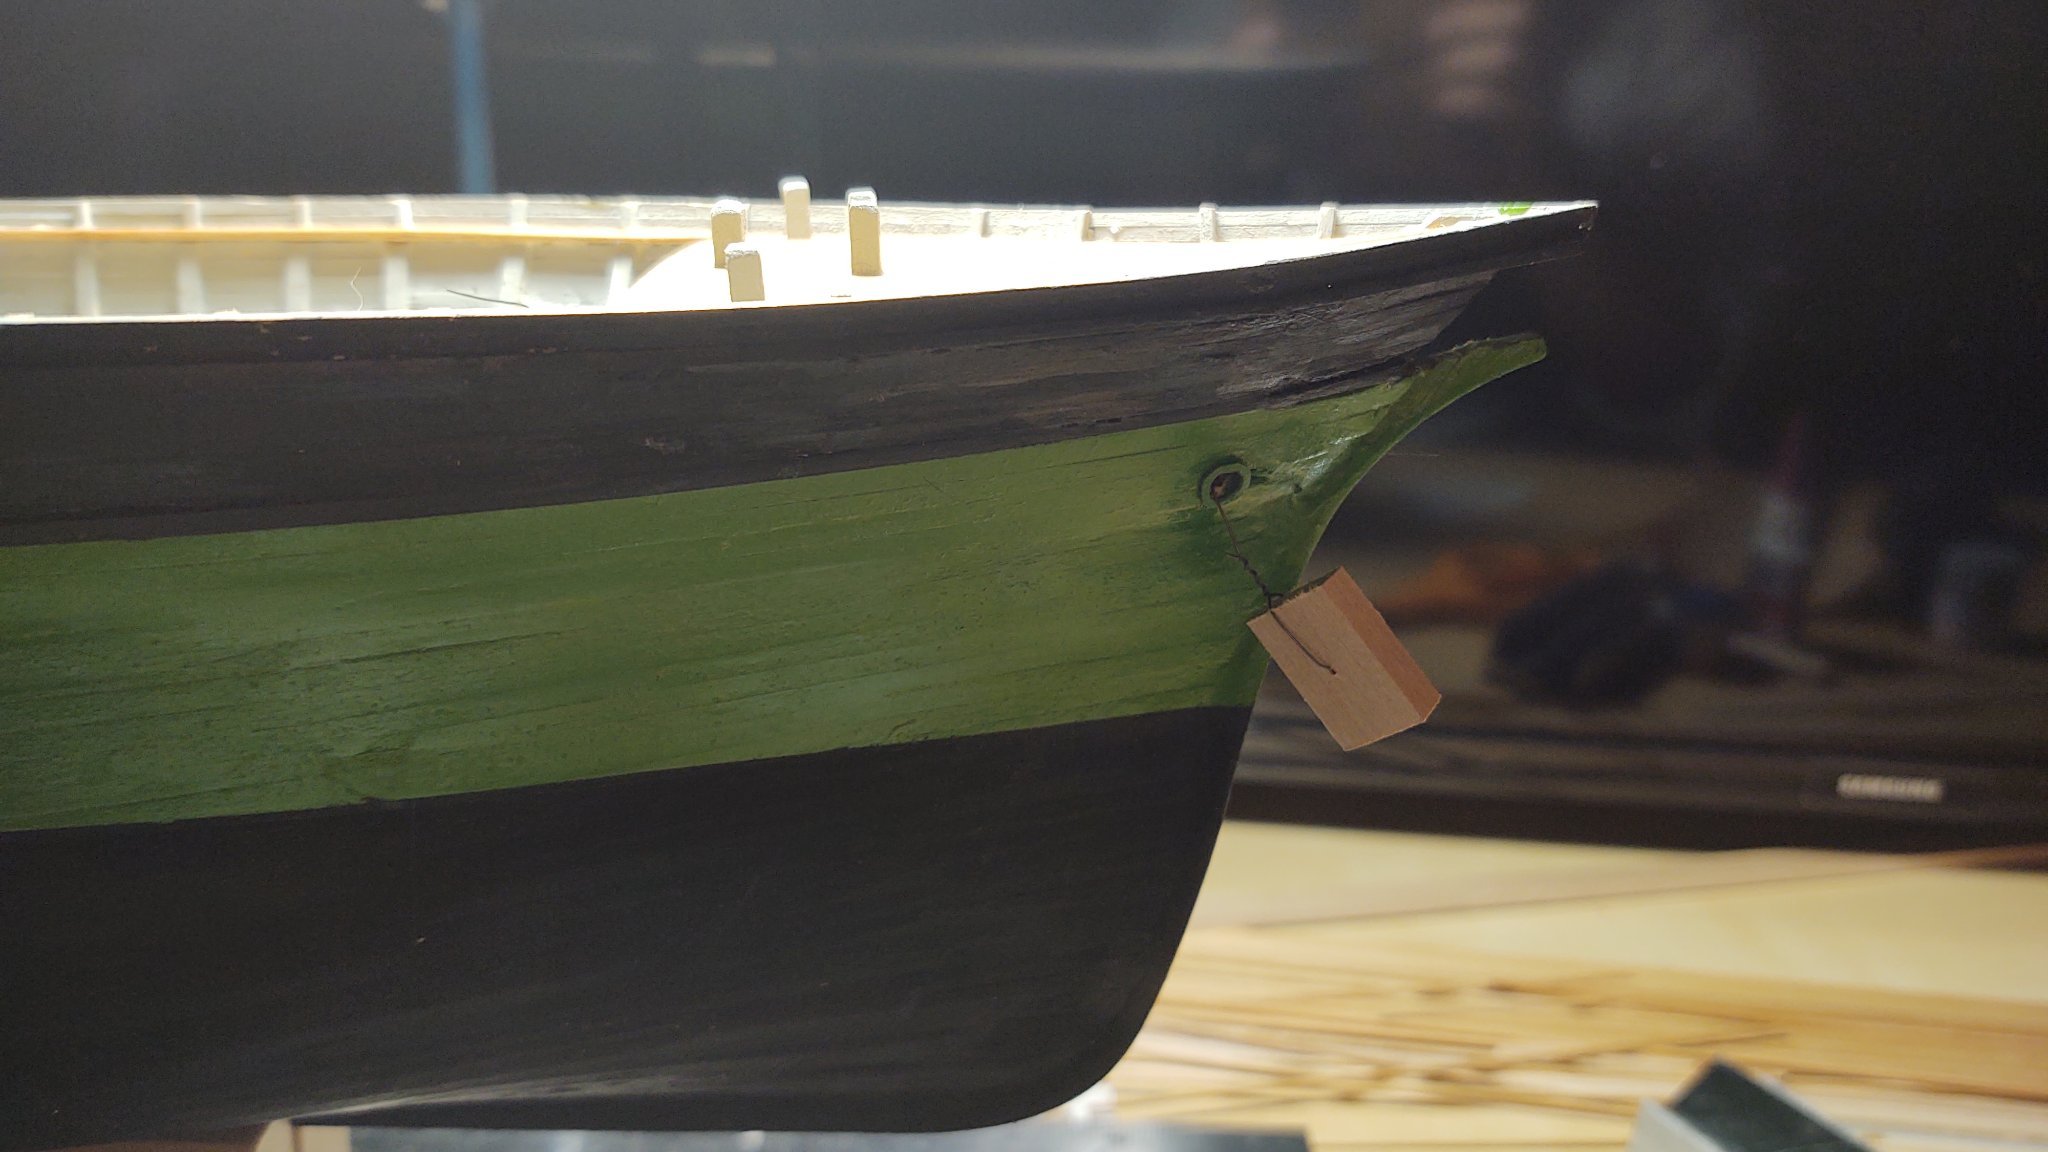
ClipperFan, The included picture (and the others at the link) are a great set of photos related to the Fish. FWIW, the idea to paint the ship green came from Stephen Ujifusa's book Barons of the Sea and their race to build the world's fastest clipper ship. In the book, he relates that McKay had wanted to paint the ship green, obviously this was not translated into life, but I decided to try to build it the way McKay had originally envisioned. The biggest problem now is that it appears VentureTape which is the major supplier of copper and brass foil tape to the stained glass community has stopped making the brass variant. Since the Fish had Muntz metal rather than copper plates, I was hoping to use that. I have heard of people painting the copper with metallic paint to get the Muntz look, but not sure I'm going to bother as I wonder about the longevity of the painted copper. The Model Shipways plans shows a flat surface on the after end of the stern cabin, with slightly curved port and starboard sides so that would seem to be compatible with your observations. Your observation about the cutwater is interesting. I'll have to see if there are any references that show the cutwater clearly enough to add it to the stem. Thanks for the insights! George
-
Thanks! It definitely has the overhang. Do you know why? This seems to be a not uncommon design element and the only explanation I could come up with is that it might provide an entrance that is full height since it would presumably be clear of the beams for the poop deck.
-
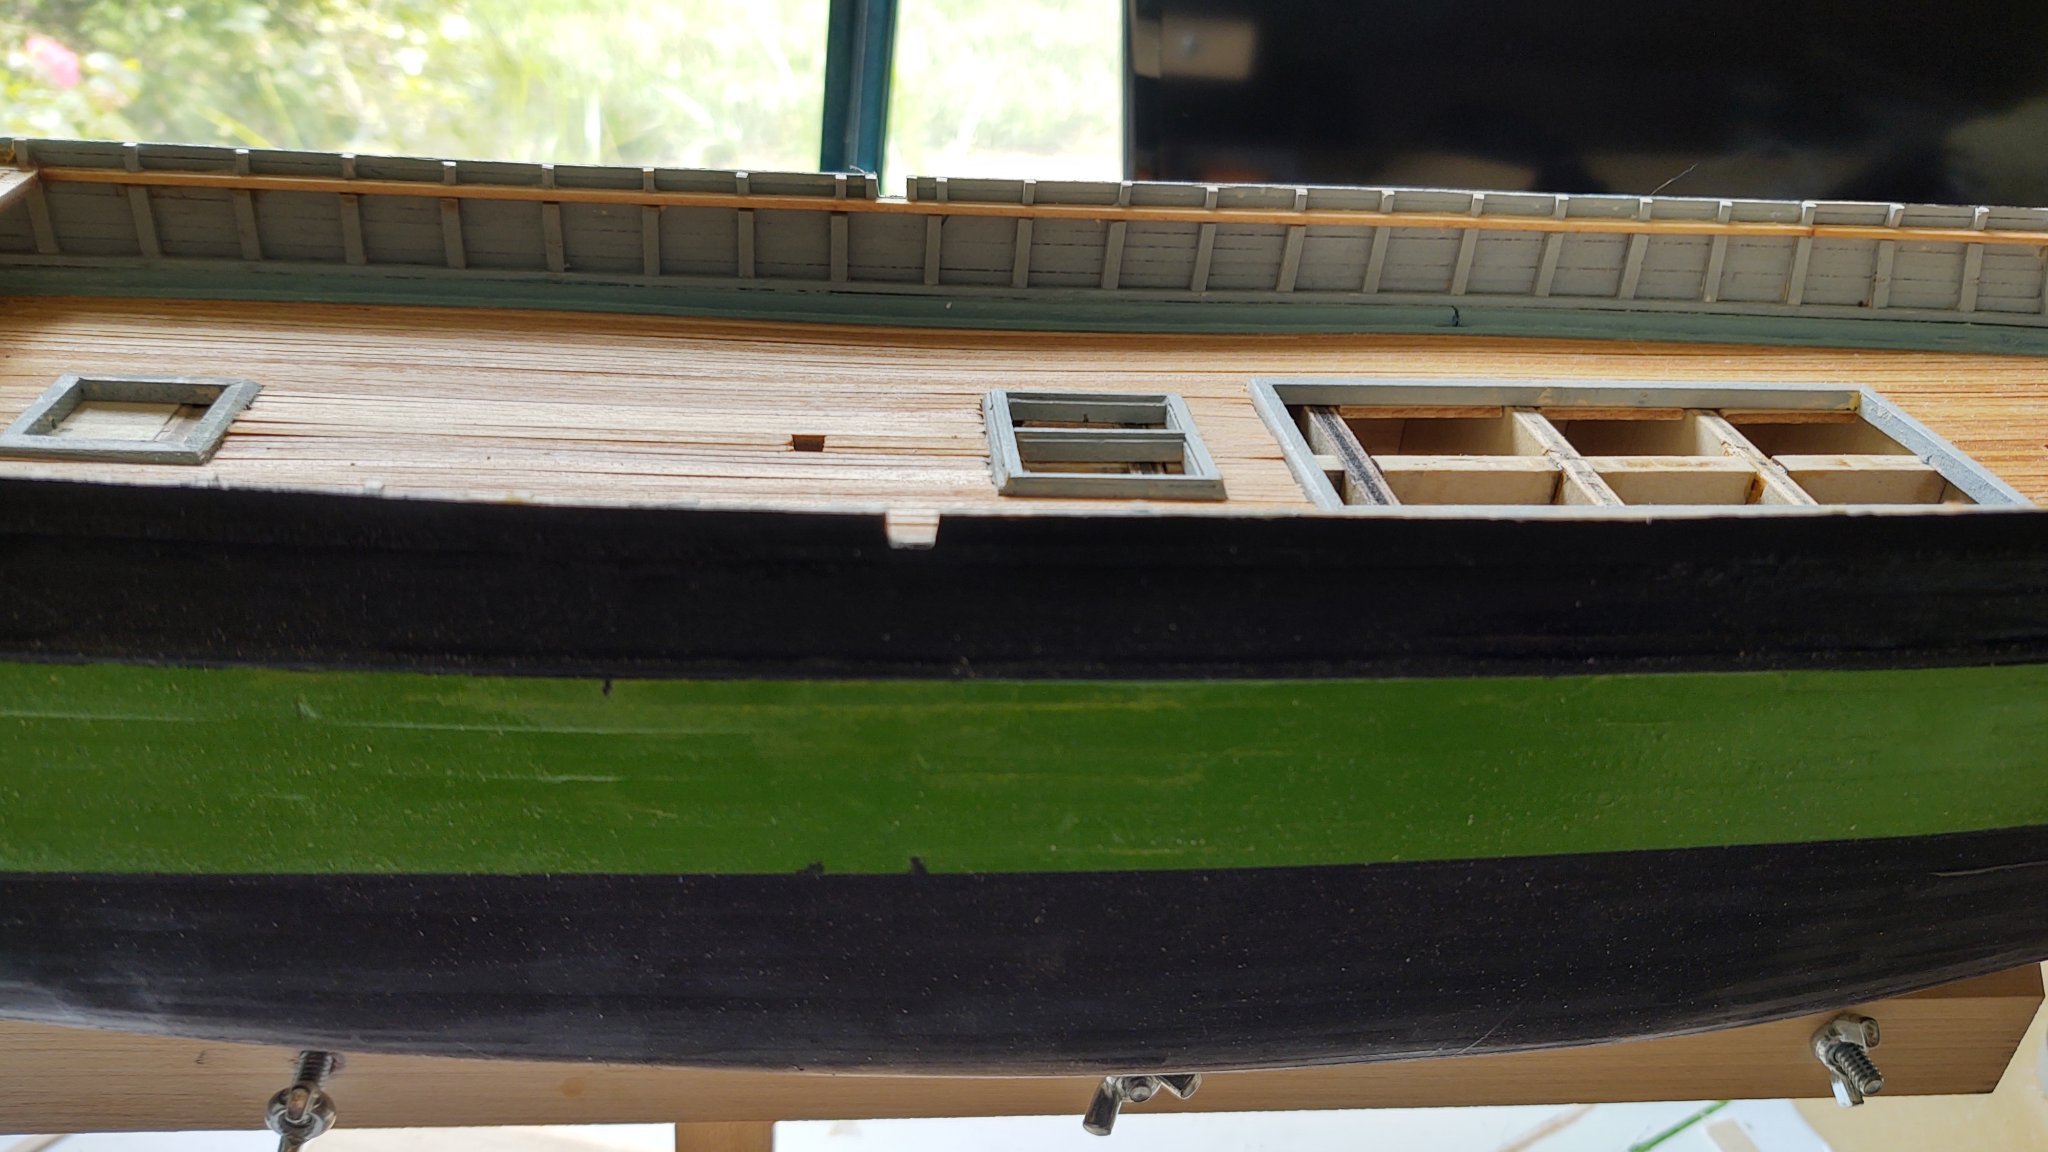
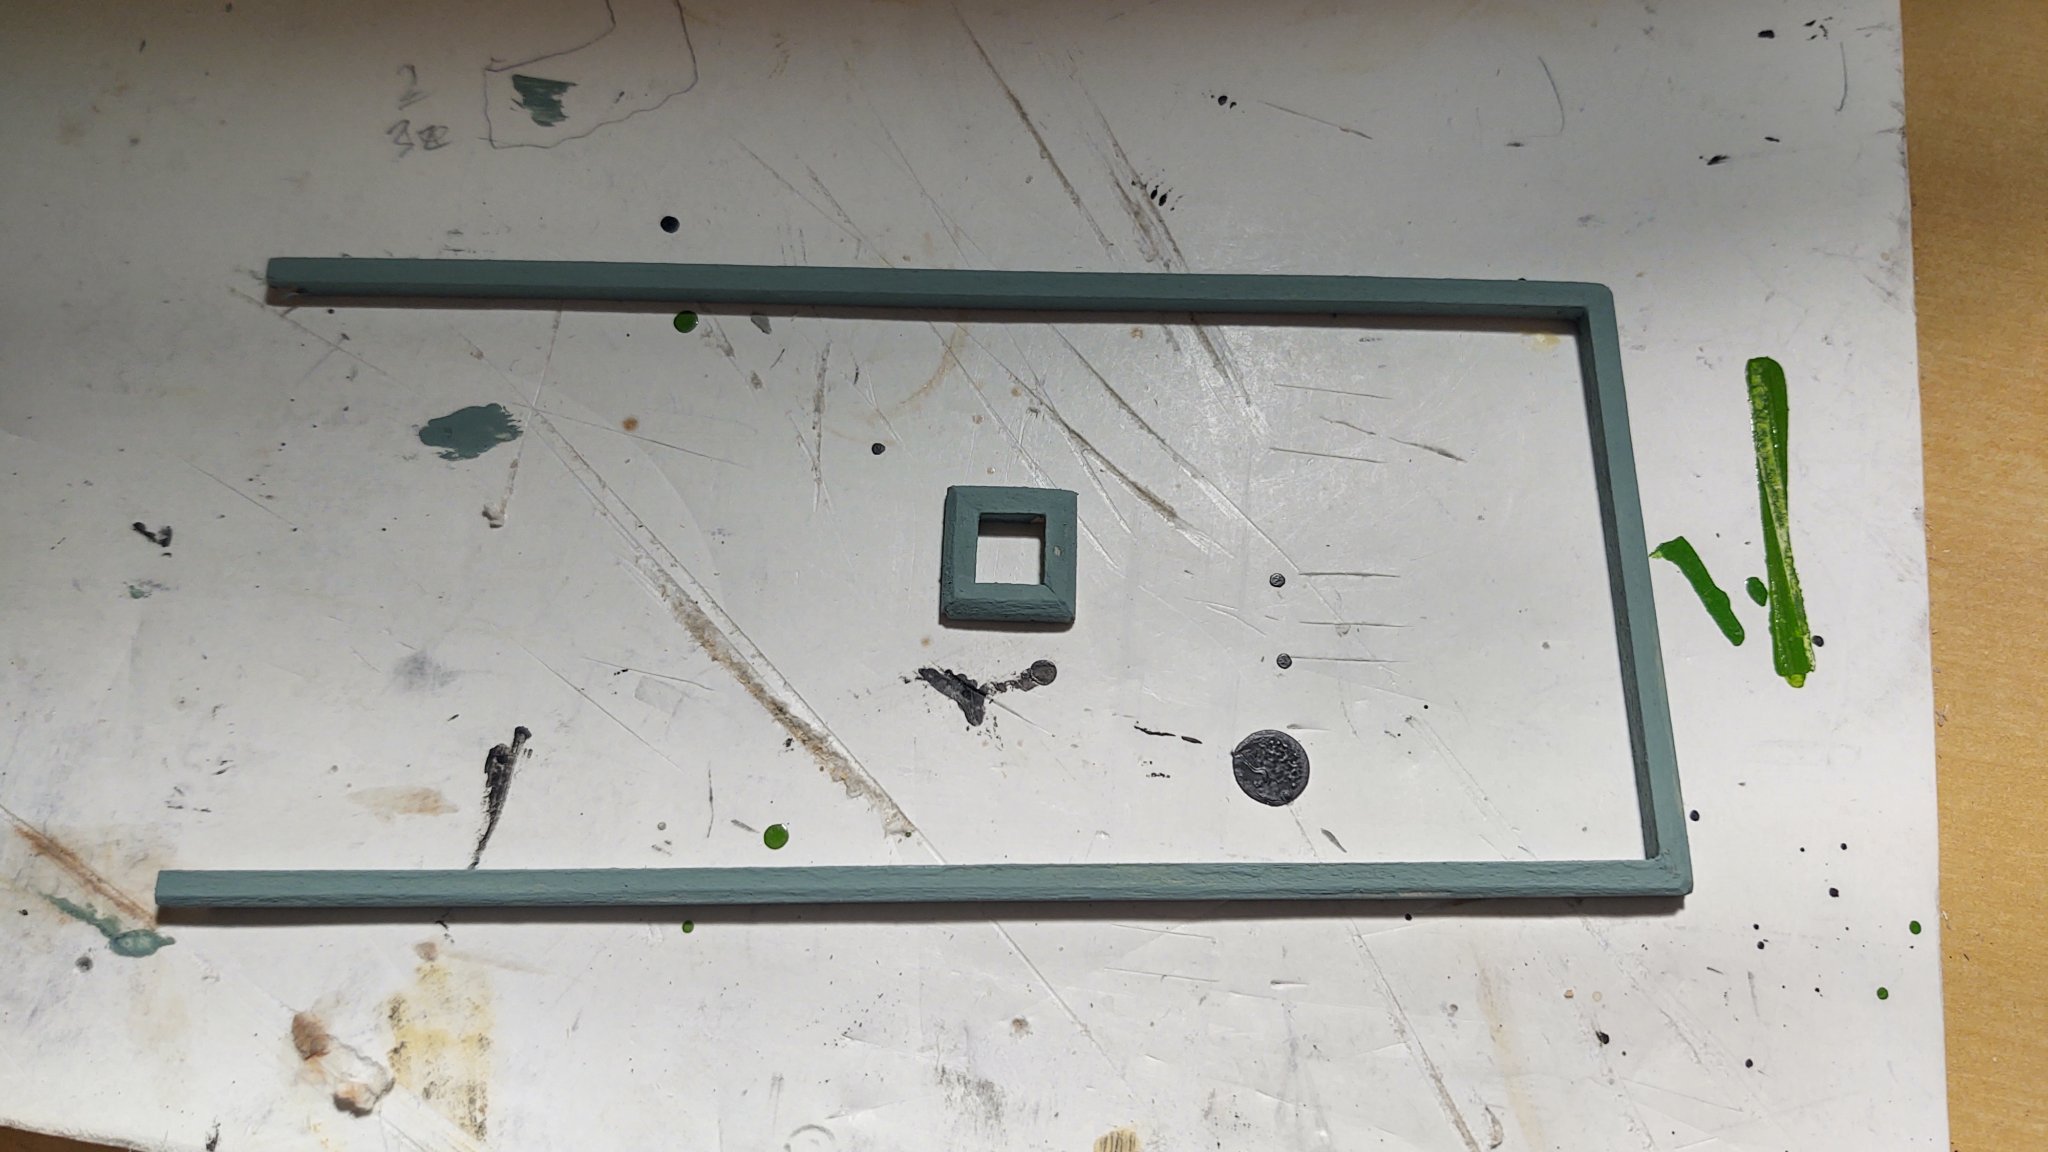
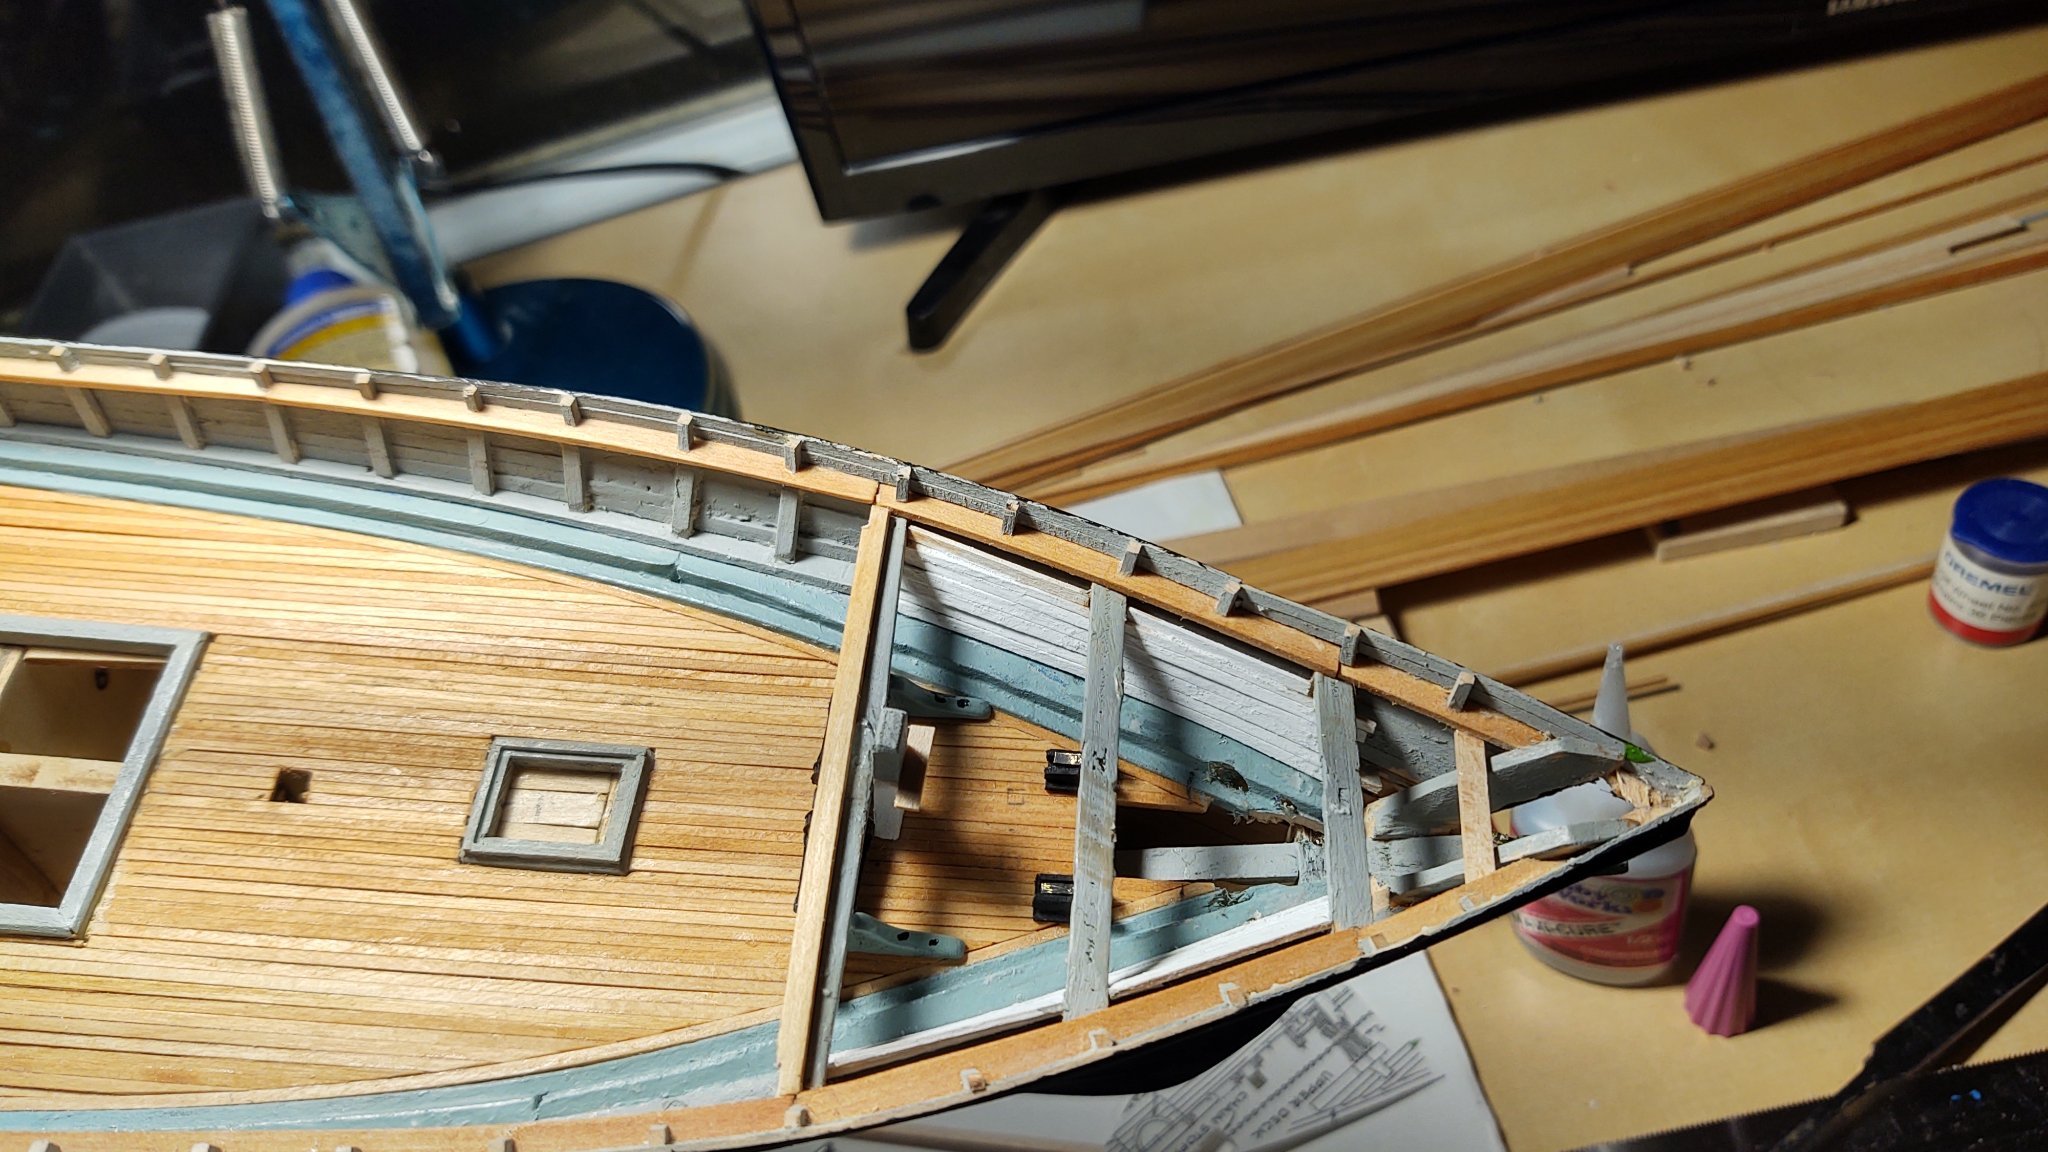
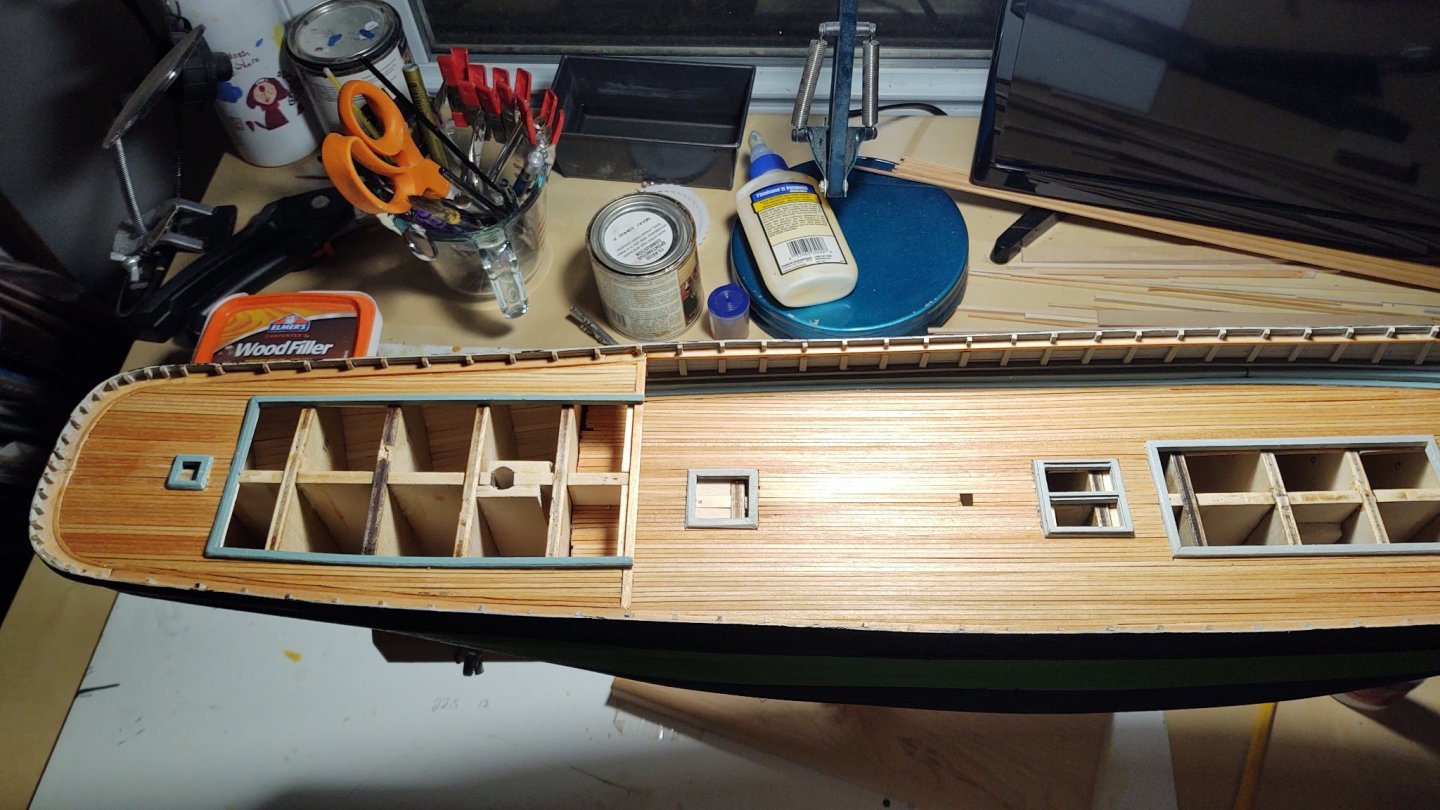
Hey, a quick question to anyone that has done the Fish. I'm working on decking the poop. In the photo below, the coamings for the after deckhouse have been installed, and I'm pre-bending the continuous strake for the deck planking itself. If you look at the plans and the photo below, you will note that the after deckhouse is curved, not straight. The question is whether, in the segment next to the deckhouse the deck planks would have followed the (pretty mild) curvature of the coaming or whether they would have been straight and basically trimmed to match the coaming? Between the deckhouse and the covering board there are a lot of interesting curvature there, just curious as to which would have been done on the real ship so that I can at least try to replicate it on the model.
- 602 replies
-
- 4
-
-
- Flying Fish
- Model Shipways
- (and 2 more)
-
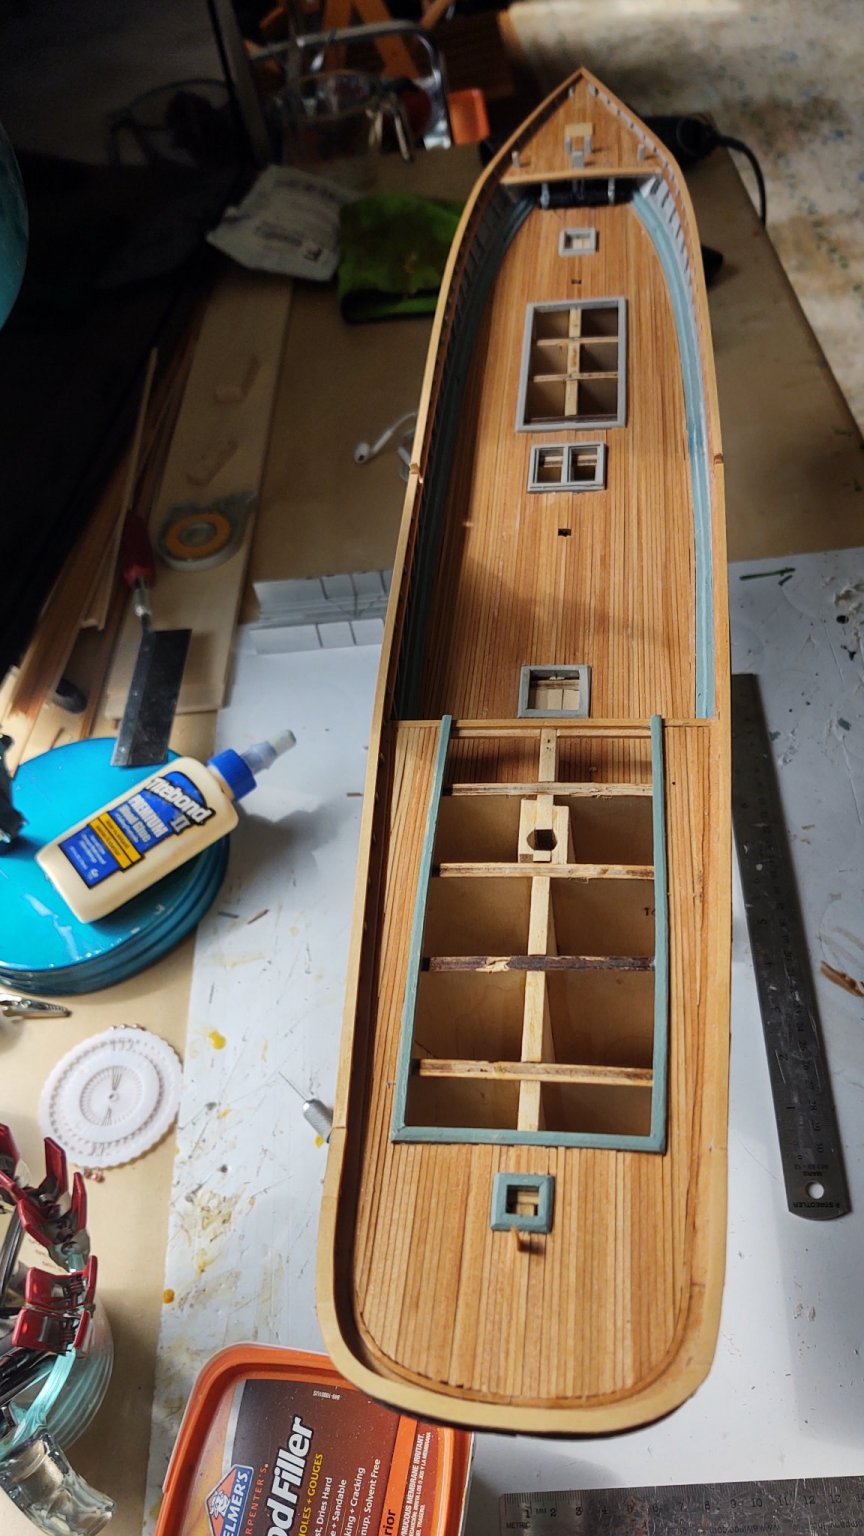
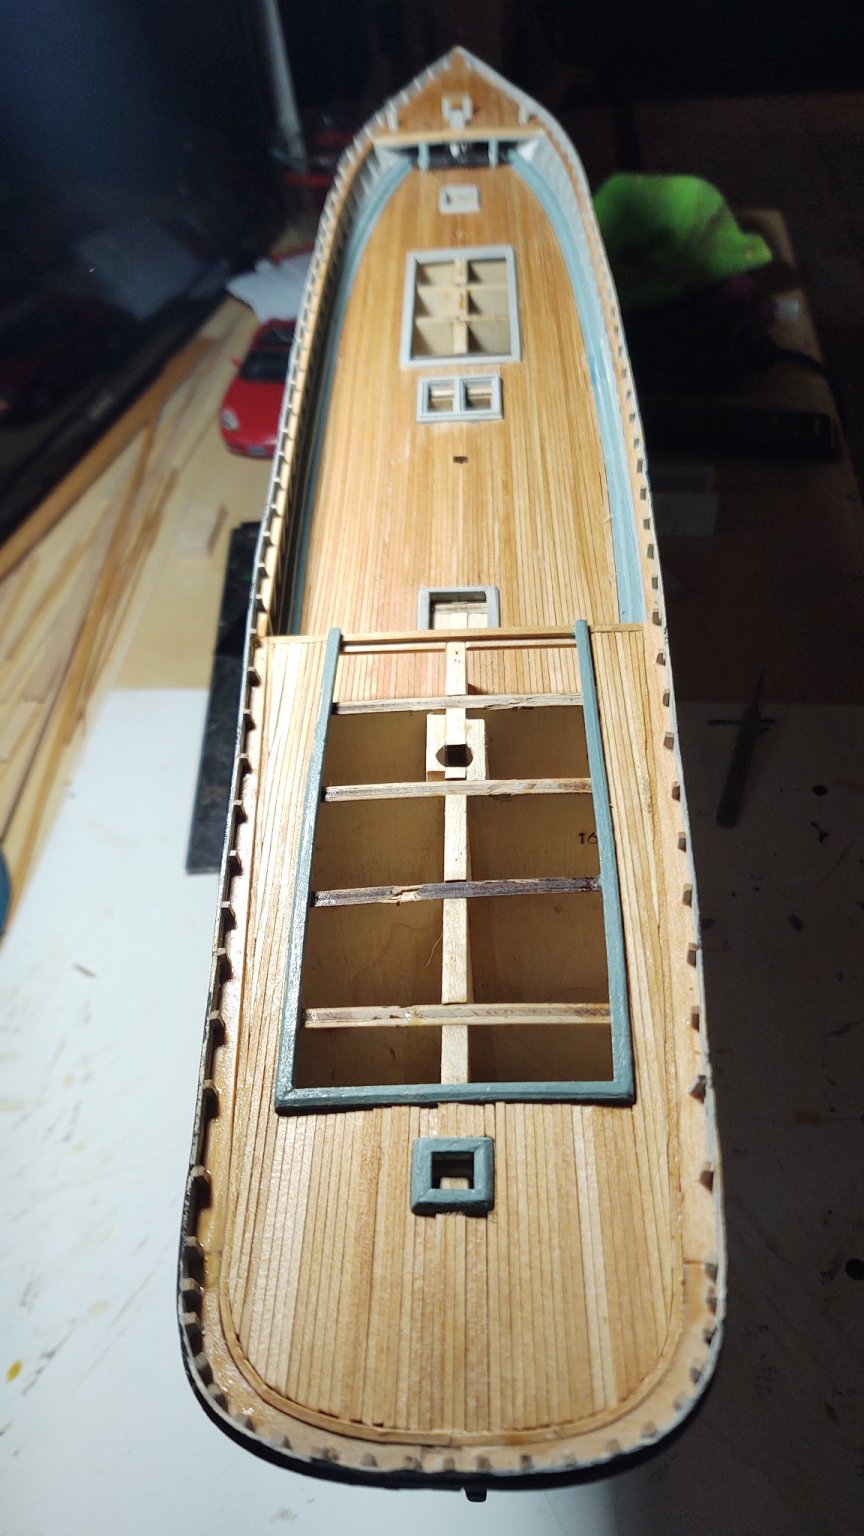
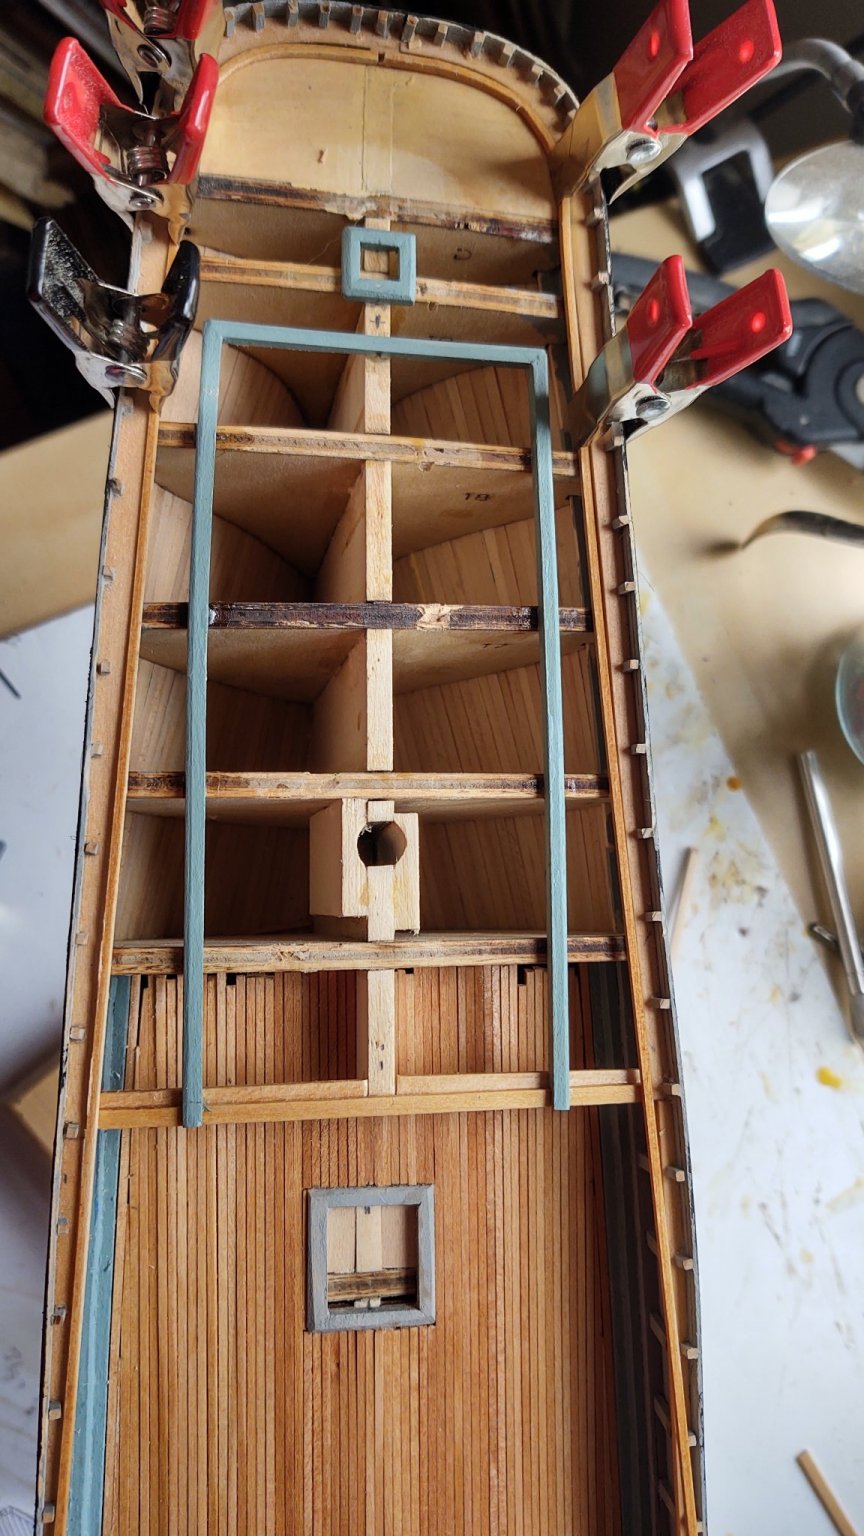
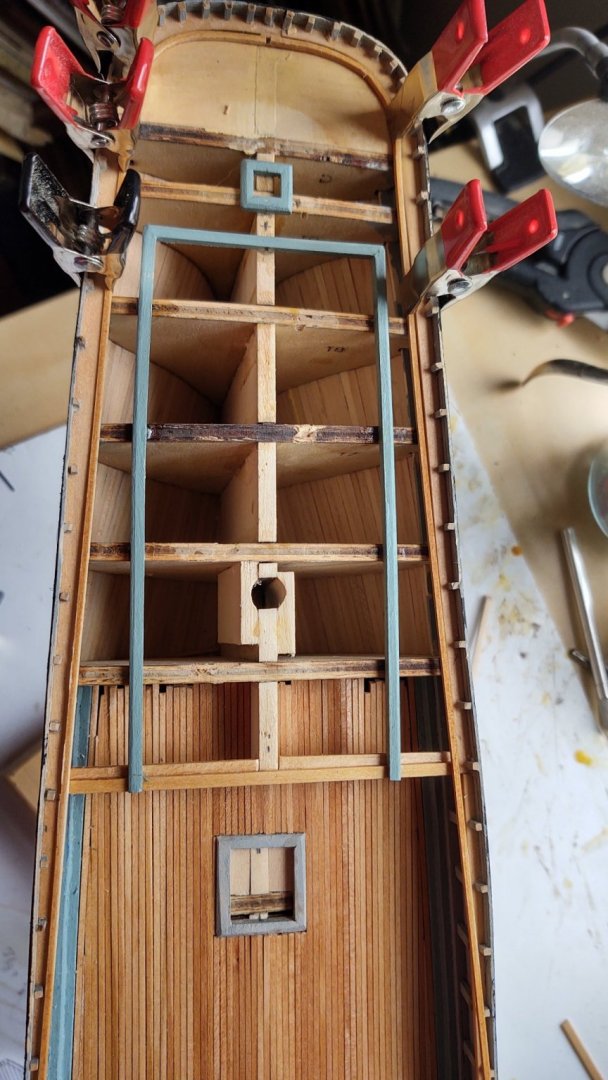
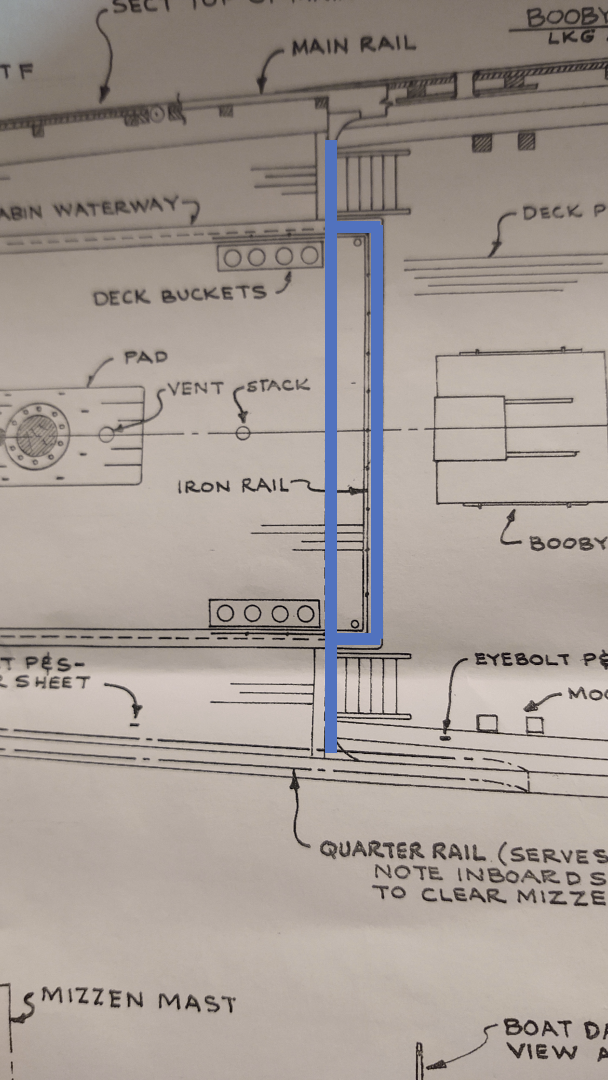
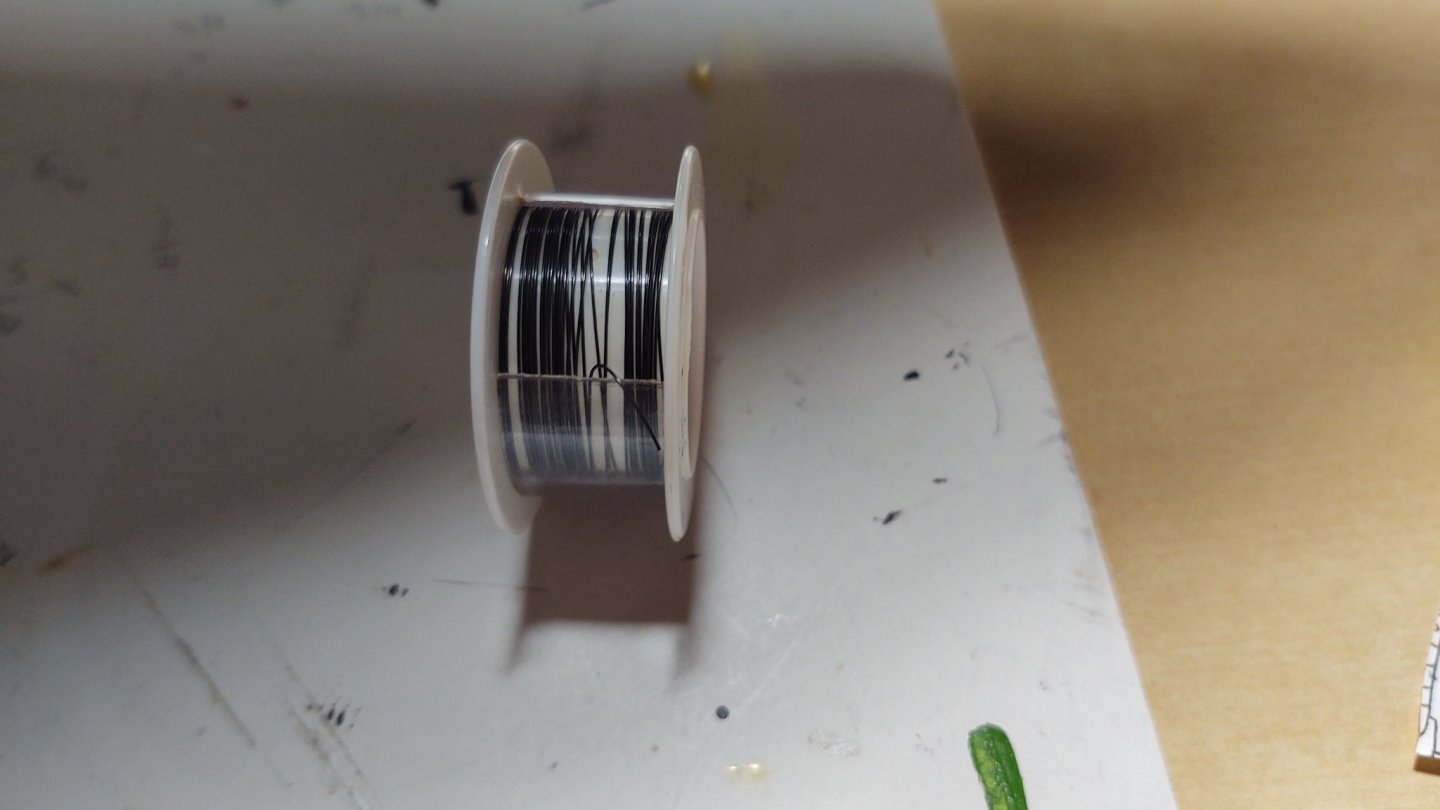
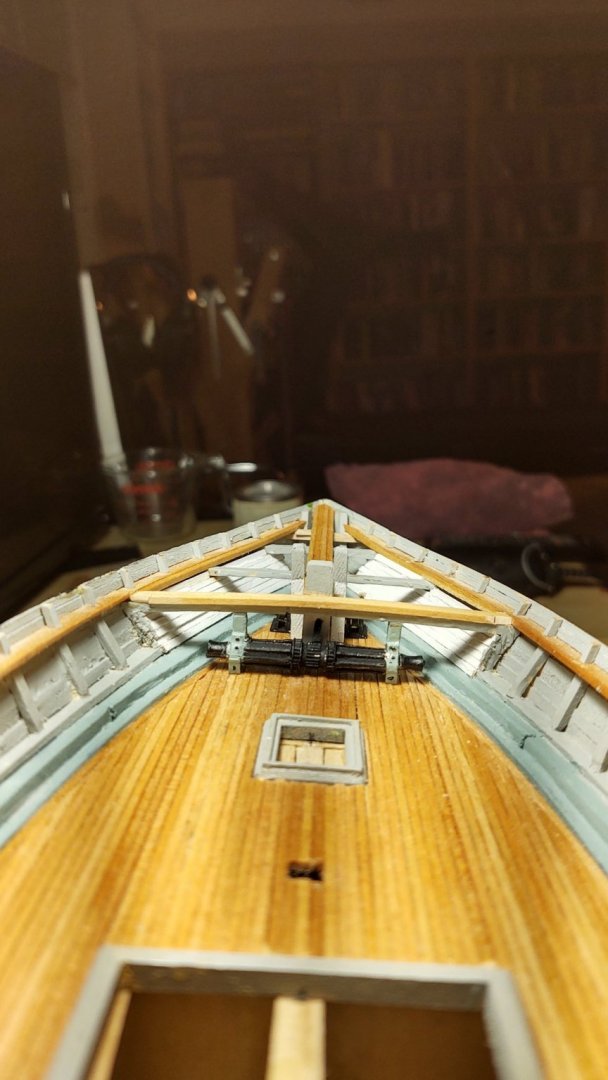
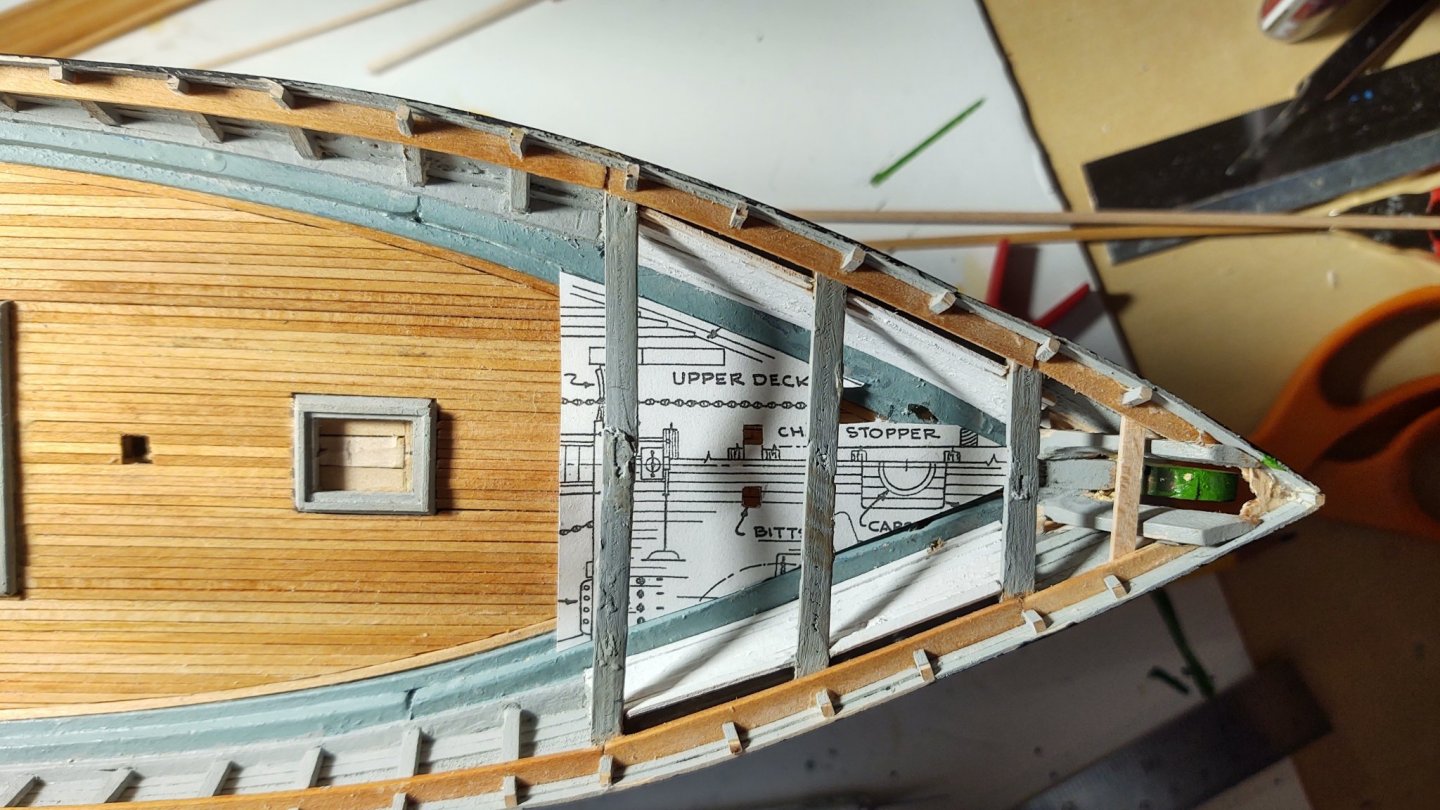
Some progress made in the past week. While waiting for the chain to arrive from BlueJacket, I started working on the poop, making and painting the coamings for the after deck house and the stores locker. However, it occurred to me that I had a way of finishing the forecastle without waiting for the chain and without making it impossible to access the chain stoppers and the like. I had a bit of wire that I purchased from BlueJacket that I used on my Niagara - it is nice and flexible and very fine, fine enough to act as the link in a chain. So I fed a stretch of wire through the hawse pipes from the outside, ran it through the chain stopper and then anchored it on the windlass. I connected the outside end to a block of wood to keep it from getting accidentally sucked up the hawse pipe. When I'm ready for the chain, I will disconnect the block of wood, run the fine wire into the chain, close the end off with a tiny drop of CA glue and then pull the chain to where I want it. With this out of the way, I decked the forecastle, and installed the remaining 2 bits (which pass through the deck and terminate on the ceiling planks under planking). The last thing to do there before putting the topgallant rail in place is to cut the sections for the catheads. One question to anyone who has completed the Fish. My understanding of the after deck house is that it extends beyond the edge of the poop, but that there are ceiling planks along the edge of poop that closes off the main deck from the beginning of the poop. Which is to say that there needs to be a coaming (or set of coamings) that look like the blue lines in the figure below (or a single coaming that follows the outer edge of the blue below). Is that how you all interpret the plans? As always, thanks for looking in! George K


- 602 replies
-
- 4
-
-
- Flying Fish
- Model Shipways
- (and 2 more)
-
I think she looks great so far. And I agree with everyone that you do what is going to please you. Yes, we all strive for accuracy, but by definition any model is a simplification and it's also an art form; there is always something of each of us in what we build. I've always painted, perhaps because I started with plastic, but I think it is more likely to be a desire to see something as it is, particularly for ships like this that aren't with us anymore. So, for me, maybe it is a desire to see something from the past - only you know what drives you. Keep it up. I find it incredibly inspiring (and I'm pretty confident that lots of others do as well). Your work is helping me get the confidence to start my own scratch build plans. Regards, George K
-
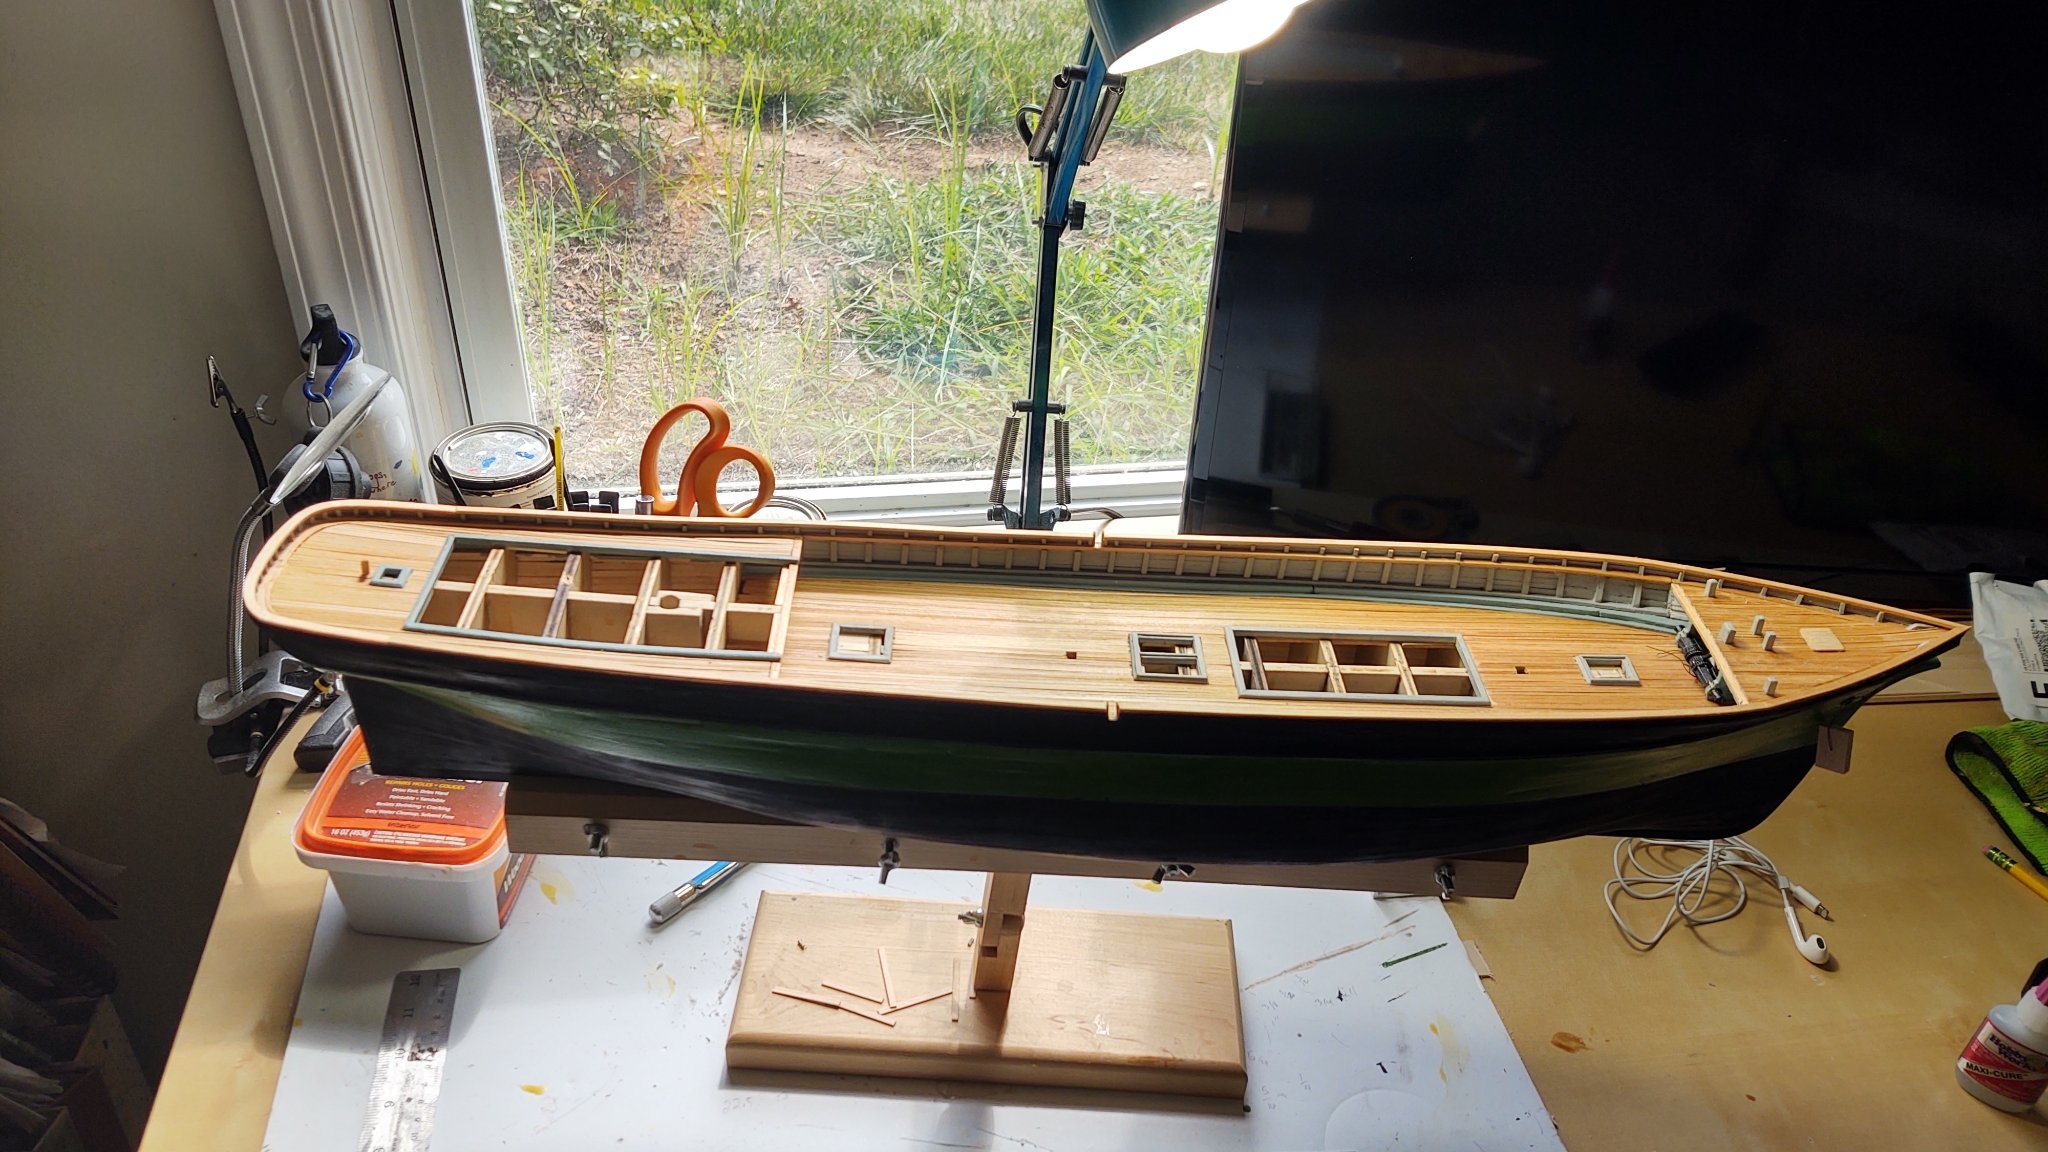
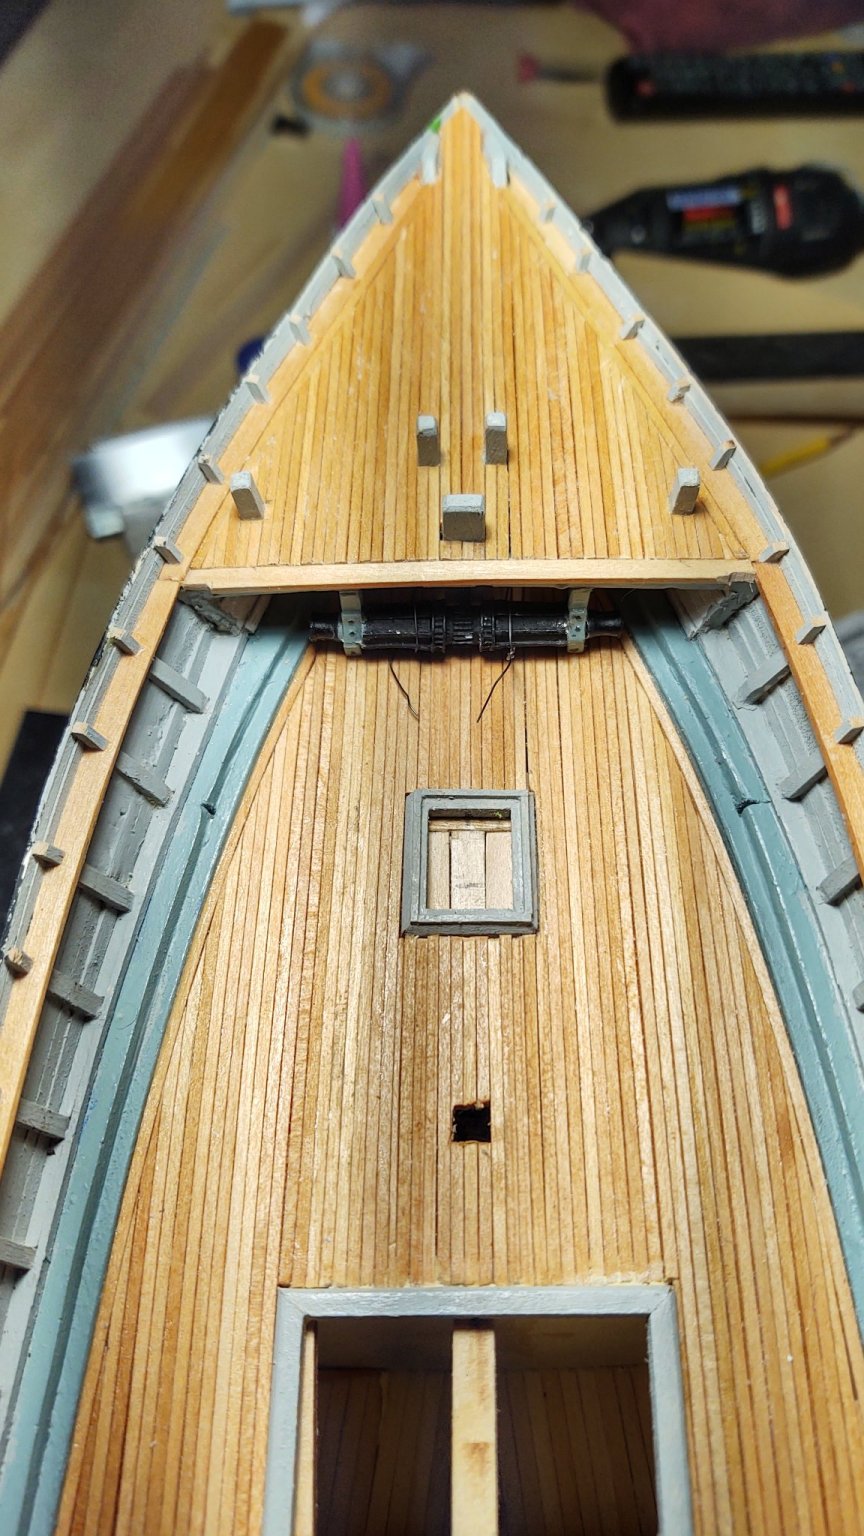
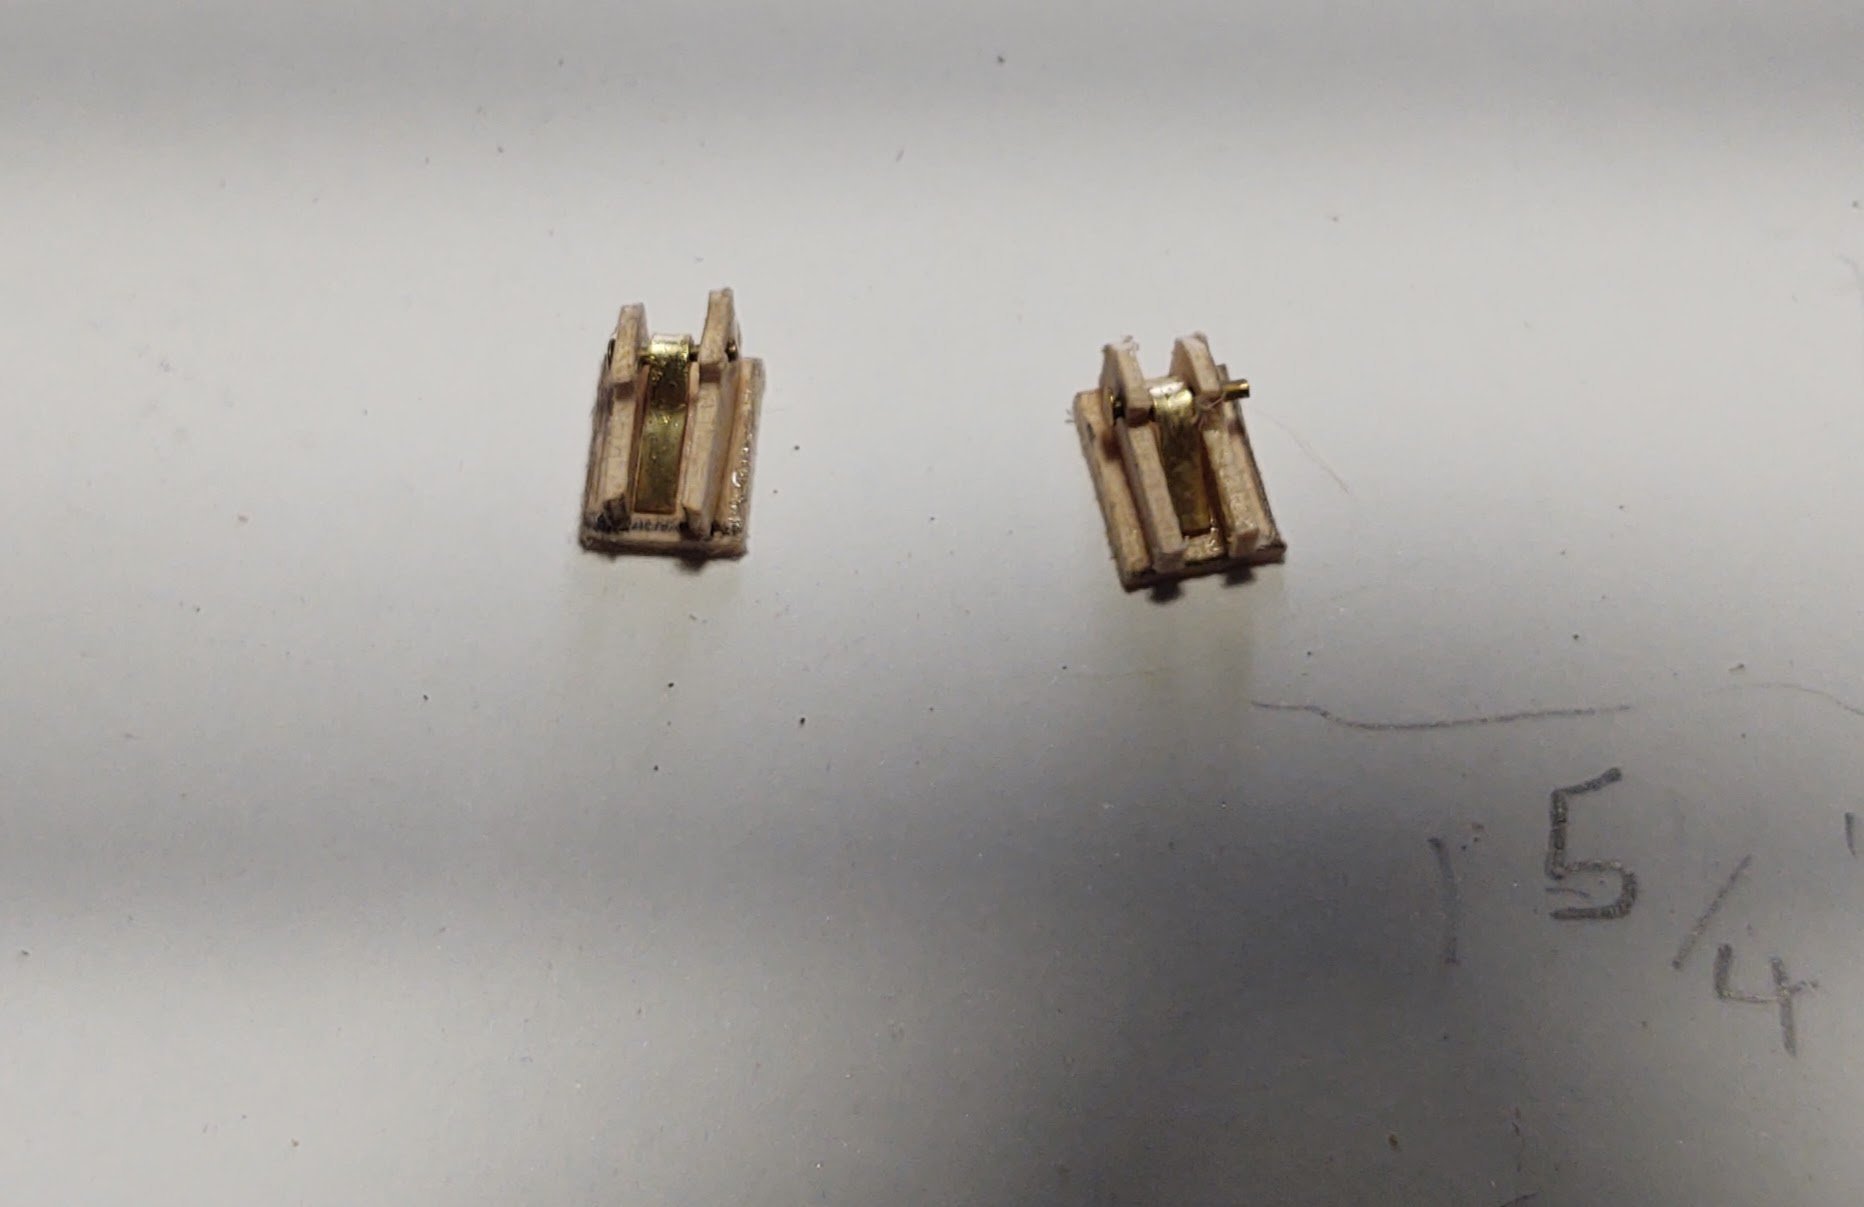
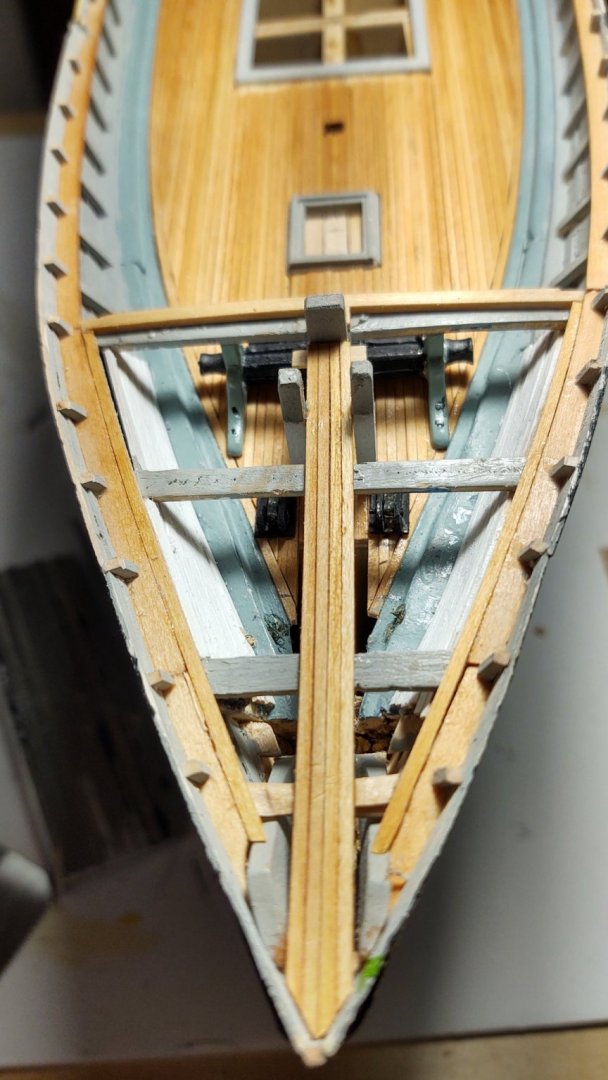
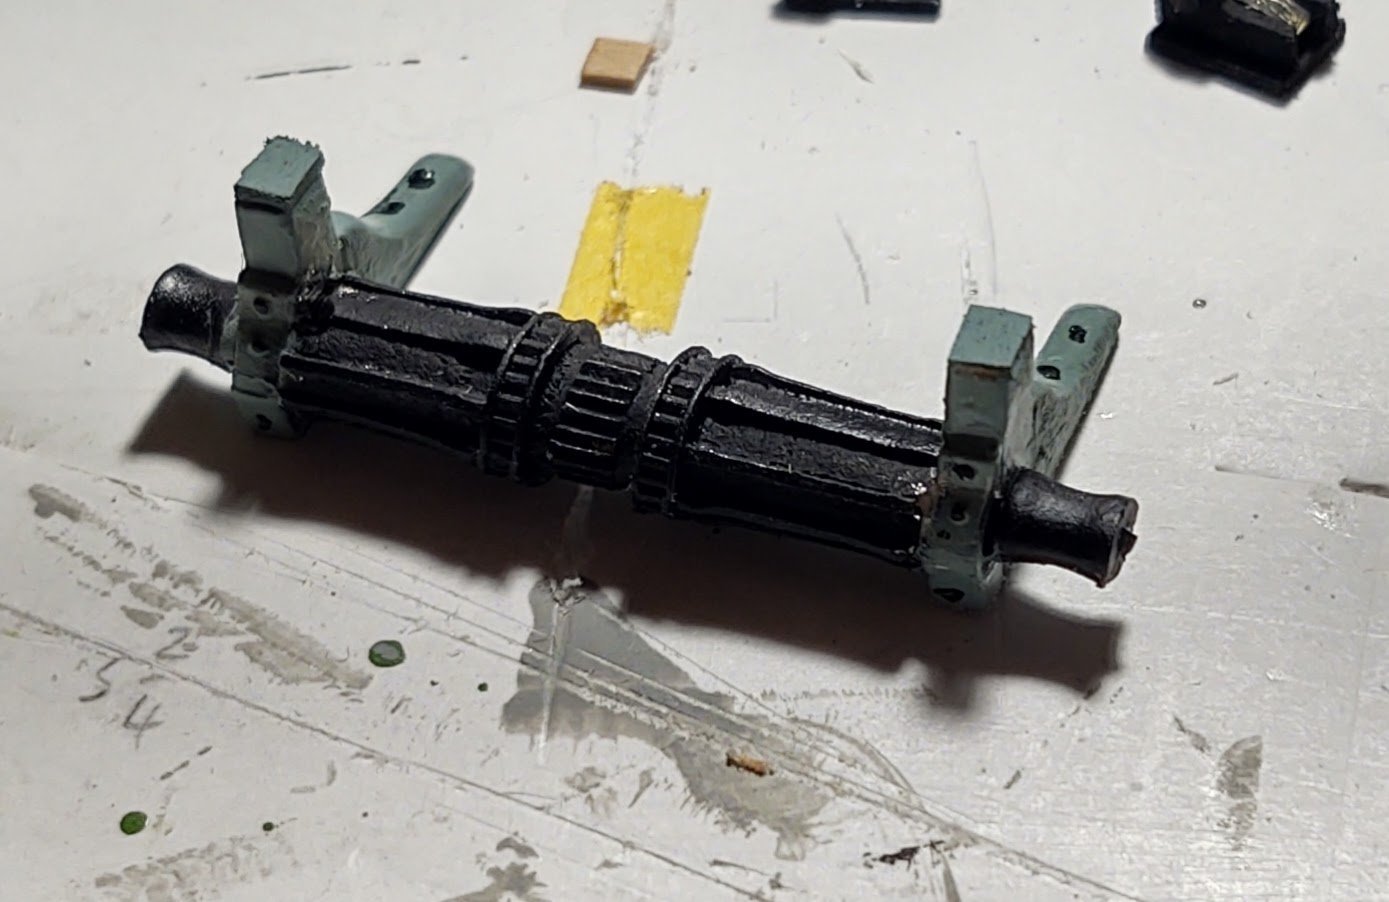
Okay. Initial work on the forecastle. First, the painted cleaned up windlass and the chain stopper (unpainted in the photo) I copied and cut out a template to locate the furniture I then mounted a stained end beam (with two small cutouts for where the knees are going to go, mounted the windlass and the chain stoppers. I didn't put in the troughs - it was getting mighty tight in there and they will be practically invisible (true of the chain stoppers pretty much as well, but it was good practice and will help thread the anchor chain cleanly. Next, I mounted the windlass bitt. As you can see in the photo, I mounted a small piece of wood to the forward side to give the deck planks something to mount on. I then put a continuous strake on both sides of the forecastle deck and then start planking. I did the deck planking slightly differently than the planking on the main deck. The windlass bitt is four planks wide, and so I glued together a section of four planks, which I put trimmed to fit to the bow between the knightheads. Once they were installed I could install the two inboard bitts whose location I had marked earlier. That is the stopping point for the forecastle until the new anchor chain comes in from BlueJacket. Once I have that, I can run the chain through the hawse pipes, chain stoppers and then store the excess under the deck until I'm ready for the anchors. I just don't want to make the interior end of the hawse pipes and the chain stoppers any more inaccessible than they already are until I've run the chain. So, next steps will be to lay out the coamings on the poop and plank it's deck. Thanks for looking in! George K


- 602 replies
-
- 4
-
-
- Flying Fish
- Model Shipways
- (and 2 more)