CDW
-
Posts
7,755 -
Joined
-
Last visited
Content Type
Profiles
Forums
Gallery
Events
Everything posted by CDW
-
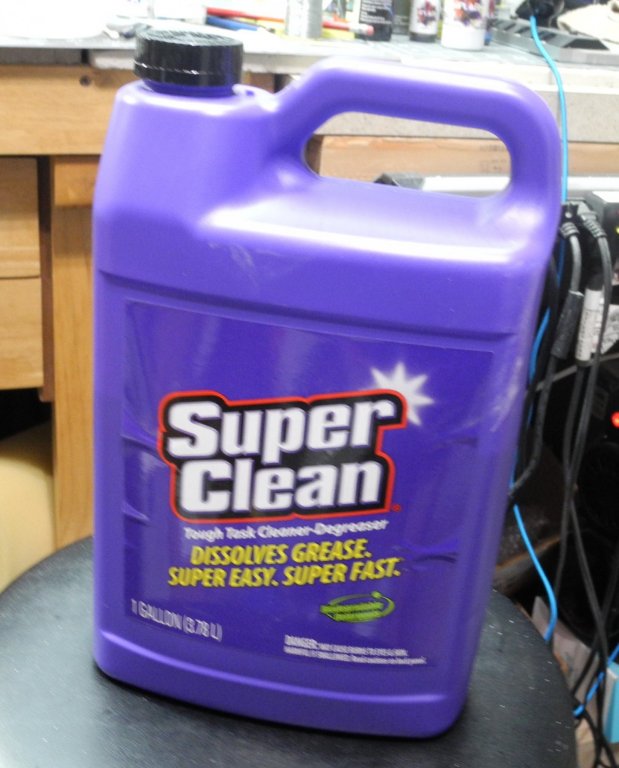
 No, it doesn't harm the glue joints at all. By the way, this stuff is designed as a cleaner/degreaser as shown on the label, but it is so strong, it will remove your auto paint underneath your hood if you leave it on too long. Oxidizes polished aluminum, too.
 -
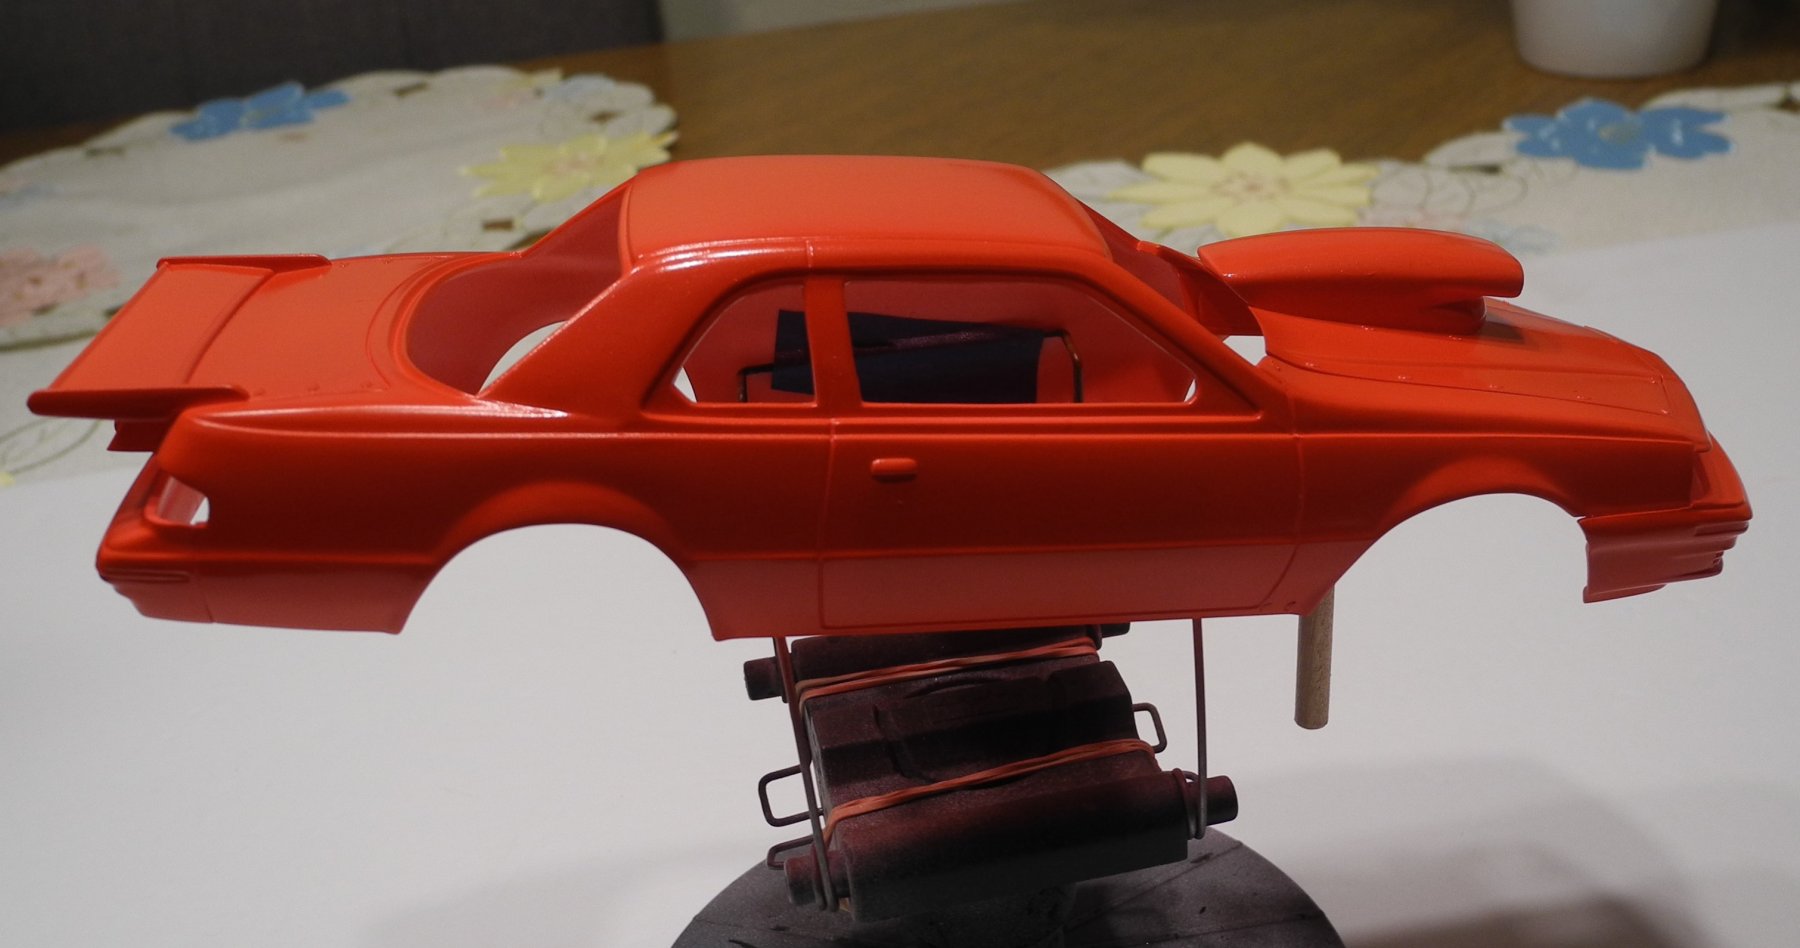
Decided to paint the body in Createx Wicked Pearl Red. That's an acrylic paint. It has no clear coat on it yet. The clear top coat should really make the color pop, and the pearl stand out. When using these pearl colors, you can get a lot of variation according to the base coat. Mine is painted over white primer. Either a silver, gold, or copper, could give an entirely different look to the finished pearl red. Going to give this a little time, then put the clear coat on later today.


-
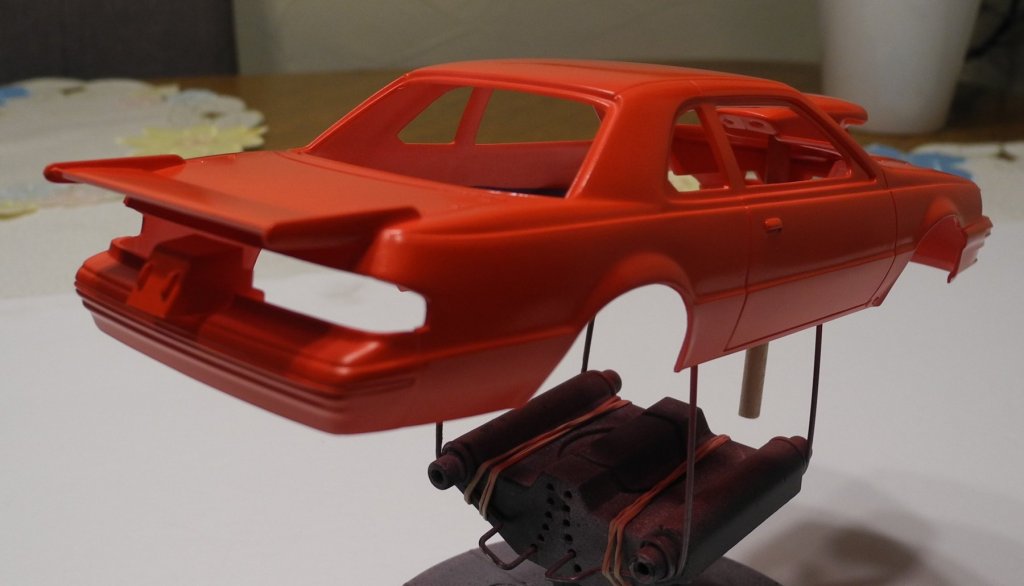
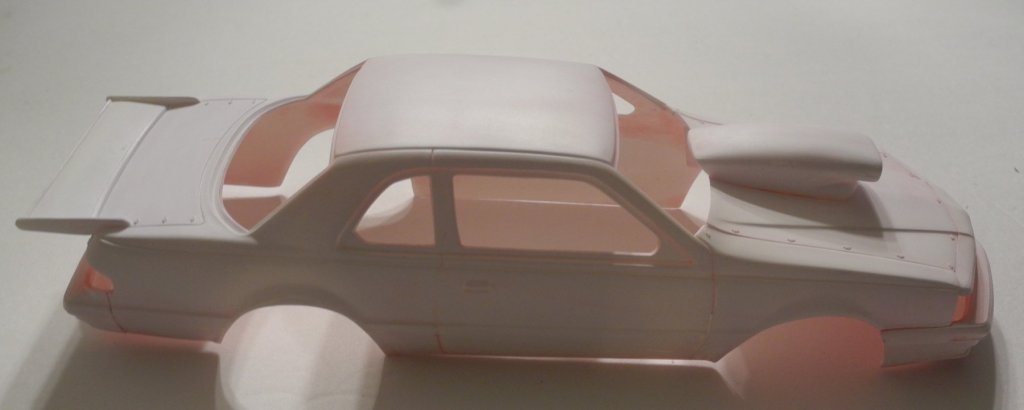
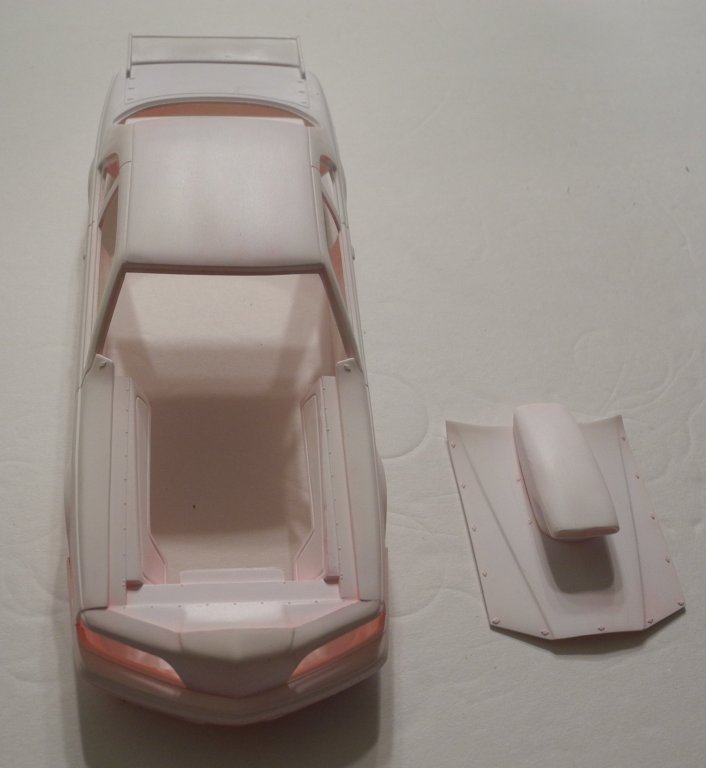
Stripping Paint and Decals off a Model Just to share the total experience, thought I would share my magic weapon secret for paint removal and decal stripping. It's even perfectly safe on clear plastic parts, too. Won't fog or screw up clear plastic if you happen to have windows glued in. In your local WalMart, head over to the automotive section and pick up a gallon of this product. It costs about $8, and will last a long time, years even, as long as you keep the lid sealed tight. I take a gallon size freezer zip lock bag, put my model parts I want to strip inside the bag and fill it with just enough Super Clean to cover the parts. Seal the zip lock bag and let the parts sit in that Super Clean bath until the paint comes off. Happens almost instantly on chrome parts, and it took only a couple of hours to strip off all that red and white paint on my model car body. Use an old tooth brush to scrub away any stubborn spots and/or let it soak in the bath a little longer. Now I have to warn you, do not put your bare hands into this stuff, because it's very potent and will do undesirable things to your skin. Probably will be absorbed into your system through your skin. So wear a good pair of latex gloves when you're working with it. When I am done with my paint stripping session, I pour the contents of my strip project right back inside my container and use it over and over again until it loses it's strength. But that's going to be months if not years away. Here's what my car body looked like after a 2-3 hour bath. Slick as a whistle.

-
Ed I've never needed to contact Pontos, so I am interested how you requested the missing parts. Did you contact them via email or ??? Never know when I may need to do the same, so would like to be prepared.
-
Good article, Mark. Enjoyed that reading.
-
If you mean recreating the Bob Glidden graphics, no, I can't make those same graphics as depicted by the decals. Beyond my abilities. If you mean, can I create my own paint scheme using masking tape, yes certainly. But a car like this needs graphics and for me, that means at least sponsor decals. Those I must choose from some existing commercially available set.
-
The body is in the strip tank now. All the decals and paint will have to be removed. Thinking about doing a custom, fictional paint job. Digging in my stash now for the next project. Decisions, decisions. 😎
-
The kit has been out of production for way too long so I doubt they would have any laying around, but who knows? Secondly, Revell (USA) went out of business a while back, so I don't know who's in charge anymore.
-
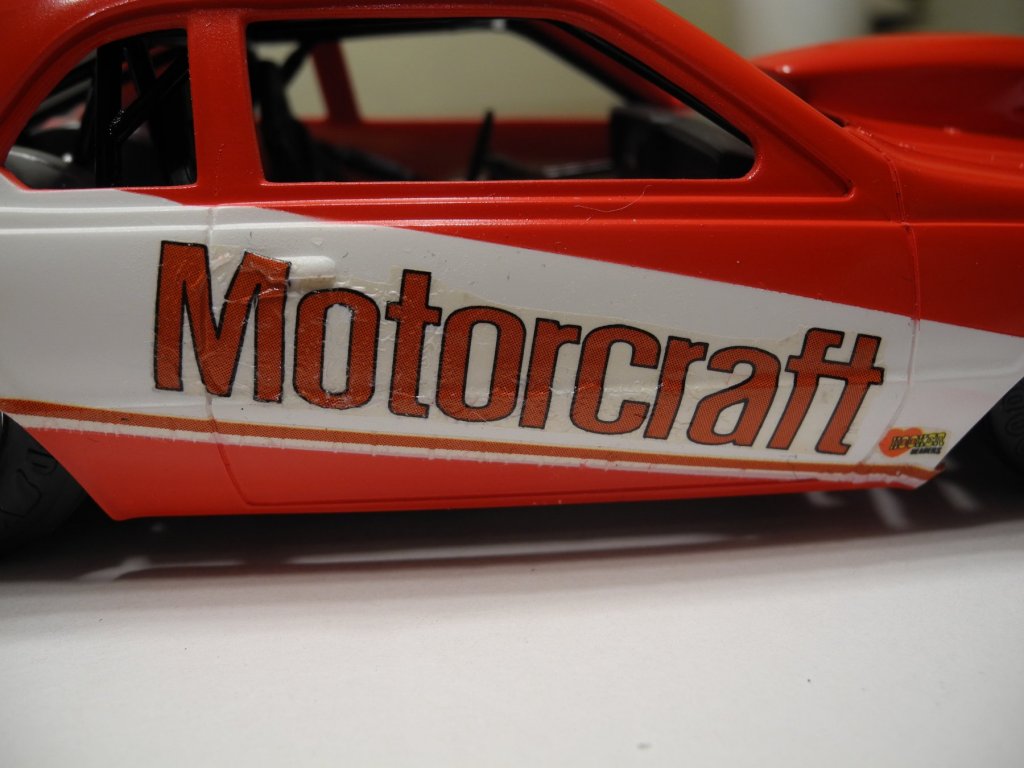
As much as I hate to do it, I am going to strip off the decals I put on so far, then put this model on hold to finish until I find a good set of decals for it. The decals are not laying down properly and decal solvent won't help fix the problem. It may take a while to find a good set, but I don't want to continue it as it is. To be continued....
-
That is beautiful, an amazing piece of engineering. I have never seen a crane like this at work. Must cost a fortune to have one of those on a job site.
-
They are holding together just fine. The trick to saving them is the clear acrylic top coat (Pledge/Future), but it also makes them more difficult to lay down and conform to the shape of the model because they are now thicker. Even a potent decal solvent like Solvaset has a difficult time softening the decal so it lays down to conformity. Will have to give it over night to celebrate success or cry uncle, don't know yet, but so far, so good.
-
The ship and the crane look amazing, Semore. Beautiful work on both of those. I am curious about the crane...is this a crane as one might see when a high rise is being built? I see what looks like a huge number of counter weights. What is the scale of that model?
-
Thanks for the kind words, Denis. I already started laying down the decals tonight. If they are dry tomorrow evening, will start putting on the clear top coat.
-
These are a refreshing break-away from ship modeling. By comparison, they are cheaper to build, much faster to build, and just an enormous amount of subject matter to choose from. Eventually, I will want to build a ship model again, but right now, I have some very interesting (to me) other subjects to do.
-
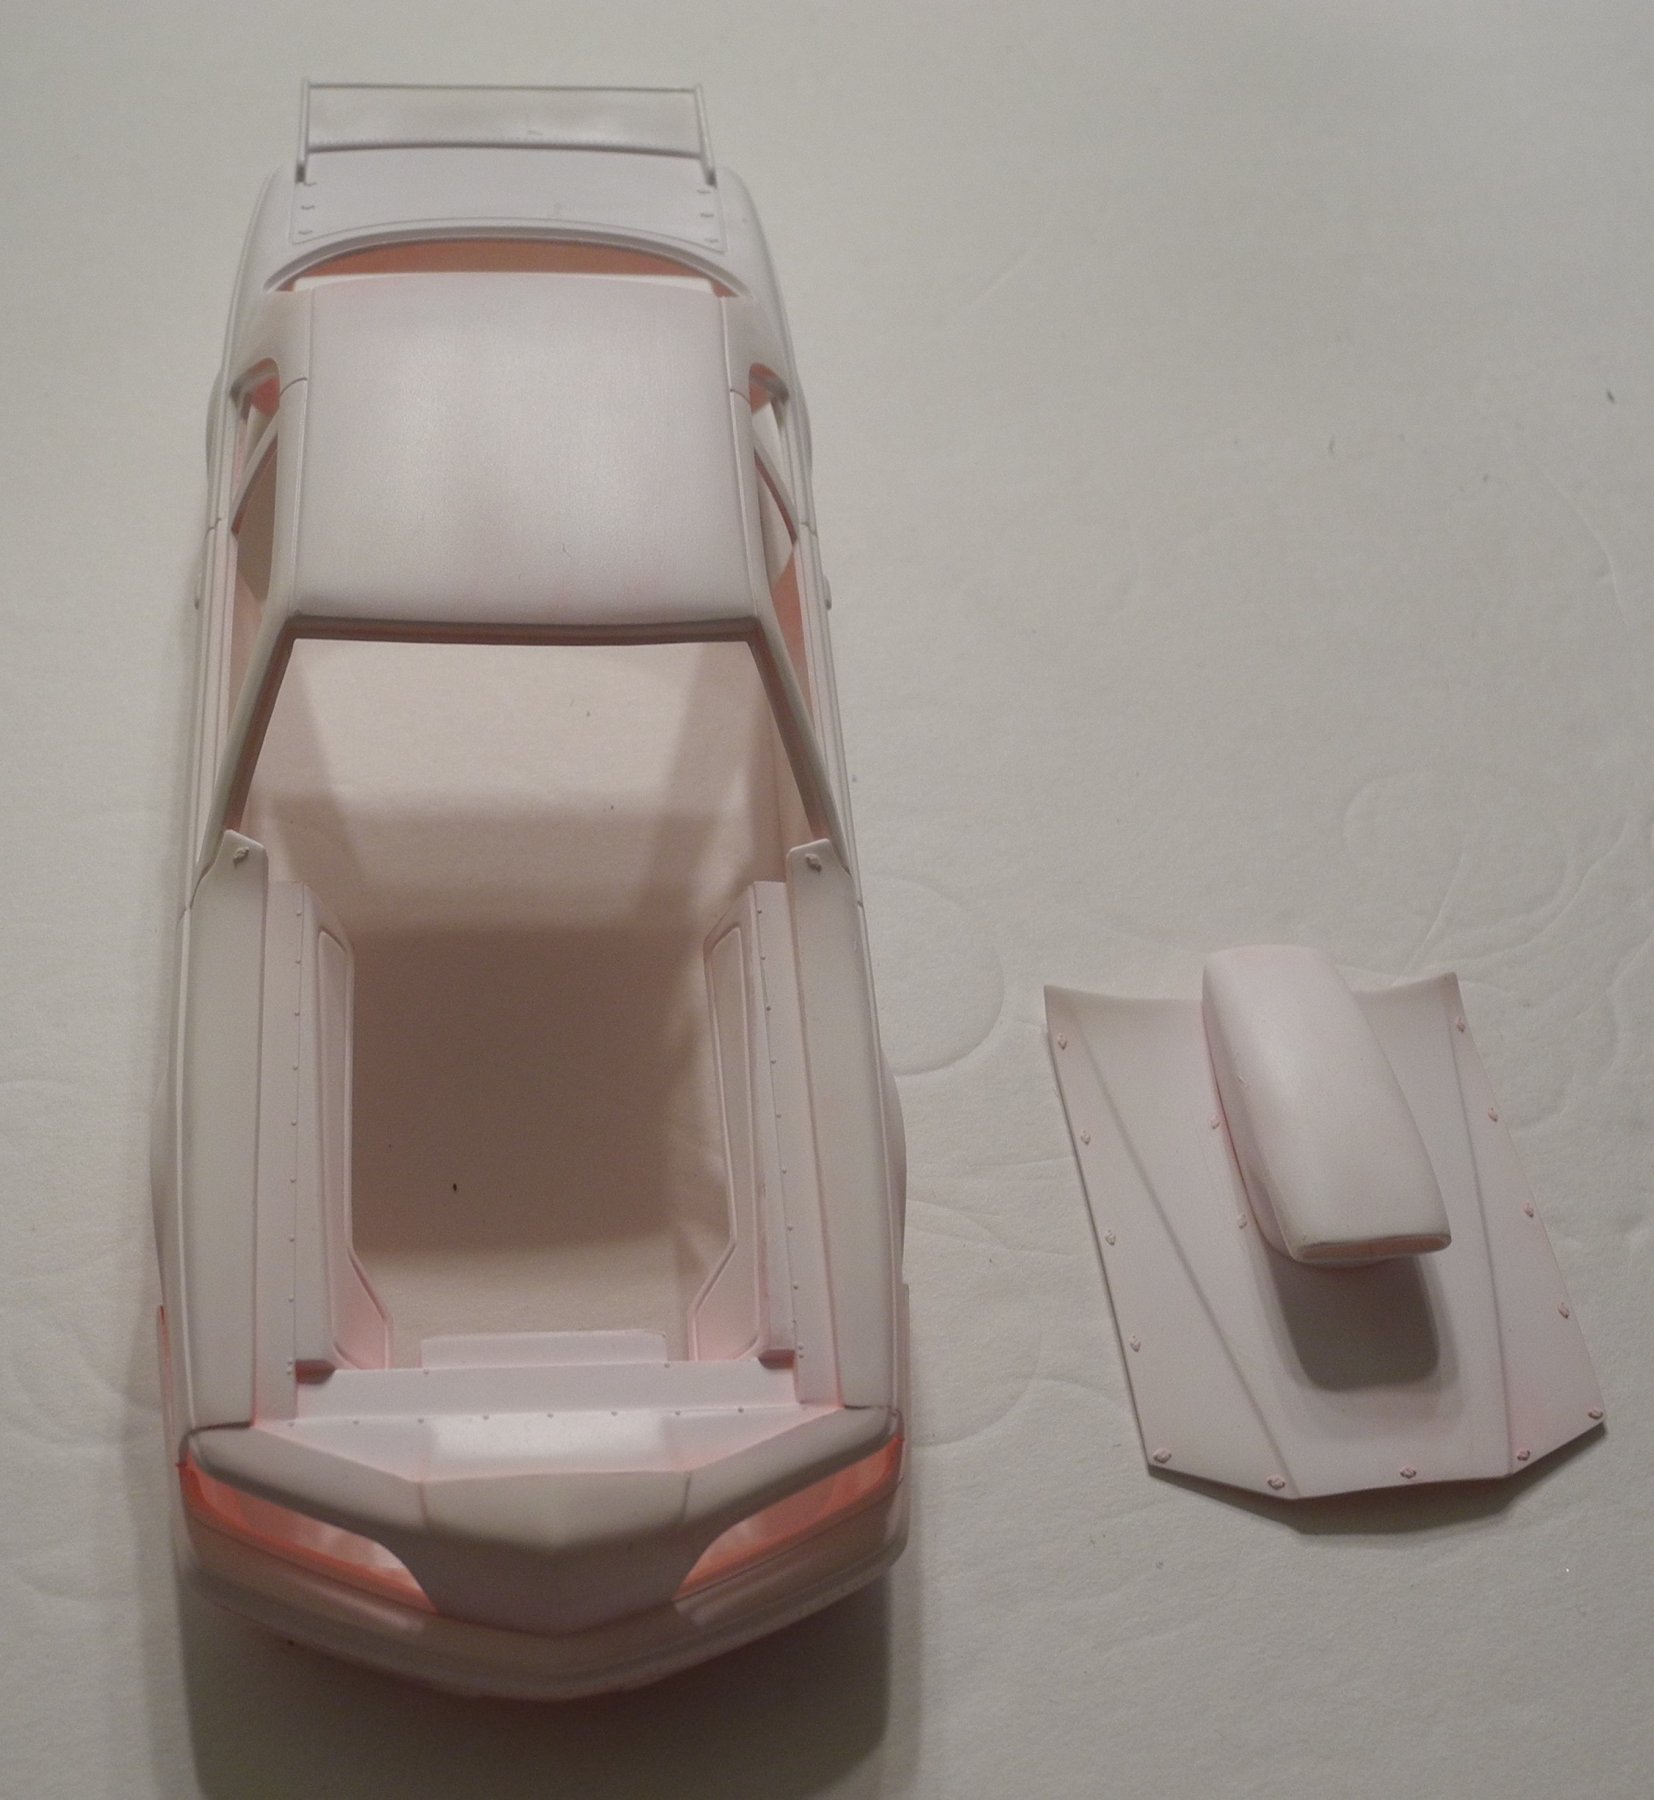
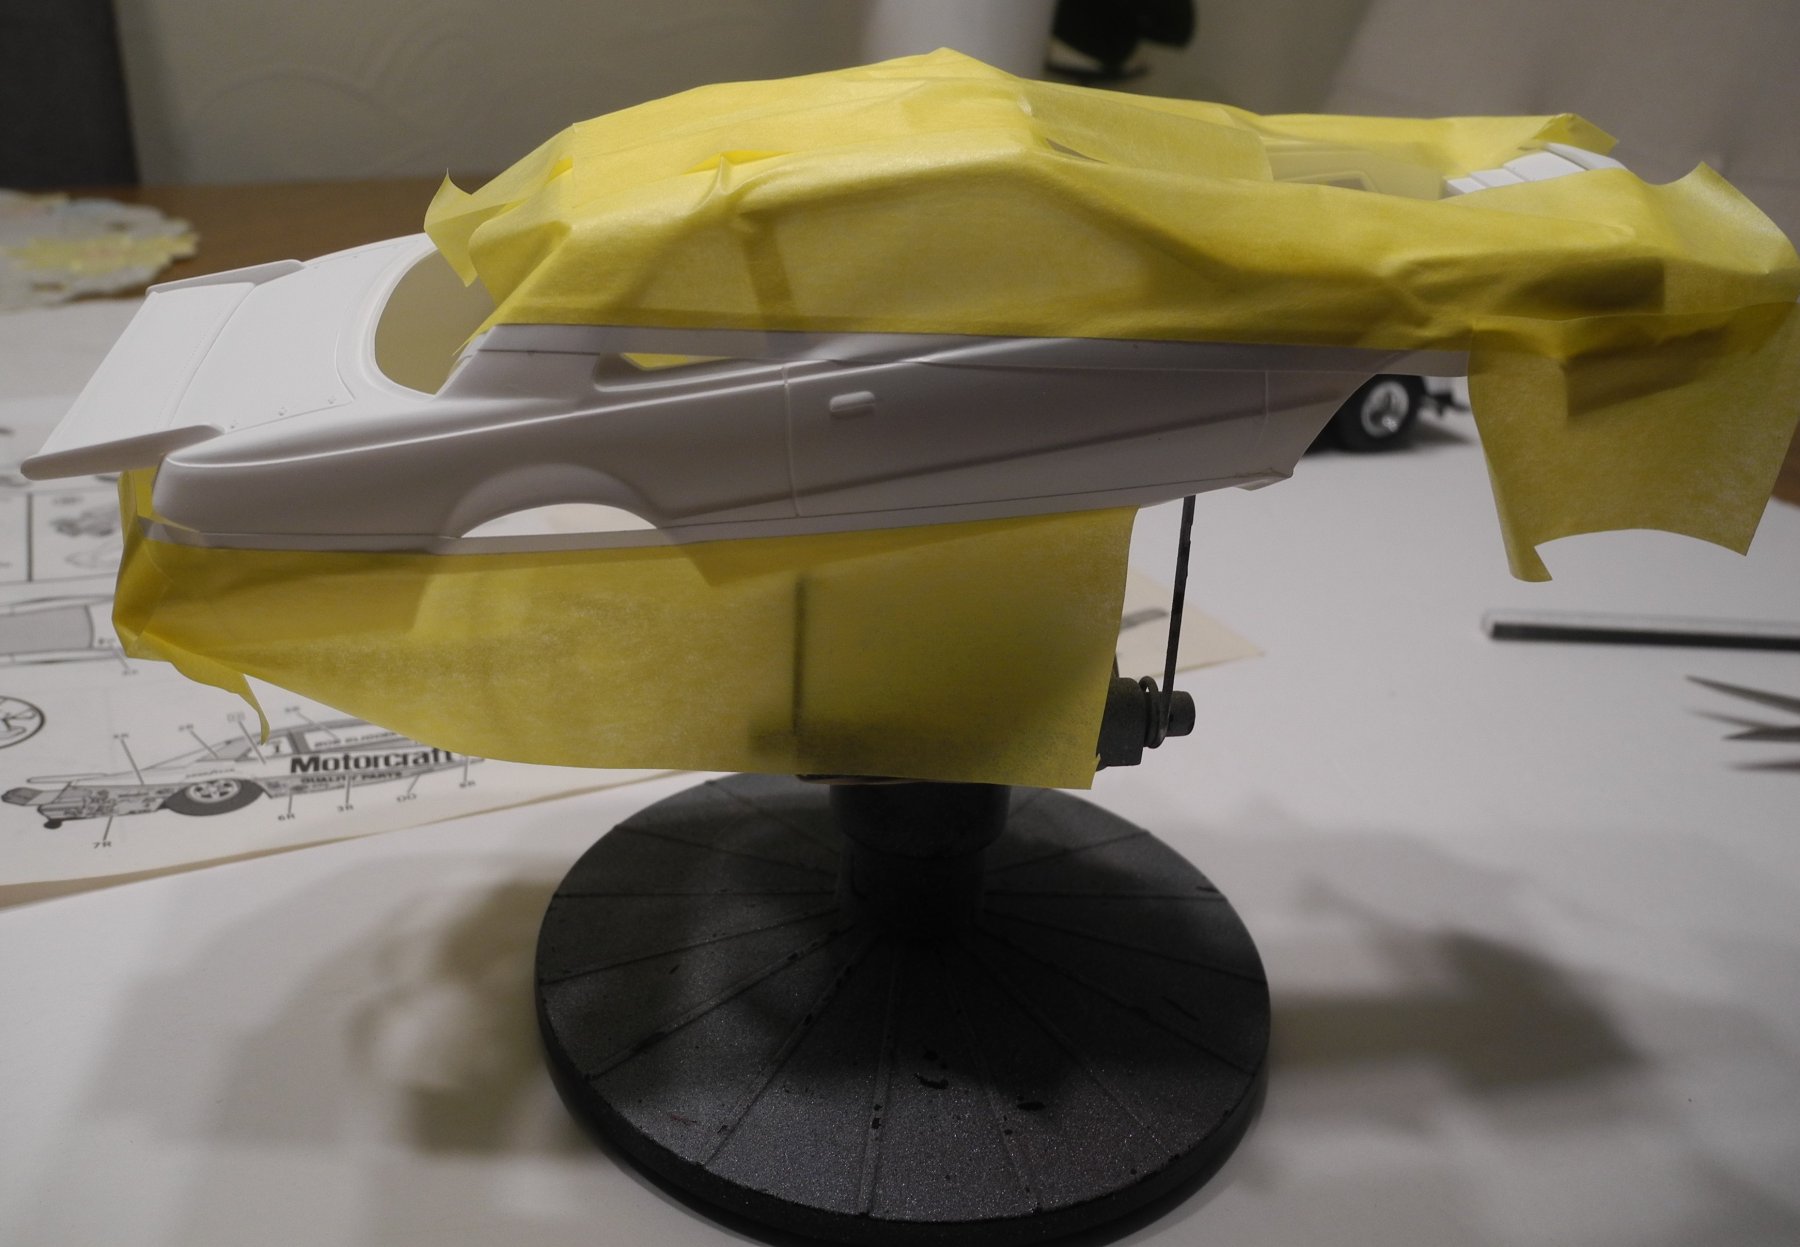
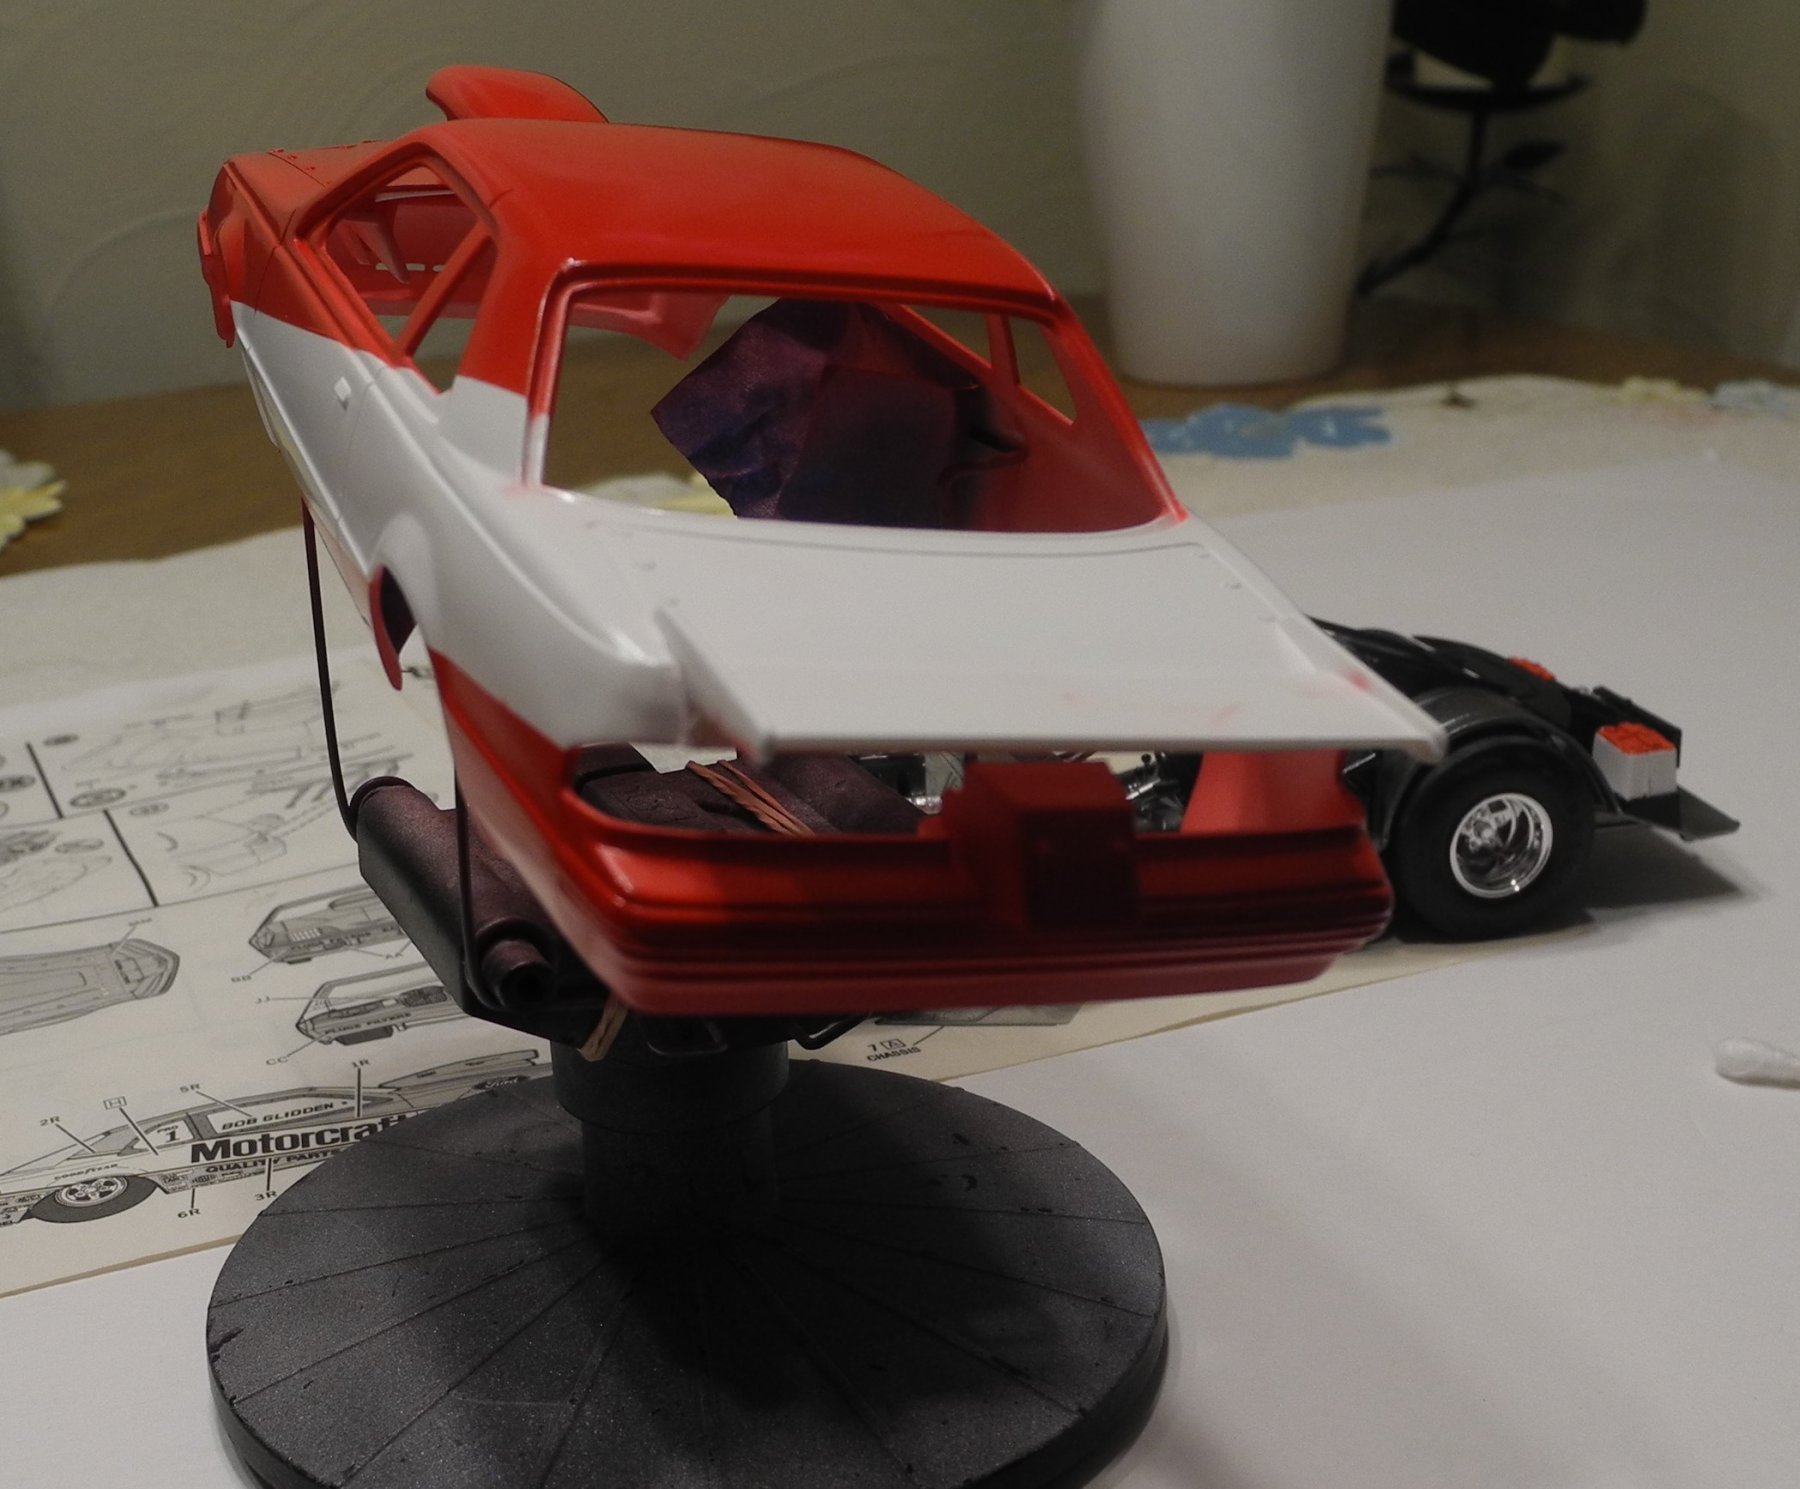
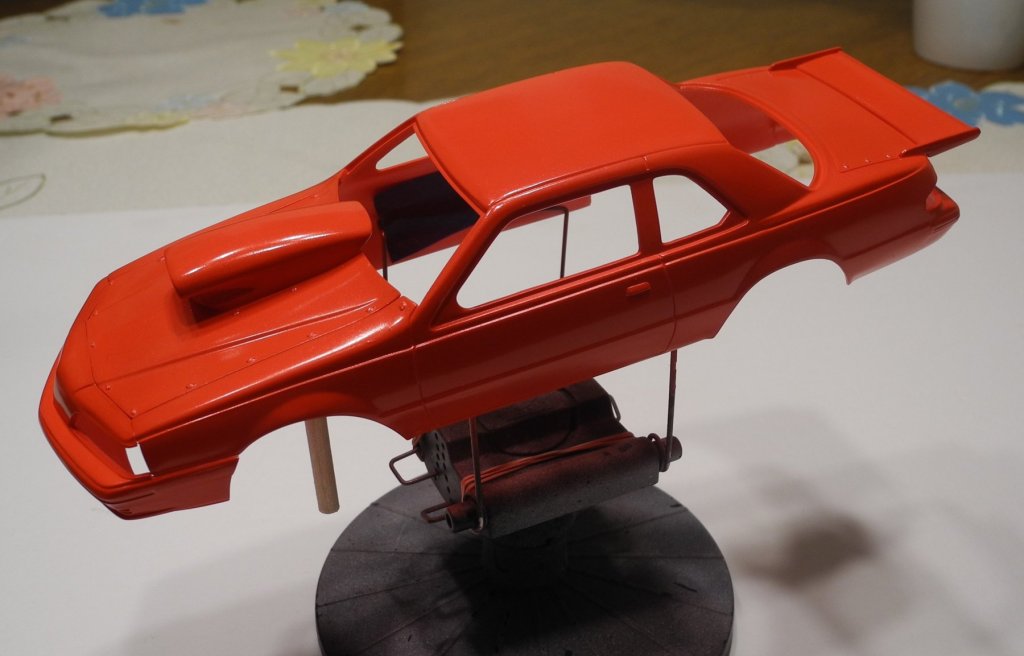
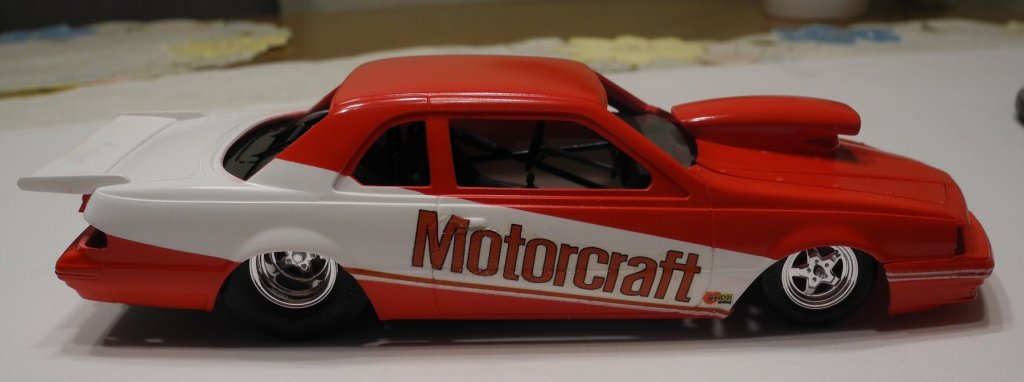
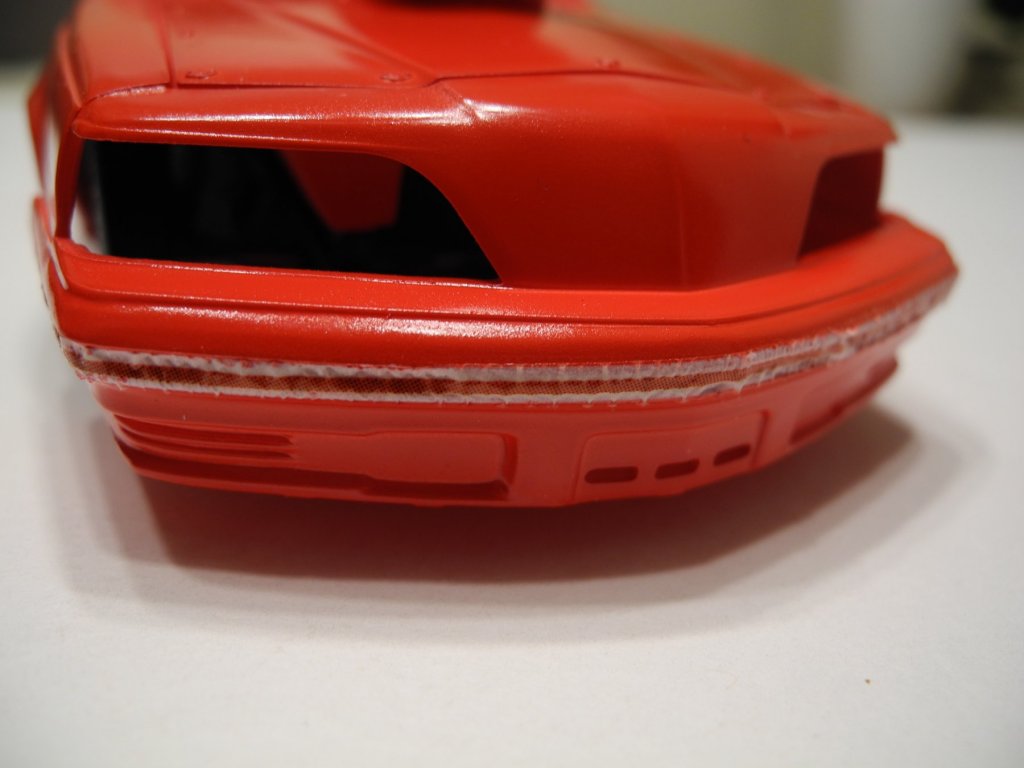
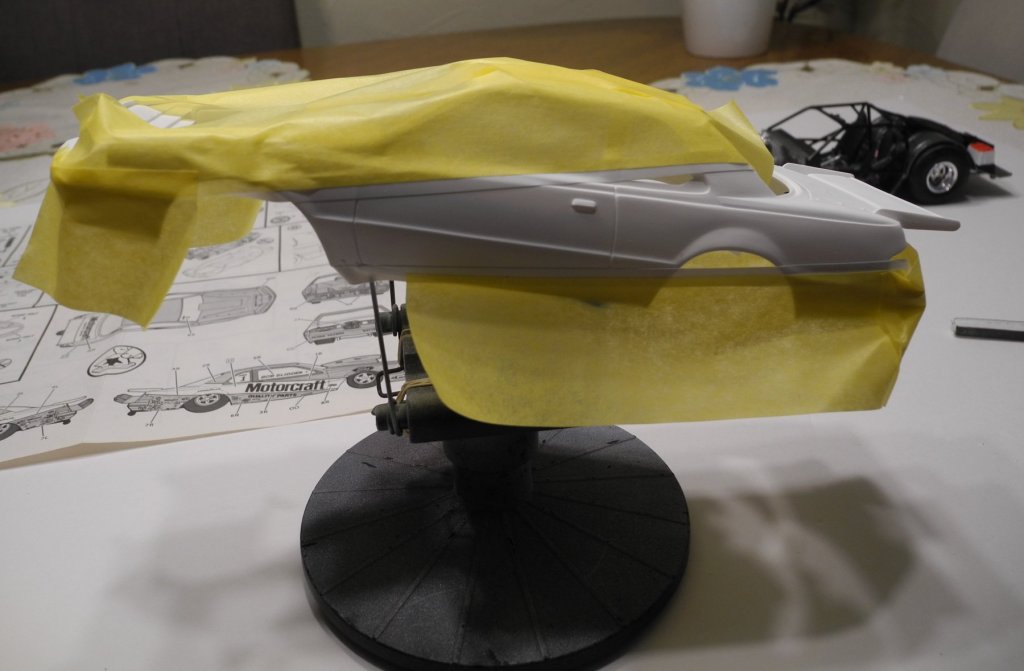
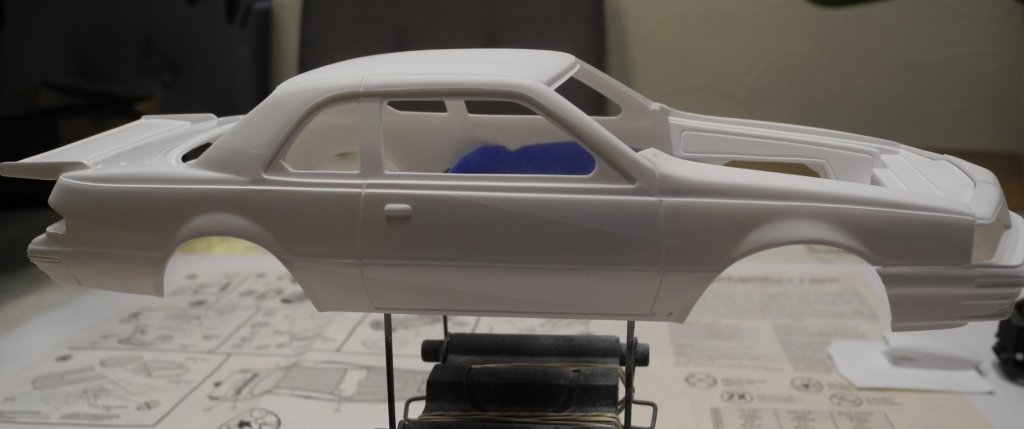
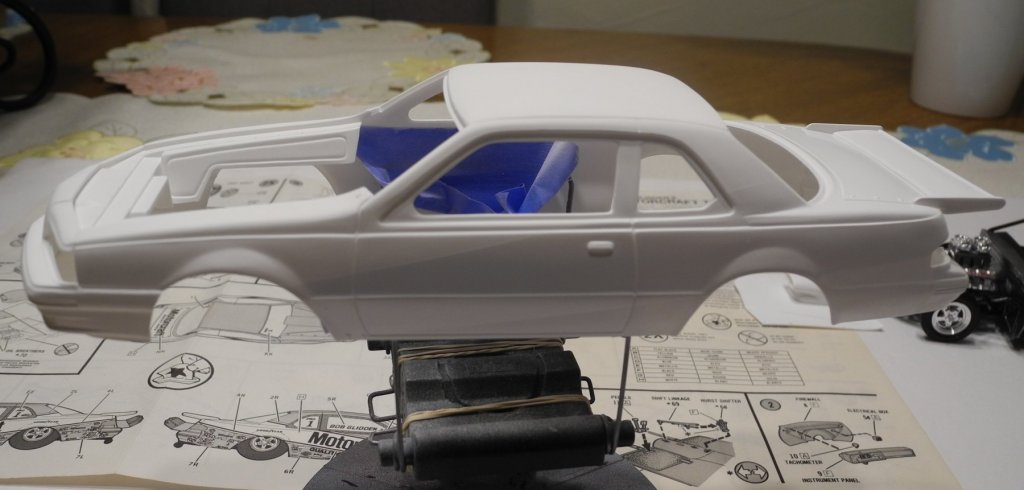
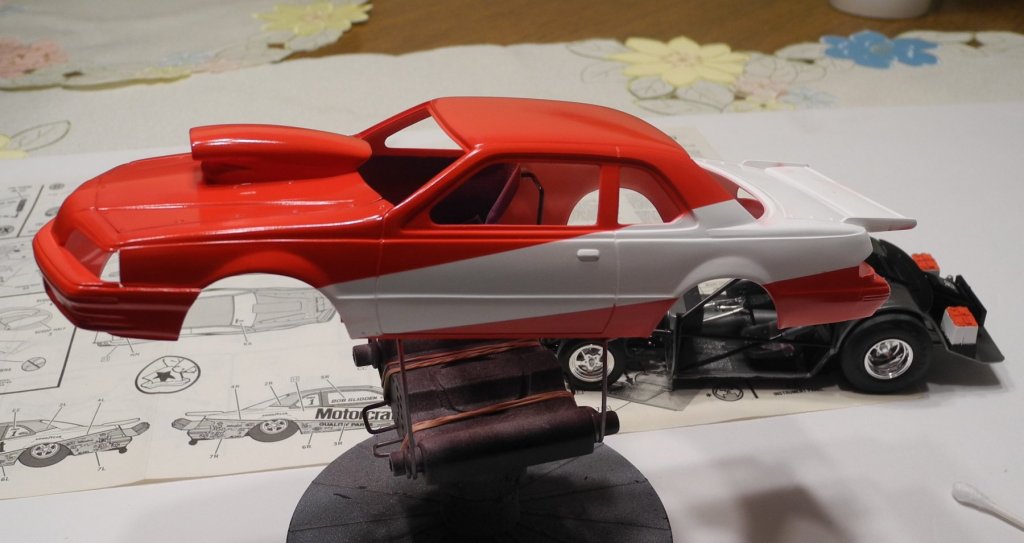
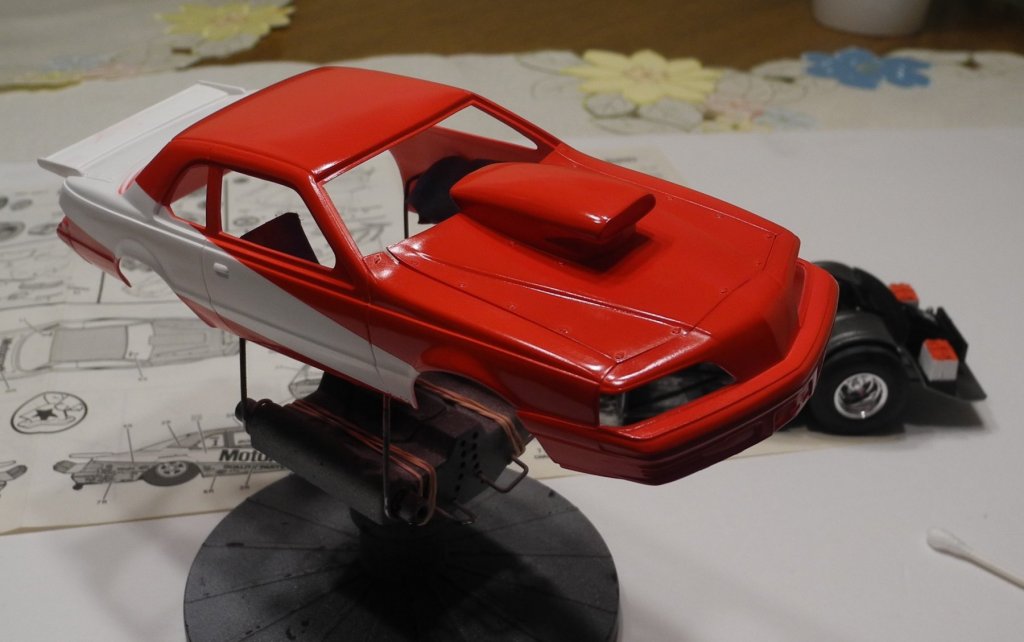
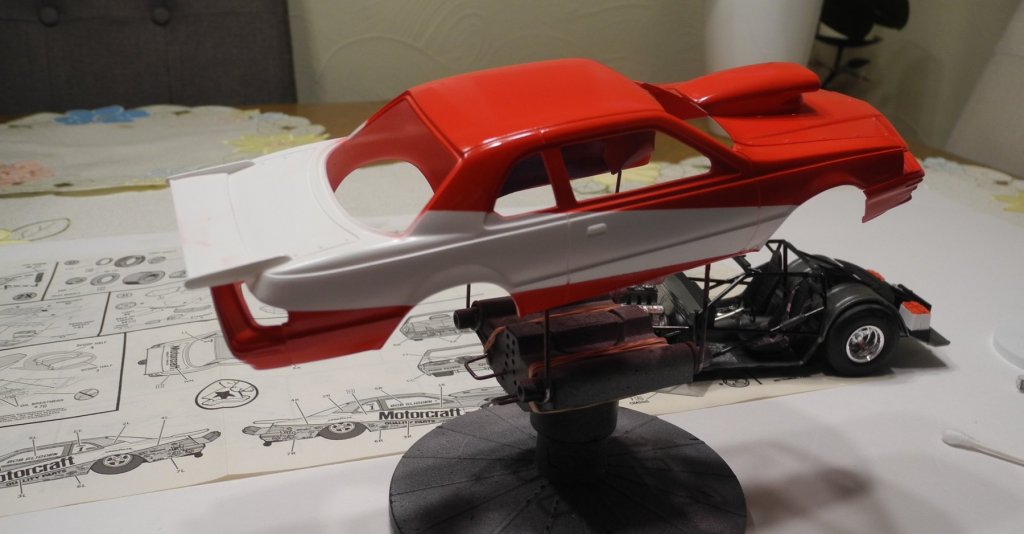
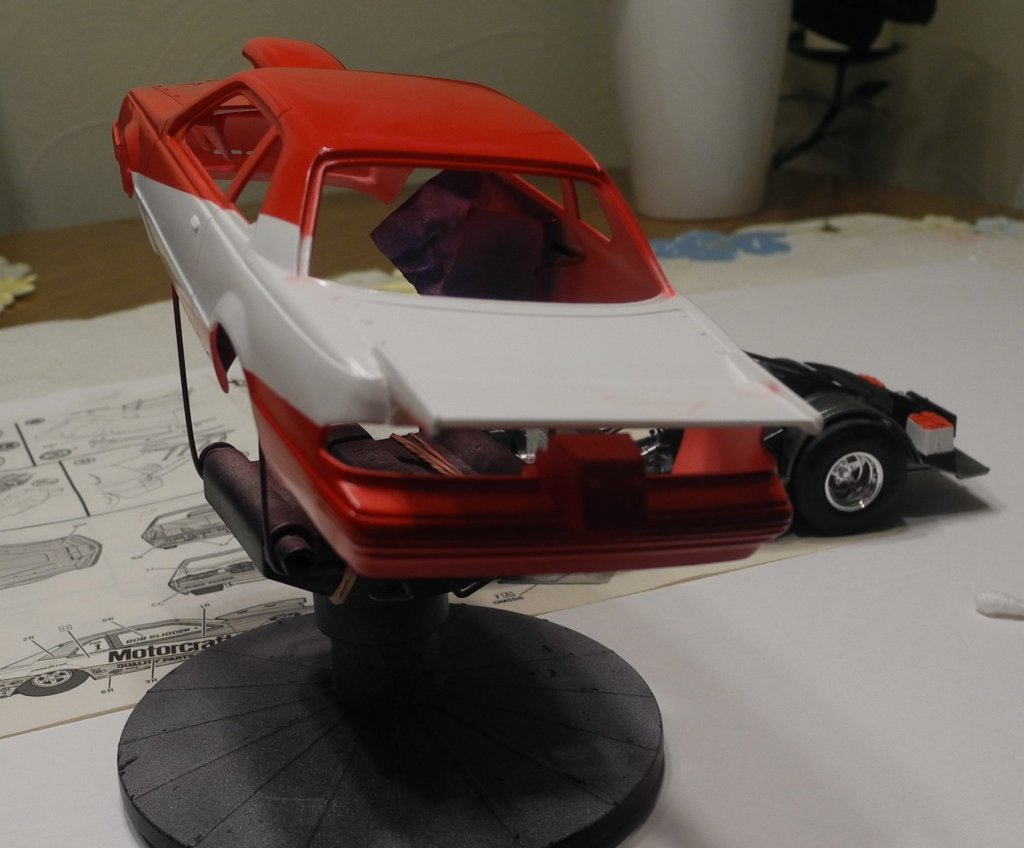
Body Work and Paint Day Today was body work and paint day. It started off with a round of sanding the entire body with 2000 grit wet or dry paper to make sure it was nice and smooth with some tooth for the primer to stick. After that was completed, laid down the Tamiya white primer. Here she is in primer: Next masking is applied for the white panel to go down. Here, I used Tamiya gloss white acrylic through my airbrush. After painting the white and masking is removed, you can see the mask line/s. When I mask for red, I mask right along the raised line where the gloss white went down. This way, when the red goes down, it blends right in and more or less makes the raised line invisible. Here, the red (Tamiya gloss red acrylic through my airbrush) has gone down and now all that's left is a few touch-ups where some minor over spray got on my white. Tomorrow, the decals will go down (fingers crossed), then Monday everything will get a clear top coat to seal everything up and make this baby slippery-shiney...the wet look.


-
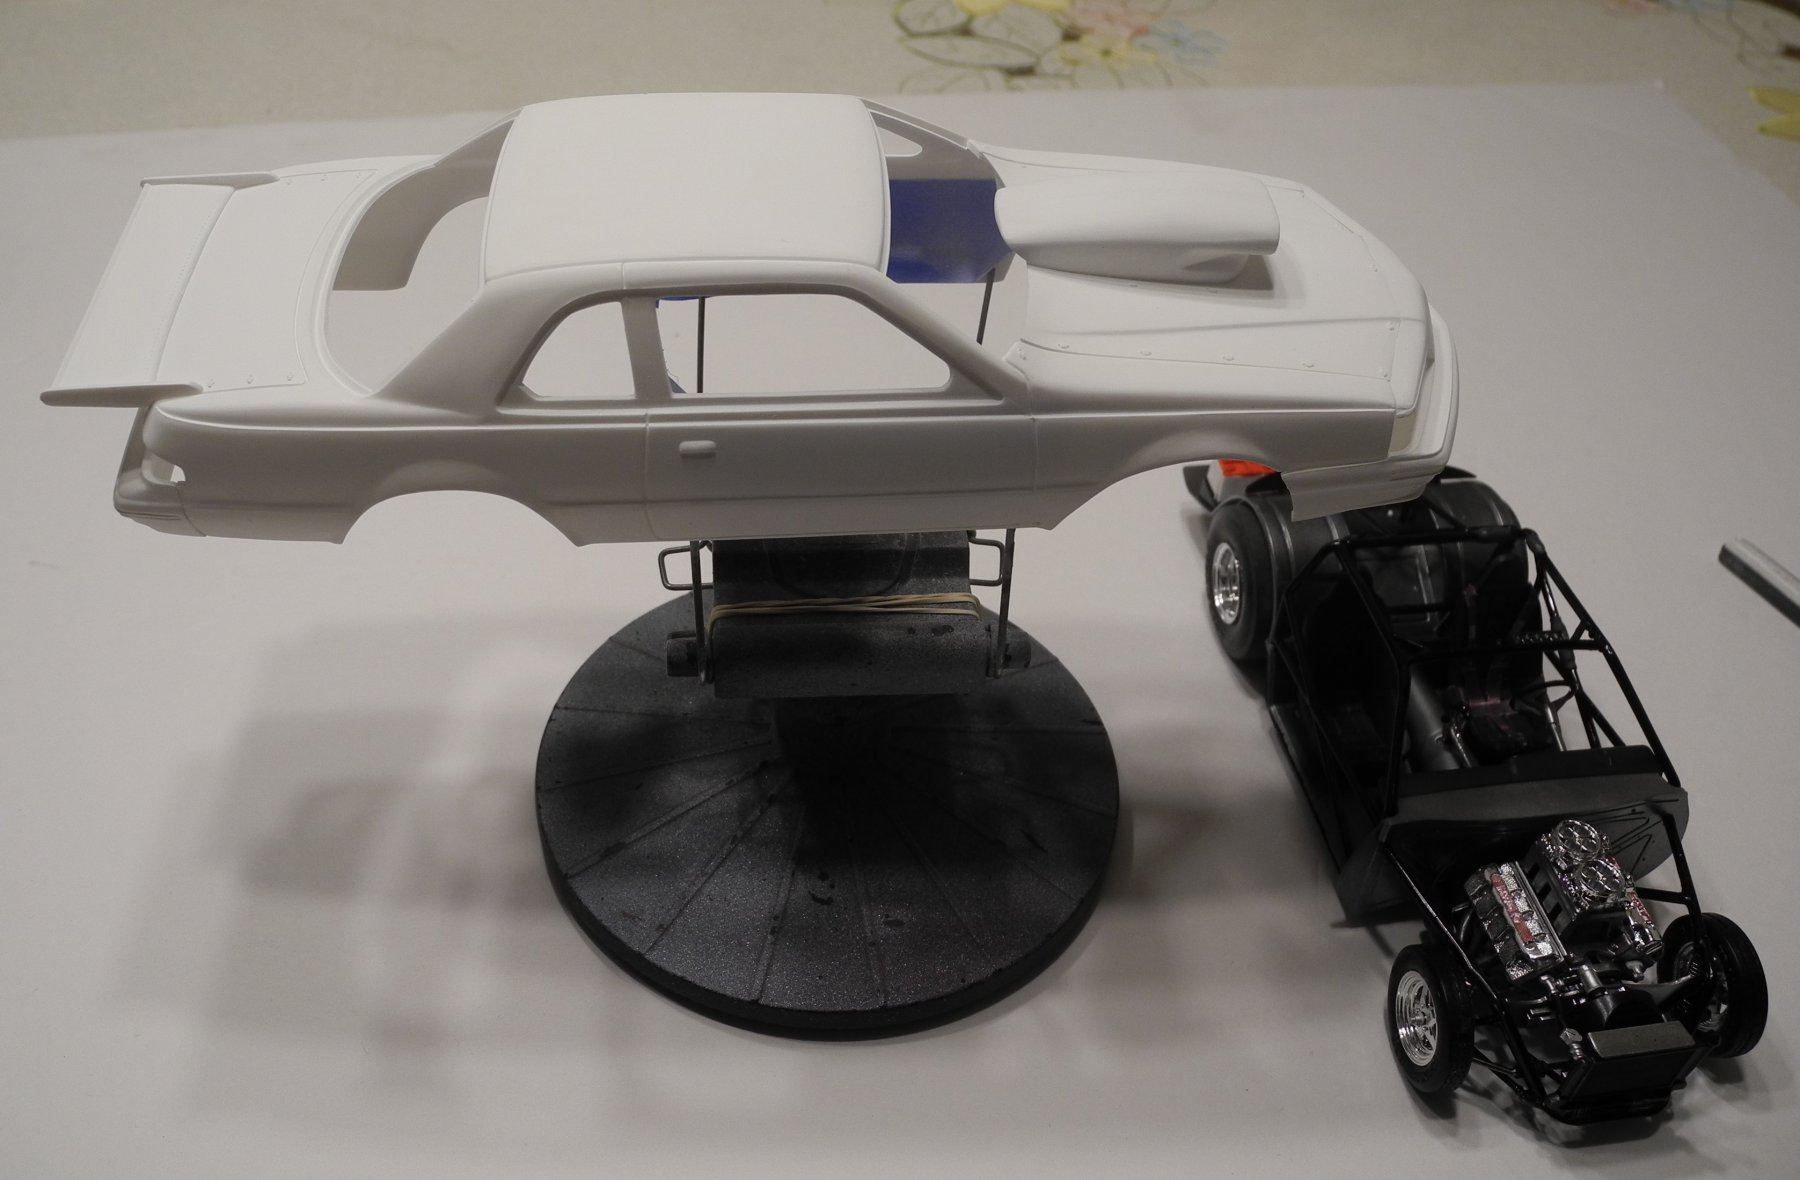
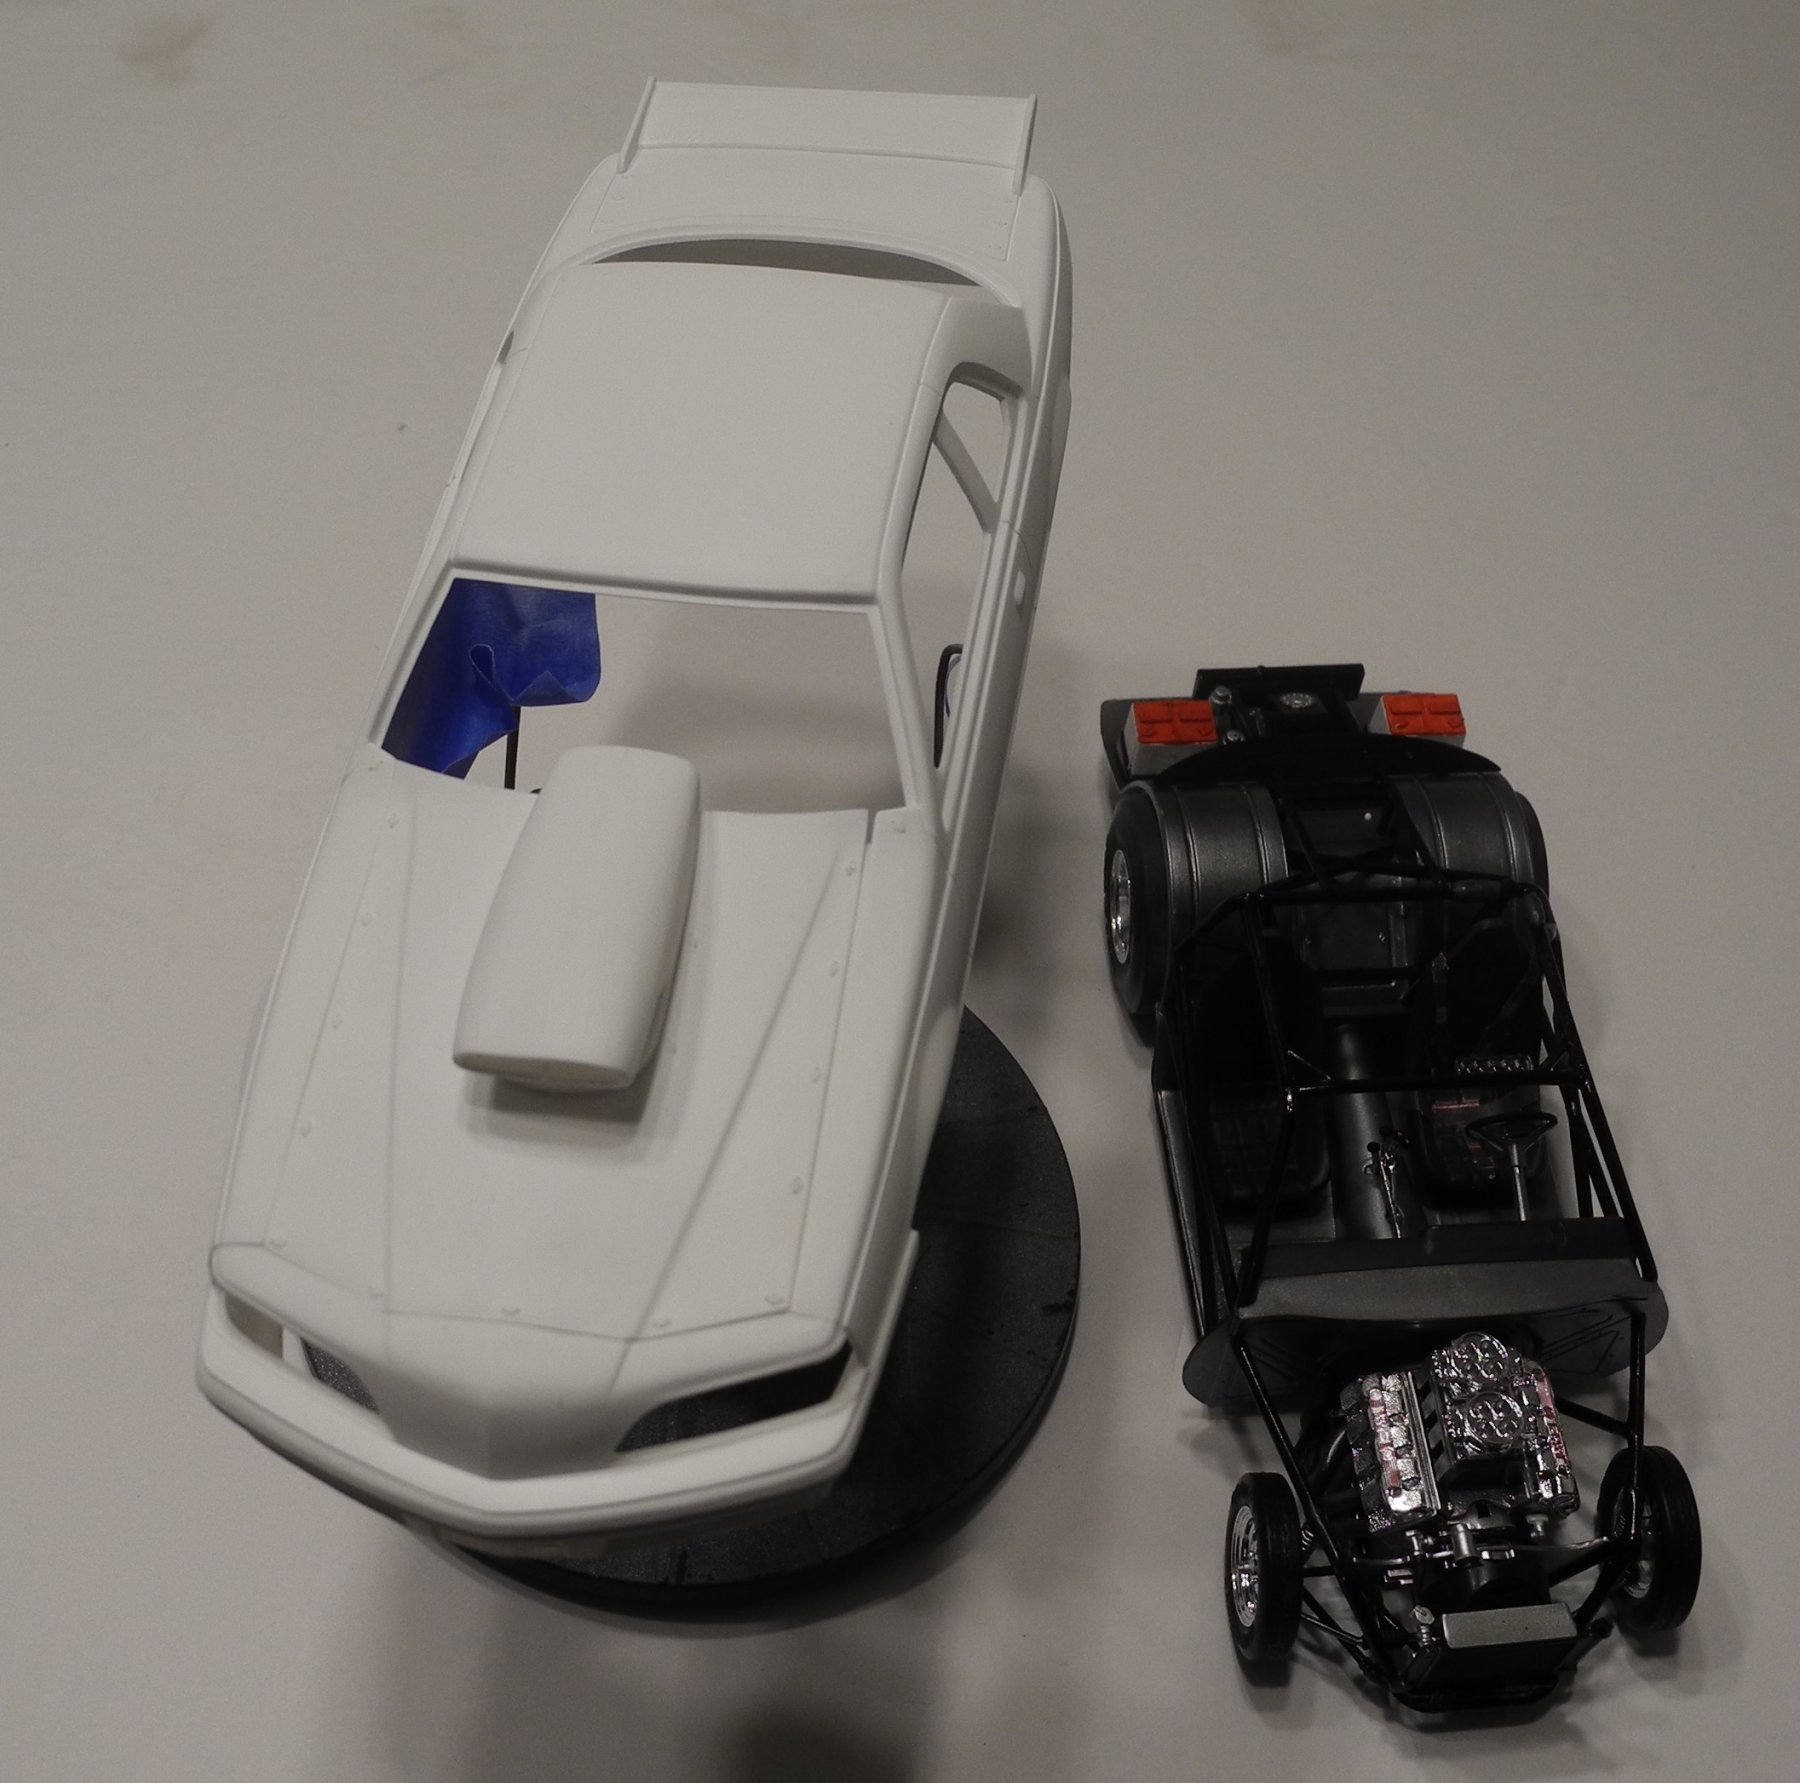
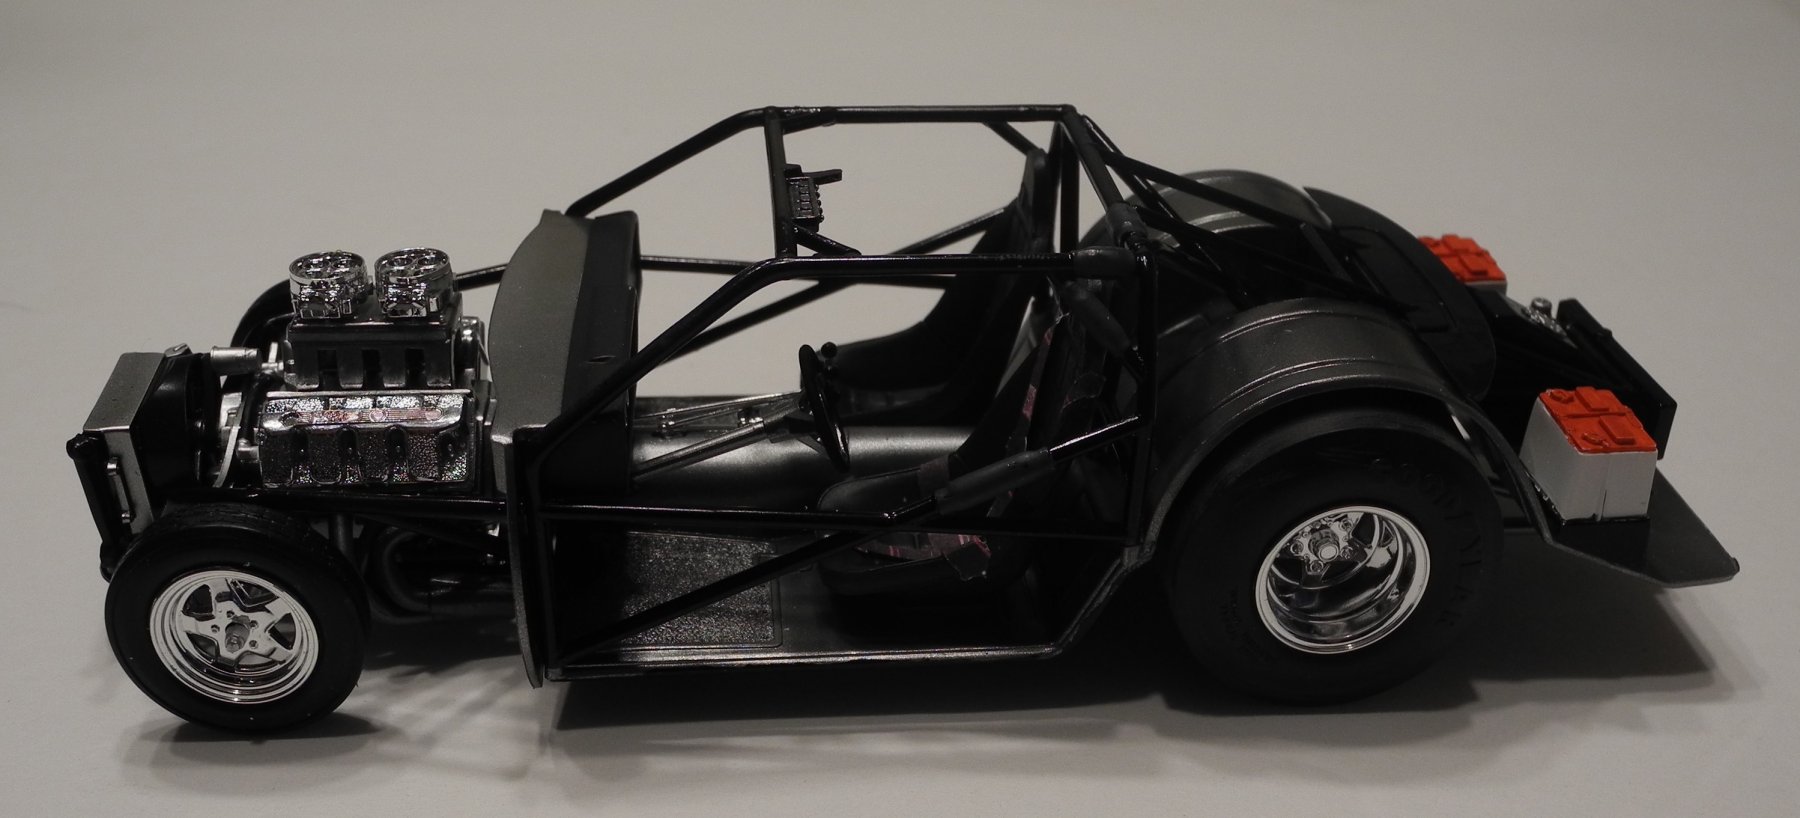
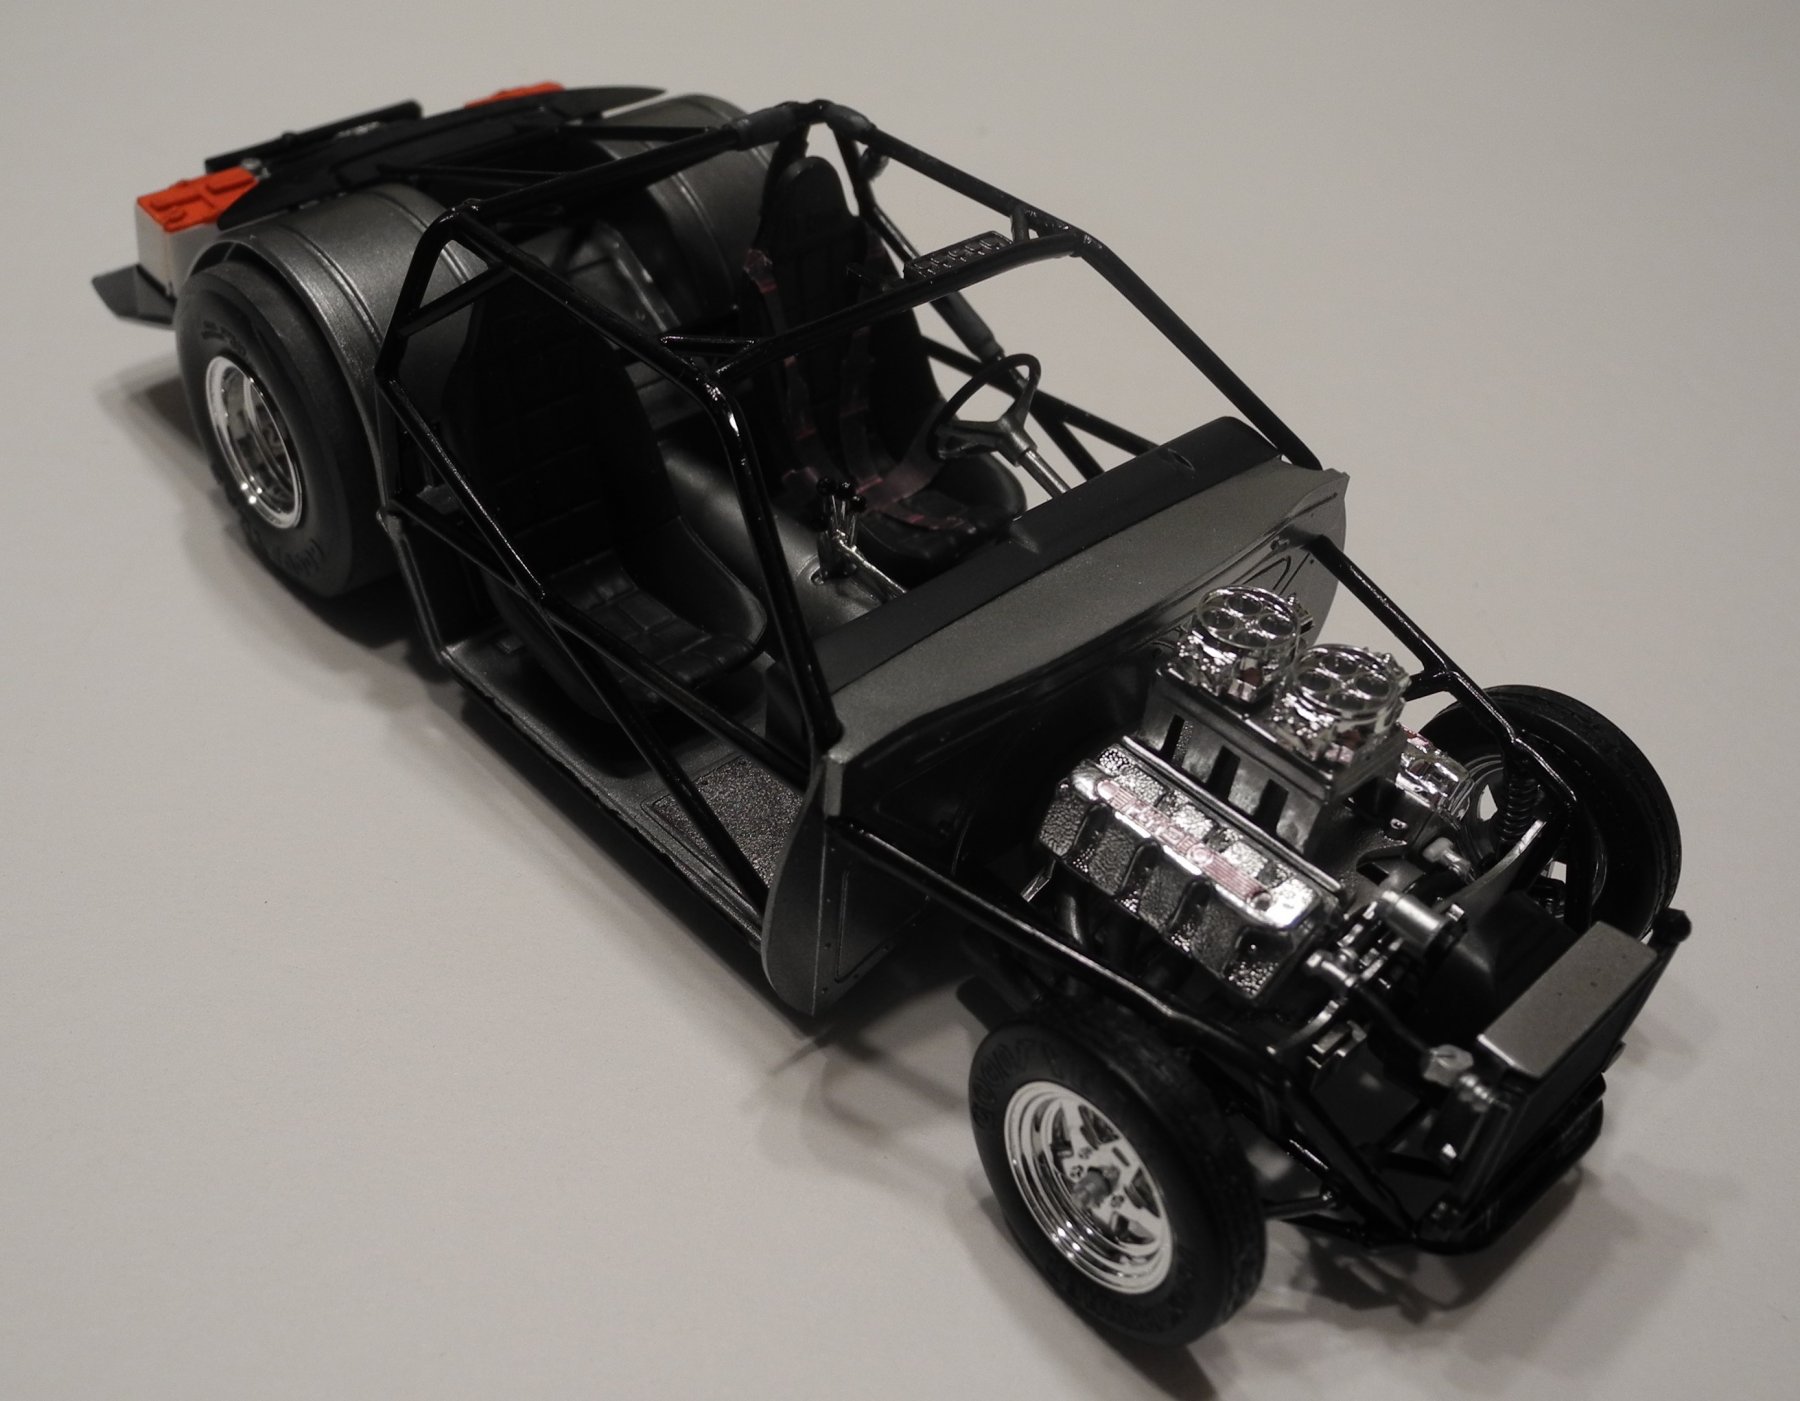
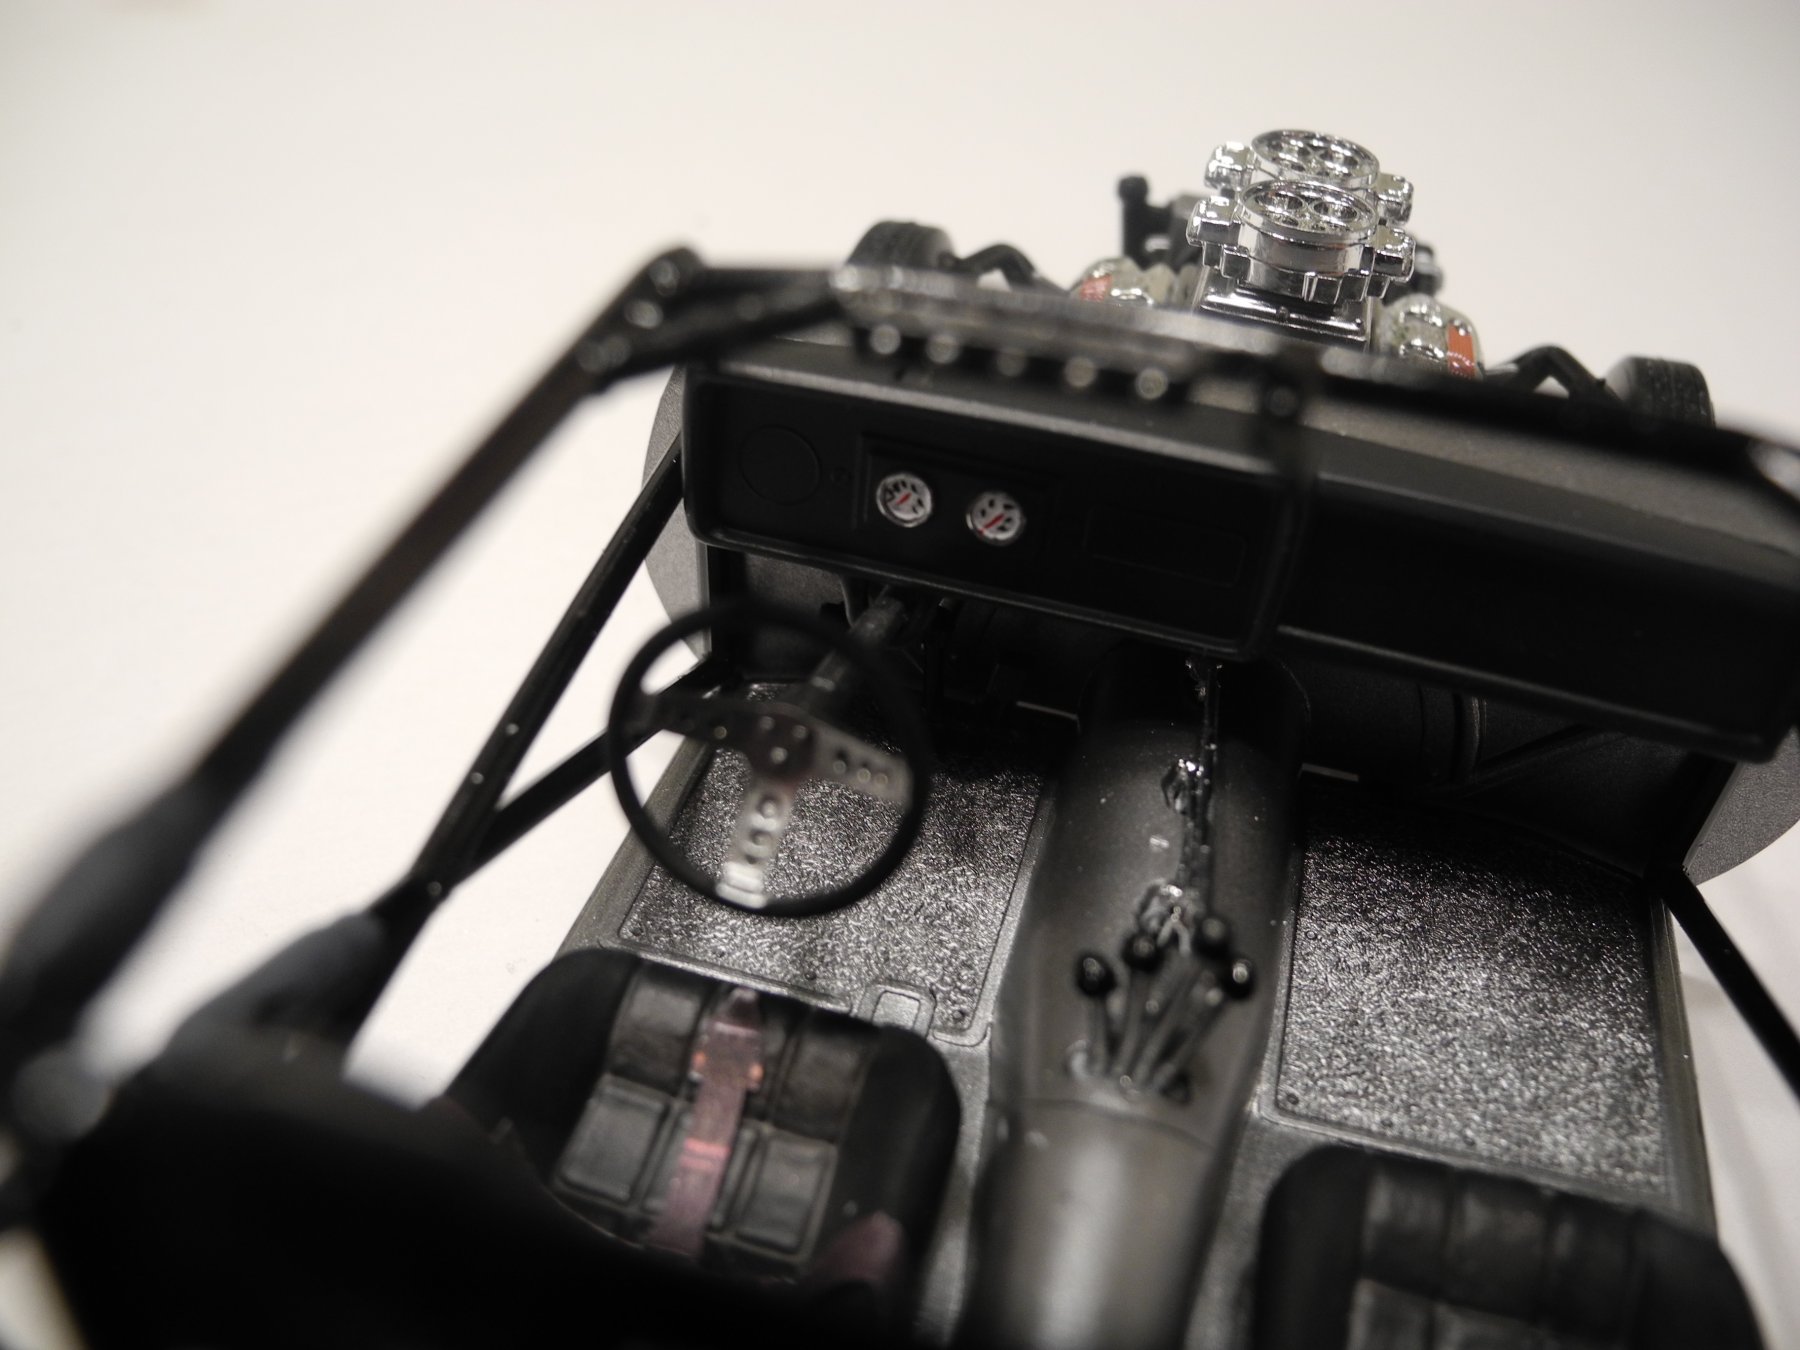
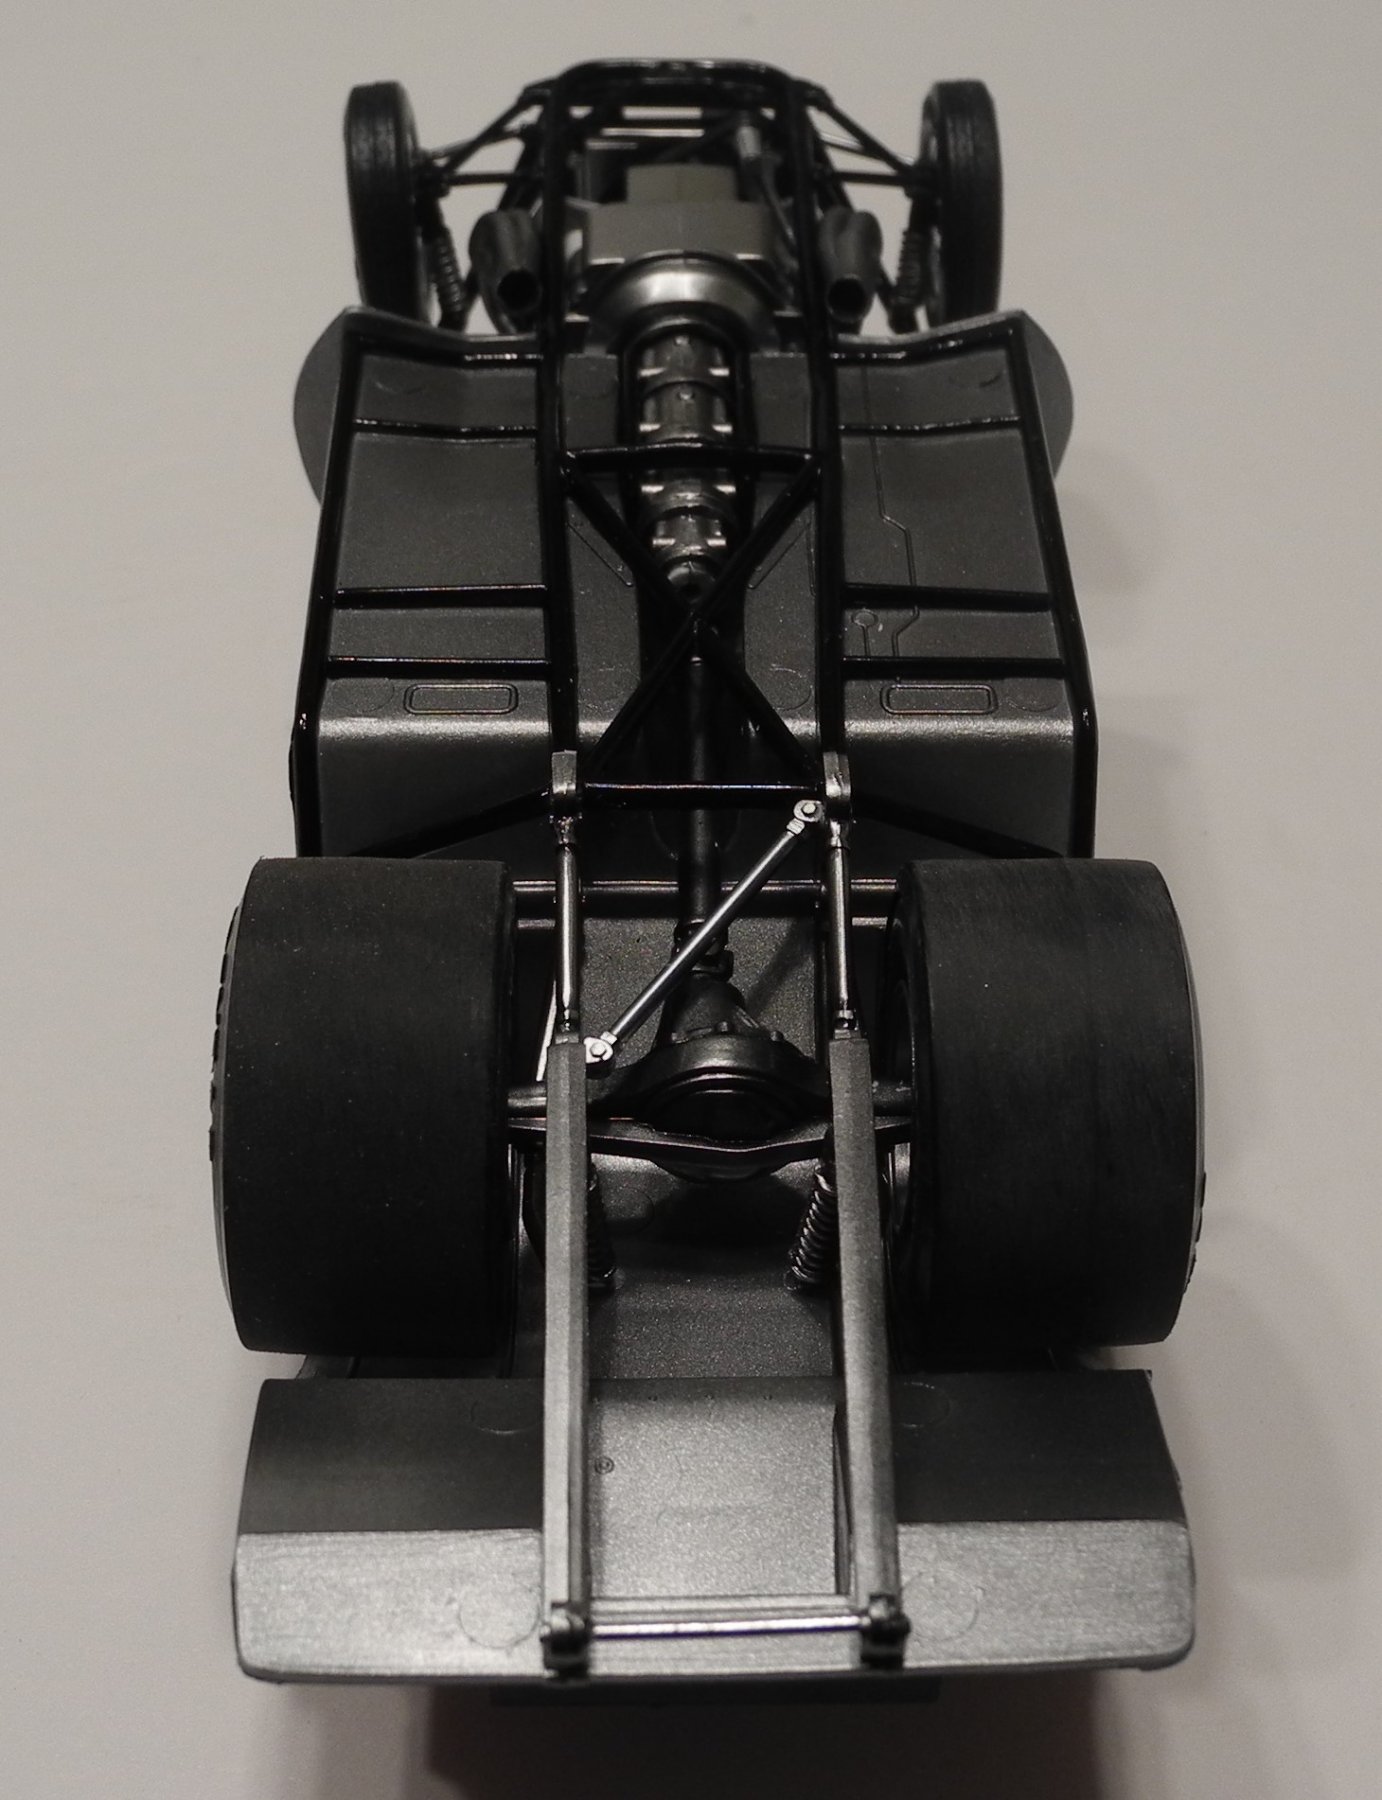
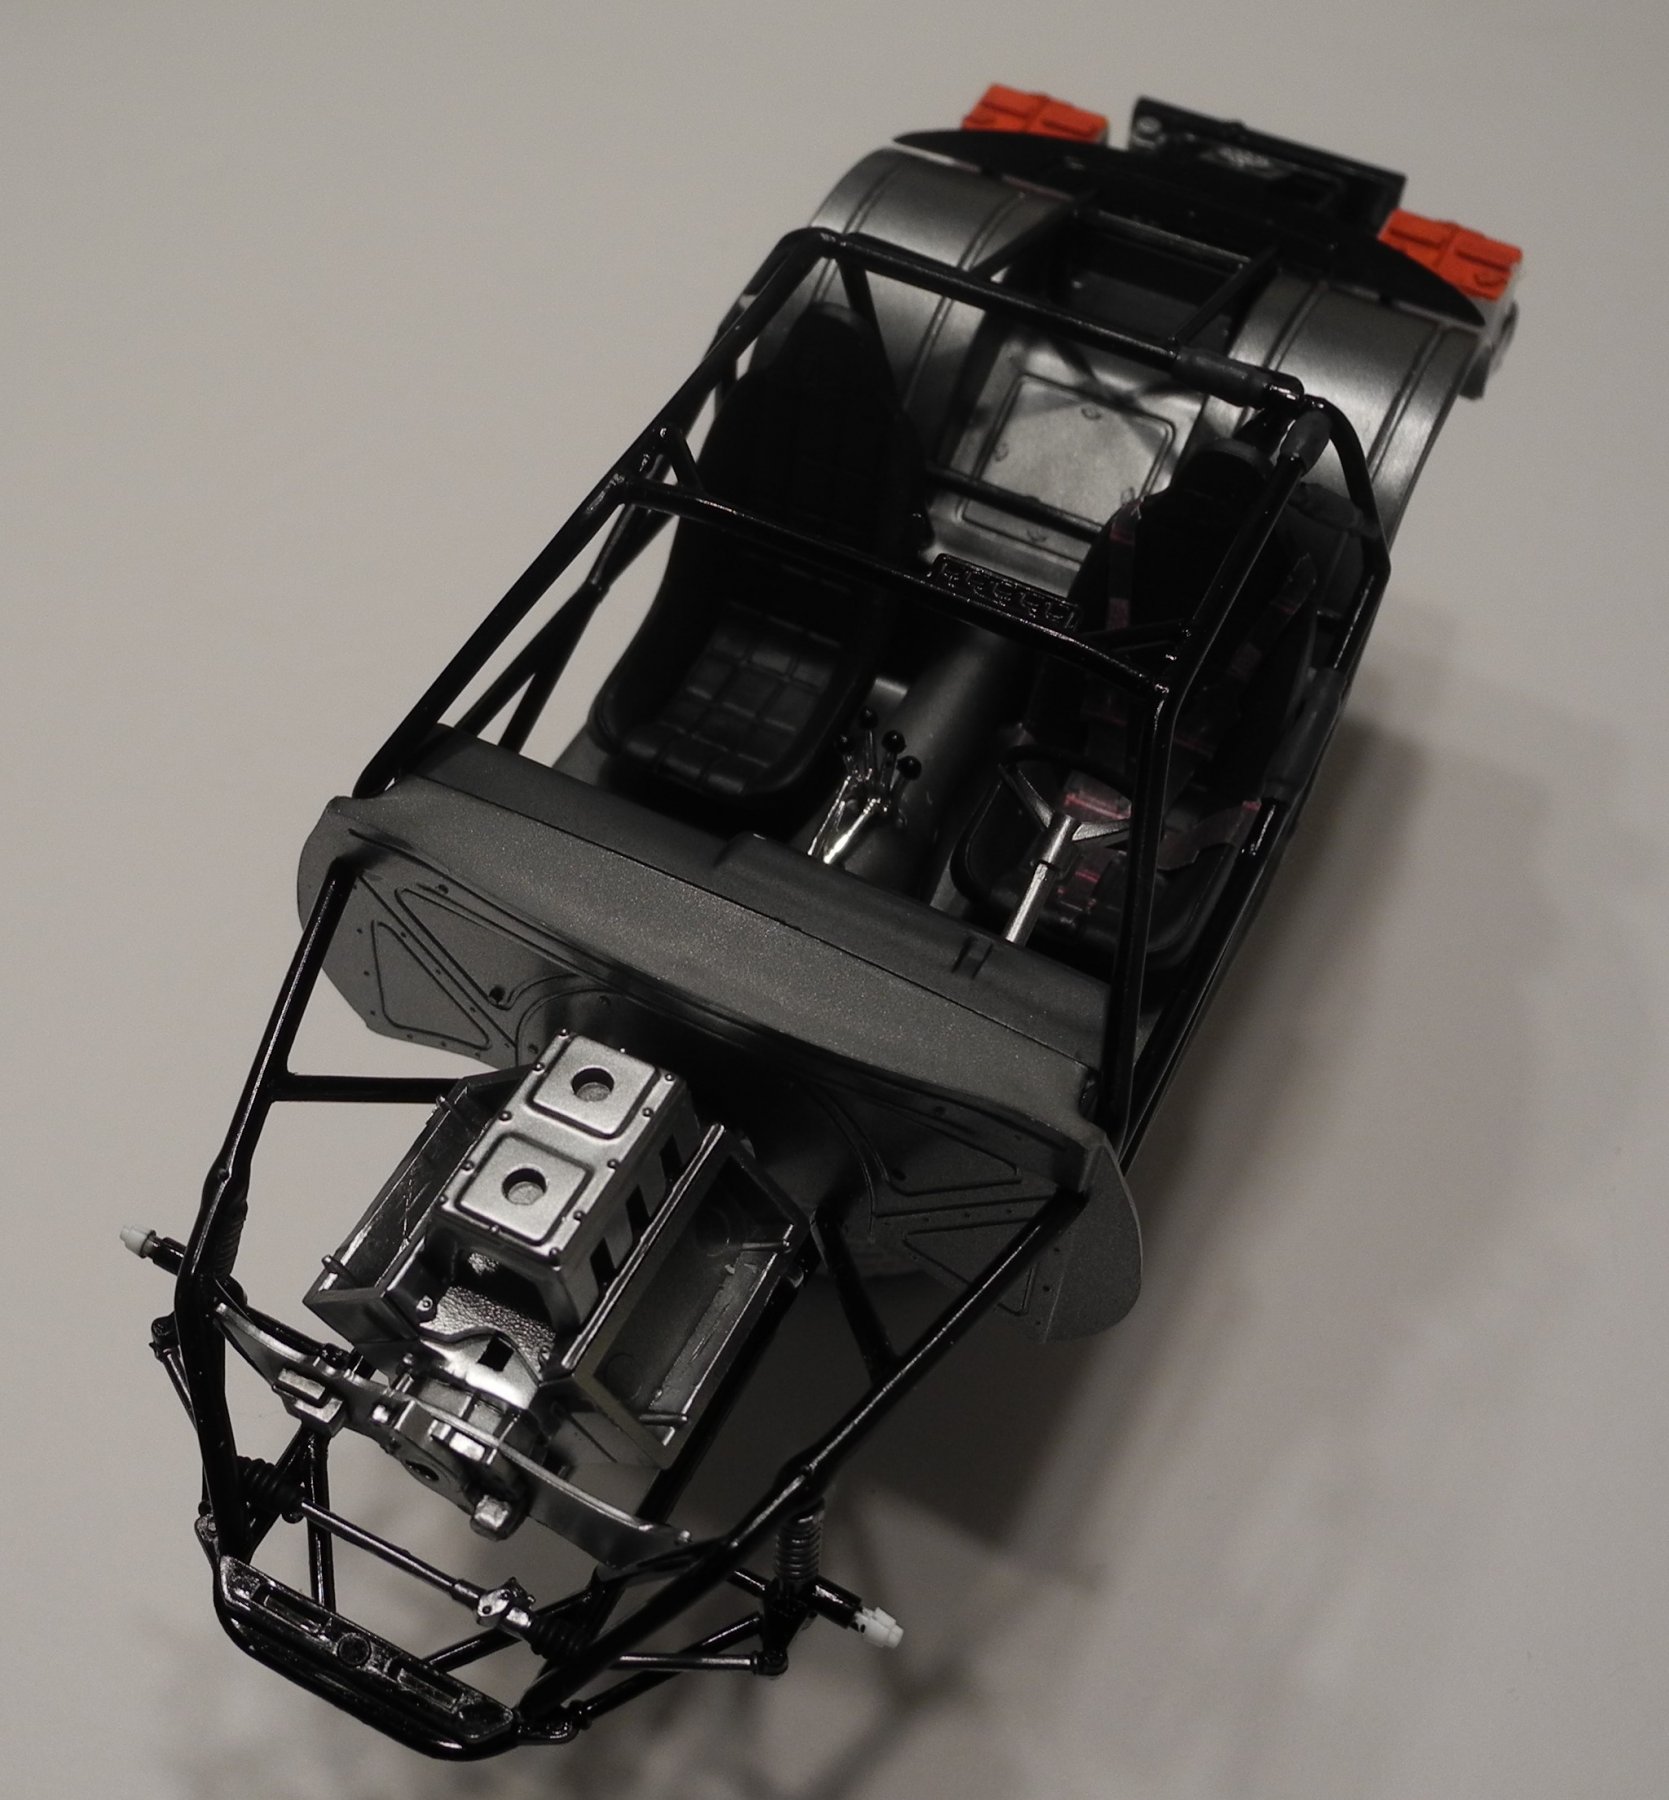
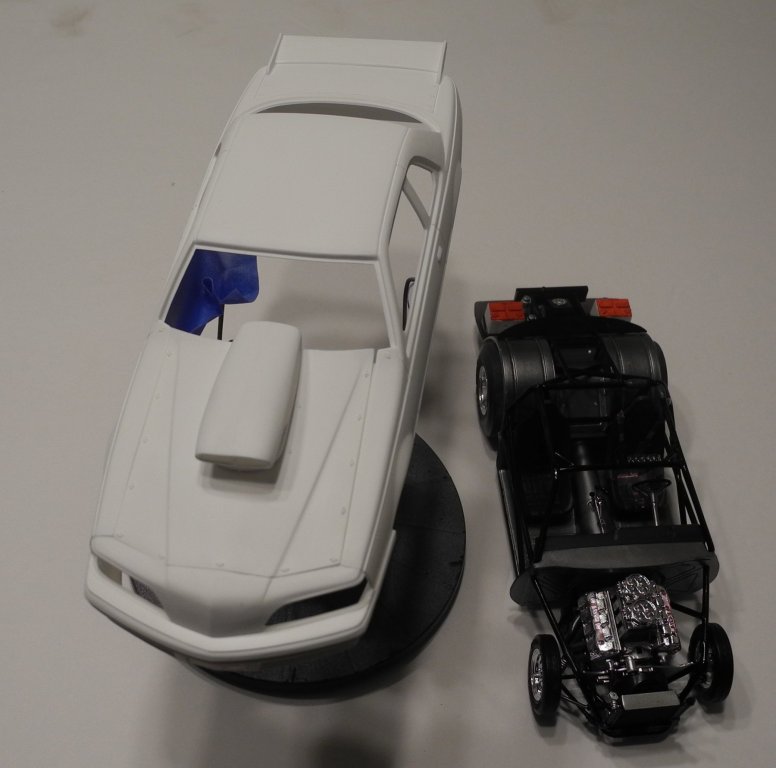
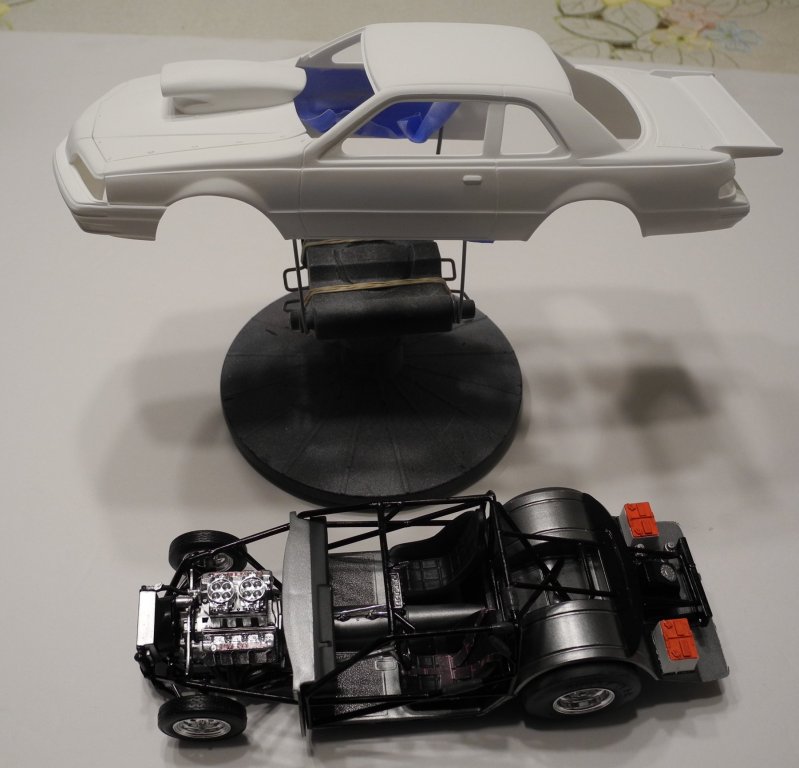
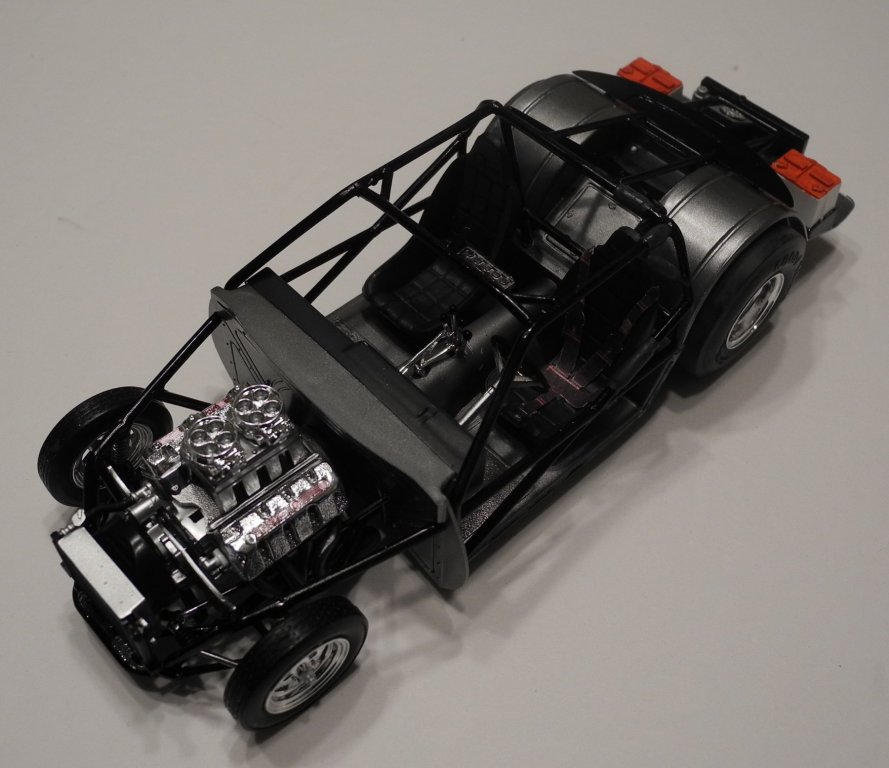
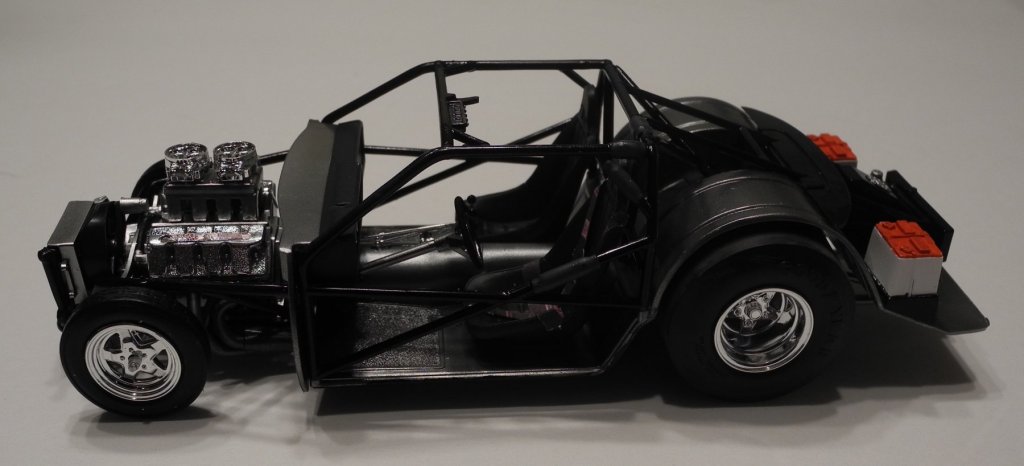
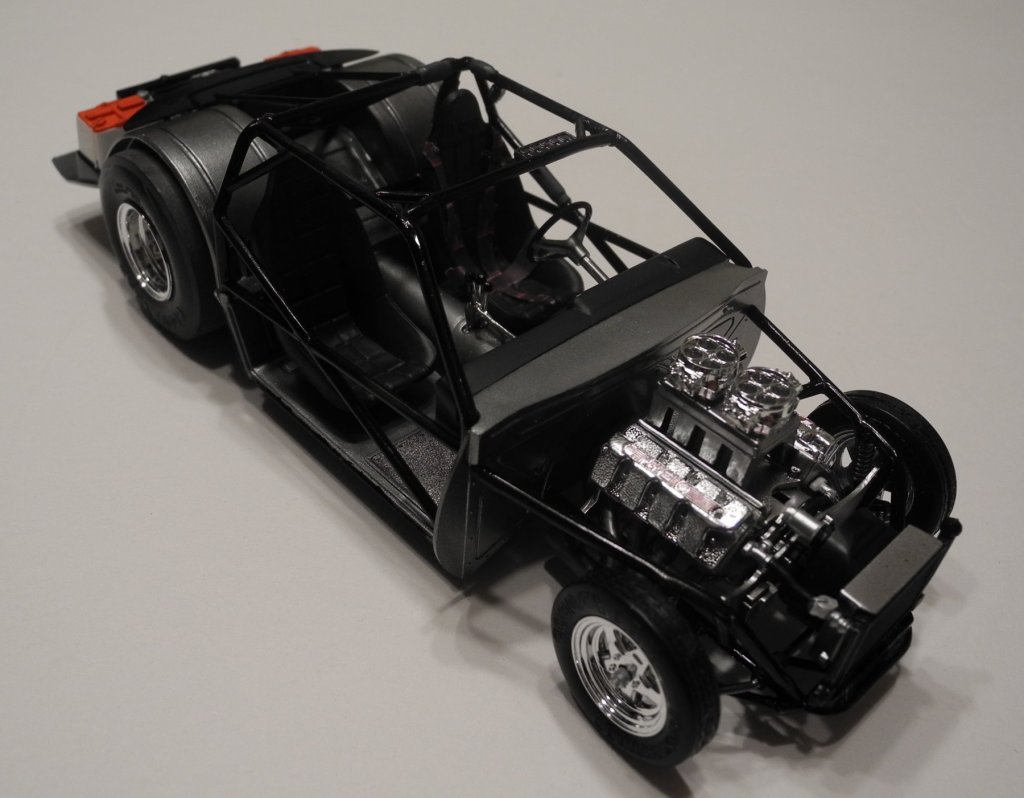
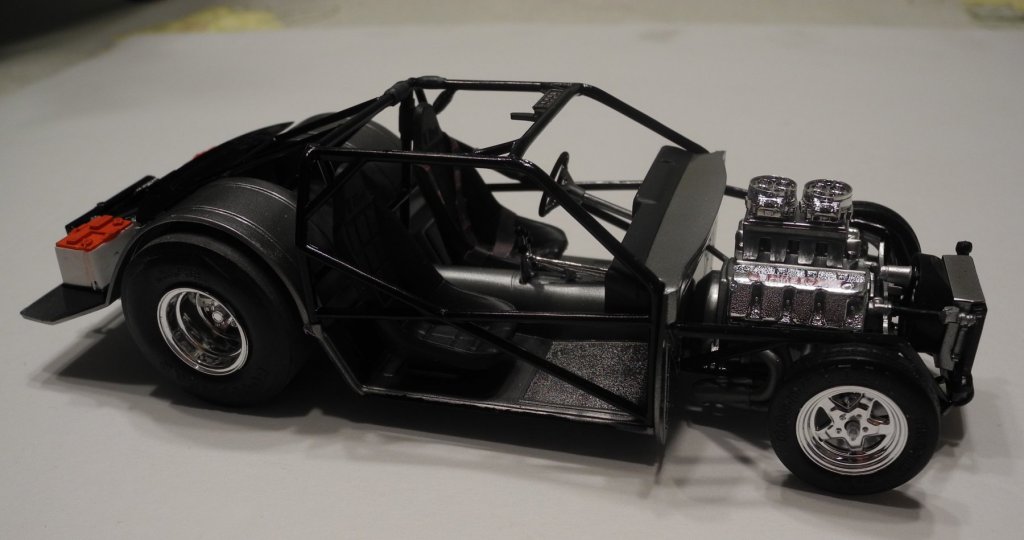
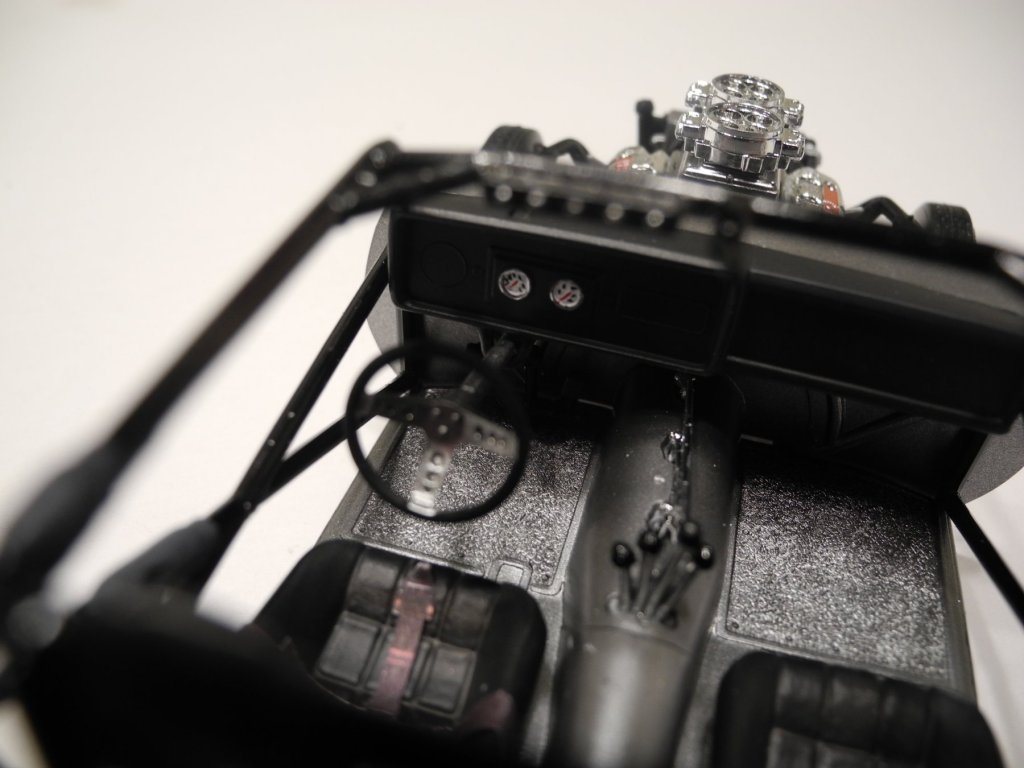
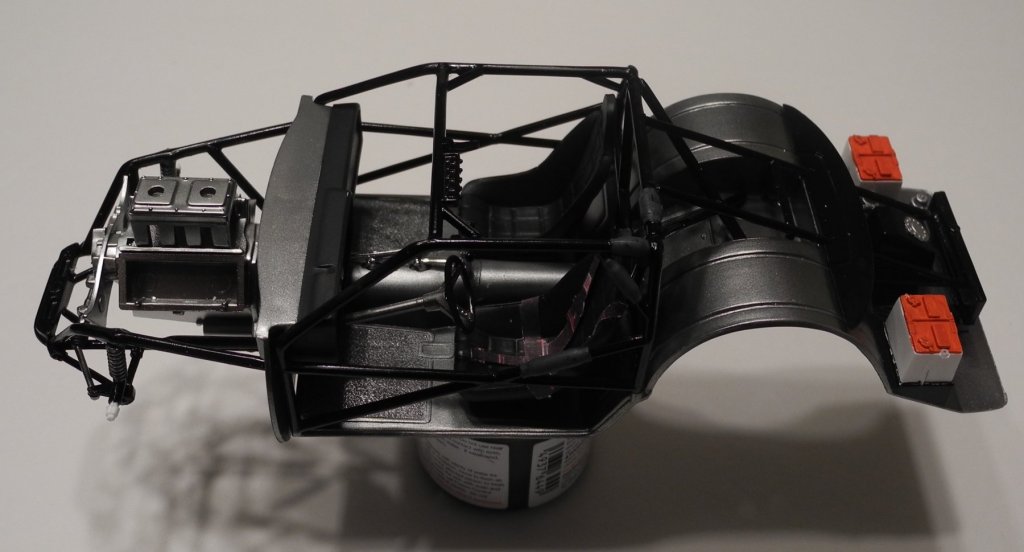
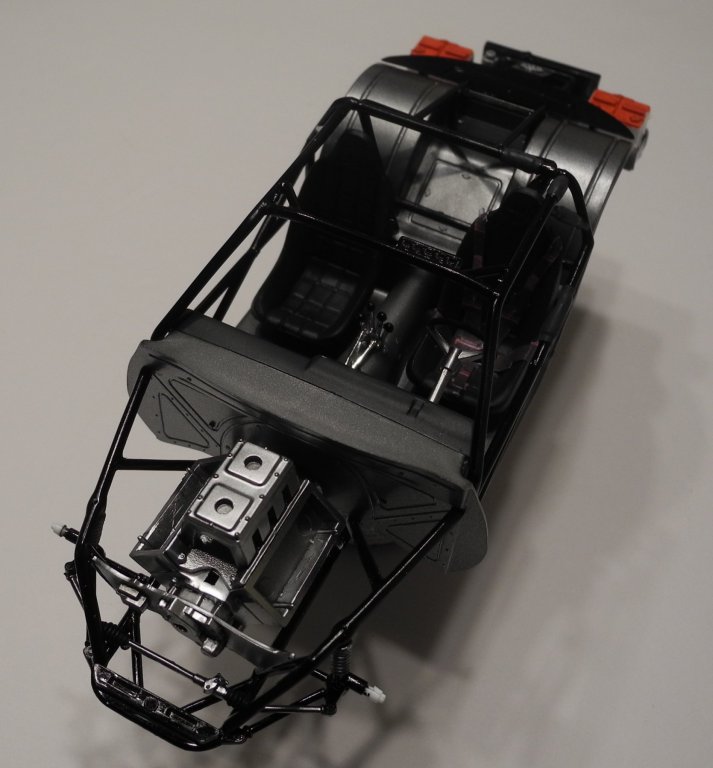
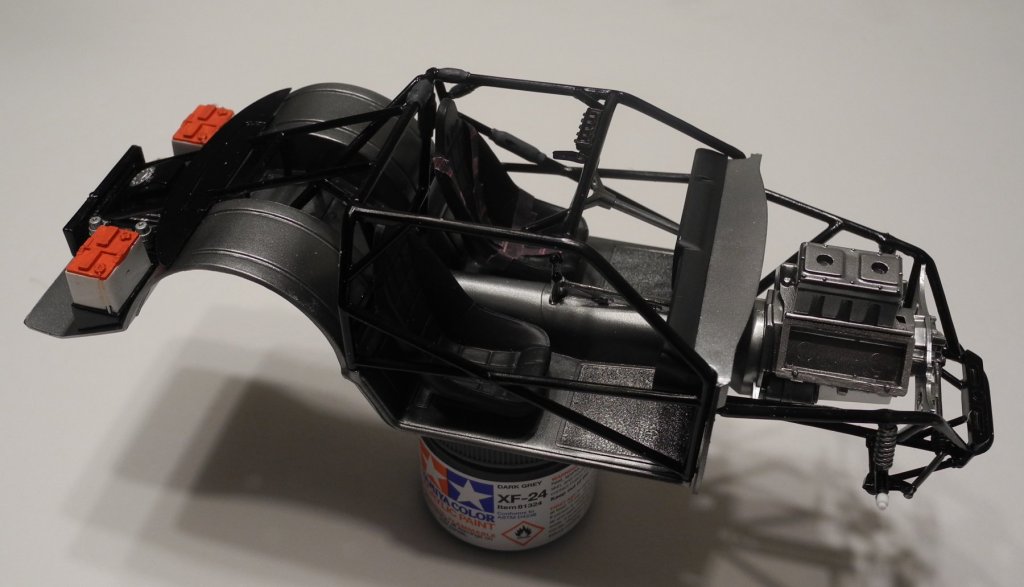
Chassis's Got Wheels This pretty much wraps up the chassis work. Still have some plumbing to do, but waiting for a wired magneto that's coming in on Monday. Next, I'll start the body, paint, and decal work. Still have my fingers crossed on those decals. We shall soon see if the dead (decals) has been brought back to life. Rise Lazarus, rise.

-
Hi Adrian Thanks for your post and kind words. I had also read what the captain told you, that the paint scheme was only used when she was first built. But I still liked it and wanted mine to be dressed in a scheme I liked. I wold certainly love to see your photos when they are available.
- 467 replies
-
- 4
-

-
- mikasa
- wave models
- (and 1 more)
-
I have never done much reading on early sail/steam ships like Alabama or Kearsarge. I wonder how much they depended on sail vs steam power. It would seem their capacity to carry coal fuel would severely limit how much and how often they used steam power, so I imagine they were most often under sail.
-
I should also mention, acrylics are perfectly fine under lacquer based paints. That's exactly what you use (Tamiya gloss black acrylic) as a base coat under Alclad 2, and similar lacquer based metal colors. It's best to give them a full 24 hours to dry, or either use a food dehydrator on a low temp setting to quick-dry. Low setting so as not to harm the plastic.
-
Well, yes it does say. Says it uses Tamiya lacquer thinner to reduce it. That's a sure bet it means it's lacquer based, not acrylic/water based. You can use Tamiya primer under any kind of paint that I know of. The other good news, these primers brushed straight out of the bottle make one of the very best small crack/gap fillers there are to be found. Fast drying and sandable.
-
This is excellent news. Now, I can avoid the dreaded 'rattle cans', and it's also very economical by comparison. Tamiya white primer is a favorite of mine, now it's ready (after reducing) to shoot through our airbrush. Probably the very best plastic primer out there as far as I know. https://www.scalehobbyist.com/catagories/Paint_and_Construction/liquid-surface-primer-white/TAM00087096/product.php
-
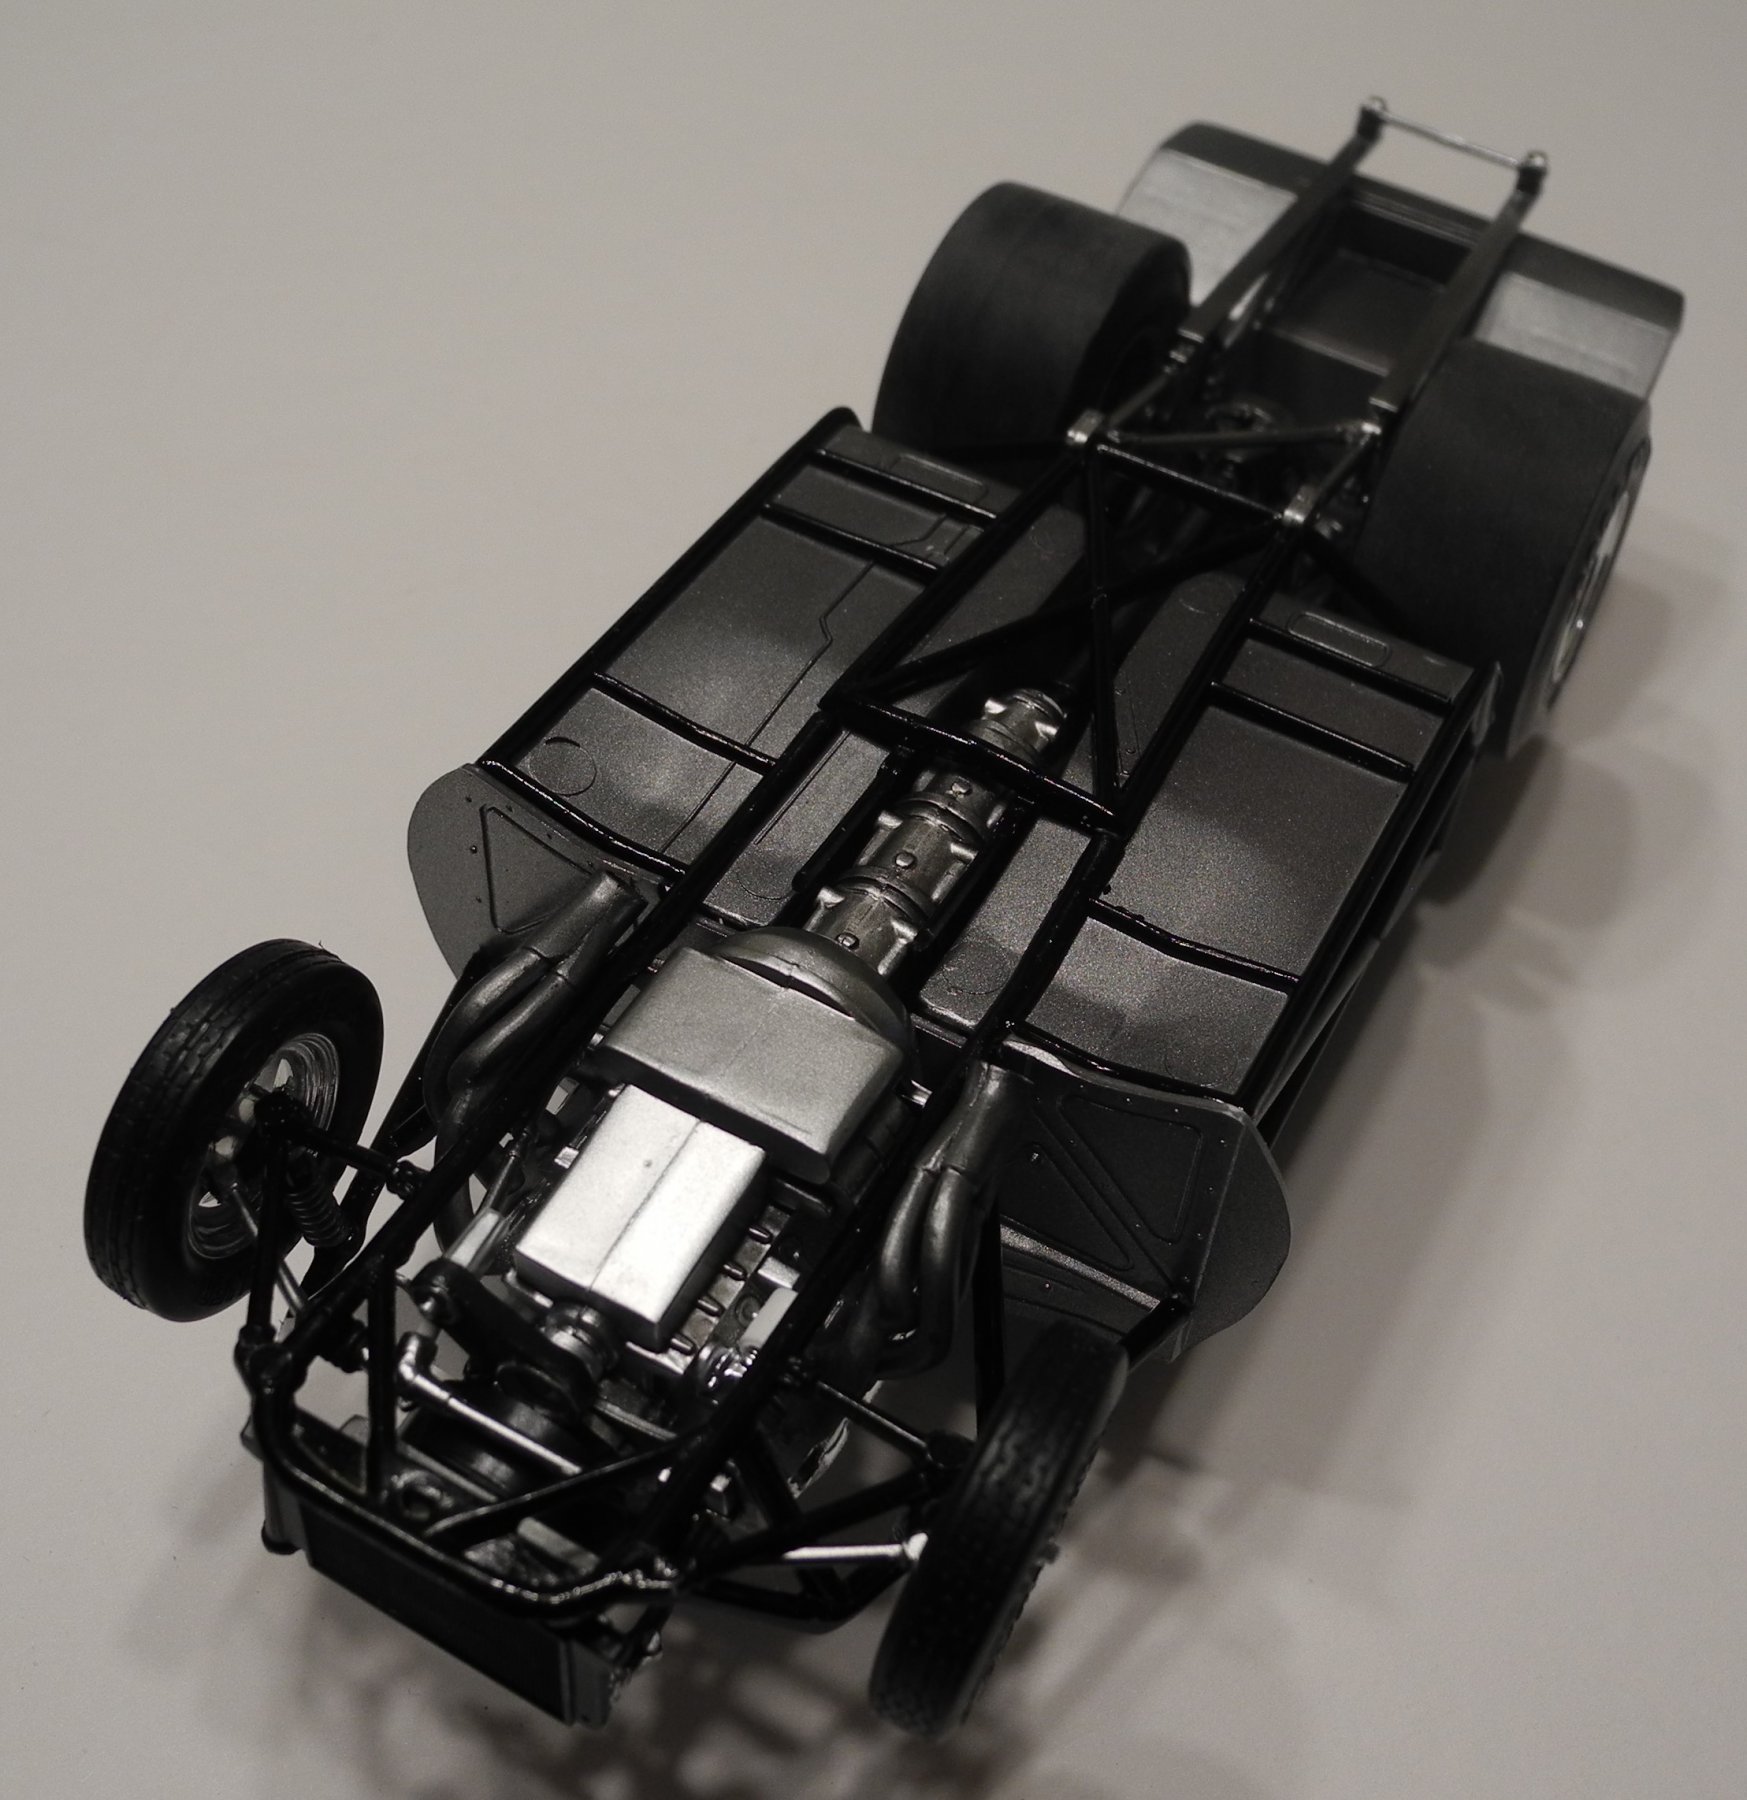
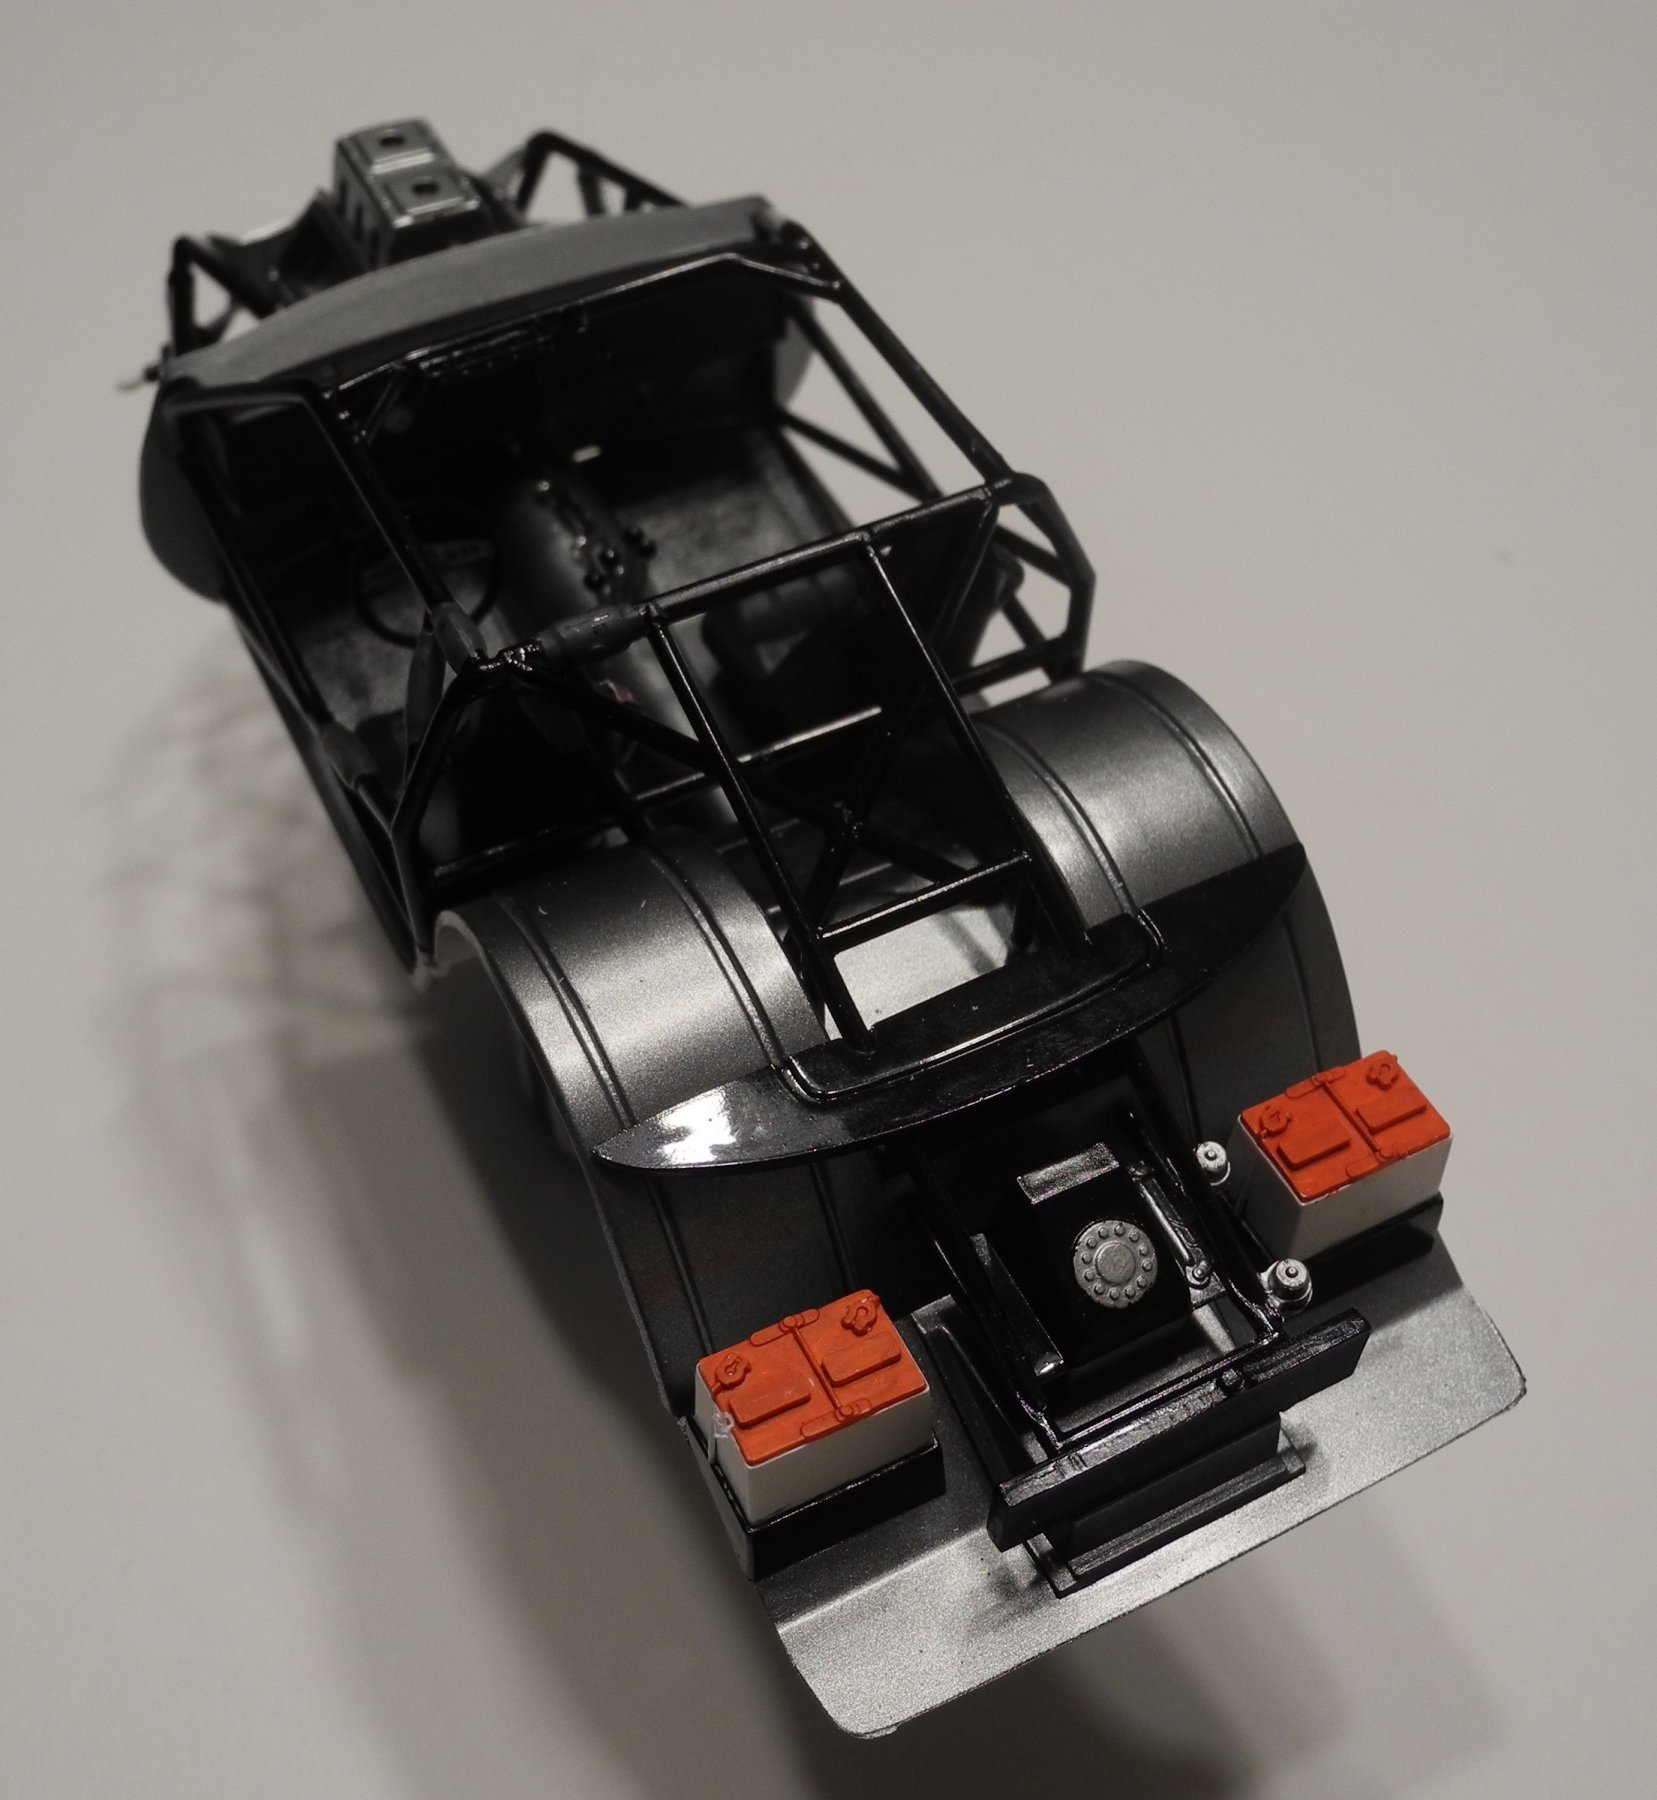
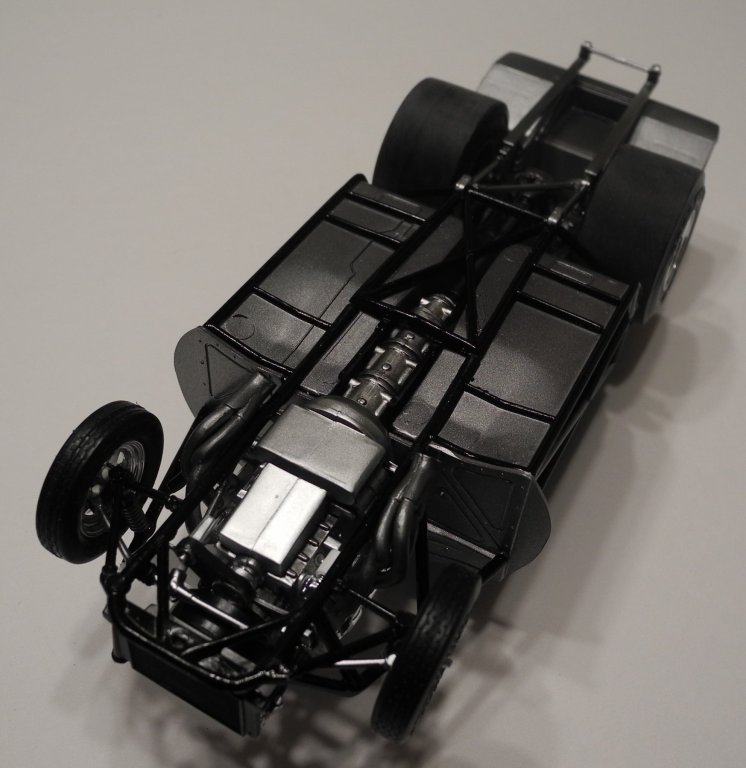
Chassis's Filling Out Engine Block Started

-
No reason for us to feel sorry for 'ol Lou. He's tougher than woodpecker lips I guarantee you that. 😃 Just kidding with you Lou. You know we're all pulling for you for a complete and speedy recovery. Hey Ed...the more I look at it and think about it, that brass potentially tarnishing will just give an added patina that will just enhance the model over time. In any event, she is a striking model to see, a real beauty. It requires 'near perfection' to display a finished model the way you've done it. Paint covers a multitude of sin, and your model is laid bare and visible. Excellent!
- 34 replies
-
- 4
-
-
- mikasa
- wave models
- (and 2 more)
-
A clear gloss acrylic sprayed over the decal sheet can give new life to old, cracked decals....sometimes. It doesn't work 100%, but it often works. Also, taping the decal sheet to a window, allowing it to get some sunshine for a few hours can clear/restore old, yellowed decals. I've done both to this sheet and have my fingers crossed.