CDW
-
Posts
7,755 -
Joined
-
Last visited
Content Type
Profiles
Forums
Gallery
Events
Everything posted by CDW
-
 Humble Beginning
-
For the scale purist, I know that's a big deal and great modelers go to extraordinary lengths to correct those types of deficiencies. But to me, if I get it 90% close to the real thing, I would be happy as heck. I'm one of those who is more concerned with a different aspect of the model...the visual appearance. A hull could be 10' off in it's scale length and that wouldn't phase me none whatsoever. Unless someone pointed it out to me, I would never know and wouldn't care. I admire those who do care and fix those problems, but I just wouldn't be happy chasing that rabbit.
- 467 replies
-
- 7
-

-
- mikasa
- wave models
- (and 1 more)
-
An aspect of working in/around clay that's quite notable is it's tendency to stick to everything that touches it when it's wet. When I worked around heavy equipment, IE, dozers, track backhoes, etc....we had to clean the clay off the tracks and bogie wheels multiple times a day to keep the clay from causing the tracks to jump off the sprockets. Man, that clay would stick to your workboots and pant legs until your legs would weigh two or three times what they normally did. Miserable stuff to work in/around. It's dusty as heck when it's dry, and it sticks to ya like glue when it rains/wet.
-
That's an excellent reference Steve, and I sure do appreciate you sharing the link with us here. Yes, as the reference article points out, the original hull design was for the Kearsarge, then it was adapted for use as the Alabama. I knew it was one way or the other but this straightens it all out. What do you think of the Scale Decks? They sure do look good in pictures on Ebay.
- 467 replies
-
- 7
-
-
- mikasa
- wave models
- (and 1 more)
-
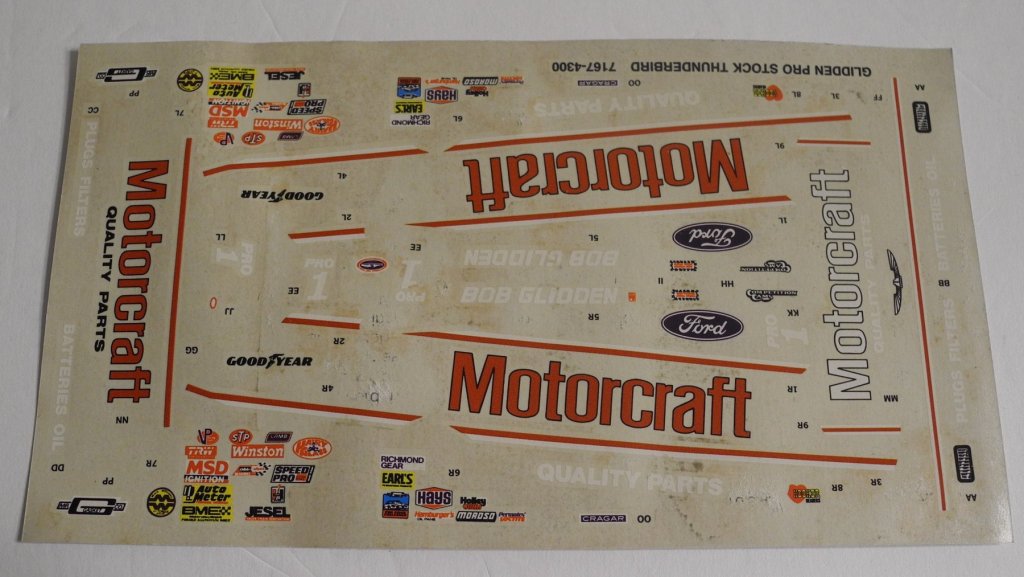
Yes, those decals are rough. 🤥 But I think I can make them work with just a little good luck. Yeah, the Slixx ones are different year model Thunderbird and others. When you buy an old kit like this, decals are almost always a liability, even though the kit was sealed. It was probably stored in a non climate controlled building or garage.
-
Ala-Kart by CDW - FINISHED - AMT - 1:25 Scale - PLASTIC
CDW replied to CDW's topic in Non-ship/categorised builds
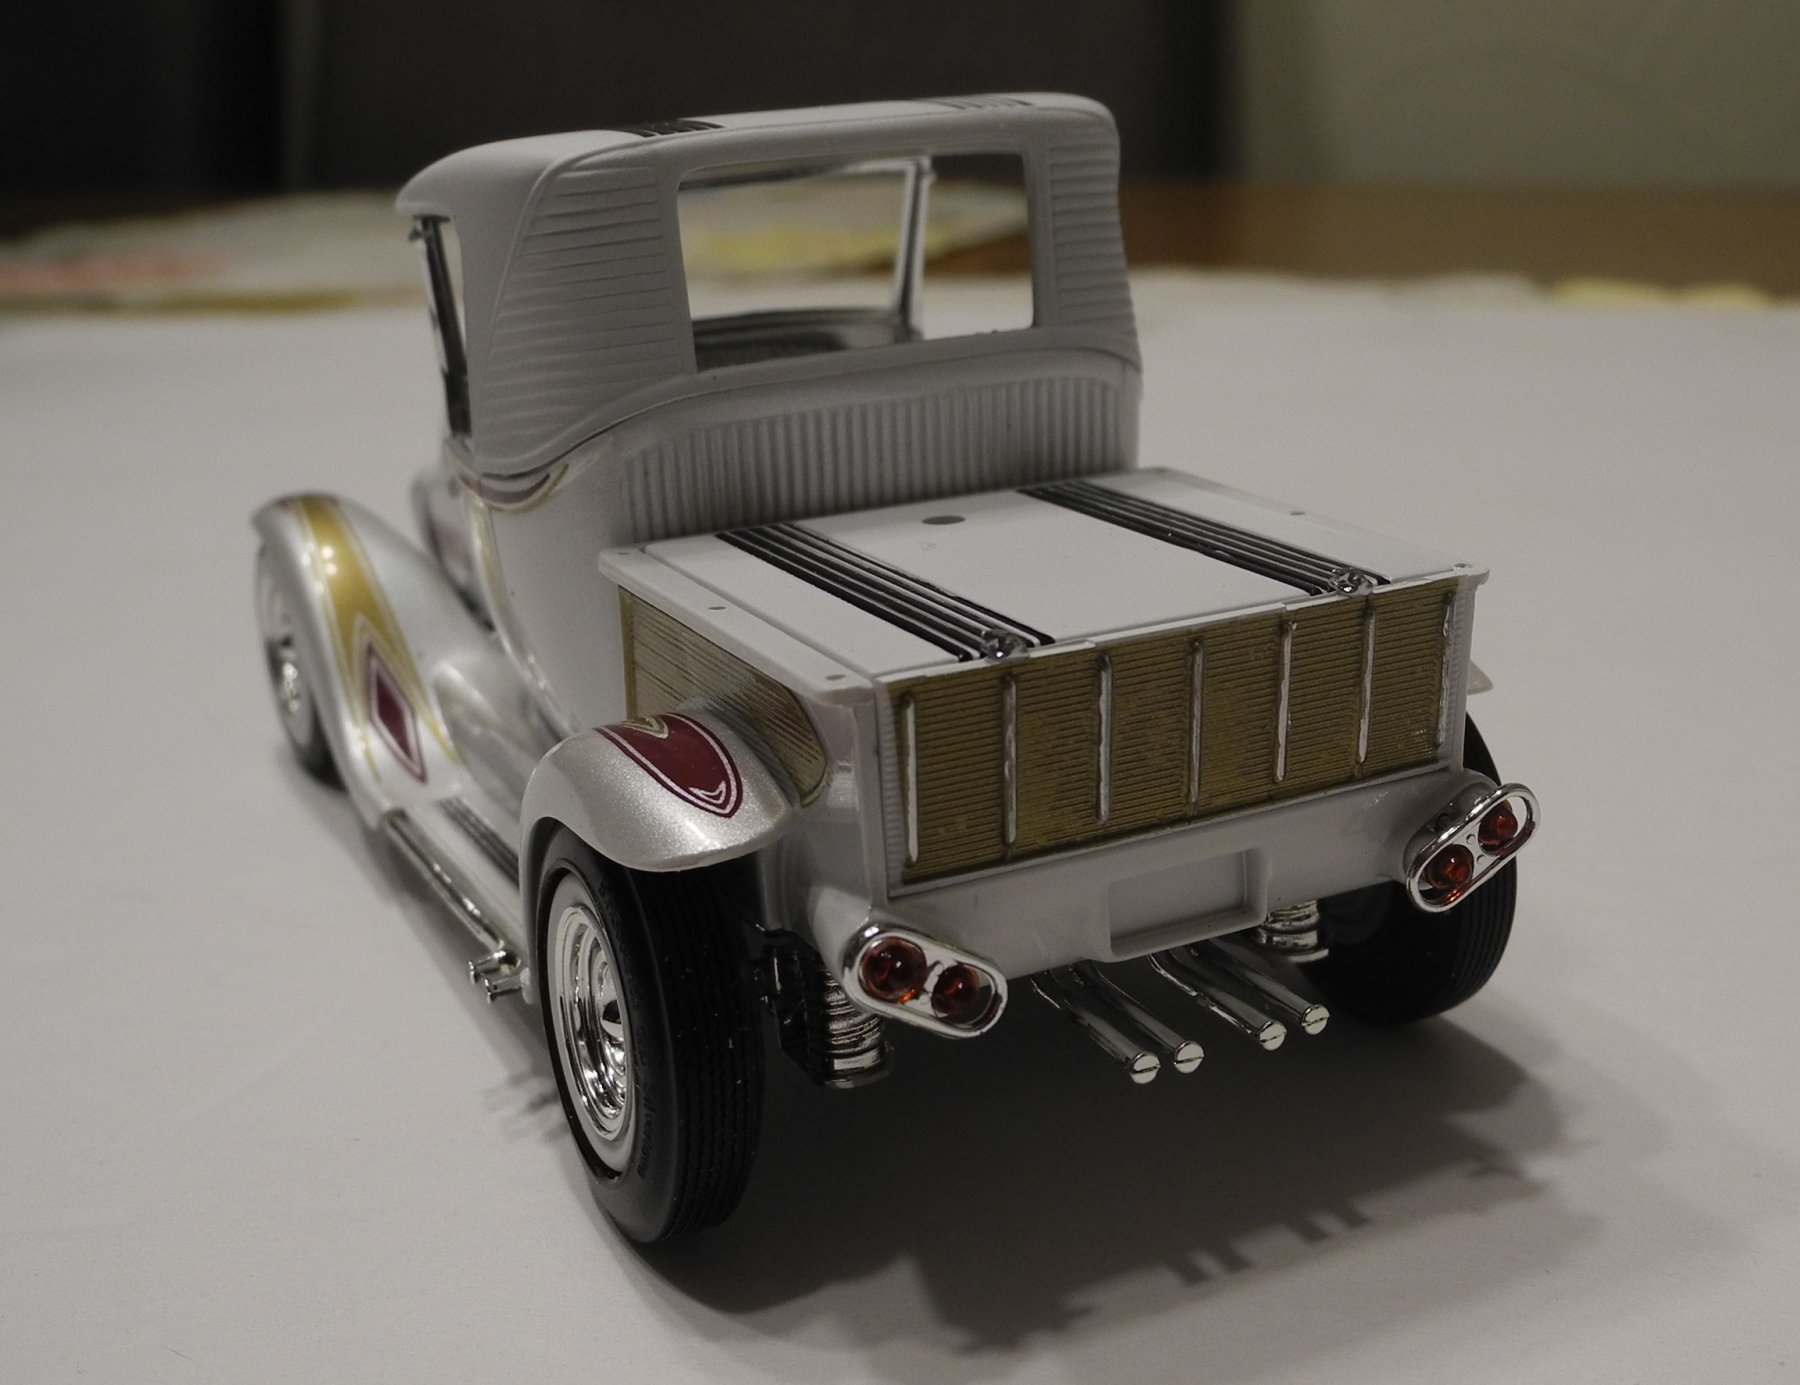
Yes, I am certain the four carbs are early. The Ala-Kart was built in the 50's. The old short track stock cars all ran carbs, singles and two barrel. The large throat 2 barrel carbs were very popular in racing at one time. Lots and lots of muscle cars ran 3 2 barrel carb setups. I had an Offenhauser 3 single barrel carb manifold setup on my old '51 Chevy six cylinder when I was a teen. -
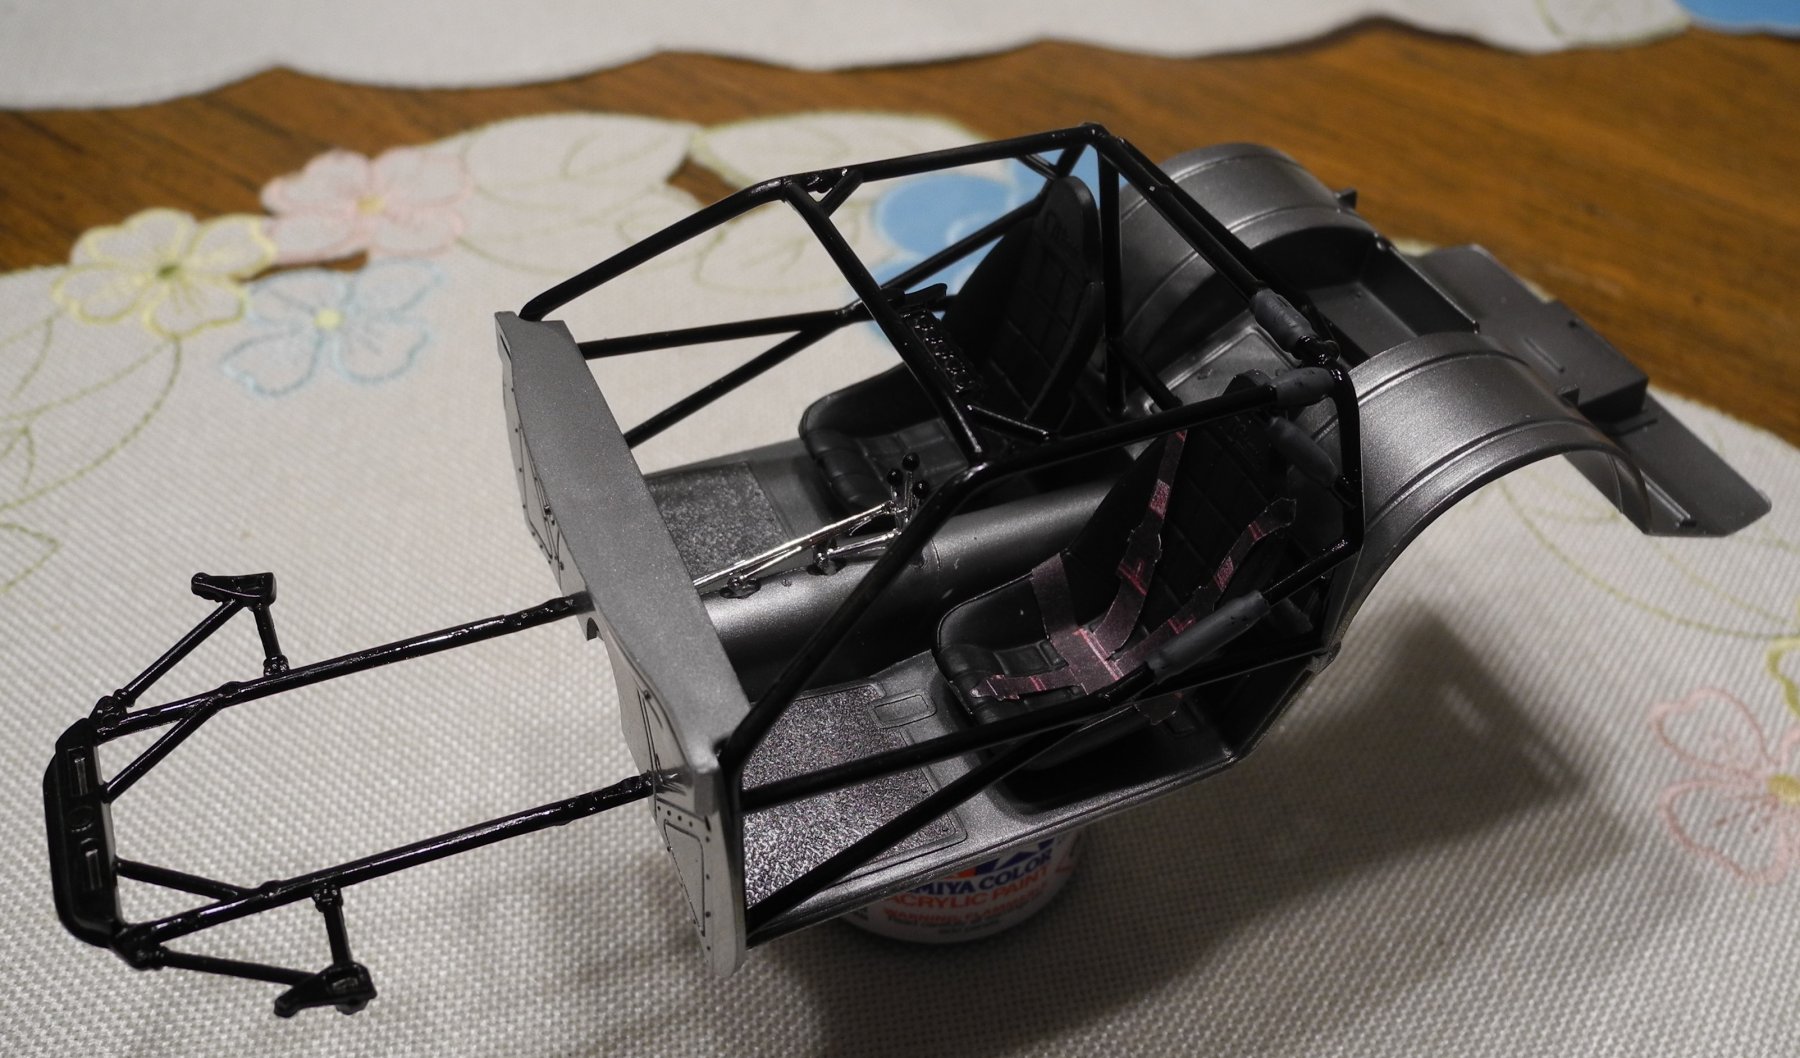
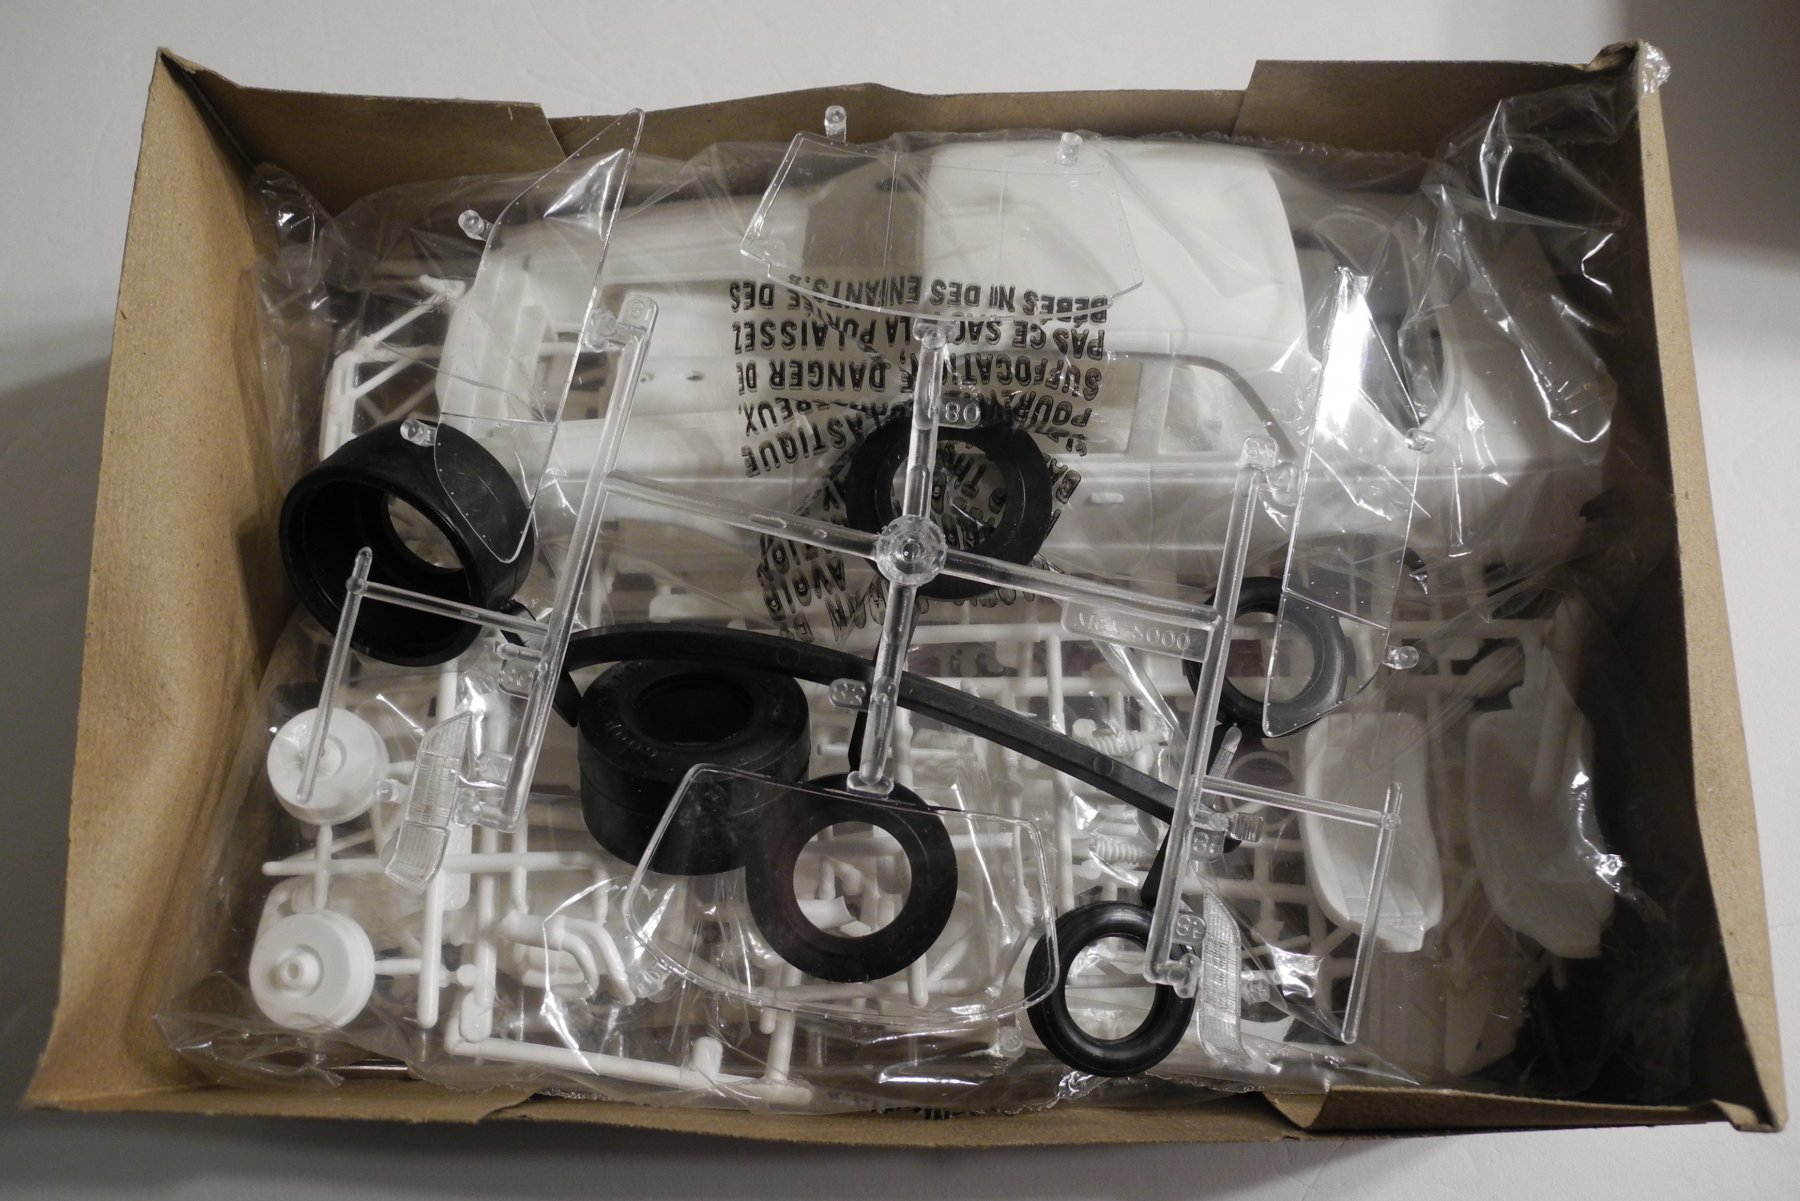
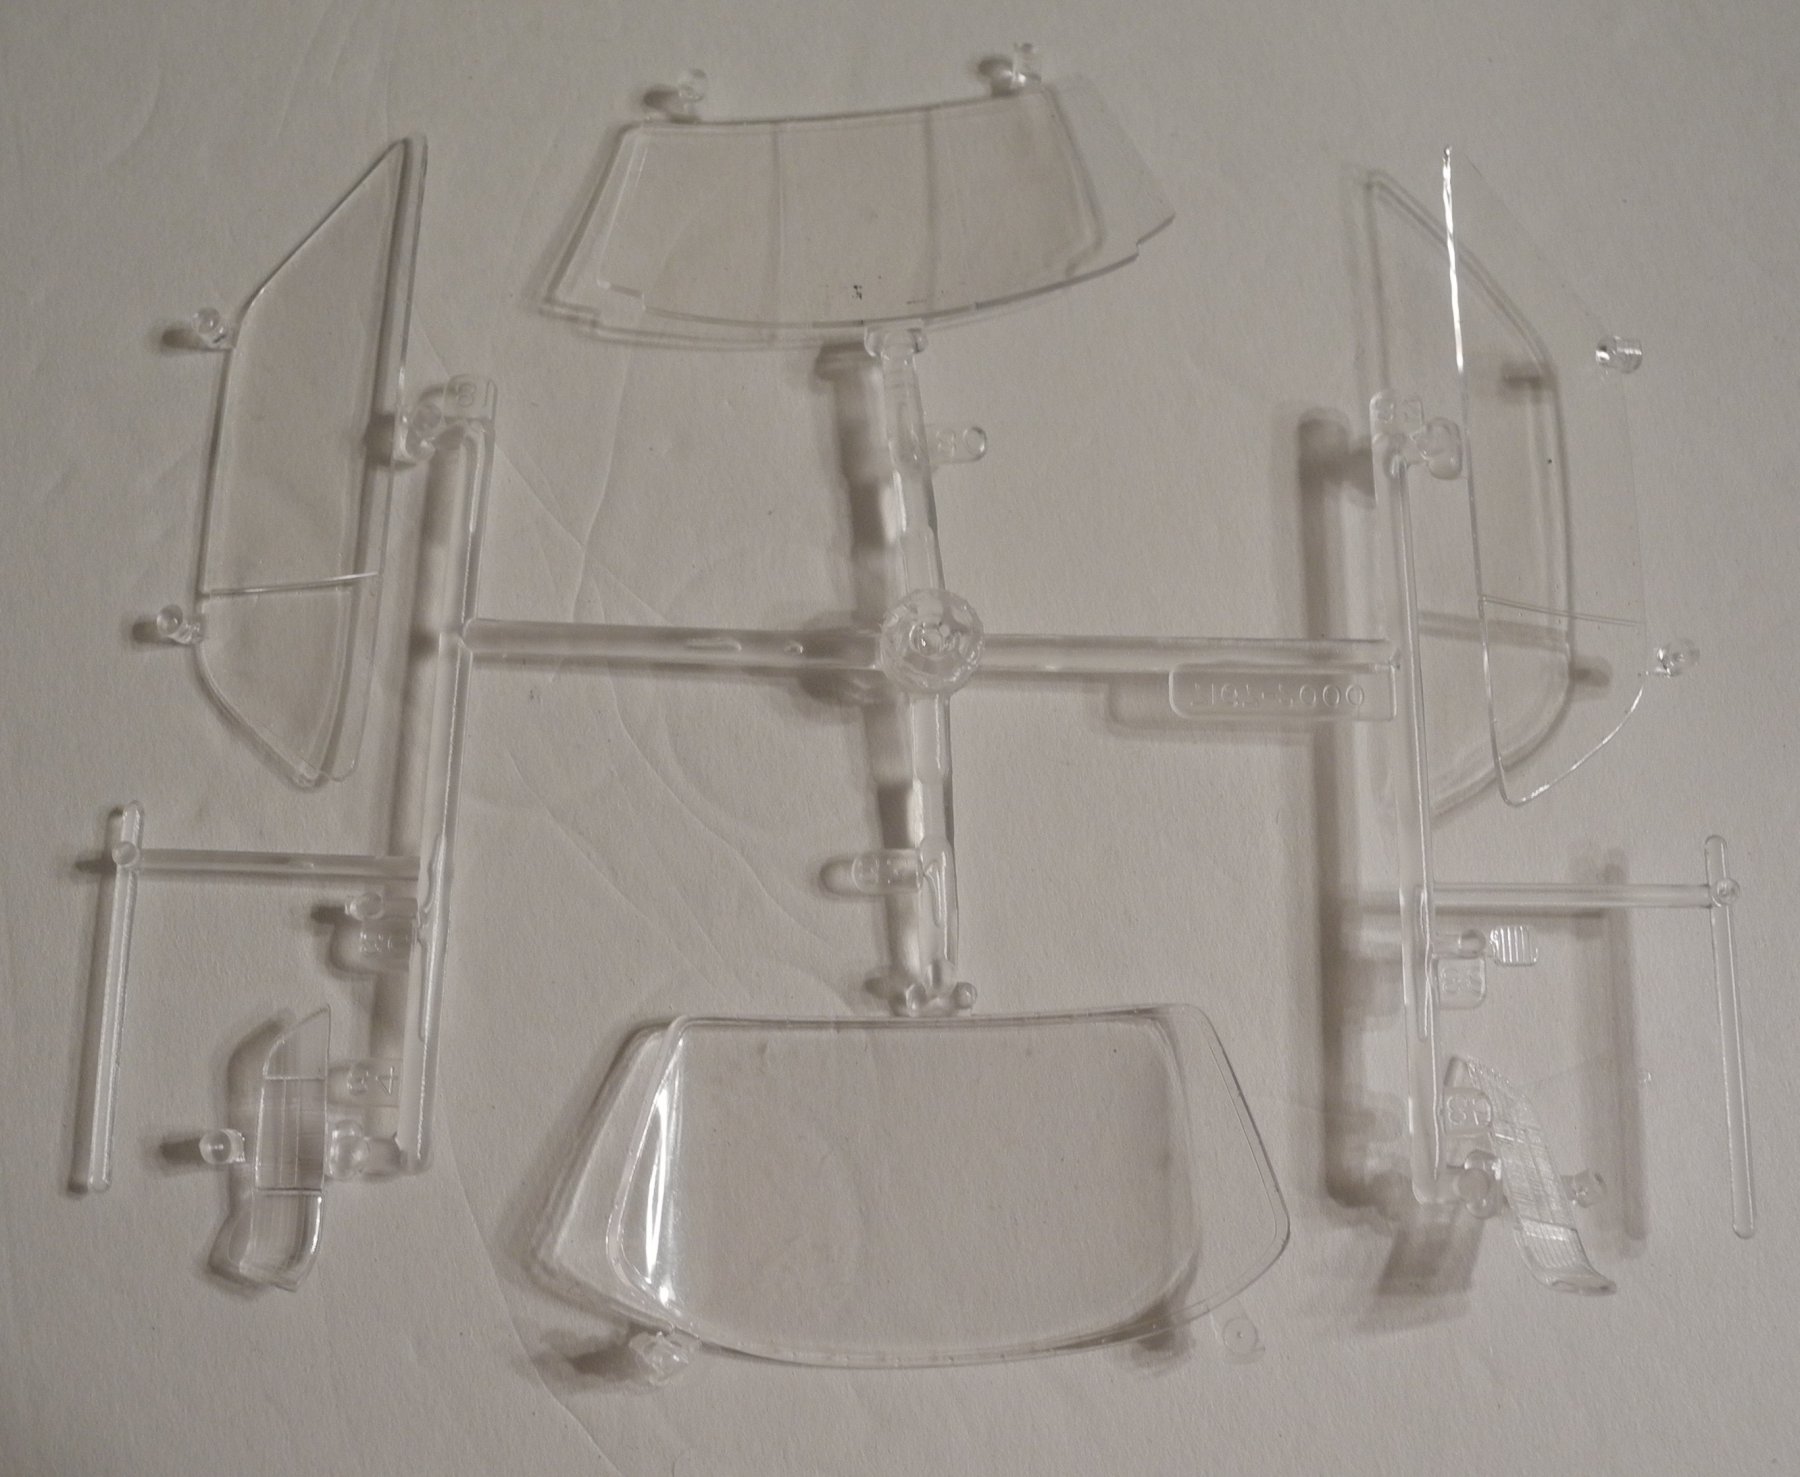
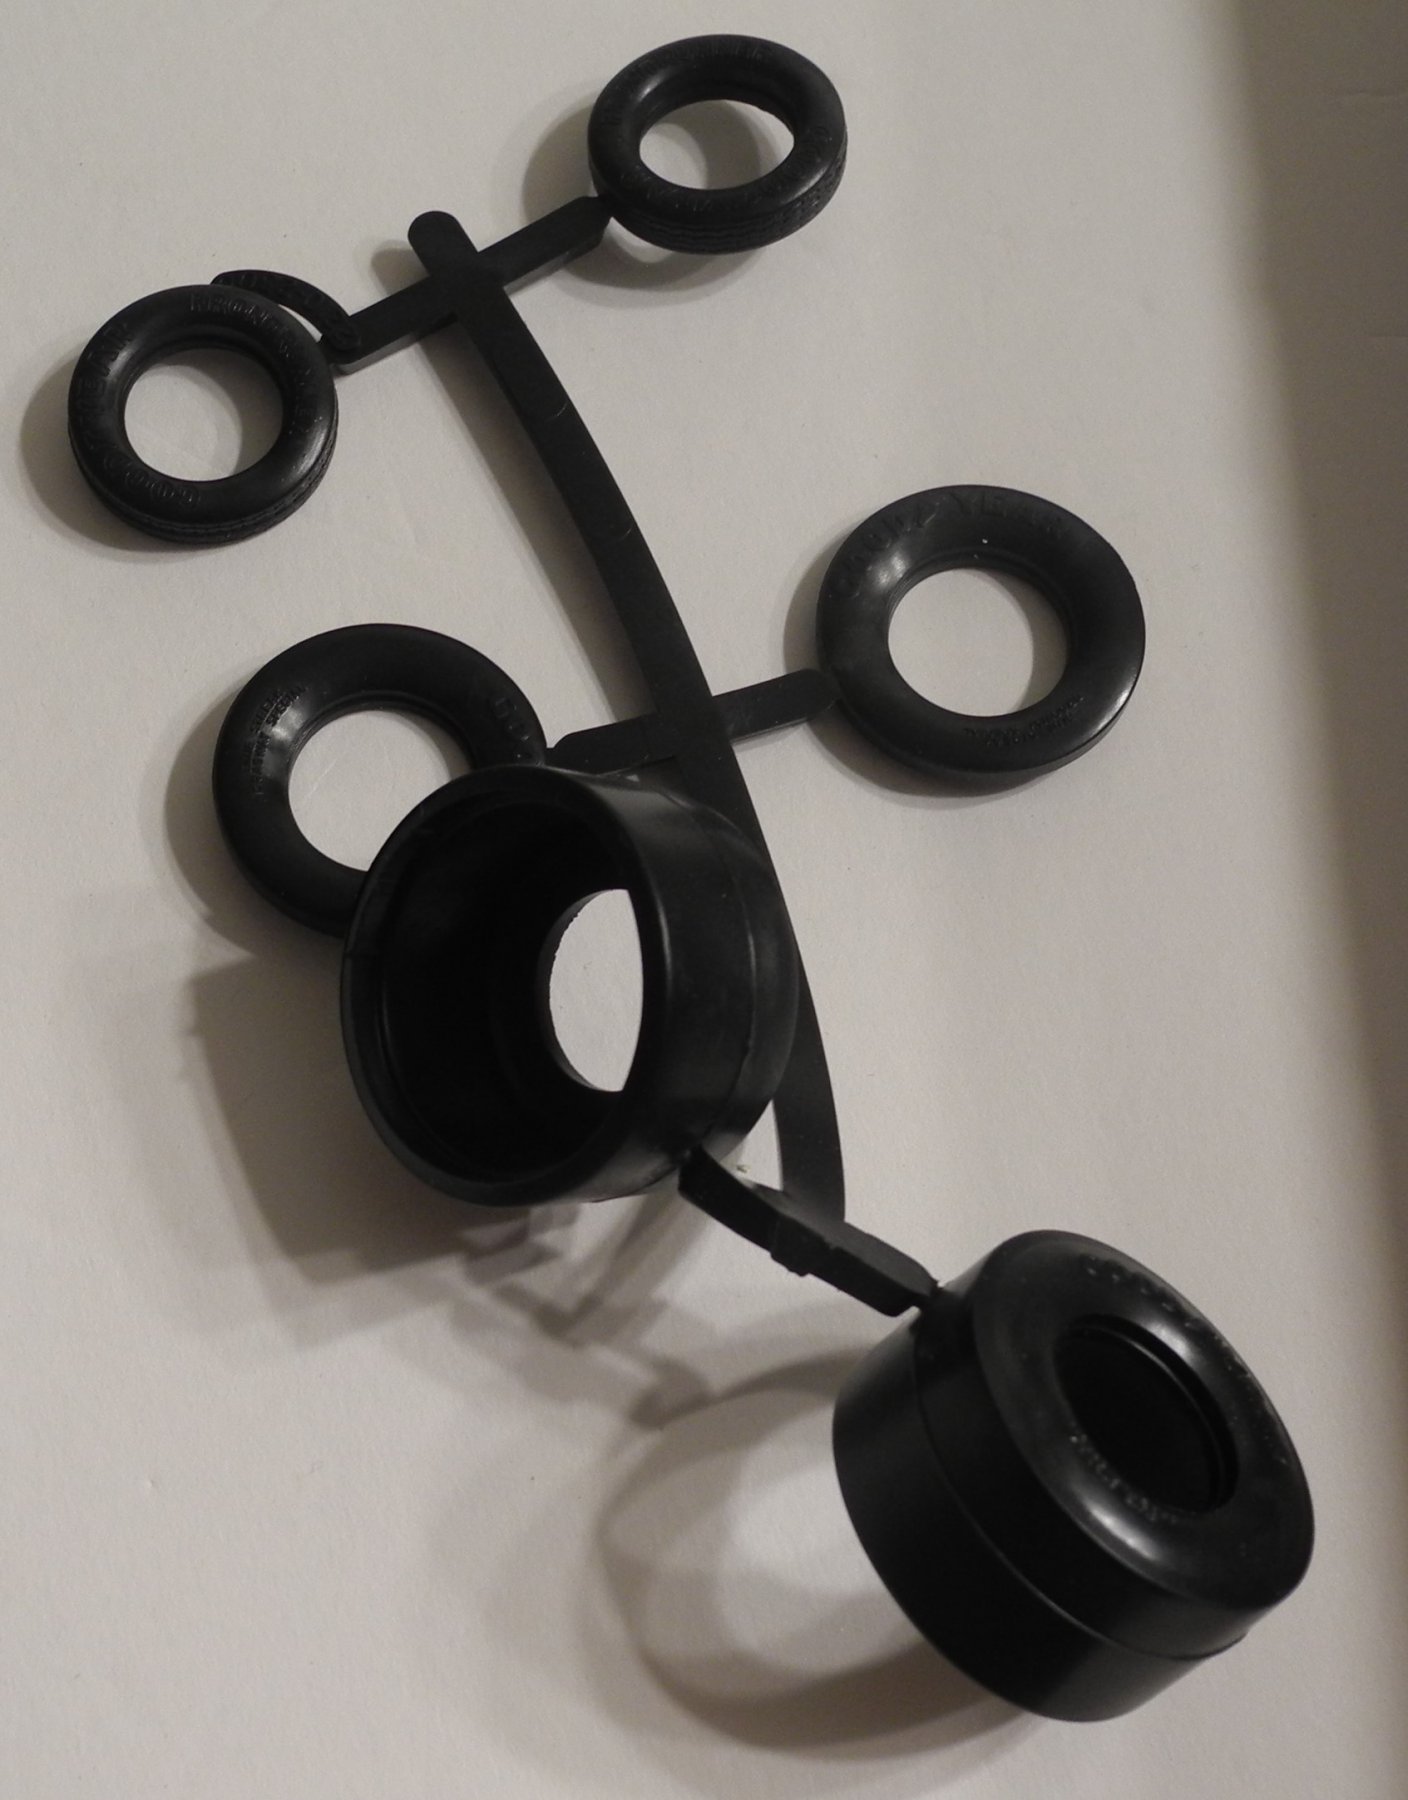
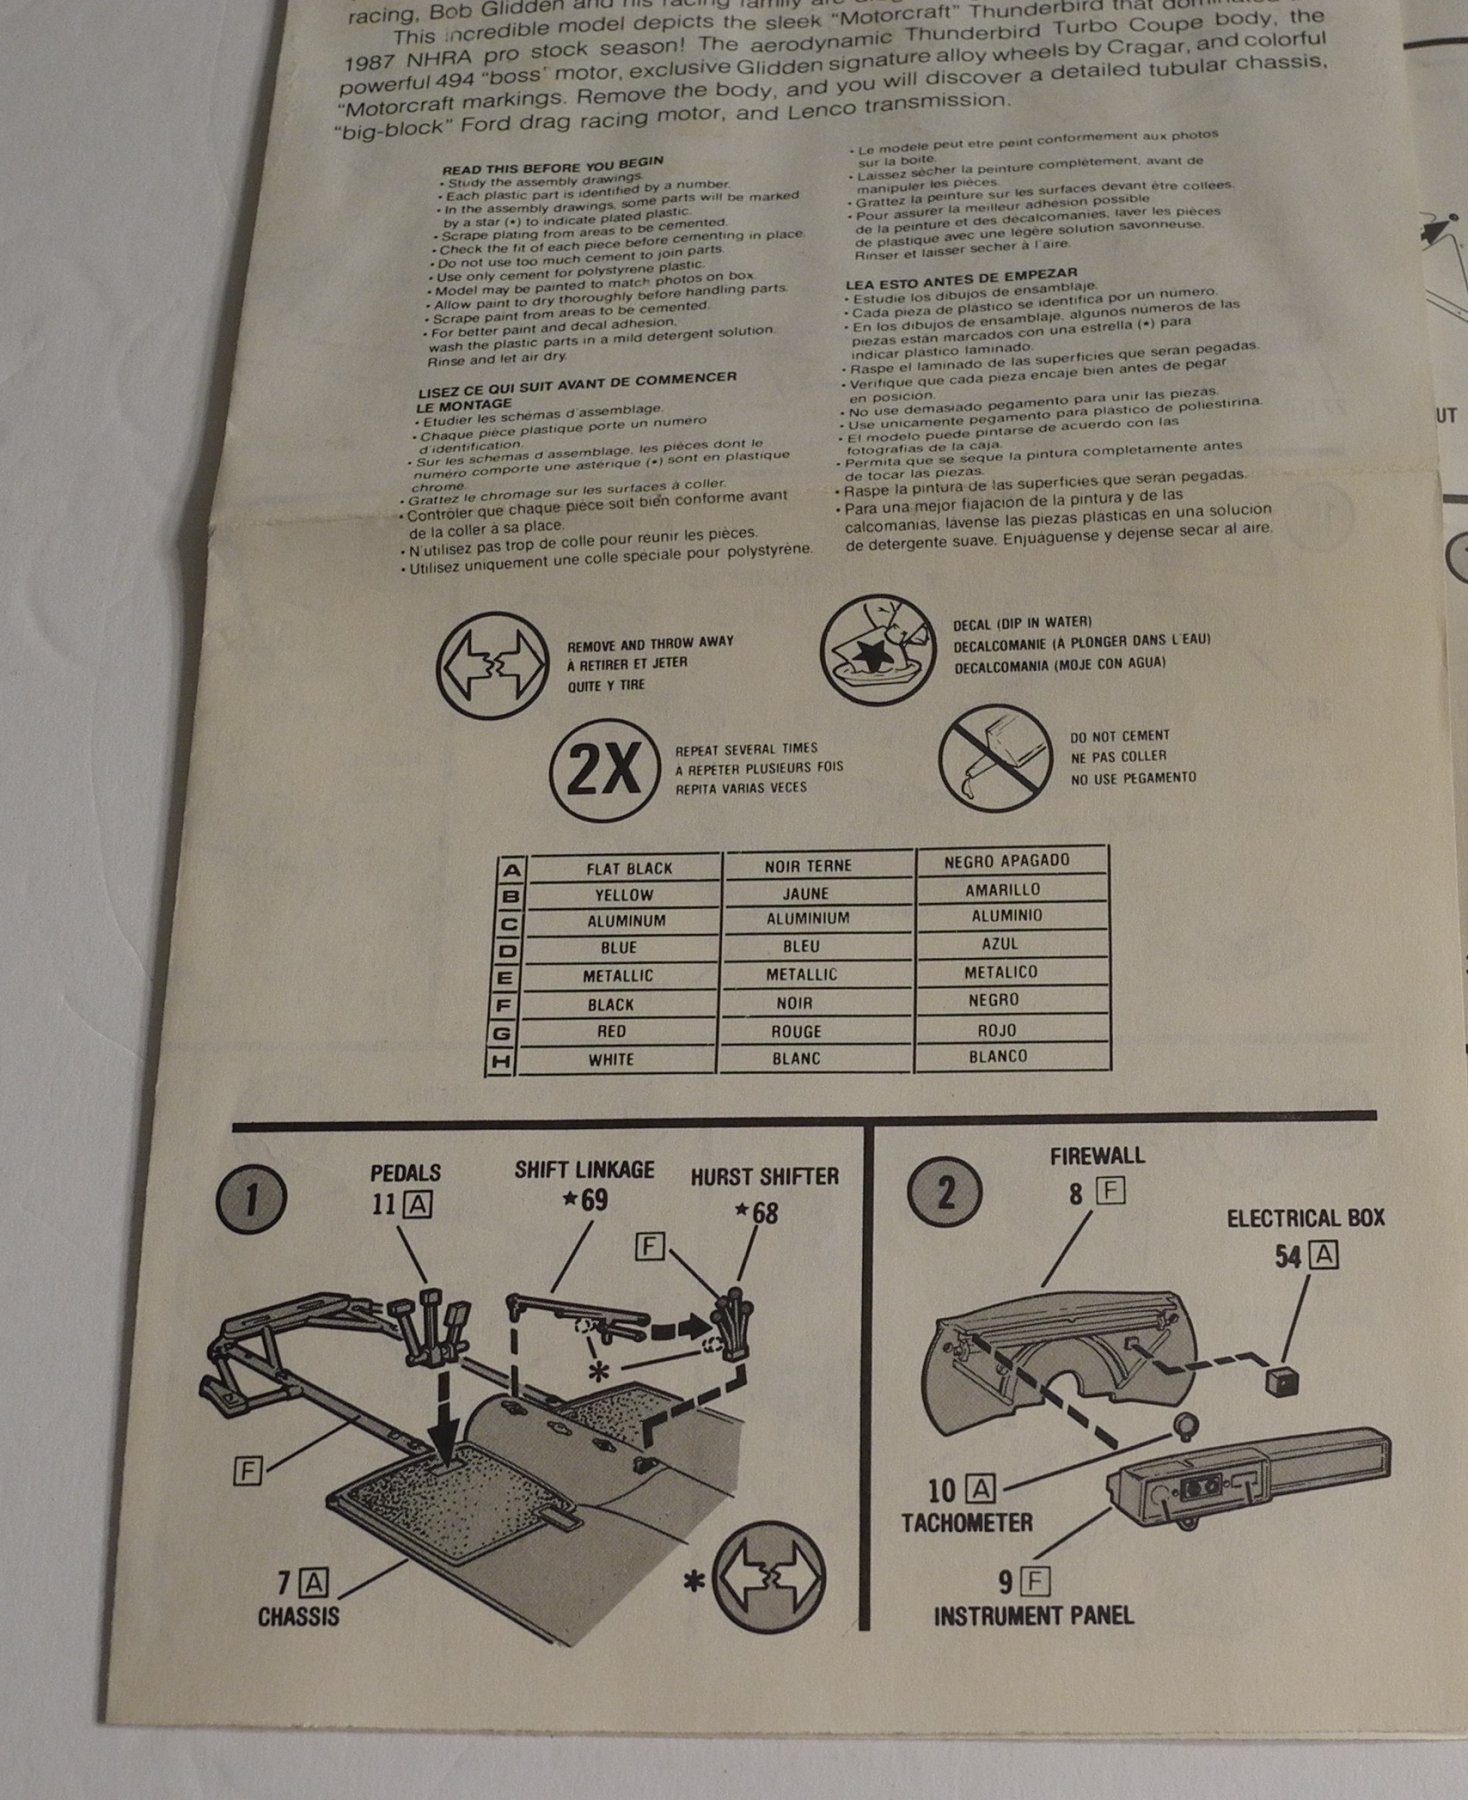
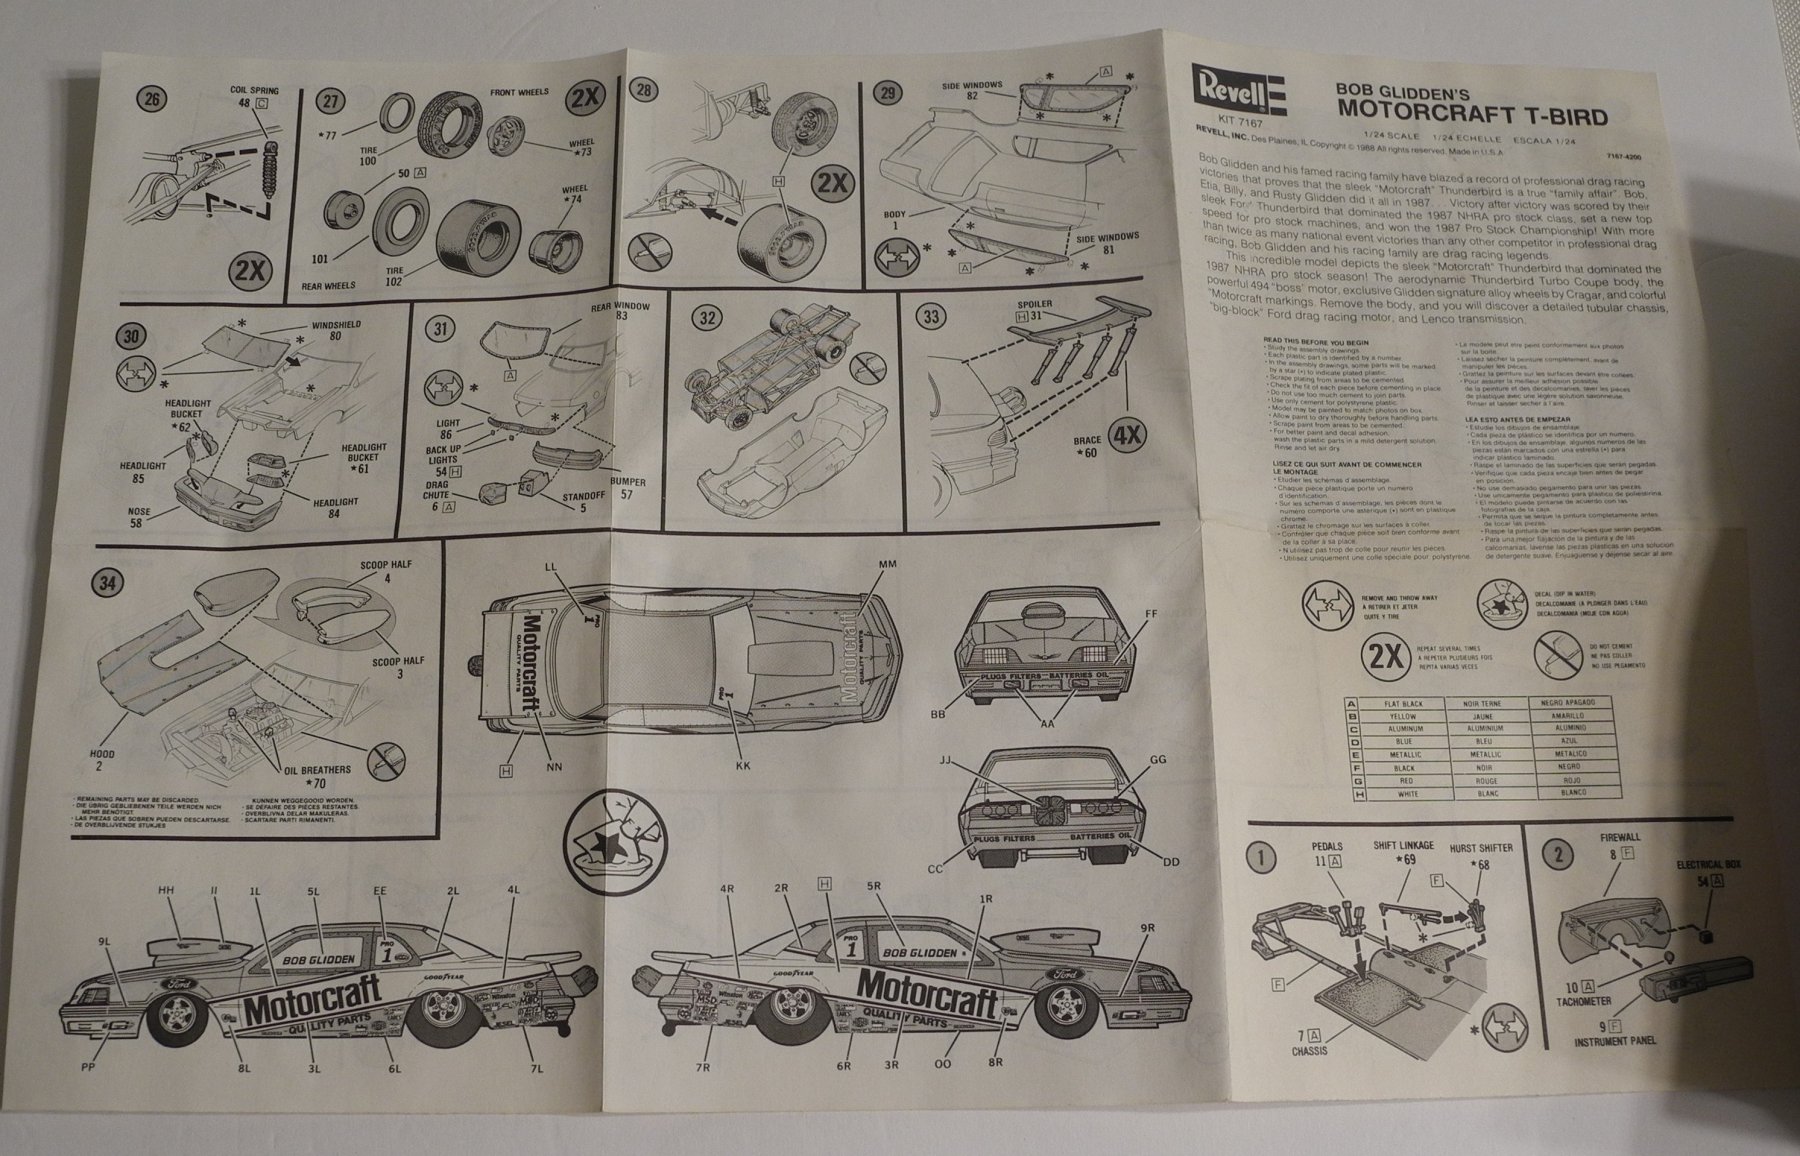
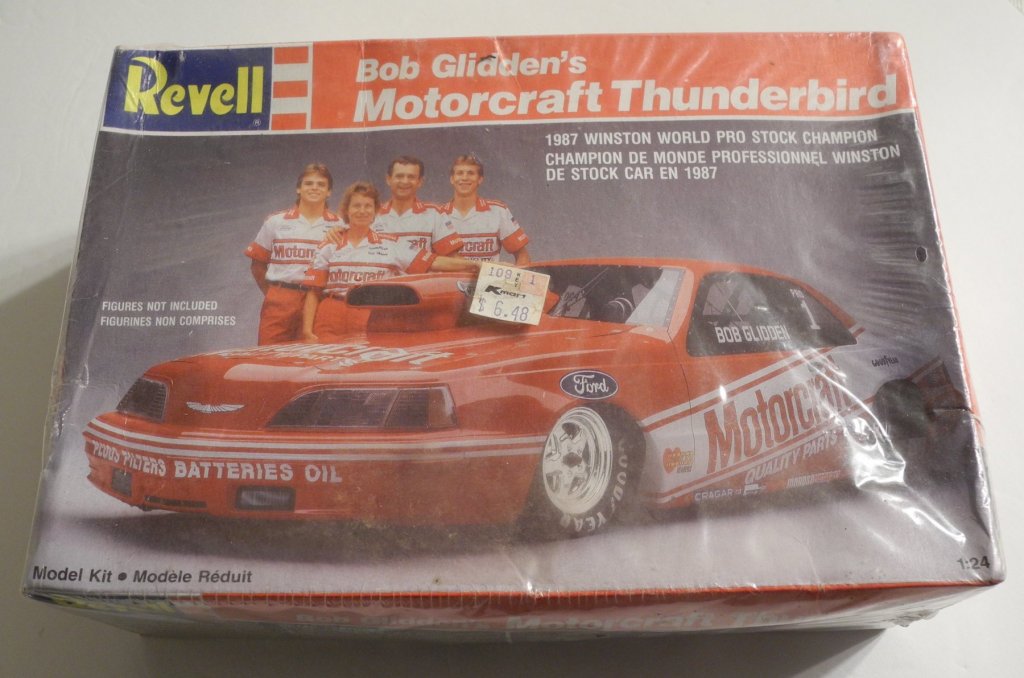
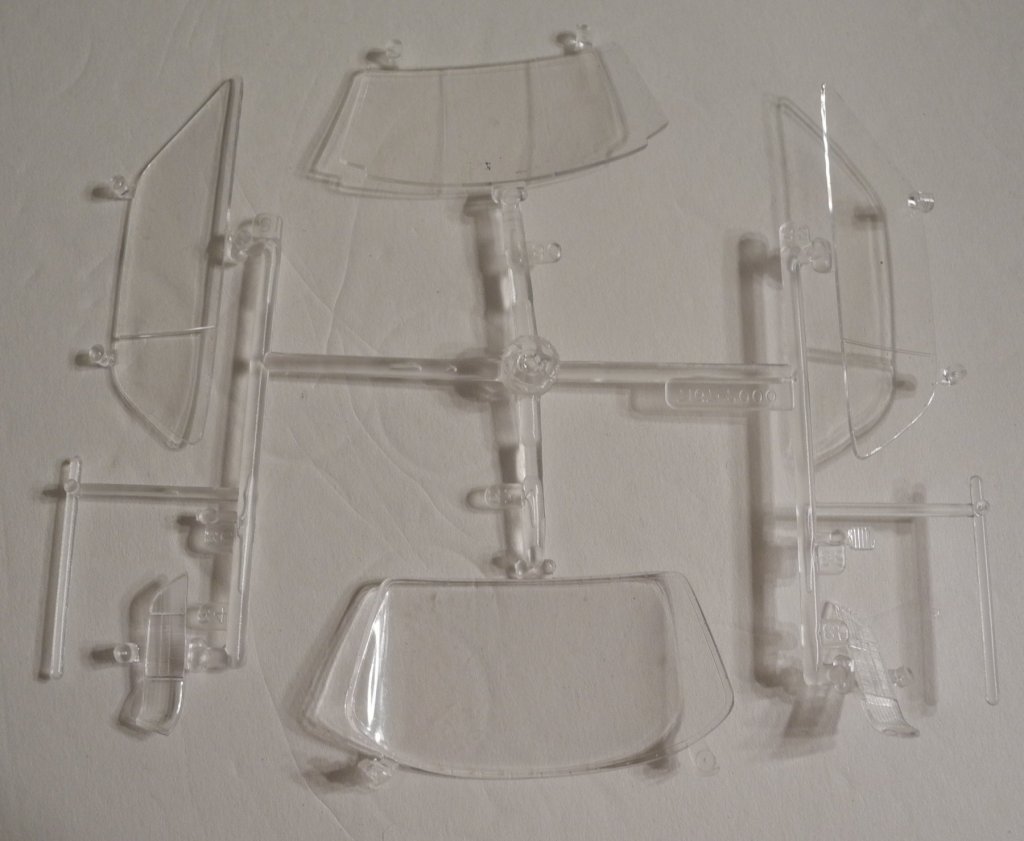
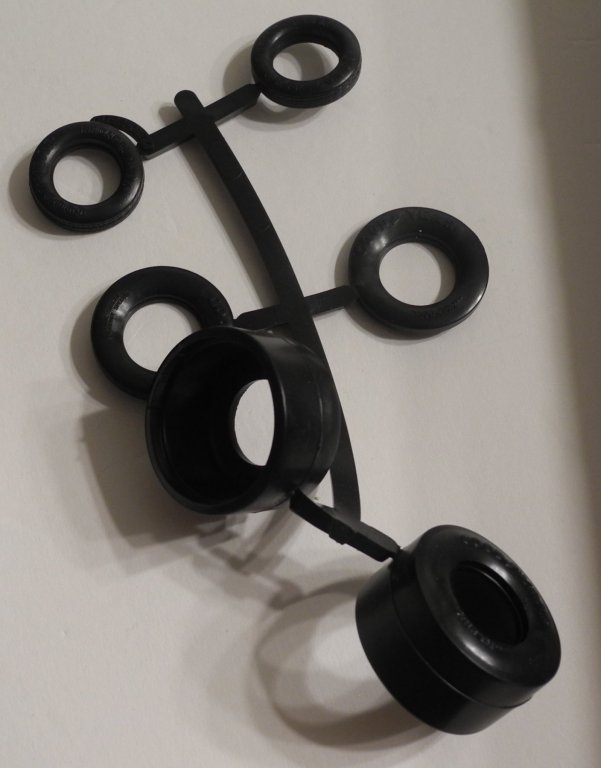
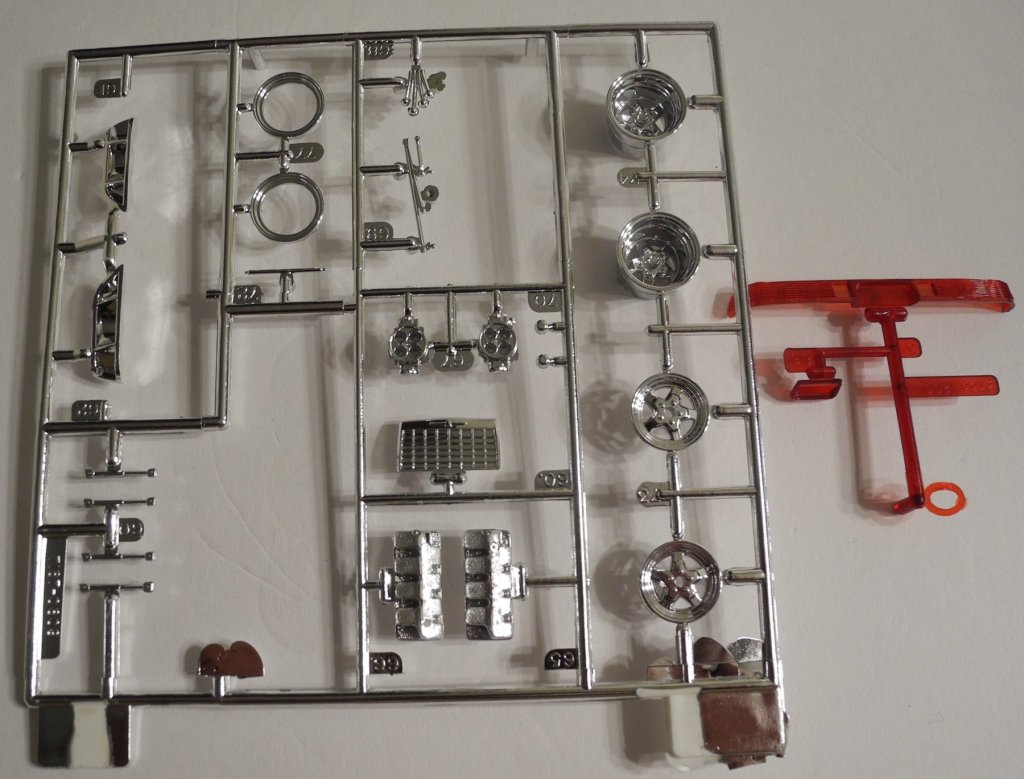
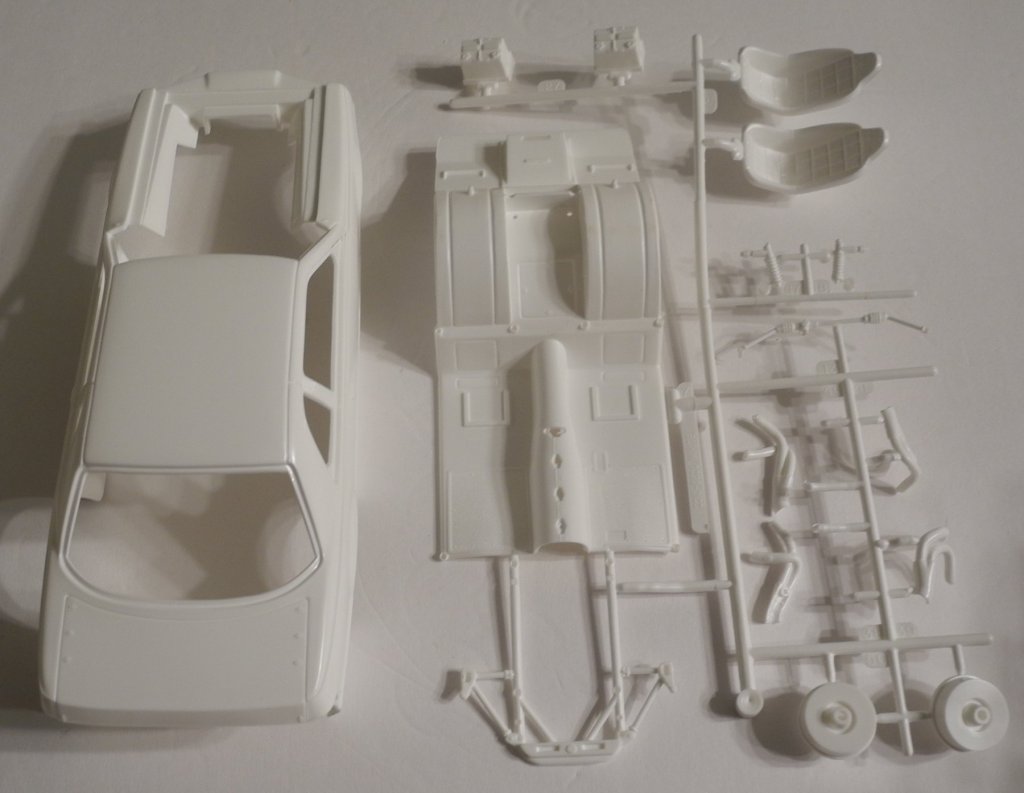
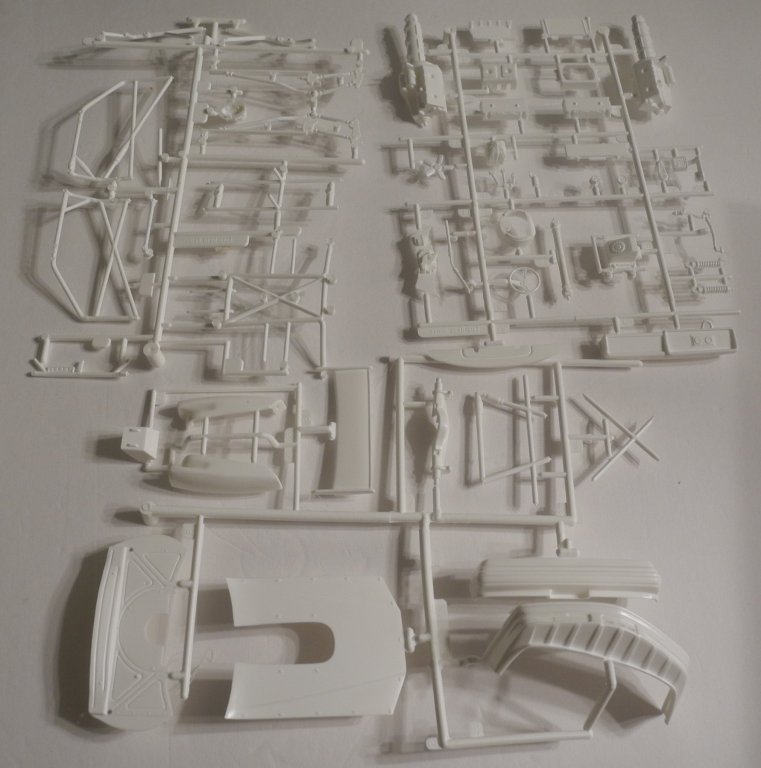
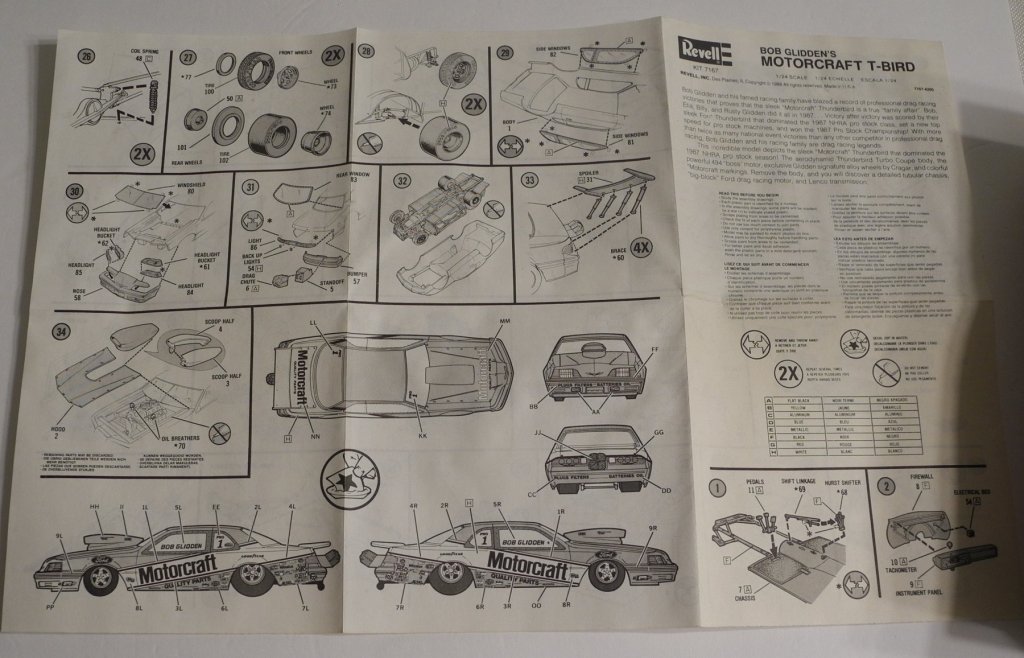
Right around 1990, Revell came out with a very nice scale model kit of the Bob Glidden Motorcraft Thunderbird Pro Stock. This car was the 1987 World Champion in the extremely competitive and popular Pro Stock category. For those who don't know, the Pro Stock category morphed from the old Super Stock category/classification. The cars are of "stock body" production cars, carburetors (no fuel injection or superchargers), but every bit as wild as Funny Cars and almost just as fast. The Glidden Thunderbird was a great build for me around 1990. The kit went together very well, very well engineered, and I liked the color scheme and markings. Recently I found an unopened copy of the kit on Ebay at a very fair price, and pounced on it. Here, I will build this model once more to enjoy that experience one more time. Here's what I got: The Kit Box (check out that low KMart price tag from 1990 🙂) The Kit Contents The Instructions The Decals (I'm going to need to pull off a near-miracle to salvage these)


-
Ala-Kart by CDW - FINISHED - AMT - 1:25 Scale - PLASTIC
CDW replied to CDW's topic in Non-ship/categorised builds
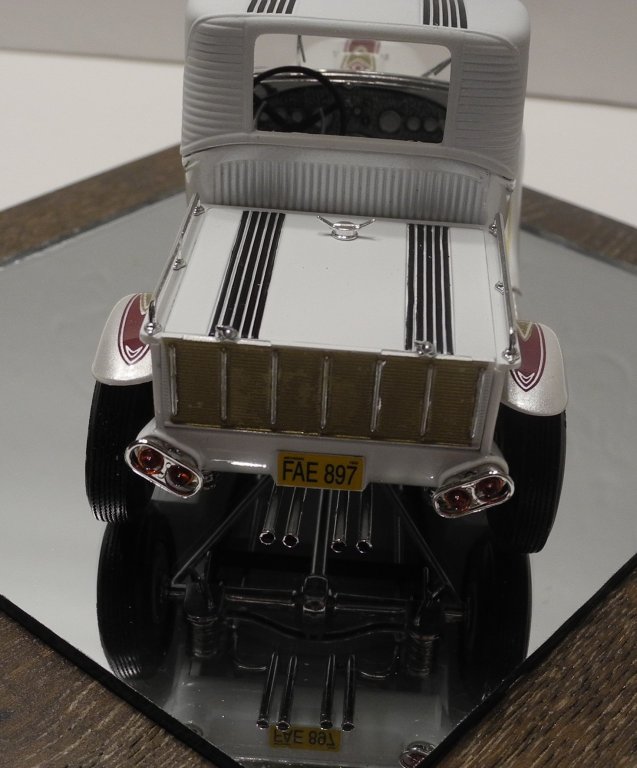
This kit came with two other options, both are different carburetor configurations. Four single barrels carbs inline. Don't know if that's fantasy, or if earlier versions of Ala-Kart was equipped with carbs. They even include the fuel lines for the carb setups. Need to start doing some serious research to pull this off. Maybe even the main library (been years since I did that last). -
Ala-Kart by CDW - FINISHED - AMT - 1:25 Scale - PLASTIC
CDW replied to CDW's topic in Non-ship/categorised builds
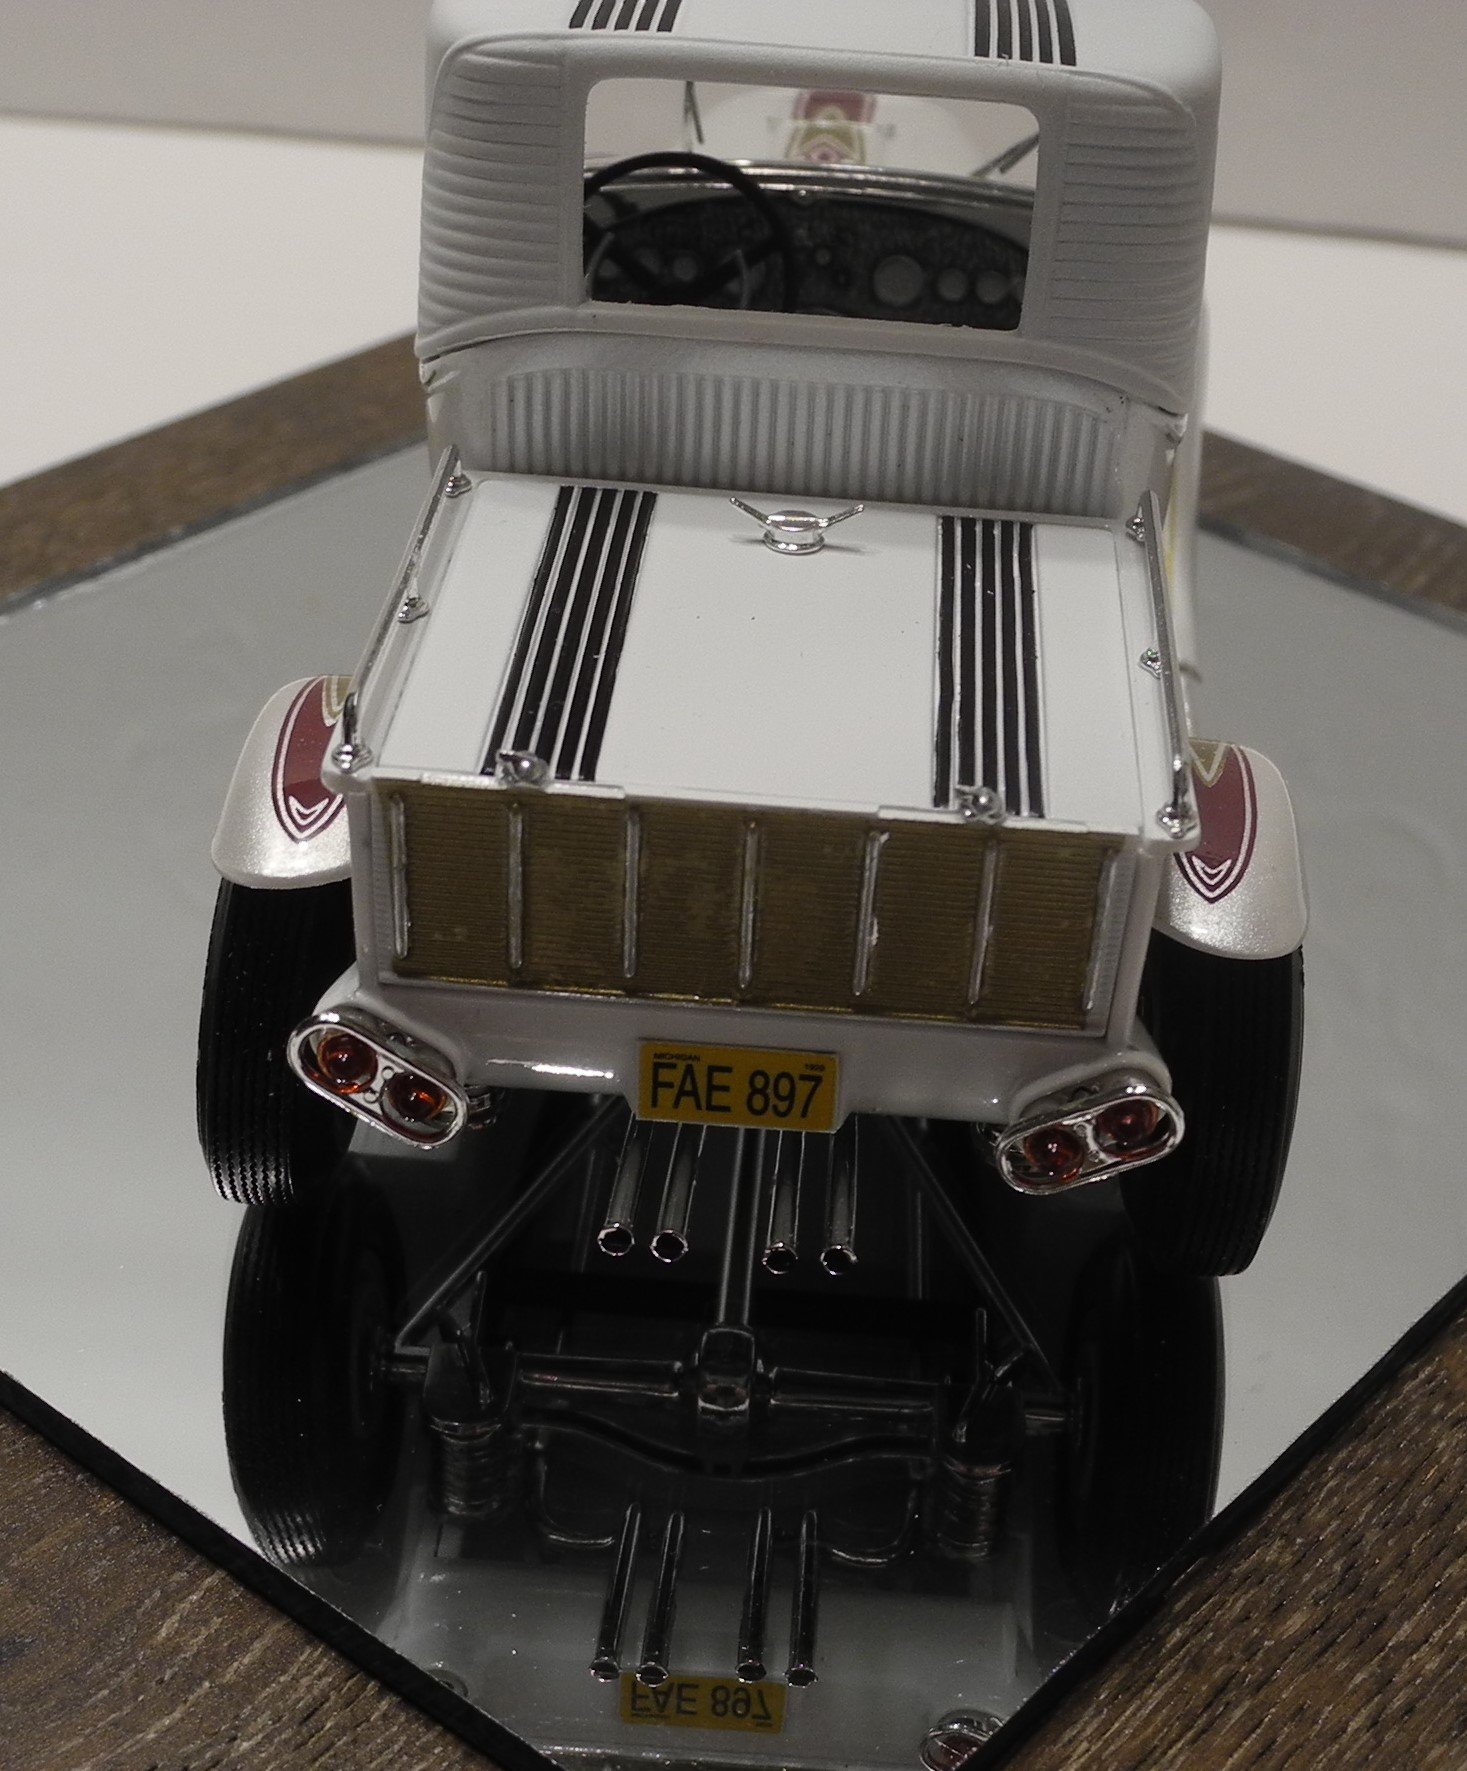
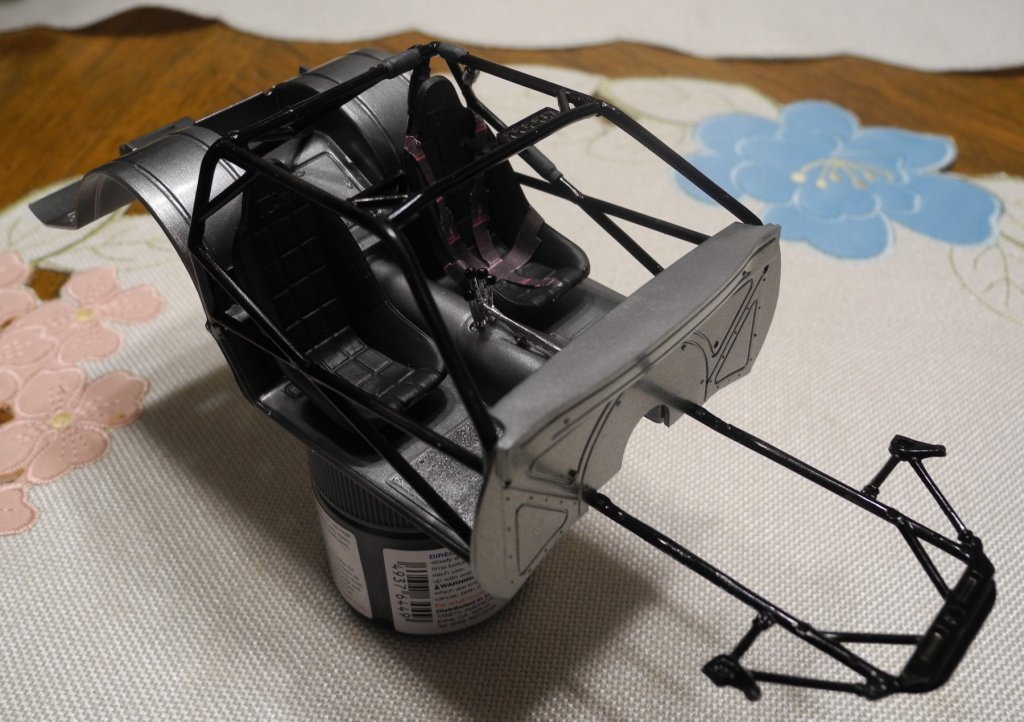
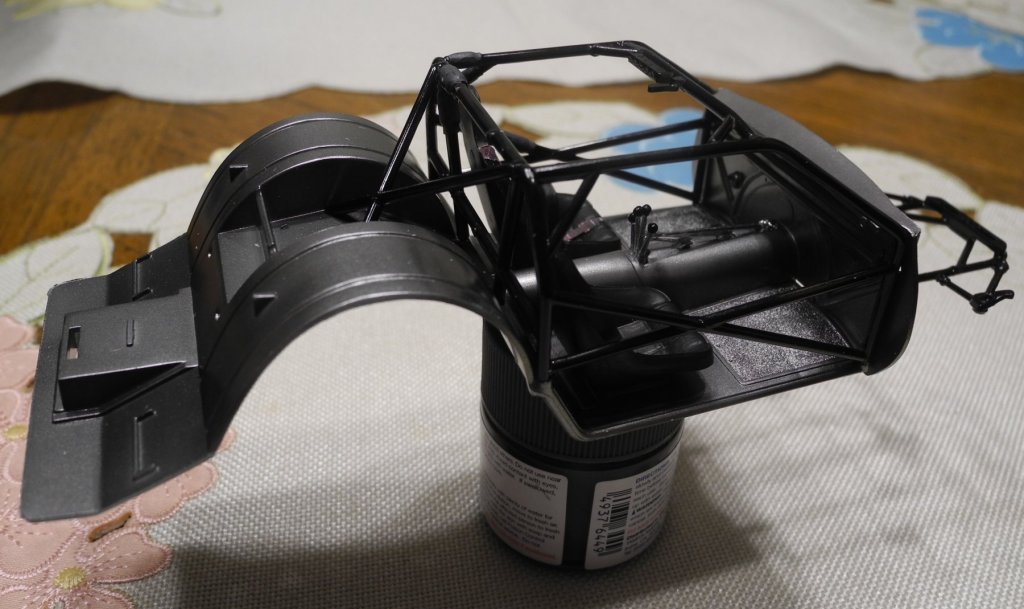
These will give a little view of the chassis and running gear underneath.

-
Yes, it's 1/96. I need to do a side by side comparison of the Alabama and Kearsarge hulls/decks. It's been my understanding for a long time that Revell based one off the other and this leaves one of them (can't remember which) less accurate than the other. When I get them out to compare, will take some photos and post them.
- 467 replies
-
- 5
-
-
- mikasa
- wave models
- (and 1 more)
-
Ala-Kart by CDW - FINISHED - AMT - 1:25 Scale - PLASTIC
CDW replied to CDW's topic in Non-ship/categorised builds
That 2nd set was the one I passed on yesterday. Shipping too high. Tonight I bought the 1st set. 😎 -
Ala-Kart by CDW - FINISHED - AMT - 1:25 Scale - PLASTIC
CDW replied to CDW's topic in Non-ship/categorised builds
I just now found and bought another set of Fred Kady Ala-Kart decals on Ebay. The postage charge was very fair this time, price as well. Maybe there will be a new and better Ala-Kart in my future. Got a lot of ideas I need to write down while it's fresh on my mind. I don't know much about that 241 cubic inch hemi. Need to research it for super detail on the next model, plus figure out how I want to display an open hood. A high quality build will require a lot of details be added. -
I've had multiple copies in the past, but just kept one each. Gave some to my friends. CSS Alabama was re released around 2000, or maybe the 90's. My Kearsarge is from 50's or 60's.
- 467 replies
-
- 5
-
-
- mikasa
- wave models
- (and 1 more)
-
Ala-Kart by CDW - FINISHED - AMT - 1:25 Scale - PLASTIC
CDW replied to CDW's topic in Non-ship/categorised builds
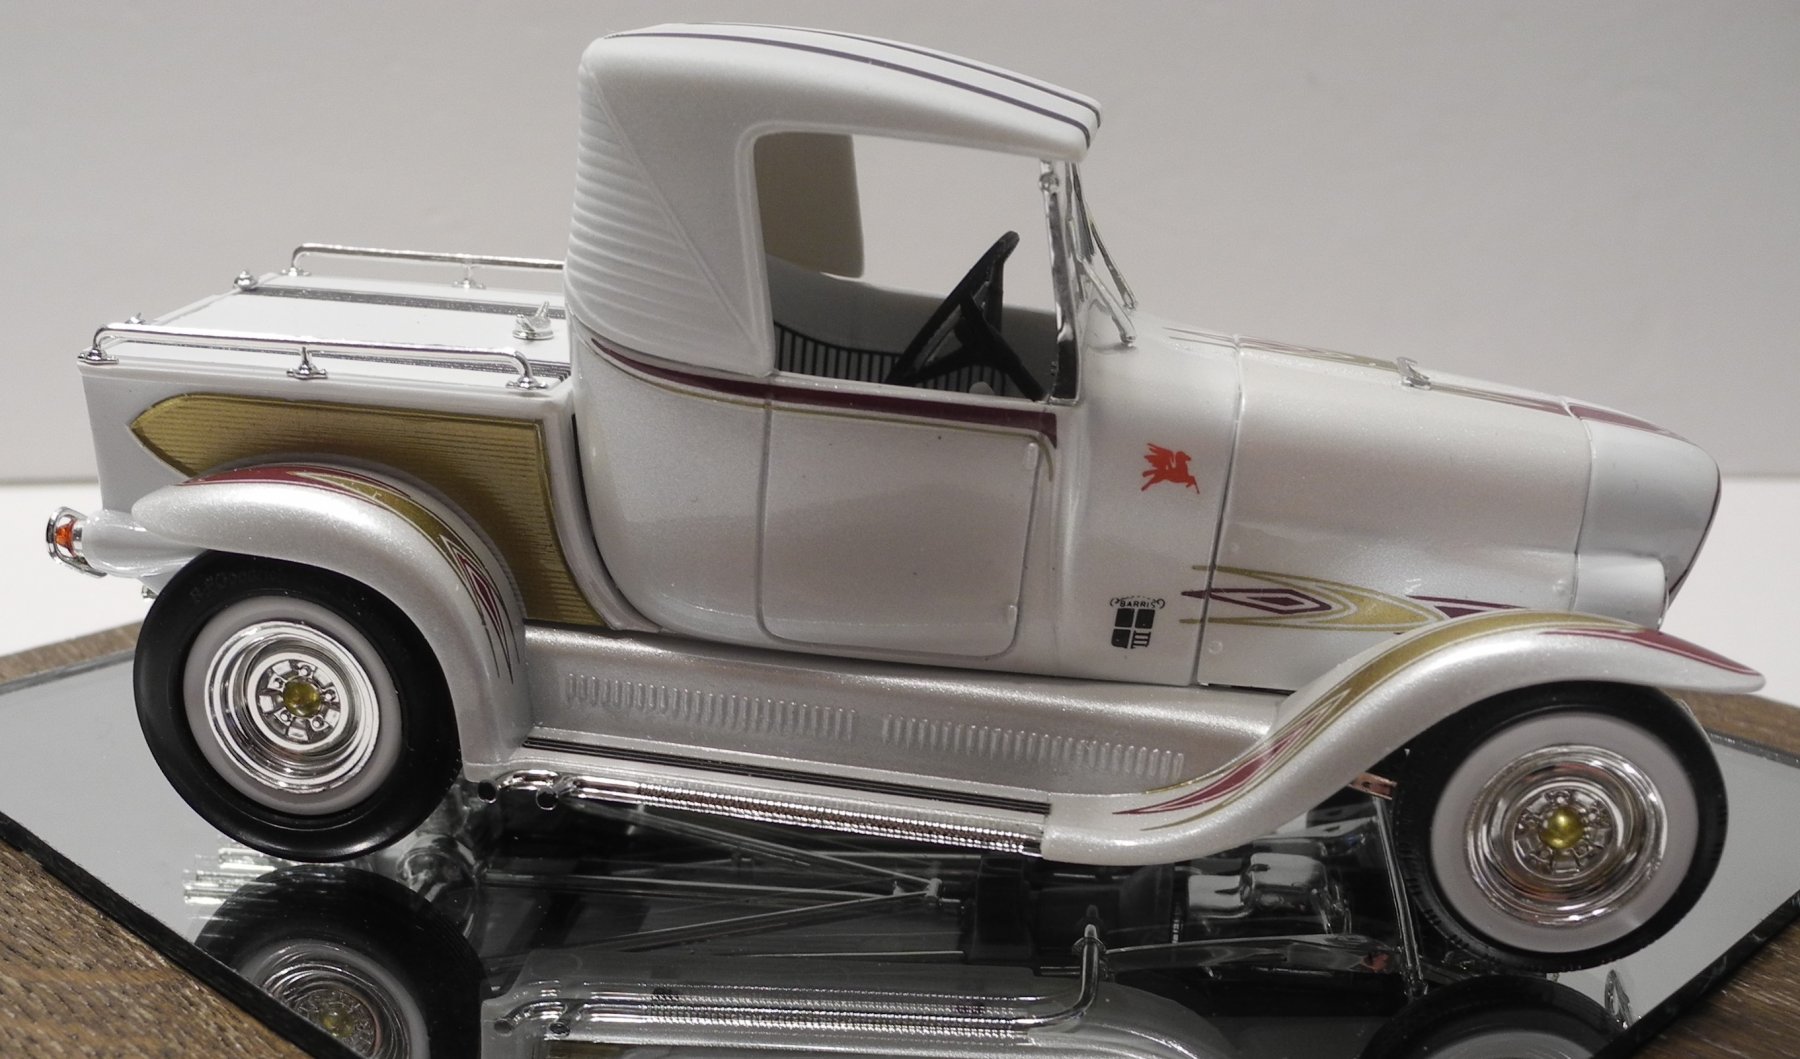
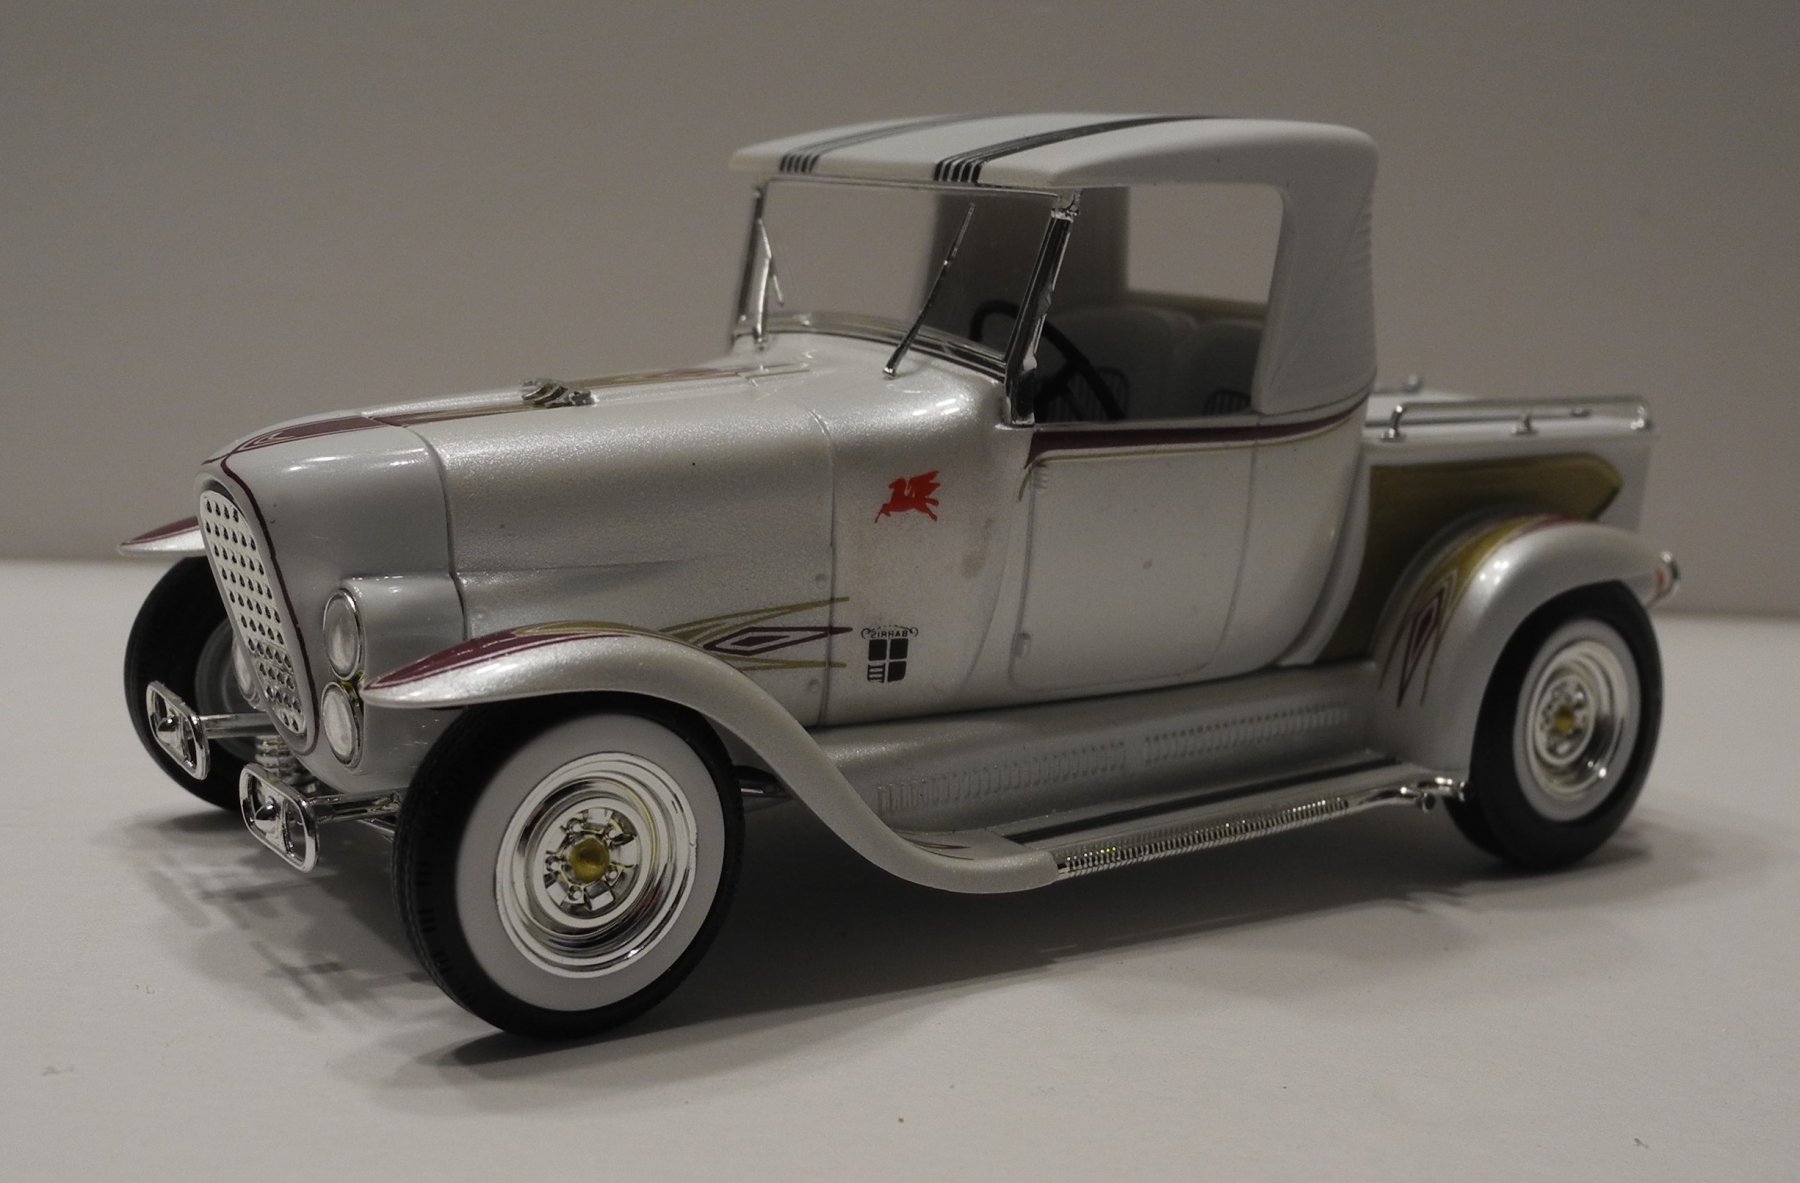
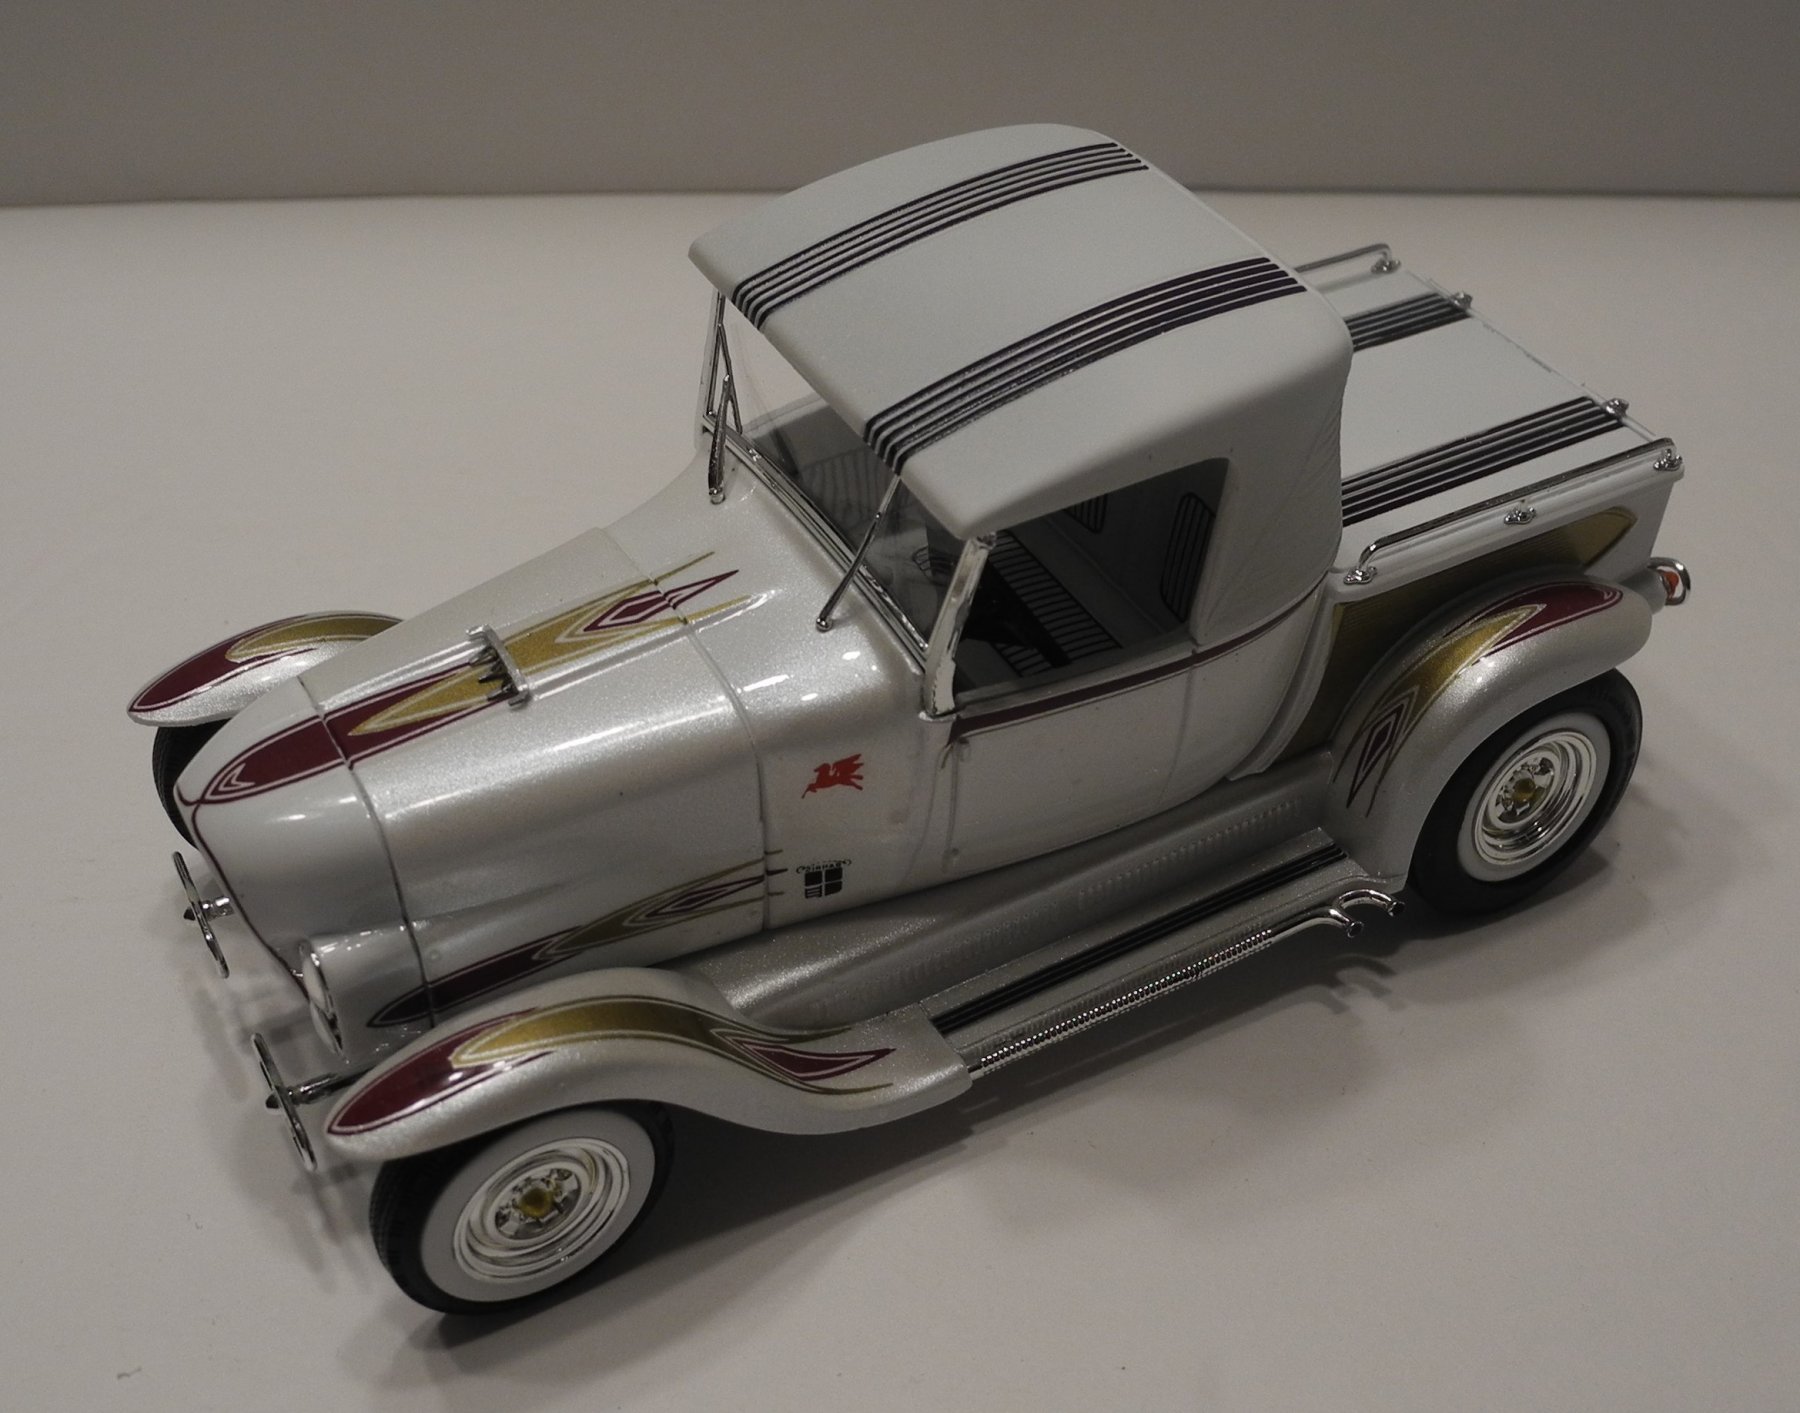
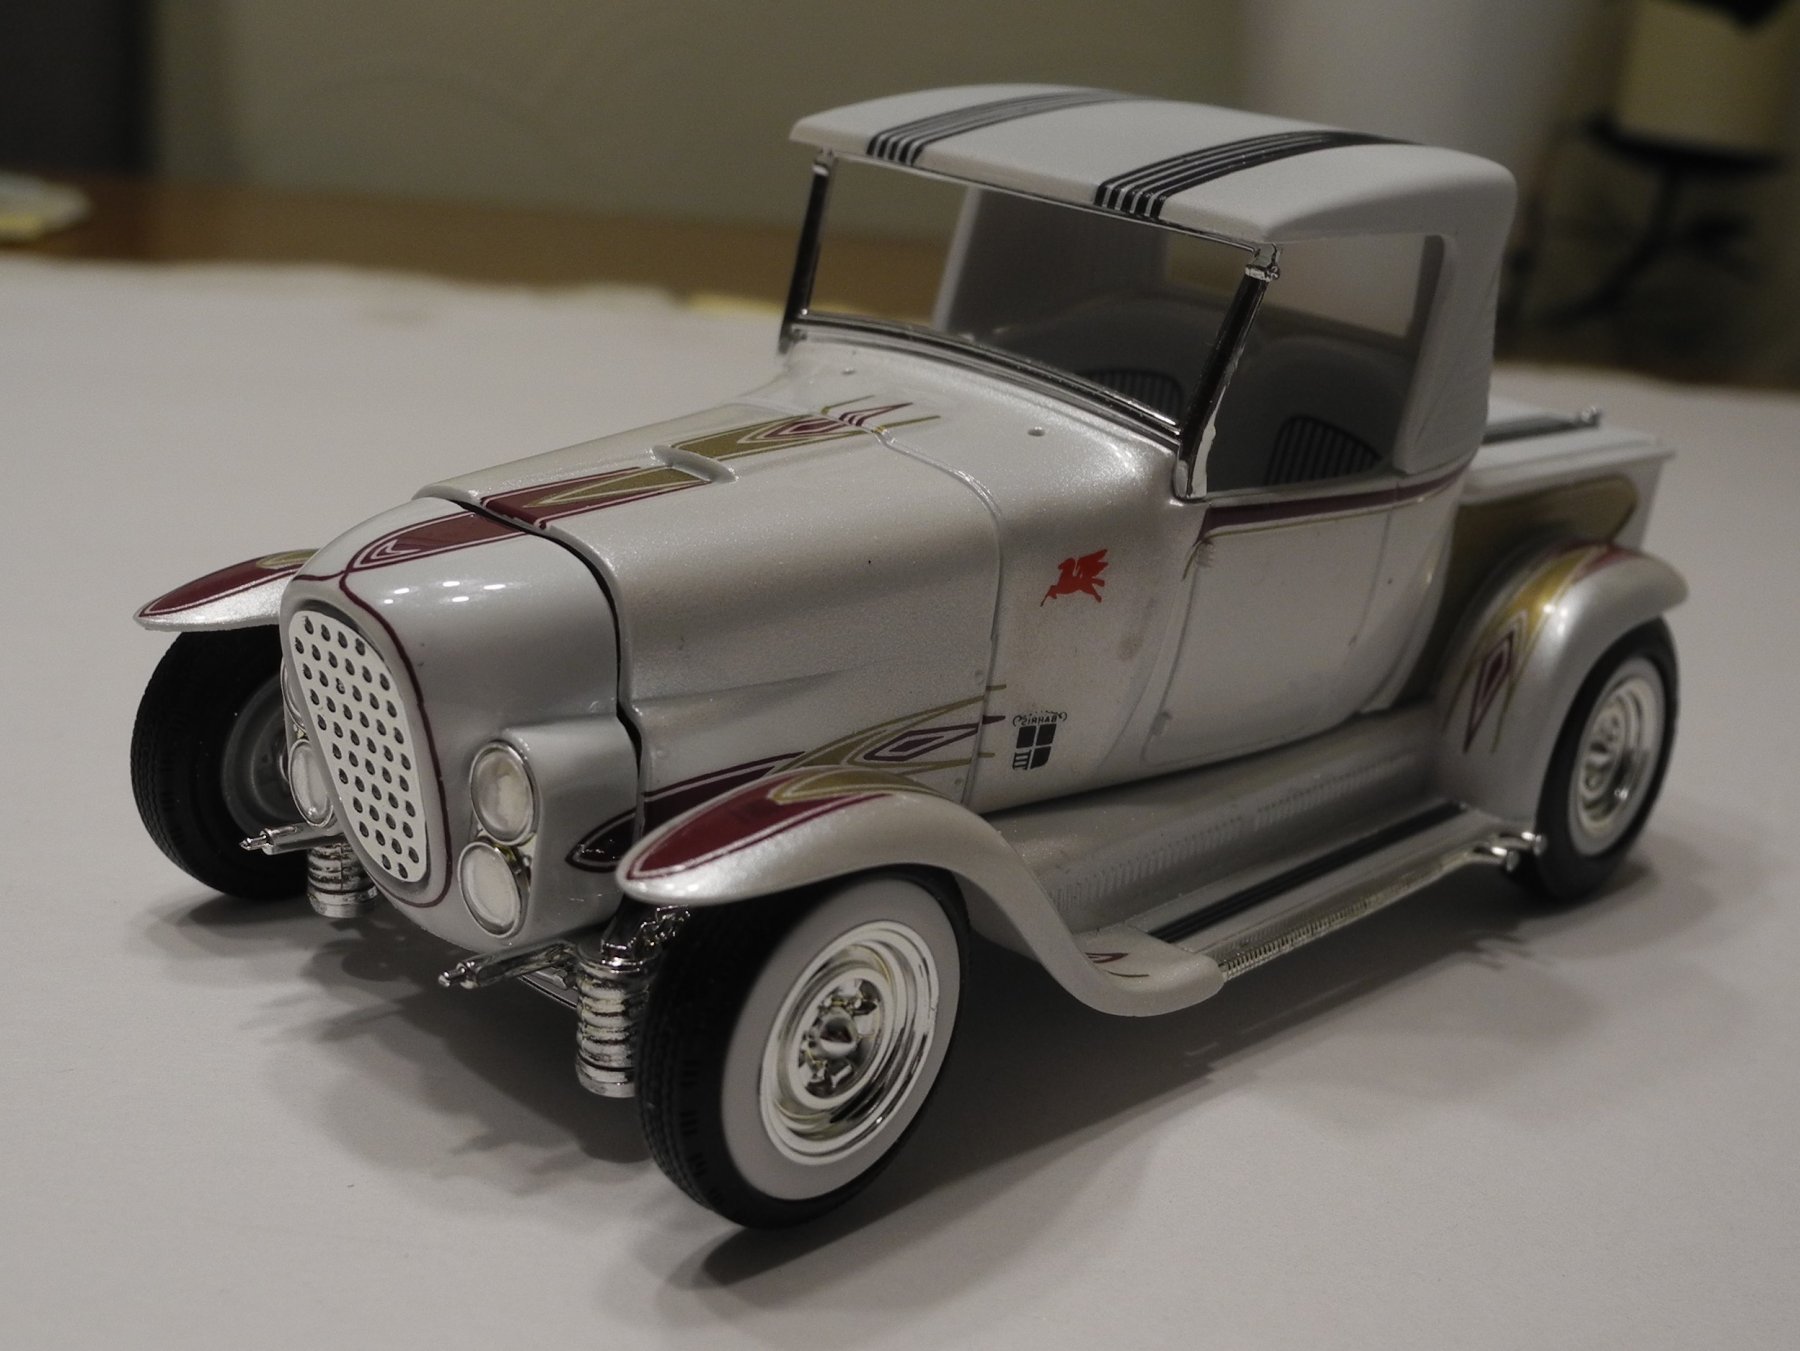
Thanks much for all your kind comments. The flaws are there, it's just not show quality. Looks pretty decent but leaves a bitter taste in my mouth because I hate imperfection in my own work. Not that perfection could ever be achieved 100% but it's still what we shoot for, perfection, symmetry, and fully functional (to the degree a model will allow). But all this goes back to the fact it takes me always at least two kits of each thing I build to get it right. At least two. I saw another set of these decals for sale but didn't buy them. I thought the shipping price was too high. Probably should have bought them anyway, because they won't be easy to find. The kit is not hard to find, but the decals...oh man. That different look from different angles is a function of the pearl white and clear reflecting the colors of the decals. The model just wouldn't be the same without the decals. The kit ones are pure dog pile. Not fit for use. -
Ala-Kart by CDW - FINISHED - AMT - 1:25 Scale - PLASTIC
CDW replied to CDW's topic in Non-ship/categorised builds
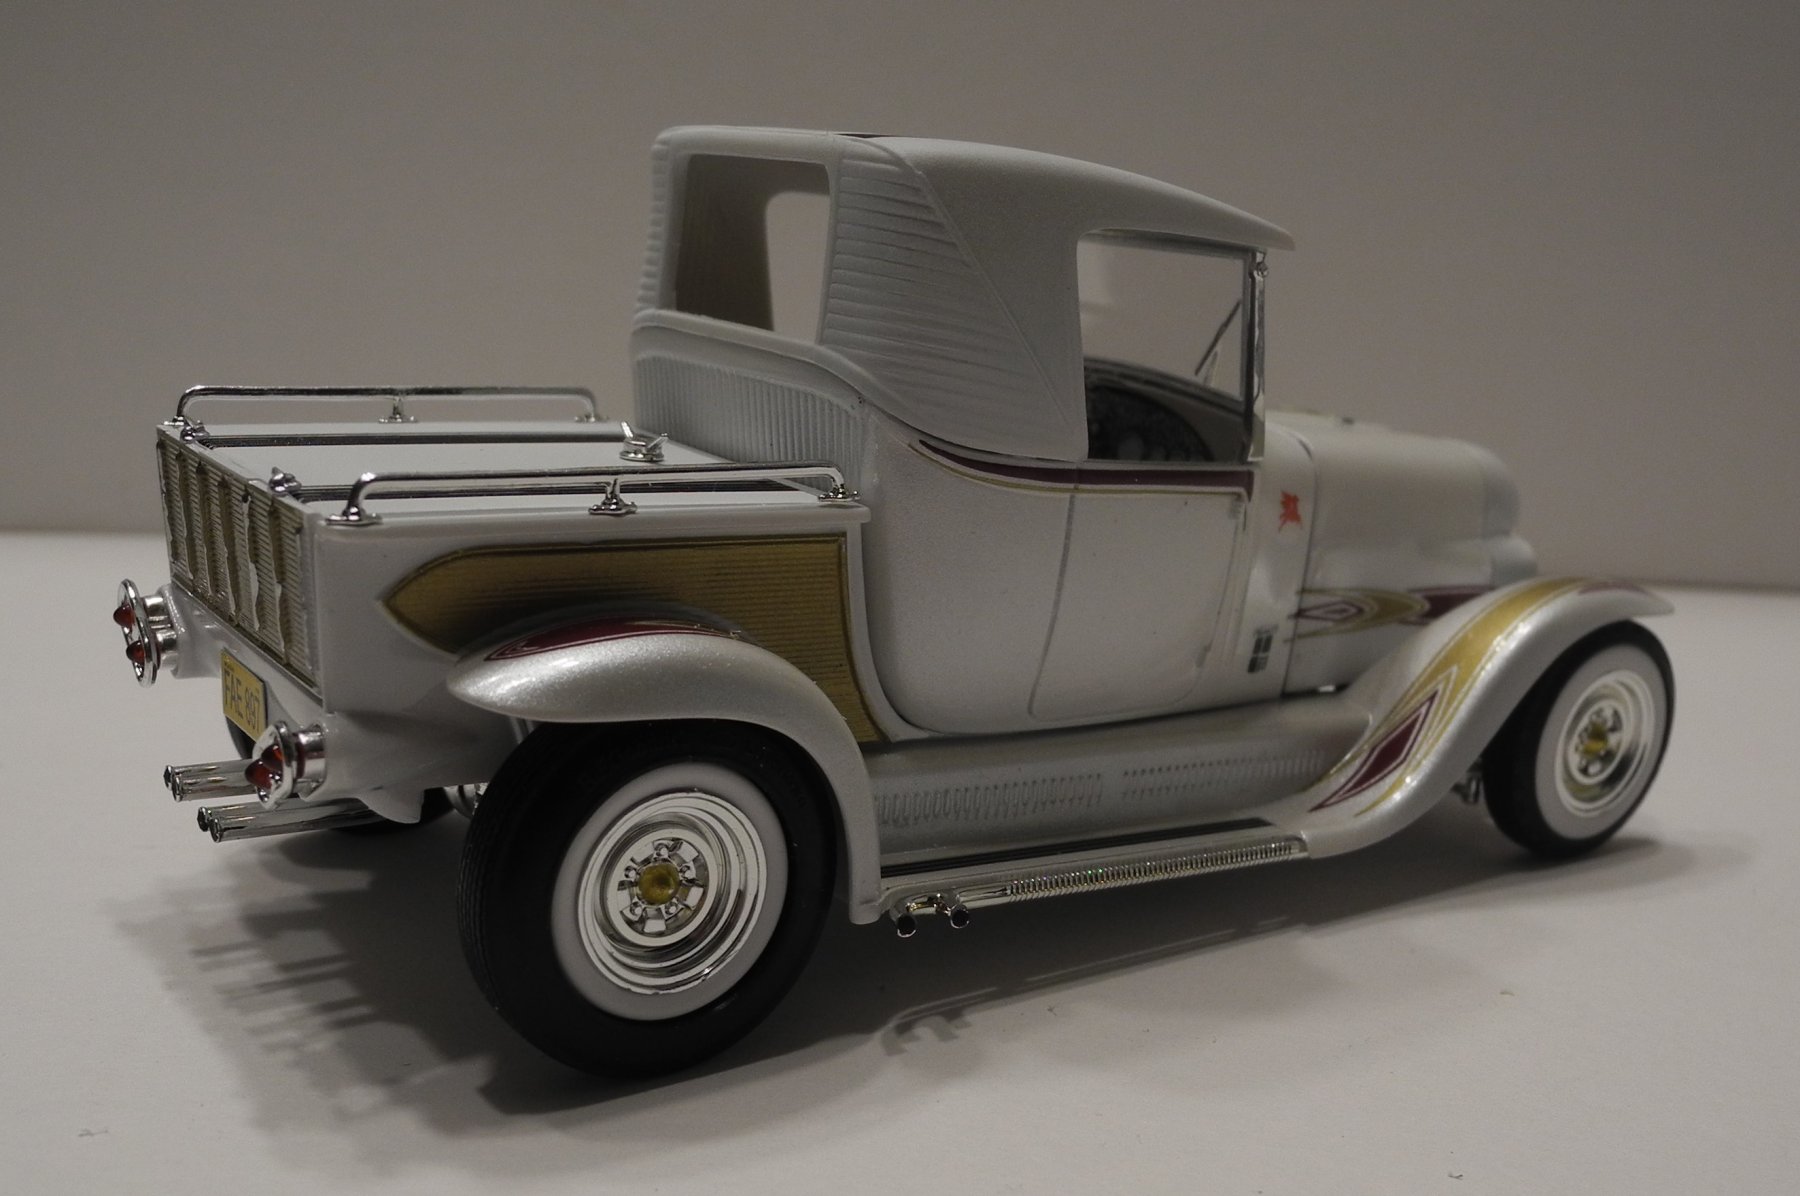
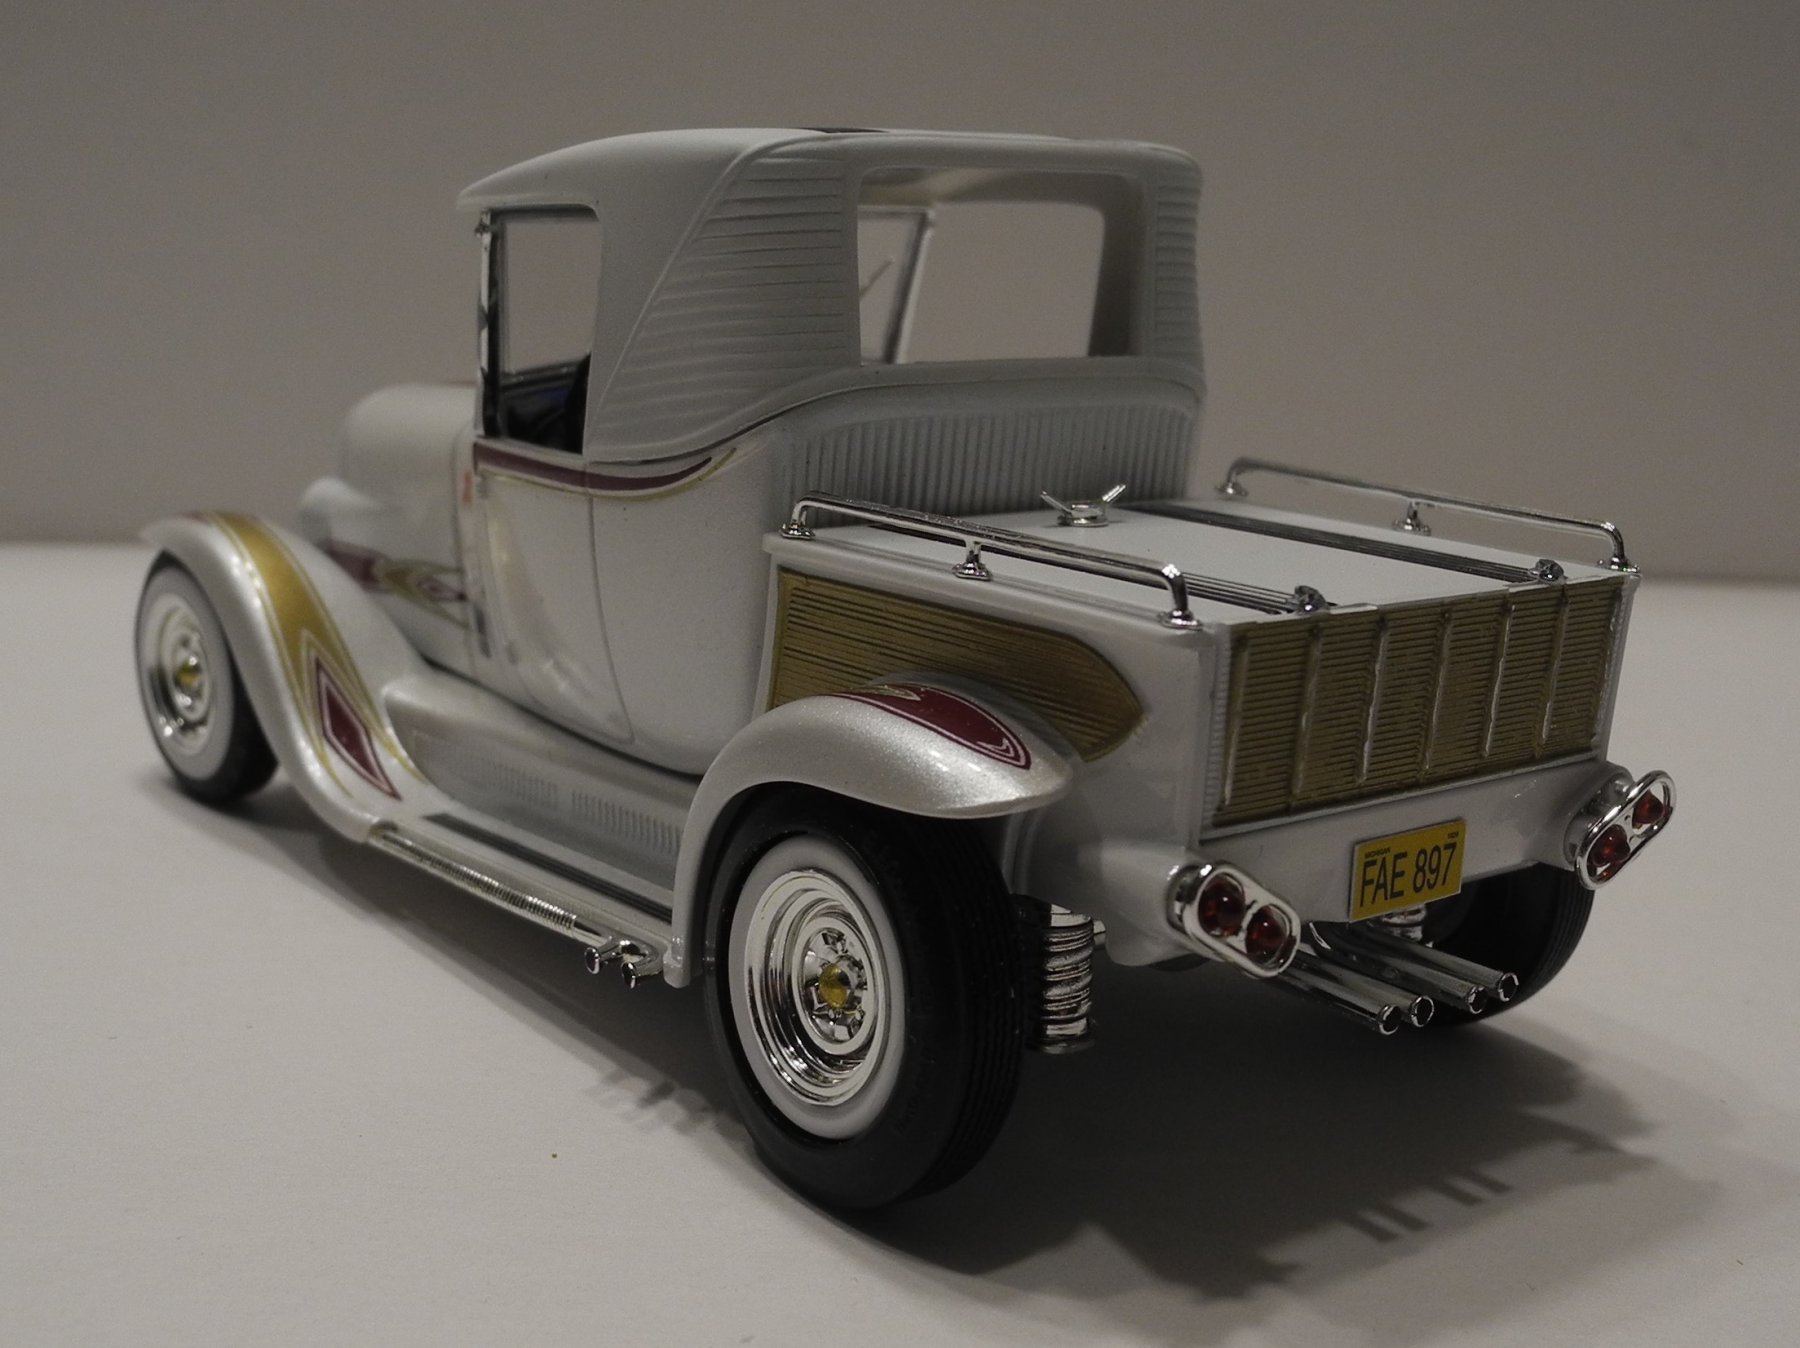
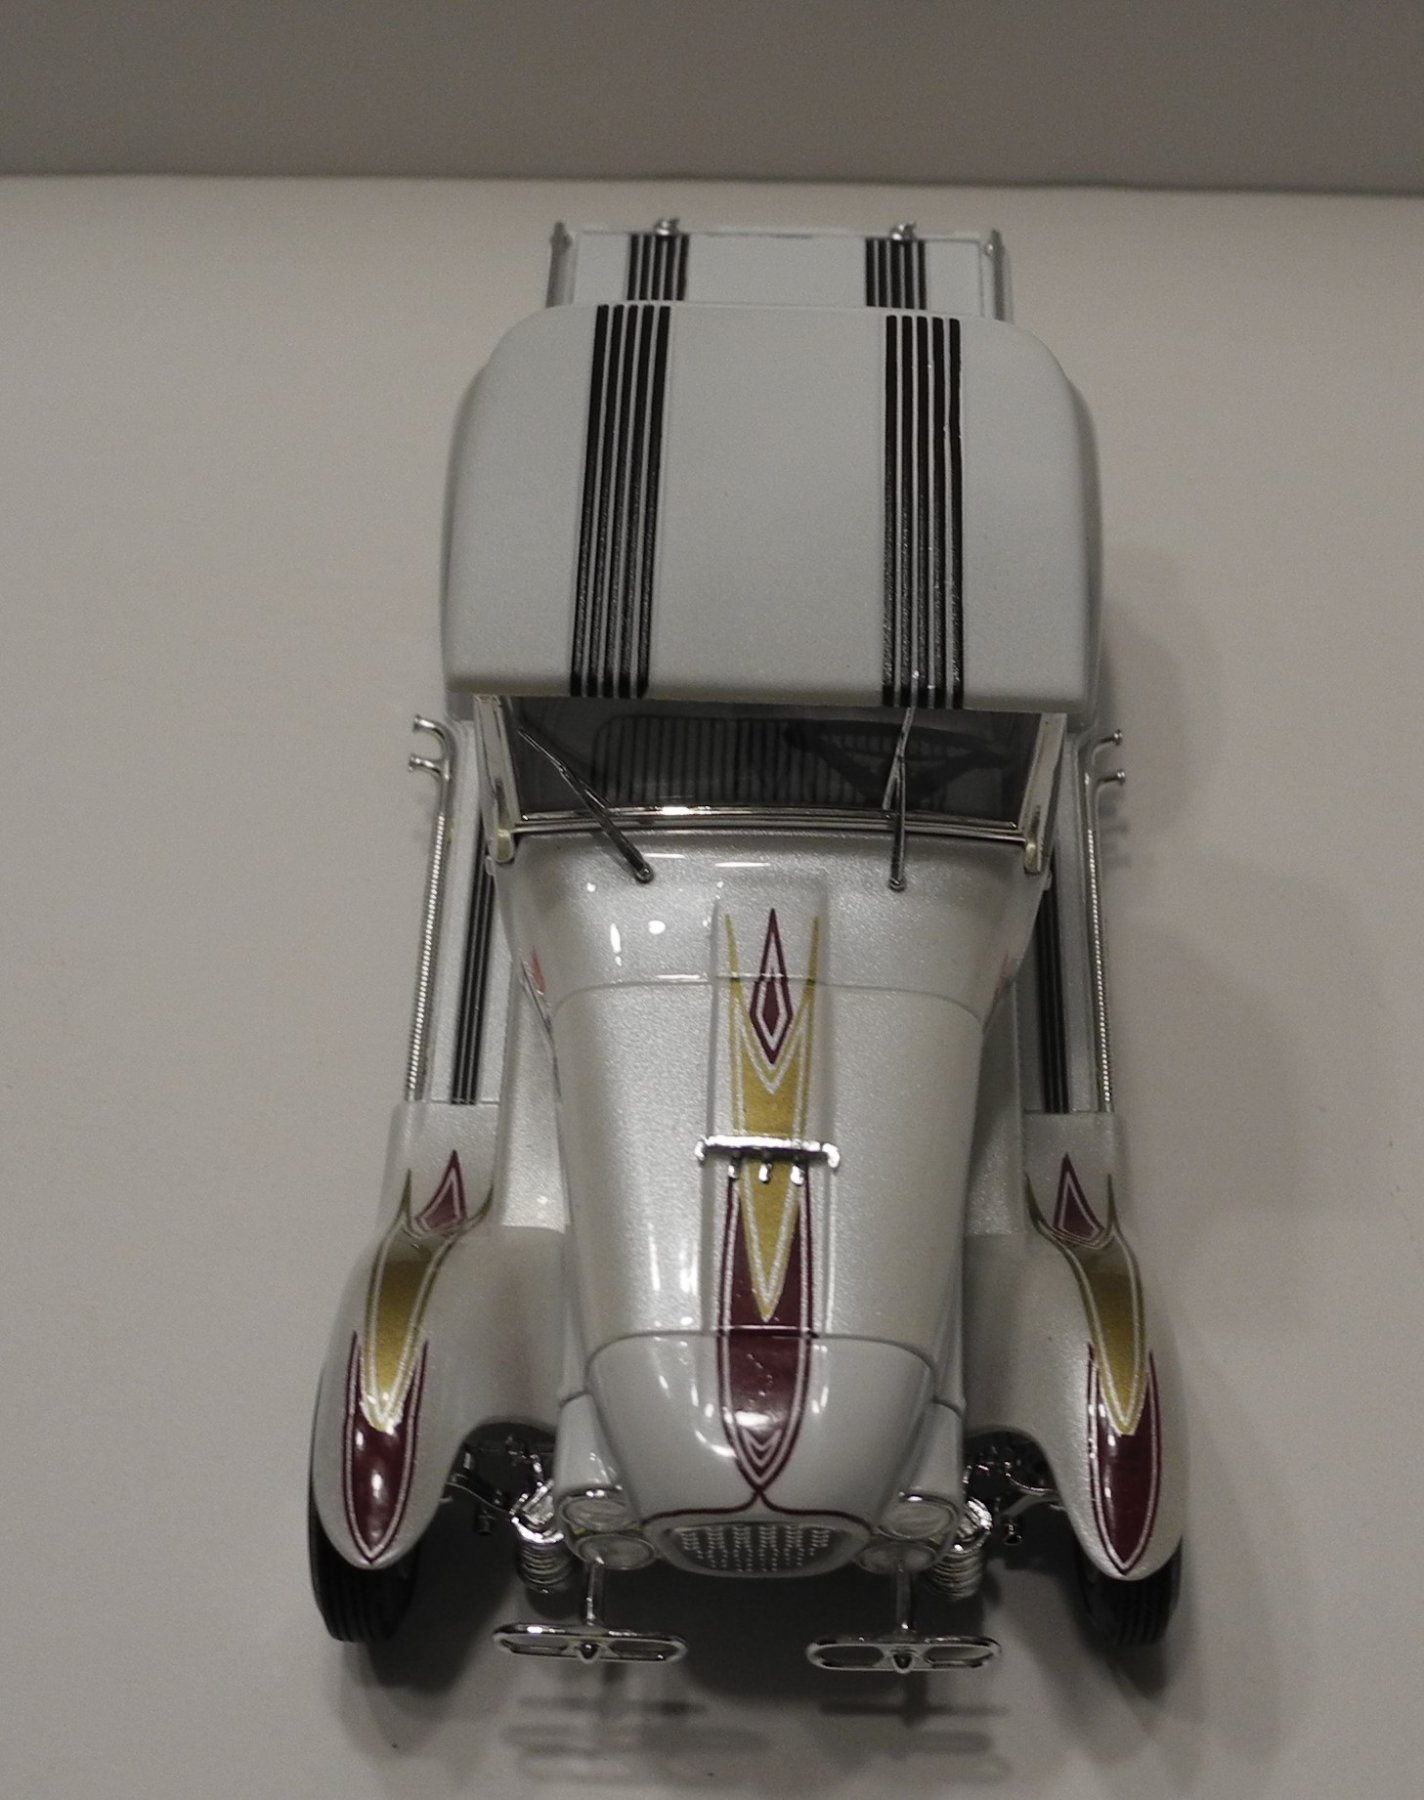
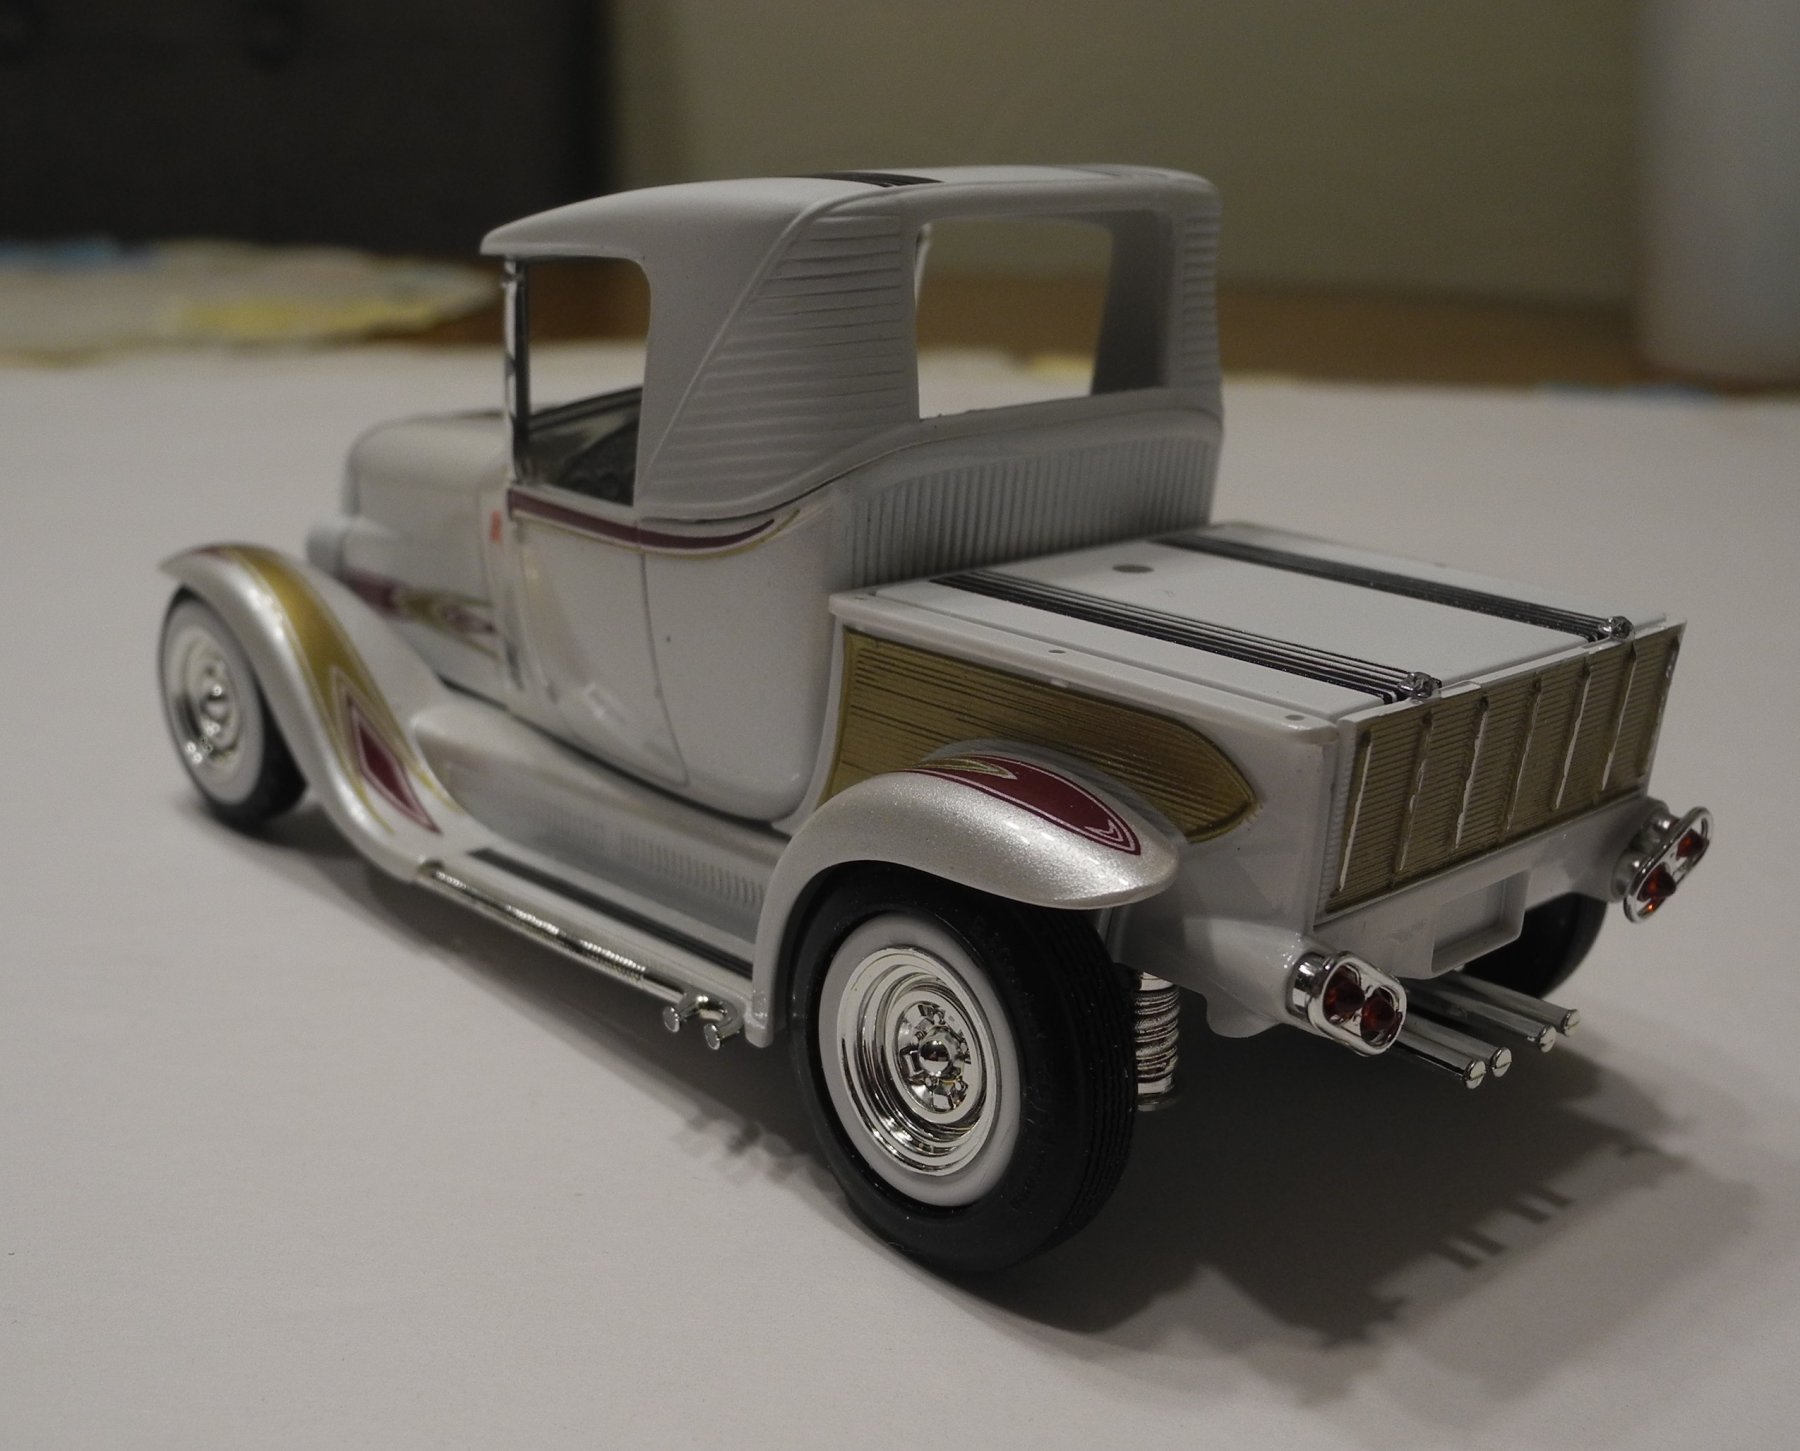
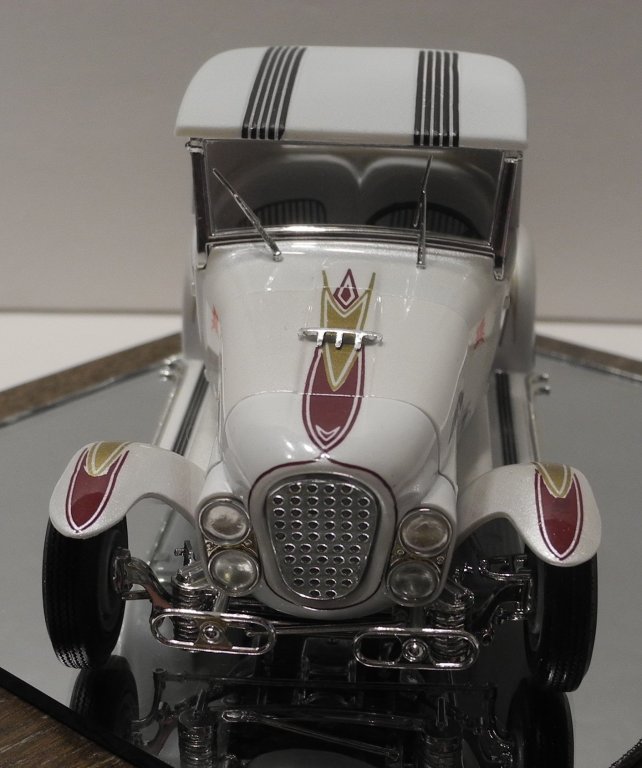
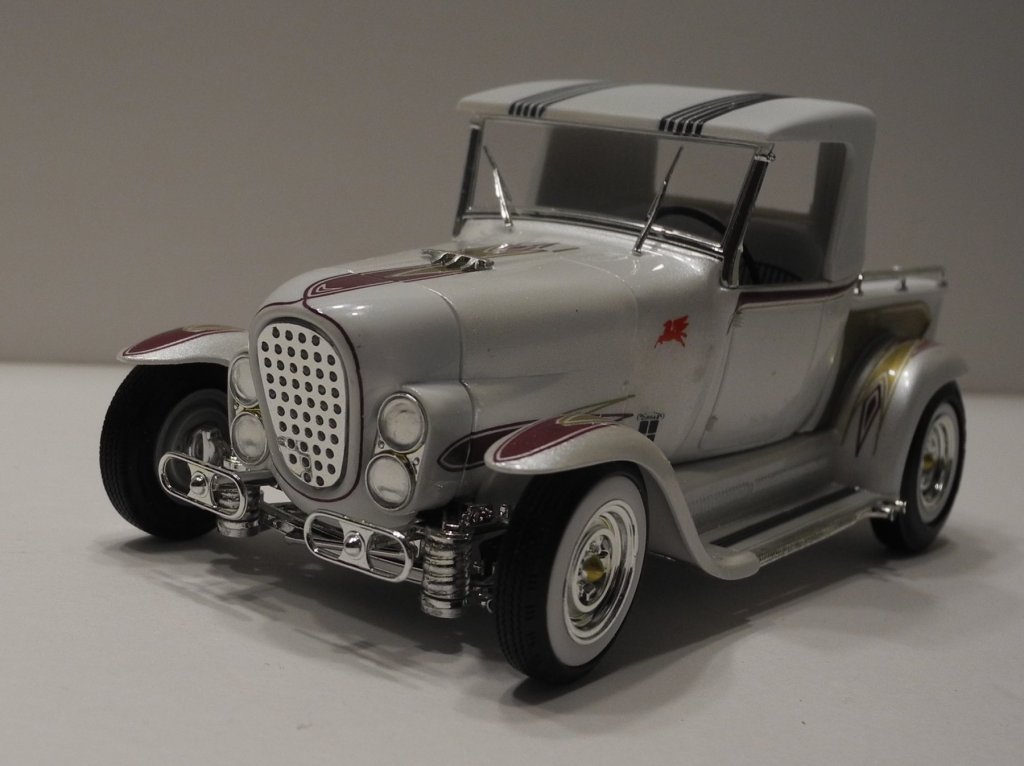
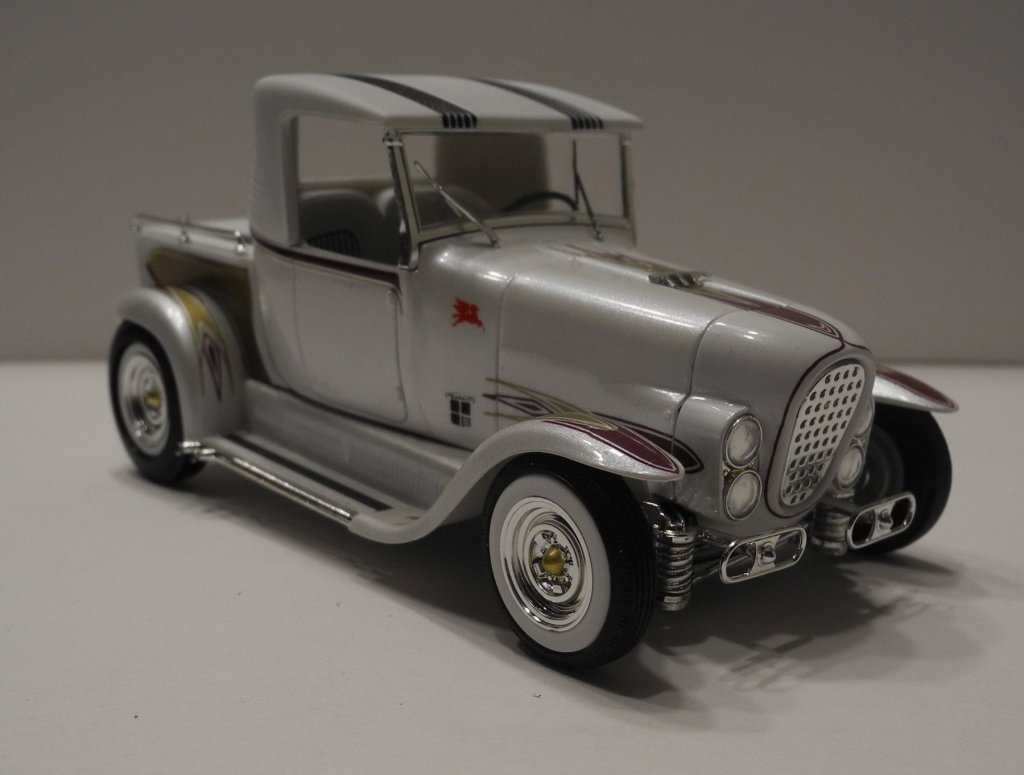
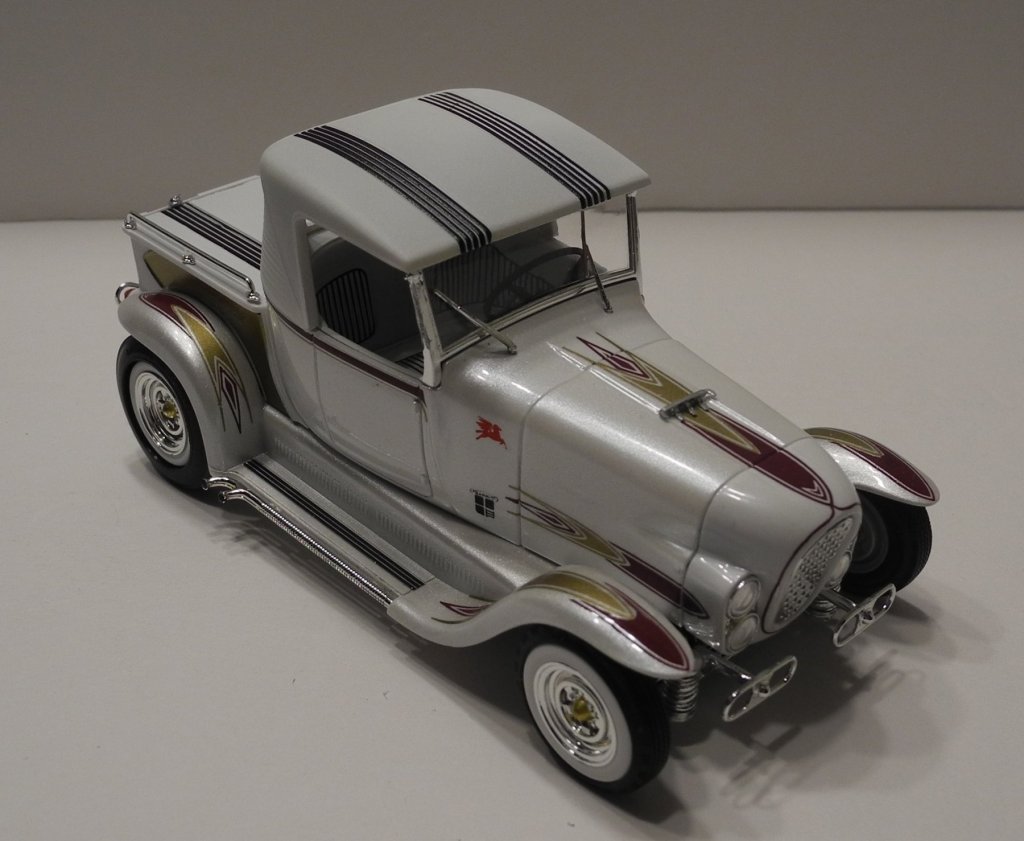
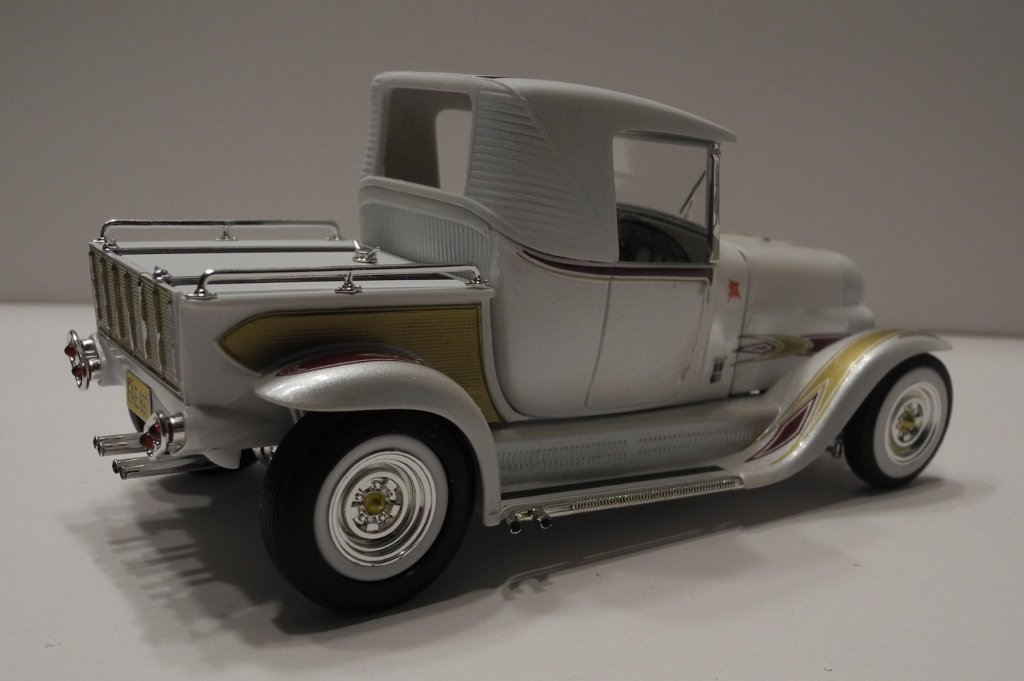
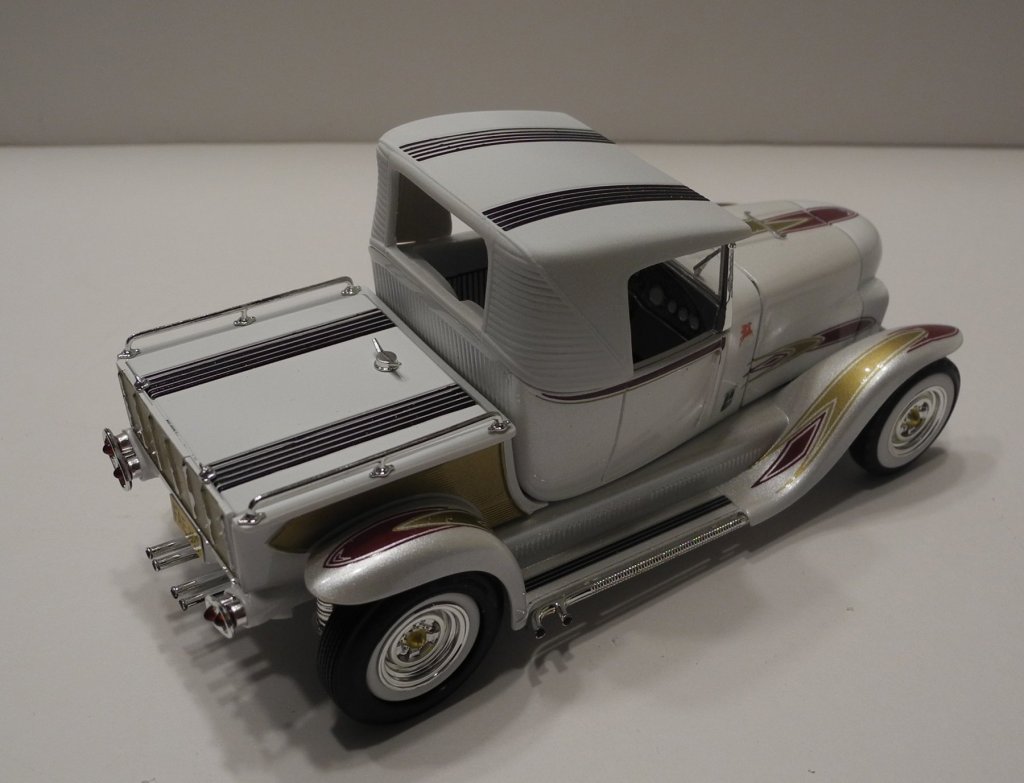
Final Finished Photos of the Ala-Kart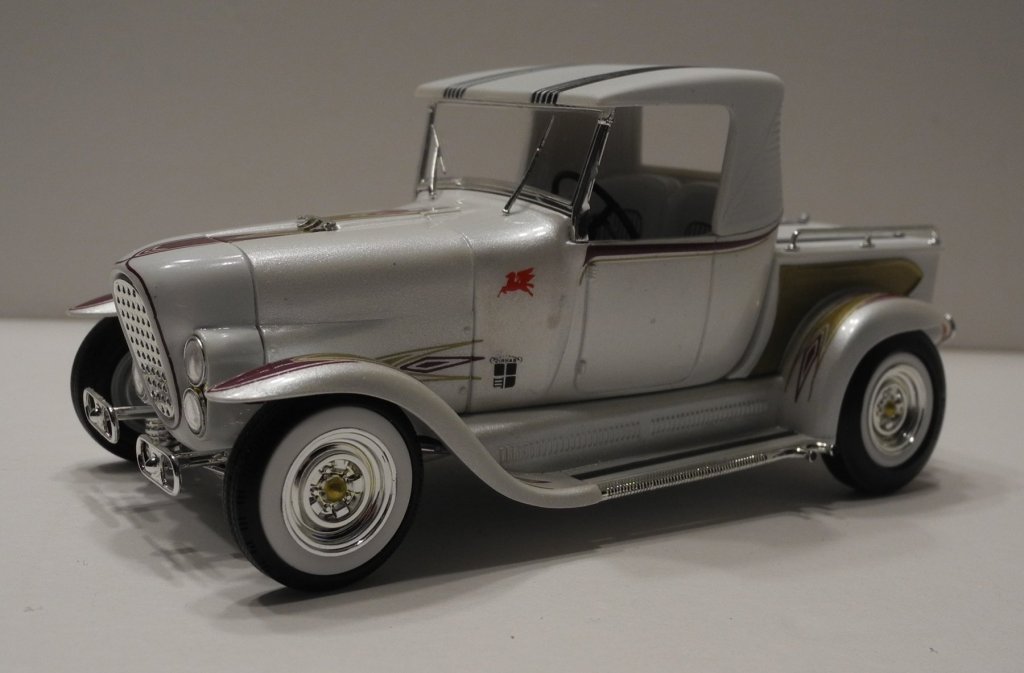


- 59 replies
-
- 10
-
-
Ala-Kart by CDW - FINISHED - AMT - 1:25 Scale - PLASTIC
CDW replied to CDW's topic in Non-ship/categorised builds
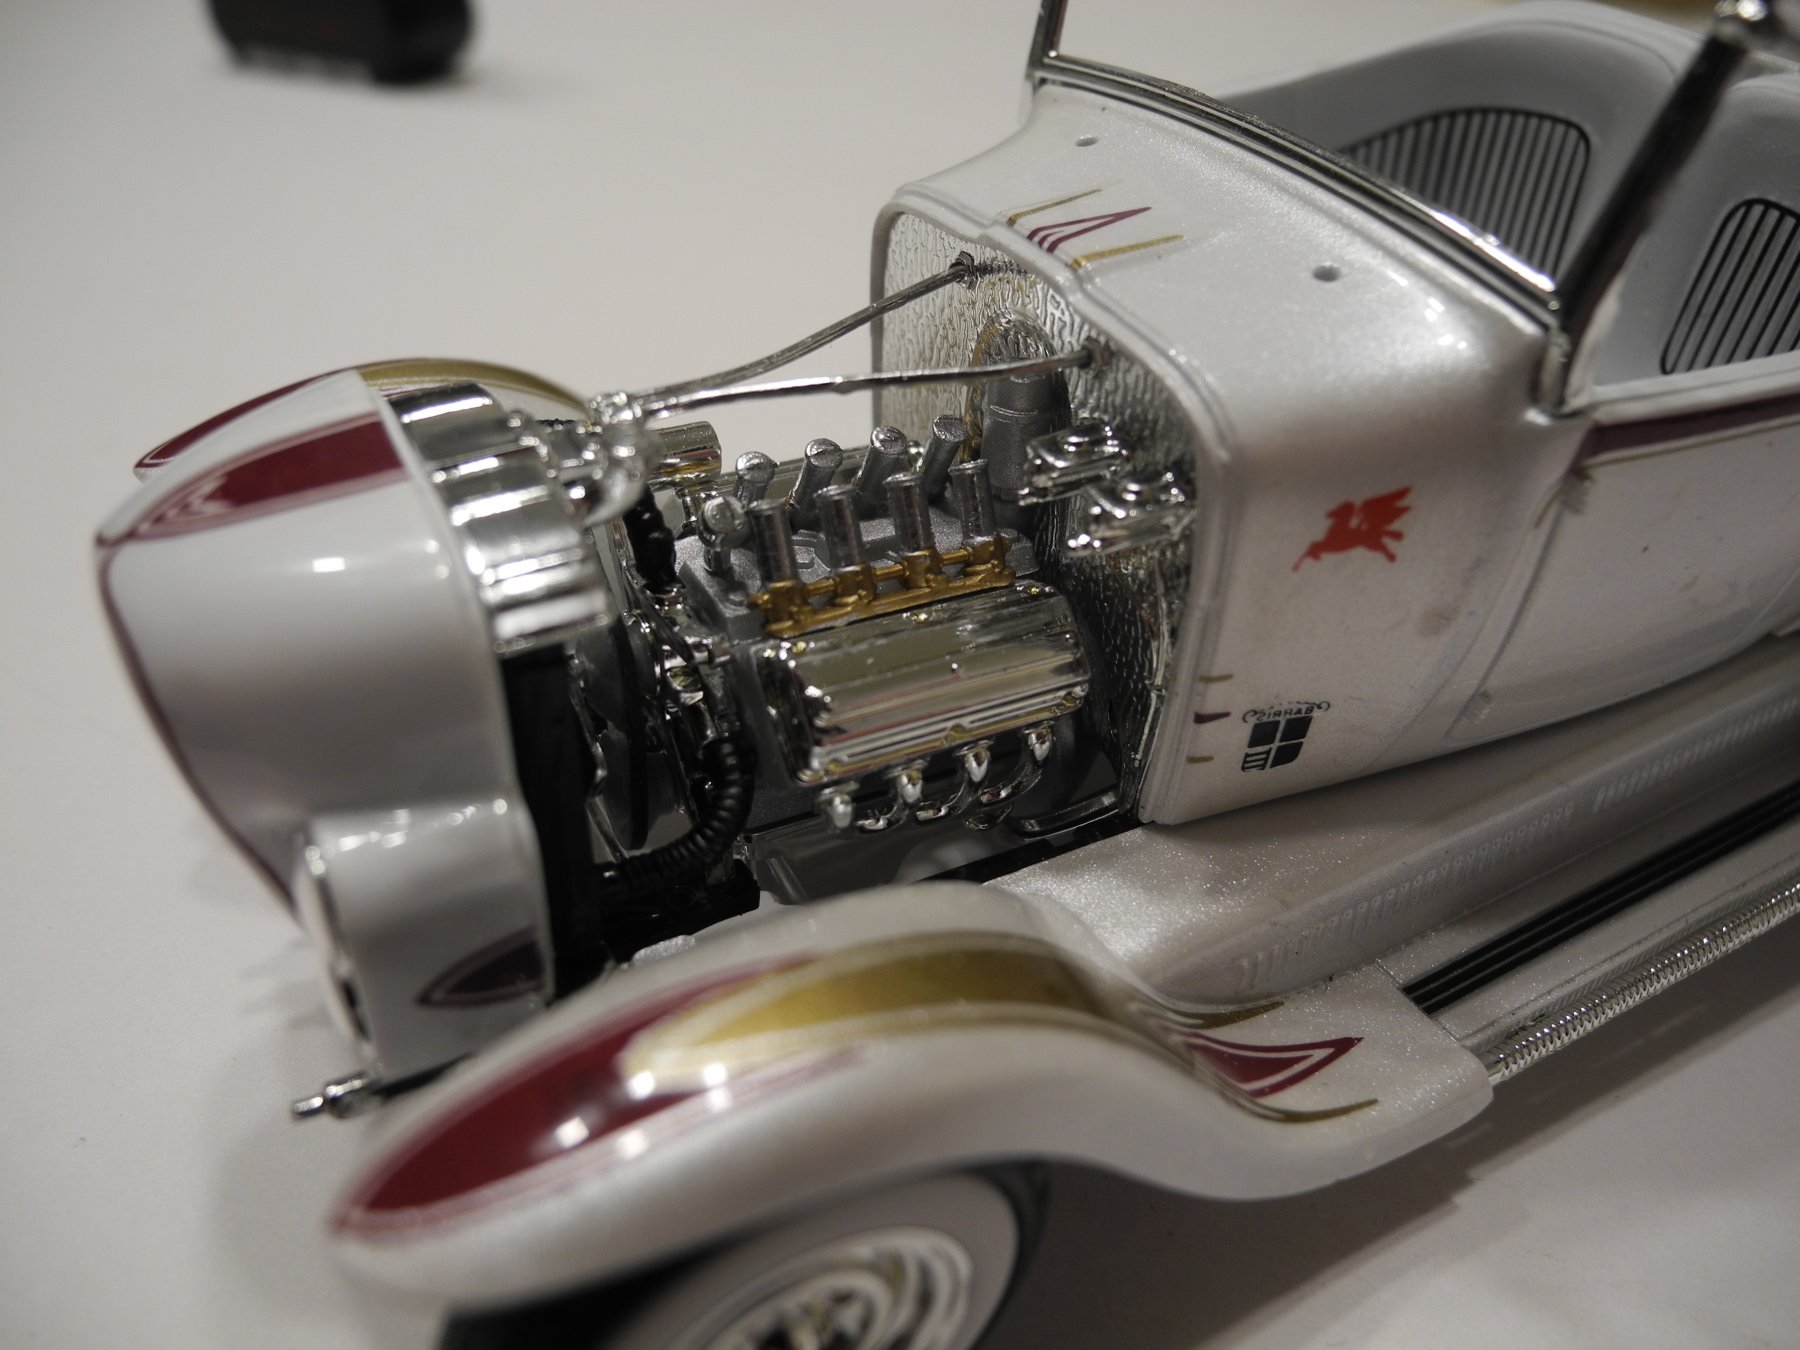
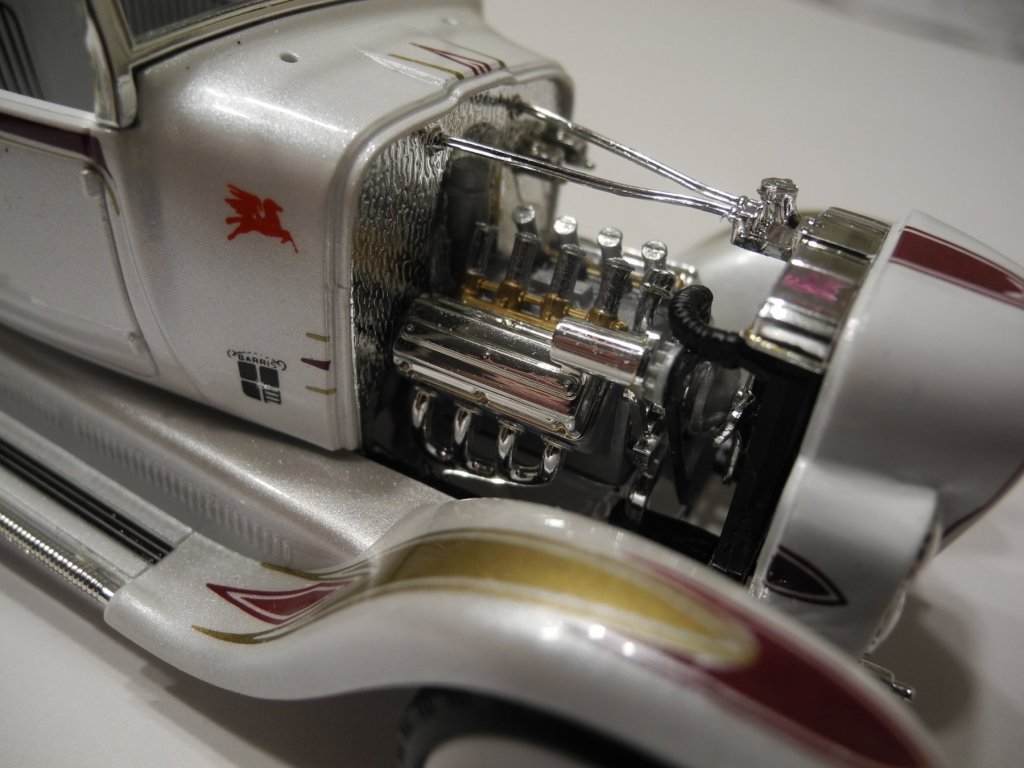
I realized that none of my photos included anything of the powerplant...the 241 cubic inch, fuel injected Hemi. To add to posterity, here are my only photos of the engine compartment. I decided early on that fit issues with this model's body parts would prohibit me from leaving the hood as a removable unit. I decided to finish/model her with the hood closed and instead, show off the distinctive, colorful graphics and body paint. Another option would have been to possibly model it with the sides of the hood removed and leave just the top section. However, I have never seen the actual Ala-Kart displayed this way. Maybe if I ever decide to do another build of the same model, I'll go full monty on the engine and figure out a way to correct the fit issues. A competition build would require I do that so this one will be my shelf queen instead.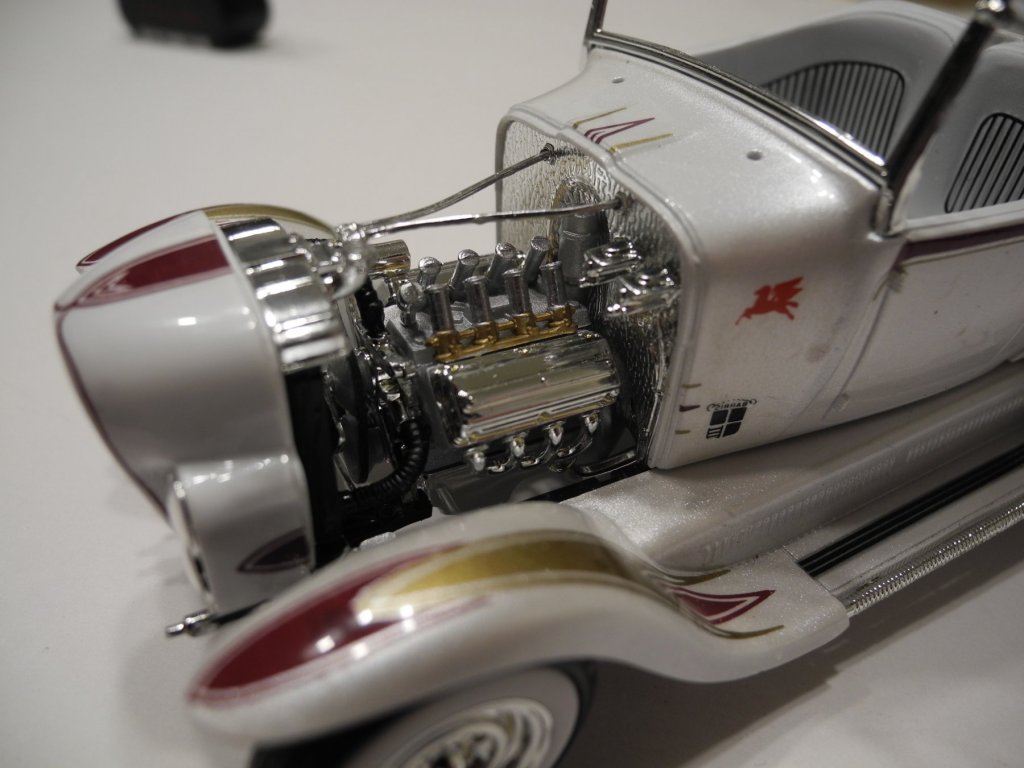
-
Yes, the very early Revell kits had pre painted copper hulls below the waterline. Darn good paint, too. It held up just fine after all these years in the box. Box is in tatters, but box art still visible. Will take the kits out for some pictures when I can get around to it. One time years ago, a fellow sent me a ton of great information and line drawings of the Kearsarge. I have looked and looked for that package he sent but cannot find it yet. It had everything I needed to make corrections.
- 467 replies
-
- 5
-
-
- mikasa
- wave models
- (and 1 more)
-
Thanks for the kind words, Jonathan. One of these days, I'm going to drag out my CSS Alabama and USS Kearsarge kits from Revell and build them. I only hope I can do half as good a job on them as you've done on your CSS Alabama. My Kearsarge kit is so old, it's the one that came with the pre-painted copper clad hull back in those days. The kit box is practically falling apart. I've been thinking about buying the Cottage Industries update sets for both models, along with the wooden decks that are available nowadays.
- 467 replies
-
- 5
-
-
- mikasa
- wave models
- (and 1 more)
-
To be honest, I end up giving a lot of finished models away. My joy is in building them.
- 467 replies
-
- 5
-
-
- mikasa
- wave models
- (and 1 more)
-
Ala-Kart by CDW - FINISHED - AMT - 1:25 Scale - PLASTIC
CDW replied to CDW's topic in Non-ship/categorised builds
These will be the last dry fit pictures I will take. The model should be finished either tomorrow or Tuesday. Like many AMT, Revell, Monogram, and other early hot rod and stock models from years past, this kit has a few fit issues that are disappointing in the end. However, when you consider the low cost of the models to begin with along with the age of the tooling, it's understandable. Long ago, I always knew to buy at least 2 of any model I really wanted to be show quality. The first had to be built to learn the flaws inherent in it, and the second kit to correct the problems found with the first build.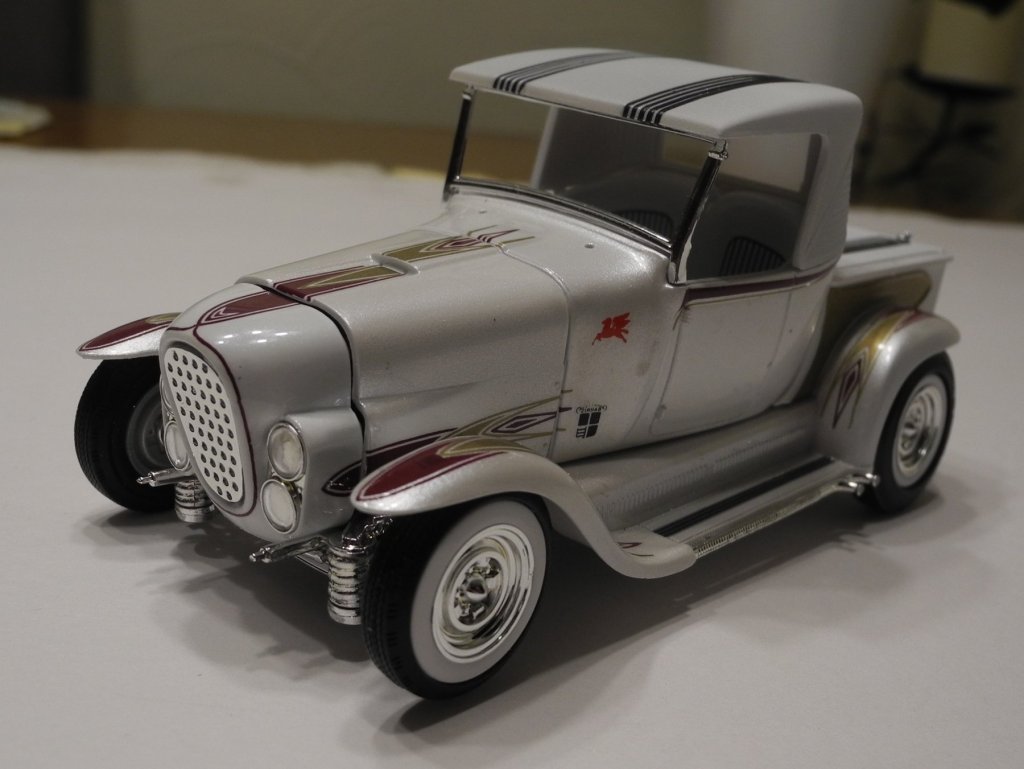


-
Unless you're doing paid, commissioned work, the only one you need to please is yourself. That's why I have no desire to do paid, commissioned work. 😎 Then this great hobby of ours (that we love) might be a chore, not a joy.
- 467 replies
-
- 6
-
-
- mikasa
- wave models
- (and 1 more)
-
Ala-Kart by CDW - FINISHED - AMT - 1:25 Scale - PLASTIC
CDW replied to CDW's topic in Non-ship/categorised builds
The Molotow is unlike any other chrome silver marker out there, I promise you that. It's the only one that actually looks like the chrome on the parts trees, not like silver paint. But hey, it's one of those things that's a buggaboo for me. Can't stand seeing touched up silver chrome parts. I would rather strip the chrome altogether and repaint everything with Alclad II chrome silver rather than have mismatched patched together chrome parts. I know, I know...it's OCD, and I have it bad. -
Have you tried contact Stevens International for the parts trees? Stevens is the USA distributor for Trumpeter. it's unlikely the Chinese will deal directly with you as Stevens likely has a contract with them as the sole USA distributor. I would definitely contact Stevens for the parts you want. it may take a while, but they may have them. https://www.stevenshobby.com