CDW
-
Posts
7,755 -
Joined
-
Last visited
Content Type
Profiles
Forums
Gallery
Events
Everything posted by CDW
-

Ala-Kart by CDW - FINISHED - AMT - 1:25 Scale - PLASTIC
CDW replied to CDW's topic in Non-ship/categorised builds
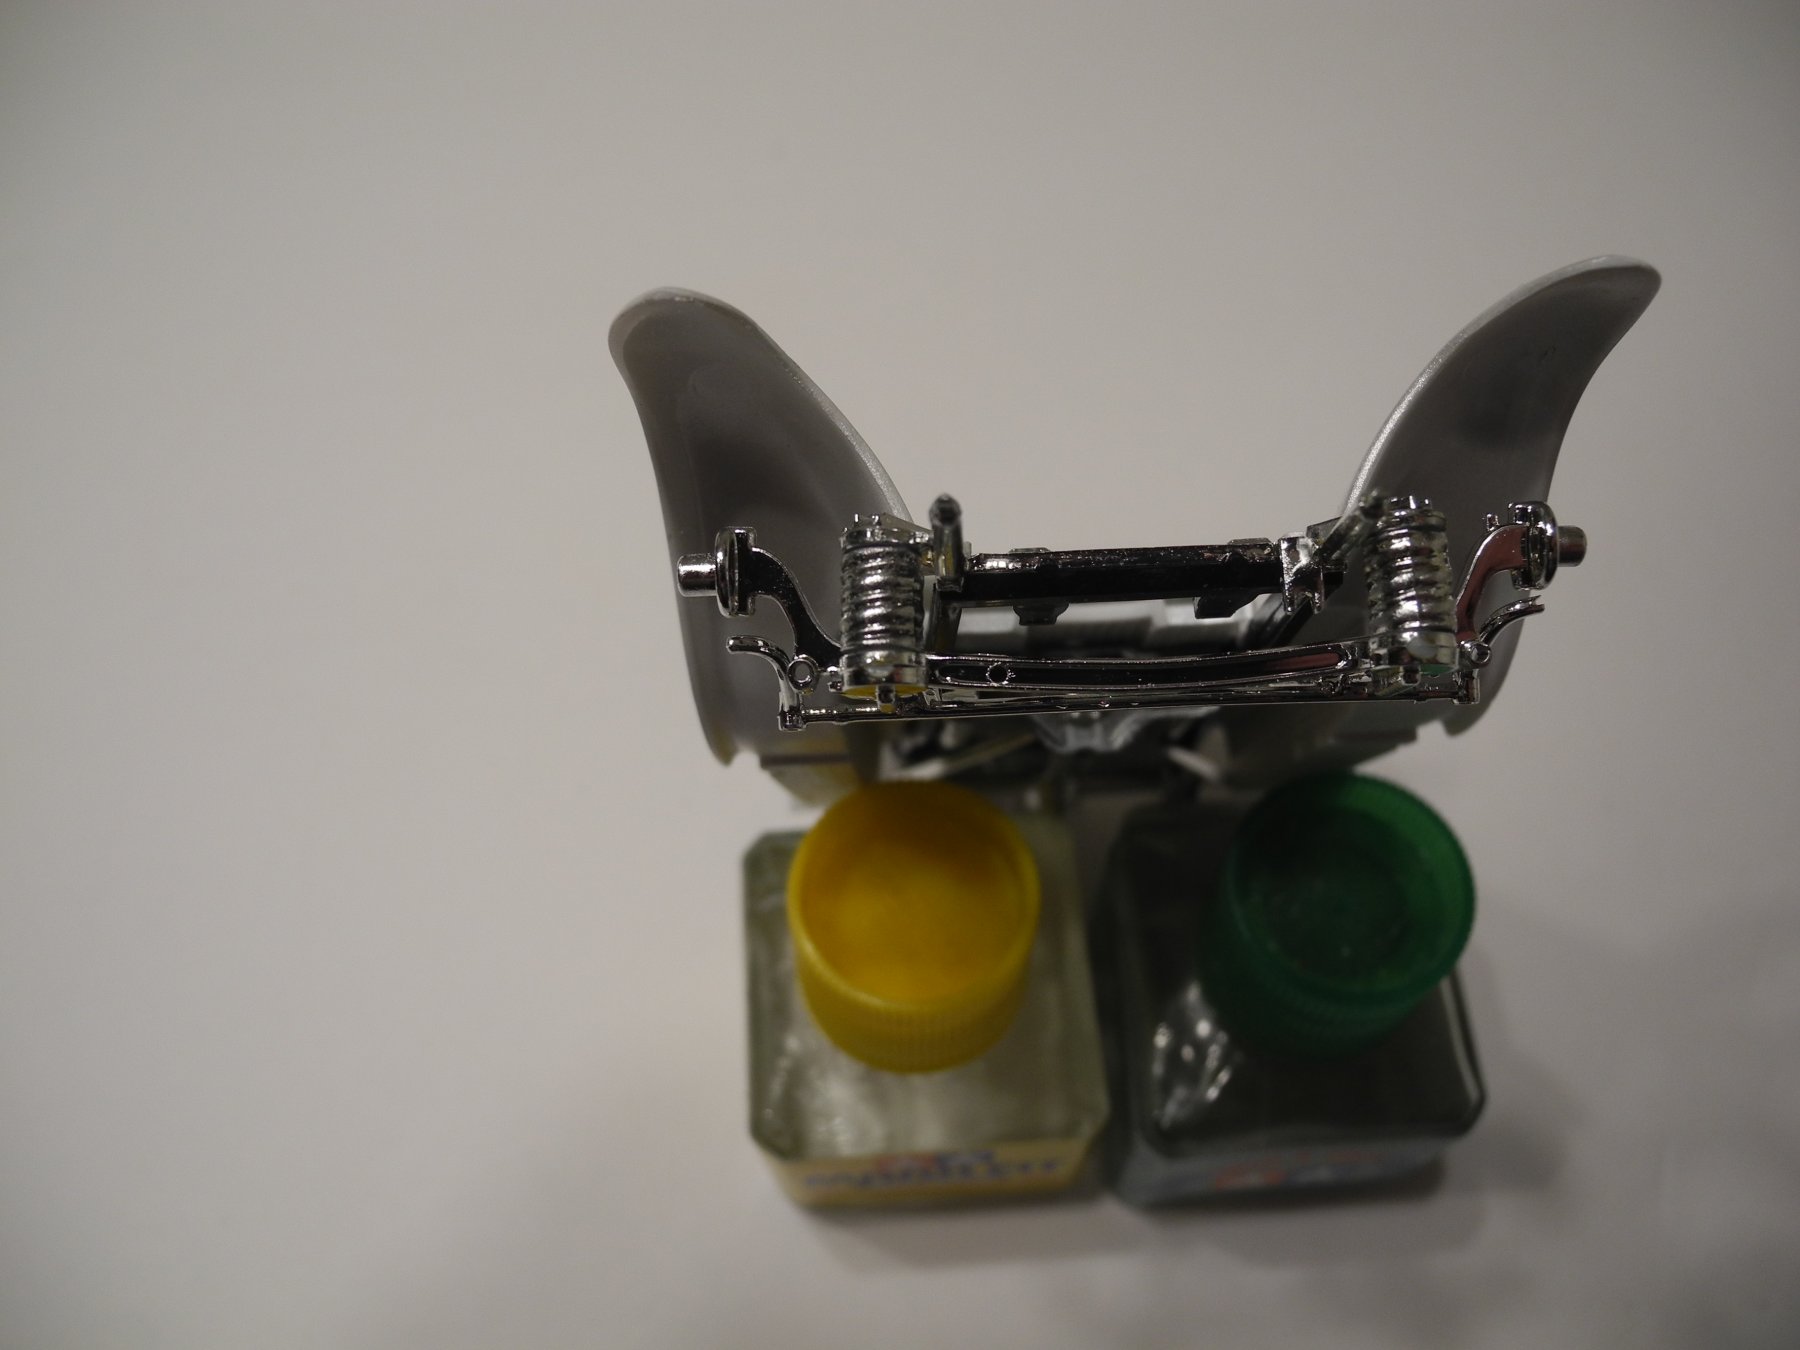
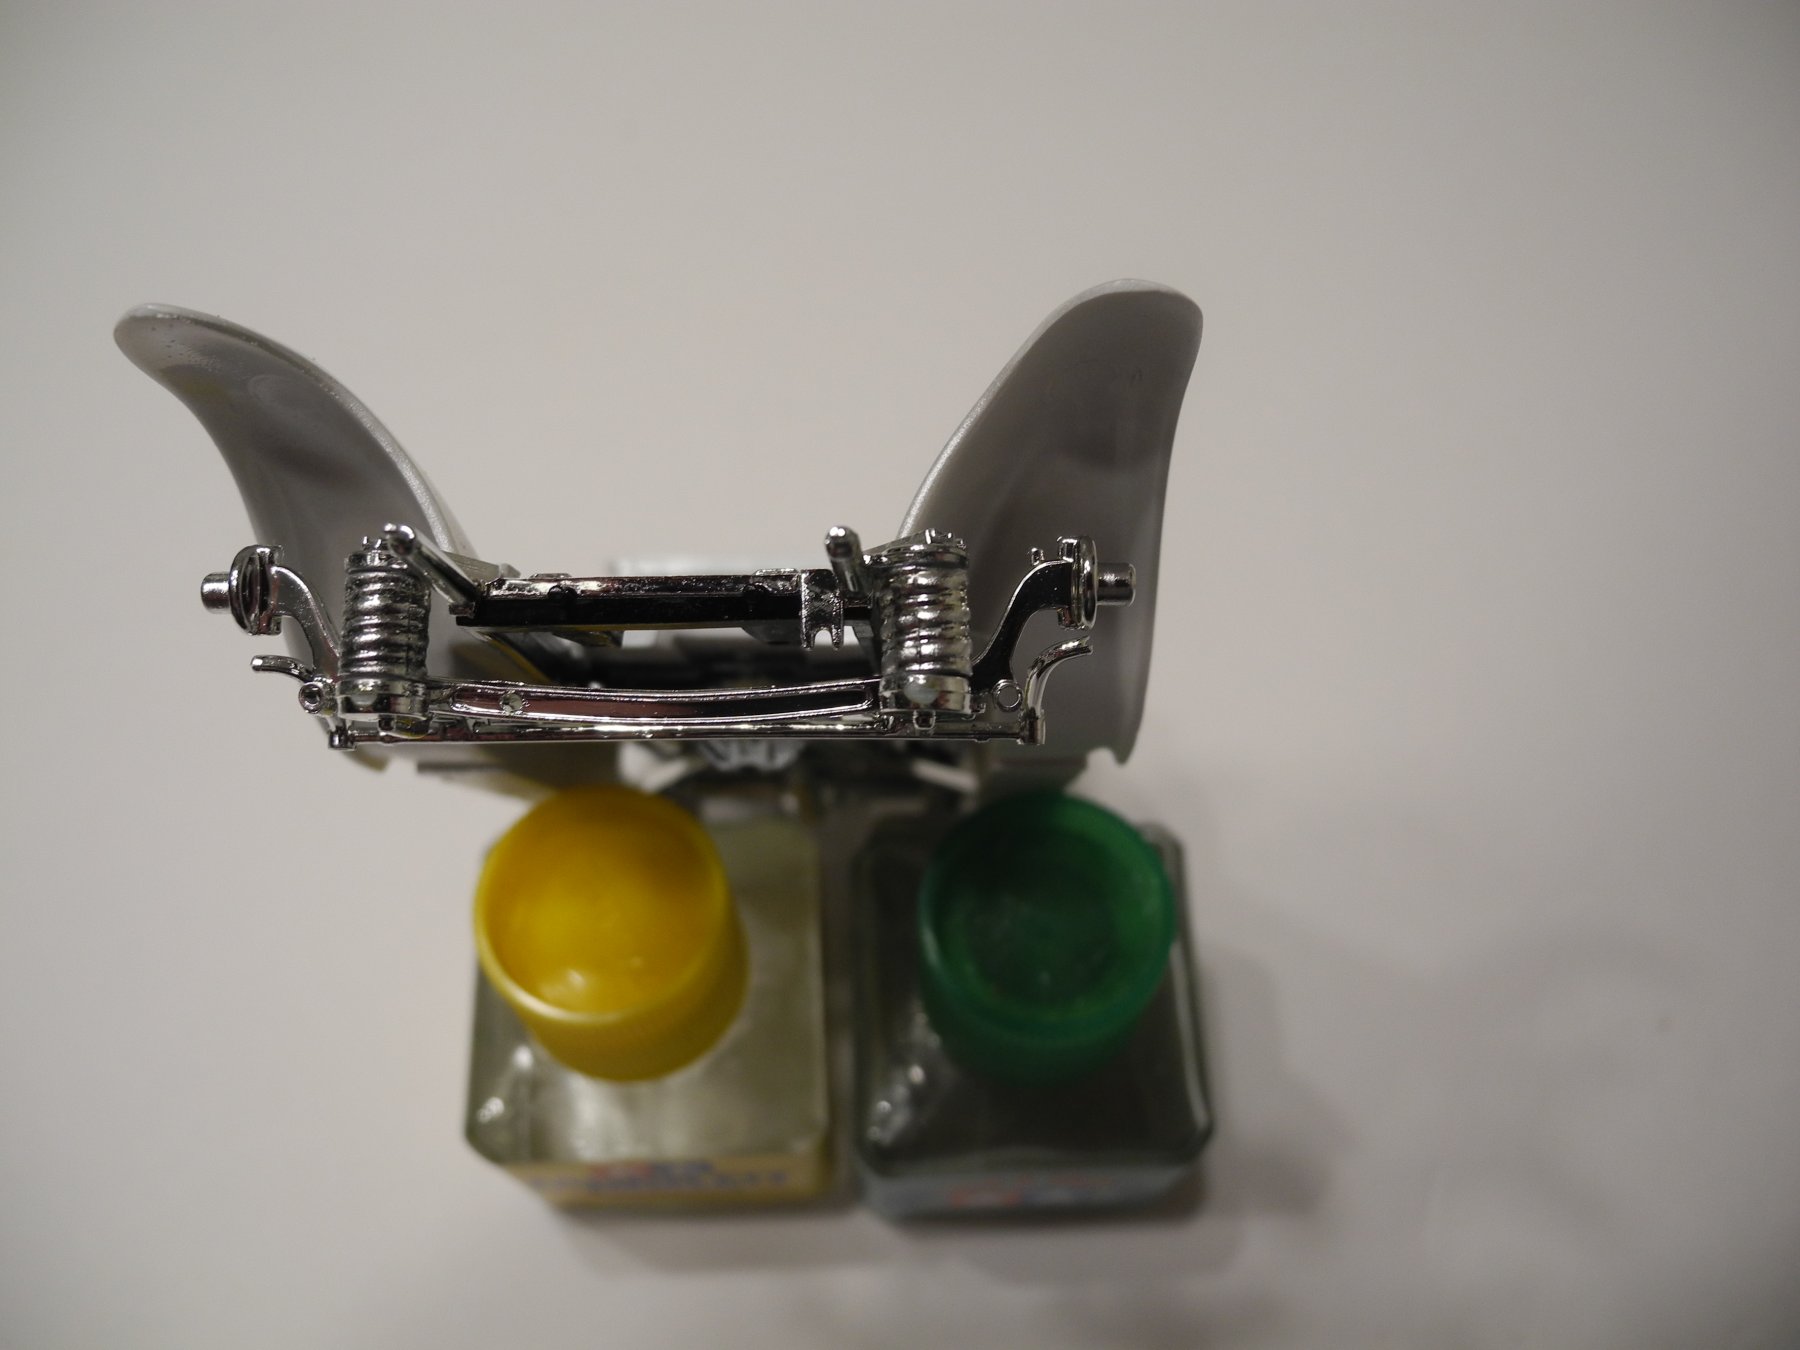
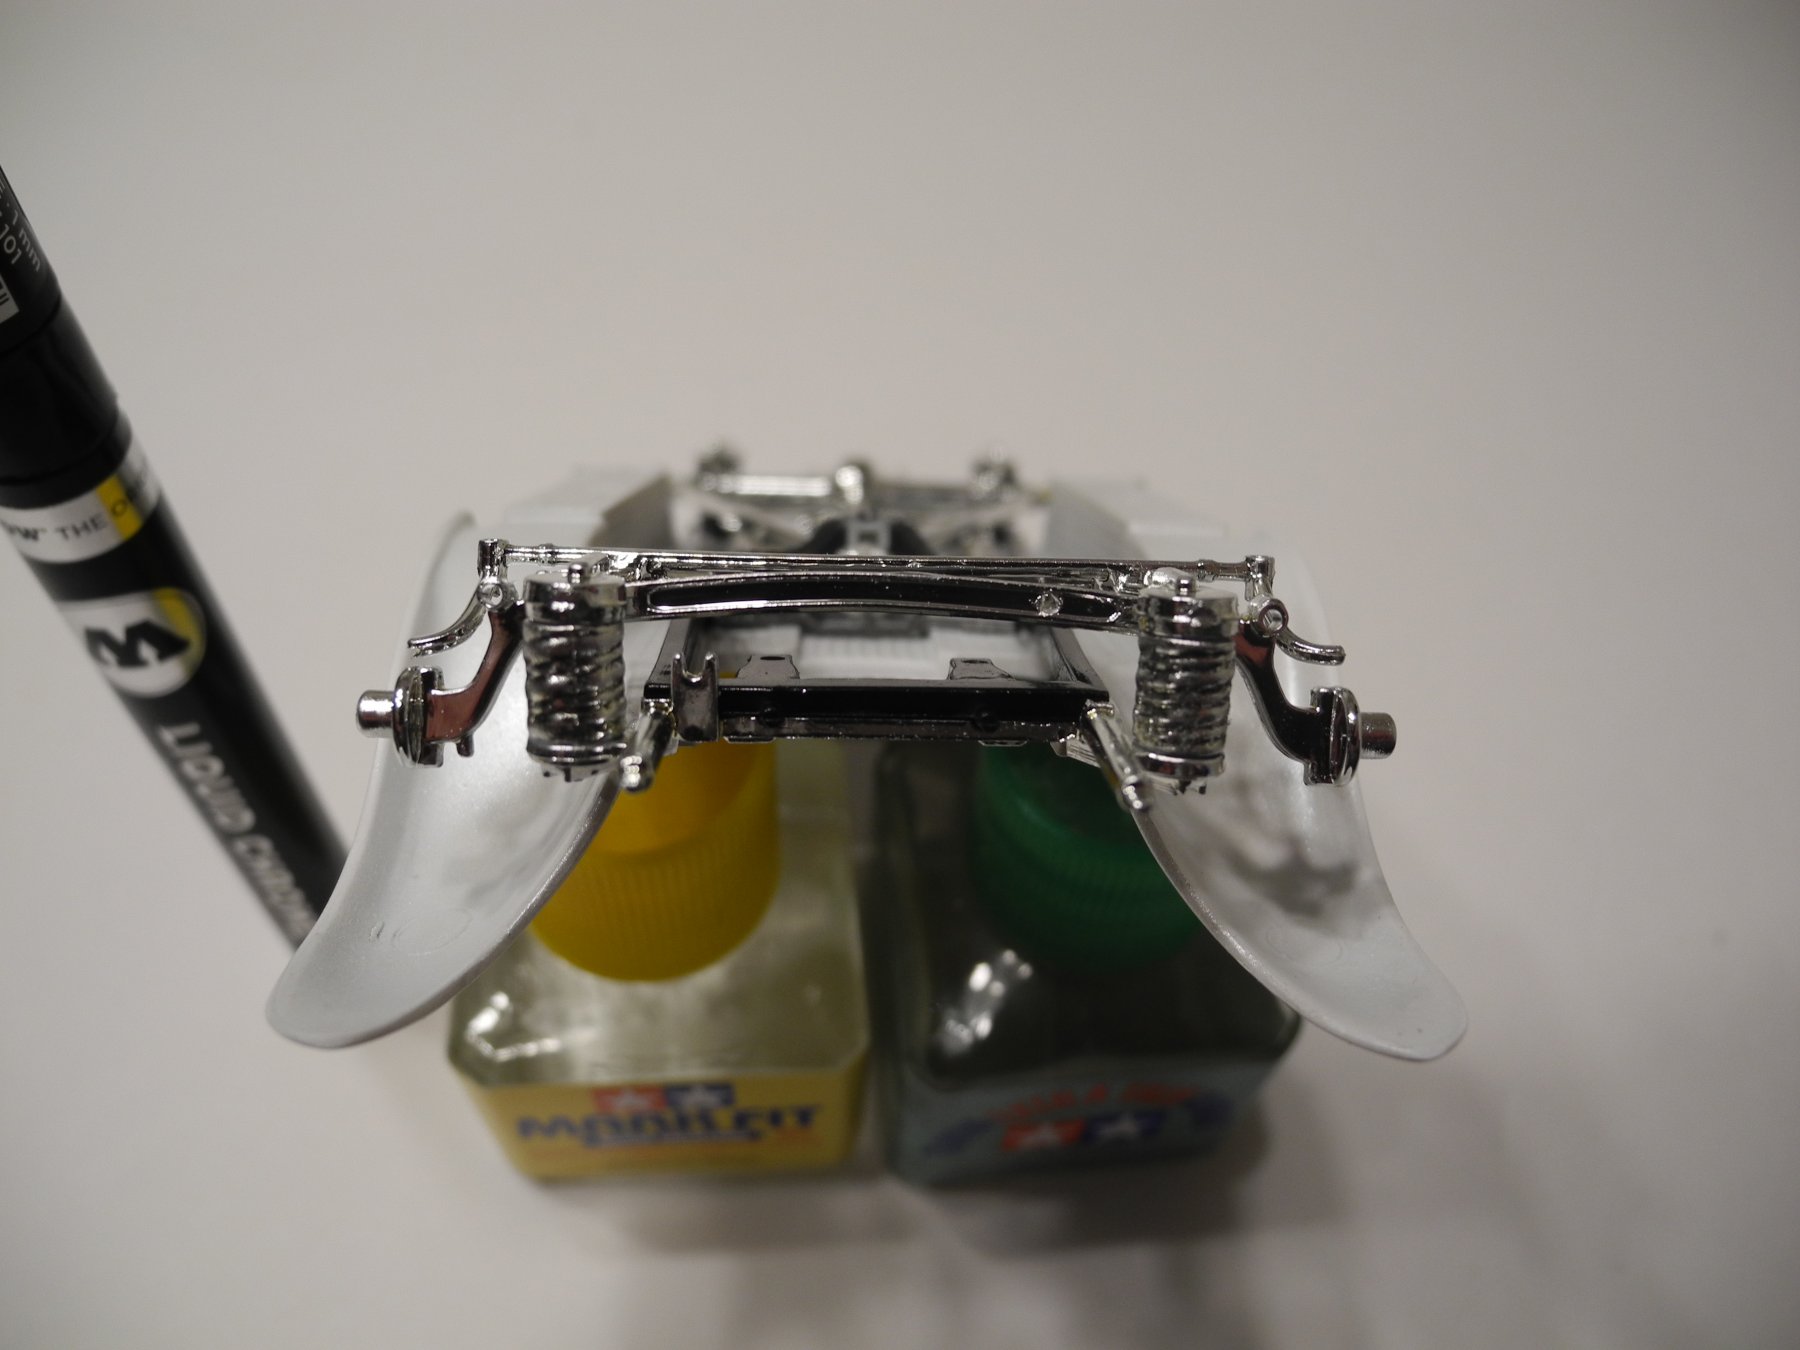
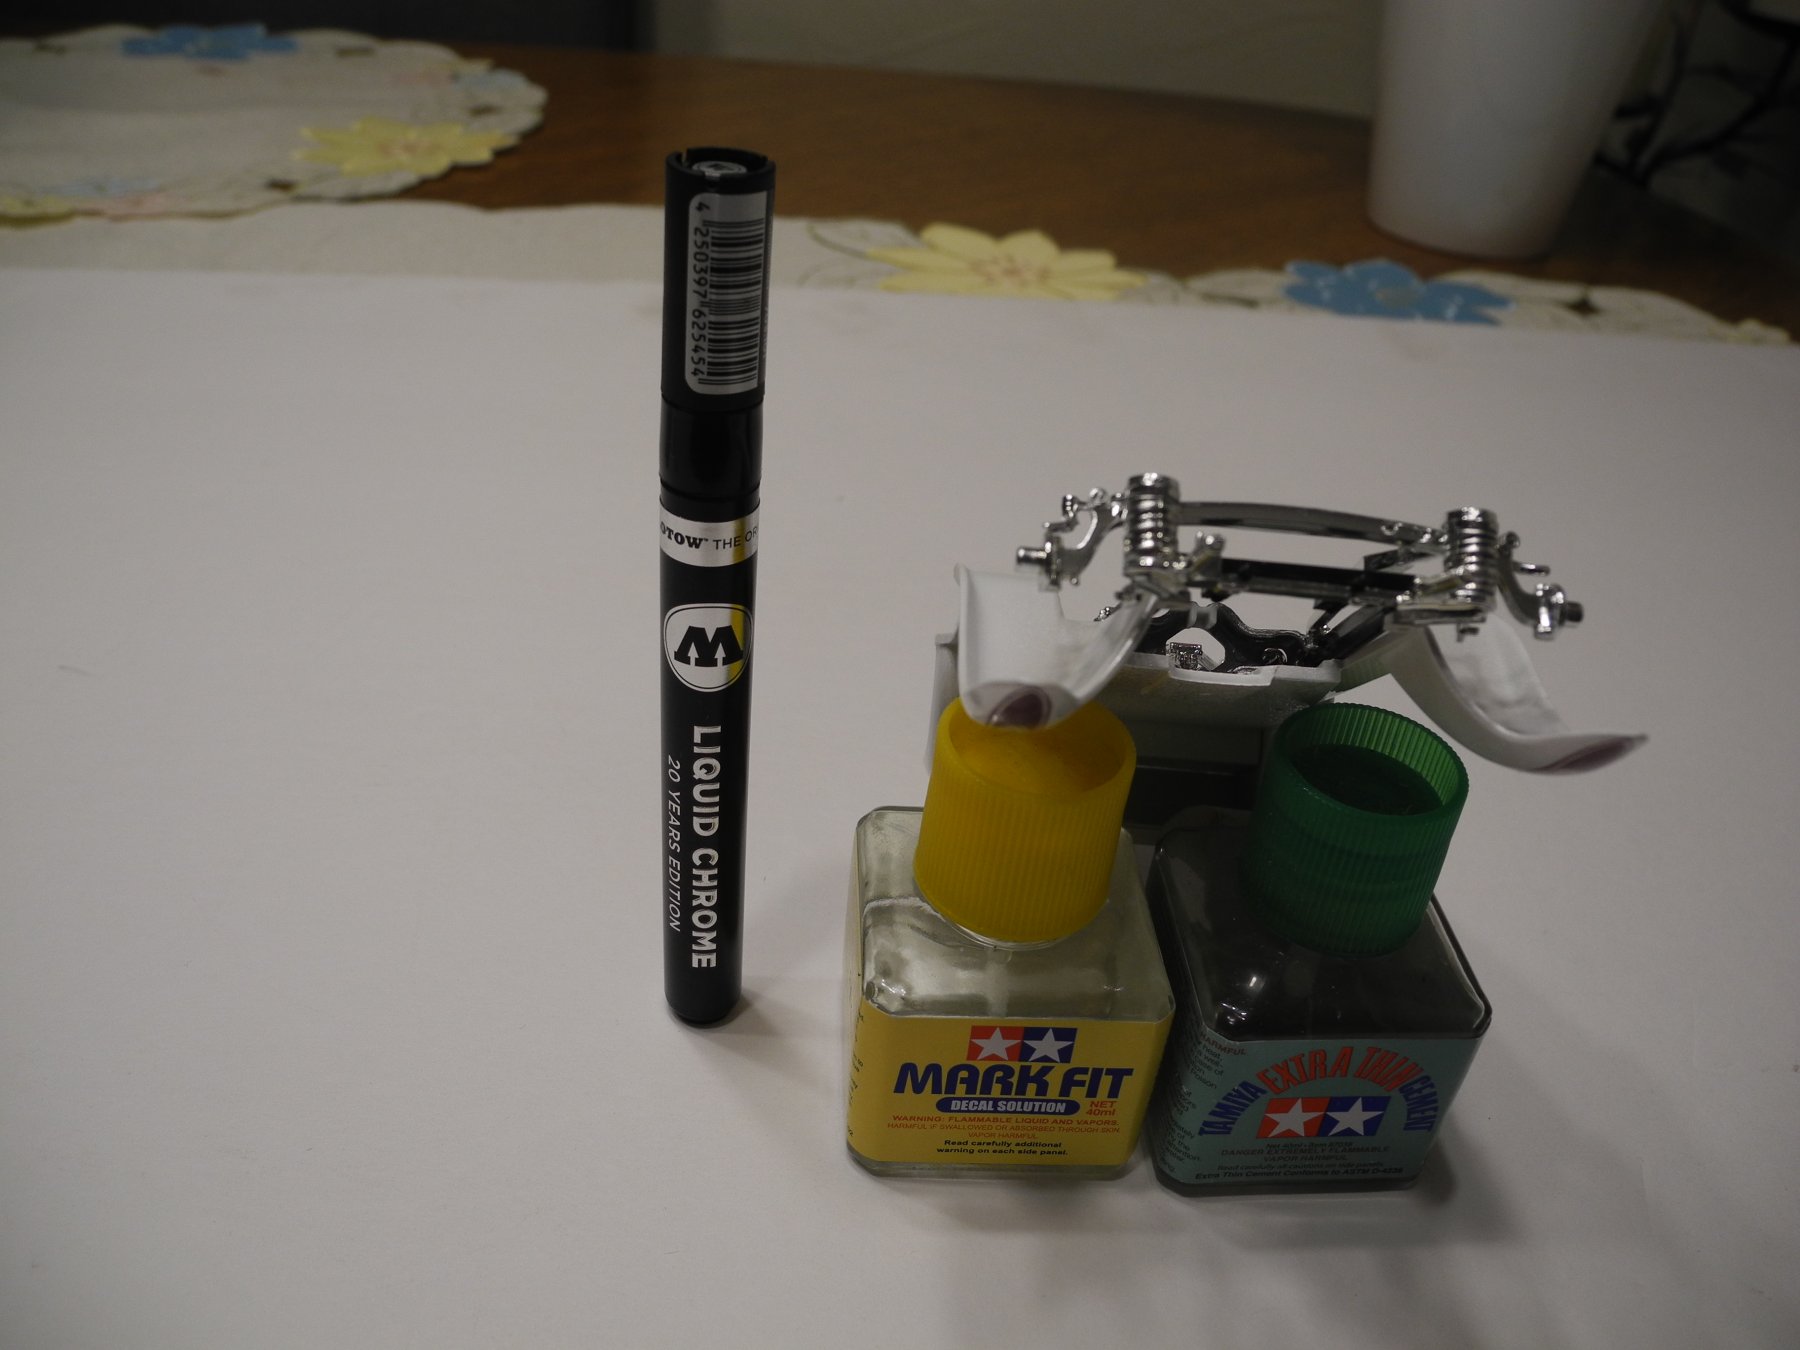
Here is something that any of you who build plastic models that include chrome plated parts, a product you'll be glad to have in your supplies. I read where someone once said "they had never found any silver that could match chrome plating". While I agree a perfect match probably does not exist in reality, there is something that will cover those scratches and little spots where you've trimmed the plated parts from their sprue. An the best part is, it looks so much like chrome plating, the average person will never notice it's been touched up unless they have been told to examine it with a magnifying glass. It's that good. It's called a Molotow Chrome Pen. Comes in various tip size pens, very convenient to make pin point spot repairs or in larger tip sizes, larger areas. You use it like a Sharpie Marker, just be sure to give it a good shake before each use. Here in these first two photos, you cab see where I trimmed the chrome at the front suspension spring locating points. The chrome plating has been scratched off where the parts were attached to sprue. The third photo is how they look after touchup with the Molotow pen. An invisible patch that will not be noticed by those who see your models. The most "chrome-looking" paint I have ever seen.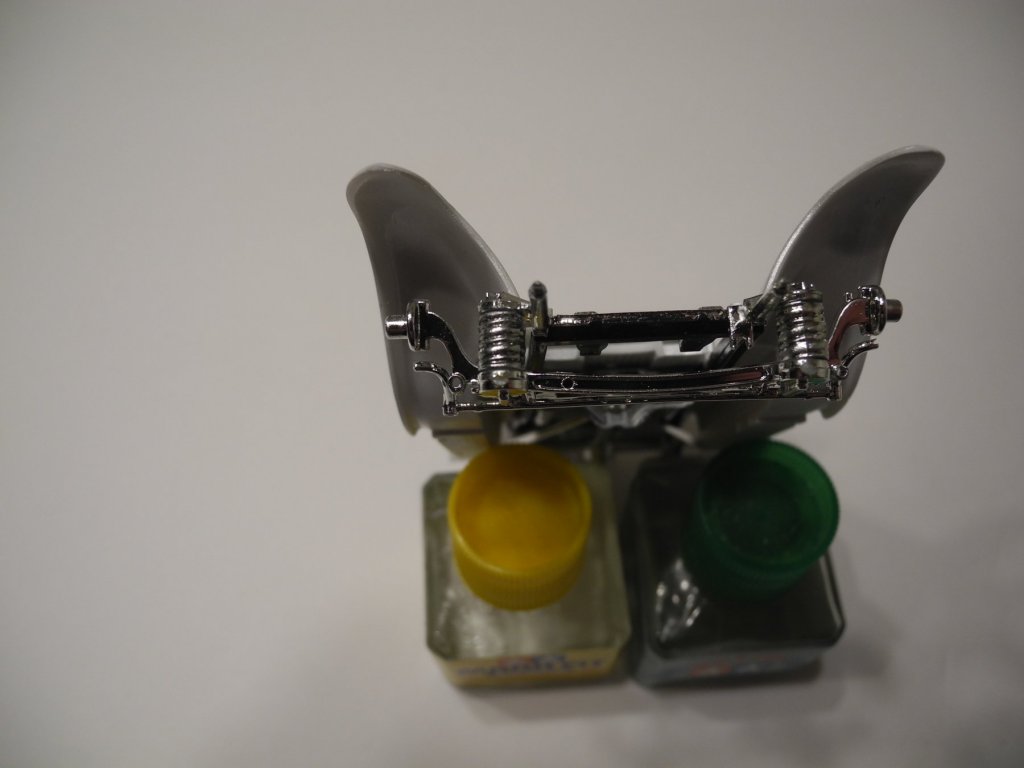


-
Ala-Kart by CDW - FINISHED - AMT - 1:25 Scale - PLASTIC
CDW replied to CDW's topic in Non-ship/categorised builds
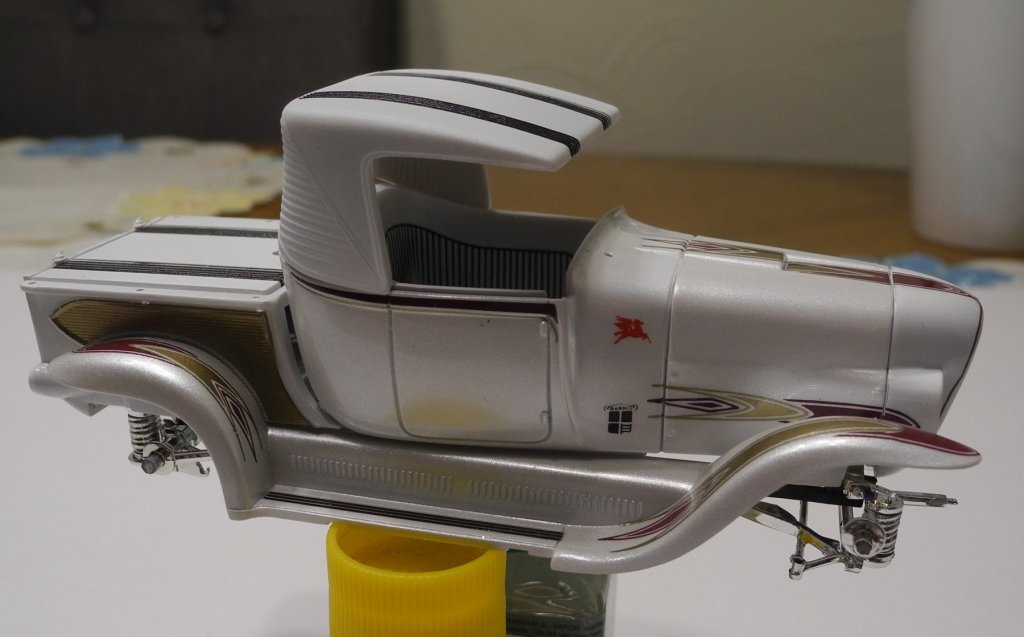
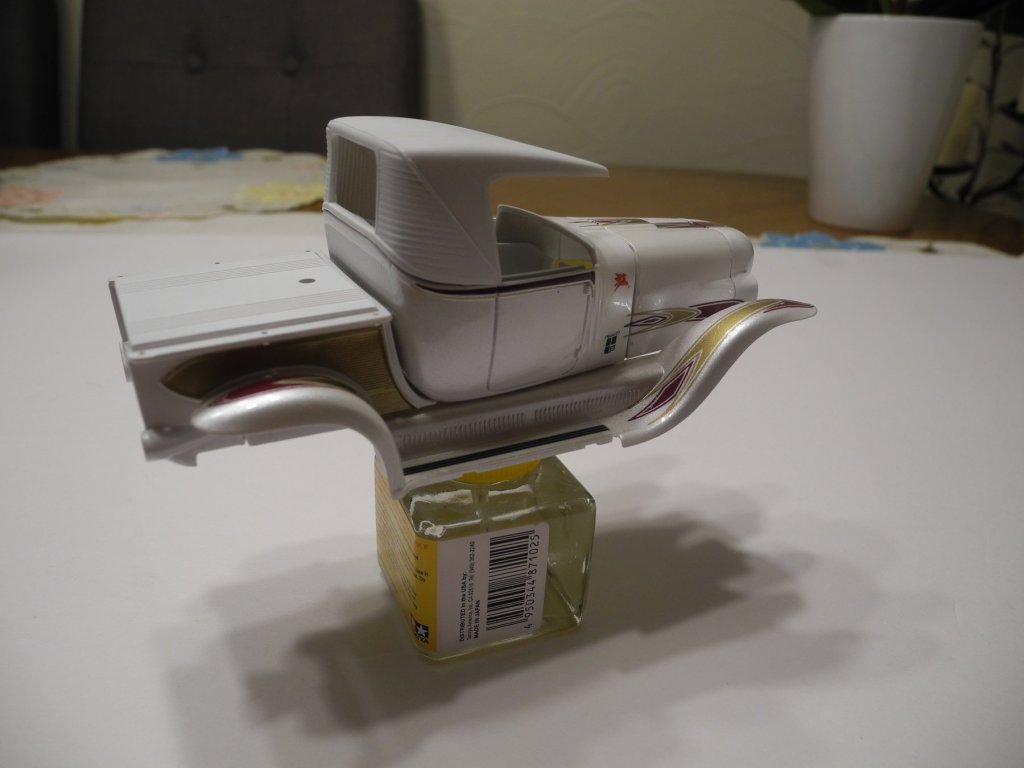
Decal work is done now. All clear top coats are finished. Chassis assembly is 90% done with some details remaining. Lots of small trim work to be done on the body and bed, adding headlights, grill, tail lights, nerf bars, and bed rails/fuel tank cap. Engine and transmission have been assembled and painted but needs to be installed along with the headers, firewall, radiator, and hoses. Interior work needs finishing. Of course, we still are without wheels and tires. More to come.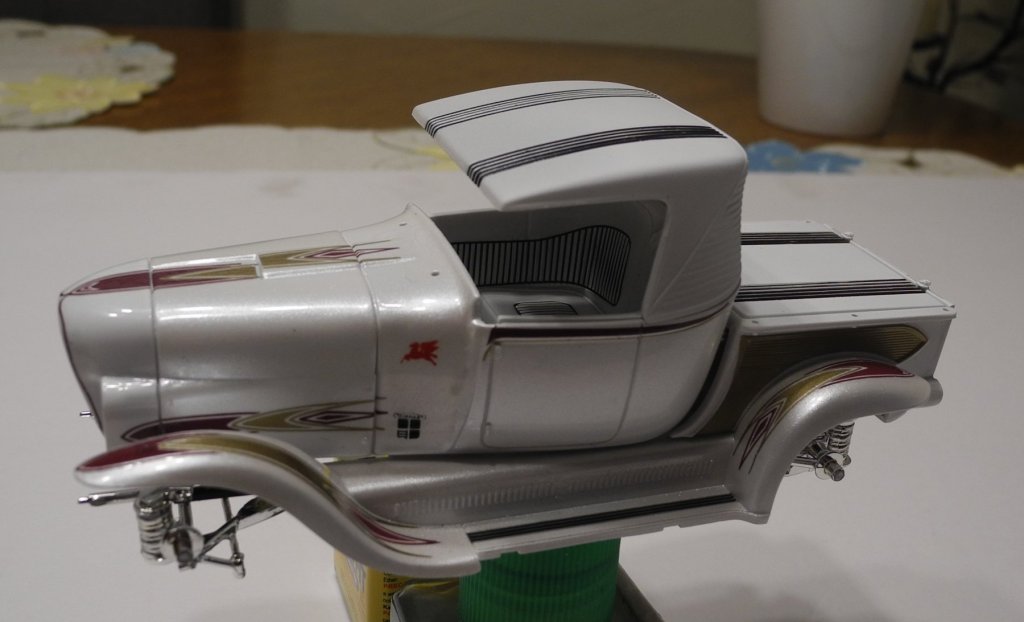

- 59 replies
-
- 11
-

-
I had lots of problems with both issues. If I had it to do over again, I would change the rigging so the main derrick is in a raised position rather than lowered. Otherwise, I just positioned the boom in a fixed position, a location between rigging lines as I assume the way they used it was to raise and lower it as needed between rigging as there is no way the boom can swing between all those lines. As for the rigging interfering with the ship's boats (or vice versa), I repositioned my rigging location points several times to find something that would work without interference. It's frustrating, I know.
- 467 replies
-
- 3
-
-
- mikasa
- wave models
- (and 1 more)
-
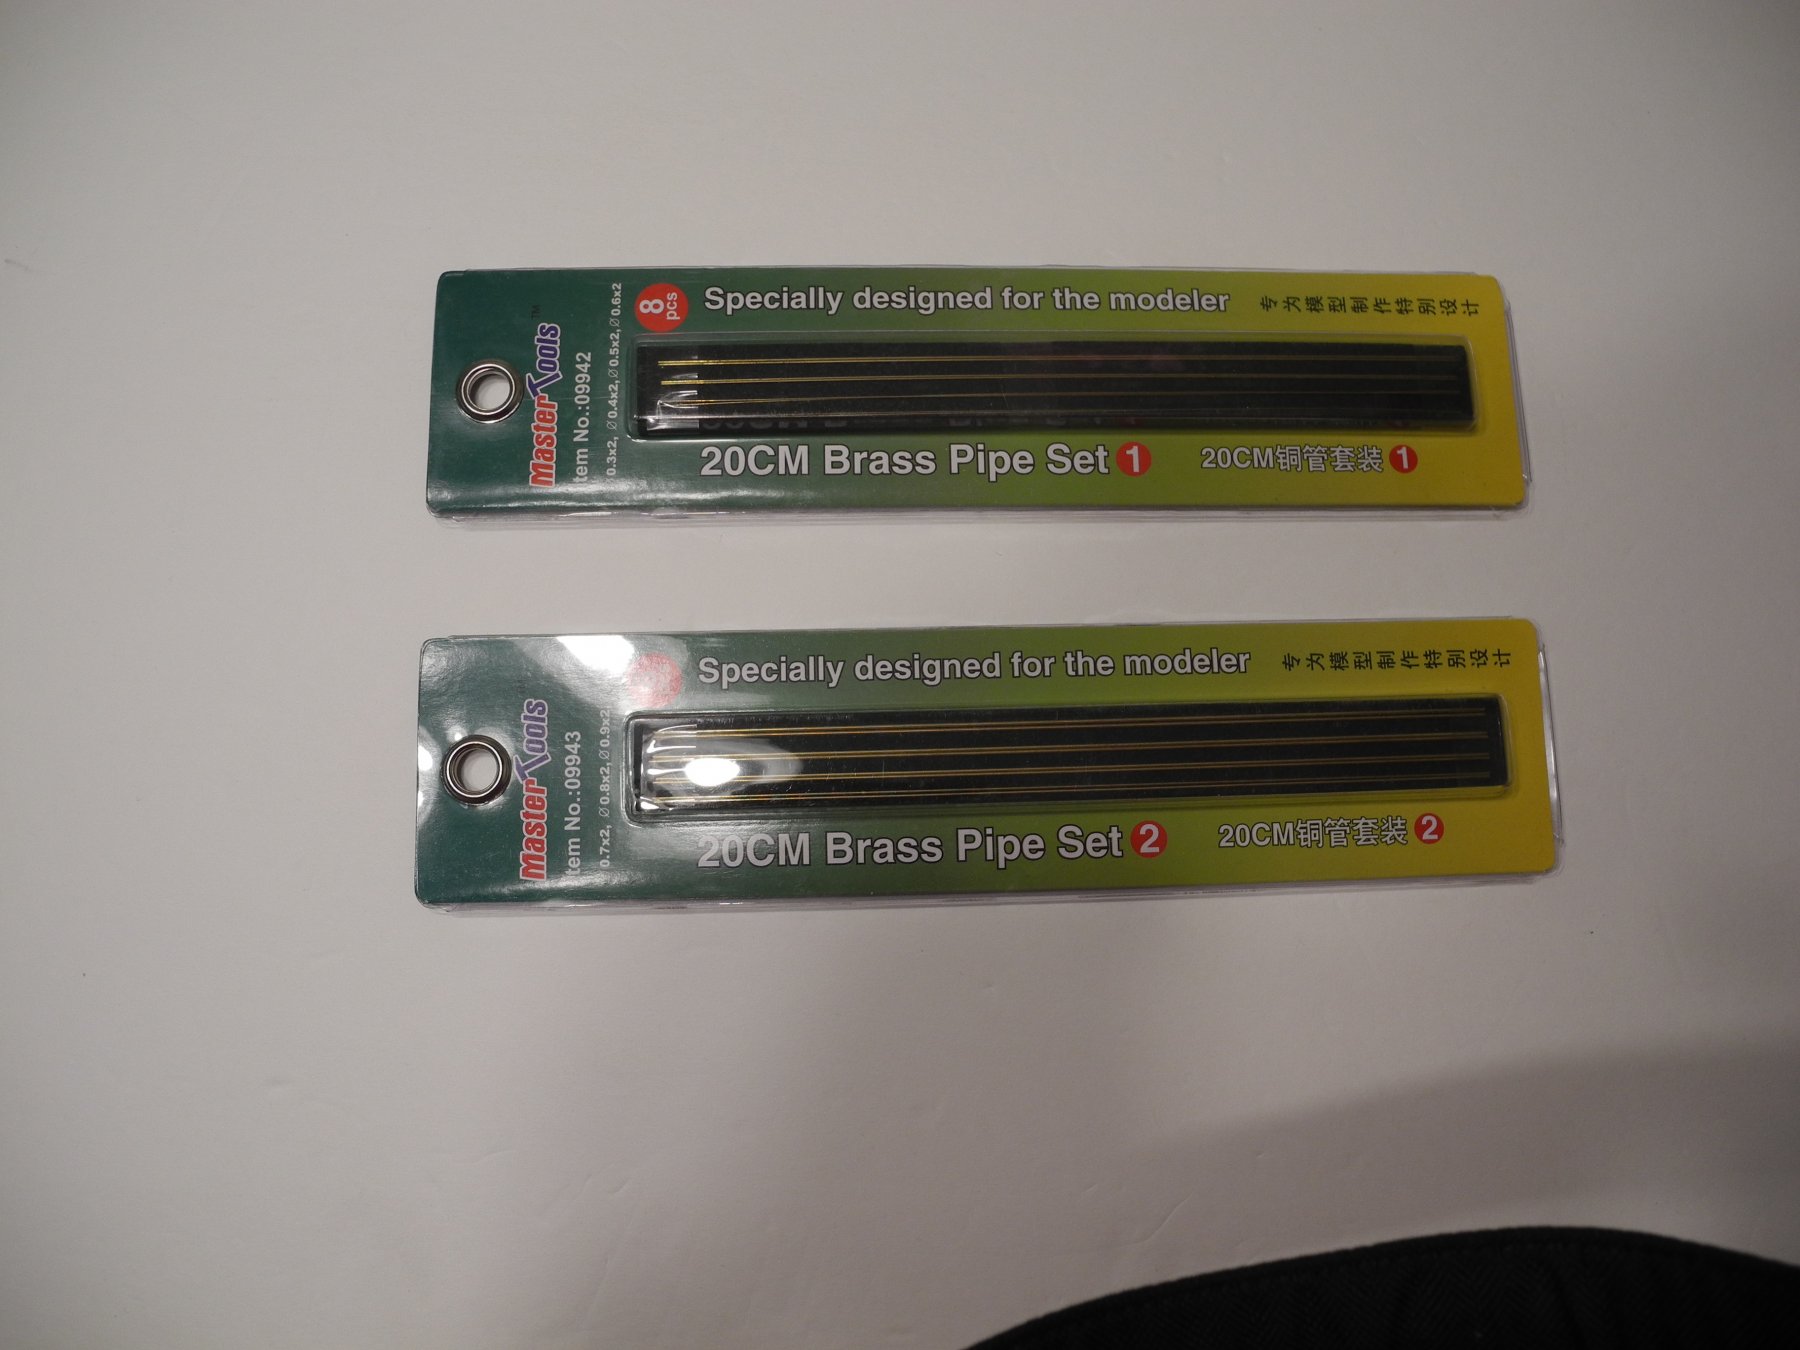
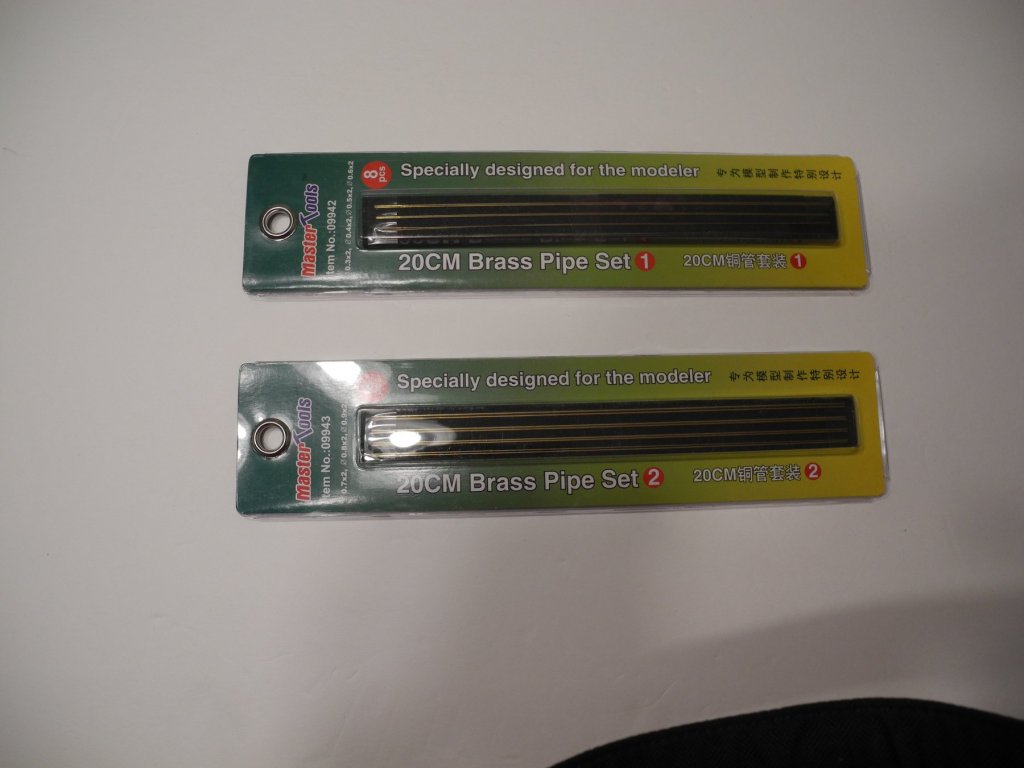
Here is a picture of it Greg. Not sure where you might source it on your side of the planet, but I guess it wouldn't be hard to find. Maybe BNA Modelworld has it. Set 1 comes with the smallest diameter tubes, set 2 just a little larger. Honestly, the tubes in set 1 are so small (inside diameter), I would advise set 2 as the most practical to use. The photo is in high definition, so you should be able to magnify it to see the details.
- 467 replies
-
- 5
-
-
- mikasa
- wave models
- (and 1 more)
-
The smallest brass tubing I have found is from Trumpeter. Not many shops carry it, you'll just have to do a google search to find a shop of your choosing who has it. Some of it is so small, you can't even pass ez line thread through it, so it can't be out of scale. Good luck with your endeavor, and oh, by the way, don't worry about highjacking my thread. I didn't feel you highjacked it at all. To the contrary, I enjoyed your photos and conversation. You're welcome back anytime. Happy modeling
- 467 replies
-
- 4
-
-
- mikasa
- wave models
- (and 1 more)
-
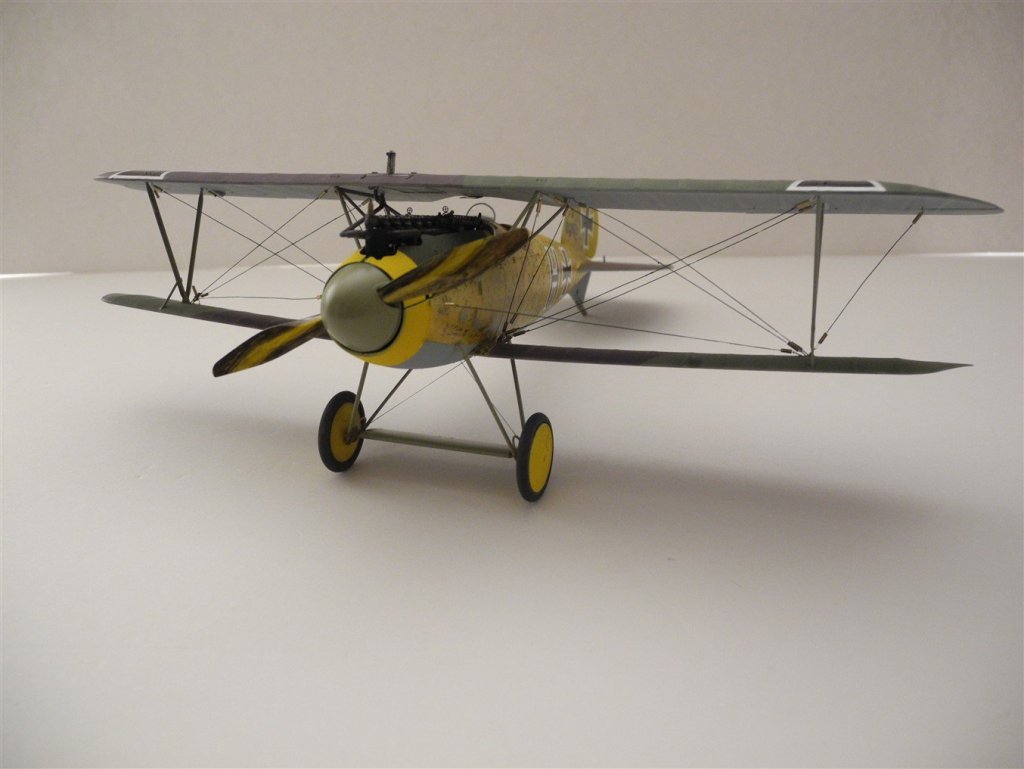
The next time I build and rig a model the size of Mikasa, I am going to use the same technique to seize the rigging lines that I use for seizing the rigging of my WW1 model airplanes. I cut off a tiny piece of micro brass tubing, run the rigging line through it, then loop it back through the tubing to seize it (with a tiny dab of super glue). Knots wouldn't be appropriate for the rigging on ships from this period, or at least that's my best guess. Here is a photograph of an Albatros biplane where I've seized the rigging using micro tubing:
- 467 replies
-
- 11
-
-
- mikasa
- wave models
- (and 1 more)
-
Ala-Kart by CDW - FINISHED - AMT - 1:25 Scale - PLASTIC
CDW replied to CDW's topic in Non-ship/categorised builds


- 59 replies
-
- 12
-
-
Ala-Kart by CDW - FINISHED - AMT - 1:25 Scale - PLASTIC
CDW replied to CDW's topic in Non-ship/categorised builds
It most certainly would cause an imbalance. However, I cannot decal the hood until the top coat cures, and the hood decals run over onto the nose piece, so it all must be done at one time. Will be working on that tomorrow after the paint has plenty of time to fully harden. Remember, I had to rework the hood because I didn't shoot enough pearl white on it to match the other parts. Fixed that. -
adapt this idea for a small spray both?
CDW replied to Bob Blarney's topic in Modeling tools and Workshop Equipment
Just about everything but taking a bath could include a long sleeve shirt and tie back then.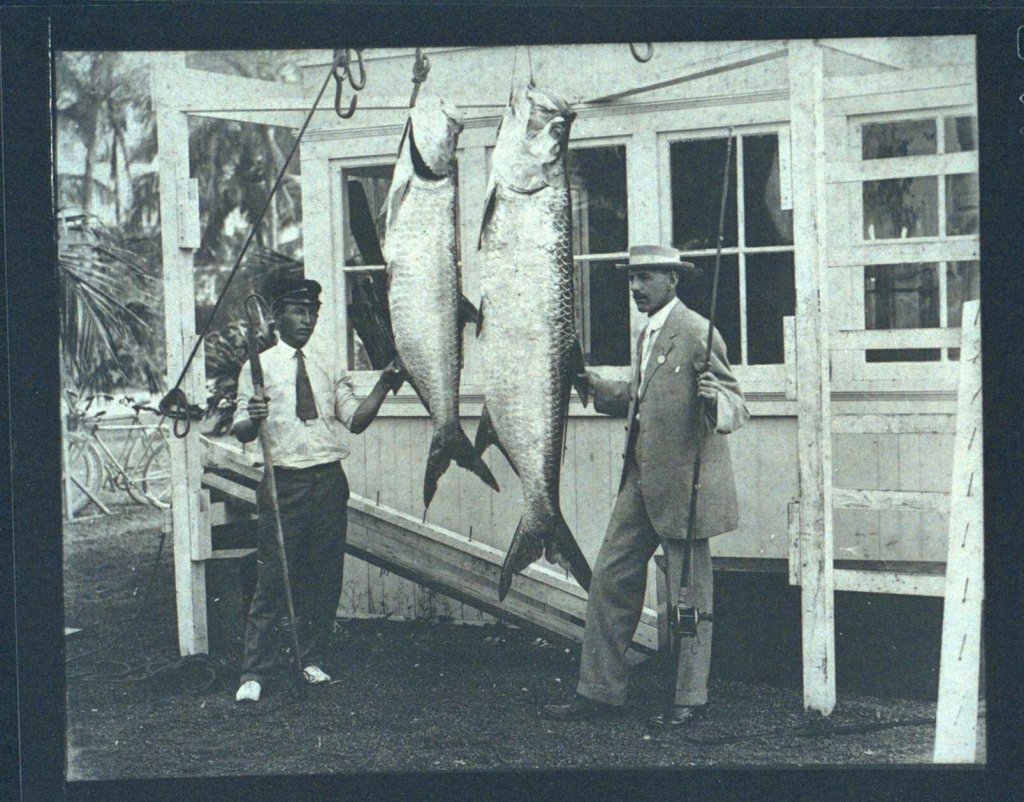
-
Ala-Kart by CDW - FINISHED - AMT - 1:25 Scale - PLASTIC
CDW replied to CDW's topic in Non-ship/categorised builds


-
Ala-Kart by CDW - FINISHED - AMT - 1:25 Scale - PLASTIC
CDW replied to CDW's topic in Non-ship/categorised builds
Laid down a couple of good coats of urethane clear (w/hardener) over my body parts with decals, as well as the refinished hood. Came out great, but it's hands-off for at least another 24 hours until it cures. Got a little worried after the first coat over the decals, as it looked like tiny little fish eye pock marks over some of the decals. Thought maybe the decals had a bad reaction to the clear. But I realized when I applied the second (and last) coat, I needed to lay it down heavy and it came out smooth as glass. The clear urethane had no tendency to run and could take a heavy coat. Really nice paint combo, the acrylic color under the urethane clear. I was a little skeptical at first but it worked beautifully well I think. The thing you have to remember with acrylics, particularly the metallics and pearls, there is little to no chance to fix a problem area because acrylic can't be sanded. If you try to sand it, it just rolls up and makes a mess. If it's bad, the best bet is to strip it down and do it over again. I'll get some pictures later when it's safe to handle. -
Ala-Kart by CDW - FINISHED - AMT - 1:25 Scale - PLASTIC
CDW replied to CDW's topic in Non-ship/categorised builds
My distributor carries a line of solvent based paints very similar to the Gravity line, called Splash. Lots and lots of auto-based colors. I ordered some last night. I have a lot of car models that need to be finished. Yes, the running boards have decals. -
Ala-Kart by CDW - FINISHED - AMT - 1:25 Scale - PLASTIC
CDW replied to CDW's topic in Non-ship/categorised builds
Using aluminum foil to help direct the paint into a bottle is a great idea. Will have to try that. The whole reason I wanted to try the Createx Wicked line of acrylic paints (top coated with a solvent based clear coat) was because of the vast array of colors they offer at a low cost with the convenience of acrylic. As an added bonus, a local vendor is a distributor. -
Looks great! I'll bet there are parts for rigging the torpedo nets on those frets as well. Pontos doesn't show where all the parts are to be used.
- 467 replies
-
- 4
-
-
- mikasa
- wave models
- (and 1 more)
-
Ala-Kart by CDW - FINISHED - AMT - 1:25 Scale - PLASTIC
CDW replied to CDW's topic in Non-ship/categorised builds
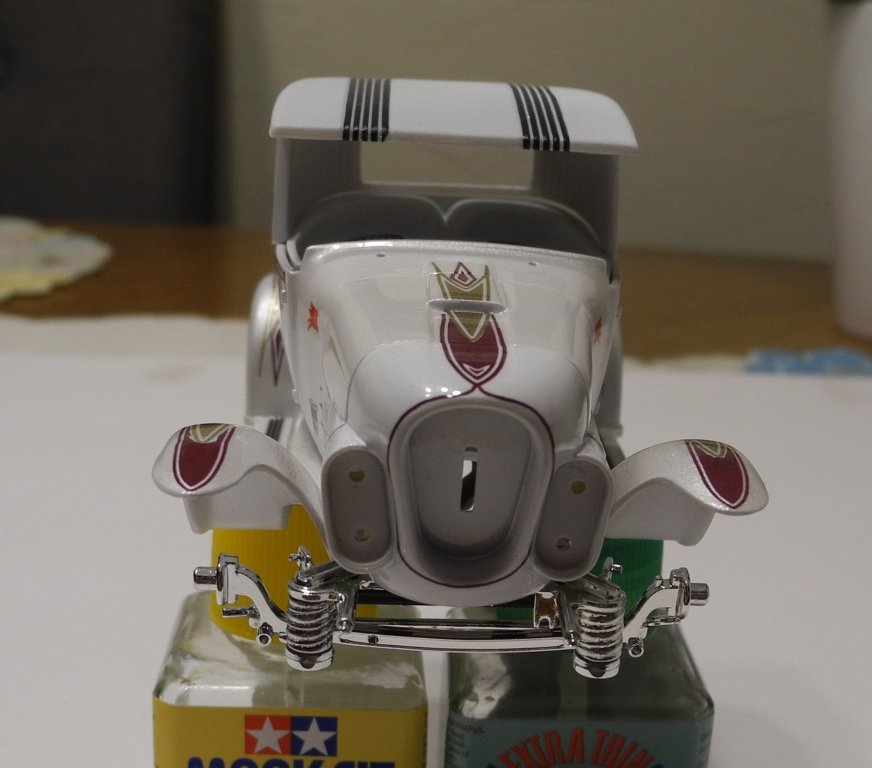
All the body parts got the clear coat buffed down with a 3000 grit sanding sponge to prepare for decals. The hood got a couple of shots of pearl white in hopes of getting it matched with the other body parts. After the decals are all down, the body parts including the hood will get a coat of clear, the hood a couple of coats. All the decals are in place on the body parts with the exception of the hood. It will take a couple more days to decal the hood after it's clear coated. While the Ala-Kart was Hemi powered, the kit engine looks small.....because it was small. The engine was just a 241 cubic inch Hemi, much smaller than the "elephant engine" Hemi's we are accustomed to seeing in drag racing.
-
Ala-Kart by CDW - FINISHED - AMT - 1:25 Scale - PLASTIC
CDW replied to CDW's topic in Non-ship/categorised builds
Thanks OC! -
Ala-Kart by CDW - FINISHED - AMT - 1:25 Scale - PLASTIC
CDW replied to CDW's topic in Non-ship/categorised builds
You're right Denis. The finish came out beautiful. A little polish and it will look fantastic. I just wish I had paid closer attention and held the parts side-by-side to make sure the pearl on each part looked the same. Spraying white pearl on top of white primer makes it very hard to see how much paint is going down, but it's necessary to get the shade of white I was wanting. Thanks for your kind comment. I should also mention that the suggestion Hexnut made to use Tamiya rattle can paint is good, too. I have gotten some beautiful finishes using their rattle can paint. The down side to rattle cans is a lack of control for how much paint comes out, which can sometimes obliterate small details. Airbrush allows us to regulate the spray pattern so much more so fine coats can be achieved. -
Ala-Kart by CDW - FINISHED - AMT - 1:25 Scale - PLASTIC
CDW replied to CDW's topic in Non-ship/categorised builds
Where I went wrong: I should have had all the body parts sitting in line, in their proper order, when I was shooting the color with my airbrush. Instead, I had each individual part on a stick and I painted each, one by one rather than painting them all at the same time. Had I painted them all at the same time, sharing each stroke/pass of the airbrush, this one not have happened. The way I did it, I could have just as easily gotten a poor result with the Tamiya paint as well. With the decals that are going on, and the fact the model will be displayed with the hood off, I am leaning toward leaving it alone, as-is. Another alternative would be to strip down just the hood and do it all over again. -
Ala-Kart by CDW - FINISHED - AMT - 1:25 Scale - PLASTIC
CDW replied to CDW's topic in Non-ship/categorised builds
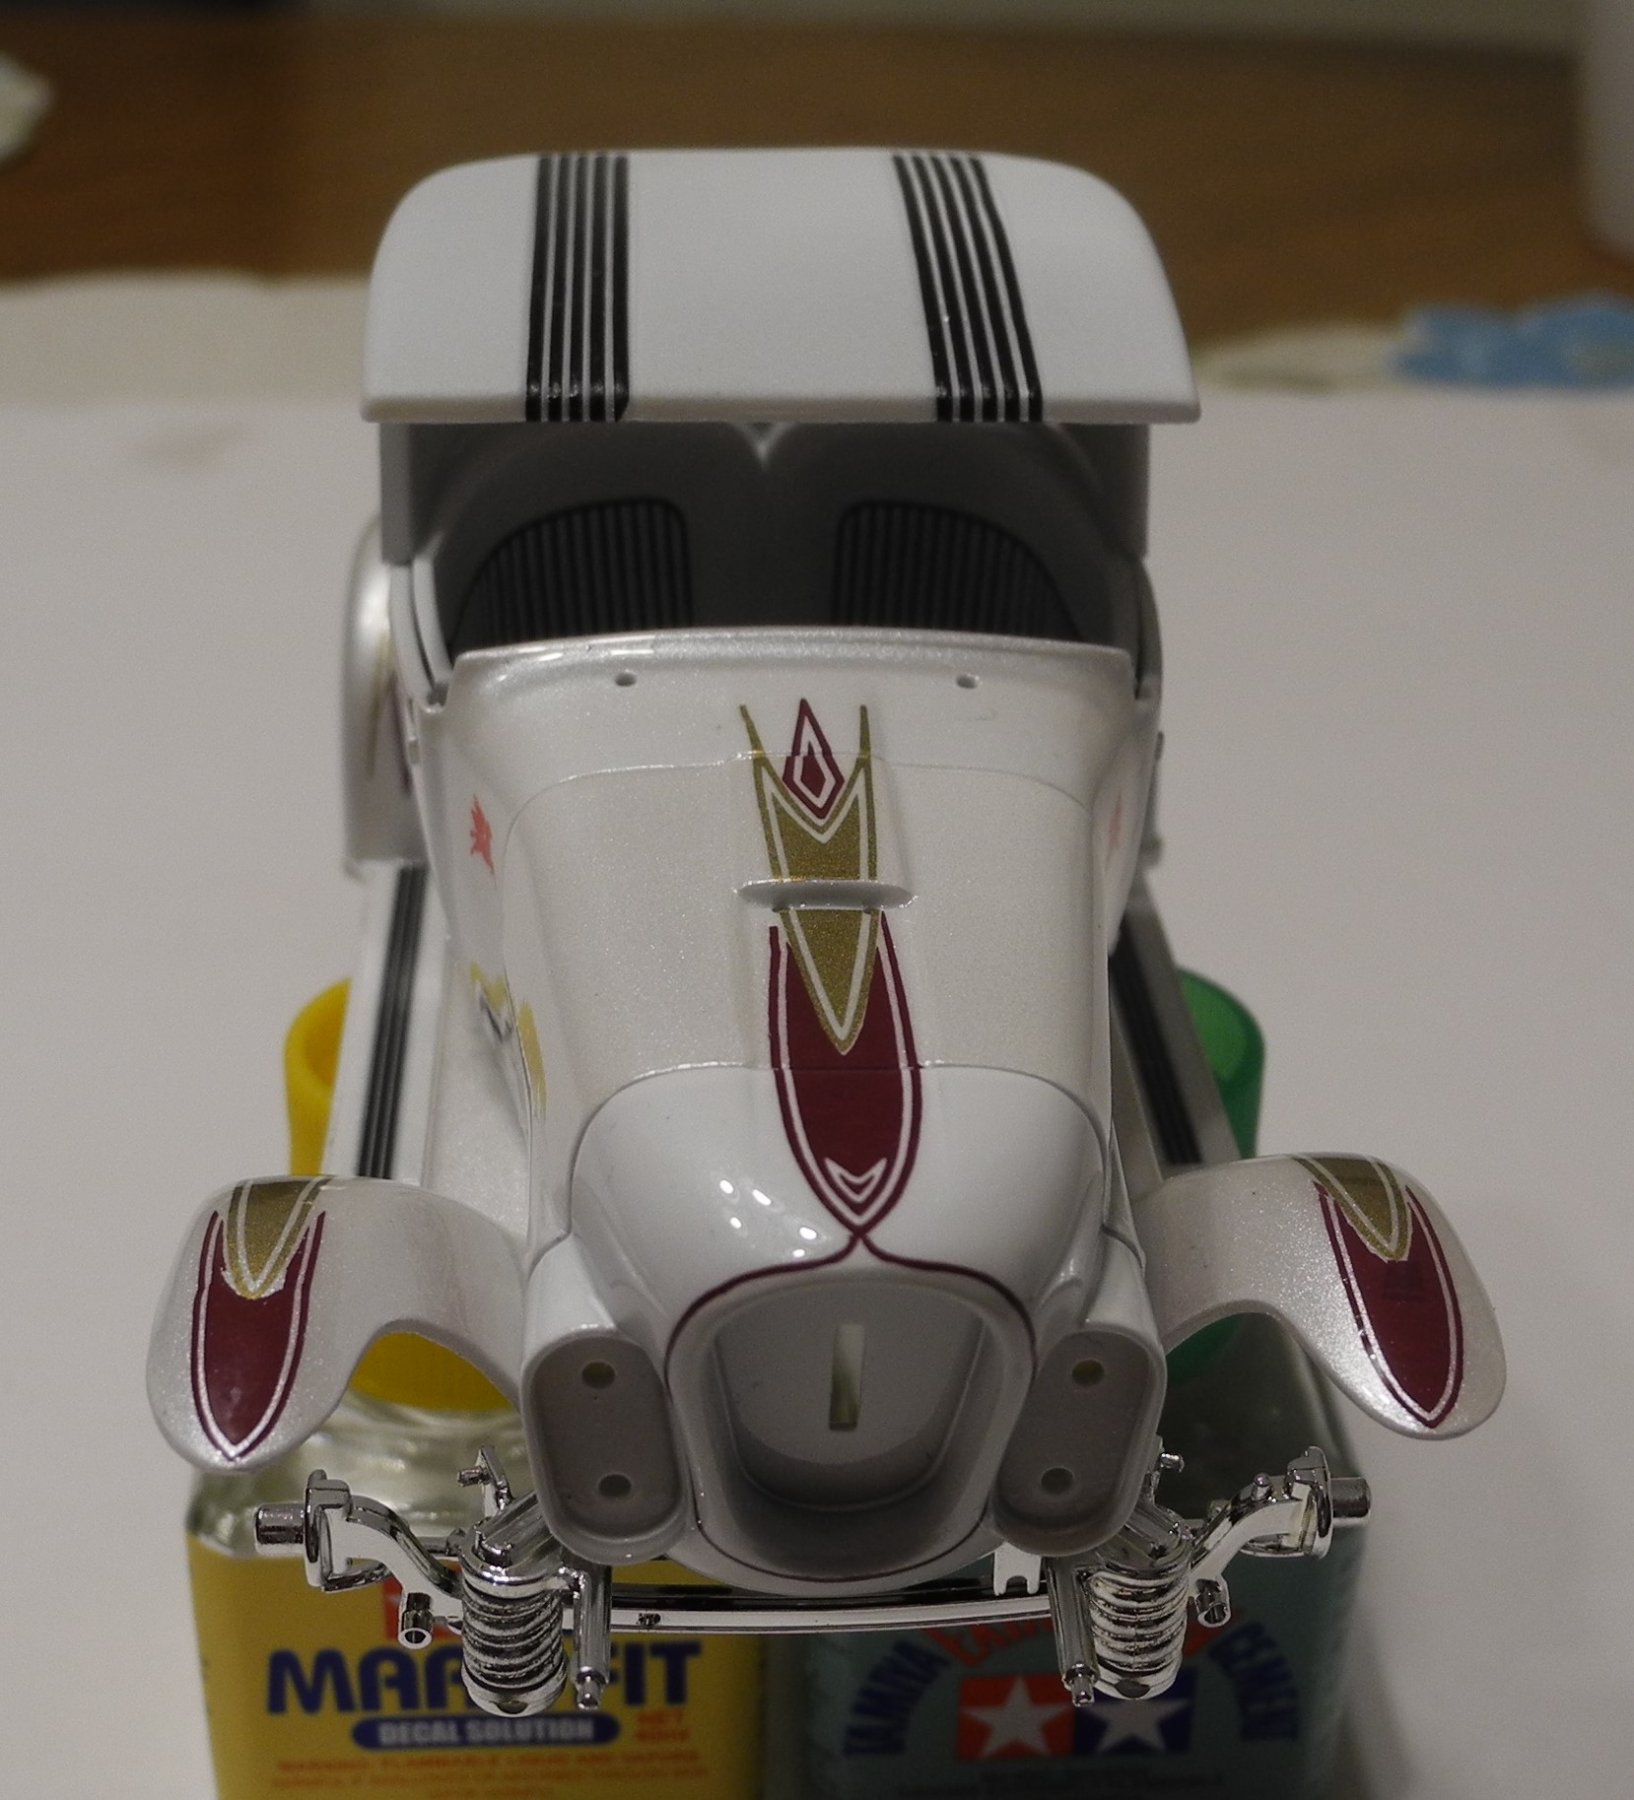
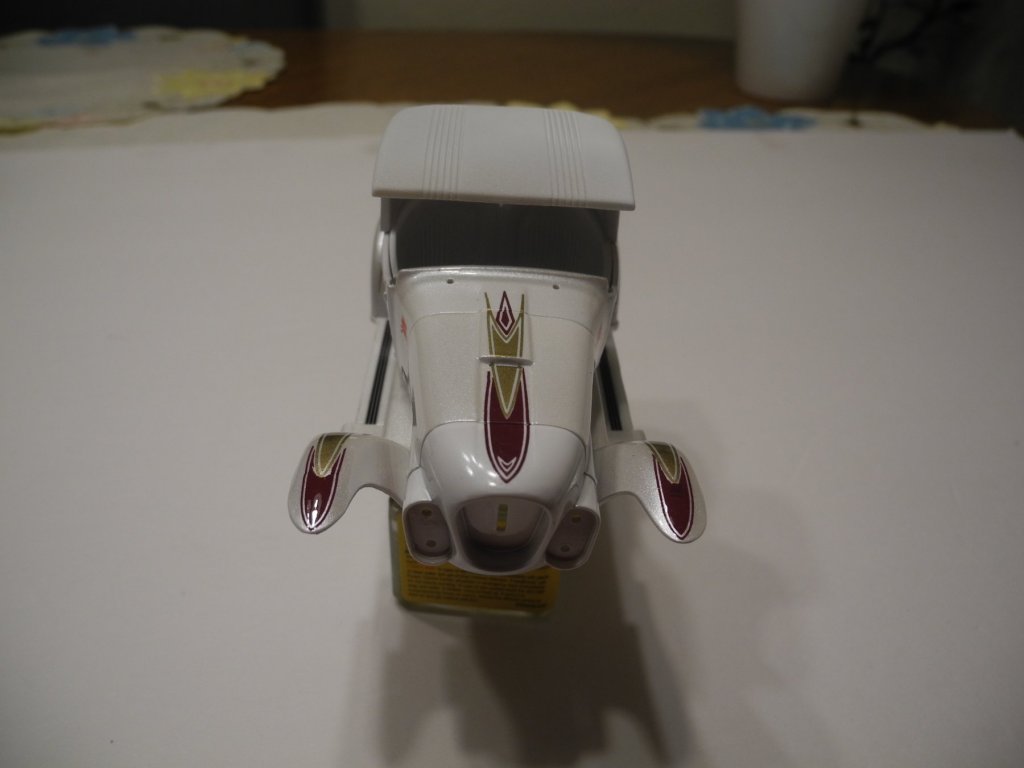
Now that the light of day is here, I can clearly see that not enough pearl white was laid down on the hood, leaving it a lighter different shade of white (brighter) than the other body parts. Guess I need better lighting in my work shop area where I paint, 'cause I sure didn't notice it last night. Pearl colors along with metallics are notoriously hard to paint in the first place. It's all too easy to have your pearl/metal pigments segregate which will leave visible blemishes. This segregation often comes when varying amounts of paint get laid down. Consistency is key when spraying these paints. I might be able to add some more pearl over the top-coated hood, then top coat again. Not sure how that would turn out though. It might make it worse. Then again, I could get the decals laid down and maybe the color difference will not be all that noticeable. All I know is, it's very noticeable to me, but you sure can't see it very well in pictures. I am going to give this topcoat a full 72 hours to cure before I do anything else with it. -
Having fun is what it's all about. In the process, you are achieving quite an accomplishment, particularly considering the fact you've built this model from scratch. Very nice indeed, Phil.
- 355 replies
-
- 3
-
-
- prince de neufchatel
- schooner
- (and 3 more)
-
Ala-Kart by CDW - FINISHED - AMT - 1:25 Scale - PLASTIC
CDW replied to CDW's topic in Non-ship/categorised builds
Did a little additional investigation and learned I only needed to wait 60 minutes to apply the top clear coat, so it's now got 3 clear coats. Will wait until tomorrow and polish it up a bit first, then apply the decals. Once the decals have had at least a day to dry, will top coat those as well to finish it off.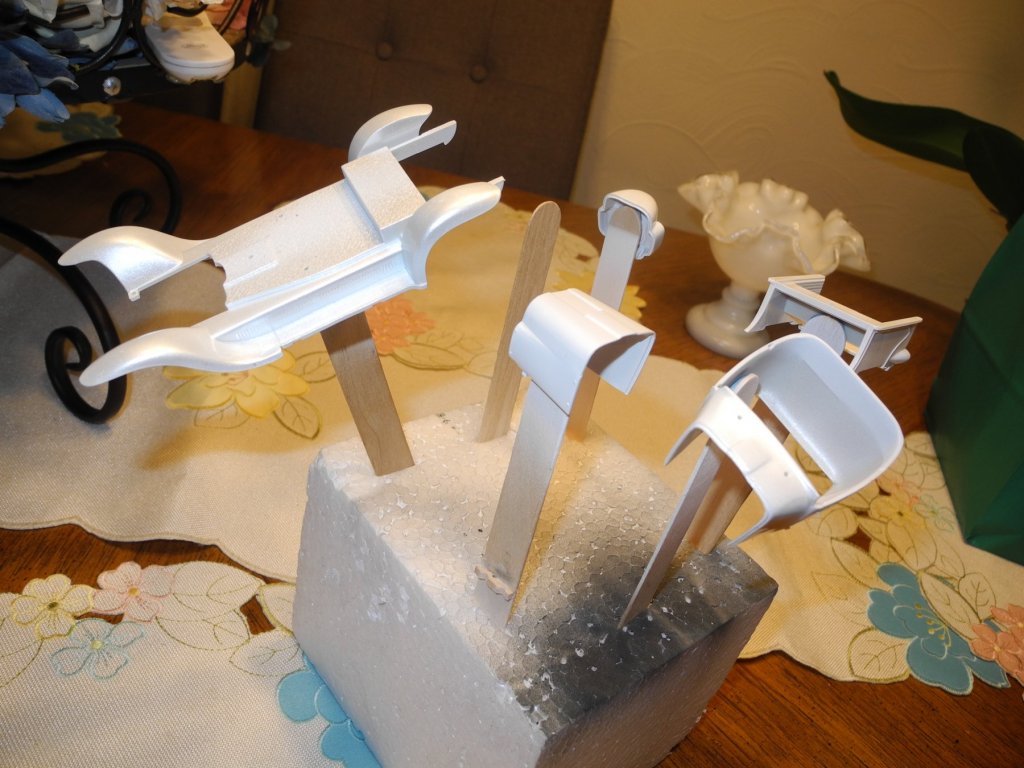

-
Ala-Kart by CDW - FINISHED - AMT - 1:25 Scale - PLASTIC
CDW replied to CDW's topic in Non-ship/categorised builds
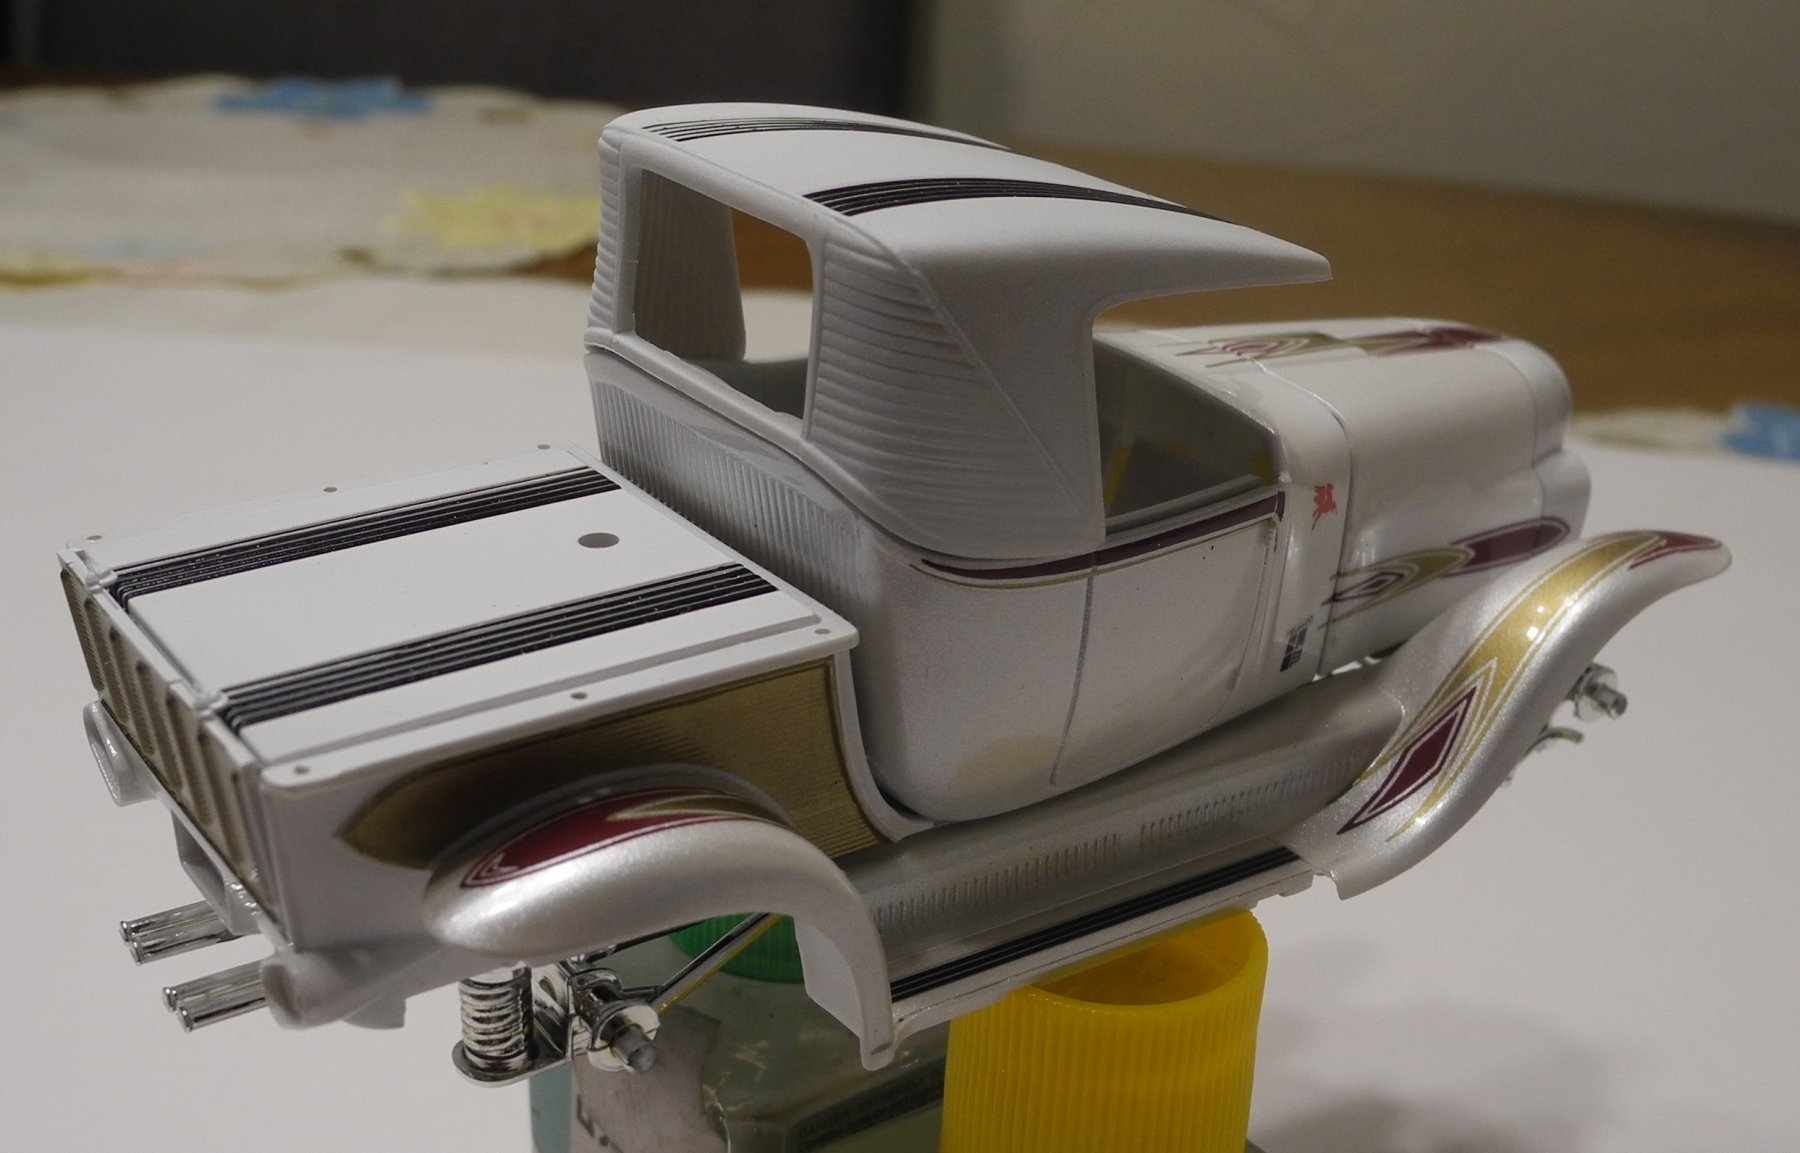
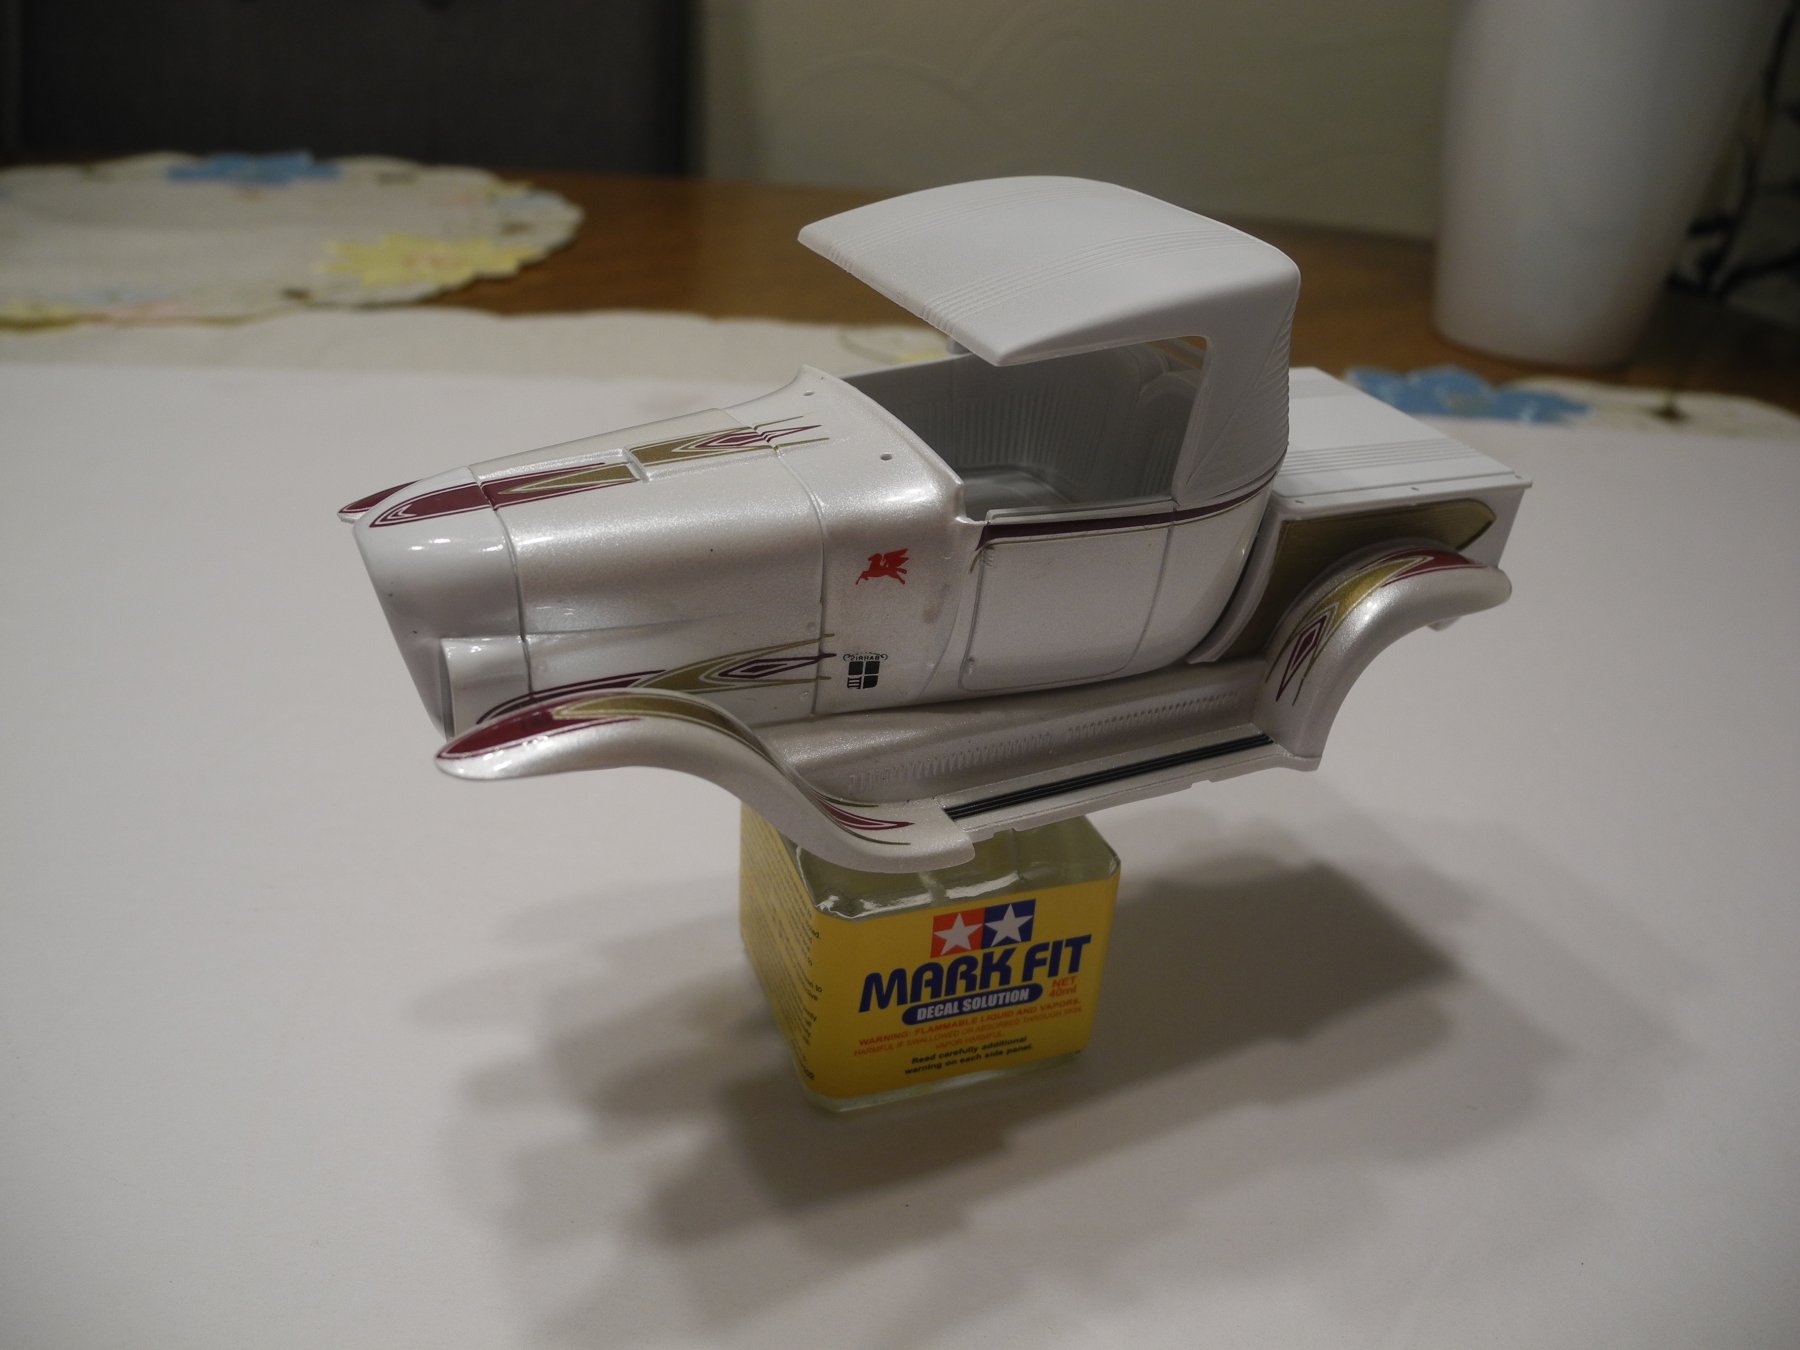
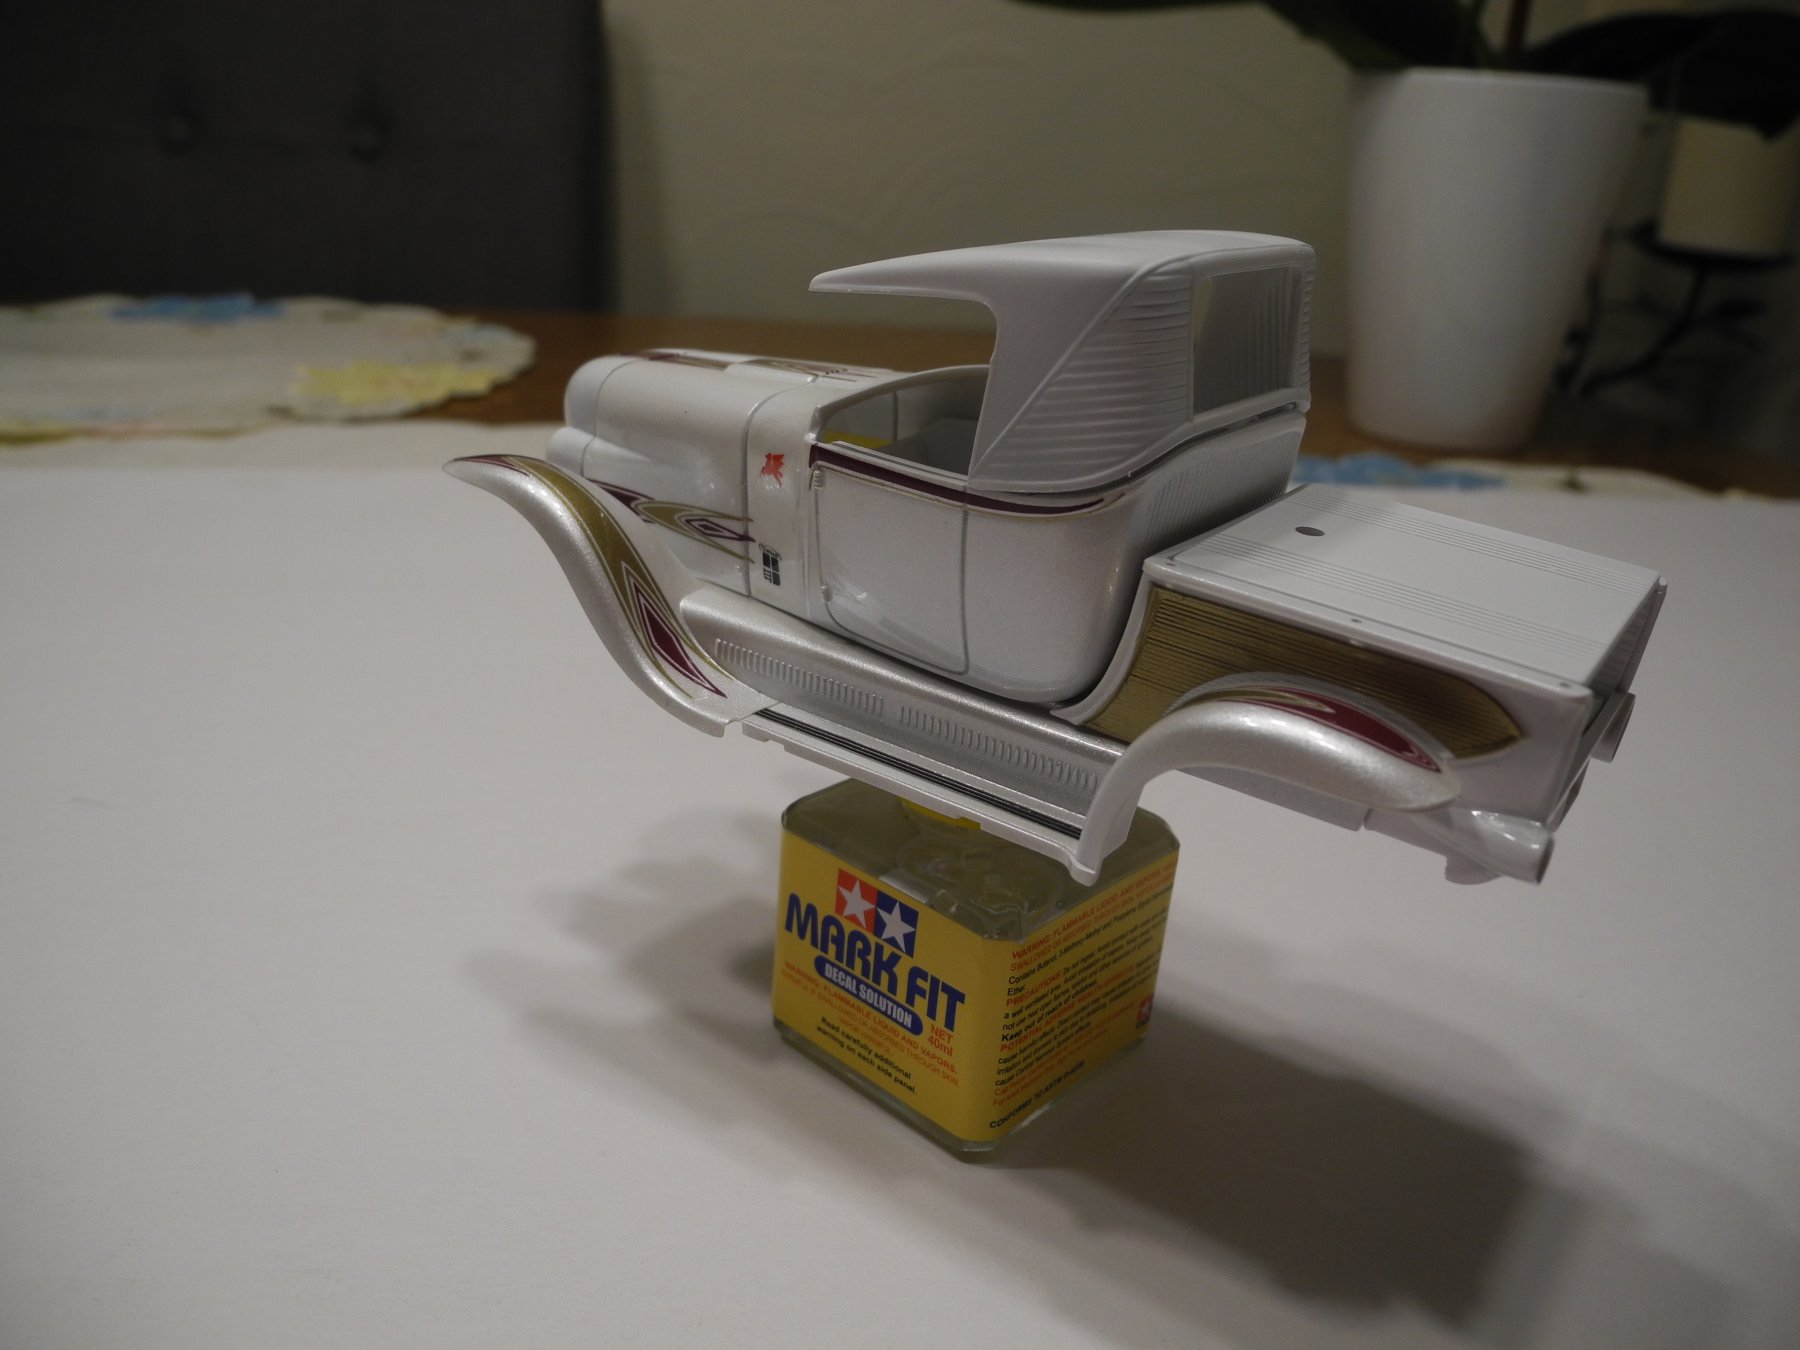
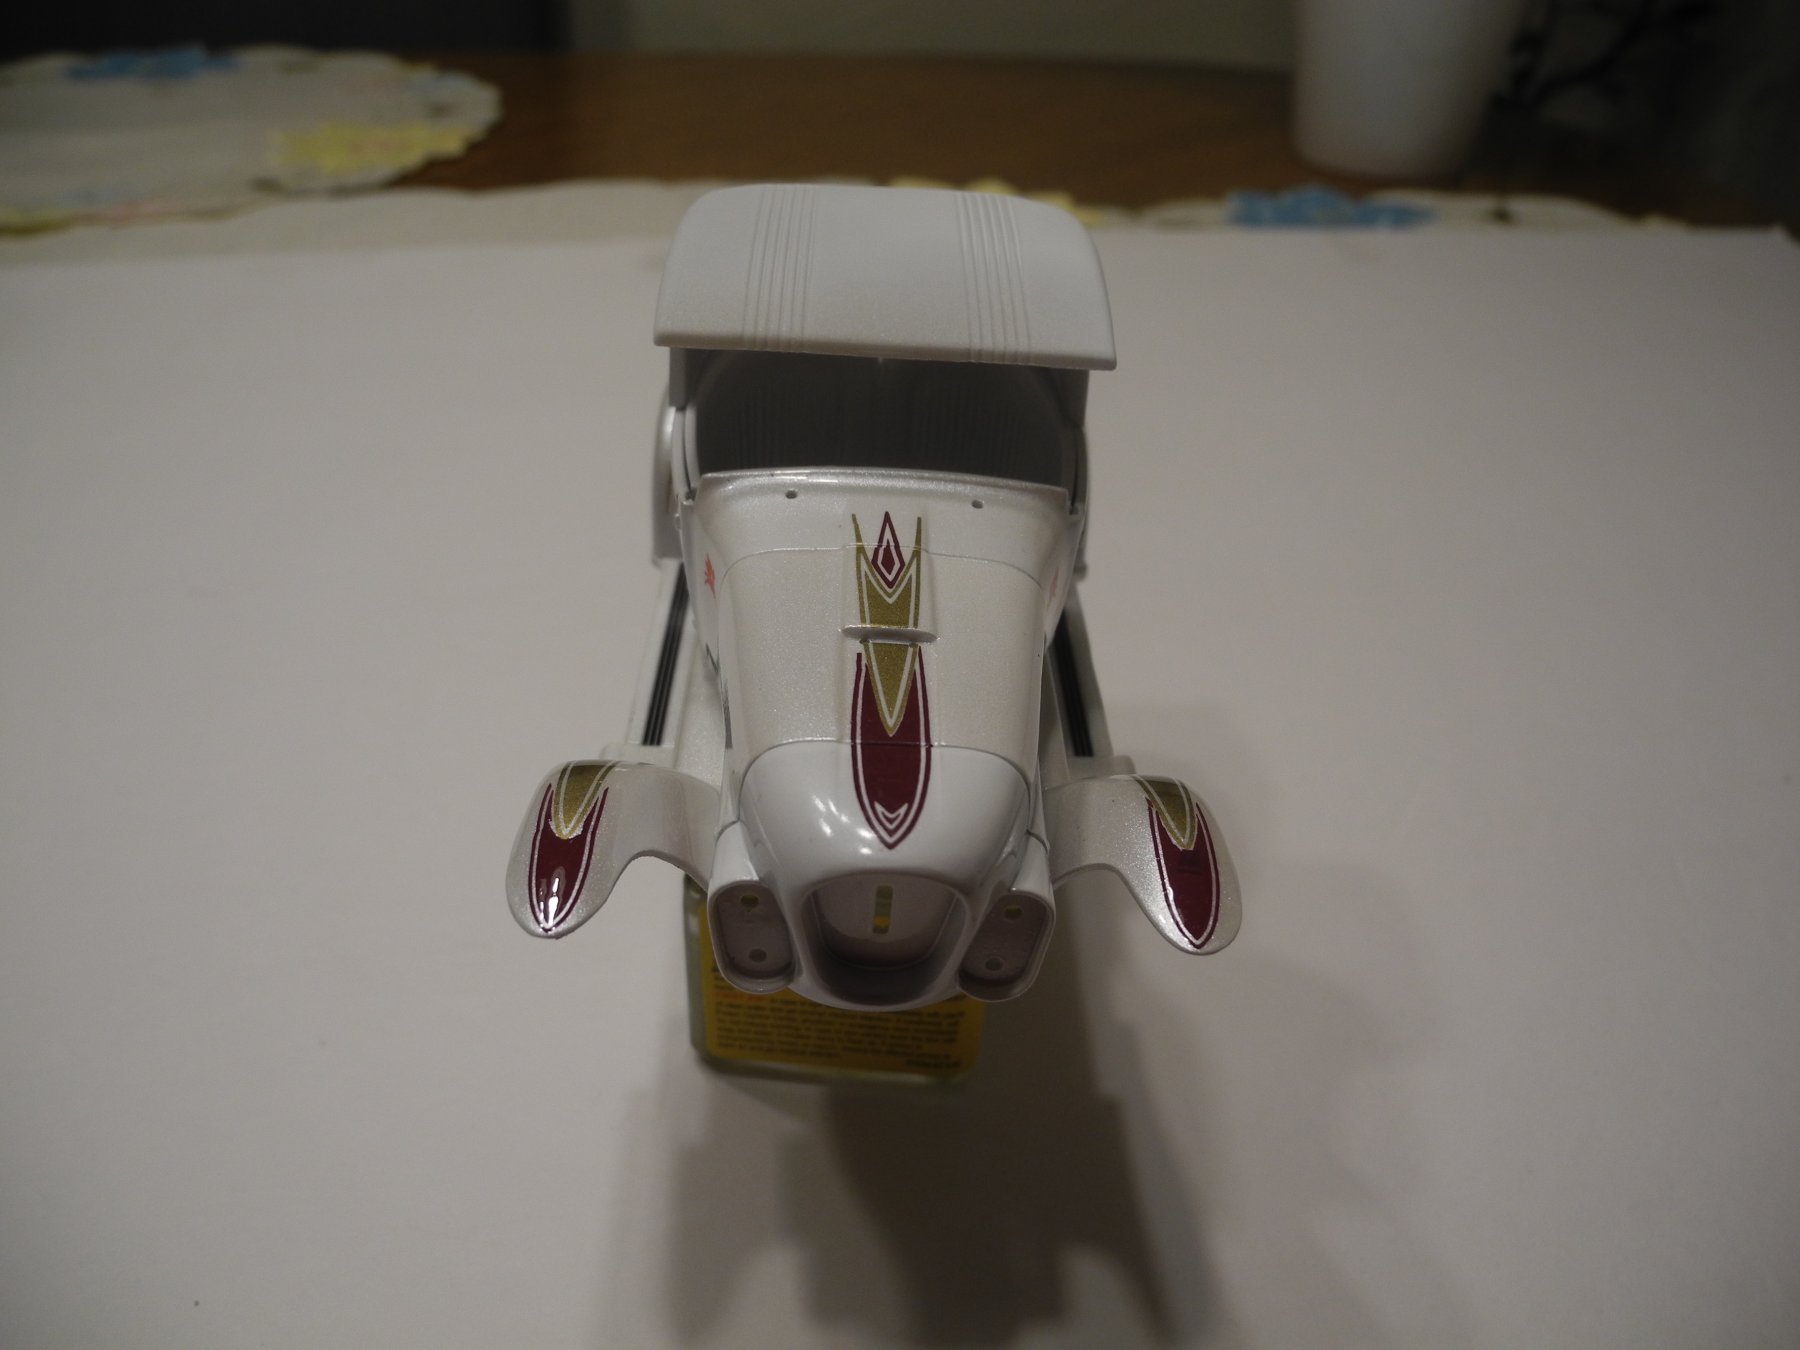
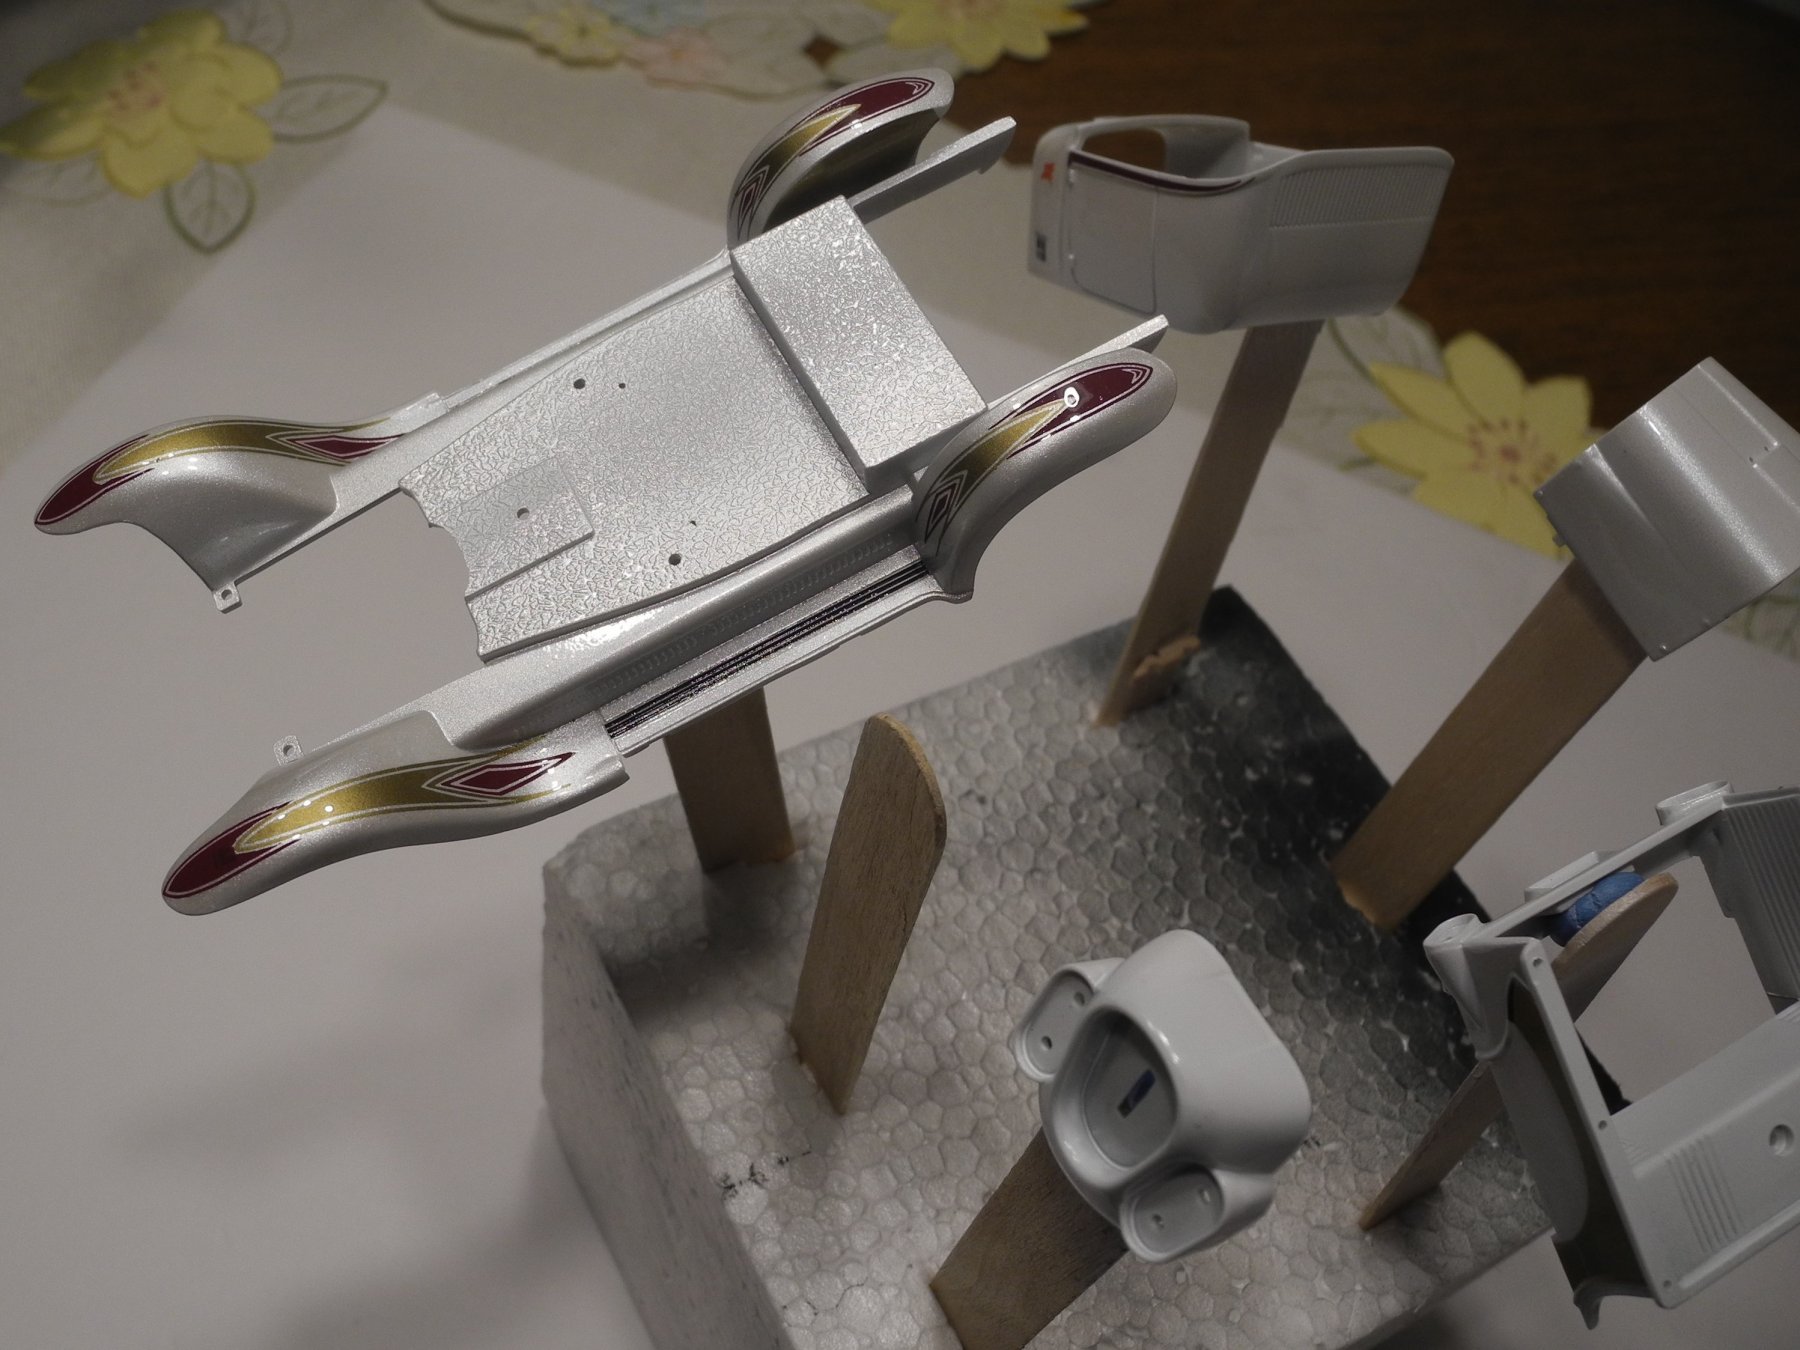
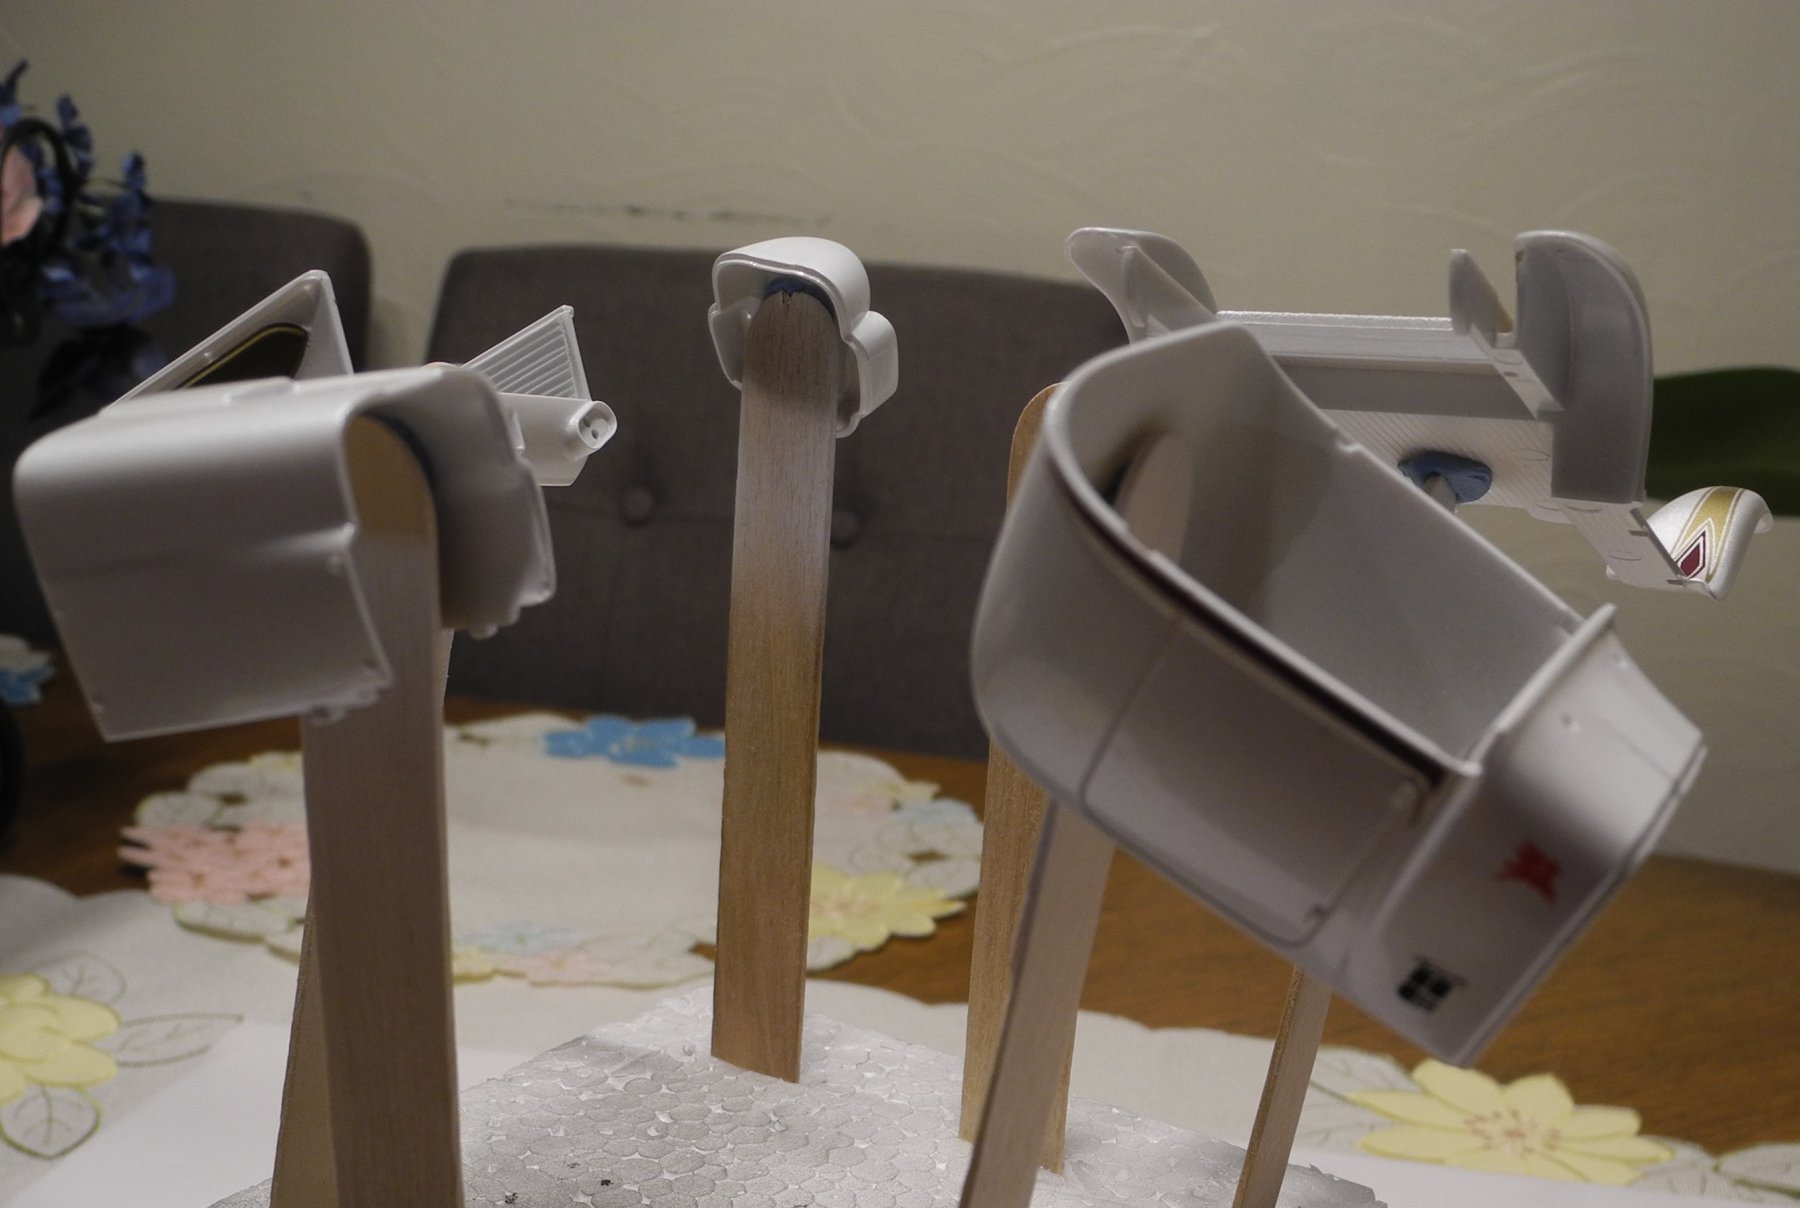
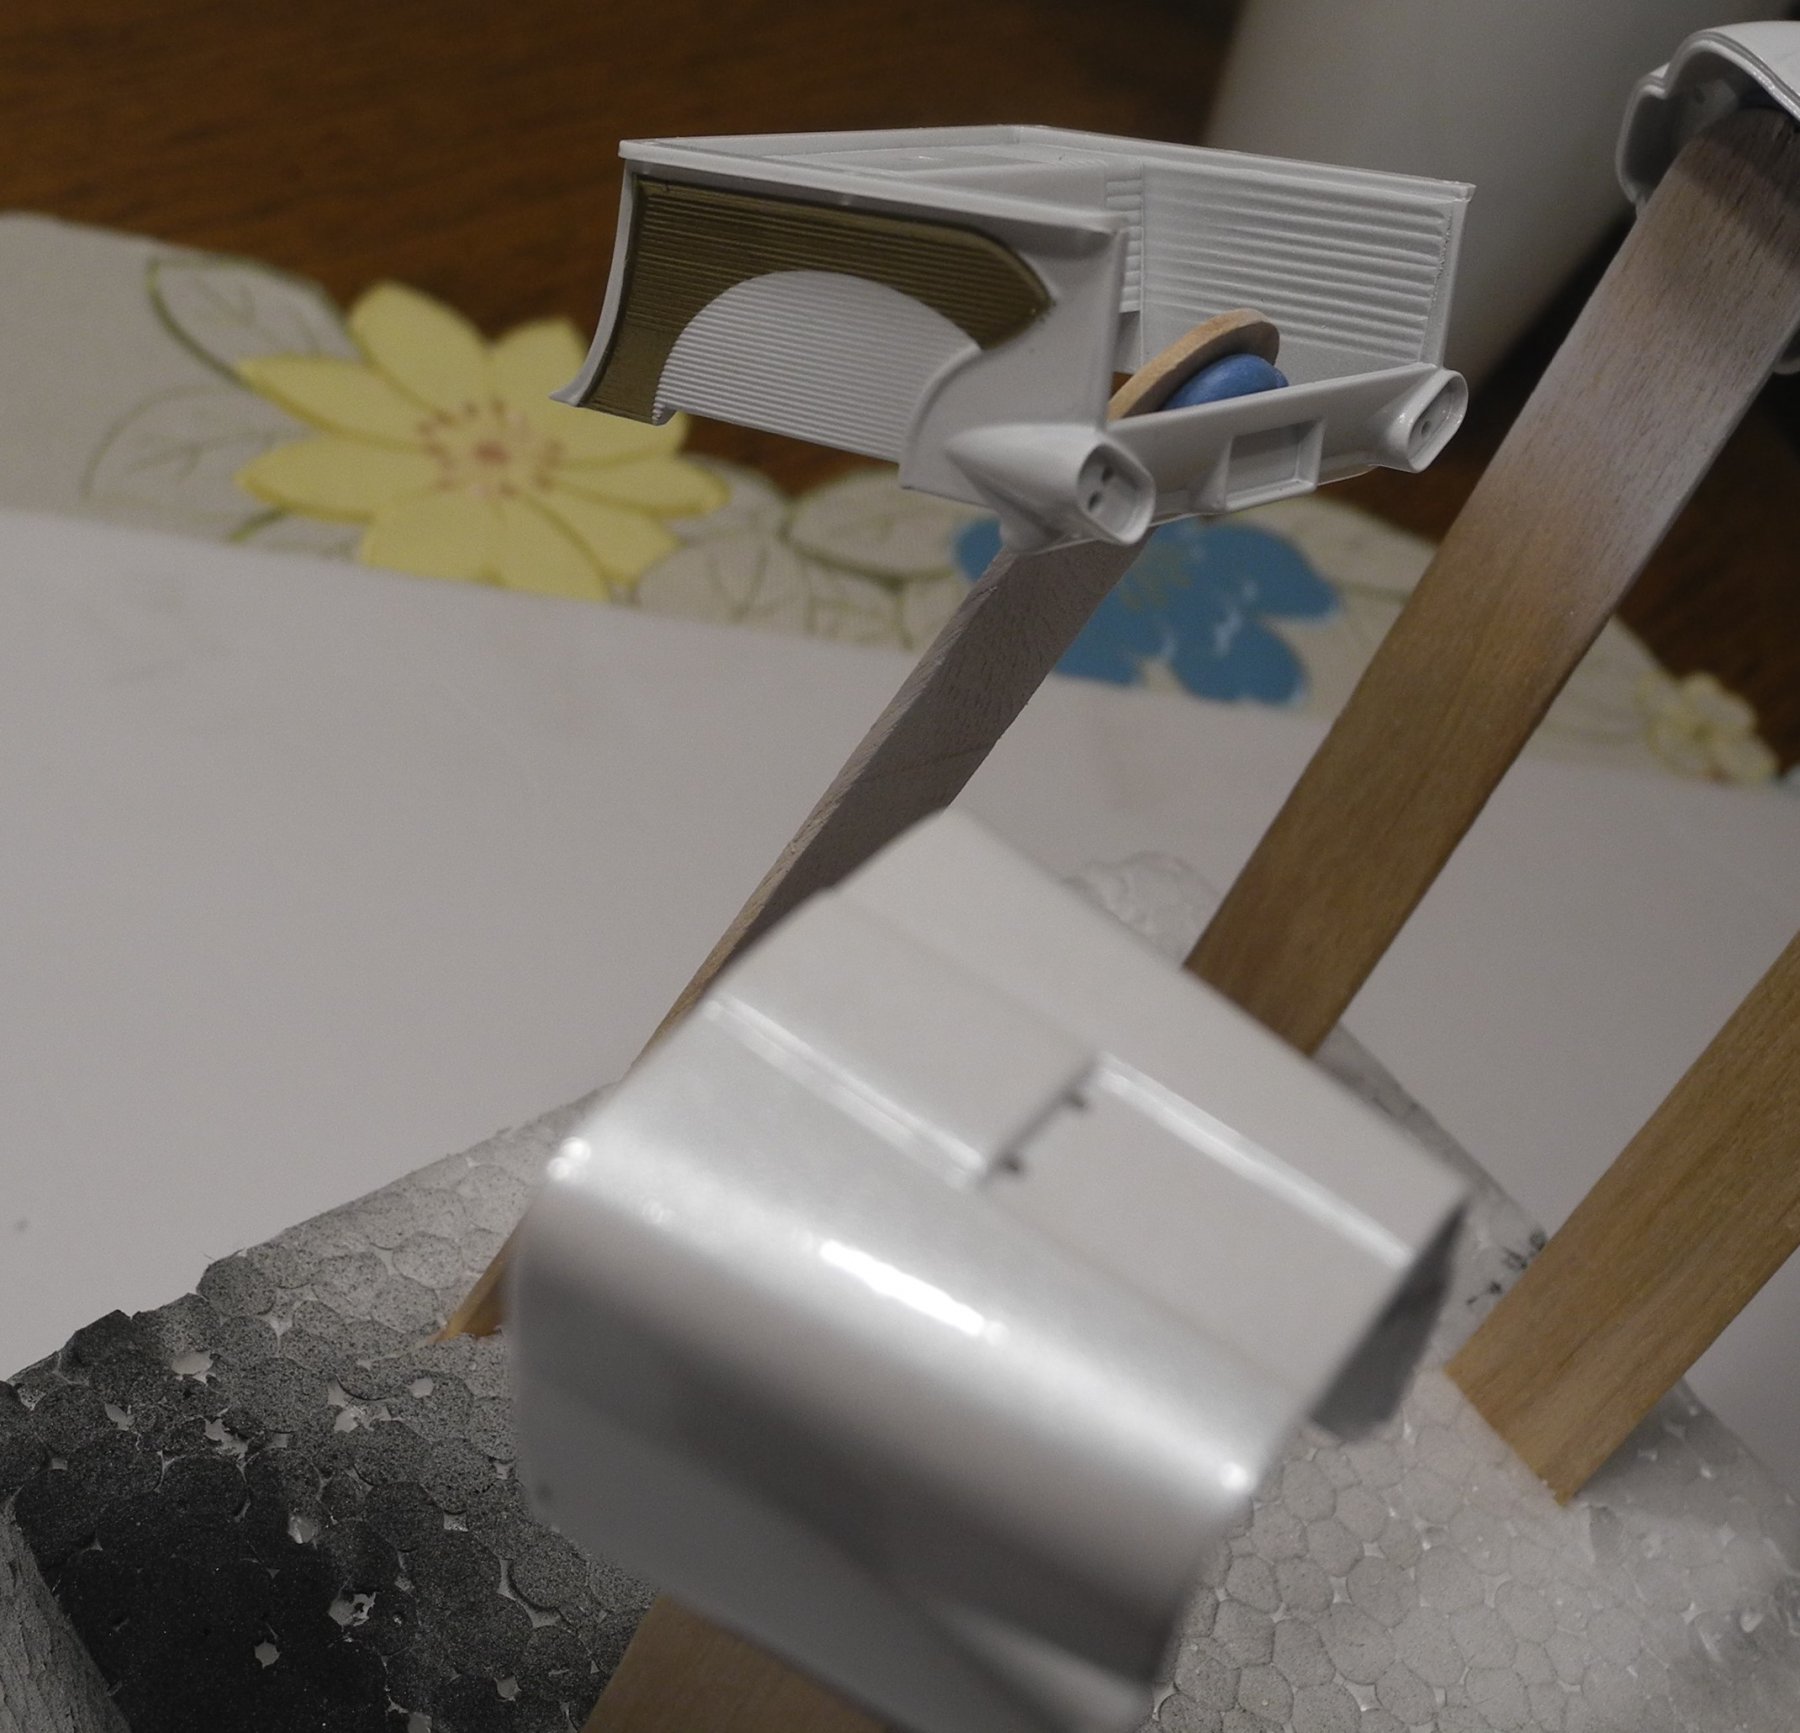
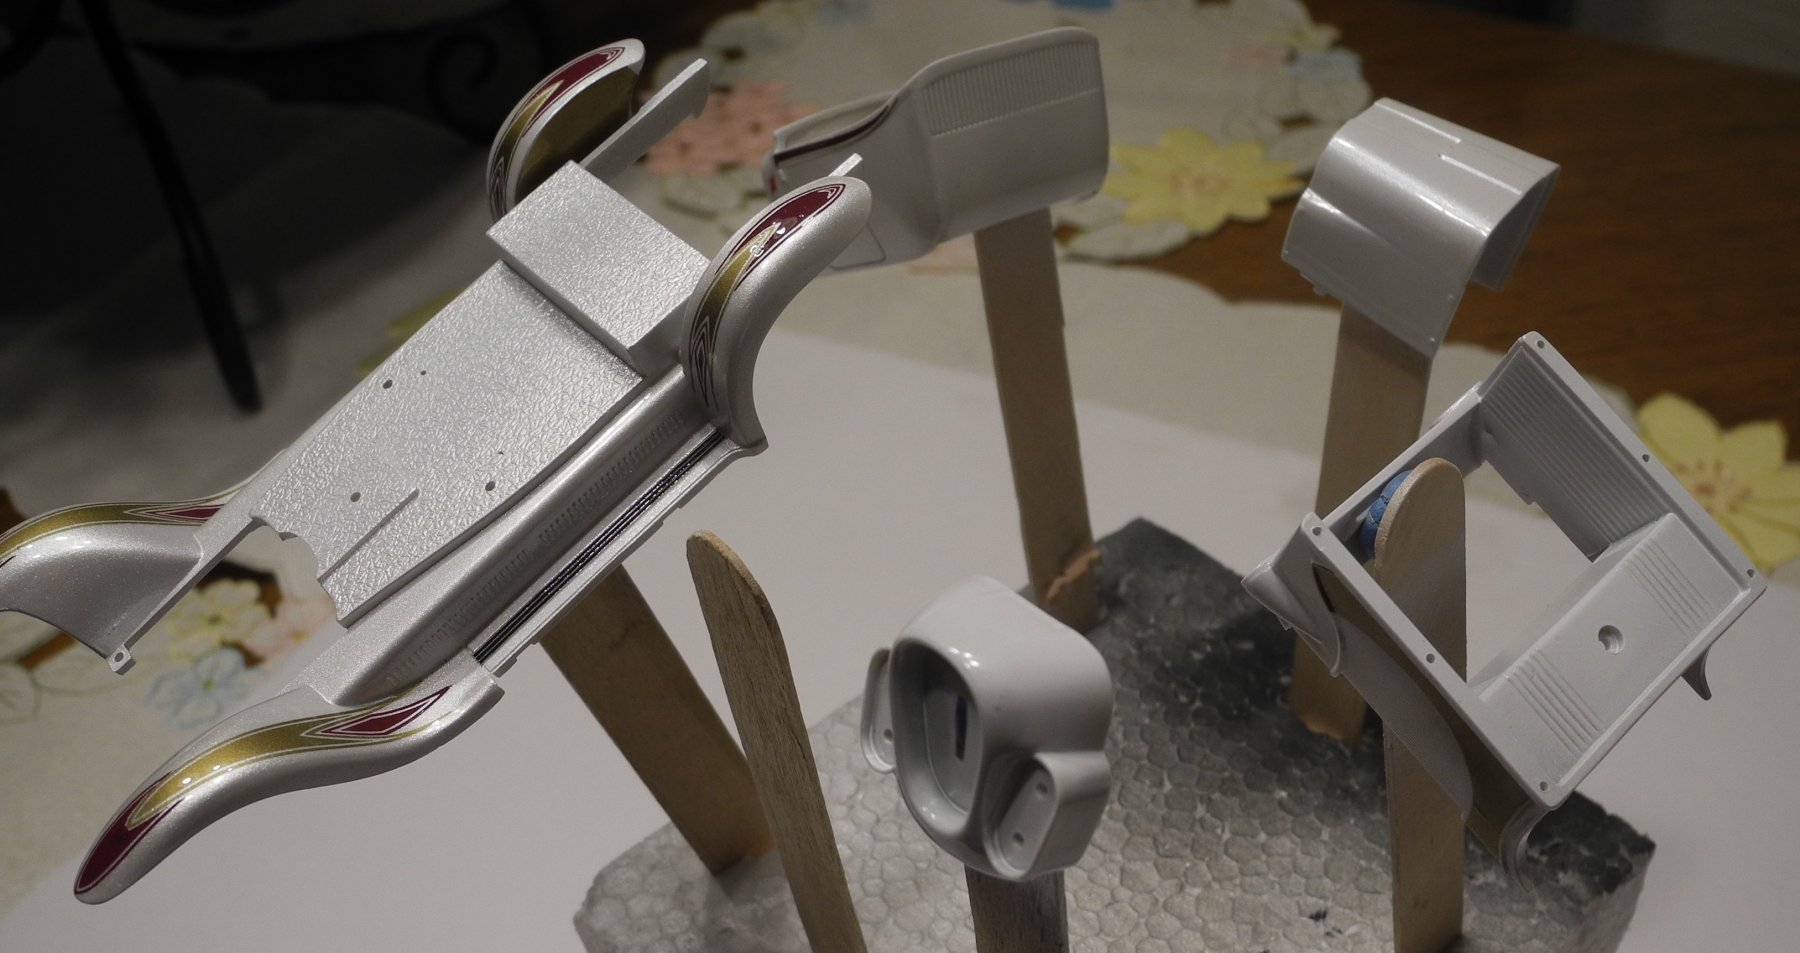
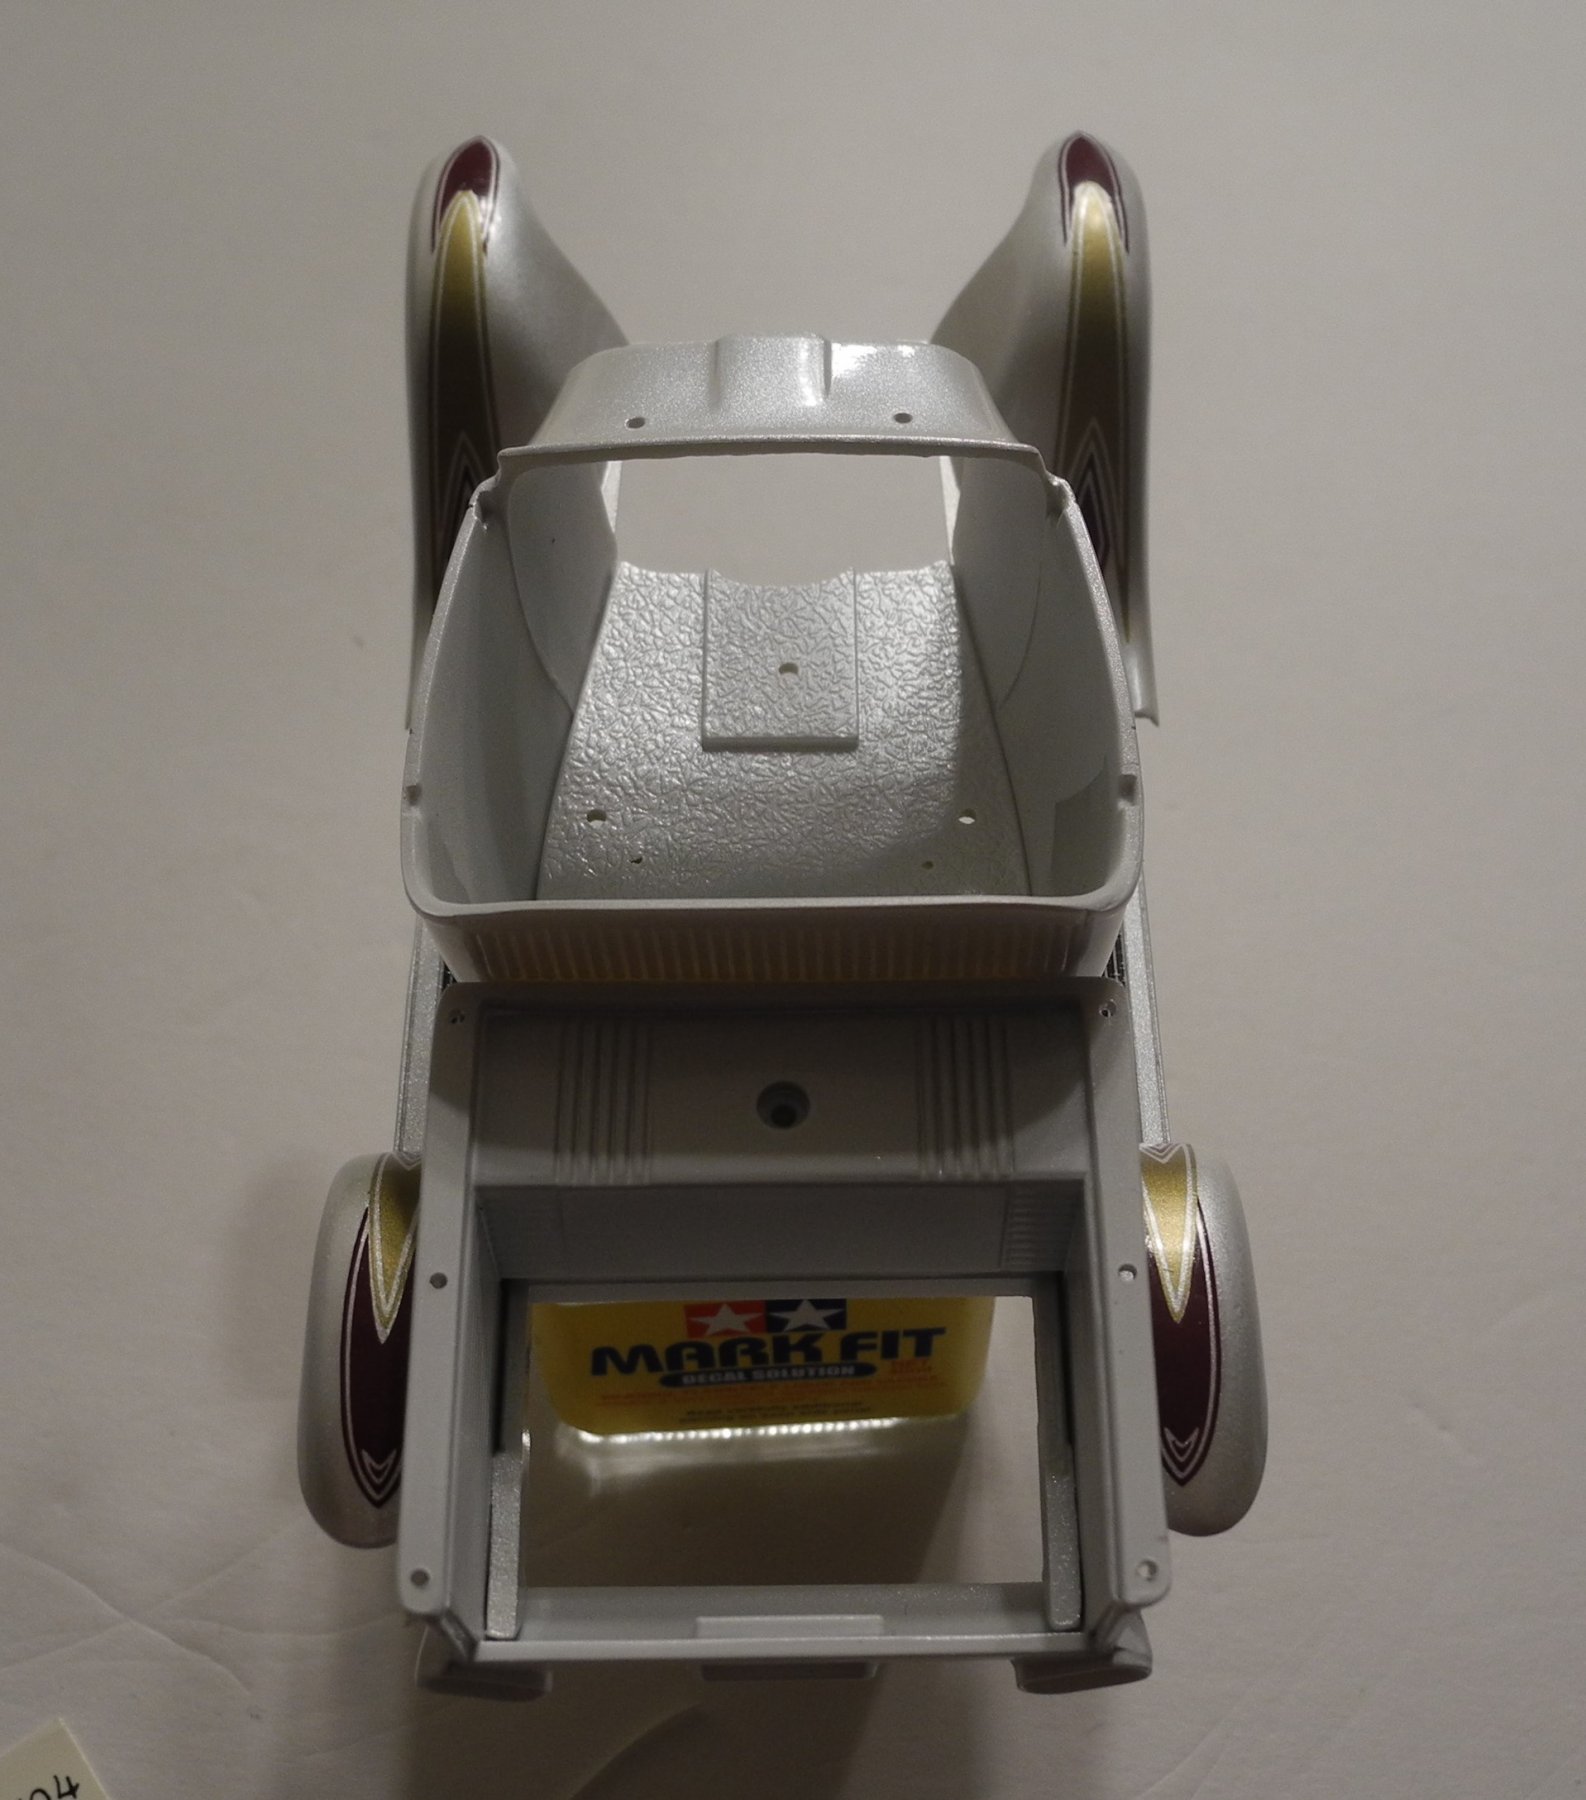
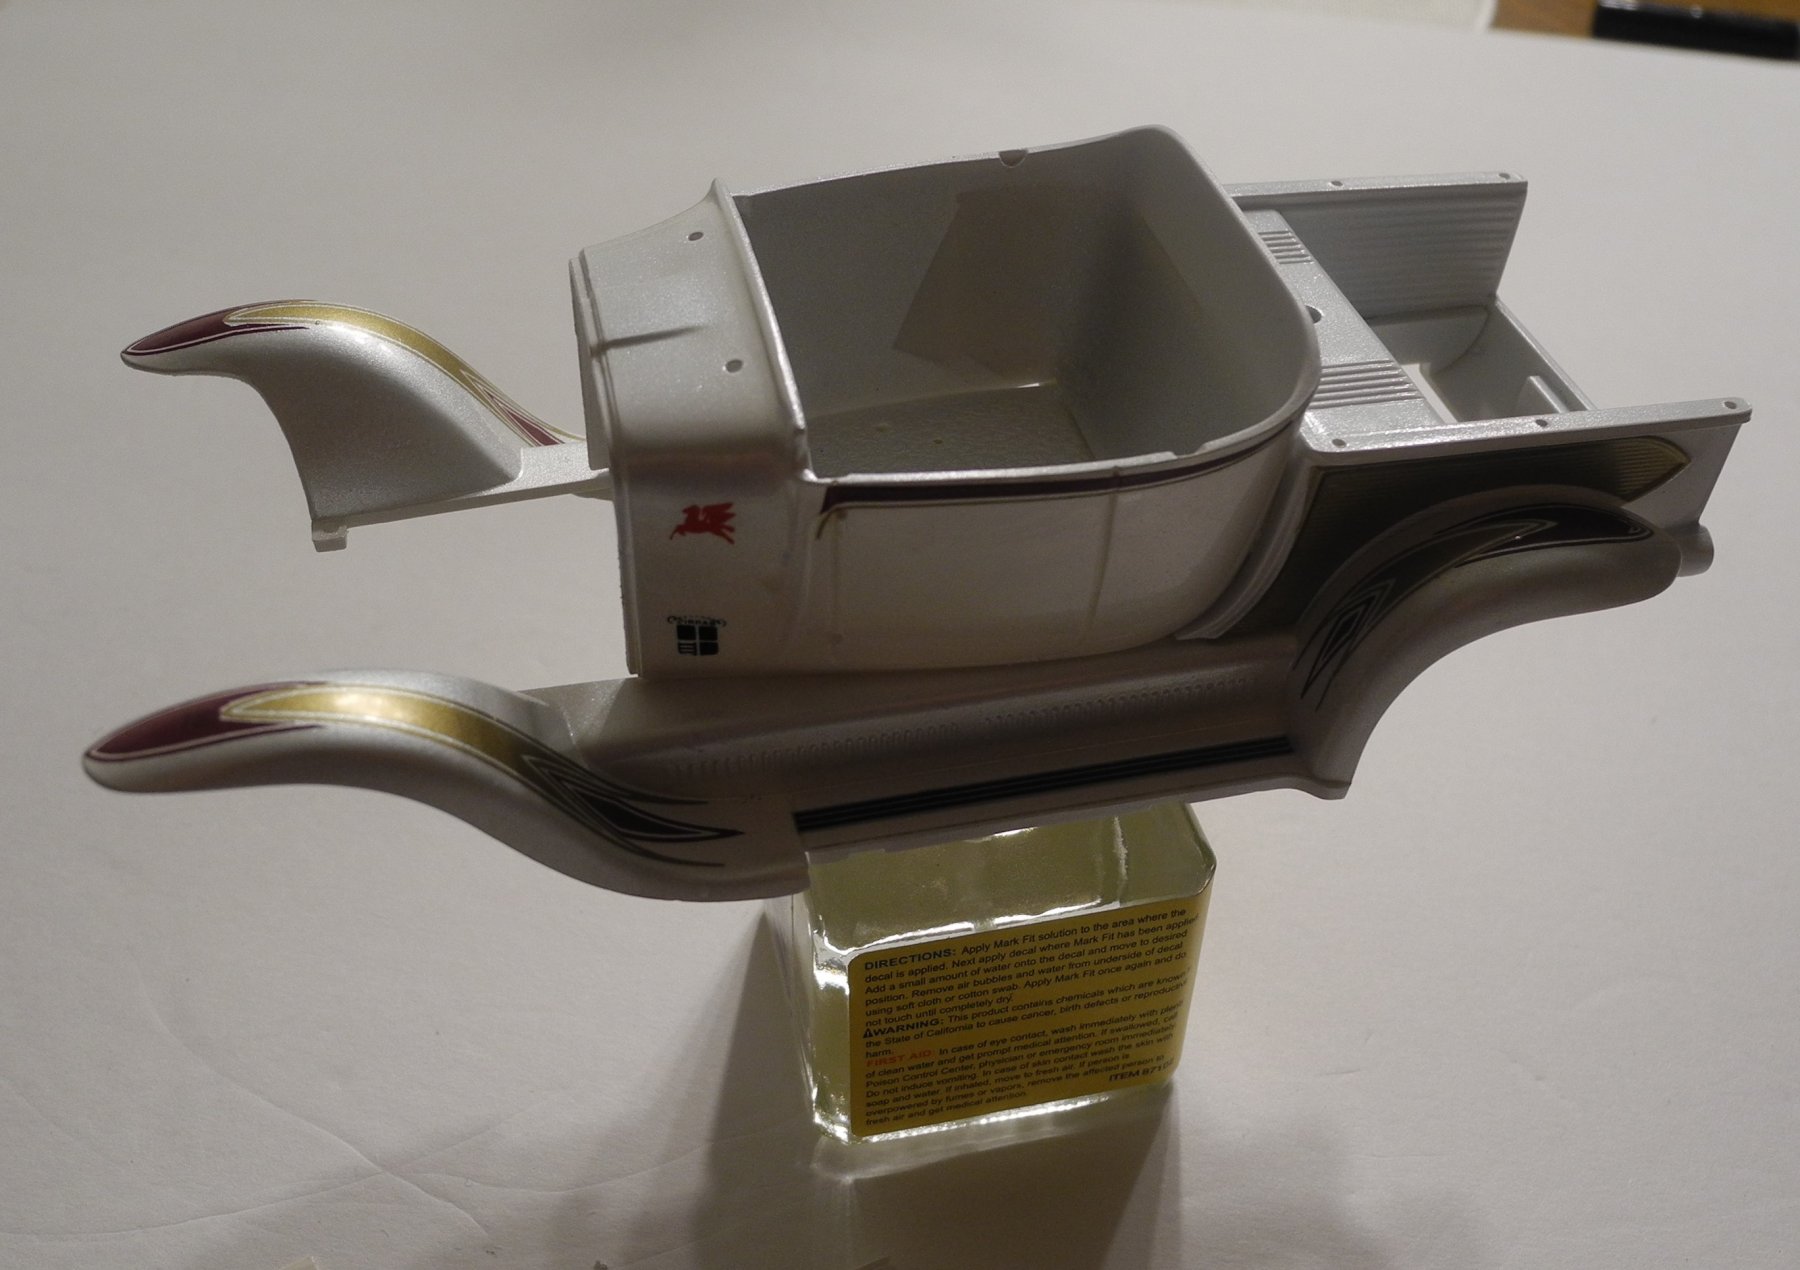
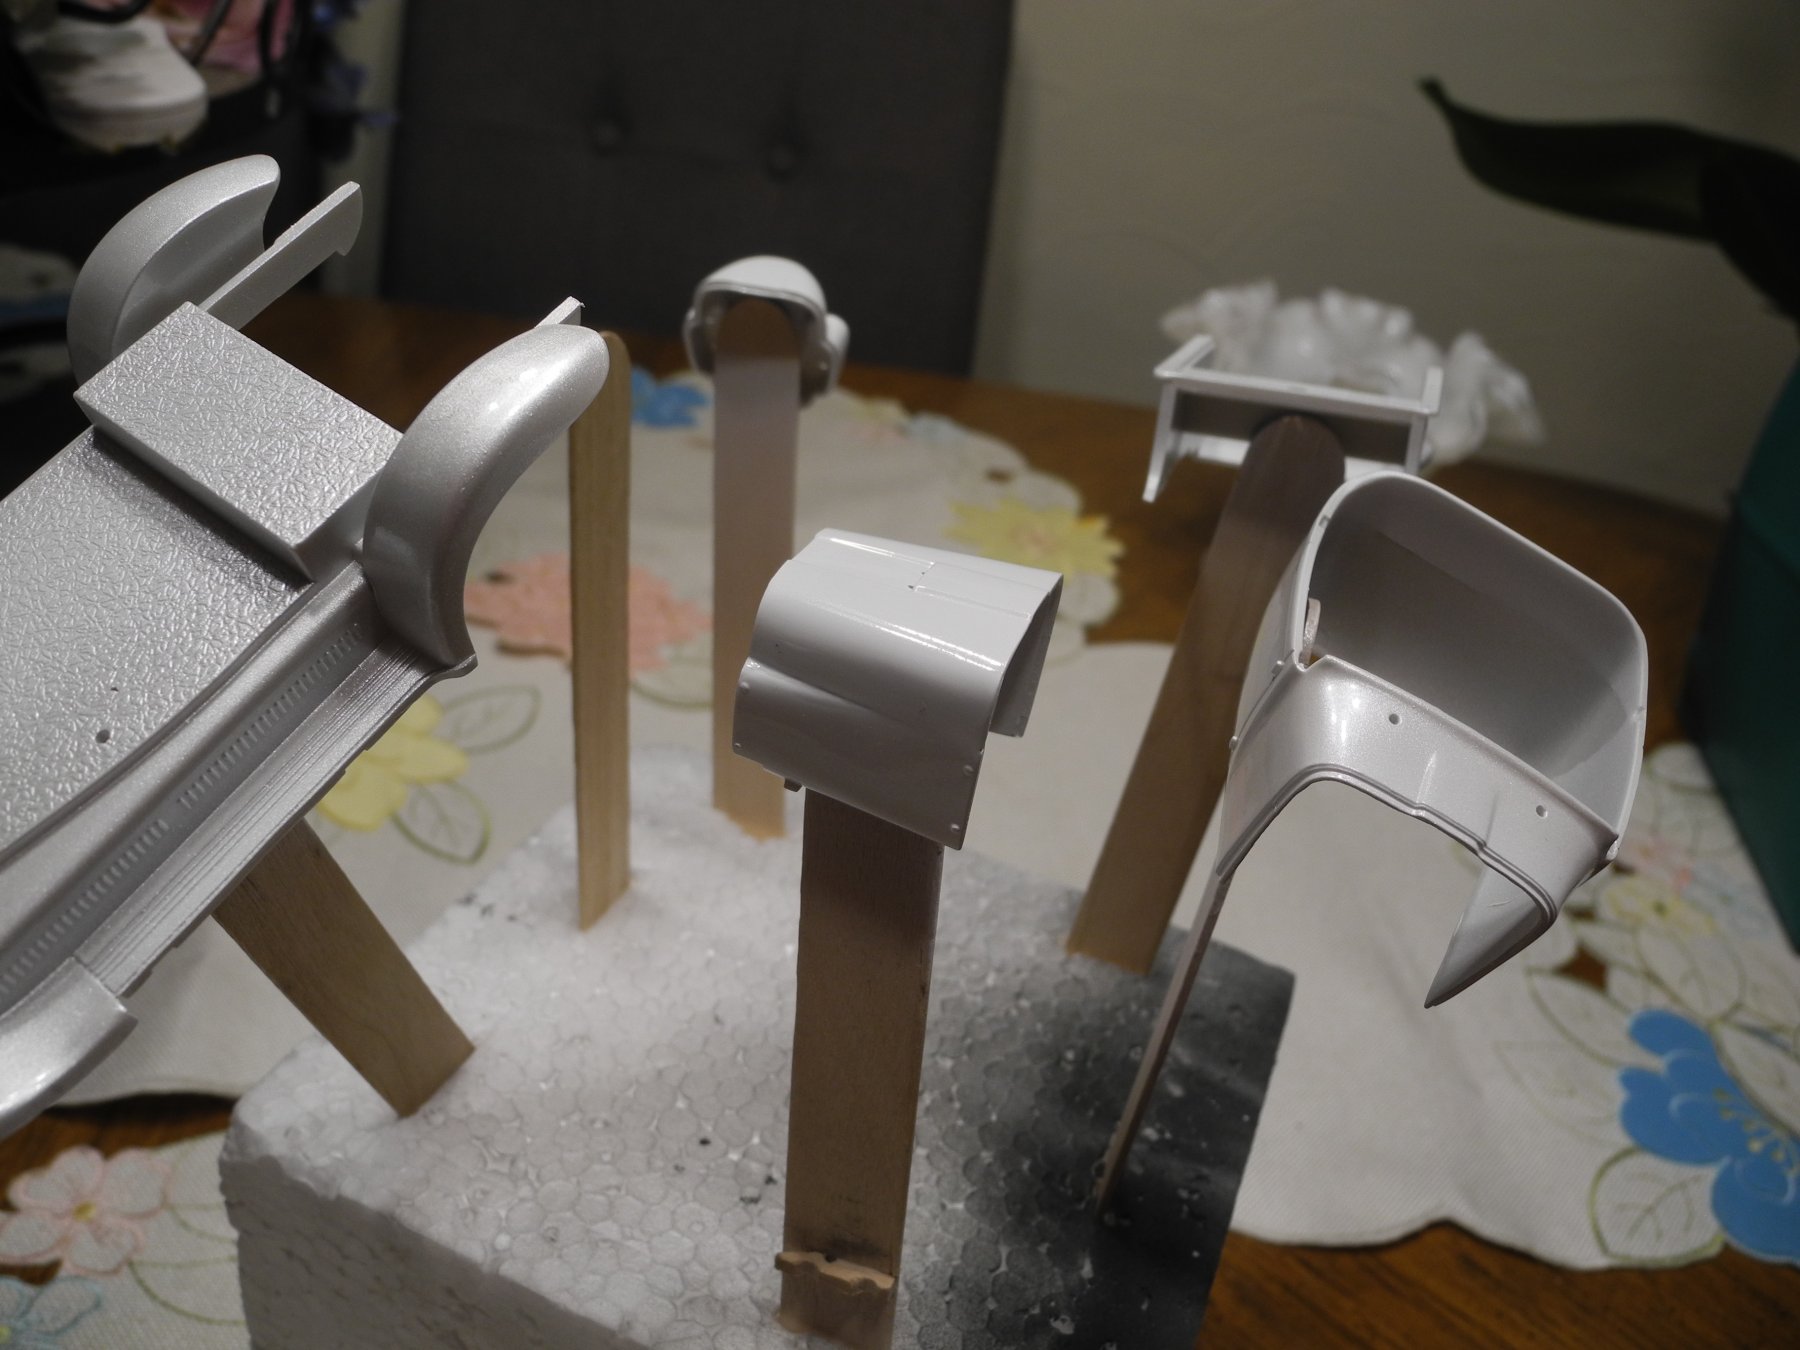
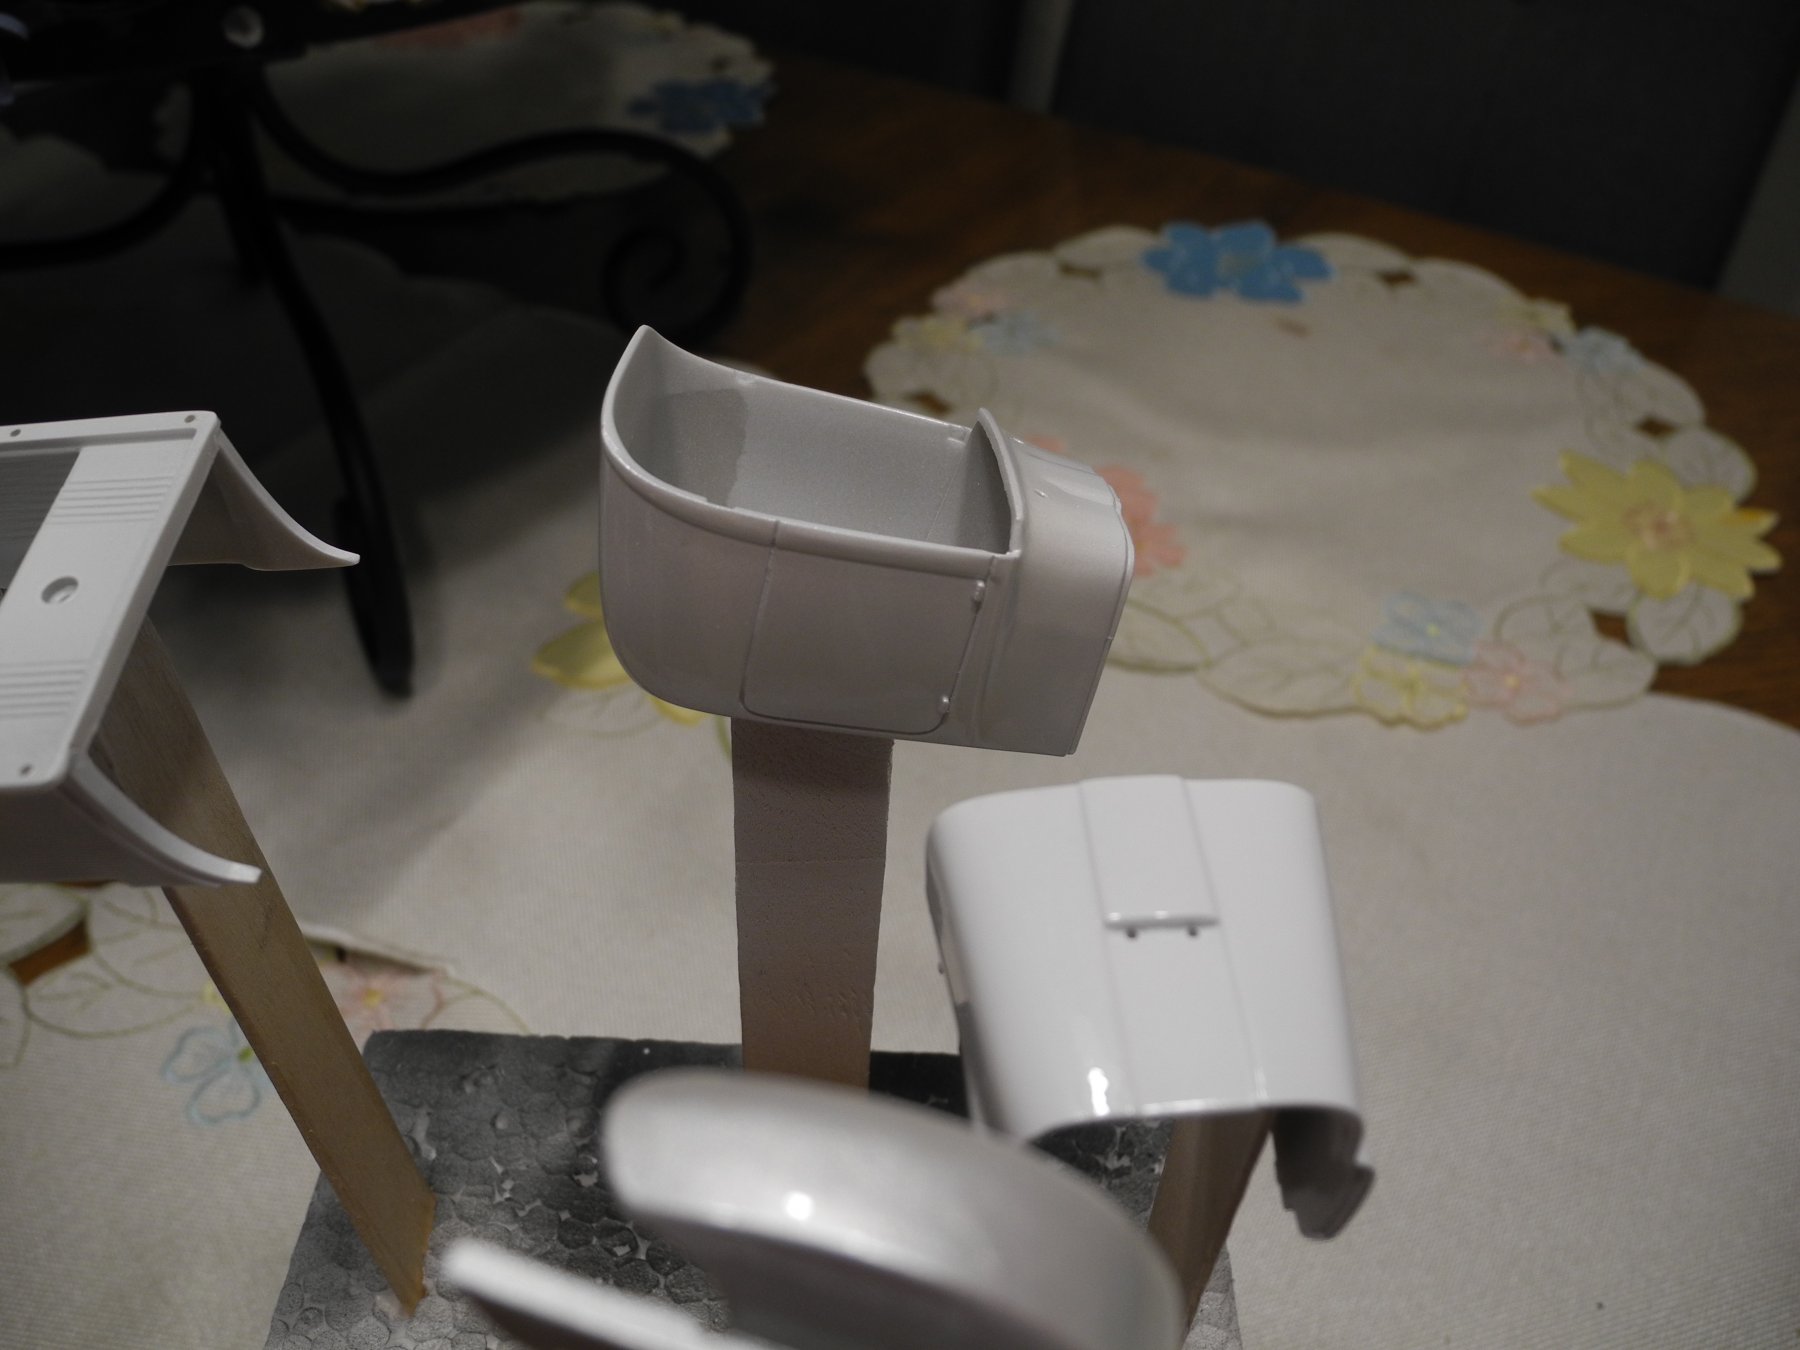
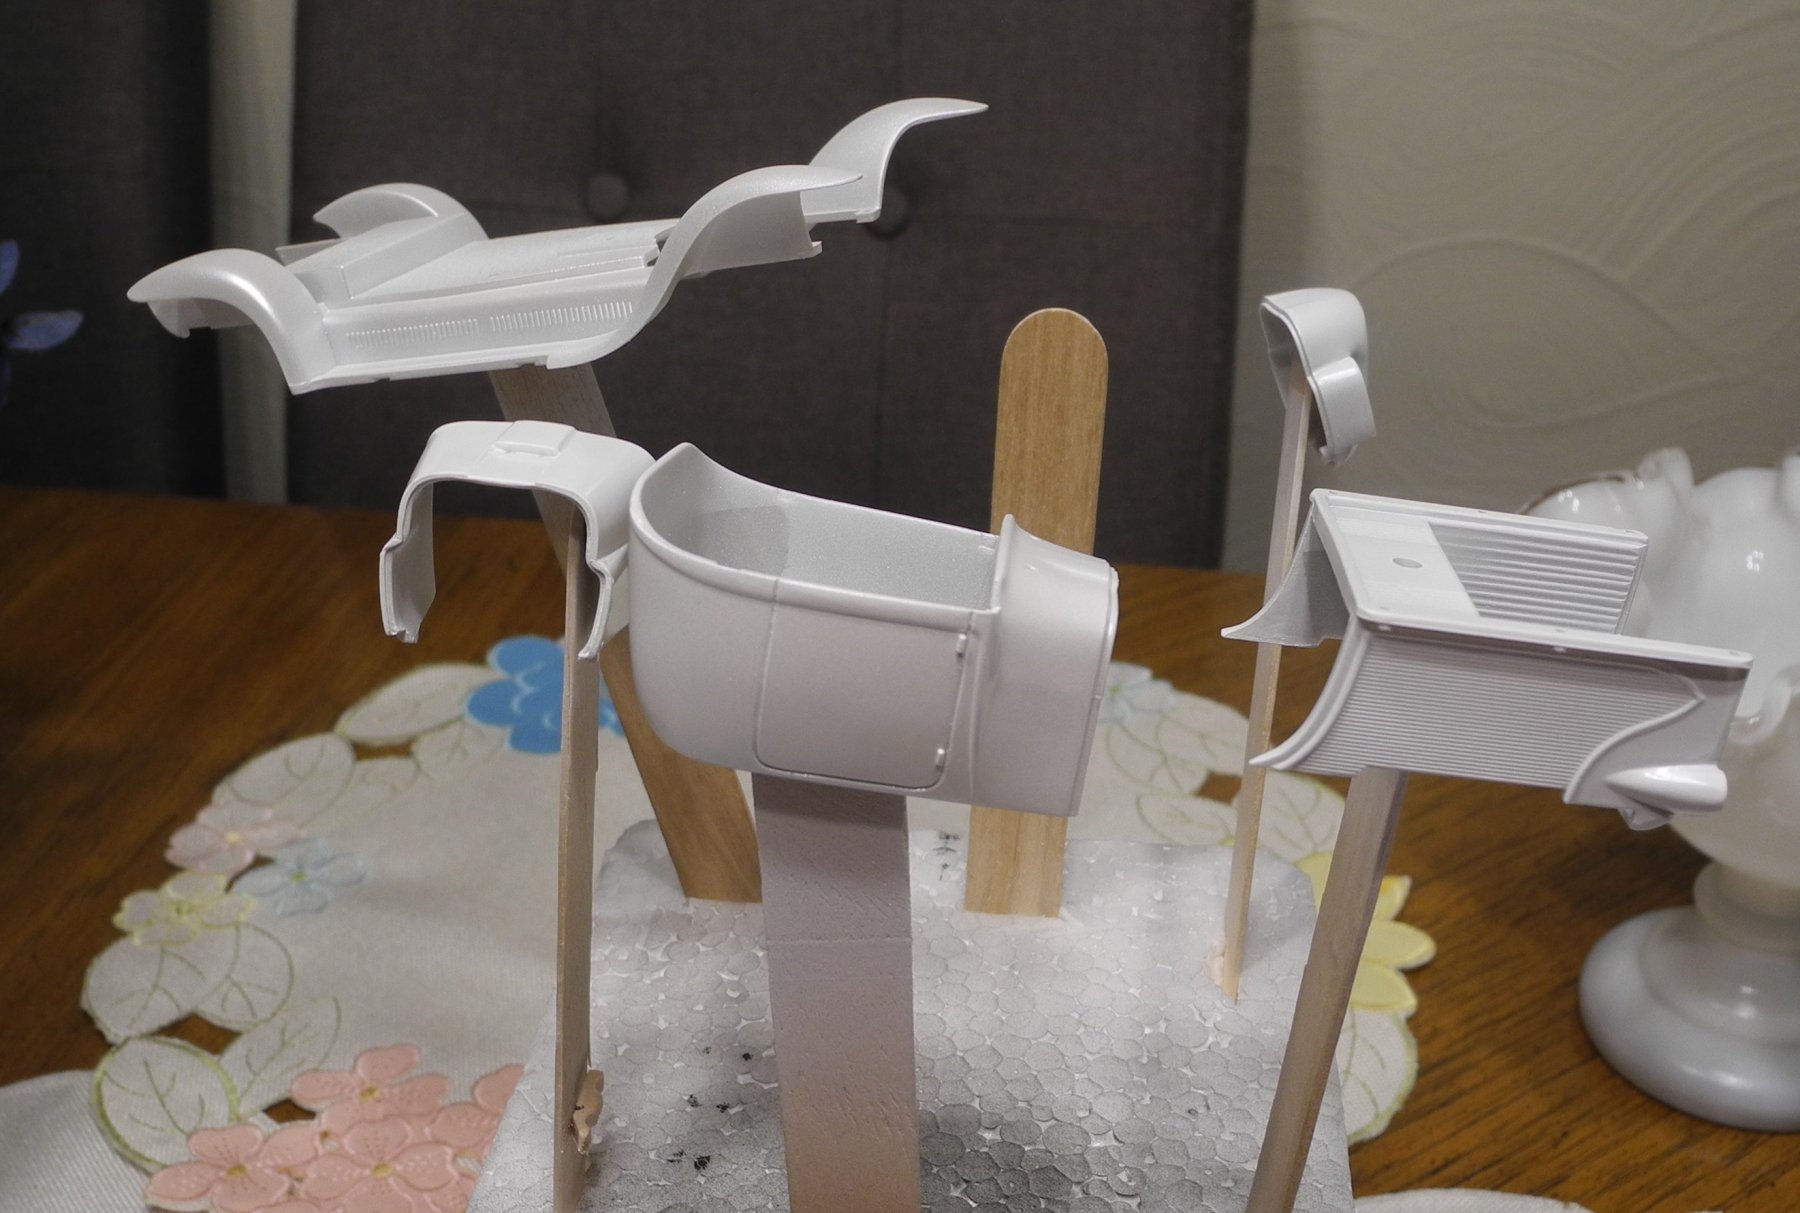
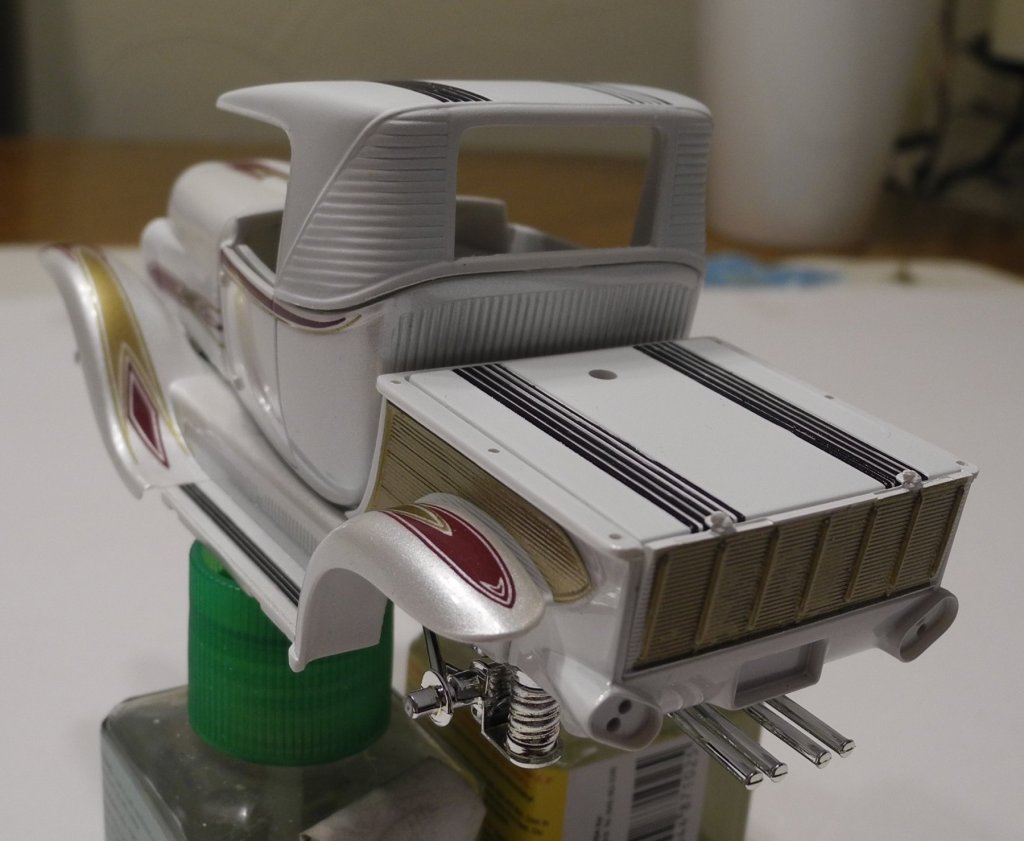
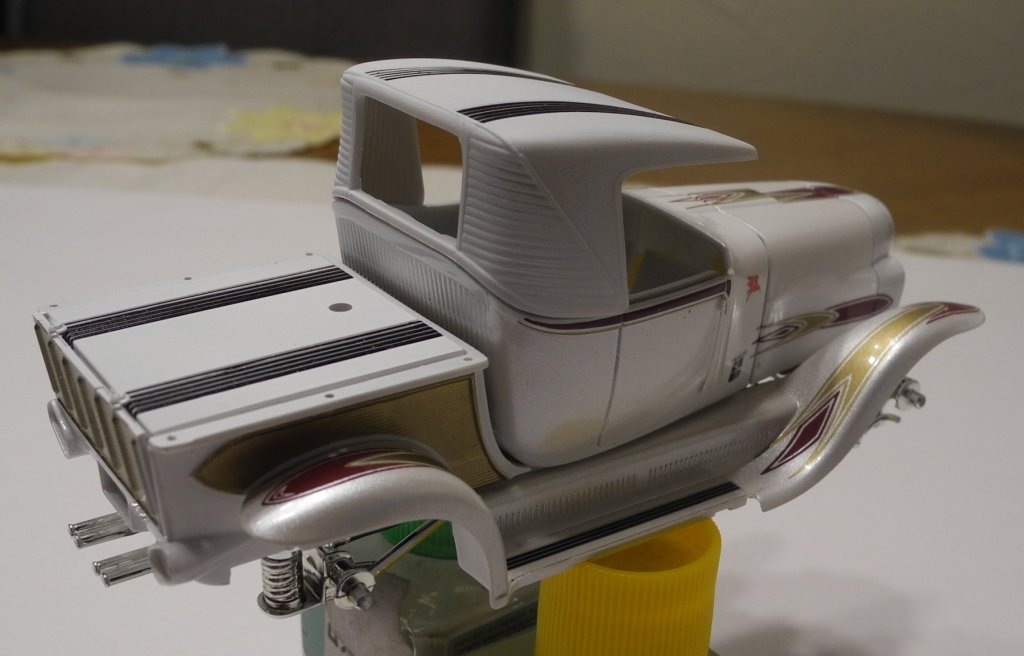
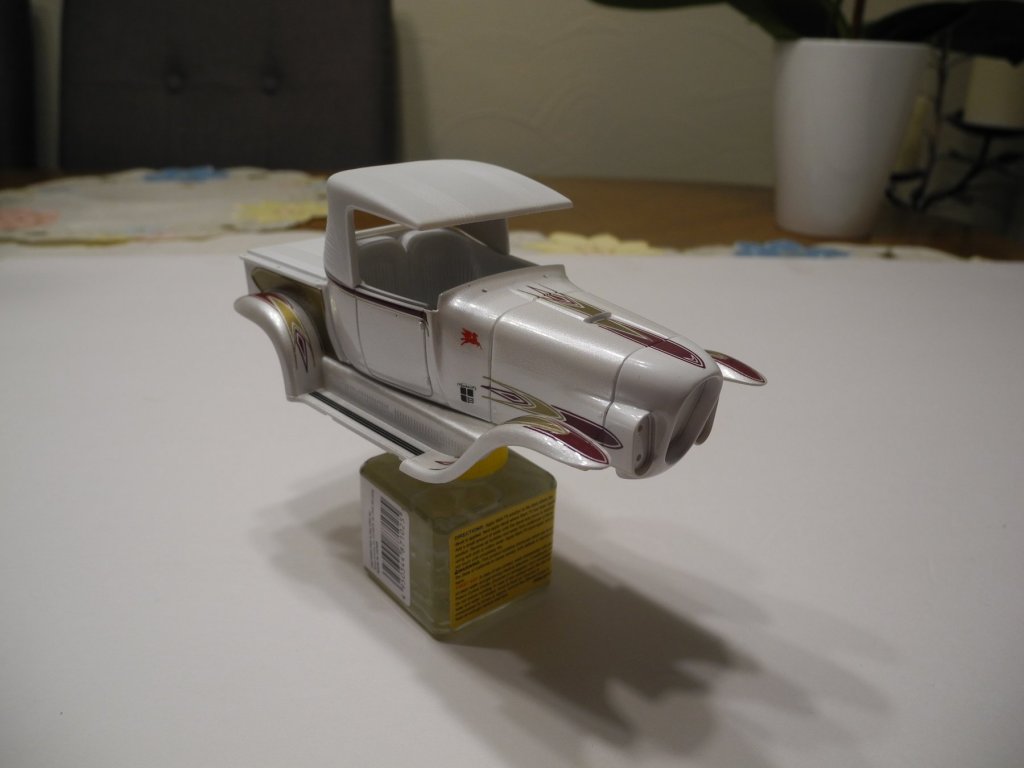
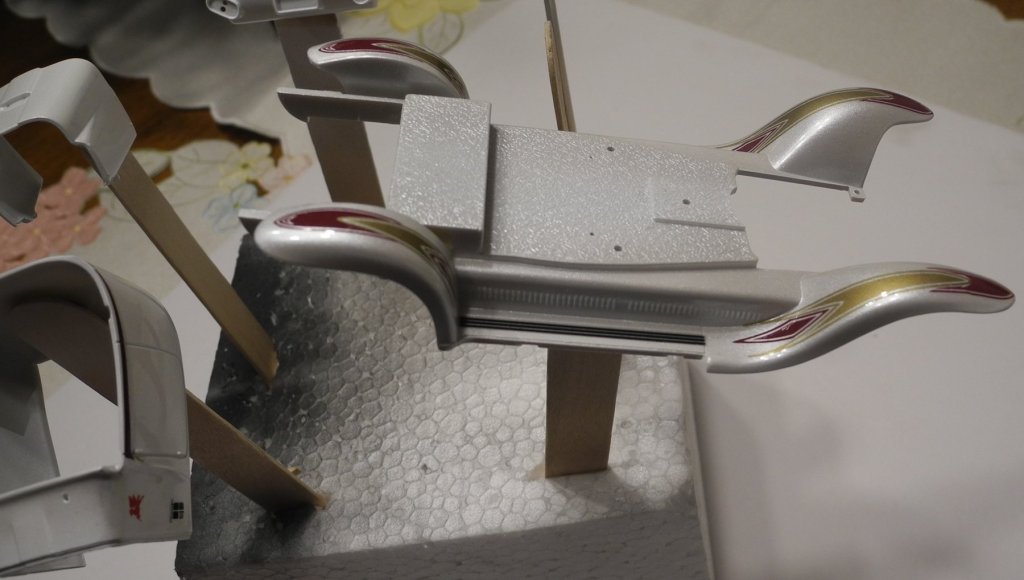
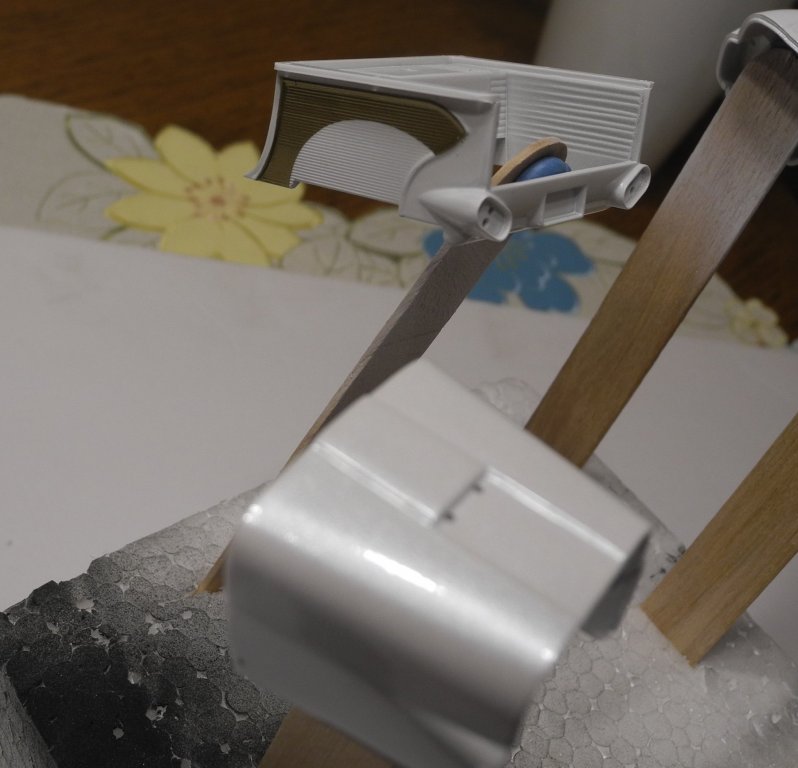
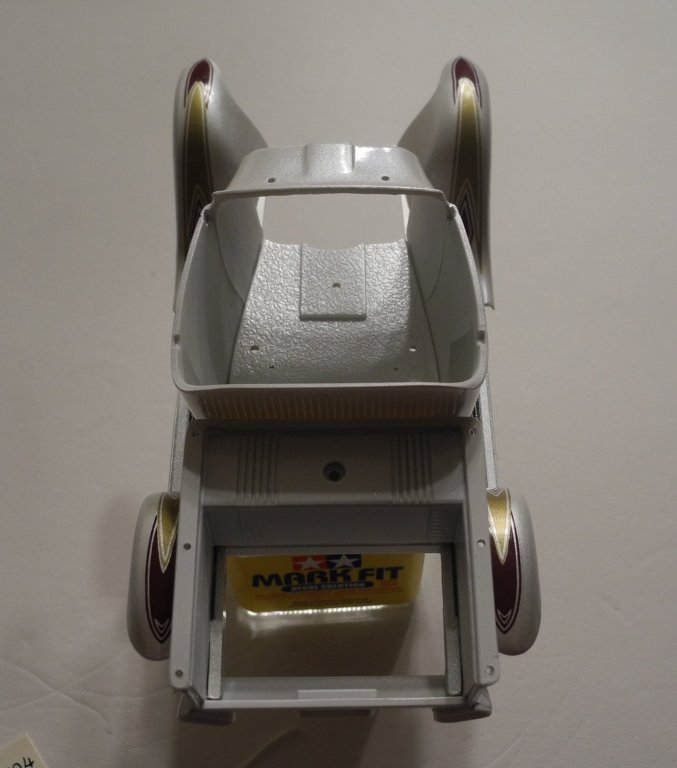
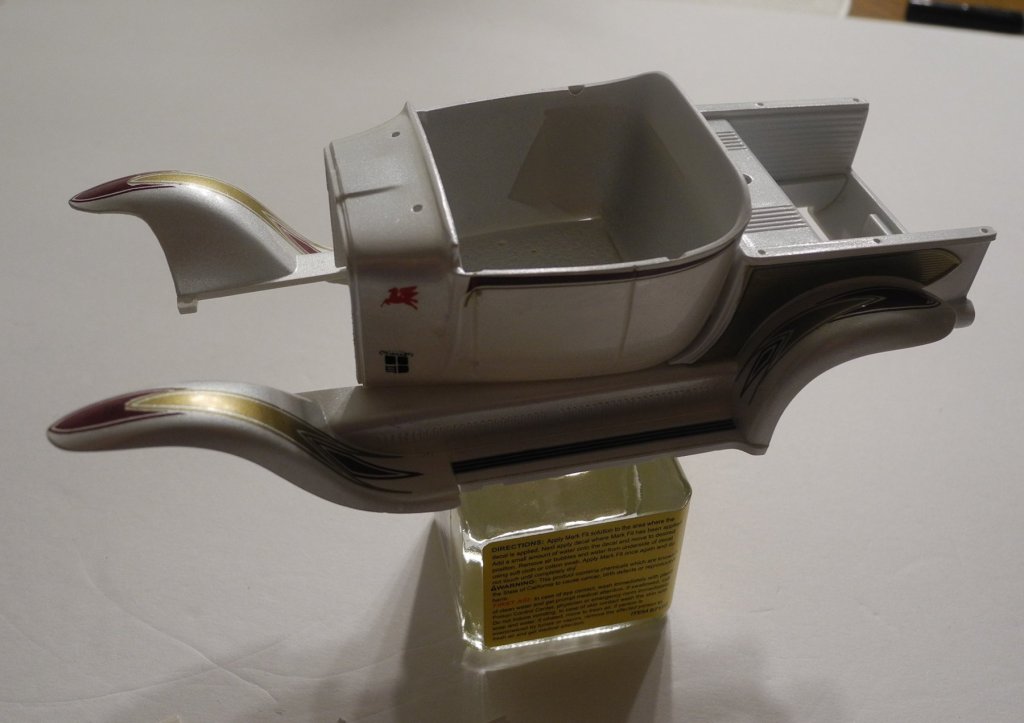
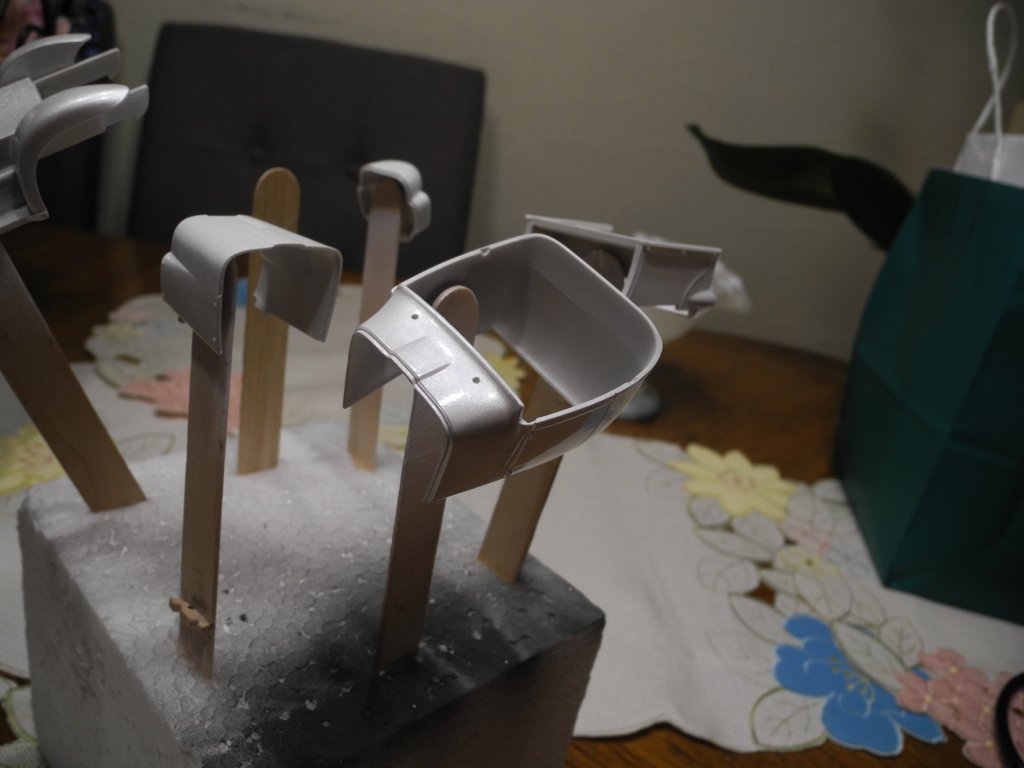
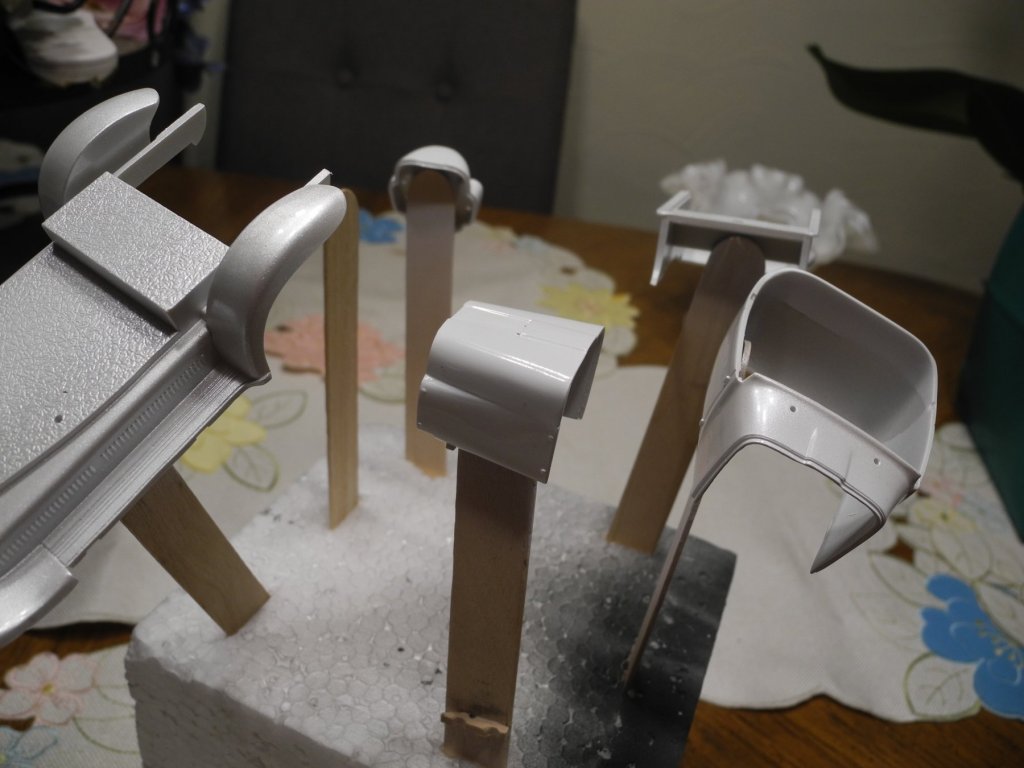
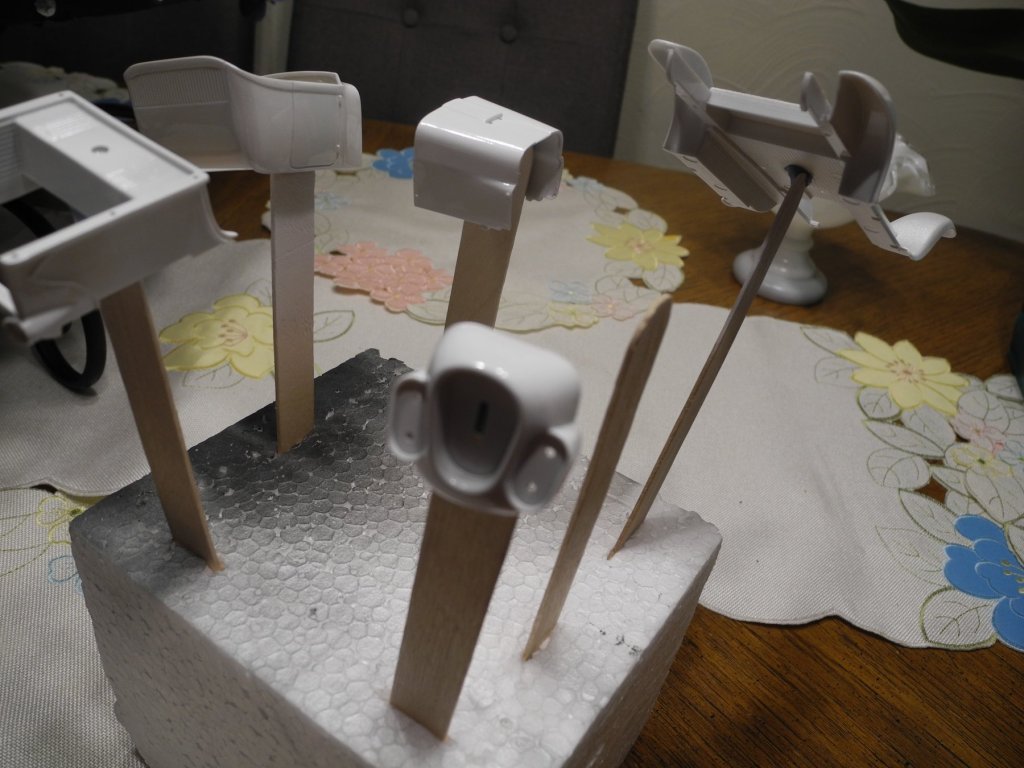
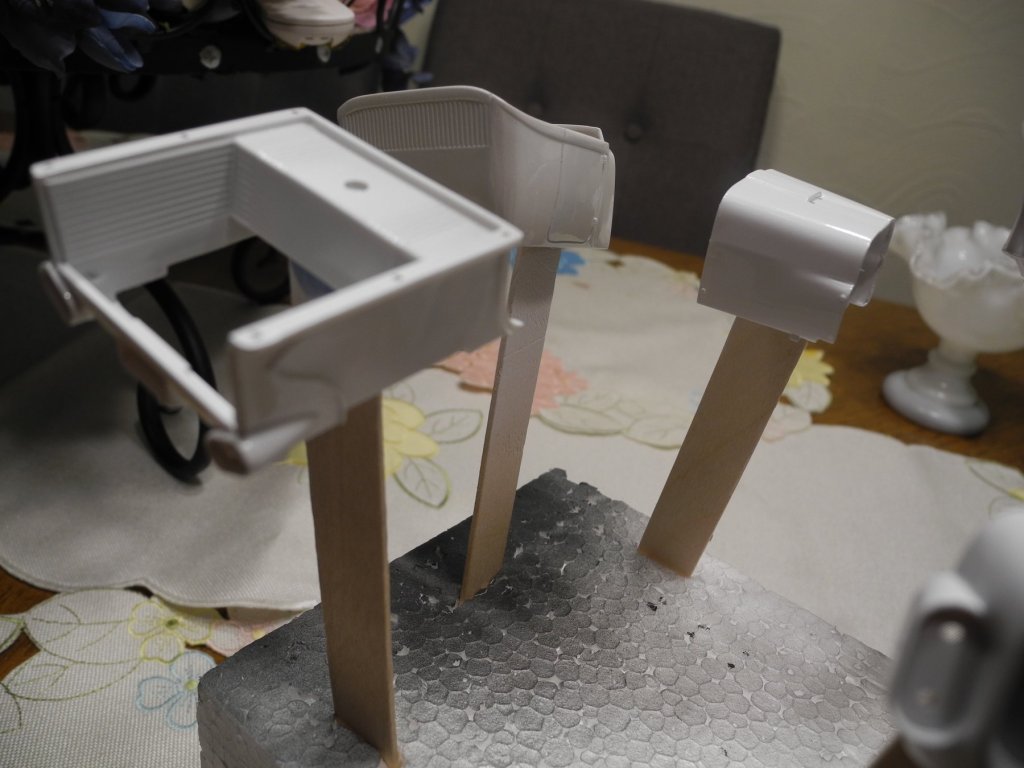
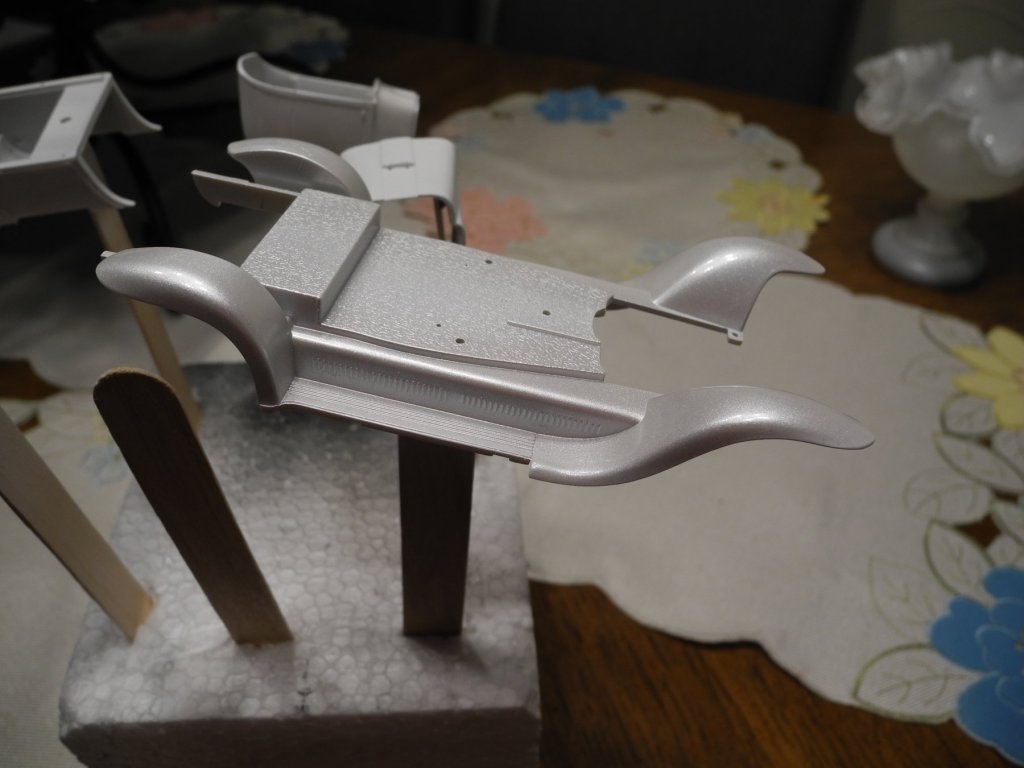
After the body parts prep, sprayed on 3 coats of Tamiya white fine primer. Next, polished up the primer a bit and touched up a few spots. Then it was time to spray on the Createx Wicked Pearl White paint. These are acrylic paints, water based. Pearl colors are not opaque, so it's important to choose the right colors for your primer depending on your finish coat. These paints are not going to do well over bare plastic, they must be primed first for the paint to have something to grab onto. Additionally, they must be sprayed on in multiple fine coats. Heavy coats would be a disaster. Because of the pearl color, I put down four light coats giving each coat about 5-10 minutes drying time in between coats. Just to stay on the safe side, I used the Createx proprietary primer, their stock number 4012. Although I have read others say you can use other acrylic primers as well, like Vallejo primer. But alcohol and other reducers that work with Tamiya and Mr Color paints will damage Createx paint and should be avoided altogether. The following pictures are of the Pearl White painted body parts. I will wait a few days to apply the 2-part diamond clear coats. In the meantime, will probably start building and painting the sub assemblies.

-
Just a stunningly beautiful model. She does such tribute to the men who served aboard Liberty ships in WW2. A fitting subject for Memorial day.
- 227 replies
-
- 4
-
-
- BlueJacket Shipcrafters
- Stephen Hopkins
- (and 2 more)
-
Ala-Kart by CDW - FINISHED - AMT - 1:25 Scale - PLASTIC
CDW replied to CDW's topic in Non-ship/categorised builds
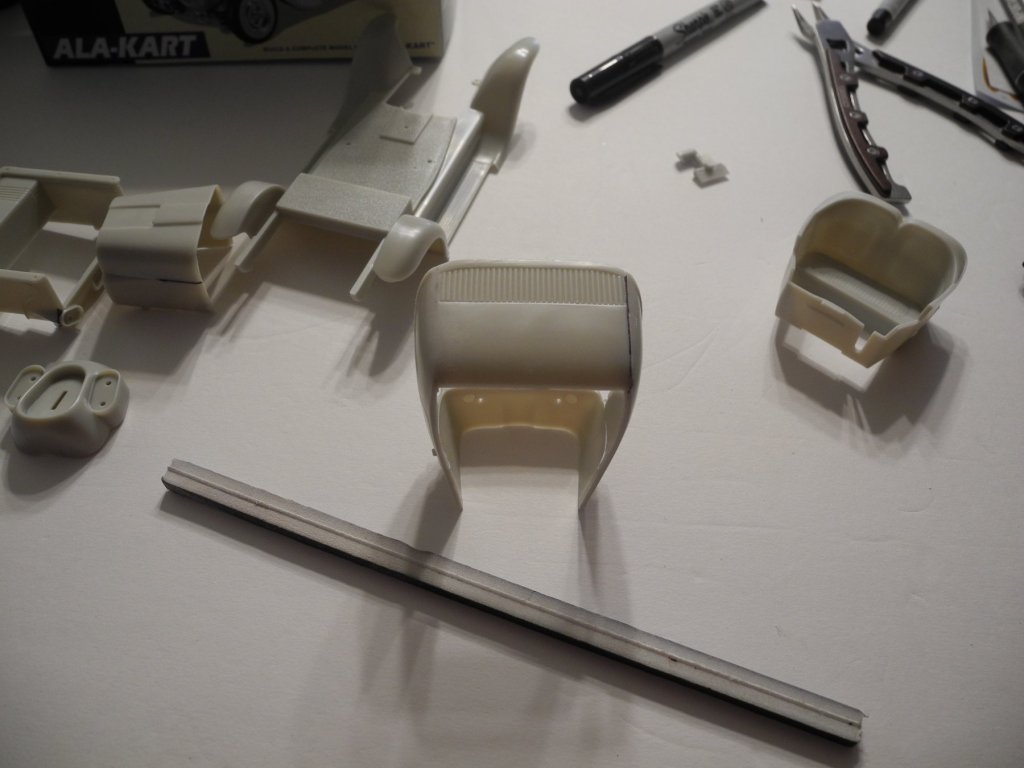
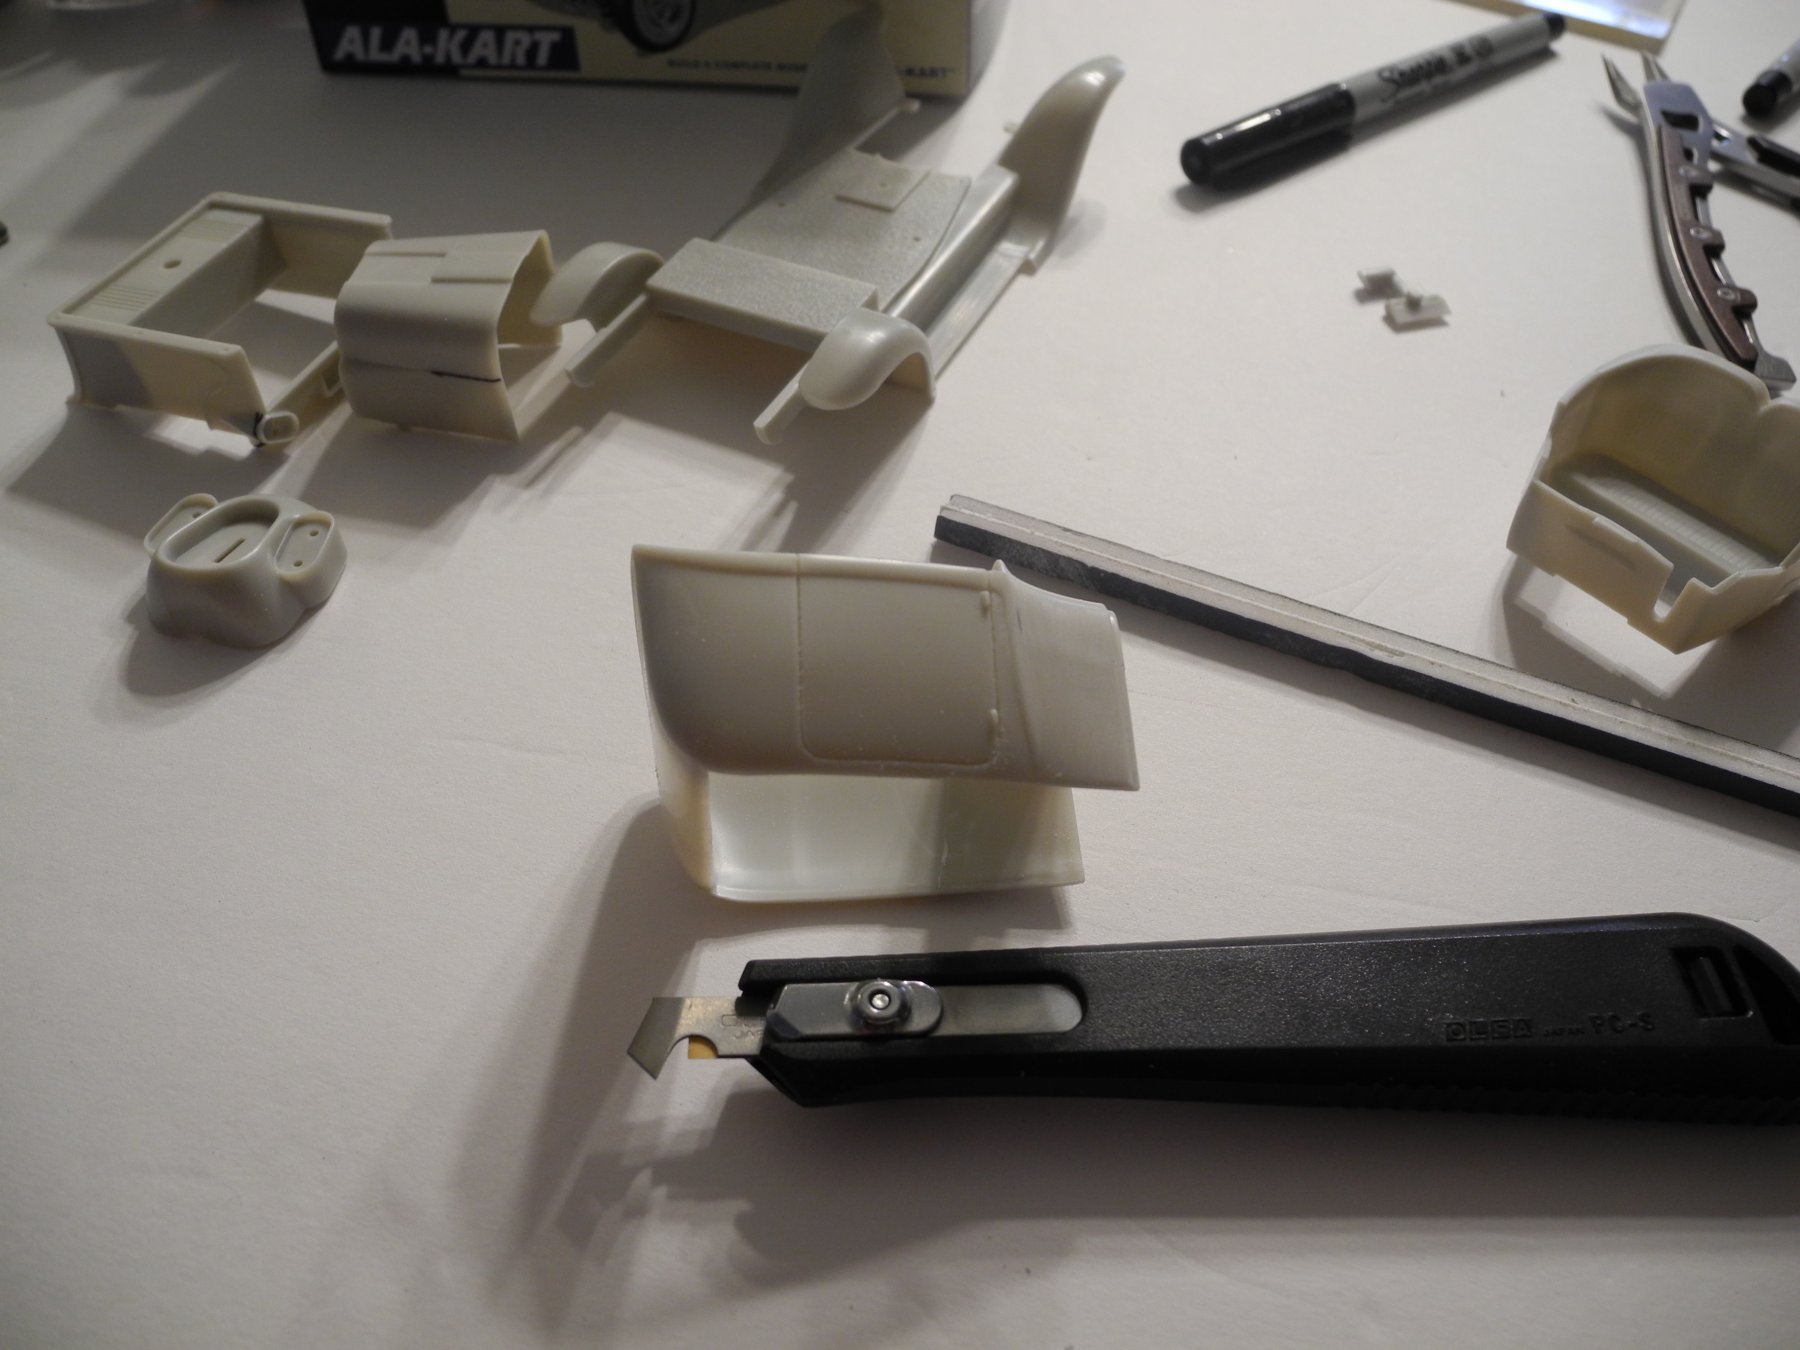
It's an excellent tool for re scribing or deepening panel lines. -
Ala-Kart by CDW - FINISHED - AMT - 1:25 Scale - PLASTIC
CDW replied to CDW's topic in Non-ship/categorised builds
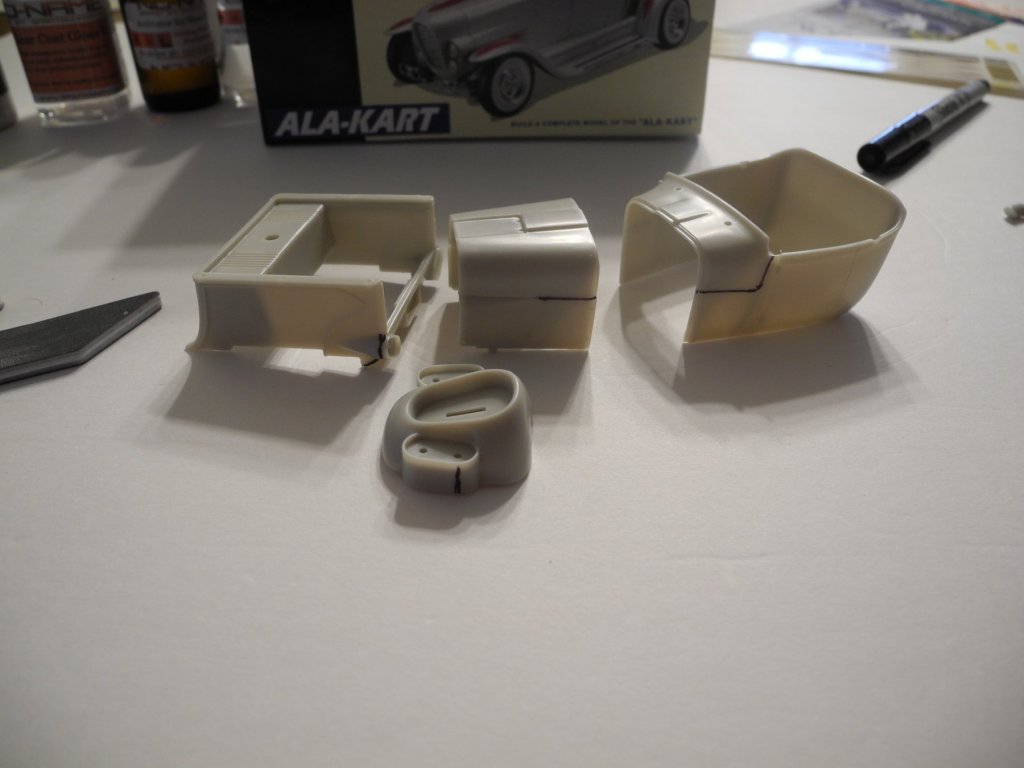
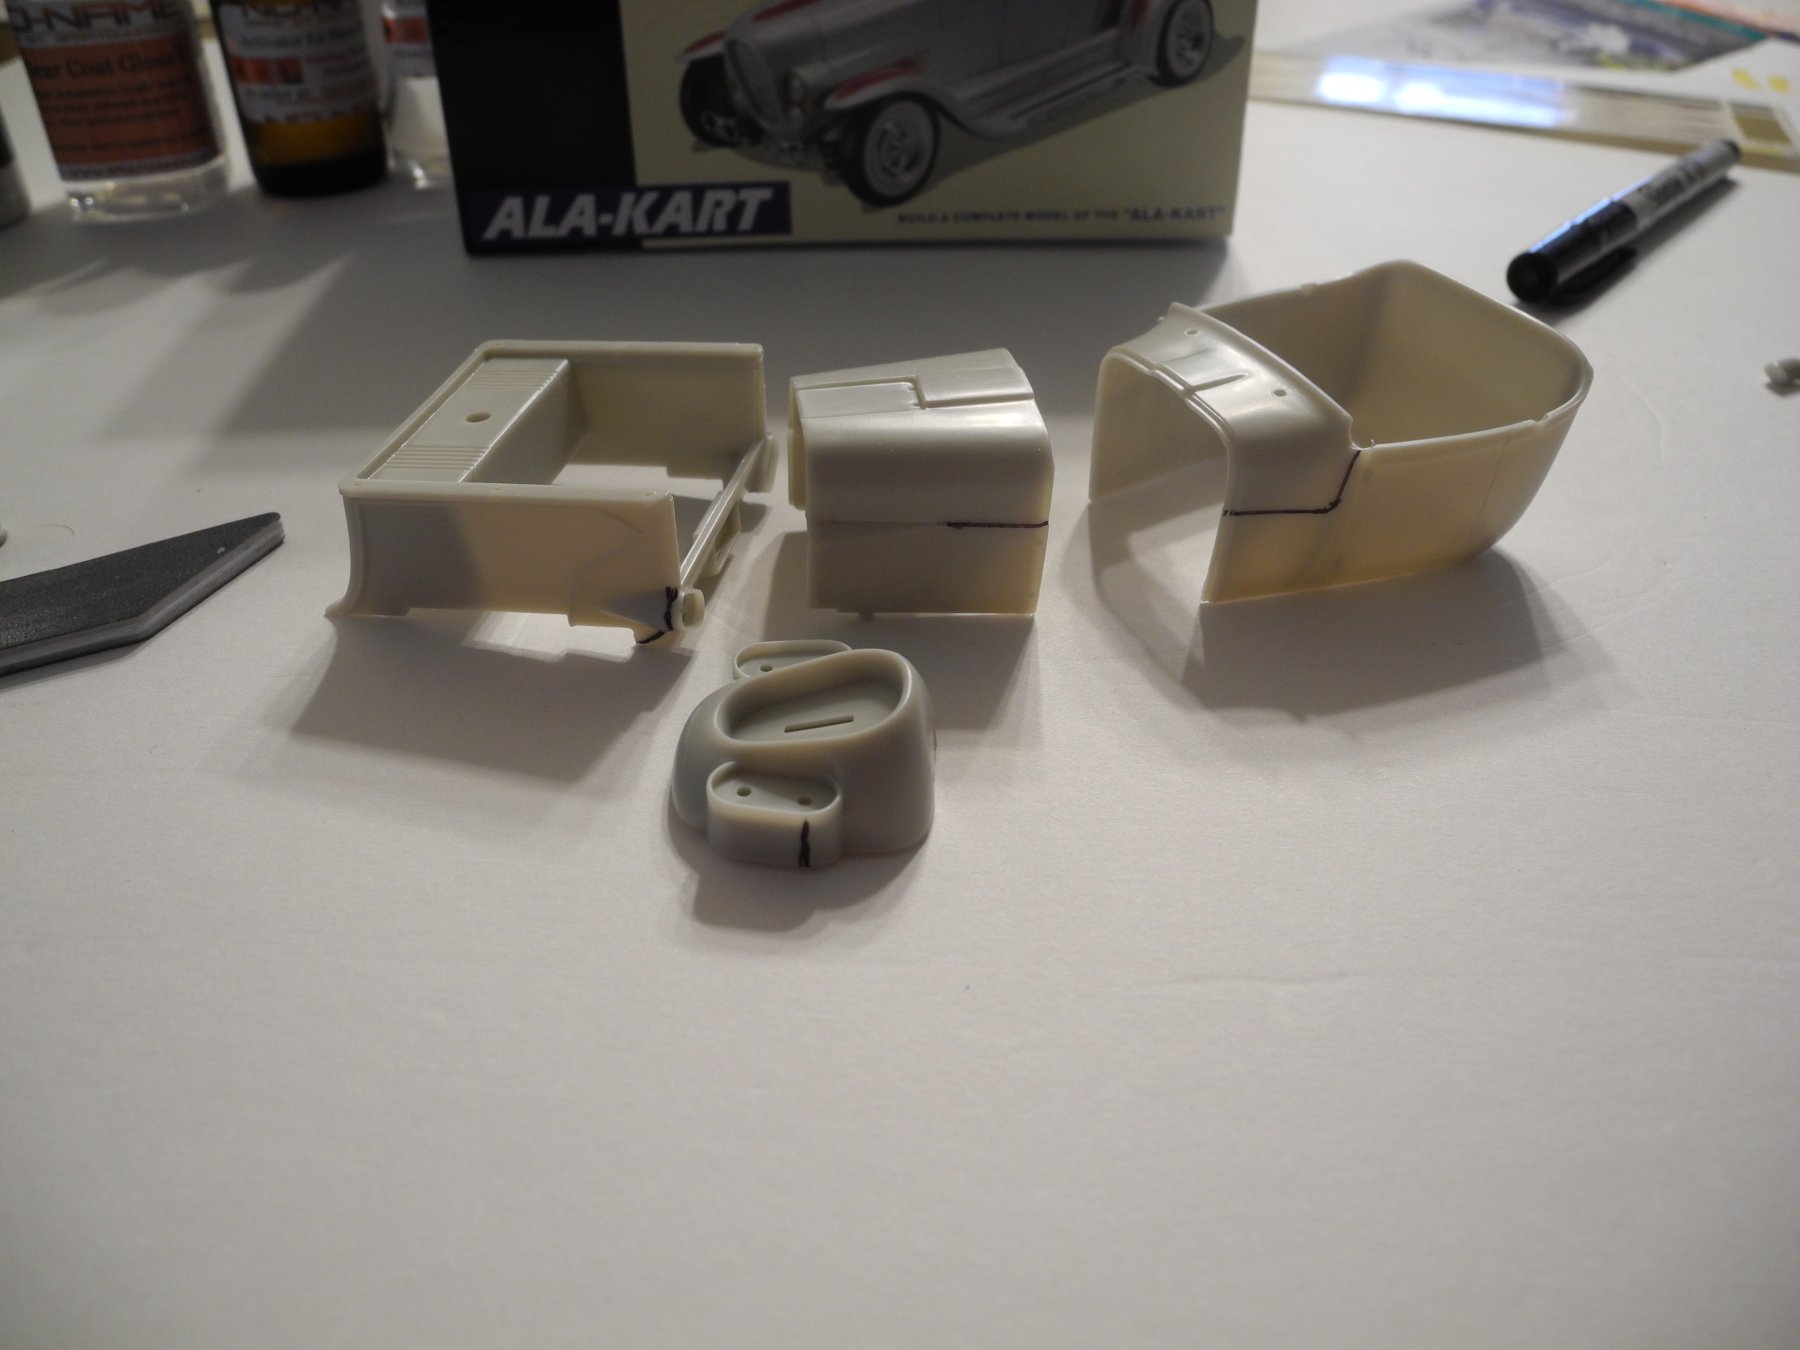
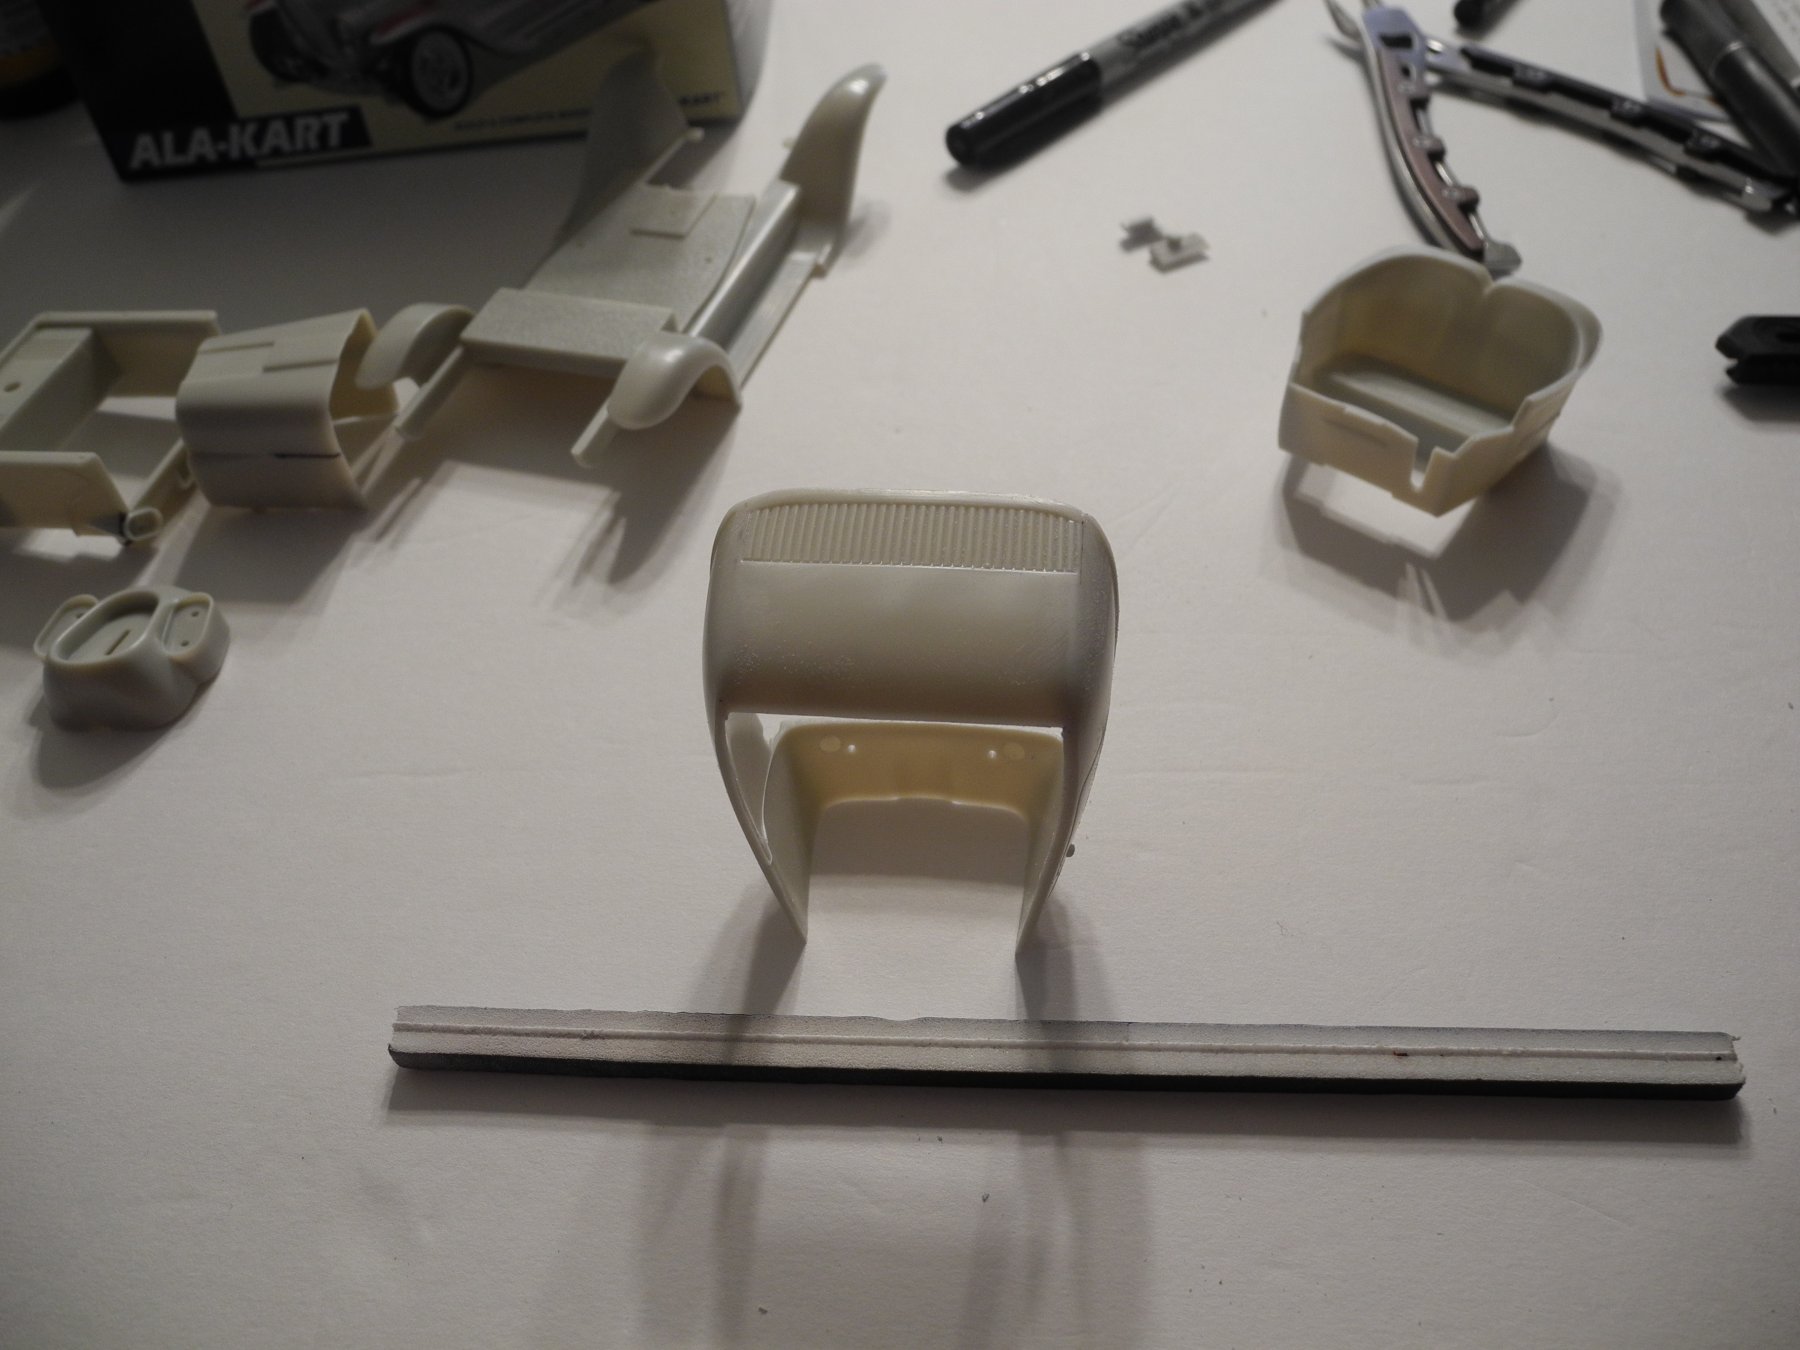
When building car models, I like to carefully examine the body/parts to identify any imperfections caused by mold separation lines. These will leave a raised line along the body that needs to be removed before priming. To help see what I'm doing, I'll first mark the lines with a sharpie permanent marker. Then will use sanding sticks to sand away the imperfections. When the sharpie mark is removed, I know enough sanding has been done. Next, I rescribe any panel lines that need to be a little deeper and wider to prevent the coats of paint from filling them. In this case, the doors. Last, I will go over all the body parts with fine sand paper/sanding sponge to prep it for the primer.