CDW
-
Posts
7,755 -
Joined
-
Last visited
Content Type
Profiles
Forums
Gallery
Events
Everything posted by CDW
-
 So I got up this morning with the full intention of spending some quality model building time. But there was one little thing I wanted to do first out in the yard. One thing led to another (more yard work) and the next thing I knew, it was time to come inside and take a shower, change clothes, and take my daughter and granddaughter to drop them off at the movie theater. After picking them up, my wife wanted to take them to the mall to pick out new birthday clothing. Right, getter done. Came home and did more yard work until it was dark. It's time for another shower and change of clothing, but it's my full intention of burning the late night oil to get that modeling time in. To get myself in the mood, I like to listen to favorite music, like this one. Oh yeah, I am ready now.
 -
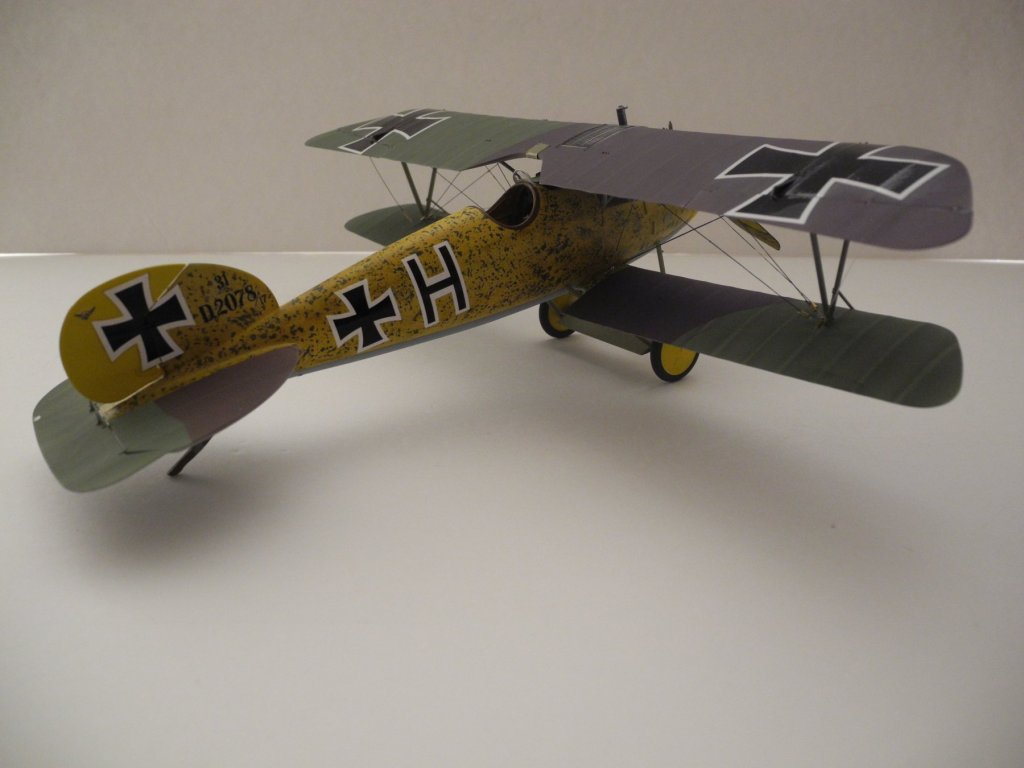
Can you imagine....if just one lucky (or well placed) round was to hit and sever that cable, aileron control would be totally lost and the plane would probably spiral to earth in a death crash. Such was the life and times of WW1 aviators. A brave bunch those were when aircraft were so unreliable and fragile.
-
Wow, OC. You are quite the resourceful one when it comes to searching down aircraft details. Thanks for those....they will get put to use.
-
You've been busy, Jack. I love that Ranch Wagon Ford station wagon. You know, you are the first modeler I've seen do an online build on the Stearman kit. I am surprised what a nice kit that is, and you're doing a great job with it. When I saw that kit advertised for sale, I imagined it was a rebox of some old tooling they found somewhere in an attic, had no idea it was a new tool.
-
Those are very good observations on the pulleys and cables. I just don't know what type of transparent material besides glass was available back in 1917. I know plastic came along much later, but tell me about eisenglass. Not familiar with it and would like to know more. I still have a few old scratch built balsa and tissue models I finished. Some of the subjects I liked were not available in kit form, but I found it was easy enough to improvise and build something that was "close" to scale.
-
I think I'll save myself some work and only cut out/replace just the one cover for show. Can't see much point in doing them all that way as I can quite easily paint in and shade an opaque cover on the remainder of the locations.
-
Those are quite nice construction photos of the S.E.5a, OC. Thanks for the link. I'm thinking the clear covers are simply a feature of the model to show off the pulley and cables. The real thing being a simple access cover, opaque.
-
I need to check, but I think I may have reached the age where fishing licenses are no longer required in my state. 🙂 It's a benefit of becoming a senior citizen at some point.
-
Not sure if you're talking to me or to Lou. If me, then yes, the radiator pipe cam loose from the upper wing/radiator.
-
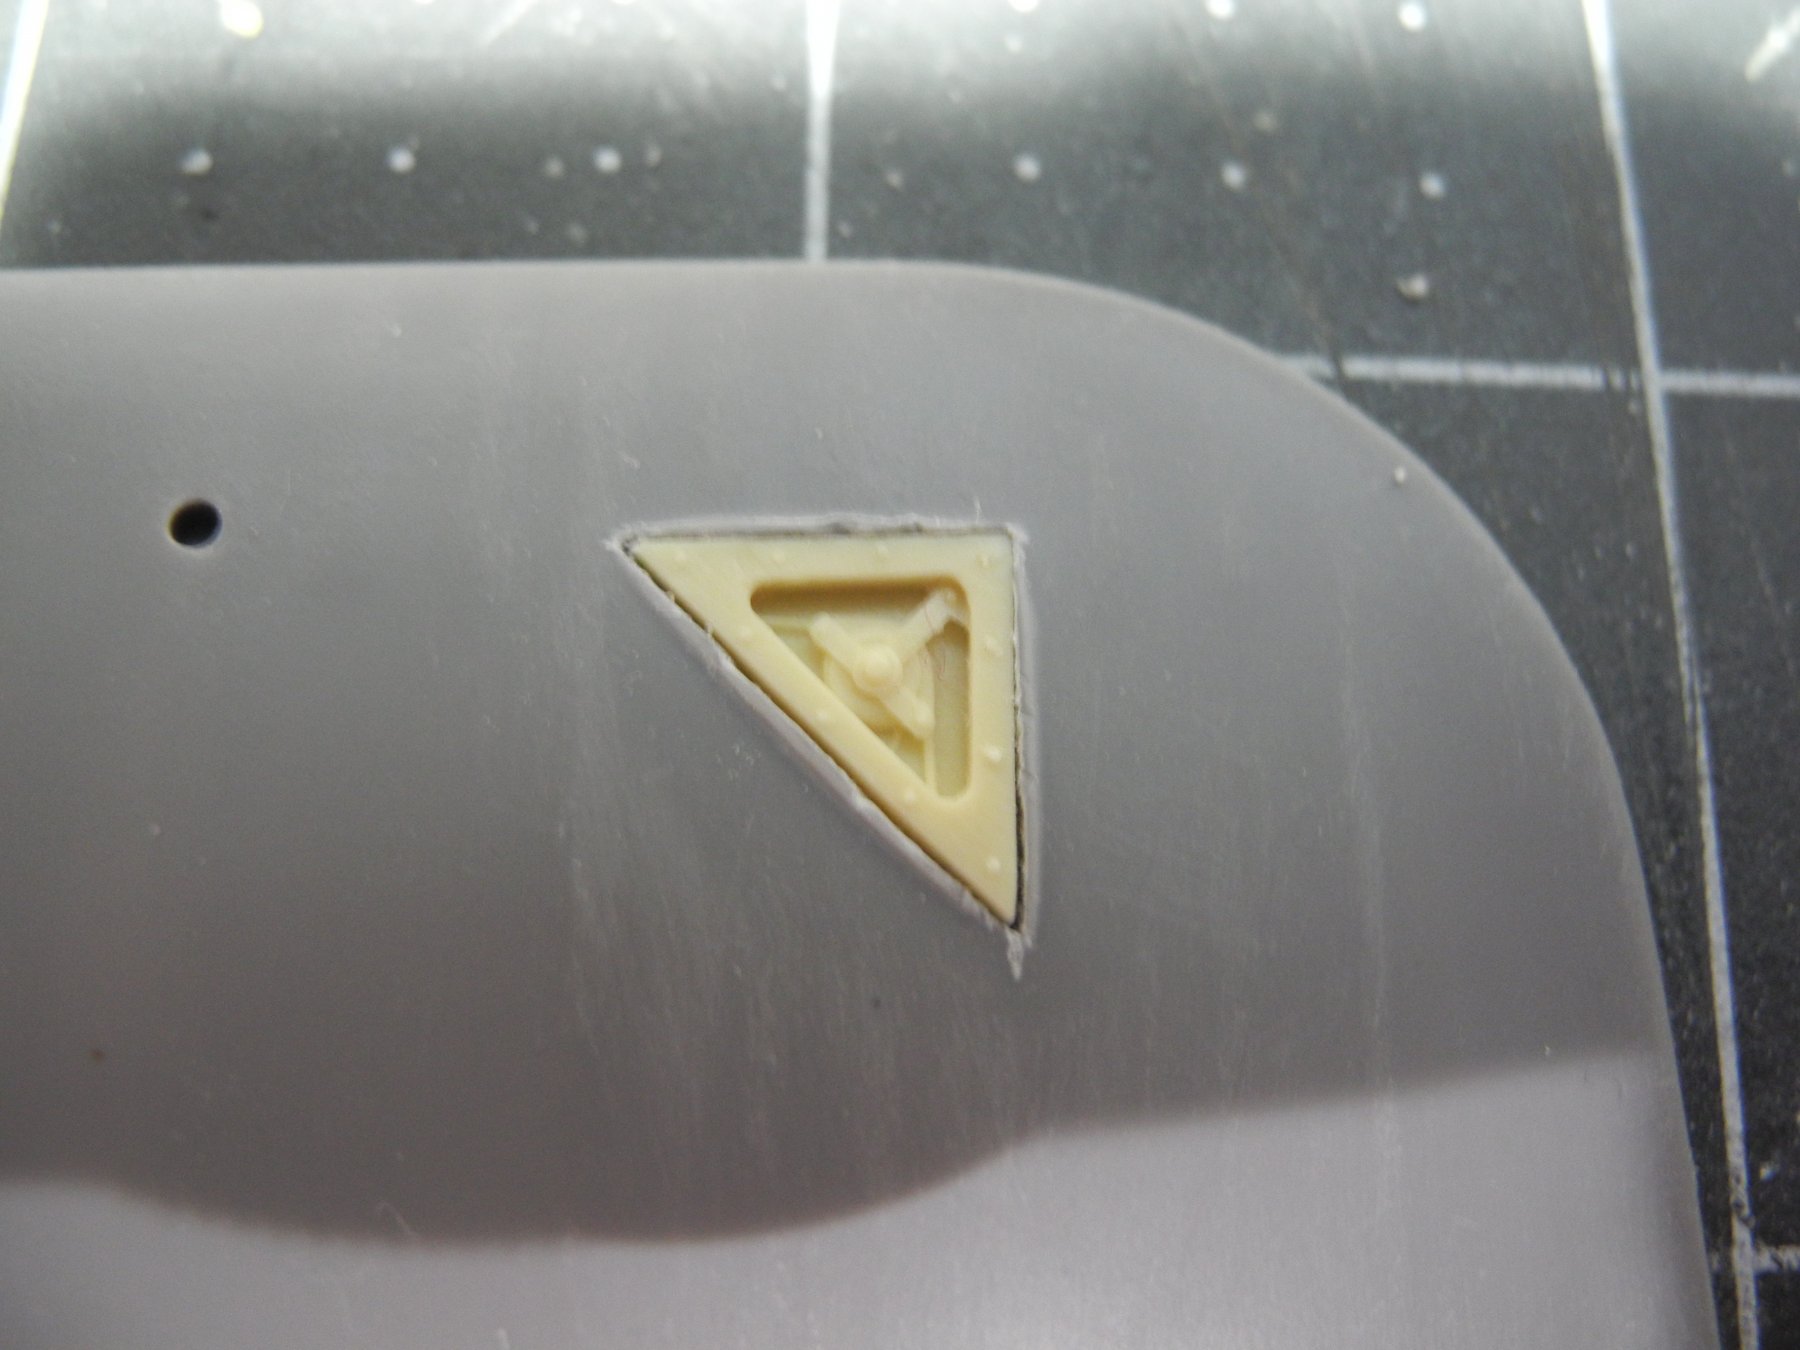
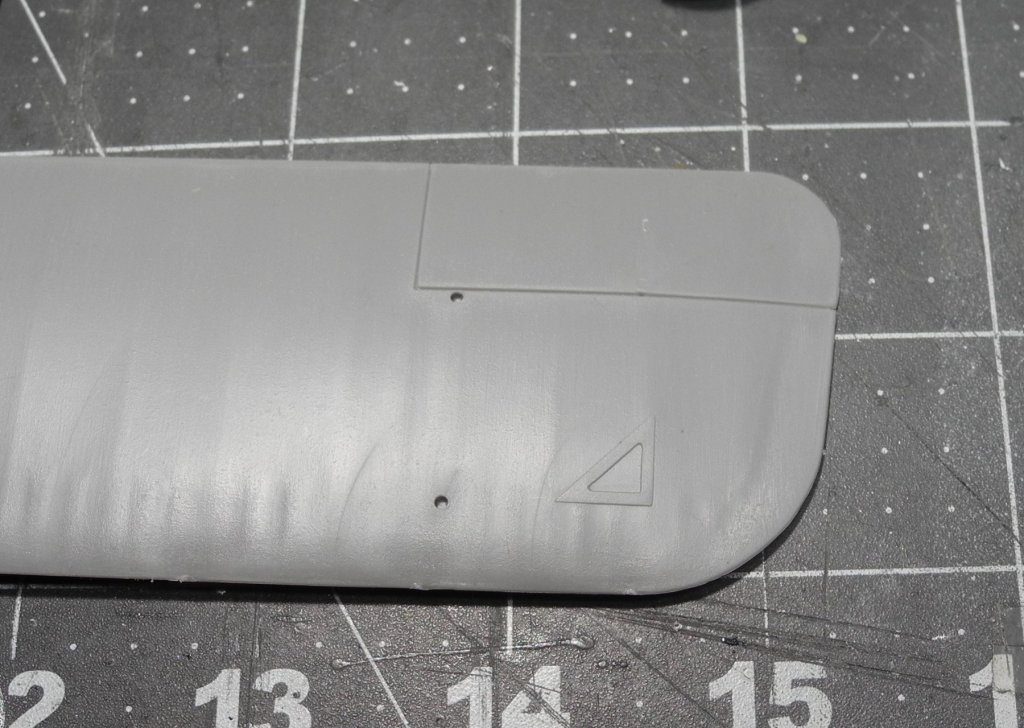
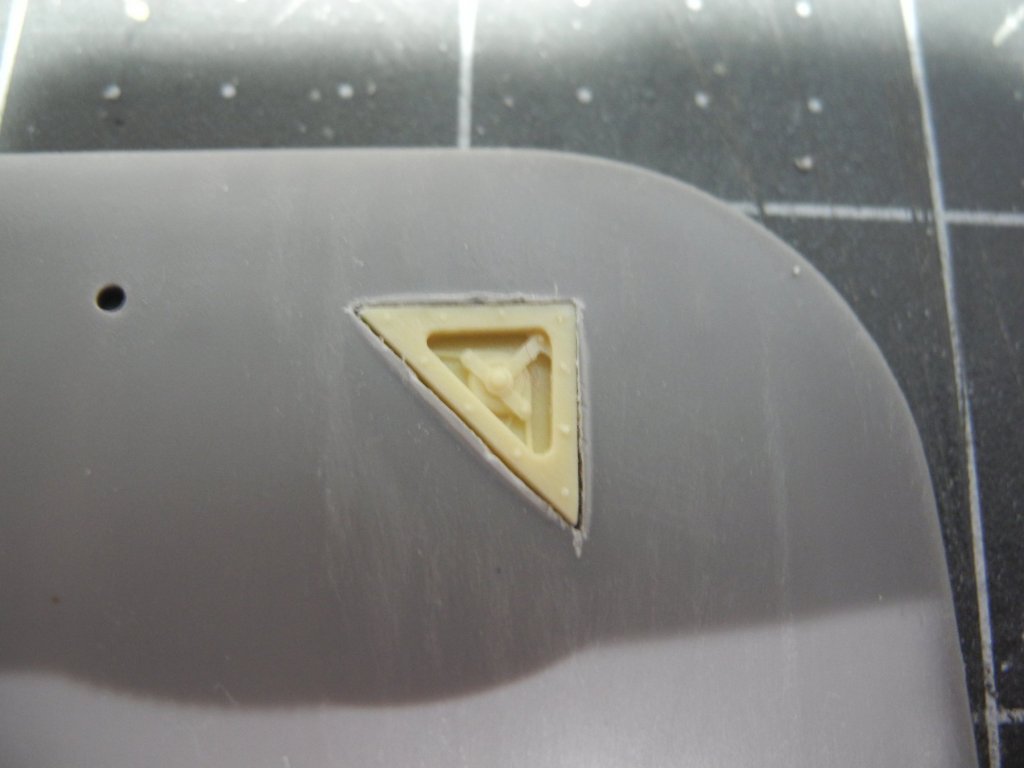
The kit provides clear acetate triangle shaped windows to cover the resin pieces but still allow the inner parts to show through. I'm scratching my head and wondering if this is just a feature added to the model to show off the detail, or was the actual aircraft fitted with glass over the pulley and cable for a quick visual inspection? Unfortunately, I don't have much reference for the S.E.5a that might tell me the answer to that question.
-
A pull-pull system with the pair of ailerons on each side linked together.
-
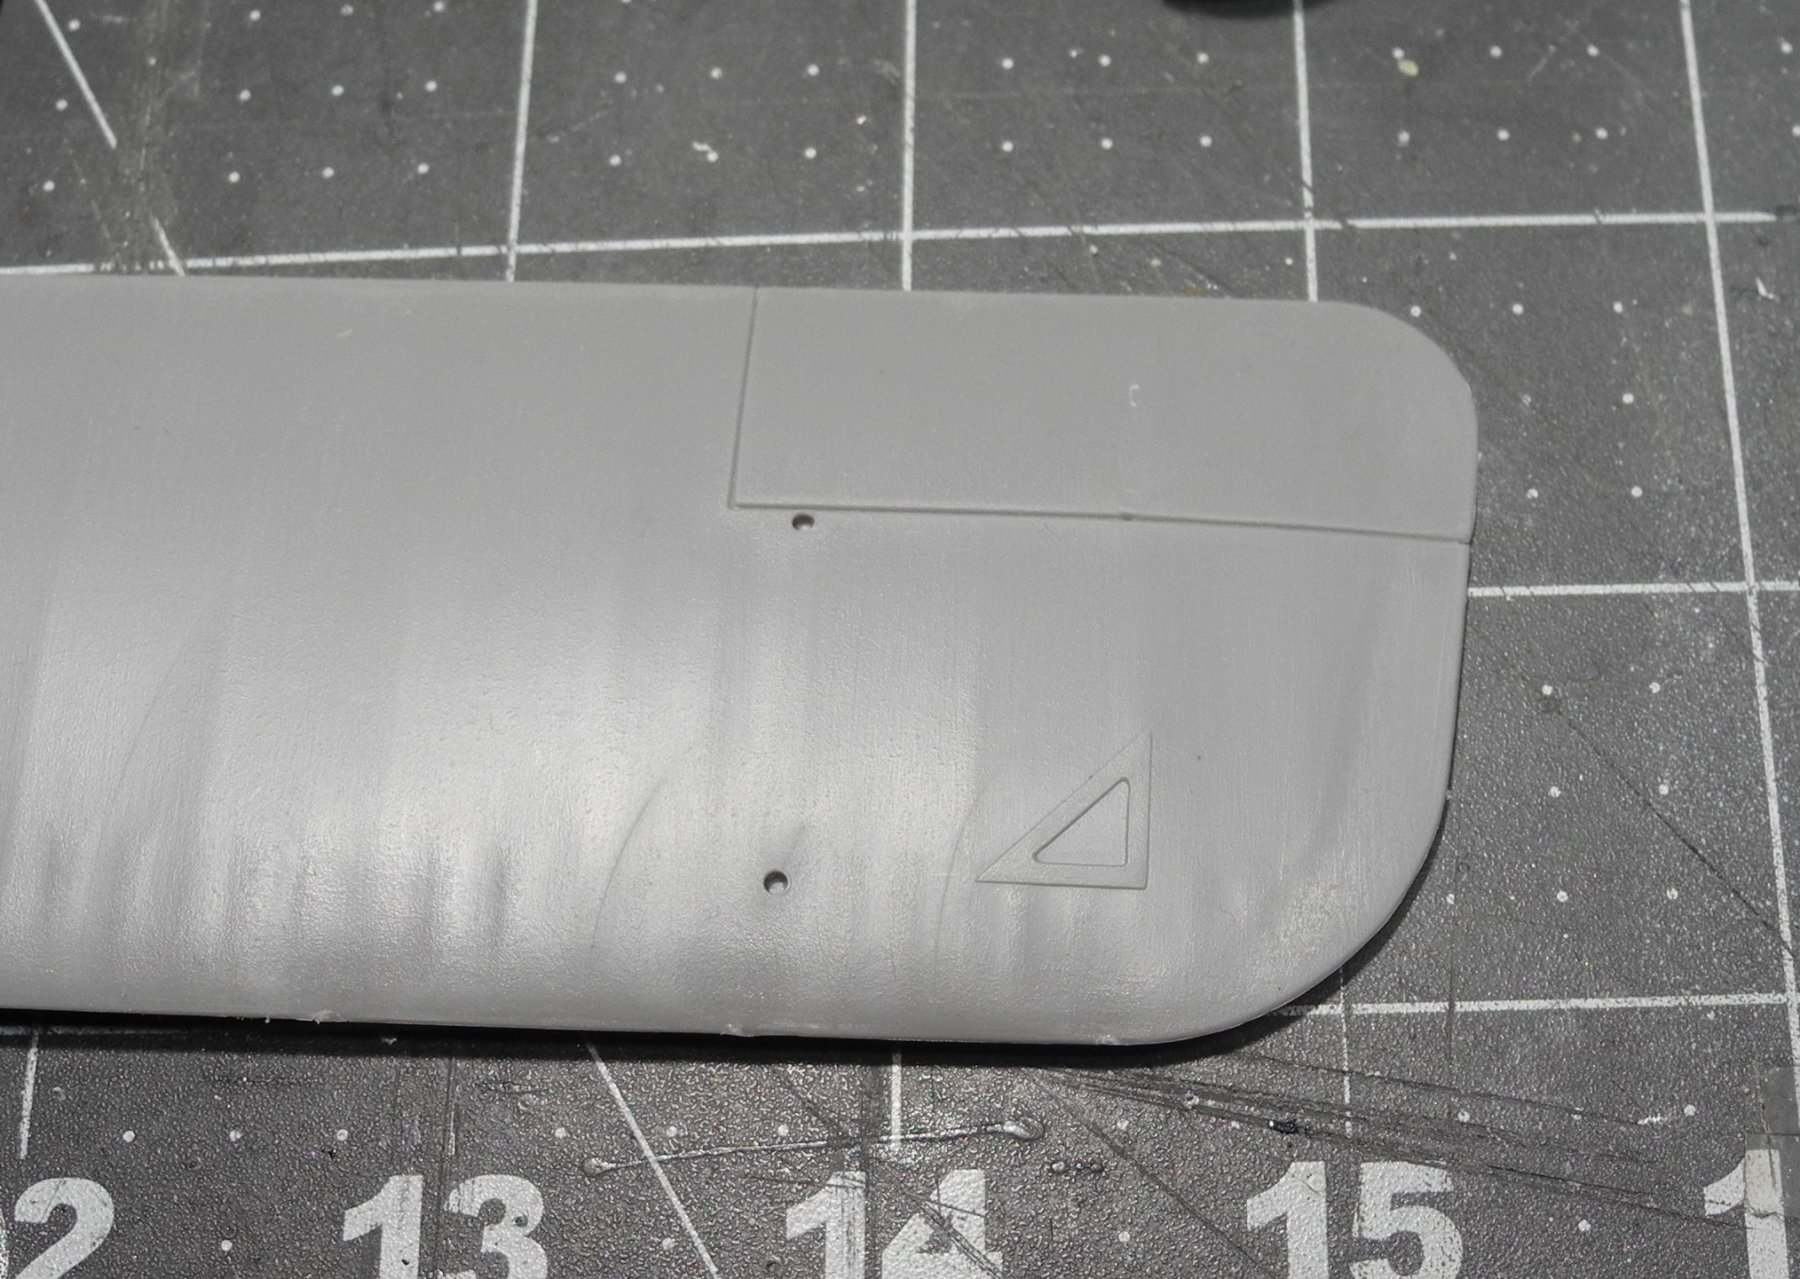
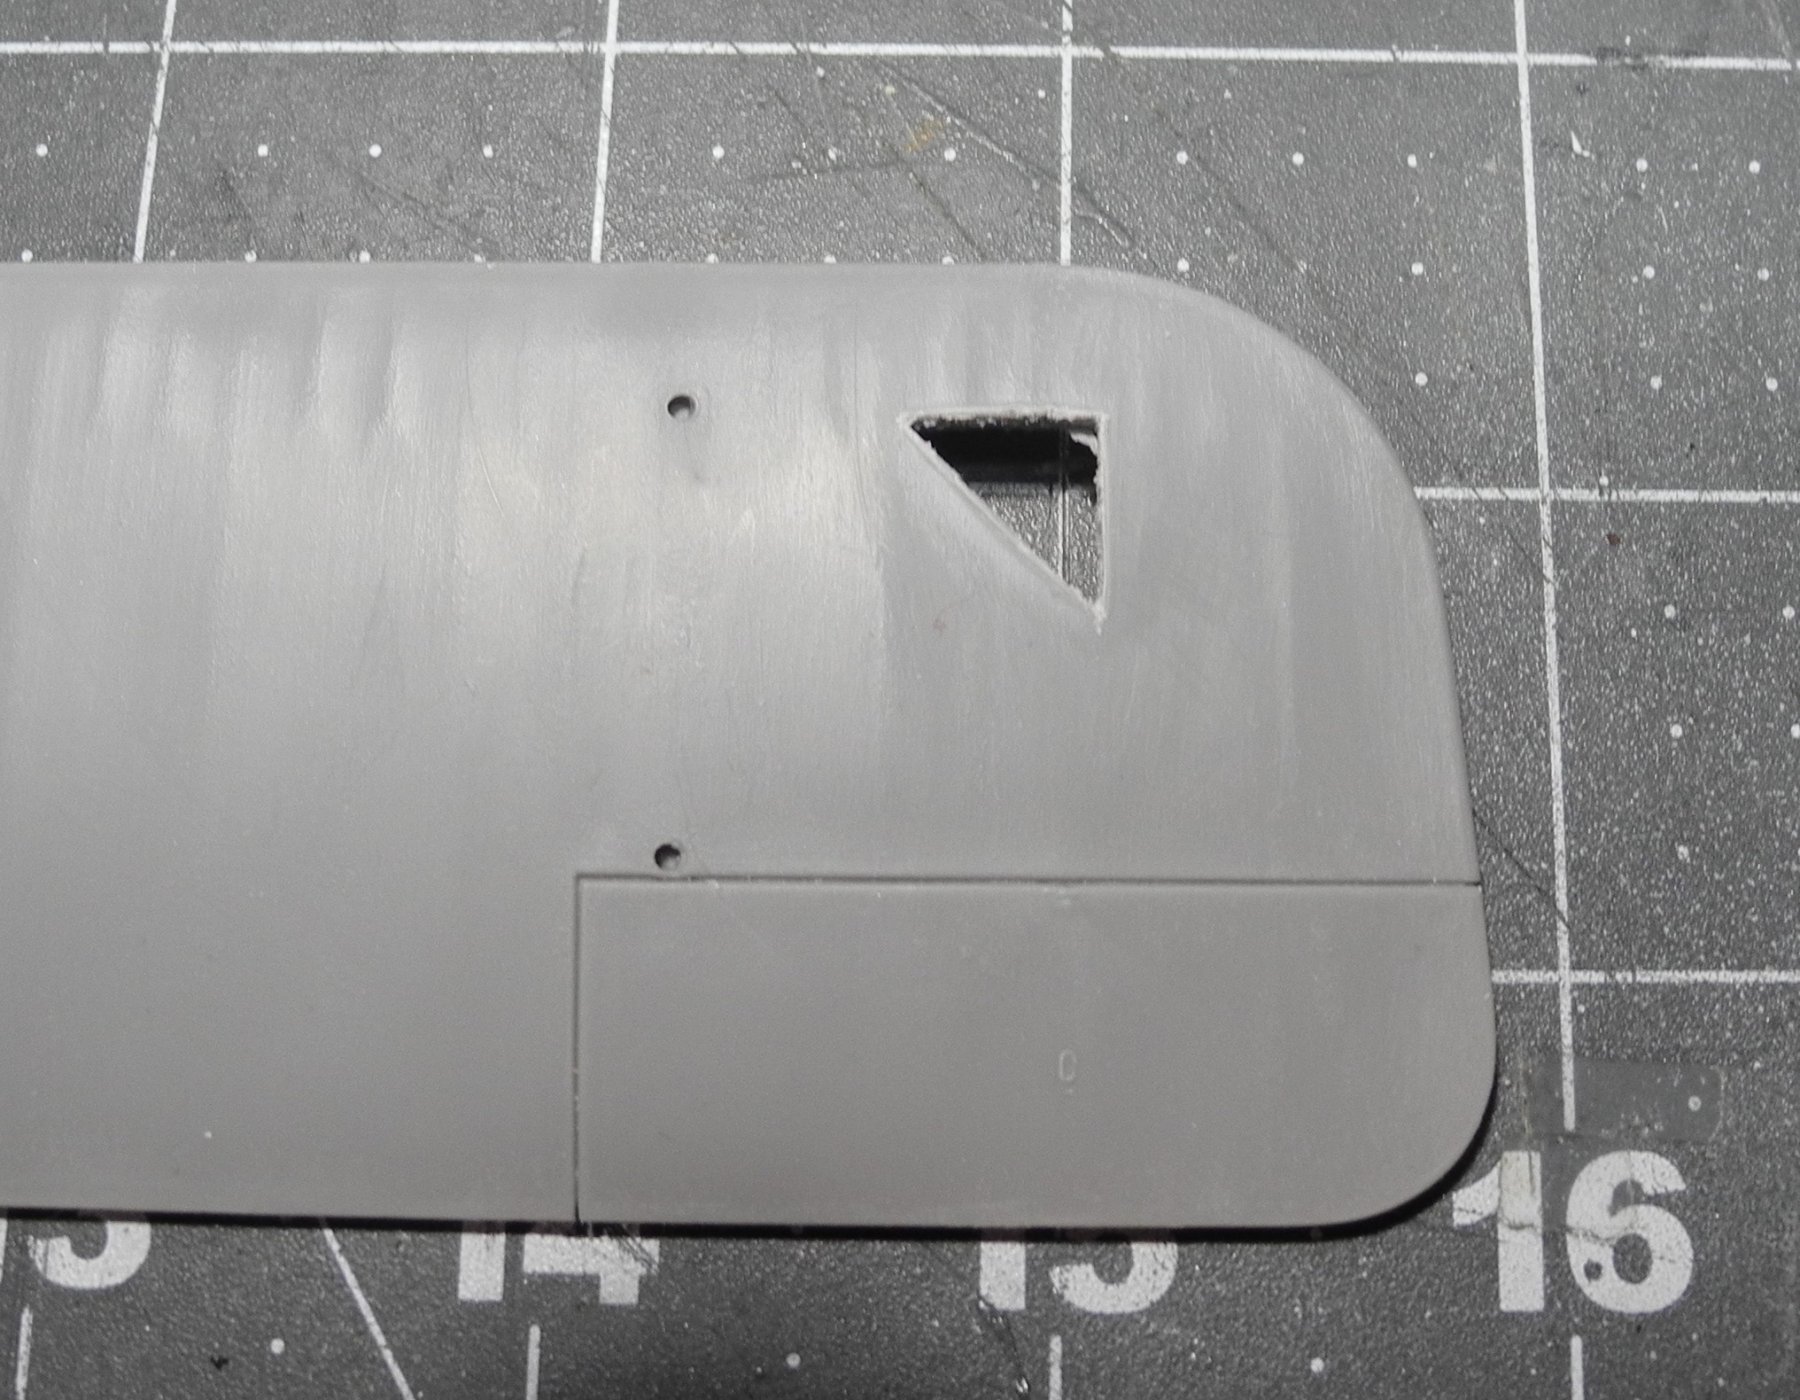
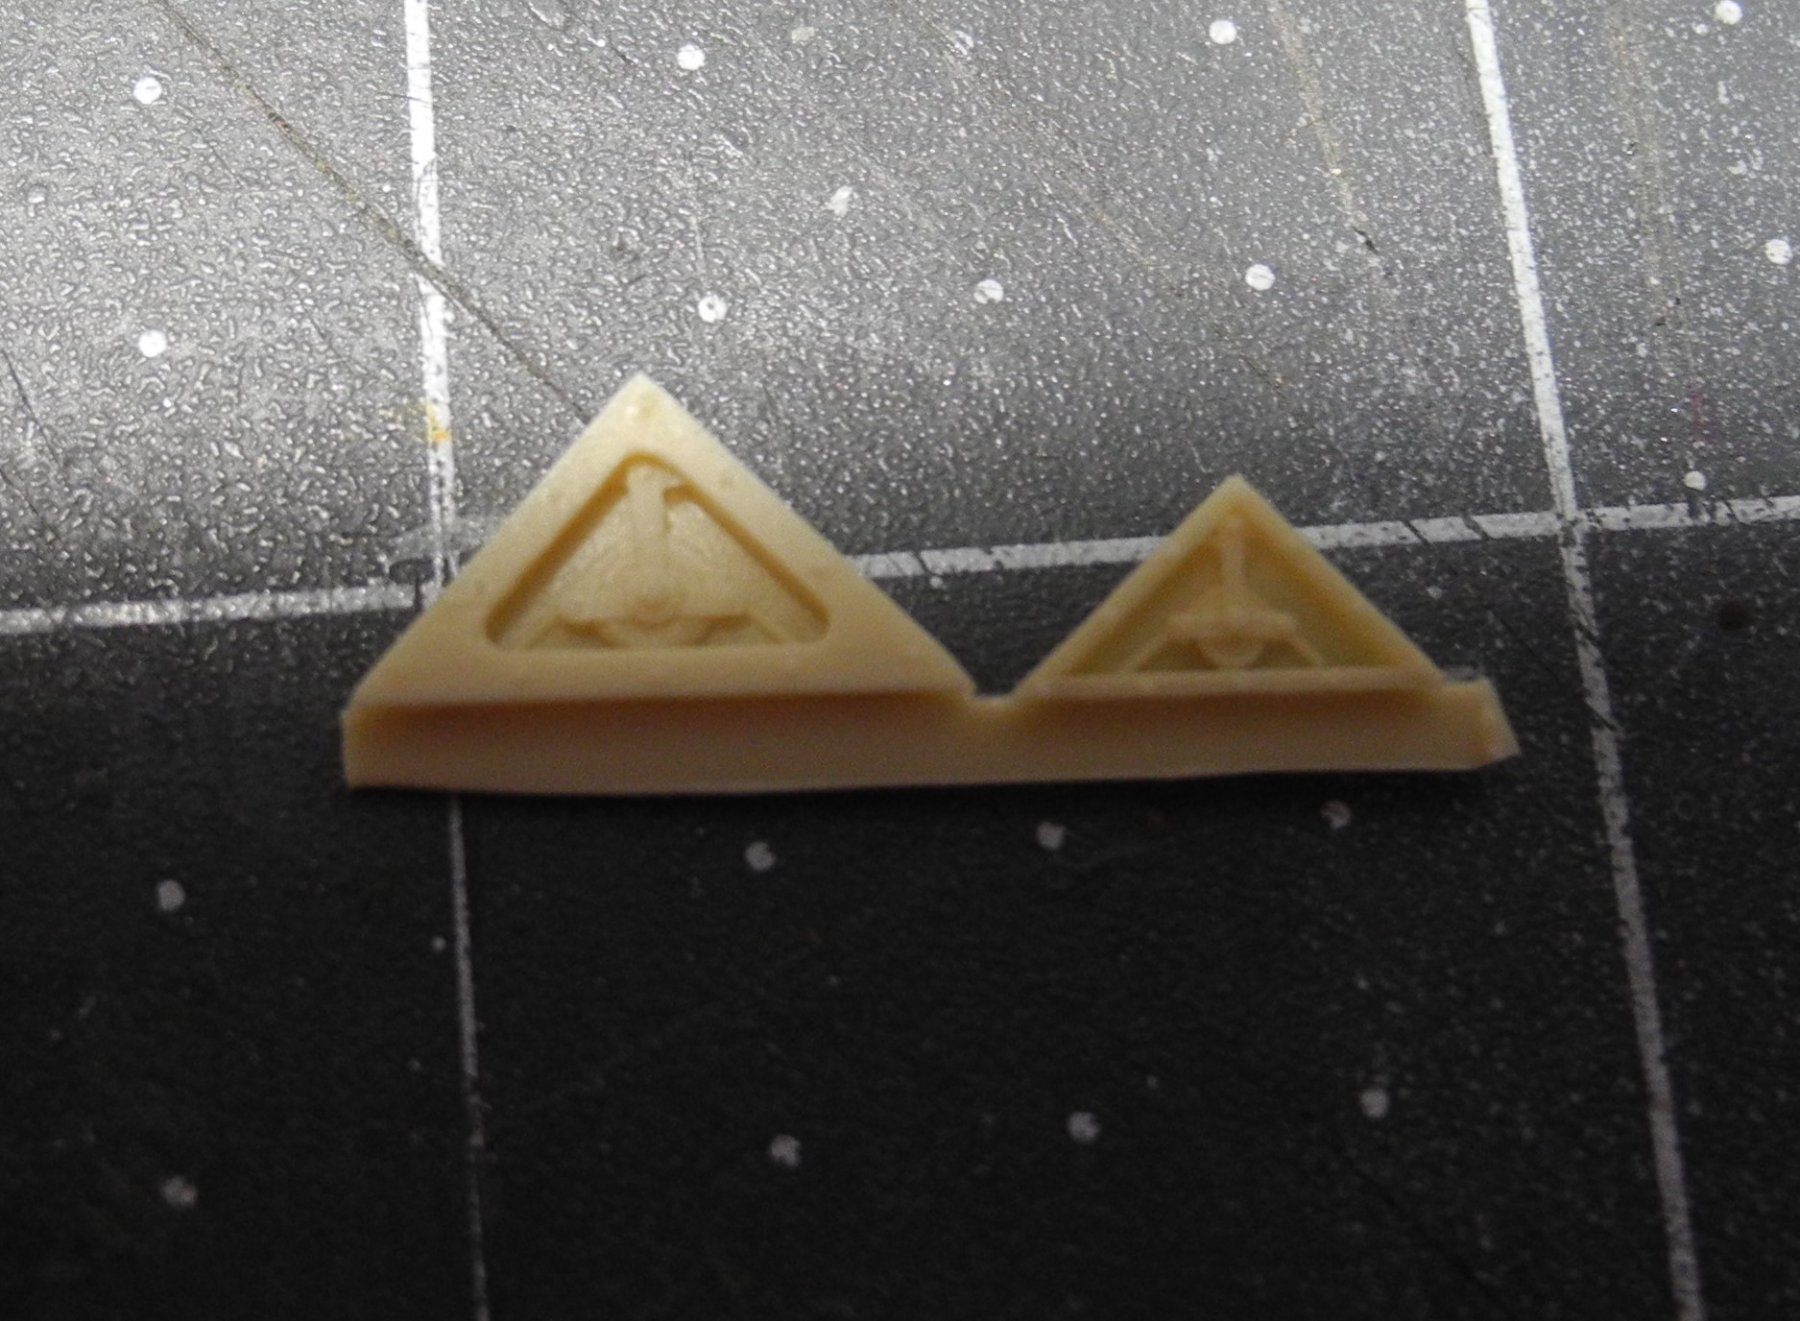
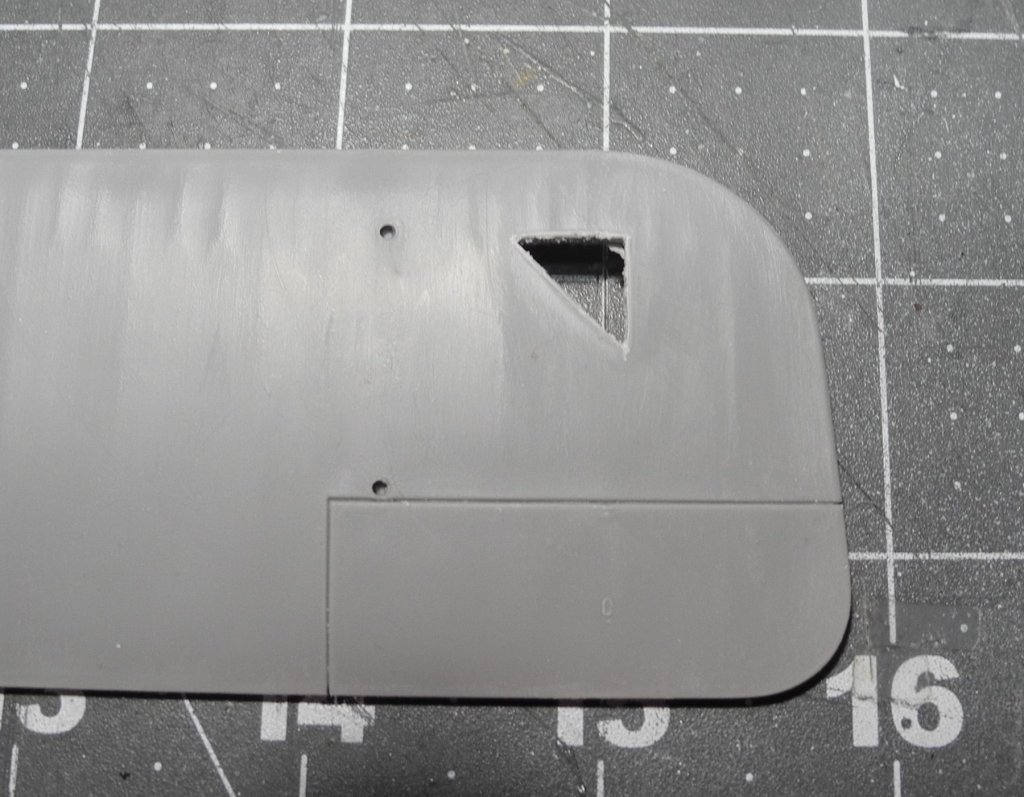
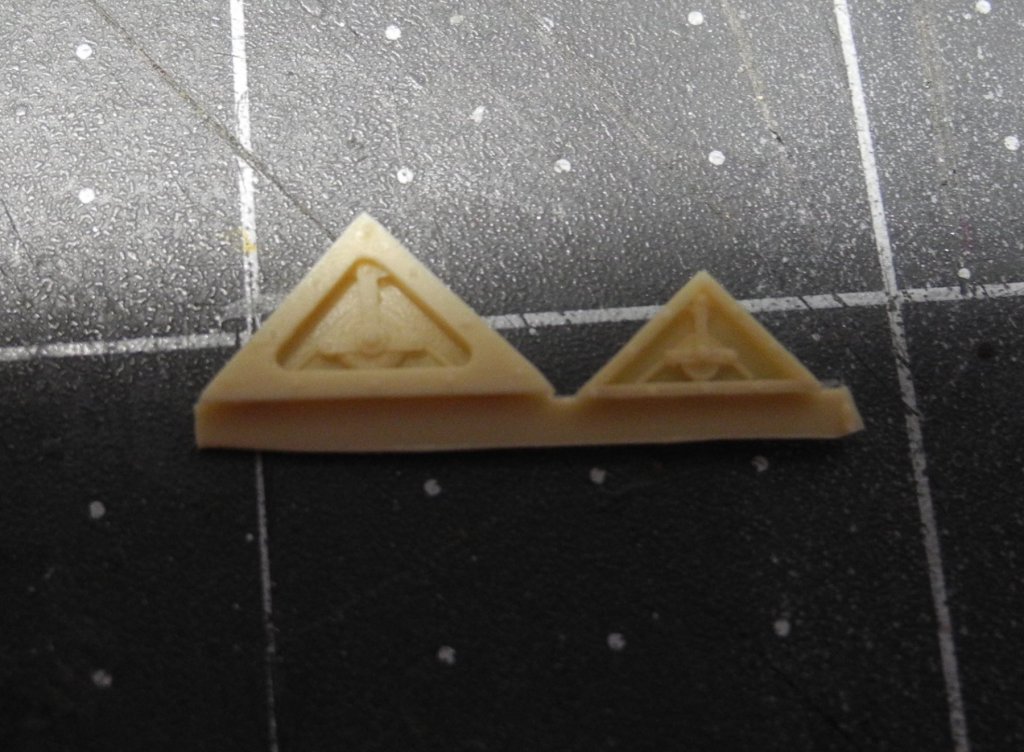
Earlier (yesterday) I described the aileron control cables and pulley systems molded in the wings and horizontal stabilizer. Here is a picture of how the stock wings look at the control system location, the triangle-shaped units. Plain vanilla. The idea is to cut out these triangles with an xacto knife or similar tool These are the after market resin replacement units included in the Encore kit. It captures the look of the detailed control cable and pulley systems. They will look something like this when installed. Of course, a little filler and sanding will be needed around the edges. A much better look...something you might expect to see already molded in to a Wingnut Wings kit, thus my previous "you get what you pay for" statement.
-
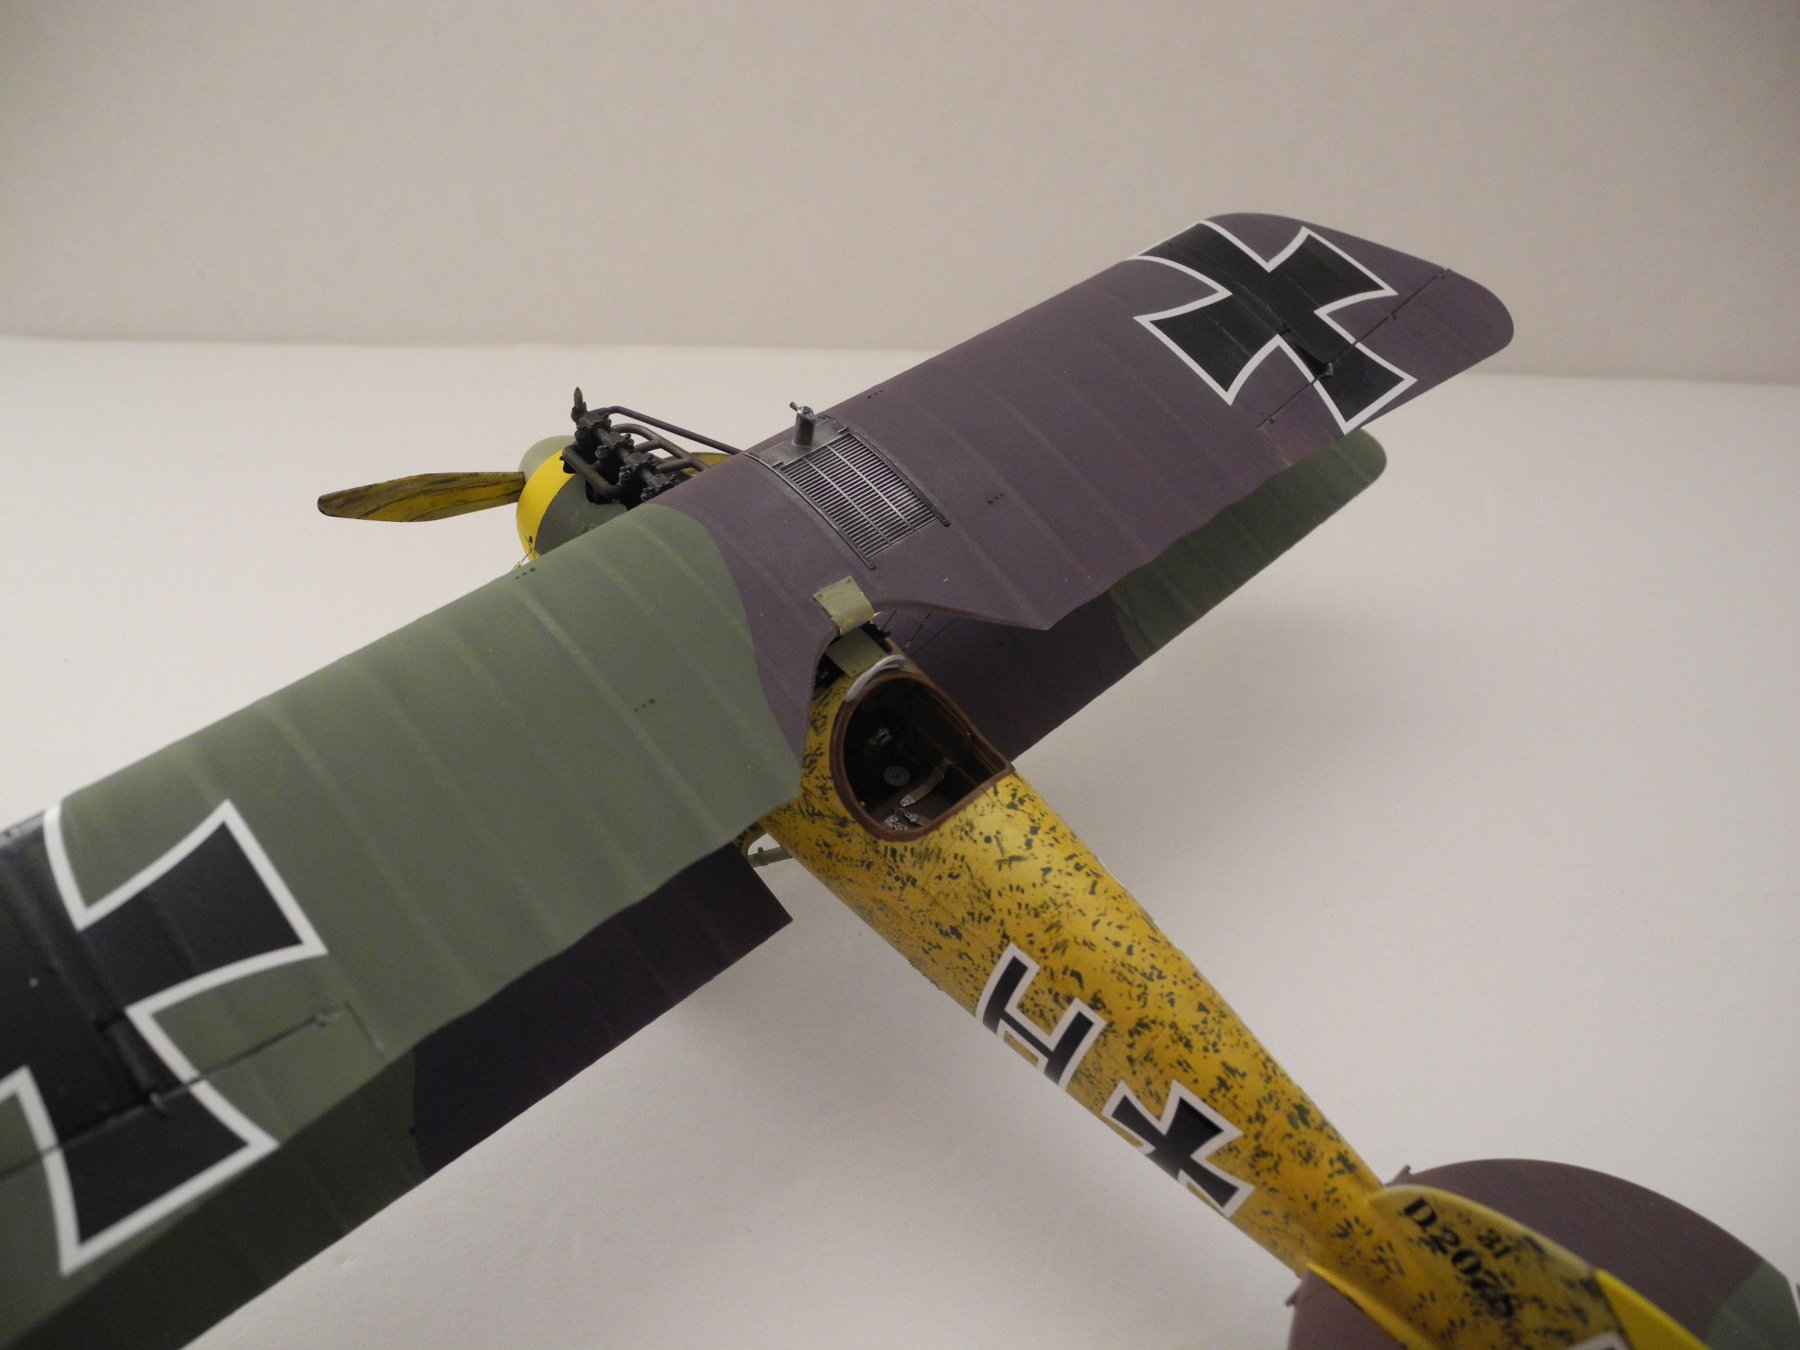
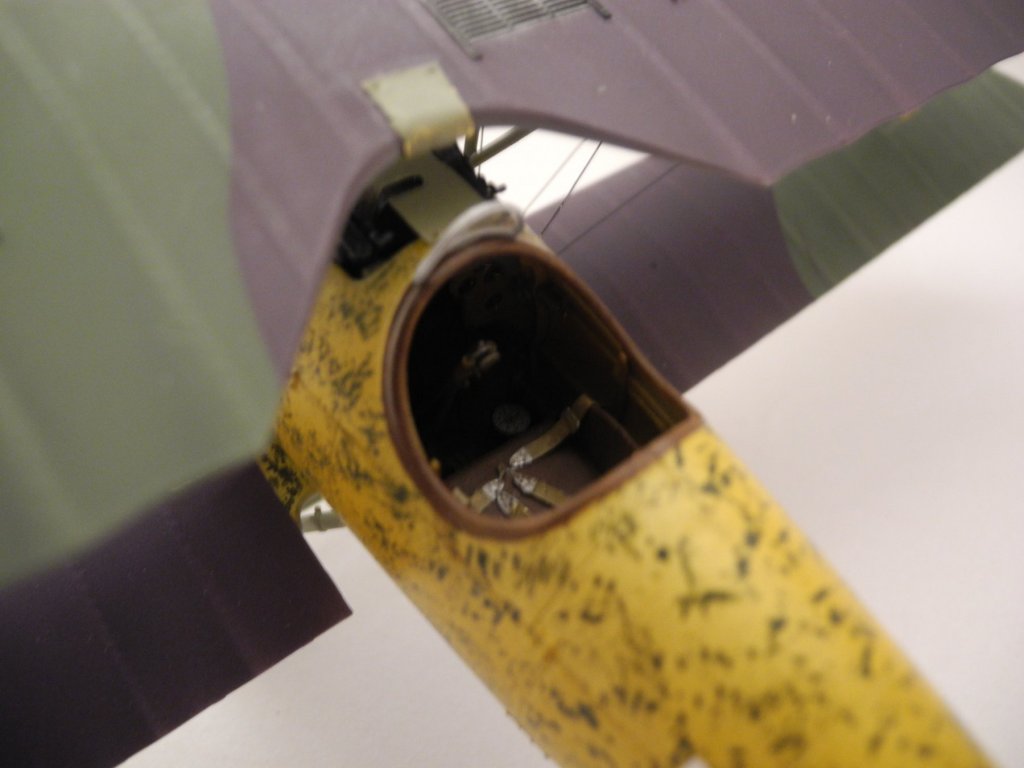
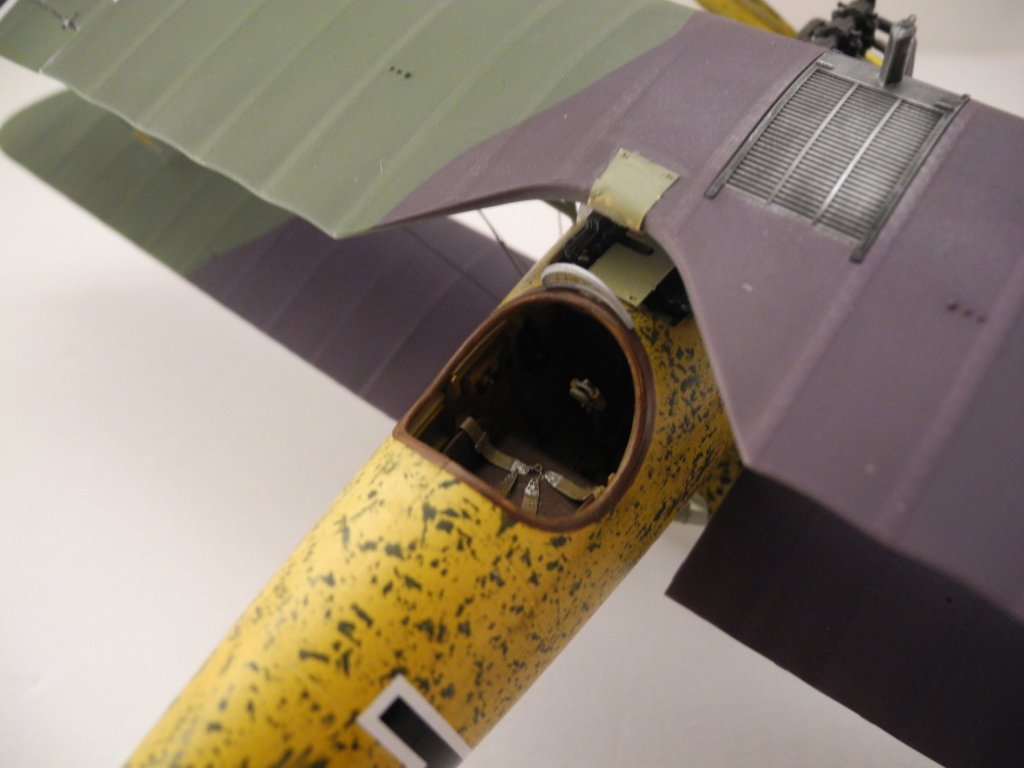
When I first posted these photos, it made me realize one of the radiator pipes had come unglued from the radiator. It's fixed now. It's amazing what details can be seen in photos that often escape the naked eye.
-
Thanks JCT. Enjoying that RV? My brother and his wife sure do get a lot of use out of theirs. Almost every time I call him, they are out on a lake somewhere, fishing. That couple love fishing more than anybody else I have ever seen. They are darned good at it, too. His friends kid him and say, "Gene could catch a fish by casting a lure in a bath tub." I can tell you from experience, you can be fishing all day long in your boat, never get a bite, and he will pull up near you in his boat, cast a line over near your boat and catch a fish.
-
Right now, I'm wrestling with cutting out the molded on aileron cable and pulley systems at each of the four corners of the wings, and the two pulleys/cables at the horizontal stabilizers. The kit includes some very nicely detailed pulley/cable systems to replace the lack luster molded on units. Being that the wings are molded in solid pieces rather than upper and lower wing halves, it makes for thick plastic to cut through. Not one of my favorite chores as it's easy to accidentally cut out more plastic than was intended. But the end result will be 100% better than the stock units. I had in mind to do the mid version, modeling the aircraft at the time of the Voss encounter. I do have a second S.E.5a kit to do the latter version with the spinner. Generally speaking, the Squadron Encore kits of any variety are bargains to be on the lookout for. They include detail parts such as resin and photo etch, sometimes historical pilot figures, and decal sheets that make them a bargain compared to their stripped down cousins on which the Encore kits are based. The Roden kits that are the basis for this Encore kit are what i would call 'limited run' kits. It's rather evident looking at the molded parts that the molds are just not up to the high quality standards of more modern, high production molds. These type of molds will only produce a very limited number of copies before they must be discarded. In other words, when the kits are gone, they are pretty much gone for good.
-
Goodness, that's a lot of beautiful work represented in one model. It looks totally busy. Makes me appreciate the knowledge and skill the old sailors must have had to work and maintain a ship like that.
- 1,306 replies
-
- 8
-

-
- syren
- model shipways
- (and 1 more)
-
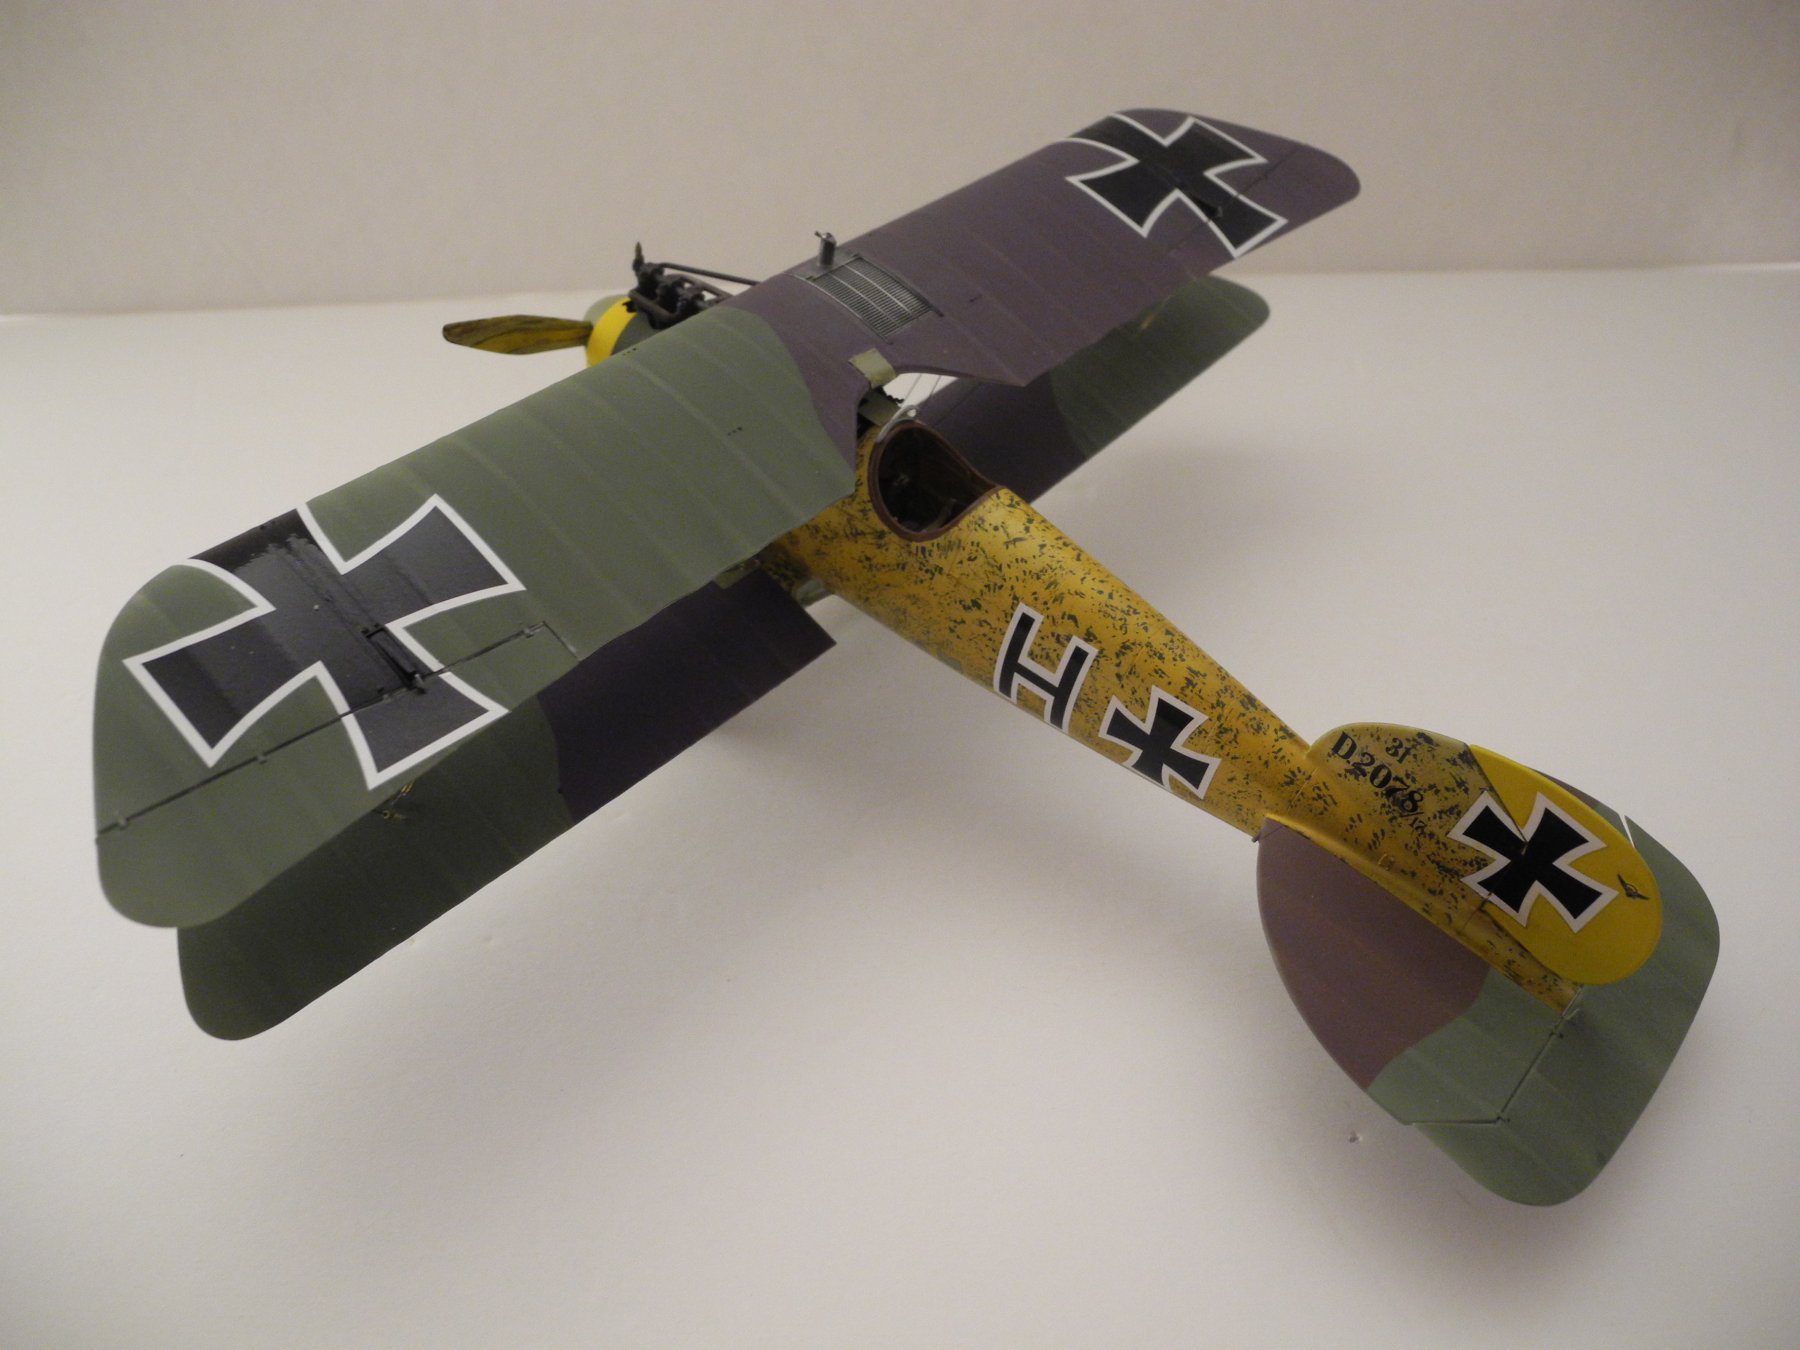
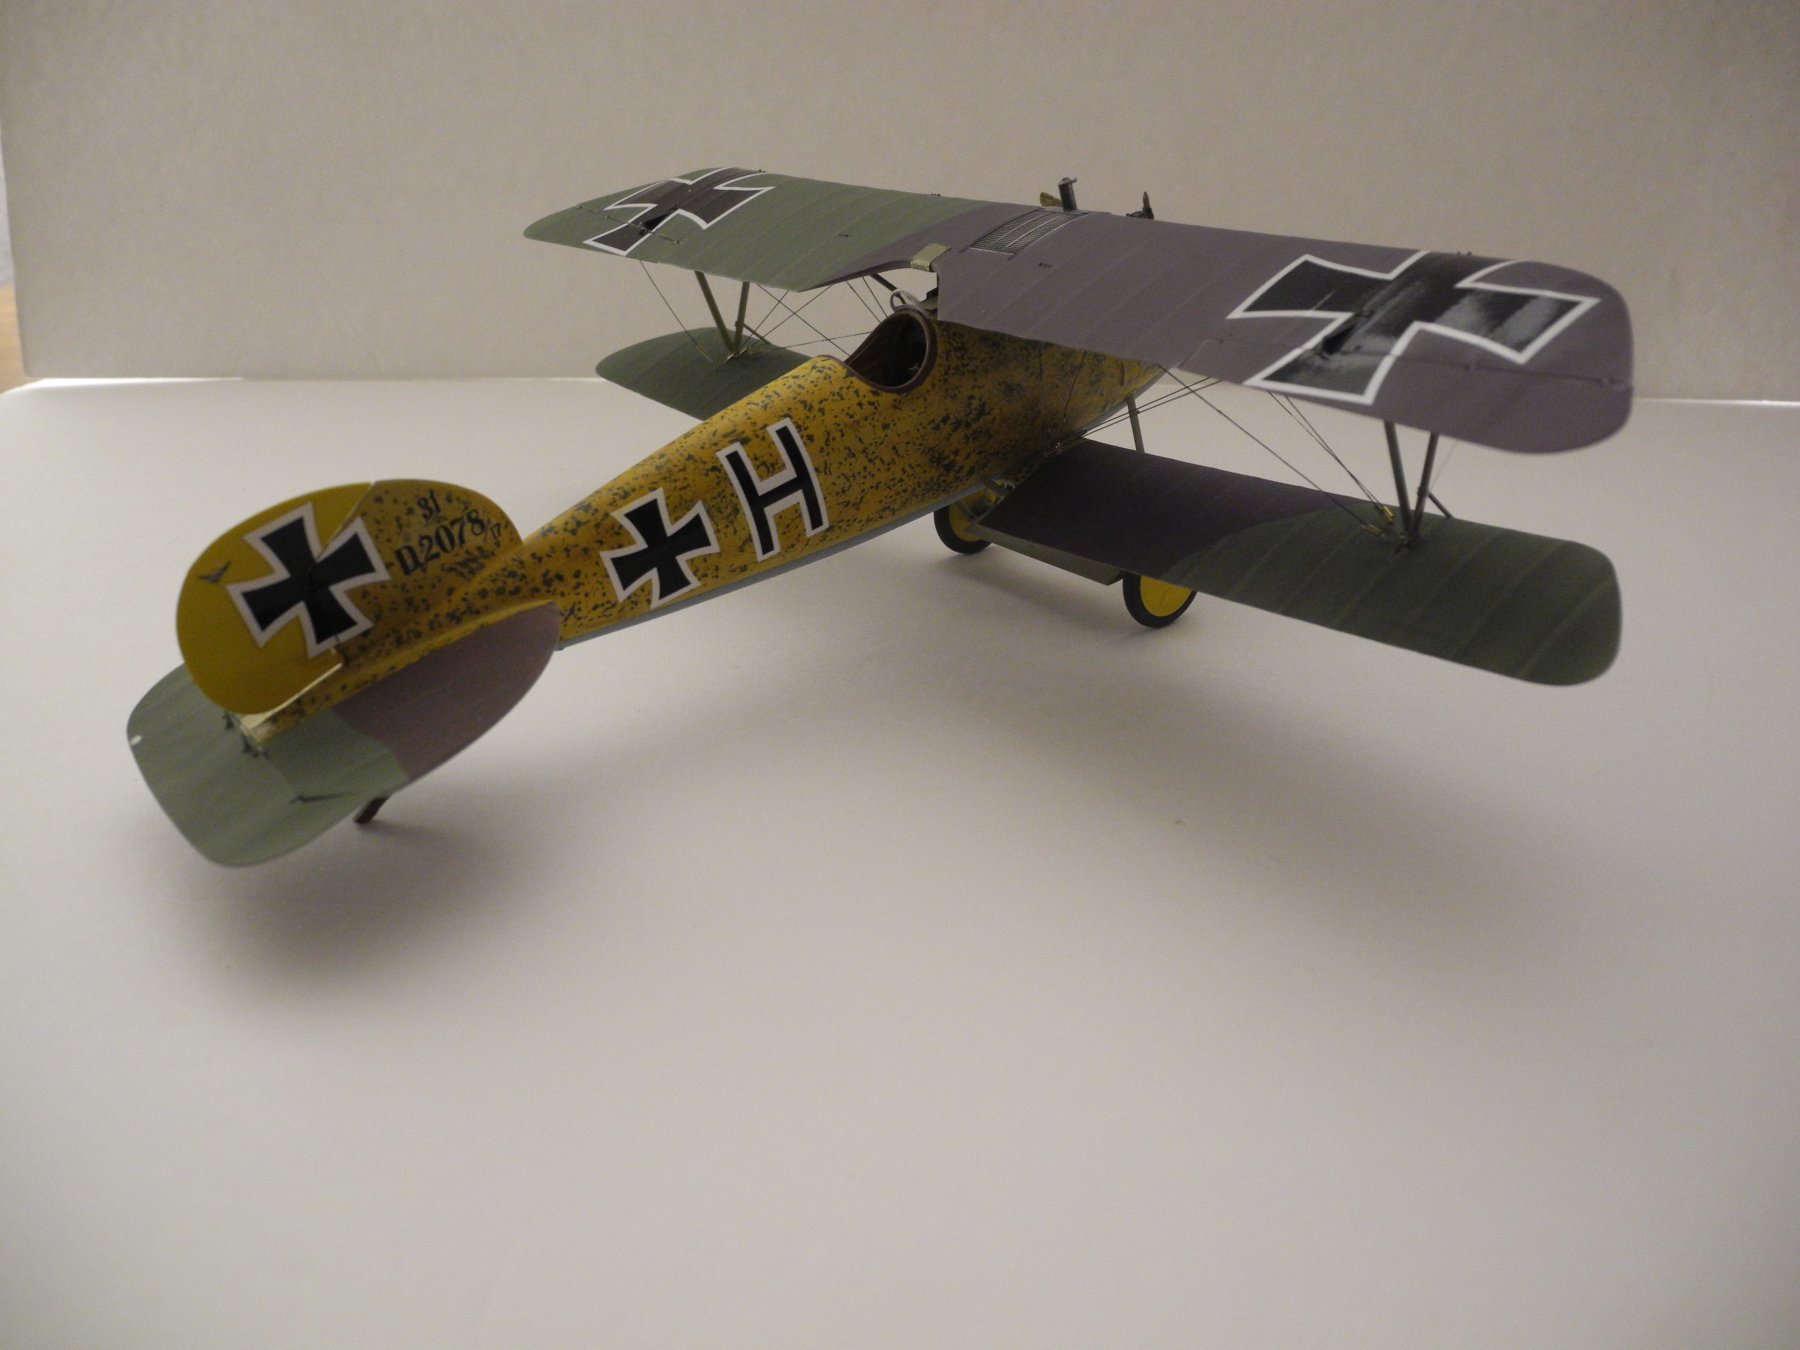
Yes, it certainly does include that spinner...in resin as an add-on choice. Kit comes with three sets of markings, basically an early, mid, and late McCudden aircraft that included the spinner. For those who are unaware, the S.E.5a was a very durable, stable and well mannered aircraft compared to other highly aerobatic aircraft of that time period such as the Fokkers and the Sopwiths. This was due to the fact the S.E.5a was designed with lots of dihedral in the wings. This resulted in a very stable gun platform, but a slow roll rate. McCudden capitalized on the speed and stablity of the airframe by developing superior tactics and gunnery. Killed in combat at the age of just 23, McCudden made all but five of his fifty-seven aerial combat kills in the S.E.5a.
-
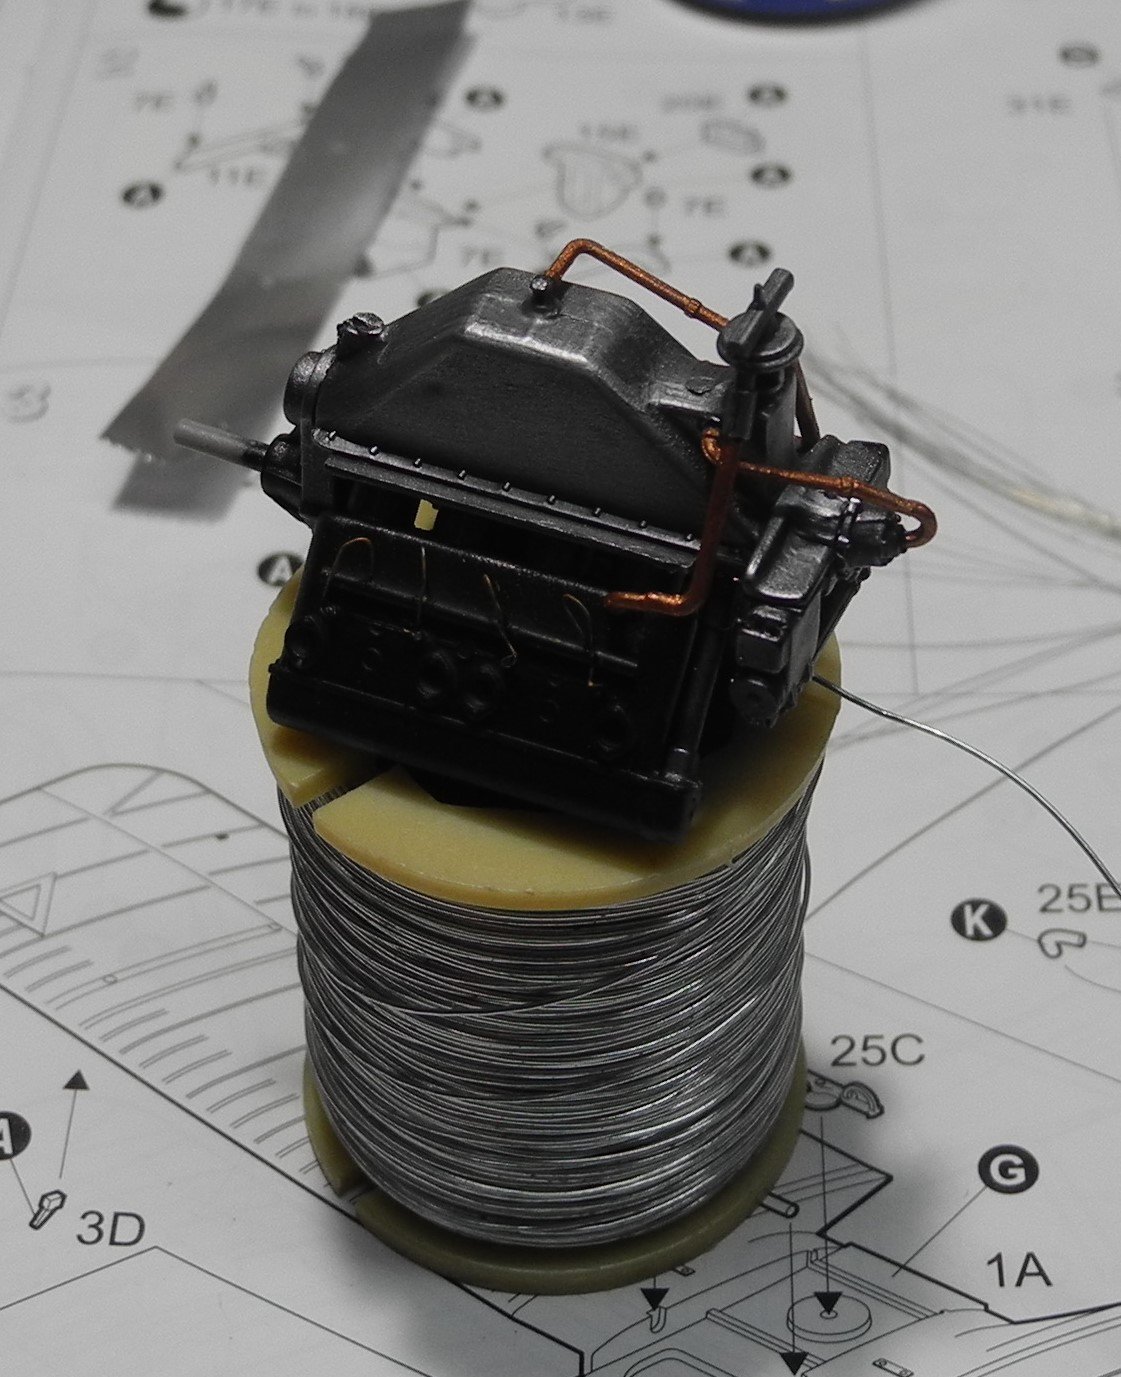
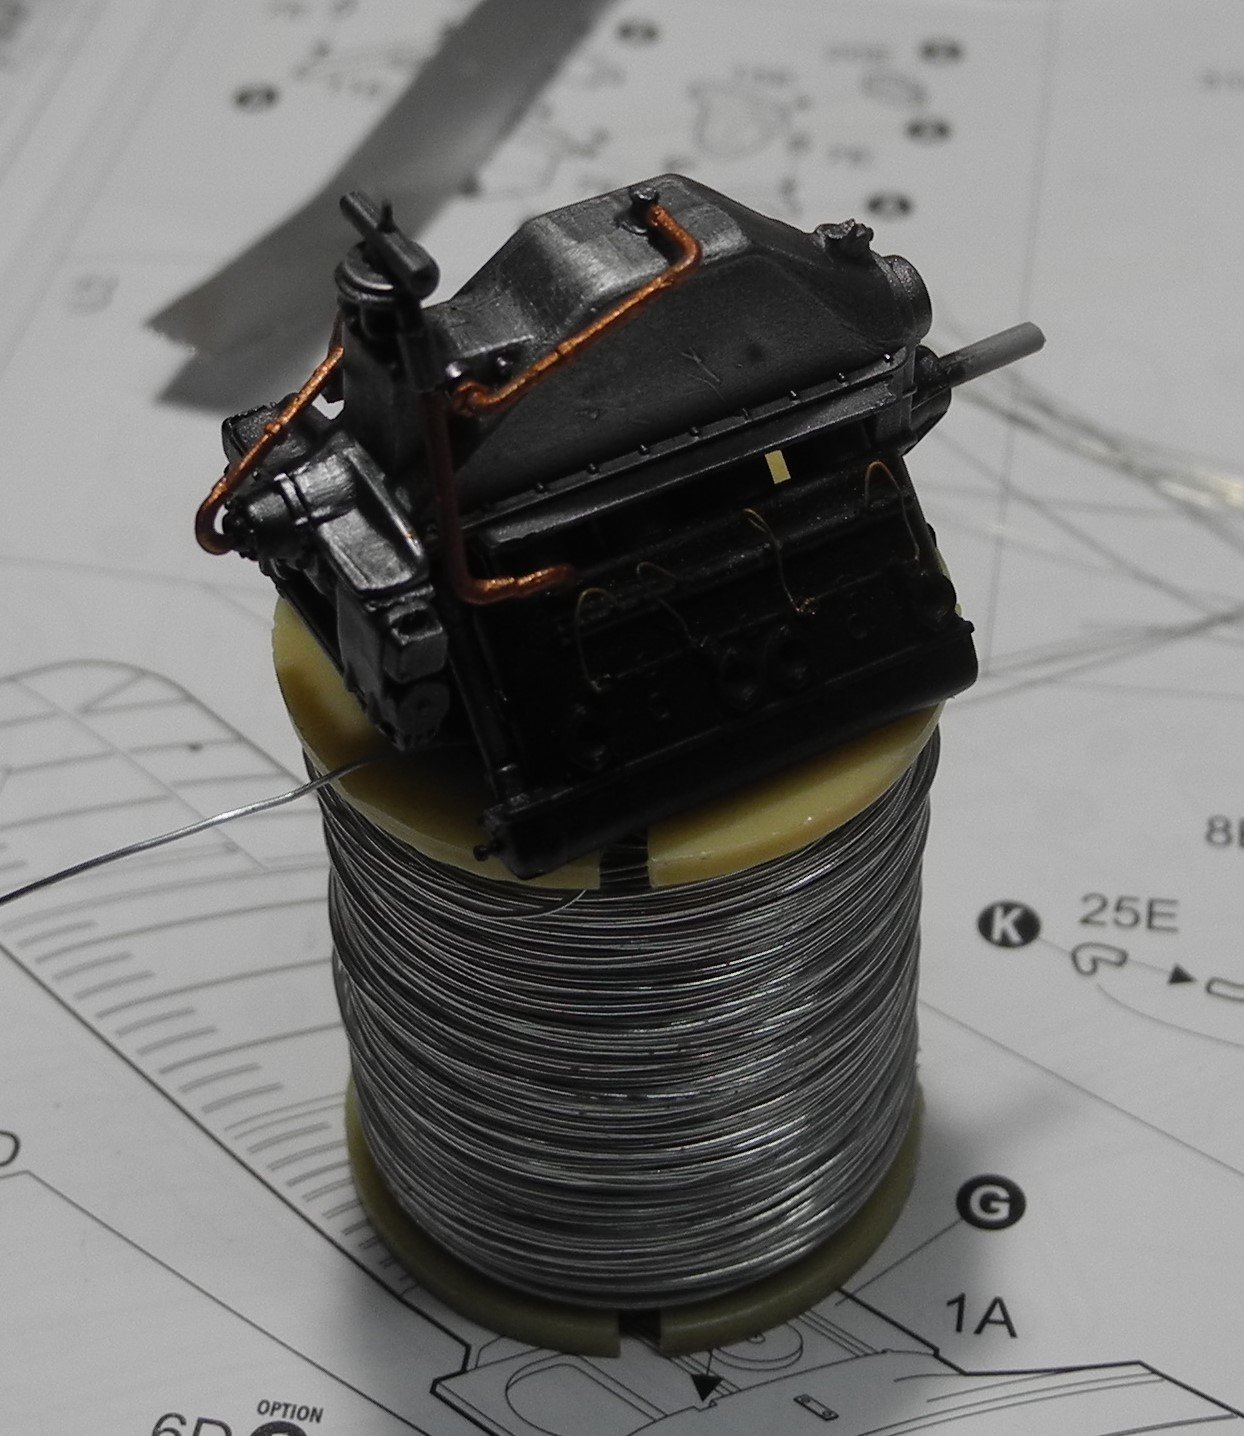
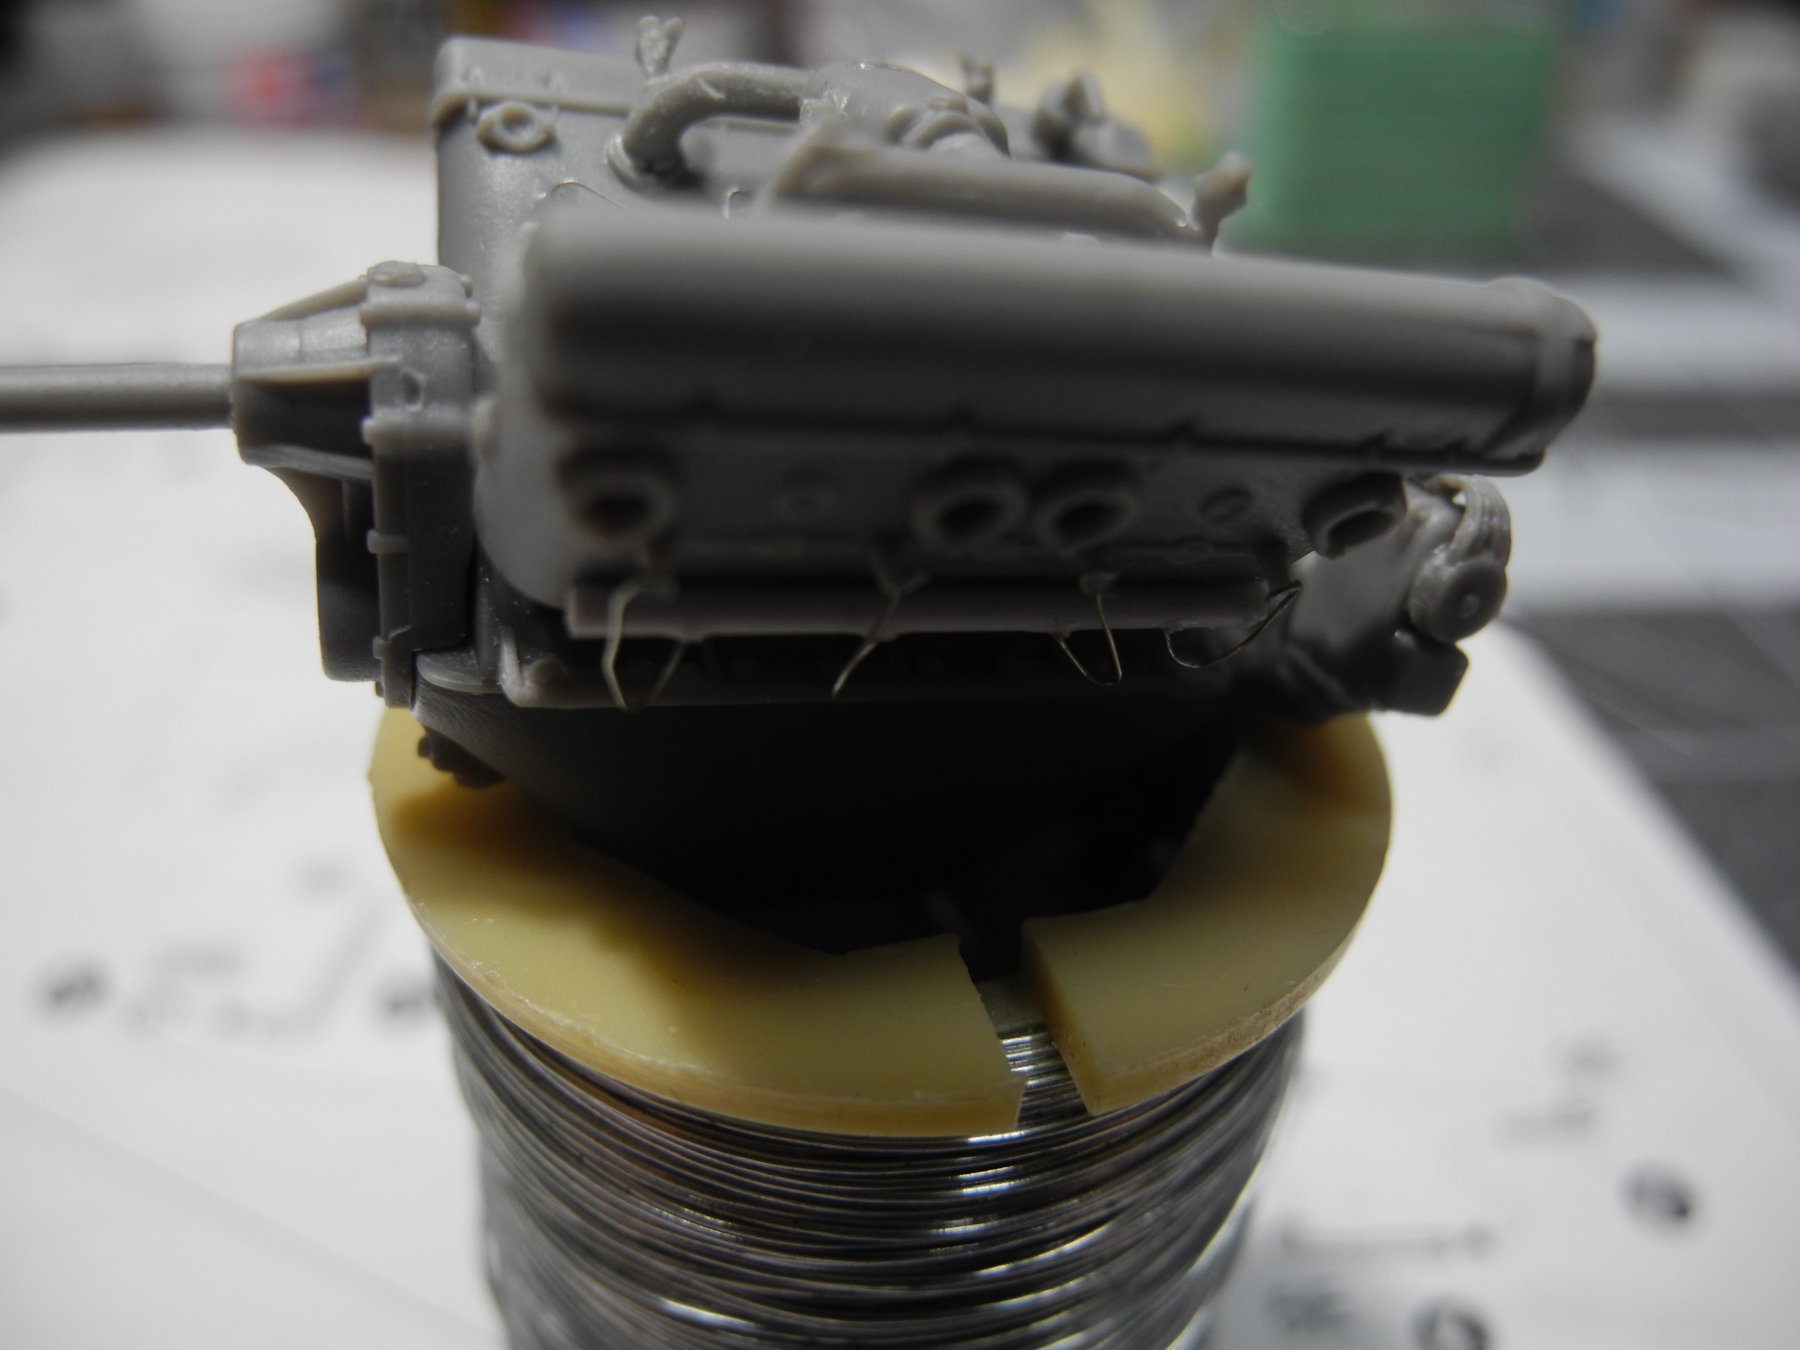
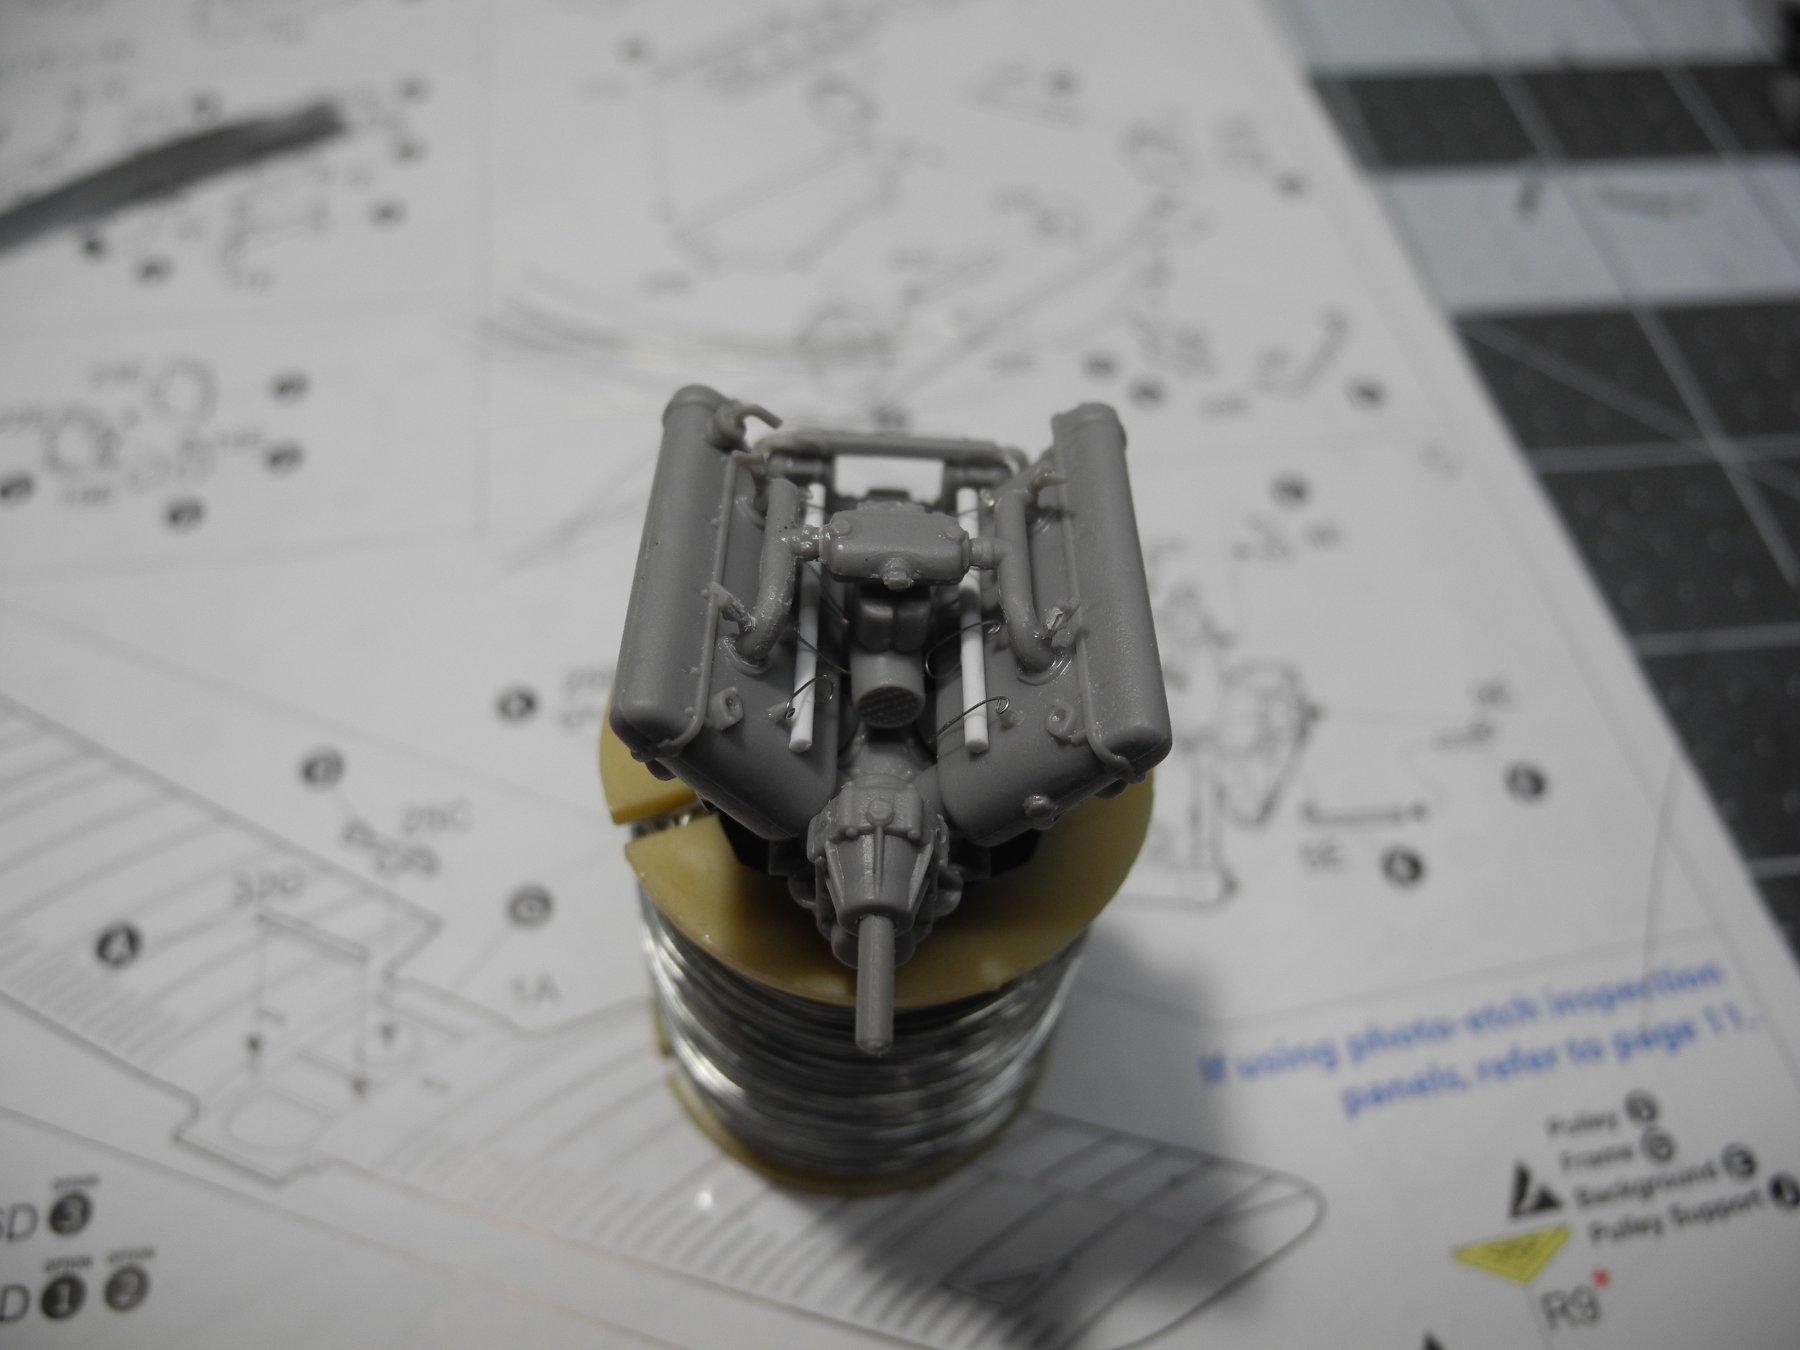
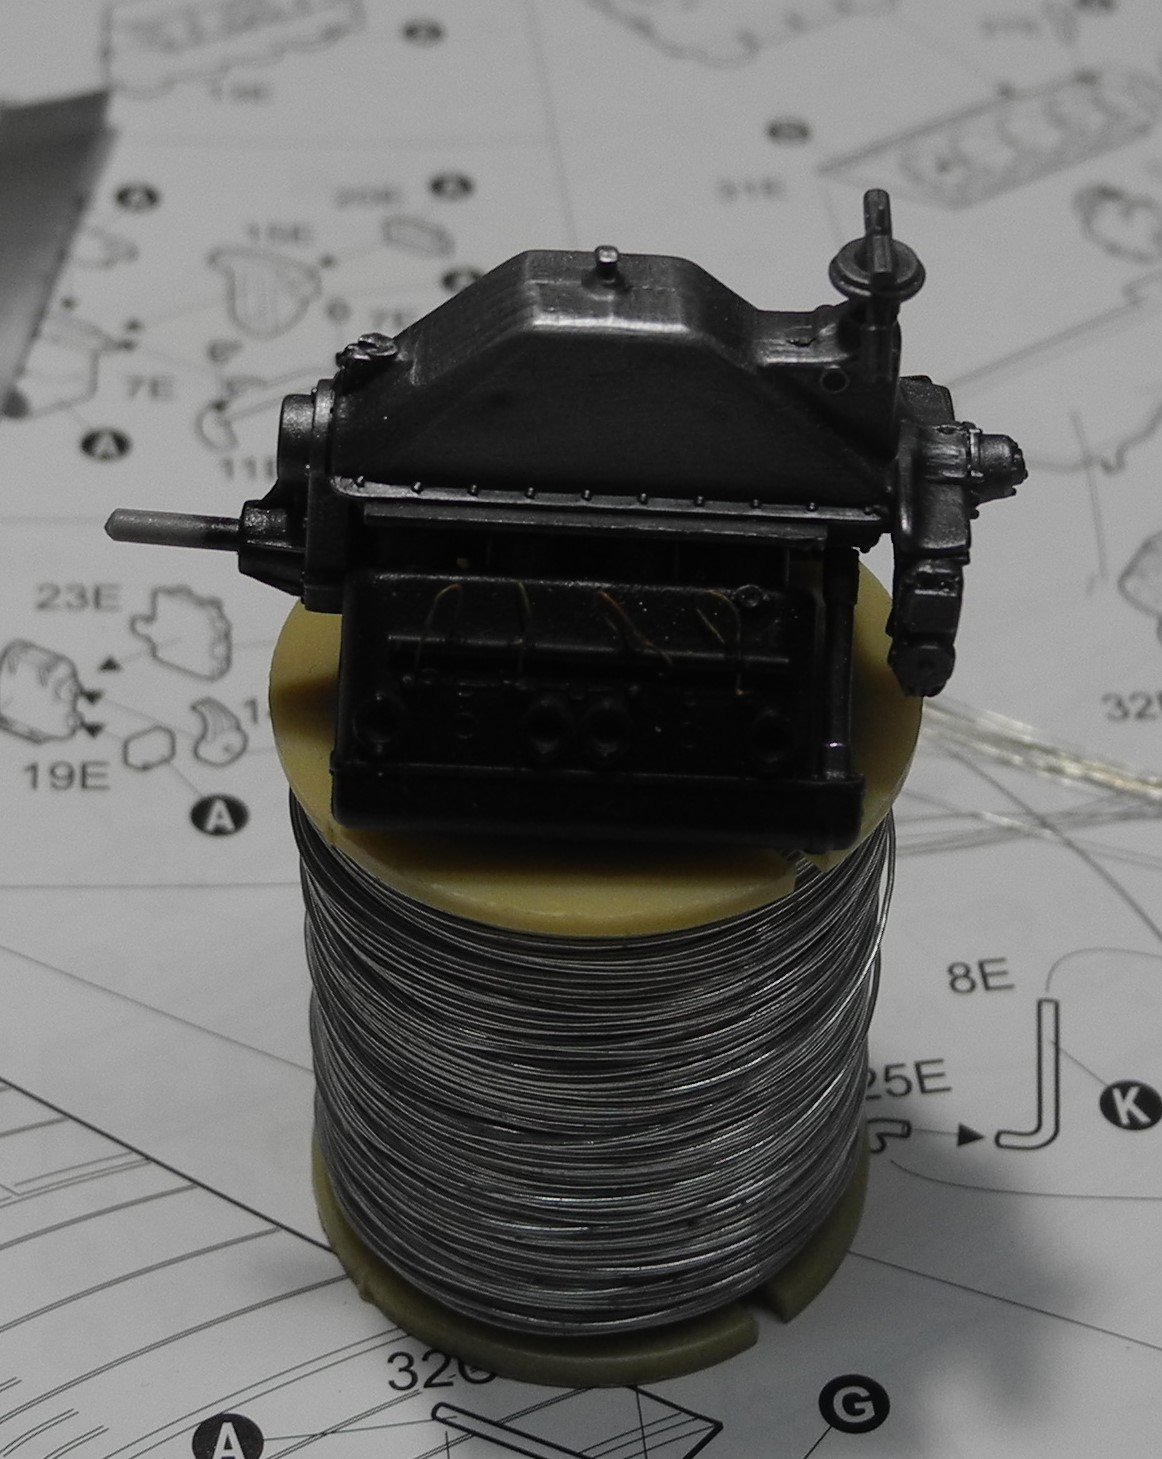
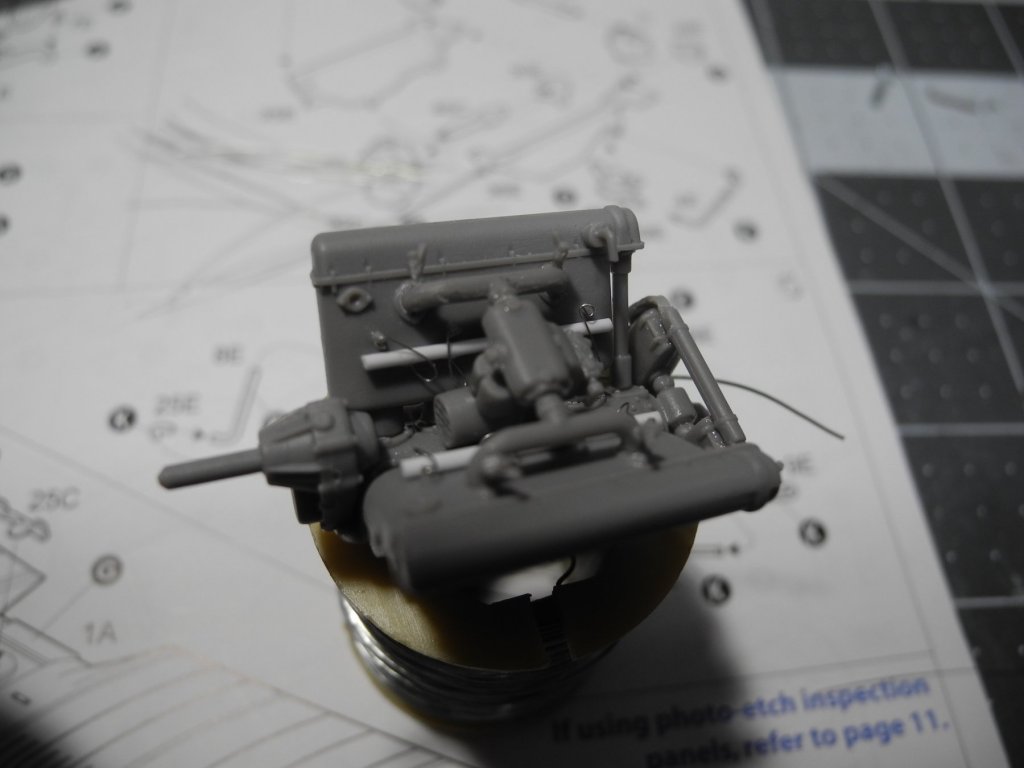
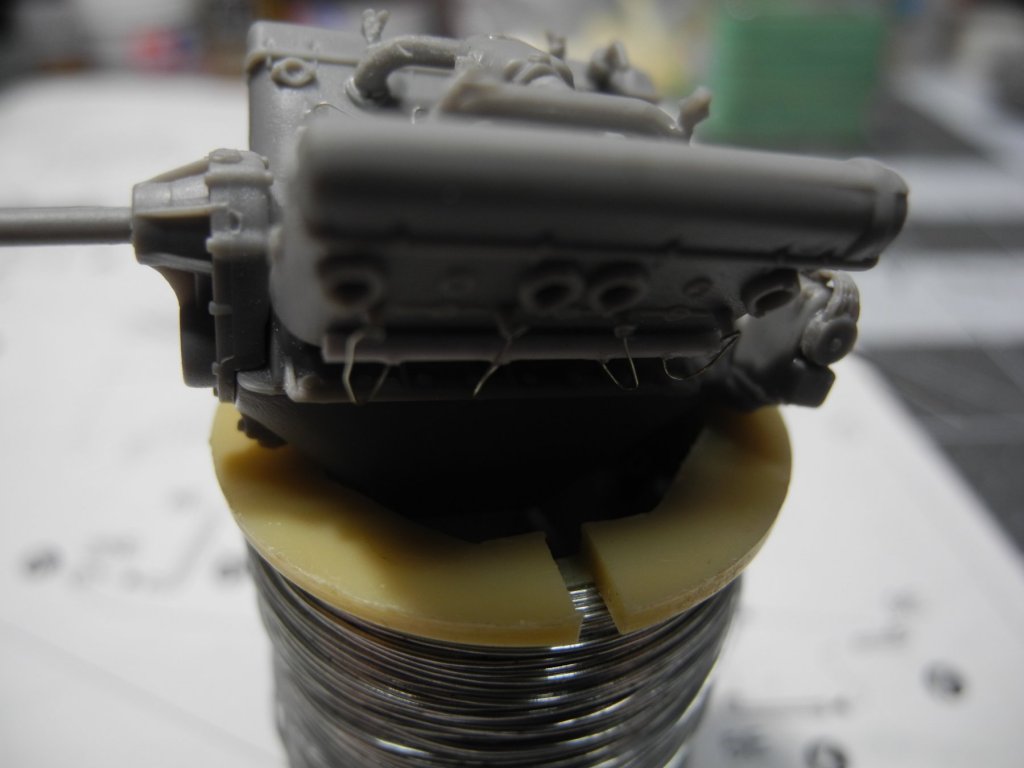
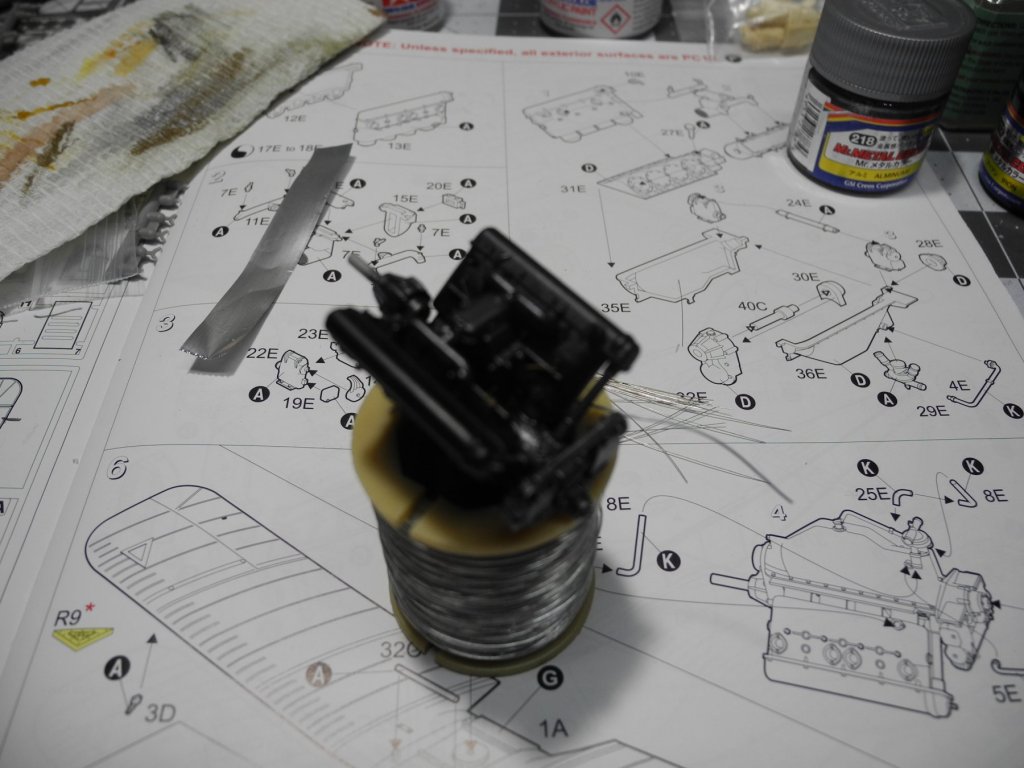
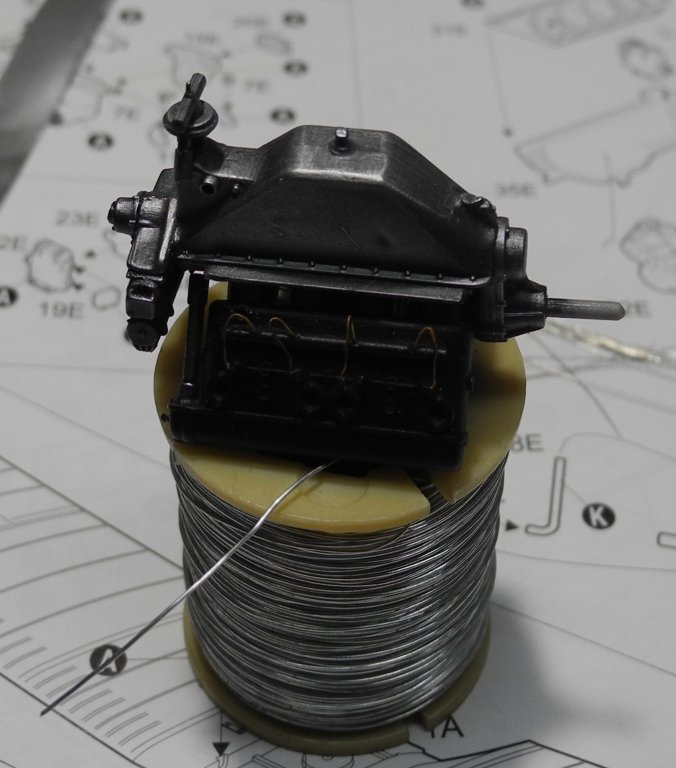
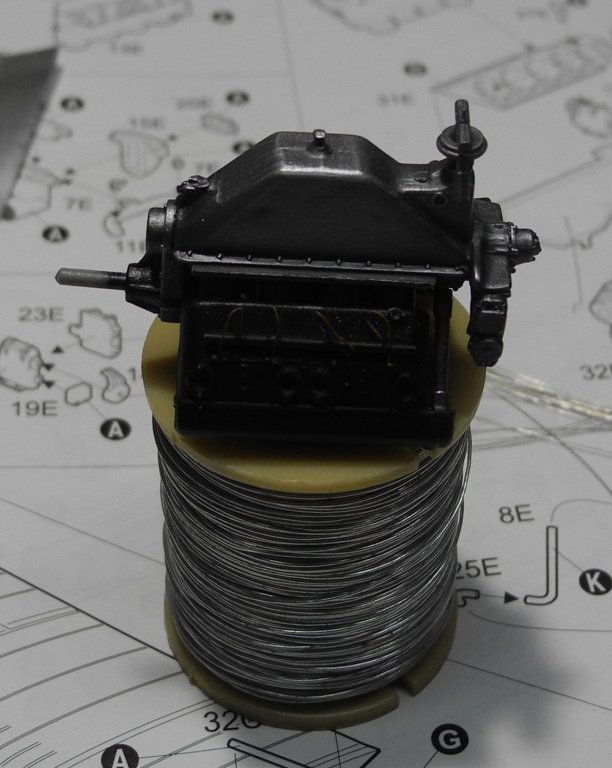
This is the S.E.5a engine, the Hispano Suiza 8 cylinder. Engine is the stock kit pieces with added spark plug wiring from scratch (plastic rod and fine wire). Engine is painted in Tamiya semi gloss black, dry brushed with Mr. Metal Color iron and aluminum. The only parts of the engine that will be readily seen once the model is finished are the rocker covers. There's no reason for me to go too wild on engine detail that's going to be hidden.


- 53 replies
-
- 10
-
-
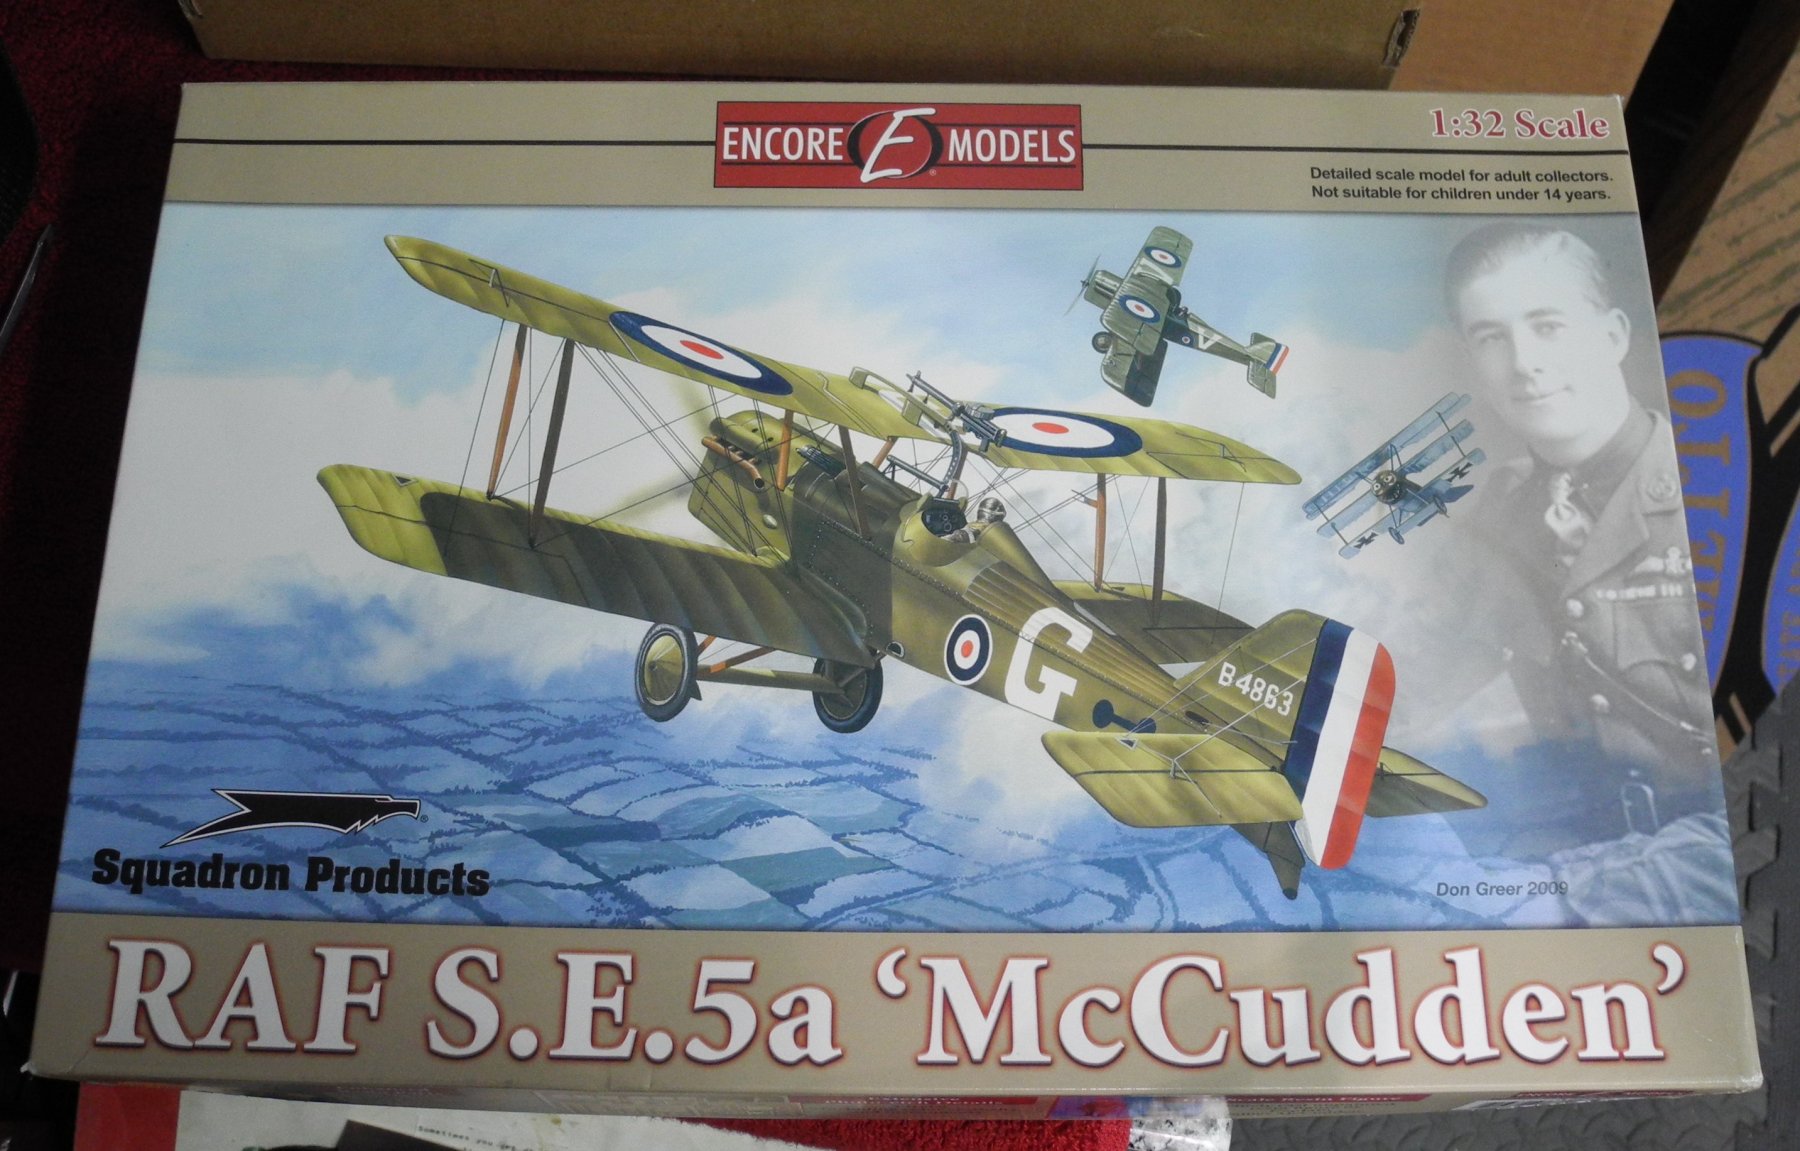
Okay, this is the 1:32 Squadron Encore Models S.E.5a as flown by England's highest scoring ace of WW1, James McCudden. This particular kit is from somewhere around or about 2009 and is currently out of production. A copy can be found most times listed on Ebay, and sometimes the asking price is a little too much IMHO. I paid roughly $60 for this kit and that's a decent price for it. Basically, the kit is the Roden model with added resin and photo etch pieces, plus a nice resin figure kit of James McCudden. The plastic parts are a little on the rough side compared to Wingnut Wings kits...you get what you pay for as the old saying goes. Still, I believe this can be built into a pretty decent model. Gonna give it a shot and see what happens. For starters, my kit's fuselage halves are strangely warped. I believe I may be able to straighten these out in the construction process. If not, I have a 2nd Roden kit as a backup which I will rob parts from if I must. Hang on and I'll post some initial construction photos later tonight. v

-
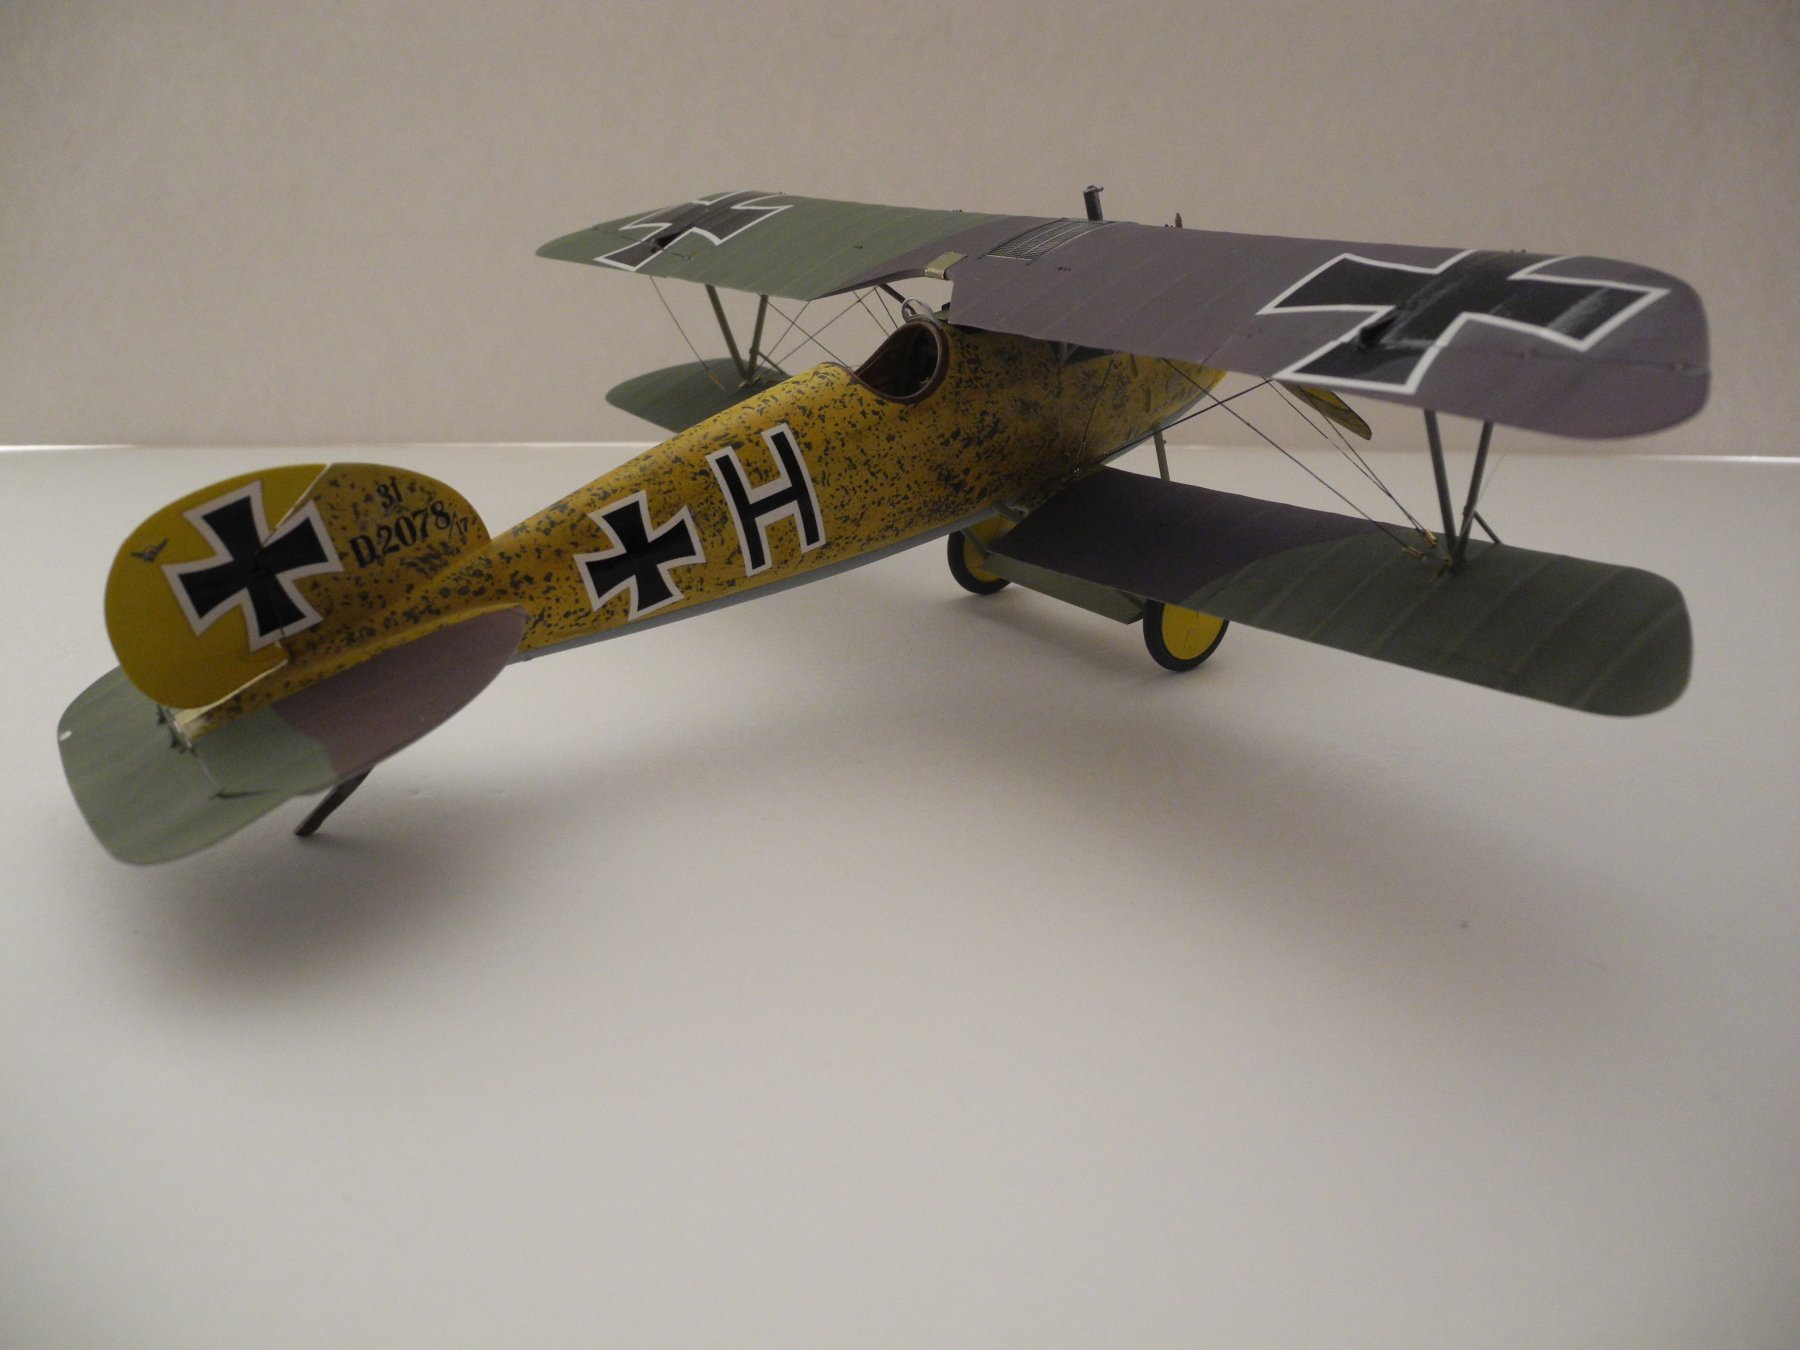
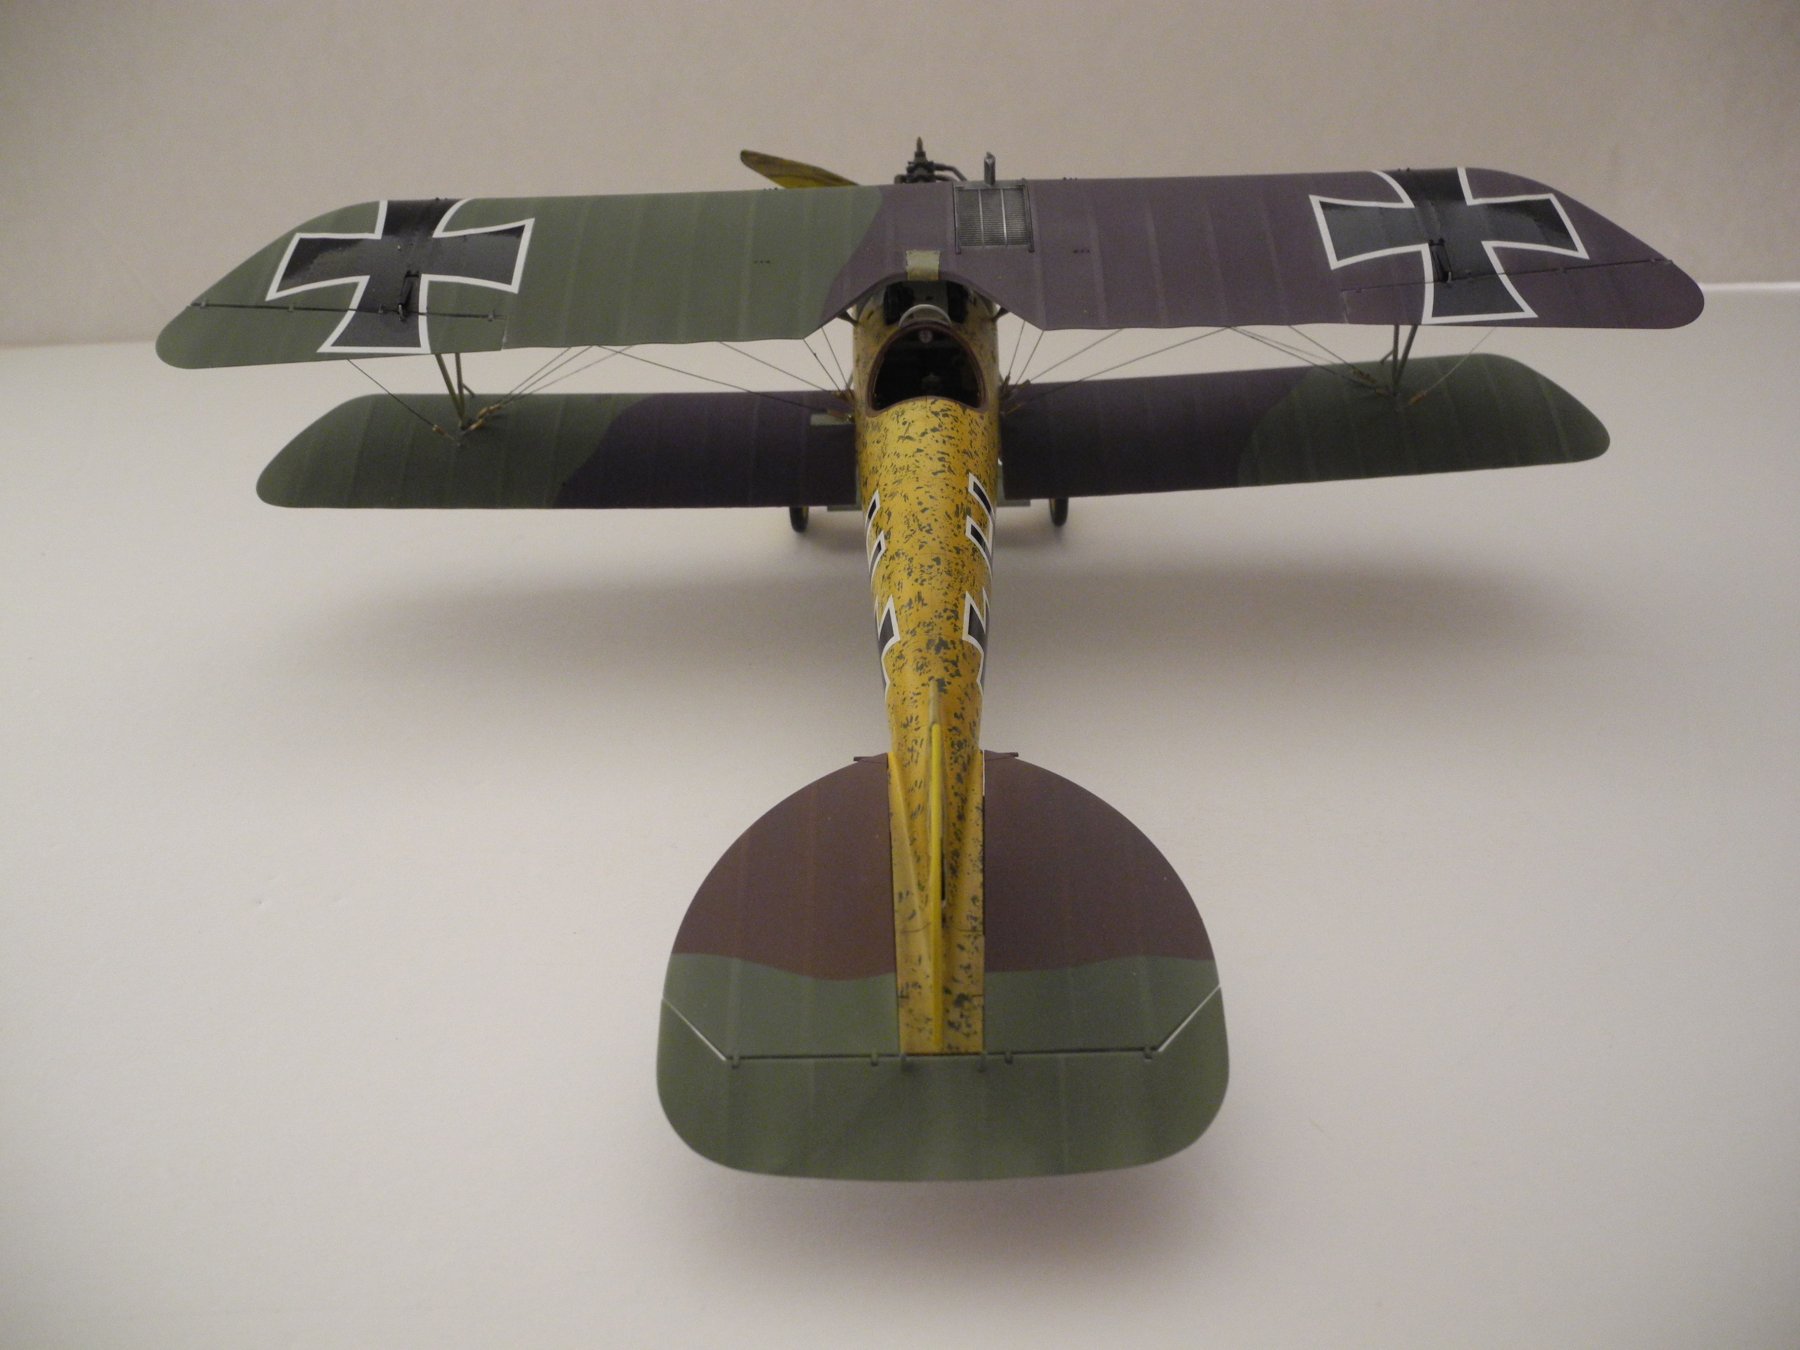
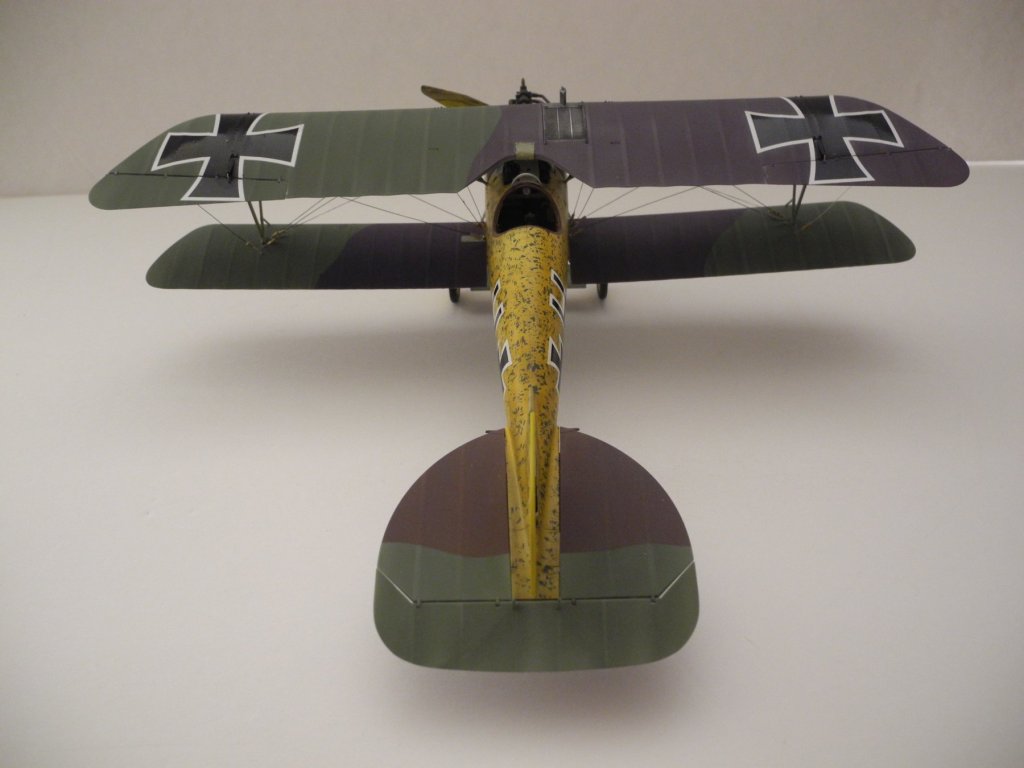
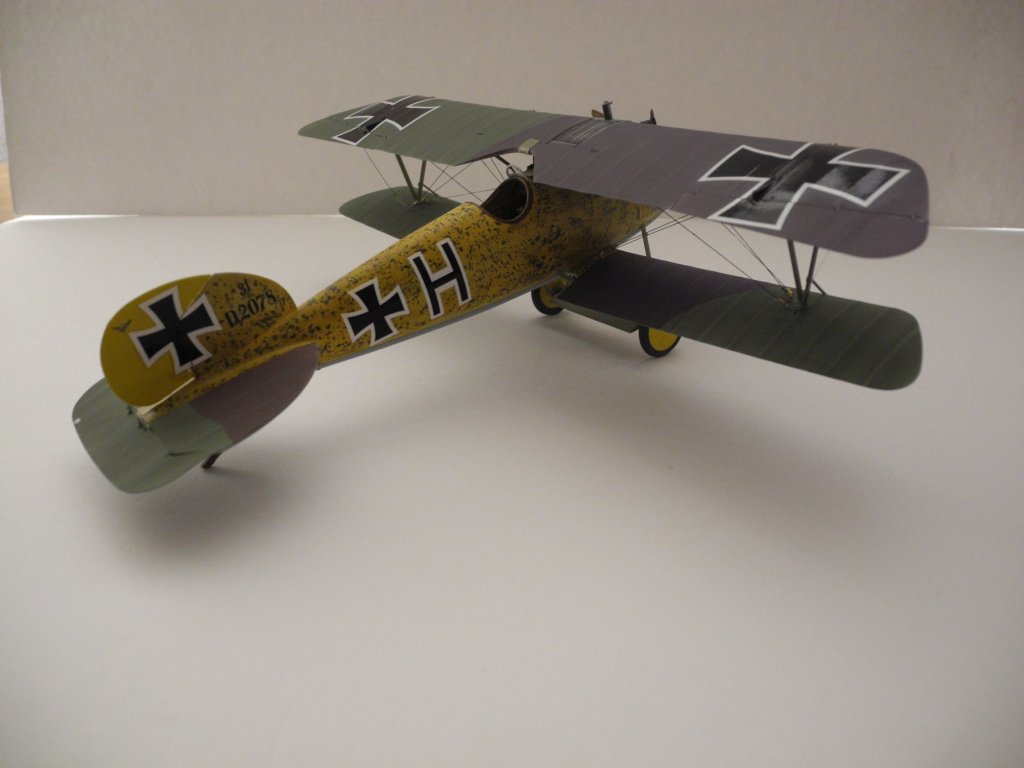
I just realized I failed to post these "final" pictures of the Albatros a few days ago. Three days late, but what the heck.


- 165 replies
-
- 12
-
-
Thanks for the nice comments Lou. I don't know for sure, nothing in my references tell me exactly what that object might be, but I am guessing it's a vent for the radiator and possibly where the coolant was filled. I'll bet vossiewulf knows what it is. Maybe if he looks in, he will tell us.
-
The locomotive is looking very nice, Denis. I am beginning to appreciate how much work goes into an old vintage model like this. A lot of steps involved and it looks like not much is a "drop fit". Of course, this just adds to the modeling pleasure experience in some ways. 🙂