CDW
-
Posts
7,755 -
Joined
-
Last visited
Content Type
Profiles
Forums
Gallery
Events
Everything posted by CDW
-
 Wow, Glen. Our buddy Mike told me about your Iron Clads, but the photos really bring the subject into clear view. Awesome work there! Will this have operable guns as well? Craig
 -
Wow...a stroke of genius. Never let it be said that a 'crappy' idea cannot at the same time be a great idea. 🙂 Excuse me while I head over to Home Depot for some 'hardware'.
-
I have a new Model Shipways Syren US Brig kit for sale. Bought the kit with the full intention of building it myself, but it's going to be too long before I have time to get around to it. Offering this new kit at a substantial savings from the current price of the model. $250 shipped anywhere in the USA except Hawaii or Alaska. Would need a tad more postage for either of those two states. Pictures available on request.
- 1 reply
-
- 1
-

-
I didn't realize you're in New Hampshire. I'm flying up there for a week next month. How's the weather going to be? Probably be a big change from my day to day tropical experience.😵
-
Have a extra $100.00 to spend......
CDW replied to CPDDET's topic in Modeling tools and Workshop Equipment
Wen makes a 1/2" x 18" hand held belt sander. Is that the one you're using? -
Mike Have you ever built one of these R/C models? I would have to learn how to sail it if I built it. I have one (kit). It's old as heck. http://woodenmodelboatkits.com/sterling_models_emma_c_berry_wood_ship_b21m_sailing_schooner_radio_control_kit.htm
-
I never intended to build it R/C, although that's probably the most popular option with a model of this size and hull type. It certainly has all the space one would ever need to equip the boat with R/C gear. Many years ago, in the '70's, I built a Dumas Hydroplane kit that came out real nice. I had intended from the beginning to R/C that model, and equipped it with one of the K&B inboard glow engines it was designed for. By chance, I learned about a nearby pond where R/C boaters raced on the weekends. While I was there, a helicopter flew in and landed. Aboard the helicopter was Bernie Little, the owner of the Miss Budweiser unlimited hydroplane (the 1:1 version, not a model). He just stopped by to watch the R/C boat races. 🙂 Bernie Little was our area Budweiser distributor/owner and a very wealthy guy. At that race, I was rather disappointed to learn how frequently our R/C boats would flip over during the course of a race. A john-boat was an absolute requirement to retrieve the boats before they sank. Instead of racing my boat (which wasn't completely finished installing the R/C gear), I decided I would sell it because it was going to be too much hassle and I wasn't prepared for that. I realize of course, an R/C/ boat like the Calypso would have just a very small chance of capsizing.
-
Keep it very light, misted on coats. Several light coats to cover are better than a heavy coat that bleeds thru.
- 345 replies
-
- 5
-
-
- graf zeppelin
- trumpeter
- (and 2 more)
-
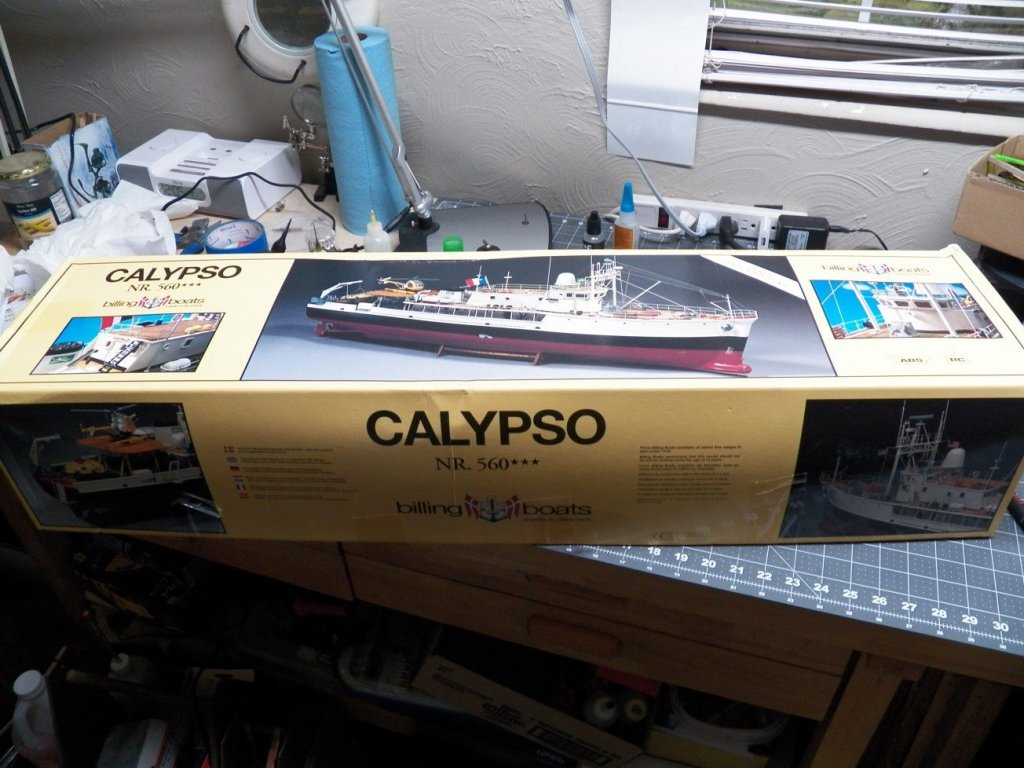
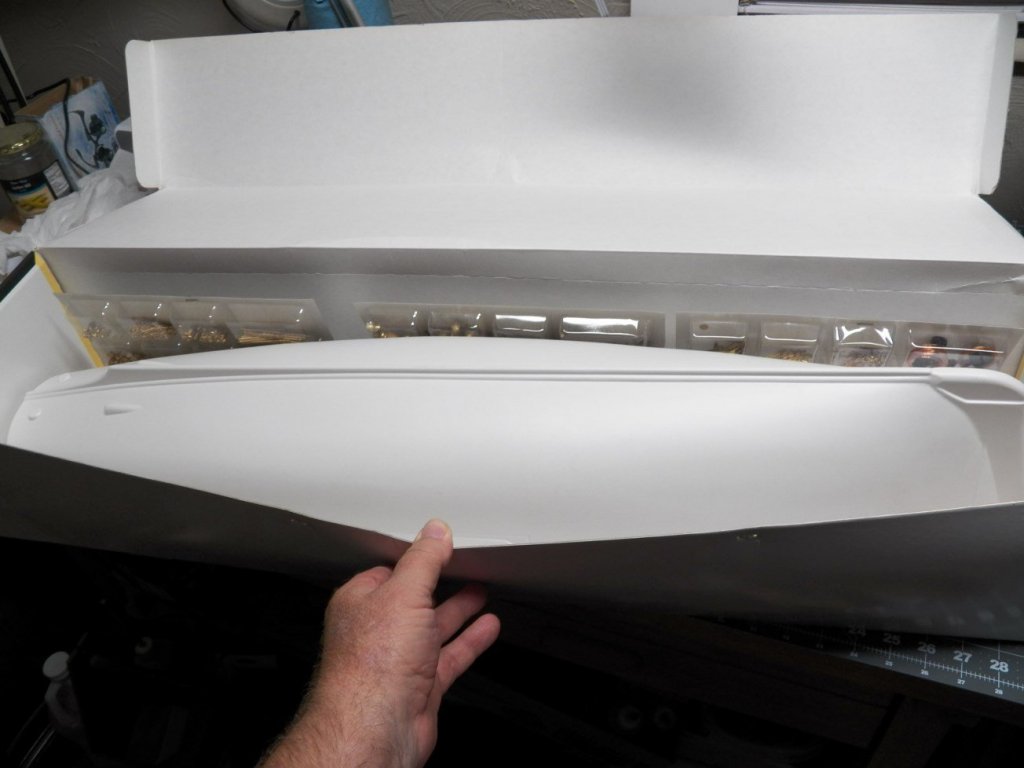
No Longer Available For sale is this Billing Calypso ship kit, complete and unstarted. Offering it here on MSW for a mere or, if you would rather, you can buy it from Ages of Sail for 😕 (just kidding, I know you don't want to do that). And I seriously doubt the new re released kits have all these beautiful brass parts. I hate to part with this kit, but I know it's something I just won't get around to building anytime in the foreseeable future.
-
I got bleed-thru on my USS Essex carrier deck when I masked and painted the ship numbers on fore and aft ends of the deck. In retrospect, I could have first spraying a coat of flat clear, let it dry, then applied the black numbers. I think this would have prevented any bleed-thru that could be seen. Secondly, maybe should have reduced the paint a little less. In any case, the wooden deck acts as a wick to pull the paint under the masking.
- 345 replies
-
- 4
-
-
- graf zeppelin
- trumpeter
- (and 2 more)
-
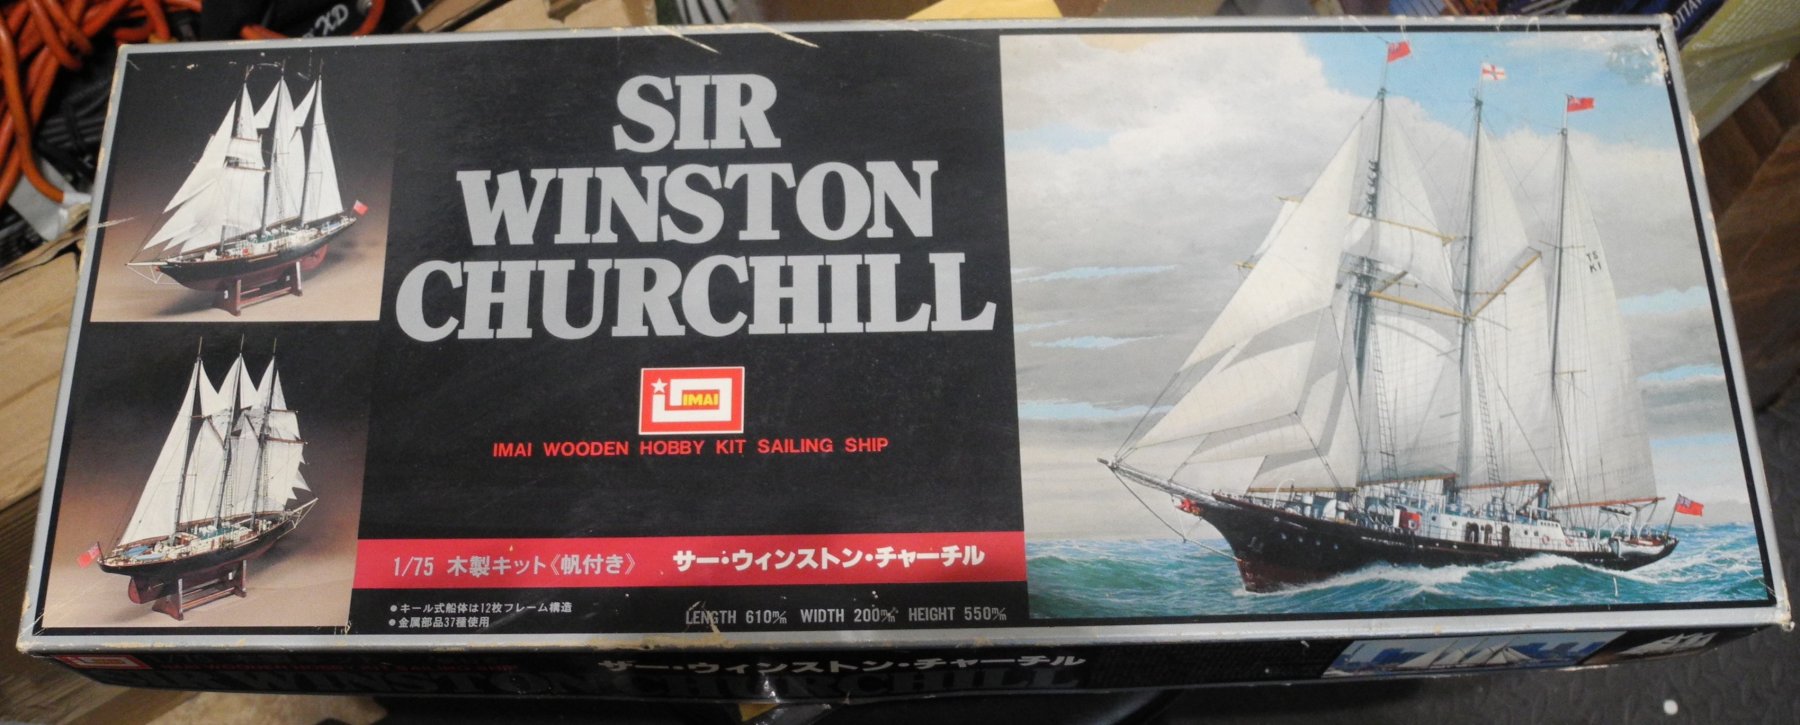
No Longer Available For sale is this 1:75 IMAI Sir Winston Churchill wooden model ship kit. This is the same kit as the Woody Joe label, but sold by IMAI (I presume at an earlier date than Woody Joe). Contents of kit are pristine, virgin, and unmolested. I am offering this kit here on MSW at a much lower price than you can buy it from Japan (Woody Joe). Will sell it as a shipped price to any address in the lower 48 states of the USA for If no one shows an interest to buy it here within the next few days, off it will go to Ebay at a considerably higher price to offset my fees and hassles there. Grab it while you can. A gorgeous kit. Will provide additional pictures of contents if needed, but everything is secured in it's original packaging inside. Payment by Paypal, please.

-
- 1
-
-
I'm pretty sure that's the same History Channel show I watched about the theft of the General.
-
Was it an auction or a buy-it-now price? Sometimes, guys are asking for prices they will never get. I sure as heck wouldn't pay $700 for one of these.
-
Yeah, you could use these, Greg. They would be right up your alley. That Akagi has got your name written all over it.
-
Wow, beautiful models. No, I have never bought anything from them, but maybe I will after looking at their products.
-
Both DD's sold to Sean. Thanks Sean!
-
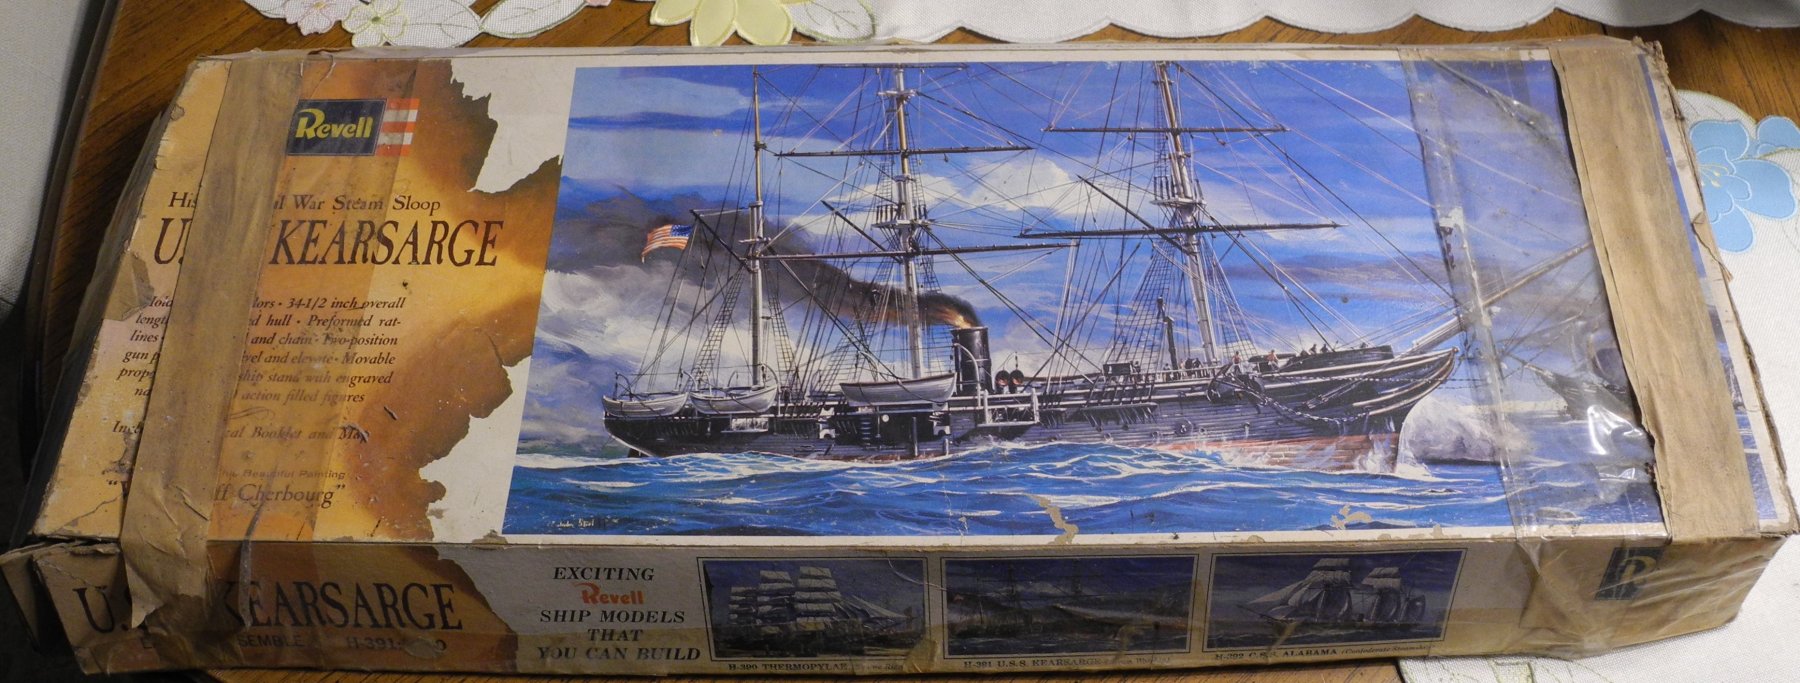
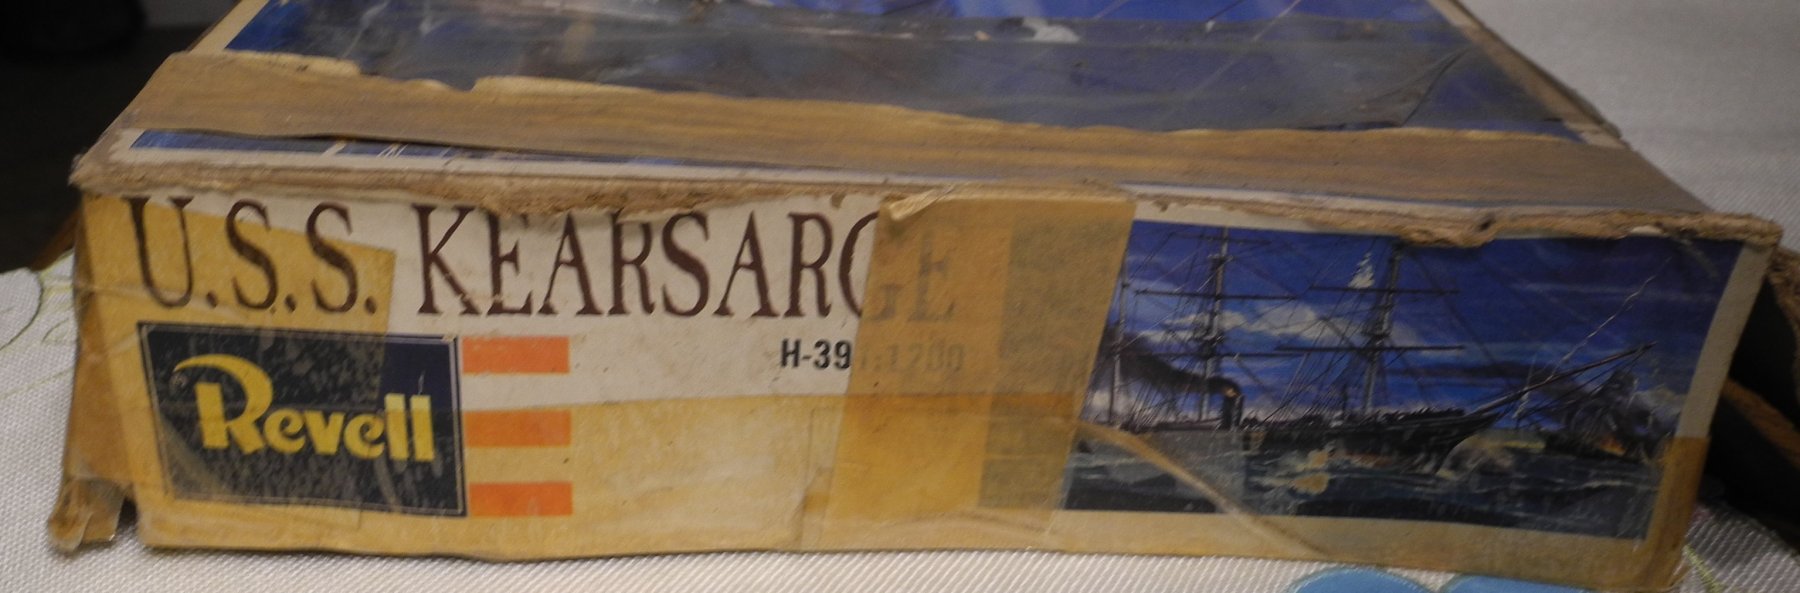
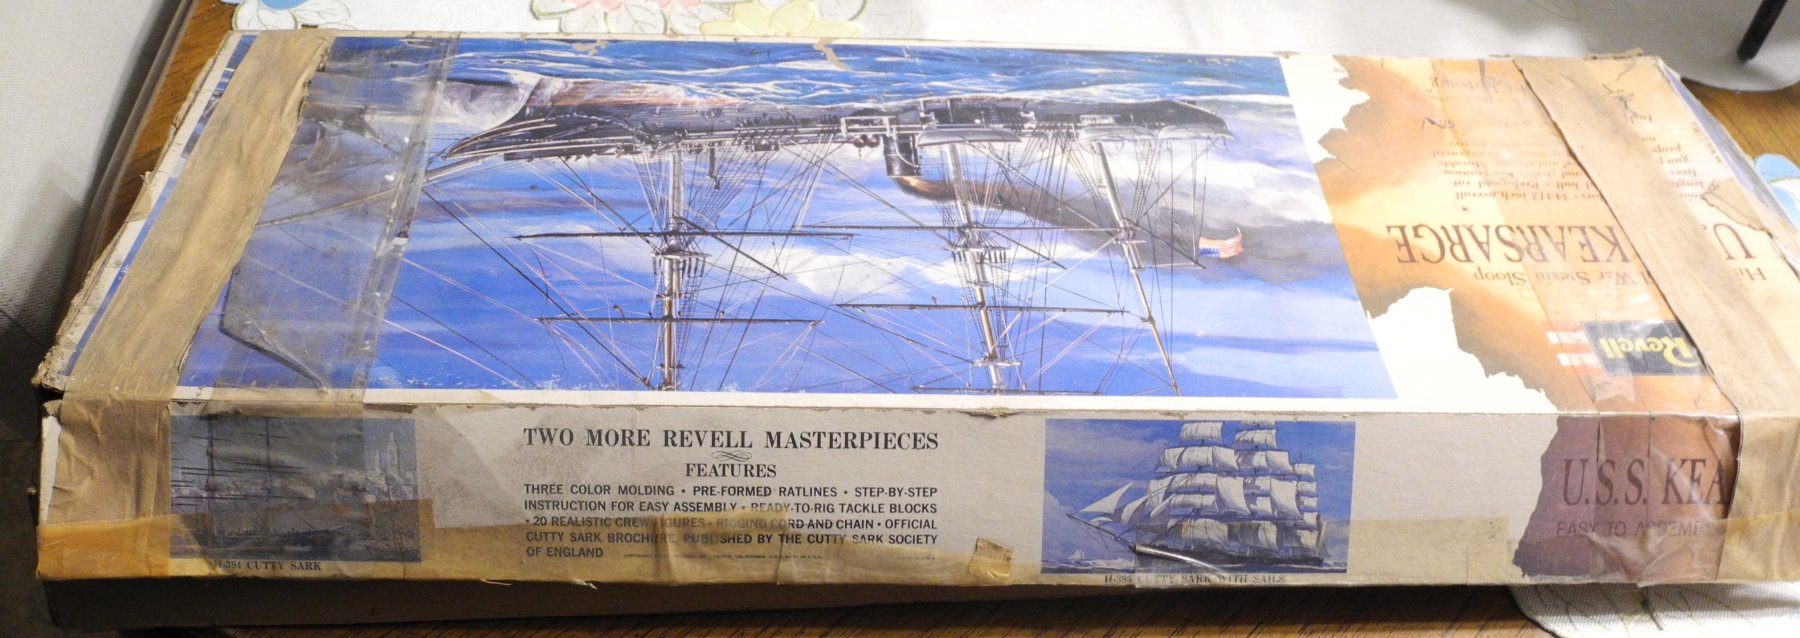
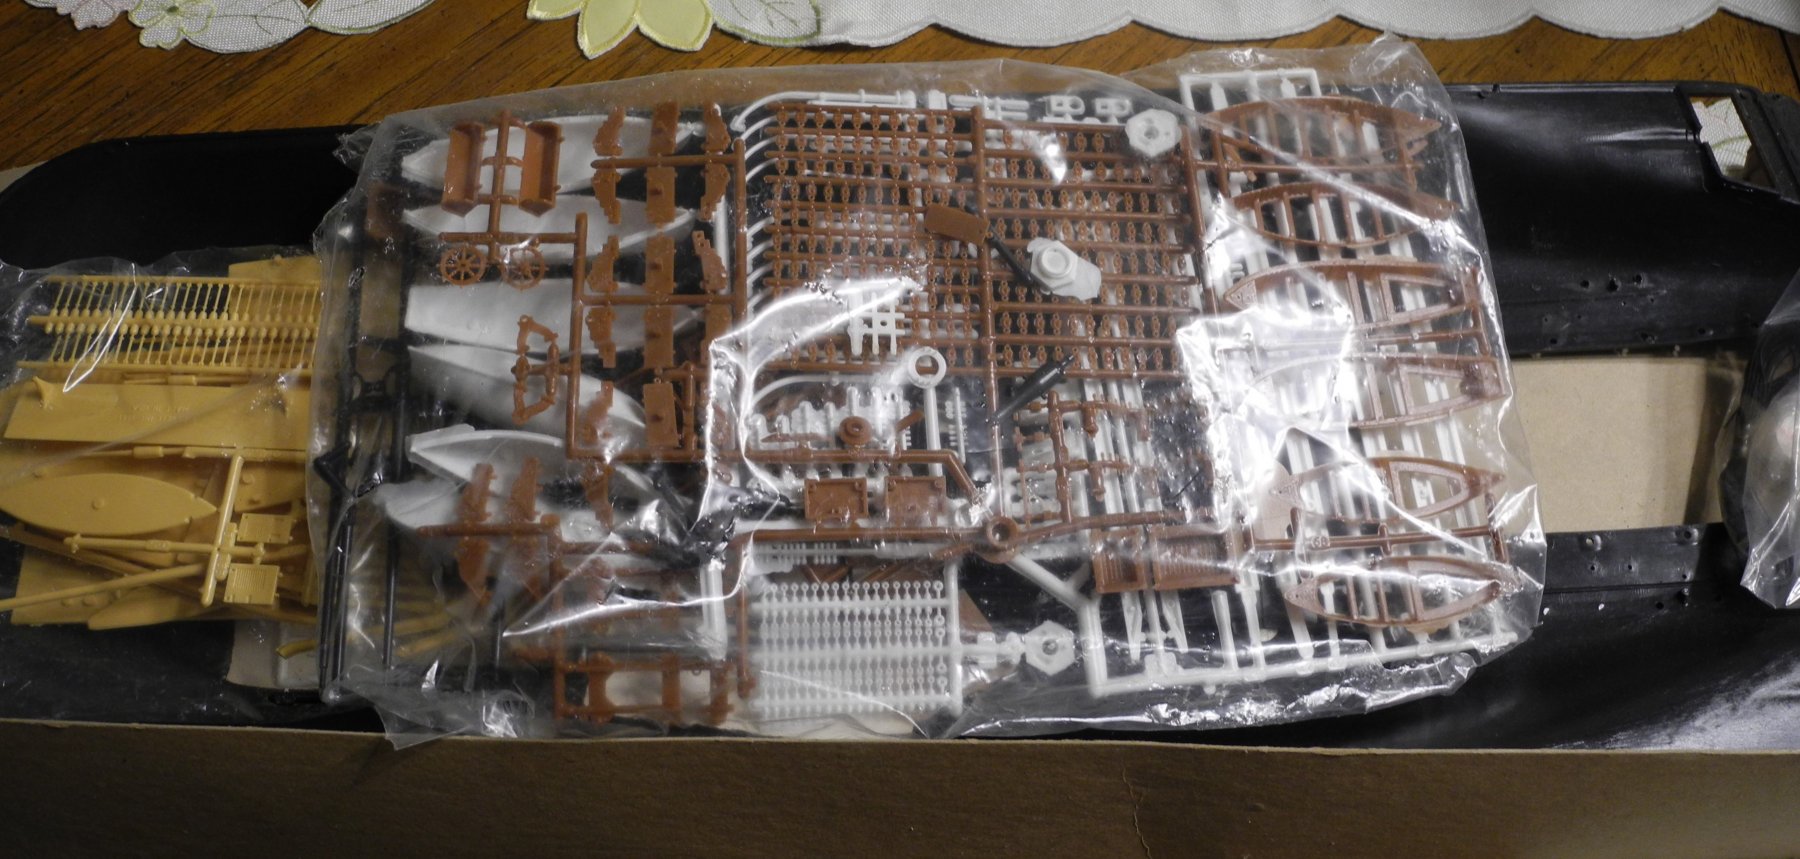
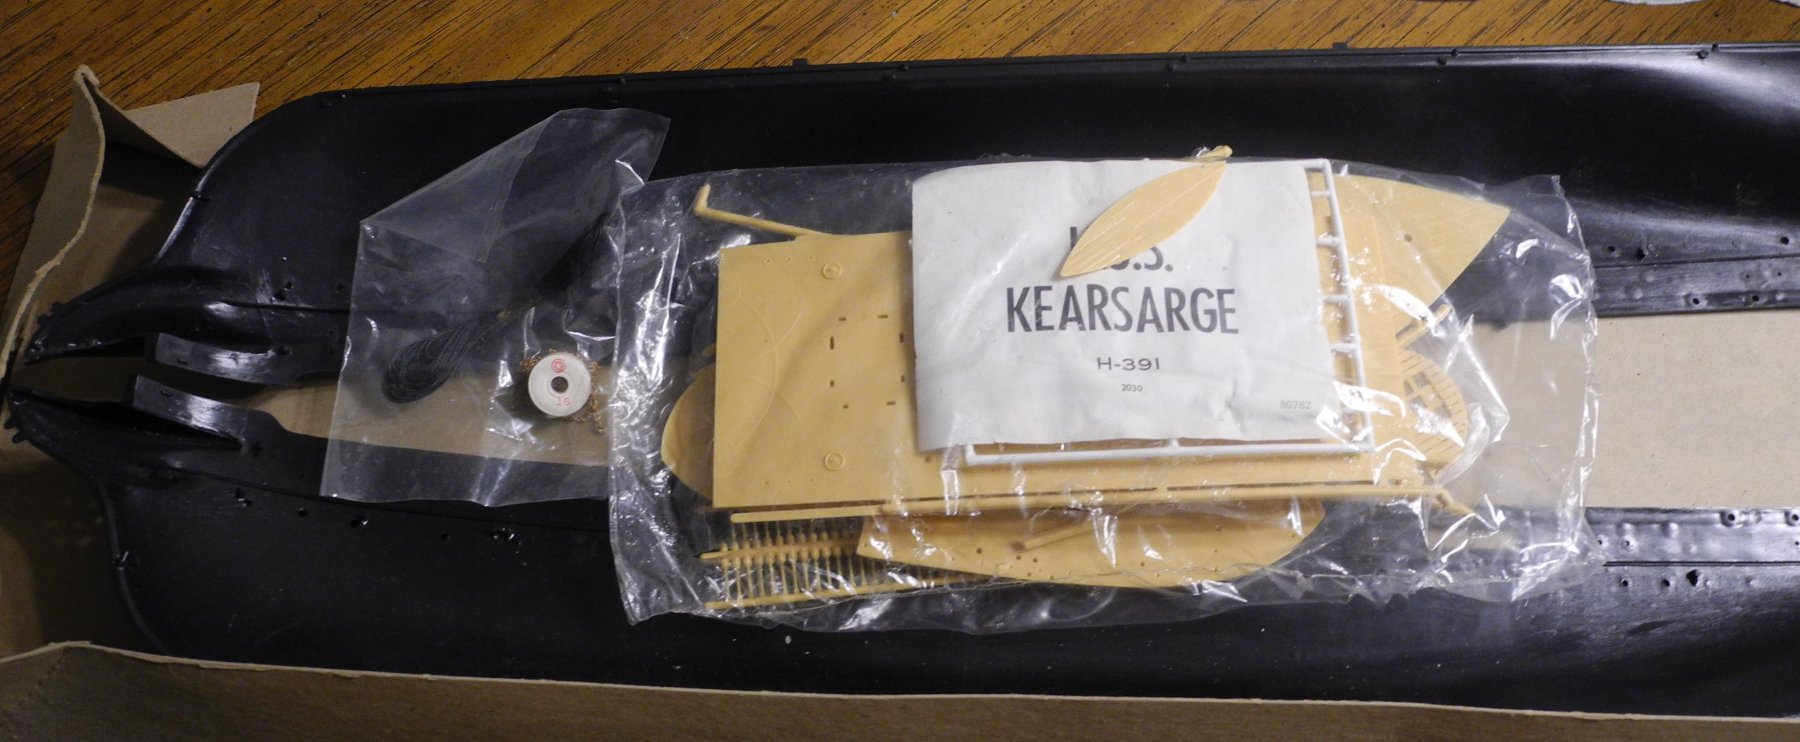
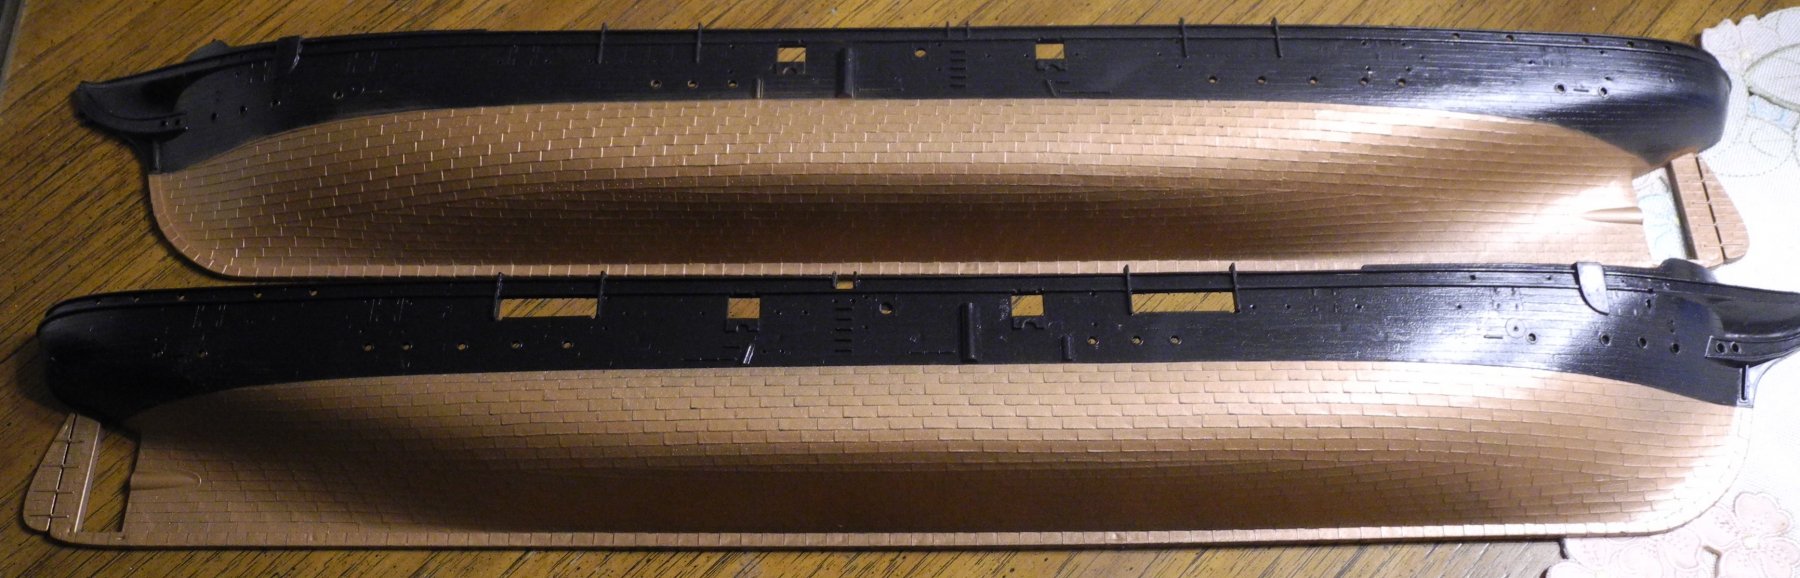
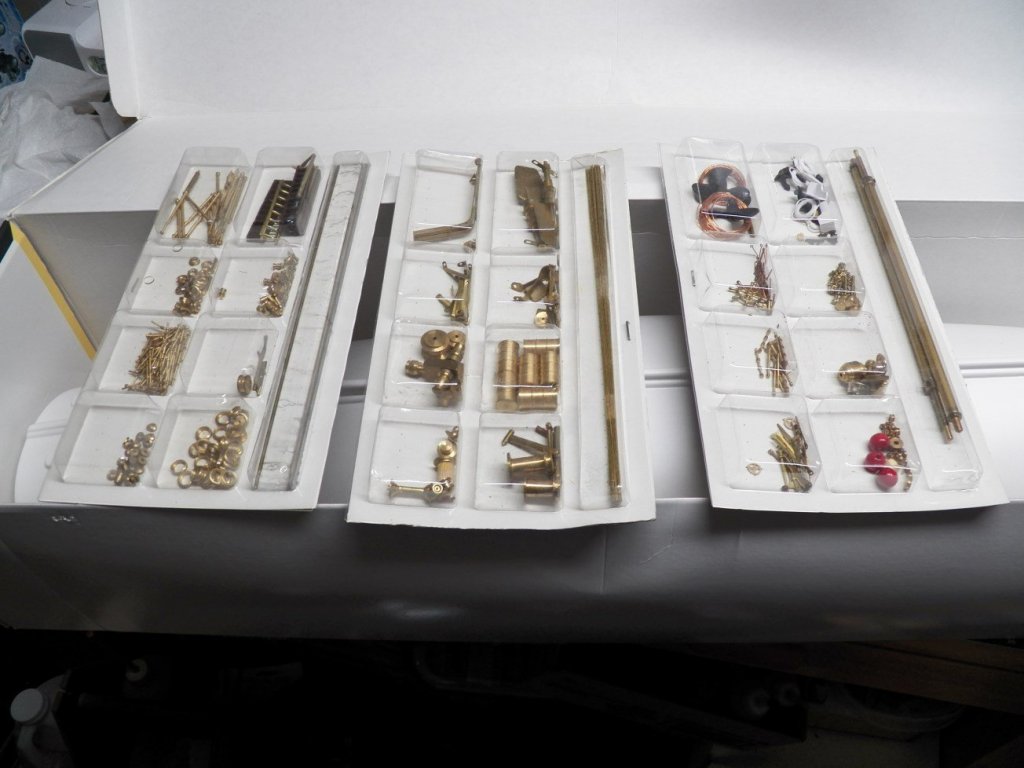
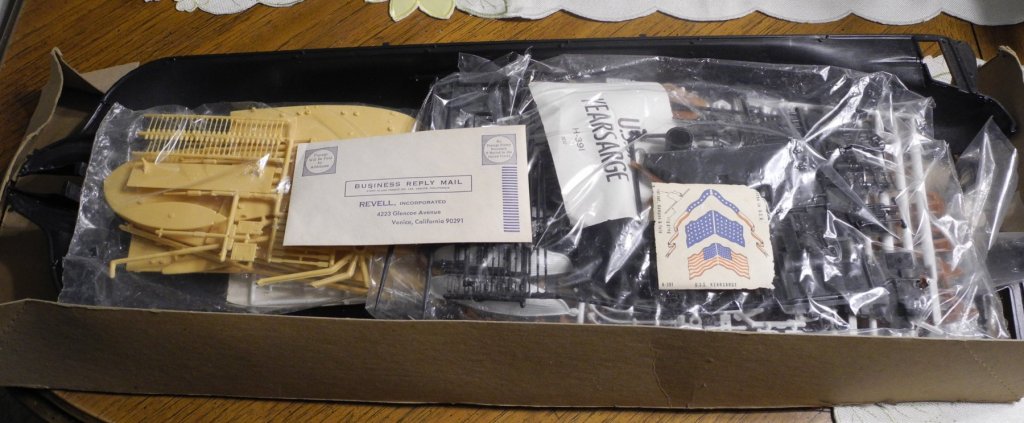
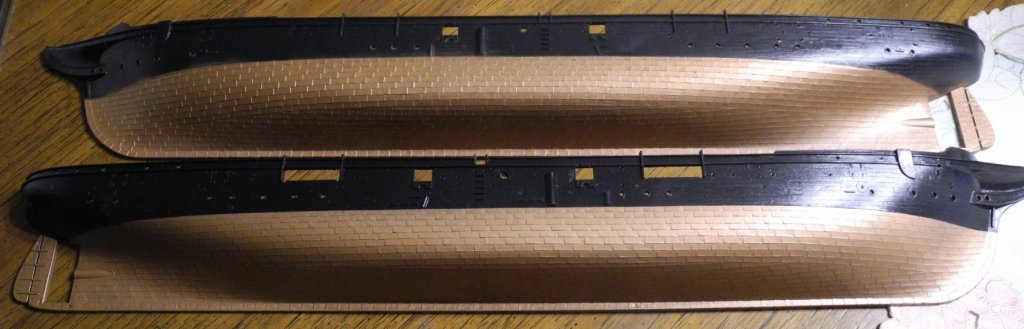
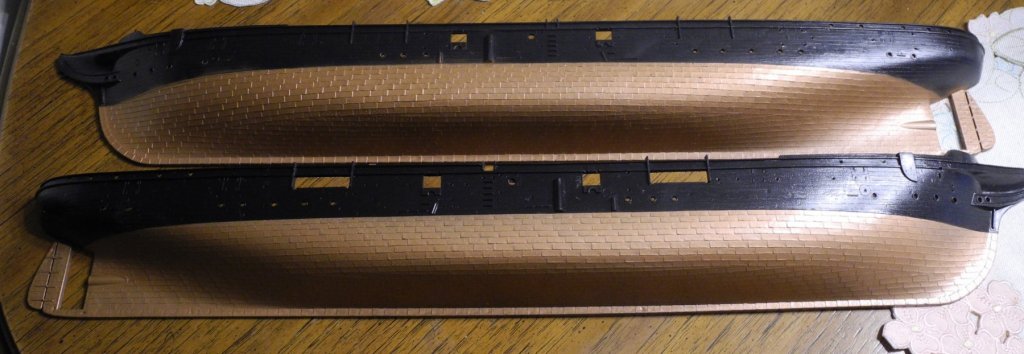
This will be my place holder for when I begin my build for the early 1960's vintage 1:96 Revell Kearsarge. The kit box has seen the ravages of time and is collapsed. However, I am fortunate the contents are still sealed in the original plastic bags intact. There are several things noteworthy about this particular model... **the first thing that catches my eye is how much better the plastic parts look when I compare them with more modern releases of other 1:96 Revell ship kits. It shows how good those molds were when they first came out. **the parts are molded in multiple colors of plastic **the hull halves came pre painted/copper clad from Revell **note how straight the hull halves are. when dry fitted, it's a much more perfect fit than modern releases of similar Revell ship models. requires little - no pressure at all for the halves to fit tightly together. My kit instructions were never in the kit (when I first received it). I will have to rely on the CSS Alabama instructions to some degree to determine what goes where if that is possible. Anyway, I promised some fellows pictures of the Revell USS Kearsarge kit, and here they are.


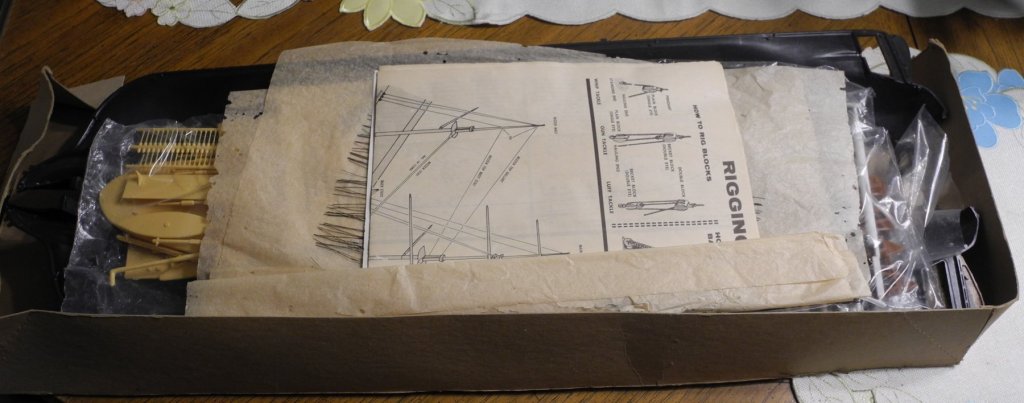
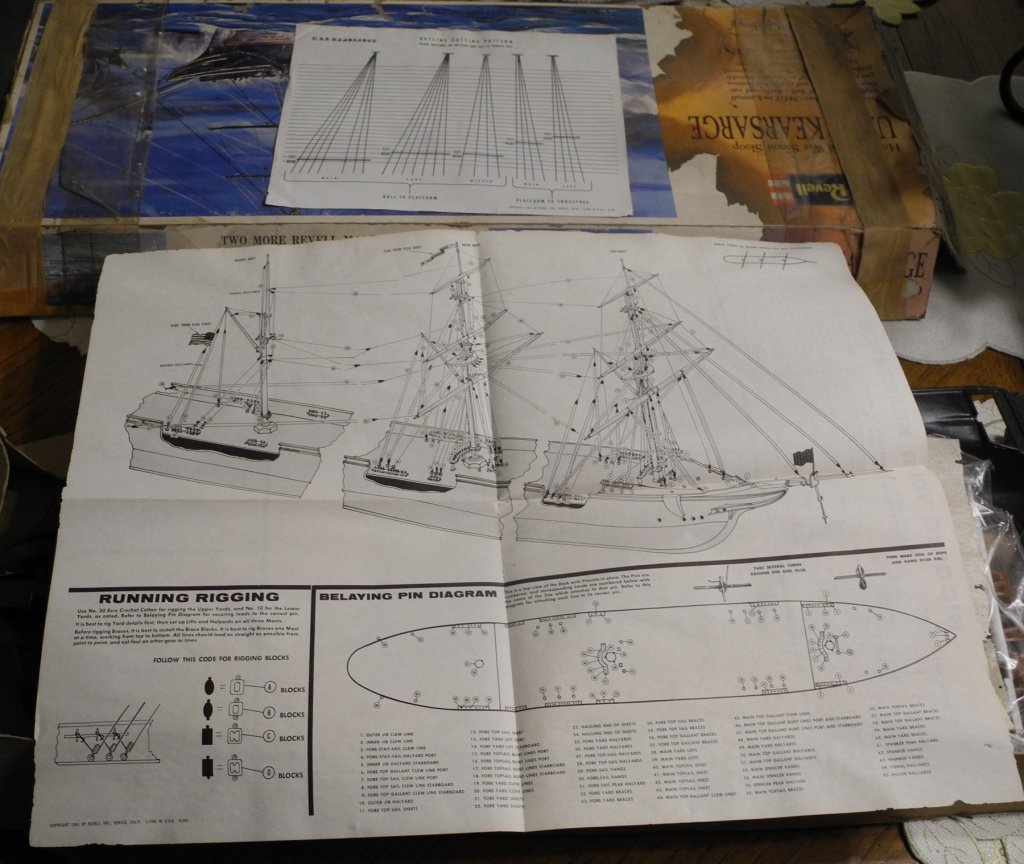

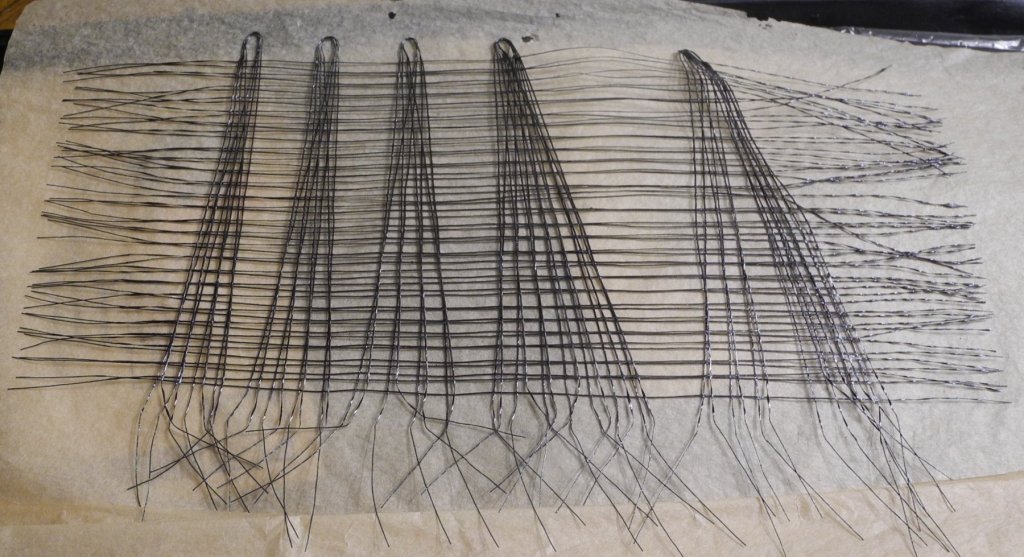


- 27 replies
-
- 12
-
-
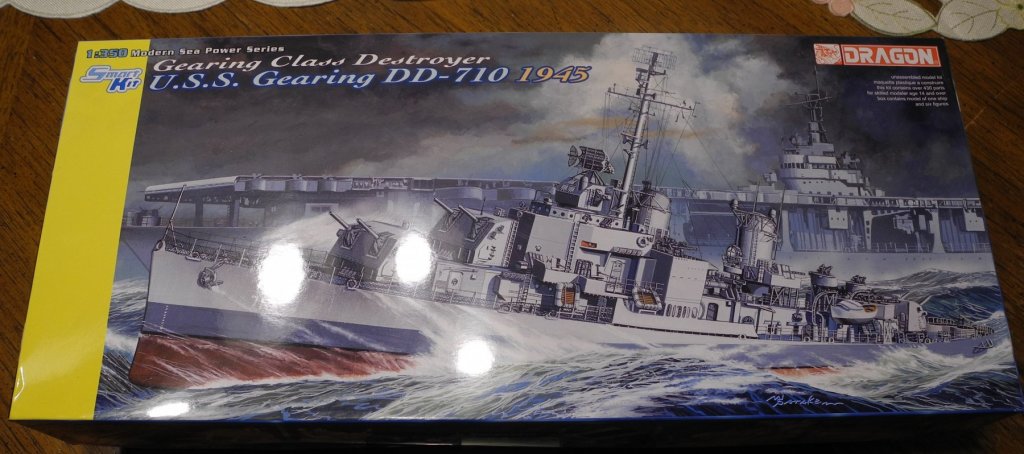
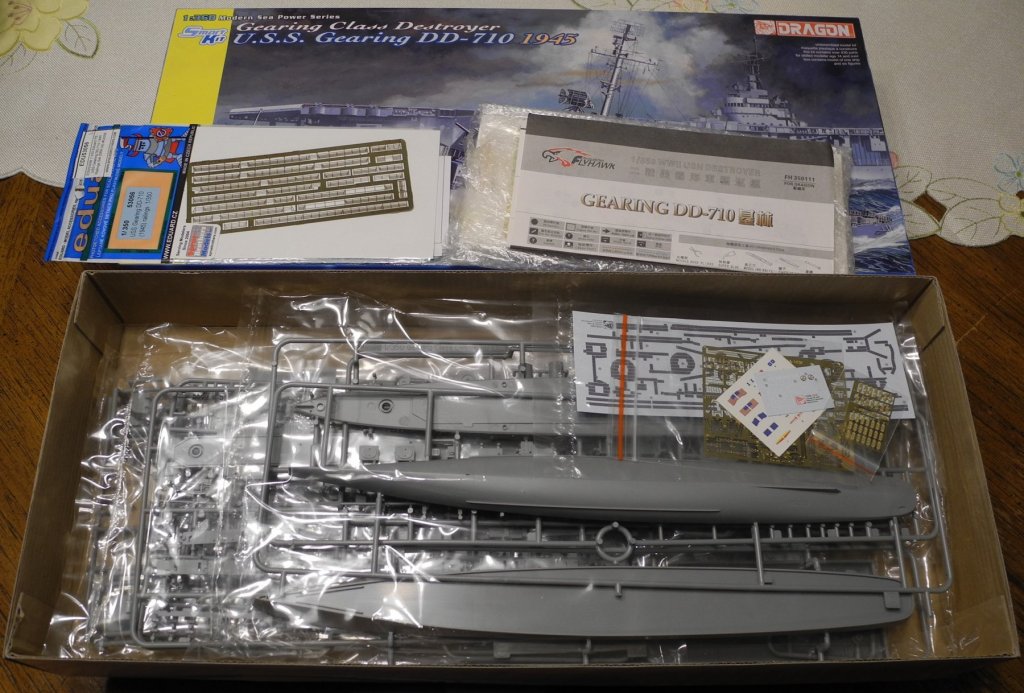
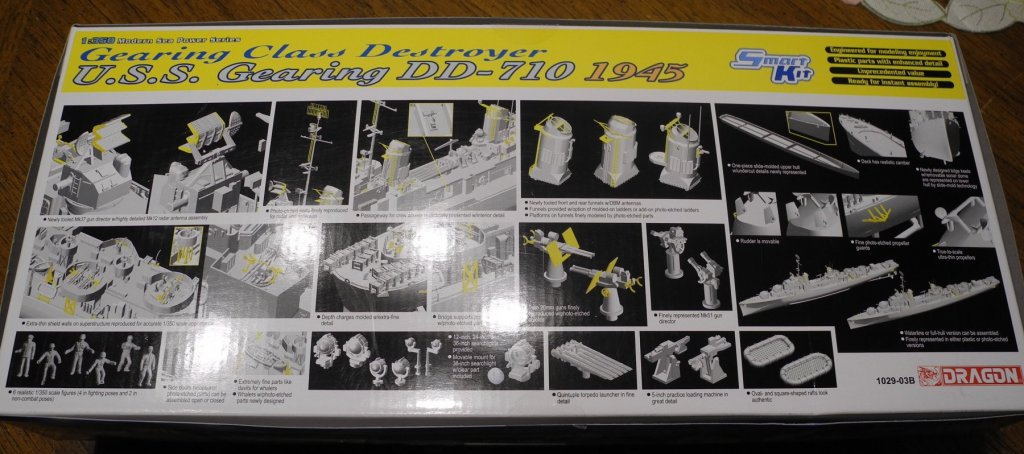
SOLD 1:350 Dragon Models USS Gearing DD-710 SOLD 1:350 Dragon Models USS Gearing DD-710 Smart Kit 1:350 Flyhawk photo Etch Update Set 1:350 Eduard Photo Etch Set Shipping cost to an address in the USA = $8 (if it's less, I will refund the difference) $50 SOLD SOLD SOLD
-
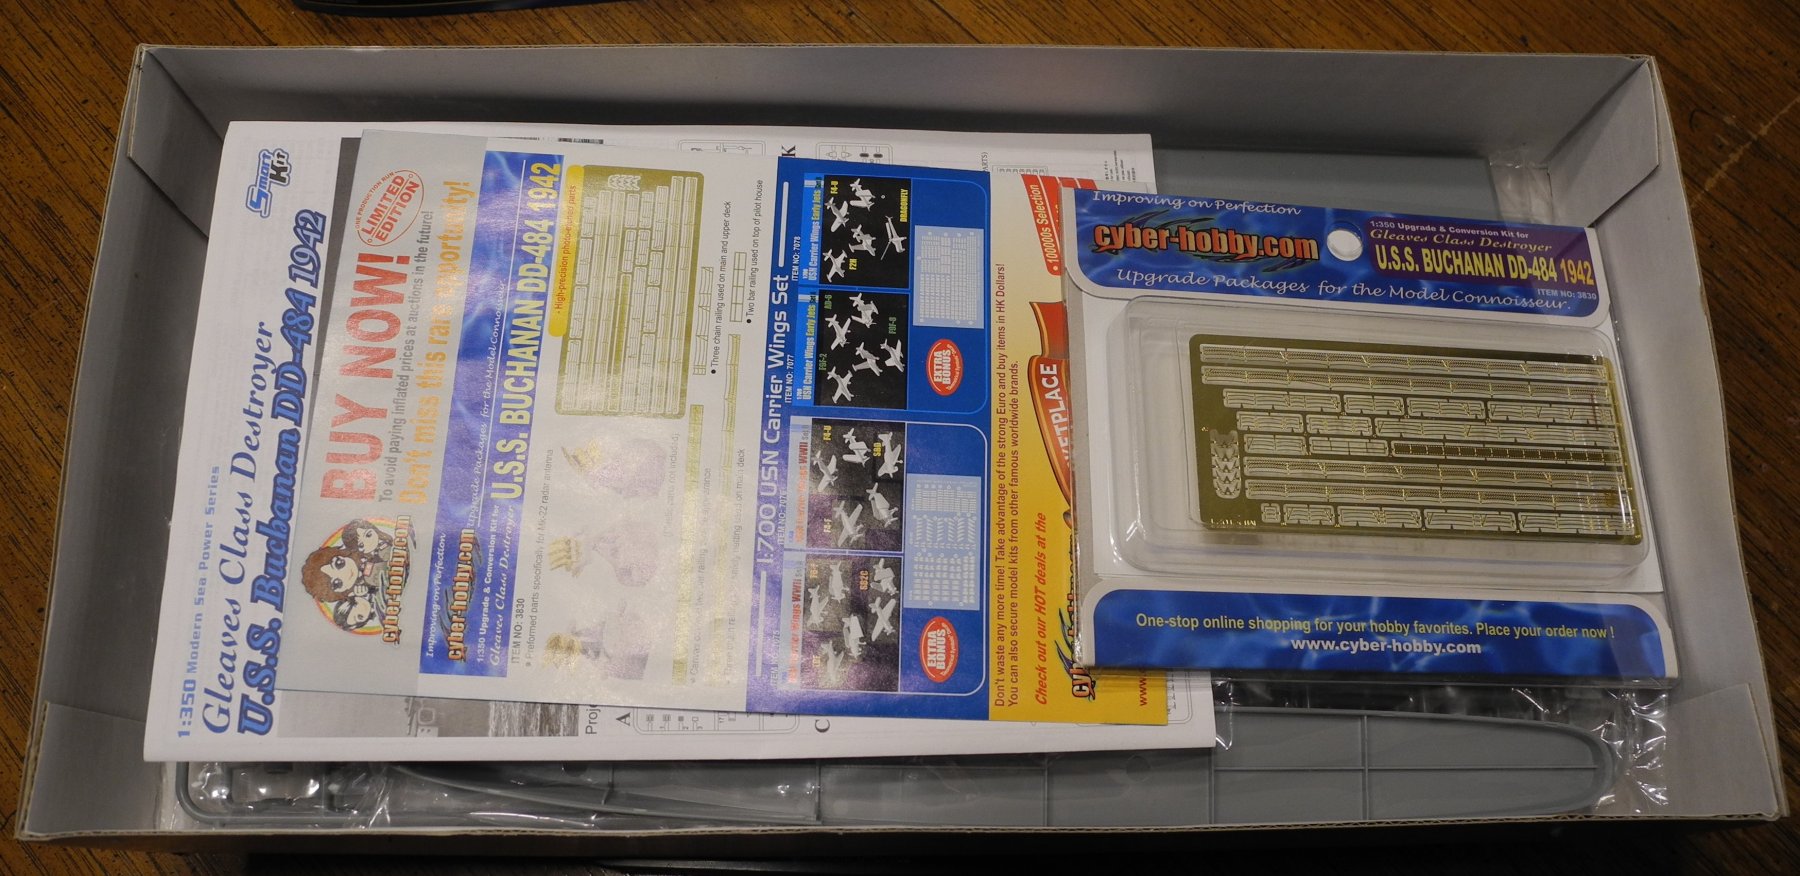
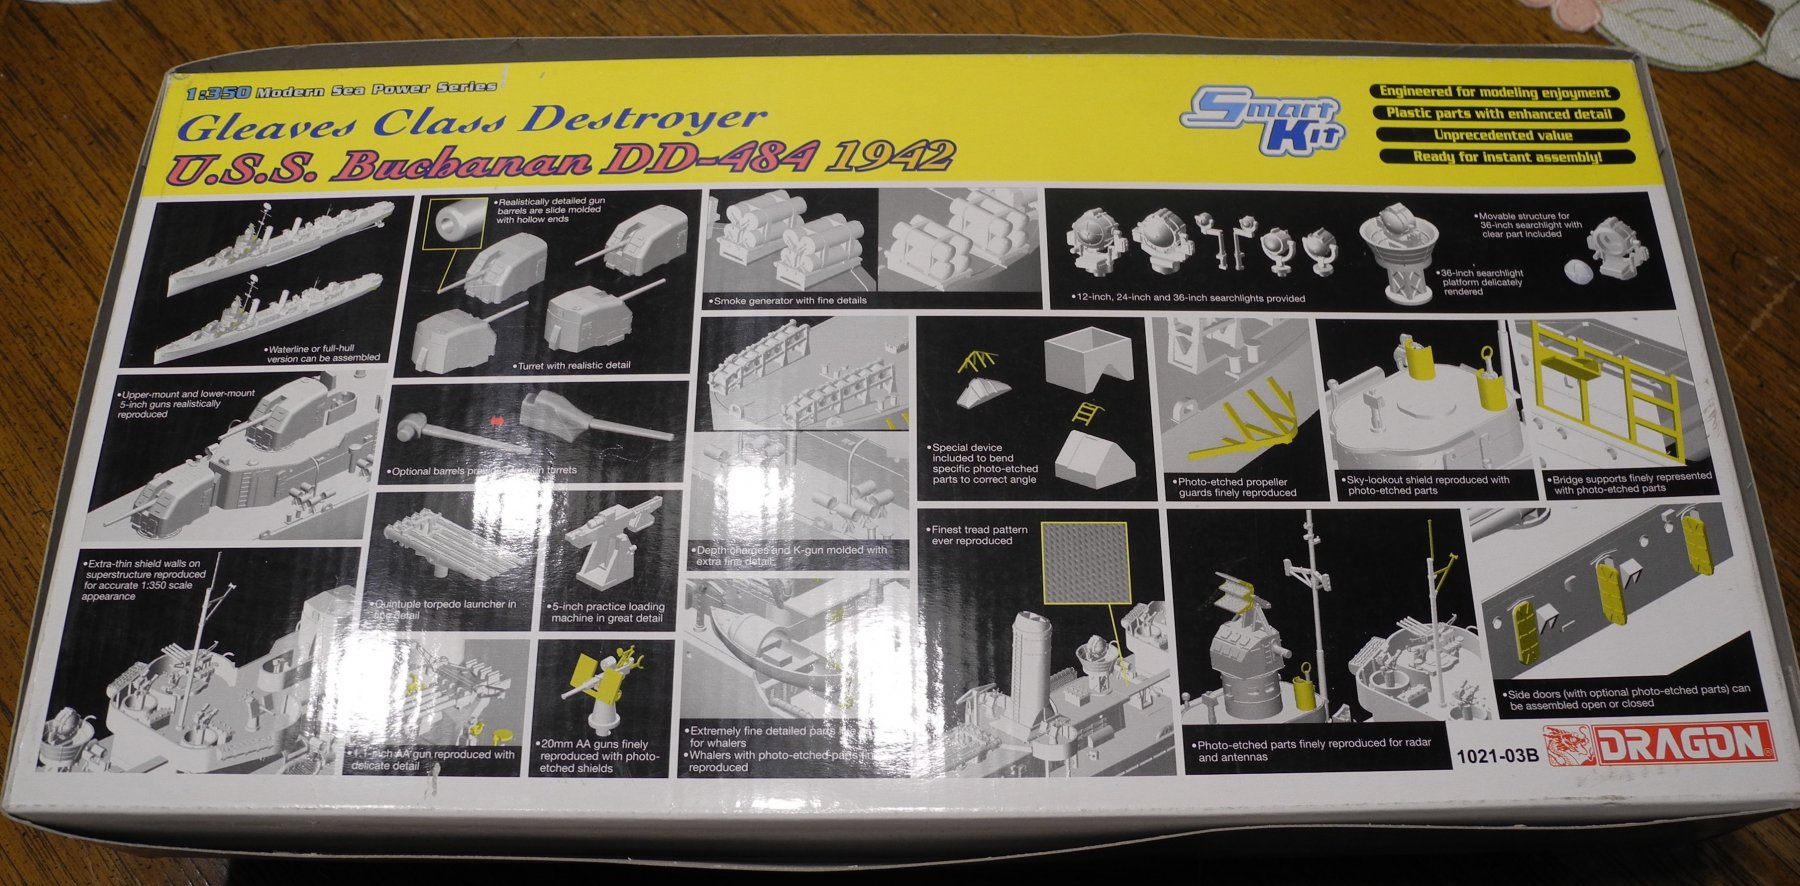
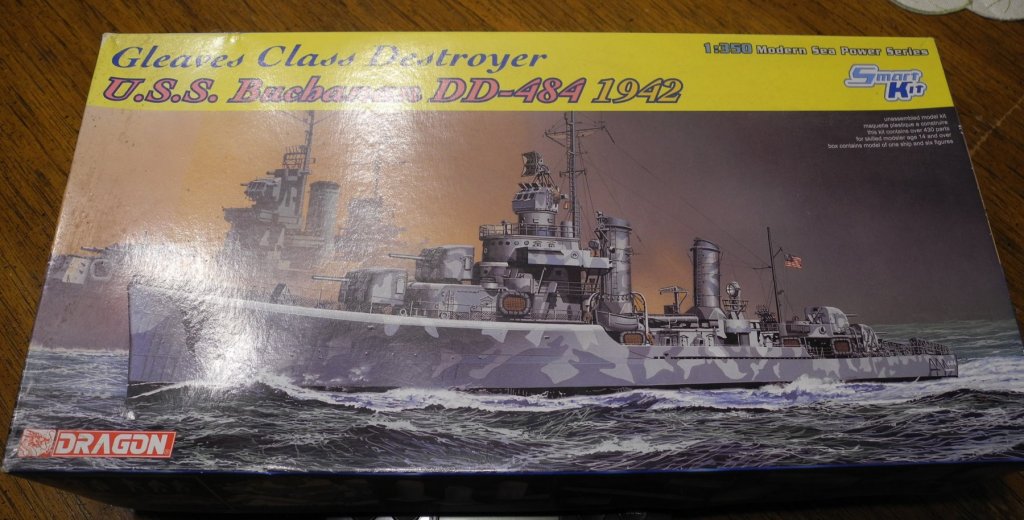
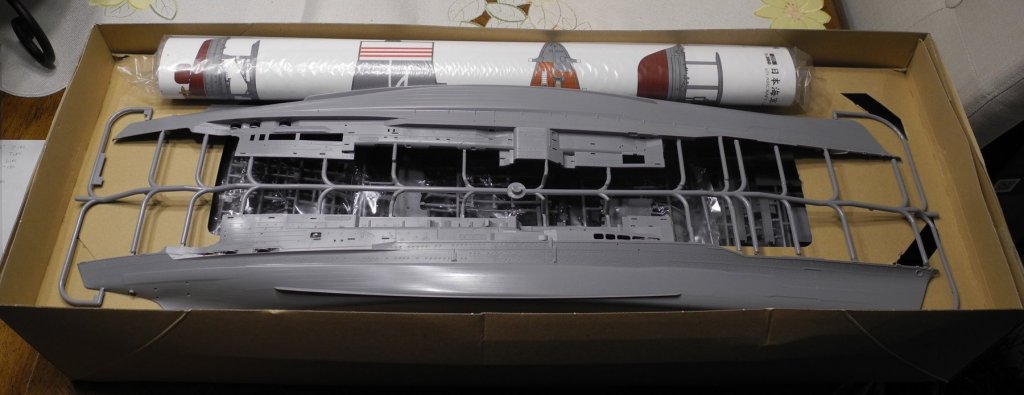
SOLD 1:350 Dragon Models USS Buchanon DD-484 Smart Kit SOLD Comes with a small CyberHobby extra photo etch sheet seen in pictures Shipping cost to an address in the USA = $8 (if it's less, I will refund the difference) $25 SOLD SOLD SOLD


-
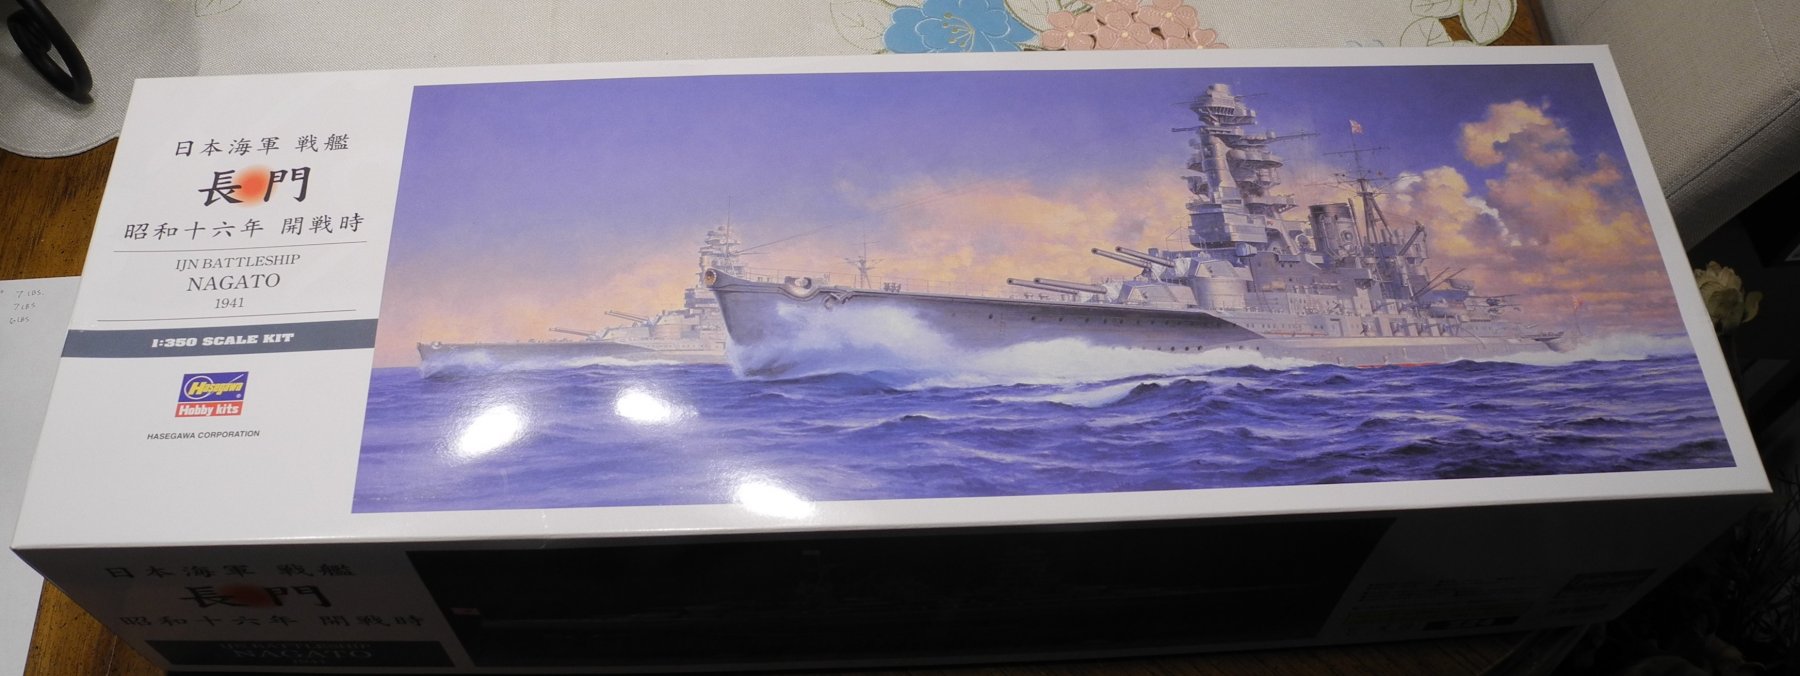
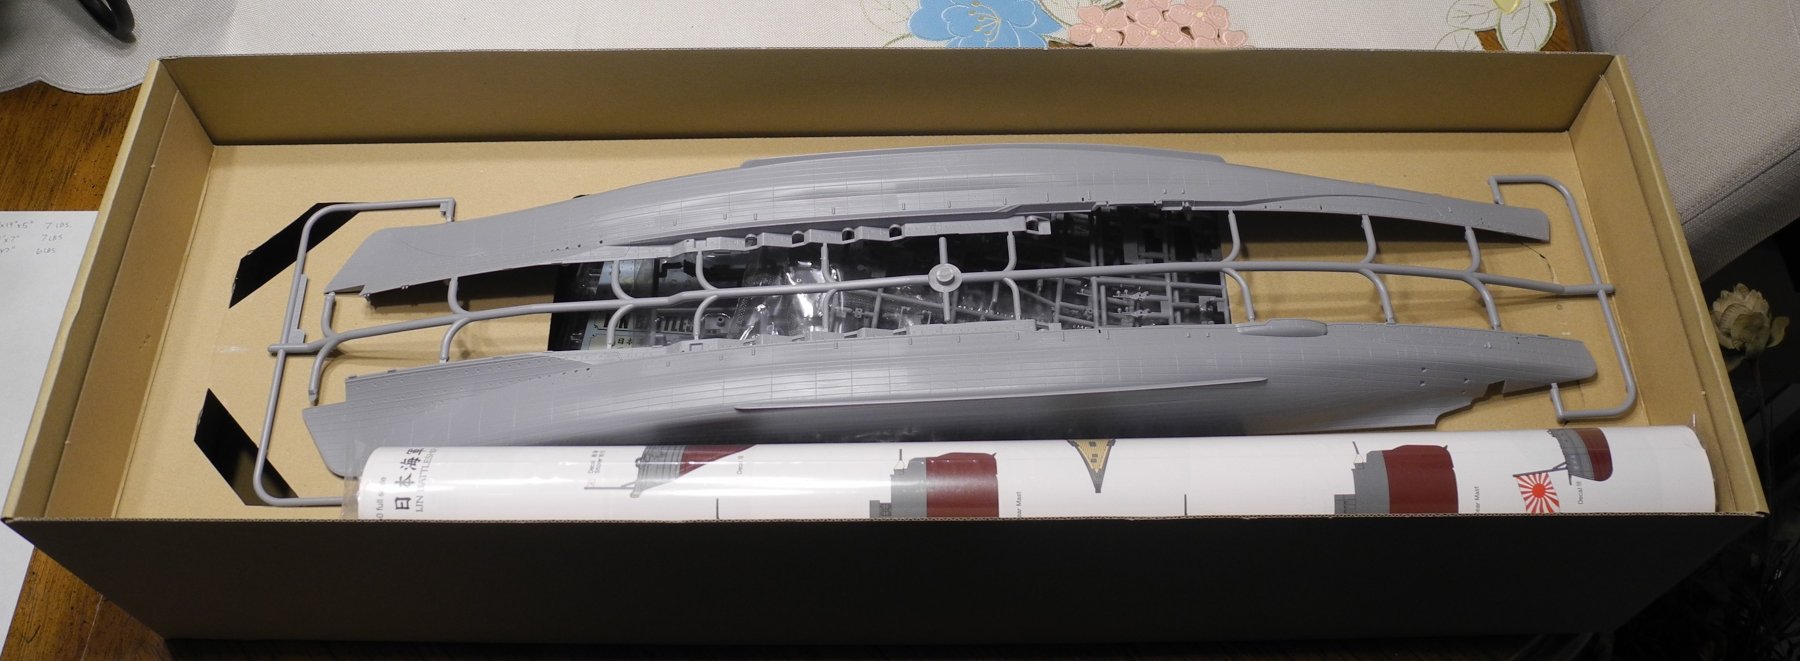
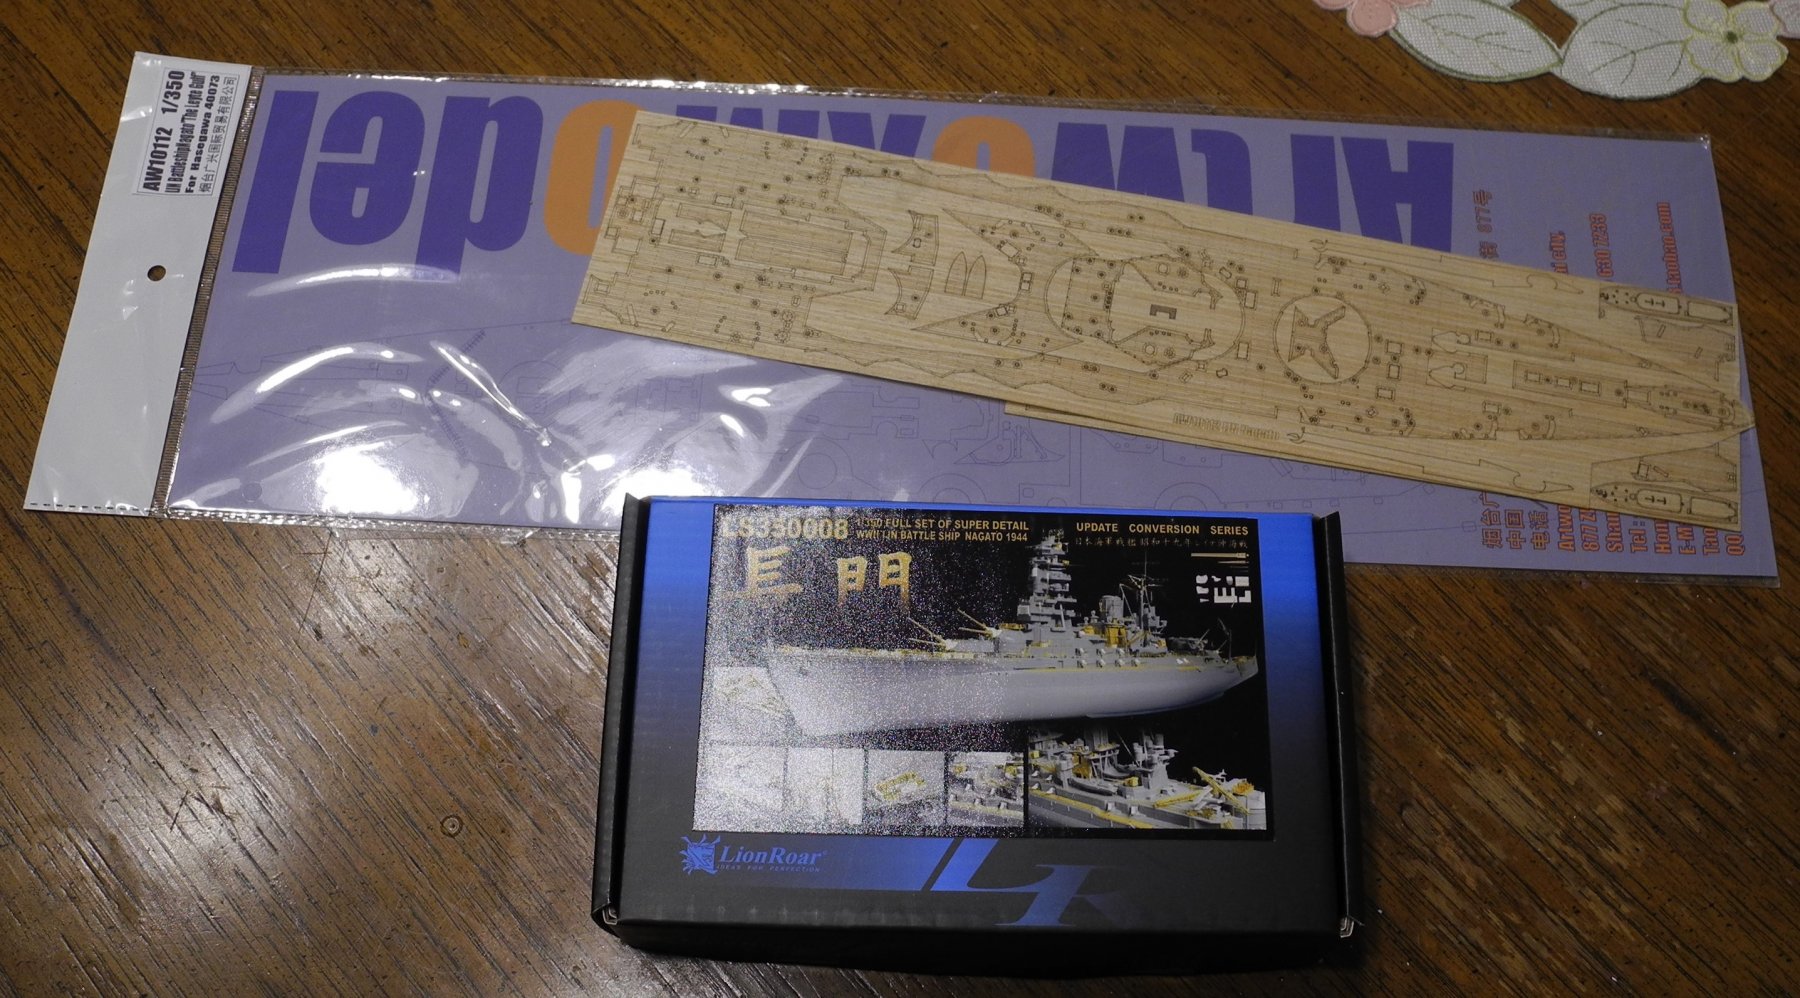
No longer available 1:350 IJN Nagato Battleship Set This set includes the following: 1:350 Hasegawa IJN Nagato Kit number 40024 1:350 Artwox Nagato Wooden Deck AW101112 1:350 Lion Roar Nagato Super Update Set LS350008 Shipping Box Size is: 30" x 10" x 7" Shipping Weight is: 7 lbs.


-
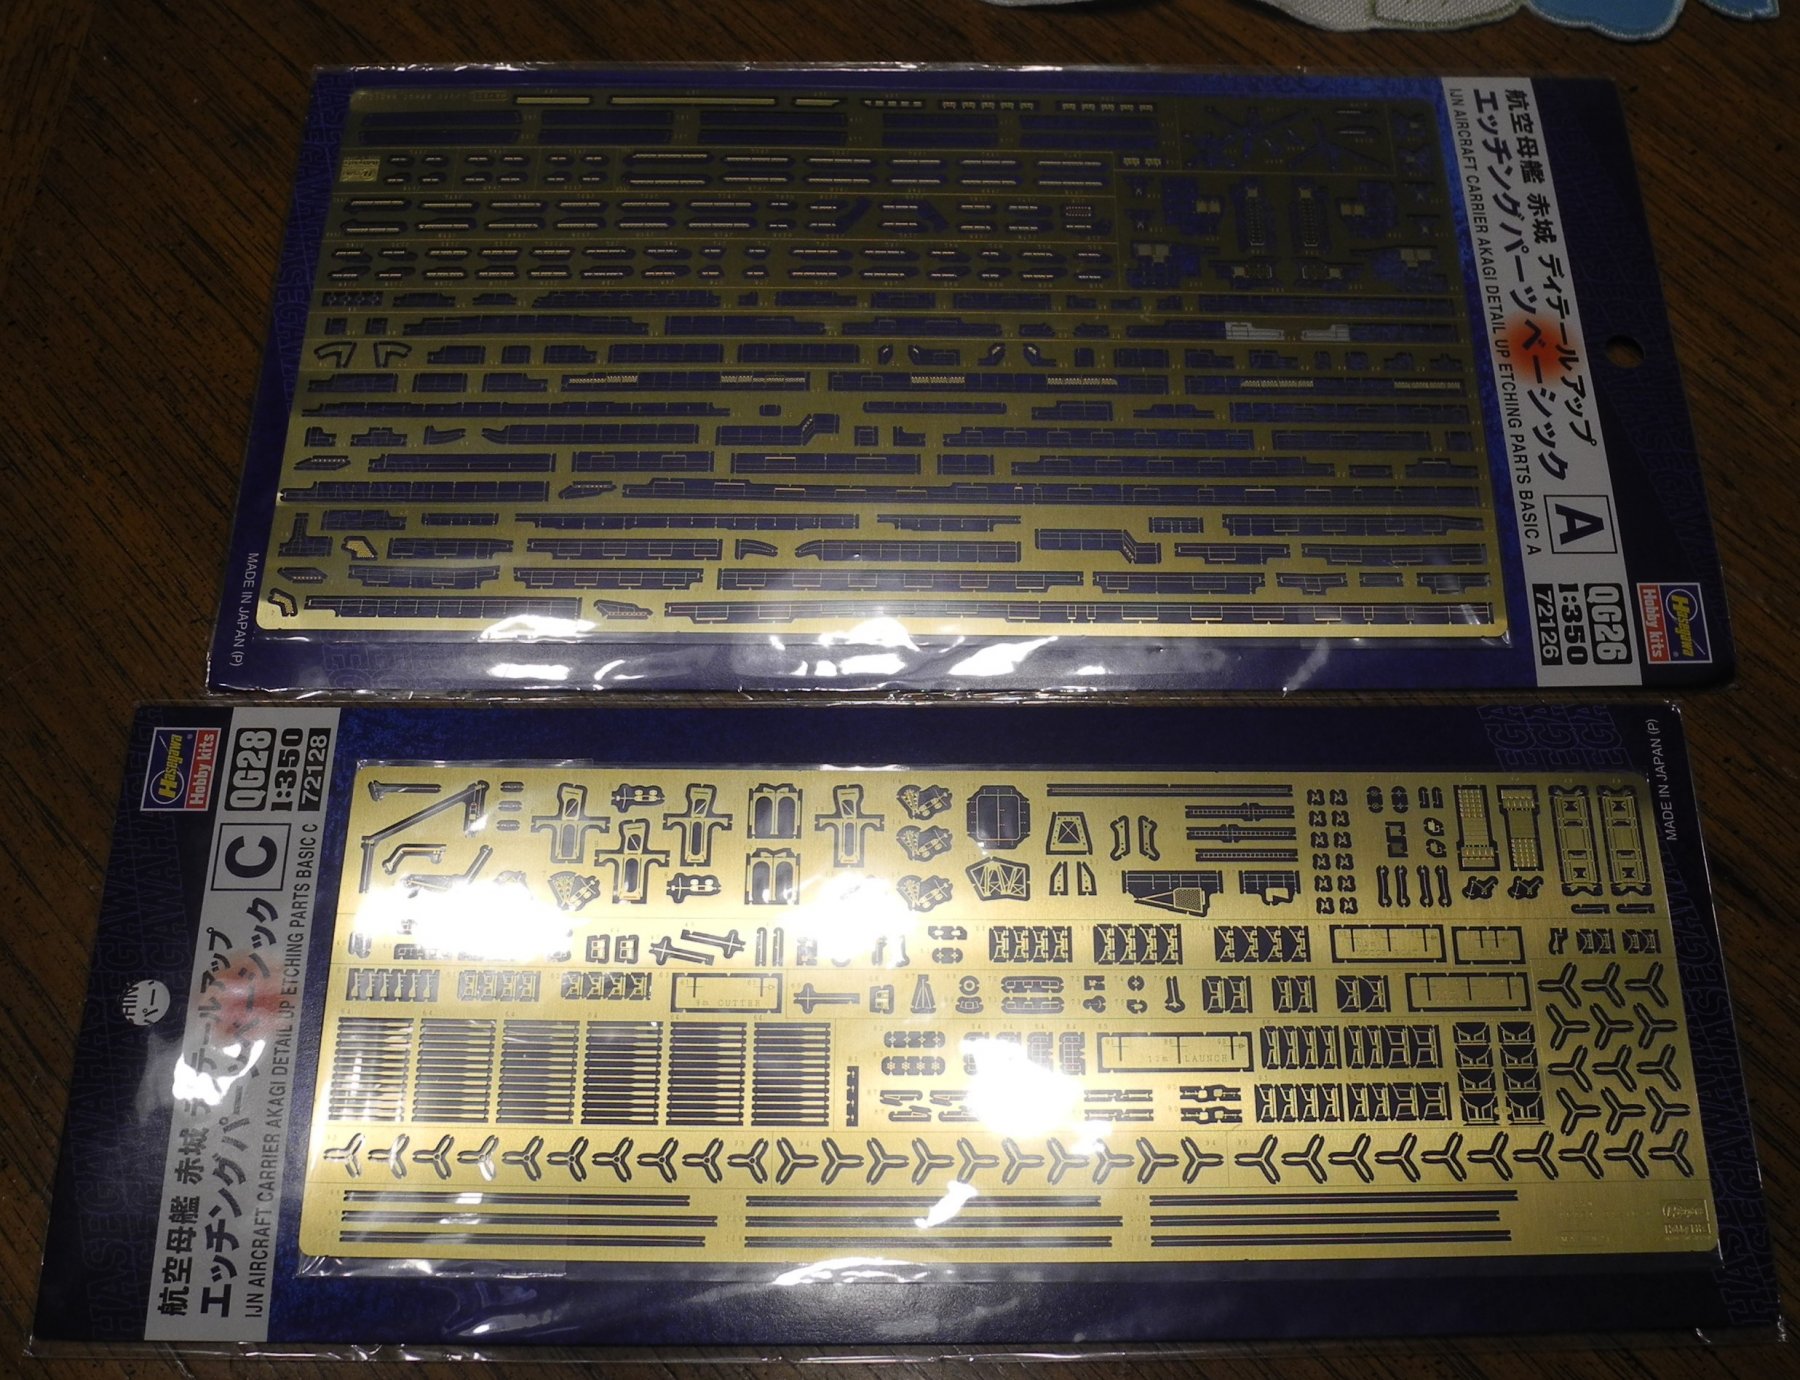
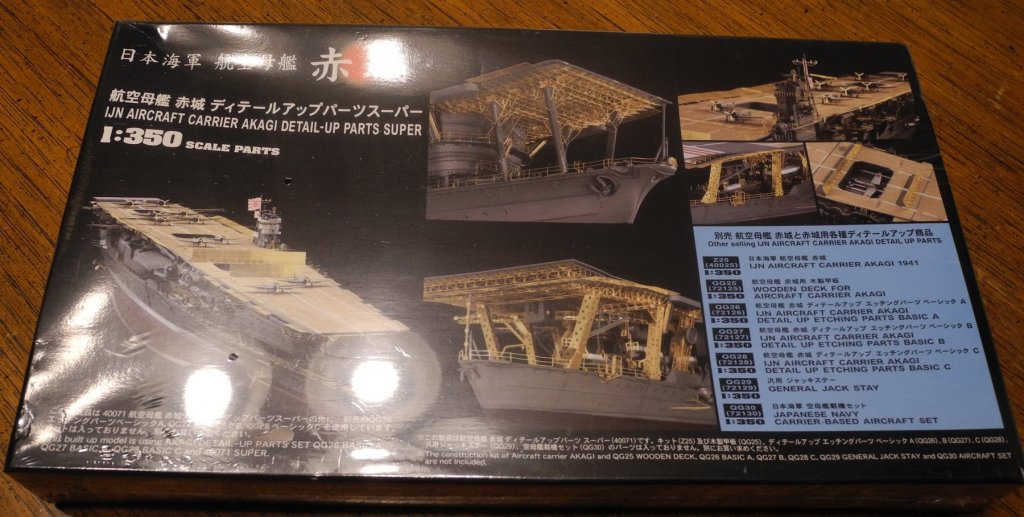
No Longer Available 1:350 Hasegawa IJN Akagi Aircraft Carrier Set This set includes the following: 1:350 Hasegawa IJN Akagi Aircraft Carrier Kit number 40025 1:350 Hasegawa Carrier Based Aircraft Set 72130 1:350 Hasegawa Detail Up Parts 40071 1:350 Hasegawa Wooden Deck Set 72125 1:350 Hasegawa Etch Parts C 72128 1:350 Hasegawa Etch parts A 72126 Shipping box size is: 33" x 12" x 7" - Shipping Weight is: 9 lbs.


-
I have collected more model ship kits than it's reasonable to assume I will build anytime in the near or semi-distant future. Instead of putting these on Ebay, I wanted to offer them here first at a discounted price so my fellow MSW forumites might enjoy them and perhaps even do a build thread for us to see. 😎 I prefer to be paid by Paypal. I will provide the dimensions and weight of each package so you can calculate the USPS cost (on their website) for shipping, or alternatively, advise me if you are considering a purchase and I will calculate the postage cost for you. My shipping location is zip code 33614, in the USA. I am afraid with the size of the boxes, international shipping will be cost prohibitive. Contact me through PM if you are interested in any of these and I will provide my email information for further discussion or Paypal purposes.
-
Mighty nice of you to go through the effort to post this article for all of us sea urchins...Thanks Jonathan!
-
right click on each image, then 'save as', then save in a folder of your choice. Easy peasy