

CDW
-
Posts
7,717 -
Joined
-
Last visited
Content Type
Profiles
Forums
Gallery
Events
Posts posted by CDW
-
-
2 hours ago, Old Collingwood said:
Is it Airfix re tooling jobby? if it is then I imagine it will build really well.
OC.
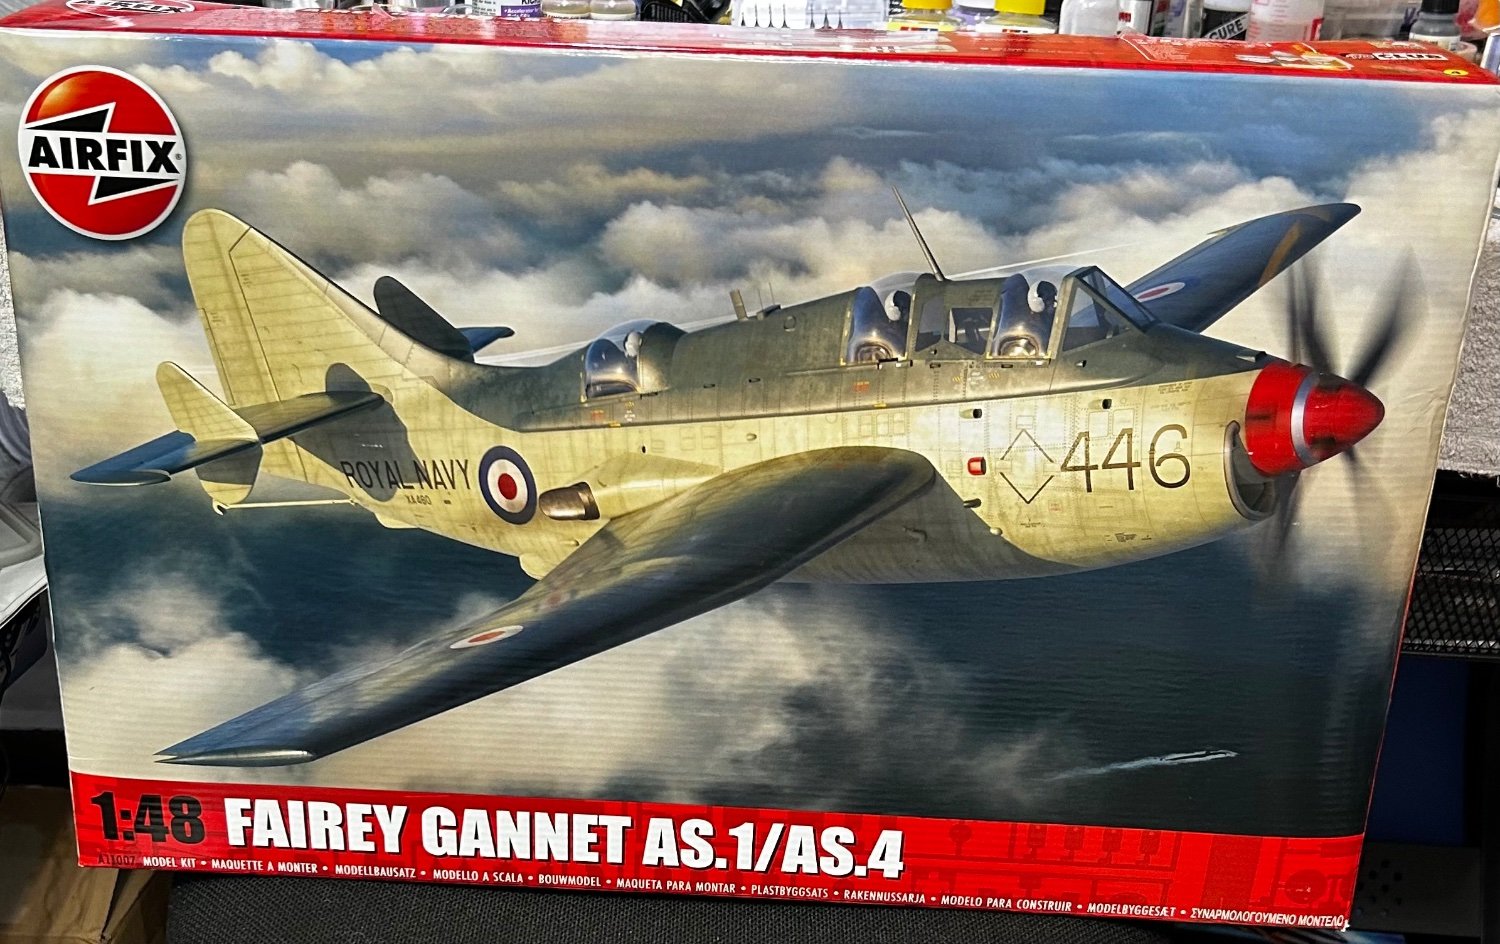
Airfix brand new tool. I don’t believe there has been another 48th scale Gannet aside from Classic Aiframes and the Dynavector one from decades ago.
-
1 minute ago, realworkingsailor said:
Nice! Glad to see it arrived. Can’t wait to see you get after it, or will you be waiting on any aftermarket goodies that might show up?
Andy
I'll likely tackle it right out of the box. Let's look at all the parts, first, then decide. It arrived in a much larger box than I expected. Have not opened it yet but will tonight.
-
Check out this big boy that came in the mail from Hannants today.😀

-
By the way, the name of that aftermarket company was American Satco.
- Jack12477, Old Collingwood, Canute and 2 others
-
 5
5
-
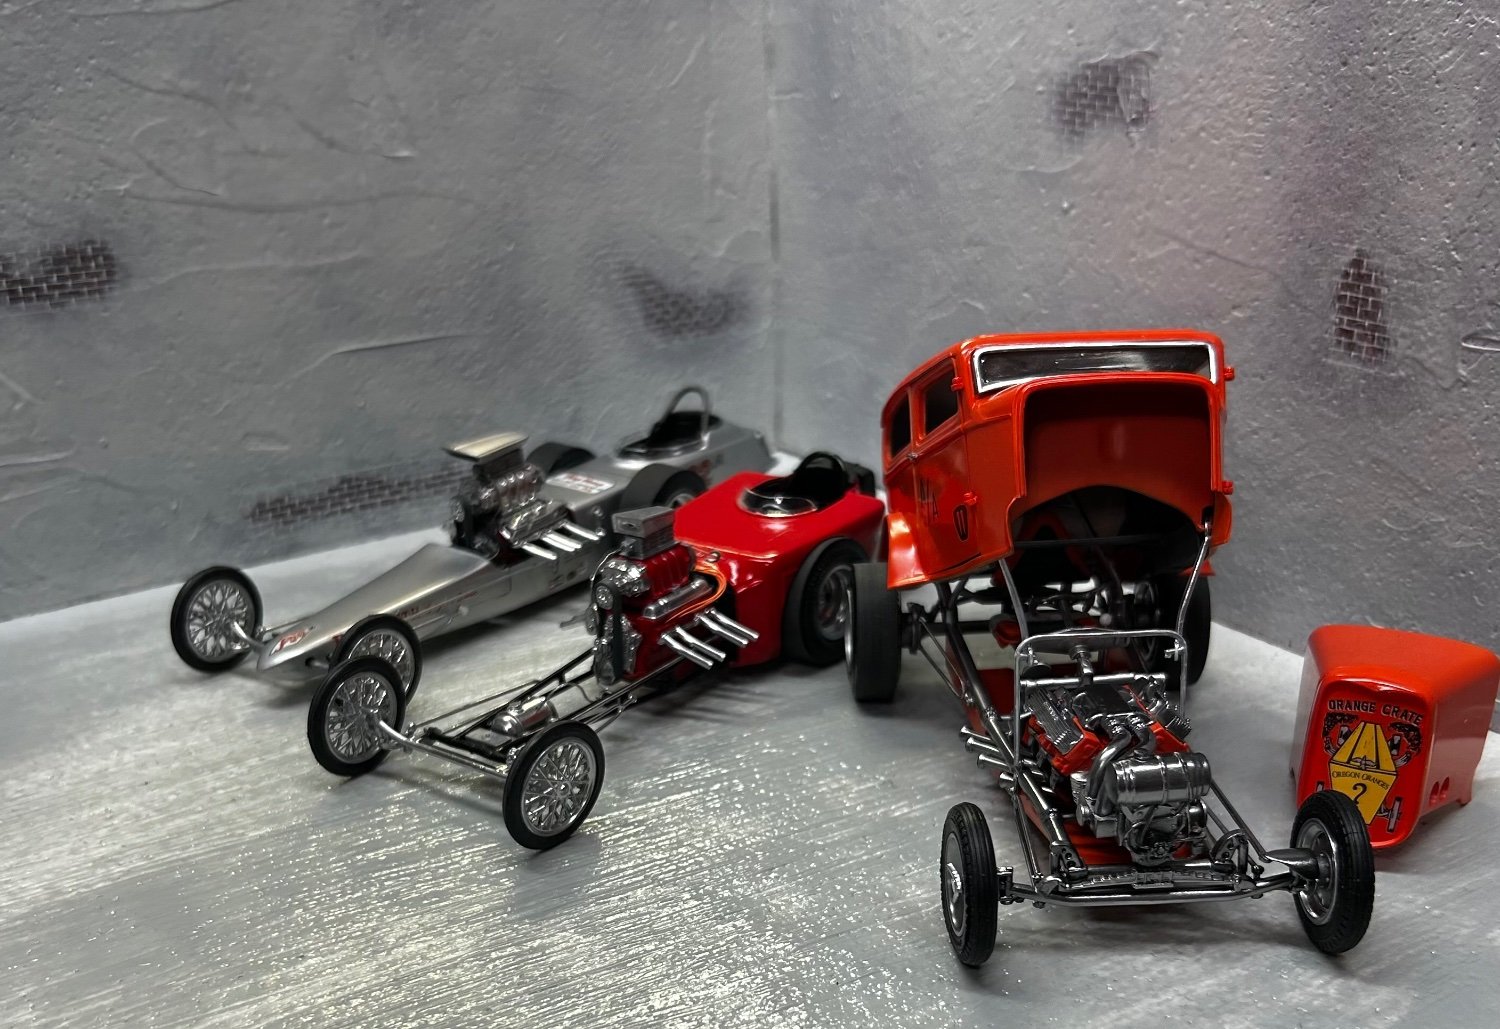
Once upon a time there was an American aftermarket company that produced and sold model car tires. This is a set of fatties I had stashed away for a special occasion.
- Canute, GrandpaPhil, Egilman and 8 others
-
11
-
-
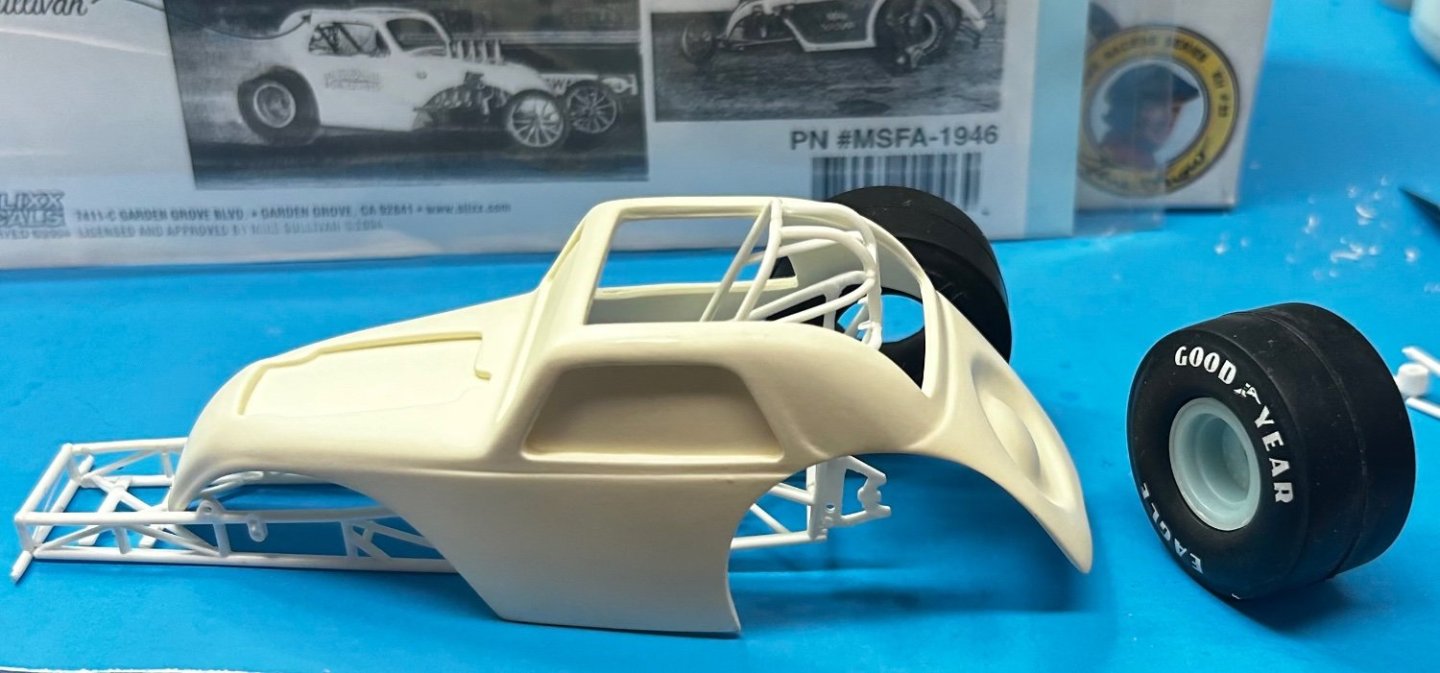
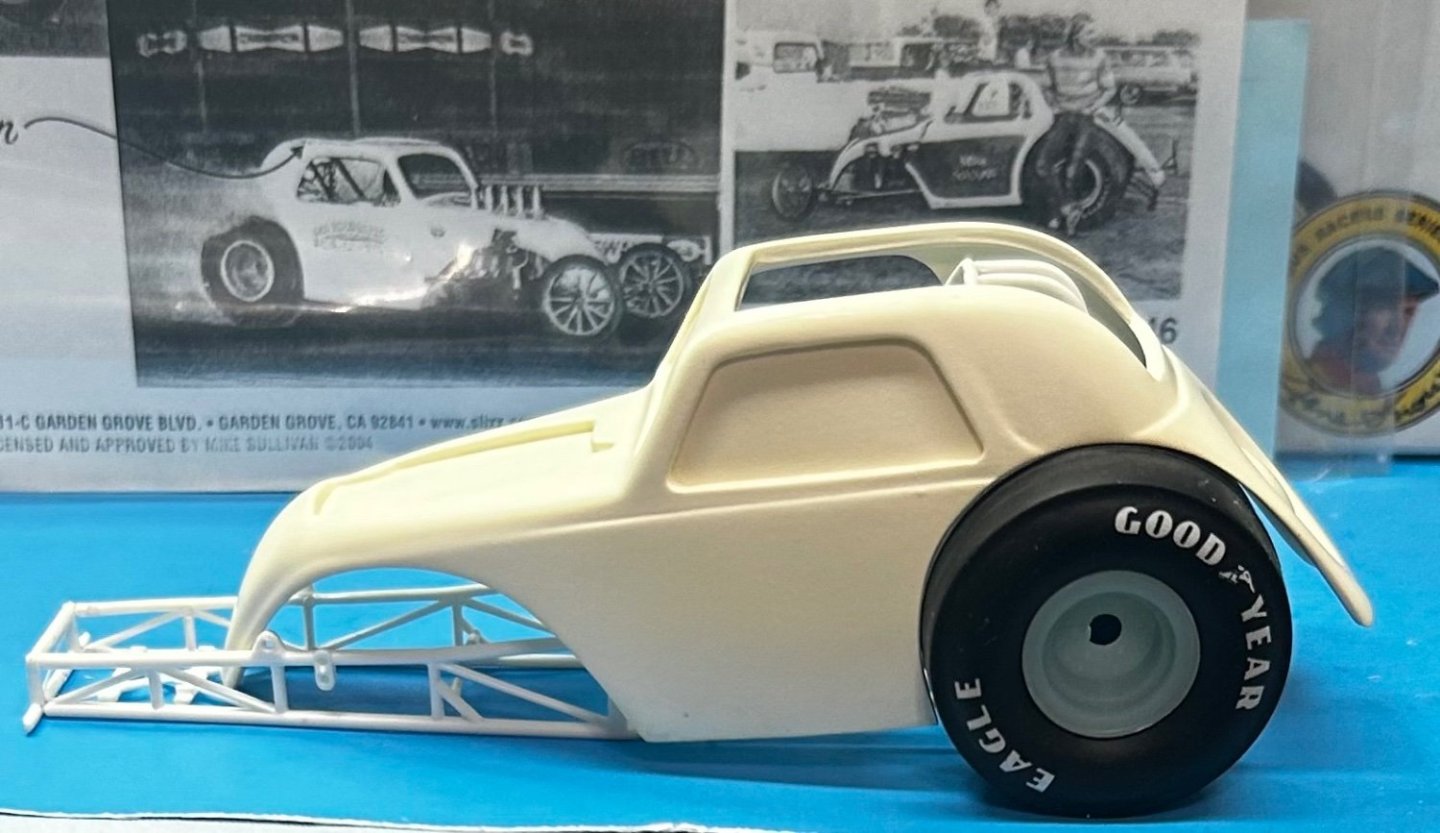
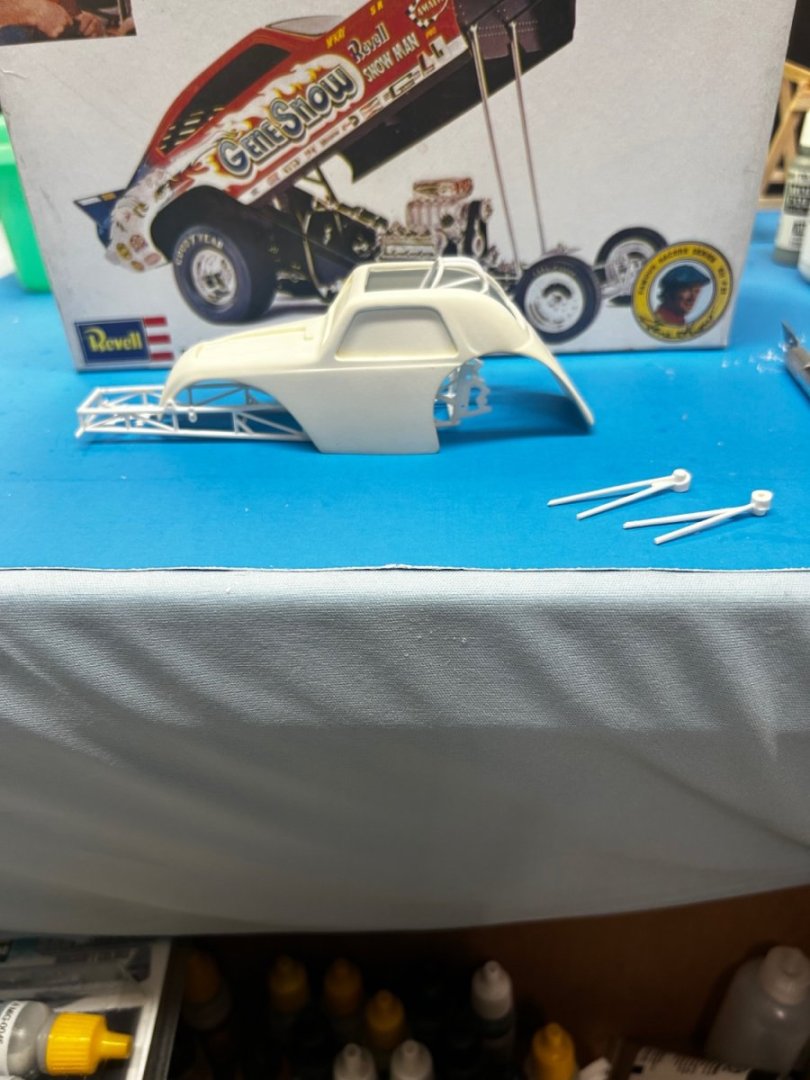
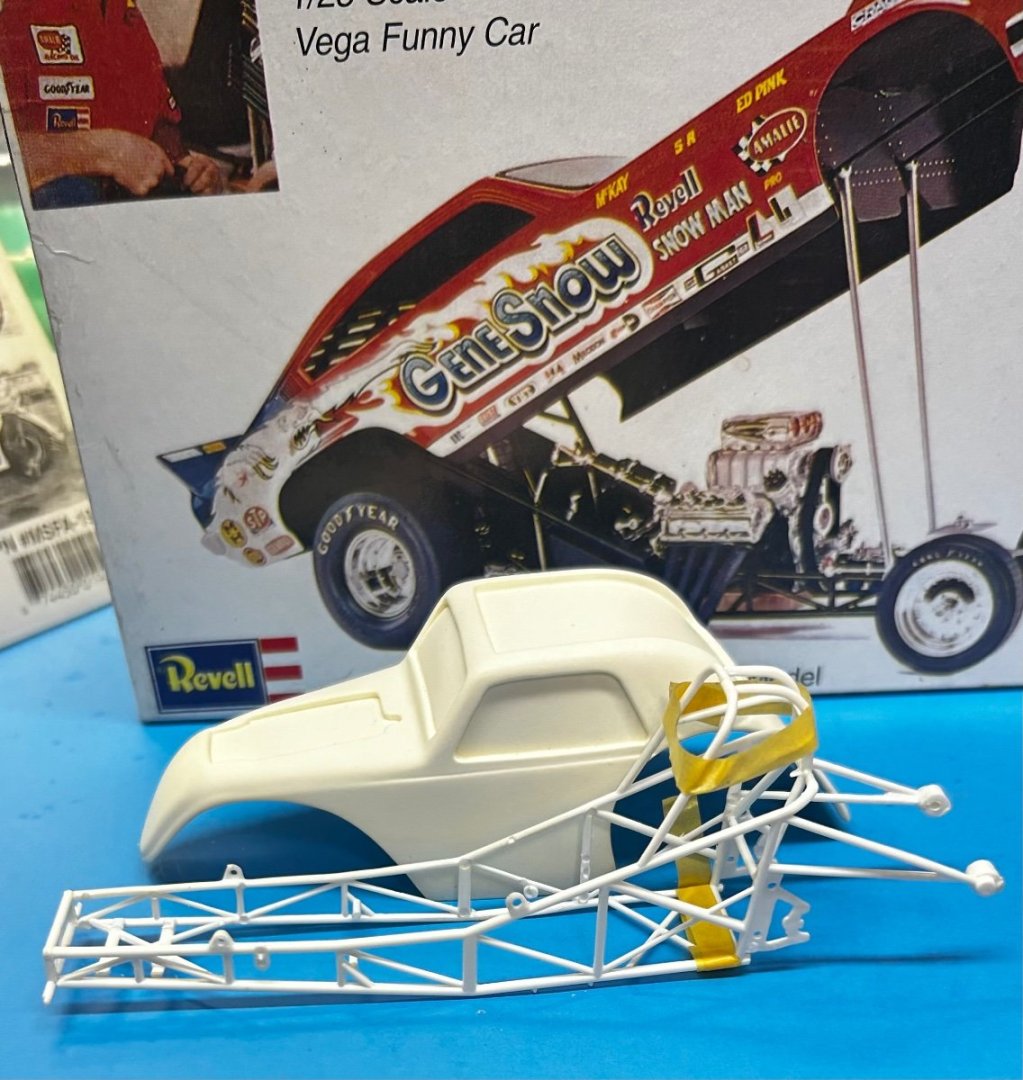
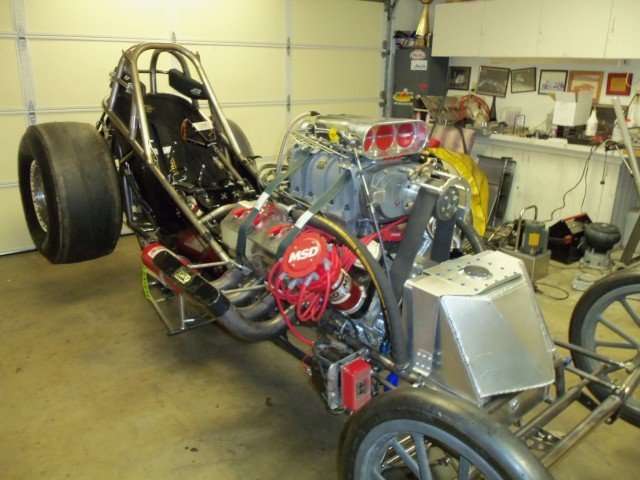
The pieces I’ve cut off the rear of the chassis were part of the body mounts for the funny car, and won’t be needed for this model. In fact, they interfere.
With the body sitting on top of the chassis, it gives an idea of the location where a portion of the front of the chassis needs to be removed so the front axle is slightly ahead of the front of the body. I’ll attach both front and rear axles and the wheels to make a definitive location for the cut.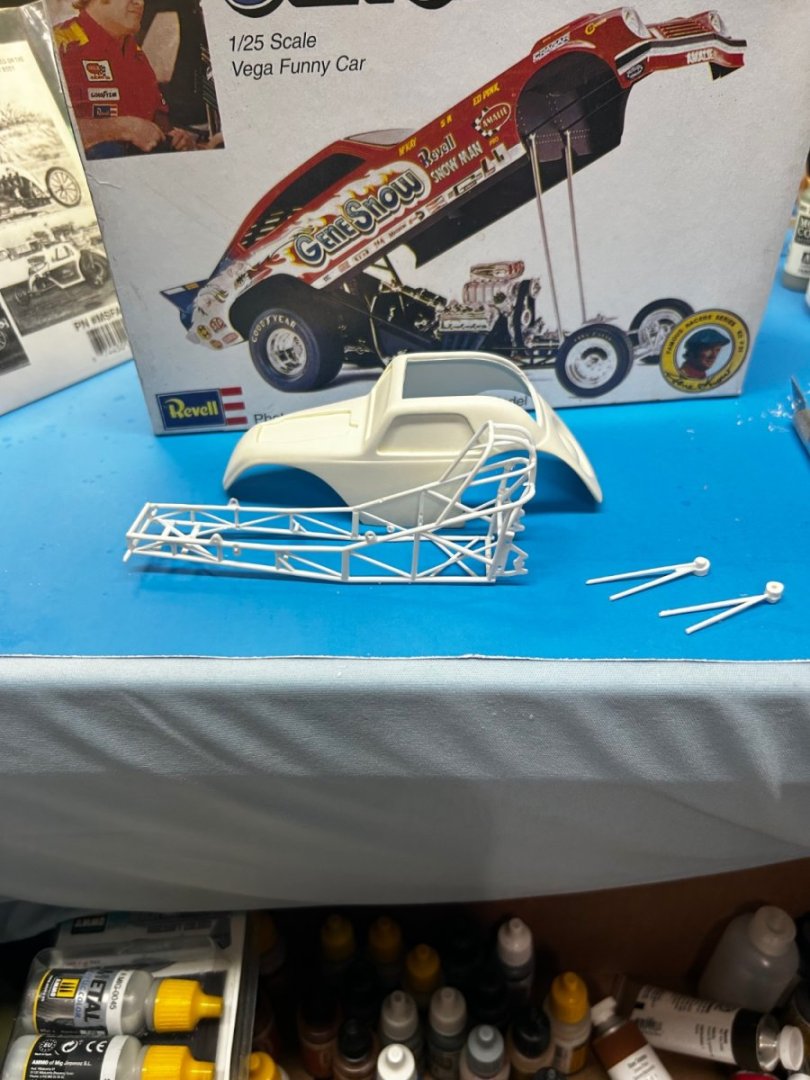
- Canute, Ryland Craze, GrandpaPhil and 5 others
-
8
-
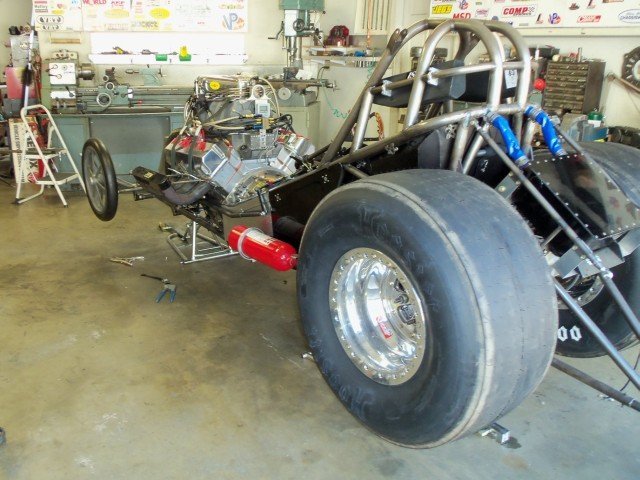
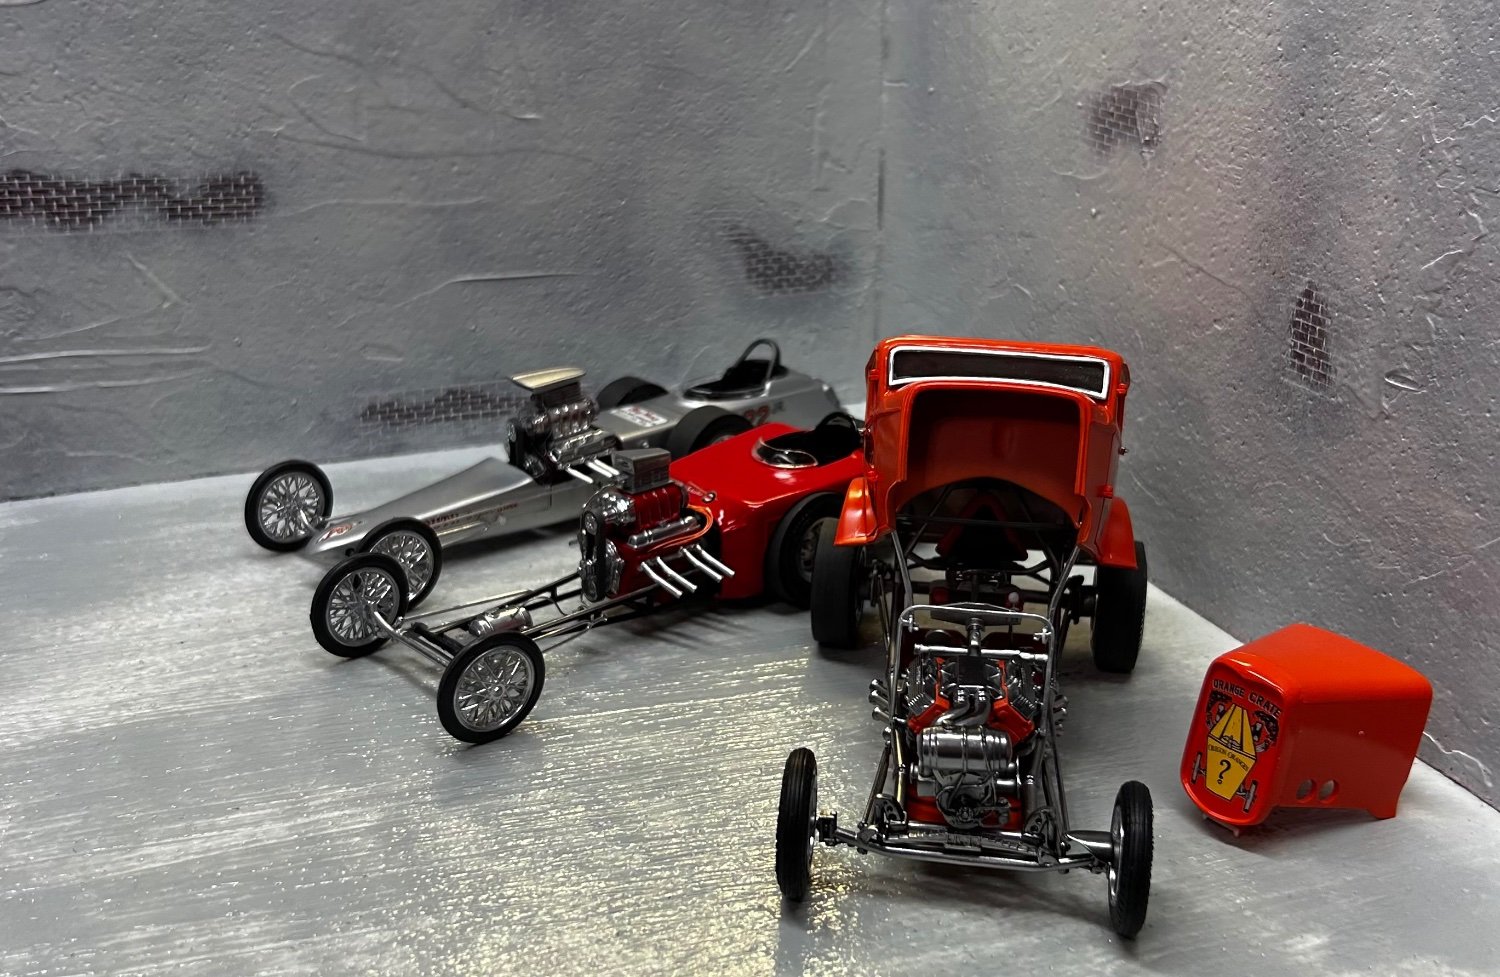
There is so much cleanup to do on the parting lines of these tubular chassis. Maybe 80% is taken care of now. Will get the rest after glue joints set up.
I need to look and see where adjustments and alterations need to take place to make this a reasonable reproduction of the real thing. Wheel base is a little long I know. Roll cage may need to be shortened as well as adjustments for the wheelie bars.
-
1 hour ago, realworkingsailor said:
You’re gonna need a bigger garage….
Andy
More garages
-
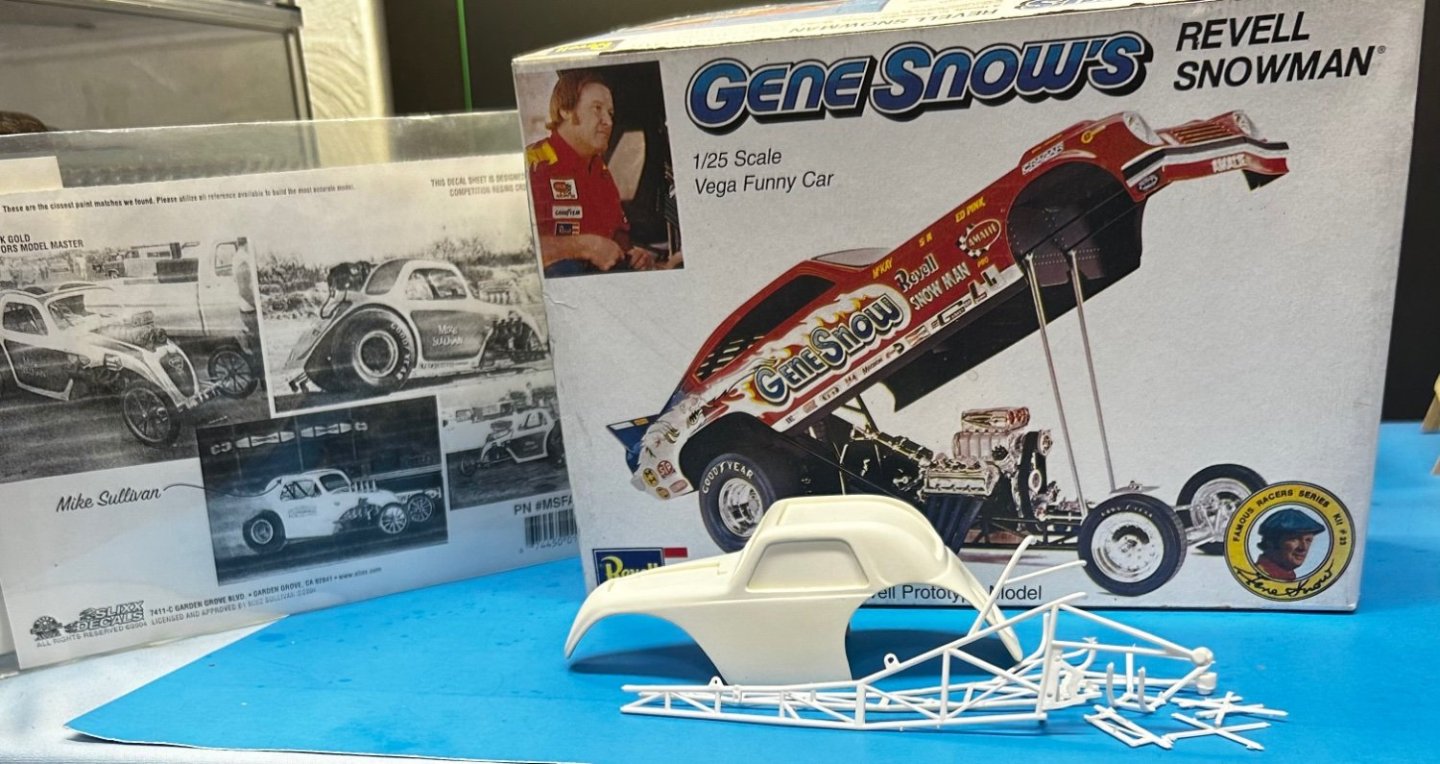
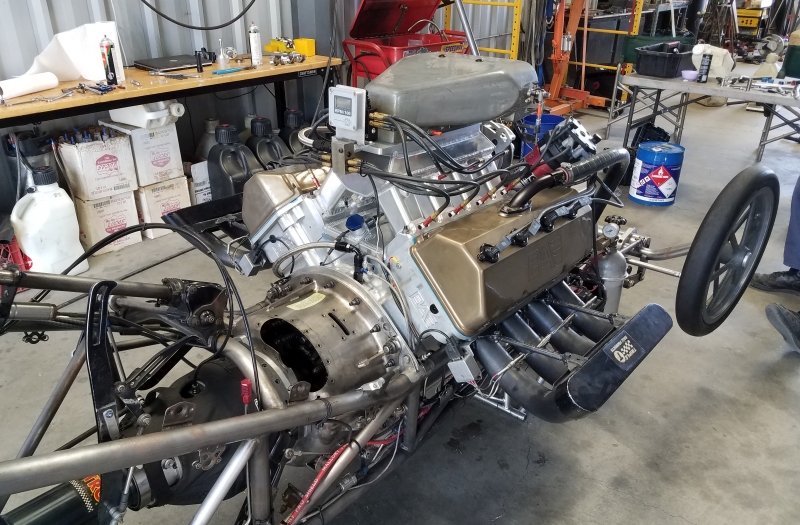
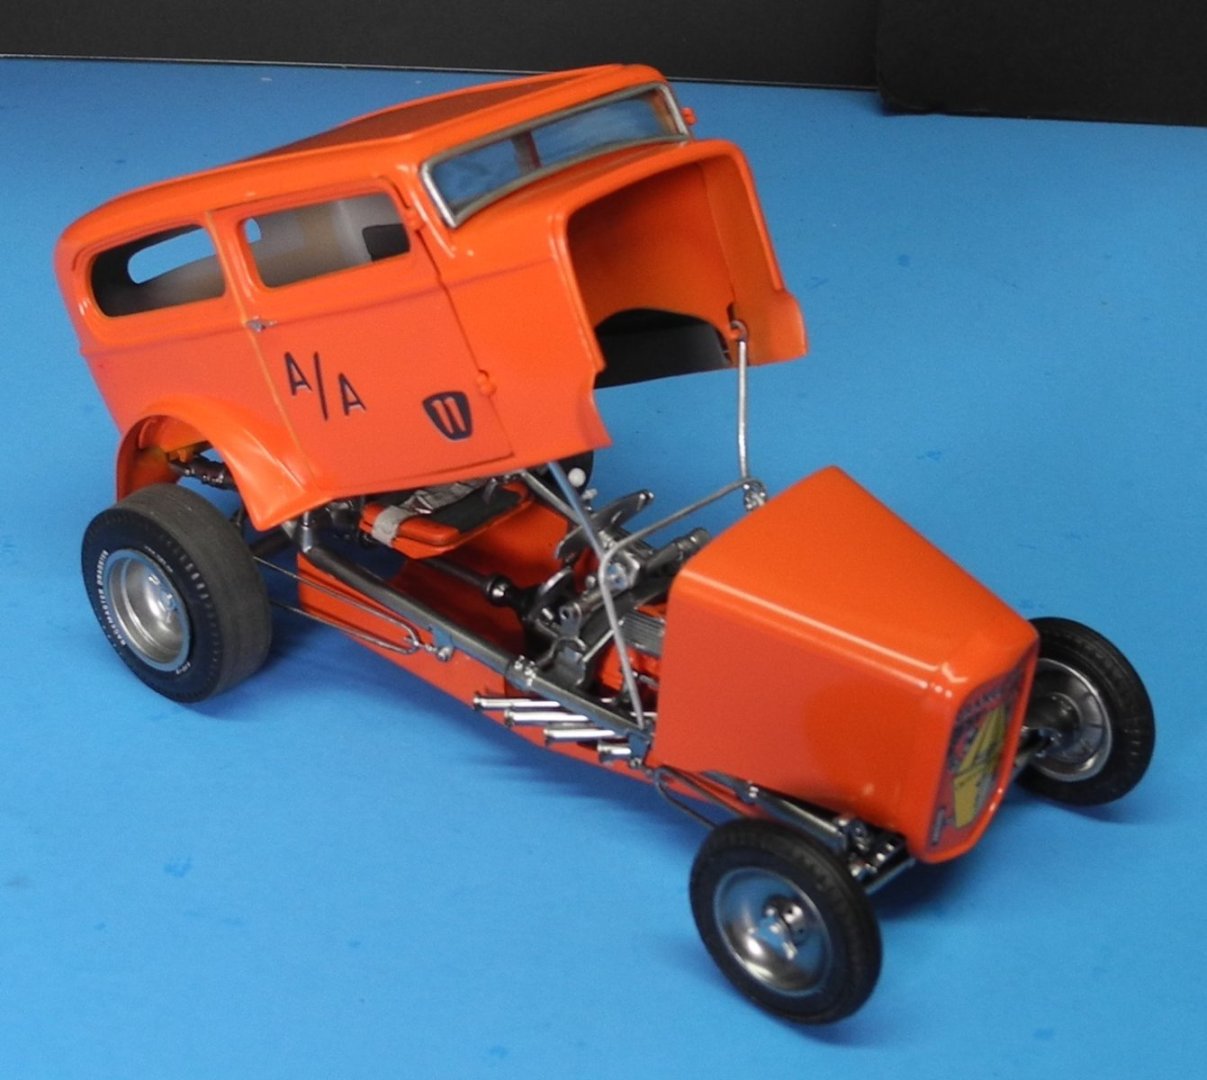
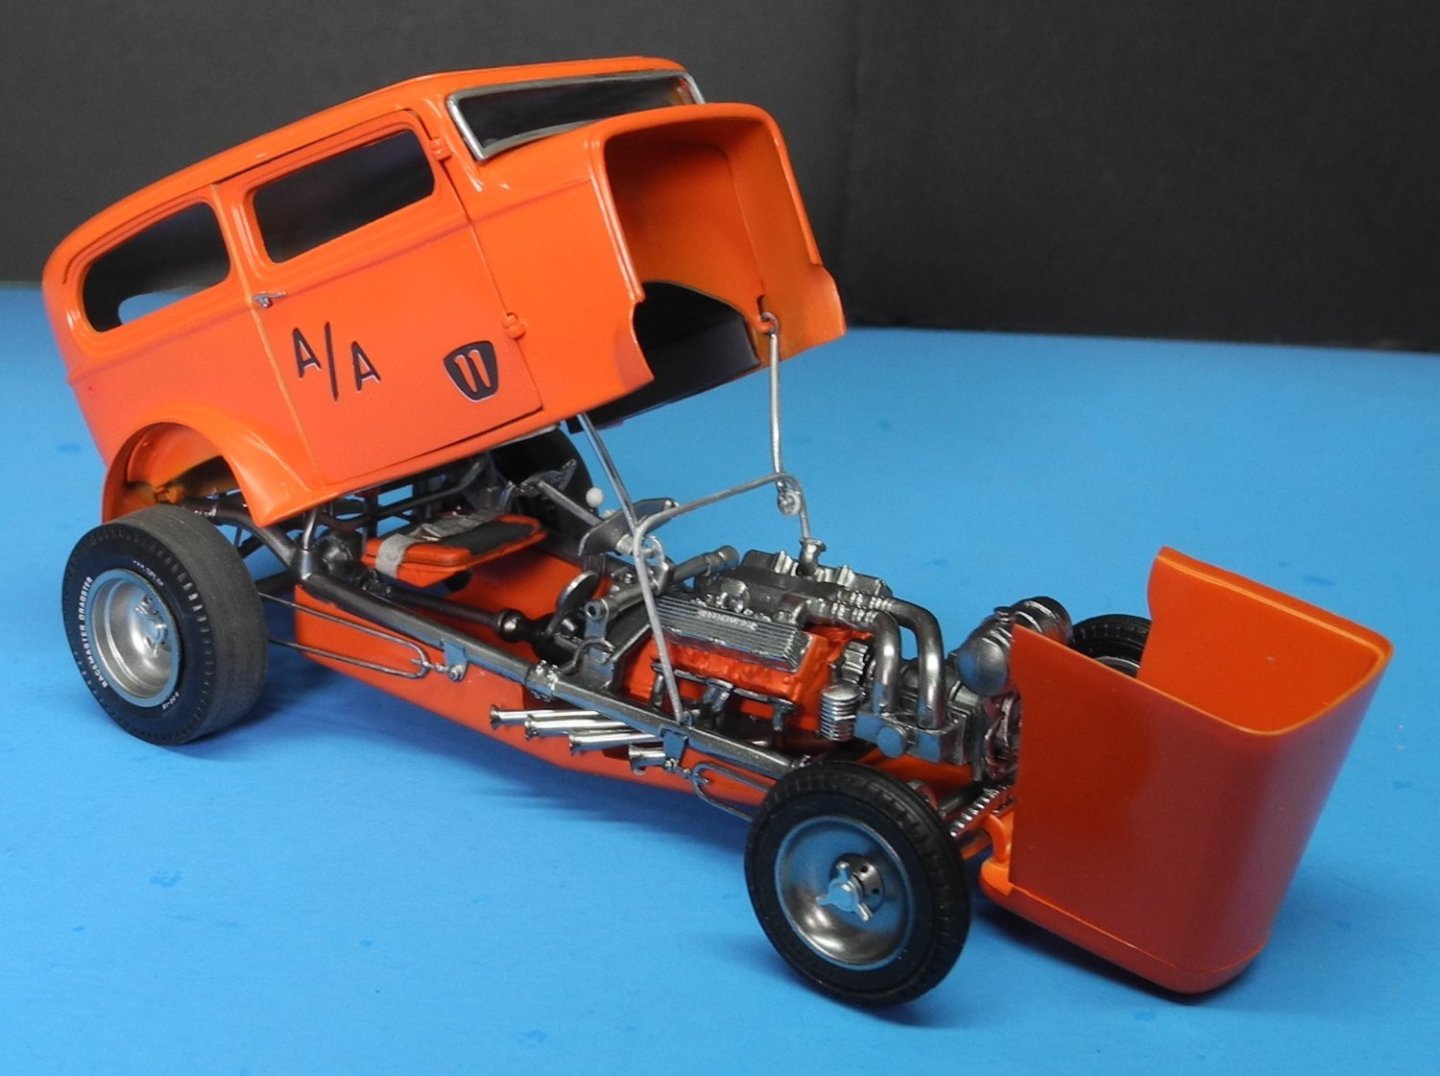
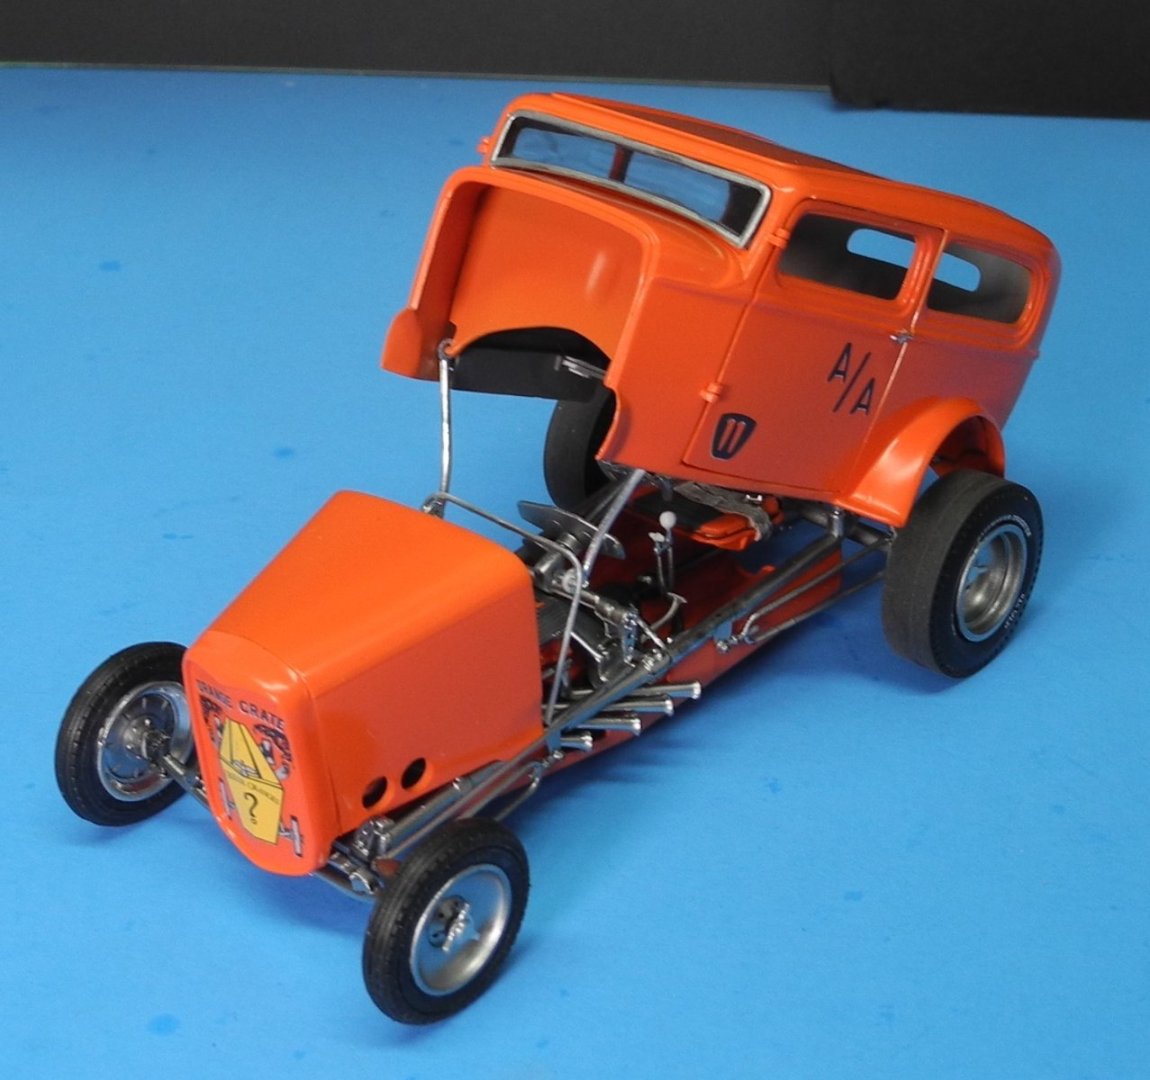
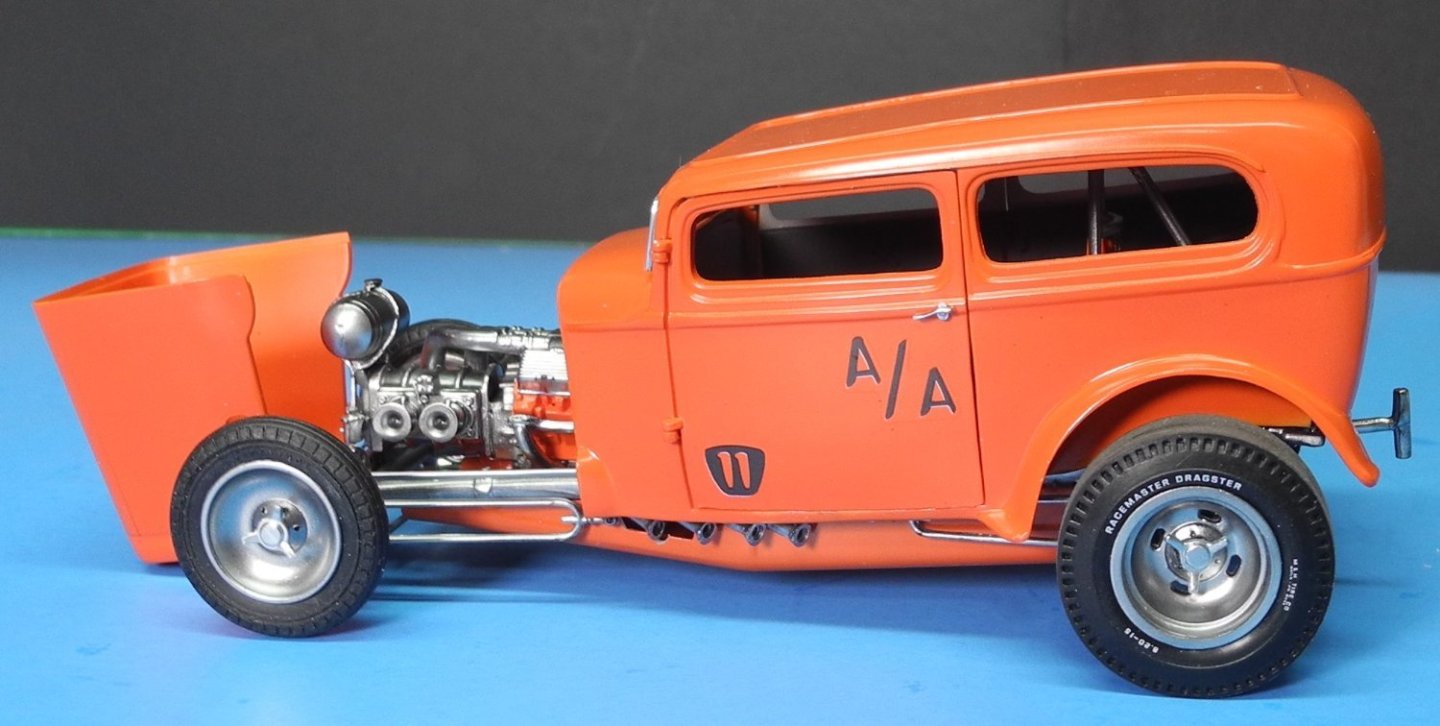
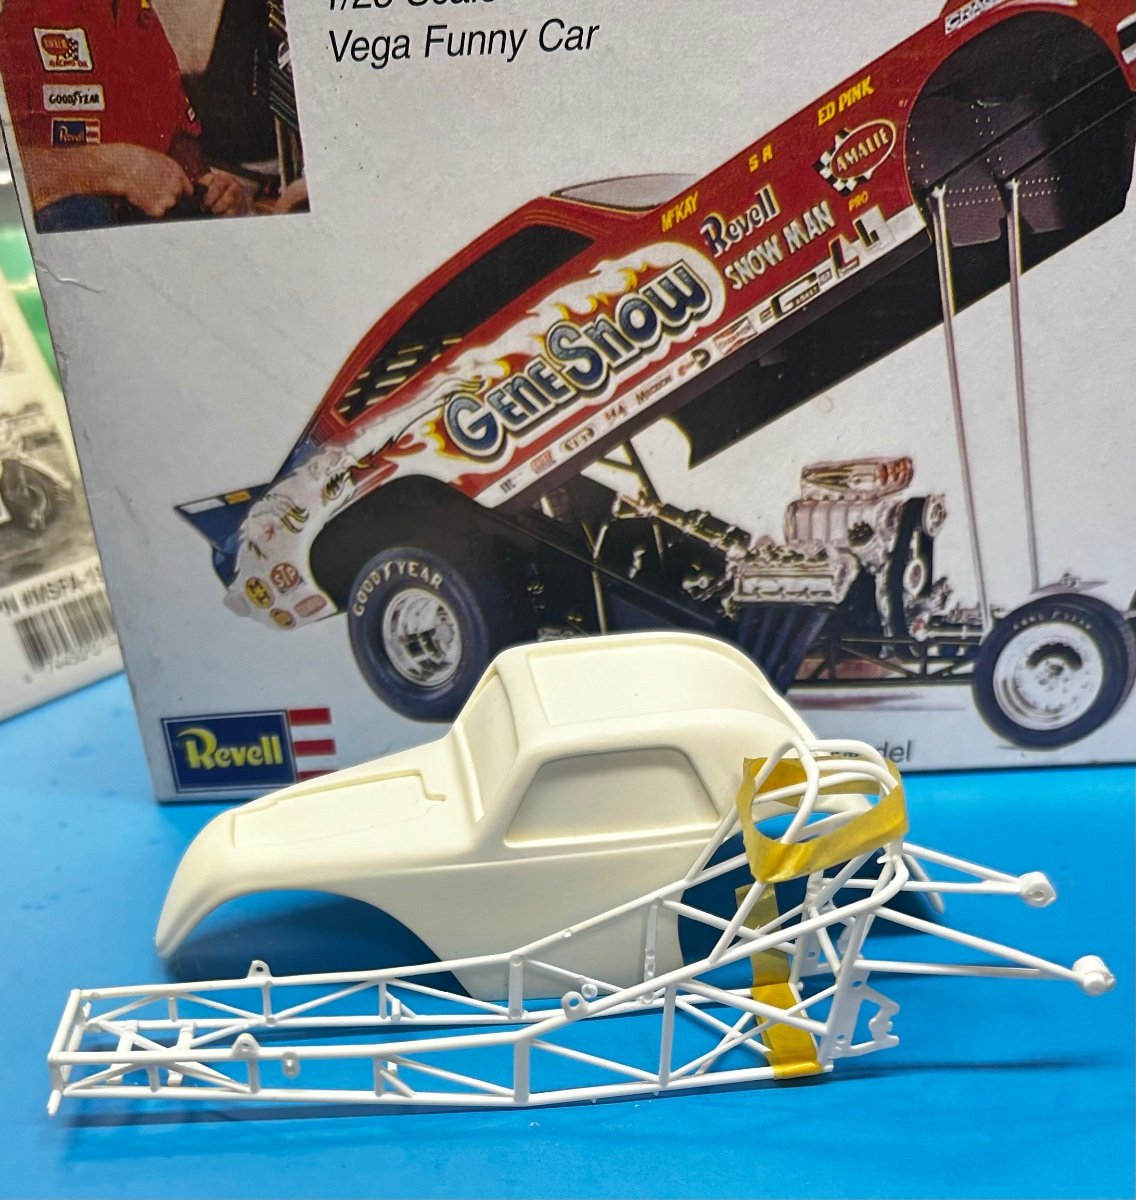
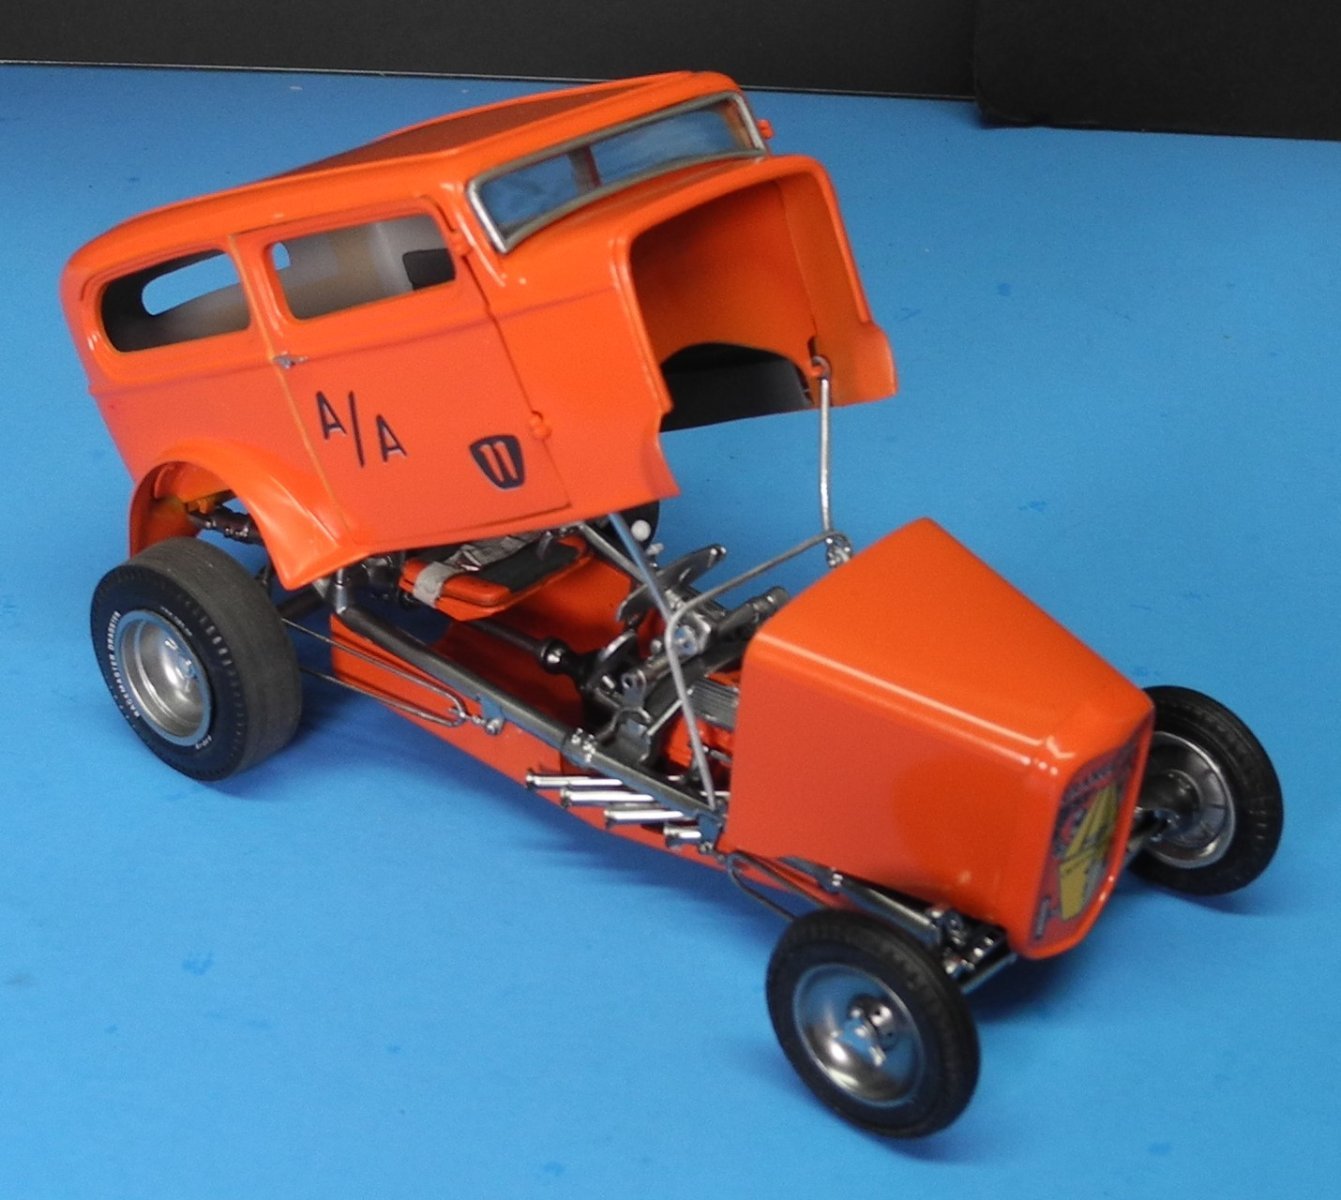
This will be a kit bash custom build of Mike Sullivan's Fiat AA/Fuel Altered dragster. The major portion of the component pieces for this build will come from the old Revell Gene Snow Vega Funny Car, a Competition Resins Fiat body, and Slixx Decals to match Mike Sullivan's machine. A photo of the donated pieces for the build:
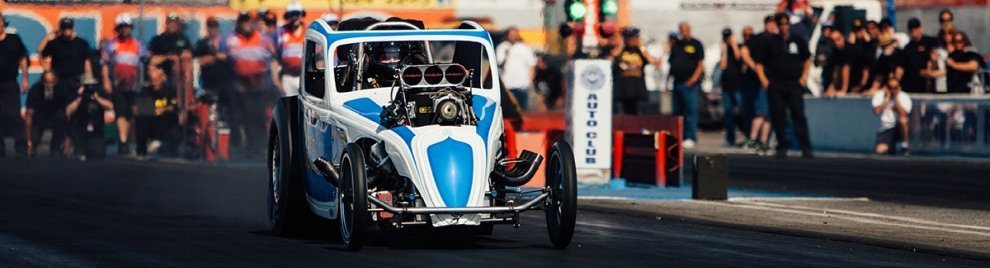
A YouTube video of the machine in action
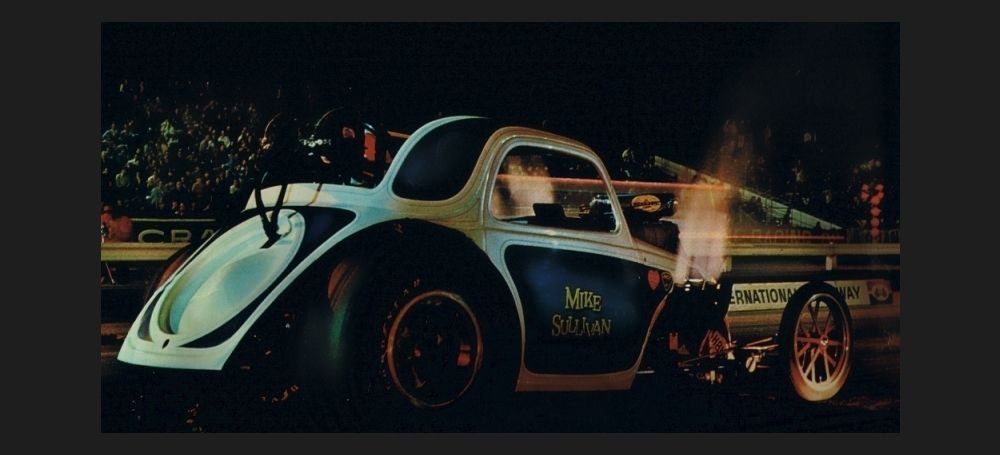
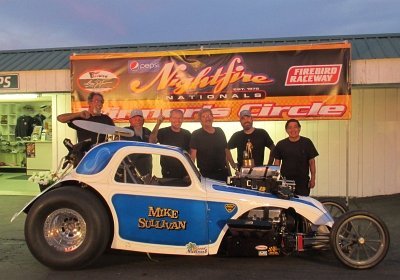
Some photos of the actual car that I will try to duplicate (as close as I consider "reasonable") in this model.
-
-
-
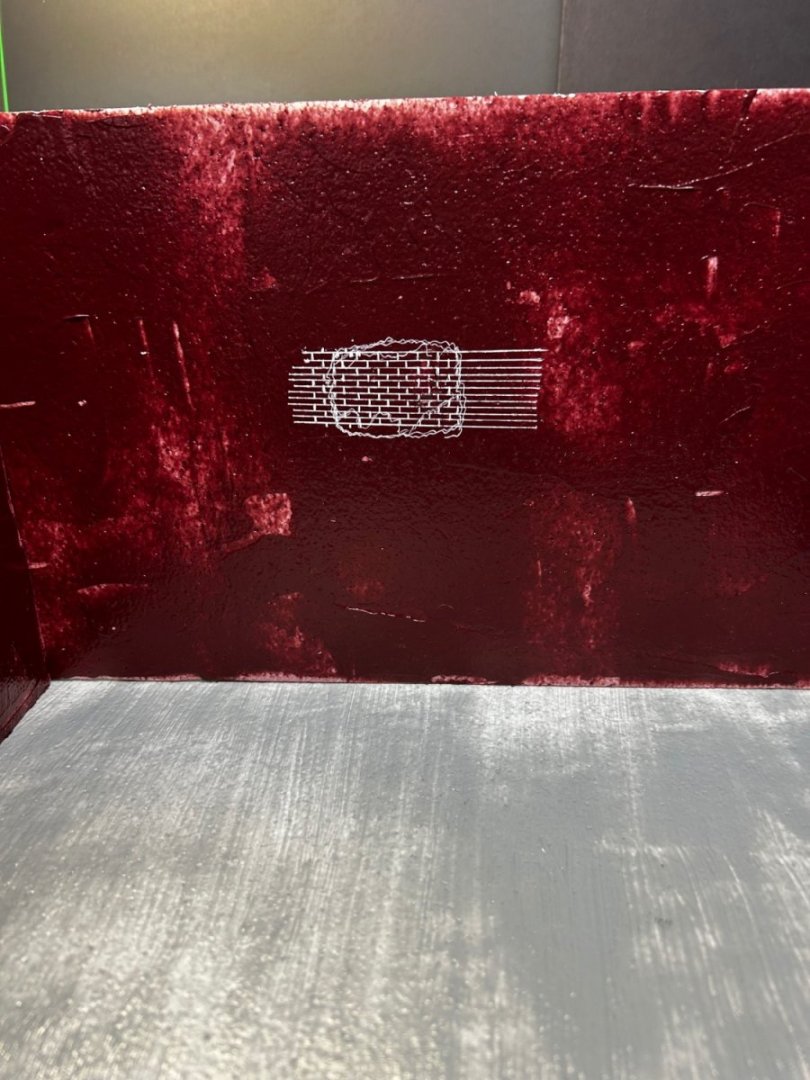
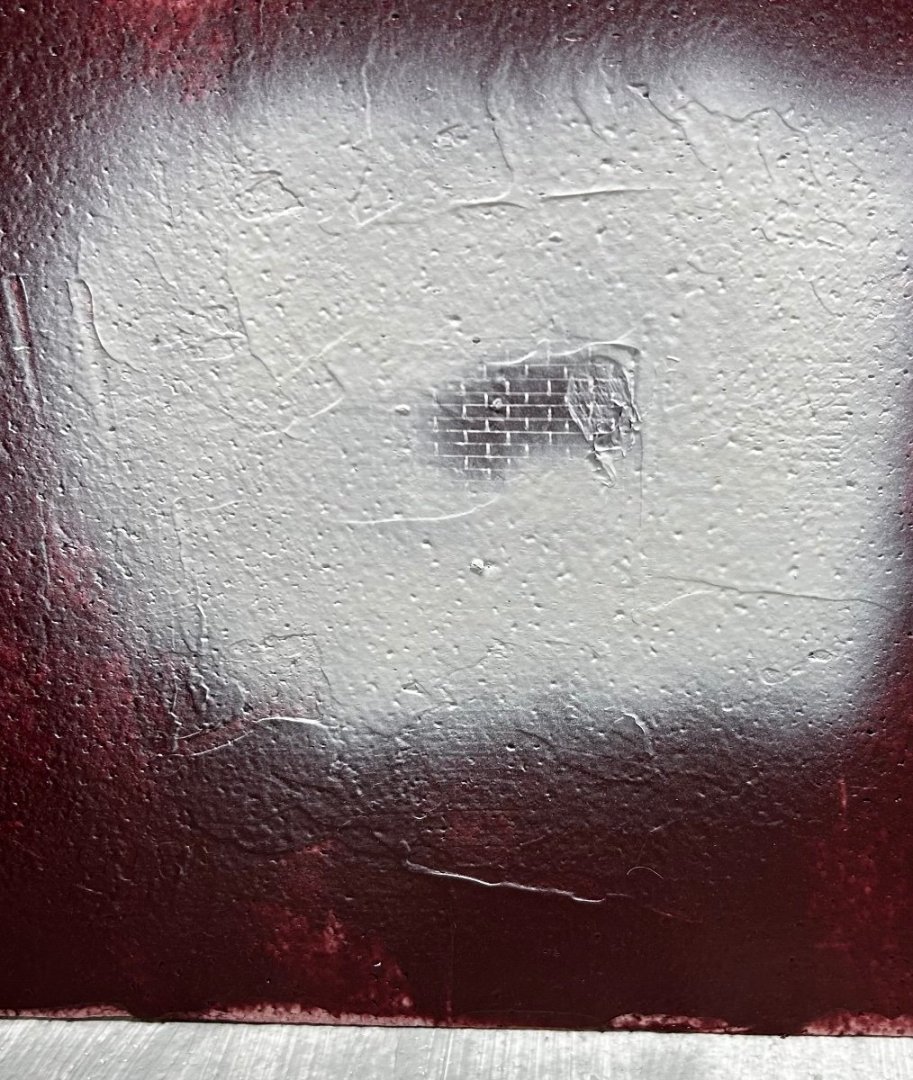
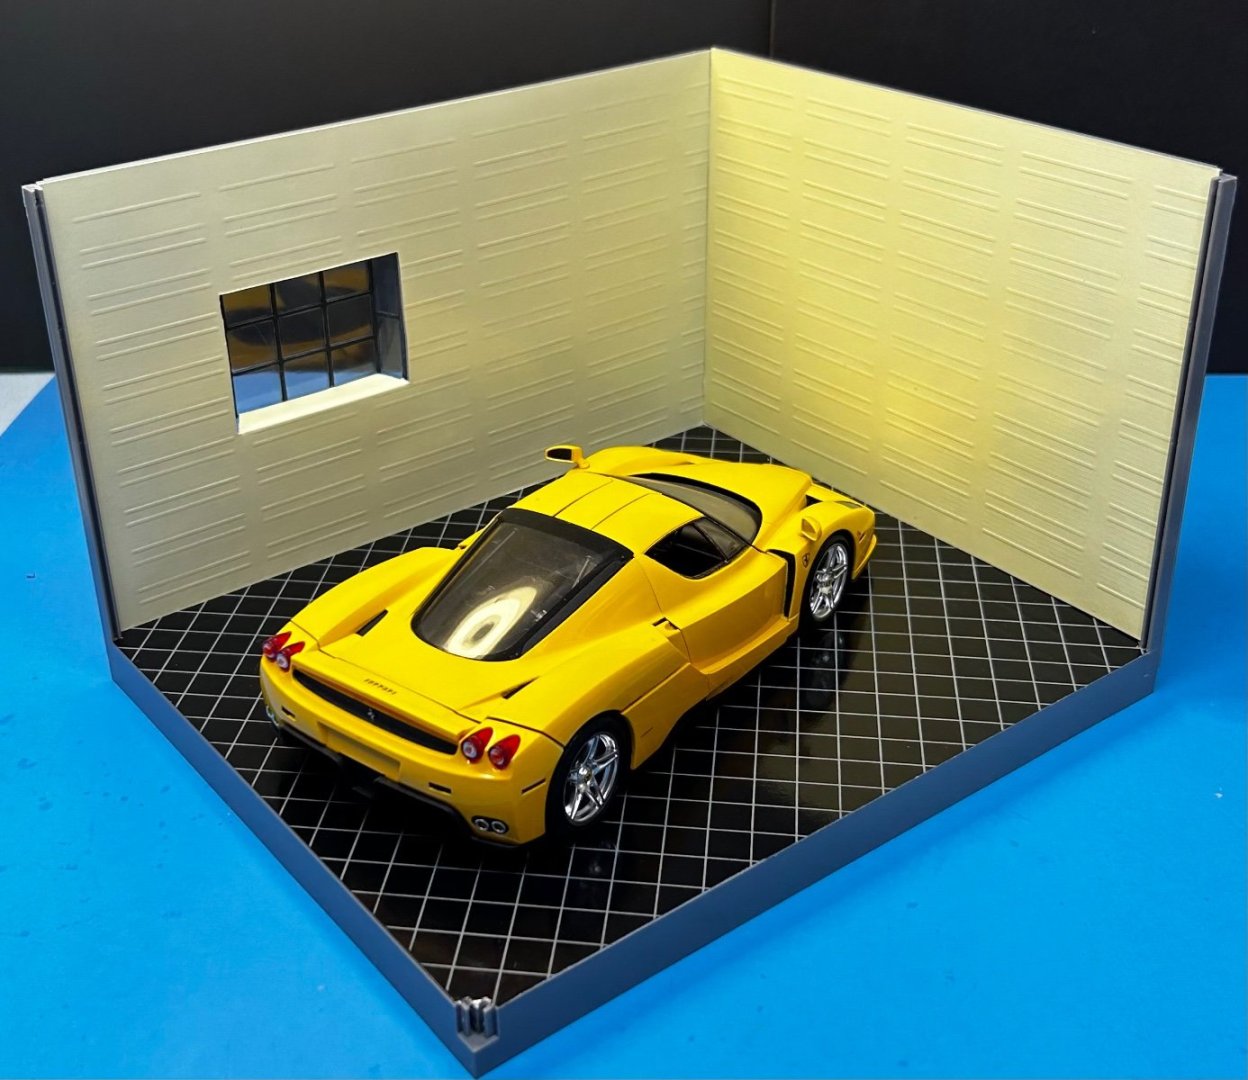
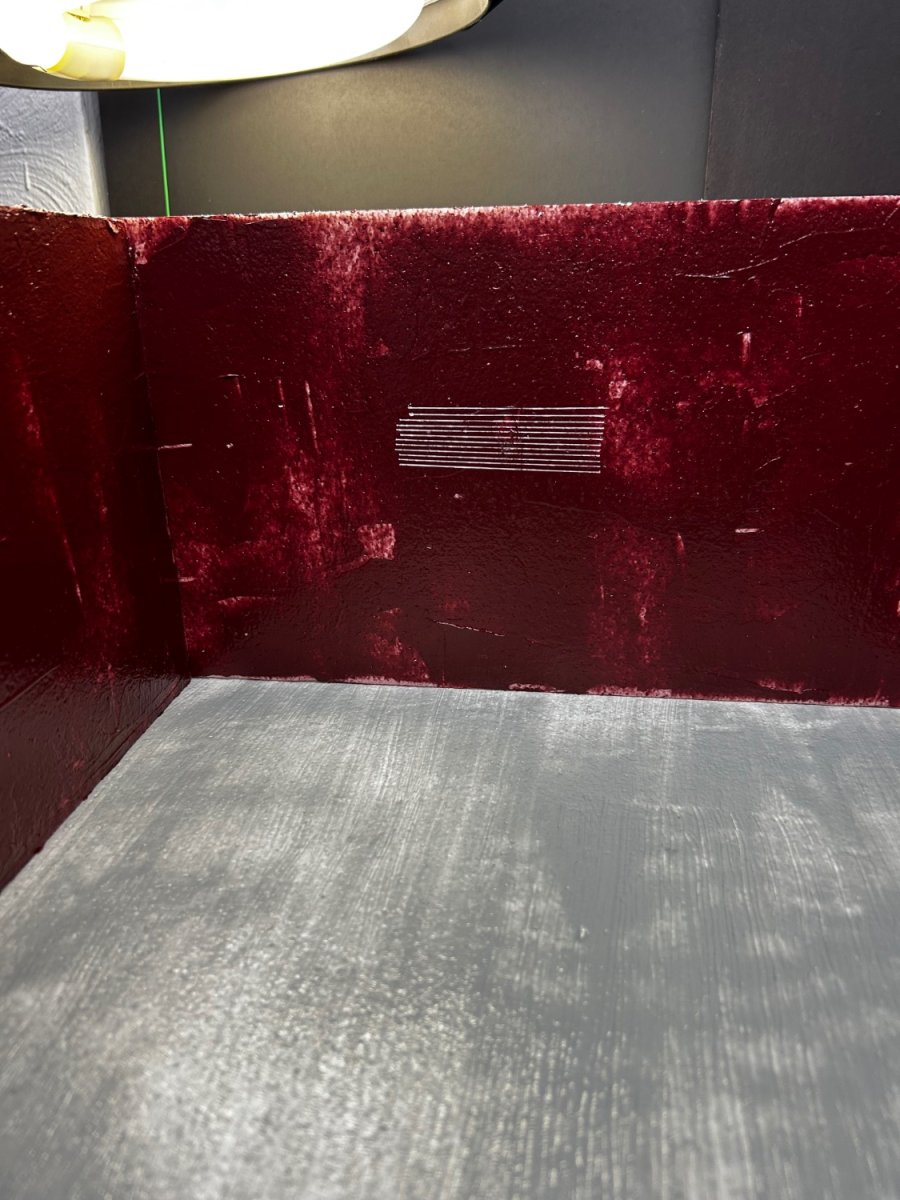
Here’s what I’m attempting…
drawing scale brick mortar lines with a white gel pen. Then, painting a light gray color around the brick simulation to give an appearance of plaster that’s chipped away and fallen off over time, exposing the red brick. I intend to draw in the brick in various places and odd intervals then expose those areas in the same way.


- yvesvidal, Baker, Old Collingwood and 10 others
-
13
-
Nice start! How did you like the feel of the airbrush? Single or double action, gravity feed or siphon?
- Old Collingwood, Jack12477, mtaylor and 2 others
-
5
-
6 hours ago, realworkingsailor said:
Looks like a good sized backdrop.
Have you considered perhaps doing one in all black (floor and walls)? I noticed in your previous photos, the colours of your car models looked really vibrant against the black “floor”.
Andy
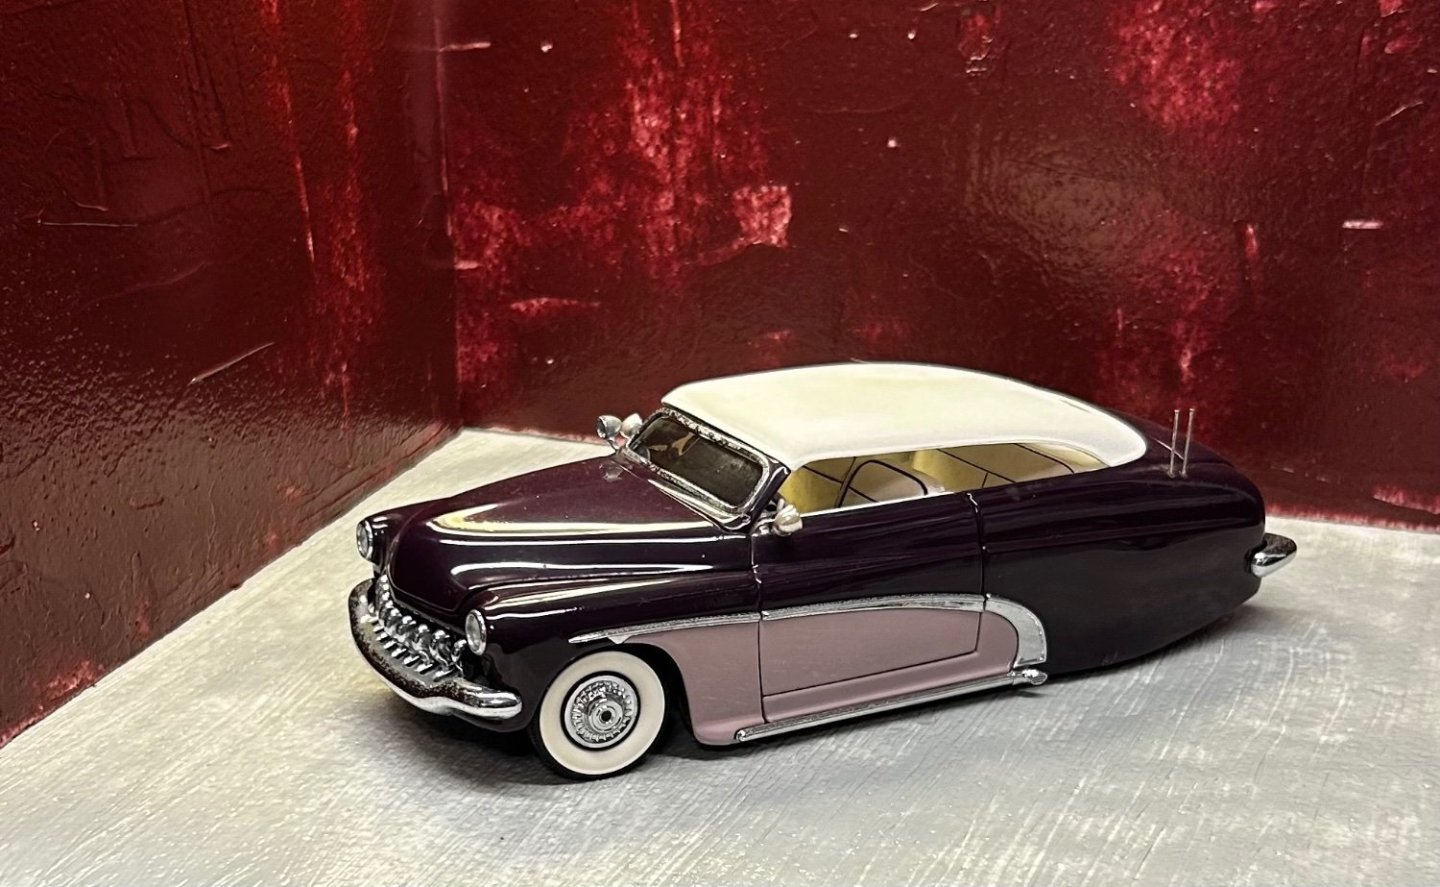
A couple of days ago, I ordered some sheets of corrugated plastic. Depending on the color of the model, different background colors seem to have positive or negative impact on the photo quality that are obvious. I am going to experiment with the plastic panels to see what might make the best all-around color for any model being photographed.
Keep in mind, the colors you see on what I've done so far are only a starting point. It takes a while for that gel medium to cure so I must wait to take this project further.
Thanks for the suggestion, Andy. Keep the ideas coming.
-
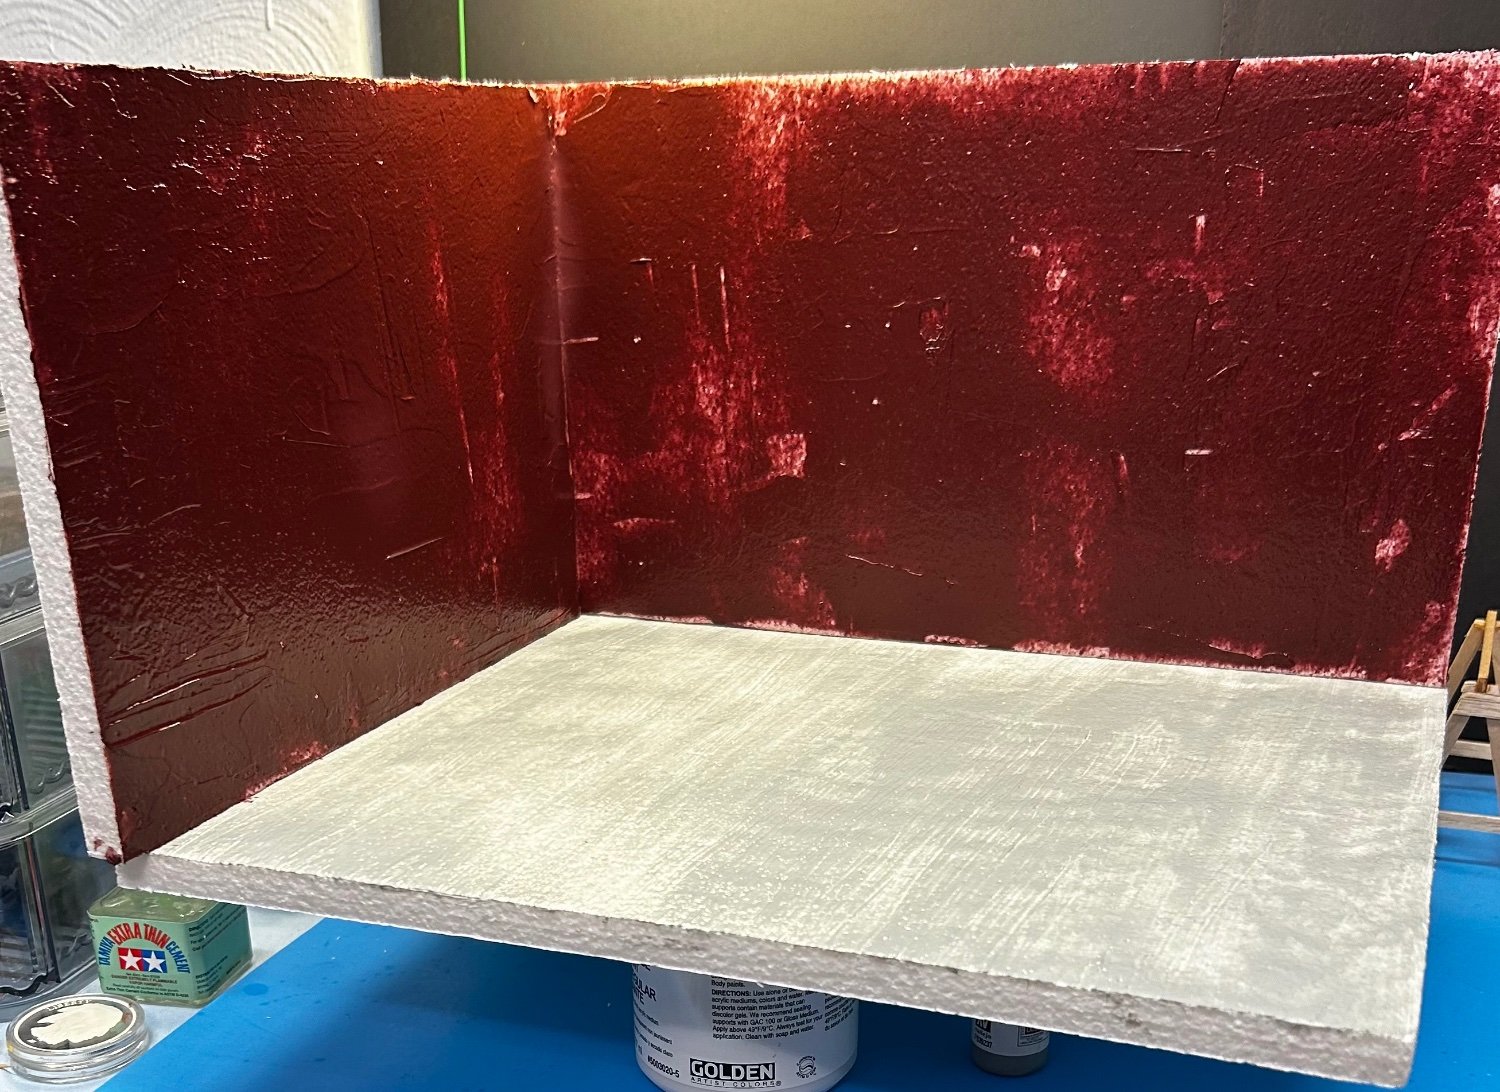
It’s a start. A lot more space to work with here. Will be adding details next.

- king derelict, Canute, Egilman and 7 others
-
10
-
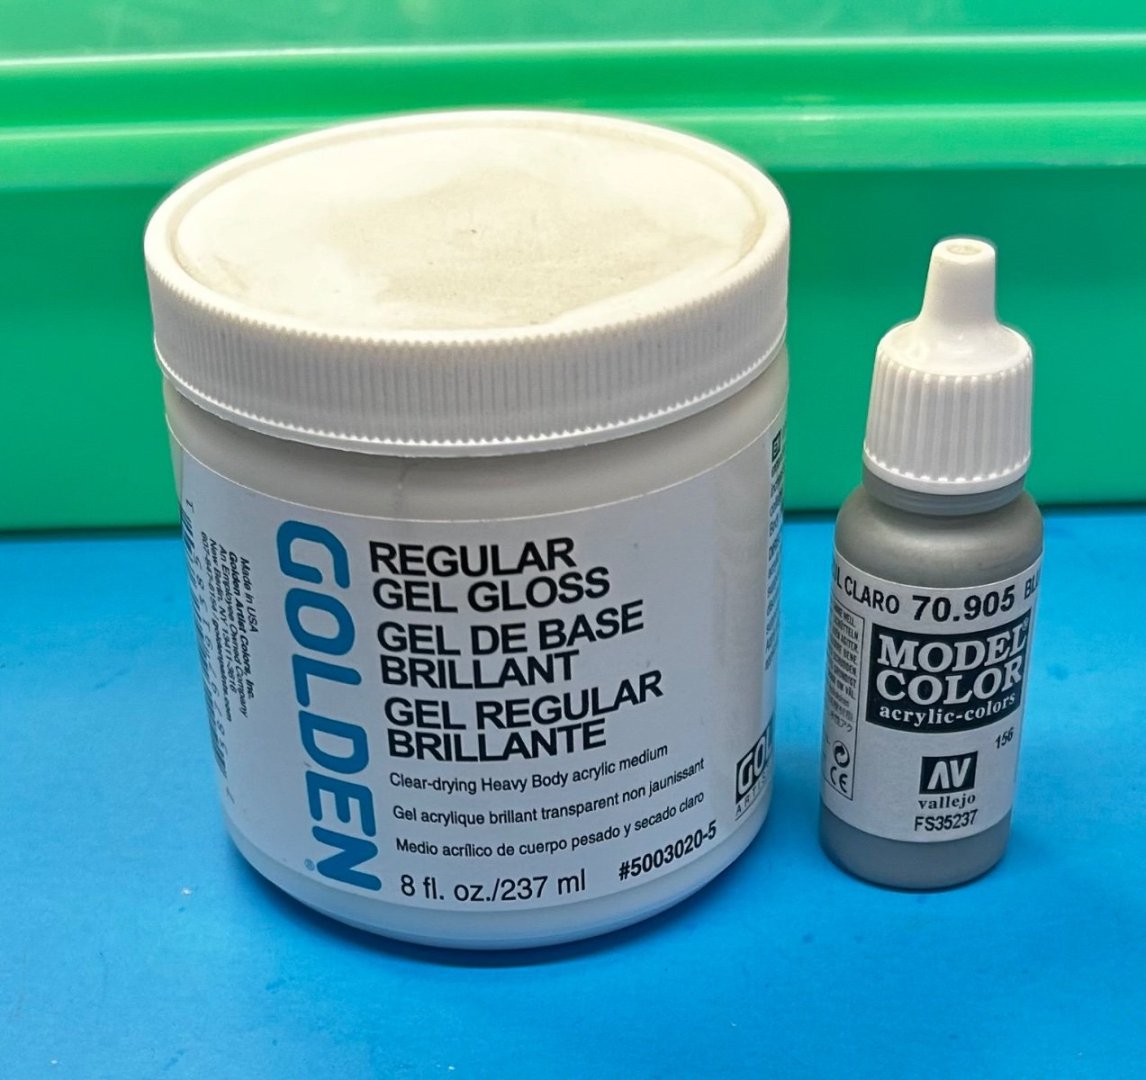
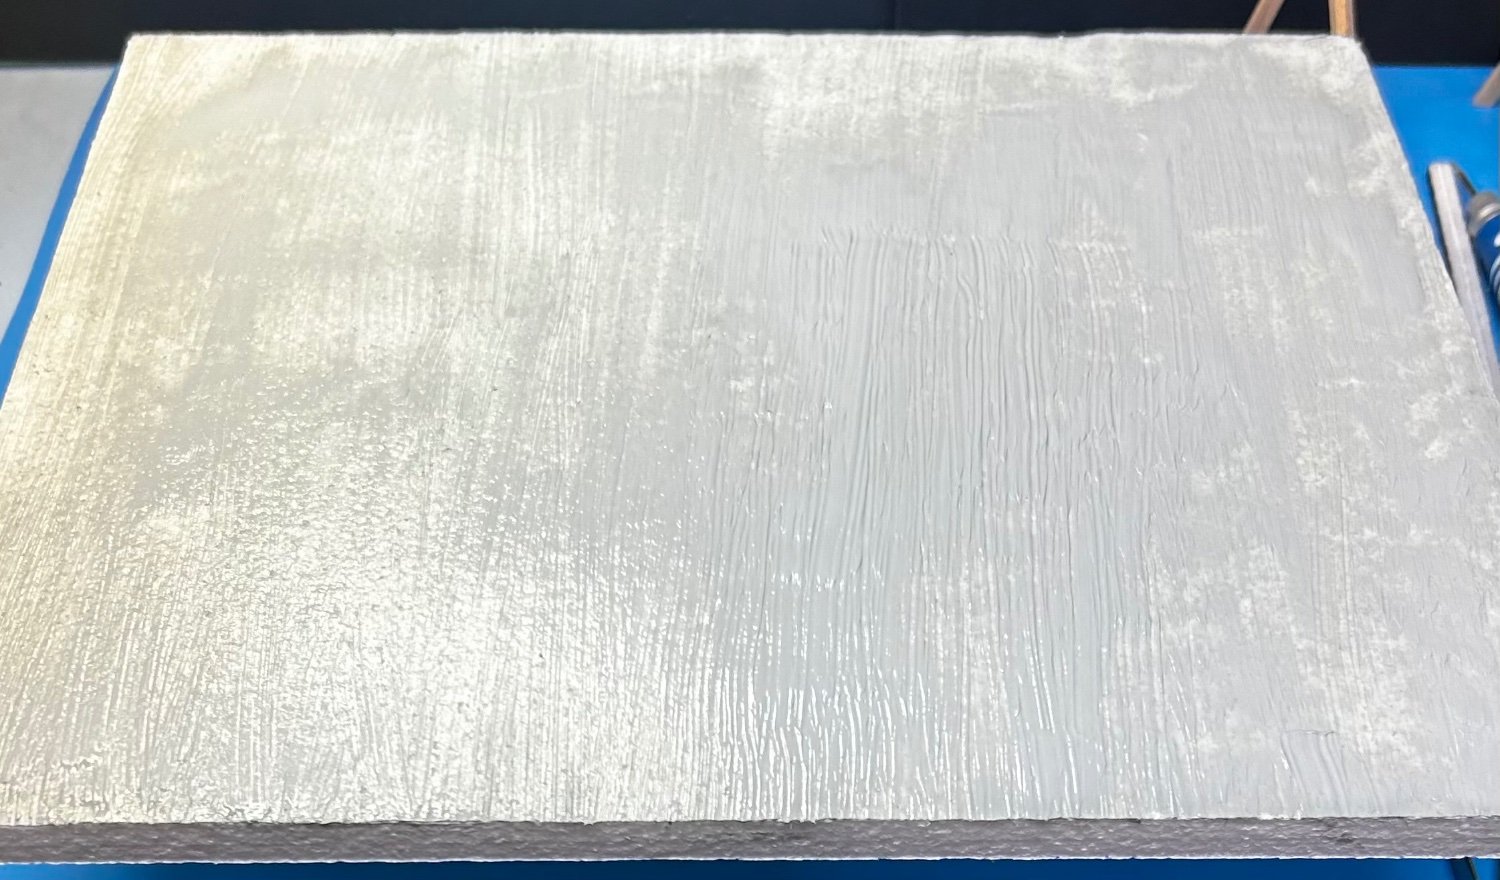
I used some sheet foam and cut a 12 x 14 inch piece for the floor. Mixed Vallejo pale gray with acrylic gel for texture then gave the floor a “broom finish” with a stiff flat paint brush. I’ll use a similar technique for the walls with dark red mixed in acrylic gel, then use a scratch built tool to strike the mortar lines for the brick treatment.

- Egilman, mtaylor, Landlubber Mike and 6 others
-
9
-
Great body style, when car brands had their own distinctive look, unlike today when they almost all look the same.
- Egilman, Old Collingwood, Canute and 2 others
-
5
-
22 hours ago, Baker said:
Just an idea.
Why don't you make 2 if you're going to scratch build.
One with all the tools for models under construction.
and one as a "showroom" for finished modelsGreat idea! I bought some materials from Hobby Lobby to scratch build my own. Will plan to scratch one of an actual workshop.
Meanwhile, this will be coming soon to a showroom near you
-
-
I’ve owned the 1:24 scale Garage and Tools kits for a long time but never got around to building them. Realizing I need a better backdrop for photographing my model cars, decided to slap these together and see what I”ve got.
Right off the bat, it seems two garage kits are needed to make it wide enough to suit me. The kit is designed to attach multiple garage modules and stretch it out. I’ll be ordering another garage and connect the two.
Here’s how one looks without any tools. Very simple construction. Cardboard wall paper and flooring included in the kit.
I’ll likely build another garage from scratch. I think I’ll be more satisfied with that. This one leaves me rather cold, but it’s better than nothing.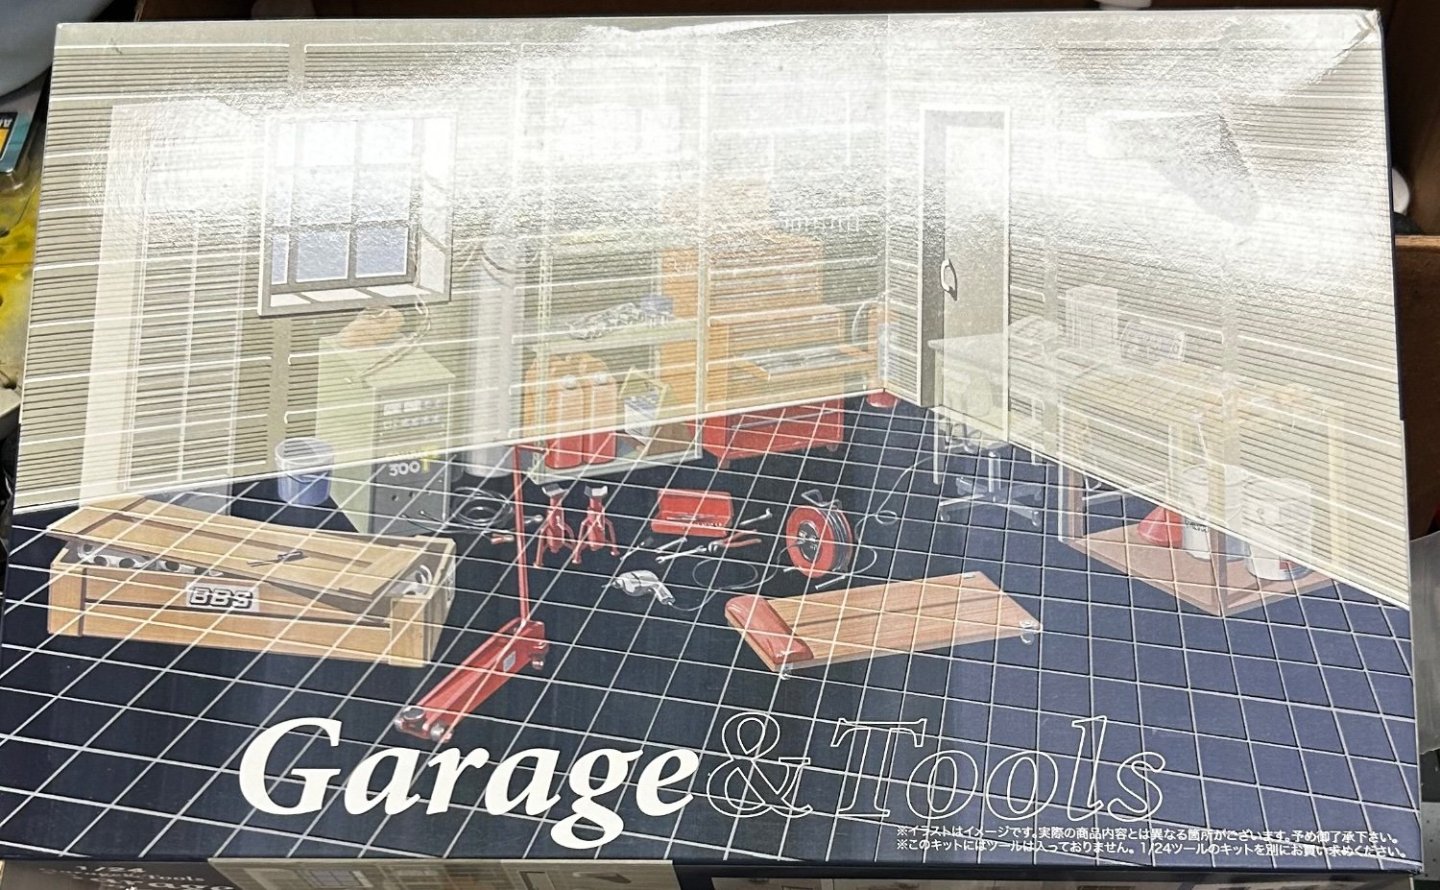

-
Love the model, Chris. The Italian aircraft subject matter is a favorite as well.
- Old Collingwood, ccoyle, AJohnson and 4 others
-
7
-
I've come to the end of the road with this one and am calling it finished.
Decided against more clear coats and am satisfied as it is.
Thanks once again for following along, your likes, your comments, and very interesting discussion. It was lots of fun. See you again soon!


-
22 minutes ago, king derelict said:
Boy, there is no holding those MiG people. Looks very good
Alan
But I have only found one dealer in the USA who carry the Cobra Motors paints right now. More European based as are the actual colors.
- Old Collingwood, Egilman, mtaylor and 2 others
-
5


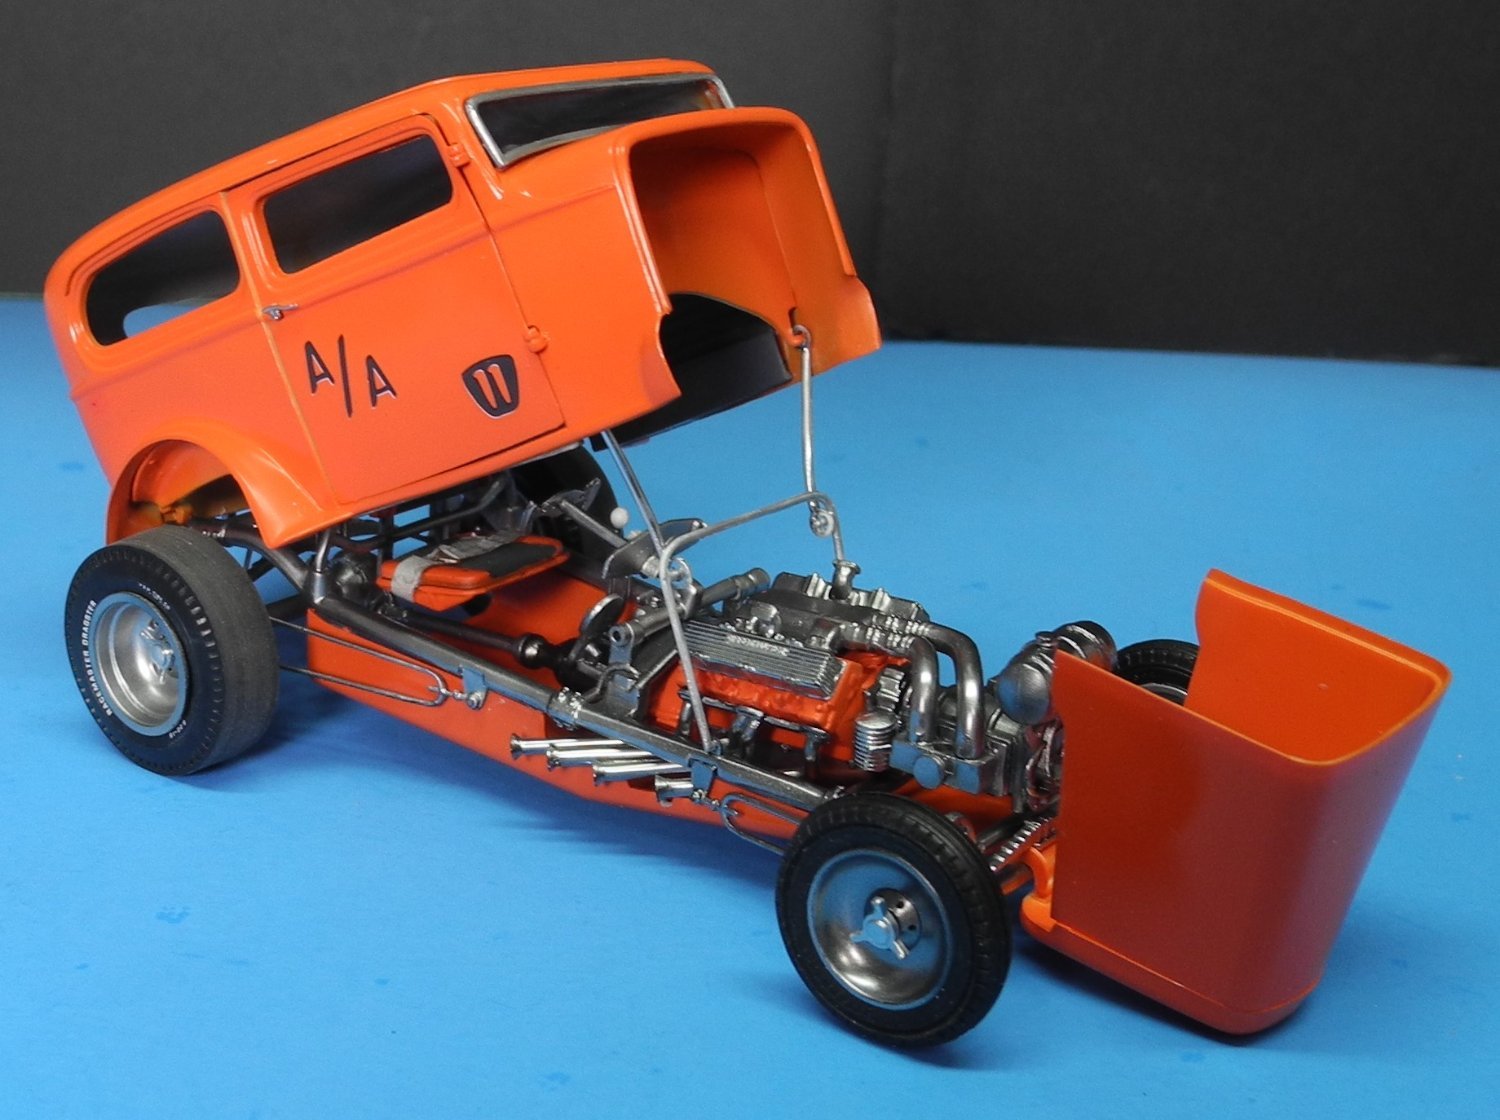
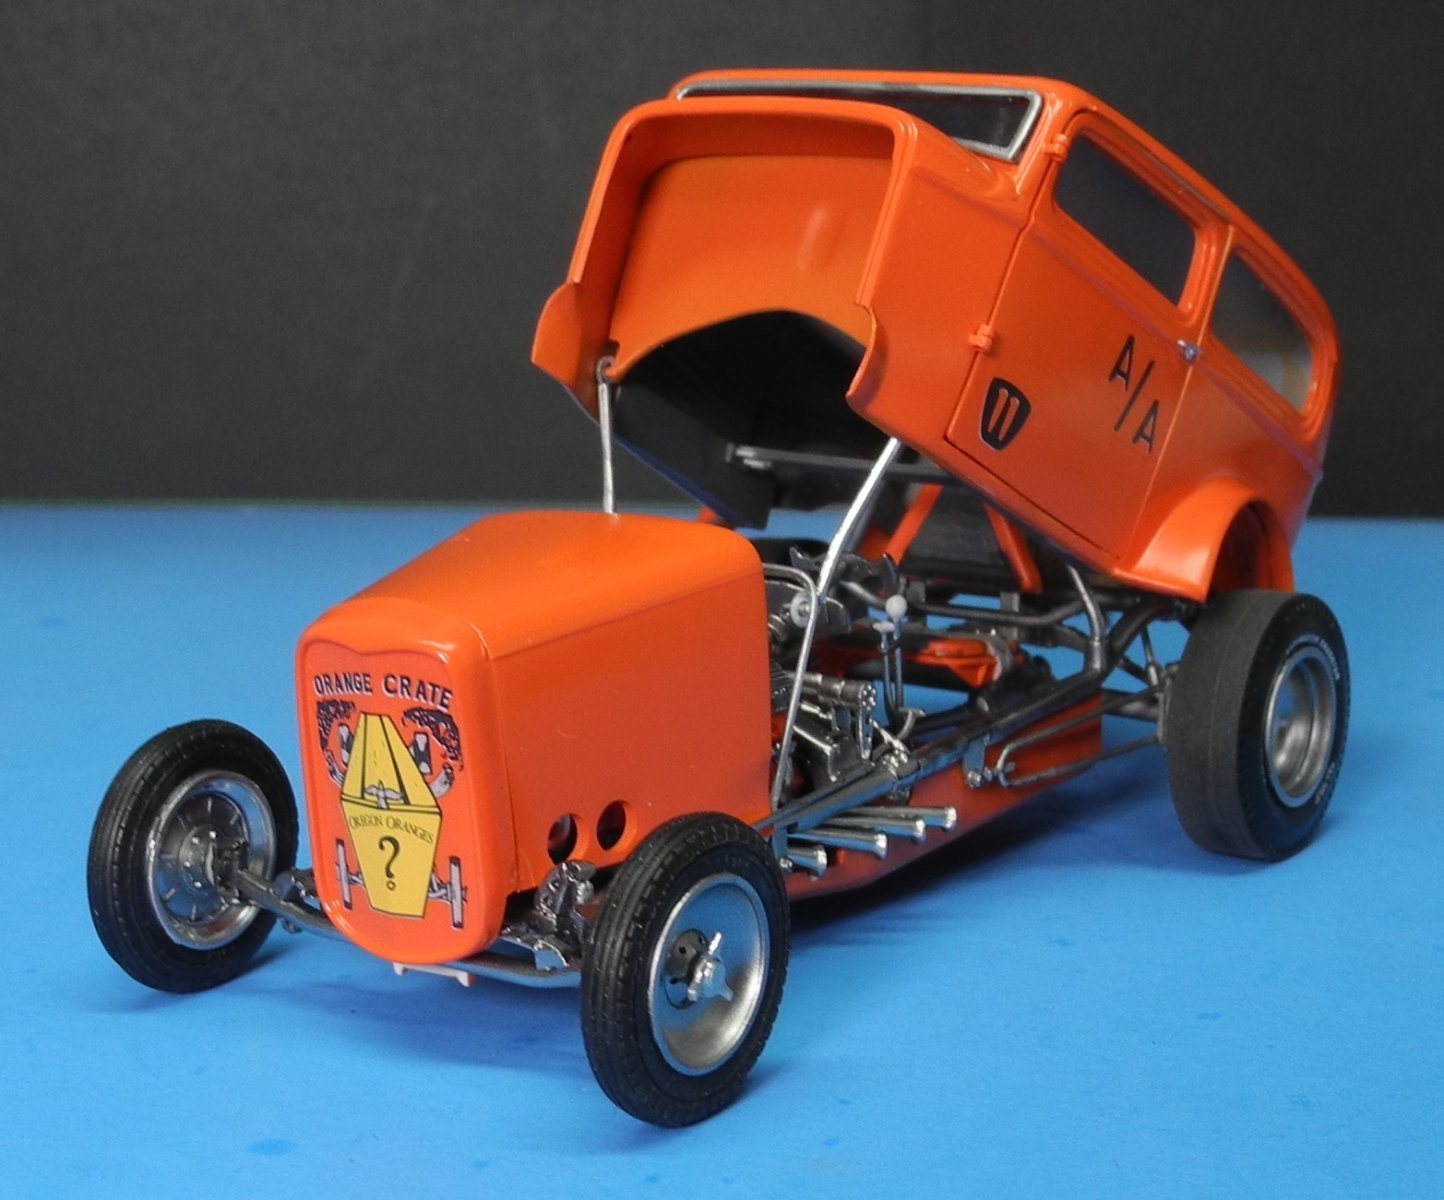

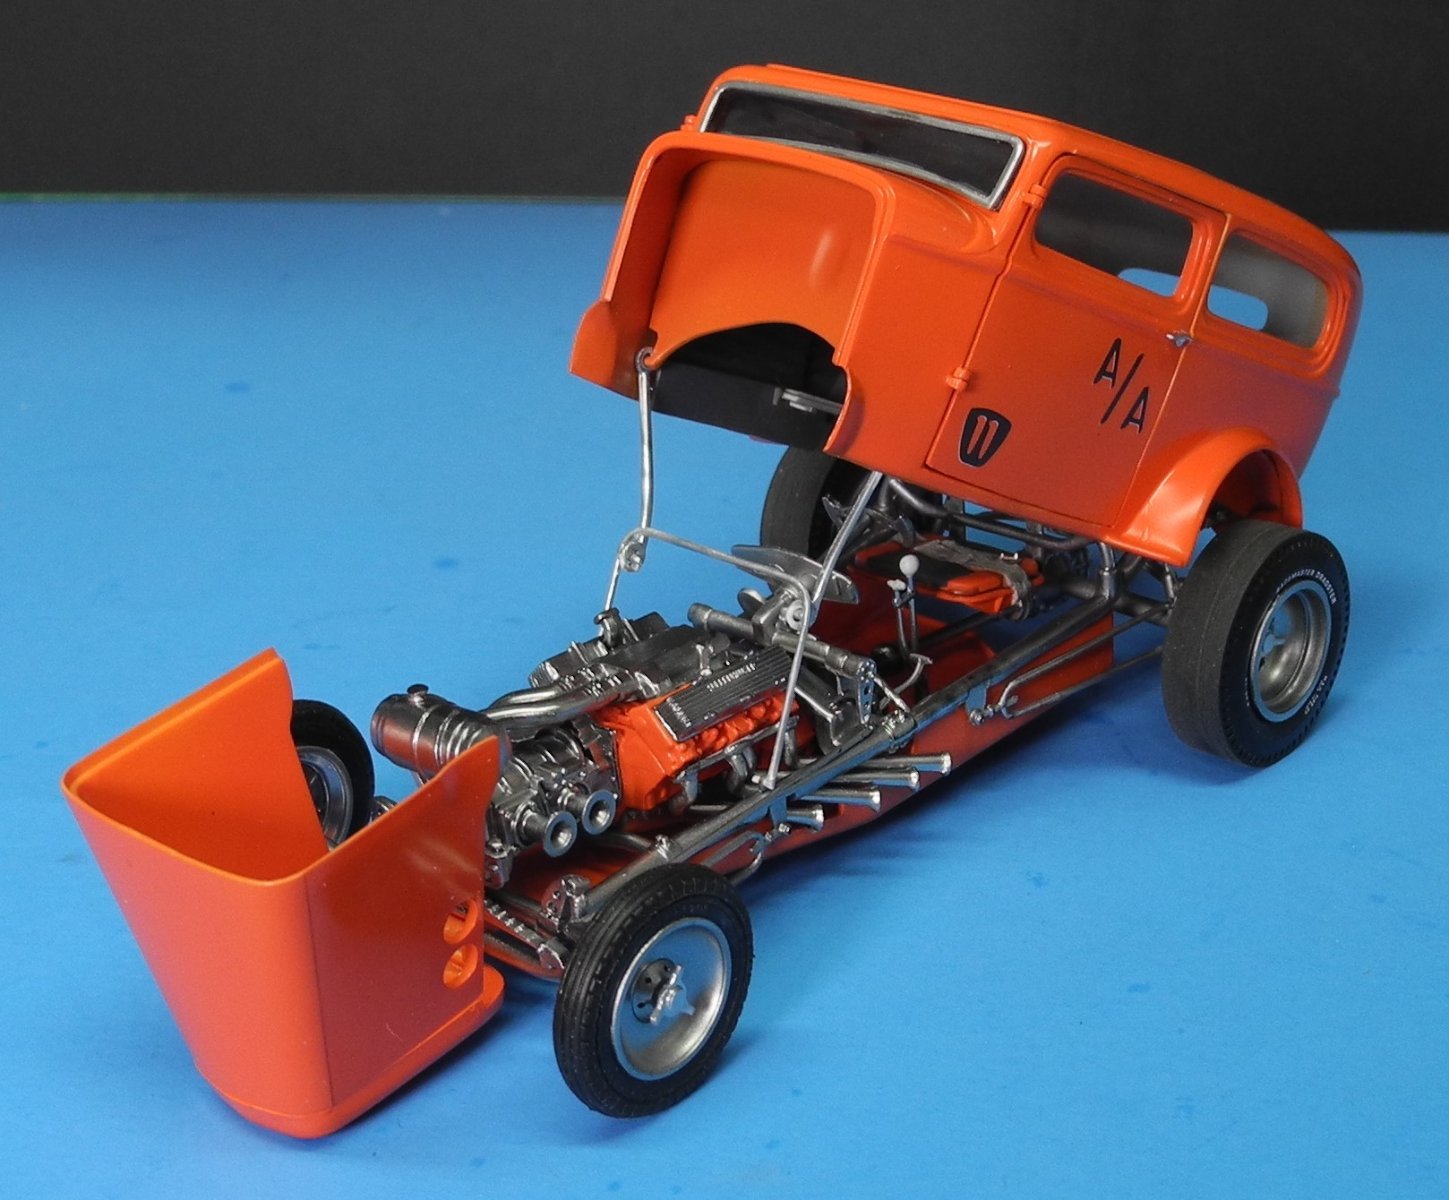
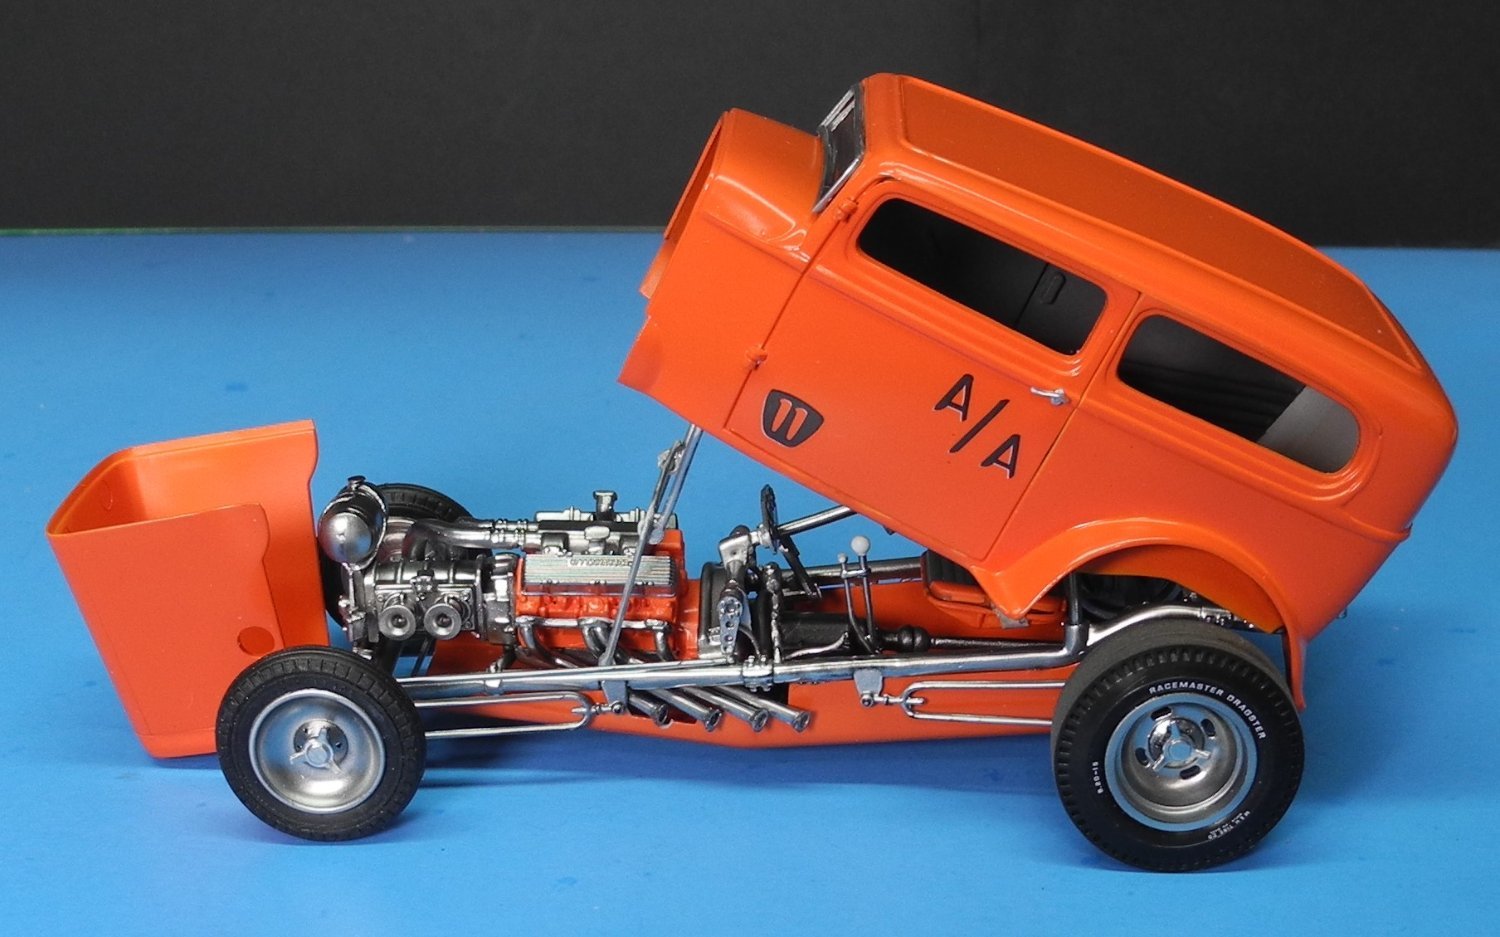

Mike Sullivan Fiat AA/Fuel Altered Dragster by CDW - Finished - Kit Bash Custom Build - 1:25 Scale
in Non-ship/categorised builds
Posted
I stumbled upon a new "chrome plated" finishing method for our models. It involves items your wife may already have at home for nail care. I ordered all the items you see here from Amazon for around $35. You'll need a UV light, Finishing gel, and a chrome pigment powder. You'll apply a coat of the finishing gel on the item to be chrome plated, then apply the UV light for 60 seconds. Last, you'll use foam tipped makeup applicator to apply a small amount of the chrome pigment to the part. Use a soft paint brush to lightly dust off any excess pigment and "shazaam!", you've got the brightest, shiniest chrome you've ever seen. Darned near perfect. Very very easy to do. We'll just have to see how well it holds up over time but seeing as how it's for nails, it's likely to be very durable. This small amout of product will do a LOT of small chrome model parts. I have doubts about doing large parts but will test that at some time in the future. For the chrome parts for this model, it's perfect so far.