HOLIDAY DONATION DRIVE - SUPPORT MSW - DO YOUR PART TO KEEP THIS GREAT FORUM GOING!
×


Salty Sea Dog
-
Posts
666 -
Joined
-
Last visited
Content Type
Profiles
Forums
Gallery
Events
Everything posted by Salty Sea Dog
-
 I'll give it a try! Thanks!
 -
Nicely done repair!
-
Hi Mario! Wow!! This is really cool! - great job! Could you please explain how you did the painting of the weathered rudder hinges? I would like to acheive that kind of look too. Thanks!
-
Awesome work! The tiles are genius and the dragon head looks great!
-
This is looking very interesting. Nice work!
-
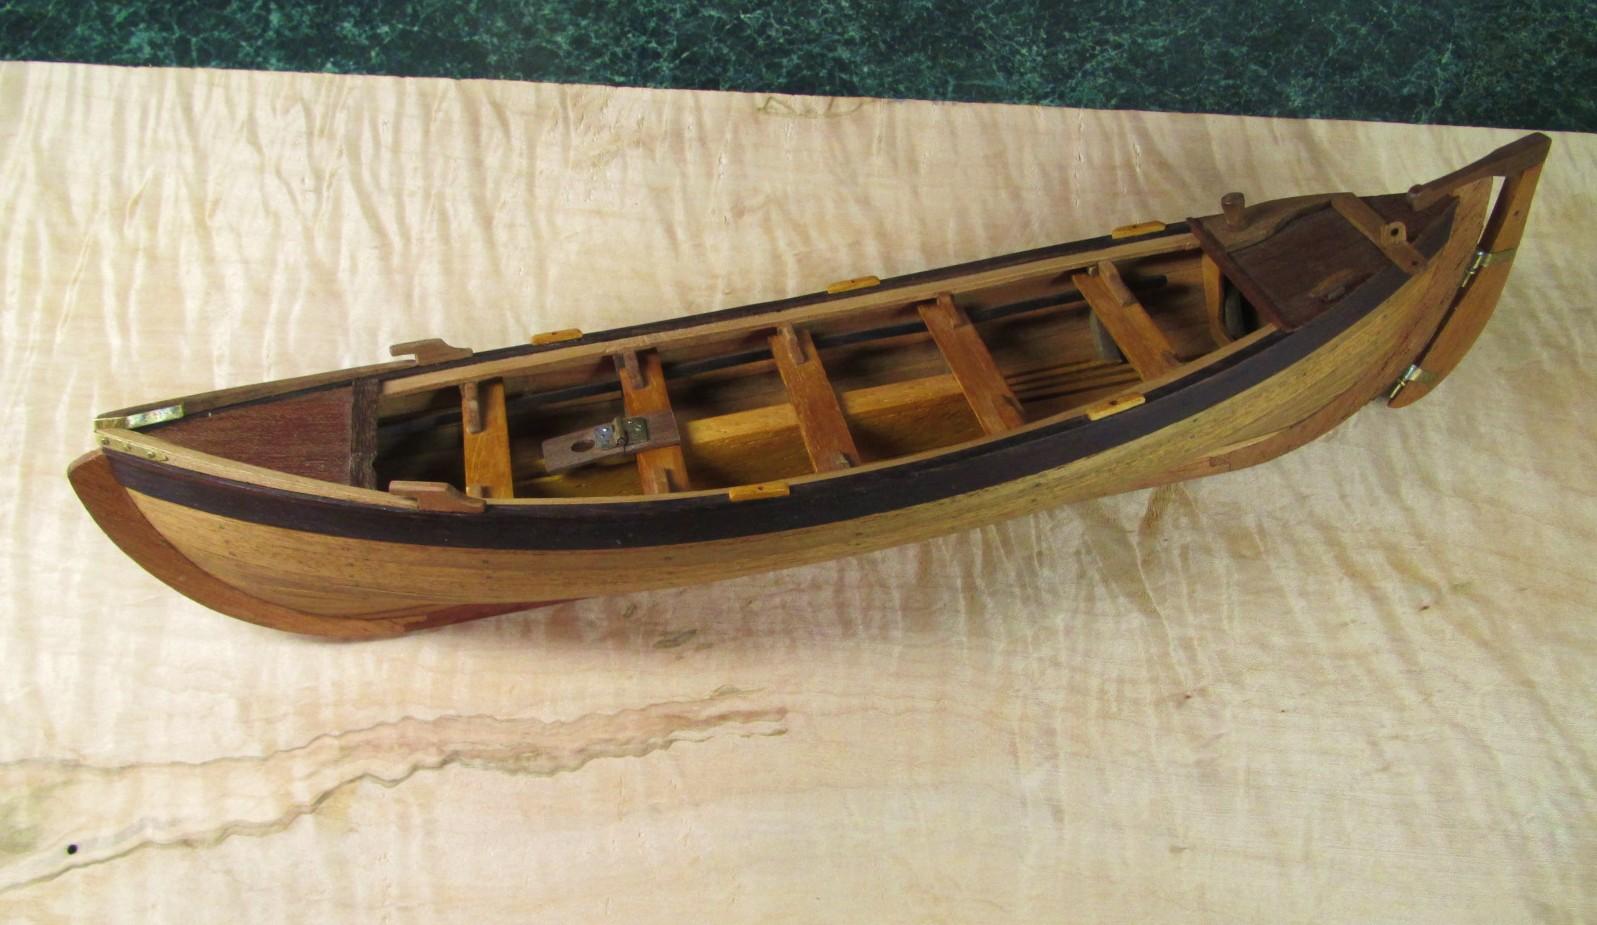
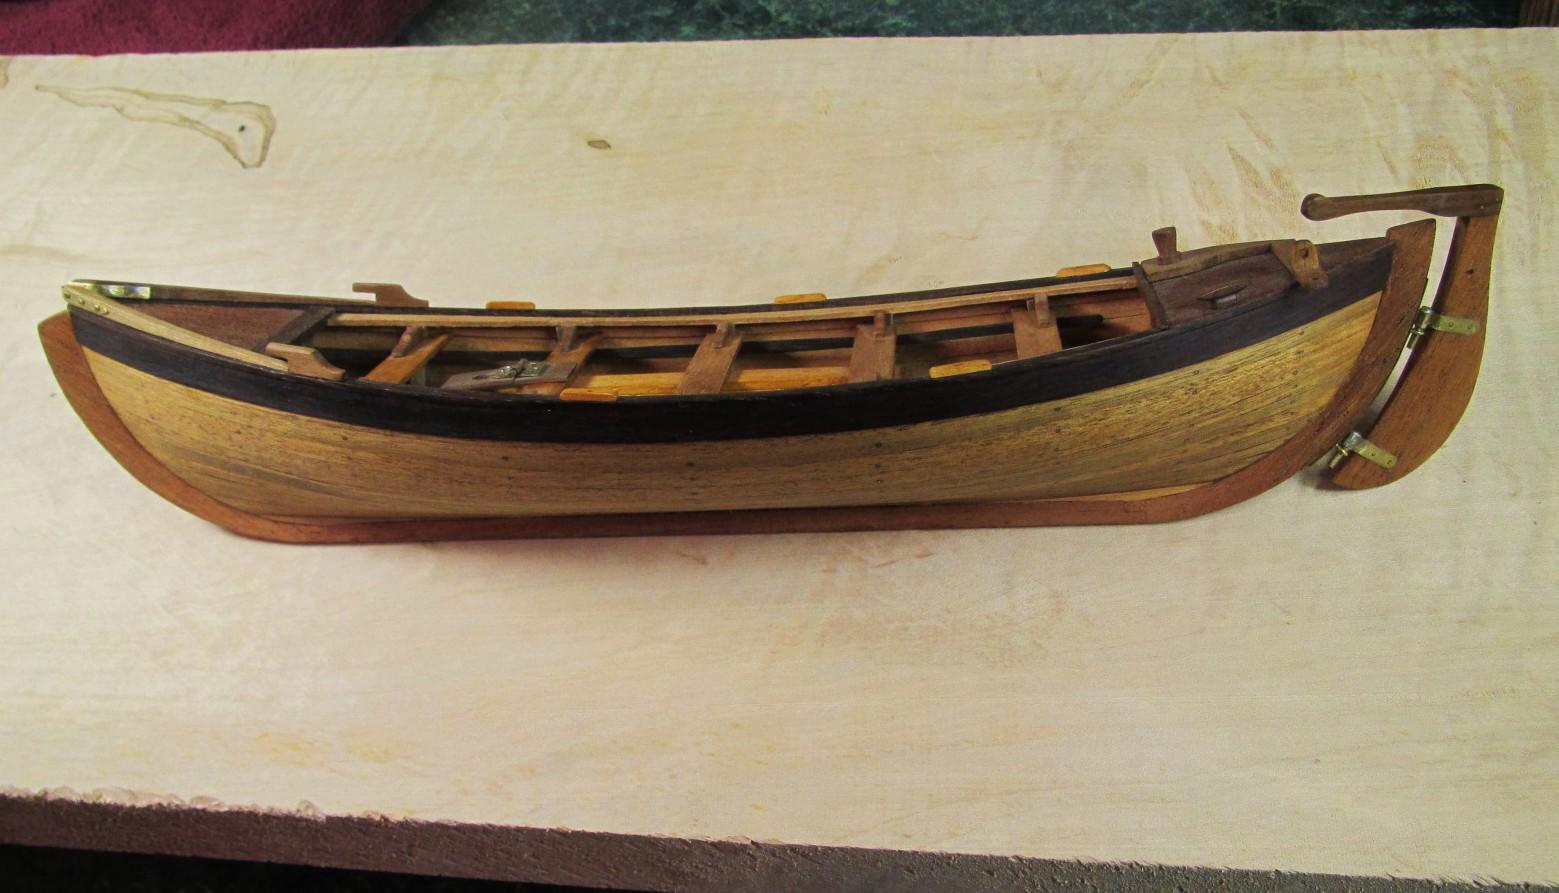
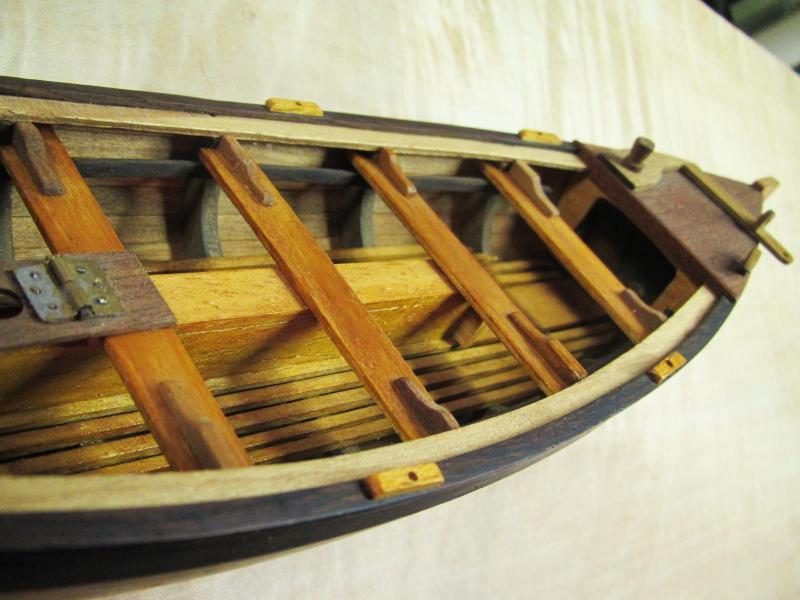
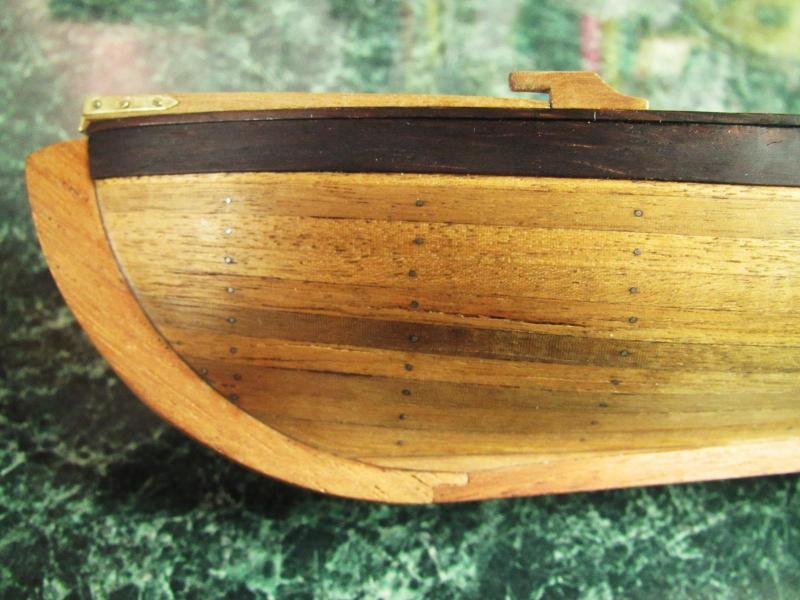
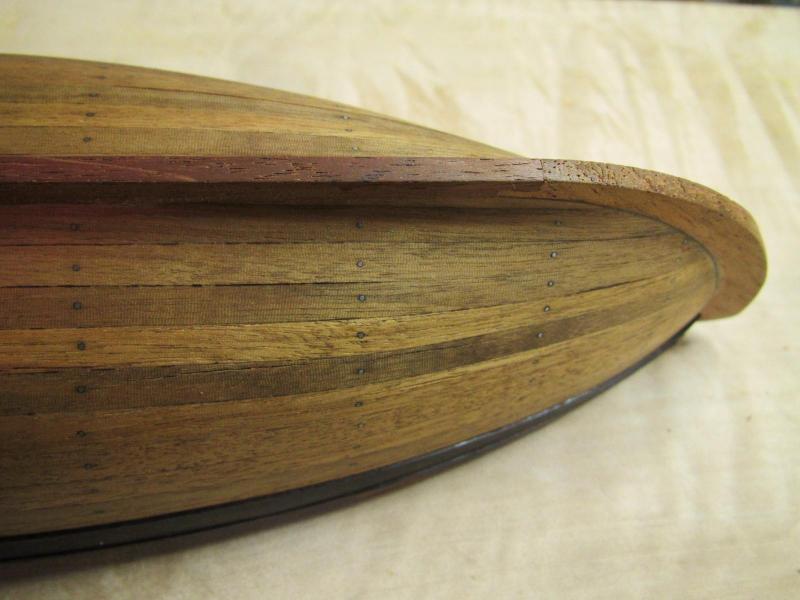
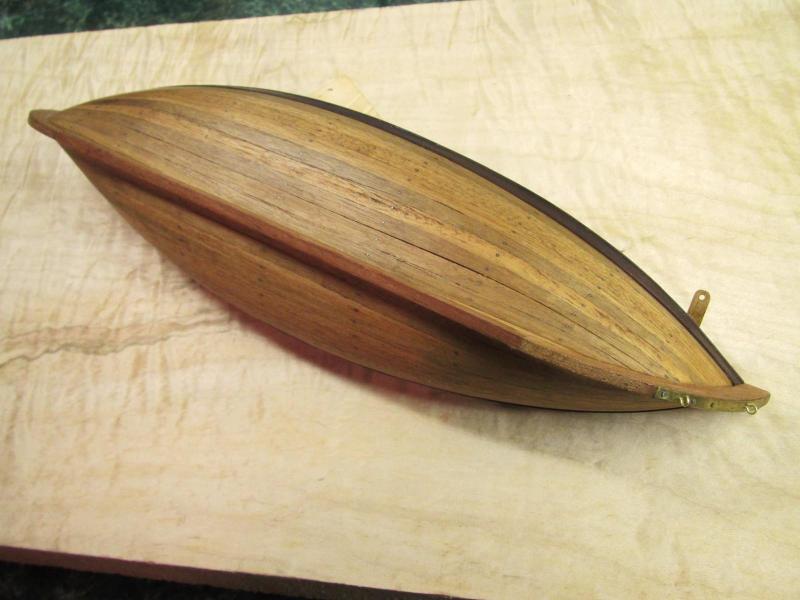
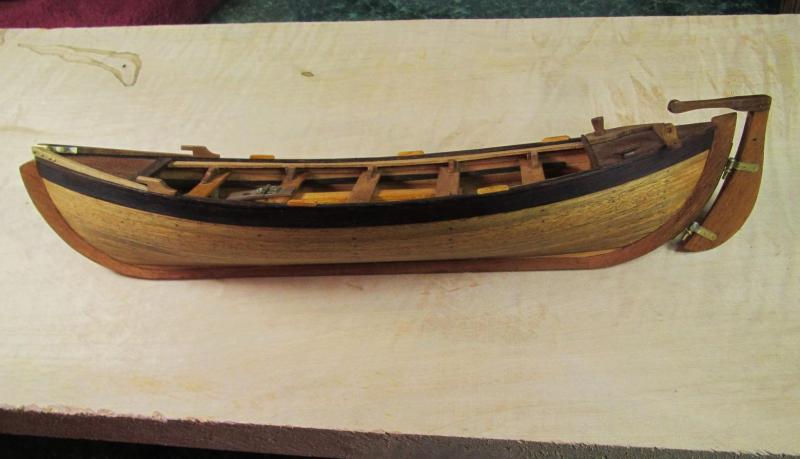
2) Original work done in 1986/87 The frames on this kit are plywood so they were lightly sanded then stained in dark walnut before assembly to help conceal the laminations. I stole that idea from the picture on the box. There was no internet back then to learn about planking (I was using a state-of-the-art PC with dual floppies at work!) so the 16 page booklet "Planking Model Ships" by Richard Mansir was my guide. Once I started the single planking it became obvious that I really needed to get the edge joints beveled just right. I found it tricky to get the joints to look tight on both the outside and the inside. After one plank was installed and secured and the next one was spiled and bent, I slid a folded piece of 220 grit sandpaper back and forth between the 2 planks while holding the new plank against the previous one. Also shown in this picture, although it was done more recently, is the finish that I applied on the ramin wood parts. Because the wood is so light and porous it showed dirt (or walnut dust transferred from fingers) easily. The floor boards and centerboard case are sealed with clear (super-blonde) shellac. The thwart seats and oarlock bases are finished in garnet shellac. My first screw-up was only ordering the 5mm wide walnut planking.The garboard planks would have been better if I had used 10mm planks for them. I first tried staining the little wedge shaped areas of the false keel that showed at each end but that looked like poop. Later I cut shallow pockets into the false keel and inlayed some wedge shaped pieces of walnut, but they are a lousy color match and are too light. I may try coloring them before I put a finish on. Another problem that has occurred over the years is that some of the walnut planks have shrunk or developed splits. I'll need to repair these before applying a finish too. The nails that came with the kit were really soft and even with pre-drilling, they bent too easily. I used stainless steel straight pins instead. Each one had to be clipped off which left a wedge shape tip which was carefully ground down as close to the planks as I dared with a Dremel grinding wheel. I then used a small drift punch to seat them flush and then finished with block sanding with a hard block. Stainless pins are a pain! The pins are staggered side-to-side on each plank per Mansir's book while still hitting the frames. At the time the boat was set aside, the keel, prow and stern posts and floor boards were added but nothing else in the pictures were.
- 515 replies
-
- 8
-

-
- artesania latina
- whaleboat
- (and 1 more)
-
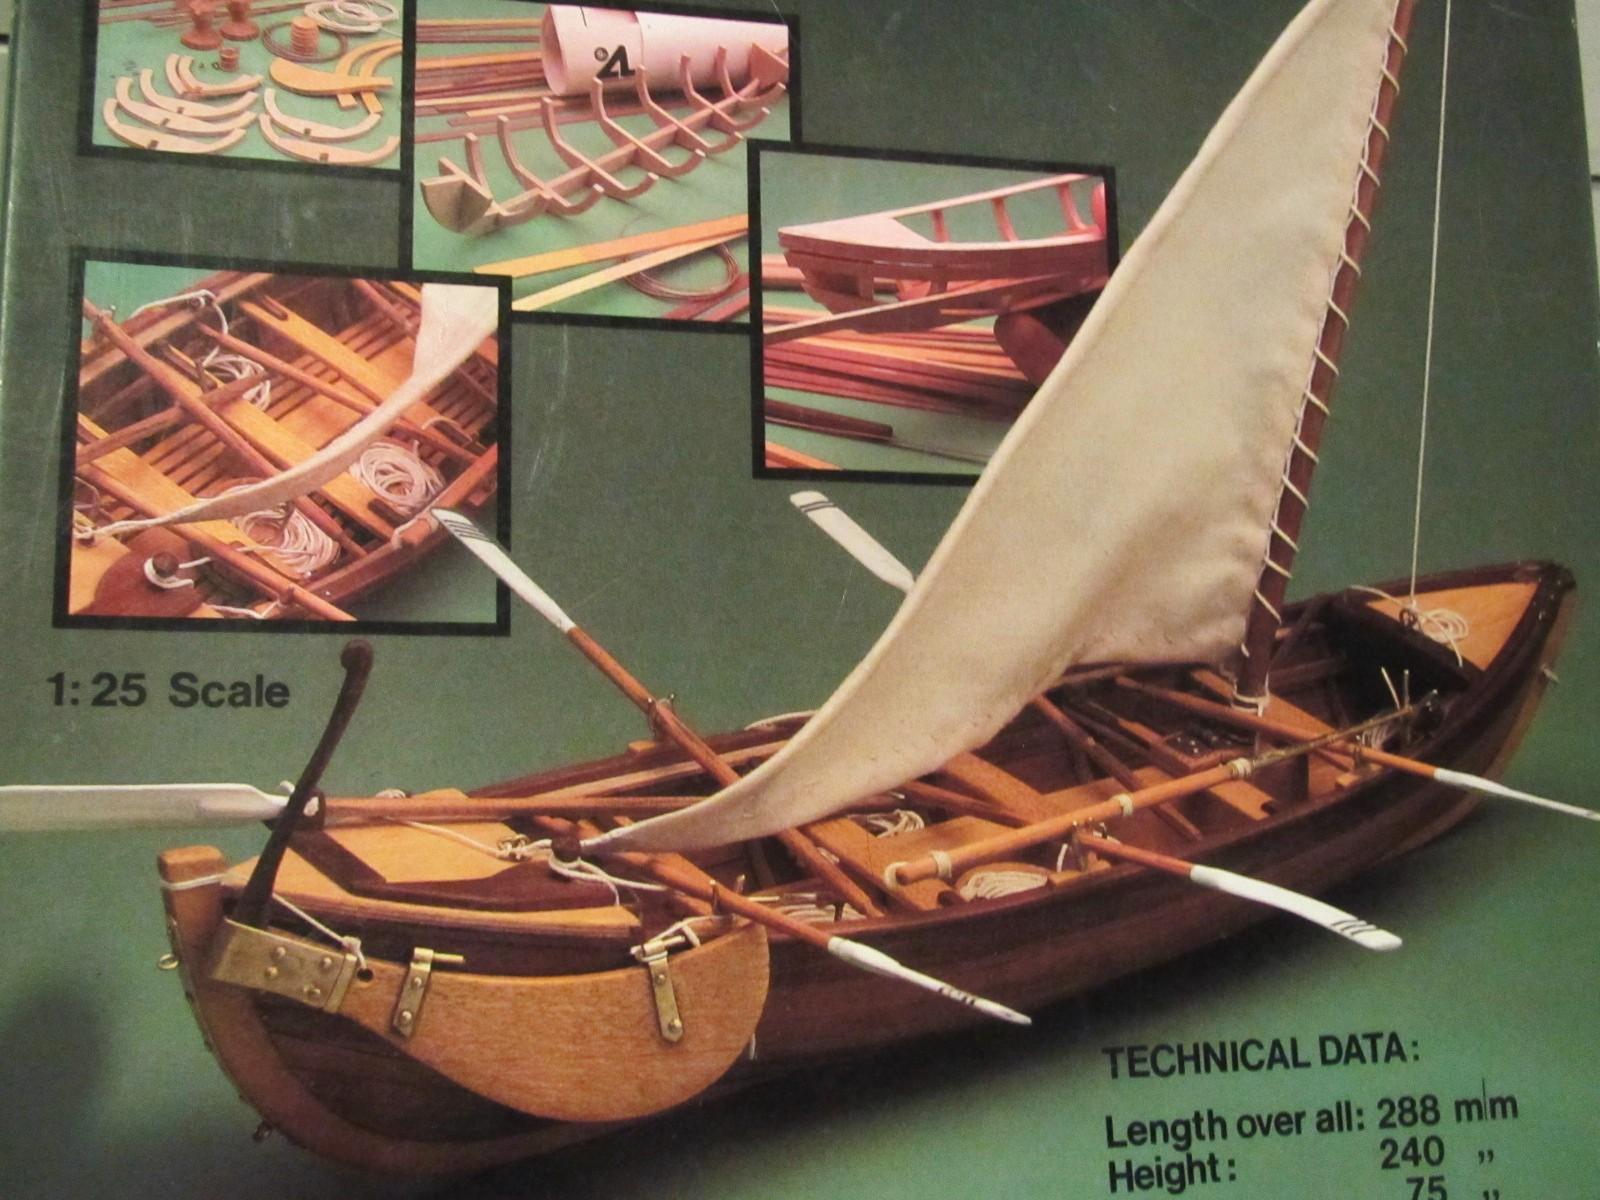
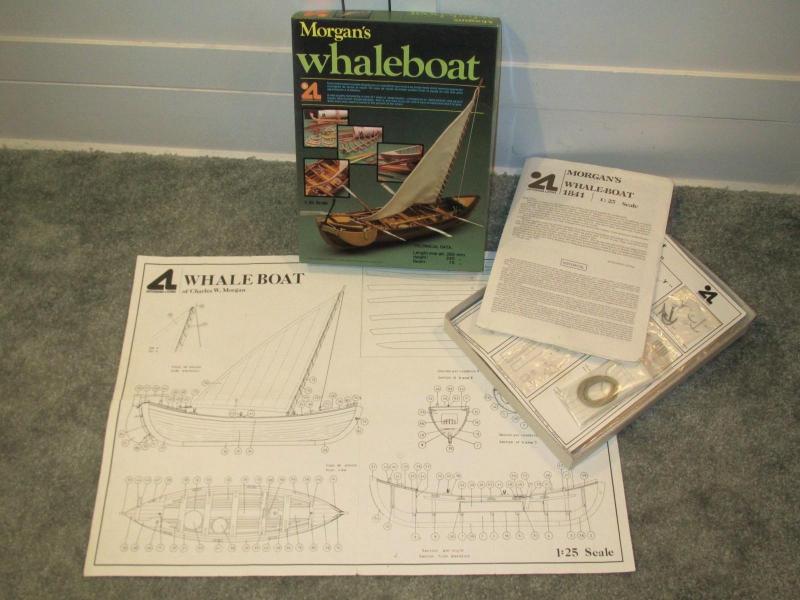
Yesterday started like this: After shoveling a spot for our little white dogs with low ground clearance to do their thing, I decided it was the perfect day to gather up info to start a build log. I had the day off anyway. My wife gave me this kit for Christmas back in 1986 after I casually left a Model Expo catalog laying open in her chair with a note saying 'I'd really like this for Christmas'. I got a good start on it back then, but life got in the way and it sat until about a year ago. Back in 1986, Model Expo used to sell this kit for $24.95, and although the kit is no longer made, they show up on eBay for about $25 every now and then. This boat is inflation proof! Here are the box pictures, which I beleive by build log law, must be shown about now: This kit is designed to be double-planked with wide pre-shaped limewood first layer planking and "walnut" veneer second layer planking (my kit's 2nd layer strips were a dark red-brown wood with giant pores like oak end grain). The instructions said that if you prefer, you could buy some 1.5mm x 5mm walnut strips instead. Of course the nice pictures of this boat on the box and in the catalog showed it as single planked with good walnut. I thought it would look wierd in an open boat if the backside of the planks didn't match the outside, so I ordered some walnut planking from Model Expo. Besides looking better, I figured that it would be twice as easy to build this way since it would only be one layer! My logic could have been wrong about that... So here is where I am in the build now. The hull is about ready to receive a finish and the detail parts made. I've taken pictures with the boat sitting on a really nice maple board because anything would look better than it really is while sitting on it! I'll add posts to try to discuss some of the challenges and little triumphs I encountered along the way until I get caught up to the current build activity. I am to slow as Popeye is to fast, so if I can stay ahead of my posts in real life, I hopefuly will be able to avoid long delays between posts. Starting this log should also put a fire under my ...


- 515 replies
-
- 5
-
-
- artesania latina
- whaleboat
- (and 1 more)
-
MJD, I think we all tend to be our own worse critics. In case you don't see it, your work shows a great deal of artistry. The top view of the bow is stunning! I have the Billings version of this on the shelf but I'm trying to build up the chops to do it justice before I attempt it. I'm learning a lot from you!
-
Does anyone know if wood harvested from a dead standing cherry tree would be any good, or does wood need to be freshly cut and dried?
-
Hi Robbyn! I think your ship is looking really good! If you are wanting a color that looks a little deeper and richer than the bare wood, maybe all you really need is a finish coat. I'm a big fan of shelac because you can wipe it all off with alcohol if you don't like it and it sticks to anything. If you have some scrap planking, you might try wiping a little cooking oil or lemon oil on it and that would give you a good idea of what a clear shelac finish would look like. I'm in the same boat as Steve (sorry -bad pun!) and like bringing out the natural beauty of the wood with clear finishes whenever possible. Did you get any of that freaky thunder snow where you're at? That was bizzare!
-
Hi Popeye! I'm so glad that you put this build back up -I was really enjoying it before the crash. Those lobstah traps are the coolest! I too am amazed at how quickly you can knock stuff out. You are like the Chuck Norris of model ship building!
-
Hi Robbyn. I'm in the seaport of Wichita. Well it's on the Arkansas river and I've seen some canoes. We used to have the Koch's America cup racer on display here though. Where are you at?
-
Great tip! I have a roll of that dull tape that didn't look too good when wrapping Christmas presents. So this is it's proper use!! Hi Robbyn! It's good to see another member from the seafaring state of Kansas!
-
Wow! Very nice work md1400cs!! I especially like your jointery in the planking. Are the square nails included in the Corel kit? There is a randomness to their size that looks really cool in a rugged kind of way and it gives a hefty look to the planks. Nicely done!
-
MONTANES by Garward - OcCre
Salty Sea Dog replied to Garward's topic in - Kit build logs for subjects built from 1751 - 1800
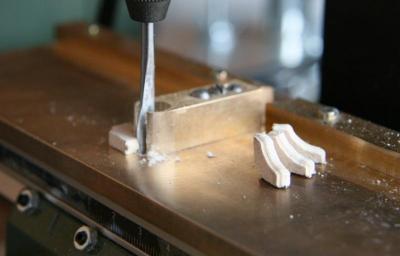
Hi Garward! When you are edge milling little pieces like these, do you have a special way to hold and guide the pieces, or are you using your fingers? Does the shape of your aluminum fence allow you to use your fingers without any danger? What rpm is the bit spinning at? Thank you for re-posting this info. Your imaginative techniques and amazing skill are inspiring! You sir are one of the treasures of this site.