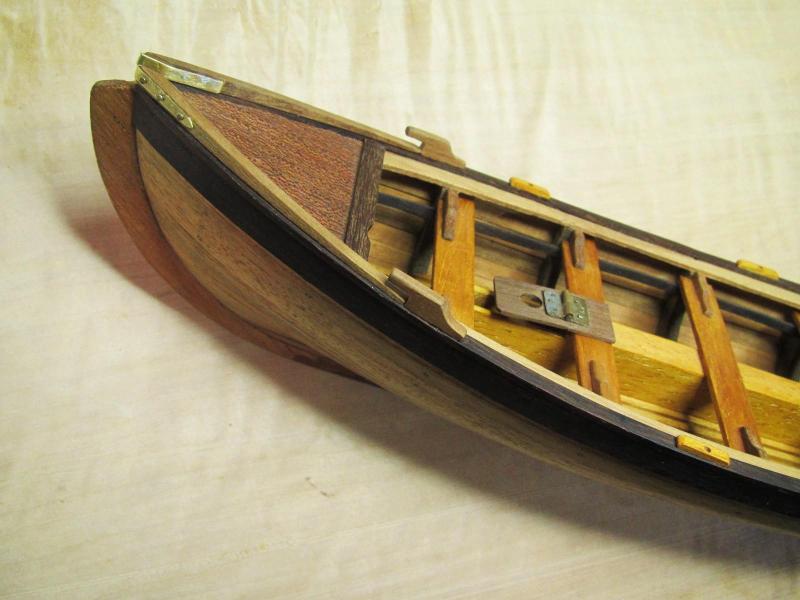
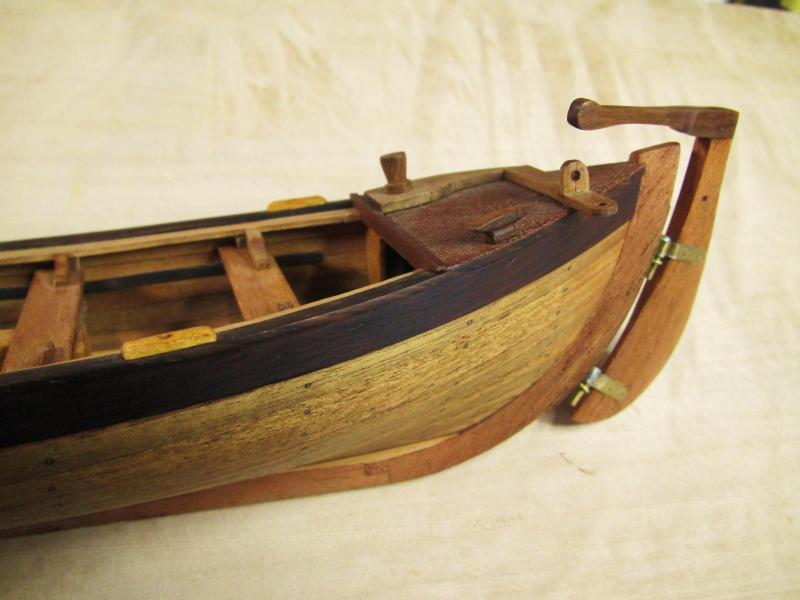
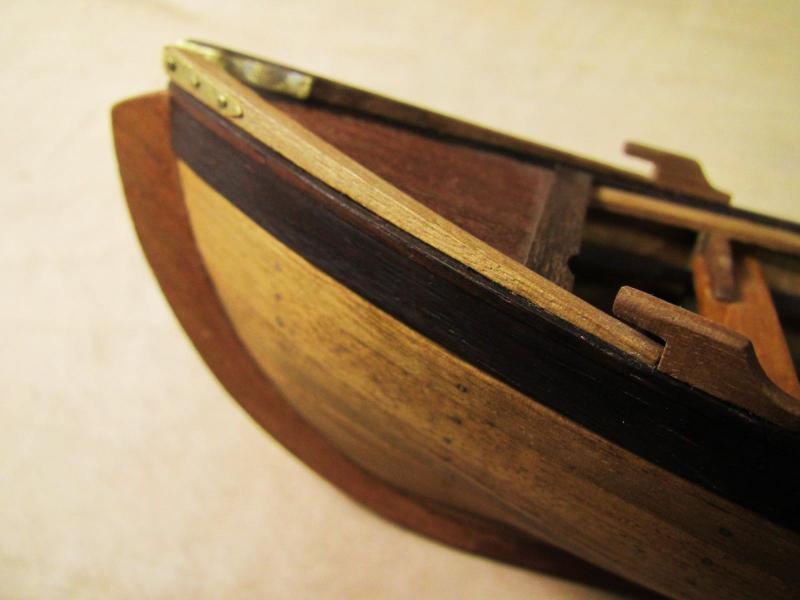
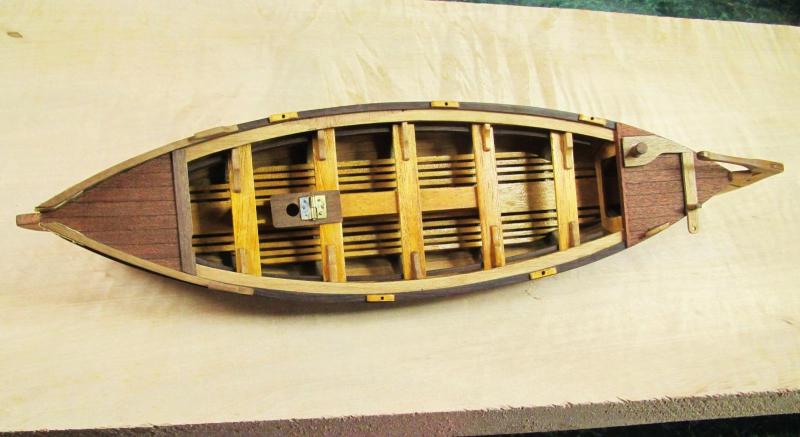
-
Posts
666 -
Joined
-
Last visited
Content Type
Profiles
Forums
Gallery
Events
Everything posted by Salty Sea Dog
-
Hi Sarah! Very cool boat! Nice job!
- 35 replies
-
- bounty jolly boat
- artesania latina
-
(and 2 more)
Tagged with:
-
Hi Keith- Thanks for dropping in! I recently noticed a newer version of this AL kit on eBay with a painted boat on the box lid. The old kit had a wood non-painted boat on the box lid (like the one in my first post). The newer "painted" kit sems to sell for twice as much as the old kit but I don't think there is any difference. Maybe there are better instructions in the newer kit! Just curious, but do you have a favorite Pink Floyd album? I've always been fond of the "Wish You Were Here" album.
- 515 replies
-
- artesania latina
- whaleboat
-
(and 1 more)
Tagged with:
-
Hello from Kansas Anja! I'm wishing you the best with the interview. Your Half Moon is really looking good and I'm anxiously awaiting to see more of it. At the risk of sounding like Sjors, we need some more pictures of it!! I'll try to be patient though.....
-
Thank you for the kind words Bob -much appreciated. Thanks for the link too. I had not seen that before and it is very cool to see real ones being made. The brass roller has given me an idea.... Good luck with your Lobster Smack! P.S. - If you ever think about throwing your "rough sketch" away, I'd take it and hang it on my wall!
- 515 replies
-
- artesania latina
- whaleboat
-
(and 1 more)
Tagged with:
-
Hi Pete! Like Janos said, you will encounter glue adheshion problems if you oil the parts first. I started the Midwest Dinghy kit as a side project and the planks overlap along their long edges (lap sided) which require that you sand bevels on the overlaps. The planks are also oversize in length so they must be trimmed and sanded after they are glued. The front edges of the planks then have to be sanded further to pointed shape. If you finish these pieces ahead of time, you will be sanding the finish off in a lot of areas and then re-finishing them. Besides the glue not sticking well to oiled surfaces, you could end up with splotchy areas in the finish depending on the finish you use. The dinghy kit has been pretty fun so far and the instructions are excellent. I'm doing an oil and shellac finish on my whaleboat build.
-
Maybe some slalom skiing through the bouys?.....
- 552 replies
-
- maine lobster boat
- Midwest Products
-
(and 1 more)
Tagged with:
-
Thanks Augie! I started going through your Syren build and it is gorgeous!! I love the details. My head about explodes looking at your rigging- that stuff scares me! I hope that I can get half as good as you some day. I had to laugh seeing your cat. We used to have a calico years ago when I did engineering work. I would sometimes be working on large floor plan type drawings and she would plop down on top and watch. She was critical of my work and would bat at my pencil while I was trying to make scale additions! I'm kind of glad she's not here to help with boat building!
- 515 replies
-
- artesania latina
- whaleboat
-
(and 1 more)
Tagged with:
-
Hi Dee Dee! I'm sure glad you are paving the way with all the details you're working out. Really nice work! Thanks for the nice words about my whaleboat. Hope you enjoy your trip to Colorado Springs. P.S. After reading your comment I realized I had made a typo, the Martin was a 1927 OO-18 instead of a D-18. A really sweet tone. It was tough to return that one to its owner after the repair!
- 89 replies
-
- muscongus bay lobster smack
- midwest products
-
(and 1 more)
Tagged with:
-
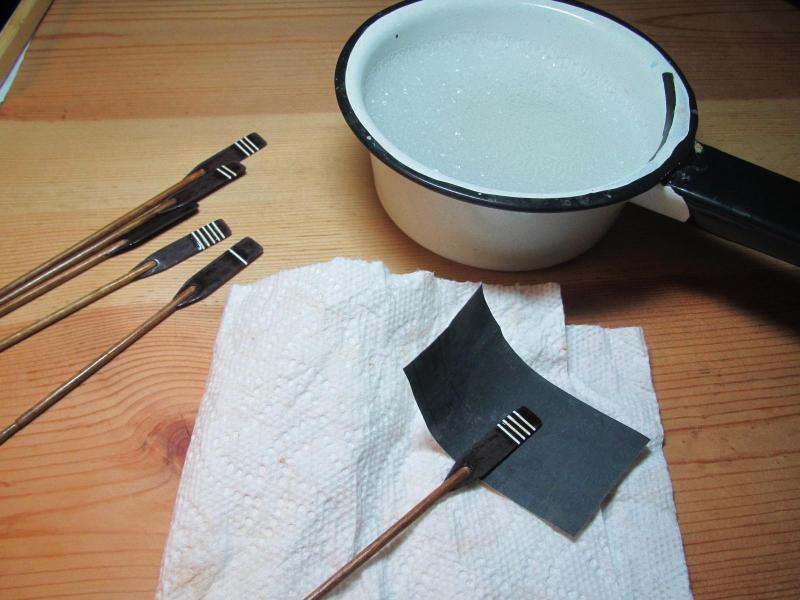
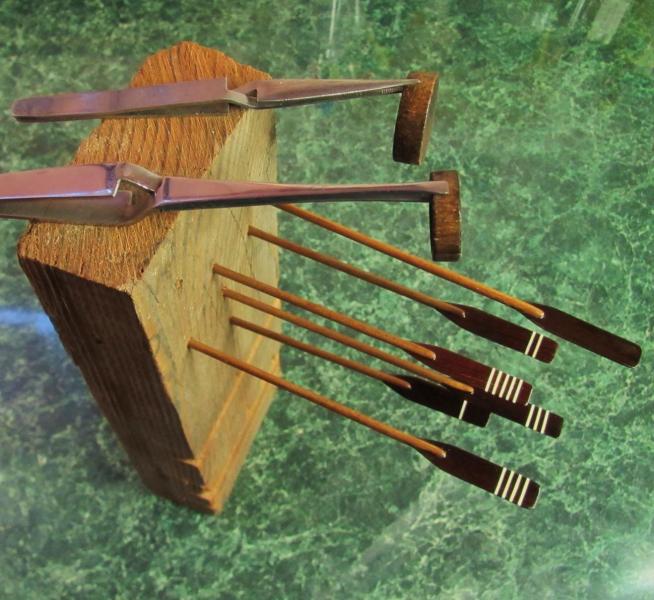
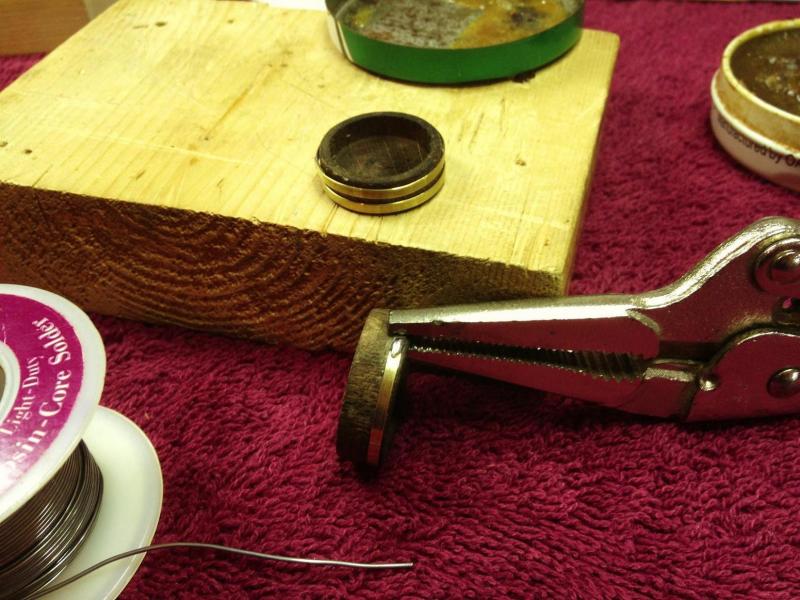
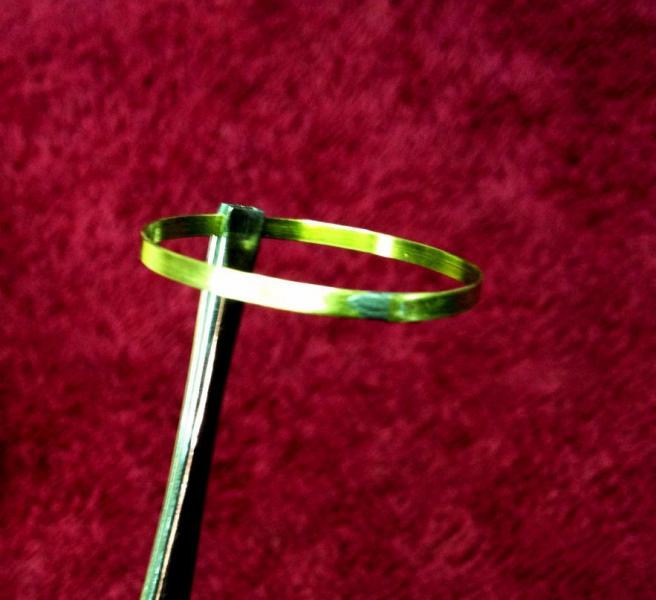
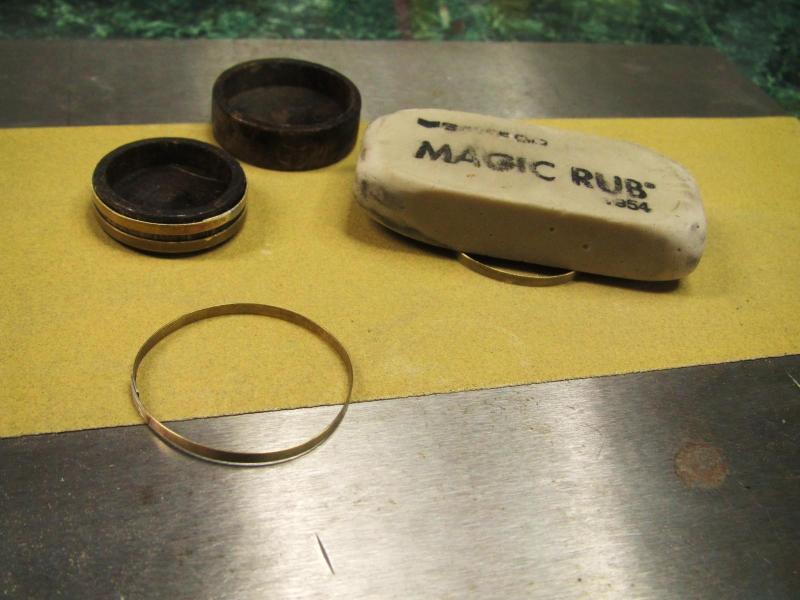
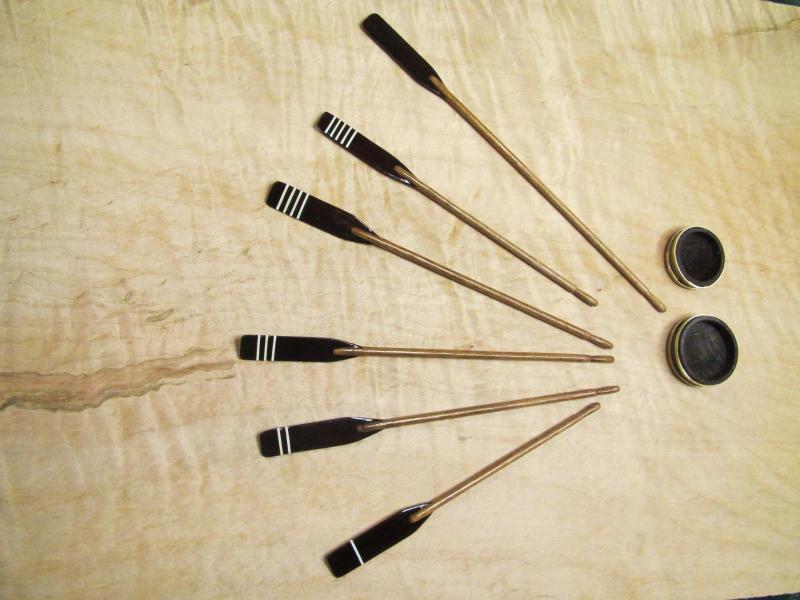
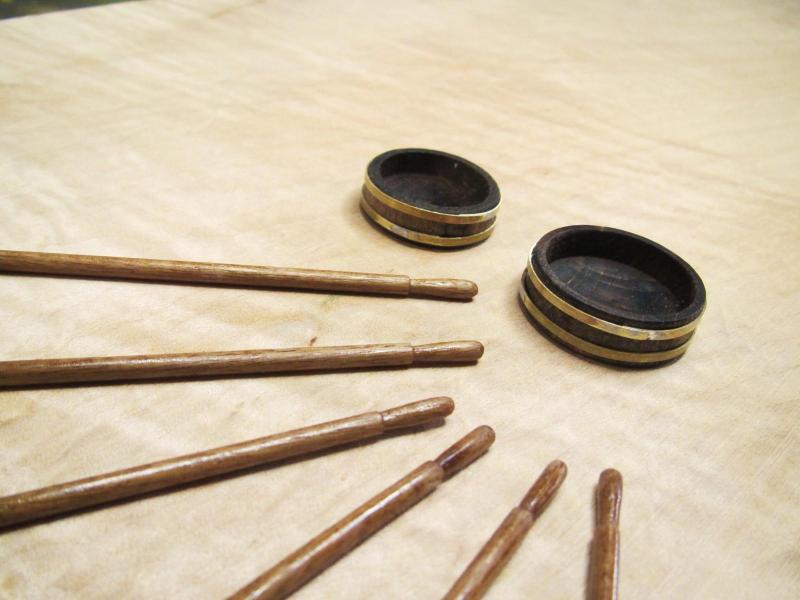
6) Making some little stuff: Because I had some left over cocobolo, it was used for the oar blades instead of the kit provided walnut. The instructions say to paint the blades white and add black stripes but I didn't want to risk being arrested by the wood police for vandalizing nice wood! White stripes were used on the dark cocobolo instead. I practiced masking off and painting the white stripes on scrap wood, but it was looking pretty sad. I ended up using 1/32" Pactra pin striping tape. The tape looked too thick after applying it so I figured a thick finish like varnish would help blend it into the surface. I used some varnish that I had, and thinned it down 50% with naptha (naptha thins varnish and shortens the long dry time too). A little dust still managed to settle in the finish so the oars were wet sanded with soapy water, cleaned and recoated. It took 3 coats to get a build that subdued the thickness of the tape. On the last coat, I thinned the varnish another 50% further with naptha to really speed up the dry time and get a very thin smooth coat. No dust this time! The oar handles were fun to whittle! Heck, all this stuff is fun! The line tubs in the kit were short pieces of dowel hollowed out a little on one side. I mixed up some concentrated water based stain to get them to look like dark barrel wood. I got it a little too dark so I dipped them in clean water and dabbed them with a brush to lighten the stain. WARNING! DON"T DO THAT!! The barrels got swollen and burst open like blooming flowers! I was bummed out and called it a night. The next morning, the barrels had dried and had almost closed up. Having nothing to loose, I decided to really try to dry them out in the microwave. That actually worked! Some water-thin super glue was "painted" on the inside of the barrels to try to keep the cracks closed. The brass bands were then soldered around the barrels and the solder joints were cleaned up with sandpaper. A few days later the weather changed and the humidity went up causing the line tubs to swell a little. The bands popped open at the solder joint. Aarghhh! I resoldered them to fit the new plus size barrels and decided to varnish the barrels inside and out to try to keep their sizes stable. So far, so good!. The brass bands for the barrels were 2mm wide which looked too wide. I lapped them down on some self-stick 220 grit sandpaper using an eraser to grip them. I decided 1.5mm looked OK. I was worried that if the bands got too narrow, it might not take much humidity to make the solder joints pop again. I'm holding off with the rope coils in the barrels for now to make sure that the bands will be OK. A collection of little stuff:
- 515 replies
-
- artesania latina
- whaleboat
-
(and 1 more)
Tagged with:
-
Brian, Thanks so much for the awesome comments! I admit I am a wood geek and I get excited about a nice piece of wood. Dave, It really is my first wooden boat kit. I was self-employed as a guitar repairman for 8 years with a specialty in structural damage. I always tried for an invisible repair. Fretwork involves a lot of metal shaping and extremely tight tolerances (a good guitar setup requires measurements less than 1/1000 of an inch!). I was a detail engineer in the telecom industry for 20 years prior to that. If you look up retentive in the dictionary, there could be a picture of me there! gerty, Thanks! And thanks for stopping in to check out my build. Michael, The mini-me cutout was hilarious and had me laughing out loud! I'm hoping to try something like that. I'm glad you liked the trick with the modified cutters. Augie, Thank you for the very kind words! Crackers, That picture is frightening! To quote the line from jaws - " I think we're gonna need a bigger boat" Thanks for the info on the details. I didn't know about the flags but that makes a lot of sense. I'm imagining something about the length and size of a golf flag with a sharpened tip- would that be right?
- 515 replies
-
- artesania latina
- whaleboat
-
(and 1 more)
Tagged with:
-
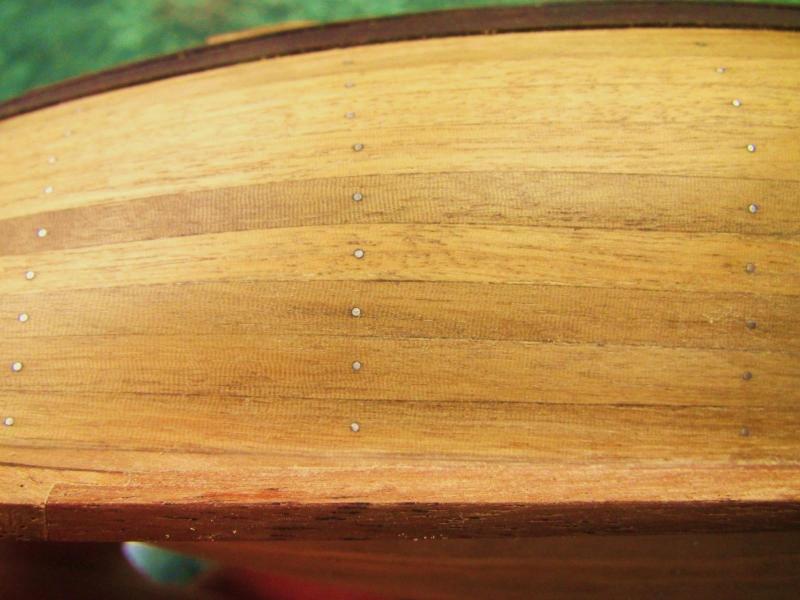
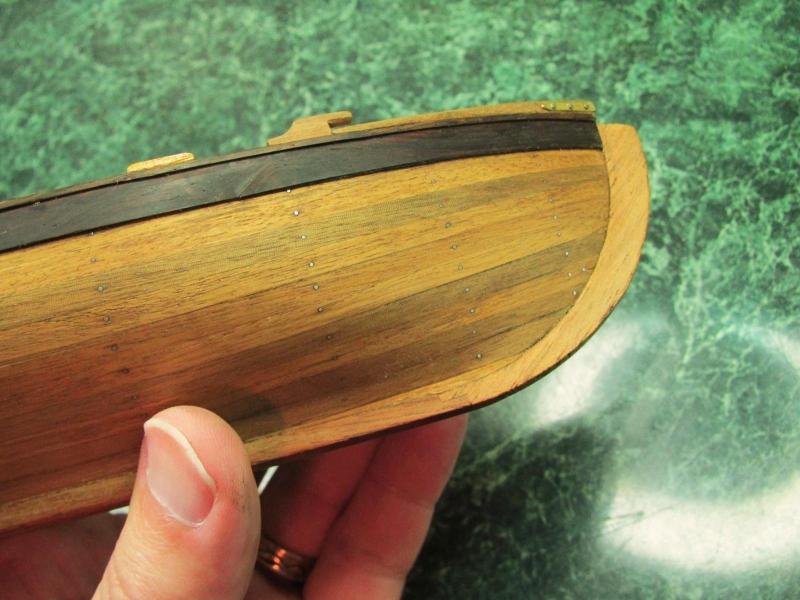
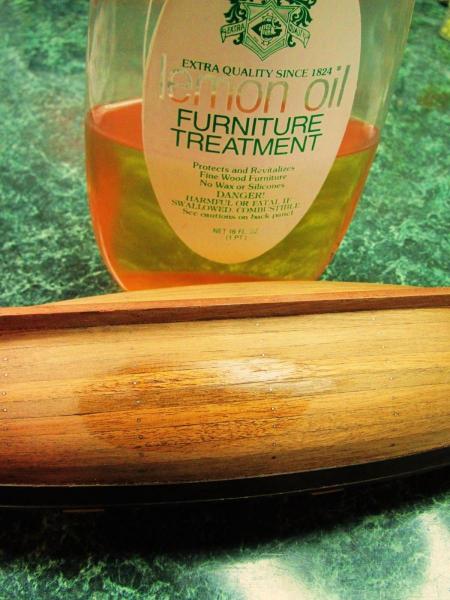
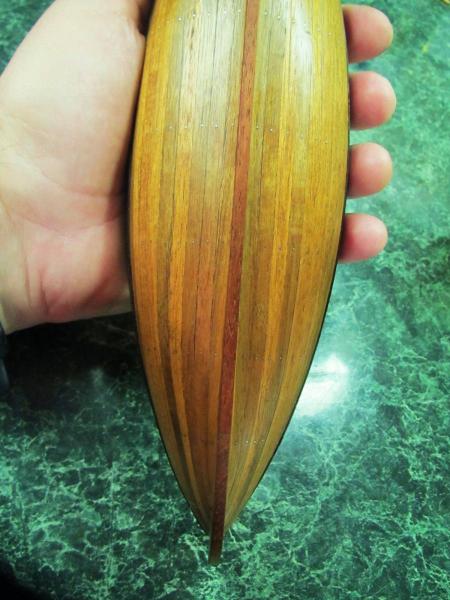
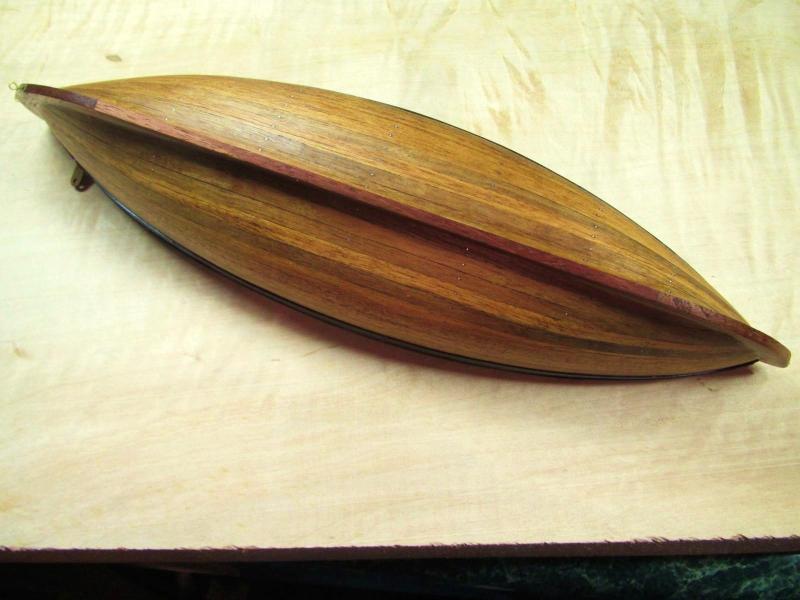
5) Prepping the hull for finish The gaps and splits in the walnut planking that had occurred over the years due to dryness and wood shrinkage (shown in the earlier photos) were repaired with sawdust and thinned white glue and sanded. The triangular garboard fillers at the ends of the keel were stained for a better color match. Then the fun part. Lemon oil was applied to all the bare wood. Instant magic! I just love the look of oiled wood. The main thing was to NOT use an oil with wax or silicone in it as that could interfere with my plans for a shellac top coat. The exterior was rubbed down with a few applications of oil and the interior was oiled using a brush. The previously shellacked floorboards and seats were unaffected and any stray oil was wiped off of them. This will need to sit for a few days before I apply a thinned out shellac wash coat to seal it.
- 515 replies
-
- artesania latina
- whaleboat
-
(and 1 more)
Tagged with:
-
Bob, Dee Dee and Mario - Thanks for all the details you are providing on this boat. It will be very useful to me when I get going on mine! I love the lines of this little boat. Bob - you're "rough sketch" should be framed and hung on a wall!
- 86 replies
-
- muscongus bay lobster smack
- Midwest Products
-
(and 1 more)
Tagged with:
-
This is looking really cool! Nice work!
- 89 replies
-
- muscongus bay lobster smack
- midwest products
-
(and 1 more)
Tagged with:
-
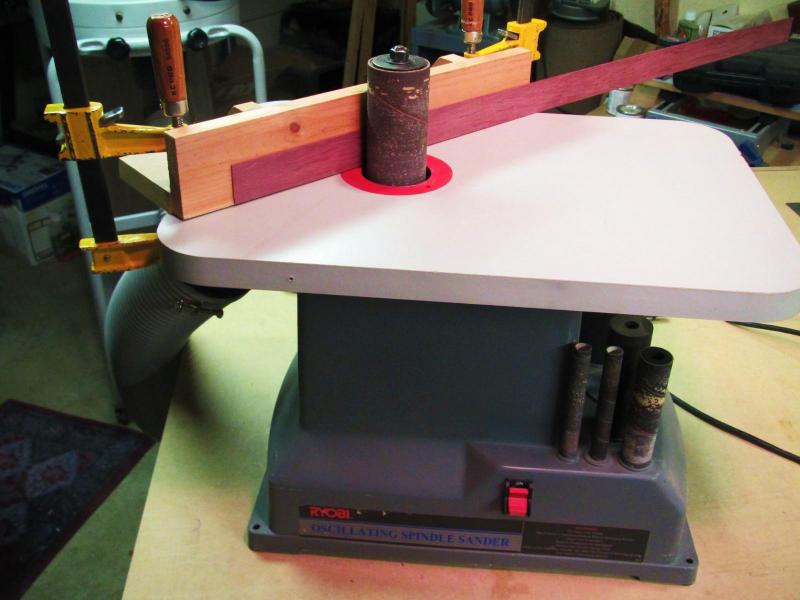
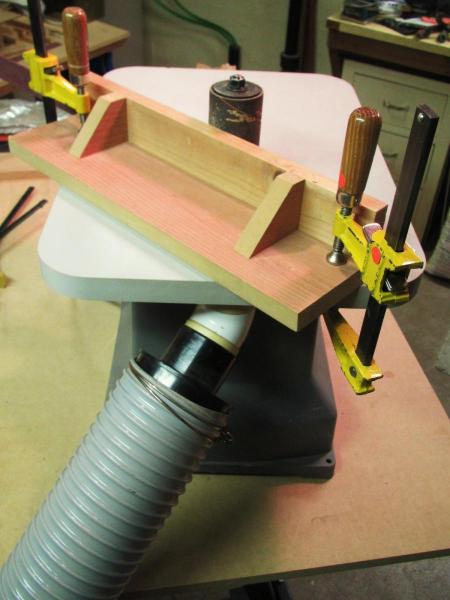
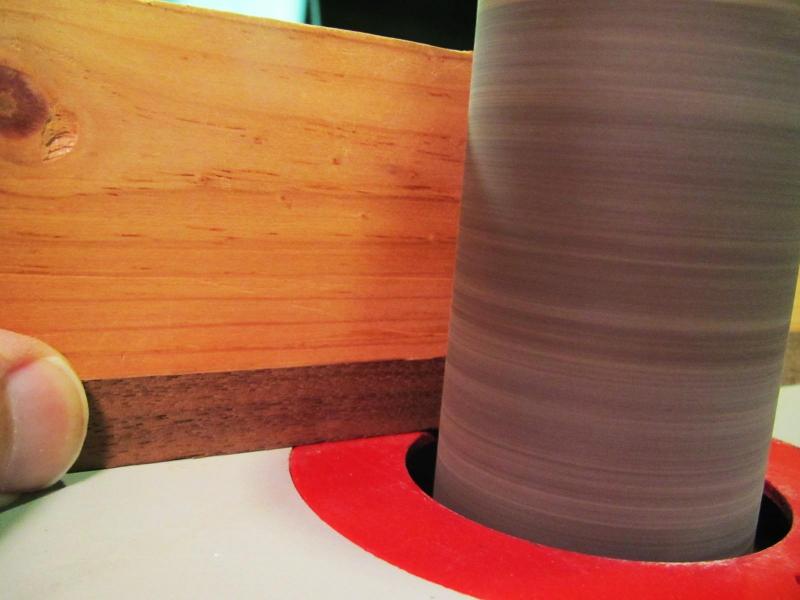
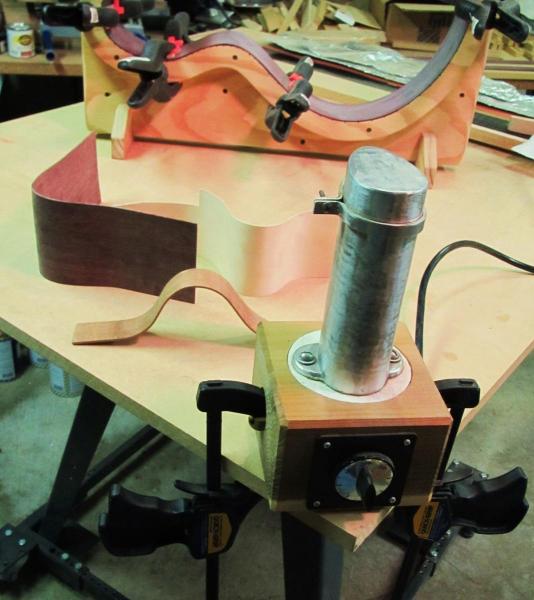
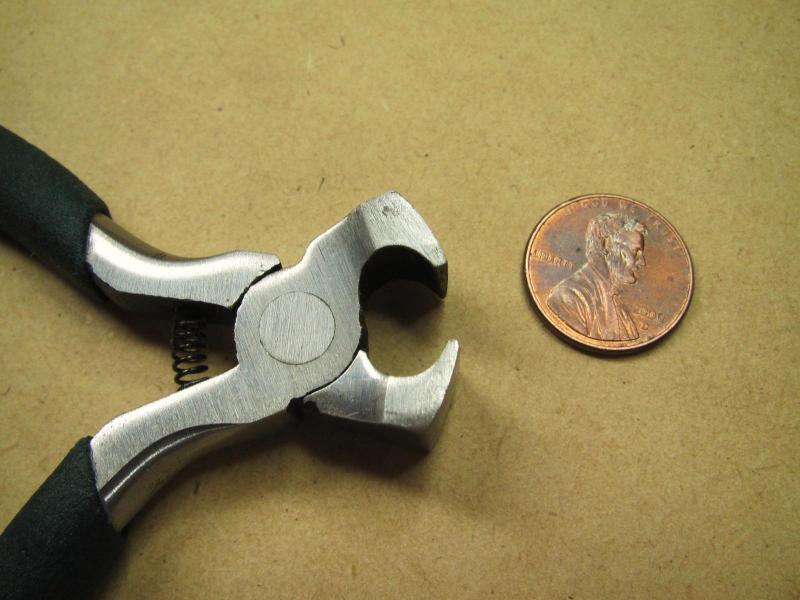
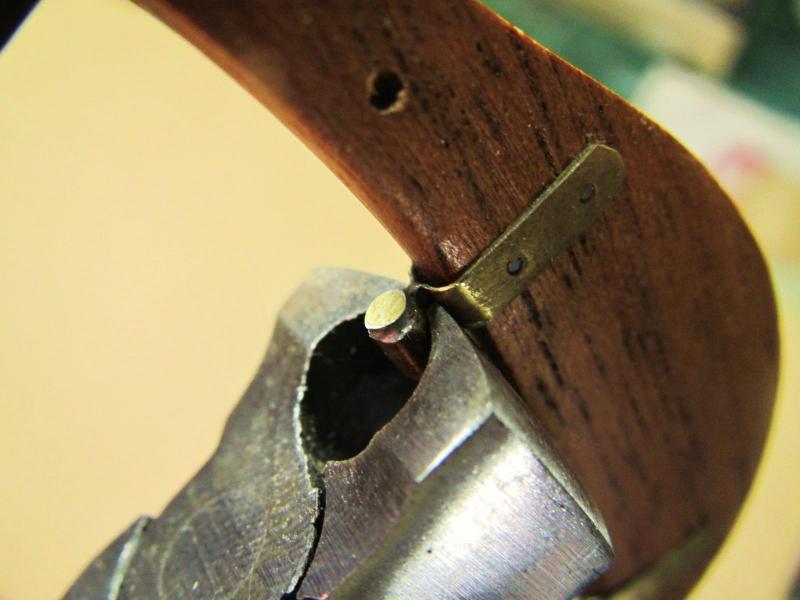
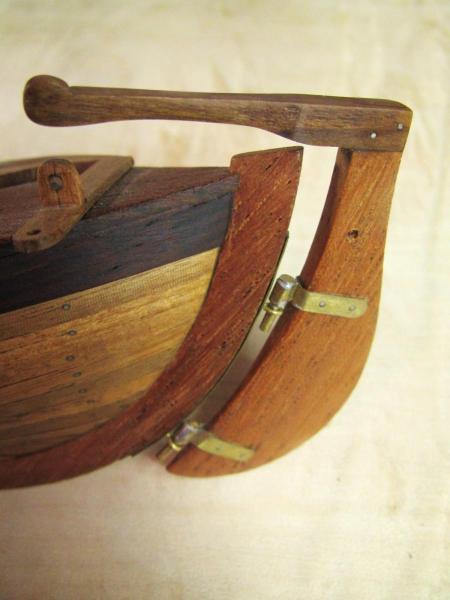
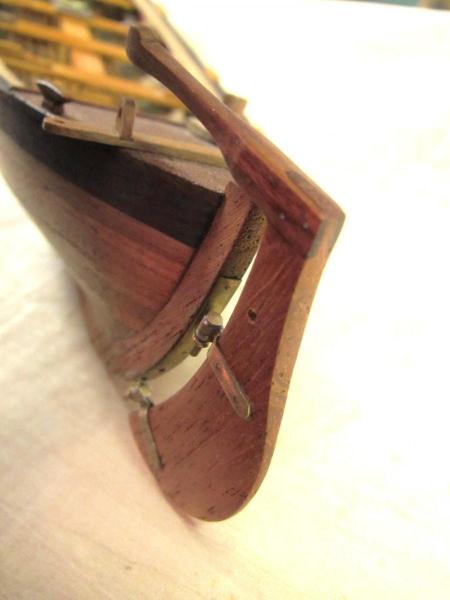
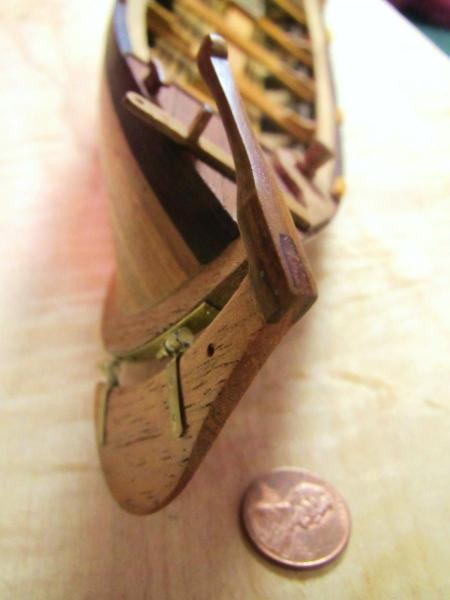
4) Re-purposing some tools for model ship building Thought I'd show some tools and techniques that I found useful that may interest some of you. To thickness sand the rosewood and cocobolo strips, I used a homenmade fence clamped to an oscillating spindle sander table. The spindle turns counter-clockwise and I feed the strips from right to left with the rotation. It's easier to work with the rotation and there's less chance of breakage on thin pieces (unless you let go and they go flying!! ). Press the outfeed side against the fence to prevent dips in the sanded surface. It's best to sand longer pieces and cut them to length later as there may be a bit of snipe at the ends. To use this type of setup, you initially set the fence so there is just a hint of resistance when trying to slide the workpiece past the spindle with the machine off. After power sanding a few passes, loosen the clamp slightly on the infeed side and gently tap the fence forward a hair, re-clamp and sand again. Repeat until you acheive the thickness you want. The straight wale and gunwale strips had to be bent sideways and curved edgeways too. That could have been tricky with hardwoods like rosewood and cocobolo, but it was soooo easy with a guitar side bending iron. I wish I had this bad boy when I was bending the planks. These irons can be clamped either vertically or horizontally which leaves you with both hands free to work the wood. Wet the wood before bending. The eliptical shape of the iron allows a bunch of different radius choices. These irons are probably a bit too expensive for casual use, but it makes the bending job easy and allows a lot of precision. If you do a lot of ship building, the cost might make more sense. Like many tools, it takes a little practice to get good with it. It's mostly getting used to moving the wood and feeling when the wood is ready to bend. That's a pretty thick piece of mahogany in the picture behind the bender, and behind that, purpleheart and maple. That's a purpleheart guitar side clamped in the form in back (another project underway that divides up my time!). There are several places that offer bending irons, but I like the accessory bands this company offers. The bands seem to help when bending edgeways. http://www.lmii.com/CartTwo/thirdproducts.asp?NameProdHeader=Professional+Bending+Iron There were a few posts recently on how to form the brass rudder hinge straps around the pins. Here's how I went about it. There's probably better ways to do it, but this is cheap. I took a pair of inexpensive end cutters and ground the sharp tips to flat faces so they would be able to grip without cutting. I originally used them to pull bone saddles out of the tight slots in acoustic guitar bridges. It turns out they work pretty well for the rudder hinges too. They easily squeezed the brass straps tightly around the pins so I could solder them.
- 515 replies
-
- artesania latina
- whaleboat
-
(and 1 more)
Tagged with:
-
Wayne- Thanks for the hatchet info and the kind words. Much appreciated! Your harbor master needs to allocate a larger dry dock for you! Mario- Thank you for your kind words. You have been an inspiration to me and have really fueled my interest in small boats. I have some Midwest kits in the ships locker because of your builds. The dinghy diarama is the coolest!!
- 515 replies
-
- artesania latina
- whaleboat
-
(and 1 more)
Tagged with:
-
Hi Michael! I checked out your scratch Bristol Pilot Cutter build and it is AMAZING! You have serious skills. I lmao at your photoshopped mini-you pictures and that's inspired me to learn how to do it so I can put my dogs in my whaleboat! I have been thinking about what to build next, and I'm unsure. I would like to tackle something that will require rigging, but I'm all thumbs and that stuff scares me! I have an AL Dallas that would not break my heart if I screwed up so maybe that will be next so I can learn rigging. Either that or I may do a work boat to put off the scary rigging stuff! Your ropes are works of art by the way!
- 515 replies
-
- artesania latina
- whaleboat
-
(and 1 more)
Tagged with:
-
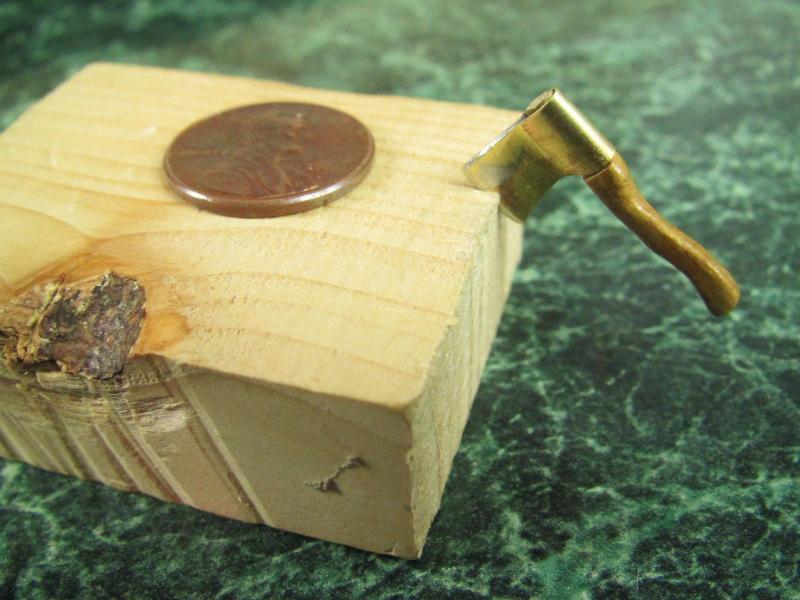
Hi Crackers! Thank you for the nice words. I am working on the details now and will post those pretty soon. In the meantime, here's a sneak preview. By the way, does anyone know where the boat's hatchet was typically stored in a whaleboat? I've been looking through the "To Build A Whaleboat" book at the photos and construction details but did not find one. I imagine that it should be up front to sever the harpoon line in case things got scary.
- 515 replies
-
- artesania latina
- whaleboat
-
(and 1 more)
Tagged with:
-
Hi Michael! Your build is such a joy to look at! Your talents are amazing. The photo shopped mini you is hillarious too!
- 2,215 replies
-
Hi Brian! Thank you so much for the kind words. They are very much appreciated. I should have a new update tomorrow.
- 515 replies
-
- artesania latina
- whaleboat
-
(and 1 more)
Tagged with:
-
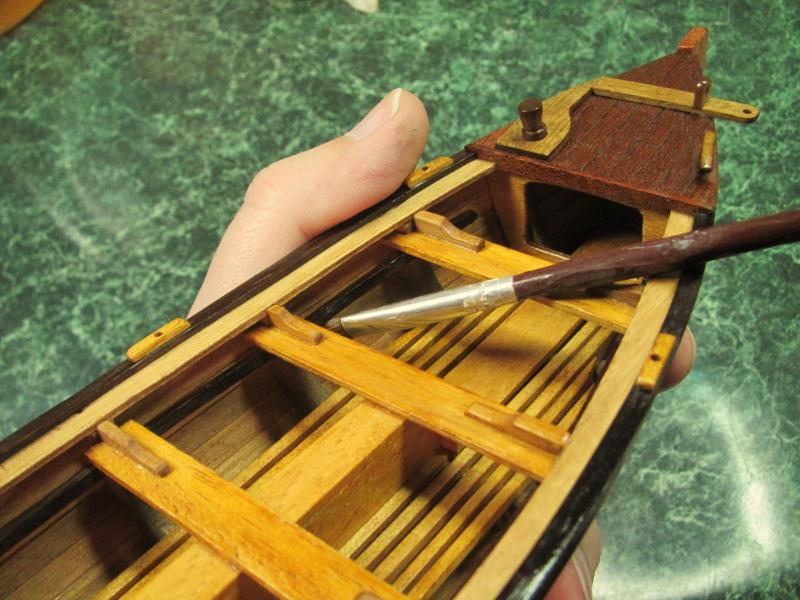
3) Work done during the last year So my little whaleboat sat around for a bunch of years and I would look at it every now and then. I wasn't ever satisfied with the fit of the keel between the stern and the prow. The kit supplied keel is fit with a butt joint at each end and it was just a tiny bit too short. Not too bad, but just enough of a loose fit to nag at me when I looked at it. It taunted and mocked me! I had been working on another project and had a scrap piece of mahogany that was a nice color match to make a new keel, so I cut/chopped/chiseled/filed the old one out and made a new one using half-lap joints at each end. I figured that would look more boat-like but mostly it was just fun to play with a little saw and a chisel. I got such a kick out of fixing the keel that I kept going. I liked the look of the really dark wood wales and gunwales (cap rails?) used in the photo on the box lid. I had a left over Brazillian Rosewood binding strip from a guitar repair job and decided to use it for the gunwales. FYI - Per the CITES treaty, Brazillian Rosewood is banned for sale in the USA unless it is certified as pre-ban or salvaged from old stumps like these strips were. I had been lucky enough to locate 3 binding strips for the repair job (a 1927 Martin OO-18 if you're into guitars) and one strip was a spare. It was a special piece of wood to me and I thought it would be cool to use it in my boat. I used a dark scrap of cocobolo for the wales since it looks similar. The centerboard case, thwart seats, mast hinge and the rest of the top of the boat was also built at this time. The kit supplied mast hinge was huge and had to be cut down. I had the most fun making the rudder. The kit showed using a clunky looking folded piece of brass to attach the tiller and it just seemed wrong to me. I cut a little bridle joint and double pinned it instead. The hinge pins were soldered in place as were the cross pins through the straps and rudder. (edited to correct typo of Martin guitar model to a OO-18 instead of D-18, still a very cool guitar!)
- 515 replies
-
- artesania latina
- whaleboat
-
(and 1 more)
Tagged with:
About us
Modelshipworld - Advancing Ship Modeling through Research
SSL Secured
Your security is important for us so this Website is SSL-Secured
NRG Mailing Address
Nautical Research Guild
237 South Lincoln Street
Westmont IL, 60559-1917
Model Ship World ® and the MSW logo are Registered Trademarks, and belong to the Nautical Research Guild (United States Patent and Trademark Office: No. 6,929,264 & No. 6,929,274, registered Dec. 20, 2022)
Helpful Links
About the NRG
If you enjoy building ship models that are historically accurate as well as beautiful, then The Nautical Research Guild (NRG) is just right for you.
The Guild is a non-profit educational organization whose mission is to “Advance Ship Modeling Through Research”. We provide support to our members in their efforts to raise the quality of their model ships.
The Nautical Research Guild has published our world-renowned quarterly magazine, The Nautical Research Journal, since 1955. The pages of the Journal are full of articles by accomplished ship modelers who show you how they create those exquisite details on their models, and by maritime historians who show you the correct details to build. The Journal is available in both print and digital editions. Go to the NRG web site (www.thenrg.org) to download a complimentary digital copy of the Journal. The NRG also publishes plan sets, books and compilations of back issues of the Journal and the former Ships in Scale and Model Ship Builder magazines.


