


6ohiocav
-
Posts
543 -
Joined
-
Last visited
Content Type
Profiles
Forums
Gallery
Events
Posts posted by 6ohiocav
-
-
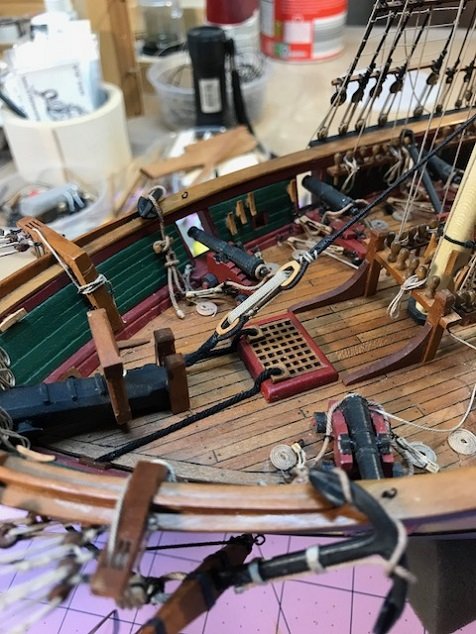
ANCHORS AWAY….
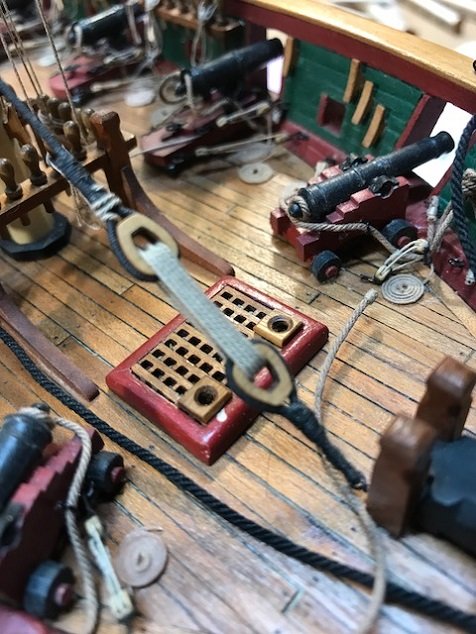
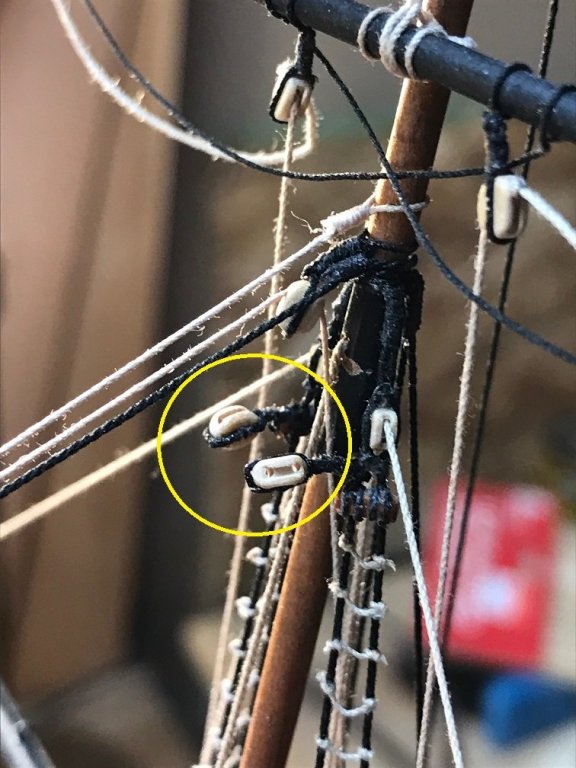
Worked over the weekend rigging and attaching my anchors. I decided to bring the anchor cables through my forward hatch, and to do that, I had to so some surgery on the grate. The grating material supplied by Model Expo is a hardwood. Trying to cut through that while placed on the bow of a crowded deck was a challenge. My exacto knife was not up to the call, so out came the Dremel. My original plan was to carve out a square in the front corners and insert a chafing block. While I was able to white knuckle the cutting, I could not get it square or clean enough to suit my taste, and decided to install the chafing blocks on top of the cut.
Obviously, this is another task that I should have done sooner. I could have easily added chafing blocks to the grates before installing them.
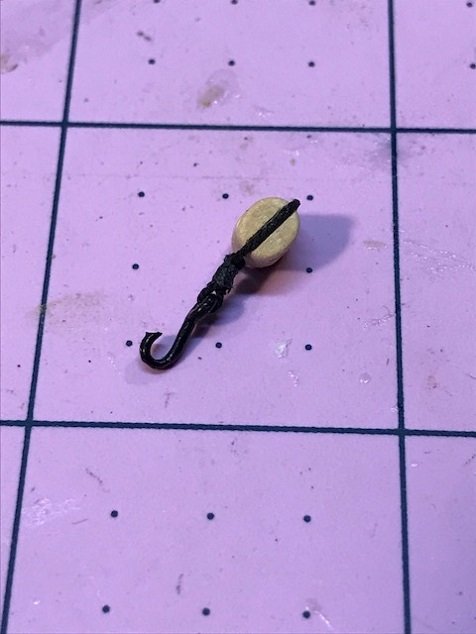
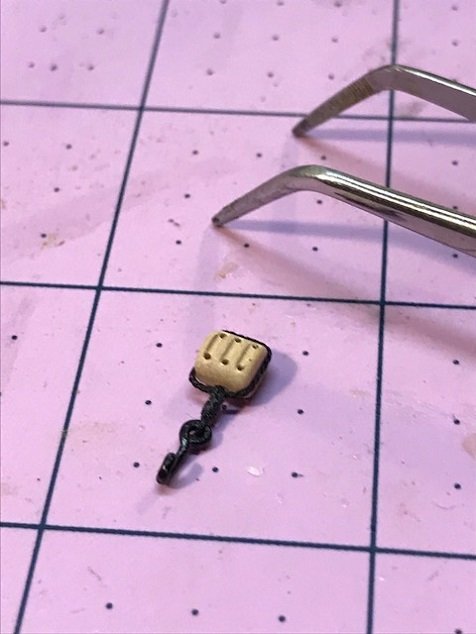
I also stropped the big triple blocks, and fabricated a hook with some coated black wire. The coating on the wire gives the surface some texture to simulate an iron look. It took me a while and about 10 tries to twist up a hook to look right.
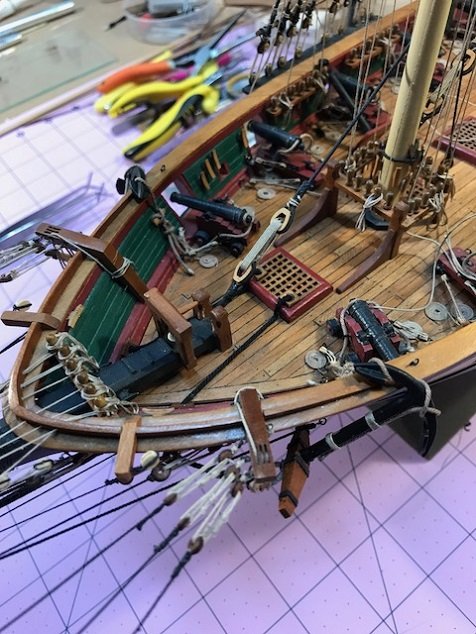
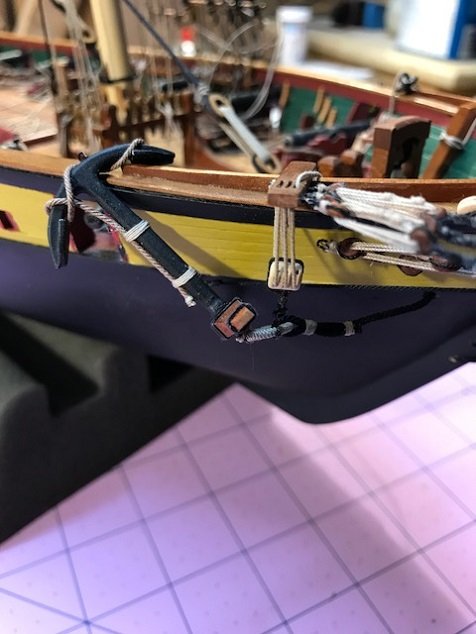
I then rigged the block, and attached the anchor. I ran into another snag. Realizing the anchor and cable weigh tons, I could not get the cable to lay flat on the deck, or get my lanyards on my triple blocks to tighten. The Brittania anchors just don’t weigh enough. I therefore glued the cable to the deck. I stretched the lanyards on the triple blocks by attaching a small weight, and coated the ropes with a mixture of water and white glue. That froze the ropes straight.
I then tied off the haul ropes on a bulwark cleat and tied off the lanyards on pins.
My bow is just about complete.
- jwvolz, Tigersteve, russ and 10 others
-
 13
13
-
Tom
Great looking blocks. By now, I have stropped so many blocks, it is almost second nature, but like you, my first blocks were for the guns with hooks. And yes, it took me all day just to figure out how to do my first one.... Yes, there are 170 more waiting for you. Good training for the future. I have to make an omission too. I stropped 170 single blocks with hooks before I realized that I need to add a lanyard to each one. I had to strip them down and redo each one. I also blackened by hooks.
Check your plans. I believe the single block you stropped needs a lanyard attached opposite the hook. The single hooks to the bulwark. The lanyard runs back through the double block at the gun, back to the single block and back to the double. I think. I am not at my shipyard and relying on a memory that is not as good as it used to be.
Everything is looking good. If you ever run into a jam, feel free to send my a private e-mail.
-
Steve,
Hijacking the site, Not at all. I love the painting of the Battle of Lake Erie and the images of the Lawrence. When Commodore Perry is done with her, Capt. Eliot is ready to turn my Niagara over to you! Now that's a real hijacking.
In the end, I left one of the skylights off for the simple reason that the guns clearly were too crowded. I can place the two buildings around the capstan such that they aren't in the recoil line of the carronades. It looks much better.
I always wondered about a ship's wheel. Steering this large Brig with a tiller seems a bit off, although I note that the replica is rigged with one.
Is your Lawrence scratch built, of built on a Model Shipways Niagara hull? It's fantastic.
-
Getting a little tired of trying to figure out how to load the photos in the right order. All of the remaining photos kept loading in reverse order.
Come on guys, I spend more time trying to figure out how to post photos of the things I build than the time I spend actually building the darn things.
- jbford, Tigersteve, mtaylor and 4 others
-
7
-
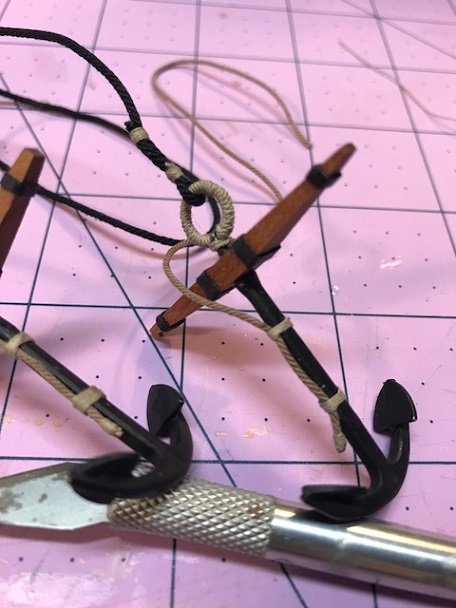
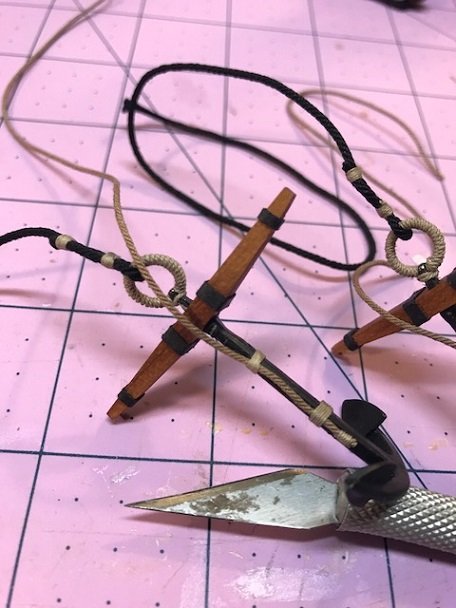
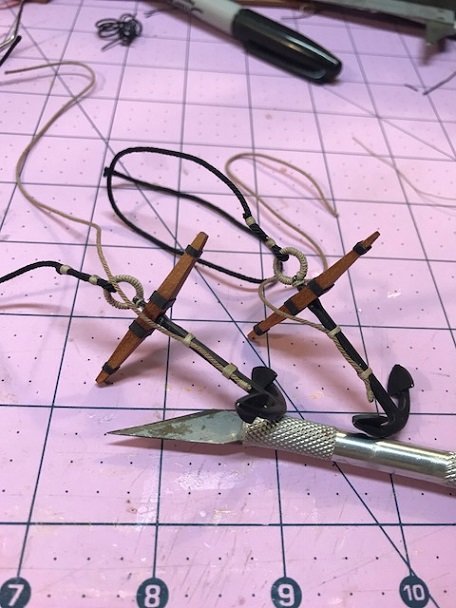
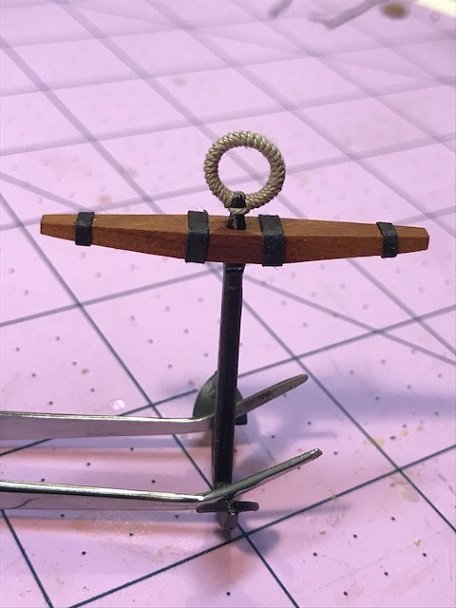
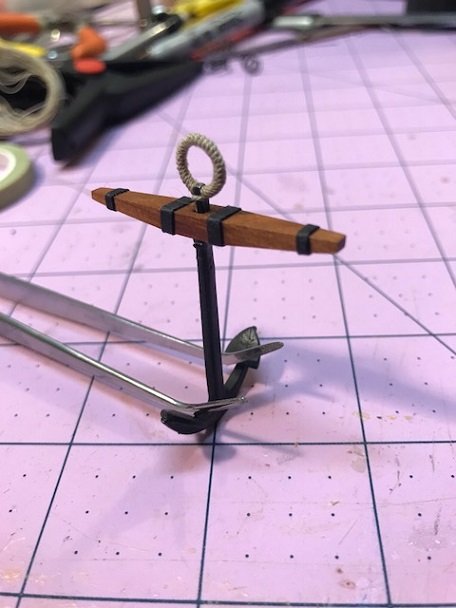
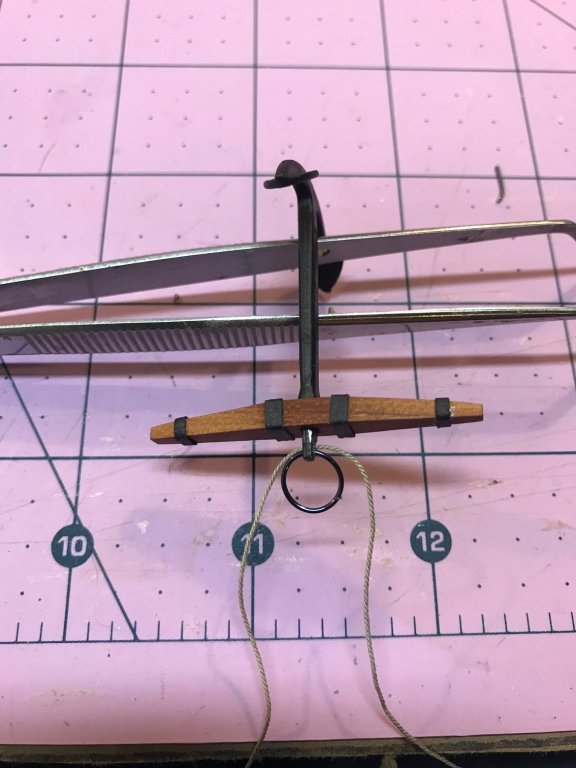
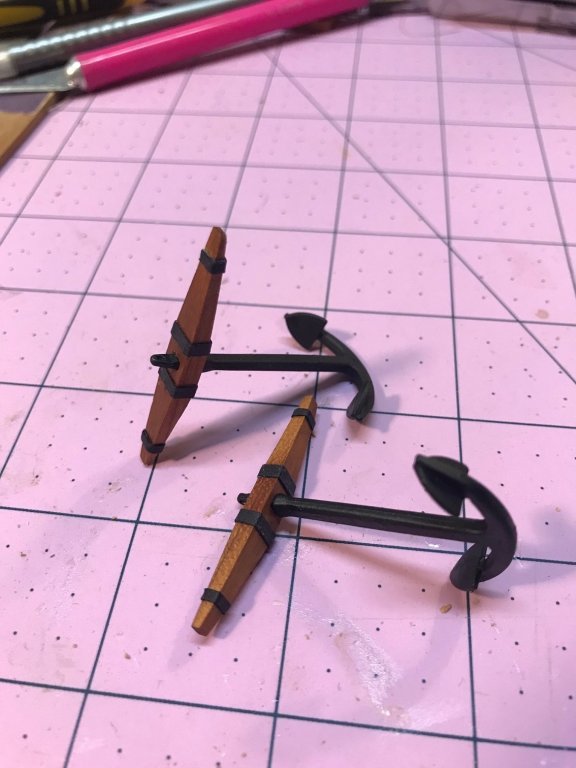
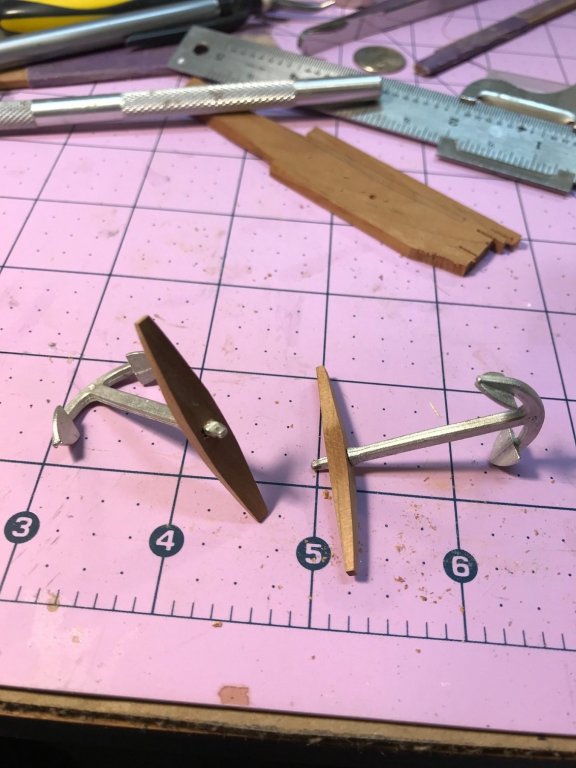
BOWER ANCHORS
Time to work on the anchors. I created the stocks out of cherry. Not an easy task. There are tapers on three sides. I traced a rough pattern from the plans, did a rough cut on the band saw, and finished them off on the disc sander.
I then rigged the Anchor Ropes. I used a photo of the actual ship for the pattern on the lines.
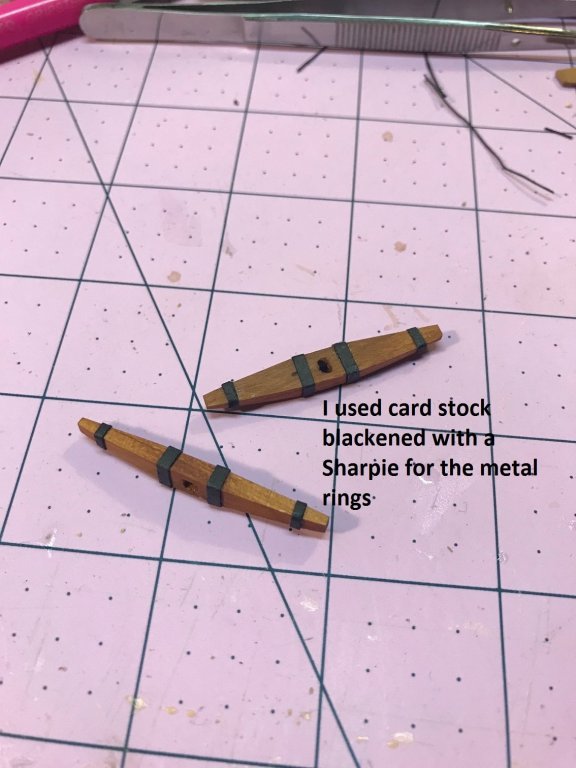
I wrapped .018 brown rope around the Anchor rings. That was a tedious process. I ran one end into the anchor mortice, and then inserted the ring (made out of .20 metal wire) to secure one end. Then with two tweezers, began the wrapping. I tied it off at the end and froze it with a spot of CA.
I will work on attaching the anchors this weekend. I need to construct chaffing blocks on both sides of the holes I drilled in the hull for the anchor line, and open up the front corners of the grates on my forward hatch. That means delicate destruction work on the ship again. UGHH.
Here are some photos of the anchor assembly.

-
-
Mike,
Thanks for the heads up. So far, all of the standing and running rigging lines I installed are holding up, and since I started this process so long ago, I would have to say that any stretching has already occurred.
It is great to see other Niagara logs out there. I can remember when it was only the two of us.
-
-
-
Tom, Mark and Mike, thanks for stopping in. I think I may shoot for more space, and leave one of the skylights off. I would have followed Mike's lead on his Niagara and place a grating with a ladder if I had not spent all of that time building the structures.
I have said this many times before, but I could not have completed this kit, and survive all of the challenges without the collective wisdom and willing contributors from our forum friends.
-
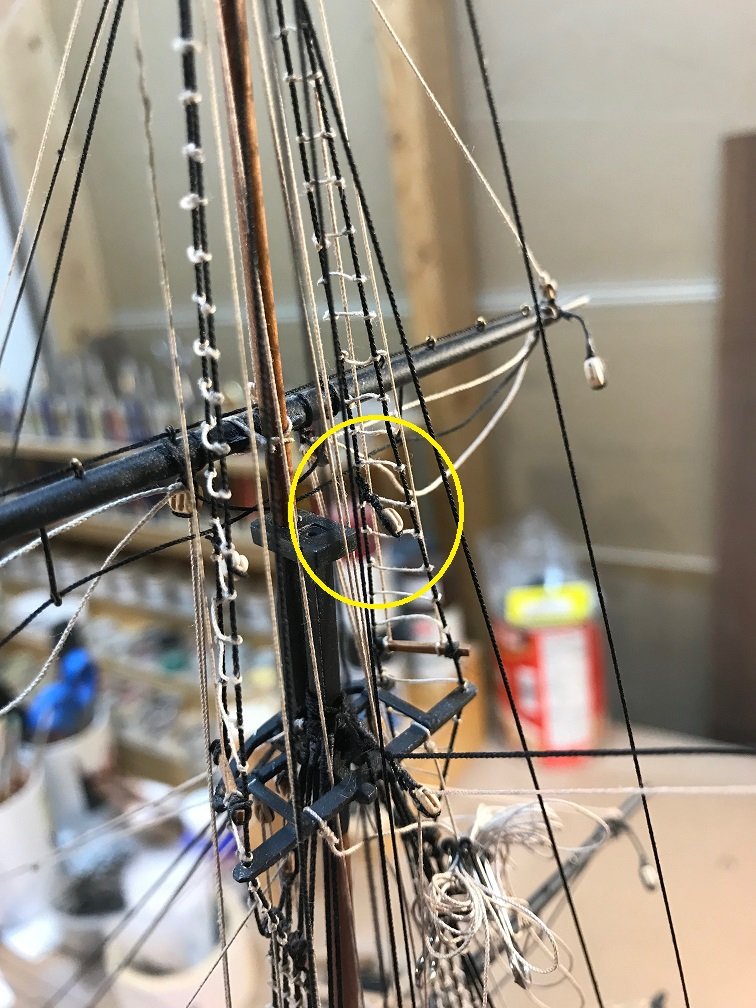
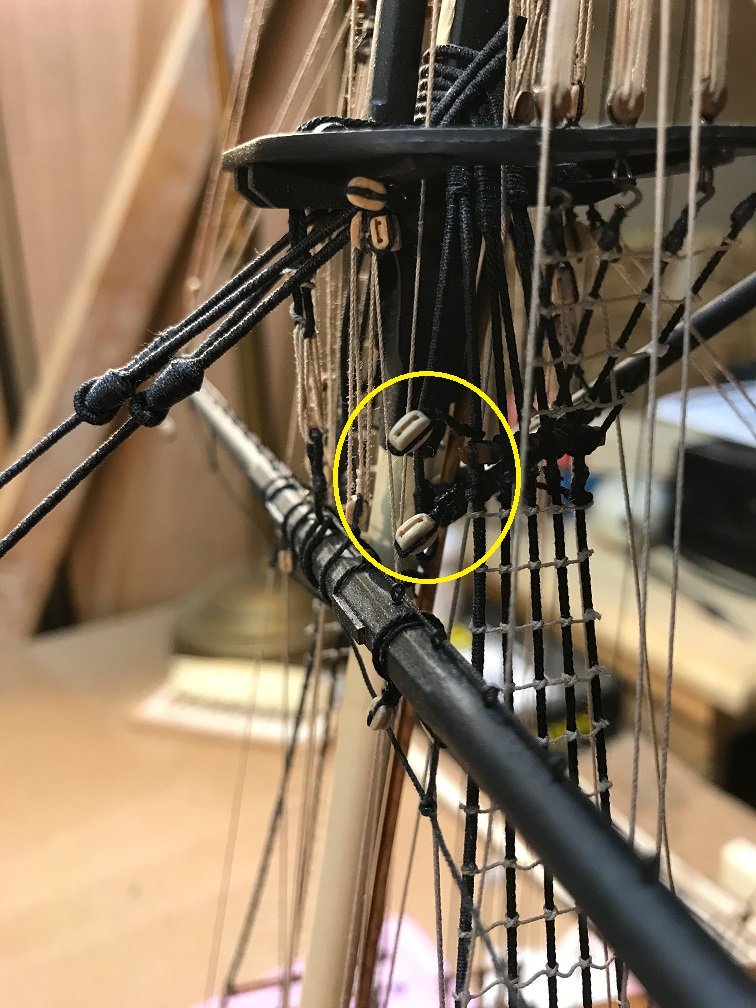
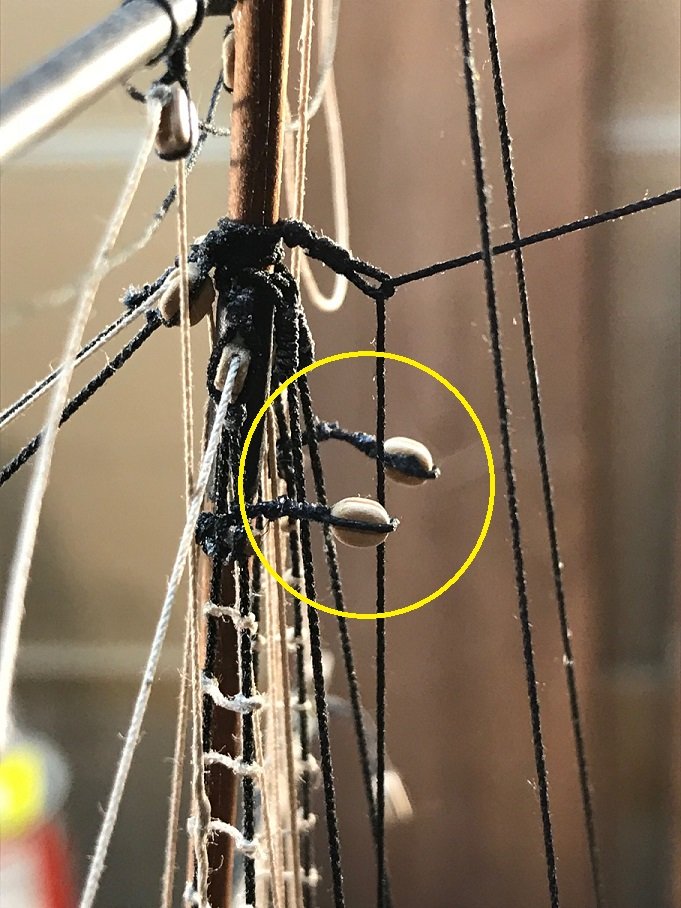
BRACES
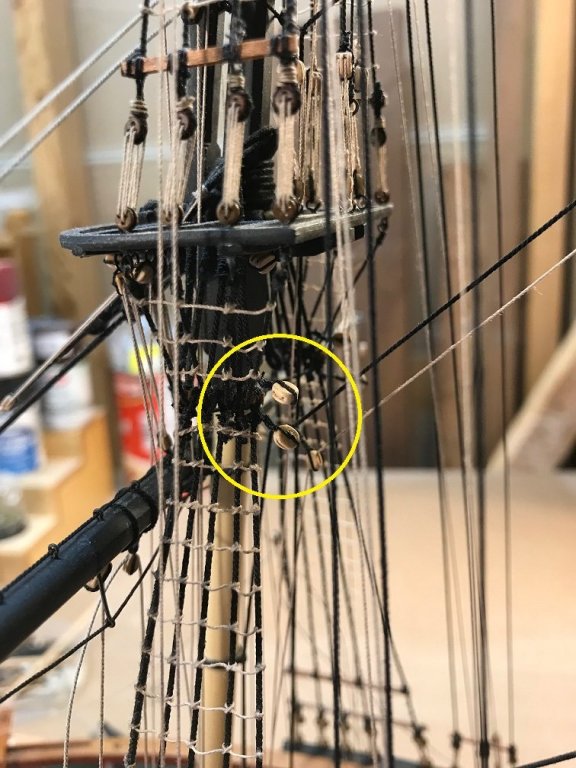
Moving along to completion. The last major rigging task is the braces, and boy was this more difficult than it needed to be. Sixteen blocks needed to be seized, most to the shrouds, some to the tops on both masts, and SHOULD HAVE BEEN DONE BEFORE I DID ANY RIGGING.
**** WARNING**** TO ALL NIAGARA BUILDERS – SEIZE THE BRACES BLOCKS EARLY.
All of the blocks on the upper shrouds could have been attached while my masts were still on the bench. It would have been so easy!
Instead, I had to strop a set of 1/8 and 5/32 blocks with long lines, seize the lines to the block, snake the line through a mess of rigging to wrap around the shroud or bar on the tops, pull it through away from the model, tie a seizing, then pull the tail and with tweezers snake the block back through the rigging lines up against the shroud, then reach through to tighten the seizing lines, apply a spot of glue to freeze the knot, and if that is not hard enough (or stressful), then insert an x-acto knife and cut the ends off as close to the knot as possible, without cutting something else.
This took me the entire weekend. I kept smacking yards, back stays, and shrouds with my hands, my tweezers, my pliers, my knife, my kitchen sink…. You get the picture. Thankfully, everything except a couple of ratlines held up. The 4 blocks seized under the lower top on the foremast were by far the hardest. There were at least 8 rigging lines and back stays to work around.
As soon as I get everything done on deck, and insert the hammock stanchions, I will rig the braces, (last thing) since that will completely encapsulate the space between the masts.
Here are some photos. The knots are not up to par, but only in close up pictures. From afar, you can hardly see the blocks.


-
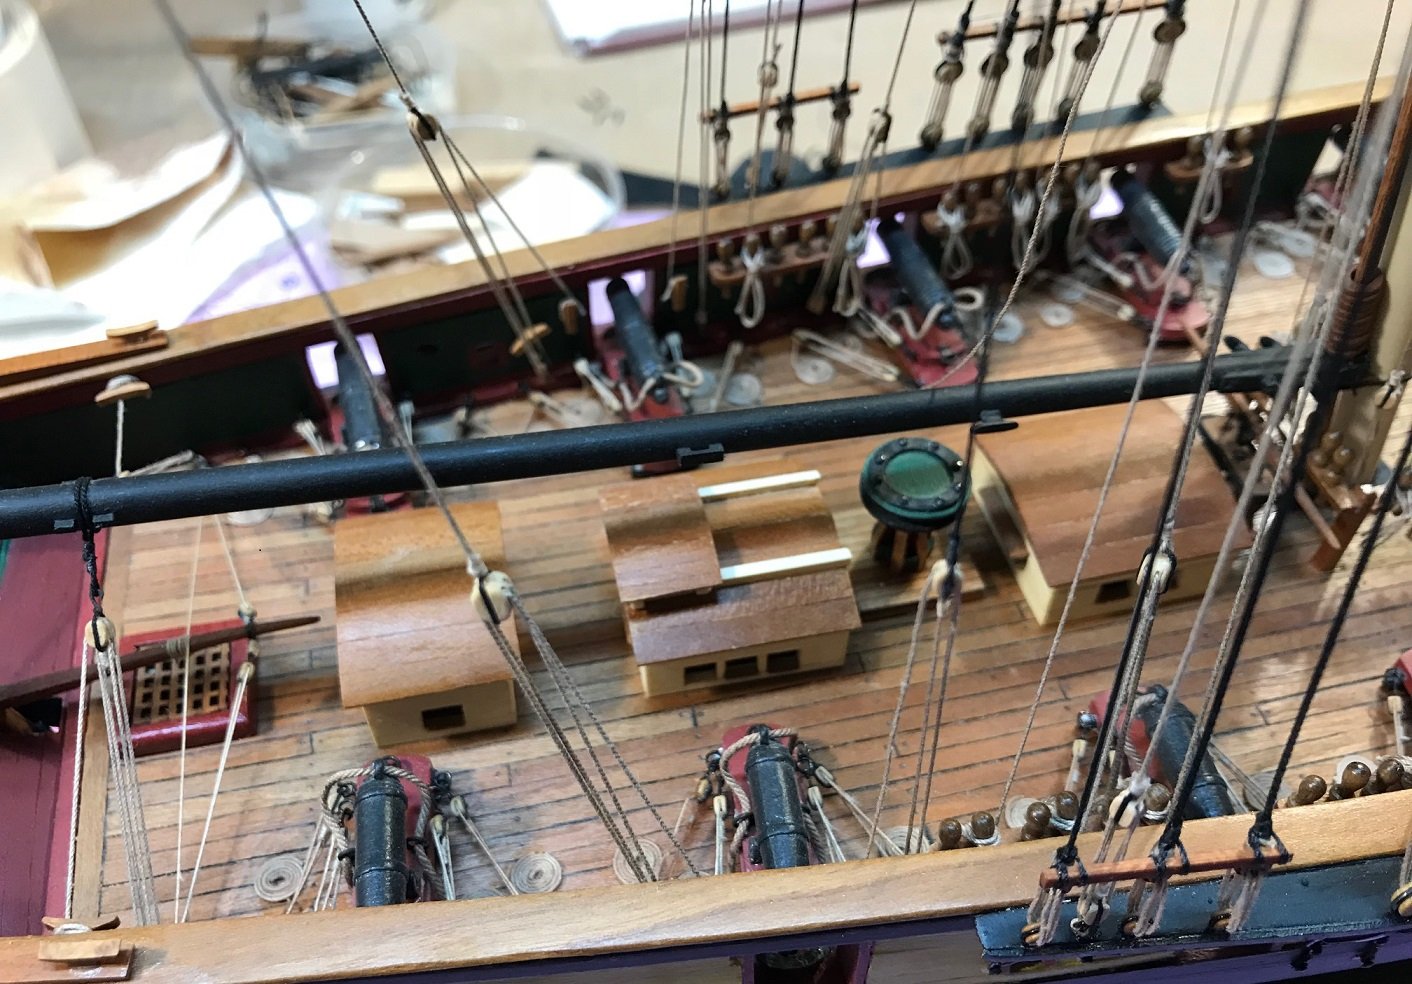
DILEMMA – PLAN ACCURACY (FOR THE REPLICA SHIP) OR HISTORICAL ACCURACY
Those of you that have reviewed previous portions of this log, or have studied the Niagara, know that there is a historical anomaly regarding Model Shipways Niagara Kit. It is based on the Replica Ship owned by the State of Pennsylvania and moored at Erie, Pa. I was drawn to this kit because I was born in a town on the banks of Lake Erie, and have a driving interest in military history, and Commadore Perry’s exploits during the famous battle on Lake Erie during the War of 1812 are absolutely fascinating.
I come to find out that the US Niagara, which I had seen in person at a tall ships event in Cleveland Ohio, is not the restored original ship that Perry used to defeat the British (it rotted out of existence). It is a replica, and no plans really exist of the original. While the current ship is a good rendition, it has some modern amenities that would not have been present on the 19th century ship.
That conflict hits the kit builder squarely in the face when the decision to place the companionway (which by most accounts, and based on a number of contributors on the forum, was not present on the historical ship) the skylights (which would likely have been on the historical ship), and the capstan (which definitely was on the original ship and was a real workhorse) come into play.
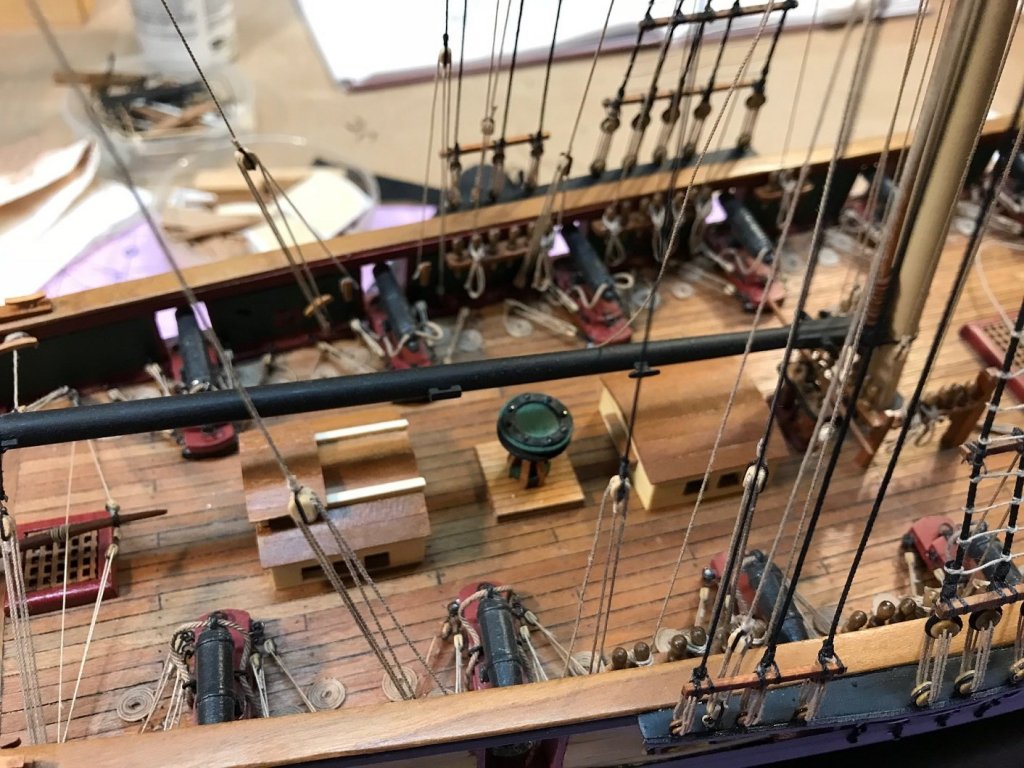
So here is my dilemma. I scratch built the two skylights and the companionway based on the plans, and built the capstan with laser-cut kit parts. When you place all of these strutures on the ship as per the plans, it is INCREDIBLY CROWDED. The Capstan is literally wedged between the forward skylight and the companionway, so much so, to be almost useless, and that is after raising the height so that the wood bars could actually turn without hitting something. The forward skylight also is right up against the pumps, making for more cramped space.
In the attached photos, I have demonstrated the problem. The first photo is a design that leaves the aft skylight out.The second is with all of the structures as per the plan.
By the way, I looked at some photos of the replica ship and YES, it is very crowded indeed, so the plans are accurate.
Any thoughts out there. By the PLANS, or BASED ON HISTORY AND UTILITY??? Two skylights and the companionway, or leave out one of the skylights and give the crew some room to maneuver???

- mikiek, Tigersteve, Tom E and 3 others
-
6
-
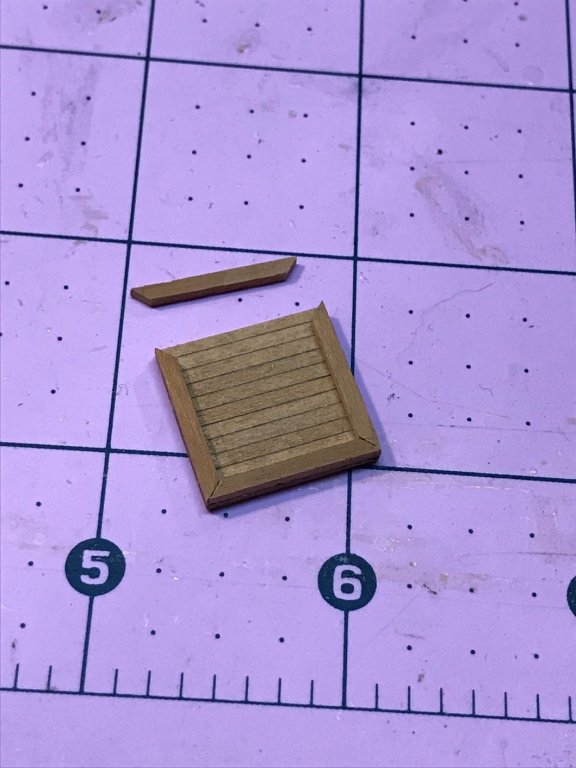
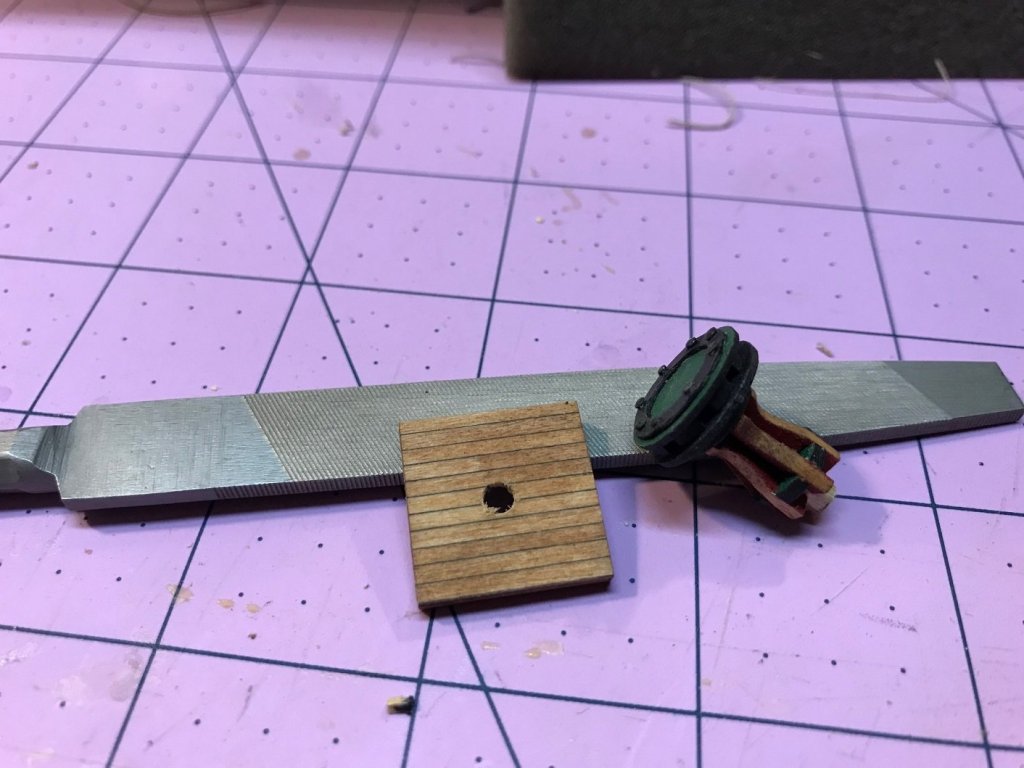
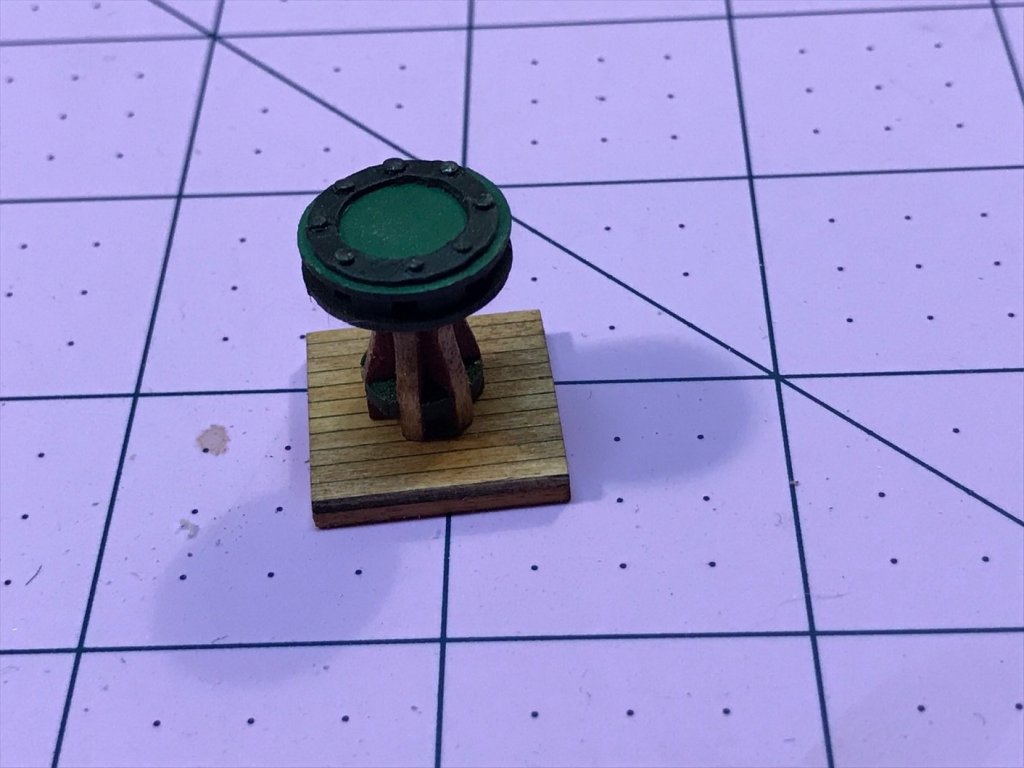
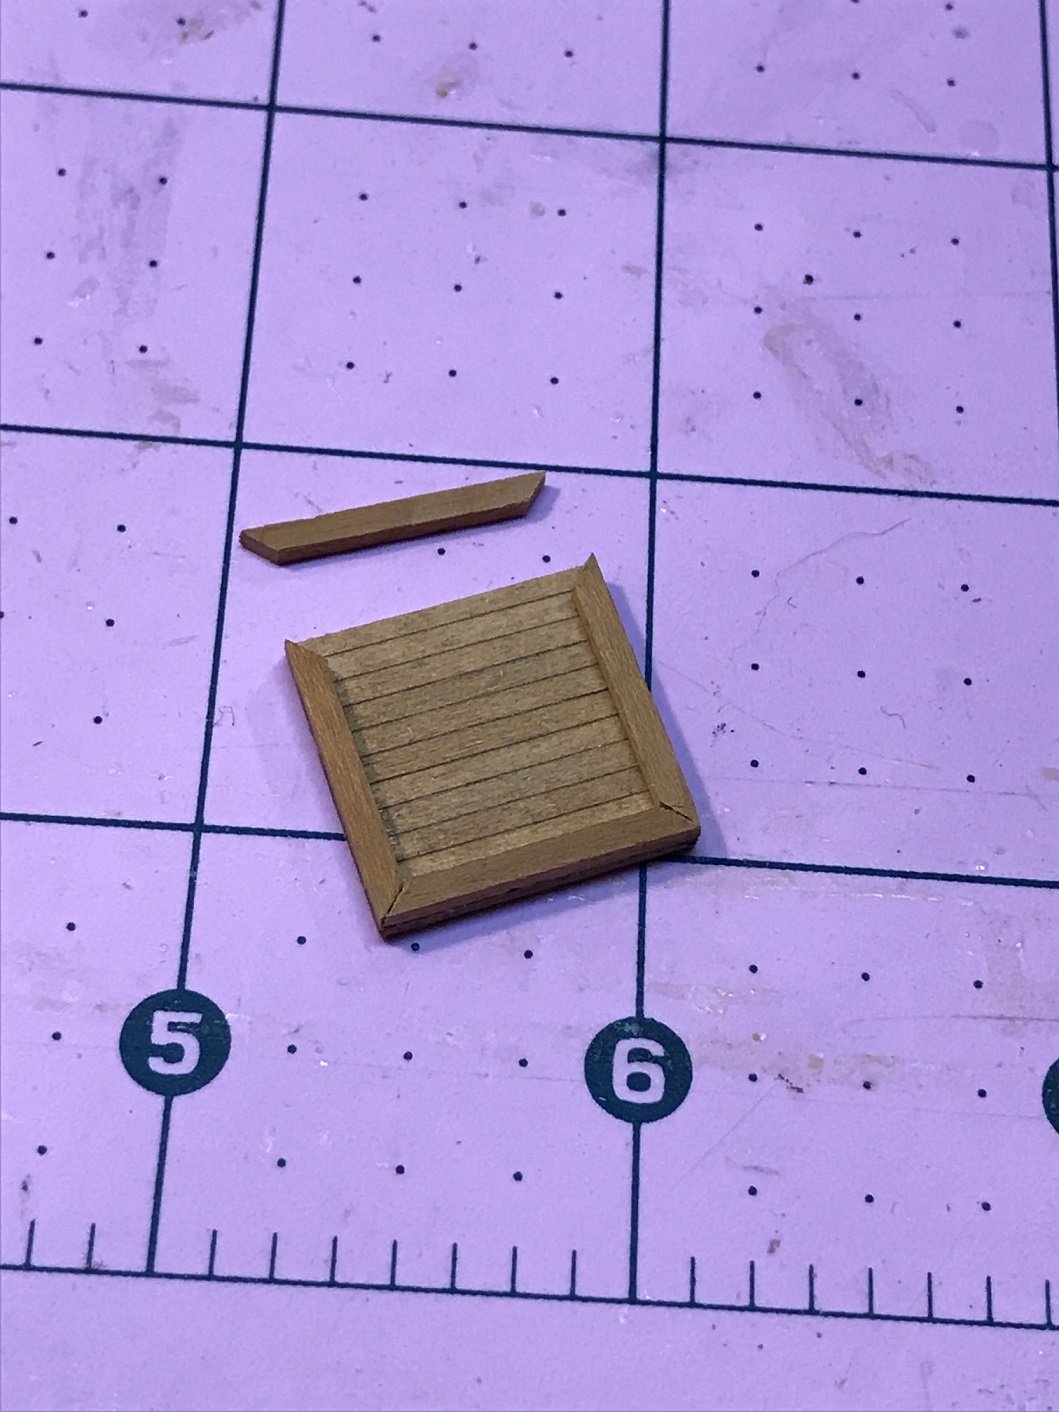
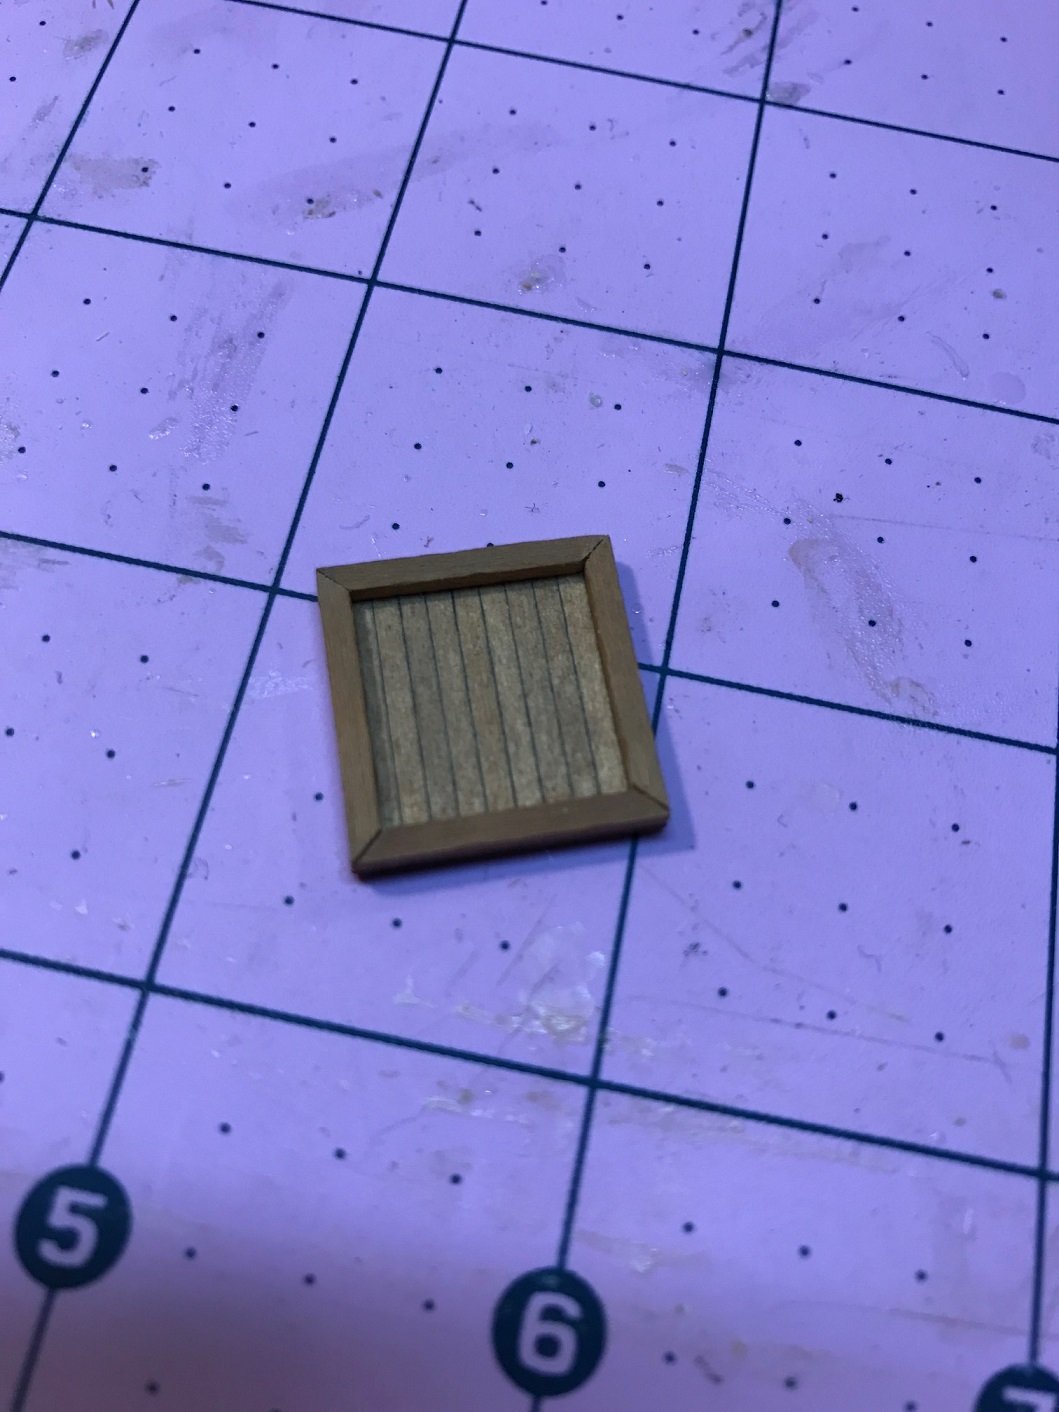
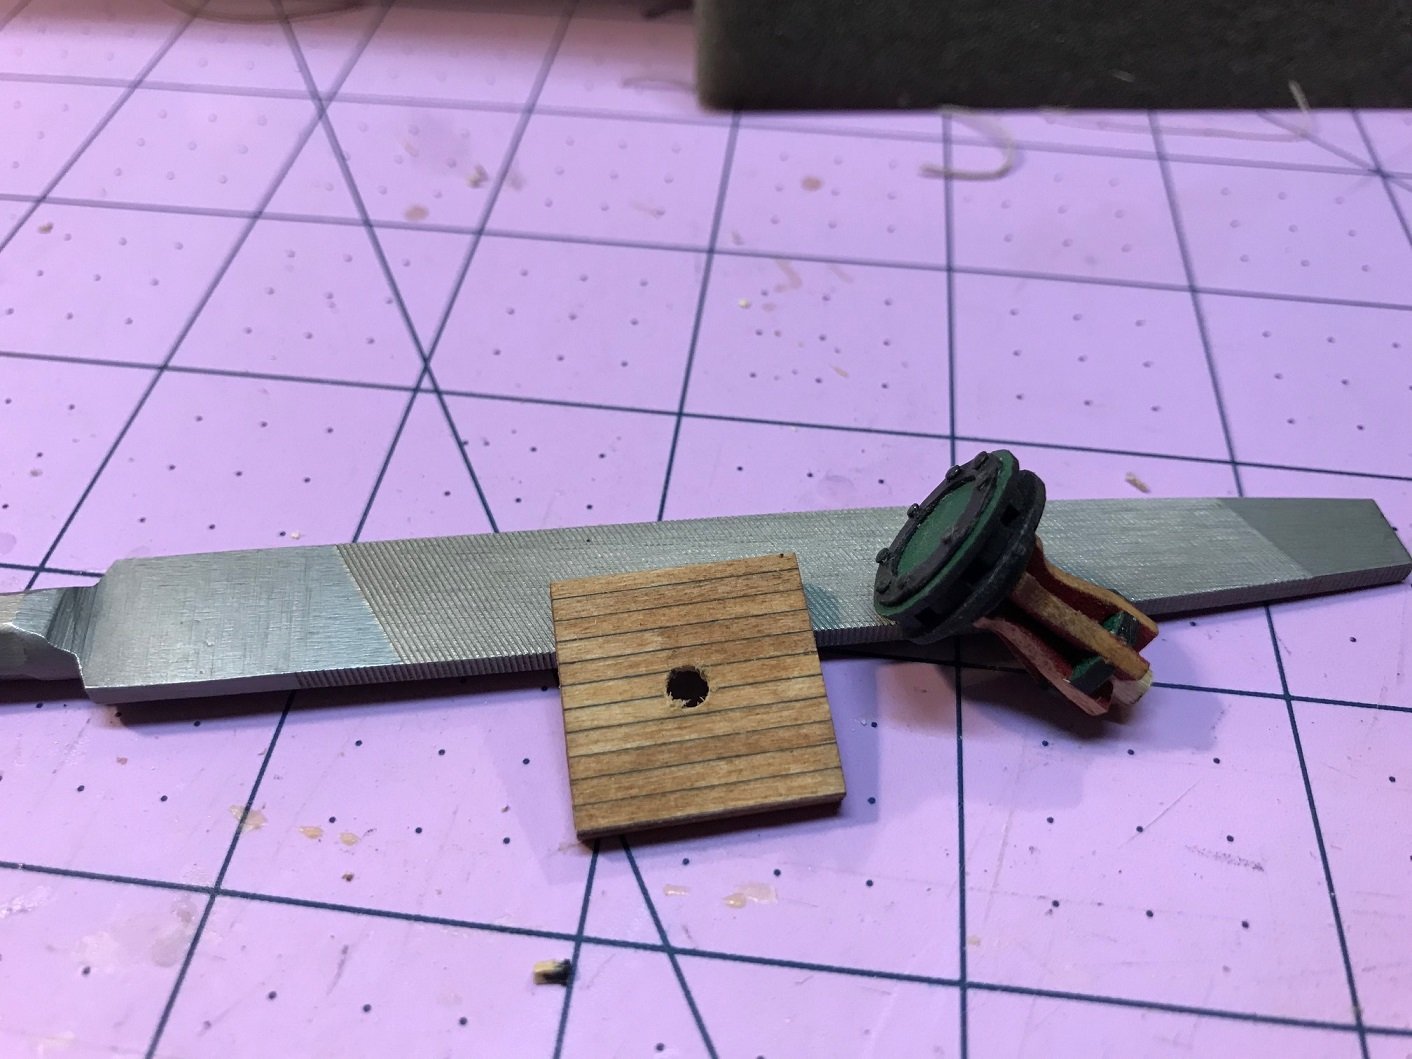
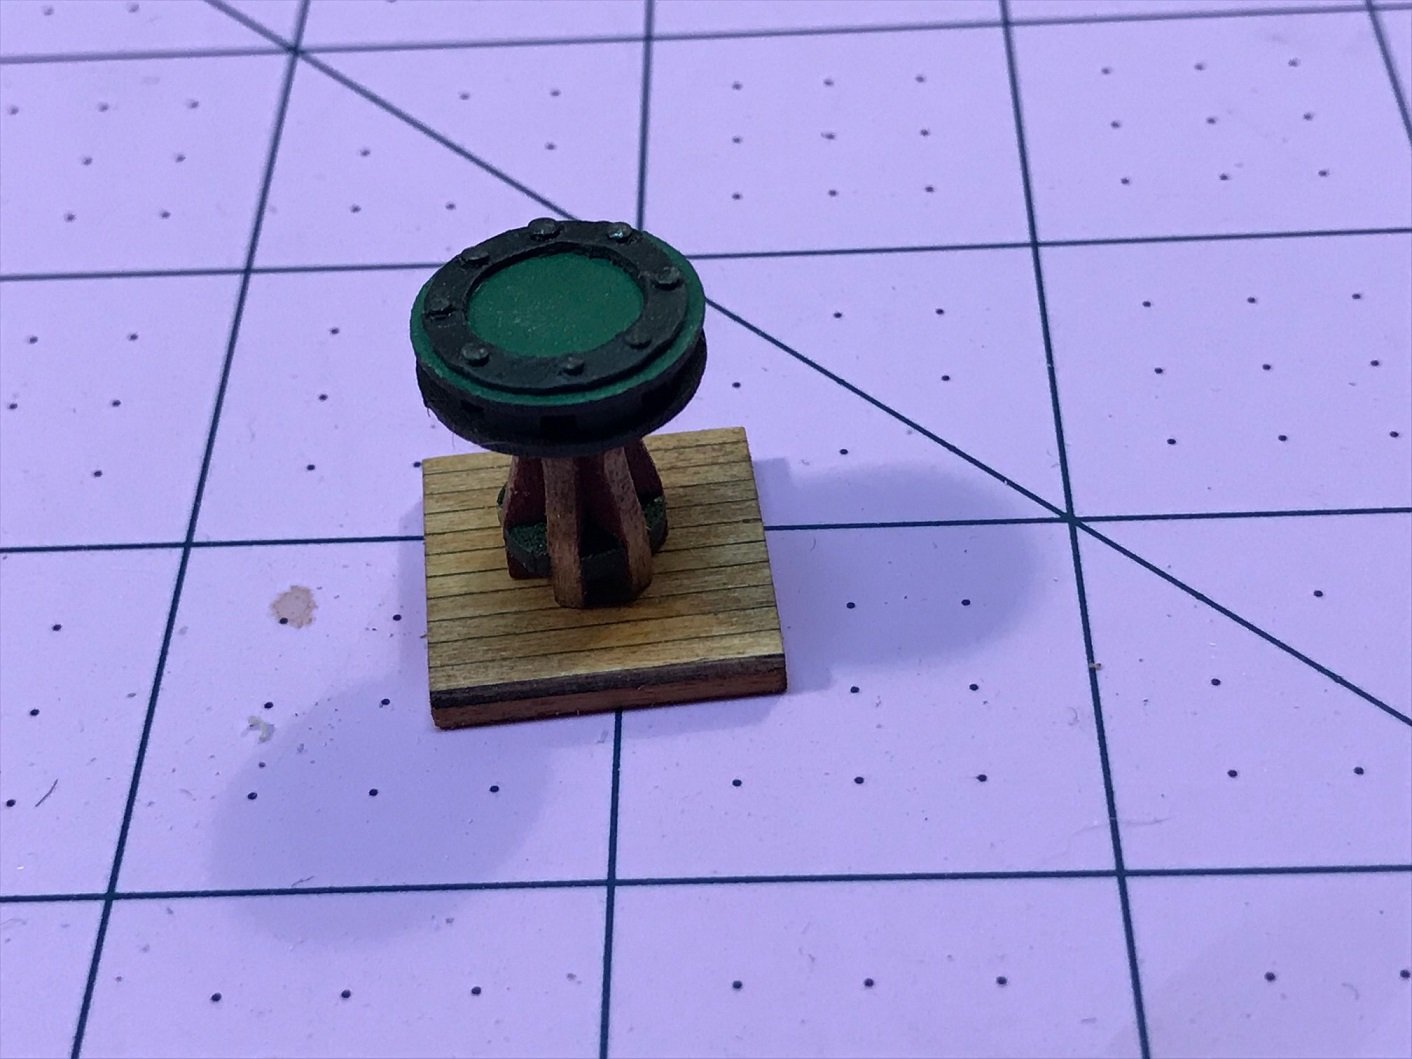
CAPSTAN PLATFORM
I decided that I had better get all of my deck furniture and structures finished and glued down before I do any more rigging. I had to build a platform for my Capstan that I built over a year ago. The plans call for it, and comparing the Capstan to the adjacent Skylights, I definitely need one to raise the height so that the wood handles when attached to turn it rise above the tops.
Here are the photos on how I did mine. I could have just added a square piece of cherry, but decided to do a little joinery, even though it is on the bottom and won’t be seen.

- mikiek, AON, Tigersteve and 3 others
-
6
-
Tom,
Looking good. The key to the garboard strake is the shape of the edge at the bow. It has to be shaped (sort of a half round) so that the upper edge of the strake is straight in all places as it bends around the bow and fits at the bottom in the rabbit. This will assure that the upper strakes lay correctly as you move your way up.
I used Syren's 3mm blocks for the cannon/carronade rigging, and I rigged just the carriages to the deck first before adding the actual tubes and upper slides. I posted a practicum on stropping the small 3mm blocks on my log. For scale purposes, it seemed to be the right block, even though it was incredibly small and hard to handle.
Good luck.
- Tom E and Jim Rogers
-
2
-
Sean,
Welcome aboard. As a fellow buckeye, I have to reiterate Lee's suggestion to join the modeling club. I have been a member for two years, and although I have a hard time making all of the meetings (I am 2 hours away), the ones I have attended are really helpful. The members of this club are some of the finest craftsmen in the state, and you will learn a lot.
We are all looking forward to you build log.
- geoff, Noctavigant, Keith Black and 1 other
-
4
-
Ron,
Your build looks great. Your gun ports and sweeps are very neat and tight. the paint looks good as well. This is a great ship to build. Good luck going forward.
-
-
-
Mike,
Bad description. With the hammocks installed, you have to reach over them to get the pinrails. They fit flush with the ends of the rails. It is just so hard to do anything inside the body of the ship's deck with all of the lines already. I just did not want to add to the challenge. I will add the hammock rails at the very end.
I love those "itty bitty" hammocks on your build. I just did not have the energy.
-
I spent some quality time in the shipyard this weekend and finished all of the hammock rails and stations.
Before I install them, I have to clean up all of the pin rails. When I did my rigging, I simply fastened the ropes in the pinrails by wedging the ropes in the holes. I did not want to tie anything off in case I had to tighten lines. I am sure glad I made that decision because I had to make a lot of adjustments. The only detriment is that it is very crowded on deck, forcing me to go double fisted with the tweezers.
Working from the bow, going back, I have started to tighten lines and tie off the tails. this should take a while. I spent all day Sunday working on the bow pin rails and Foremast rails. Once I get done, I will be making some rope coils for the pins that carry lines.
Final thoughts on the hammock rails, I thought I had made a mistake by not building them when the deck was clear of masts and rigging. In the end, if I had added them then, and built them from the ground up on the ship rail as the plans suggest, it would have been more difficult, and in the end, they would have been the way when I did get around to rigging. They cover all of the major pin rails. Doing them on the bench and sliding them in after all of the rigging and deck work is done to me seems to be the better play.
-
Tom,
It has been a while since I took a peek at your log and I note that you have made tremendous progress. You are doing all the right things. I am looking forward to seeing the results of your paint work.
Looks like we are sending another big snow storm your way. We are getting it tonight. And yes, I hate it when I hear that Mike is using his air conditioner.
-
-
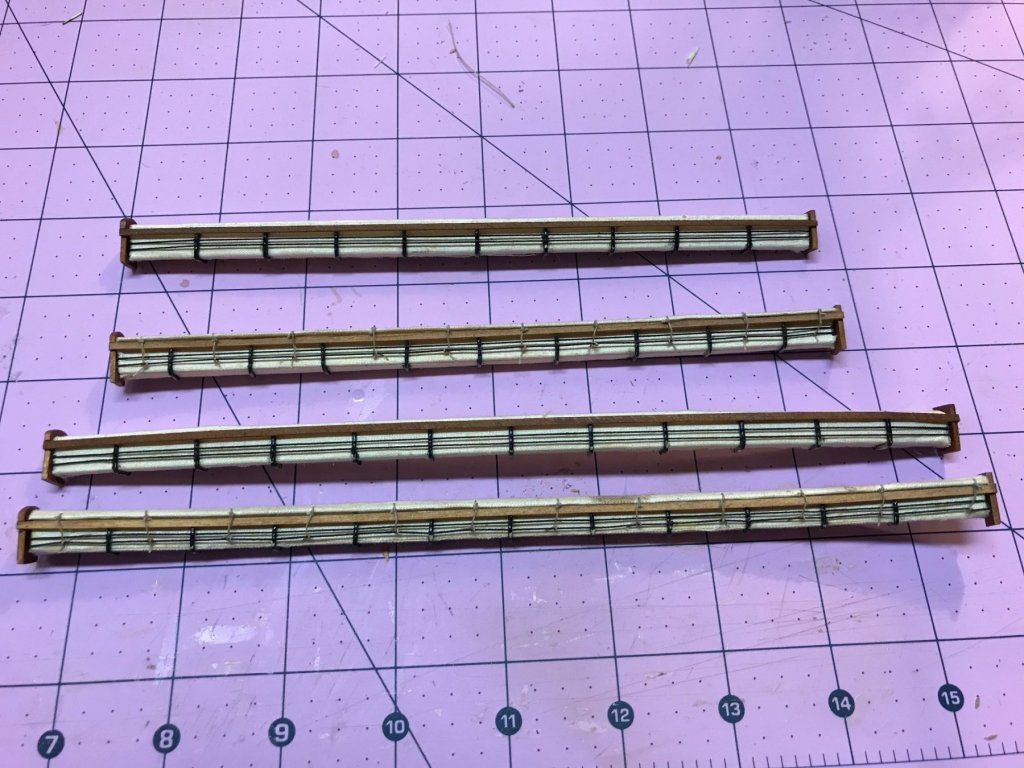
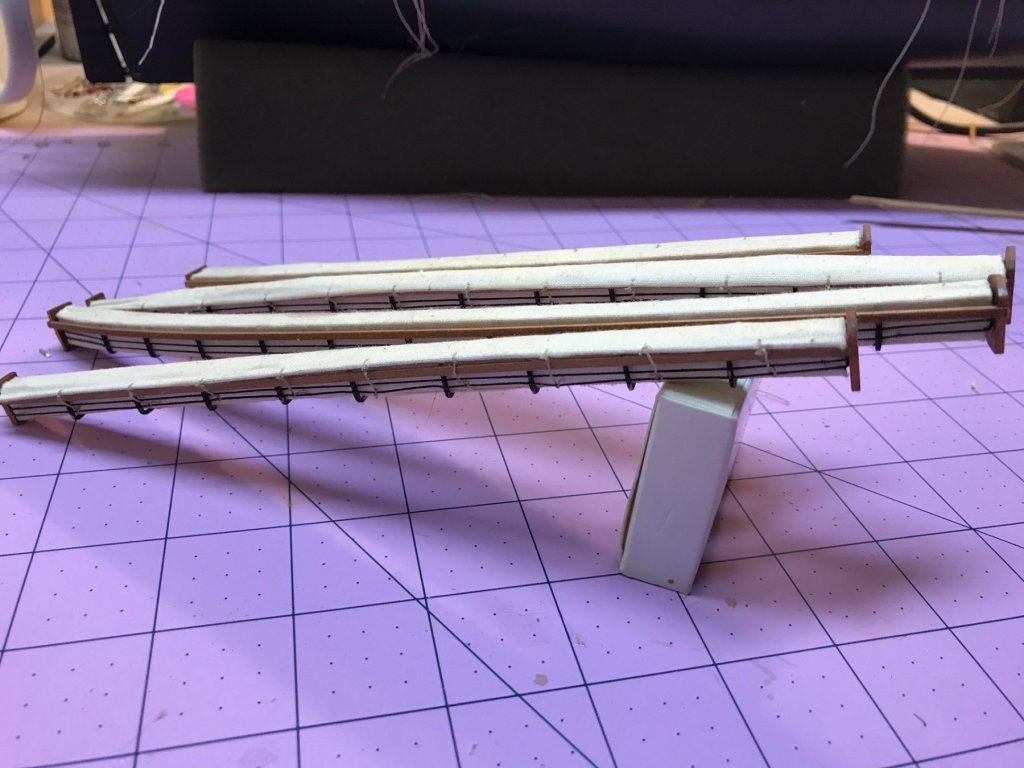
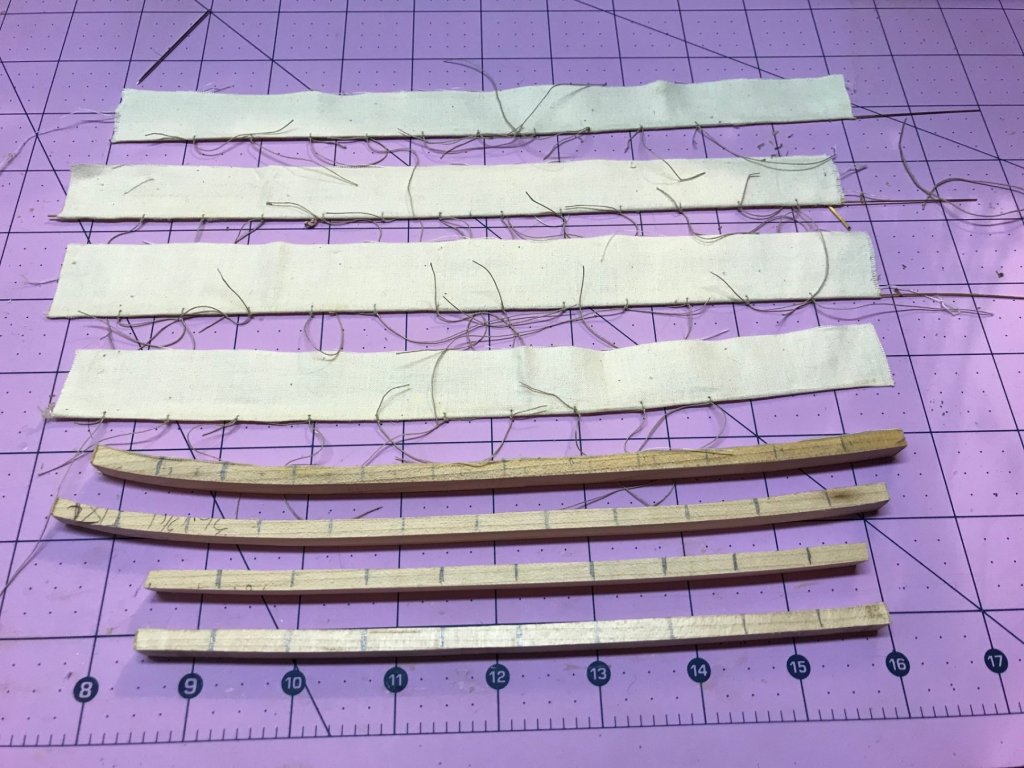
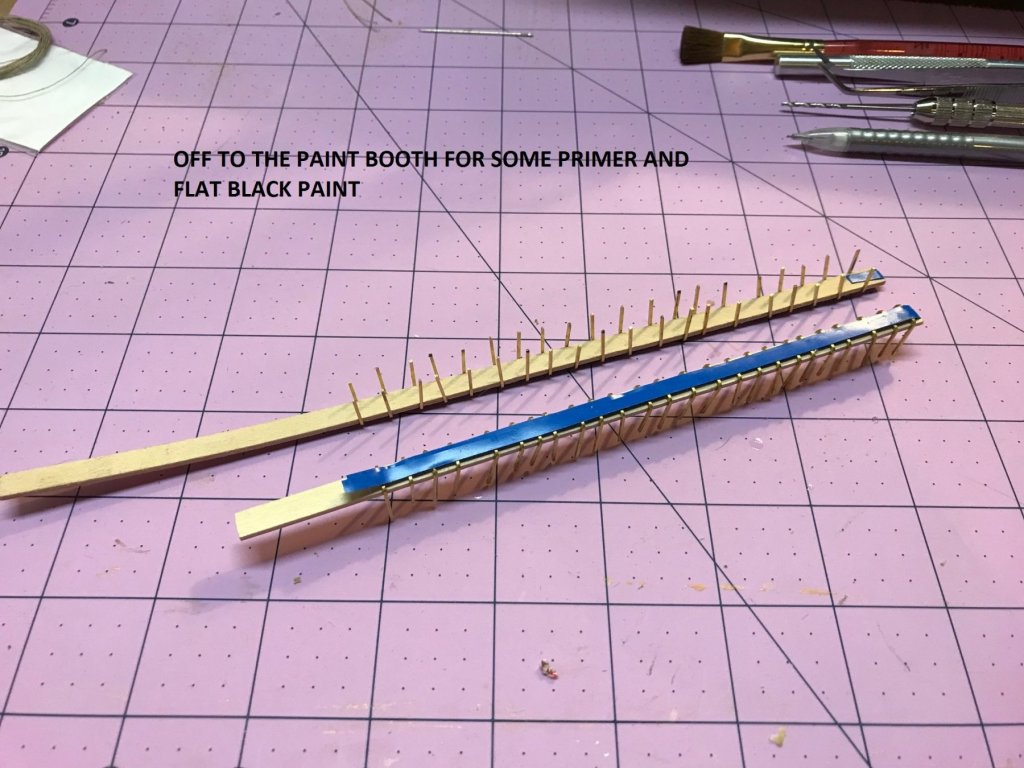
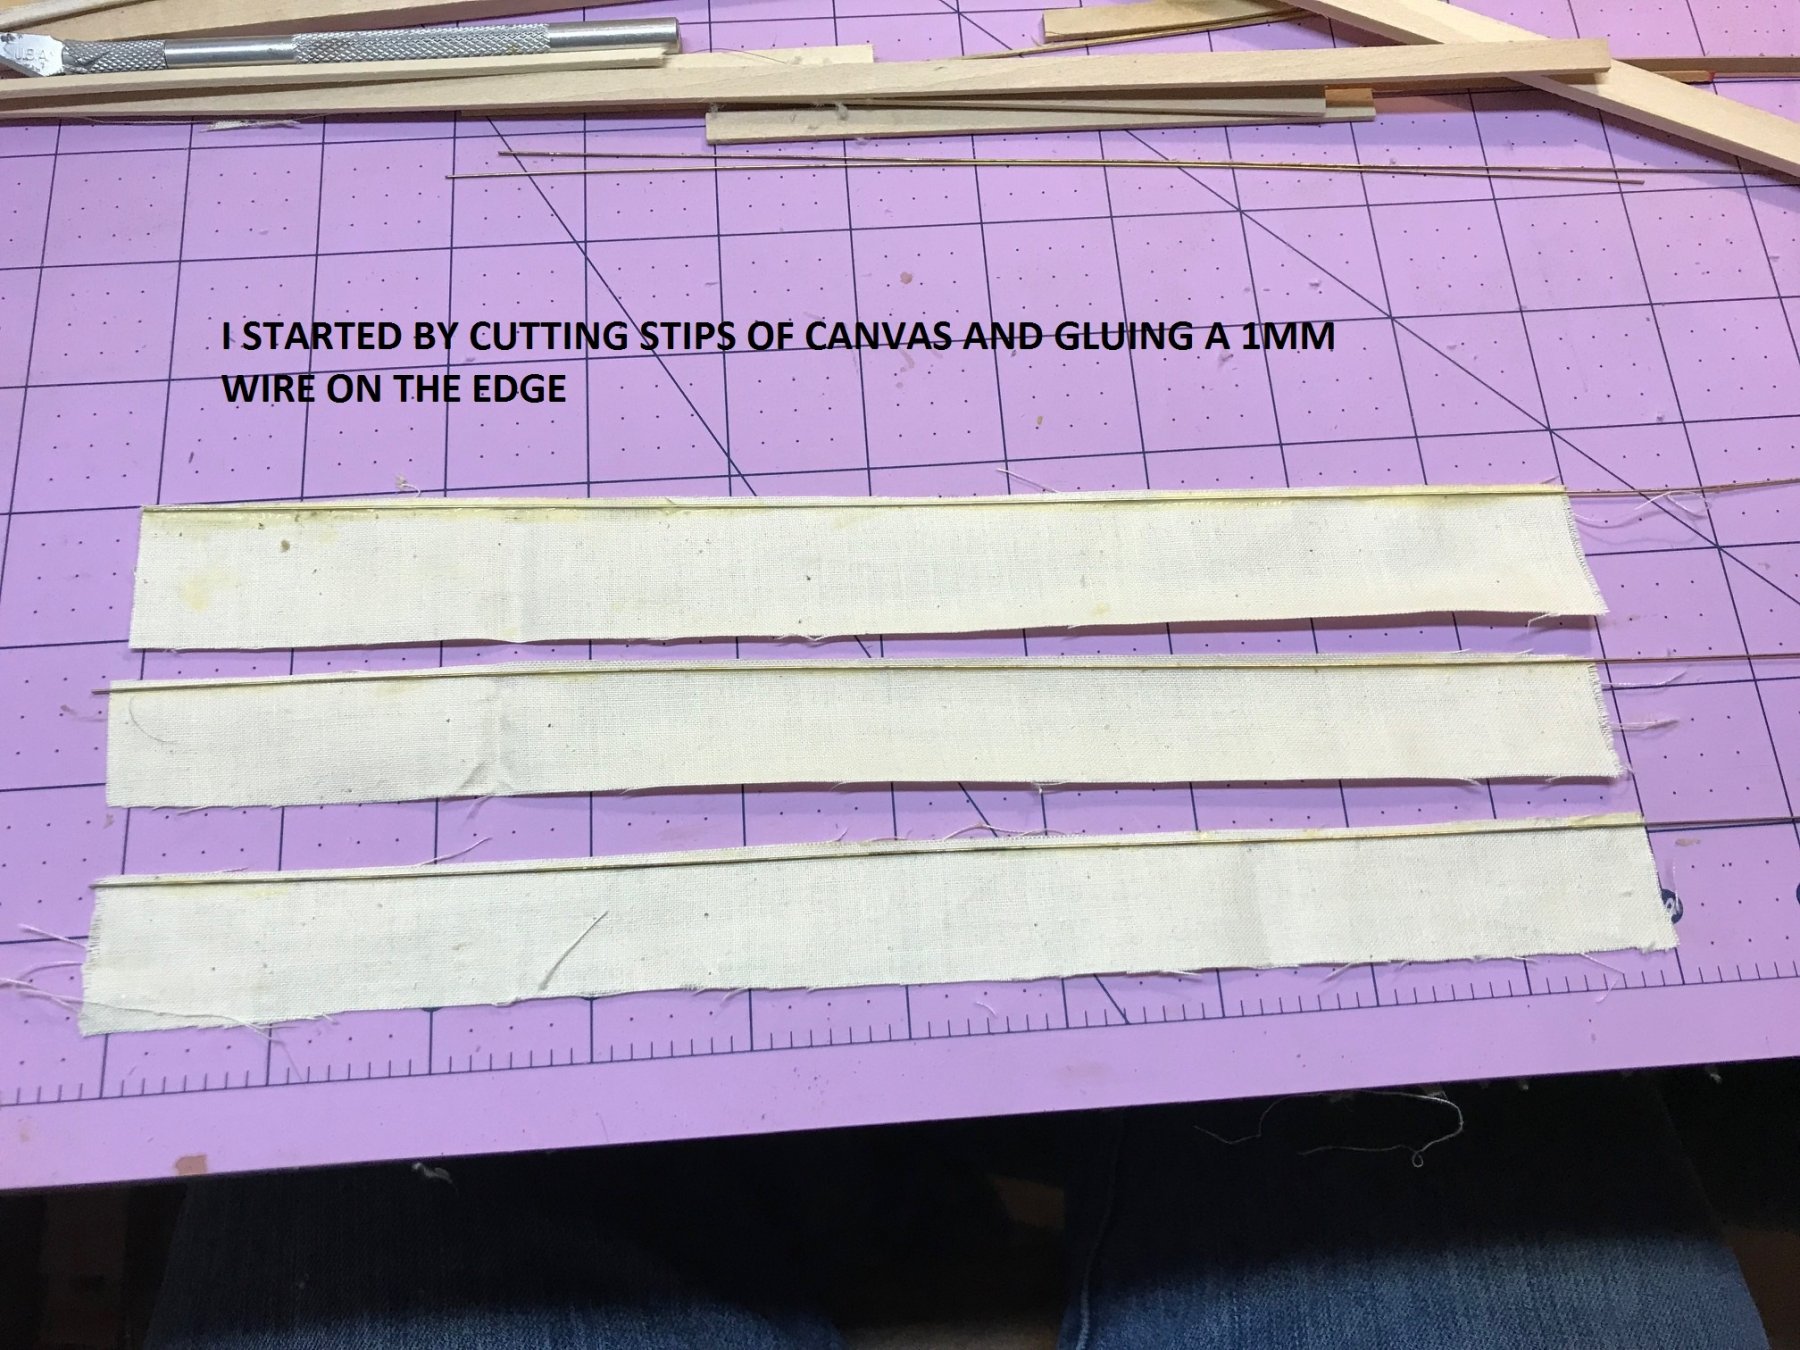
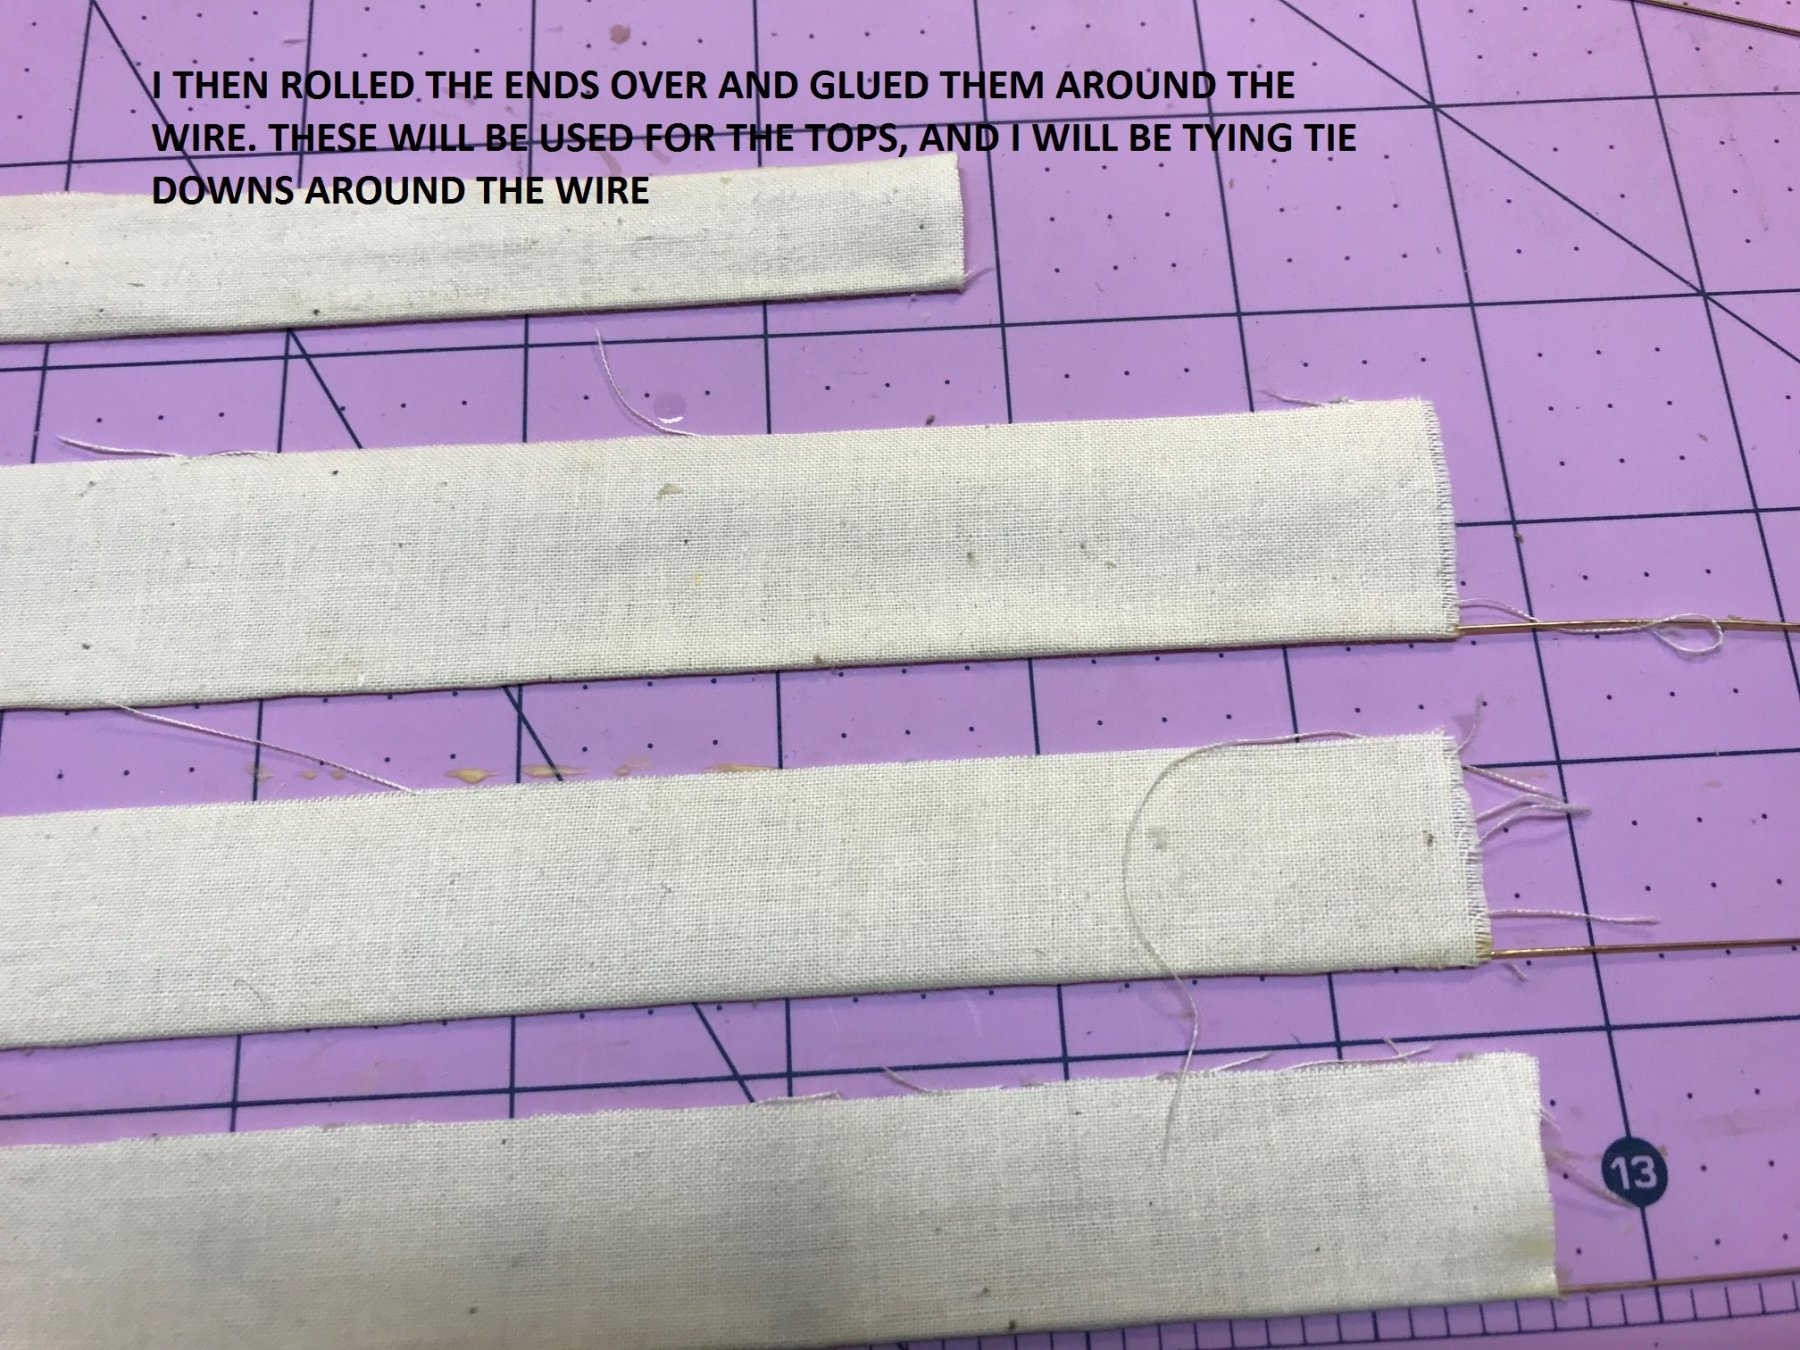
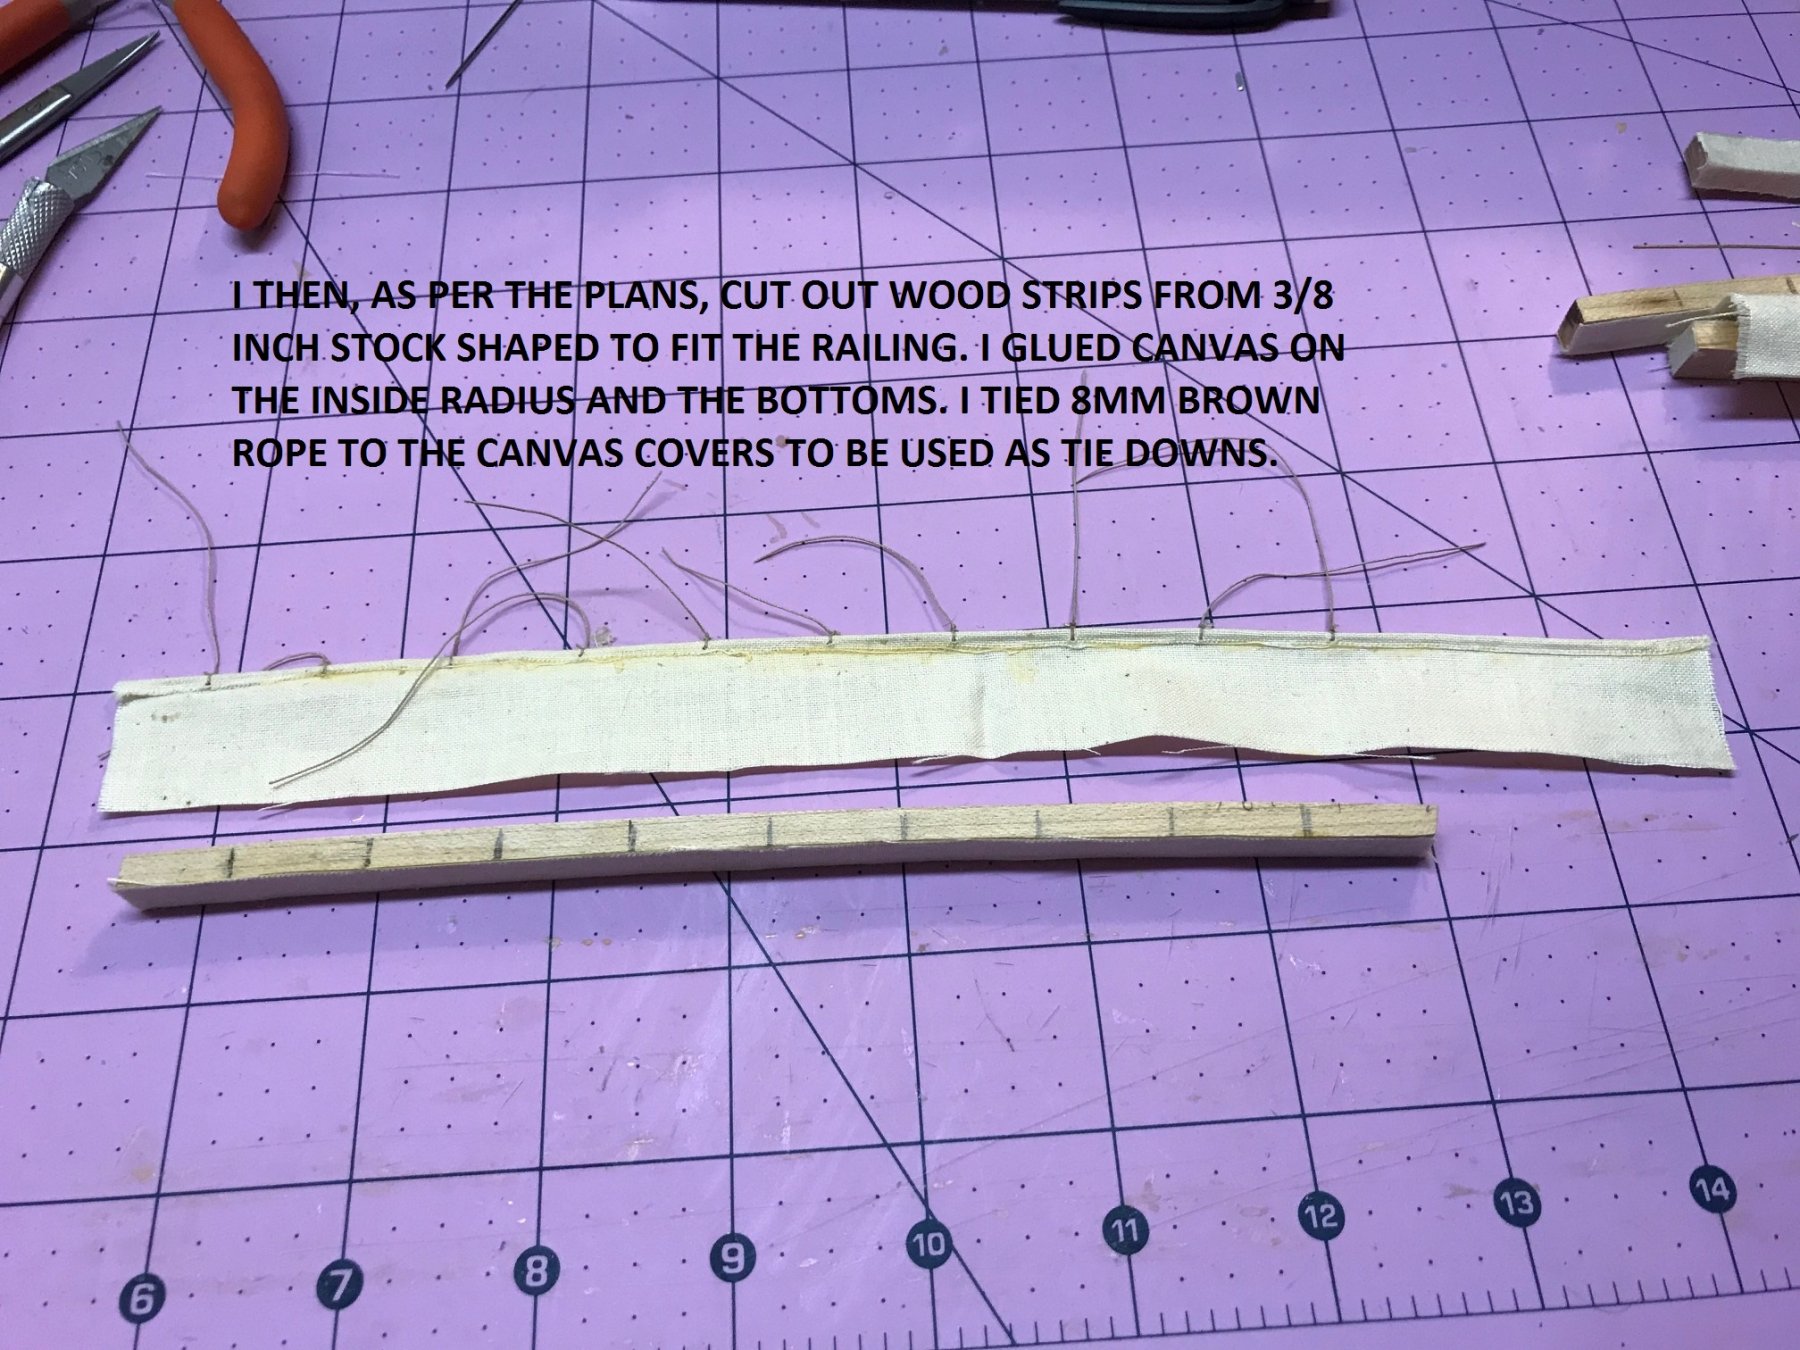
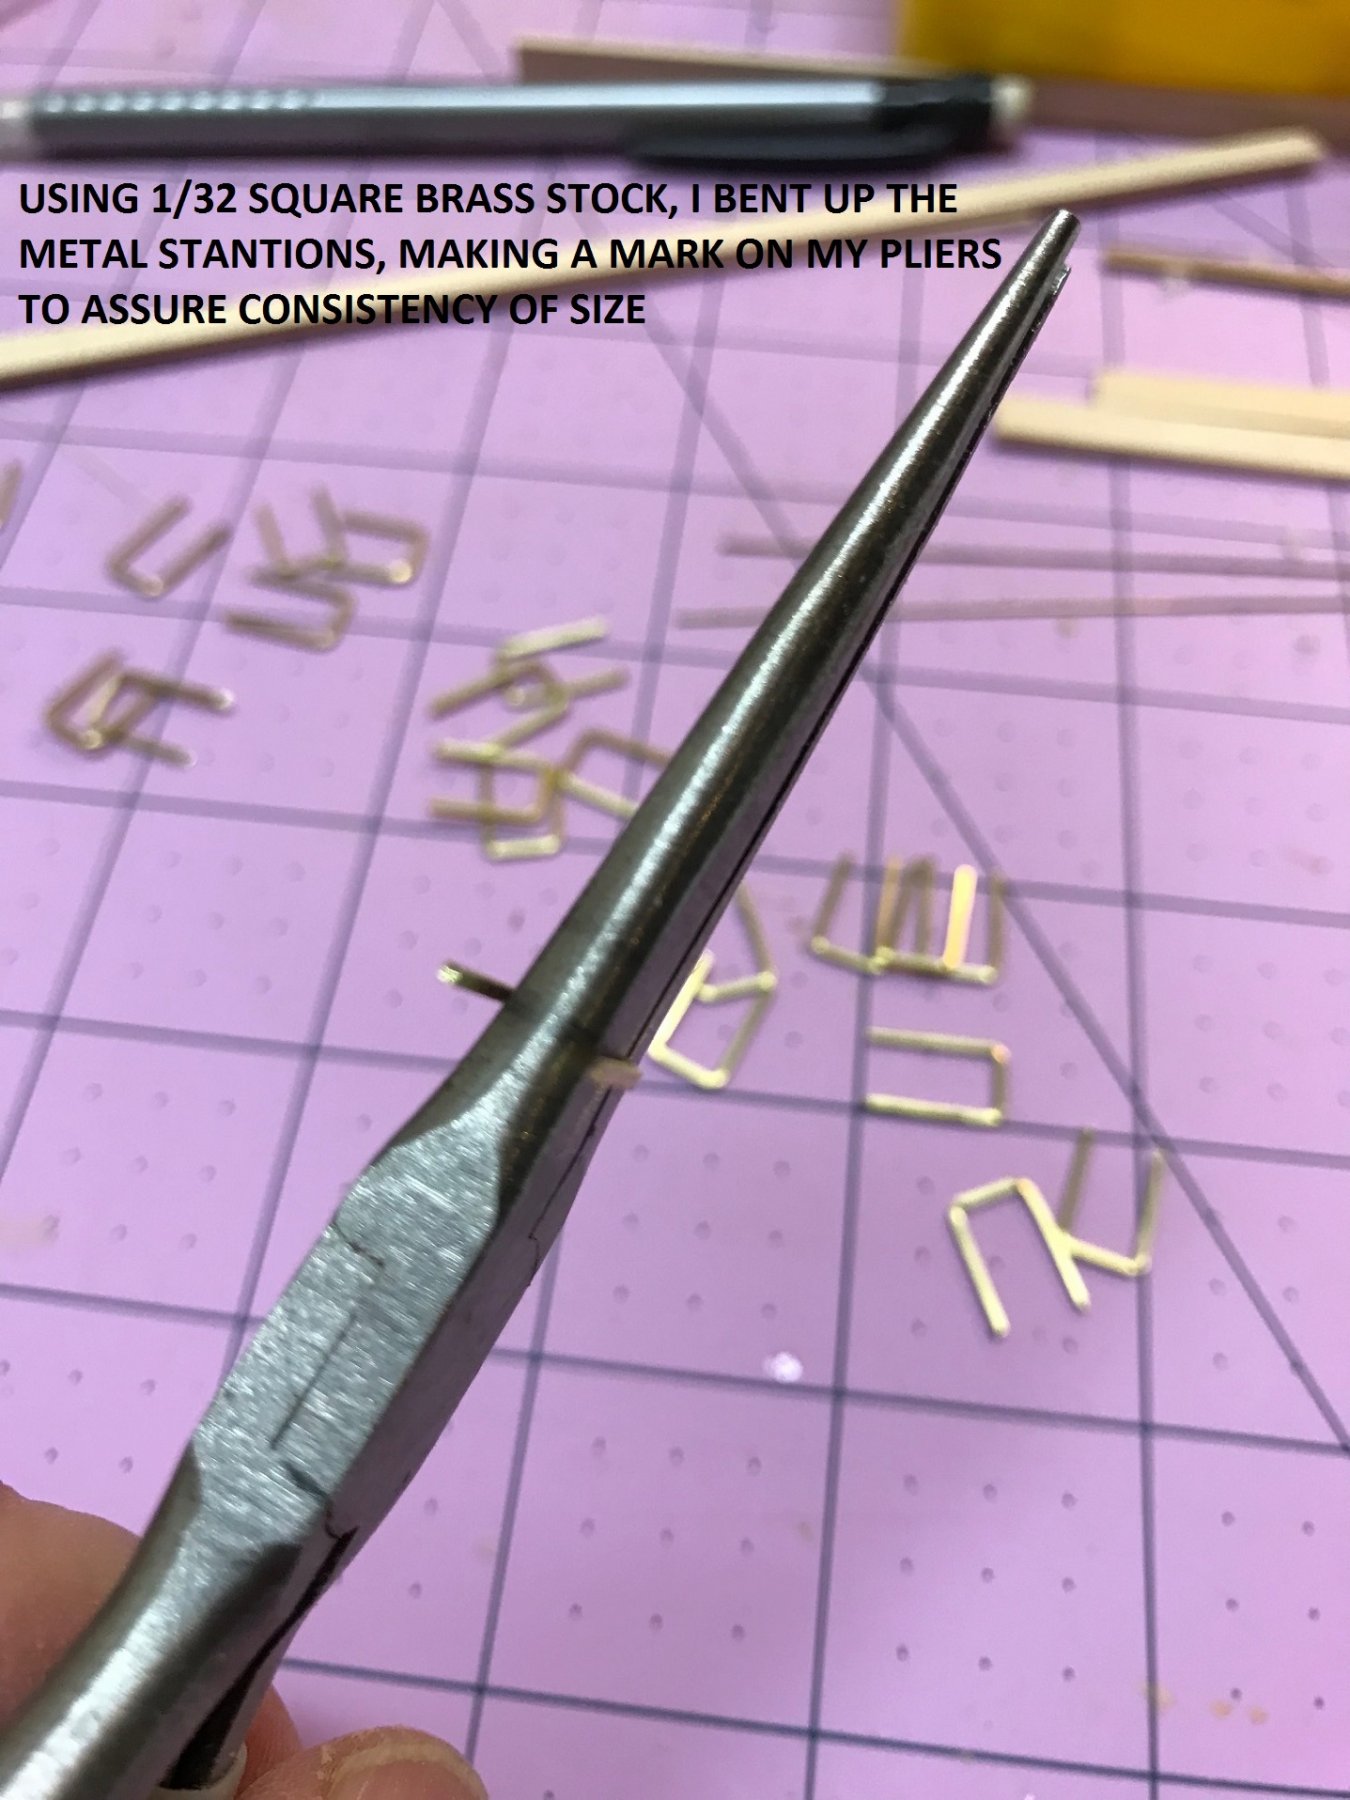
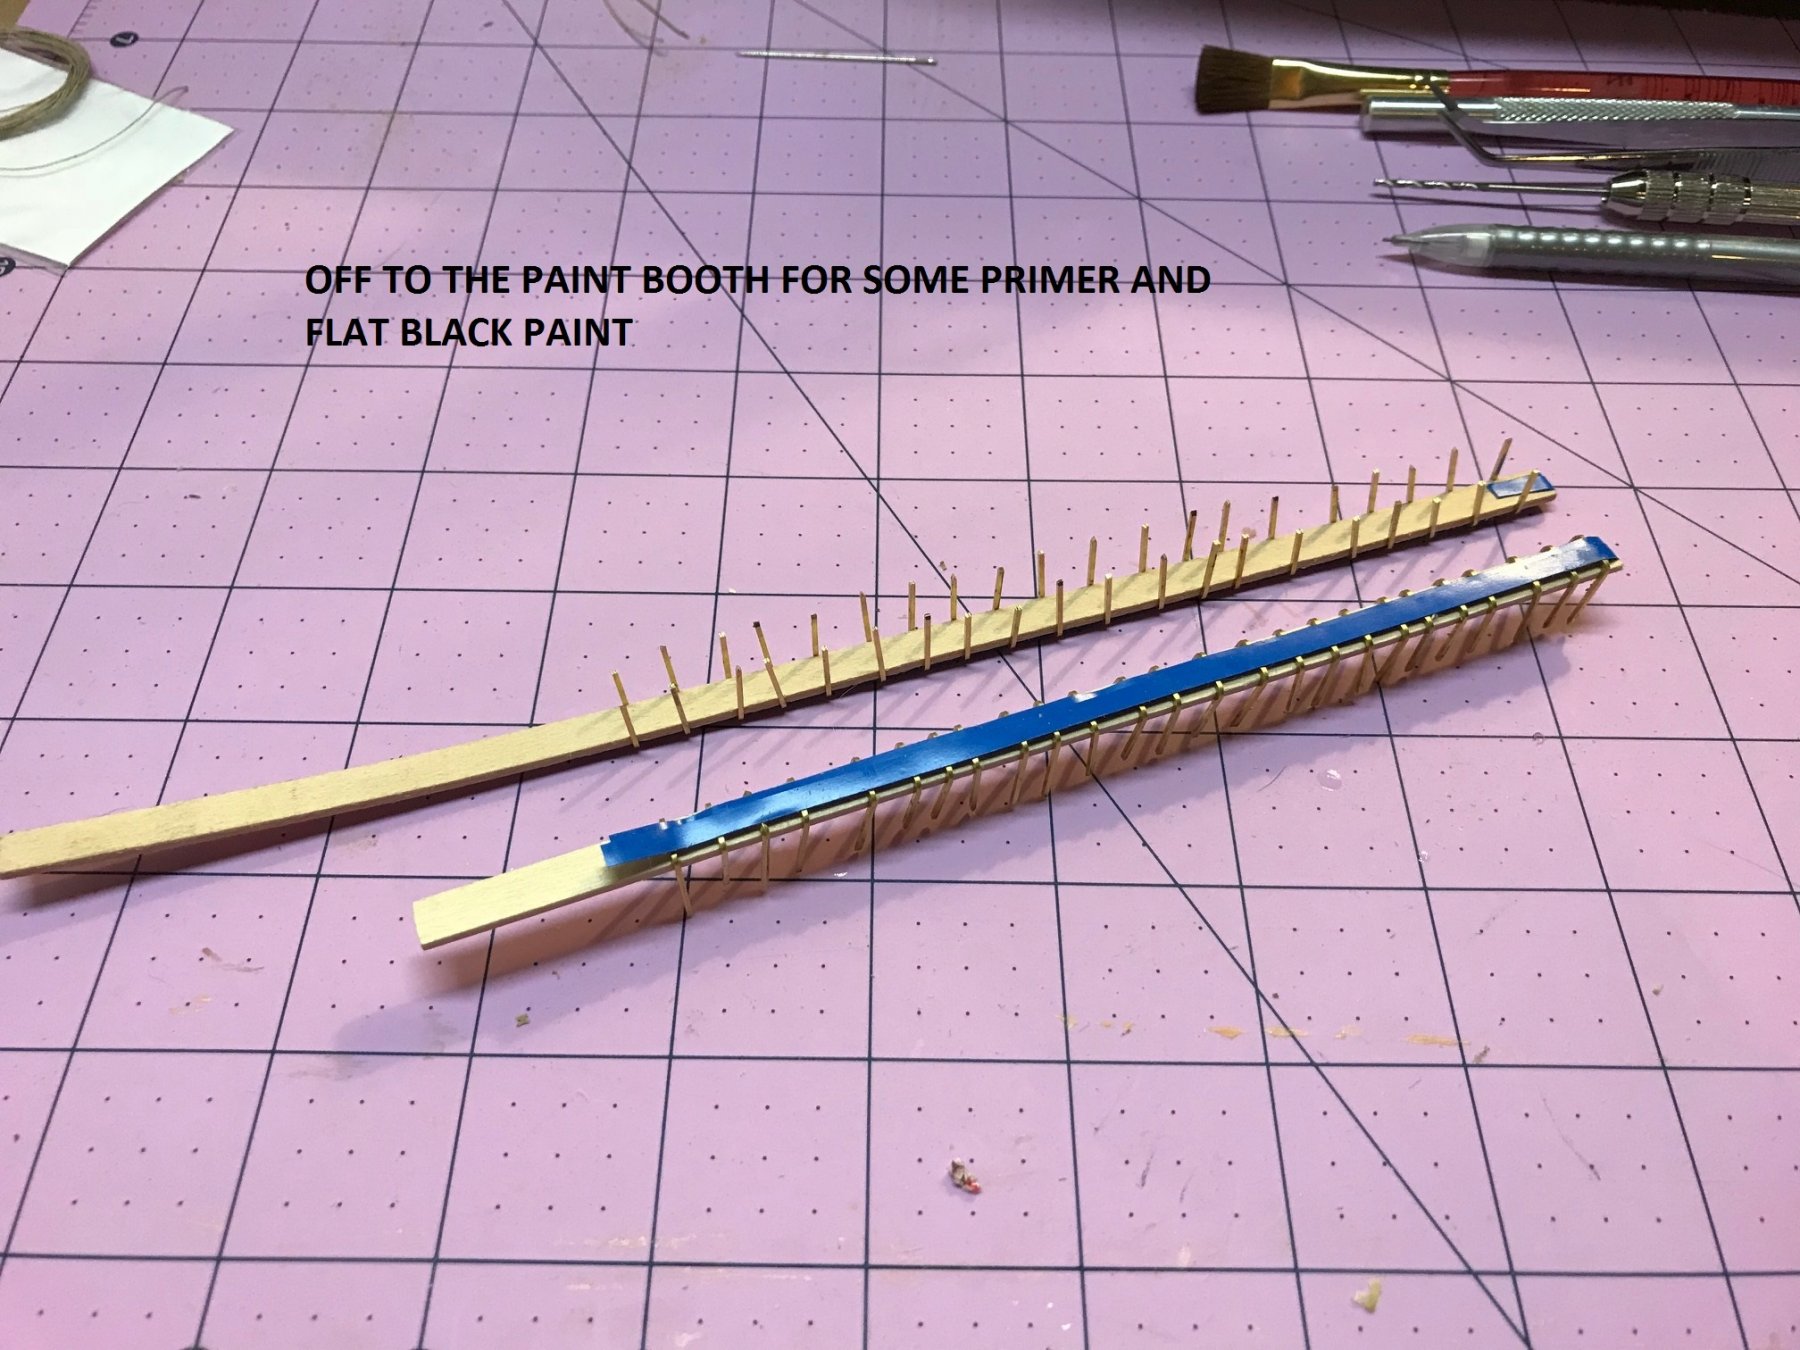
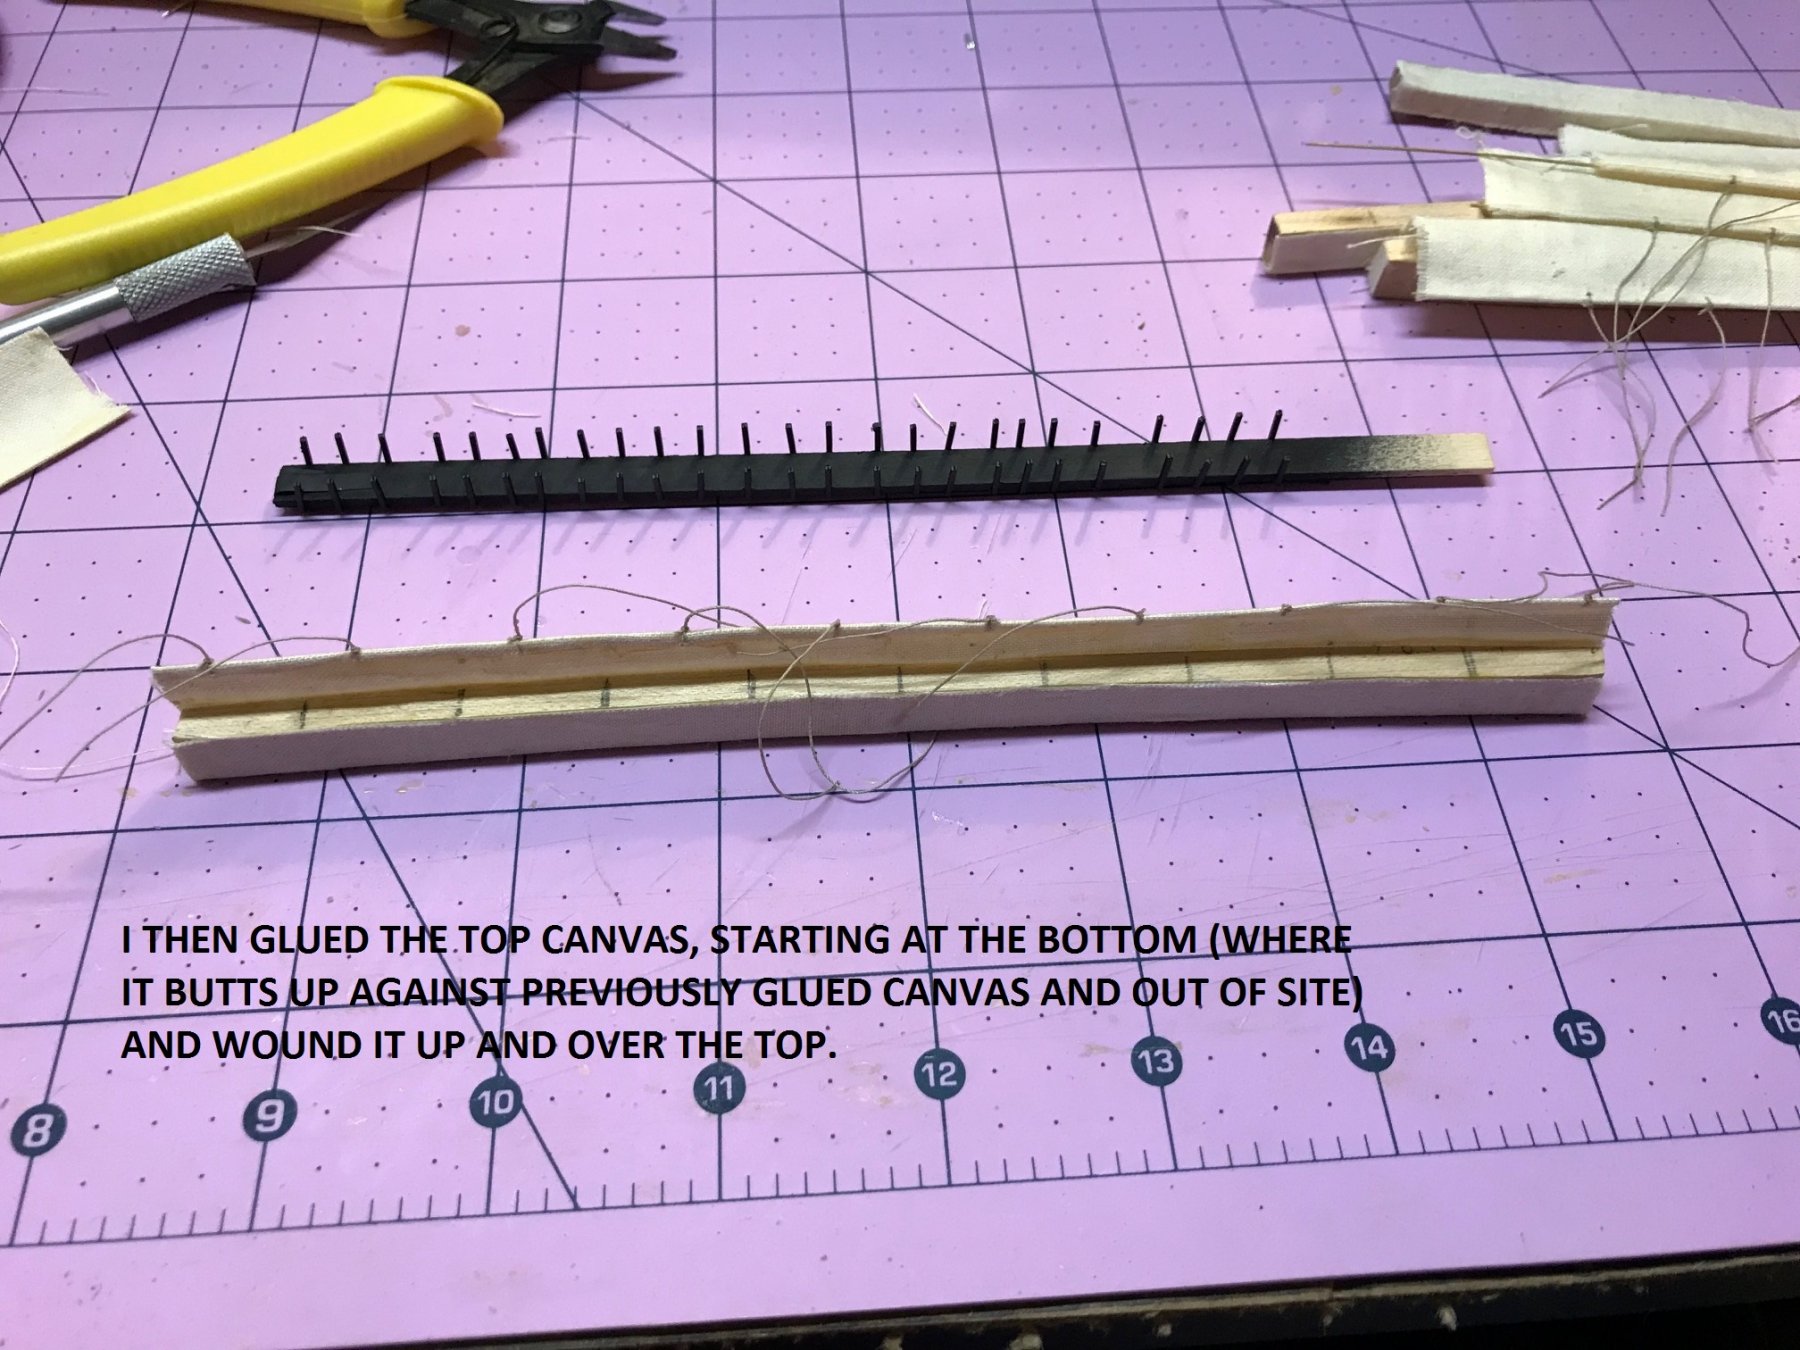
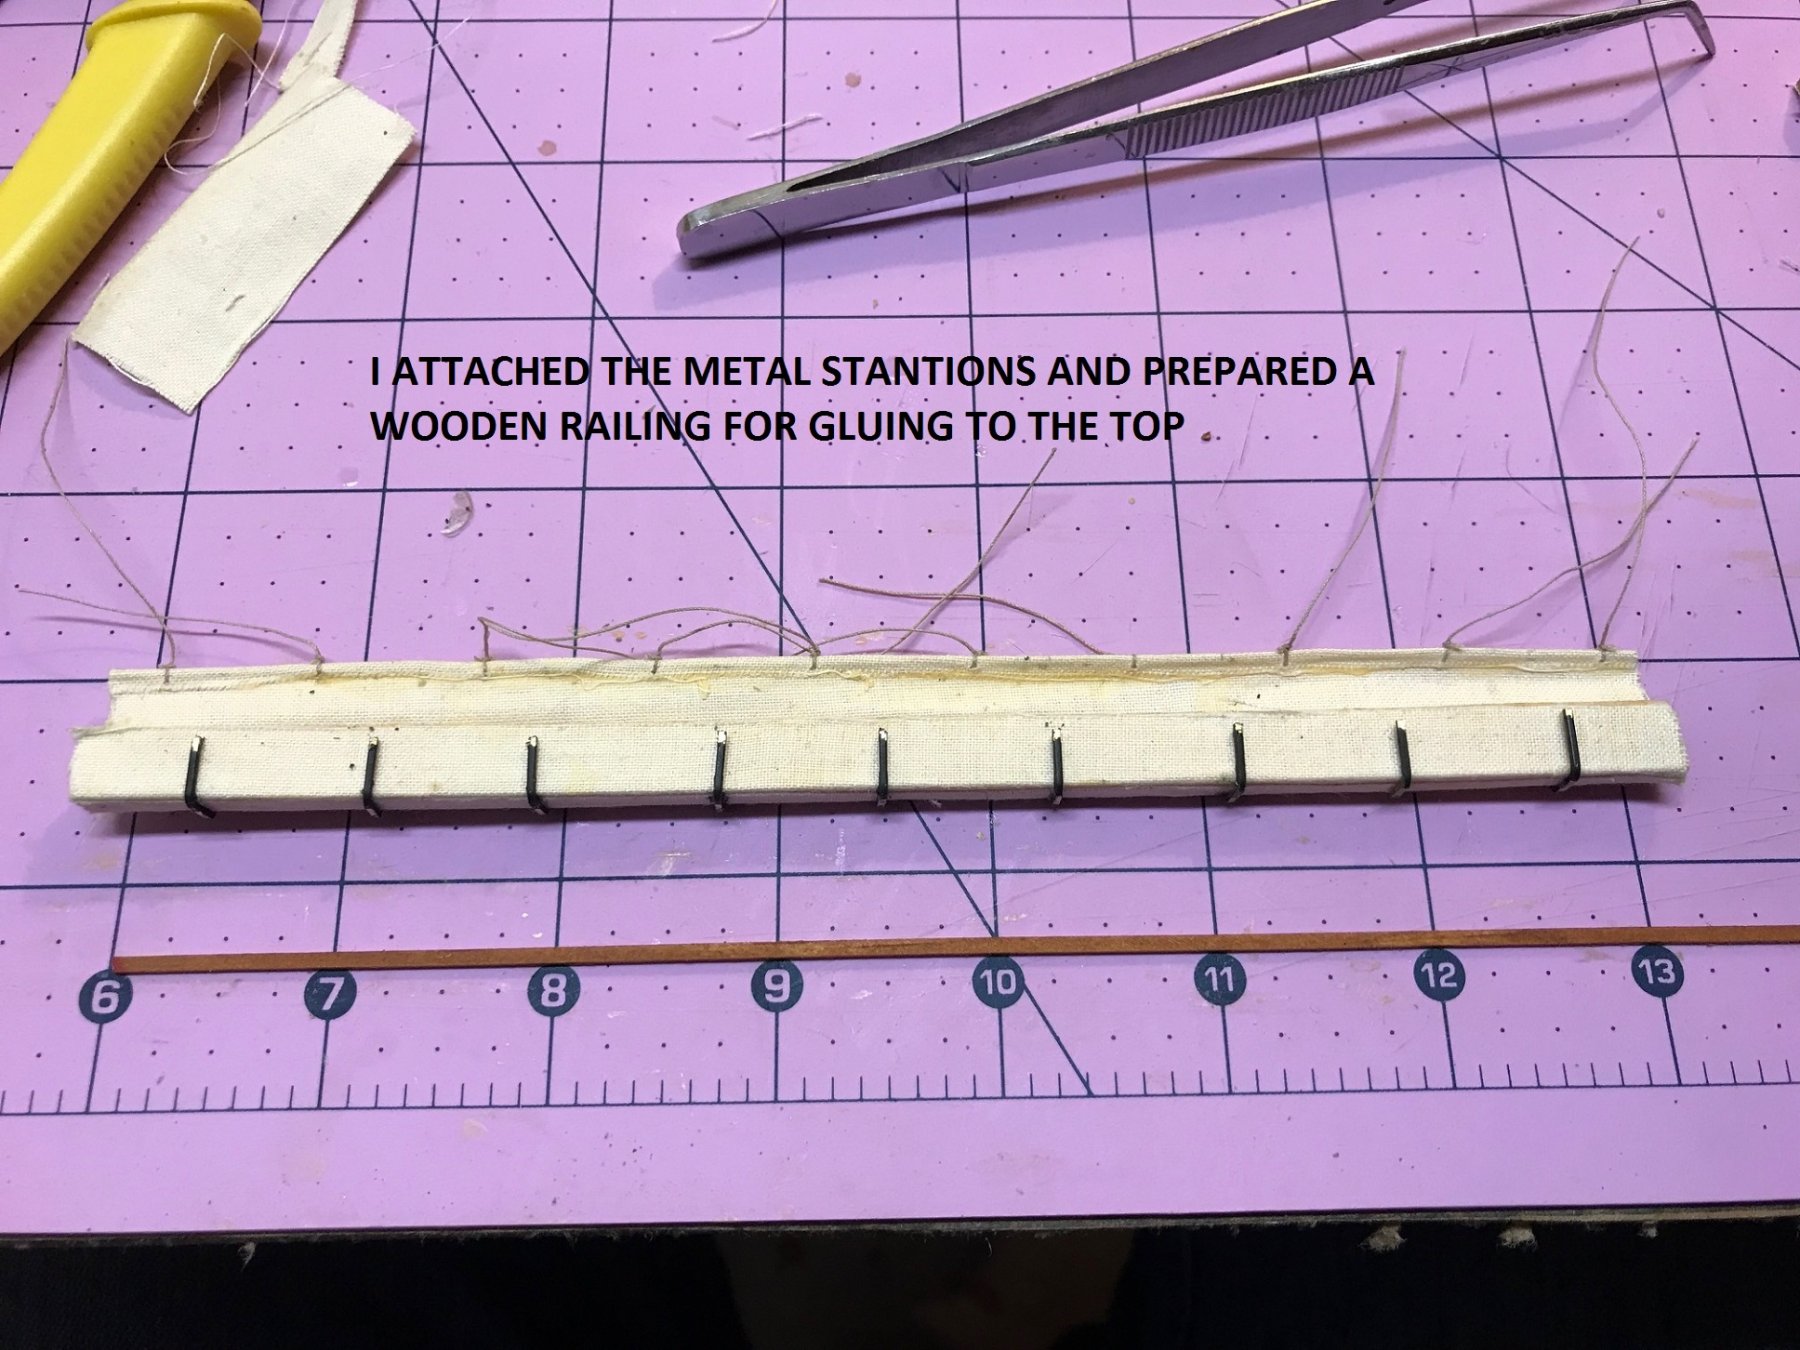
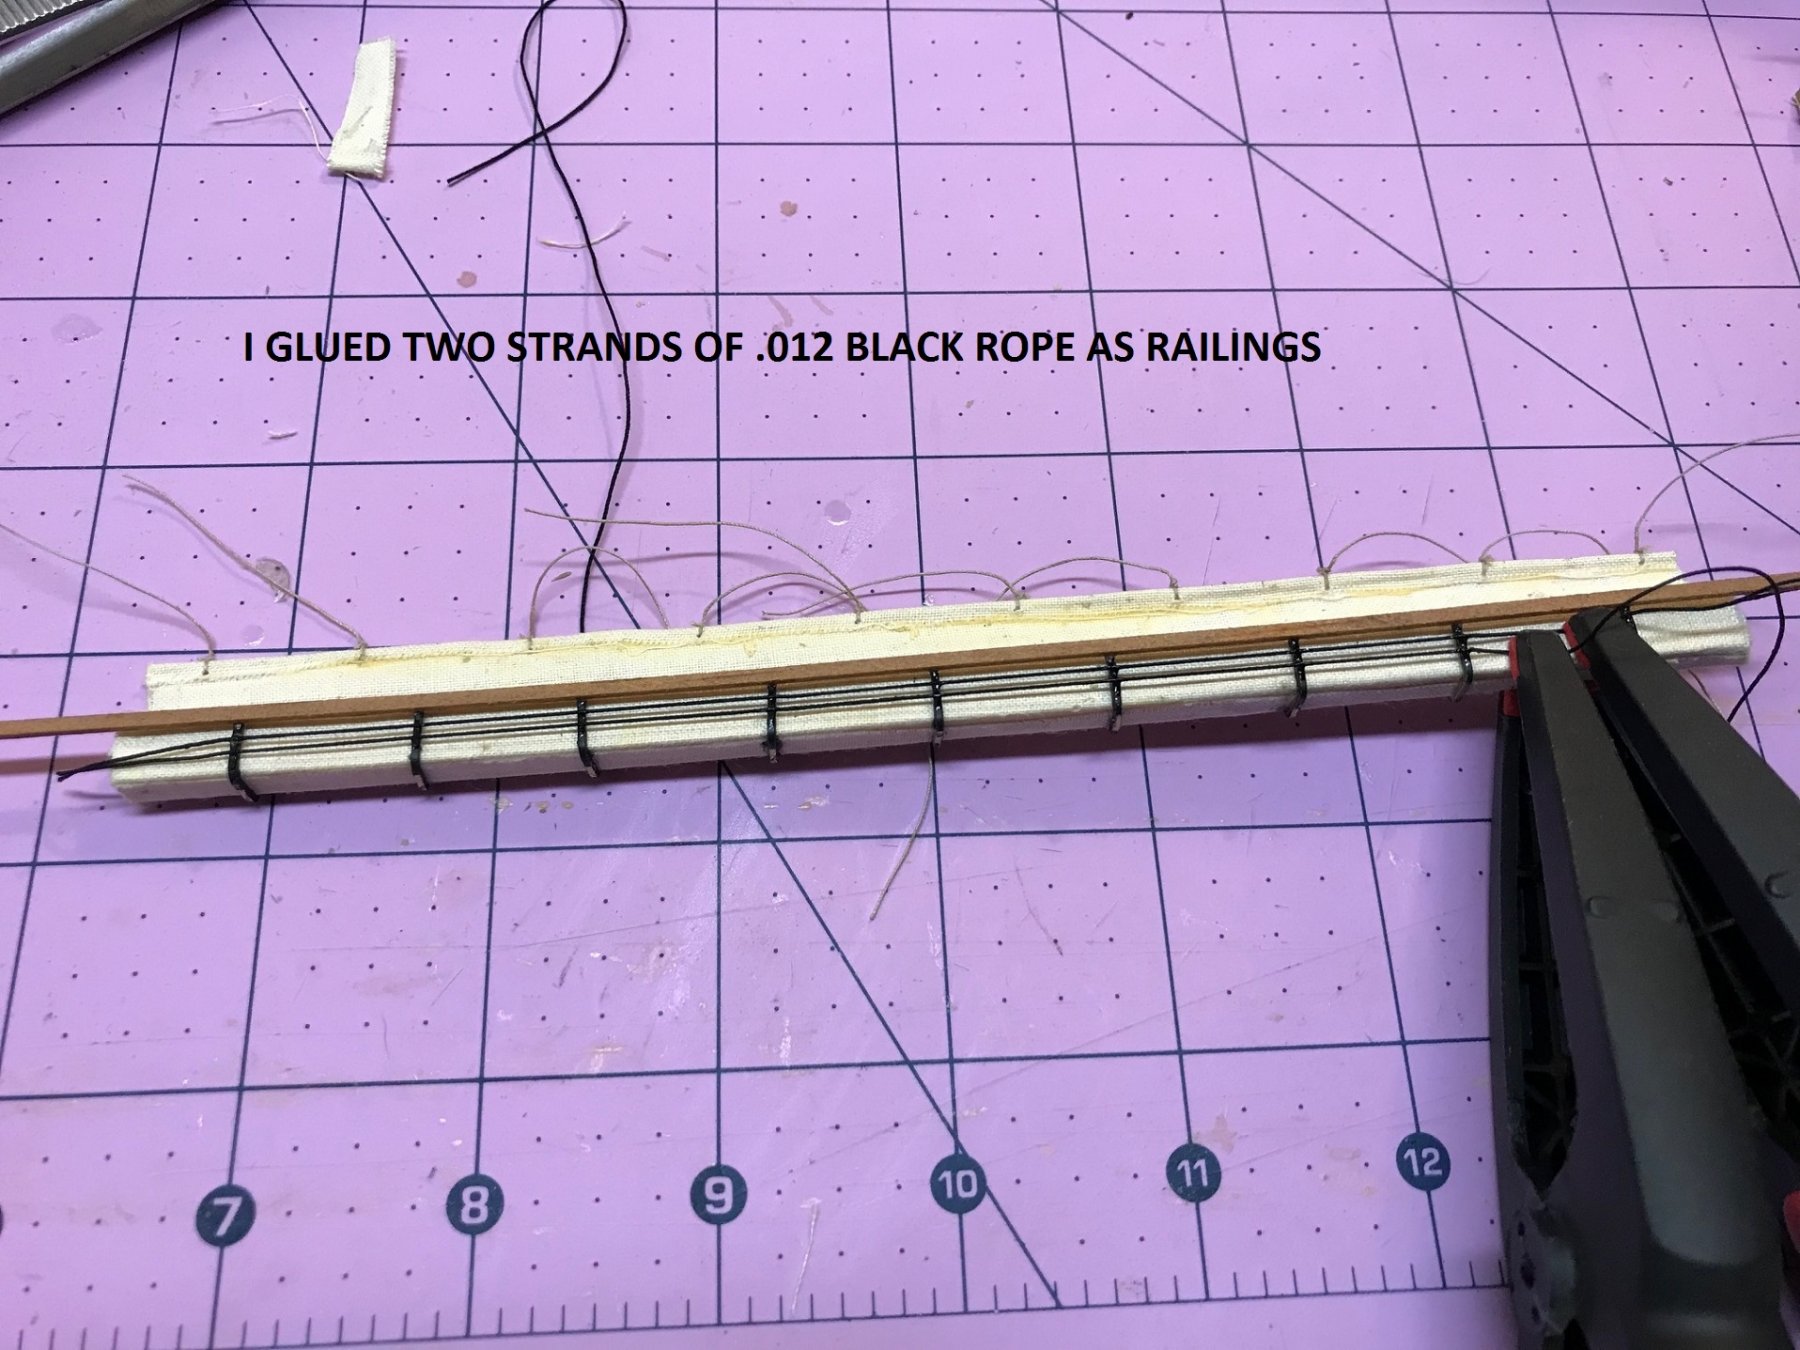
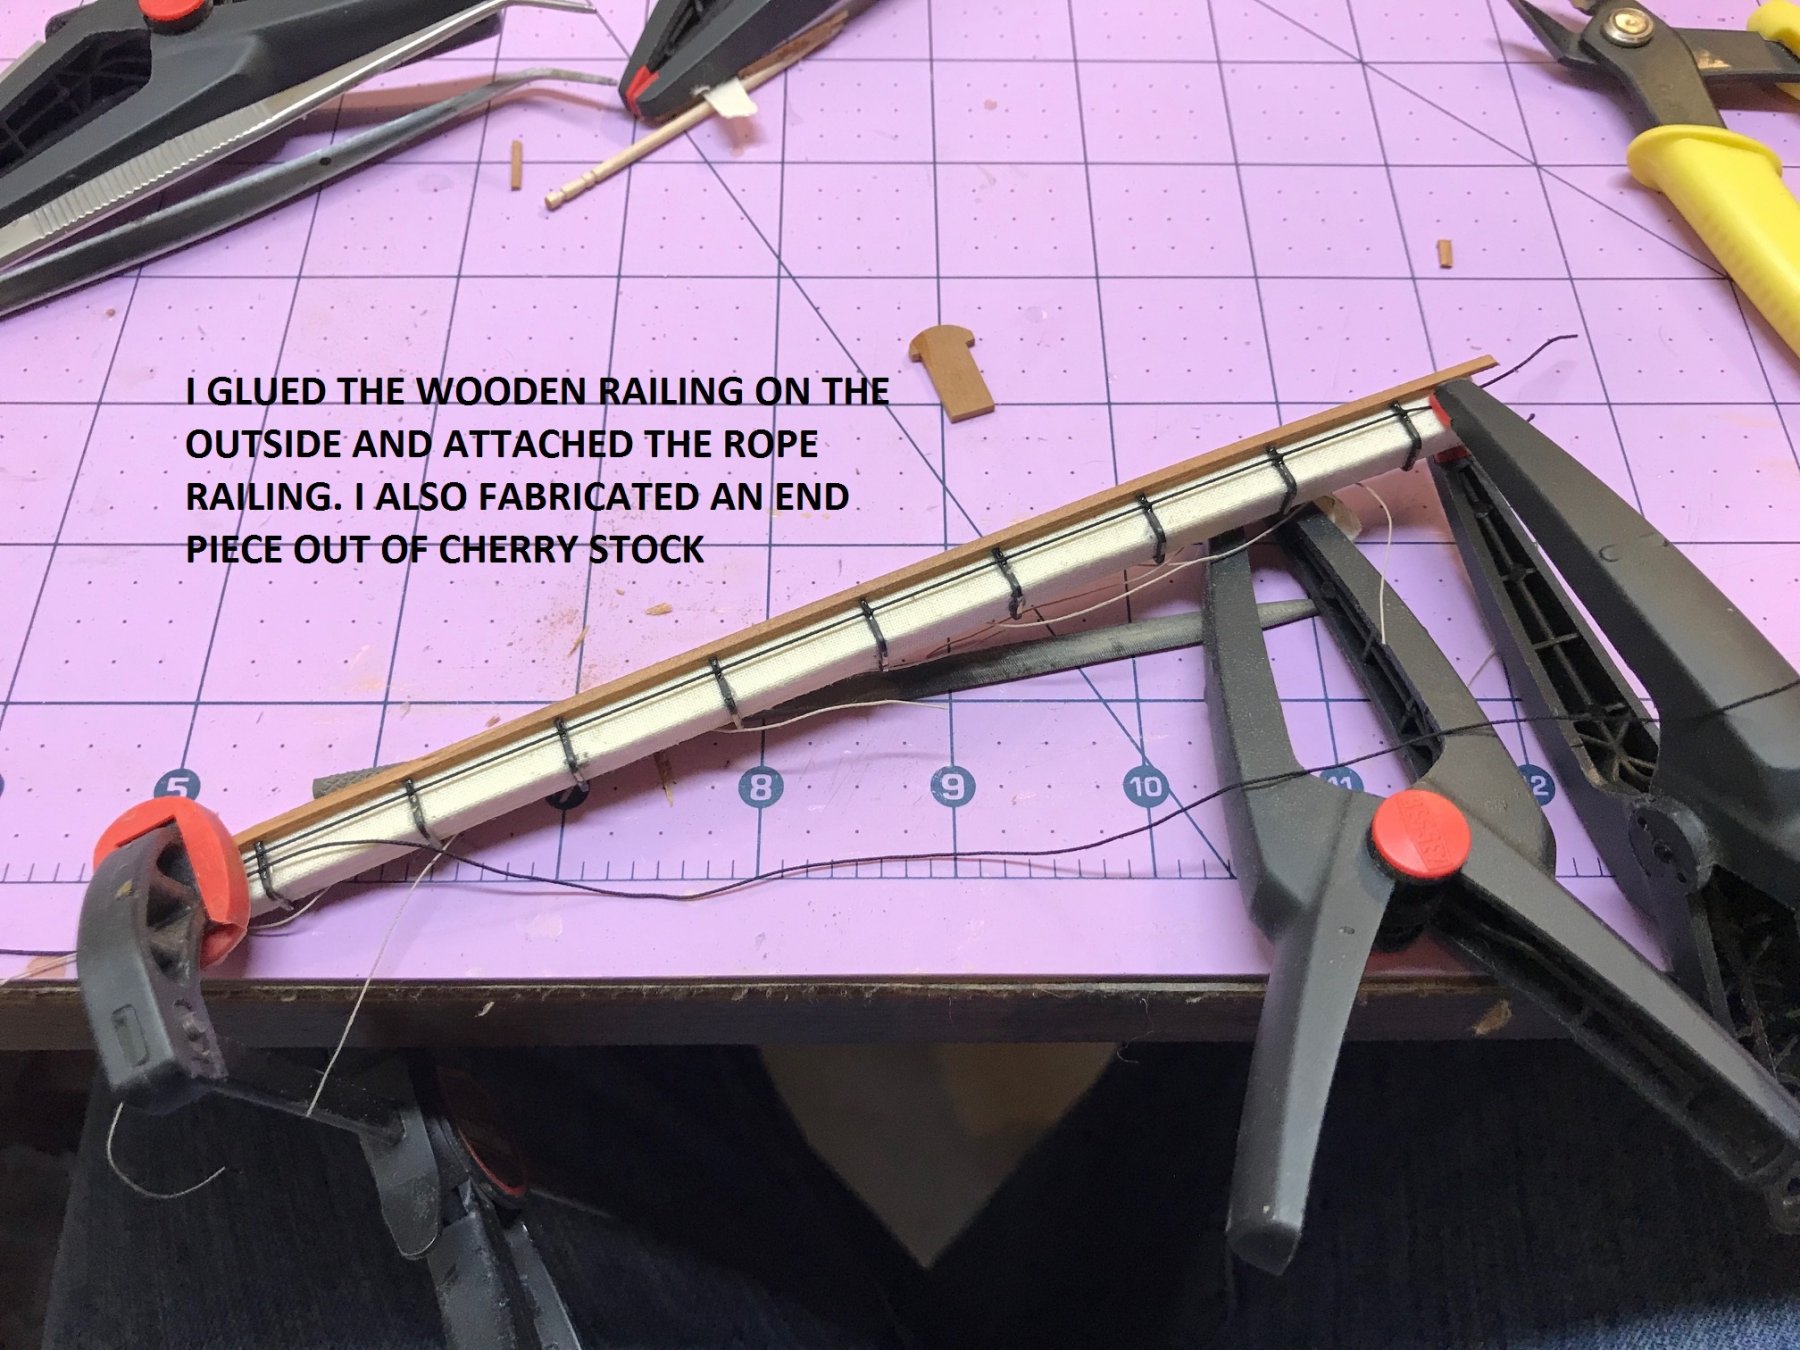
HAMMOCK STANTIONS
It has been quite a while since I posted to my build log. Since I moved, I have been working on a complete remodeling of my kitchen, so my carpenter skills have been focusing on the Macro rather than the Micro.
I have finally got time to get back to the Niagara, and am dedicated to the stretch run to get her done.
A while back, as I was rigging the ship, and encasing the deck and railing with ropes and stays, I realized that I had not built the hammock railings. When I realized that it would be nearly impossible to build them with all of the rigging lines in the way, I therefore decided to skip the process.
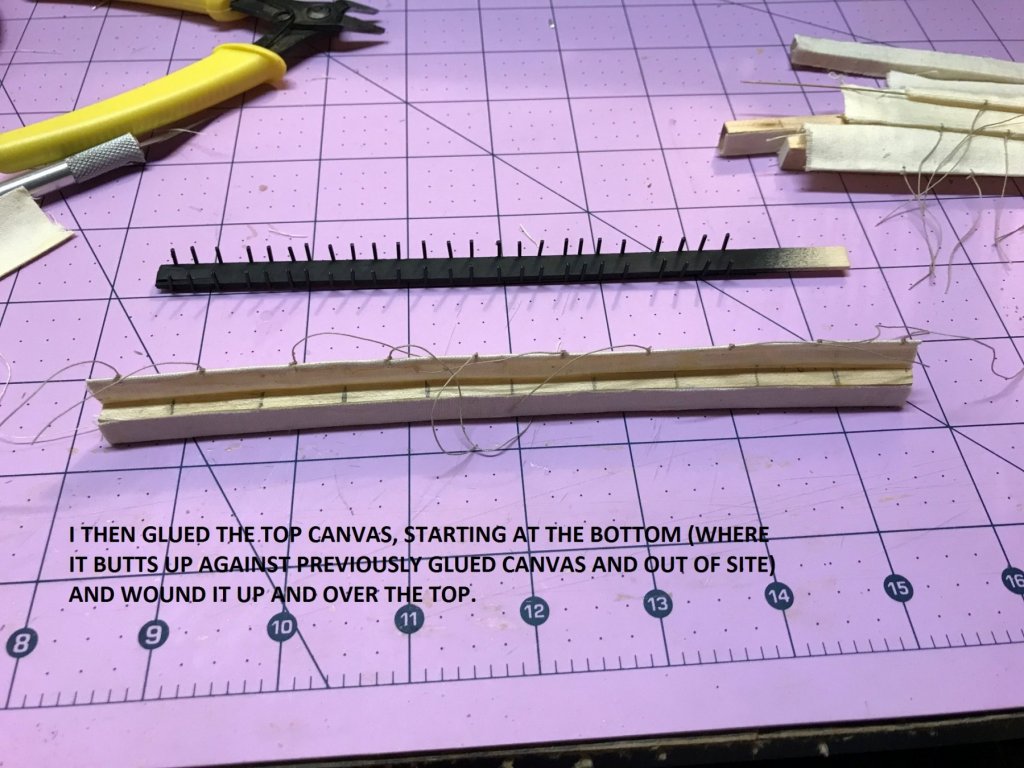
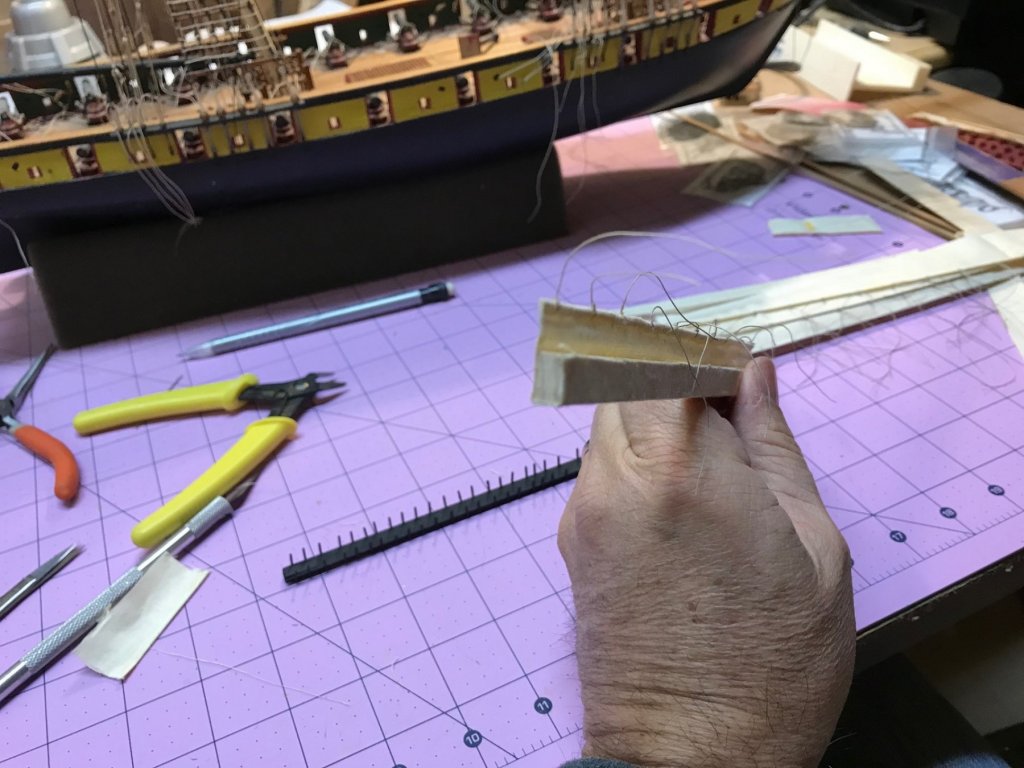
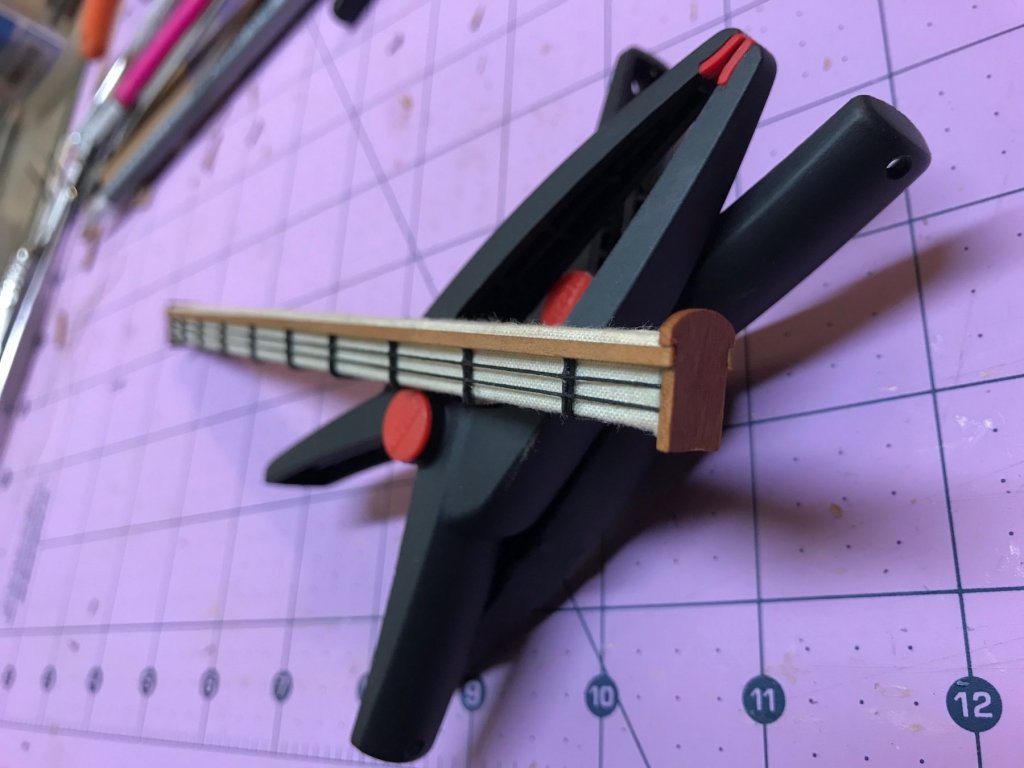
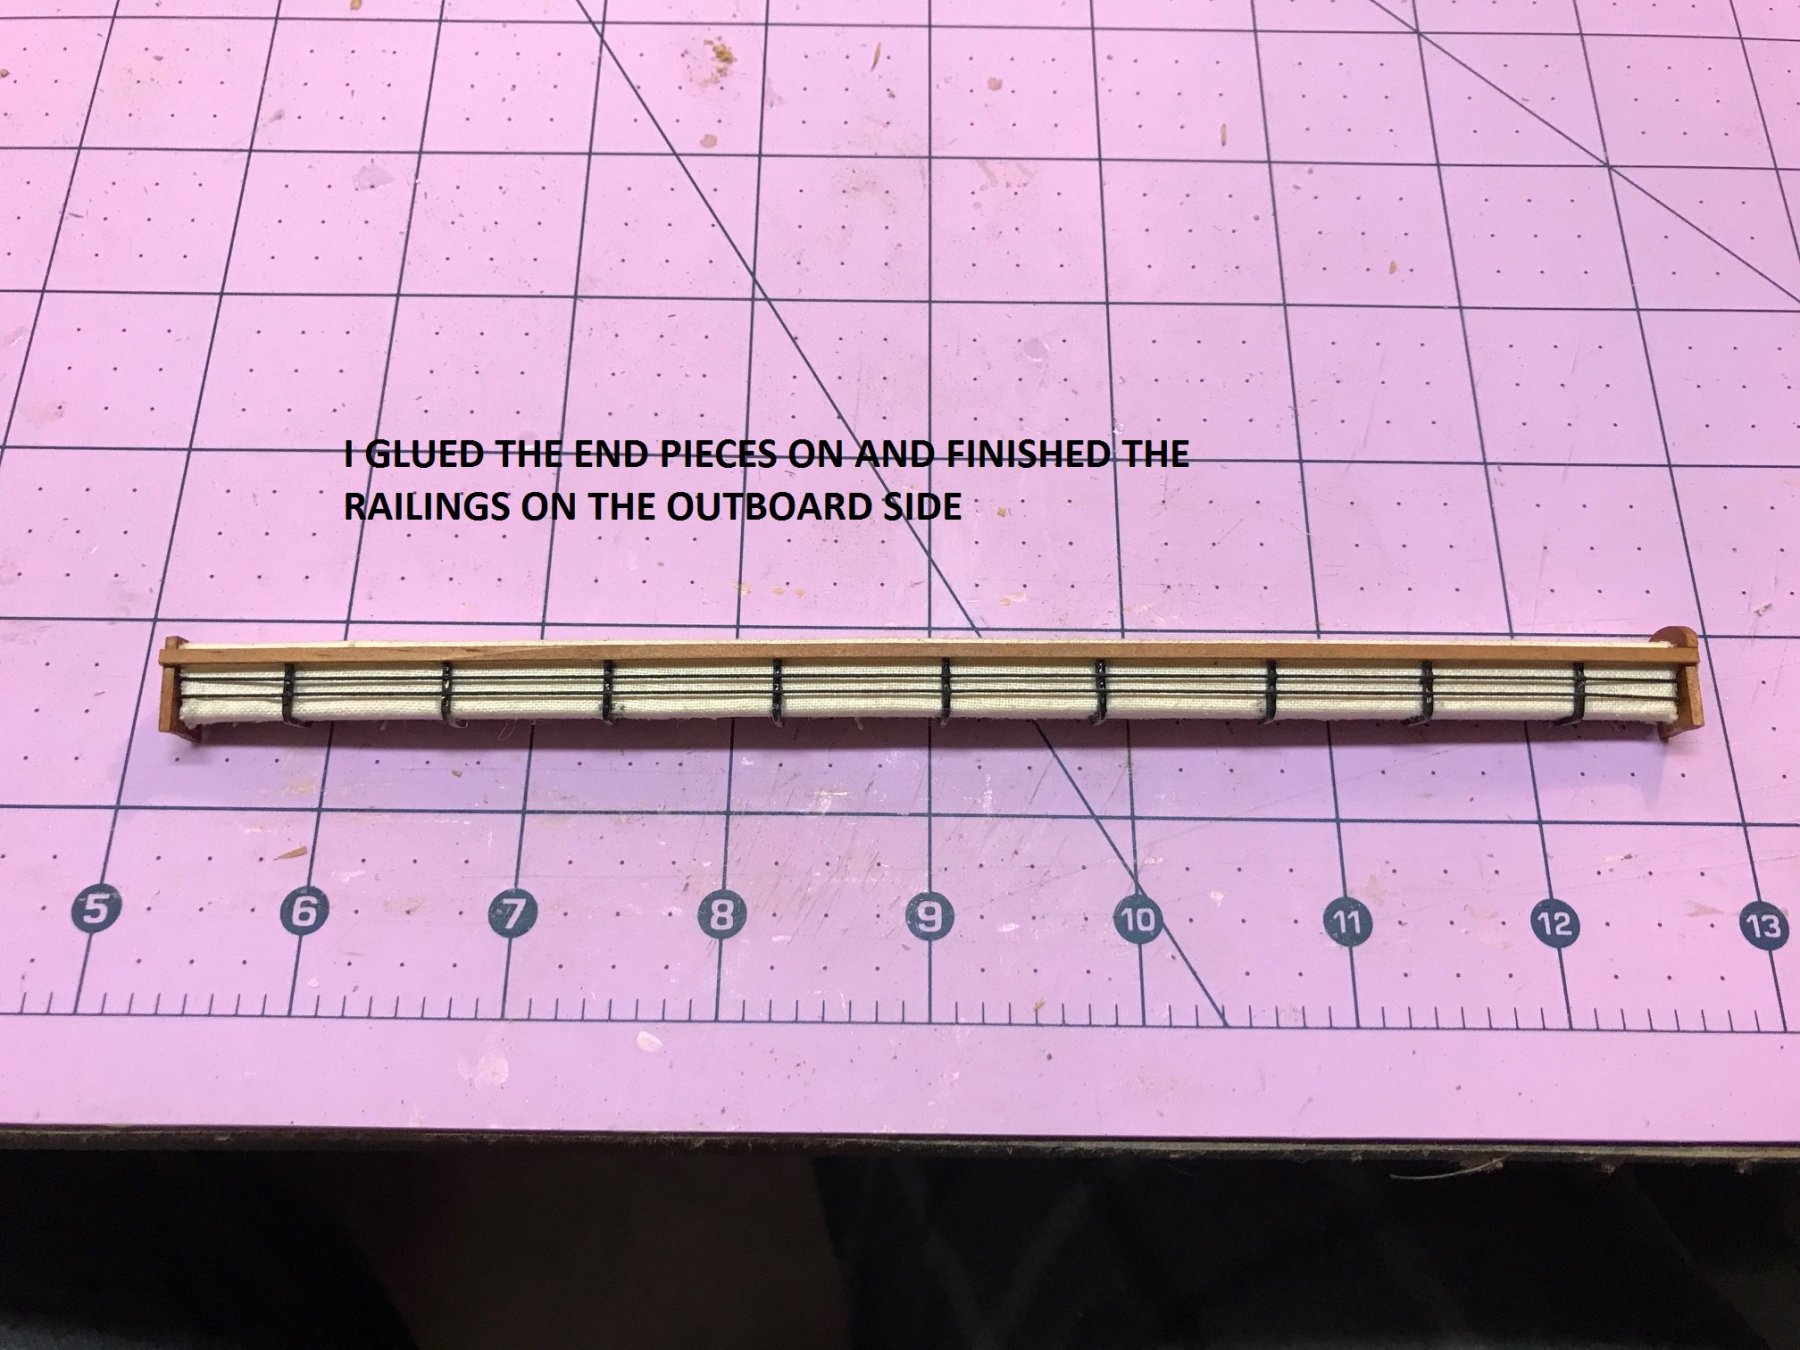
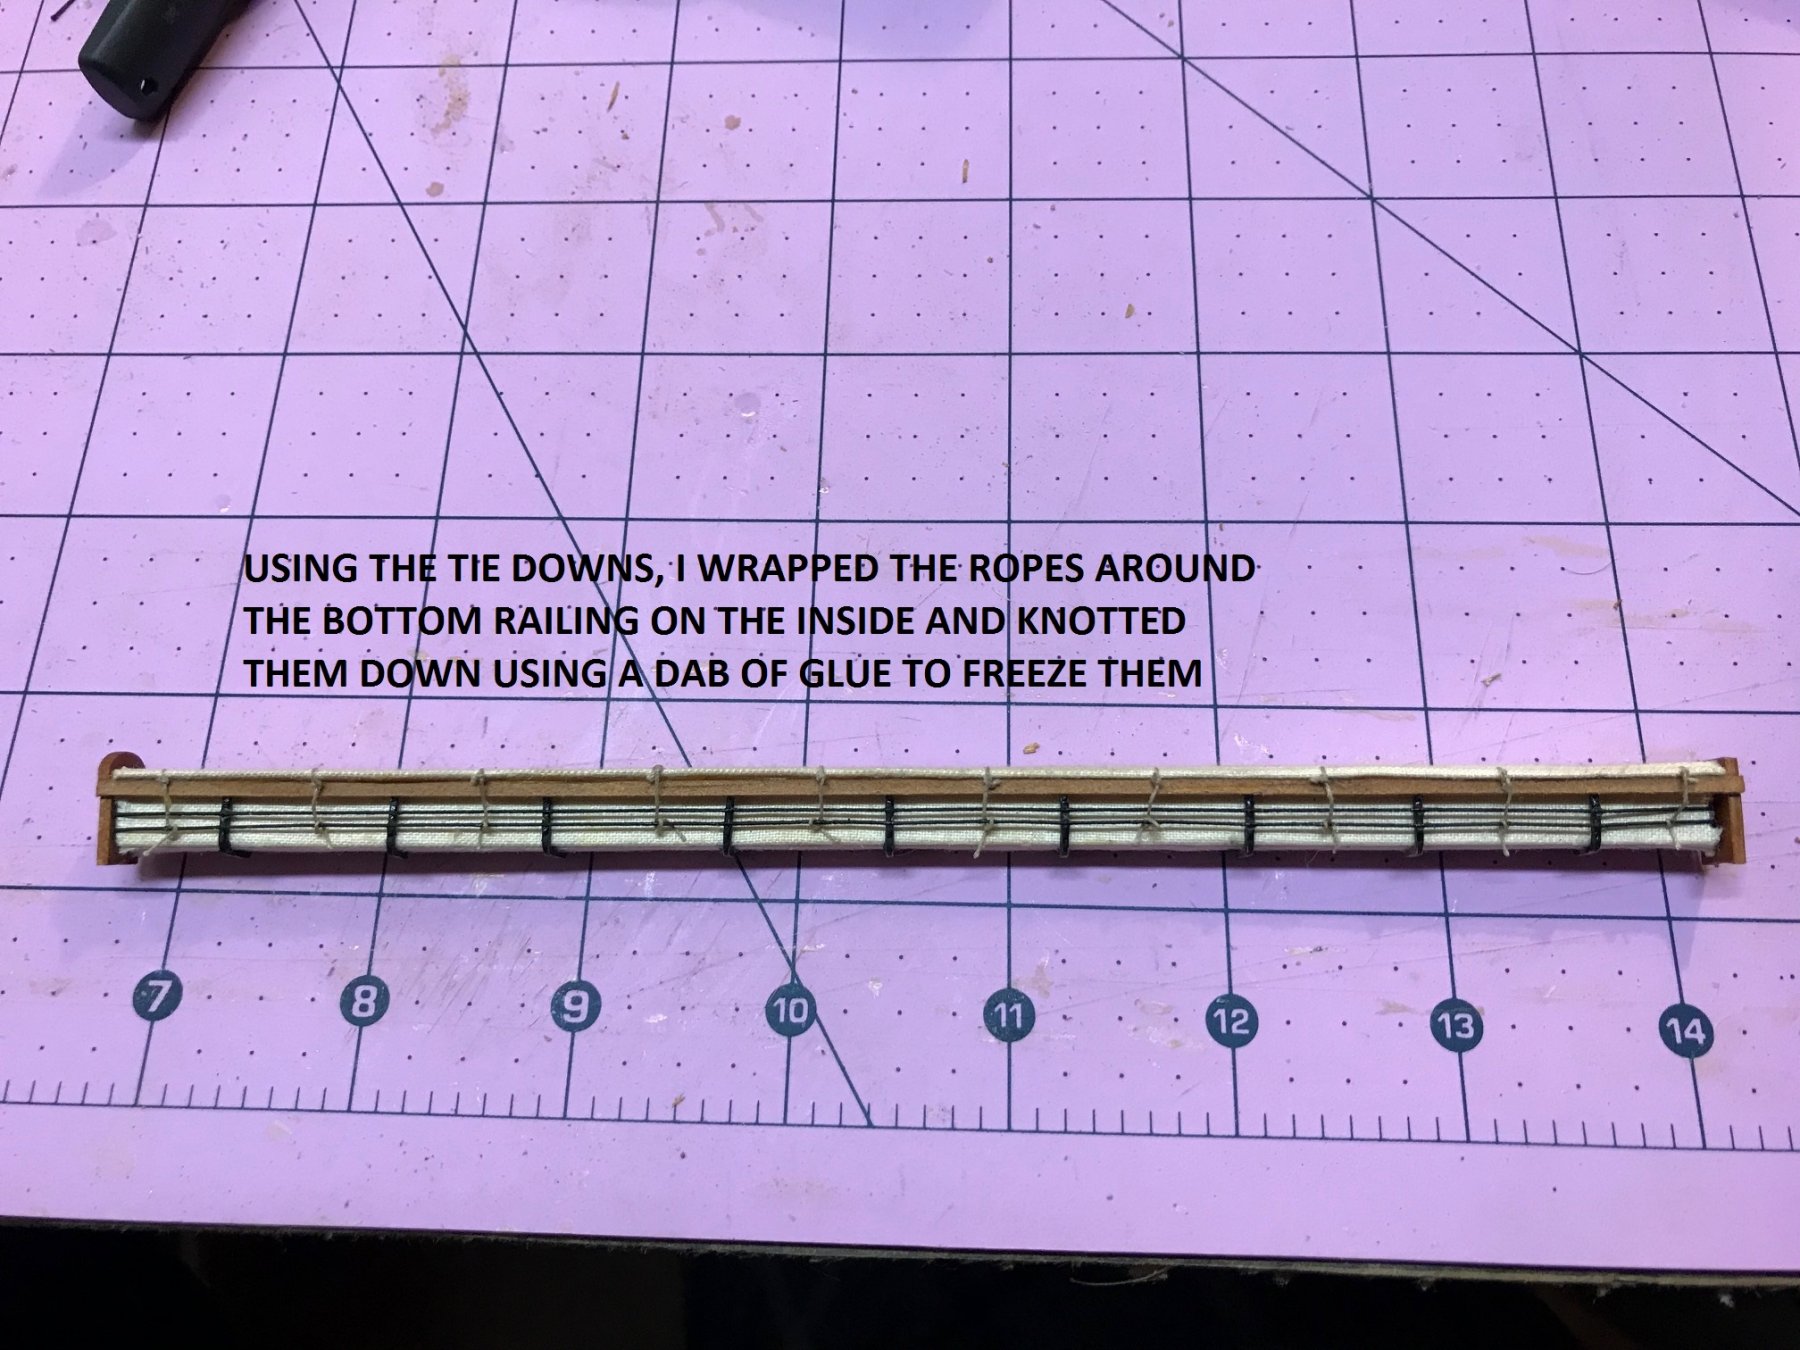
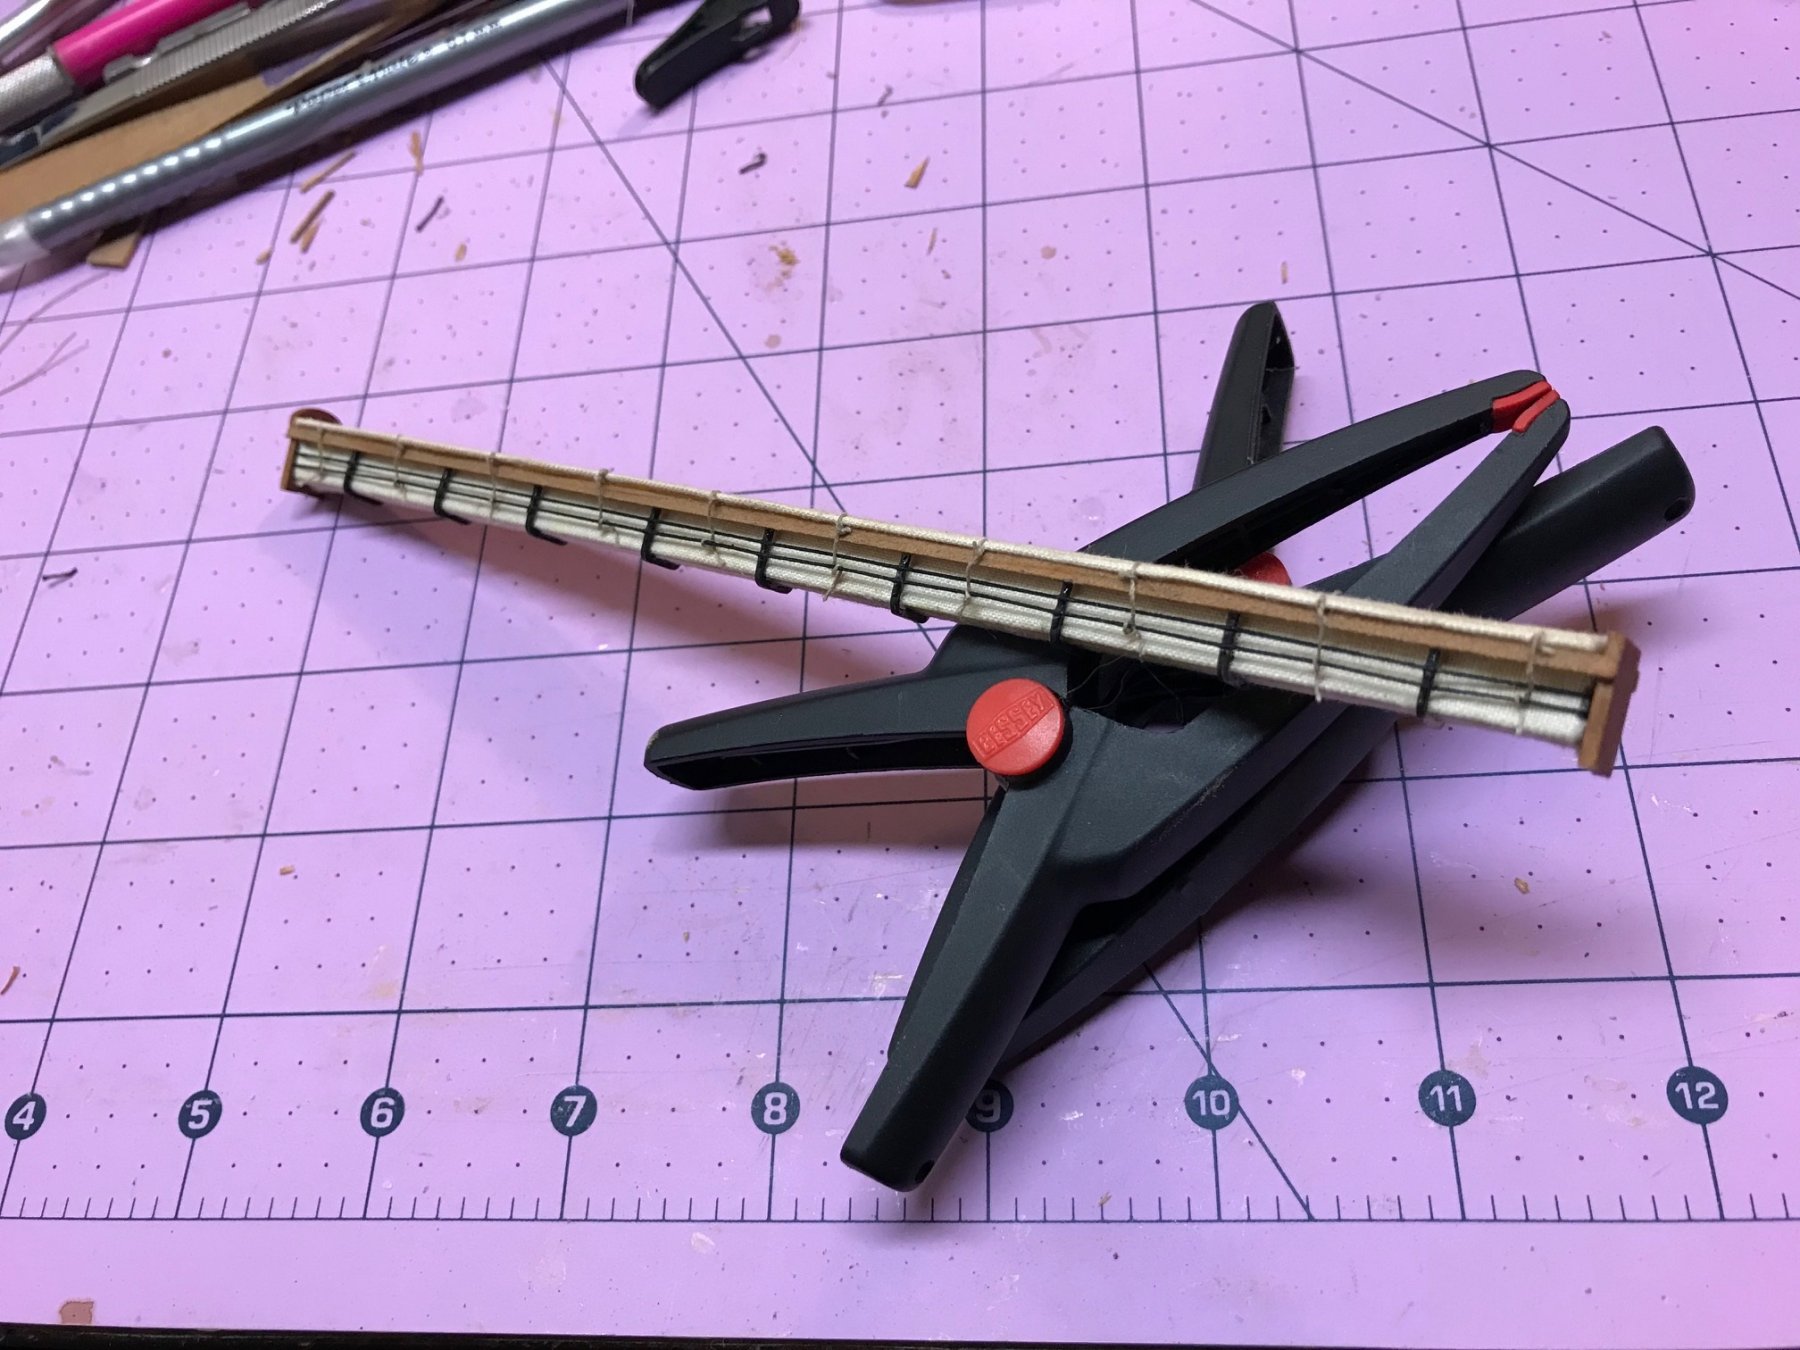
Overtime, I felt that was a cop out and decided to come up with a strategy to install them. Following the plans, I surmised I could accomplish this only one way – to build them on the bench as a total component, and then slip them between the rigging lines and stays and glue them down. Necessity is the mother of invention. In the end, It actually was a good way to tackle this part of the build. Here is how I did it.


-


US Brig Niagara by 6ohiocav - FINISHED - Model Shipways - Scale 1:64
in - Kit build logs for subjects built from 1801 - 1850
Posted · Edited by 6ohiocav
Ron,
I think an upgrade of the Brittainia Stocks for the anchors is worth the effort. I am a terrible painter, and trying to paint the metal to look like wood would be a lost cause before I ever started.
Steve,
Thanks for the heads up on your log. I actually was following it when it had its Niagara title. I will note your change, and applaud you for taking on the Lawrence.
AND.... Mark, Thanks for stopping in and your comments on my anchors. I took a look on the tips you forwarded on posting pictures. In my humble opinion, the process suggested is more complicated than trying to figure out how to seize a bracing block to a forward upper shroud while manipulating through a royal backstay, top gallant backstay, and topmast backstays. The Craftsmen on this forum do incredible things, and overcome insurmountable challenges. I would think that the software guys can count to twelve, in the proper order.