


6ohiocav
-
Posts
543 -
Joined
-
Last visited
Content Type
Profiles
Forums
Gallery
Events
Posts posted by 6ohiocav
-
-
Tom,
Can't agree more with Jim on rigging plan. I did all of the standing rigging on my masts while they laid flat on the bench, including all of the upper shrouds and ratlines. I tried to apply all of the blocks, but missed a few. I think I showed that on my log.
Good luck going forward. Your paint work is superb.
-
Gary,
Your deck is outstanding. Well done. Love the Cedar and flat poly decision. Good luck on the hull.
-
-
Jim,
The pain I share in your frustration over photo sequence is tempered by the beauty of your ship. I can't figure out how to overcome this software glitch either.
-
Gary,
I would add that your decision to build these as separate compartments is ingenious. It looks like it would be easier to shape and a better platform to add the gun port and sweep linings (which took forever). Also much easier to paint. good tip.
-
Gary,
Good catch. You will be glad you made this correction at this time. Symmetry is important. Perhaps as important is the fact that the position of those sweeps will affect future decisions for placement of many other items.
Looking real good.
-
Great steady progress and everything looks great.
I would suggest you consider applying a sealer to the basswood decking before you stain. Basswood is very soft, and has inconsistent density, so that it tends to cause blotches when stain is applied. Applying a sealer will equalize the density and help with a finer finish. Just a suggestion.
-
Ken,
As you travel through Ohio, think about stopping at Keim's to stock up on some inventory. Be happy to meet you there.
I just packed up my Niagara, not as securely as your wonderful Constitution, and took it to the Ohio State Fair and entered it into the Miniature Fine Arts Competition. I had a two hour white knuckle drive worrying how she would travel. I can't imagine a coast to coast trip. Safe travels friend.
-
Gary,
Looking great. Have fun with the airbrush. What brand did you purchase?
-
Robert,
Your build is incredible, and I have been silently admiring it for a while.
I have to agree with Ian. These are great tips and will surely find their way into my repertoire going forward. Thanks for sharing.
- mort stoll and Seventynet
-
 2
2
-
Gary,
Looking good. I like your idea of using the bowsprit wood strip to support the knightheads for gluing. I will file that one away.
Good luck going forward.
-
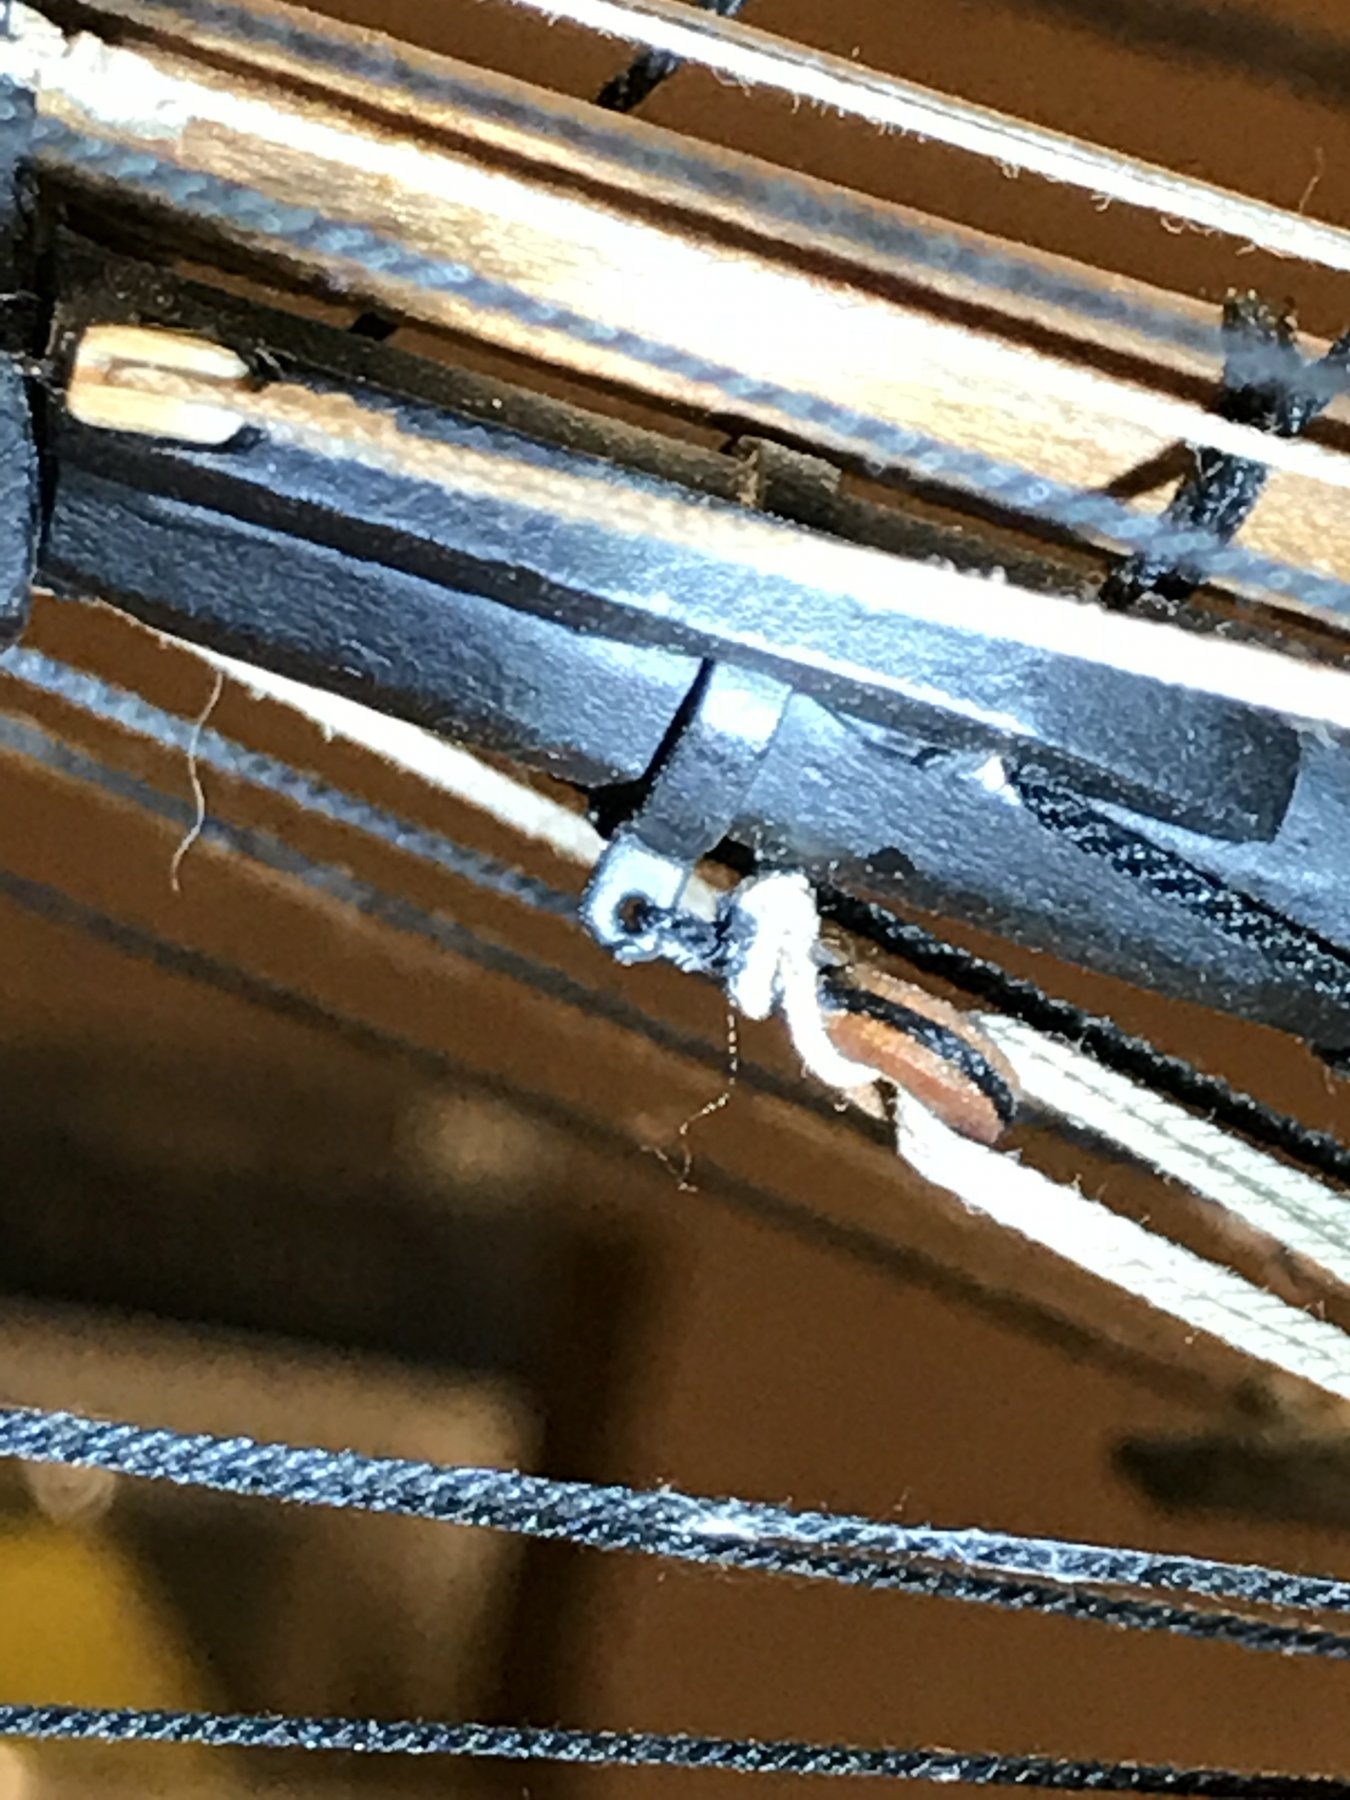
Definitely the Bobstay Wye Iron. I used a piece of brass strip to wrap around the bowspirit. I soldered the end and left a short tail. I filed it to shape and drilled a small hole. In fact if I remember I drilled the hole first then wrapped it around the bowspirit. I finished it off by seizing a bullseye to the hole and rigged the lower Bobstay to the bullseye with a lanyard. Here is a photo.

- Tom E, coxswain, Tigersteve and 1 other
-
4
-
-
-
-
Ron,
Let me know when you go. It is only about 2 hours for me. I have not seen the ship for many years, and when I did see it in Cleveland for a Tall Ships Event, I never dreamed that I would build a model of it.
Your Build looks great.
-
Beautiful work. Can't wait to see with paint and finish.
-
Mark,
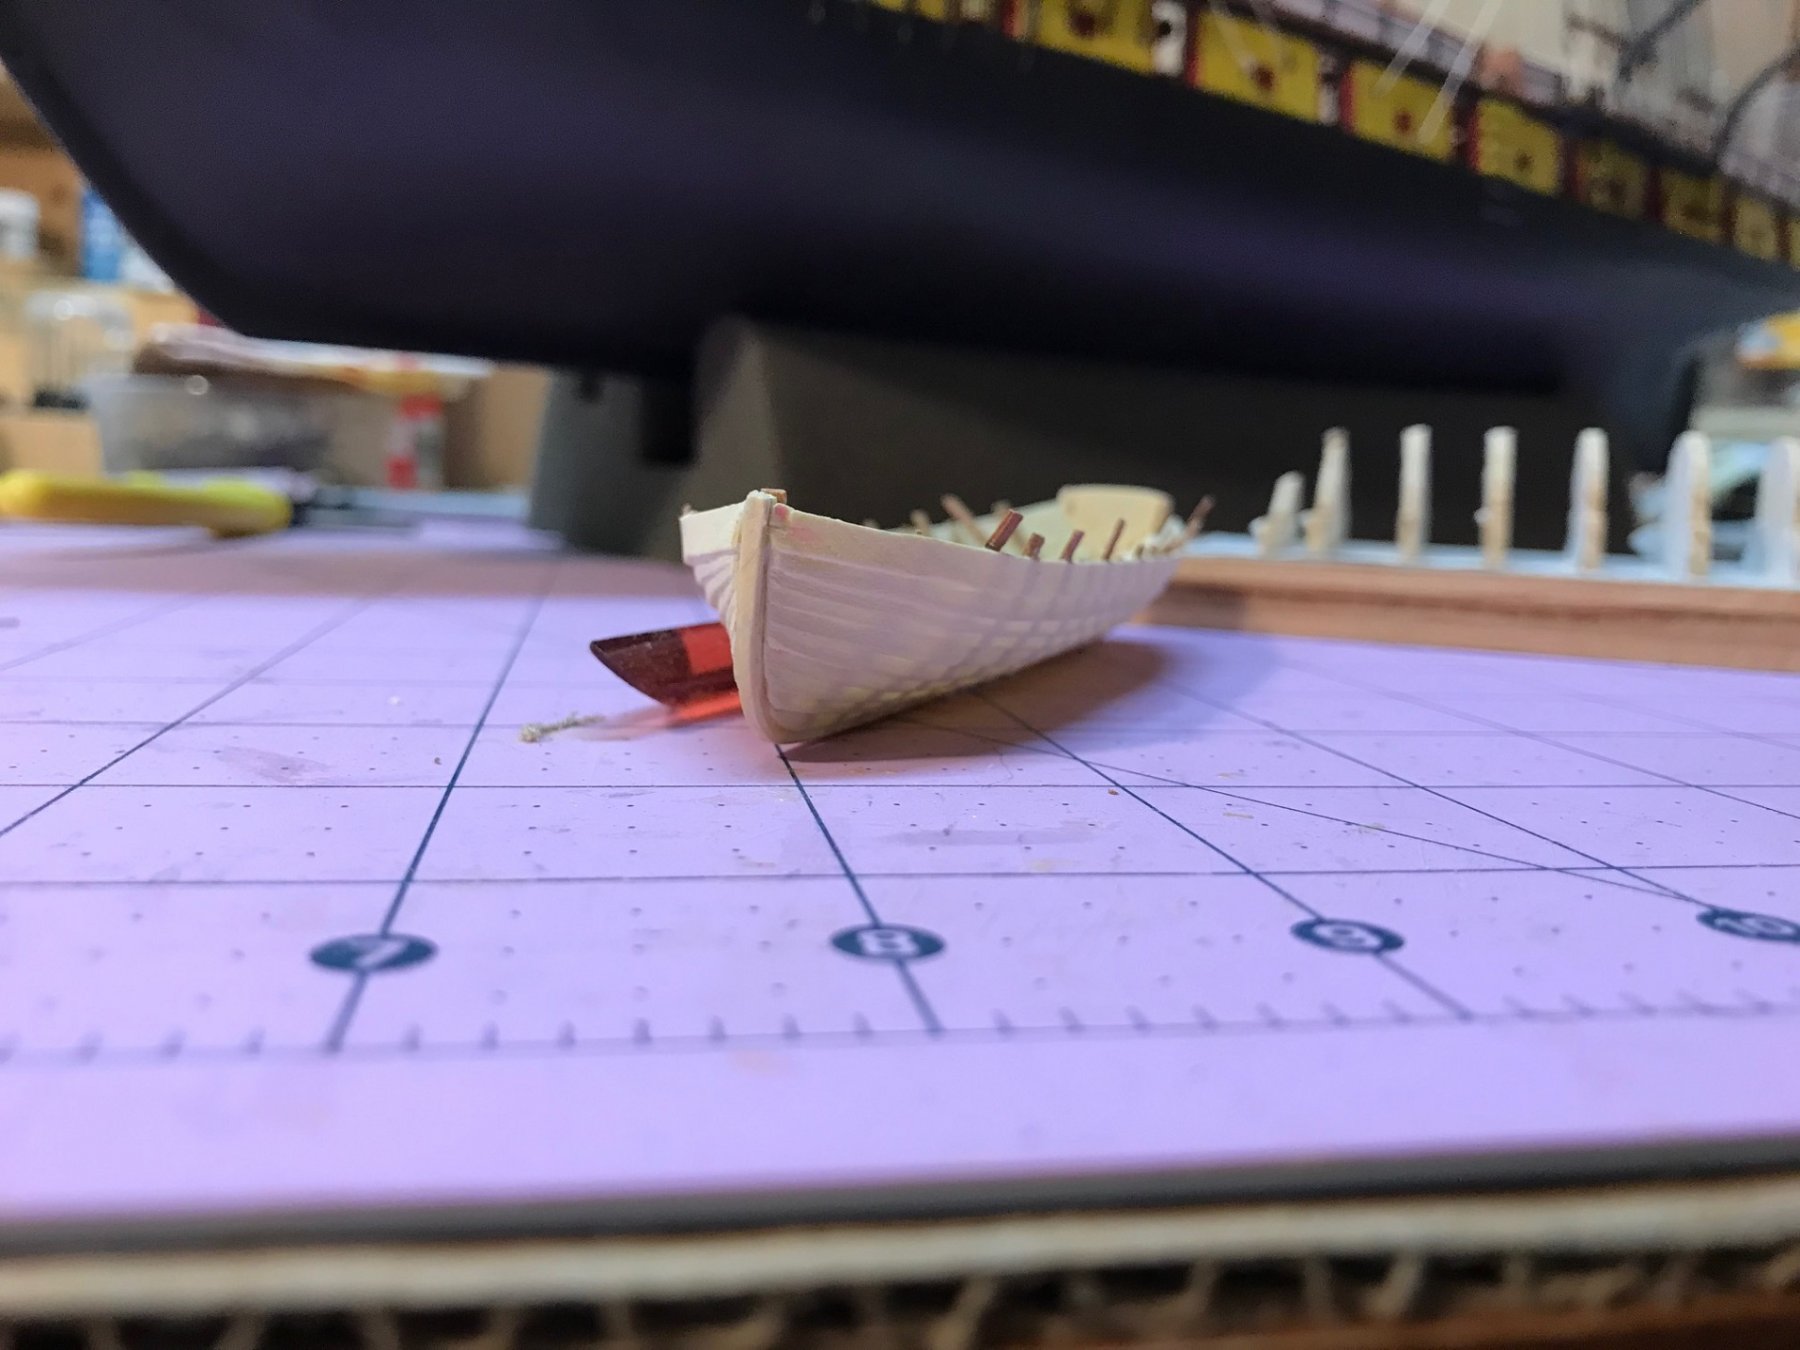
I started with thin (1mm) holly strips, and I soaked them in boiling water and glued them on while they were still wet. I left the boat in the jig until it dried, and when I separated it from the jig, the gunnels flared out.
Steve, Very good observation. That was my first thought as well to pull the sides back into shape with the seats. As I squeeze the gunnels together back into shape however, there is enough resistance to cause me worry that I may break the planks. I may have to steam the entire structure and give that a try.
Ron,
I might try your method for printing the name on black matte and see how it works.
Mike,
Good suggestion, but I am going to stick with wooden frames for now. The plan is holly for the planking and cherry for the rest. According to Petersson, that three block configuration is only used on the Course Yards and only on the Main Mast. The foremast course yard is rigged with a two block configuration. Please forgive me if I am not using the proper terminology.
In the end, a firmer framing material is still the proper remedy for the boats, and my next attempts will focus on that.
-
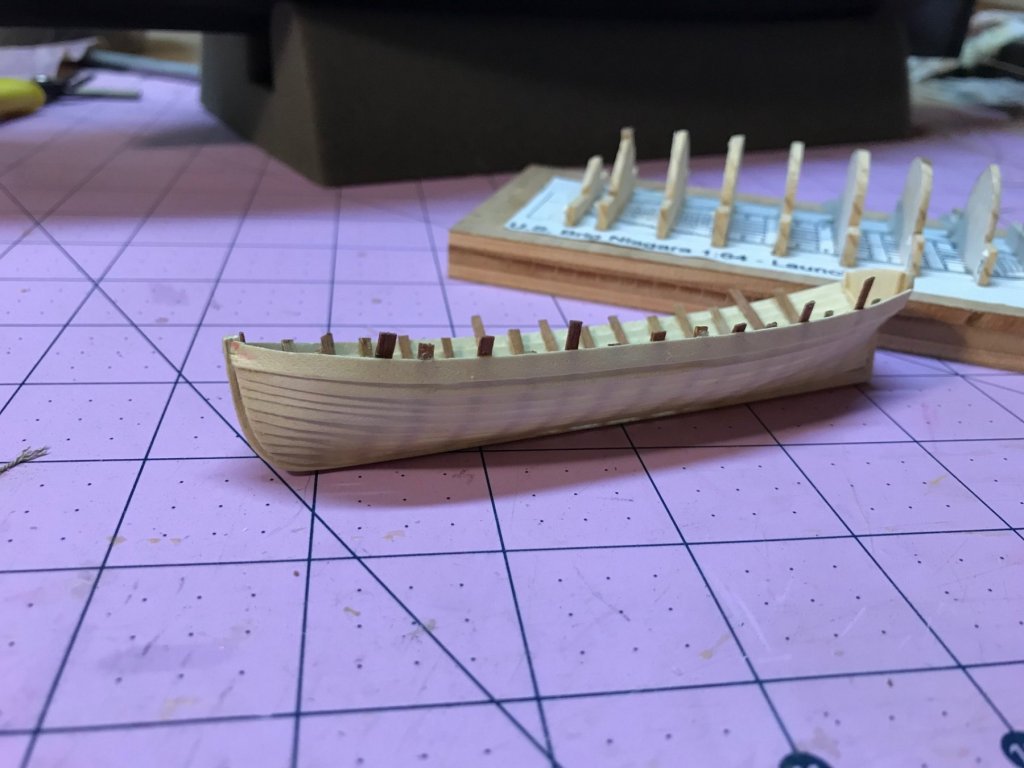
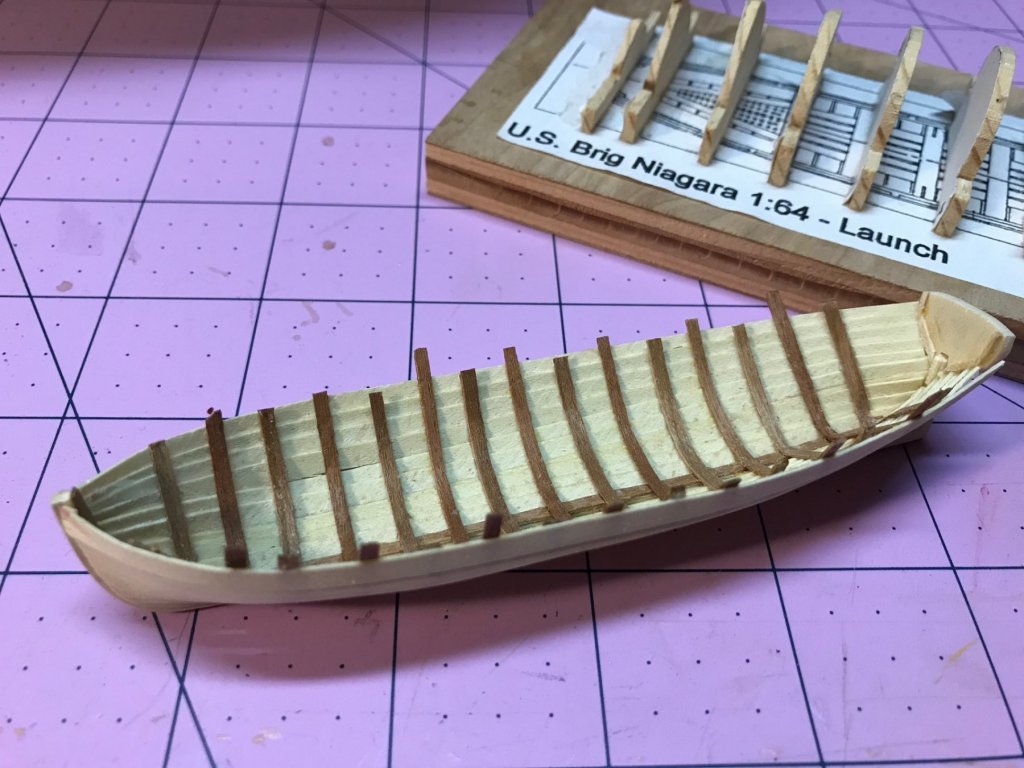
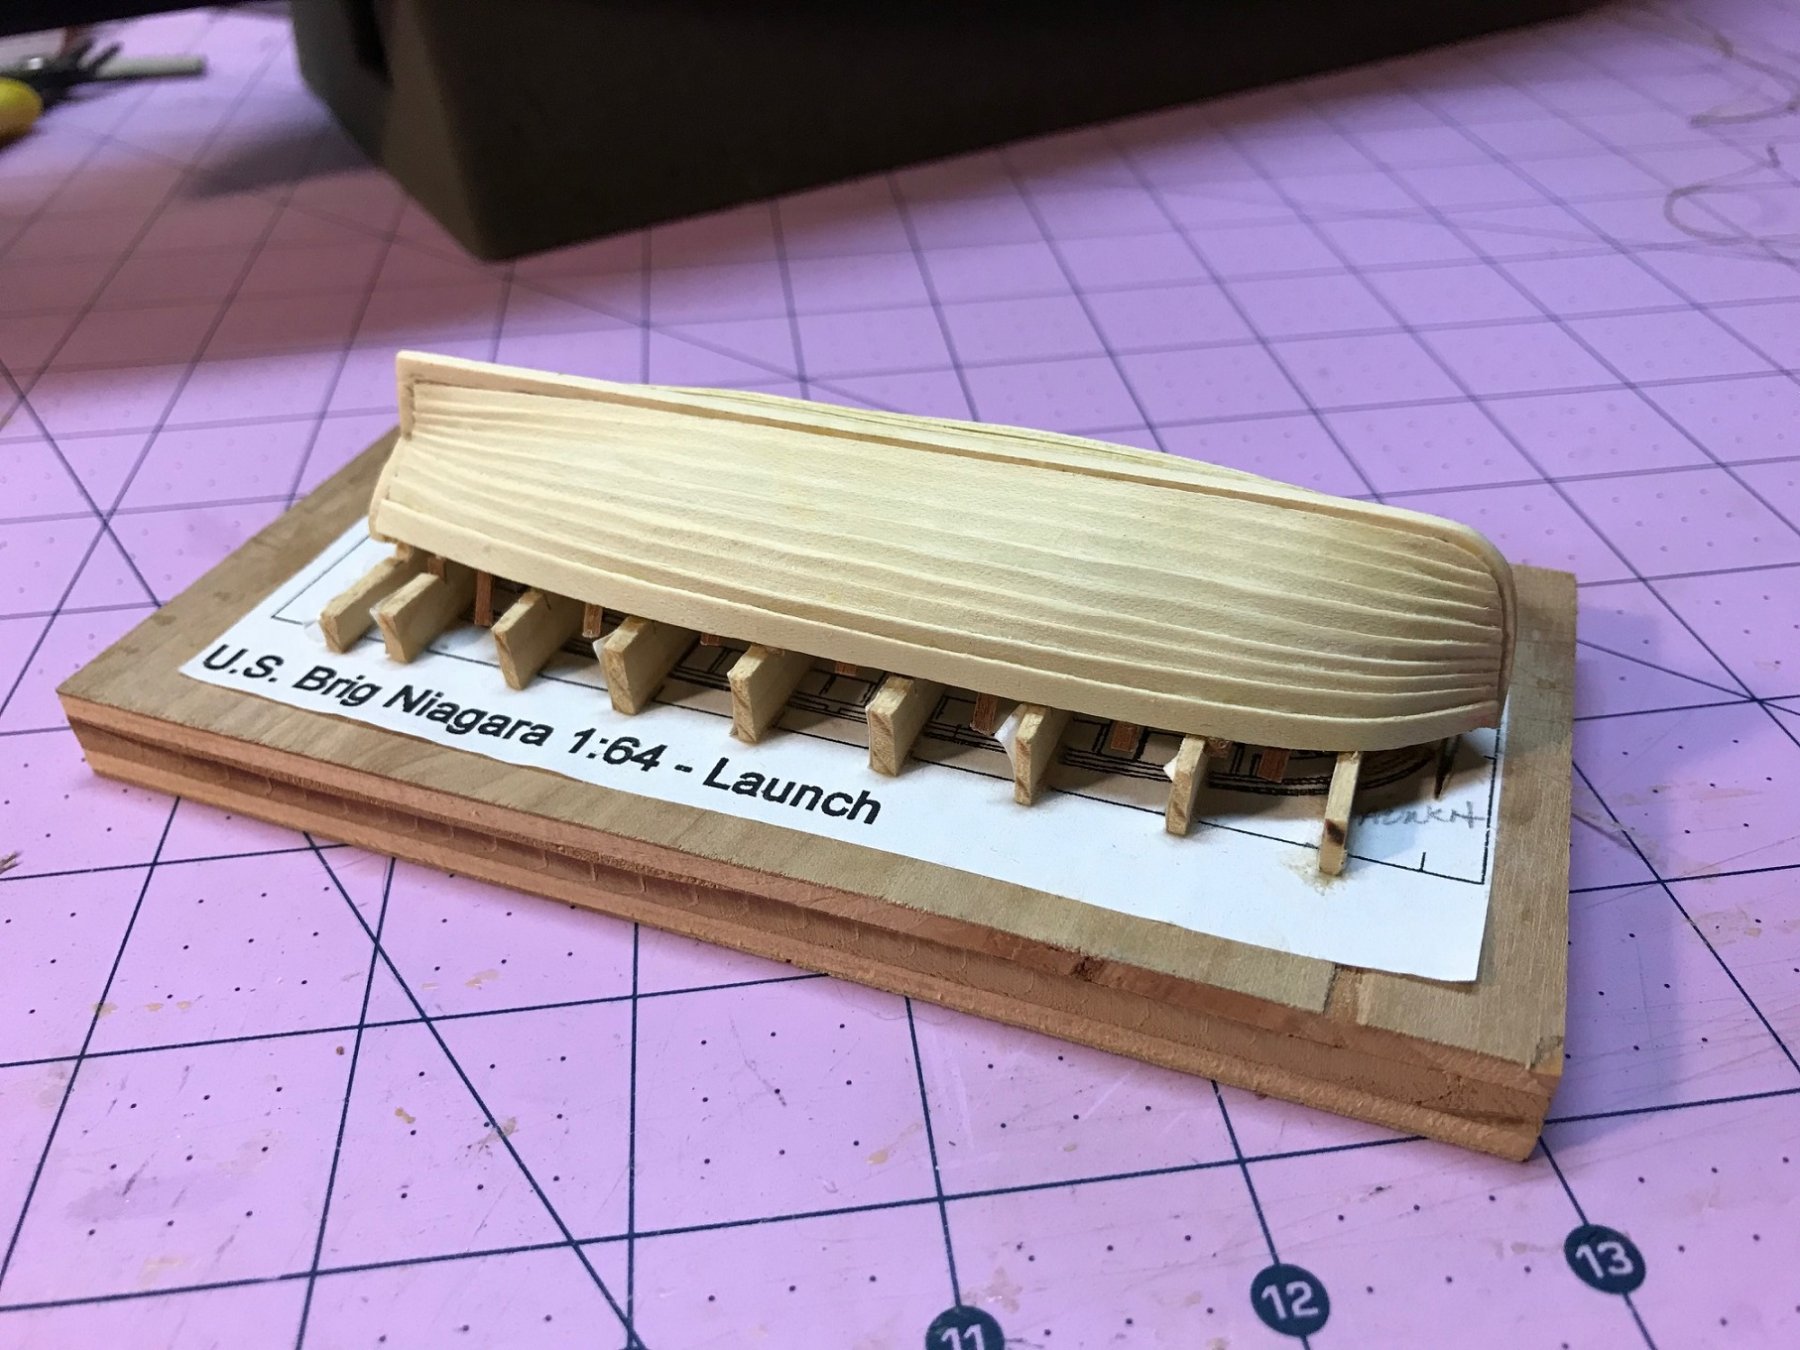
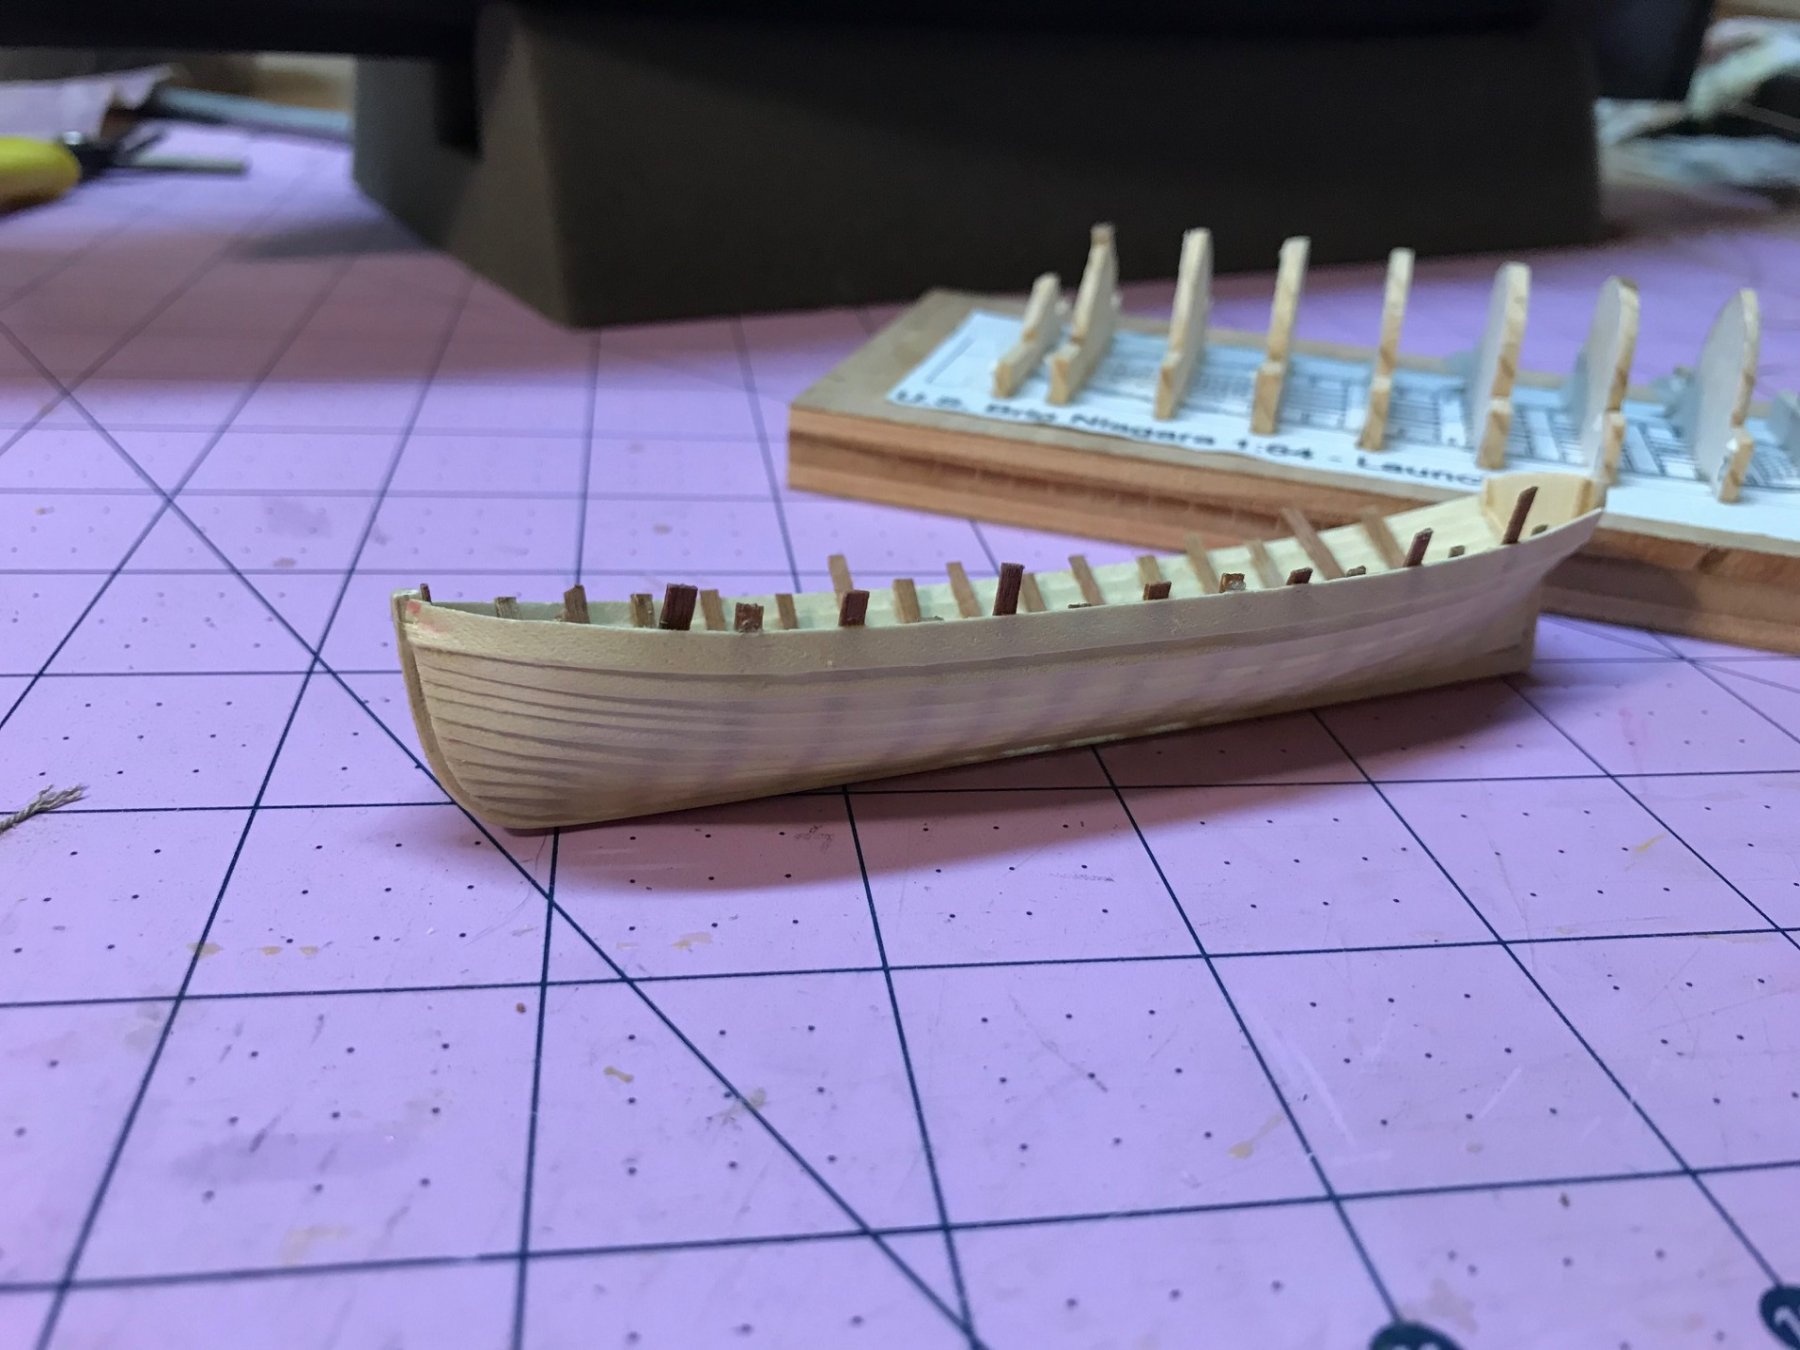
SHIPS BOATS
I decided to scrap the sliced bread boat frames provided by the kit. Instead, I downloaded a plan for building a jig that allowed me to scratch build the boats.
I copied the jig frames and glued them to some birch plywood and cut them out on the bandsaw. I then assembled the jig and attached cherry veneer strips on the outer edge of the frames and inserted the ends in the bottom slit in the jig frames which held them in place.
I then cut a series of thin holly (very white) strip wood to use as planks. Using CA, I started to glue the stripwood to the cherry lined frames, being careful not to spill any glue onto the cherry strips that would affix them to the frames, since you have to remove the entire assembly from the jig after it is done. I also decided to overlap the holly stripwood to give it a realistic look. This eliminated the need to taper any of the strips.
Here are some photos of my first proto-type. Not bad for my first time, but I discovered some problems. As stated, I used cherry veneer for the frame wood, because it was easier to bend around the sharp corners of the jig frames. However, it was not stiff enough to hold the shape of the boat when I removed it from the jig. The vertical lines of the frames drifted outward quite a bit since the cherry veneer was not strong enough to hold it in place.
So back to the drawing board. I need to use a stiffer material, and that means that I need to decide whether I can bent it around the jig frames, some of which are sharper than 90 degrees, or whether I can cut them out of solid wood in the proper shape, and still make them thin enough and strong enough to meet my needs


-
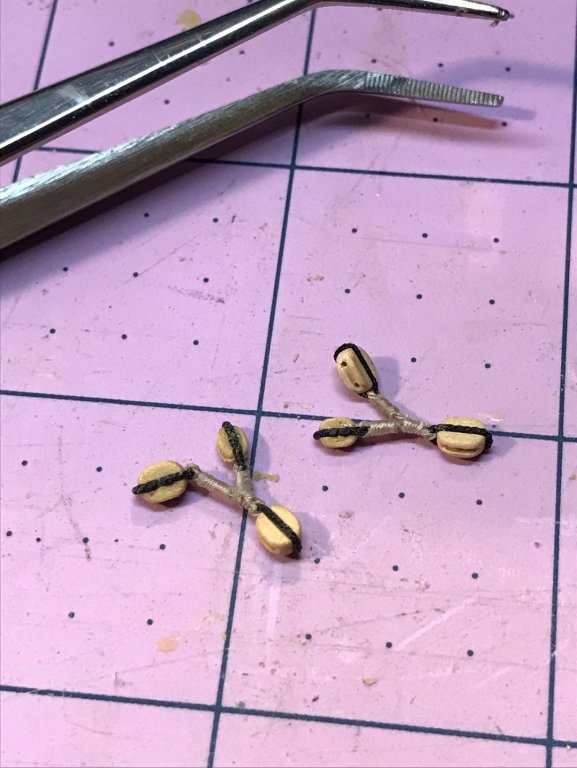
MAIN SHEET, TACK AND CLUELINES,
Got my order of .18 Rope from Syren so that I could finish rigging the Sheet and Tack lines for the Main Mast. I had to strop three blocks together, following suggestions from Petersson’s Rigging book.
I then attached the lines to eyebolts and rigged them through the blocks and then through the sheaves in the bulwarks.
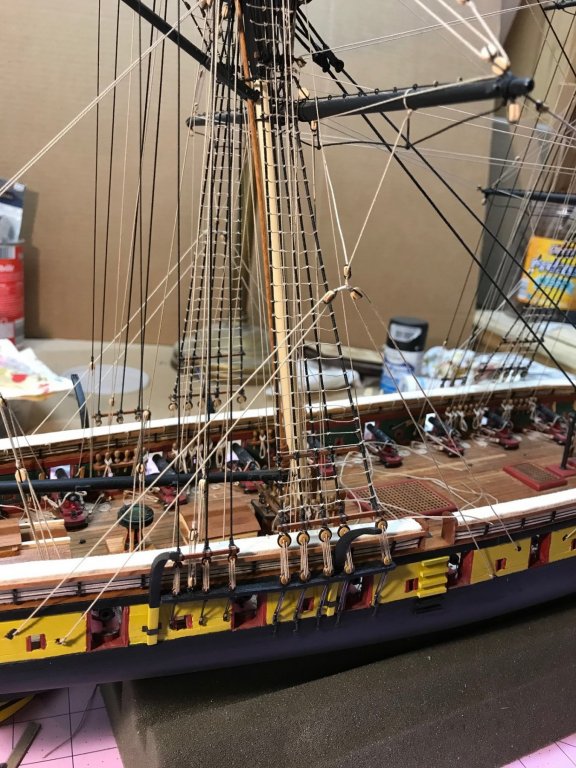
AND WITH THAT………………….. I am DONE WITH THE RIGGING.
Here are some final photos.
I need to come up with a method of attaching the painted name on the stern. Following Mike’s suggestion, I am searching out a decal that I can print on. I also need to work on flags.
But up next…. Ships Boats.
-
Ron,
looking good. I did my deck the same way you did and after giving consideration to the size of the gun ports, everything worked out fine. I used 1/16 birch plywood and cherry veneer planking, which actually met the mark on thickness of the deck planks as per the plans.
The notches in the keel set the angle of the masts. Just follow that.
-
-
-
Ken,
For wood working tools, supplies and of course the Exotic Wood Room, I would not know what to do without having Keim's 30 minutes away! And that drive through Ohio Amish Country is first rate. Except for the weather (which has really been bad this spring), we are quite spoiled here in North East Ohio.
If you need anything special from Keims, let me know. I am always looking for an excuse to go there.


US Brig Niagara by cdrusn89 - FINISHED - Model Shipways - 1/64 scale
in - Kit build logs for subjects built from 1801 - 1850
Posted
I agree with Jim. I put a cherry rail on my Niagara. Traced it from the laser cut pattern and cut it out on the jig saw. I substituted cherry for bass wood for anything that was not painted