


6ohiocav
-
Posts
543 -
Joined
-
Last visited
Content Type
Profiles
Forums
Gallery
Events
Posts posted by 6ohiocav
-
-
Tom,
Good progress.
The dreaded timbers. All I can say is that I am a Browns Fan, (going back to the days when Bill was our coach), and I can honestly say that we are so bad, there is nothing the Browns could do to break one of my timbers.
Good luck going forward. I used the 2 diagrams of the filler blocks from the plan sheet, cut them out, transposed them on my basswood block, and rough cut it out with the band saw. I then attached the blocks to the stern and did all of the rest with a file. It took me more than a few to get two right.
I also placed filler blocks inside the first couple of bulkheads, aft and bow. I used balsa wood. It was very helpful when it came to planking. I strongly recommend it.
-
Hi Eric,
Great progress. What wood are you using for the second layer of planking? Whales? Is it kit supplied?
Thanks,
-
-
Welcome aboard Tom. She is a great ship.
You never sail alone in the Niagara club. We are always here to lend a hand. Don't hesitate to seek us out.
- Tom E and Bill Morrison
-
 2
2
-
-
-
-
Steve,
Tremendous progress!
I understand your challenge with the stern. It was by far the toughest part of the hull for me. You have also captured the unique shape of the bow bulwarks, where they "flair" out as they go forward. Again, not easy since you are not using the kit supplied bulkheads.
I tried to get some "arch" to my archboard and fully understand the issue you faced.
I don't know what your plan is for painting, but if you do paint, you may want to paint the sweeps and gun ports before you plank.
I have to reiterate a point you made early on, this really is much more of a scratch build.
-
-
-
-
-
Steve,
You obviously got my attention, and I look forward to the experiment.
I do have to ask however, what is driving your decision to start with a solid hull that you will ultimately plank. Is it a functional one? - that is to create a solid base upon which to lay wooden planks? Are you going to start with the Model Expo bulkheads, and fill in the gaps with wood, or simply carve the entire hull out of a single block of wood?
In any case, welcome to the Niagara club.
- Elijah and Tigersteve
-
2
-
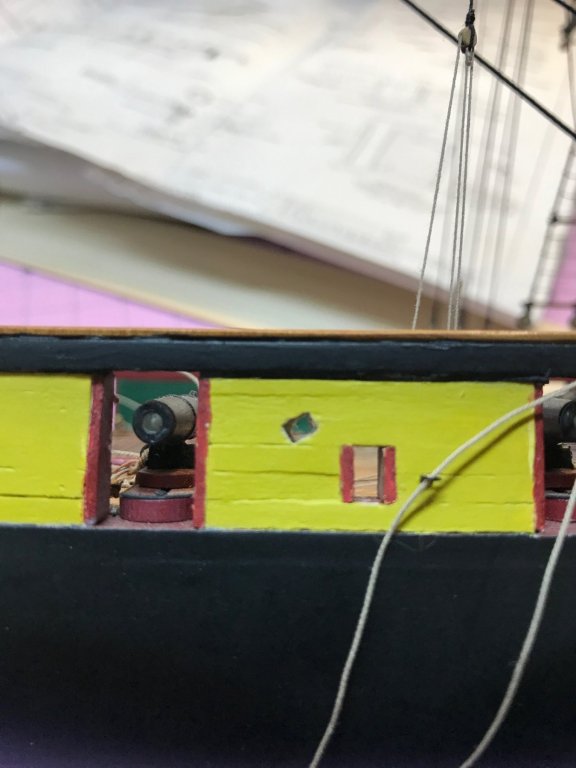
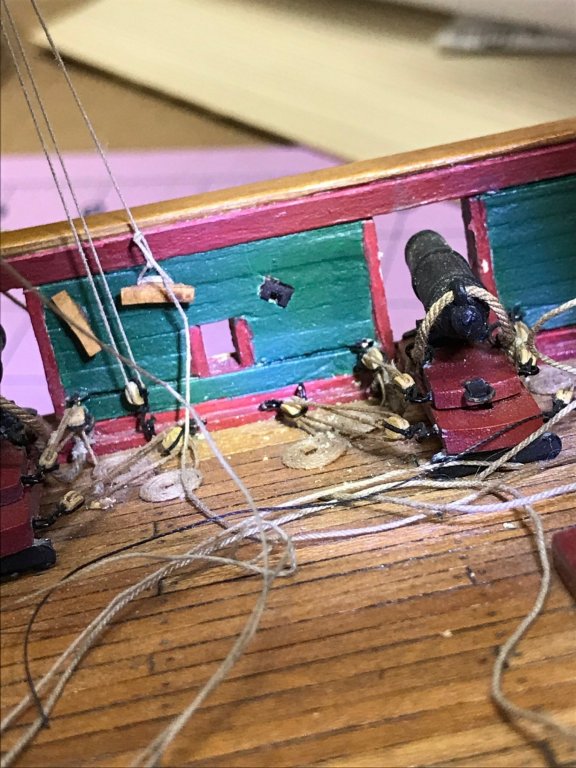
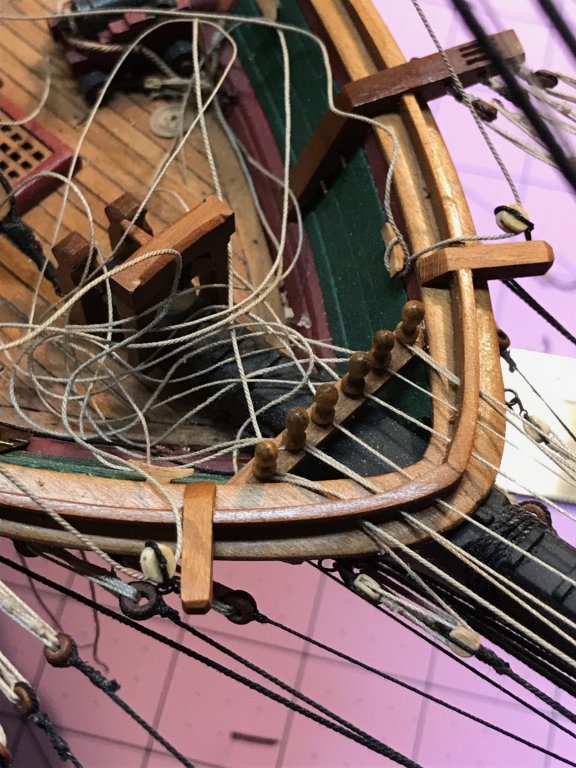
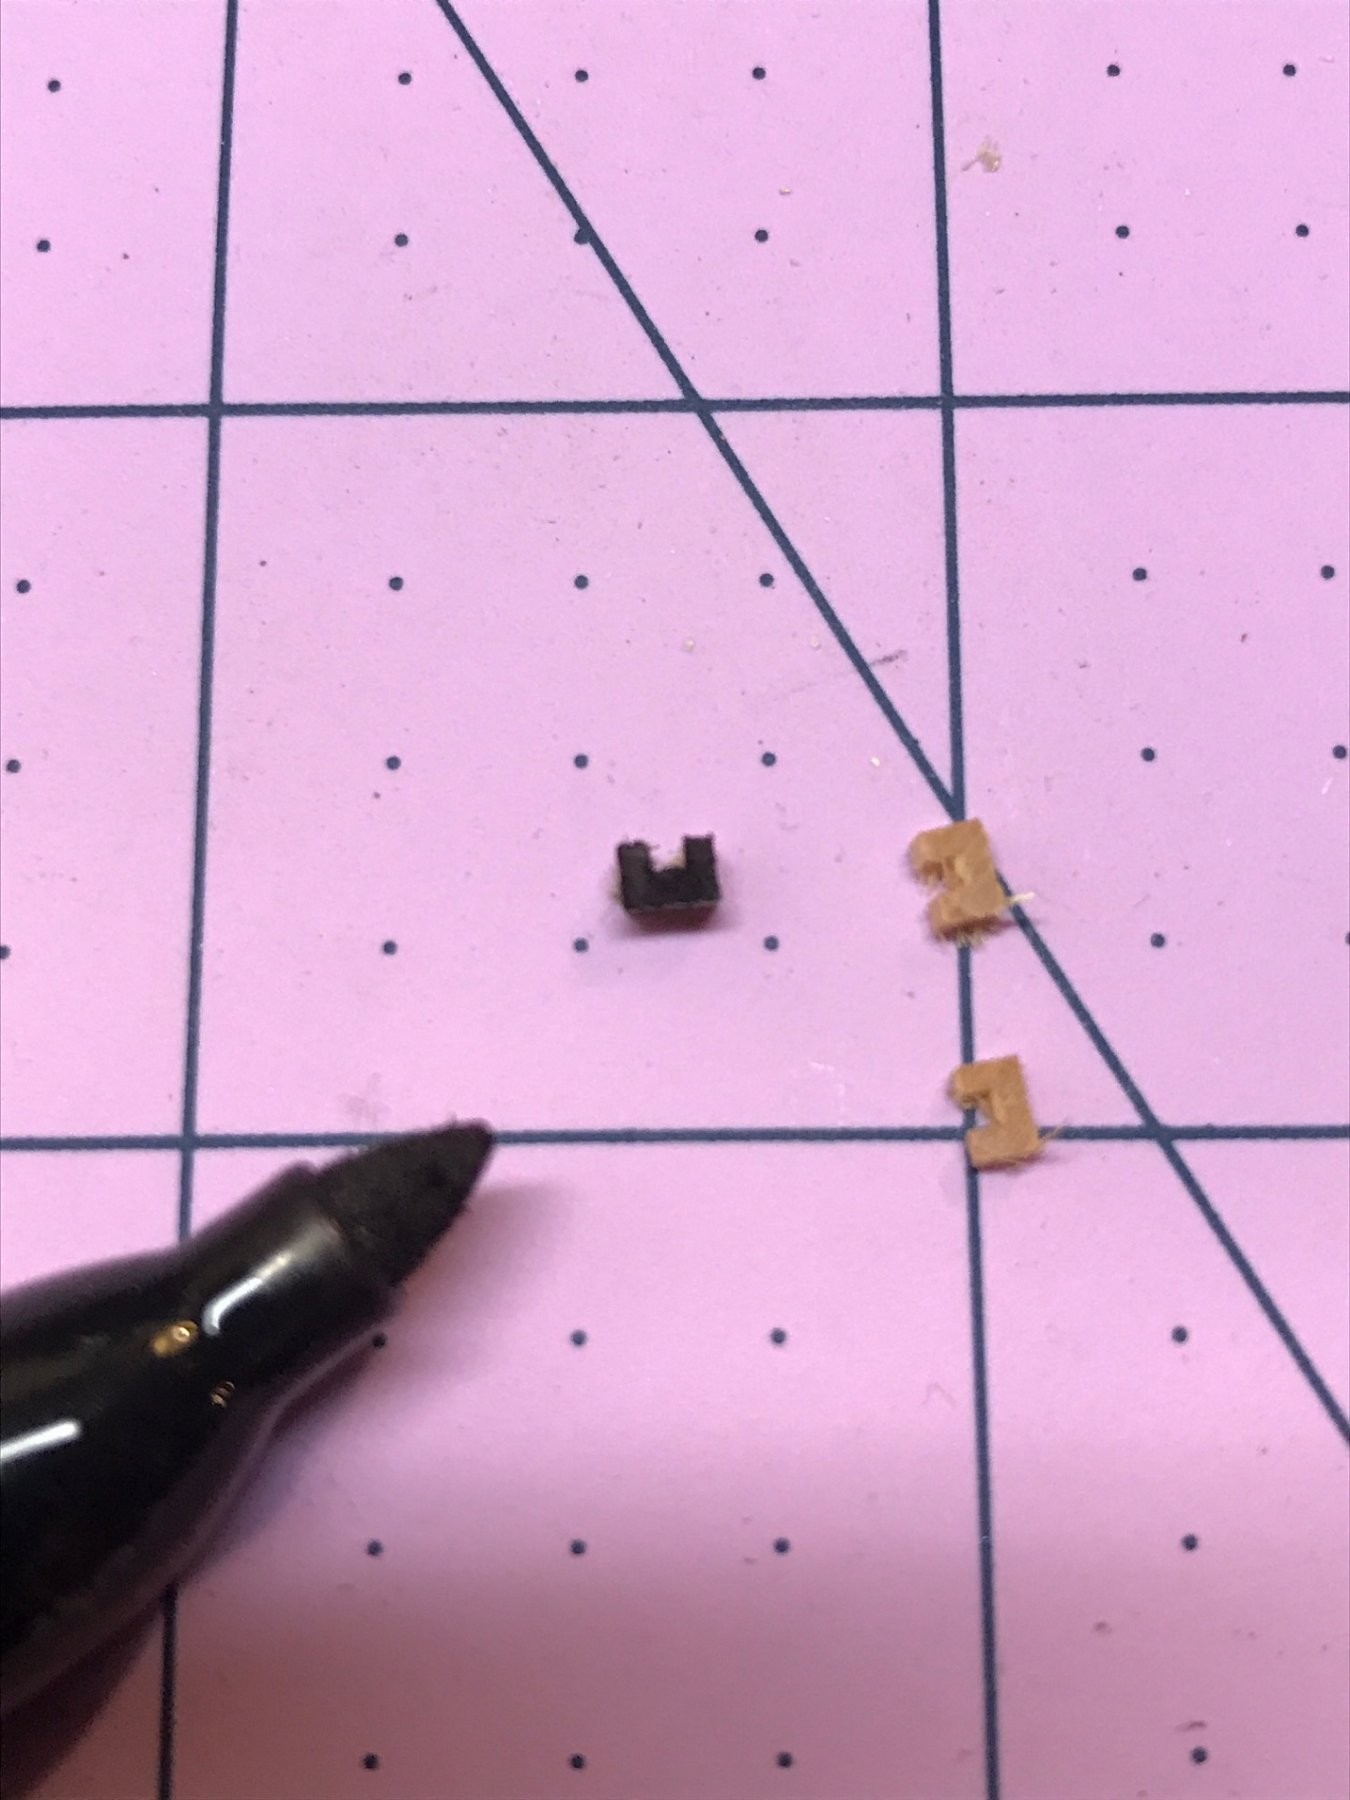
SHEAVES
I have to run the sheet lines through the bulwarks. The plans call for the installation of sheaves. I understand that a sheave is a rectangular box with a pulley inside that the rope slides on. Giving this some thought, and after reviewing some build logs to see how other shipwrights have handled this challenge, I decided to forego installing a pulley wheel in my sheaves. The scale is just too small.
So I compromised. I took some “U” shaped wood stock and cut small pieces off (1 mm). I decided to cut rectangular holes in the side of my ship and insert the chips. I then ran the sheet lines through the channel. When I was done, I have to say it looks like the rope is suspended in the box as if it would if a pulley was indeed installed.
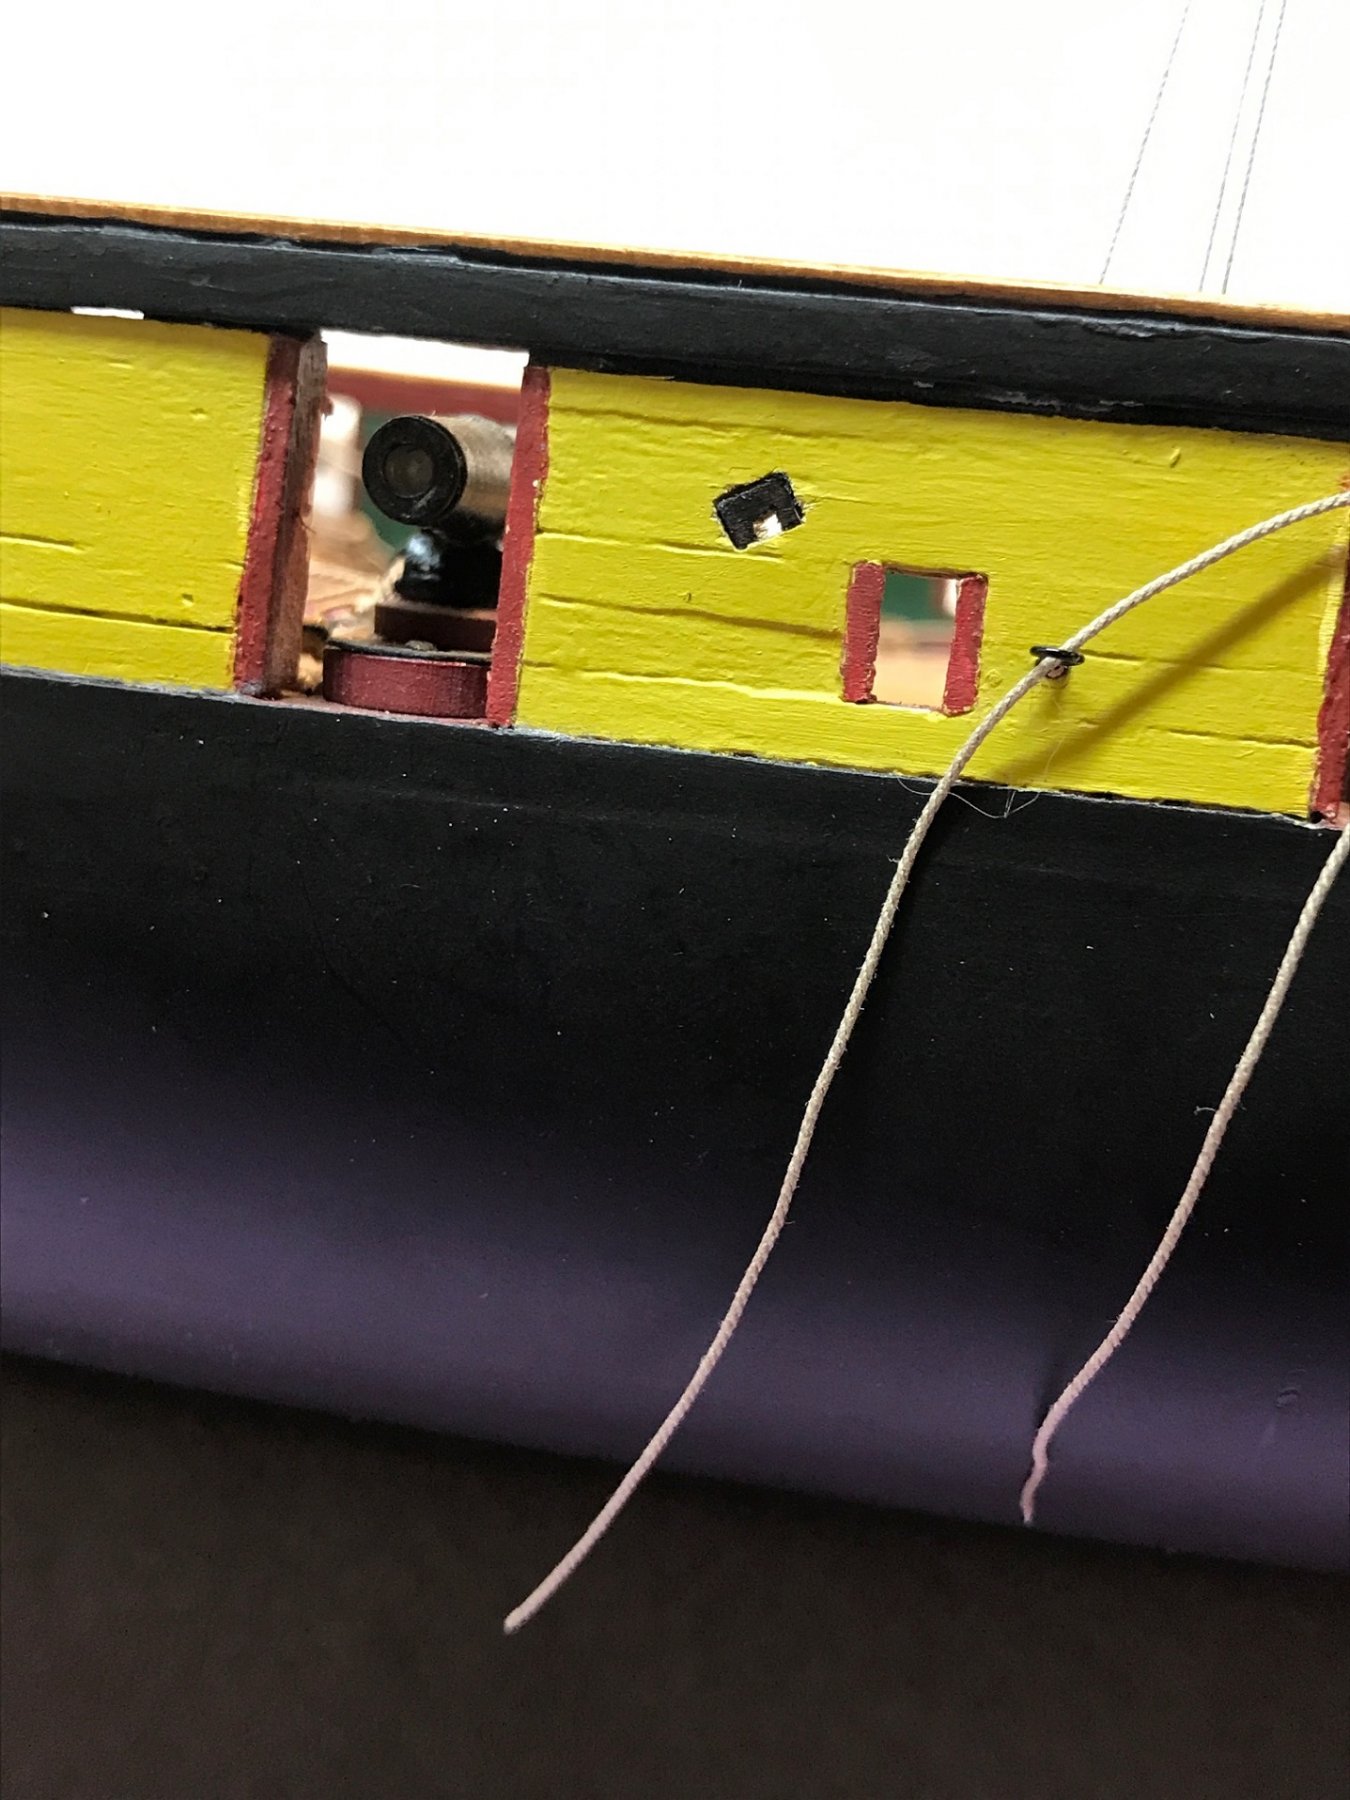
By the way, drilling holes and carving out a rectangular shape in your hull AFTER you have done all of the rigging and installed all of the yards is not recommended. Cutting the hole in the outer hull was ok, but do that on the inside, by reaching through all of the rigging lines, was incredibly delicate.
Hint to fellow Niagara builders. If you are going to install sheaves, DO IT BEFORE YOU STEP THE MASTS AND DO ANY RIGGING.
This exercise took all evening, and I have 5 more to do. It looks like it is going to be a “Sheave” week.
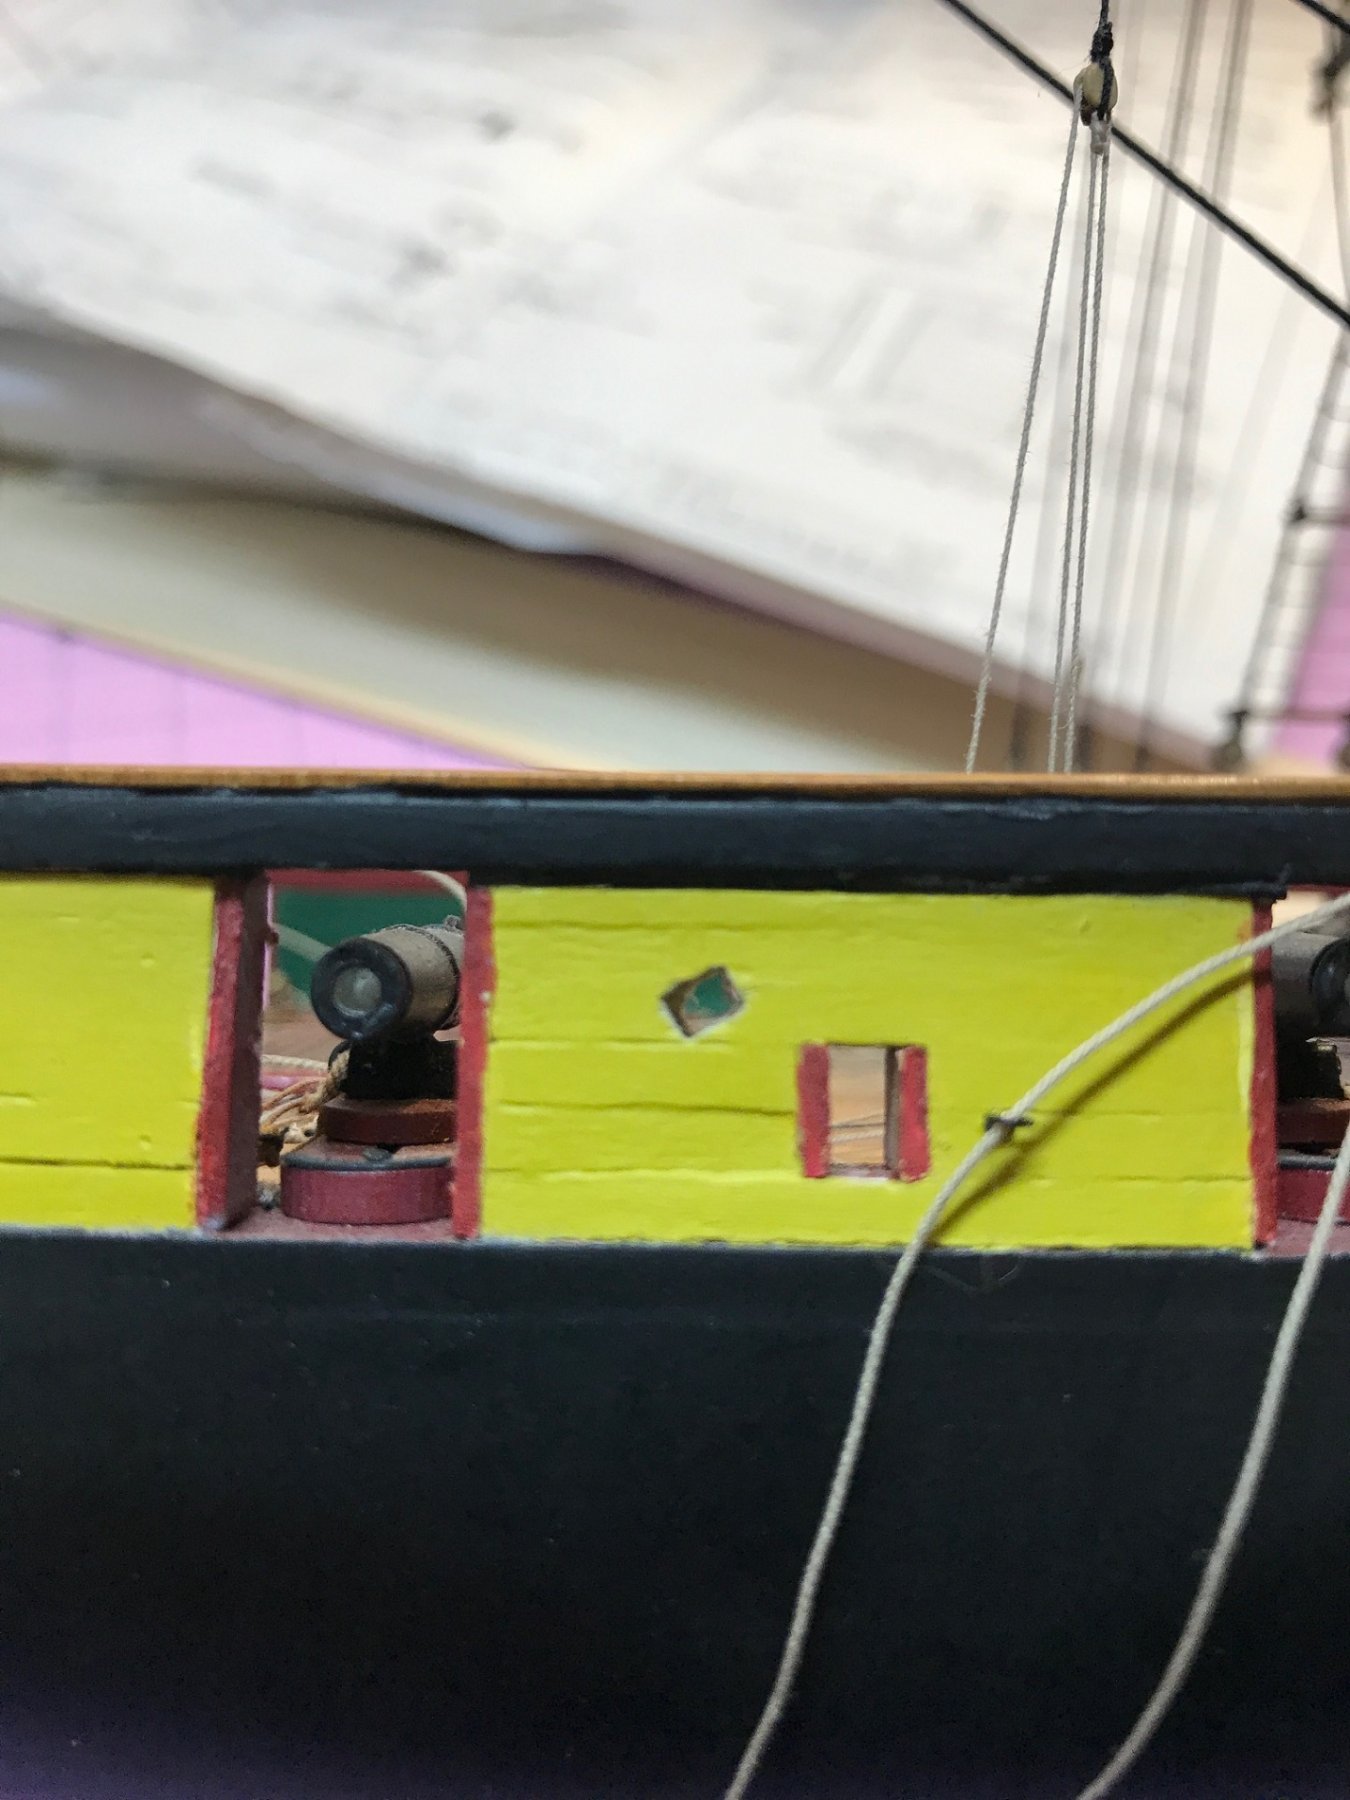
I STARTED BY DRILLING A HOLE THROUGH THE ENTIRE BULWARK, AND THEN CARVED A RECTANGULAR SHAPE WITH THE X-ACTO KNIFE. THE INSIDE BULWARK WAS A REAL "YOU KNOW WHAT"
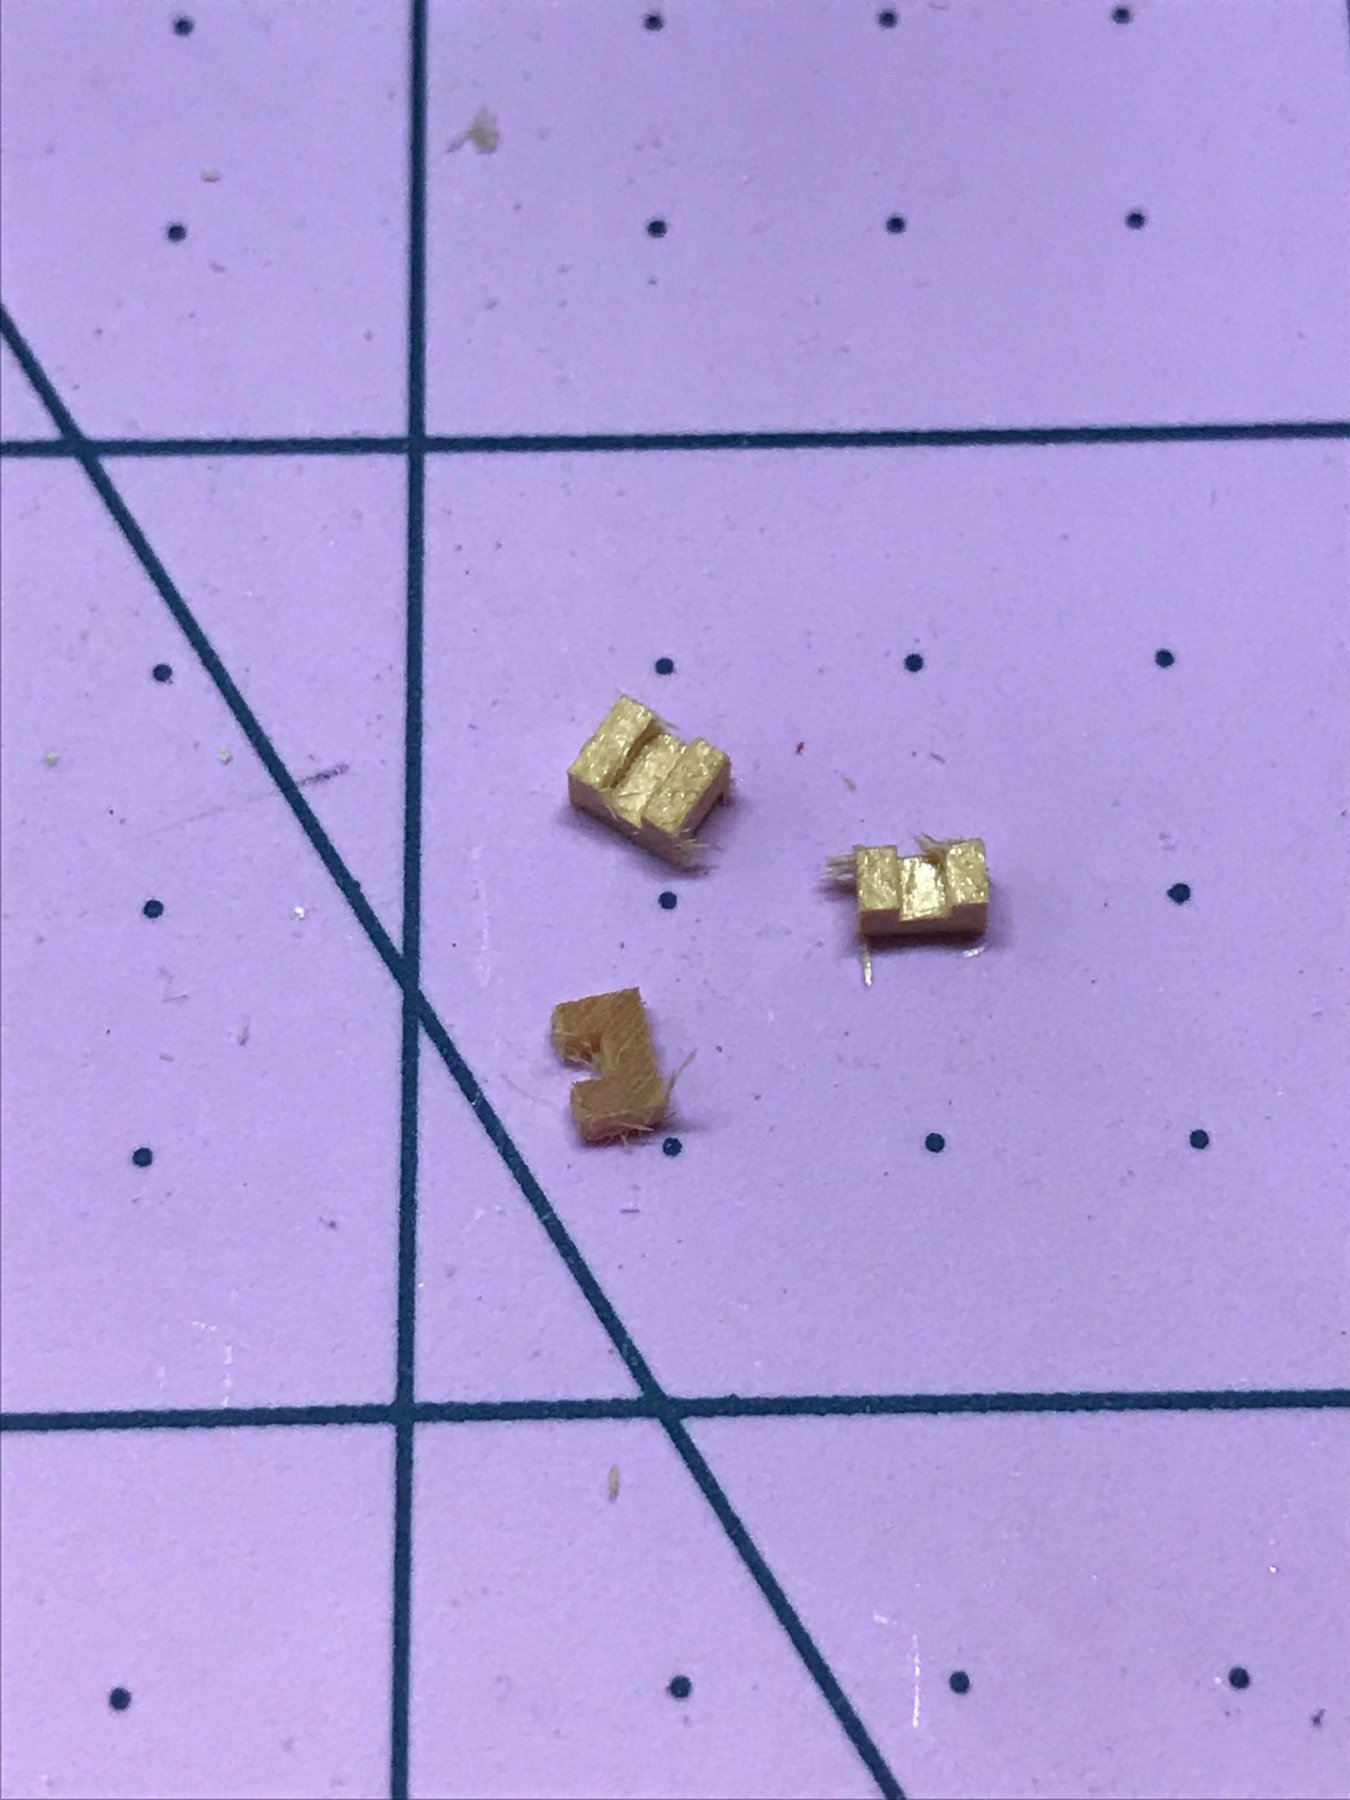
I THEN TOOK A PIECE OF "U" SHAPED STOCK AND CUT 1MM CHIPS.
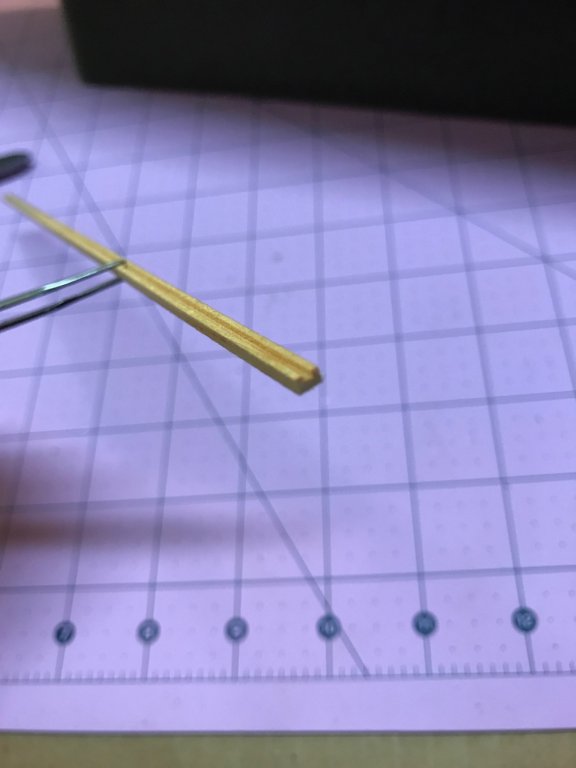
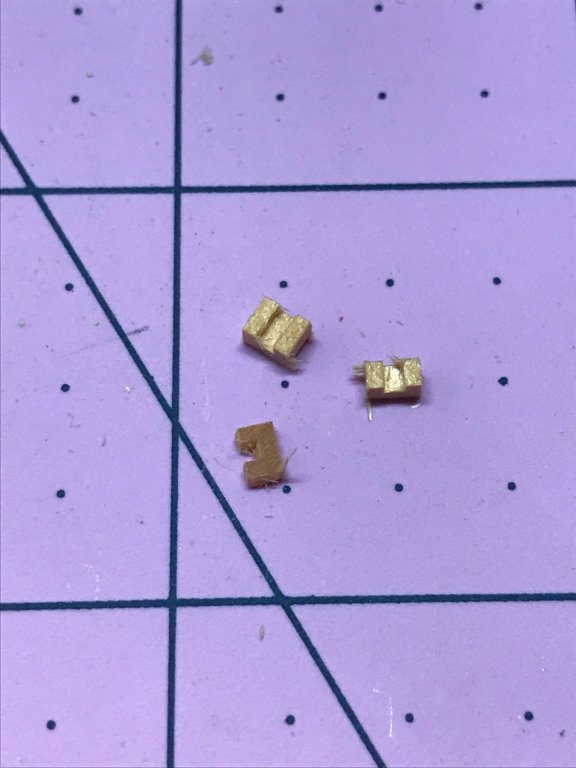
I BLACKEND IT WITH A SHARPIE. THE ENDGRAIN SOAKED UP THE INK NICELY.

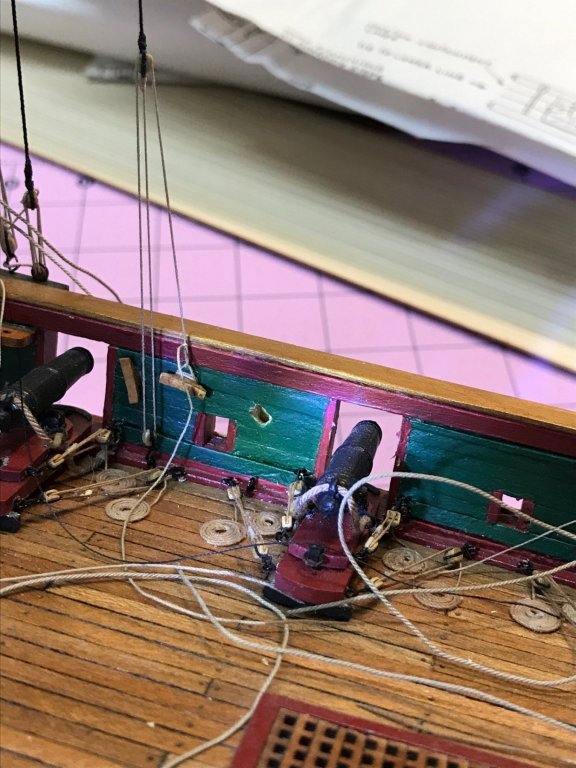
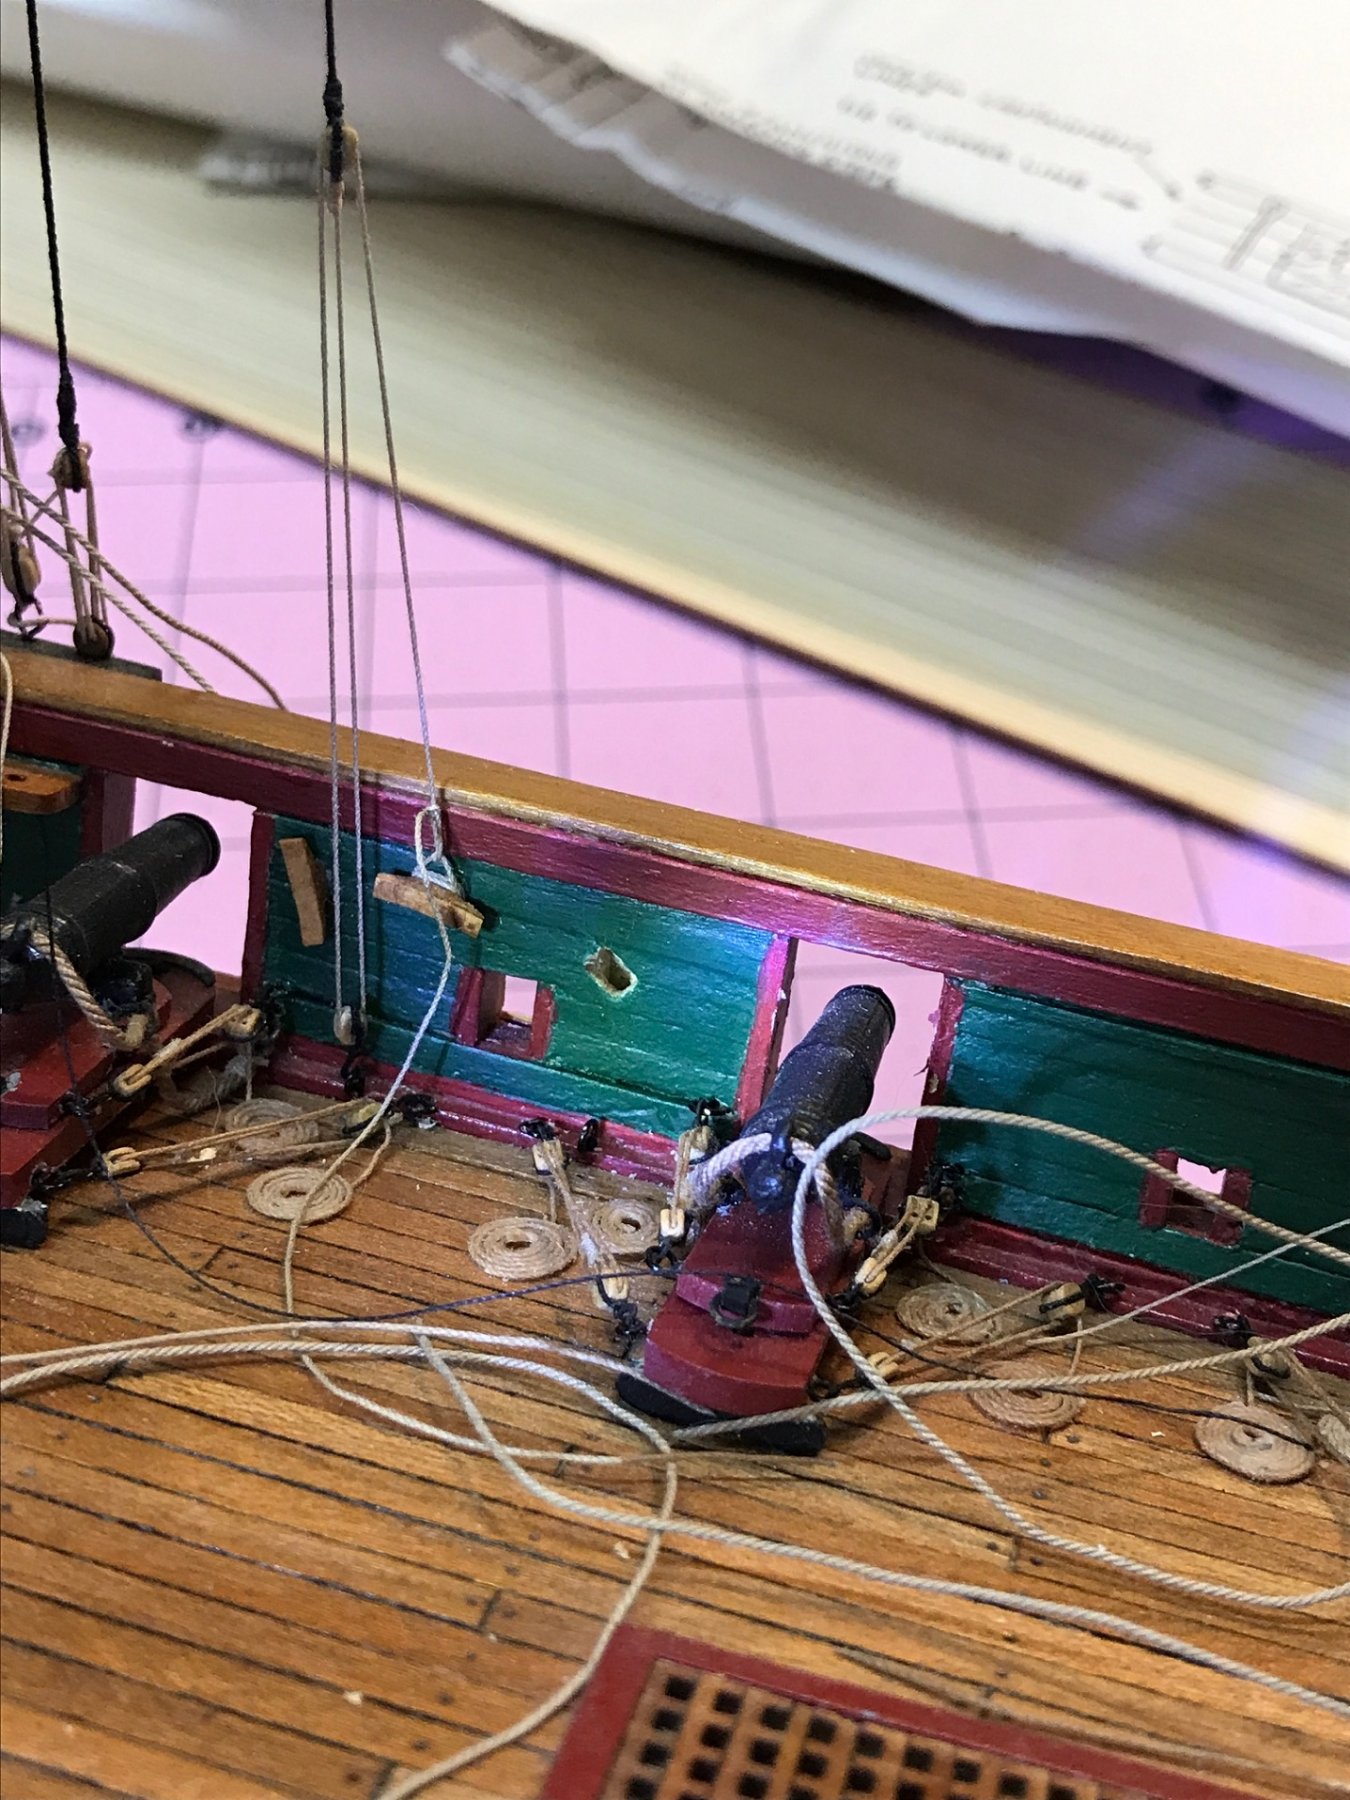
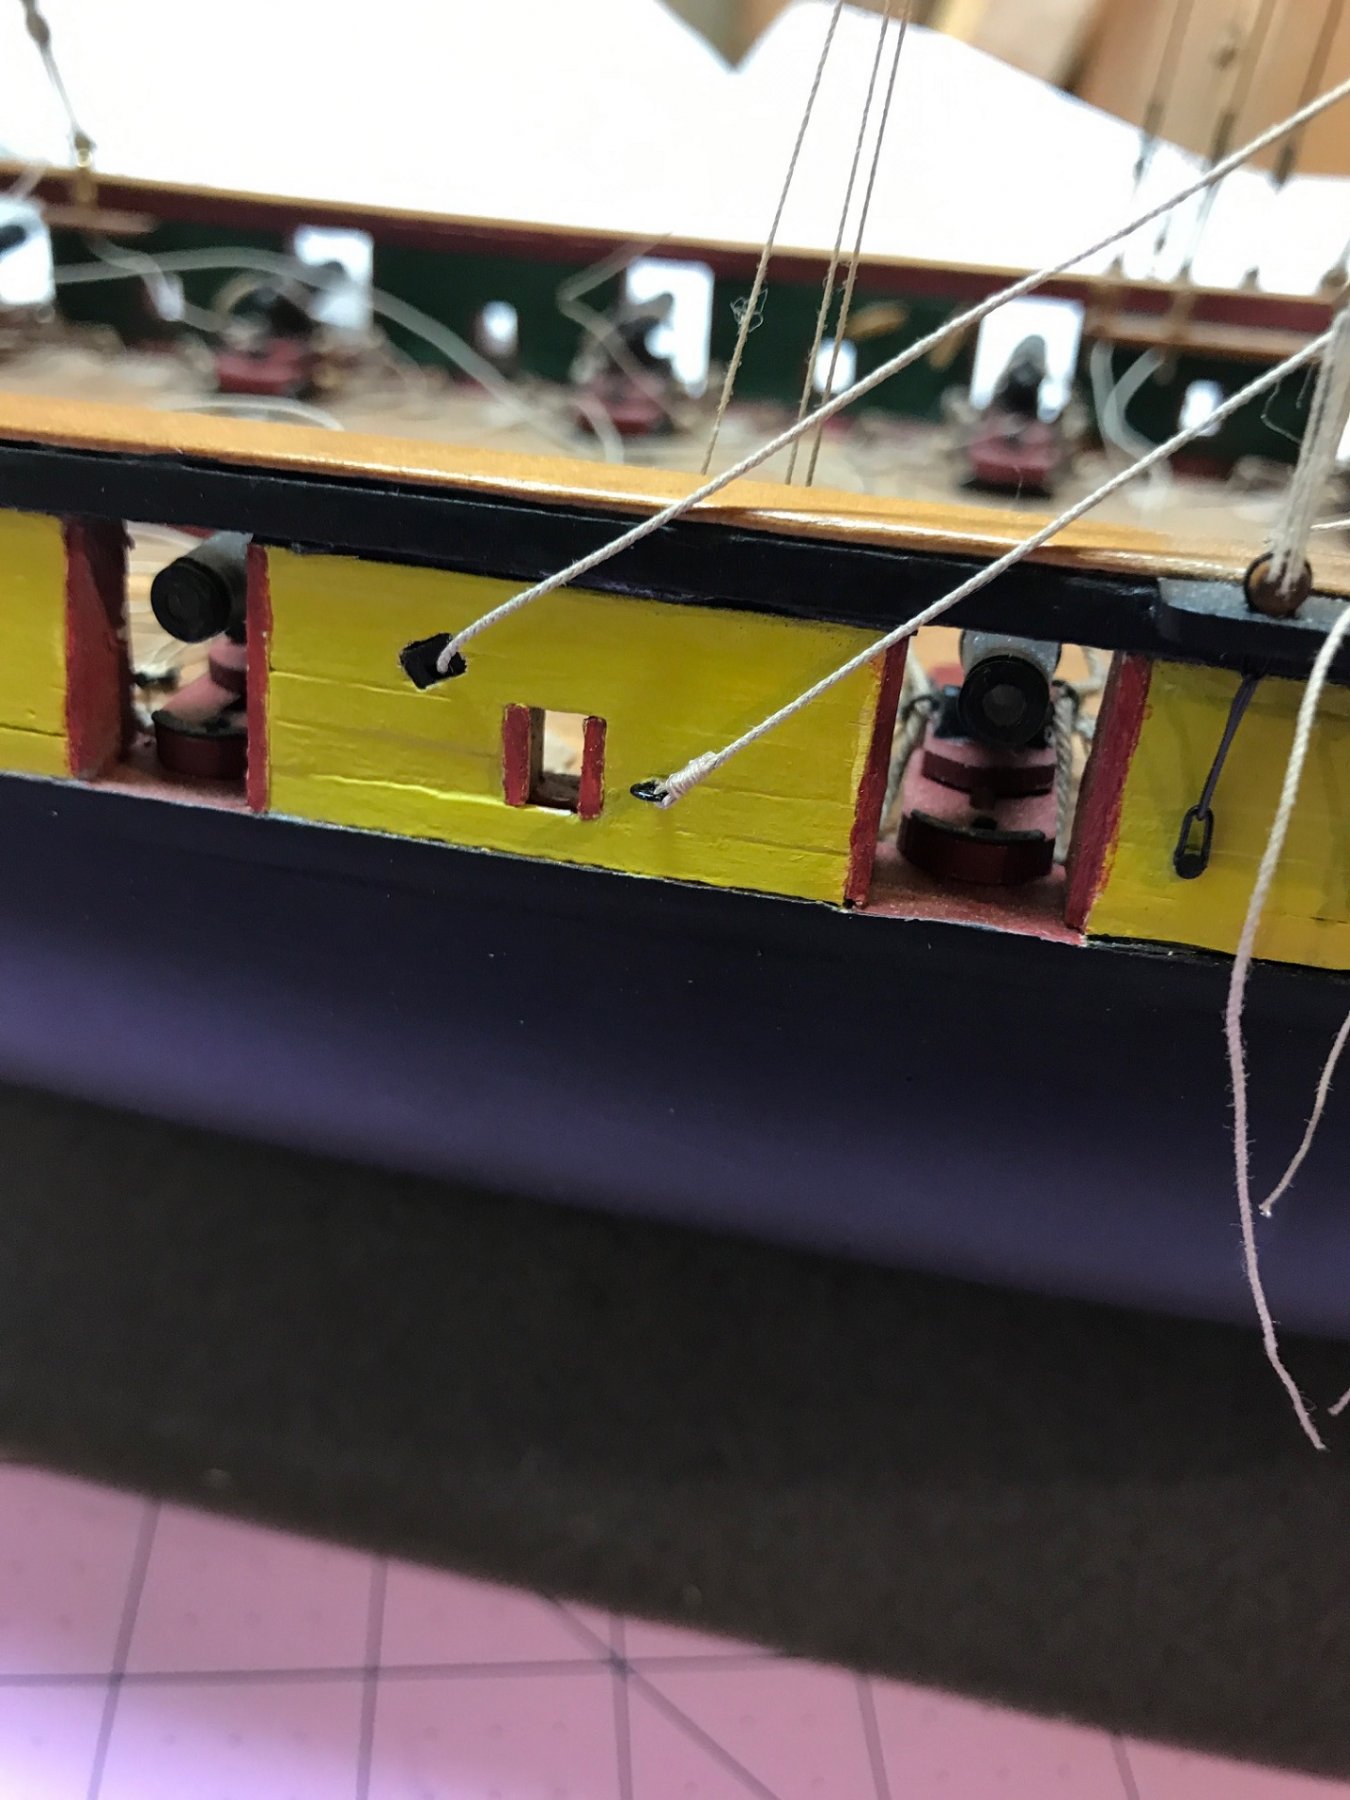
I THEN INSERTED THE SHEAVES WITH A SMALL SPOT OF WOOD GLUE INTO THE SQUARE HOLES. AGAIN, INSTALLING THE INSIDE SHEAVE REQUIRED ME TO REACH THROUGH THE DECK AND RIGGING LINES. I HAD TO DETACH THE ROYAL BACK STAY TO GIVE MY FAT HAND ROOM.

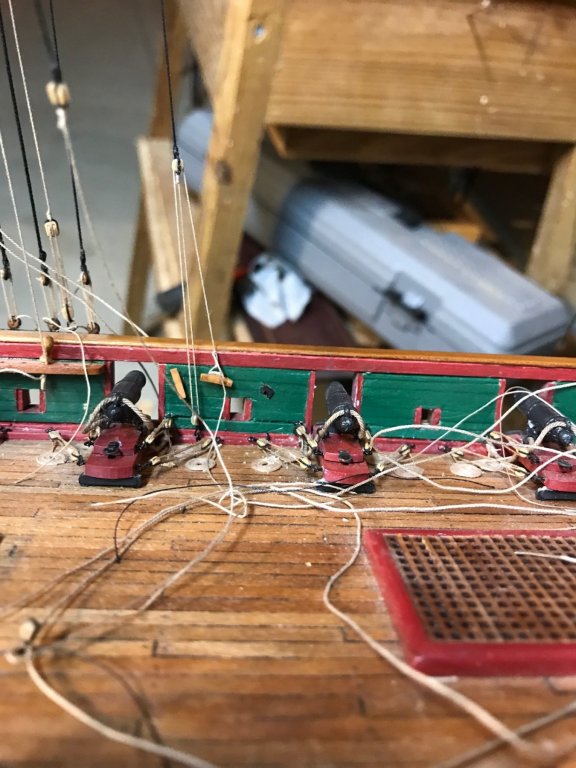
THE FINAL PRODUCT. THE LINE RUNNING THROUGH THE "FAUX" SHEAVE IS ACCEPTABLE.


- Tigersteve, demetri, mrshanks and 1 other
-
4
-
Mike,
I am sure that on the real ship, this was done with an eye splice. However, the small diameter of the rope for these three stays at our scale just did not make sense to me, so I simply tied a standard whipping knot, which I might add, visually looks a little like an eye splice anyway. That is especially so, now since I have added a ton of other lines, blocks, shrouds, stays and the sort, and quite frankly, you can barely even see the knots through all of the clutter.
Make this simple. Just whip it.
-
Mike,
On the real ship, I am sure these three stays are attached with an eye splice. However, the small diameter of line we are using at our scale convinced me that an eye splice made no sense and would have been simply too difficult. I therefore decided to tie a whipping knot, which I might add, visually looks a little like an eye splice anyway. Besides, the knots are now totally hidden with all of the clutter of shrouds, halliards, stays, and other lines that I have since added, so that you can't even see them anyway.
Make this simple. Just whip it.
-
On 8/13/2017 at 10:04 AM, mikiek said:
Amen to that

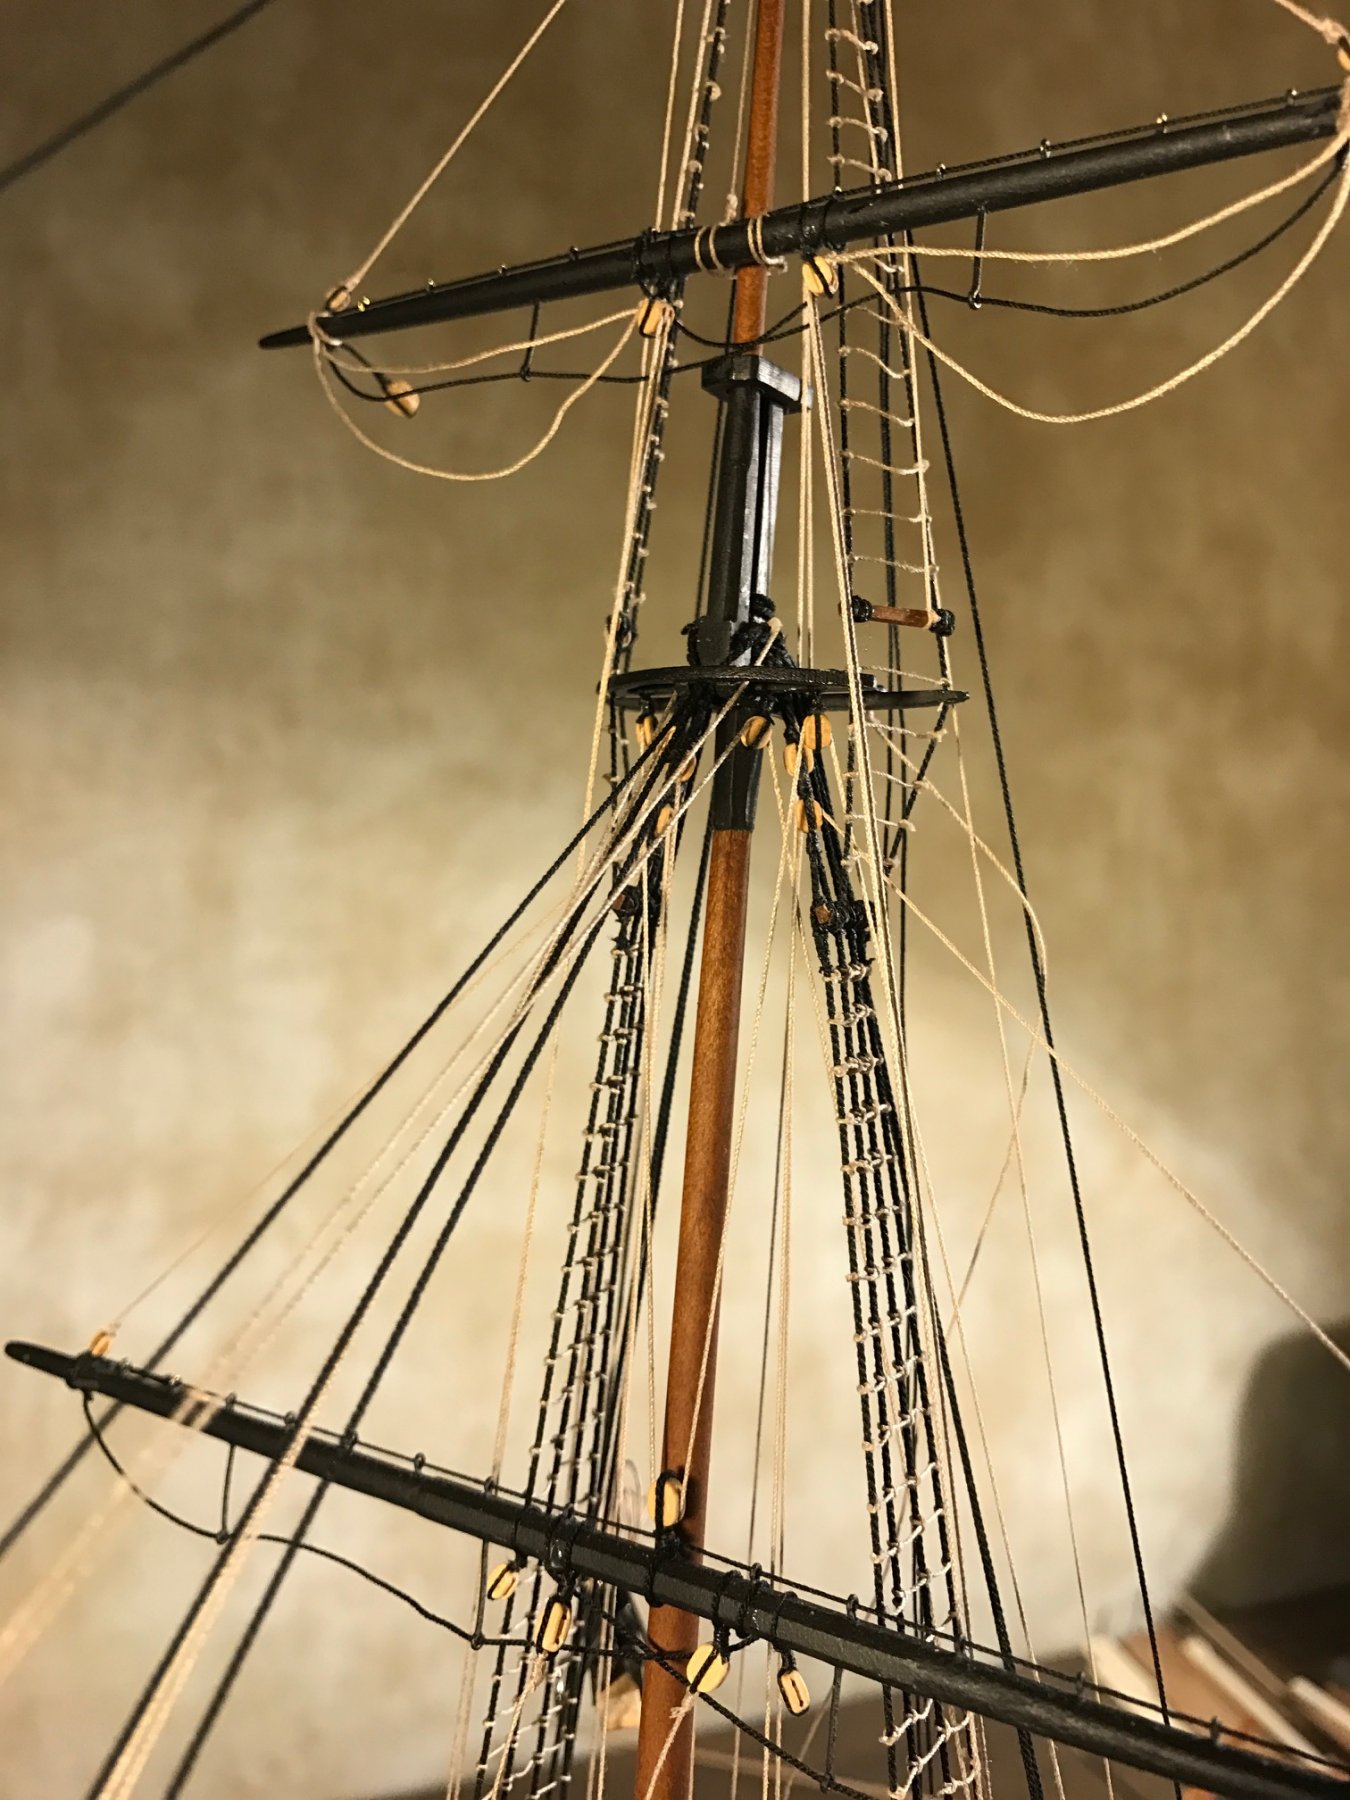
Darrell, this will probably be another one of those 'I missed it' situations. Can't find how the fore top stay and inner & outer jib stay fasten to the mast. Is it an eyesplice with a mouse like the lower stays? The fore upper top doesn't have much room for ropes to pass thru it. Are all 3 of those stays supposed to pass thru that square opening?
Mike,
I did not use an eye splice and mouse. I tied the fore top, inner and outer jib stays to the mast (back post) using a simple whipping knot. However, I used a heavier thread (I think a .008), and used at least 8 wraps to extend the knot. All three pass through the square hole in front of the upper tops without a problem. They sit on top of the shrouds.
By the way, I don't know where you are, but I tied these before I stepped the mast.
Here is a photo from my build log that shows how the stays pass through the top.
Hope this helps.

-
David,
Thanks for stopping in. It is good to know there is another Niagara builder out there.
Here is a rough inventory on what I have purchased from Syren so far. Chuck sells his products in small plastic packs. What I am listing below refers to individual packs.
RIGGING
TAN
.008 - 5 packs
.012 - 6
.018 - 2
.035 - 1
BLACK
.008 - 2
.012 - 2
.018 - 3
.025 - 2
.035 - 2
BLOCKS
3/32 SINGLE - 5
3/32 DOUBLE - 4
1/8 SINGLE - 4
1/8 DOUBLE - 3
5/32 SINGLE - 1
5/32 DOUBLE - 1
7mm CLEATS - 2
7mm CLOSED HEARTS - 1
3mm rigging hooks - 2
That is not a complete inventory, as I have a number of partially used packs, and am not finished rigging. That will however get you to where I am. When I am totally finished, if that day ever comes, I will be able to provide a more detailed inventory.
As I have said throughout the entire build, Chuck's products are simply outstanding. I highly recommend them if you able to swing the cost.
Good luck on your rigging challenges and don't hesitate to send me a note if you have any questions. I may not have the correct answer, but I can at least share with you how I decided to tackle the problem.
-
-
Dave,
That is a fine saw. Mine is similar albeit larger and not Japanese made. Hishika is a great product, and Japanese saws in general set the standard. The problem I had was the that Jib Shrouds are at the very same plane as the chock rail, and sit only about an inch away in the front. On the back side, my bell tower was directly in line. I therefore had no way to draw my micro saw in either direction.
I survived. The dremel was quick and exhilarating, although I think I will save this kind of excitement for my favorite sports team.
That Hishika is now on my list. That is a fine product and I already know how I could of used this on other tasks. Thanks for the referral.
-
Doug,
Soft woods, such as basswood (one of the softest) and pine are very difficult to stain effectively. The wood fibers are less dense, and are very inconsistent. They soak up the stain, and because of the inconsistency in density, takes the stain differently throughout and tends to create a blotchy appearance. I can see that in your photos.
Pre-stain, or Pre conditioners (minwax makes a good product) helps with soft woods since it saturates the fibers. After it dries, subsequent coats of stain will therefore adhere more consistently. Conditioners are basically clear, but will add some darkening.
I must caution you however, no preconditioners are going to fully remedy the look of a soft wood when it is stained. Unlike hardwoods, such as pear, cherry, or boxwood, where stain enhances the look of the wood, staining softwoods almost always "changes" the look of the wood.
I am not suggesting that you strip off the basswood and replace with expensive hardwoods (although some many modelers have done that with the Syren), but you might think about painting it.
As far as adding conditioner after staining, you might want to try that after you sand down the surface as it appears you are doing now. Apply a couple of coats of conditioner and restain. It might help, but then again, it might look similar to your first effort. At this point, I would suggest that you experiment on a section of scrap planks first to see what you come up with.
Good luck. Your ship looks great so far. The gun ports and sweeps are spot on. That is not easy to do.
- cog, David Rice and wool132
-
3
-
-
-
BUMPKINS/BOOMKINS
Thanks to the responses from fellow forum members, and particularly Jerry, I found the answer to my question regarding the tie off for my forward tack lines. The actual ship is equipped with stubby bumpkins. I looked over the plans last night, and they make no reference to the bumkins. So, based on the photo that Jerry was able to provide, I created some.
I first had to cut a slot in the Chock Rail. Not an easy thing to do on a fully rigged ship. I could not find room to use my jewelers saw, and the cherry wood was too hard to cut with an x-acto knife. I elected to pull out my dremel with a rotary diamond cutter. That was scary. It fit in there, but one slip, and I could wipe out an entire month of rigging. Luckily, I was able to cut the slot, and NOTHING ELSE!
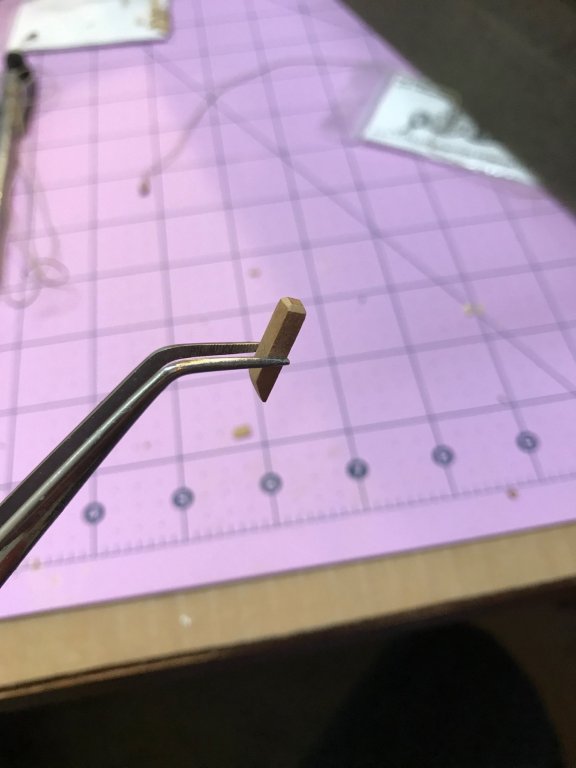
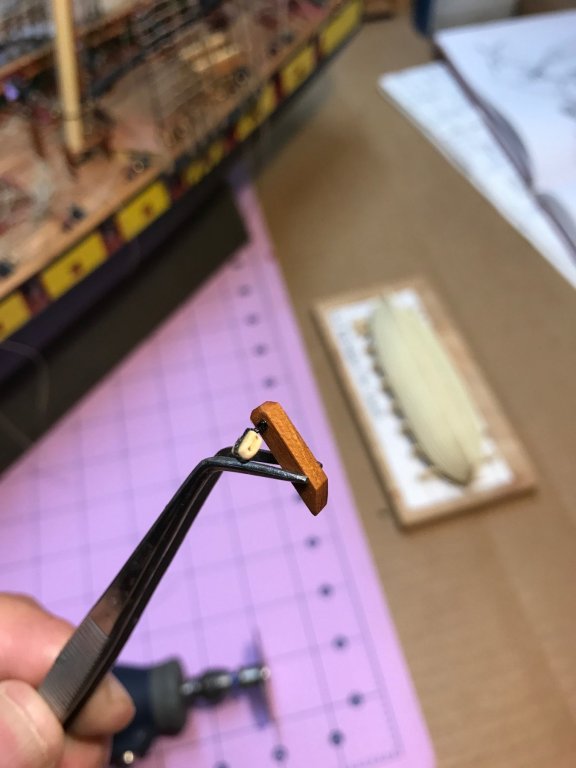
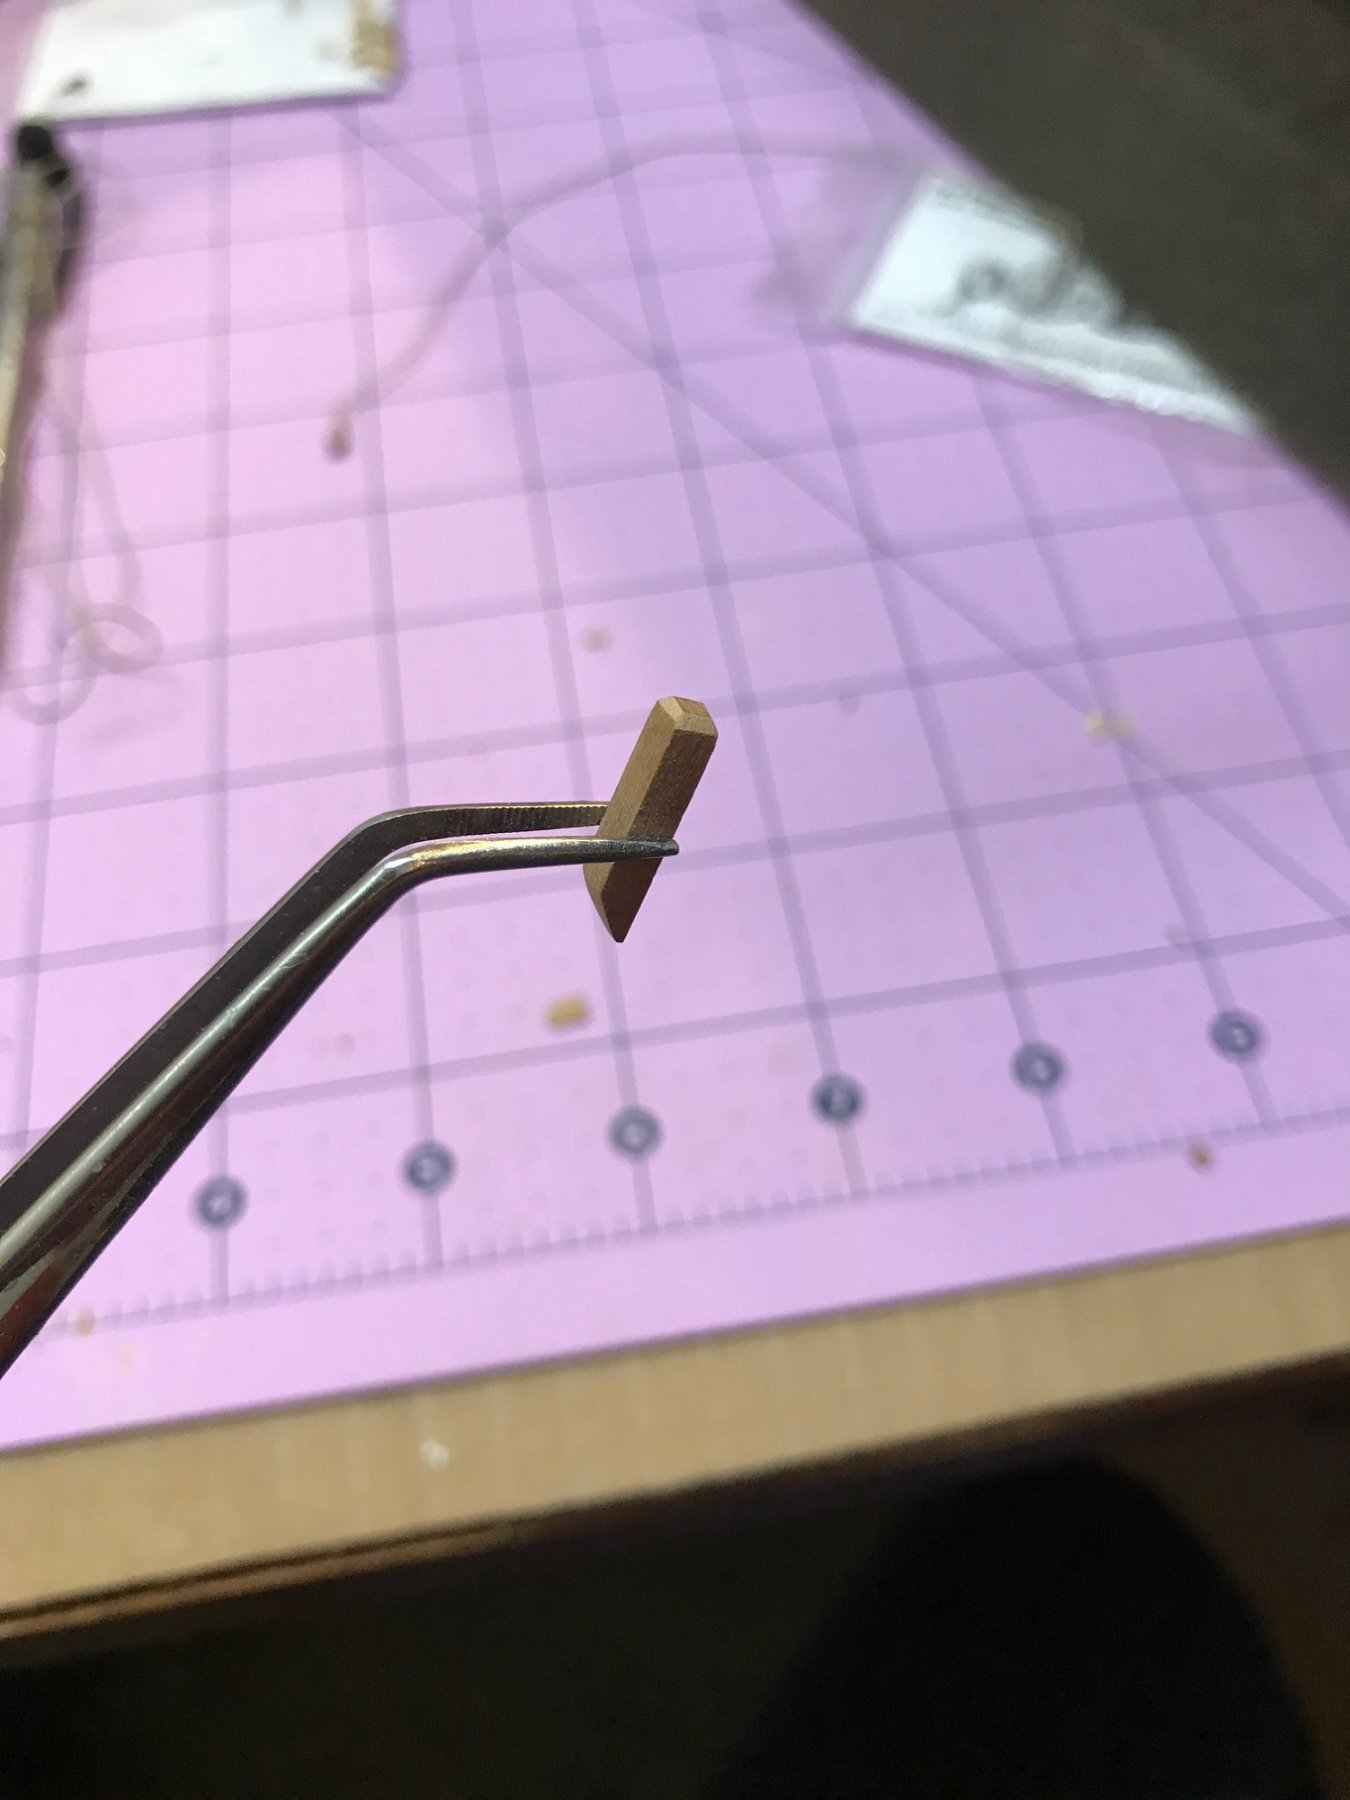
I then fabricated the bumpkins out of cherry square stock. I chamfered the end and beveled the back to make it look better. I then stropped a 5/32 block to an eyebolt and seized it to the end of the bumpkins and then glued it to the ship. I then attached a cleat to the inside of the bulwark to finish it up.
Don't try this at home.
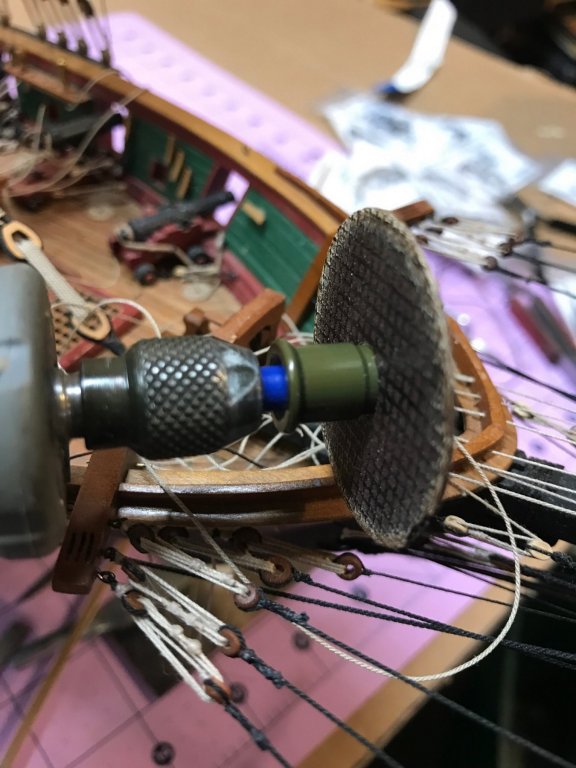
The slot for the Bumpkin
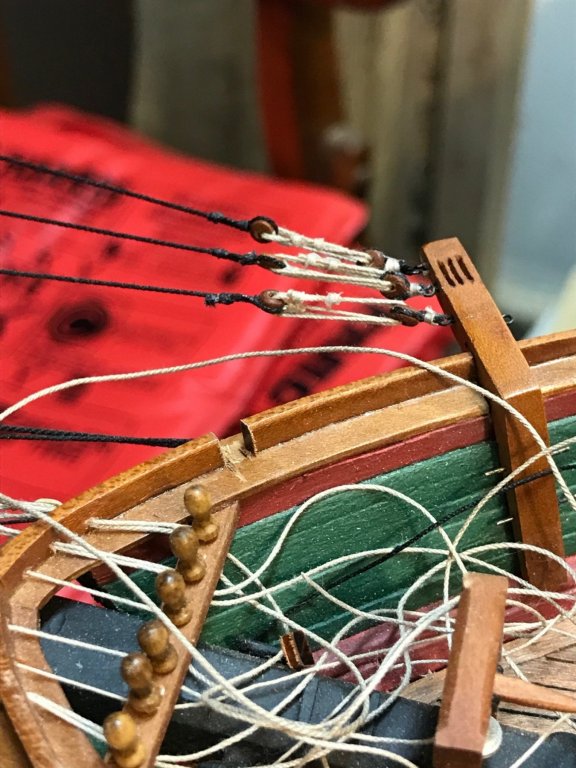
I used some square cherry stock for the bumpkin. The design is based on a photo of the original ship, which is not very clear, so this is pretty much what I thought it should look like.
A couple of coats of tung oil and I drilled a hole and inserted the 5/32 single block.
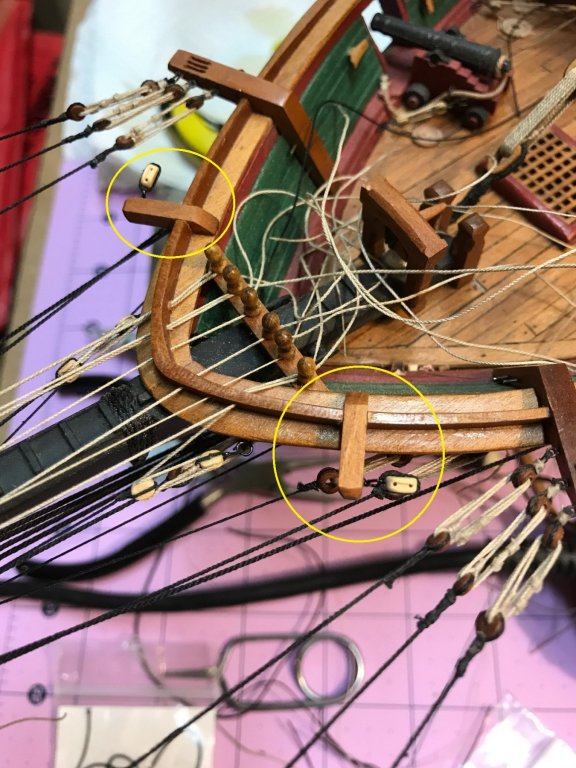
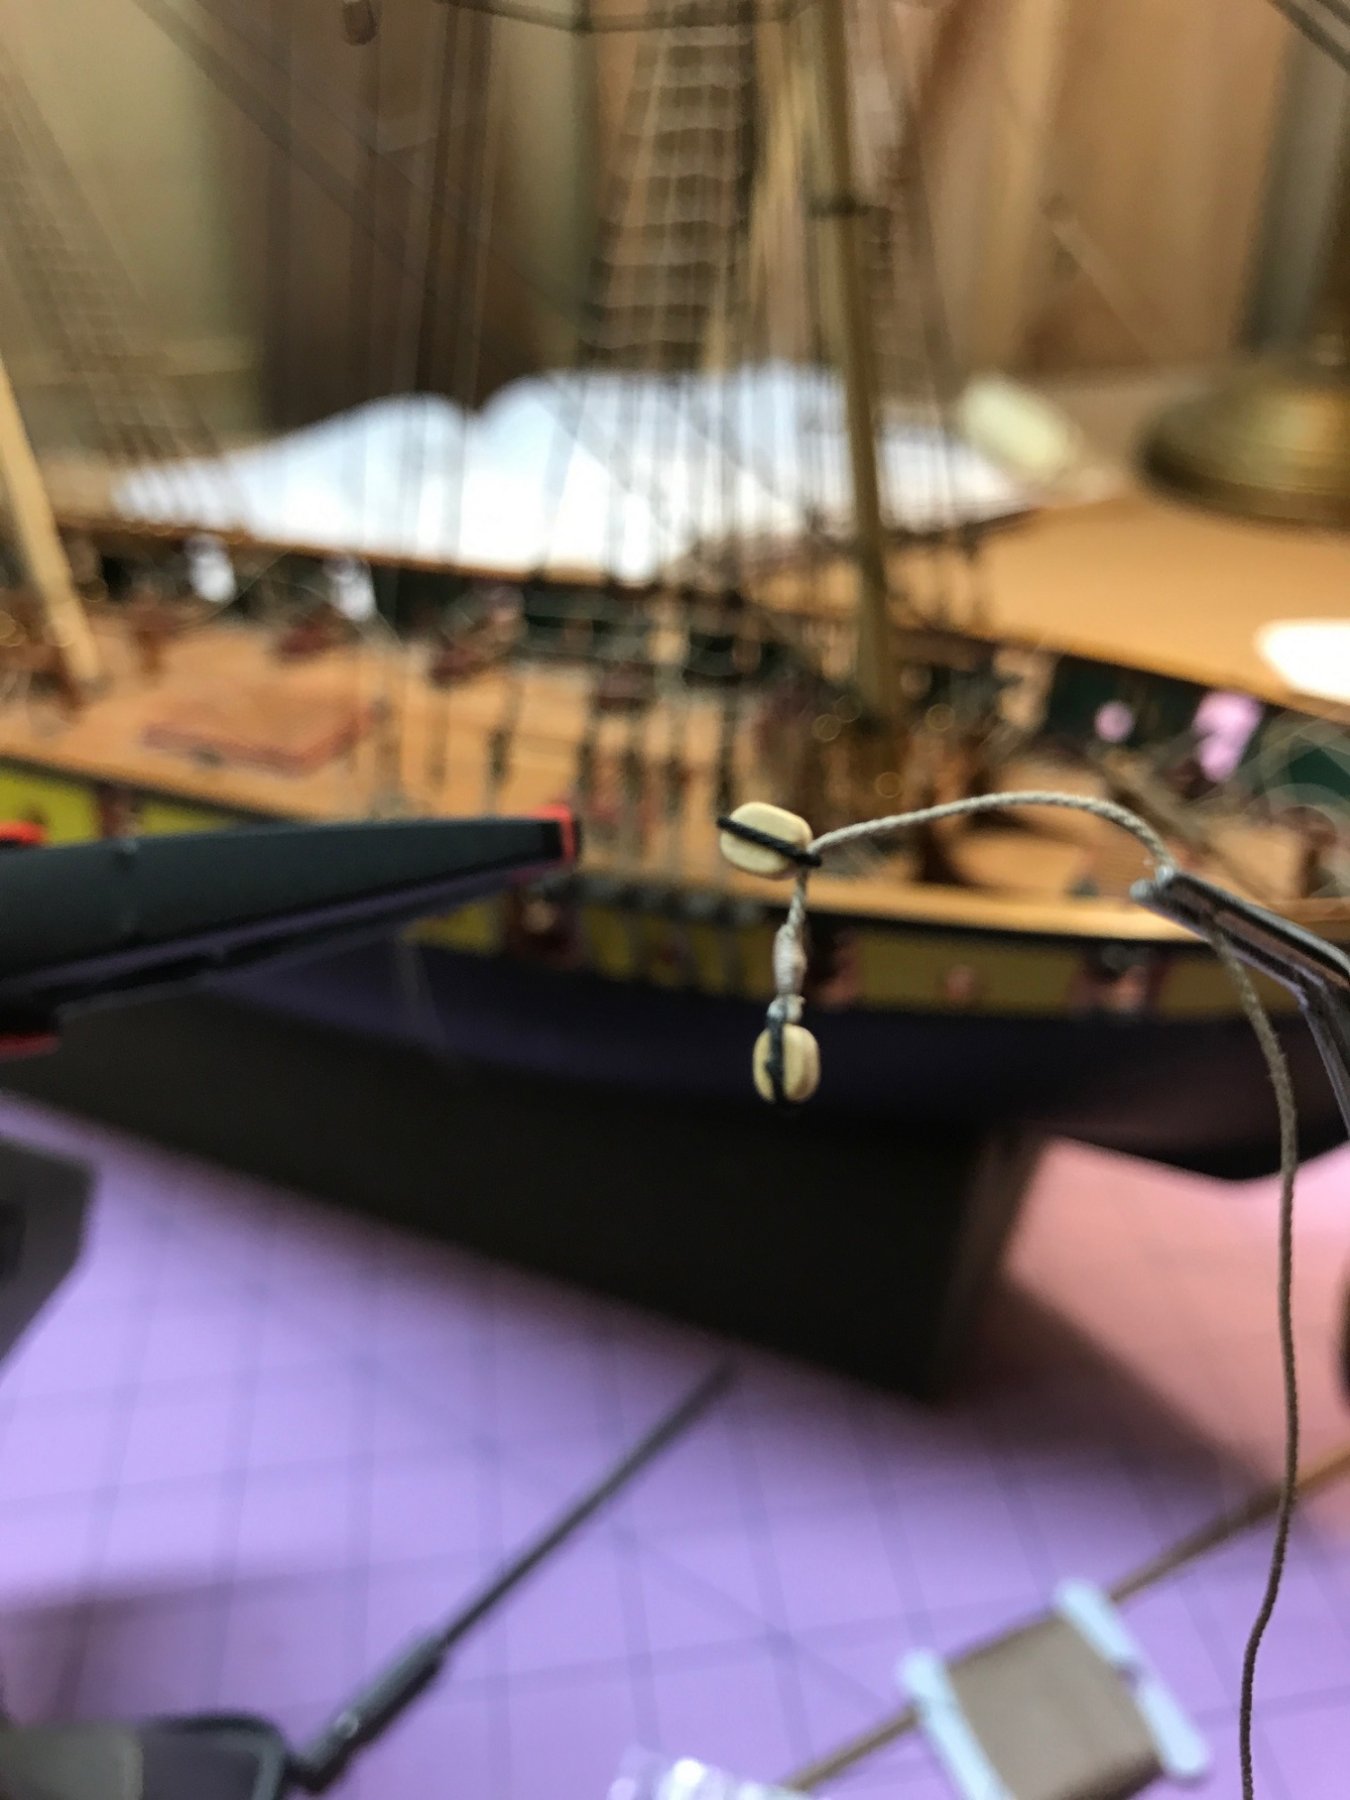
Installed on the ship
Stropping the tack line to the Sheet block
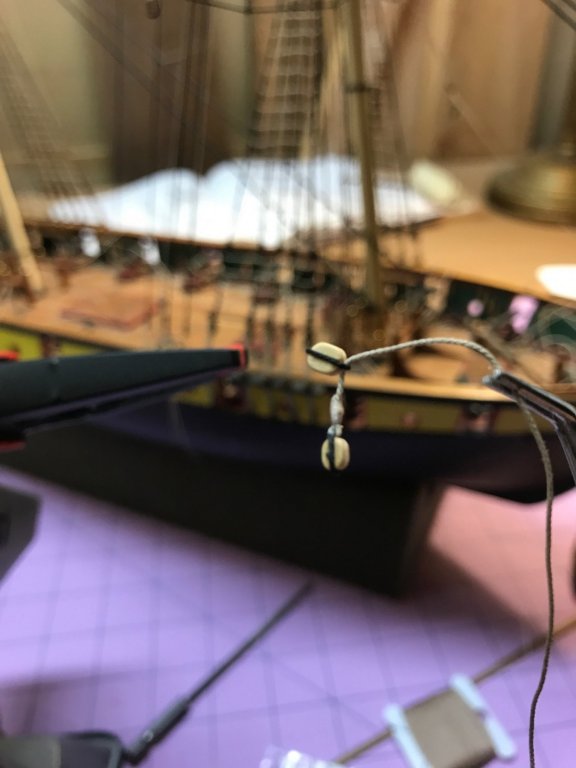
Rigged
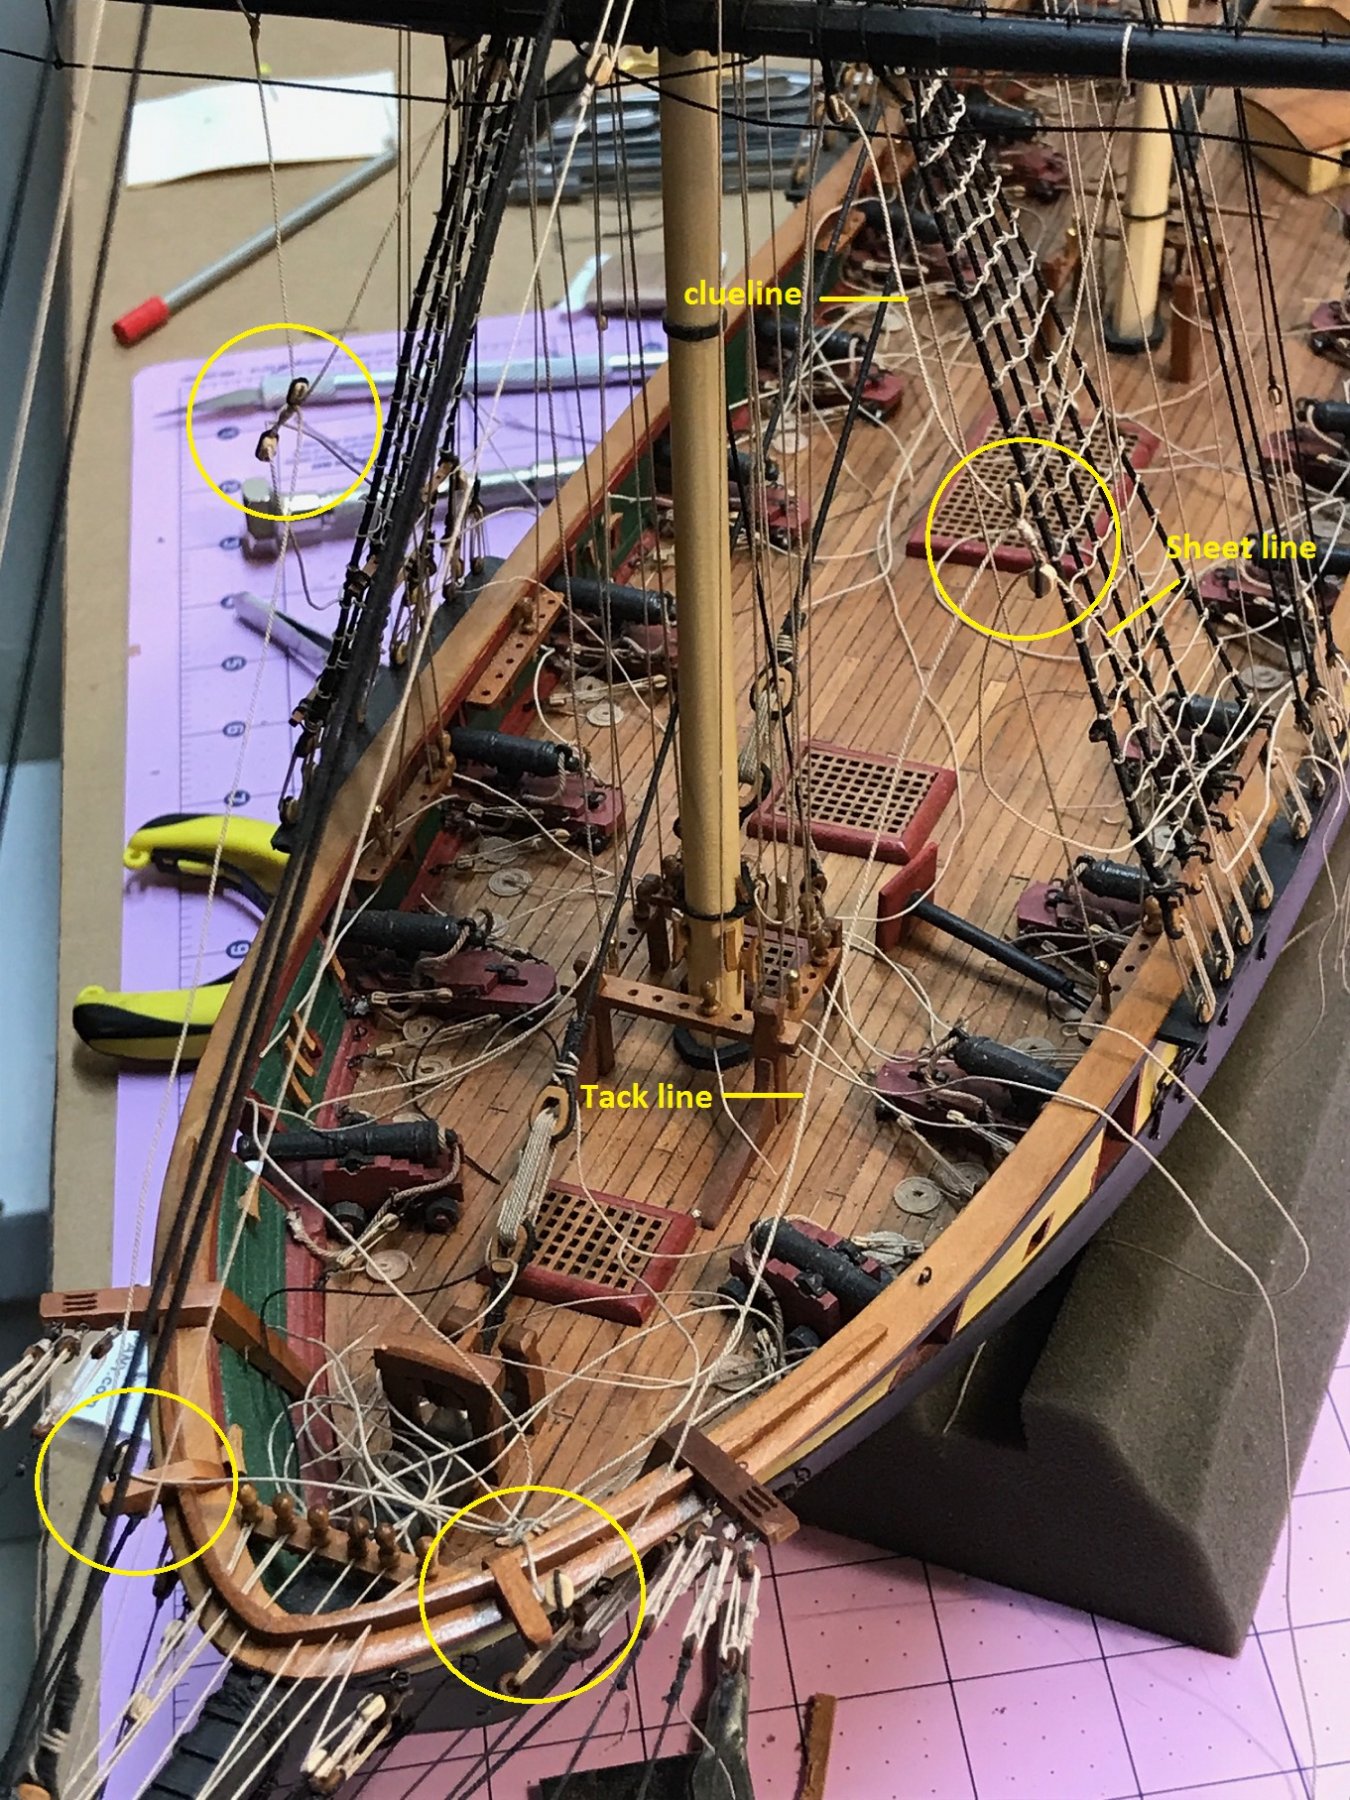
Final assembly. Today, I will have to cut some sheaves in the bulwarks and belay the sheet lines on eyebolts.


US Brig Niagara by Tom E - Model Shipways - 1:64 Scale
in - Kit build logs for subjects built from 1801 - 1850
Posted
Tom,
Looks like you nailed it. Good job.